
MTL55W14E - Refrigerator MATSUI - Free user manual and instructions
Find the device manual for free MTL55W14E MATSUI in PDF.


| Product Type | Refrigerator (No Freezer) |
| Model | MTL55W14E |
| Brand | Matsui |
| Fresh Food Storage Volume | 240 L |
| Overall Dimensions (W x D x H) | 550 x 580 x 1430 mm |
| Energy Consumption (kWh/24h) | 0.270 kWh |
| Annual Energy Consumption | 99 kWh/year |
| Energy Efficiency Class | A++ |
| Climate Class | N/ST (16°C – 38°C) |
| Temperature Range (Fresh Food) | 0°C to 8°C (average ≤4°C) |
| Defrost Type | Auto Defrost |
| Noise Level | 42 dB(A) |
| Rated Voltage | 220-240 V~ |
| Rated Current | 0.55 A |
| Shelves | 4 Adjustable Glass Shelves, 1 Salad Bin Cover Shelf |
| Door Shelves | 4 Upper Door Shelves, 1 Lower Door Shelf |
| Salad Bin | 1 Salad Bin |
| Reversible Door | Yes (can be reversed to left or right) |
| Internal Light | 10W SES bulb (replaceable) |
| Leveling Feet | 2 Adjustable front feet |
| Weight (Approximate) | Approximately 45 kg |
| Recommended Use | Indoor household use, not for garage/outdoor |
| Included Accessories | 2 Rear Spacers, Instruction Manual |
Frequently Asked Questions - MTL55W14E MATSUI
User questions about MTL55W14E MATSUI
0 question about this device. Answer the ones you know or ask your own.
Ask a new question about this device
Download the instructions for your Refrigerator in PDF format for free! Find your manual MTL55W14E - MATSUI and take your electronic device back in hand. On this page are published all the documents necessary for the use of your device. MTL55W14E by MATSUI.
USER MANUAL MTL55W14E MATSUI
natural_image
White rectangular refrigerator with lid and frontrest (no visible text or symbols)TALL FRIDGE
Instruction manual
GB
STÄENDE KJÖLESKAP
Instruksjonsmanual
NO
HÖGT KYLSKÅP
Instruktionsbok
SE
SUURI JÄÄKAAPPI
käyttöopas
FI
H∅J K∅LESKAB UDEN FRYSER
brugervejledning
DK
Safety Warnings....8
Unpacking....13
Installation....14
Location....14
Levelling the Unit....14
Installing the Spacers ....14
Free Space Requirements ....14
Reversing the Door Swing....15
Cleaning Before Use....18
Before Using Your Unit....18
Product Overview....19
Operation 20
Switching On Your Unit 20
Adjusting the Temperature 20
Noises Inside the Unit! 20
Tips for Keeping Food in the Unit....21
Cleaning 21
Defrosting....21
Cleaning the Interior and the Exterior of the Unit....21
Maintenance 22
Changing the Internal Light....22
Care When Handling / Moving the Unit 22
Servicing 22
Switching Off for Long Periods of Time 22
Condensation....22
Disposal 22
Specifications....23
For your continued safety and to reduce the risk of injury or electric shock, please follow all the safety precautions listed below.
- Read all instructions carefully before using the unit and keep them for future reference.
- Retain the manual. If you pass the unit onto a third party, make sure to include this manual.
• This appliance is intended for indoor household use and similar applications such as:
– farm houses and by clients in hotels, motels and other residential type environments; - bed and breakfast type environments;
– catering and similar non-retail applications.
- Ensure that the plug is easily accessible to enable disconnection from the mains supply.
- Keep ventilation openings in the unit enclosure clear of obstructions.
- Do not use mechanical devices or other means to accelerate the defrosting process, other than those recommended by the manufacturer.
- Do not use electrical appliances inside the food storage compartments of the unit, unless they are of the type recommended by the manufacturer.
- If the mains cable is damaged, it must be replaced by the manufacturer, its service agent or a qualified technician in order to avoid a hazard.
- Choose a location for your unit away from heat sources such as radiators or fires as refrigerant and vesicant are burnable.
- Do not damage the refrigerant circuit (The refrigerant is a very environmentally friendly gas but is also combustible. Take care when transporting or moving the unit to ensure that the refrigeration circuit is not damaged. In the event of damage avoid naked flames or ignition sources and ventilate the room in which the unit is placed for a few minutes.)
• The unit must be manoeuvred by a minimum of 2 persons.
- This appliance can be used by children aged from 8 years and above and persons with reduced physical, sensory or mental capabilities or lack of experience and knowledge if they have been given supervision or instruction concerning use of the appliance in a safe way and understand the hazards involved. Children shall not play with the appliance. Cleaning and user maintenance shall not be made by children without supervision.
• Children should be supervised to ensure that they do not play with the unit.
- If your unit is fitted with a lock to prevent children being trapped inside, keep the key out of reach and not in the vicinity of the unit.
- Do not store volatile or flammable substances, such as aerosol cans with a flammable propellant, in the unit.
WARNING

IT IS HAZARDOUS FOR ANYONE OTHER THAN AUTHORISED SERVICE PERSONNEL TO CARRY OUT SERVICING OF REPAIRS WHICH INVOLVE THE REMOVAL OF COVERS.

TO AVOID THE RISK OF AN ELECTRICAL SHOCK DO NOT ATTEMPT REPAIRS YOURSELF.
Thank you for purchasing your new Matsui Fridge.
We recommend that you spend some time reading this instruction manual in order that you fully understand all the operational features it offers.
Read all the safety instructions carefully before use and keep this instruction manual for future reference.
Unpacking
GB
Remove all items from the packaging. Retain the packaging. If you dispose of it please do so according to local regulations.
The following items are included:

natural_image
Line drawing of a rectangular trash bin with a lid (no text or symbols)The Main Unit

Adjustable Glass Shelf x 4

Salad Bin Cover Shelf

Salad Bin

Upper Door Shelf x 4

Lower Door Shelf
Instruction Manual

Rear Spacer x 2
Location
When selecting a position for your unit you should make sure the floor is flat and firm, and the room is well ventilated with an average room temperature of between 16^ C and 38^ C. If the room temperature drops below 16^ C your freezer may start to defrost. Avoid locating your unit near a heat source, e.g. cooker, boiler or radiator. Also avoid direct sunlight as it may increase the electrical consumption. Extreme cold ambient temperatures may also cause the unit not to perform properly. This unit is not designed for use in a garage or outdoor installation. Do not drape the unit with any covering.
Levelling the Unit
To do this adjust the two levelling feet at the front of the unit. If the unit is not level, the doors and magnetic seal alignments will not be covered properly.

Installing the Spacers
Screw the spacers to the left and right side of the unit's rear part.

natural_image
Technical line drawing of a cabinet and a mechanical component with rotational motion indicator (no text or symbols)Free Space Requirements
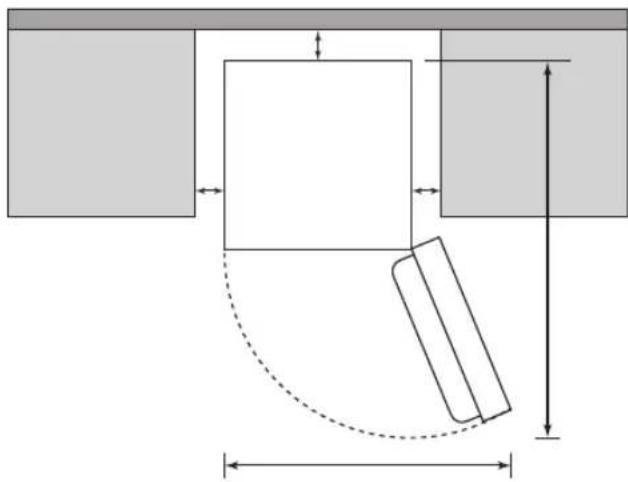
When installing the unit, ensure that 25 mm of free space is left at both sides, 50 mm at the rear of the unit and 25 mm at the top of the unit. The door can be opened to the right or the left, depending on which best suits the location. Please ensure there is adequate space for the door to fully open to 160°.
natural_image
Pure mechanical diagram showing a rectangular block with a curved cutout and dimension lines, no text or symbols present.Reversing the Door Swing
Tools required: Philips style screwdriver / Flat bladed screwdriver / Hexagonal spanner
- Ensure the unit is unplugged and empty.
- To take the door off it is necessary to tilt the unit backwards. You should rest the unit on something solid, e.g. a chair just below the top panel.
- All parts removed must be saved to do the reinstallation of the door.
- Do not lay the unit flat as this may damage the coolant system.
• We recommend that 2 people handle the unit during assembly. -
If you want to have the door swing reversed, we recommend that you contact a qualified technician. You should only try to reverse the door yourself if you believe that you are qualified to do so.
-
Remove the 2 screws.

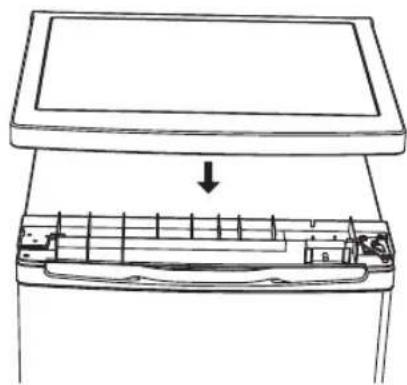
- Carefully lift the top cover away from the unit.

natural_image
Line drawing of a computer keyboard with an upward arrow indicating the key component (no text or symbols present)INSTALLATION
- Remove the three screws, then remove the upper hinge that holds the door in place. Lift the door and place it on a padded surface to prevent it from scratching.
- Remove the screws and bottom hinge. Then remove the levelling feet from both sides.
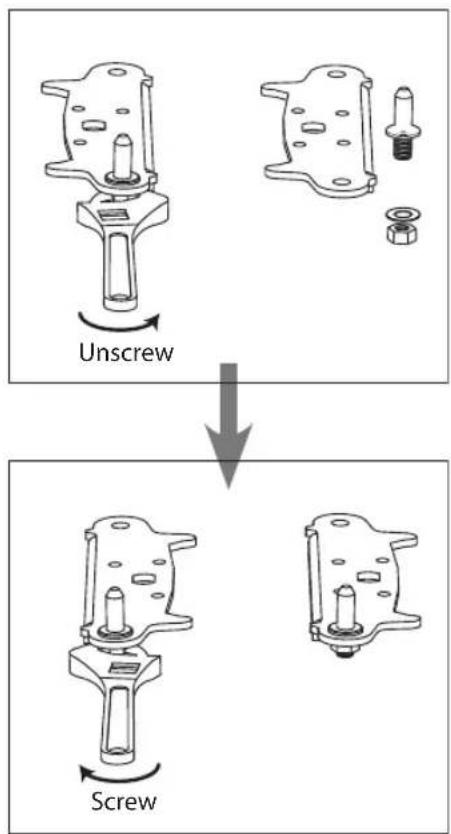
- Unscrew and remove the bottom hinge pin, turn the bracket over and replace it.

INSTALLATION
- Re-fit the bottom hinge. Replace both levelling feet.

- Place the door back on. Ensure the door is aligned horizontally and vertically so that the seals are closed on all sides before finally tightening the top hinge.

- Put the top cover back.
natural_image
Line drawing of a computer monitor with an open keyboard and a downward arrow indicating compression (no text or symbols)- Screw the 2 screws.

INSTALLATION
- With the door closed, check that the door is aligned horizontally and vertically and that the seals are closed on all sides before finally tightening the bottom hinge. Re-adjust the levelling feet as needed.

natural_image
Simple line drawing of a rectangular box with a lid (no text or symbols)Cleaning Before Use
Wipe the inside of the unit with a weak solution of bicarbonate soda. Then rinse with warm water using a sponge or cloth. Wipe completely dry before replacing the shelves and salad bin. Clean the exterior of the unit with a damp cloth.
If you require more information refer to the Cleaning section.

• Before Plugging in YOU MUST
Check that you have a socket which is compatible with the plug supplied with the unit.
• Before Turning On!
Do not turn on until two hours after moving the unit. The coolant fluid needs time to settle.
Before Using Your Unit
Before placing any food in your unit, turn it on and wait for 24 hours, to make sure it is working properly and to allow it time to fall to the correct temperature. Your unit should not be overfilled.

Switching On Your Unit
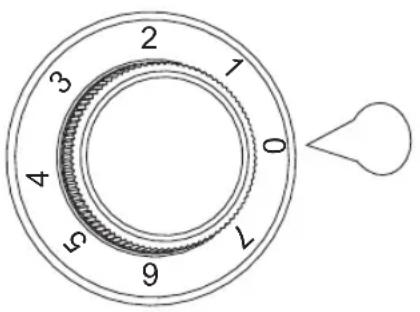
- Connect the mains cable to the mains socket. The internal temperature of your unit is controlled by a thermostat. There are eight settings, of which position 7 is the coldest and position 0 turns the unit off.
- Adjust the thermostat control dial to the desired position, bear in mind that the higher the number, the lower the temperature. Position 4 is the recommended setting when operating at normal room temperature (between 16°C and 38°C).
- The unit may not operate at the correct temperature if it is in a particularly hot or a particularly cold room, or if you open the door often.
- To ensure that the unit is cool enough to sufficiently chill your food, wait 24 hours before filling it with food.
- If you are concerned that your unit is not being kept cold enough and wish to check the temperature, you will need a special fridge/freezer thermometer. These are available from most supermarkets and hardware shops.
Place the thermometer in the centre of the unit, where it can be read easily. Leave overnight, the temperature in the unit should be an average of 5^ C.

Adjusting the Temperature
The internal temperature of the unit is controlled by a thermostat. The recommended position is between 1 to 4 for colder working environments (i.e. during winter) and between 5 to 7 for hotter environments. Please adjust according to the environment.
Noises Inside the Unit!
You may notice that your unit makes some unusual noises. Most of these are perfectly normal, but you should be aware of them!
These noises are caused by the circulation of the refrigerant liquid in the cooling system. It has become more pronounced since the introduction of CFC free gases. This is not a fault and will not affect the performance of your unit. This is the compressor motor working, as it pumps the refrigerant around the system.
Tips for Keeping Food in the Unit
- Cooked meats/fishes should always be stored on a shelf above raw meats/fishes to avoid bacterial transfer. Keep raw meats/fishes in a container which is large enough to collect juices and cover it properly. Place the container on the lowest shelf.
- Leave space around your food, to allow air to circulate inside the compartments. Ensure all parts of the unit are kept cool.
- To prevent transfer of flavours and drying out, pack or cover the food separately. Fruit and vegetables do not need to be wrapped.
- Always let pre-cooked food cool down before you put in the unit. This will help to maintain the internal temperature of the unit.
- To prevent cold air escaping from the unit, try to limit the number of times you open the doors. We recommend that you only open the doors when you need to put food in or take food out.
Cleaning
Defrosting
Frost may accumulate on the inner rear surface of the appliance which will automatically defrost during the off cycle of the compressor.
Water is channelled via the drain hole to the collection tray above the compressor where it will evaporate.
Please ensure the drain hole is checked and cleaned on a regular basis so water can exit the storage compartment.

natural_image
Line drawing of a hand pressing down on a mechanical component, with an inset magnified view showing the hand pressing down (no text or symbols)Cleaning the Interior and the Exterior of the Unit
- Remove all the shelves and the salad bin.
- Wipe the inside of the unit with a weak solution of bicarbonate soda and then rinse with warm water using a sponge or cloth. Wipe completely dry before replacing the shelves and salad bin.
- Use a damp cloth to clean the exterior, and then wipe with a standard furniture polish. Make sure that the door is closed to avoid the polish getting on the magnetic door seal or inside the unit.
- The grille of the condenser at the back of the unit and the adjacent components can be vacuumed using a soft brush attachment.
Changing the Internal Light
- Before carrying out the bulb replacement always adjust the thermostat control dial to Position 0, then disconnect the mains supply.
- Use a flat bladed screwdriver and gently prise off the light bulb cover.
- Remove the old bulb by unscrewing in an anticlockwise direction.
- Replace with a new bulb (10W SES).
- Re-fit the light bulb cover and reconnect the unit to the mains supply and switch on by adjusting the thermostat.

natural_image
Technical line drawing of a mechanical component with no visible text or symbolsCare When Handling / Moving the Unit
Hold the unit around its sides or base when moving it. Under no circumstances should it be lifted by holding the edges of the top surface.
Servicing
The unit should be serviced by an authorised engineer and only genuine spare parts should be used. Under no circumstances should you attempt to repair the unit yourself. Repairs carried out by inexperienced persons may cause injury or serious malfunction. Contact a qualified technician.
Switching Off for Long Periods of Time
When the unit is not in use for a long period of time, disconnect it from the mains supply, empty all food and clean the unit, leaving the door ajar to prevent unpleasant smells.
Condensation
Condensation may appear on the outside of the unit. This may be due to a change in room temperature. Wipe off any moisture residue. If the problem continues, please contact a qualified technician for assistance.
Disposal
Old units still have some residual value. An environmentally friendly method of disposal will ensure that valuable raw materials can be recovered and used again. The refrigerant used in the unit and insulation materials require special disposal procedures. Ensure that none of the pipes on the back of the unit are damaged prior to disposal.
Up to date information concerning options of disposing of your old unit and packaging from the new one can be obtained from your local council office.
When disposing of an old unit break off any old locks or latches and remove the doors as a safeguard.
Specifications
| Model MTL55W14E | |
| Storage Volume - Fresh Food Storage Compartment | 240L |
| Storage Temperature 0-8°C, average ≤ 4°C | |
| Energy Consumption 0.270 kWh / 24h | |
| Energy consumption 99 kWh per year, based on standard test results for 24 hours. Actual energy consumption will depend on how the appliance is used and where it is located. | |
| Appliances Category Category 1 (Refrigerator) | |
| Energy Grading A++ | |
| EU Ecolabel N/A | |
| Defrosting Type Auto Defrost | |
| Climate Class N/ST | |
| This appliance is intended to be used at an ambient temperature between 16°C and 38°C. | |
| Airborne Acoustical Noise 42dB(A) | |
| Rated Voltage 220-240V~ | |
| Rated Current 0.55A | |
| Overall Dimension (W x D x H) 550 x 580 x 1430 mm | |
Features and specifications are subject to change without prior notice.
natural_image
Line drawing of a rectangular trash bin with a lid (no text or symbols)Hovedenheten
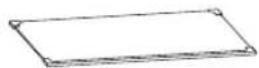
Justerbar glasshylle x 4

Hylle over salatskuff

Salatskuff
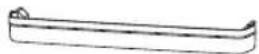
∅vre dørhylle x 4
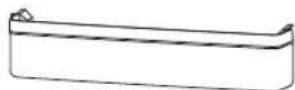
Nederste dørhylle

Instruksjonsmanual

Avstandsholder bakside x 2
Plassering
Innstallering av avstandsstykker
natural_image
Technical line drawing of a cabinet and a mechanical component with rotational motion indicator (no text or symbols)Plassbehov
natural_image
Pure mechanical diagram showing a rectangular block with a curved cutout and dimension lines, no text or symbols present.natural_image
Line drawing of a device with an open lid and internal circuit board (no text or symbols)INSTALLASJON
natural_image
Line drawing of a computer monitor with an open keyboard and a downward arrow indicating compression (no text or symbols)- Fest de to skruene.

natural_image
Simple line drawing of a rectangular trash bin (no text or symbols)Rengjøring før bruk
natural_image
Diagram showing a hand pressing down on a mechanical component, with an inset circle highlighting the hand's finger movement (no text or symbols present)natural_image
Technical line drawing of a mechanical component with no visible text or symbolsnatural_image
Line drawing of a rectangular trash bin with a lid (no text or symbols)Huvudenhet

Flyttbar glashylla x 4

Lock salladslåda

Salladslåda

Övre dörrhylla x 4
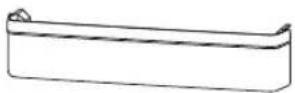
Nedre dörrhylla
Bottom Door Shelf

Instruktionsbok

Bakre distanser x 2
Plats
natural_image
Technical line drawing of a cabinet and a mechanical component with rotational motion indicator (no text or symbols)Luftcirkulationsbehov
natural_image
Pure mechanical diagram showing a rectangular block with a curved cutout and dimension lines, no text or symbols present.natural_image
Line drawing of a computer keyboard with an upward arrow indicating the key component (no text or symbols present)INSTALLATION

INSTALLATION
natural_image
Line drawing of a computer monitor with an open keyboard and a downward arrow indicating compression (no text or symbols)natural_image
Simple line drawing of a rectangular box with a lid (no text or symbols)natural_image
Line drawing of a hand pressing down on a device panel, with an inset circle highlighting the hand movement (no text or symbols)natural_image
Technical line drawing of a mechanical component with no visible text or symbolsnatural_image
Line drawing of a rectangular trash bin with a lid (no text or symbols)Laite
Käyttöopas
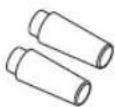
Takavälikappale x 2
Paikka
natural_image
Technical line drawing of a cabinet and a mechanical component with rotational arrow (no text or symbols)natural_image
Pure mechanical diagram showing a rectangular block with a curved cutout and dimension lines, no text or symbols present.natural_image
Line drawing of a laptop keyboard with an upward arrow indicating the key component (no text or symbols present)ASENNUS
natural_image
Line drawing of a computer monitor with an open keyboard and a downward arrow indicating the press or mode (no text or symbols present)- Ruuvi kaksi ruuvia.

ASENNUS
natural_image
Simple line drawing of a rectangular box with a lid (no text or symbols)natural_image
Diagram showing a hand pressing down on a surface with an arrow indicating the direction (no text or symbols present)natural_image
Technical line drawing of a mechanical component with no visible text or symbolsnatural_image
Line drawing of a rectangular trash bin with a lid (no text or symbols)Hovedenheden
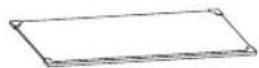
Justerbar glashylde x 4
Brugervejledning
DK
natural_image
Technical line drawing of a cabinet and a mechanical component with rotational arrow (no text or symbols)Krav til fri plads
natural_image
Pure mechanical diagram showing a rectangular block with a tilted support and dimension lines, no text or symbols present.natural_image
Line drawing of a computer keyboard with an upward arrow indicating the key component (no text or symbols present)INSTALLATION
natural_image
Line drawing of a computer monitor with an open keyboard and a downward arrow indicating compression (no text or symbols)natural_image
Simple line drawing of a rectangular box with a lid (no text or symbols)Rengøring før brug
natural_image
Line drawing of a hand pressing down on a device panel, with an inset magnified view showing the hand pressing down (no text or symbols)natural_image
Technical line drawing of a mechanical component with no visible text or symbolsThe symbol on the product or its packaging indicates that this product must not be disposed of with your other household waste. Instead, it is your responsibility to dispose of your waste equipment by handing it over to a designated collection point for the recycling of waste electrical and electronic equipment. The separate collection and recycling of your waste equipment at the time of disposal will help conserve natural resources and ensure that it is recycled in a manner that protects human health and the environment.
For more information about where you can drop off your waste for recycling, please contact your local authority, or where you purchased your product.
NO
- Safety Warnings....8
- Unpacking....13
- Installation....14
- Product Overview....19
- Operation 20
- Cleaning 21
- Maintenance 22
- Disposal 22
- Specifications....23
- WARNING
- Thank you for purchasing your new Matsui Fridge.
- Unpacking
- Location
- Levelling the Unit
- Installing the Spacers
- Free Space Requirements
- Reversing the Door Swing
- INSTALLATION
- Cleaning Before Use
- Before Using Your Unit
- Switching On Your Unit
- Adjusting the Temperature
- Noises Inside the Unit!
- Tips for Keeping Food in the Unit
- Cleaning
- Defrosting
- Cleaning the Interior and the Exterior of the Unit
- Changing the Internal Light
- Care When Handling / Moving the Unit
- Servicing
- Switching Off for Long Periods of Time
- Condensation
- Disposal
- Specifications
- Plassering
- Innstallering av avstandsstykker
- Plassbehov
- INSTALLASJON
- Rengjøring før bruk
- Plats
- Luftcirkulationsbehov
- Paikka
- ASENNUS
- Krav til fri plads
- Rengøring før brug
- NO
Brand : MATSUI
Model : MTL55W14E
Category : Refrigerator