
MFSC66W400 - Cooker MATSUI - Free user manual and instructions
Find the device manual for free MFSC66W400 MATSUI in PDF.


| Type of product | Freestanding Cooker |
| Brand | Matsui |
| Model | MFSC66W400 |
| Energy source | Electric |
| Hob type | Ceramic |
| Number of cooking zones | 4 |
| Oven type | Fan assisted |
| Oven capacity | 65 liters |
| Dimensions (H x W x D) | 900 x 600 x 600 mm |
| Weight | 50 kg |
| Power supply | 230 V, 50 Hz |
| Total power | 10 kW |
| Energy efficiency class | A |
| Safety features | Child lock, automatic shut-off |
| Cleaning type | Enamel interior, easy-clean |
| Additional features | Timer, oven light, storage drawer |
| Warranty | 2 years |
| Spare parts availability | Available through service centers |
Frequently Asked Questions - MFSC66W400 MATSUI
User questions about MFSC66W400 MATSUI
0 question about this device. Answer the ones you know or ask your own.
Ask a new question about this device
Download the instructions for your Cooker in PDF format for free! Find your manual MFSC66W400 - MATSUI and take your electronic device back in hand. On this page are published all the documents necessary for the use of your device. MFSC66W400 by MATSUI.
USER MANUAL MFSC66W400 MATSUI
Freestanding Electrical Cooker
EN

natural_image
Line drawing of a simple kitchen oven with four burners and a front panel (no text or symbols)
natural_image
Line drawing of a simple kitchen oven with four fans and control panel (no text or symbols)MFSE561W
MFSE66W
MFSC56W
MFSC66W
MSFC66W400
MATSUI
Contents
Getting to know your Freestanding Cooker ....3
Important safety notes....6
Control panel....10
Instructions for use 13
Hints and tips 16
Troubleshooting 20
Specifications....21
Getting to know your Freestanding Cooker
Thank you for choosing this Matsui freestanding cooker. We hope the following information will help you to familiarise yourself with the features of the cooker, and to use it successfully and safely.
Please read the instructions in this user guide before using the cooker and keep it for future reference.
This Instruction book is valid for serval Matsui models.
Getting to know your Freestanding Cooker
Freestanding Cooker

Identifying parts of your Cooker:
- Cooker Top(Hob)
- Control Panel
- Oven Door Handle
- Adjustable Feet
- Oven Door
-
Oven Tray
-
Wire Grid
- Grill
- Oven Lamp
- Cooking zone (a.Hotplate - b.Ceramic)
- Hot Surface Indicator (b. Ceramic)
| Model | Size WxDxH(cm) | Type |
| MFSE561W | 50x60x90 | ELECTRIC(10a) |
| MFSE66W | 60x60x90 | ELECTRIC(10a) |
| MFSC56W | 50x60x90 | CERAMIC(10b) |
| MFSC66W | 60x60x90 | CERAMIC(10b) |
| MSFC66W400 | 60x60x90 | CERAMIC(10b) |
Getting to know your Freestanding Cooker


Child Lock: To open the door, press the child lock upwards then pull the door towards you then release the door lock.
Close the door in the normal manner, the door lock will automatically engage.

Flap Drawer: To open the flap drawer lift the handle and pull the drawer cover towards yourself. A slight push will be enough to close the drawer.
Important safety notes
We have included this section for your safety. Please read this information carefully before using your cooker.
- General Safety
These warnings are provided in the interest of your safety. Read this manual carefully before using the appliance.
Please keep this manual in a safe place and pass on the instruction manual to the new owner if you sell the appliance.
The serial number is also included in the IB, for servicing issues please quote this number or provide it to the service engineer.
The appliance must be installed by a qualified electrician.
This appliance is not intended for use by persons(including children) with reduced physical, sensory and mental capabilities, or lack of experience and knowledge, unless they have been given supervision or instruction concerning use of the appliance by a person responsible for their safety.
- Before Installation
Transport damage
After removing the packaging, check if there is any damage, if found never attempt to use the appliance, please contact the store where purchased.
Important safety notes
Electrical Connection
The electrical connection of this cooker should be carried out by a qualified electrician, according to the instructions in this guide and in compliance with the current regulations.
The cooker may only be connected by an approved specialist. Losses resulting from damage caused by incorrect connection will invalidate warranty claims.
Check that the electricity supply matches that of the rating plate before connecting the appliance.
This appliance has been designed for domestic use only.
- Child safety
Do Not allow children to play with any part of the packaging.
Do Not allow children to be near the appliance unsupervised, accessible parts may be hot during use. Ensure that children do not play with the appliance.
Do Not allow children to climb or sit on oven door.
Important safety notes
Do Not stand and sit on the oven door.
Do Not place the baking tray, aluminium foil or dishes on the oven floor. This will cause heat accumulation. The baking and roasting times will no longer be correct and the enamel may become damaged.
Do Not hold or carry the cooker by the door handle. The door handle cannot hold the weight of the cooker and may break off.
Do Not place combustible items in the oven. There is a risk of fire.
Do Not use adaptors, multiple sockets and or extension leads.
Do Not trap cables of electrical appliances in the hot oven door. The cable insulation could melt. There is a risk of short-circuiting.
Do Not change or repair the supply cable by yourself. Always contact an authorised service agent.
Do check the door seals regularly. If the oven seal is very dirty, the oven door will no longer close properly when the oven is in use. The fronts of adjacent units could be damaged. Keep oven seal clean.
Do open the oven door carefully when cooking. Hot steam may escape.
Do leave the appliance to cool down before touching the internal parts of the oven. Some parts of the appliance may remain hot for a long time after it has been switched off. It is recommended to leave the appliance to cool down with the door closed. Do not allow anything to become trapped in oven door. Even if you only leave the oven door open slightly, the fronts of adjacent units may become damaged over time.
Do keep the oven door closed during grilling mode.
Important safety notes
For ceramic models
Do Not cut bread on the glass of the hob. Glass panels should not be used as working surfaces.
Do Not use the cooking zones with empty cookware or without cookware, placed on the zone.
When the oven is not in use, make sure the control dials are in the '0' (off) position.
- Safety when cleaning:
For cleaning, the appliance must be switched off and allowed to cool down.
Do Not use steam cleaners for cleaning the cooking hobs and oven cavity.
Do Not use harsh, abrasive cleaners or sharp metal scrapers to clean the oven door glass since they can scratch the surface, which may result shattering of the glass.
Note: Every care is taken to ensure the safety of the customer. Glass can break. Be very careful when cleaning the glass as not to scratch it. Do not knock or hit the glass with the accessories.
Control Panel
Models
MSFE561W
MSFE66W
Oven Function Knob
Thermostat Knob
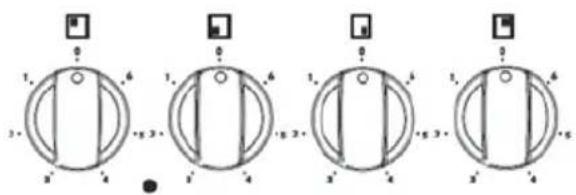
Hob Control Knobs

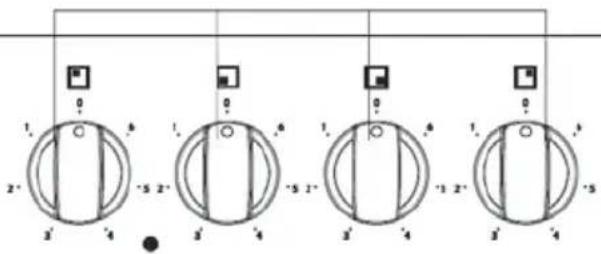
MFSE 561 W

MFSE 66 W
Models
MSFC56W
MSFC66W


MFSC 56 W

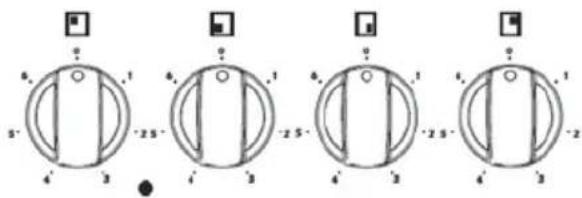
MFSC 66 W
Control Panel
Models
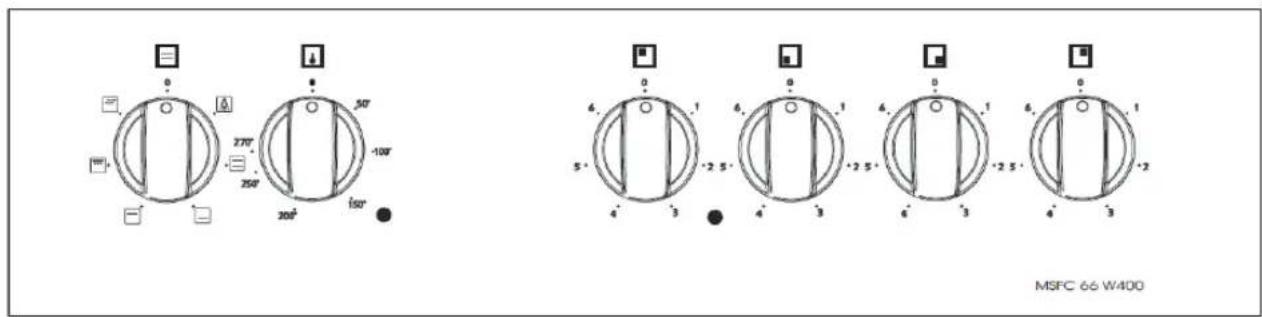
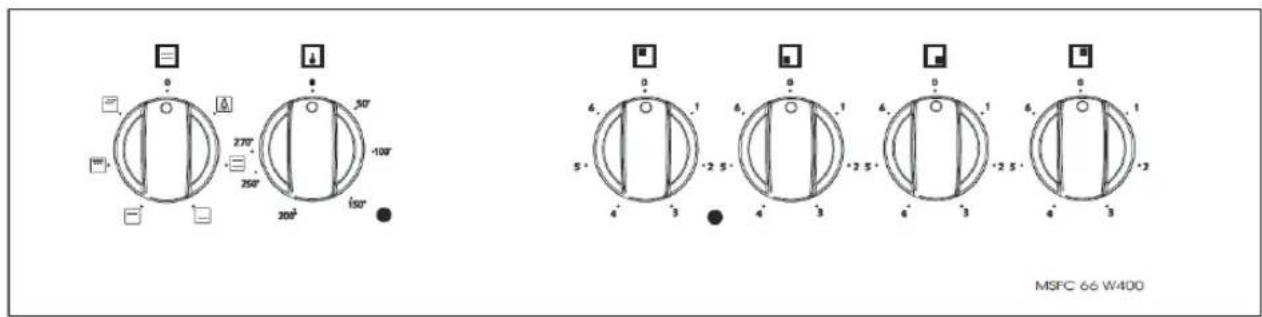
MSFC66W400
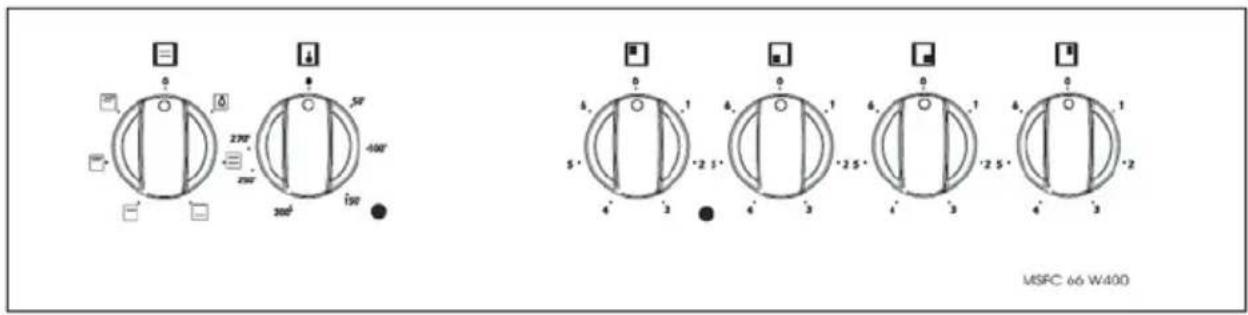
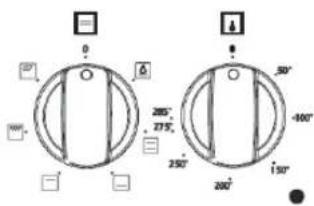
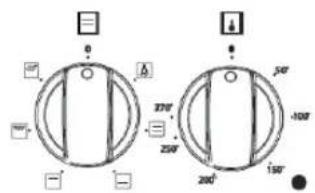
Oven controls - the function and temperature controls
To use an oven function, first select the function with the left hand dial, then set the temperature of the function with the right hand dial. The thermostat light will illuminate. When the temperature inside your oven reaches the temperature you set, the thermostat will cut off the heating element and the thermostat light will go off. When the temperature falls below the set temperature, the heating element will again be turned on and the thermostat light will illuminate again.

For models: MFSE561W - MFSC56W
For models: MFSE66W - MFSC66W - MSFC66W400
Control Panel
 | The oven light will be turned on. |
 | Static cooking functionThe oven's thermostat light, the lower and upper heating elements will be switched on.The static cooking function emits heat, ensuring even cooking of the lower and upper food, this is an excellent function for making pastries, cakes, baked pasta, lasagne and pizza. |
 | Lower heating functionThe oven's thermostat light, lower heating elements will be switched on.As the heat rises from the bottom of the oven, it warms food up, rather then cooking the foods. |
 | Upper heating functionThe oven's thermostat light, upper heating element will be switched on.Upper heating function is appropriate for heating the upper side of already cooked food. |
 | Grilling functionThe oven's thermostat, the grill heater will be switched onThis function is used for grilling foods such as cheese on toast, always use the highest rack position available. Lightly brush the grill rack with oil to stop foods sticking and place the foods in the centre. The grill rack and oven tray should be used together to catch the drips of oil.Warning: The maximum temperature should be set to 190^0 C. This function must be used with the door closed |
 | Faster grilling functionThis function is similar to the grilling function but is used for faster grilling and for covering a larger surface area, such as grilling meats, which tend to take up more room on a grilling rack.Warning: The maximum temperature should be set to 190^0 C. This function must be used with the door closed |
Instructions for use
Using the oven
When you first use your oven, odors may come from the insulation materials and the heating elements. For this reason, before using your oven for the first time, switch on the oven while empty, at its maximum temperature for 45 minutes.
- Select the oven function you require. Select the temperature you require.
- Before placing food in the oven you may need to pre-heat the oven for 10 minutes.
- The red temperature light will go out when the chosen temperature has been reached.
- To switch the oven off turn the function control dial to the off position '0'.
Note: Under no circumstances should the oven be lined with aluminium foil, do not place dishes or baking trays directly or onto the oven base as overheating and damage may occur.
Using the hob
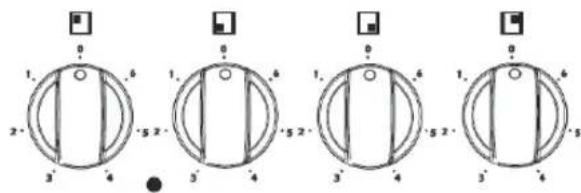
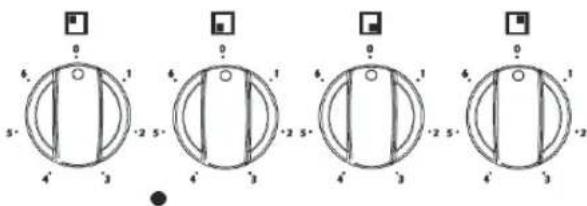
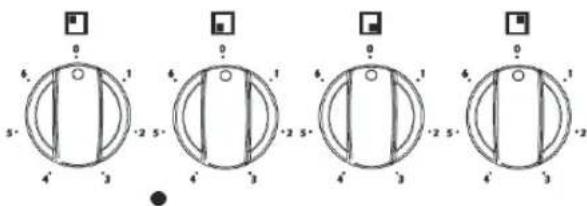
Your hob has four elements. Each knob has a symbol above it, which indicates which element it controls. The hob is designed for operatring at 6 different levels.

For models:
MFSC56W
MFSC66W
MSFC66W400
Using the Cooking zones
Care must ALWAYS be taken before touching any cooking appliance.
| Settings | Operation |
| 0 Cooking | zones off |
| 1 - 2 Gentle | simmering, slow warming |
| 3 - 5 Reheating, rapid simmering | |
| 6 Maximum | heat, Boiling, Saute and searing |
Instructions for use
- Choose the element you want, by using the four control knob's on the control panel. Each hob has a symbol above it to indicate which element it controls.
- Switch the hob on by turning the knob to 1-6, depending on the temperature required
- There are two different types of elements. The large elements are suitable for large pans and the two small elements are for smaller pans.
Hot hob warning indicators (Ceramic hobs)
(Models: MSFC56W, MSFC66W, MSFC66W400)
When a hot surface indicator light is on, it is indicating the cooking zone has some residual heat. Be careful not to place objects onto the glass surface.
Hints and tips
Baking tips
- Always place baking tins in the centre of the wire shelf.
- Make sure you use bakeware that is oven proof.
- Do not place bakeware too close to the rear or sides of the oven walls.
- You can influence the degree of browning by changing the temperature setting.
- If a cake collapses after removing it from the oven:
- Use less liquid on your next attempt.
- Consider using a longer baking time or use a slightly lower temperature setting.
Cookware
Hobs
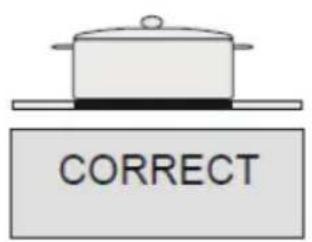
Use heavy gauge, flat, smooth bottomed pans that are the same diameter as the element. This will provide good contact with the glass and help reduce cooking times.
Cookware with a stainless steel sandwich base or enameled cast iron base will give you the best results.
Never use plastic or aluminium foil dishes on the hob.
Aluminium and copper bottomed cookware can cause a metallic residue to remain on the hob. If left, this becomes difficult to remove. Clean the hob after every use.


Hints and tips
Energy Saving
- During use of electrical cookers, it is required to use saucepans having flat bases.
- Choose a cookware of proper size.
- Using a lid will reduce cooking times.
- Minimise the amount of liquid or fat to reduce cooking times.
- When liquid starts boling, reduce the temperature setting.
- Oven door should not be opened often during cooking.
Cleaning tips(Disconnect the appliance from the power supply.)
- Wait until the oven has cooled before removing the wire shelves, wash them separately in warm soapy water and dry thoroughly.
- Wash the interior of the oven with hot soapy water and wipe down with a damp cloth.
- Leave the door open until the interior has dried, before replacing the wire shelves.
- Clean the oven after each use, especially after roasting or grilling, this will prevent spilt or splattered food debris burning and becoming difficult to remove.
- Do not use abrasive pads to clean the interior of the oven as this may remove the enamel, which will affect the efficiency of your oven.
- Do Not use harsh, abrasive cleaners or sharp metal scrapers to clean the oven door glass since they can scratch the surface, which may result shattering of the glass.
Cleaning the outside of the oven (Disconnect the appliance from the power supply.)
- You should regularly wipe over the control panel, oven door and oven sides using a soft cloth and mild liquid detergent as spilt liquids may damage the enamel.
- Wash enameled or chrome plated parts of the oven with warm soapy water or with non-abrasive detergents.
Hints and tips
-
Never use abrasive pads to clean enameled, chromed or stainless steel surfaces.
-
When using commercially available stainless steel cleaning products, avoid cleaning any lettering or symbols, as they can become damaged.
Removing the door for easier cleaning
We recommend you have someone to assist you during removal of the door.
- Open the door completely.
- The door hinge has a small latch. Lift the latch on both hinges.
- Lift the door slightly as if closing, and then with both hands supporting the door, pull it away from the oven.
- To replace the door, hold the door in an open position and insert the latches on both hinges back into place. Open and close the door to make sure that it has been fitted correctly.
Latch

natural_image
Close-up of a car door with a person walking near the window (no visible text or symbols)Hints and tips
Replacing the oven light
- Switch off and disconnect the power from the oven. Ensure that the internal parts are cool before touching internal parts.
- Remove the lamp cover by turning it anti-clockwise (note, it may be stiff), remove the bulb by turning it anti-clockwaise.
- Insert the new bulb, which should be resistant to 300^ C.
For replacement bulbs contact your local service centre. - Re-fit the cover.
- If in any doubt, consult a qualified electrician for help.

natural_image
Abstract grayscale illustration of a room with a circular object and grid pattern (no text or symbols)Trouble Shooting
Should a malfunction occur, it if often due to a minor fault. Please read the follow instructions before calling the after-sales service:
| Problem Possible | Cause Please Check | |
| The oven does not work | Blown Fuse | Please check the fuse box that the fuse is in working order |
| Incorrect setting Please | lease check all controls have been turned to the desire location | |
| Some hob zones a heating | Installation Please | check that the appliances terminal box has been correctly installed (see installation instructions) |
Specifications
| Model MFSE561W MFSE66W | ||
| Rated Voltage (V) | 230-240 / 400 | |
| Rated Frequency (Hz) | 50 | |
| Power (W) | 7600-8300 | 8200-8900 |
| Current (A) | 33-35 | 36-37 |
| Top element (W) | 1000 1200 | |
| Bottom element (W) | 1000 1100 | |
| Grill (W) | 1600 2000 | |
| Net Weight (kg) | 38 | 42 |
| Product Dimensions (cm) | 50x60x90 60x60x90 | |
| Oven Capacity (lt) | 52.5 61 | |
| Energy Efficiency class | B | B |
| Model | MFSC56W | MFSC66W | MSFC66W400 |
| Rated Voltage (V) | 230-240 / 400 | 400 | |
| Rated Frequency (Hz) | 50 | ||
| Power (W) | 8600-9300 | 9200-10000 | 9700 |
| Current (A) | 37-39 | 40-41 | 25 |
| Top element (W) | 1000 | 1200 | 1200 |
| Bottom element (W) | 1000 | 1100 | 1100 |
| Grill (W) | 1600 | 2000 | 2000 |
| Net Weight (kg) | 37 | 41 | |
| Product Dimensions (cm) | 50x60x90 | 60x60x90 | |
| Oven Capacity (lt) | 52.5 | 61 | |
| Energy Efficiency class | B | B | |

This symbol on the product or in the instructions means that your electrical and electronic equipment should be disposed at the end of its life separately from your household waste. There are separate collection systems for recycling in the EU. For more information, please contact the local authority or your retailer where you purchased the product.
Brugervejledning
natural_image
Line drawing of a standard electric stove with four burners and a front panel (no text or symbols)
natural_image
Line drawing of a standard electric stove with four fans and four doors (no text or symbols)MFSE561W
MFSE66W
MFSC56W
MFSC66W
MSFC66W400
MATSUI
Indhold
Identificere forskellige dele til komfuret

MFSE 561 W

MFSE 66 W
Modeller
MSFC56W | MSFC66W


MFSC 66 W
Kontrolpanel
Modeller
MSFC66W400

natural_image
Abstract grayscale illustration of a ceiling with a spherical object and grid pattern at the base (no text or symbols)Fejlfinding
natural_image
Line drawing of a standard electric stove with four burners and top cabin (no text or symbols)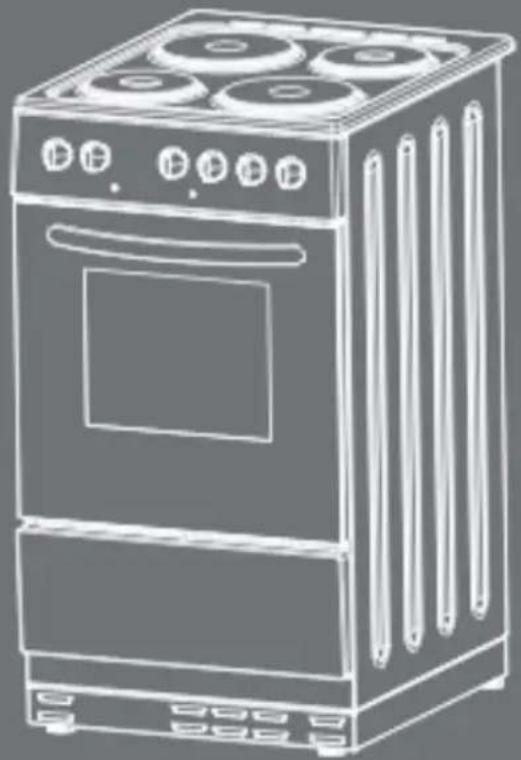
natural_image
Line drawing of a standard electric stove with four burners and a front panel (no text or symbols)MFSE561W
MFSE66W
MFSC56W
MFSC66W
MSFC66W400
MATSUI
Sisältö
Sähkölieden osat:

MFSE 66 W
Mallit
MSFC56W | MSFC66W

MFSC 66 W
Ohjauspaneeli
Mallit
MSFC66W400
Mallit: MFSE561W, MFSE56W

Mallit: MFSE66W - MFSC66W - MSFC66W400
Ohjauspaneeli
natural_image
Abstract grayscale illustration of a ceiling structure with a spherical object and grid pattern at the base (no text or symbols)Vianetsintä
natural_image
Line drawing of a simple electric stove with four burners and top ovens (no text or symbols)
natural_image
Line drawing of a standard electric stove with four fans and control panel (no text or symbols)MFSE561W
MFSE66W
MFSC56W
MFSC66W
MSFC66W400
MATSUI
Innholdsfortegn
Skader under transport
Termostathjul

MFSE 561 W

MFSE 66 W
Modeller
MSFC56W | MSFC66W


MFSC 66 W
Kontrollpanel
Modeller
MSFC66W400

natural_image
Abstract grayscale illustration of a ceiling with a spherical object and grid pattern at the base (no text or symbols)Feilsøking
natural_image
Line drawing of a standard electric stove with four burners and top ovens (no text or symbols)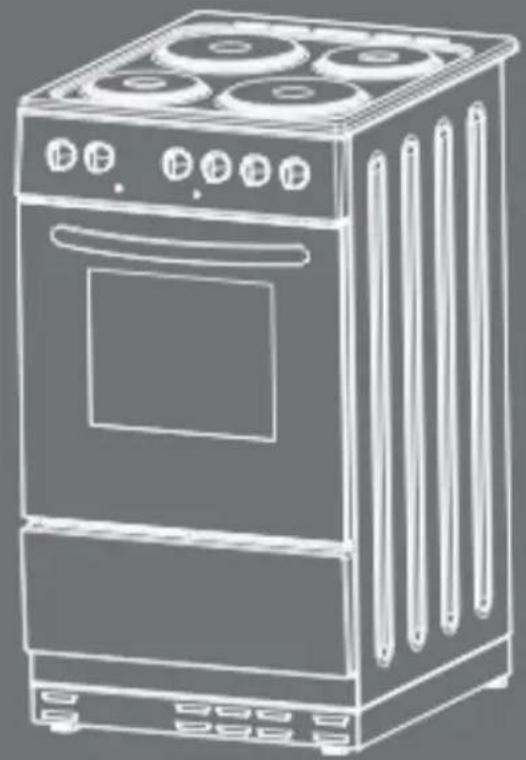
natural_image
Line drawing of a vintage kitchen oven with four fans and front panel (no text or symbols)MFSE561W
MFSE66W
MFSC56W
MFSC66W
MSFC66W400
MATSUI
Innehåll
Spiselhällens kontrollknappar

MFSE 561 W


MFSE 66 W
Modeller
MSFC56W | MSFC66W


MFSC 66 W
Kontrollpanel
Modeller
MSFC66W400
natural_image
Abstract grayscale illustration of a ceiling with a spherical object and grid pattern at the base (no text or symbols)Felsökning
- Freestanding Electrical Cooker
- EN
- Contents
- Getting to know your Freestanding Cooker
- Identifying parts of your Cooker:
- Important safety notes
- - General Safety
- - Before Installation
- Transport damage
- Electrical Connection
- - Child safety
- For ceramic models
- - Safety when cleaning:
- Control Panel
- Models
- Oven controls - the function and temperature controls
- Instructions for use
- Using the oven
- Using the hob
- Using the Cooking zones
- Hot hob warning indicators (Ceramic hobs)
- (Models: MSFC56W, MSFC66W, MSFC66W400)
- Hints and tips
- Baking tips
- Cookware
- Hobs
- Energy Saving
- Cleaning tips(Disconnect the appliance from the power supply.)
- Cleaning the outside of the oven (Disconnect the appliance from the power supply.)
- Removing the door for easier cleaning
- Replacing the oven light
- Trouble Shooting
- Specifications
- Brugervejledning
- Indhold
- Identificere forskellige dele til komfuret
- Modeller
- Kontrolpanel
- MSFC66W400
- Fejlfinding
- Sisältö
- Sähkölieden osat:
- Mallit
- Ohjauspaneeli
- Vianetsintä
- Innholdsfortegn
- Skader under transport
- Kontrollpanel
- Feilsøking
- Innehåll
- Felsökning
Brand : MATSUI
Model : MFSC66W400
Category : Cooker