
MD 11711 - Microwave MEDION - Free user manual and instructions
Find the device manual for free MD 11711 MEDION in PDF.


| Product Type | Microwave Oven |
| Brand | Medion |
| Model | MD 11711 |
| Capacity | 20 Liters |
| Power Output | 800 Watts |
| Power Levels | 5 Levels |
| Grill Function | Yes, 1000W Quartz |
| Defrost Function | Yes, by weight or time |
| Auto Cook Programs | 8 Preset Menus |
| Control Type | Electronic with Digital Display |
| Timer | Up to 99 minutes 99 seconds |
| Child Lock | Yes |
| Dimensions (W x D x H) | 45.5 x 32.5 x 26.5 cm |
| Interior Dimensions (W x D x H) | 30 x 30 x 20 cm |
| Net Weight | 10.5 kg |
| Power Supply | 230V/50Hz, 1300W (total) |
| Turntable Diameter | 25.5 cm |
| Interior Light | Yes |
| Cleaning | Wipe with damp cloth; avoid abrasives |
| Spare Parts Availability | Quartz grill element, turntable motor, fuse, door switch |
| Reparability Index | High (common parts, easy access) |
Frequently Asked Questions - MD 11711 MEDION
User questions about MD 11711 MEDION
0 question about this device. Answer the ones you know or ask your own.
Ask a new question about this device
Download the instructions for your Microwave in PDF format for free! Find your manual MD 11711 - MEDION and take your electronic device back in hand. On this page are published all the documents necessary for the use of your device. MD 11711 by MEDION.
USER MANUAL MD 11711 MEDION
Programa A-3: Pizza helada.... 27
Programa A-4: Verduras 27
Programa A-5: Patatas....27
Programa A-6: Calentar.... 28
Programa A-7: Pizza fresca 28
Programa A-8: Pollo 28
Temporizador....29
| Pulsar la tecla „microondas“ | Indicativo en la pantalla | Rendimiento (watios) |
| 1 x | P-HI | 900 W |
| 2 x | P-90 | 810 W |
| 3 x | P-80 | 720 W |
| 4 x | P-70 | 630 W |
| 5 x | P-60 | 540 W |
| 6 x | P-50 | 450 W |
| 7 x | P-40 | 360 W |
| 8 x | P-30 | 270 W |
| 9 x | P-20 | 180 W |
| 10 x | P-10 | 90 W |
| 11 x | P-00 | 0 W |
Programa A-3: Pizza helada
Safety Instructions....3
Application/intended use.... 3
Setting up and electrical connection 4
Initial operation and use....5
Important information.... 5
Faults 6
About microwaves....8
The effect of microwaves on foodstuffs 8
The microwave functions....8
Notes on cooking food in the microwave....9
General notes....9
Microwave-suitable materials 10
Suitable materials 10
Materials that are partially suitable.... 10
Unsuitable materials 11
Summary of suitable materials for the microwave, grill and hot air .. 12
Size and shape of microwave-suitable containers.... 12
Before use....13
Setting up the unit....13
Heat appliance while empty 14
Insert accessories....14
Operation 15
Setting clock time.... 15
Child lock....15
Cooking with microwave energy.... 16
End of the cooking process 17
Interrupting the Programme....17
Fast start....17
Automatic defrosting according to weight.... 18
Grill operation....19
Hot air operation....20
Combi mode....21
Grill and microwave.... 21
Hot air and microwave.... 22
Automatic cooking 23
Setting the automatic programme 24
Programm A-1: Drinks 25
Programm A-2: Pasta 25
Programm A-3: Frozen pizza 26
Programm A-4: Vegetables.... 26
Programm A-5: Potatoes 26
Programm A-6: Reheating 27
Programm A-7: Fresh pizza 27
Programm A-8: Chicken 27
Timer 28
Using several programmes.... 29
Recipes ....30
Muffins....30
Rissoles.... 31
Crisping up rolls.... 32
Browned potatoes 32
Cleaning and care....34
Taking the device out of operation ....35
Troubleshooting....36
Disposal 37
Appliance 37
Packaging 37
Technical data 38
Safety Instructions
Read these instructions thoroughly before using the appliance for the first time and follow the safety instructions. This appliance should only be used as designated and described in these instructions.
Please keep these instructions in a safe place for future reference. If you pass on this microwave to a third party, please include these instructions.
Application/intended use
- This appliance is intended solely for household use. It should only be used for warming up appropriate foodstuffs in microwave-suitable containers and dishes.
- When warming up meals in plastic or paper containers it is necessary to monitor the container constantly because of the risk of fire.
- The microwave is not intended for the preparation of foods which require frying. The appliance is also not intended for drying out objects. Caution! This could cause a fire!
- This device is not intended to be used by people (including children) with restricted physical, sensory or intellectual abilities or with a lack of experience and/or knowledge, unless they are being supervised by an individual responsible for their safety or receive instructions from this individual how the device is to be used. Children should be supervised in order to ensure that they do not play with the device.

WARNING!
Attention: Children must only be permitted to use the device without supervision if sufficient instructions that will put the child in a position to use the device safely and to be able to understand the dangers of incorrect use have been given to the respective child.
WARNING!
If you use the appliance in combi or grill mode, children may only use the appliance under the supervision of adults because of the high temperatures.
Setting up and electrical connection
- Connect the microwave only with an appropriate 230 V\~50 Hz safety plug which has at least a 16 Amp fuse. Do not use an extension cable.
- Ensure that the power cable is undamaged and does not run underneath the appliance or over any hot surfaces.
- The microwave should be set up on a level, stable surface, which is able to carry the weight of the appliance as well as the food which is to be prepared within it. Only set up the microwave in a safe, dry environment.
- The appliance is freestanding. It is not designed to be integrated in kitchen units.

WARNING!
Please pay attention to the minimum safe distances and under no circumstances cover the ventilation slots.

Do not place any objects on the microwave as these may become hot during use. To ensure adequate ventilation a minimum safe clearance distance of 20 cm, 10 cm at the back side, and 5 cm on both sides must be observed. The openings in the appliance should not be covered or blocked.
Protect the appliance from water droplets or spray. If the appliance does become wet then pull out the plug immediately.

WARNING!
During use the touchable surfaces may become very hot!.
Initial operation and use
Important information
- Never use the microwave when empty, i.e. without items to be cooked insider.
- Only use the accessories that are enclosed or described as suitable in these instructions.
- Never use dishes with metal trimmings, metal utensils or the grill stand in microwave mode as this could damage the appliance.
- After cooking with the grill the rotating table will become very hot! Therefore always use oven gloves or protective cloth when removing food.
- Use only microwave-suitable dishes. Look for markings such as "Microwave-suitable" or "For the microwave".
- When warming up meals in plastic or paper containers it is necessary to monitor the container constantly because of the risk of fire.
- Do not remove any of the microwave's internal panels or the inner coating of the viewing window as this could lead to microwave radiation leakage.
- Never leave the appliance unattended during operation.

WARNING!
When heating liquids in the microwave so-called "delayed boiling" can occur, i. e. the liquid has reached boiling temperature without beginning to bubble as boiling liquids normally do.
Agitation, for instance when removing the liquid from the appliance, can lead to a sudden boiling up of the liquid. Therefore take care when moving the liquid container.
There is a risk of scalding!
Always place a glass or ceramic rod in liquids that are to be heated up. This will hinder sudden, belated boiling of the liquid.
- Never heat up food in closed containers as these could easily explode. Therefore always remove the seal on bottles and closable containers such as baby's bottles.
- With foods that have a firm skin, e. g. sausages or tomatoes, make small slits in the skin so that they do not burst during cooking.
- Do not try to heat up eggs in their shells or pre-boiled eggs unless in specially designed microwave-suitable containers.

WARNING!
Eggs which are already boiled can explode, even after being removed from the oven.
- After heating, stir the food if possible to ensure even temperatures, otherwise let the food stand in the appliance for a short time.
- Check the temperature before eating food cooked in the microwave. Special care must be taken with baby food and bottles. Always stir or shake the baby food before checking the temperature to avoid burns.
Faults
- Protect the device and the mains cable against damage.
- Check the mains cable and the device for damage before each use.
- Do not use the device under any circumstances if you have established damage. Pull the mains cable out of the socket with the plug immediately in this case.
- Have a defective device repaired immediately by a qualified specialist workshop and get a damaged mains cable replaced at once or use the Medion service, in order to avoid damage.


WARNING!
It will be dangerous for all individuals, apart from an individual trained to do so, to carry out servicing or repair work requiring the removal of the housing, which ensures protection against radioactive damage by microwave energy.
- You must absolutely keep the door closed and switch the device off immediately with the Stop/Cancelar button if smoke develops, in order to avoid flames arising or to stifle flames already present.
- Pull the plug out of the socket immediately after this

WARNING!
You must not use the device under any circumstances in the case of damage to the housing, the covers, the door or the door opening. Have the device repaired by a suitably qualified workshop or contact the Medion service, in order to avoid danger.
- Also pay attention that the device is not located too close to a source of heat or in an area where it could come into contact with water.
About microwaves
Microwaves are high-frequency electromagnetic waves which have a warming effect on the food within the oven. This heating effect is more effective the higher the water content of the foodstuff.
To ensure optimal distribution of heat let food stand for a minute or two after cooking.
The effect of microwaves on foodstuffs
- Microwaves penetrate foodstuffs to a depth of up to 3 cm.
- They heat up water, fat and sugar molecules (foodstuffs with higher water content are heated more intensively).
- This heat then works its way – slowly – throughout the food and has a defrosting, heating and cooking effect on the food.
- The cooking chamber and the air within are not heated (the food container is heated mainly by the hot food).
- Each foodstuff requires a certain amount of energy to cook or defrost. As a rule of thumb we can say high output – short time or low output – long time.
The microwave functions
- A microwave generator, the so-called magnetron, generates the microwaves and directs them into the cooking space.
- The inner walls reflect the microwaves inwards so that they cannot escape from the interior.
- The microwave output and the cooking time can be set in several steps.
- After the cooking time has elapsed, or when the door is opened, the magnetron turns off immediately.
Notes on cooking food in the microwave
General notes
- To arrange food so that it cooks properly place the food with the largest pieces towards the outer edge.
- Note the exact cooking or heating times.
- Choose the shortest available cooking or heating time and extend it if necessary.

WARNING!
Overcooked food can start to smoke or even catch fire.
- Cover food during cooking or heating with a cover that is suitable for the microwave. Covering the food helps avoid splashes; furthermore the food is more evenly cooked.
- Foods such as chicken pieces or hamburgers should be turned once during cooking to speed up cooking. Larger pieces such as joints or roasting chickens must be turn at least once.
- It is also important to reposition food, e.g. with meatballs. After half of the cooking time is over the food should be repositioned from top to bottom and from the middle to the outside.
Microwave-suitable materials
You can buy special dishes and accessories for your microwave. Look for markings such as "Microwave-suitable" or "For the microwave". You can also use your existing dishes – if the material is suitable.
Suitable materials
- Porcelain, glass ceramic and heat-proof glass
- Plastics which are heat-proof and microwave-suitable (note: plastics may become discoloured by foods or become warped by the heat)
- Baking paper

Caution
Do not use porcelain, ceramic or plastic containers in grill or grill combi mode. Cling film should also not be used. Due to the very high temperatures the materials could break, warp or even melt.
Materials that are partially suitable
- Stoneware and ceramics. Use clay containers only for defrosting and for short cooking times because the air and water content of the material could cause the clay to crack or break.
- Dishes with gold or silver décor should only be used when the manufacture has labelled it "microwave-suitable".
- Aluminium foil. Never use aluminium foil in large quantities. It can however be used in small pieces to cover sensitive parts. You can also cover the corners of containers to prevent overcooking as the microwave energy is primarily concentrated on the corners. Maintain a distance of 2.5 cm between the foil and the internal wall.
- Aluminium dishes (e. g. for ready-made dishes) are suitable in some circumstances but must be at least 2 cm high.
Unsuitable materials
• Metal, i.e. metal pots, pans and lids.
Caution
Metal in the cooking space can lead to sparks! These can damage the appliance or the viewing window! Therefore use the supplied grill only in grill or combi mode.
- Dishes with metal parts (handles, decoration or bottoms) or with gold or silver décor can also lead to sparks during microwave operation.
- Crystal or lead crystal can shatter, coloured glass may become discoloured.
- Any materials which are not heat-proof can lose shape or even burn.

Note:
To test whether a dish is suitable for use in the microwave, put some water in the container and place it in the microwave. Start the microwave by pushing the button twice. Check carefully whether the container is cooler than the water. If the container is hotter than the water it is not suitable for microwave use. Microwave suitable dishes are only warmed by the heat of the food.

WARNUNG!
As soon as you notice sparks, flashes or even fire, turn off the microwave immediately using the button Stop/Cancelar.
Summary of suitable materials for the microwave, grill and hot air
The following list is a general guide to help you choose the correct cooking dishes:
| Cooking dishes Microwave Grill Hot Air | Combi operation | |||
| Heatproof glass Yes | Yes Yes Yes | |||
| Non-heatproof glass No No No No | ||||
| Heatproof ceramic Yes Yes Yes Yes | ||||
| Microwave-suitable plastic dished | Yes | No | No | No |
| Baking paper Yes No No No | ||||
| Metal dish No Yes Yes No | ||||
| Supplied grill stand No Yes Yes No | ||||
| Aluminium foil and foil containers | No | Yes | Yes | No |
*Combi operation: Microwave + grill or microwave and hot air
Size and shape of microwave-suitable containers
Flat, broad containers are better than narrow, tall ones. "Flat" foods can be cooked more evenly.
Round or oval containers are better than angular ones. There is a danger of local overheating in the corners.
Before use
Setting up the unit
- Ensure that all packaging materials have been removed from inside the appliance and the interior of the door.

Caution
On the right side of the cooking area, a cover has been inserted into the casing. This plate covers the microwave's magnetron and may not be removed under any circumstances!

Note:
Check the microwave for any damage – e.g. if the door is crooked or bent, door seals and other seals are damaged, hinges and the closing mechanism are defective or loose, or if the interior of the appliance or the door are dented or damaged. If you discover any damage, do not use the microwave. In this case please contact our customer service.
- Do not place the microwave near to any heat sources, in a location prone to wetness or high humidity, or in the immediate vicinity of inflammable materials.
- The feet must not be removed.

Caution
The microwave has been designed for household use and may not be used outside!
- Connect the microwave to a 230 V\~50 Hz safety plug.
Heat appliance while empty
Before using the microwave you must first heat it up whilst empty in order to remove remains left over from production. To do this, switch the device on in the Grill operational mode, without food and without accessories, as described in the following:
- Open the door and remove packaging or accessory parts from the interior, if necessary. Then close the door again.
- Press the Aire caliente button once. You will select the hot air operation with this. A temperature of 230° C will appear in the display.
- Turn the ◆ control clockwise, to set a cooking time of 10 minutes.
- The device will switch off automatically after the process has finished.

Note:
During this initial heating period you may notice faint odours. The odour will disappear after a short period of time. Ensure adequate ventilation e. g. by opening a window.
- After 10 minutes the appliance turns itself off automatically. Wait until it has completely cooled down.
- Remove the plug from the socket and then clean the appliance once more inside and out with a damp cloth and dry it off carefully.
Insert accessories
When you have heated the microwave once empty as stated above it may no longer be used without the roller ring and rotating plate inserted properly.
- Insert the roller ring in the centre of the cooking area over the drive axle.
- Set the rotating plate over the centre of the roller ring.
Operation
Every time a button is pressed you will hear a beep to confirm.
Setting clock time
When the microwave is used for the first time or the power supply is broken the screen shows „0:00“. Set the clock as follows:
▶ Press the Reloj/Temporizador button for 3 seconds.
▶ Select the 24 or 12 hour format by pressing the Reloj/Temporizador again.
▶ Turn the Menú/Tiempo control until the correct hour is shown in the display.
▶ Press the Reloj/Temporizador button.
▶ Turn the Menú/Tiempo control until the correct minute is shown in the display.
Press the Reloj/Temporizador, button to confirm your settings.
Child lock
- Press the Stop/Cancelar button and hold it down for 3 seconds. A bleep will sound and a key symbol will appear in the display. The buttons and the control of the microwave will now not have any functions.

- Press the Stop/Cancelar button and hold it down for three seconds again, until the bleep sounds and the child protection display disappears, in order to deactivate the child protection.
Cooking with microwave energy
Proceed as follows, to cook only with microwave energy:
▶ Press the Microondas button once or several times, in order to select an energy level in accordance with the following Table:

| Press the ‘Microwave’ button | Display | Power (Watts) |
| 1 x | P-HI | 900 W |
| 2 x | P-90 | 810 W |
| 3 x | P-80 | 720 W |
| 4 x | P-70 | 630 W |
| 5 x | P-60 | 540 W |
| 6 x | P-50 | 450 W |
| 7 x | P-40 | 360 W |
| 8 x | P-30 | 270 W |
| 9 x | P-20 | 180 W |
| 10 x | P-10 | 90 W |
| 11 x | P-00 | 0 W |
▶ Turn the ◆ control, in order to set the required cooking time in the following time intervals. The longest cooking time is 95 minutes.
| From 10 seconds to 5 minutes in 10-second steps | |
| From 5 to 10 minutes in 30-second steps | |
| From 10 to 30 minutes in 1-minute steps | |
| From 10 to 30 minutes in 1-minute steps | |
| From 30 minutes in 5-minute steps |
▶ Press the ◆ button. The cooking process will start.
End of the cooking process
Four bleeps will sound and 'END' will be shown in the display after the end of each cooking process. The cooking process will be finished with this. Press the Stop/Cancelar button or open the door, in order to reset the display.

WARNING!
Use oven cloths or heat-resistant gloves when removing the food from the interior of the device, because the food or the containers can be very hot.
Interrupting the Programme
It will frequently be necessary to interrupt the programme, to stir the food or to turn it after half the cooking time has passed, for example.
- Open the door or press Stop/Cancelar, in order to interrupt the programme. Remaining running time will continue to be shown in the display.
▶ Press the ◆ button, in order to continue the cooking process, after you have closed the door again. - Press the Stop/Cancelar button twice, in order to interrupt the programme finally and prematurely.
Fast start
The cooking programme will be started at the highest energy level (900 watts) in microwave operation, if you press the ◆ button without setting an energy level beforehand.
▶ Press the ◆ button quickly several times, to increase the cooking time:
Press 1 time: 0:30 seconds;
press 2 times: 1:00 minutes;
press 3 times: 2:00 minutes;
press 4 times: 3:00 minutes;
etc. up to a maximum of 10 minutes.
The cooking programme will start automatically a short time after the button has been pressed for the last time.
Automatic defrosting according to weight
The defrosting time and the energy level will be set automatically as soon as you have entered the weight of the food to be defrosted. The scale for the weight of the frozen food stretches from 100g to 1,800g.
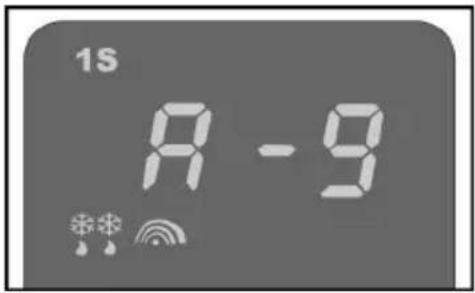
▶ Turn the control to the left until A-9 appears in the display; see the illustration opposite.
- Press the Peso button once or several times, to set the required weight in grammes.
▶ Press the ◆, button, in order to start the defrosting.

Note:
A bleep will sound and the programme will stop after half the time has passed. Turn the food round, if possible, in order to optimise the defrosting. Then, press the ◆ button again, to continue the programme.
Grill operation
Cooking with the microwave's grill is well suited to quickly browning and gratinating dishes with short cooking times, e. g for: thin slices of meat, steaks, minced meat, kebabs, small sausages; toasted sandwiches and gratin dishes.
During grill operation the cooking time stops half way so that the item can be turned.
The maximum cooking time is 95 minutes.

WARNING!
Pay attention to the minimum distances of the device from the wall and do not cover the ventilation slots under any circumstances.
▶ Press the Grill/Grill doble button once or twice, in order to select the type of grilling according to the illustrations:

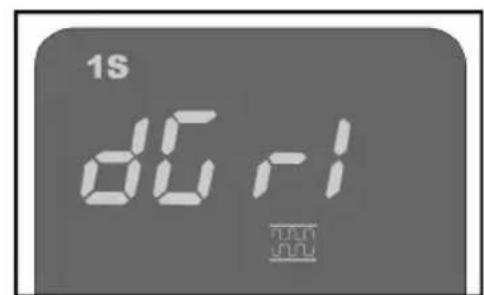
Button press 1x: Grill Button press 2x: Double grill
▶ Then turn the control clockwise and set the required time.
▶ Press the ◆ button, to start the grilling process.
Hot air operation
The hot air circulates in the interior of the device in hot air operation. Hot air is particularly recommended for the preparation of soufflés or crisp food.
Proceed as follows, in order to cook with hot air:
▶ Press the Aire caliente button once or several times, in order to select an energy level in accordance with the following Table:
| Press the ‘Aire caliente’ button | Display | Temperature |
| 1 x | 230°C | 230°C |
| 2 x | 215°C | 215°C |
| 3 x | 200°C | 200°C |
| 4 x | 185°C | 185°C |
| 5 x | 170°C | 170°C |
| 6 x | 155°C | 155°C |
| 7 x | 140°C | 140°C |
| 8 x | 125°C | 125°C |
| 9 x | 110°C | 110°C |
| 10 x | 95°C | 95°C |
▶ Press the ◆ button, if you wish to pre-heat the device. A bleep will sound after the set temperature has been reached.
Please continue directly with the following step if you do not wish to pre-heat the device.
▶ Turn the control, to set the cooking time required. The longest cooking time is 9 hours and 30 minutes.
The illustration opposite shows a running cooking programme 1 hour and 00 minutes long. The 'H' with a preceding number shows the cooking time in hours. The cooking time will be less than one hour if no number is displayed in front of the 'H'. The numbers behind the colon show the cooking time in minutes.

▶ Press the ◆ button. The cooking process will start.
Combi mode
Grill and microwave
Microwave and grilling operation are combined in the combination operation. Four combination programmes are available. The maximum cooking time is 95 minutes in the case of each of these programmes.

You will be able to use the grill supplied with the device in combination operation, as far as the food is suitable for this.
The illustration shows a running combination programme with microwave and double grilling.
- Press Microondas + Grill/Grill doble button once or several times and select the performance level. The following levels of performance will be available to you:
| Press the ‘Microondas + Grill/Grill doble’ button | Display | Microwave power | Grill power | Double grill power |
| 1 x | [-1] | 30 % 70 % -- | ||
| 2 x | [-2] | 55 % 45 % -- | ||
| 3 x | [-3] | 30 % -- 70 % | ||
| 4 x | [-4] | 55 % -- 45 % |
▶ Turn the control clockwise, to set the required time.
▶ Press the ◆ button. The programme will start.
Hot air and microwave
Microwave and hot air are combined in this combination operation. Four combination programmes are available. The maximum cooking time is 9 hours and 30 minutes in the case of each programme.

▶ Press the
Microondas + Aire caliente button
once or several times and select the level of power. The following levels of power are available to you :
| Press the ‘Microondas + Aire caliente’ button | Display Temperature Microwave power | ||
| 1 x | 200°C | 200°C | 272 |
| 2 x | 170°C | 170°C | 409 |
| 3 x | 140°C | 140°C | 518 |
| 4 x | 110°C | 110°C | 645.5 |
▶ Turn the control clockwise, to set the required time.
The above illustration shows a running cooking programme of 1 hour and 20 minutes. The 'H' with a preceding number shows the cooking time in hours. The cooking time is less than one hour if no number is
shown in front of the 'H'. The numbers after the colon show the cooking time in minutes.
▶ Press the ◆.button. The programme will start.
Automatic cooking
It is not necessary to enter the cooking time and the energy level in the case of automatic cooking. The microwave will automatically establish the values, depending on the food and weight entered.
The following automatic programmes are available:

Setting the automatic programme
▶ Turn the control anti-clockwise in steps. A programme number (e.g. 'A-1' for automatic programme 1) and the symbol for the corresponding cooking programme will appear in the display. Select automatic programmes 1 to 8 in this way.
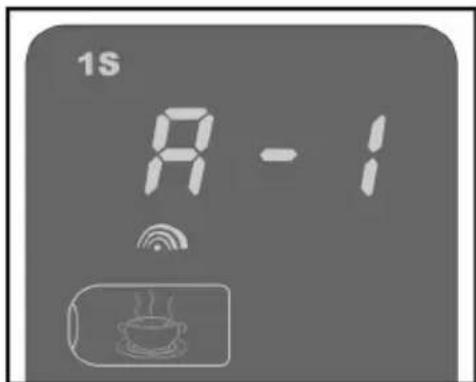
Now press the Peso button once or several times and select the required weight or the number of portions. The quantities can be set in accordance with the table below:
| Programme | Weight/Portion | ||||||
| A1 Drinks (200 ml portion) | 1 | 2 | 3 | ||||
| A-2 Noodles | 100g | 200g | 300g | ||||
| A-3 Frozen Pizza | 150g | 300g | 450g | ||||
| A-4 Vegetables | 100g | 200g | 300g | 400g | 500g | ||
| A-5 Potatoes (200g portion) | 1 | 2 | 3 | ||||
| A-6 Reheating | 200g | 300g | 400g | 500g | 600g | 700g | 800g |
| A-7 Fresh pizza | 150g | 300g | 450g | ||||
| A-8 Chicken | 800g | 1000g | 1200g | 1400g | |||
▶ Press the ◆ button, to start the cooking process.
Continue cooking the dish with the microwave or grill programme if it has not cooked through properly. The level of browning of the food will also be increased in the case of subsequent cooking with the grill function.

ATTENTION
Do not use covers or non-heat-resistant crockery in the case of programmes where the grill function is switched in, because they can melt or catch fire!
The rotating plate will be very hot after a cooking process with grilling! Use oven cloths or heat-resistant gloves under all circumstances, when removing the plate from the interior of the device.

Note:
Please pay attention to the fact that the size, shape and type of the food will also determine the result of the cooking.
Programme A-1: Drinks
▶ Use a container suitable for microwave for heating drinks.
Start a second cooking process with microwave (as described from Page 16 if the drink is not hot enough).
Programme A-2: Pasta
▶ Use a high container for cooking pasta, because there is a danger of boiling over. Use as much water as in the case of conventional cooking.
▶ Then add the pasta and start the cooking programme for pasta.
▶ Lastly, allow the pasta to rest for approx. 3 minutes.
Start a second cooking process with microwave (as described from Page 16) if the pasta is still too hard after the cooking).
Programme A-3: Frozen pizza
- Place the plate with the food that you want to heat up in the centre of the rotating plate.
▶ Select the weight and start the cooking programme for pizza.
Start a second cooking process with microwave (as described from Page 16) if the pizza is not hot enough after defrosting and heating it up.
Programme A-4: Vegetables
- Put the vegetable into a container suitable for microwave with some water. Start the cooking programme for vegetables.
Start a second cooking process with microwave (as described from Page 16) if the vegetable is not done after being cooked.
Programme A-5: Potatoes
It is recommended to use potatoes with skins for a cooking process. Prick the skin a few times.
- Put the unpeeled potatoes onto a plate or into a container suitable for microwave. Use potatoes equal in size as far as possible. The potatoes should not touch, if possible.
▶ Start the cooking process for potatoes.
Start a second cooking process with microwave (as described from Page 16) if the potatoes are not done after the cooking process.
Programme A-6: Reheating
- Place the plate with the food that you wish to reheat onto a plate suitable for microwave and start the cooking programme for reheating. Place the plate with the food that you wish to reheat onto a plate suitable for microwave and start the cooking programme for reheating.
Programme A-7: Fresh pizza
- Place the pizza in the centre of the rotating plate supplied with the device. - Select the weight and start the cooking programme for pizza.
Start a second cooking process with microwave (as described from Page 16) if the pizza is not hot enough after cooking.
Programme A-8: Chicken
- Place the meat on a plate that is suitable for hot air. Season the chicken as required and start the cooking programme for chicken.
The meat will have to be turned to cook it evenly. A bleep will sound after about 2/3 of the time for this reason. Turn the meat and press the button, to continue the programme.
Start a second cooking process with grill or microwave (as described on Page 19 and on Page 16) if the chicken is not yet done or not browned enough after the programme.
Timer
The device can make a signal after the expiry of a defined time. For example, this function can be used as an egg-timer.
▶ Press the Reloj/Temporizador button.
▶ Turn the control clockwise, until the required time to the signal sound has been set. The maximum time that can be set is 95 minutes.
▶ Now confirm with ◆.
The signal sound will be emitted after the expiry of the time set. Stop the signal sound by pressing Stop/Cancelar.

Note:
The timer can also be started during operation. Then, simply proceed as described. The cooking programme will not be influenced by this.
Using several programmes
The device is able to carry out several programmes in succession. Up to 3 sequences, which will run automatically, are possible. The illustration of an example shows a running grill programme as the second programme ('2S').

Set the cooking programme as described in each case and press the button, after setting the final cooking programme.
Example:
You would like to defrost food with the defrosting programme, and then start the grill programme and subsequently a second grill programme.
▶ Set the defrosting programme as described on Page 18, without then pressing the ◆ button.
- Then set the grill programme as described on Page 19, without then pressing the button.
▶ Set the second grill programme then.
Set the cooking programme as described in each case and press the button, after setting the final cooking programme.
Example:
You would like to defrost food with the defrosting programme, and then start the grill programme and subsequently a second grill programme.
- Set the defrosting programme as described on Page 18, without then pressing the ◆ button.
- Then set the grill programme as described on Page 19, without then pressing the button.
▶ Set the second grill programme then.
▶ Now, press the ◆ button to start the programme.

Recipes
Muffins
Ingredients
| Number of the muffins | ||||
| 10 to 20 | 20 to 30 | 30 | to 40 40 to 50 | |
| Cooking margarine with 80% fat content or salted butter | 170 g | 225 g | 340 g | 450 g |
| Refined sugar in crystals (max. Grain size 0.3 mm) | 170 g | 225 g | 340 g | 450 g |
| Eggs (55 g to 60 g with shell) | 3 | 4 | 6 | 8 |
| Wheat flour without raising agents | 225 g | 310 g | 450 g | 625 g |
| Baking powder 7 g | 10 g | 15 g | 20 g | |
| Salt 0,25 g | 0,25 g | 0,5 g | ||
Preparation
Put the muffin dough into normal paper baking cups (diameter approx. 45 mm, height approx. 28 mm)
Preheat the microwave to 170° C. The device is preheated by pressing the Aire caliente button until the temperature of 170° C is shown in the display. You will start the device by pressing the rotating button. An acoustic signal will be emitted when the set temperature has been reached. It will only be necessary to preheat the device once, if you need several baking processes because of the number of muffins.
Now spread the muffins on the rotating plate evenly.
Select the following setting for the baking process: hot air 170° C, length: 12 minutes
The setting is made by pressing the Aire caliente button until the temperature of 170° C is displayed. You will select the baking time by turning the rotating button clockwise.
Rissoles
Shape approx. 125g mince into a rissole (diameter approx. 75mm, height approx. 35mm).
Spread the rissoles directly on the rotating plate evenly.
Preparation
You will achieve the best result by the following programme combination, to be set by yourself:
• Stage 1: Hot air 230°C, 4:00 min
• Stage 2: Microwave 100%, 5:30 min.
- Stage 3: Hot air 230°C, 2:00 min. (or 4:00 min. if darker browning is required)
The setting is made by pressing the Aire caliente button until the temperature of 230° C is displayed. You will select the cooking time by turning the rotating button clockwise (Display: H4).
Press the Microondas button directly after this for Stage 2. P/O for 100% microwave power will be shown in the display. Turn the rotating button clockwise to 5:30 min.
Then set the third stage. Press the Aire caliente button again, until the temperature of 230° C is displayed, to do this. You will select the cooking time by turning the rotating button clockwise (Display: H2 or H4).
You will start the cooking process by pressing the rotating button.
Preheating is not necessary.
Crisping up rolls
Select the hot air function to crisp up rolls.
Place 3-4 rolls directly on the rotating plate. Preheating is not necessary. Select the following setting for the baking process: hot air 170° C, length: 12 minutes
The setting is made by pressing the Aire caliente button until the temperature of 170° C is displayed. You will select the baking time by turning the rotating button clockwise (Display: H/2).
You will start the baking process by pressing the rotating button.
Shorten the time by 1-2 minutes, because the device will now be already preheated, if you wish to crisp up additional rolls directly afterwards.
Browned potatoes
Use a round dish with a lid, with a height of from 5 to 6 cm and a diameter of approx. 22 cm.
- 750 g waxy pealed potatoes
- 300 g cream
- 100 g grated cheese with a dry fat content of 25% to 30%
- Seasonings
Preparation
Cut the potatoes into slices approx. 3 – 4 mm thick.
Then arrange about half of the potatoes overlapping in the baking-dish.
Now sprinkle with about half the cheese and half the seasonings onto the potatoes and add approx. 150 g cream.
Then, the remainder of the cut potatoes will also be placed on top of this and covered by the remaining ingredients
Cover the dish with the lid and place it in the microwave.
You will achieve the best result with the following programme combination, to be set by yourself:
• Stage 1: Microwave 100% 10:00 min
• Stage 2: Hot air 230 °C 10:00 min
• Stage 3: Microwave 100% 10:00 min
The setting is made by pressing the Microondas button. P/D for 100% microwave power will be displayed. Turn the rotating button clockwise to 10:00 min.
Press the Aire caliente button directly afterwards, until the temperature of 230° C is displayed, for Stage 2. Select the cooking time of 10:00 min. by turning the rotating button clockwise.
Then you will set the third stage. Press the Microondas button again to do this. Select the microwave time of 10:00 min. by turning the rotating button clockwise.
Start the cooking process by pressing the rotating button.
Preheating is not necessary.
Cleaning and care
Poor appliance hygiene can lead to damage to the surfaces, which in turn can reduce the lifespan of the appliance and even result in dangerous situations.
Therefore clean the microwave regularly and remove all remaining food.
- Switch the microwave off and pull the plug from the socket before cleaning.
- Keep the inside of the appliance clean. Wipe away splashes or spilled liquids that attach to the walls with a damp cloth. A mild cleaning solution can be used for serious dirt. Do not use sprays or other caustic detergents as these could attack, scratch or dull the door surface.
- The external areas should be cleaned with a damp cloth. In order to prevent damage to the oven's internal operating parts, avoid allowing water to penetrate into the ventilation openings.
- Parts of the door, the viewing window, and especially the seal and the closing mechanism should be cleaned carefully with a mild detergent solution. Pay great attention to avoid damage to these parts.
- The operating field may not become wet. Clean with a soft, damp cloth. When cleaning the operating field leave the door open to prevent the oven being switched on by accident.
- If steam collects inside or on the external areas, wipe it away with a soft cloth.
- Steam may occur if the microwave is used with high humidity; this is normal.
- The glass rotating plate must be removed occasionally for cleaning. Wash the plate in warm water with a mild soap solution or in the dishwasher.
- Then dry the rotating plate thoroughly with a soft cloth. After removing the rotating plate from the floor opening for cleaning ensure that it is replaced properly.
- The roller ring and floor should be cleaned regularly to avoid the formation of loud noises.
- Simply wipe the oven floor with a mild cleaning solution. The roller ring can be washed in mild foamy water or in the dishwasher.
- Odours remaining in the oven can be removed by placing a glass of water with the juice and rind of a lemon on a deep container that is
suitable for microwave use and heating for 5 minutes. Wipe out thoroughly and dry with a soft cloth.
- If you have to replace the light in the oven, please contact a qualified specialist workshop or Medion Service.
Taking the device out of operation
Open the door and remove the cooking unit, when the cooking process has finished and the time appears in the display. The device will have switched off after the end of the cooking process. Take the fact that the lighting of the microwave is switched on when the door is open and switches of independently after a defined time into consideration. If you do not use the appliance for a longer period of time, pull out the mains plug and store the appliance in a dry location.
Troubleshooting
| Problem | Possible cause | Solution |
| The appliance will not start. | The mains plug is not properly inserted. | Pull out the plug, wait 10 seconds and then plug it back in again. |
| The fuse is blown or the power interrupter has tripped. | Replace the fuse or reset the power interrupter (contact our service centre to do this). | |
| The socket is defective. | Check the socket by plugging in another appliance. | |
| The appliance does not warm up. | The door is not closed. | Close the door. |
| The rotating dish makes a loud noise when it turns. | The roller ring or the floor of the oven is dirty. | Clean the appliance.Read the "Cleaning the appliance" section. |
Disposal
Appliance

At the end of its life ensure that the appliance is disposed of in an environmentally appropriate manner. This may be a local collection point for old appliances. Seek the advice of your local authority about the local options for disposing of waste. Before disposal cut off the cable.
Packaging
Your microwave is wrapped in packaging to protect it against transportation damage. Packaging materials are primary products and can therefore be reused or recycled.
Technical data
Nominal voltage 230 V \~ 50 Hz
Nominal levels of power
| Microwave: | 1400 | W | ||||
| Double | grill: | 1700 | W | |||
| H | o | t | A | i | r | : |
Nominal power output (microwave): 900 W
Microwave frequency: 2450 MHz
Measurements (B x H x T) in cm
| D | e | v | i | c | e | : | |
| l | n | t | e | r | i | o | r : |
Cooking area volume: 25 litres
N e t w e i g h t


Subject to technical changes!
Inhalt
| Taste „Mikrowelle“ drücken | Anzeige im Display | Leistung (Watt) |
| 1 x | P-HI | 900 W |
| 2 x | P-90 | 810 W |
| 3 x | P-80 | 720 W |
| 4 x | P-70 | 630 W |
| 5 x | P-60 | 540 W |
| 6 x | P-50 | 450 W |
| 7 x | P-40 | 360 W |
| 8 x | P-30 | 270 W |
| 9 x | P-20 | 180 W |
| 10 x | P-10 | 90 W |
| 11 x | P-00 | 0 W |

Abmessungen (B x H x T) in cm



- Temporizador....29
- Programa A-3: Pizza helada
- Safety Instructions....3
- Initial operation and use....5
- About microwaves....8
- Notes on cooking food in the microwave....9
- Before use....13
- Operation 15
- Automatic cooking 23
- Recipes ....30
- Cleaning and care....34
- Taking the device out of operation ....35
- Troubleshooting....36
- Disposal 37
- Technical data 38
- Safety Instructions
- Application/intended use
- Setting up and electrical connection
- Initial operation and use
- Important information
- WARNING!
- Faults
- About microwaves
- The effect of microwaves on foodstuffs
- The microwave functions
- Notes on cooking food in the microwave
- General notes
- Microwave-suitable materials
- Suitable materials
- Caution
- Materials that are partially suitable
- Unsuitable materials
- Note:
- WARNUNG!
- Summary of suitable materials for the microwave, grill and hot air
- Size and shape of microwave-suitable containers
- Before use
- Setting up the unit
- Heat appliance while empty
- Insert accessories
- Operation
- Setting clock time
- Child lock
- Cooking with microwave energy
- End of the cooking process
- Interrupting the Programme
- Fast start
- Automatic defrosting according to weight
- Grill operation
- Hot air operation
- Combi mode
- Grill and microwave
- Hot air and microwave
- Automatic cooking
- Setting the automatic programme
- ATTENTION
- Programme A-1: Drinks
- Programme A-2: Pasta
- Programme A-3: Frozen pizza
- Programme A-4: Vegetables
- Programme A-5: Potatoes
- Programme A-6: Reheating
- Programme A-7: Fresh pizza
- Programme A-8: Chicken
- Timer
- Using several programmes
- Example:
- Recipes
- Muffins
- Preparation
- Rissoles
- Crisping up rolls
- Browned potatoes
- Cleaning and care
- Taking the device out of operation
- Disposal
- Appliance
- Packaging
- Technical data
- Nominal levels of power
- Measurements (B x H x T) in cm
- Inhalt
Brand : MEDION
Model : MD 11711
Category : Microwave