
Liva X - Desktop computer ECS - Free user manual and instructions
Find the device manual for free Liva X ECS in PDF.


| Product Type | Desktop Computer (Mini PC) |
| Brand | ECS (Elitegroup Computer Systems) |
| Model | Liva X |
| Dimensions (W x D x H) | Approximately 11.5 x 11.5 x 2.5 cm |
| Weight | Approximately 0.5 kg |
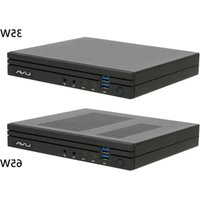
| Power Supply | External power adapter, 12V DC, 3A (36W) |
| Processor | Intel Celeron N2807 or similar |
| RAM | 2 GB DDR3L (onboard, not expandable) |
| Storage | 32 GB eMMC |
| Operating System | Windows 8.1 / 10 (depending on version) |
| Connectivity | Wi-Fi 802.11 b/g/n, Bluetooth 4.0, Gigabit Ethernet |
| Ports | 2x USB 3.0, 2x USB 2.0, HDMI, VGA, headphone/mic combo |
| Main Functions | Web browsing, office applications, media playback, light computing tasks |
| Cleaning | Use a soft dry cloth; avoid liquids and abrasives |
| Safety Precautions | Keep away from moisture, heat sources, and direct sunlight. Ensure proper ventilation. |
| Spare Parts Availability | Limited; contact ECS support for replacement parts |
| Repairability | Not user-serviceable; most components are soldered |
| Warranty | 1 year standard limited warranty |
| General Information | The Liva X is a compact, fanless desktop designed for energy-efficient performance. |
Frequently Asked Questions - Liva X ECS
User questions about Liva X ECS
0 question about this device. Answer the ones you know or ask your own.
Ask a new question about this device
Download the instructions for your Desktop computer in PDF format for free! Find your manual Liva X - ECS and take your electronic device back in hand. On this page are published all the documents necessary for the use of your device. Liva X by ECS.
USER MANUAL Liva X ECS
| VERSION | REVISION HISTORY | DATE | AUTHOR |
| 1.0 | First version to release | 2016-01-30 | Taylor Huang |
Content
REVISION HISTORY....2
1. INTRODUCTION ....4
1.1. OVERALL INSTALLATION PROCEDURE ....4
2. DOWNLOAD AND INSTALL UBUNTU OS....5
2.1. DOWNLOAD UBUNTU 14.04.3 LTS 64-BIT ....5
2.2. INSTALL UBUNTU OS....5
2.3. IGNORE INSTALLING WARNING....5
3. GFX DRIVER ....7
3.1. REQUIREMENTS....7
3.2. BUILD AND INSTALL....7
a. Libvdpau....8
b. Libva....8
c. vaapi-intel-driver....9
d. Cairo 9
e. Libdrm 10
f. Mesa 11
g. Xorg-server....13
3.3. REINSTALL GFX DRIVER....14
3.4. REVERT GFX DRIVER....15
4. WIFI/BT DRIVER....16
4.1. INSTALL / UNINSTALL WIFI DRIVER....16
a. Build & install....16
b. Uninstall 16
4.2. INSTALL / UNINSTALL BT DRIVER ....16
a. Build & install....16
b. uninstall....16
1. Introduction
This goal of document is to provide informaon and instrucons to people who want to install Ubuntu on LivaX. The informaon covered here mainly is relevant to Ubuntu 14.04.3 LTS.
1.1. Overall Installation Procedure
● Download and Install Ubuntu OS
- Install GFX Driver
● Install WIFI/BT Driver
2. Download and Install Ubuntu OS
Ubuntu is a Debian-based Linux operang system and distribuon for personal computers, smartphones and network servers. You can free download and install desktop distribuon of Ubuntu on LivaX. Here are the installaon instrucons of ubuntu 14.04.3 LTS.
2.1. Download Ubuntu 14.04.3 LTS 64-bit
The ISO le can be downloaded from Ubuntu Ocial Website.
hp://www.ubuntu.com/download/desktop
In the downloading page, nd Ubuntu 14.04.3 LTS and choose "64bit – recommended" to download.
2.2. Install Ubuntu OS
Visit Ubuntu Official Website to get the Ubuntu installation guide:
hps://help.ubuntu.com/
There are two ways to burn the Ubuntu image into a USB disk :
A. Recommended to burn the Ubuntu image into a USB disk with Universal USB Installer.
B. Use Linux command to burn Ubuntu image into a USB disk.
$ su
<h1 id="fdisk-l-to-make-sure-usb-disk-path">fdisk -l (to make sure USB disk path)</h1>
<h1 id="dd-ifpathubuntu-14043-desktop-amd64iso-ofdevsdx">dd if=/path/ubuntu-14.04.3-desktop-amd64.iso of=/dev/sdx</h1>
Note: The image must be written to the whole-disk device and not a partition, e.g.
/dev/sdb and not /dev/sdb1. Do not use tools like unetbootin which alter the image.
2.3. Ignore Installing Warning
Once warning dialog appears like following picture during installaon. You can press “Ignore” buons to connue installaon. The problem is a bug on Ubuntu 14.04 when Ubuntu is installed on eMMC. During installaon, Ubuntu will scan all the available parons. However, /dev/mmcblk0rpmb is special parons
for secure data on eMMC and cannot be accessed via normal emmc command.
Thus, the popup warning will show up.
Ubuntu 15.10 already skip RPMB paron to x the problem.

3. GFX Driver
Intel has a long history of producing or commissioning open source drivers for its graphics chips. There provide integraon of required graphic driver on LivaX.
The version of driver that LivaX need to be installed as follows:
- Libvdpau -1.1-1
- Libva - 1.6.1
• vaapi-intel-driver - 1.6.1 - Cairo - 1.14.2
- Libdrm - 2.4.64
- Mesa - 11.0.2
• Xorg-server - 1.17.2
There provides two scripts "liva-graphic.sh" and "liva-graphic-e.sh":
- "liva-graphic.sh" : Download the required version of driver. Then Build and install GFX driver on ubuntu 14.04.3. It should be executed with "mesa.di" and "xorg-server.di" di les.
- "liva-graphic-e.sh" : Download and install GFX driver for reverng to generated version.
The GFX script and di le download website as following link:
hp://www.ecs.com.tw/ECSWebSite/Product/Product_LIVA_DOWNLOAD.aspx
?DetailID=1593&LanID=0
Enter LIVA X download page to download GFX script & di les.
3.1. Requirements
To build GFX driver, do following commands rst.
\$ sudo apt-get update
\$ sudo apt-get install gcc make binuls libncurses5-dev
3.2. Build and Install
Execute "liva-graphic.sh" for building and installing drivers. Before execung script, make sure "mesa.di", "xorg-server.di" and "liva-graphic.sh" in the
same folder. Entry to scripts download folder and Run the script via following commands.
$ sudo chmod a+x liva-graphic.sh
$ ./liva-graphic.sh
If execung scripts that ECS provides successfully means already update GFX driver. Otherwise show more details of GFX driver as following:
a. Libvdpau
◆ Installaon info of Libvdpau is in following gure, one of shown version that needs to be installed.
| Update version for Ubuntu 14.04.3 | Generated version of Ubuntu 14.04.3 | |
| version | Libvdpau – 1.1-1 | Libvdpau – 0.7-1 |
| Install | libvdpau-dev_1.1-1ubuntu1_amd64.deb libvdpau1_1.1-1ubuntu1_amd64.deb libvdpau-doc_1.1-1ubuntu1_all.deb | libvdpau-dev_0.7-1ubuntu0.1_amd64.deb libvdpau1_0.7-1ubuntu0.1_amd64.deb libvdpau-doc_0.7-1ubuntu0.1_all.deb |
◆ If you download needed les, entry to download folder and run the following commands :
$ sudo dpkg -i *.deb
$ sudo apt-get install -f
b. Libya
◆ Installaon info of Libya is in following gure, one of shown version that needs to be installed.
| Update version for Ubuntu 14.04.3 | Generated version of Ubuntu 14.04.3 | |
| version | Libva -1.6.1-1 | Libva -1.3.0-2 |
| Install | libva-dev_1.6.1-1_amd64.deblibva-drm1_1.6.1-1_amd64.deblibva-egl1_1.6.1-1_amd64.deblbva-glx1_1.6.1-1_amd64.deblbva-x11-1_1.6.1-1_amd64.deblbva-tpi1_1.6.1-1_amd64.deblbva1_1.6.1-1_amd64.deblbva-wayland1_1.6.1-1_amd64.debva-driver-all_1.6.1-1_amd64.debvainfo_1.6.1-1_amd64.debvdpau-va-driver_0.7.4-4_amd64.deb | libva-dev_1.3.0-2_amd64.deblibva-drm1_1.3.0-2_amd64.deblibva-egl1_1.3.0-2_amd64.deblbva-glx1_1.3.0-2_amd64.deblbva-x11-1_1.3.0-2_amd64.deblbva-tpi1_1.3.0-2_amd64.deblbva1_1.3.0-2_amd64.deblbva-wayland1_1.3.0-2_amd64.debvainfo_1.3.0-2_amd64.debvdpau-va-driver_0.7.3-2ubuntu1.2_amd64.deb |
◆ If you download needed les, entry to download folder and run the following commands :
$ sudo dpkg -i *.deb
$ sudo apt-get install -f
c. vaapi-intel-driver
◆ Installaon info of vaapi-intel-driver is in following gure, one of shown version that needs to be installed.
| Update version for Ubuntu 14.04.3 | Generated version of Ubuntu 14.04.3 | |
| version | vaapi-intel-driver -1.6.1-1 | vaapi-intel-driver -1.3.0-1 |
| Install | i965-va-driver_1.6.1-1_amd64.deb | i965-va-driver_1.3.0-1ubuntu1_amd64.deb |
◆ If you download needed les, entry to download folder and run the following commands :
$ sudo dpkg -i *.deb
$ sudo apt-get install -f
d. Cairo
◆ Installaon info of Cairo is in following gure, one of shown version that needs to be installed.
| Update version for Ubuntu 14.04.3 | Generated version of Ubuntu 14.04.3 | |
| version | Cairo -1.14.2-2 | Cairo -1.13.0~20140204 |
| Install | libcairo2-dev_1.14.2-2ubuntu2_am d64.deblibcairo-gobject2_1.14.2-2ubuntu2 _amd64.deblibcairo2-doc_1.14.2-2ubuntu2_am d64.deblibcairo2_1.14.2-2ubuntu2_amd64. deblibcairo-script-interpreter2_1.14.2- 2ubuntu2_amd64.debcairo-perf-uls_1.14.2-2ubuntu2_a md64.deb | libcairo2-dev_1.13.0~20140204-0ubuntu1.1_amd64.deblibcairo-gobject2_1.13.0~20140204-0ubuntu1.1_amd64.deblibcairo2-doc_1.13.0~20140204-0ubuntu1.1_all.deblibcairo2_1.13.0~20140204-0ubuntu1.1_amd64.deblibcairo-script-interpreter2_1.13.0~20140204-0ubuntu1.1_amd64.debcairo-perf-uls_1.13.0~20140204-0ubuntu1.1_amd64.deb |
◆ If you download needed les, entry to download folder and run the following commands:
$ sudo dpkg -i *.deb
$ sudo apt-get install -f
e. Libdrm
To build Libdrm, do following commands rst.
$ sudo apt-get build-dep libdrm
$ sudo apt-get install xuls-dev
◆ Update libdrm that must to rebuilt via following commands:
$ git clone hps://anonscm.debian.org/git/pkg-xorg/lib/libdrm.git
$ cd libdrm && git checkout libdrm-2.4.64-1 -b libdrm-2.4.64-1
$ dpkg-buildpackage -uc -us -b -rfakeroot -j4
Removing unnecessary les and only remaining installaon les required via following commands.
$ rm *dbg*
$ rm *.changes
\$ rm *.udeb
\$ rm *.dsc
Entry to compiled .deb les folder and install them via following commands.
\$ sudo dpkg -i *.deb
\$ sudo apt-get install -f
◆ Installaon info of Libdrm is in following gure, one of shown version that needs to be installed.
| Update version for Ubuntu 14.04.3 | Generated version of Ubuntu 14.04.3 | |
| version | Libdrm -2.4.64-1 | Libdrm -2.4.60-2 |
| Install | libdrm-intel1_2.4.64-1_amd64.deblbdrm2_2.4.64-1_amd64.deblbdrm-nouveau2_2.4.64-1_amd64.deblbdrm-amdgpu1_2.4.64-1_amd64.deblbdrm-radeon1_2.4.64-1_amd64.deblbdrm-dev_2.4.64-1_amd64.deb | libdrm-intel1_2.4.60-2~ubuntu14.04.1_amd64.deblbdrm2_2.4.60-2~ubuntu14.04.1_amd64.deblbdrm-nouveau2_2.4.60-2~ubuntu14.04.1_amd64.deblbdrm-radeon1_2.4.60-2~ubuntu14.04.1_amd64.deblbdrm-dev_2.4.60-2~ubuntu14.04.1_amd64.deb |
◆ Revert to generated version of Libdrm and download needed les, entry to download folder and run the following commands:
\$ sudo dpkg -i *.deb
\$ sudo apt-get install -f
f. Mesa
◆ Update Mesa that must to rebuilt via following commands with di le "mesa.di":
$ git clone hps://anonscm.debian.org/git/pkg-xorg/lib/mesa.git
$ cd mesa && git checkout
cd59ba3ade0e24c3b378402e56779db88aa8bf0e -b 11.0.2-ubuntu1
$ patch -p1 < mesa.di (make sure that mesa.di is in the mesa folder)
\$ dpkg-buildpackage -uc -us -b -rfakeroot -j4
Removing unnecessary les and only remaining installaon les required via following commands.
$ rm *dbg*
$ rm *.changes
$ rm *.udeb
$ rm *.dsc
Entry to compiled .deb les folder and install them via following commands.
$ sudo sudo dpkg -i *.deb
$ sudo apt-get install -f
◆ Installaon info of Mesa is in following gure, one of shown version that needs to be installed.
| Update version for Ubuntu 14.04.3 | Generated version of Ubuntu 14.04.3 | |
| version | Mesa -11.0.2-1 | Mesa -10.5.9-2 |
| Install | libegl1-mesa-dev-lts-vivid_11.0.2-1ubuntu1_amd64.deblibegl1-mesa-lts-vivid_11.0.2-1ubuntu1_amd64.debliggbm1-lts-vivid_11.0.2-1ubuntu1_amd64.debliggbm-dev-lts-vivid_11.0.2-1ubuntu1_amd64.debliggl1-mesa-dev-lts-vivid_11.0.2-1ubuntu1_amd64.debliggl1-mesa-dri-lts-vivid_11.0.2-1ubuntu1_amd64.debliggl1-mesa-glx-lts-vivid_11.0.2-1ubuntu1_amd64.debligglapi-mesa-lts-vivid_11.0.2-1ubuntu1_amd64.deblibgles1-mesa-dev-lts-vivid_11.0.2- | libegl1-mesa-lts-vivid_10.5.9-2ubuntu1~trusty2_amd64.deblibegl1-mesa-dev-lts-vivid_10.5.9-2ubuntu1~trusty2_amd64.debliggbm1-lts-vivid_10.5.9-2ubuntu1~trusty2_amd64.debliggbm-dev-lts-vivid_10.5.9-2ubuntu1~trusty2_amd64.debliggl1-mesa-dev-lts-vivid_10.5.9-2ubuntu1~trusty2_amd64.debliggl1-mesa-dri-lts-vivid_10.5.9-2ubuntu1~trusty2_amd64.debliggl1-mesa-glx-lts-vivid_10.5.9-2ubuntu1~trusty2_amd64.debligglapi-mesa-lts-vivid_10.5.9-2ubuntu1~trusty2_amd64.deblibgles1-mesa-dev-lts-vivid_10.5.9-2ub |
| 1ubuntu1_amd64.deblibgles1-mesa-lts-vivid_11.0.2-1ubuntu1_amd64.deblibgles2-mesa-dev-lts-vivid_11.0.2-1ubuntu1_amd64.deblibgles2-mesa-lts-vivid_11.0.2-1ubuntu1_amd64.deblibwayland-egl1-mesa-lts-vivid_11.0.2-1ubuntu1_amd64.deblibxatracker2-lts-vivid_11.0.2-1ubuntu1_amd64.deblibxatracker-dev-lts-vivid_11.0.2-1ubuntu1_amd64.debmesa-common-dev-lts-vivid_11.0.2-1ubuntu1_amd64.debmesa-vdpau-drivers-lts-vivid_11.0.2-1ubuntu1_amd64.deb | untu1~trusty2_amd64.deblibgles1-mesa-lts-vivid_10.5.9-2ubuntu1~trusty2_amd64.deblibgles2-mesa-dev-lts-vivid_10.5.9-2ubuntu1~trusty2_amd64.deblibges2-mesa-lts-vivid_10.5.9-2ubuntu1~trusty2_amd64.deblibwayland-egl1-mesa-lts-vivid_10.5.9-2ubuntu1~trusty2_amd64.deblibxatracker2-lts-vivid_10.5.9-2ubuntu1~trusty2_amd64.deblibxatracker-dev-lts-vivid_10.5.9-2ubuntu1~trusty2_amd64.debmesa-common-dev-lts-vivid_10.5.9-2ubuntu1~trusty2_amd64.debmesa-vdpau-drivers-lts-vivid_10.5.9-2ubuntu1~trusty2_amd64.deb |
◆ Revert to generated version of Mesa and download needed les, entry to download folder and run the following commands:
$ sudo dpkg -i *.deb
$ sudo apt-get install -f
g. Xorg-server
◆ Update xorg-server that must to be rebuilt via following commands with di le "xorg-server.di":
$ git clone
hps://anonscm.debian.org/git/pkg-xorg/xserver/xorg-server.git
$ cd xorg-server
$ git checkout cbdf27a6dad9533e9811c17cd8722591d4bdb4a6 -b 1.17.2-1ubuntu7
$ patch -p1 < xorg-server.di (make sure that mesa.di is in the xorg-server folder)
$ dpkg-buildpackage -uc -us -b -rfakeroot -j4
Removing unnecessary les and only remaining installaon les required via following commands.
$ rm *dbg*
$ rm *source*
$ rm *.changes
$ rm *.udeb
$ rm *.dsc
Entry to compiled .deb les folder and install them via following commands.
$ sudo dpkg -i *.deb
$ sudo apt-get install -f
◆ Installaon info of xorg-server is in following gure, one of shown version that needs to be installed.
| Update version for Ubuntu 14.04.3 | Generated version of Ubuntu 14.04.3 | |
| version | Cairo -1.14.2-2 | Cairo -1.13.0~20140204 |
| Install | libcairo2-dev_1.14.2-2ubuntu2_am d64.deblibcairo-gobject2_1.14.2-2ubuntu2 _amd64.deblibcairo2-doc_1.14.2-2ubuntu2_am d64.deblibcairo2_1.14.2-2ubuntu2_amd64. deblibcairo-script-interpreter2_1.14.2- 2ubuntu2_amd64.debcairo-perf-uls_1.14.2-2ubuntu2_a md64.deb | libcairo2-dev_1.13.0~20140204-0ubuntu1.1_amd64.deblibcairo-gobject2_1.13.0~20140204-0ubuntu1.1_amd64.deblibcairo2-doc_1.13.0~20140204-0ubuntu1.1_all.deblibcairo2_1.13.0~20140204-0ubuntu1.1_amd64.deblibcairo-script-interpreter2_1.13.0~20140204-0ubuntu1.1_amd64.debcairo-perf-uls_1.13.0~20140204-0ubuntu1.1_amd64.deb |
◆ Revert to generated version of xorg-server and download needed files, entry to download folder and run the following commands:
$ sudo dpkg -i *.deb
$ sudo apt-get install -f
3.3. Reinstall GFX driver
Aer execung "liva-graphic.sh", there are some "deb" les in the folder. You can keep these les when reinstalling Ubuntu system at LivaX next me. The commands as following:
$ sudo dpkg -i *.deb
$ sudo apt-get install -f
3.4. Revert GFX driver
There provide the way to revert generated GFX driver. Entry to downloaded script folder and run the script via following commands:
$ sudo chmod a+x liva-graphic-e.sh
$ ./liva-graphic-e.sh
4. WiFi/BT driver
LivaX use Realtek RTL8723be Wireless and Bluetooth card. You need to install WiFi & BT driver for funcon working normally on Ubuntu.
The WiFi/BT driver download website as following link :
hp://www.ecs.com.tw/ECSWebSite/Product/Product_LIVA_DOWNLOAD.aspx
?DetailID=1593&LanID=0
Enter LIVA X download page to download WiFi/BT driver.
4.1. Install / Uninstall WiFi driver
a. Build & install
Entry to the WiFi driver directory, and run the following commands:
$ make
$ sudo make install -s
$ sudo modprobe 8723be
b. Uninstall
Entry to the WiFi driver directory, and run the following commands:
$ sudo make uninstall -s
4.2. Install /Uninstall BT driver
a. Build & install
Entry to the Bluetooth driver directory, and run the following commands:
$ sudo make install -s
$ sudo modprobe rtk_btusb
b. uninstall
Entry to the Bluetooth driver directory, and run the following commands:
$ sudo make uninstall -s
- Content
- REVISION HISTORY....2
- INTRODUCTION ....4
- DOWNLOAD AND INSTALL UBUNTU OS....5
- GFX DRIVER ....7
- WIFI/BT DRIVER....16
- Introduction
- Overall Installation Procedure
- Download and Install Ubuntu OS
- Download Ubuntu 14.04.3 LTS 64-bit
- Install Ubuntu OS
- Ignore Installing Warning
- GFX Driver
- Requirements
- Build and Install
- a. Libvdpau
- b. Libya
- c. vaapi-intel-driver
- d. Cairo
- e. Libdrm
- f. Mesa
- g. Xorg-server
- Reinstall GFX driver
- Revert GFX driver
- WiFi/BT driver
- Install / Uninstall WiFi driver
- a. Build & install
- b. Uninstall
- Install /Uninstall BT driver
Brand : ECS
Model : Liva X
Category : Desktop computer