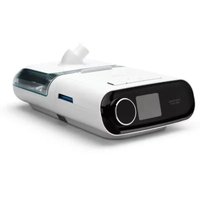
DreamStation BiPAP autoSV HH1487 - Medical device PHILIPS - Free user manual and instructions
Find the device manual for free DreamStation BiPAP autoSV HH1487 PHILIPS in PDF.


| Product Type | Non-invasive BiPAP autoSV ventilator for sleep apnea and respiratory impairment |
| Dimensions (Device) | 15.7 x 19.3 x 8.4 cm (6.2 x 7.6 x 3.3 inches) |
| Weight (with power supply) | Approximately 1.28 kg (2.83 lbs) |
| Power Supply | AC 100-240 V, 50/60 Hz, 2.0-1.0 A; DC 12 V, 6.67 A |
| Pressure Range | IPAP: 4-30 cmH₂O, EPAP: 4-25 cmH₂O, CPAP: 4-20 cmH₂O (0.5 cmH₂O increments) |
| Breath Rate (Backup) | Off, Auto, or 4-30 BPM |
| Inspiratory Time | 0.5 to 3.0 seconds (0.1 increments) |
| Therapy Modes | BiPAP autoSV, CPAP, Bi-level with backup rate |
| Comfort Features | Ramp, SmartRamp, Bi-Flex (1-3), Rise Time (1-6), Digital Auto-Trak leak compensation |
| Alarms | Patient disconnect, apnea, low minute ventilation, loss of power |
| Connectivity | Bluetooth (for DreamMapper), optional Wi-Fi, optional cellular modem |
| Humidifier | Optional heated humidifier with fixed or adaptive mode; tube temperature setting 0-5 |
| Filters | Reusable blue pollen filter (washable, replace every 6 months); disposable ultra-fine filter (replace every 30 days) |
| Operating Temperature | 5° to 35°C (41° to 95°F) |
| Storage Temperature | -20° to 60°C (-4° to 140°F) |
| Sound Level (Device only) | 25.8 dB(A) with uncertainty 2 dB(A) |
| Service Life | 5 years |
| Included Accessories | SD card, user manual, carrying case, power cord, flexible tubing, reusable blue pollen filter, optional ultra-fine filter |
| Cleaning | Exterior: damp cloth with mild detergent or 10% bleach solution; tubing: weekly wash in warm soapy water; filters: rinse or replace as directed |
| Patient Interface | Compatible with Philips Respironics masks (nasal or full face) with exhalation port; tubing sizes 15 mm, 22 mm, or heated tube (15H) |
Frequently Asked Questions - DreamStation BiPAP autoSV HH1487 PHILIPS
User questions about DreamStation BiPAP autoSV HH1487 PHILIPS
0 question about this device. Answer the ones you know or ask your own.
Ask a new question about this device
Download the instructions for your Medical device in PDF format for free! Find your manual DreamStation BiPAP autoSV HH1487 - PHILIPS and take your electronic device back in hand. On this page are published all the documents necessary for the use of your device. DreamStation BiPAP autoSV HH1487 by PHILIPS.
USER MANUAL DreamStation BiPAP autoSV HH1487 PHILIPS
Respironics Inc. 1001 Murry Ridge Lane Murrysville, PA 15668 USA
REF 1128707

128/0/RO6 JIB 05/20/2021 EN DOM


User manual
Provider guide
DreamStation BiPAP autoSV
Warning!
Remove this guide before giving the device to the patient. Only medical professionals should adjust pressure settings.
This guide provides you with instructions on how to access and navigate the provider screens used to modify device settings. Refer to the user manual for more information on using the DreamStation BiPAP autoSV device.
The device is to be used only on the instruction of a licensed physician. The clinician or home care service provider will make the correct pressure settings and device configurations including accessories, according to the health care professional's prescription.
If you need to contact Philips Respironics directly, call the Philips Respironics Customer Service department at 1-800-345-6443 or 1-724-387-4000.
Accessing the provider mode screens
Accessing Provider mode unlocks settings that cannot be modified by the user. To access Provider mode:
- Supply power to the device.
- Once the device is powered, press and hold both the control dial and the Ramp button on the device for at least 5 seconds.
- You are now in Provider mode. You can choose between the following Provider mode screens.
![graph LR A["User Interaction"] --> B["Warning Icon"] B --> C["Question Icon"] C --> D["Security Icon"] D --> E["Info Icon"] E --> F["Home Icon"]](/content/2026/05/856171/images/5e926d501fb343a332f85bc29acd92e75f190254ce69825d3f2c7fa6ee9bb34b.jpg)
Therapy Alarms Comfort Device Info Patient
Mode
Navigating the Provider mode screens
The User Interface (UI) on this device allows you to adjust the device settings and view information about therapy. The UI is composed of the display screen and the control dial. Rotate the control dial in either direction to scroll through the menu options on the display screen.
To adjust a setting:
- Rotate the control dial to your desired menu option.
- Press the control dial to select that setting.
- Rotate the control dial to change the setting. The rotate dial icon 📄 on any screen indicates to rotate the dial to perform an action.
- Press the control dial again to save the change. The click dial icon on any screen indicates to press the dial to perform an action.
Notes
Pressing the dial when the down arrow ↗ appears on any screen will take you to a sub-menu with more menu options. Pressing the dial when the up arrow ↗ appears on any sub-menu will return you back to the main menu.
The screens shown throughout this guide are examples for reference only. Actual screens may vary based upon device model and provider settings.
Provider settings
The following sections will describe the options available from the Provider screens.

Therapy Settings
Choosing this screen will take you to a sub-menu where you can adjust the device therapy modes and pressure settings. These settings are described here.
Note
Not all settings shown here will display on the device. The display will vary based on therapy device model and device settings.
| Icon Text Description | ||
| Opti-Start Opt | -Start This feature | e starts a therapy session at a starting pressure that is closer to the previous session's 90% pressure, in order to reduce the likelihood of any residual events at the beginning of a therapy session. You can enable or disable this feature. |
| Pres | Max Pressure This screen displays the current maximum pressure setting. You can adjust the setting from 4 to 30 cm H2O in 0.5 increments. | |
| EPAP | EPAP Min This screen allows you to modify the Minimum EPAP setting. This setting will be the minimum level of pressure applied during the expiratory breath phase. You may adjust the setting from 4 cm H2O up to the lesser value of either maximum pressure or 25 cm H2O . | |
| EPAP | EPAP Max This screen allows you to modify the Maximum EPAP setting. This setting will be the maximum level of pressure applied during the expiratory breath phase. You may adjust the setting from the minimum EPAP setting up to the lesser value of either maximum pressure or 25 cm H2O . | |
| PS | PS Min This screen allows you to modify the Minimum Pressure Support setting. This setting is the minimum difference that is permitted between IPAP and EPAP. You may adjust the setting from 0 cm H2O to the difference between the maximum pressure setting minus the maximum EPAP setting. | |
| PS | PS Max This screen allows you to modify the Maximum Pressure Support setting. This setting is the maximum difference that is permitted between IPAP and EPAP. You may adjust the setting from the minimum pressure support setting to the difference between the maximum pressure setting minus the minimum EPAP setting. | |
| BPM BPM This | screen allows you to modify the Breaths Per Minute setting. The Breaths Per Minute setting is a back-up breath rate where there is a machine-triggered breath to the patient within the defined timeframe per breath. You can choose between Off, Auto, or 4 through 30. This setting only displays if PS max is greater than zero. | |
| Ti | Ti This screen allows you to modify the Inspiratory Time setting. You may adjust the setting from 0.5 to 3.0 seconds in 0.1 increments. This setting only displays if PS max is greater than zero and BPM is not set to Off or Auto. | |

Alarm settings
Choosing this screen will take you to a sub-menu where you can enable or disable the alarms described below.
| Icon Text Description | ||
| Patient Disconnect Alarm | You can enable or disable the Patient Disconnect alarm by choosing 0, 15, or 60 seconds. The alarm will sound when a large, continuous air leak is detected in the circuit for more than the specified alarm setting. The default is 0. | |
| Apnea Alarm The Apnea | You can enable or disable the Apnea alarm by choosing 0 (off), 10, 20, or 30 seconds. The alarm will sound when the time between patient-triggered breaths is greater or equal to the specified apnea alarm setting. The default is 0. | |
| Low Min Vent Alarm You | You can enable or disable this alarm by choosing 0 (off) to 99 lpm in 1.0 increments. The alarm will sound when the calculated minute ventilation is less than or equal to the specified setting. The default is 0. |
Comfort settings
Choosing this screen will take you to a sub-menu where you can adjust the humidification and pressure comfort settings. These settings are described here.
Note
Not all settings shown here will display on the device. The display will vary based on therapy device model and device settings.
| Icon Text Description | |
| Humidification This setting allows you to select the humidification mode being used. You can choose between Fixed or Adaptive (A) humidification. If a heated tube is attached to the device, then the device will automatically switch to Heated Tube Humidification mode. Fixed mode applies a constant heat on the humidifier heater plate. Under certain conditions and settings, this mode can allow condensation to occur in the tube. Adaptive mode adapts the heater plate temperature to the ambient conditions in the room, and is designed to not allow condensation to occur in the tube. |
| Icon Text Description | ||
 | Humidifier This setting | allows you to choose the desired humidity setting for the humidifier: 0, 1, 2, 3, 4 or 5. |
 | Tube Temperature This setting allows you to choose the desired temperature for the heated tube: 0, 1, 2, 3, 4 or 5. | |
 | SmartRamp When SmartRamp mode is enabled, the therapy device's ramp function utilizes an auto-titrating algorithm during the ramp period. It allows patients the ability to stay at lower pressures during the ramp period, to improve their acclimation to therapy. SmartRamp mode functions differently, depending on the therapy mode that the device is using.The SmartRamp period will terminate in either of two ways:1) If SmartRamp pressure reaches the minimum pressure of the therapy mode selected, then SmartRamp ends, and the device continues to deliver therapy under the selected therapy mode, or:2) If SmartRamp pressure does not reach the minimum pressure of the therapy mode selected by the end of the Ramp Time, then pressure is increased at a rate of approximately 1 cm H2O per minute.Once the pressure reaches the minimum pressure of the therapy mode selected, then the device will continue to deliver therapy for that mode.If SmartRamp mode is not enabled, then the standard, linear pressure ramp mode is active. | |
 | Ramp Time This enables you to modify the Ramp time setting in 5 minute increments. The range for this setting is 0 (off) to 45 minutes. This setting only displays if EPAP min is greater than 4 cmH2O . | |
 | Ramp Start You can increase or decrease the ramp starting pressure in 0.5 cmH2O increments. You may adjust the setting from 4 cm H2O to the EPAP min setting. This setting only displays if Ramp time is not zero and EPAP min is greater than 4 cmH2O . | |
 | Flex This screen displays the comfort mode setting. You can select None or Bi-Flex. | |
 | Flex Setting You can modify the Flex setting (1, 2 or 3) on this screen if you enabled Bi-Flex. The Bi-Flex comfort feature allows you to adjust the level of air pressure relief that the patient feels when exhaling during therapy. The setting of 1 provides a small amount of pressure relief, with higher numbers providing additional relief. | |
 | Flex Lock This enables you to lock the Flex setting if you do not want the patient to change it. | |
 | Rise Time Rise time is | the time it takes for the device to change from the expiratory pressure setting to the inspiratory pressure setting. This screen allows you to adjust the rise time so you can find the desired setting. A setting of 1 is the fastest rise time, while 6 is the slowest. This is only available if Flex type is set to None and PS max is greater than zero. |
 | Tube Type This setting | allows you to select the correct size diameter tubing that you are using with the device. You can choose either (22) for the Philips Respironics 22 mm tubing, or (15) for the Philips Respironics 15 mm tubing. When using Heated Tubing, the device will automatically change this setting to the appropriate tubing type (15H). |
 | Tube Type Lock This | enables you to lock the Tube Type setting for either the 15 mm or the 22 mm tubing if you do not want the patient to change it. |
 | Mask Type This setting | allows you to select the appropriate Mask Type resistance setting (also known as System One Resistance Control) for your Philips Respironics mask. This feature allows the device to adjust the level of pressure compensation to match your mask. Refer to the packaging of your mask to identify the resistance setting for your mask.Note: It is important to use the appropriate Mask Type resistance setting to ensure proper pressure delivery to the patient. |
 | Mask Type Lock This | enables you to lock the Mask Type resistance setting if you do not want the patient to change it. |
 | Check Mask Fit You can | an enable or disable the check mask fit setting. This feature allows the patient to check the fit of their mask prior to starting therapy. This is done by measuring the amount of leak in the patient circuit. |

Device settings
Choosing this screen will take you to a sub-menu where you can adjust the way the device displays information. These settings are described here.
Note
Not all settings shown here will display on the device. The display will vary based on therapy device model and device settings.
| Icon Text Description | ||
AHI | Show AHI/Fit/PBAutomatic On You | You can select whether or not the Apnea/Hypopnea index, Mask Fit averages, and Periodic Breathing averages are displayed on the patient’s My Info screens.can enable or disable this feature if you want the device to automatically turn the airflow on whenever the patient applies the interface (mask) to their airway. |
 | Language This feature allows you to choose which language to display on the interface. | |
 | Clear Default Reminders | This setting turns off the default patient reminders that are enabled in the therapy device from the factory.Note: This does not turn off additional reminders that you may have activated in Encore. Encore messages must be cleared or modified in Encore. |
 | Reset Data Use the | Reset Data function to clear patient data from the therapy device, as well as an SD card and modem (if installed). After you pres the control dial to execute Reset Data, the device will display a message asking you to confirm the reset. Press the control dial again to reset data in the device.Note: Reset Data resets blower hours that are visible to the patient, but it does not reset machine hours in the Provider Menu. |
Info Screens
Choosing this screen will take you to a sub-menu where you can view information on patient usage. The Info screens are described in Chapter 2 of the user manual.
Return to Patient Mode
Choosing this screen will exit Provider mode and the device will return to the Patient mode. Provider mode will also time out after 5 minutes of inactivity and automatically return to the Patient mode.
Performance check device screening tool
Performance Check troubleshooting tool is a self-diagnostic utility built into the therapy device. It allows you to quickly evaluate a therapy device remotely. If a patient calls indicating that their therapy does not seem to be operating properly, just direct them to click on Performance Check in the patient's My Provider menu. The check operates the blower and screens the device for any operation errors. The screen then displays whether the device passed the check (displays a green check mark) or should be returned for service (displays a red X). If a modem is installed, Performance Check will automatically upload a troubleshooting dashboard to the Encore Anywhere patient management software. This dashboard gives you an overview of key device settings and statistics to help make troubleshooting over the phone easier. If there is not a modem installed in the therapy device, you can direct the patient to read you the five codes off the Performance Check screen over the phone. You can decode these codes in EncoreAnywhere, EncorePro or Encore Basic to populate the troubleshooting dashboard.
Updating software using the SD card
You can update the device software using the SD card. The software update must be done when the therapy is off.
- Insert an SD card with the new software version into the device. A pop-up screen appears asking "Would you like to upgrade software?"
- Turn the control dial to select Yes and then press the control dial to start the upgrade. The busy icon appears while the upgrade is in progress. Do not remove power from the device.
- If the software update is successful, the Change Accepted icon appears on the screen. Removed the SD card from the device to restart the device and use the new software.


- If an SD card error is detected, the Change Rejected icon appears. Remove the SD card and reinsert. If the alert continues to occur, contact Philips Respironics at 1-800-345-6443 or 1-724-387-4000 for a new SD card.

Clearing patient data for multiple users
If you are using the device on multiple users, you must use the Reset Data option, available through the Device menu, to clear patient data from the device. See Device settings earlier in this document for more information.
To eliminate patient confidentiality concerns and to remove previous patient therapy settings, the Reset Data function removes all patient-stored data. If using the device on multiple users, be sure to follow these instructions between patients.
This option appears in the Device settings menu. It allows you to clear all patient data and visual alarms stored in the device memory and the device SD Card, if inserted. It also clears the modem, if installed.
Gathering device information
If applicable, make note or copy the patient's therapy settings before testing begins.
Note
When testing is complete and before patient use, an authorized individual should adjust the device to the patient's therapy settings.
- If applicable, connect the device to a humidifier. Ensure that a clean or new blue pollen filter is installed in the device.
- Record the serial number and model number on the data sheet.
- Record the model name on the data sheet.
- Connect AC power and record the firmware version on the data sheet.
- Record the blower hours of the device on the data sheet.
DreamStation BiPAP autoSV
System checkout procedure
Perform this test procedure prior to connecting the device to a patient or in between patient usage. The tests should be performed as described in order to verify proper operation of the device.
Warning!
Do not use the ventilator on a patient until a system checkout has been performed.
If the device fails to perform within the stated specifications, have the system serviced by a qualified Philips Respironics approved service facility.
Verifying the Pressure
If your patient setup procedure requires verification of actual pressure with a manometer, use the following instructions to be sure that the device is functioning properly. You will need the following equipment to verify the pressure:
- Philips Respironics Pressure Calibration Kit, which includes:
• Philips Respironics Whisper Swivel II
• Philips Respironics O 2 Enrichment Assembly ②
- 0.25 inch orifice
- Closed end cap, stopper, or equivalent ③
-
Philips Respironics flexible tubing
-
Pressure tubing 5
-
Blue pollen filter (not shown)
-
Philips Respironics Digital Manometer 6 (or equivalent), with the following minimum specifications:
- 0 - 30 cm H 2 O (or better)
• ± 0.3 cm H 2 O accuracy
• ± 0.1 cm H 2 O resolution
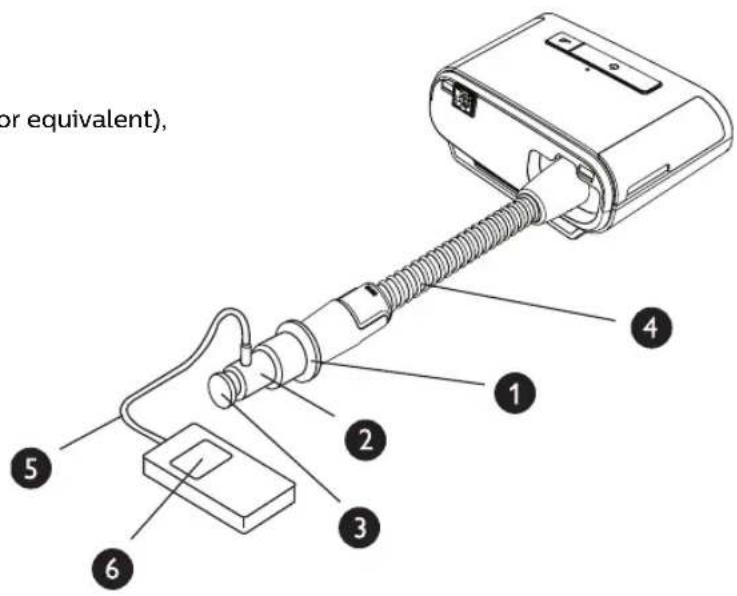
Complete the following steps to verify the pressure. Refer to the figure on the previous page for proper configuration.
- With the device unplugged, install the blue pollen filter into the device.
- Connect the patient flexible tubing to the device/humidifier outlet port (4).
- Connect the Whisper Swivel II to the end of the patient flexible tubing (1).
- Place the O 2 Enrichment Assembly on the end of the Whisper Swivel II (2).
- Place the end cap (3) on the end of the O 2 Enrichment Assembly.
- Connect a Digital Manometer (6) to the pressure pick-off (5) on the O 2 Enrichment Assembly.
- Press and hold the Therapy on/off button for 2 seconds to end therapy.
- Press the Therapy on/off button.
- Press and hold the Therapy on/off button to return to Standby.
- Enter Provider mode and set up remaining parameters.
-
Return to Patient Mode. The unit is ready for patient use.
-
Turn the manometer on. If it does not display a reading of zero, adjust the manometer to calibrate it. If the manometer has variable settings for devices, set it to cm H2O .
-
Supply power to the device and access the Provider menu. Set the Min EPAP and Max EPAP settings to 4. Set the Min PS and Max PS settings to 0.
-
Exit the Provider menu, and then press the Therapy on/off button to start therapy. Record the manometer reading on the test data sheet.
-
Enter the Provider menu. Set the Min EPAP and Max EPAP settings to 20. Set the Min PS and Max PS settings to 0. Record the manometer value on the test data sheet, and then stop therapy.
-
Verify that the pressure setting matches the pressure displayed on the manometer. If the pressure setting does not match the measured value for the device, contact Philips Respironics or an authorized service center to have the device serviced.
DreamStation BiPAP autoSV
Verifying the Alarms
Important
The following steps assume that the steps in Complete the following steps to verify the pressure have been run first.
When testing is complete and before patient use, an authorized individual should adjust the device to the appropriate patient settings.
Use the test orifice from the Verifying the Pressure instructions and the patient's prescription for the following tests. Make sure the blower is turned On before starting each alarm test.
Patient Circuit Disconnect Alarm Test
Note
The Patient Circuit Disconnect Alarm relies on a fixed relationship between the patient pressure settings and the open circuit flow of the patient circuit. Verify that the Patient Circuit Disconnect Alarm operates properly with the patient pressures and circuit.
- Enter Provider mode.
- Set the Apnea Alarm setting to Off.
- Set the Patient Circuit Disconnect Alarm setting to 15 seconds.
- Exit to the Home screen.
- Connect a standard circuit with Whisper Swivel II and an end cap.
- Press the Therapy on/off button to start therapy.
- Simulate breathing by alternately occluding and opening the outlet port.
- Remove the closed end cap.
- Verify that the Patient Circuit Disconnect Alarm occurs in approximately 15 seconds.
- Press the control dial to silence the alarm, and wait for one minute until the alarm sounds again.
- Press the control dial again to acknowledge and remove the alarm from the screen.
- Replace the closed end cap.
- Press and hold the Therapy on/off button for 2 seconds to end therapy. Exit to the Standby screen.
- Set the Patient Circuit Disconnect alarm to Off.
- Record the patient disconnect alarm test results on the data sheet.
- Return to Provider mode and set the Patient Circuit Disconnect Alarm to the desired patient setting.
Apnea Alarm Test
- Enter Provider mode.
- Set the Apnea Alarm setting to 10 seconds.
- Exit to the Home screen.
- Press the Therapy on/off button to start therapy.
- Remove the closed end cap. Verify that the device triggers to IPAP.
- Replace the closed end cap. Verify that the Apnea Alarm occurs in approximately 10 seconds.
- Press the control dial twice to silence and clear the alarm, and wait for one minute until the alarm sounds again.
- Press the control dial again to acknowledge and remove the alarm from the screen.
- Press and hold the Therapy on/off button for 2 seconds to end therapy. Exit to the Standby screen.
- Set the Apnea Alarm setting to Off.
- Record the Apnea alarm test result on the data sheet.
- Return to Provider mode and set the Apnea Alarm to the desired patient setting.
Low Minute Ventilation Alarm Test
- Connect the device to an approved circuit, whisper swivel II leak device, and test lung.
- While in the Standby, press the Therapy on/off button to start therapy.
- Simulate 6 breaths by alternately occluding and opening the outlet port for 2 seconds each.
- With therapy still on, set the Low Minute Ventilation Alarm setting = 10.0 LPM.
- Simulate 1 or 2 breaths by occluding and opening the outlet port.
- Verify that the Low Minute Ventilation alarm occurs.
- Press and hold the Therapy on/off button for 2 seconds to end therapy. Exit to the Standby screen.
- Set the Low Minute Ventilation Alarm setting to 0.0 (Off).
- Record the Low Minute Ventilation alarm test result on the data sheet.
- Return to Provider mode and set the Low Minute Ventilation Alarm setting to the desired patient setting.
Loss of Power Alarm Test
- While the device is providing therapy, remove the power connector. Verify that the Loss of Power alarm sounds.
- Press the control dial to acknowledge and remove the alarm.
- Reconnect power. Verify that the device resumes providing therapy.
Important
When testing is complete, and before patient use, adjust the device to the appropriate patient settings.
DreamStation BiPAP autoSV
Specifications
See Chapter 6 in the user manual for device specifications.
Table of contents
1. Introduction ...... 1
1.1 Package contents....1
1.2 Intended use....1
1.3 Safety information....2
1.4 Symbols glossary 8
1.5 System overview 10
1.6 How to contact Philips Respironics....12
2. Device setup....13
2.1 Installing and replacing the air filters....13
2.2 Positioning the device....14
2.3 Supplying AC power to the device....15
2.4 Connecting the breathing circuit....16
2.5 Starting the device....17
2.6 Navigating the device screens 18
2.7 Menu navigation (with therapy on) and optional humidification settings....19
2.8 Menu navigation (with therapy off)....21
2.9 Connecting to Wi-Fi (if available)....26
2.10 Bluetooth® wireless technology (if available) 27
2.11 Check mask fit....29
2.12 Sleep progress....30
2.13 Altitude compensation....30
3. Alarms, alerts, and troubleshooting....31
3.1 Device alarms....31
3.2 Device alerts....31
3.3 Alarm and alert LED indicators....31
3.4 Alarm and alert audible indicators 32
3.5 Silencing an alarm 33
3.6 Alarm message screens....33
3.7 What to do when an alarm occurs 33
3.8 Alarm summary table 34
3.9 Alert summary table.... 37
3.10 Troubleshooting 41
4. Accessories....45
4.1 Humidifier....45
4.2 SD card....45
4.3 Cellular modem 45
4.4 Wi-Fi accessory 45
4.5 Link module....46
4.6 Oximeter....46
4.7 Philips Respironics proprietary compliance software....47
4.8 Roll stand 47
4.9 Supplemental oxygen....47
4.10 DC power cord 47
4.11 Carrying case and airline travel 48
4.12 In-use bag (wheelchair bag)....48
5. Cleaning and disinfection ....49
5.1 Cleaning and disinfection overview 49
5.2 Home and hospital/institution cleaning: device and humidifier exterior....50
5.3 Hospital and institution disinfection: device and humidifier exterior 51
5.4 Home and hospital cleaning: non-heated flexible tubing....52
5.5 Home and hospital: rinsing and replacing filters....53
5.6 Service....54
6. Specifications, disposal, and EMC 55
6.1 Specifications....55
6.2 Disposal 58
6.3 EMC information....58
Warranty 63
1. Introduction
This chapter provides an overview of the DreamStation BiPAP autoSV device. Take time to read the entire manual before using your device for the first time. This chapter includes:
- Package contents
- Intended use
- Safety information
- System overview
1.1 Package contents
Your DreamStation system may include the following components. Some components are optional accessories that may not be packaged with the device.
- Device • SD card
- User manual • Flexible tubing
- Carrying case • Reusable blue pollen filter
- Power cord • Disposable light-blue ultra-fine filter (optional)
• Power supply • Humidifier (optional)
1.2 Intended use
The BiPAP autoSV device is intended to provide non-invasive ventilatory support to treat adult patients (>30 kg/66 lbs) with Obstructive Sleep Apnea and Respiratory Impairment caused by central and/or mixed apneas and periodic breathing. This device may be used in the hospital or home.
1.3 Safety information
1.3.1 Warnings and cautions
CAUTION! U.S. federal law restricts this device to sale by or on the order of a physician.

Warning: Use only the cleaning methods outlined in your user manual. Philips is unable to verify the safety or performance of any device if ozone or other unapproved cleaning and disinfection methods are used.
1.3.2 Warnings
A warning indicates the possibility of injury to the user or operator.
| Device usage | This device is not intended for life support or invasive ventilation. The device provides Positive Pressure Ventilation and is indicated for assisted ventilation through a noninvasive interface. The device has the capability of providing a back-up rate as needed.The device does not provide ventilation with a guaranteed tidal volume delivery. Patients requiring ventilation at a predetermined tidal volume are not candidates for Pressure Support ventilation. | |
| This device system is not suitable for a ventilator dependent patient. | ||
| Personnel qualifications | This manual serves as a reference. The instructions in this manual are not intended to supersede your health care professional's instructions regarding the use of the device. | |
| The prescription and other device settings should only be changed on the order of the supervising physician. | ||
| The operator should read and understand this entire manual before using the device. | ||
| SD card prescription changes | When making a therapy prescription or alarm setting change with the SD card, the health care professional must review and verify any prescription changes before using the device. The health care professional is responsible to ensure that the prescription settings are correct and compatible with the patient after using this feature. Installing the wrong prescription for a particular patient may result in improper therapy, lack of appropriate safety monitoring, and injury to the patient. | |
| Operating and storage temperatures | Do not use this device if the room temperature is warmer than 95° F (35° C) because the temperature of the airflow may exceed 109° F (43° C). This could cause thermal irritation or injury to the patient's airway. | |
| Do not use the device while positioned in a warm place, such as direct sunlight or near a heating appliance. These conditions can increase the temperature of the airflow and could cause thermal irritation or injury to the patient's airway. | ||
| Device start-up | Make sure the device is working properly at start-up. Always verify that the alarm LEDs light red then yellow momentarily. Contact Philips Respironics or an authorized service center for service if these indications do not occur at start-up. See Chapter 2 for more information about device start-up. | |
| Bacteria filter | If the device is used by multiple persons in a hospital environment (such as rental devices), a low-resistance, main flow bacteria filter should be installed in-line between the device and the circuit tubing to prevent contamination. | |
| Nebulizer or humidification | Nebulization or humidification can increase the resistance of breathing system filters. Monitor the breathing system filter frequently for increased resistance and blockage. | |
| This device is not intended to be used with a nebulizer. The ventilator accuracy may be adversely affected by gas added by use of a nebulizer. | ||
| Patient circuits | The ventilator should only be used with compatible patient interfaces (e.g., masks, circuits and exhalation ports). Proper operation of the device, including alarms, with other circuits has not been verified by Philips Respironics and is the responsibility of the health care professional. A mask should not be used unless the device is turned on and operating properly. The exhalation port(s) associated with the mask should never be blocked.Explanation of warning: The device is intended to be used with special masks or connectors that have exhalation ports to allow continuous flow of air out of the mask. When the device is turned on a functioning properly, new air from the device flushes the exhaled air out through the mask exhalation port. However, when the device is not operating, enough fresh air will not be provided through the mask, and exhaled air may be rebreathed. Rebreathing of exhaled air can, in some circumstances, lead to suffocation. | |
| If you are using a full face mask (a mask covering both your mouth and your nose), the mask must be equipped with a safety (entrainment) valve. | ||
| An exhalation port is required. Do not block the exhalation port. This can reduce airflow and result in rebreathing of exhaled air. | ||
| At low expiratory pressures, the flow through the exhalation port may be inadequate to clear all exhaled gas from the tubing – some rebreathing may occur. | ||
| Do not pull or stretch the tubing. This could result in circuit leaks. | ||
| Covering breathing tubes with a blanket or heating them in an incubator or with an overhead heater can affect the quality of the therapy or injure the patient. | ||
| Verify operation of the Patient Disconnect alarm with any changes in the patient circuit. | ||
| Improperly functioning ventilator | If you notice any unexplained changes in the performance of the device, if it is making unusual sounds, if water is spilled into the enclosure, or if the enclosure is cracked or broken, discontinue use and contact your home care service provider. | |
| Circuit disconnect | You should not rely on any single alarm to detect a circuit disconnect condition. The Low Minute Ventilation and Apnea alarms should be used in conjunction with the Circuit Disconnect alarm. | |
| Test the operation of the circuit disconnect function whenever a change is made to the circuit. An increase in circuit resistance can prevent proper operation of some alarms. | ||
| Power cord | Route the power cord to the outlet in a way that will prevent the cord from being tripped over or interfered with by chairs or other furniture. | |
| This device is activated when the power cord is connected. | ||
| Use only power cords supplied by Philips Respironics for this device. Use of power cords not supplied by Philips Respironics may cause overheating or damage to the device. | ||
| Accessories | To ensure that you receive safe, effective therapy, use only Philips Respironics accessories. The use of accessories, transducers, and cables other than those specified by Philips Respironics may result in increased emissions or decreased immunity of the device. | |
| Oxygen When administering fixed-flow supplemental oxygen, the oxygen concentration may not be constant. The inspired oxygen concentration will vary, depending on the pressures, patient flows and circuit leak. Substantial leaks may reduce the inspired oxygen concentration to less than the expected value. Appropriate patient monitoring should be used, as medically indicated, such as an alarming pulse oximeter. | ||
| Cleaning To avoid e | electrical shock, always unplug the power cord from the wall outlet before cleaning the device. | |
| Do not immerse the device in any fluids or spray the device with water or cleaners.Clean the device with a cloth dampened with an approved cleaner. | ||
| Humidifier | If using a humidifier, do not use the humidifier at an altitude above 2286 m (7500 ft) or outside a temperature of 5°C to 40°C ( 41°F to 104°F ). Using the humidifier outside of this temperature range or above this altitude can affect the quality of the therapy or injure the patient. | |
| To prevent disconnection of the tubing or tubing system during use, only tubes in compliance with ISO 5367 or ISO 80601-2-74 should be used. | ||
| For safe operation when using a humidifier, the humidifier must always be positioned below the breathing circuit connection at the mask. The humidifier must be level for proper operation. | ||
| Humidification can increase the resistance of the bacteria filter and the operator must monitor the bacteria filter frequently for increased resistance and blockage to ensure the delivery of the therapeutic pressure. | ||
1.3.3 Cautions
A caution indicates the possibility of damage to the device.
| Electrostatic Discharge (ESD) | Do not use antistatic or conductive hoses or conductive patient tubing with the device. |
| Pins of connectors marked with the ESD warning symbol shall not be touched and connections shall not be made without special precautions. Precautionary procedures include methods to prevent build-up of electrostatic charge (e.g., air conditioning, humidification, conductive floor coverings, non-synthetic clothing), discharging one's body to the frame of the equipment or system or to earth. It is recommended that all individuals that will handle this device understand these precautionary procedures at a minimum as part of their training. | |
| Before operating the device, ensure that the SD card/filter access door and the modem access door are both closed whenever any of the accessories such as the Link Module or Modem are not installed. Refer to the instructions that came with your accessory. | |
| Condensation | Condensation may damage the device. If the device has been exposed to either very hot or very cold temperatures, allow it to adjust to room temperature (operating temperature) before starting therapy. Do not operate the device outside of the operating temperature range shown in the Specifications chapter later in this manual. |
| Filters | A properly installed, undamaged Philips Respironics blue pollen filter is required for proper operation. |
| Dirty inlet filters may cause high operating temperatures that may affect device performance. Regularly examine the inlet filters as needed for integrity and cleanliness. | |
| Never install a wet filter into the device. You must ensure sufficient drying time for the cleaned filter. | |
| Extension cords Do not use extension cords with this device. | |
| DC power | Always ensure that the DC power cord securely fits into your therapy device prior to use. Contact your home care service provider to determine if you have the appropriate DC cord for your specific therapy device. |
| When DC power is obtained from a vehicle battery, the device should not be used while the vehicle's engine is running. Damage to the device may occur. | |
| Only use a Philips Respironcis DC power cord and battery adapter cable. Use of any other system may cause damage to the device. | |
| Device placement | Do not place the device in or on any container that can collect or hold water. |
| Do not place the device directly onto carpet, fabric, or other flammable materials. | |
| Do not plug the device into an outlet controlled by a wall switch. | |
| Tobacco use Tobacco smoke may cause tar build up within the device. | |
| Humidifier | The heated humidifier can only be used when the ventilator is connected to AC power. It cannot be used with a battery. |
| Cleaning | Do not immerse the device or allow any liquid to enter the enclosure or the inlet filter. |
| Do not steam autoclave the ventilator. Doing so will destroy the ventilator. | |
| Do not use harsh detergents, abrasive cleaners, or brushes to clean the ventilator system. | |
1.3.4 Notes
- This product is not made with DEHP or natural latex rubber in patient or operator accessible areas or in the air path or breathing circuit.
• See the Limited Warranty section of this manual for information warranty coverage.
1.3.5 Contraindications
The device is contraindicated on patients without a spontaneous respiratory drive. If any of the following conditions apply to you, consult your physician before using the device:
- Inability to maintain a patent airway or adequately clear secretions
- At risk for aspiration of gastric contents
• Diagnosed with acute sinusitis or otitis media - Allergy or hypersensitivity to the mask materials where the risk from allergic reaction outweighs the benefit of ventilatory assistance
- Epistaxis, causing pulmonary aspiration of blood
- Hypotension
When assessing the relative risks and benefits of using this equipment, the health care professional should understand that this device can deliver the pressure ranges indicated in the Control Accuracy table in chapter 6. In the event of certain fault conditions, a maximum pressure of 60 cmH2O is possible.
Warning
Physicians should assess individual patient risks before prescribing autoSV therapy for patients with chronic, symptomatic heart failure (NYHA II-IV) with left ventricular ejection fraction below 45% and moderate to severe predominant central sleep apnea.
The physician should assess the relative risks and benefits of autoSV therapy on a case-by-case basis in patients with severe heart conditions including unstable angina or unstable arrhythmias.
1.3.6 Patient precautions
- Immediately report any unusual chest discomfort, shortness of breath, or severe headache.
- If skin irritation or breakdown develops from the use of the mask, refer to the mask instructions for appropriate action.
- The following are potential side effects of noninvasive positive pressure therapy:
— Ear discomfort
— Conjunctivitis
— Skin abrasions due to noninvasive interfaces
— Gastric distention (aerophagia)
1.4 Symbols glossary
The following symbols may appear on the device, power supply, accessories, and packaging. For a full list and description of the symbols used, see www.symbols.philips.com.
Symbol Title and meaning
| Operator's manual; operating instructionsConsult instructions for use. | |
 | MR unsafeDo not use device in a Magnetic Resonance (MR) environment. |
 | AC power (Alternating current)Indicates on the rating plate that the equipment is suitable for alternating current only; to identify relevant terminals. |
 | DC power (Direct current)Indicates on the rating plate that the equipment is suitable for direct current only; to identify relevant terminals. |
| IP22 | Drip proof equipment |
 | Prescription deviceCaution: U. S. federal law restricts this device to sale by or on the order of a physician. |
 | Caution, consult accompanying documents. |
 | Electrostatic sensitive devices (ESD warning symbol)Attention - Observe precautions for handling electrostatic sensitive devices. |
 | Class II equipment (Double Insulated)To identify equipment meeting the safety requirements specified for Class II equipment. |
 | For airline use. Complies with RTCA/DO-160G section 21, category M. |
 | Separate collection for electrical and electronic equipment per EC Directive 2012/19/EU. |
 | Bluetooth® symbolIndicates the device has Bluetooth capabilities. |
 | Non-ionizing electromagnetic radiationIndicates that the equipment includes RF transmitters. |
 | Serial ConnectionIdentifies a connector for a serial data connection. |
Symbol Title and meaning
 | Keep away from sunlightIndicates the medical device needs protection from light sources. |
| [ZG23] | Do not disassemble. |
 | Type BF applied partTo identify a type BF applied part complying with IEC 60601-1. |
 | For indoor use onlyEquipment is designed primarily for indoor use. |
 | Audio pauseIndicates that an auditory alarm system is in the audio paused state. |
 | Therapy on/off (Stand-by)Identifies the button to turn therapy on or off (puts the device in a stand-by condition). |
 | Ramp (Variability)To identify the control device by means of which a quantity is controlled. The controlled quantity increases with the figure width. |
 | Patient breath indicator |
 | Keep dryIndicates the medical device that needs to be protected from moisture. |
| [OKKA] | Fragile, handle with careIndicates the medical device can be broken or damaged if not handled carefully. |
 | Humidity limitationIndicates the range of humidity to which the medical device can be safely exposed. |
 | Temperature limitIndicates the storage temperature limits to which the medical device can be safely exposed. |
 | ManufacturerIndicates the medical device manufacturer. |
 | Date of manufactureIndicates the date when the medical device was manufactured. |
 | Reorder numberIndicates the manufacturer's catalogue number so the medical device can be identified. |
 | Serial numberIdentifies the manufacturer's serial number for the medical device. |
1.5 System overview
1.5.1 Device description
The device is intended to augment patient breathing by supplying pressurized air through a patient circuit. It senses the patient's breathing effort by monitoring airflow in the patient circuit and adjusts its output to assist in inhalation and exhalation. This therapy is known as Bi-level ventilation. Bi-level ventilation provides a higher pressure, known as IPAP (Inspiratory Positive Airway Pressure), when you inhale, and a lower pressure, known as EPAP (Expiratory Positive Airway Pressure), when you exhale. The higher pressure support your inhalation, and the lower pressure makes it easier for you to exhale.
When prescribed, the device can also provide features to help make your therapy more comfortable. The ramp function allows you to lower the pressure when trying to fall asleep. The air pressure will gradually increase until the prescription pressure is reached. Additionally, the Flex comfort feature provides increased pressure relief during the expiratory phase of breathing.
Several accessories are also available for use with the device. Contact your home care service provider to purchase any accessories not included with your system.
1.5.2 Therapy features
If prescribed for you, the device provides the following therapy features.
1.5.2.1 Bi-Flex comfort feature
If enabled, the device provides a comfort feature called Bi-Flex. The Bi-Flex attribute adjusts therapy by inserting a small amount of pressure relief during the latter stages of inspiration and during active exhalation (the beginning part of exhalation). Bi-Flex levels of 1, 2, or 3 progressively reflect increased pressure relief that will take place at the end of inspiration and at the beginning of expiration.

1.5.2.2 Ramp
If enabled, the device is equipped with a linear ramp function. The Ramp feature will reduce the pressure and then gradually increase (ramp) the pressure to the prescription pressure setting so patients can fall asleep more comfortably.

1.5.2.3 Rise time comfort feature
If enabled, the device provides a comfort feature called Rise Time. Rise time is the amount of time it takes the device to change from the expiratory pressure setting to the inspiratory pressure setting. Rise time levels of 1-6 progressively reflect slowed response of the pressure increase that will take place at the beginning of inspiration. A setting of 1 is the fastest rise time while a setting of 6 is the slowest. Providers should adjust the rise time to find the most comfortable setting for the patient. Rise time cannot be adjusted when Bi-Flex is enabled.

1.5.2.4 Digital Auto-Trak
Digital Auto-Trak is an important ventilation feature due to its ability to recognize and compensate for unintentional leaks in the patient circuit. Digital Auto-Trak is an automated process that maintains optimum ventilator performance in the presence of leaks. The device continuously monitors the actual circuit and adjusts an internal estimate of patient flow as natural variations in the circuit leak occur. As unintentional circuit leaks occur, the triggering and cycling algorithms ensures optimum patient and machine synchrony. It also provides a high degree of accuracy for calculation of flow-based parameters, such as exhaled tidal volume.
1.5.3 Device features

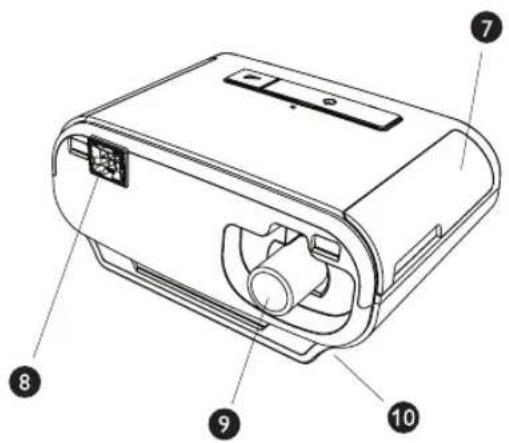
The figure above illustrates some of the device features, described in the following table.
| # Feature Description | ||
| 1 | Therapy on/off button ⏻ | Starts and stops the airflow for therapy. |
| 2 Ambient light sensor Detects room | light levels and adjusts brightness of LCD display screen. | |
| 3 | Ramp button ↗ | Activates the ramp feature during therapy. |
| 4 | Door, SD card & filter access | This door lifts open for access to the SD card and filter area. |
| 5 LCD display screen This is the User | Interface for the therapy device. | |
| 6 Control dial | Turn the dial to scroll between options on the screen. Press the dial to choose an option and silence and acknowledge alarms. | |
| 7 Door, accessory access This door lifts open for access to the (optional) accessories. | ||
| 8 Humidifier connector | Humidifier connects to the back of the therapy device. The humidifier pin connector will attach here. | |
| 9 Air outlet port Connect the tubing here. | ||
| 10 Power inlet Connect the power cord here. | ||
1.6 How to contact Philips Respironics
Should you experience trouble with this equipment or require assistance setting up, using, or maintaining the device or accessories, please contact your home care service provider. To contact Philips Respironics directly, call 1-800-345-6443 or 1-724-387-4000. You can also use the following address:
Respironics, Inc.
1001 Murry Ridge Lane
Murrysville, PA 15668
2. Device setup
This chapter details how to set up the DreamStation BiPAP autoSV device. This chapter includes:
• Installing the air filter
- Positioning the device
- Connecting the breathing circuit
• Supplying AC power to the device
- Menu and screen navigation
- Bluetooth and Wi-Fi setup
2.1 Installing and replacing the air filters
Caution
A properly installed, undamaged Philips Respironics blue pollen filter is required for proper operation.
The device uses a blue pollen filter that is washable and reusable and a light-blue ultra-fine filter that is disposable. The reusable blue filter screens out pollens, while the light-blue ultra-fine filter provides more complete filtration of very fine particles. The reusable blue filter must be in place at all times when the device is operating. The ultra-fine filter is recommended for people who are sensitive to tobacco smoke or other small particles.
The reusable blue filter is supplied with the device. A disposable light-blue ultra-fine filter may also be included. If your filter is not already installed when you receive your device, you must at least install the reusable filter before using the device.
This device has an automatic air filter reminder. Every 30 days, the device will display a message reminding you to check your filters and replace them as directed.
Note
This message is a reminder only. The device does not detect the performance of the filters nor does it recognize when a filter has been cleaned or replaced.
- Lift up on the filter access door and swing open. If replacing, pull out the old filter assembly.
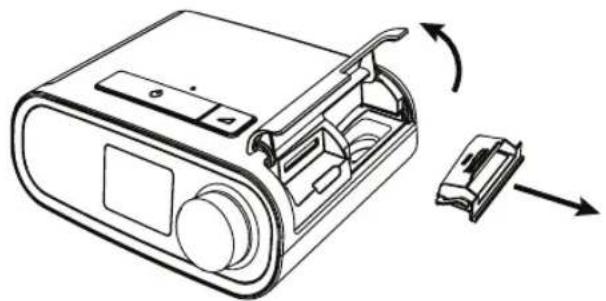
DreamStation BiPAP autoSV User Manual
- If applicable, place a clean, reusable blue pollen filter (1) on top of a new, optional disposable light-blue ultra-fine filter (2) and firmly snap them together.
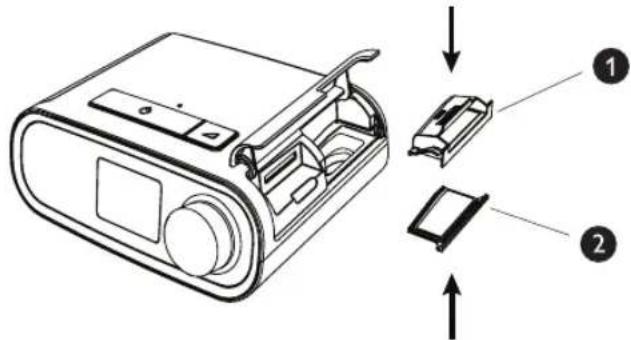
- Place the new filter assembly back in the side of the therapy device. Swing the door closed.

2.2 Positioning the device
Place the device on a firm, flat surface somewhere within easy reach of where you will use it at a level lower than your sleeping position. Make sure the device is away from any heating or cooling equipment (e.g., forced air vents, radiators, air conditioners).
Note
When positioning the device, make sure that the power cable is accessible because removing power is the only way to turn off the device.
Cautions
Make sure the filter area on the side of the device is not blocked by bedding, curtains, or other items. Air must flow freely around the device for the system to work properly.
Do not place the device directly onto carpet, fabric, or other flammable materials.
Do not place the device in or on any container that can collect or hold water.
2.3 Supplying AC power to the device
Complete the following steps to operate the device using AC power:
- Plug the socket end of the AC power cord (included) into the power supply (also included).
- Plug the pronged end of the AC power cord into an electrical outlet that is not controlled by a wall switch.
![graph TD A["Device with cable"] -->|①| B["Cable"] B -->|②| C["Power outlet"]](/content/2026/05/856171/images/adcf57239030b7d4f9b0b77da7c2390af794d68fae89d4906429bb5dd766ddc5.jpg)
- Plug the power supply cord's connector into the power inlet on the side of the device.

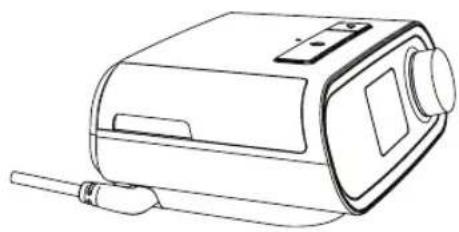
- Verify that the plug at the side of the device, at the power supply, and at the electrical outlet are fully inserted. This will help to ensure that a secure, reliable electrical connection has been made.
Note
If the Incorrect Power Supply icon appears on the screen, please repeat step 4.

Important
To remove AC power, disconnect the power supply cord from the electrical outlet.
Warning
Periodically inspect electrical cords and cables for damage or signs of wear. Discontinue use and replace if damaged.
Caution
Do not use extension cords with this device.
DreamStation BiPAP autoSV User Manual
2.4 Connecting the breathing circuit
To use the system, you will need the following accessories in order to assemble the recommended breathing circuit:
• Philips Respironics interface (nasal mask or full face mask) with integrated exhalation port, or Philips Respironics interface with a separate exhalation device (such as the Whisper Swivel II)
• Philips Respironics flexible tubing, 1.83 m (6 ft.)
• Philips Respironics headgear (for the mask)
To connect your breathing circuit to the device, complete the following steps:
- Connect the flexible tubing to the air outlet on the back of the therapy device. Line up the connector (1) at the top of the heated tube to the top of the air outlet port on the back of the device.
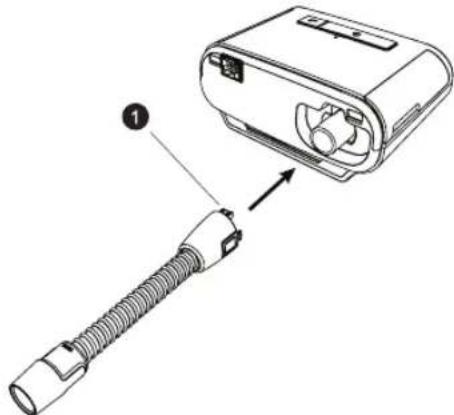
- Press the tubing into place over the air outlet port until the tabs on the side of the tube click into place in the slots on the sides of the outlet port.
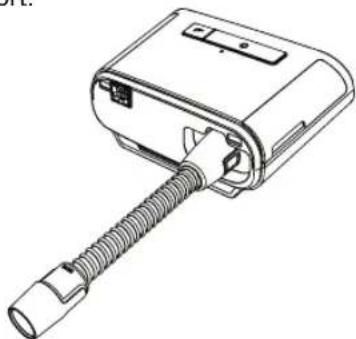
Notes
If you are using a standard tube (not shown) instead of a heated tube, simply slide the tubing over the air outlet port on the therapy device.
If the device is being used by multiple persons in a hospital environment, connect a bacteria filter to the device air outlet, and then connect the flexible tubing to the outlet of the bacteria filter. When using the bacteria filter, the device performance may be affected. However, the device will remain functional and deliver therapy.
- Connect the tubing to the mask. For proper placement and positioning, refer to the instructions that came with your mask.
Warnings
Do not pull or stretch the tubing. This could result in circuit leaks.
Inspect the tubing for damage or wear. Discard and replace the tubing as necessary.
- Attach the headgear to the mask if necessary. Refer to the instructions that came with your headgear.
Warnings
If you are using a full face mask (a mask covering both your mouth and your nose), the mask must be equipped with a safety (entrainment) valve.
An exhalation port is required. Do no block the exhalation port. This can reduce airflow and result in rebreathing of exhaled air.
If the device is used by multiple persons (such as rental devices), a low-resistance, main flow bacteria filter should be installed in-line between the device and the circuit tubing to prevent contamination.
2.5 Starting the device
- Ensure power is supplied to the device. The first screen to display will be the Philips Respironics logo, followed by the device model screen, and then the Home screen.
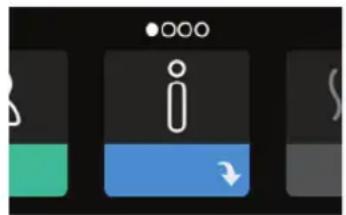
The first time the device is powered on, a pop-up will prompt you to set the time on the device. The default setting is Greenwich Mean Time, but you may adjust the time in 30 minute increments to match your local time zone. If you choose to skip this initial time setting, the time can always be adjusted under the My Setup menu.
Note
This time setting is not displayed as a clock function on the device. It is only used to align your therapy data for your home care service provider's data reports.
DreamStation BiPAP autoSV User Manual
- Put on your mask assembly. Refer to the instructions supplied with the mask.
- Press the Therapy button ( ⏻ ) on top of the device to turn on airflow and begin therapy. The current delivered pressure will display on the screen.
- Make sure that no air is leaking from your mask. If necessary, adjust the mask and headgear until the air leak stops. See the instructions provided with your mask for more information.
Note
A small amount of mask leak is normal and acceptable. Correct large mask leaks or eye irritation from an air leak as soon as possible.
- If you are using the device in a bed with a headboard, try placing the tubing over the headboard. This may reduce tension on the mask.
- Press and hold the Therapy button for 2 seconds to turn off therapy.
Note
During therapy, if there is a mains interruption (i.e. power loss) the device will return to the Home screen once power is restored. You may resume therapy as needed.
2.6 Navigating the device screens
The User Interface (UI) on this device allows you to adjust the device settings and view information about your therapy. The UI is composed of the display screen and the control dial. Rotate the control dial in either direction to scroll through the menus on the display screen. Press the control dial to open a menu.
To adjust a setting:
- Rotate the control dial to your desired setting.
- Press the control dial to select that setting.
- Rotate the control dial to change the setting. The rotate dial icon 📋 on any screen indicates to rotate the dial to perform an action.
- Press the control dial again to save the setting change. The click dial icon 📄 on any screen indicates to press the dial to perform an action.
Notes
Pressing the dial when the down arrow ↗ appears on any screen will take you to a sub-menu with more menu options. Pressing the dial when the up arrow ↗ appears on any sub-menu will return you back to the main menu.
The screens shown throughout this guide are examples for reference only. Actual screens may vary based upon device model and provider settings.
2.7 Menu navigation (with therapy on) and optional humidification settings
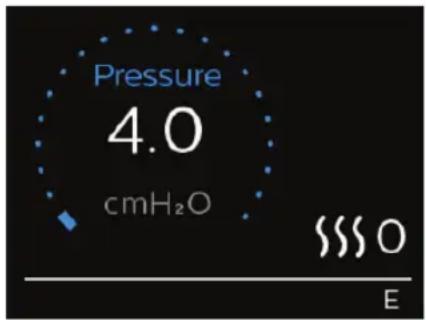
The following screen is displayed while therapy is turned on. The table below describes the different features that may appear on your screen. If an accessory is attached to the therapy device, additional symbols may appear. Refer to the instructions provided with the accessory for more information.

| # Feature Description | |
| 1 Therapy pressure Displays the current de | delivered pressure. |
| 2 Adjustable tube temperature setting | You can change this setting from 0 to 5. Only displays when optional heated tube is connected. |
| 3 Adjustable humidifier setting You can ch | change this setting from 0 to 5. Only displays when humidifier is attached. |
| 4 Enabled features If enabled, the following therapy features will display here:Opti-StartHumidifierI or E - indicates IPAP or EPAP statePatient breath indication | |
2.7.1 Adjusting the humidifier and heated tube settings
If you have a humidifier, you can adjust tube temperature or humidifier settings while the device is delivering therapy by following these steps:
- Turn the control dial counter-clockwise to activate the humidifier setting and clockwise to activate the heated tube setting.
- Press the control dial to edit the setting.
- Turn the control dial until you reach the desired setting. The setting increments when you turn the dial clockwise and decrements when your turn the dial counter-clockwise.
- Press the control dial to save the setting.
Note
If you are using the humidifier without the heated tube, simply just rotate the control dial in either direction to change the humidifier setting.
2.7.2 Ramp feature
The device is equipped with an optional ramp feature that your home care service provider can enable or disable. This feature reduces the air pressure when you are trying to fall asleep and then gradually increases (ramps) the pressure until your prescription setting is reached, allowing you to fall asleep more comfortably.
If ramp is enabled on your device, after you turn on the airflow, press the Ramp ( ) button on the top of the device. You can use the Ramp button as often as you wish during the night.
When you click the ramp button, the Therapy screen will change to reflect the Ramp pressure, and the green circle will reflect the gradual increase in pressure.
Your device has two ramp modes. Your provider will select the one that is most appropriate for you. The standard ramp mode increases pressure at a steady rate. Alternately, the SmartRamp mode maintains a constant lower pressure until the device detects that you require more pressure.
2.8 Menu navigation (with therapy off)
From the Home screen, you can scroll between the following four options:
![graph LR A["Information Input"] --> B["Hot Water"] B --> C["User Interaction"] C --> D["User Interaction with Feedback"] D --> E["Feedback Loop"]](/content/2026/05/856171/images/88409f267e18a5c9edb1e01c6708e764b64a6eeb2acb2300cd813c192c51d903.jpg)
My Info Preheat My Provider My Setup
My Info This menu provides summary statistics of your therapy use.
Preheat This function lets you warm up your humidifier for 30 minutes before starting a therapy session. This only displays when a humidifier is attached to your device.
My Provider This menu contains information that your provider may direct you to read to them so they can better assist you over the phone.
My Setup This menu contains comfort settings that you can adjust as needed.
2.8.1 My Info

When you select My Info, you will be able to view the following screens. You cannot change settings in the My Info menu. These screens are only for reference. Your home care provider may periodically ask you for this information.
Note
Additional icons may appear if optional accessories are being used (such as the oximetry module). Refer to the manual that accompanies the accessory for more information.
Icon Text Description
 | Therapy Hours This | screen displays the amount of time the user is actually receiving therapy on the device for the most recent 1-day time frame. It also displays the average amount of time the patient is actually receiving therapy over the last 7 days and 30 days. |
| AHI | AHI | This screen displays the nightly Apnea/Hypopnea Indices (AHI) value for the most recent 1 day time frame. It also displays the average of these individual nightly AHI values over a 7-day and a 30-day time frame. This screen only displays if your home care provider has enabled it. |
| Icon Text | Description | |
 | Mask Fit Displays the value “100% minus Large Leak.” Large Leak is the percentage of time that the mask leak was so high that it is no longer possible for the device to identify respiratory events with statistical accuracy. Displays the value for the most recent 1 day, as well as the values over last 7 days and 30 days. This screen only displays if your home care provider has enabled it. | |
| Periodic Breathing | Periodic Breathing | Displays the percentage of time that the user experienced periodic breathing. Displays the value for the most recent 1 day time frame, as well as values for the last 7 days and 30 days. If you observe a large increase in the percent of time in periodic breathing indicated her, contact your home care provider for assistance. This screen only displays if your home care provider has enabled it. |
| 90% Pressure | 90% Pressure This screen displays the nightly value of 90% Pressure for the most recent 1 day time frame. It also displays the average of these individual nightly values of 90% Pressure over a 7 day and a 30 day time frame. | |
2.8.2 Preheat

NOTE
This screen only displays when a humidifier is attached.
When using a humidifier, the device can preheat the water tank for up to 30 minutes prior to starting therapy.
In order to activate the preheat mode, the blower must be off and a humidifier must be attached. When Preheat is selected, you will be able to turn the control dial to choose between On or Off. Press the control dial again to make your selection. During the 30-minute preheat, you will still be able to use the control dial to select other menu options from the Home screen.
2.8.3 My Provider

When you select My Provider, you will be able to view the following screens. You cannot change settings in the Provider menu. These screens are only for reference. Your home care provider may periodically ask you for this information.
| Icon Text Description | ||
 | Therapy This screen displays your therapy settings. Settings cannot be adjusted from this screen. | |
 | Alarms This screen displays your alarm settings. Settings cannot be adjusted from this screen. | |
 | Provider Contact Info | This screen will display the contact information for your provider if it has been uploaded to your device. |
 | Phone-In This screen displays the total therapy hours for the device, the total blower hours, the total number of days used when the sessions were greater than 4 hours, and a compliance check number used by your home care service provider to validate that the data provided by you is the data taken from this screen. | |
 | Compliance This screen displays your start date, the total number of days used when the sessions were greater than 4 hours, and a check code number used by your home care service provider. | |
| VIC90 VIC90 | This Visual Inspection Check screen will display a check code number created from information gathered over the most recent 90 day period. This 15-digit number will display as: xxx.xxxx.xxxx.xxxx. Your home care service provider may periodically ask you for this information. | |
 | Upload Allows user to initiate a modem call when an optional cellular modem or Wi-Fi accessory is installed. Signal strength ( ) is indicated at the top right of this screen. After the modem upload has finished, the screen will either display a green check mark with the text Completed to indicate a successful upload, or a red X with the text Failed to indicate an unsuccessful upload. If the upload fails, initiate an upload a second time, or contact your home care provider if the issue persists. This screen is locked if modem is off. | |
 | Device Info | This screen displays your therapy device information: serial number, model, and software version. |
| Icon Text Description | ||
 | Performance Check | Your device is equipped with a self-diagnostic tool called Performance Check. This tool can evaluate your device for certain errors. It also allows you to share key device settings with your home care service provider. Use Performance Check when directed to by your home care service provider.At conclusion of the scan, the screen displays a green check mark if no issue is detected. If device displays a red X, please contact your home care service provider for assistance. |

2.8.4 My Setup
When you select My Setup, you will be able to view the following screens. You can change the settings in the Setup menu. These screens will only display if they are available and enabled on your device.
| Icon Text Description | ||
 | Ramp This displays the ramp starting pressure. You can increase or decrease the ramp starting pressure in 0.5 cm H2O increments.Note: If a lock icon is displayed on this screen, it indicates that your provider has locked this setting and you cannot change it. | |
 | Ramp time This enables you to modify the Ramp time setting in 5 minute increments.The range for this setting is 0 to 45 minutes. | |
 | Rise time Rise time is the time it takes for the device to change from EPAP to IPAP.If rise time is prescribed for you, you can adjust the rise time from 1 to 6 to find the setting that provides you with the most comfort. A setting of 1 is the fastest rise time, while 6 is the slowest. | |
 | Flex This allows you to adjust the level of air pressure relief that you feel when you exhale during therapy. Your home care provider can enable or disable this feature. When your provider enables Flex, a level will already be set for you on the device. You can increase or decrease the setting from 1 to 3. The setting of 1 provides a small amount of pressure relief, with higher numbers providing additional relief.Note: If a lock icon is displayed on this screen, it indicates that your provider has locked this setting and you cannot change it. | |
Icon Text Description
 | Humidification This displays the Humidification Mode being used. You can choose between Fixed or Adaptive Humidification. If a heated tube is being used, the device will automatically switch to Heated Tube Humidification Mode. A lock icon will appear next to the mode setting indicating that so long as the heated tube is attached to the device, this mode cannot be changed. However, the heater plate and tube temperature settings can still be adjusted on the device Therapy screen as normal. | |
 | Mask type This setting allows you to adjust the level of air pressure relief based on the specific Philips Respironics mask. Each Philips Respironics mask may have a System One resistance control setting. Contact your home care provider if you cannot find this resistance setting for your mask.Note: If a lock icon is displayed on this screen, it indicates that your provider has locked this setting and you cannot change it. | |
 | Tube type This setting allows you to select the correct size diameter tubing that you are using with the device. You can choose either (22) for the Philips Respironics 22 mm tubing, or (15) for the Philips Respironics 15 mm tubing. When using Heated Tubing, the device will automatically change this setting to the appropriate tubing type (15H) and you will not be able to change it.Note: Tubing is identified on the cuff with the tubing identifier symbol: 15, 22 or 15H.Note: If a lock icon is displayed on this screen, it indicates that your provider has locked this setting and you cannot change it. | |
 | Language This feature allows you to choose which language to display on the interface. You can also turn the language off (0), which means the device will only display icons on the interface. | |
 | Check mask fit This feature allows you to check the fit of your mask prior to starting therapy. This is done by measuring the amount of leak. | |
| Wi-Fi Wi-Fi This feature allows you to setup or edit your Wi-Fi connection. It only displays when a Wi-Fi modem is installed and turned on. | ||
 | Modem This feature allows you to turn the modem off temporarily or turn it back on. When the modem is turned off, it will automatically turn on again after 3 days. This feature only displays when modem is installed. | |
| Bluetooth | This feature allows you to turn Bluetooth off and on. Also, it allows you to clear the pairing with a compatible Bluetooth device. | |
 | Time | This setting allows you to adjust the time. The default setting is Greenwich Mean Time, but you may adjust the time in 30 minute increments to match your local time zone.Note: This time setting is not displayed as a clock function on the device. It is only used to align your therapy data for your Provider's data reports. |
 | Brightness | This feature allows you to adjust the screen brightness. The default setting is Auto. You can change the setting from 20%-100% brightness. |
DreamStation BiPAP autoSV User Manual
2.9 Connecting to Wi-Fi (if available)
If your device has a Wi-Fi accessory installed and enabled, follow the steps below to connect your device to Wi-Fi. For additional information, see the instructions included with your Wi-Fi accessory.
- From the My Setup menu, select Wi-Fi.
- The Wi-Fi accessory will search for available networks within range of your device. Press the control dial to select your network.
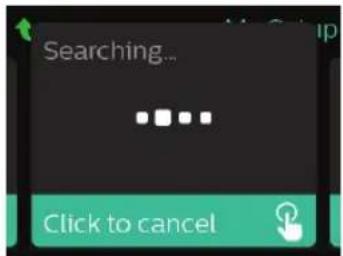
- If your network is secure, a Passkey pop-up screen appears. Enter your network password, and then select the green check mark.

Once your password is entered, the Wi-Fi accessory will connect to your network. When the completed screen appears, press the control dial to close the screen.
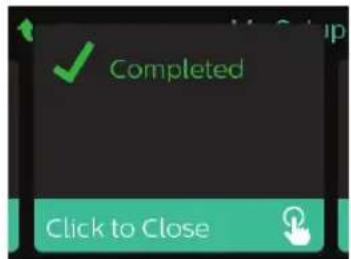
Note
If a red X appears over the signal strength icon, the Wi-Fi accessory detects a wireless router but cannot connect to it. Try repeating steps 1-3 above, making sure you select the correct network and enter the correct password.
2.10 Bluetooth ® wireless technology (if available)
Your device has Bluetooth wireless technology, which is one method by which you can transfer your therapy device's data to DreamMapper. DreamMapper is a mobile and web-based system designed to help Obstructive Sleep Apnea (OSA) patients enhance their sleep therapy experience.
2.10.1 Pairing your therapy device to your Bluetooth-enabled mobile device
Notes
You will not receive alarms on your mobile device through the Bluetooth connection.
You can only pair your therapy device to one mobile device at any given time.
Pairing works best when your therapy device and mobile device are in the same room.
The current version of DreamMapper will guide you through these instructions.
After initiating pairing, you will have 30 seconds to complete the setup. After this time, it will be cancelled automatically.
Follow the steps below to manually pair to your mobile phone or tablet.
- With your therapy device powered up and the blower off, initiate Bluetooth Setup from the DreamMapper mobile app.
- If you need to select from a list of available Bluetooth devices, the therapy device will appear as PR BT XXXX (XXXX) will be the last four digits of the serial number listed on your therapy device).
- Your mobile device will require you to confirm pairing via one of these two methods:
— Enter a PIN code
The following icon will appear on your therapy device screen with Pair?:

Rotate the therapy device's control dial to select Yes, and press the control dial. Your therapy device will display a 6-digit PIN. Enter this PIN on your mobile device to complete pairing.
— Confirm a PIN code
The following icon will appear on your therapy device screen with a 6-digit PIN and Pair?:

Verify that the PIN is the same on both the therapy device and the mobile device. If so, rotate the therapy device's control dial to select Yes and then press the control dial. Then, accept on the mobile device to complete pairing.
DreamStation BiPAP autoSV User Manual
2.10.2 Notices
The Bluetooth ® word mark and logos are registered trademarks owned by Bluetooth SIG, Inc. and any use of such marks by Philips Respironics is under license. Other trademarks and trade names are those of their respective owners.
The DreamStation device transmits data between the therapy device and a mobile device, but it does not store any of your personal data. This connection between the therapy device and a mobile device is encrypted.
This device contains a FCC/IC certified Bluetooth radio module (located on the main board).
Only the co-location of this Bluetooth radio with the radio transceivers of the DreamStation Wi-Fi accessory and cellular modem has been FCC and IC approved and is permitted.
For compliance with FCC and IC RF exposure guidelines a minimum distance of 20 cm between the Wi-Fi accessory or the cellular modem and the user's body should be maintained during operation of one of those accessories together with the DreamStation.
FCC ID: THO1116426 IC: 3234B-1116426
THO1116426 is the FCC ID of the FCC certified Bluetooth module contained in this device.
This Class B digital apparatus complies with Canadian ICES-003. HMN: DreamStation. PMN and HVIN: 1116426.
Use of non-original manufacturer-approved accessories may violate your local RF exposure guidelines and should be avoided.
This device complies with part 15 of the FCC Rules and IC radio standards RSS for license-exempt transmitters. Operation is subject to the following two conditions: (1) This device may not cause harmful interference, and (2) this device must accept any interference received, including interference that may cause undesired operation.
This equipment has been tested and found to comply with the limits for a Class B digital device, pursuant to Part 15 of the FCC Rules. These limits are designed to provide reasonable protection against harmful interference in a residential installation. This equipment generates, uses, and can radiate radio frequency energy and, if not installed and used in accordance with the instructions, may cause harmful interference to radio communications. However, there is no guarantee that interference will not occur in a particular installation. If this equipment does cause harmful interference to radio, TV reception, or other devices which can be determined by turning the equipment on and off, the user is encouraged to try to correct the interference by one or more of the following measures:
— Reorient or relocate the receiving antenna (on the radio, TV, or other device).
— Increase the separation between the equipment and receiver.
— Connect the equipment into an outlet on a circuit different from that to which the receiver is connected.
— Consult the dealer of the device for help.
Any changes or modifications made to the device that are not expressly approved by Respironics may void the user's authority to operate the equipment.
The Term “IC:” before the certification/registration number only signifies that this device is in compliance of IC’s radio device certification based on technical assessment through a designated certifying body. The term “IC:” before the certification/registration number does not imply that Industry Canada approved the equipment.
2.11 Check mask fit
The optional Check Mask Fit feature can be enabled or disabled by your home care provider. This feature allows you to check the fit of your mask prior to starting therapy. This is done by measuring the amount of leak. Put on your mask assembly. Refer to your mask instructions if needed. Navigate to the Check Mask Fit screen under My Setup, and press the control dial to start the check.
The device will deliver a test pressure while the screen counts down 40 seconds. A green bar indicates good fit, while a red bar indicates improvement is needed. After the test, normal therapy will start and the screen will either display a green check mark or a red X. The green check mark indicates that the leak found allows for optimal performance of the device. The red X indicates that the leak may affect device performance, however, the device will remain functional and deliver therapy.
Note
If you choose to try to improve your mask fit, you can stop therapy, adjust the fit of your mask, and rerun the Check Mask Fit. Refer to the instructions that came with your mask and headgear for the proper fitting procedure.
DreamStation BiPAP autoSV User Manual
2.12 Sleep progress
Your device provides summary information about your therapy use each time the therapy is turned off. The screen displays your Three Night Summary. It shows your nightly usage for the last 3 sleep sessions (measured in 24 hour periods, ending at noon each day). The most recent session is displayed in the right hand bar, labeled with the number of hours slept. A green bar indicates that you slept more than 4 hours, and a yellow bar indicates less than 4 hours of use.

2.13 Altitude compensation
This device automatically compensates for altitude up to 7,500 feet. No manual adjustment is necessary.
3. Alarms, alerts, and troubleshooting
This chapter describes the alarms and alerts and what you should do if an alarm or alert occurs. Reference the Troubleshooting section if you experience any problems while using the device.
3.1 Device alarms
There are two types of alarms:
- High priority – Require immediate response by the operator.
- Medium priority - Require prompt response by the operator.
When an alarm condition occurs:
- The audio pause icon appears and the control dial LED indicator lights.
• The audible alarm sounds. - A message appears on the screen describing the type of alarm.
3.2 Device alerts
Alerts are informational and confirmation messages that notify you of conditions that require attention but are not alarm conditions. Most alerts do not appear while therapy is being delivered. The different types of alerts are:
- Status - Message appears on the screen.
- Notification - Message appears on the screen and Therapy button LED flashes.
- Alert - Message appears on the screen, Therapy button LED flashes, and audible sound beeps once while alert is displayed.
3.3 Alarm and alert LED indicators

| Red flashing alarm LED | When a high priority alarm is detected, the audio pause icon (1) and control dial LED (2) flash red. |
| Yellow flashing alarm LED | When a medium priority alarm is detected, the audio pause icon (1) and control dial LED (2) flash yellow. |
| Flashing Therapy button LED | When an alert or notification message appears on the screen, the Therapy button LED flashes. If the alert occurs while therapy is being delivered, the alert or notification will appear on the screen, but the LED will not flash. |
3.4 Alarm and alert audible indicators
An audible indicator sounds when any of the following occurs:
• A device inoperative condition occurs
• The blower is on and a power failure occurs
• An alarm condition occurs
• An alert message appears on the screen
| Alarm/alert type Audible indicator | |
| Device Inoperative When a device inoperative alarm occurs, a continuous audible indicator sounds. | |
| Power failure When a power failure occurs, a series of beeps sounds in a 1 beep pattern,repeating one second on, then one second off.··· | |
| High priority When a high priority alarm is active, a series of beeps sounds in the followingpattern, which is repeated twice: 3 beeps, a pause, and then 2 more beeps. Thisindicator continues until the cause of the alarm is corrected or the audible alarm issilenced.······ | |
| Medium priority When a medium priority alarm is active, a series of beeps sounds in a 3-beeppattern. This pattern repeats until the cause of the alarm is corrected or theaudible alarm is silenced.··· | |
| Alerts When an alert appears on screen, a brief, 1-beep audible indicator sounds. |
3.5 Silencing an alarm
You can temporarily silence an alarm by pressing the control dial. The alarm is silenced for 60 seconds and then sounds again if the cause of the alarm has not been corrected. If another alarm occurs while the silence period is active, the audible alarm portion of the new alarm will not sound until the silence period expires. When the silence period expires, the alarm's audible alarm is reactivated if the alarm condition has not be corrected.
3.6 Alarm message screens
When an alarm message is activated, an alarm screen is displayed, showing the text or icon specific to the most recent, highest priority alarm.
Pressing the control dial once will silence the audible alarm. Press the control dial again to remove the alarm screen from the display. Resetting the alarm allows you to return to the previous screen. If multiple alarms occur during the same period of time, the alarm screen will display the higher priority alarm (higher priority alarms take precedence over lower priority alarms).
3.7 What to do when an alarm occurs
Complete the following steps when an alarm occurs:
- Observe the patient and ensure that adequate ventilation and oxygenation (if appropriate) are available.
- Listen to the audible alarm and look at the alarm indicators and whether the LED is solid or flashing.
- Look at the display to check the alarm message that appears on-screen and whether it is red or yellow.
- Press the control dial to temporarily silence the audible alarm. Or, press the control dial twice to acknowledge and remove the alarm from the screen. In case of loss of power, use the control dial to both silence and terminate the alarm.
- Look up the alarm in the alarm descriptions in this chapter to determine the source of the alarm and the appropriate action.
3.8 Alarm summary table
The following table summarizes the alarms. See Alarm and alert LED indicators and Alarm and alert audible indicators earlier in this chapter for LED and audible indicators for each alarm type.
| Alarm Priority Device action | User action | ||
| Physiological alarms | |||
 | High Operates | This alarm occurs | when the calculated minute ventilation is less than or equal to the alarm setting. Press the control dial to silence the alarm. Press the control dial again to acknowledge and remove the alarm from the screen. Report the alarm to your home care service provider. Continue using your device. |
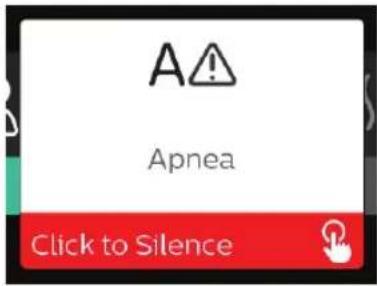 | High Operates | This alarm occurs | when the patient has not triggered a breath within the time specified in the apnea alarm setting. The device continues to operate. The alarm will automatically terminate when two consecutive patient breaths are detected that meet the apnea alarm time setting. Press the control dial to silence the alarm. Press the control dial again to acknowledge and remove the alarm from the screen. Report the alarm to your home care service provider. Continue using your device. |
 | High Operates | This alarm occurs | when the patient circuit is disconnected or has a large leak. Press the control dial to silence the alarm. Press the control dial again to acknowledge and remove the alarm from the screen. Reconnect the patient circuit or fix the leak. If the alarm continues, contact your home care service provider. |
Alarm Priority Device action User action
Technical alarms
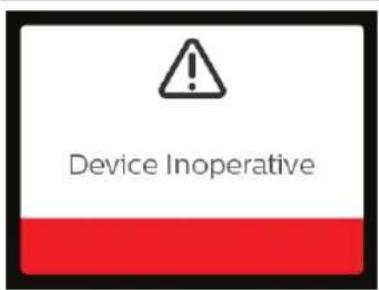
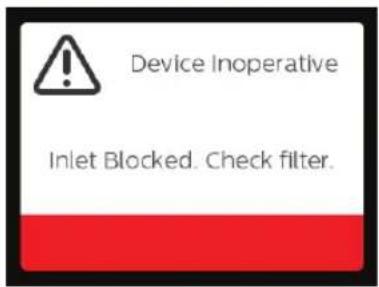

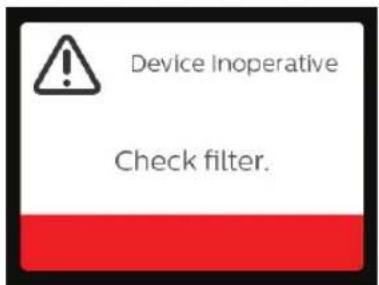
Alarm Priority Device action User action
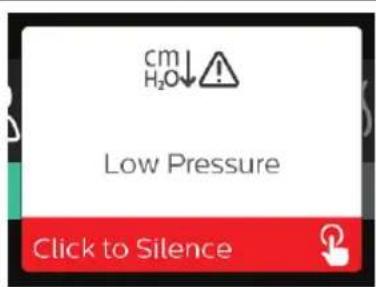
High Operates This could be caused by an

High Operates;
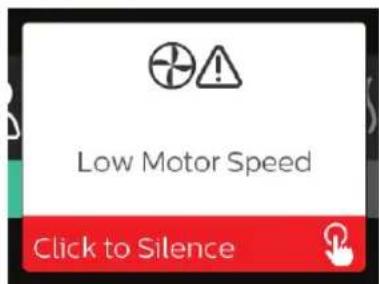
High Operates This may be caused by a
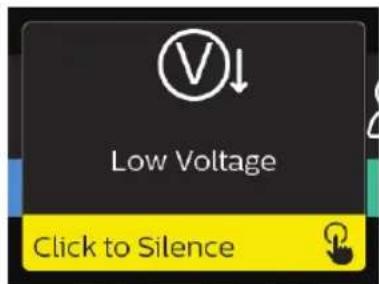
Medium Operates Press the control dial again to
excessive leak, blockage, or a device malfunction. Press the control dial to silence the alarm. Press the control dial again to acknowledge and remove the alarm from the screen. Remove your mask. Check for the following: dirty inlet filters, blocked air intake, excessive leak in the patient circuit. If the alarm continues, contact your home care service provider.
This may be caused by a malfunctioning device. Press the control dial to silence the alarm. Press the control dial again to acknowledge and remove the alarm from the screen. Remove your mask, and remove power from the device. Restore power. If the alarm continues, contact your home care service provider for service.
malfunctioning device. Press the control dial to silence the alarm. Press the control dial again to acknowledge and remove the alarm from the screen. Remove your mask, and remove power from the device. Restore power. If the alarm continues, contact your home care service provider for service.
acknowledge and remove the alarm from the screen. Remove your mask. Remove power from the device. Confirm a compatible Philips Respironics power supply is attached. Switch to compatible power supply, if needed. If battery is being used, ensure battery is adequately charged.
3.9 Alert summary table
The following table summarizes the alerts. See Alarm and alert LED indicators and Alarm and alert audible indicators for LED and audible indicators for each alert type. The screen below is an example of an alert screen. The icons shown in the table below appear on the top of each alert screen.

| Alert Icon Priority | Description | User action | ||
| Data Activity: Do not remove SD card. |  | Status SD card | read/write underway. | No action needed. |
| Change Accepted |  | Status Confirms | acceptance of prescription change or device upgrade. | No action needed. |
| Oximetry: Good Connection (icon only) |  | Status Displays | on the therapy screen when the blower is on and 3 seconds of good connection is detected. Appears at the beginning of therapy. This screen will not display again if the oximetry sensor is removed and reapplied unless therapy is stopped and restarted. | No action needed. |
| Pair?: 123456 Yes/No |  | Status Prompts | to accept or decline pairing to a Bluetooth compatible device. This device can be identified by the digits displayed. | Rotate the control dial to accept pairing (Yes), or decline (No), then press the control dial to confirm selection. |
| Pair?Yes/No |  | Status Prompts to accept or decline pairing to aBluetooth compatible device. | Rotate the control dial to accept pairing (Yes), or decline (No), then press the control dial to confirm selection. Selecting Yes opens theBluetooth passkey screen. | |
| Flow Sensor Error: Limited Therapy |  | Notification Flow sensor malfunction. Press | the control dial to acknowledge and clear the message. Disconnect the device from power. Immediately remove patient from ventilator and connect them to alternate source of ventilation. Contact your home care service provider for service. | |
| SD Card Removed. No |  | or Alert | Indicates SD card has been removed from therapy device and not reinserted before the start of the current therapy session. | Reinsert SD card, or press the control dial to clear alert. |
| Oximetry: Good Study (icon only) |  | Notification After exiting therapy, the therapy device will display the Good Oximetry pop-up screen if the oximetry sensor maintained a good connection for at least 4 consecutive hours within a 24 hour window with breaks in therapy no greater than 1 hour each. | Press the control dial to acknowledge and clear the message. | |
| SD Card Error: Remove and Reinsert |  | Notification SD card error detected. Device cannot read the SD card.A problem may exist with the SD card or it was ejected during a writing activity, or it was inserted incorrectly. | Remove SD card and reinsert. If alert continues to occur, replace with another card or contact your home care service provider. | |
SD Card Full. Notification  | is full. Remove | SD card and contact | your home care service provider for a new SD card. | |
| Patient Message |  | Notification M | Message from your provider. | Press the control dial to acknowledge and clear the message. |
| Change Rejected |  | Alert A prescr | ption or settings change was rejected. Change missing or incorrect. | Contact your home care service provider. |
| Humidification Error. Contact support if the problem persists. |  | Status Humidifier error (only when humidifier is present) Humidifier heater plate error or humidifier not properly connected to therapy device. | Turn off device and disconnect from power. Detach the humidifier, visually check that electrical contacts are clear, then reconnect humidifier and power cord. If alert continues, contact your home care service provider. | |
| Heated Tube Error. Contact support if the problem persists. |  | Status Heated tube error (only when heated tube is present). Heated tube may be overheated or damaged. | Turn off device. Detach heated tube from humidifier, make sure that tube is not covered or obstructed, and then reattach to humidifier. If alert continues, contact your home care service provider. | |
| The attached power supply does not support humidification. |  | Alert Indicates that the attached power supply is not capable of supporting humidification or heated tube. | Contact your home care service provider to obtain a compatible Philips Respironics power supply. Or, operate therapy device without humidifier. | |
| Check Power Notificati |  | ates an incompatible power supply is attached. Incompatible power supply, or power cord is not fully inserted into device's power inlet. | Confirm power cord is fully inserted into device's power inlet. Confirm a compatible Philips Respironics power supply is attached. Switch to compatible power supply if needed. | |
| Busy Status Displayed | e | device | is temporarily inaccessible due to data communication. | No action needed. |
| Three Night Summary | n/a | Status Displays last 3 nights of hourly use. | Press control dial to acknowledge and clear the screen. Otherwise message times out after 30 seconds. | |
| Check Mask Fit | n/a | Status Displayed when Check Mask Fit function is enabled from Patient Menu. | This alert can be cleared by pressing the control dial. Otherwise, it will time out after 60 seconds. | |
| Loading Language and Rebooting |  | Status Displayed when a new language is selected from the menu. | No action needed. Times out when complete. | |
3.10 Troubleshooting
Your device is equipped with a self-diagnostic tool called Performance Check. This tool can evaluate your device for certain errors. It also allows you to share key device settings with your Provider. Use Performance Check when directed by your provider.
The table below lists some of the problems you may experience with your device and possible solutions to those problems.
| Problem Why it happened What to do | ||
| Nothing happens when you apply power to the device. The backlights on the buttons do not light. | There's no power at the outlet or the device is unplugged. | If you are using AC power, check the outlet and verify that the device is properly plugged in. Make sure there is power available at the outlet. Make sure the AC power cord is connected correctly to the power supply and the power supply cord is securely connected to the device's power inlet. If the problem continues to occur, contact your home care provider. Return both the device and power supply to your provider, so they can determine if the problem is with the device or power supply.If you are using DC power, make sure your DC power cord and battery adaptor cable connections are secure. Check your battery. It may need recharged or replaced. If the problem persists, check the DC cord's fuse following the instructions supplied with your DC cord. The fuse may need to be replaced.If the problem still occurs, contact your home care service provider. |
| The airflow does not turn on. | There may be a problem with the blower. | Make sure the device is powered correctly. Make sure the Home screen appears on the user interface. Press the Therapy button on top of the device to start airflow. If the airflow does not turn on, there may be a problem with your device. Contact your home care service provider for assistance. |
| The device's display is erratic. | The device has been dropped or mishandled, or the device is in an area with high Electromagnetic Interference (EMI) emissions. | Unplug the device. Reapply power to the device. If the problem continues, relocate the device to an area with lower EMI emissions (away from electronic equipment such as cellular phones, cordless phones, computers, TVs, electronic games, hair dryers, etc.). If the problem still occurs, contact your home care service provider for assistance. |
| The Ramp feature does not work when you press the Ramp button. | Your home care provider did not prescribe Ramp for you, or your therapy pressure is already set to the minimum setting | If Ramp has not been prescribed for you, discuss this feature with your home care provider to see if they will change your prescription.If your provider has enabled Ramp, but the feature still does not work, check the current pressure setting on the Therapy screen. If the therapy pressure is set to the minimum setting (4.0 cm H2O ), or the Ramp starting pressure is the same as the therapy pressure, the Ramp feature will not work. Make sure that the ramp time setting is at least 5 minutes. |
| The airflow is much warmer than usual. | The air filters may be dirty. The device may be operating in direct sunlight or near a heater. | Clean or replace the air filters.The temperature of the air may vary somewhat based on your room temperature. Make sure that the device is properly ventilated. Keep the device away from bedding or curtains that could block the flow of air around the device. Make sure the device is away from direct sunlight and heating equipment.If using the humidifier with the device, check the humidifier settings and lower the setting, if possible.Make sure there is water in the humidifier water tank.Refer to the humidifier instructions to make sure the humidifier is working properly.If the problem continues, contact your home care service provider. |
| The airflow pressure feels too high or too low. | The Tubing type setting may be incorrect. | Make sure the Tubing type setting (22 or 15) matches the tubing that you are using (Philips Respironics 22 or 15 mm tubing). If the Tubing type setting has been changed, contact your home care service provider.If you are using the heated tubing, this setting will be 15H and cannot be changed. |
| Tube Temperature is turned on but heated tubing is not warm. | Incorrect power supply is being used. | Make sure the 80W power supply is being used or a compatible battery or DC cable is being used. |
| I'm having difficulty adjusting the heated humidifier setting or the heated tube temperature setting. | The blower is not turned on, or the humidifier or heated tube is not fully connected. | The humidifier setting and tube temperature settings can only be adjusted from the Therapy ON display screen. Confirm that the blower is turned on, and that the settings are visible on the right side of the screen, then adjust to desired comfort. If the blower is on but the humidifier settings are not displayed on the Therapy ON screen, then unplug the device. Confirm that the humidifier and/or heated tube electrical contacts are not obstructed or damaged. Then reconnect the humidifier and/or heated tube, and reconnect the device's power supply. Turn the blower on; if the settings are still not visible, contact your provider for assistance. |
| The water in the water chamber runs out before morning. | Water chamber was not full at start of session. Mask leak is excessively high. The ambient conditions are very dry/cool. | Under most conditions, a full water chamber should last for a typical sleep session. However, many factors impact water consumption, including: the ambient temperature and humidity in your bedroom, your humidifier or heated tube settings, the level of mask leak, and the duration of your sleep session. First, make sure that the water chamber is filled to the maximum fill line at the start of your sleep session. Check that your mask is fitted properly, and adjust as needed to reduce mask leak to normal levels. You may use the Check Mask Fit function to evaluate your mask fit. Also, confirm that the device, humidifier, humidifier seals, and tube are connected properly and not leaking. You may also choose to lower your humidifier and/or heated tube settings or change the humidification mode from Fixed to Adaptive humidification mode to increase the time that your humidifier water will last. |
| I hear a leak or whistling sound coming from my therapy device or humidifier (not related to mask leak). | The therapy device air inlet may be obstructed. The humidifier or tube is not fully connected. The humidifier seals are not fully seated or are missing. | Check therapy device air inlet is not obstructed, and filters are clean and properly inserted. Confirm that the device, humidifier, and tube are connected properly and not leaking. Confirm that the humidifier lid seal and dry box seal are present and properly seated; if needed, gently press around the perimeter of the seals to reseat them. |
| I accidentally spilled water into my humidifier basin. | The water chamber has been filled beyond the maximum fill line. | A small amount of water spilled in the basin of the humidifier will not harm your device. A small spill in the humidifier will evaporate under normal humidifier use. However, too much water in the humidifier basin could spill over the humidifier lid hinge and might damage your furniture.Disconnect power from the device. Remove the water chamber, pour out any excess water until the water level is at or below the maximum fill line and set the chamber aside. Separate the humidifier from the therapy device, and pour out the spilled water.Once the heater plate has cooled, wipe the inside of the humidifier with a paper towel or soft cloth.If needed, dry the underside of the humidifier and confirm that your table top is dry. Reconnect the humidifier and power supply, and reinstall the water chamber. |
4. Accessories
There are several optional accessories available for your DreamStation BiPAP autoSV device. Contact your home care service provider for additional information on the available accessories. When using optional accessories, always follow the instructions enclosed with the accessories.
For more information on caring for accessories, refer to the instructions for use that came with the accessory. Review all applicable instructions for additional warnings and cautions.
4.1 Humidifier
You can use the heated humidifier and the heated tube with your device. They are available from your home care provider. A humidifier may reduce nasal dryness and irritation by adding moisture to the airflow.
Warning
For safe operation, the humidifier must always be positioned below the breathing circuit connection at the mask. The humidifier must be level for proper operation.
Note
Refer to the humidifier's instructions for complete setup information.
4.2 SD card
The DreamStation BiPAP autoSV device comes with an SD card inserted in the SD card slot on the side of the device. The SD card records information for the home care provider. Your home care provider may ask you to periodically remove the SD card and send it to them for evaluation.
4.3 Cellular modem
The DreamStation Cellular Modem is designed for use with select Philips Respironics therapy devices. Once installed, it automatically transfers data between the therapy device and Philips Respironics proprietary compliance software. The cellular modem is able to receive oximetry data and transfer it to the therapy device.
4.4 Wi-Fi accessory
Wi-Fi accessory is designed for use with select Philips Respironics therapy devices. Once installed and connected to a local Wi-Fi network it can transfer data between the therapy device and Philips Respironics proprietary compliance software. If available on your model, the accessory is able to receive oximetry data and transfer it to the therapy device.
DreamStation BiPAP autoSV User Manual
4.5 Link module
The Link Module is able to receive oximetry data and transfer it to the therapy device for home use or in a laboratory setting. For use in a laboratory setting, the Link Module also includes an RS-232 (or "DB9") port to allow remote control of the DreamStation BiPAP autoSV device by a personal computer.
Notes
- Please consult the instructions that accompany the Link Module for installation and removal.
• There are no SpO 2 alarms available.
To clean the module, remove the module from the therapy device. Wipe the outside of the device with a cloth slightly dampened with water and a mild detergent. Let the device dry completely before reinstalling into the therapy device.
Dispose of the module following the same disposal instructions for your therapy device.
Warnings
- If you notice any unexplained changes in the performance of this device, if it has been dropped or mishandled, if water is spilled into the enclosure, or if the enclosure is broken, discontinue use. Contact your home care provider.
- Repairs and adjustments must be performed by Philips Respironics-authorized service personnel only. Unauthorized service could cause injury, invalidate the warranty, or result in costly damage.
- Do not use any accessories, detachable parts, and materials not recommended by Philips Respironics. Incompatible parts or accessories can result in degraded performance.
4.6 Oximeter
The DreamStation oximetry system, when part of the DreamStation BiPAP autoSV device, measures and displays % SpO2 and heart rate in adult patients.
Warning
Use only Philips Respironics recommended SpO2 cables and pulse oximeter sensors. Use of incompatible sensors can result in inaccurate pulse oximeter performance.
4.7 Philips Respironics proprietary compliance software
You can use the Philips Respironics proprietary compliance software to download prescription data from the SD card to a computer. Encore can be used by clinicians to receive and report stored data from the SD card.
4.8 Roll stand
There is a roll stand available for use with your BiPAP autoSV device. Please see the instructions included with your roll stand for more information.
4.9 Supplemental oxygen
Oxygen may be added anywhere in the patient circuit provided that a pressure valve is used. Please note the warnings in Chapter 1 when using oxygen with the device.
4.10 DC power cord
A Philips Respironics DC power cord can be used to operate this device in a stationary recreational vehicle, boat, or motor home. In addition, a Philips Respironics DC battery adapter cable, when used with a DC power cord, allows the device to be operated from a 12 VDC free-standing battery.
Cautions
- Always ensure that the DC power cord securely fits into your therapy device prior to use. Contact your home care provider or Philips Respironics to determine if you have the appropriate DC cord for your specific therapy device.
- When DC power is obtained from a vehicle battery, the device should not be used while the vehicle's engine is running. Damage to the device may occur.
- Only use a Philips Respironics DC Power Cord and Battery Adapter Cable. Use of any other system may cause damage to the device.
Refer to the instructions supplied with the DC power cord and adapter cable for information on how to operate the device using DC power.
4.11 Carrying case and airline travel
The device is suitable for use on airlines when it is operating from an AC or DC power source.
Note
The device is not suitable for airline use with any modems or humidifiers installed.
For your convenience at security stations, there is a note on the bottom of the device stating that it is medical equipment. It may be helpful to bring this manual along with you to help security personnel understand the device.
When traveling, the carrying case is for carry-on luggage only. The carrying case will not protect the system if it is put through checked baggage. If traveling with the optional humidifier, do not travel with water in the water tank.
If you are traveling to a country with a line voltage different than the one you are currently using, a different power cord or an international plug adaptor may be required to make your power cord compatible with the power outlets of the country to which you are traveling. Contact your home care or service provider for additional information.
4.12 In-use bag (wheelchair bag)
An in-use bag is available for use with this ventilator. The bag is not for use with the humidifier. The bag is designed to attach the ventilator to a wheelchair. See the instructions included with the in-use bag for more information.
Warning
Do not use oxygen while the ventilator is contained in the in-use bag or during other mobile situations. The in-use bag is not intended for use while Low Flow Oxygen is in use.
5. Cleaning and disinfection
This chapter details how to clean and disinfect the BiPAP autoSV device, filters, and tubing in both the home and hospital or institutional environment.
5.1 Cleaning and disinfection overview
Cautions
- Only the cleaning and disinfection procedures listed in this manual are recommended by Philips Respironics. Use of other cleaning and disinfection procedures, not specified by Philips Respironics, cannot be guaranteed to maintain the performance or durability of the product.
- Follow all instructions from the manufacturer of the disinfectant product. Any deviation from these instructions, the manufacturer's instructions, or agents not listed in these instructions may impact the performance of the product. Review all applicable instructions for additional warnings and cautions.
| Home Cleaning | Home Disinfecting | Hospital, Intitutional Cleaning | Hospital, Intitutional Disinfecting | |
| Device Exterior | Mild liquid dishwashing detergent and waterWeekly | N/A Mild liquid | dishwashing detergent and waterWeekly and between patients | Discide Ultra TowelettesCloth with chlorine bleach (6% sodium hypochlorite), 1 to 9 part reduction in potable waterWeekly and between patients |
| Humidifier Exterior | Mild liquid dishwashing detergent and waterWeekly | N/A Mild liquid | dishwashing detergent and waterWeekly and between patients | Discide Ultra TowelettesCloth with chlorine bleach (6% sodium hypochlorite), 1 to 9 part reduction in potable waterWeekly and between patients |
| Non-Heated Tubing | Mild liquid dishwashing detergent and waterWeekly | N/A Mild liquid | dishwashing detergent and waterWeekly and replace between patients | N/A |
| Reusable Blue Pollen Filter | Rinse with warm tap water monthly and replace every six monthsNote: If soil is visible during inspection, rinse more frequently. | N/A Rinse with warm tap water weekly and replace every six months and between patientsNote: If soil is visible during inspection, rinse more frequently. | warm tap water weekly and replace every six months and between patientsNote: If soil is visible during inspection, rinse more frequently. | N/A |
| Ultra-Fine Filter | Replace every 30 days | N/A Replace every 30 days and between patients | N/A |
| Bacteria Filter | IMPORTANT: Use an in-line bacteria filter in the clinical environment. The bacteria filter should be disposed of weekly and between patients. | ||
Note: For more information on caring for accessories, refer to the instructions for use that came with the accessory. Review all applicable instructions for additional warnings and cautions.
5.2 Home and hospital/institution cleaning: device and humidifier exterior
Warnings
- To avoid electrical shock, always unplug the power cord from the wall outlet before cleaning the device.
- DO NOT immerse the device in any fluids.
The device's exterior surface should be cleaned weekly or more often if necessary. In the hospital or institutional environment, clean the device's exterior surface weekly and between patients.
If using the device and humidifier on multiple users, the device and humidifier exterior should be cleaned between patient use and as needed by performing the following steps:
- Turn the device off and disconnect from the power source. Detach all accessories and connectors.
- Remove the reusable blue pollen filter and disposable light-blue ultra-fine filter (if using). Refer to Home and Hospital: Rinsing and replacing filters for more information.
Warning
If you are using the device on multiple users, discard and replace the bacteria filter each time the device is used on a different person.
- Use a lint-free cloth dampened with water and a mild liquid dish washing detergent solution to clean the exterior of the enclosure. Use 1 teaspoon (5 milliliters) of liquid dish washing detergent per gallon (3.8 liters) of water.
- Pay close attention to all corners and crevices of the device exterior surfaces. Be sure all visible soil is removed.
- Wipe with a lint-free cloth dampened (not dripping) with potable water for at least one minute, turning the cloth frequently, to remove all detergent residue.
- Let the device air dry completely before plugging in the power cord.
- Inspect the device and all circuit parts for damage after cleaning. If any parts are damaged, contact Philips Respironics Customer Service. Replace any damaged parts.
Caution
Allow the device and humidifier to dry completely before reconnecting to the power source.
5.3 Hospital and institution disinfection: device and humidifier exterior
Disinfect the device exterior surface weekly or more often if necessary and between patients.
Note
Before disinfecting the device and humidifier, remove the reusable blue pollen filter and disposable ultra-fine filter (if using). Refer to Cleaning and replacing the filters for more information.
If using the device and humidifier on multiple users, the device and humidifier exterior should be disinfected between patient use as follows:
- Clean the device and humidifier as indicated in Home and hospital/institution cleaning: device and humidifier exterior.
Note
Ensure the device and humidifier is completely dry after cleaning before beginning the disinfection process.
- Use one of the following methods to disinfect all exterior surfaces of the device and humidifier, including the filter and accessory access doors.
DisCide Ultra Towelettes
— Use towelettes to initially wipe the exterior of the enclosure to clear visible soil from the surfaces.
— Use the towelettes to thoroughly wet the exterior surfaces.
Chlorine Bleach (containing 6% sodium hypochlorite), 1 to 9 part reduction with water.
— Use a lint-free cloth to initially wipe the bleach solution onto the exterior of the enclosure to clear visible soil from the surfaces.
— Use a lint-free cloth to thoroughly wet the exterior surfaces with the bleach solution.
-
Pay close attention to all corners and crevices of the device and humidifier exterior surfaces.
-
Open the humidifier lid and disinfect the latch area using one of the disinfectants above.
-
Keep wet for 5 minutes.
-
Wipe with a lint-free cloth dampened (not dripping) with potable water for at least one minute, turning the cloth frequently, to remove all detergent residue.
-
Allow the device and humidifier to air dry completely before plugging in the power cord.
-
Inspect the device and humidifier, and all circuit parts for damage after disinfection. If any parts are damaged, contact Philips Respironics Customer Service. Replace any damaged parts.
5.4 Home and hospital cleaning: non-heated flexible tubing
Clean the non-heated flexible tubing before first use and weekly. If using the device and humidifier on multiple users, dispose of the tubing between patients.
- Disconnect the flexible tubing from the device.
- Gently wash the 15 or 22 mm flexible tubing by completely immersing in a solution of warm water and a mild liquid dish washing detergent. Use 1 teaspoon (5 ml) of liquid dish washing detergent per gallon of warm water for 3 minutes.
- During immersion, gently move the tubing back and forth to loosen and adequately remove adhering substances from the tubing and connectors.
Note
Be sure to clean the entire inner surface of the tube by ensuring it is fully immersed in the detergent solution during gentle agitation by hand.
-
Rinse thoroughly with potable water for at least 1 minute to remove all soap residue from the tubing and connectors.
-
Allow to air dry completely out of direct sunlight.
-
Inspect the tubing for damage or wear (cracking, crazing, tears, punctures, etc.). Discard and replace if necessary.
Note
Refer to the DreamStation humidifier manual for the instructions on how to clean the heated tube.
5.5 Home and hospital: rinsing and replacing filters
Reusable Blue Pollen Filter
Under normal home usage, rinse the reusable blue pollen filter monthly. Replace it with a new one every six months. In the hospital or institutional environment, rinse the reusable blue pollen filter weekly and replace it with a new one every six months and between patients.
Caution
Dirty inlet filters may cause high operating temperatures that may affect device performance. Regularly examine the inlet filters as needed for integrity and cleanliness.
Follow these steps to rinse the reusable blue pollen filter:
- Turn the device off and disconnect the device from the power source.
- Remove the filter(s) from the device (refer to the Installing and replacing the air filters section of this manual). Examine the filters for cleanliness and integrity.
- To rinse off the reusable blue pollen filter, first detach the light-blue ultra-fine filter (if applicable), and set aside or dispose of as needed.
- Take the reusable filter to the sink, turn it upside down, and run warm tap water through the white filter media to rinse away any debris. Next, lightly shake the filter to remove as much water as possible.
- Allow the filter to air dry completely before reinstalling it.
- If the reusable blue pollen filter is torn or otherwise damaged, replace it.
Note
Only Philips Respironics-supplied filters should be used as replacement filters.
- If the light-blue ultra-fine filter is dirty or torn, replace it.
- Reinstall the filters. Refer to the Installing and replacing the air filters section of this manual.
Caution
Never install a wet filter into the device. Allow sufficient drying time for the filter.
Light-blue Ultra-fine Filter
In the home the light-blue ultra-fine filter is disposable. Replace it with a new one every 30 days or sooner if it appears dirty. DO NOT rinse the ultra-fine filter. In the hospital or institutional environment, the ultra-fine filter should be replaced with a new one every 30 days or sooner and should be replaced between patients.
DreamStation BiPAP autoSV User Manual
5.6 Service
The device does not require routine servicing or preventative maintenance other than inspection for normal wear or damage and device cleaning.
Warning
If you notice any unexplained changes in the performance of this device, if it is making unusual or harsh sounds, if it has been dropped or mishandled, if water is spilled into the enclosure, or if the enclosure is broken, disconnect the power cord and discontinue use. Contact your home care provider.
6. Specifications, disposal, and EMC
6.1 Specifications
6.1.1 Environmental
| Operating Temperature 5° to 35° C (41° to 95° F) |
| Storage Temperature -20° to 60° C (-4° to 140° F) |
| Relative Humidity (operating & storage) 15 to 95% (non-condensing) |
| Atmospheric Pressure: 101 to 77 kPa (0 - 2286 m / 0 - 7500 ft) |
6.1.2 Physical
| Dimensions 15.7 x 19.3 x 8.4 cm (6.2" L x 7.6" W x 3.3" H) |
| Weight (Device with power supply) Approximately 1.28 kg (2.83 lbs) |
6.1.3 Service life
The expected service life of the DreamStation therapy device and Link Module is 5 years.
6.1.4 Standards compliance
This device is designed to conform to the following standards:
- IEC 60601-1 General Requirements for Basic Safety and Essential Performance of Medical Electrical Equipment
• EN 60601-1-2 Electromagnetic Compatibility - IEC 60601-1-8: Medical Electrical Equipment – Part 1-8: General Requirements for Basic Safety and Essential Performance – Collateral standard: General Requirements, tests and guidance for alarm systems in medical electrical equipment and medical electrical systems
- IEC 60601-1-11: Medical Electrical Equipment – Part 1-11: General Requirements for Basic Safety and Essential Performance – Collateral standard: Requirements for medical electrical equipment and medical electrical systems used in the home healthcare environment
• ISO 80601-2-74 Medical Electrical Equipment — Part 2-74: Particular Requirements for Basic Safety and Essential Performance of respiratory humidifying equipment
• ISO 80601-2-79 Medical Electrical Equipment — Part 2-79: Particular Requirements for Basic Safety and Essential Performance of ventilatory support equipment for ventilatory impairment - RTCA/DO-160G section 21, category M; Emission of Radio Frequency Energy
6.1.5 IEC 60601-1 classification
| Type of Protection Against Electric Shock Class II Equipment | |
| Degree of Protection Against Electric Shock Type BF Applied Part | |
| Degree of Protection against Ingress of Water | Device: Drip Proof, IP22Link Module: Drip Proof, IP2280W power supply: Drip Proof, IP22 |
| Mode of Operation Continuous | |
6.1.6 Electrical
| AC Power Consumption (with 80W power supply) Note: Power supply is part of the medical electrical equipment. | 100 – 240 VAC, 50/60 Hz, 2.0-1.0 A |
| DC Power Consumption 12 VDC, 6.67 A | |
| Fuses There are no user-replaceable fuses. |
6.1.7 Radio specifications
| Operating Frequency Range 2402 - 2480 MHz | |
| Maximum Output Power 4.0 dBm | |
| Modulation GFSK, P/4 DQPSK, 8DQPSK | |
6.1.8 Intake port filters
| Pollen Filter 100% Polyester | |
| Ultra-fine Filter 88% Efficient @ 7-10 micron size | Blended Synthetic Fiber95% Efficient @ 0.5-0.7 micron size |
6.1.9 Sound
Alarm sound level range: 45 dB(A) to 85 dB(A)
6.1.10 Declared dual-number noise emissions values (in accordance with ISO 4871)
| The A-weighted sound pressure level Device: 25.8 dB(A) with and uncertainty of 2 dB(A).Device with Humidifier: 27.9 dB(A) with and uncertainty of 2 dB(A). |
| The A-weighted sound power level Device: 33.8 dB(A) with an uncertainty of 2 dB(A).Device with Humidifier: 35.9 dB(A) with an uncertainty of 2 dB(A). |
Note
Values determined according to noise test code given in ISO 80601-2-70:2015, using the basic standards ISO 3744 and ISO 4871.
6.1.11 Control accuracy
| Parameter Range Accuracy | ||
| IPAP 4 – 30 cmH | 2O ± 2.5 cmH | 2O^* |
| EPAP 4 – 25 cmH | 2O ± 2.5 cmH | 2O^* |
| CPAP 4 – 20 cmH | 2O ± 2.5 cmH | 2O^* |
| Breath rate 4 to 30 BPM | greater of ±1 BPM or ±10% of setting | |
| Inspiration time | 0.5 to 3 seconds | ± (10% of setting + 0.1 second) |
*Pressure measured at the patient connection port with or without the integrated heated humidifier (no patient flow).
6.1.12 Pressure accuracy
Pressure increments: 4.0 to 30.0 cmH2O (in 0.5 cmH2O increments)
6.1.13 Displayed parameter accuracy
| Parameter | Accuracy | Resolution | Range |
| Estimated Leak Rate | ± (5 + 15% of reading) LPM | 1 LPM | 0 to 200 LPM |
| Exhaled Tidal Volume | ± (25 + 15% of reading) mL | 1 mL | 0 to 2000 mL |
| Respiratory Rate | greater of ± 1 BPM or ± 10% of reading | 1 BPM | 0 to 60 BPM |
| Exhaled Minute Ventilation | ± (1 + 15% of reading) LPM | 1 LPM | 0 to 99 LPM |
DreamStation BiPAP autoSV User Manual
6.2 Disposal
Separate collection for electrical and electronic equipment per EC Directive 2012/19/EU. Dispose of this device in accordance with local regulations.
6.3 EMC information
Your unit has been designed to meet EMC standards throughout its Service Life without additional maintenance. There is always an opportunity to relocate your DreamStation Therapy Device within an environment that contains other devices with their own unknown EMC behavior. If you believe your unit is affected by locating it closer to another device, simply separate the devices to remove the condition.
Pressure and Flow Accuracy
The DreamStation Therapy Device is designed to perform within the pressure and flowrate accuracies specified in the user manual. If you suspect that the pressure and/or flow rate accuracy is affected by EMC interference remove power and relocate the device to another area. If performance continues to be affected discontinue use and contact your home care provider.
SpO2 and Pulse Rate Accuracy
The DreamStation Therapy Device is designed to capture the SpO 2 and Pulse Rate oximetry data within the accuracy specification described in the sensor manufacturer's instructions for use. When 4 hours of successful oximetry data have been achieved the device indicates this to the user by displaying "Oximetry: Good Study". If you suspect that your unit is affected by EMC interference remove power and relocate the device to another area. If performance continues to be affected discontinue use and contact your home care provider.
Warnings
- Use of this equipment adjacent to or stacked with other equipment should be avoided because it could result in improper operation. If such use is necessary, this equipment and the other equipment should be observed to verify that they are operating normally.
- To ensure that you receive safe, effective therapy, use only Philips Respironics accessories. The use of accessories, transducers, and cables other than those specified by Philips Respironics may result in increased emissions or decreased immunity of the device.
- Portable and Mobile RF Communications Equipment can affect Medical Electrical Equipment. See the EMC section of this manual for distances to observe between RF Generators and the ventilator to avoid interference.
- Do not use this device near active high frequency surgical equipment and the Radio Frequency shielded room of a Medical Electrical system for magnetic resonance imaging, where the intensity of electromagnetic disturbances is high.
Guidance and Manufacturer's Declaration - Electromagnetic Emissions –
This device is intended for use in the electromagnetic environment specified below. The user of this device should make sure it is used in such an environment.
| EMISSIONS TEST | COMPLIANCE | ELECTROMAGNETIC ENVIRONMENT - GUIDANCE |
| RF radiated emissionsCISPR 11 | Group 1Class B | The device uses RF energy only for its internal function. Therefore, its RF emissions are very low and are not likely to cause any interference in nearby electronic equipment. |
| RF conducted emissionsCISPR 11 | Group 1Class B | The device is suitable for use in all establishments, including domestic establishments and those directly connected to the public low-voltage power supply network. |
| Harmonic emissionsIEC 61000-3-2 | Class A | |
| Voltage fluctuations/Flicker emissionsIEC 61000-3-3 | Complies | |
| Emission of Radio Frequency EnergyRTCA/DO-160G Section 21 | Category M | This device is suitable for use onboard commercial airplanes inside passenger cabin. |
Guidance and Manufacturer's Declaration - Electromagnetic Immunity –
This device is intended for use in the electromagnetic environment specified below. The user of this device should make sure it is used in such an environment.
| IMMUNITY TEST | IEC 60601 TEST LEVEL | COMPLIANCE LEVEL | ELECTROMAGNETIC ENVIRONMENT - GUIDANCE |
| Electrostatic Discharge (ESD)IEC 61000-4-2 | ±8 kV contact discharges ±2 kV, ±4 kV, ±8 kV, & ±15 kV air discharges | ±8 kV contact discharges ±2 kV, ±4 kV, ±8 kV, & ±15 kV air discharges | Floors should be wood, concrete or ceramic tile. If floors are covered with synthetic material, the relative humidity should be at least 35%. |
| Electrical fast Transient/burstIEC 61000-4-4 | ±2 kV for power supply lines; 100 kHz repetition rate | ±2 kV for power supply lines; 100 kHz repetition rate | Mains power quality should be that of a typical home or hospital environment. |
| ±1 kV for input-output lines; 100 kHz repetition rate | ±1 kV for input-output lines; 100 kHz repetition rate | ||
| SurgeIEC 61000-4-5 | ±1 kV differential mode ±1 kV | V differential mode Mains power quality should be that of a typical home or hospital environment. | |
| ±2 kV common mode ±2 kV | for common mode | ||
| Voltage dips, short interruptions and voltage variations on power supply input linesIEC 61000-4-11 | <5% UT(>95% dip in UT) for 0.5 cycle at 45 degree increments<5% UT(>95% dip in UT) for 1 cycle70% UT(30% dip in UT) for 0.5 seconds<5% UT(>95% dip in UT) for 5 seconds | <5% UT(>95% dip in UT) for 0.5 cycle at 45 degree increments<5% UT(>95% dip in UT) for 1 cycle70% UT(30% dip in UT) for 0.5 seconds<5% UT(>95% dip in UT) for 5 seconds | Mains power quality should be that of a typical home or hospital environment.If the user of the device requires continued operation during power mains interruptions, it is recommended that the device be powered from an uninterruptible power supply or a battery. |
| Power frequency (50/60 Hz) magnetic fieldIEC 61000-4-8 | 30 A/m 30 A/m Power frequency magnetic fields should be at levels characteristic of a typical location in a typical hospital or home environment. | ||
| Immunity to RFID ReadersAIM 7351731 | RFID Reader frequencies as specified in AIM 7351731:134.2 kHz at 65 A/m13.56 MHz at 12 A/m | RFID Reader frequencies as specified in AIM 7351731:134.2 kHz at 65 A/m13.56 MHz at 12 A/m | Magnetic fields should be at levels characteristic of a typical location in a typical hospital or home environment. |
NOTE: UT is the a.c. mains voltage prior to application of the test level.
Guidance and Manufacturer's Declaration - Electromagnetic Immunity –
This device is intended for use in the electromagnetic environment specified below. The user of this device should make sure it is used in such an environment.
| IMMUNITY TEST | IEC 60601 TEST LEVEL | COMPLIANCE LEVEL | ELECTROMAGNETIC ENVIRONMENT - GUIDANCE |
| Conducted RF IEC 61000-4-6 | 3 Vrms150 kHz to 80 MHz6 VrmsAmateur Radio & ISMBands between 150 kHz and 80 MHz | 3 Vrms150 kHz to 80 MHz6 VrmsAmateur Radio & ISMBands between 150 kHz and 80 MHz | Portable and mobile RF communications equipment should be used no closer to any part of the device, including cables, than the recommended 30 cm (12 inches) separation distance.Interference may occur in the vicinity of equipment marked with the following symbol: |
| Radiated RF IEC 61000-4-3 | 10 V/m80 MHz to 2.7 GHzTelecommunication frequencies as specified in clause 8.10 of IEC 60601-1-2:2014:450, 810, 870, 930, 1720, 1845, 1970, and 2450 MHz at 28 V/m385 MHz at 27 V/m710, 745, 780, 5240, 5500, and 5785 MHz at 9 V/m | 10 V/m80 MHz to 2.7 GHzTelecommunication frequencies as specified in clause 8.10 of IEC 60601-1-2:2014:450, 810, 870, 930, 1720, 1845, 1970, and 2450 MHz at 28 V/m385 MHzat 27 V/m710, 745, 780, 5240, 5500, and 5785 MHz at 9 V/m | |
| Immunity to RFID Readers AIM 7351731 | RFID Reader frequencies as specified in AIM 7351731:433 MHz at 3 V/m860 MHz to 960 MHz at 54 V/m2450 MHz at 54 V/m | RFID Reader frequencies as specified in AIM 7351731:433 MHz at 3 V/m860 MHz to 960 MHz at 54 V/m2450 MHz at 54 V/m |
DreamStation BiPAP autoSV User Manual
Limited warranty
Limited Warranty
Respironics, Inc., a Philips company (“Philips Respironics”) provides this non-transferable, limited warranty for DreamStation BiPAP autoSV (“Product”) to the customer who originally purchased the Product directly from Philips Respironics.
What this warranty covers: Philips Respironics warrants each new Product will be free from defects in materials and workmanship and will perform in accordance with the Product specifications under normal and proper use and maintenance in accordance with applicable instructions, subject to the exclusions below.
How long does this warranty last: two (2) years from the longer of the date of shipment to the purchaser or date of setup by purchaser for the end user, except:
a. The warranty period for accessories, replacement parts, and disposables including, but not limited to, circuits, tubing, leak devices, exhaust valves, filters and fuses, is ninety (90) days from the date of shipment to the original purchaser.
What this warranty does not cover: This warranty does not apply to any software included with the Product as the software warranty is included in the software license. This warranty does not cover damage or injury whether to the Products, personal property, or persons caused by accident, misuse, abuse, Acts of God, water ingress, repair or alteration by anyone other than Philips Respironics or its authorized service center, failure to operate in accordance with the terms of the operating manual and instructions, lack of reasonable care, the discontinuance of a network (e.g. 2G, 3G, etc.) by a carrier (e.g. ATT, Verizon, etc.), or other defects not related to material or workmanship. This warranty is not transferable. If Philips Respironics finds that a Product returned for service or the issue raised is not covered under this limited warranty, Philips Respironics may charge an evaluation fee and return shipping.
What Philips Respironics will do: If a Product fails to conform to the warranties set forth above during the applicable warranty period, Philips Respironics will repair or replace the Product or refund the original purchase price, in Philips Respironics sole discretion. Philips Respironics may use new or remanufactured assemblies, components, and parts in repair and new or recertified refurbished devices for replacement. The balance of the original warranty period will apply to any Product or component of a Product repaired or replaced under this warranty.
Warranty Disclaimer; Limitation of Liability: EXCEPT AS SET FORTH IN THIS LIMITED WARRANTY, PHILIPS RESPIRONICS MAKES NO WARRANTIES, EXPRESSED OR IMPLIED, STATUTORY OR OTHERWISE, REGARDING THE PRODUCT OR ITS QUALITY OR PERFORMANCE. PHILIPS RESPIRONICS SPECIFICALLY DISCLAIMS THE IMPLIED WARRANTY OF MERCHANTABILITY AND THE IMPLIED WARRANTY OF FITNESS FOR A PARTICULAR PURPOSE. IN NO EVENT WILL PHILIPS RESPIRONICS MAXIMUM LIABILITY UNDER THESE WARRANTIES EXCEED THE ORIGINAL PURCHASE PRICE OR WILL PHILIPS RESPIRONICS BE LIABLE FOR ANY ECONOMIC LOSS, LOSS OF PROFITS, OVERHEAD, OR SPECIAL, INCIDENTAL, OR CONSEQUENTIAL DAMAGES. Repair, replacement, or return of purchase price by Philips Respironics is the original purchaser's sole and exclusive remedy under this warranty.
This warranty gives you specific legal rights, and you may also have other rights that vary from state to state. Some states do not allow the exclusion or limitation of incidental or consequential damages, so the above exclusion and limitations may not apply to you.
How to get warranty support: Patients contact your local authorized Philips Respironics dealer and dealers contact Respironics, Inc. at:
1001 Murry Ridge Lane Murrysville, Pennsylvania 15668-8550 +1-724-387-4000


- PROVIDER GUIDE
- DREAMSTATION BIPAP AUTOSV
- ACCESSING THE PROVIDER MODE SCREENS
- NAVIGATING THE PROVIDER MODE SCREENS
- TO ADJUST A SETTING
- NOTES
- PROVIDER SETTINGS
- THERAPY SETTINGS
- NOTE
- ALARM SETTINGS
- COMFORT SETTINGS
- DEVICE SETTINGS
- INFO SCREENS
- RETURN TO PATIENT MODE
- PERFORMANCE CHECK DEVICE SCREENING TOOL
- UPDATING SOFTWARE USING THE SD CARD
- CLEARING PATIENT DATA FOR MULTIPLE USERS
- GATHERING DEVICE INFORMATION
- SYSTEM CHECKOUT PROCEDURE
- WARNING
- VERIFYING THE PRESSURE
- VERIFYING THE ALARMS
- IMPORTANT
- PATIENT CIRCUIT DISCONNECT ALARM TEST
- APNEA ALARM TEST
- LOW MINUTE VENTILATION ALARM TEST
- LOSS OF POWER ALARM TEST
- SPECIFICATIONS
- TABLE OF CONTENTS
- INTRODUCTION ...... 1
- DEVICE SETUP....13
- ALARMS, ALERTS, AND TROUBLESHOOTING....31
- ACCESSORIES....45
- CLEANING AND DISINFECTION ....49
- SPECIFICATIONS, DISPOSAL, AND EMC 55
- WARRANTY 63
- INTRODUCTION
- 1.1 PACKAGE CONTENTS
- 1.2 INTENDED USE
- 1.3 SAFETY INFORMATION
- 1.3.1 WARNINGS AND CAUTIONS
- 1.3.2 WARNINGS
- 1.3.3 CAUTIONS
- 1.3.4 NOTES
- 1.3.5 CONTRAINDICATIONS
- 1.3.6 PATIENT PRECAUTIONS
- 1.4 SYMBOLS GLOSSARY
- 1.5 SYSTEM OVERVIEW
- 1.5.1 DEVICE DESCRIPTION
- 1.5.2 THERAPY FEATURES
- 1.5.2.1 BI-FLEX COMFORT FEATURE
- 1.5.2.2 RAMP
- 1.5.2.3 RISE TIME COMFORT FEATURE
- 1.5.2.4 DIGITAL AUTO-TRAK
- 1.5.3 DEVICE FEATURES
- 1.6 HOW TO CONTACT PHILIPS RESPIRONICS
- DEVICE SETUP
- 2.1 INSTALLING AND REPLACING THE AIR FILTERS
- CAUTION
- 2.2 POSITIONING THE DEVICE
- CAUTIONS
- 2.3 SUPPLYING AC POWER TO THE DEVICE
- 2.4 CONNECTING THE BREATHING CIRCUIT
- 2.5 STARTING THE DEVICE
- 2.6 NAVIGATING THE DEVICE SCREENS
- 2.7 MENU NAVIGATION (WITH THERAPY ON) AND OPTIONAL HUMIDIFICATION SETTINGS
- 2.7.1 ADJUSTING THE HUMIDIFIER AND HEATED TUBE SETTINGS
- 2.7.2 RAMP FEATURE
- 2.8 MENU NAVIGATION (WITH THERAPY OFF)
- 2.8.1 MY INFO
- 2.8.2 PREHEAT
- 2.8.3 MY PROVIDER
- 2.8.4 MY SETUP
- 2.9 CONNECTING TO WI-FI (IF AVAILABLE)
- 2.10 BLUETOOTH ® WIRELESS TECHNOLOGY (IF AVAILABLE)
- 2.10.1 PAIRING YOUR THERAPY DEVICE TO YOUR BLUETOOTH-ENABLED MOBILE DEVICE
- 2.10.2 NOTICES
- 2.11 CHECK MASK FIT
- 2.12 SLEEP PROGRESS
- 2.13 ALTITUDE COMPENSATION
- ALARMS, ALERTS, AND TROUBLESHOOTING
- 3.1 DEVICE ALARMS
- 3.2 DEVICE ALERTS
- 3.3 ALARM AND ALERT LED INDICATORS
- 3.4 ALARM AND ALERT AUDIBLE INDICATORS
- 3.5 SILENCING AN ALARM
- 3.6 ALARM MESSAGE SCREENS
- 3.7 WHAT TO DO WHEN AN ALARM OCCURS
- 3.8 ALARM SUMMARY TABLE
- ALARM PRIORITY DEVICE ACTION USER ACTION
- 3.9 ALERT SUMMARY TABLE
- 3.10 TROUBLESHOOTING
- ACCESSORIES
- 4.1 HUMIDIFIER
- 4.2 SD CARD
- 4.3 CELLULAR MODEM
- 4.4 WI-FI ACCESSORY
- 4.5 LINK MODULE
- WARNINGS
- 4.6 OXIMETER
- 4.7 PHILIPS RESPIRONICS PROPRIETARY COMPLIANCE SOFTWARE
- 4.8 ROLL STAND
- 4.9 SUPPLEMENTAL OXYGEN
- 4.10 DC POWER CORD
- 4.11 CARRYING CASE AND AIRLINE TRAVEL
- 4.12 IN-USE BAG (WHEELCHAIR BAG)
- CLEANING AND DISINFECTION
- 5.1 CLEANING AND DISINFECTION OVERVIEW
- 5.2 HOME AND HOSPITAL/INSTITUTION CLEANING: DEVICE AND HUMIDIFIER EXTERIOR
- 5.3 HOSPITAL AND INSTITUTION DISINFECTION: DEVICE AND HUMIDIFIER EXTERIOR
- DISCIDE ULTRA TOWELETTES
- 5.4 HOME AND HOSPITAL CLEANING: NON-HEATED FLEXIBLE TUBING
- 5.5 HOME AND HOSPITAL: RINSING AND REPLACING FILTERS
- LIGHT-BLUE ULTRA-FINE FILTER
- 5.6 SERVICE
- SPECIFICATIONS, DISPOSAL, AND EMC
- 6.1 SPECIFICATIONS
- 6.1.1 ENVIRONMENTAL
- 6.1.2 PHYSICAL
- 6.1.3 SERVICE LIFE
- 6.1.4 STANDARDS COMPLIANCE
- 6.1.9 SOUND
- 6.1.10 DECLARED DUAL-NUMBER NOISE EMISSIONS VALUES (IN ACCORDANCE WITH ISO 4871)
- 6.1.11 CONTROL ACCURACY
- 6.1.12 PRESSURE ACCURACY
- 6.1.13 DISPLAYED PARAMETER ACCURACY
- 6.2 DISPOSAL
- 6.3 EMC INFORMATION
- PRESSURE AND FLOW ACCURACY
- SPO2 AND PULSE RATE ACCURACY
- GUIDANCE AND MANUFACTURER'S DECLARATION - ELECTROMAGNETIC EMISSIONS
- GUIDANCE AND MANUFACTURER'S DECLARATION - ELECTROMAGNETIC IMMUNITY
- LIMITED WARRANTY
Brand : PHILIPS
Model : DreamStation BiPAP autoSV HH1487
Category : Medical device