
KIH 8645-6B - Cooker Kernau - Free user manual and instructions
Find the device manual for free KIH 8645-6B Kernau in PDF.


| Product Type | Induction Hob |
| Brand | Kernau |
| Model | KIH 8645-6B |
| Number of Cooking Zones | 6 |
| Power Supply | 400 V ~ 50/60 Hz, 2 phases + N, 4 x 2.5 mm² cable, 16 A fuse per phase |
| Total Connected Load | 10.8 kW |
| Energy Consumption (Hob) | 181.95 Wh/kg |
| Cooking Zone Dimensions (each) | 20.0 x 21.0 cm |
| Front Left Zone Power | 2000 W / 2600 W (Boost) |
| Rear Left Zone Power | 1500 W / 2000 W (Boost) |
| Centre Back Zone Power | 1500 W / 2000 W (Boost) |
| Front Centre Zone Power | 2000 W / 2600 W (Boost) |
| Rear Right Zone Power | 1500 W / 2000 W (Boost) |
| Front Right Zone Power | 2000 W / 2600 W (Boost) |
| Control Type | Touch sensor buttons and slider |
| Functions | Power Boost, Keep Warm (3 levels), Pause, Timer, Child Lock, Maxi Zone (bridge), Residual Heat Indicator, Pan Detection |
| Safety Features | Overheating protection, automatic switch-off, small object detection, residual heat indicator |
| Cleaning | Glass ceramic surface; use damp cloth or glass scraper; avoid abrasive cleaners |
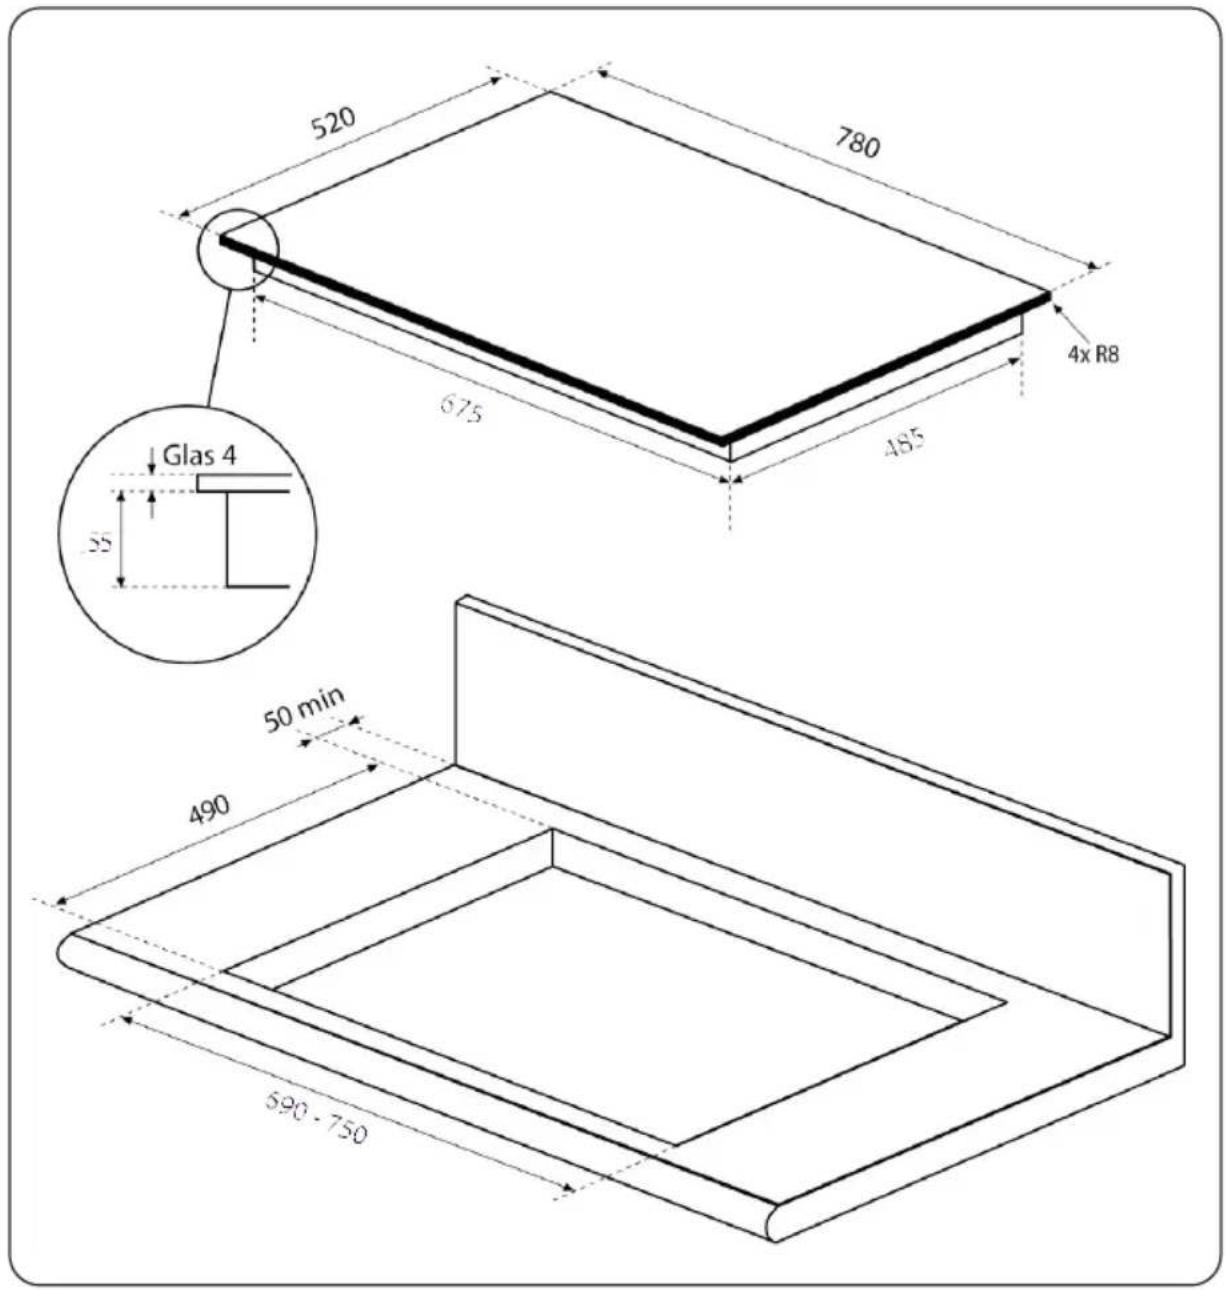
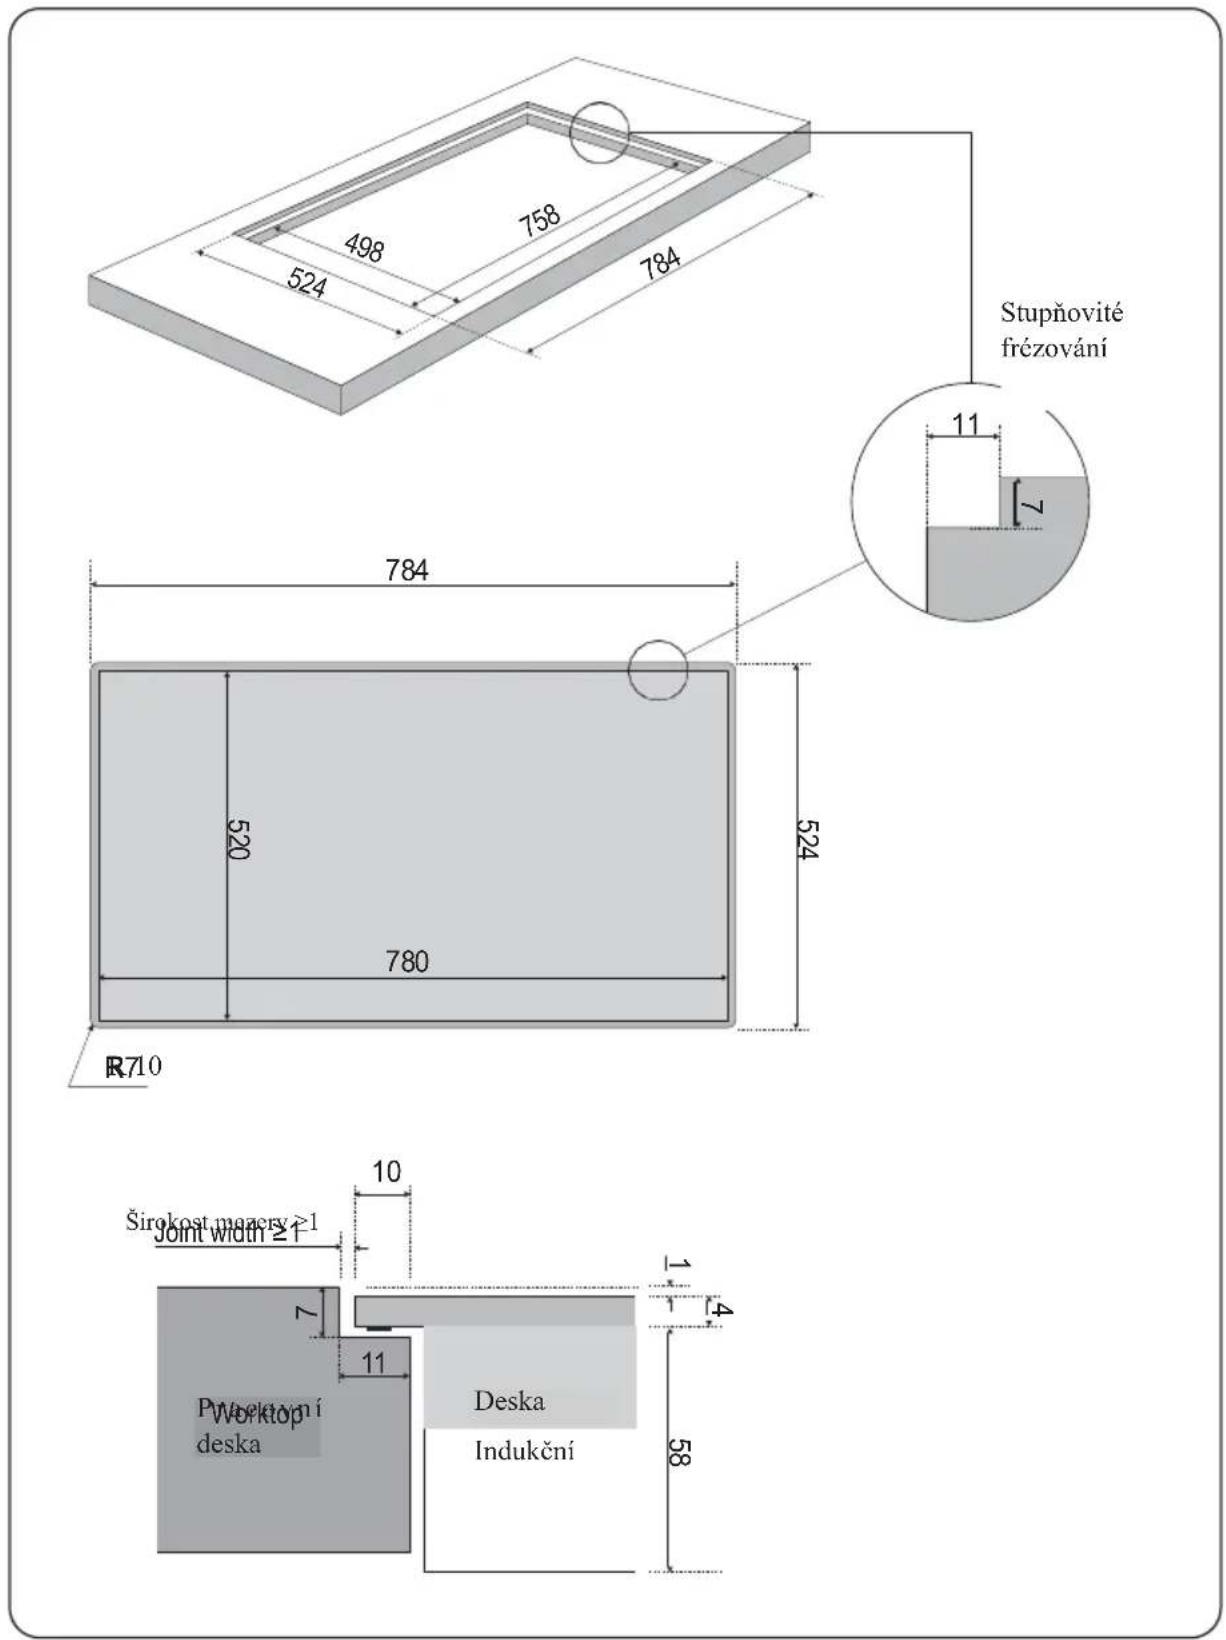
| Installation | Flush or surface mount; cutout dimensions 520 x 780 mm (overall) with 4x R8 corners; minimum 20 mm ventilation gap underneath |
| Net Weight | Approx. 12 kg (estimated, not specified) |
| Dimensions (Glass) | 675 x 485 mm (approx., from dimensional drawings) |
| Product Dimensions (Overall) | 780 x 520 mm |
Frequently Asked Questions - KIH 8645-6B Kernau
User questions about KIH 8645-6B Kernau
0 question about this device. Answer the ones you know or ask your own.
Ask a new question about this device
Download the instructions for your Cooker in PDF format for free! Find your manual KIH 8645-6B - Kernau and take your electronic device back in hand. On this page are published all the documents necessary for the use of your device. KIH 8645-6B by Kernau.
USER MANUAL KIH 8645-6B Kernau
natural_image
Pure geometric lines and symbols without any text, numbers, or labelsSZANOWNY KLIENCIE,

natural_image
Simple line drawing of a cooking pot with a U-shaped magnet (no text or symbols)NIEODPOWIEDNIE NACZYNIA KUCHENNE:
natural_image
Simple line drawing of a hand pointing upward with a circular symbol on the index finger (no text or labels)natural_image
Line drawing of a cooking pot on a stand with a flat surface (no text or symbols)natural_image
Simple line drawing of a hand pointing upward with a circular symbol on the index finger (no text or labels)WYŚWIETLANIE WSKAŹNIKA CIEPŁA RESZTKOWEGO

natural_image
Four grayscale geometric shapes with plus signs, arranged in a row: two circular and one rectangle (no text or symbols)natural_image
Two identical diagrams showing a circular object with cross marks inside dashed rectangular boundaries, no text or symbols present.Praca strefy maxi

OSTRZEŻENIE!
natural_image
Symbol of a trash bin crossed out by two diagonal lines (no text or labels)
natural_image
Pure geometric diagram with scattered dots and symbols (no text or labels)Thank you for choosing this product.
This User Manual contains important safety information and instructions on the operation and maintenance of your appliance. Please take the time to read this User Manual before using your appliance and keep this book for future reference.
| Icon Caption Description | ||
 | Warning Risk of serious injury or death | |
 | Risk of electric shock Dangerous voltage | |
 | Fire | |
 | Note | |
 | Important/Note | |
 | Read the instructions | |
 | Hot surface | |
CONTENTS
CHAPTER 1. Safety instructions....31
Precautionary measures before commissioning ....31
General safety instructions....31
Protection against damage....32
Precautionary measures in the event of device failure 32
Protection against further dangers....32
CHAPTER 2. Your device at a glance....33
CHAPTER 3. Operating elements....34
Function of the sensor buttons....34
Slider-Operation 34
CHAPTER 4. Control panel ....35
CHAPTER 5. The right cookware....36
Suitable cookware 36
Unsuitable cookware: 36
Display of unsuitable / missing cookware....37
CHAPTER 6. Using the surface induction hob....38
Switch on the device....38
Cooking operation....38
Stop cooking....39
Switch off the device....39
Residual heat display....39
Keep warm function....40
Pause- Function 41
Control panel lock (child lock)....42
Maxi-Zone 42
CHAPTER 7. Cleaning and care....44
CHAPTER 8. Safety devices....45
CHAPTER 9. Error codes....46
CHAPTER 10. Technical Data....47
CHAPTER 11. Dimensional drawings....48
Installation dimensions....48
Flush installation 49
CHAPTER 12. Installation ....50
CHAPTER 13. Electrical connection....51
Assignment of the connection box on the device:....51
Assignment of the mains cable:....52
CHAPTER 14. Customer service ....52
CHAPTER 15. Notes on disposal ....52
CHAPTER 16. Disposal of used equipment....53
CHAPTER 1. SAFETY INSTRUCTIONS

PRECAUTIONARY MEASURES BEFORE COMMISSIONING
- Completely unpack the appliance and remove or detach all parts of the packaging.
- The appliance may only be installed and connected by a qualified electrician. The manufacturer cannot be held responsible for damage caused by errors during installation or connection. Only use the appliance when it is installed.
- This appliance may only be used for domestic cooking and frying of food and is not intended for commercial or outdoor use.
- Remove all labels and stickers from the glass.
- No changes may be made to the device.
- Do not use the induction hob as a work or storage surface.
- Safety is only guaranteed if the appliance is connected to a protective earth conductor that complies with the applicable regulations.
- The appliance must not be connected to the mains using an extension cable.
- The appliance must not be installed above a dishwasher or tumble dryer: the water vapours released could damage the electronics.

GENERAL SAFETY INSTRUCTIONS
- The electronics (relay) can cause audible switching noises during operation. The cooling fan may also be audible. The cooling fan can continue to run even after cooking is complete in order to cool the electronic components. These noises are normal during operation and do not constitute a defect in the hob.
- Switch off the cooking zones after each use.
• Overheated fats and oils ignite quickly. If you prepare food in fat or oil (e.g. chips), you should monitor the cooking process. - When you cook and fry, the cooking zones become hot. Therefore, beware of burns during and after using the appliance.
- Ensure that no electrical cable from a free-standing or built-in appliance comes into contact with the glass or the hot cooking zone.
- Never cover the cooking surface with a cloth or protective film; these could become very hot and catch fire.
- This appliance can be used by children aged from 8 years and above and persons with reduced physical, sensory or mental capabilities or lack of experience and knowledge if they have been given supervision or instruction concerning use of the appliance in a safe way and understand the hazards involved.
- Cleaning and user maintenance must not be carried out by children without supervision.
- Children should be supervised to ensure that they do not play with the appliance.

WARNING:
If the glass surface is cracked, switch off the appliance immediately to prevent the risk of electric shock.
• Metal objects such as knives, forks, spoons and pot lids should not be placed on the induction hob as they could become hot.
- Do not leave the induction hob unattended due to the very fast reaction at high cooking level settings!

CAUTION, RISK OF BURNS!
Metal objects such as rings, bracelets, watches etc. can become hot in the immediate vicinity of the induction hob. Non-magnetisable objects (e.g. gold or silver rings) are not affected.
• If there are pets in the home that could reach the induction hob, activate the childproof lock.
- If a pyrolytic oven is installed under the induction hob, the induction hob should not be used during pyrolytic operation. The surface induction hob's overheating protection could be triggered.
- The overheating protection can also be triggered if the surface induction hob is not sufficiently ventilated and/or an inadequately insulated oven installed under the surface induction hob is in operation.
PROTECTION AGAINST DAMAGE
- Do not use pots or pans with an unpolished or damaged base. These can scratch the glass ceramic plates.
- Please note that grains of sand can also cause scratches.
• Glass ceramic is insensitive to temperature shocks and very resistant, but not unbreakable. In particular, sharp and hard objects that fall onto the hob surface can damage it. - Avoid touching the edges of the glass pane with pots.
- Do not use the cooking zones with empty cookware.
- Avoid placing sugar, plastic or aluminium foil on the hot cooking zones. These materials melt, stick and can cause cracks, breaks or other permanent changes to the disc when it cools down. If such substances nevertheless get onto the hot cooking zones, please switch off the appliance and remove them while it is still hot.
As the cooking zones are hot, there is a risk of burns!

ATTENTION:
The cooking process must be monitored! Even a short-term cooking process must be constantly monitored!

WARNING:
Unattended cooking on a hob with fat or oil can be dangerous and cause a fire!

FIRE HAZARD:
Do not store any objects on the hob.
• Never place hot cookware on the control unit. The electronics under the glass could be damaged.
- In order to achieve sufficient ventilation of the electronics in the induction hob, an air space of 20 mm is required under the hob.
An air gap on the front of the kitchen unit is not required.
- No flammable objects (e.g. aerosol cans) may be stored in a drawer under the hob.
- The cutlery trays in the drawer must be made of heat-resistant material.
- Do not heat closed containers (e.g. tins) on the cooking zones. The resulting overpressure can cause the containers or cans to burst, posing a risk of injury!

PRECAUTIONARY MEASURES IN THE EVENT OF DEVICE FAILURE
• If a fault is detected, the appliance must be switched off and disconnected from the power supply.
• If breaks, cracks or fissures appear on the glass: switch off the induction hob immediately, unscrew the fuse for the induction hob and contact our customer service or your specialist dealer.
- Never open the device itself.
- Repairs to the appliance may only be carried out by specialised personnel.
PROTECTION AGAINST FURTHER DANGERS
- Make sure that the cookware is always centred on the cooking zone. The base of the pan must cover as much of the cooking zone as possible.
- People with pacemakers or implanted insulin pumps must ensure that their implants are not affected by the surface induction hob.
The induction hob must not be switched off, as an electromagnetic field is generated in the vicinity of the appliance when it is switched on (the frequency range of the surface induction hob is 50 kHz).
If in doubt, please contact the manufacturer of the pacemaker or your doctor.

NOTE:
The use of unsuitable pots or adapter discs for induction leads to premature termination of the guarantee.
The manufacturer accepts no liability for any damage that may occur to the induction hob or its surroundings.
CHAPTER 2. YOUR DEVICE AT A GLANCE
KIH 8645-6B
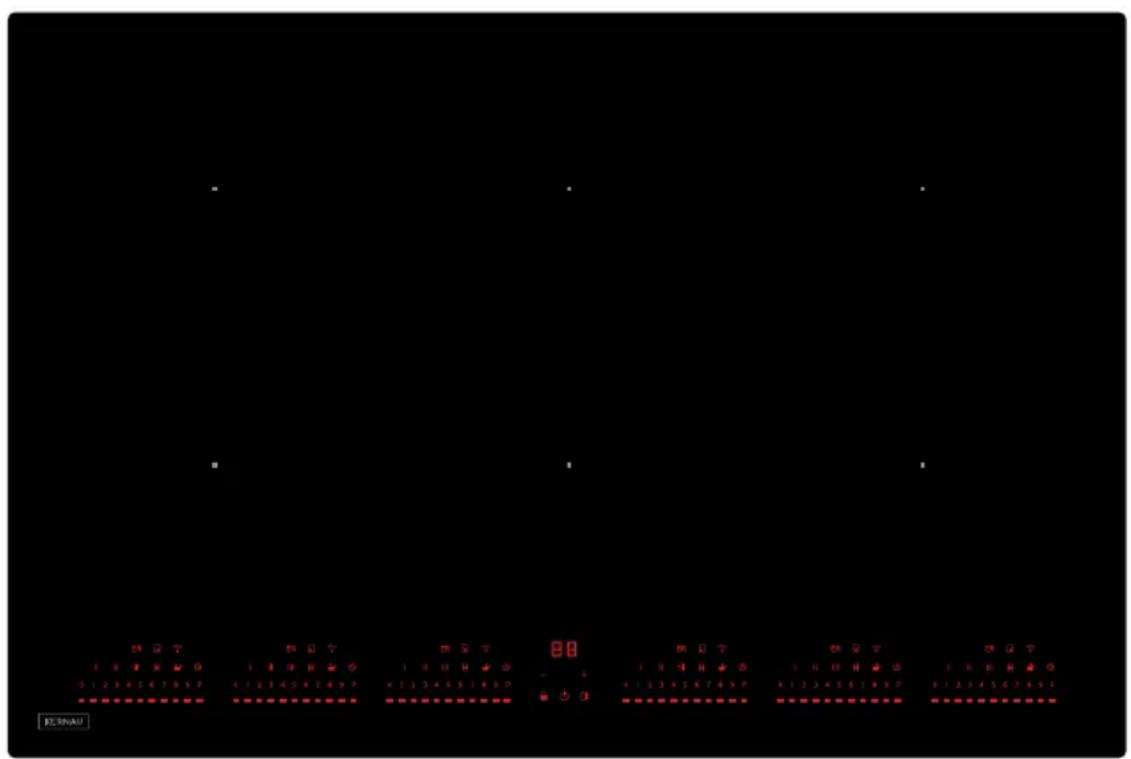
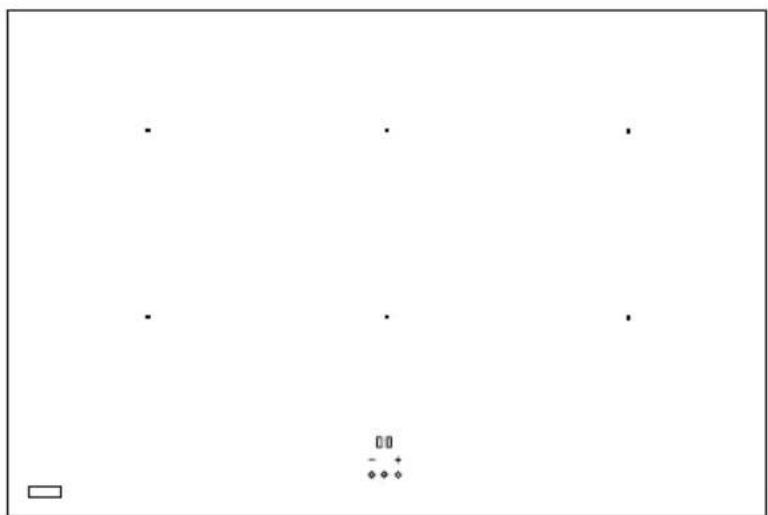
The illustrations on this page are intended to differentiate between products. They are not on the same scale and therefore do not necessarily show the actual proportions of the surface induction hobs in relation to each other again.
CHAPTER 3. OPERATING ELEMENTS
FUNCTION OF THE SENSOR BUTTONS
The surface induction hob is controlled via sensor buttons. These react to light touches on the glass surface with your finger, much like an app on your smartphone or tablet.
If you touch a sensor button for about one second, control commands are executed.
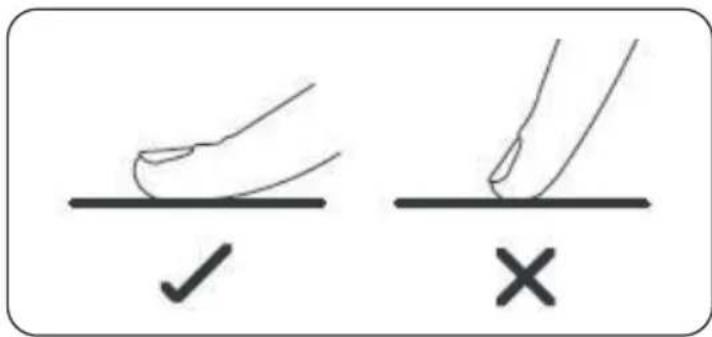
Each reaction of the sensor buttons is acknowledged with an acoustic and/or visual signal.
Only one button should be pressed at a time to avoid operating errors.
Make sure that the control panel is always clean and dry and that no objects (e.g. kitchen tools or cloths) are placed on it. Even a thin film of water can make it difficult to operate the buttons.
SLIDER-OPERATION
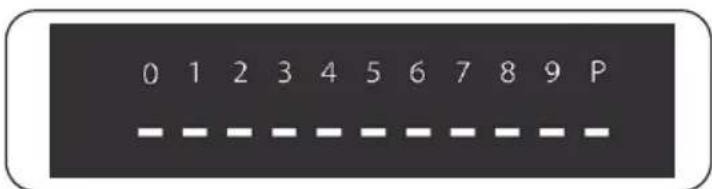
The slider is used to set the desired power level of a cooking zone or to set the time for the timer functions. The operation of the slider is similar to the operation of the Buttons.
▶ Place a finger on the slider and move your finger to the right on the slider to increase the power level of a cooking zone, for example.
▶ If you move your finger to the left on the slider, the set value decreases.
You can also select the desired setting directly with your finger by immediately touching the corresponding position on the slider.
CHAPTER 4. CONTROL PANEL
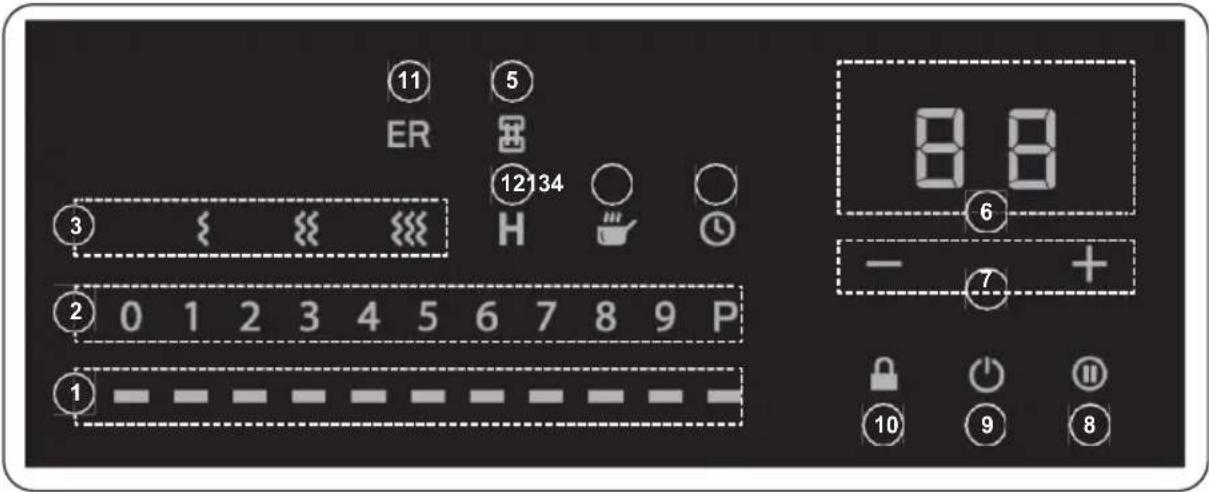
| Symbol / Display | Description of the |
| 1 Slider | |
| 2 Power level display | |
| 3 Keep warm button(s) | |
| 4 Timer button | |
| 5 Bridge switching button | |
| 6 Timer display | |
| 7 Timer setting buttons | |
| 8 Pause button | |
| 9 Device ON / OFF button (press the button for 3 seconds to switch on) | |
| 10 Control panel lock button (child lock) | |
| 11 | Fault display (lights up together with the digits of display (2) in the event of a fault) |
| 12 Residual heat display | |
| 13 | Pot detection indicator (lights up dimly: pot detected, lights up brightly: no pot detected) |
CHAPTER 5. THE RIGHT COOKWARE
Induction cooking is a safe, advanced, efficient and economical cooking technology. It works with electromagnet ic oscillations that generate heat directly in the cookware and not indirectly by heating the glass surface of the induction hob.
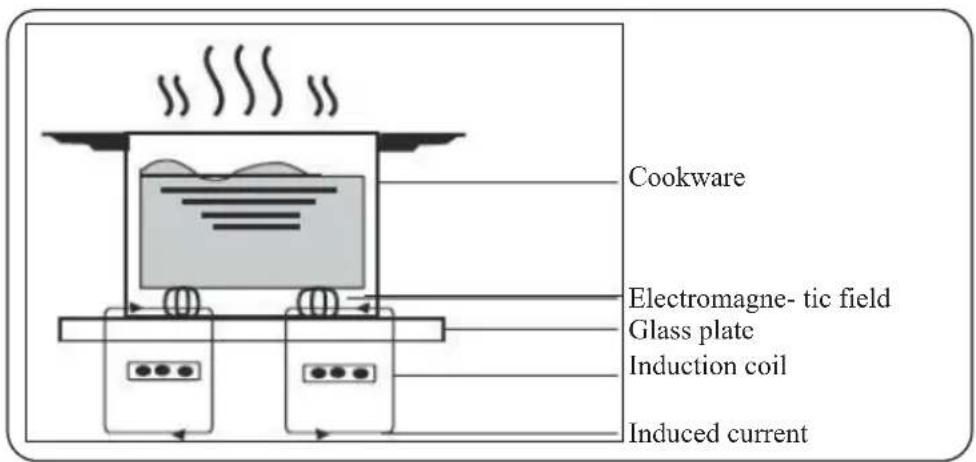

The glass of the surface induction hob only heats up because the directly heated cookware also heats it up slightly.
SUITABLE COOKWARE
made of magnetisable materials:
- Cast iron
• Stainless steel with magnetic base - Enamelled steel
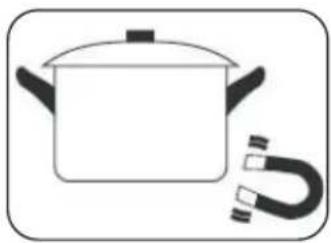
Hold a magnet to the base of the cookware. If the magnet sticks, the cookware is generally suitable for induction cooking. suitable.
natural_image
Simple line drawing of a cooking pot with a coiled tube (no text or symbols)UNSUITABLE COOKWARE:
Copper, aluminium, glass, wood, earthenware, ceramic and stainless steel cookware without a magnetisable base.
▶ Use cookware whose diameter is as large as the graphic of the selected cooking zone. If you use a pan with a slightly larger diameter, the energy will be utilised with maximum efficiency.
▶ Place the cookware in the centre of the cooking zone.
▶ Make sure that the base of the cookware used is level, lies flat on the glass and is the same size as the cooking zone used.
▶ Before cooking, make sure that the base of the cookware and the surface of the cooking zone are clean and dry.

Pots with a base diameter of less than 110 mm can remain unrecognised by the surface induction hob.

NOTE:
To prevent scratches on the glass surface:
- Lift the cookware from the induction hob without pulling or pushing!
- Only use cookware with a smooth base!
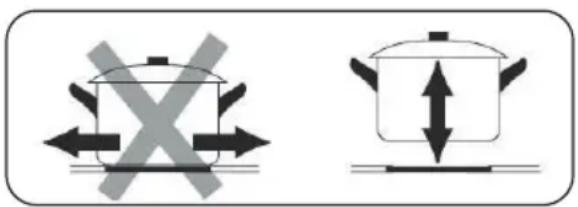
Abrasion marks or scratches on the glass ceramic are normal signs of use and therefore no reason for complaint.
DISPLAY OF UNSUITABLE / MISSING COOKWARE
if the cookware used
• is unsuitable for induction cooking.
- has too small a base diameter.
• was not placed correctly on the cooking zone.
• has been removed from the cooking zone in use.
Depending on the temperature of the glass ceramic surface, it may take up to 1 minute for the pan detection display to appear.
The appliance automatically switches back to standby mode after 1 minute if no cookware or unsuitable cookware is placed on the cooking zone.
CHAPTER 6. USING THE SURFACE INDUCTION HOB
Before switching on for the first time:
- Read these instructions and pay particular attention to the „Safety instructions” section.
- Carefully remove any protective film that may still be on your induction hob.
SWITCH ON THE DEVICE
- Press the „Appliance On/Off” button for 3 seconds to switch on the induction hob.
natural_image
Simple line drawing of a hand pointing upward with a circular symbol on the index finger (no text or labels)After switching on, a signal tone sounds. „-” appears on the power indicators. The induction hob is now in standby mode.
COOKING OPERATION
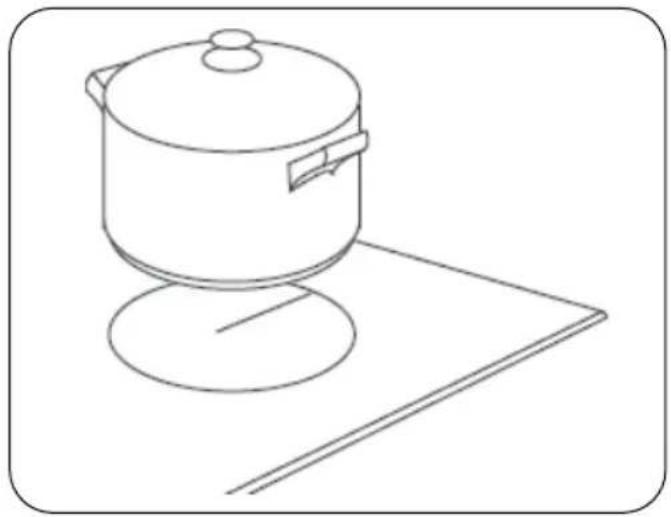
- Place suitable cookware on the selected cooking zone.
natural_image
Line drawing of a cooking pot on a stand with a flat base (no text or symbols)- The cooking zone is activated by the automatic pan detection function.
- Use the slider to set the desired power level within 5 seconds.
If you do not select a power level within 1 minute, the induction hob switches off again automatically.
You must then switch the device on again before you can use it.
The selected power level is shown on the display.
You can change the power level at any time, even during a cooking process.
STOP COOKING
- Set the power level to „0” using the slider.
Always switch off the hob at the end of cooking.
SWITCH OFF THE DEVICE
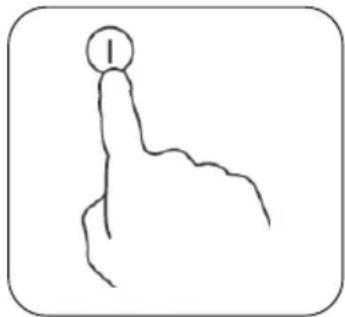
- Press the „Appliance On/Off” button to switch off the induction hob.
natural_image
Simple line drawing of a hand pointing upward with a numbered circle at the top (no text or symbols)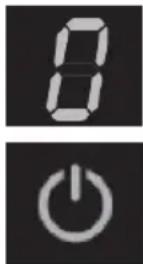
RESIDUAL HEAT DISPLAY

WARNING! RISK OF BURNS
Although the glass surface of the hob itself is not heated, it may have become dangerously hot during cooking via the cookware!
To prevent burns, the appliances have a residual heat indicator:
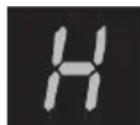
The „H” display signals that the temperature of the cooking zone is still too high to be touched safely. As soon as this indicator goes out, the temperature of the cooking zone has dropped to a safe level.

Use the residual heat from a cooking zone to „warm up” cookware that you want to use afterwards. This saves energy!
All cooking zones offer the „Power Boost“ power level, i.e. a power amplification.
The „Power Boost” performance level is designed to ensure that e.g. large quantities of water are heated quickly, such as for boiling pasta water.
Activate the „Power Boost“ performance level
- Place suitable cookware on the selected cooking zone.
The cooking zone is activated automatically. - You can also activate the desired cooking zone manually by tapping the corresponding slider.
- Set the „Power Boost“ power level with the Slider on.
- Move your finger on the
Slider all the way to the right, up to the „P” mark.
The activated „Power Boost“ power level is indicated by
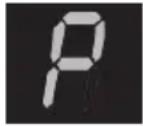
- Separate display „H“ shown.
The „Power Boost“ power level is automatically reduced to the normal highest power level after 5 minutes.
Deactivate the „Power Boost“ power level prematurely
- Select the desired cooking zone by tapping the corresponding slider.
- Press the slider at any position to deactivate the „Power Boost“ power level prematurely.
KEEP WARM FUNCTION
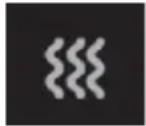
All cooking zones offer 3 keep-warm functions to keep food perfectly warm.
Activate keep warm function
- Place suitable cookware on the selected cooking zone.
The cooking zone is activated automatically. - You can also activate the desired cooking zone manually by tapping the corresponding slider.
• To activate one of the three heat retention levels
the button of the desired
Tap the heat retention level , or .
The activated keep warm function is displayed on the control panel.
Deactivating the keep warm function
- Deactivate the keep warm function by tapping the corresponding button.
TIMER-FUNCTIONS

The timer switches the corresponding cooking zone off automatically after the set time has elapsed. The timer can be set to run for up to 99 minutes for each cooking zone separately.
- Press the “Appliance On/Off” button for 3 seconds to switch on the induction hob.
- Select the desired cooking zone by tapping the corresponding slider and set a power level.
- Press the "Timer" button to activate the timer function:
- Button
The timer display starts to flash. The following appears
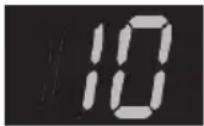
In the 2-digit timer display.
- The time is set using the “-” or “+” buttons.
- A short tap changes the time setting by 1 minute at a time.
- Press and hold to change the time setting by 10 minutes.
- Select the timer setting by tapping the Confirm the "Timer" button:
- Button
The timer indicator on the control panel lights up when the timer has been activated for the corresponding cooking zone.
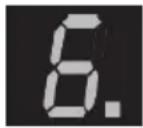
- To switch off the timer, set the time setting to ,, ,, using the ,, - ,, button.
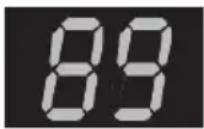
Once the time has been set, the timer starts to run down immediately. The remaining time in minutes is shown in the 2-digit timer display.
(example) displayed.
When the set time has elapsed, an acoustic signal (buzzer) sounds for 30 seconds, the relevant cooking zone is switched off and the timer display goes out.
Other cooking zones remain in operation if they have been switched on beforehand.
If other cooking zones have been assigned their own timer function, their control remains unaffected: each cooking zone has its own independent timer.
PAUSE-FUNCTION

The practical pause function allows you to interrupt an ongoing cooking process. The last selected settings are retained.
At the end of the interruption, you can reactivate and continue the cooking process with the last selected settings.
Activate pause function
- Press the “Pause” button for approx. 3 s to pause the programme.
Activate the pause function for all cooking zones.
The activated pause function for all cooking zones is activated by
is shown in the power display of the cooking zone.
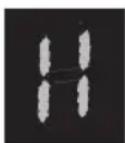
Deactivate pause function
- Press the „Pause” button again to pause the programme. Deactivate the pause function for all cooking zones.
The interrupted cooking process is reactivated and continued with the last selected settings for all cooking zones.
CONTROL PANEL LOCK (CHILD LOCK)

By activating the control panel lock, you can lock the appliance against unintentional use, e.g. by children playing.
When the control panel lock is activated, all operating elements, with the exception of the „Device on/off” button, are protected against accidental operation.
The activated control panel lock is saved by the appliance.
The memory expires when the device is disconnected from the mains voltage.
Activate the control panel lock:
The control panel lock can be activated when the hob is switched on or off.
- Press the „Control panel lock (chid lock)” button for 3 seconds to activate the control panel lock and lock the control panel.
It appears
in the 2-digit timer display.
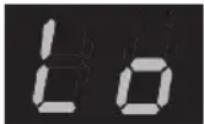

The activated control panel lock remains stored in the device, even if the device is switched off. The memory is only cancelled by deactivating the control panel lock or by disconnecting the appliance from the power supply.
Deactivating the control panel lock:
The control panel lock can be deactivated when the hob is switched on or off.
- Press the „Control panel lock (childproof lock)” for 3 seconds to deactivate the control panel lock and unlock the control panel.
The „Lo” display goes out, the appliance is now ready for operation again.
MAXI-ZONE
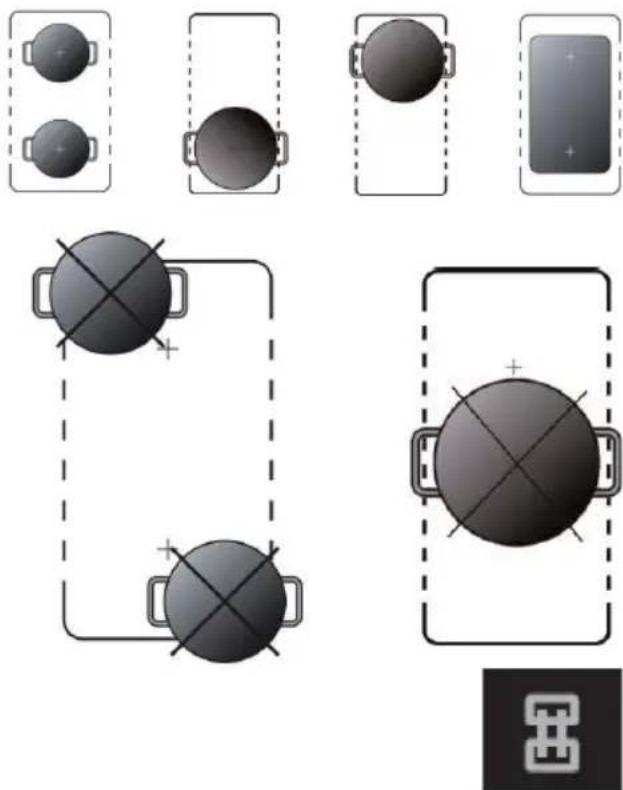
Cooking zones in a row can be combined to form a maxi zone, e.g. when using an elongated fish pot. If, with the maxi zone activated, a pan is moved from the front left to the rear left cooking zone, the power setting of the front cooking zone is automatically adopted for the rear cooking zone and the now empty front cooking zone is switched off.

NOTE:
Place cookware in the centre of the individual cooking zones!
Correct cookware placement:
natural_image
Diagram showing various camera positions and distances, including front, side, and top views with no visible text or symbols.Unsuitable cookware placement:
Operation of the maxi zone
- Press the „Bridge switching” button to activate the maxi zone.
The corresponding cooking zones have now been converted to the maxi zone interconnected. When the „Bridge switching” button/display lights up, this indicates that a maxi zone has been activated:
- Use the slider to set the desired power level for the entire maxi zone.
• To select the maxi zone, e.g. to subsequently programme a timer or to change the set power level, press the slider and carry out the desired programming or change the power level.
- To disconnect the maxi zone, press the Maxi zone, press the „Bridge switching” button again.
The corresponding cooking zones must then be used separately again.

You can also switch off the hob using the „Appliance On/Off” button.
The next time the hob is used, the maxi zone is deactivated and the two left-hand cooking zones must be used separately.
CHAPTER 7. CLEANING AND CARE
- Remove soiling as soon as possible to prevent dirt from burning in.
- Remove light, not firmly caked-on dirt with a damp cloth or a damp, soft sponge without detergent.
- Do not use washing-up liquid as it can leave a bluish discolouration.
- Sometimes stains stubbornly burn onto the hot hob and are difficult to remove. The stains can usually be removed with a glass scraper. Apply the glass scraper evenly over the entire surface and scrape with light pressure. If you don't have a glass scraper to hand, you can also use baking powder: Simply mix baking powder with a little water to form a creamy paste. Then apply the paste to the glass ceramic hob, leave to act briefly and then wipe off again.
- Light, silvery shimmering stains can be caused by aluminium residues from some pots. Such stains can be removed with a glass ceramic cleaning agent once the hob has cooled down.
- Limescale stains are caused by boiling water or pots with a wet outer base. The heat causes the water to evaporate, leaving limescale stains on the glass ceramic. Limescale stains can be removed after the hob has cooled down using a glass ceramic cleaning agent or vinegar.
- Avoid placing sugar, plastic or aluminium foil on the hot cooking zones. These substances melt, stick and can cause cracks, breaks or other permanent changes in the glass structure when cooling down. If this happens anyway, please switch off the appliance and remove these substances while It is still hot.

CAUTION:
The cooking zones are hot, there is a risk of burning!
- Never use abrasive or scouring cleaning agents, hard sponges, steel wool or stainless steel spirals. Scratches will occur.
Possible causes of scratches
Glass ceramic hobs have a very hard, resistant surface. Should scratches nevertheless occur, the usability of the glass ceramic hob surface is not restricted.
How scratches can occur:
When cleaning vegetables, grains of sand and fine dust get onto the glass ceramic cooktop. If a pot is then placed on the glass ceramic cooktop, the grains of sand can cause scratches.
Pots or pans with an unpolished or damaged base can scratch the glass ceramic panel.
The glass scraper cants under strong pressure or a scraper blade that has broken off at the edges continues to be used. Do not use the hob as a work or storage surface.
CHAPTER 8. SAFETY DEVICES
Protection against overheating
A temperature sensor monitors the temperature inside the induction hob. If an unacceptably high temperature is detected, the induction hob switches off automatically.
Detection of small objects on the surface induction hob
If unsuitable or too small cookware or small items (e.g. knives, forks, keys) are placed on the cooking zones, the appliance switches off after 1 minute. The fan cools the induction hob for a further minute.
Protection through automatic switch-off
This safety protection function switches the induction hob off automatically if you forget to switch off the hob itself. The standard operating times for different power levels are listed in the table below:
| Power level(s) Automatic switch-off after | |
| 1-3 360 min. | |
| 4-6 180 min. | |
| 7-8 120 min. | |
| 9 90 min. | |

If the cookware is removed during operation, the induction hob will stop heating immediately.
CHAPTER 9. ERROR CODES
If a malfunction occurs, the surface induction hob automatically goes into „protective status” and displays a combined error code:
| Display Possible Cause Measure | ||
| Shining bright | No cookware detected.Cookware too small. | Use suitable cookware. |
| HE 54 | Water, object or cookware is on the glass above the Control panel. | Water, object or cookware enÿappoint. |
| HE 1HE 3HE 55 | Fault in the hob. The display of the relevant Cooking zone shows „E”. | Contact the customer support. |
| HE 2HE 4 | Overheating protection. | Restart device after that Induction hob sufficient has cooled down. |
| HE 5 Supply voltage too high. | Check supply voltage. Only switch the device on again after the power supply returns to normal has. | |
| HE 6 Supply voltage too low. | Check supply voltage. Only switch the device on again after the power supply returns to normal has. | |
| HE 7 Temporary overvoltage. | Check supply voltage. Only switch the device on again after the power supply returns to normal has. | |

NOTE:
Never open or dismantle the appliance yourself. If necessary, contact customer service!
CHAPTER 10. TECHNICAL DATA
| Brand Kernau | |
| Model identifier KIH 8645-6B | |
| Type of hob Electrical | |
| Number of cooking zones and cooktop 6 | |
| Connected loadEnergy consumption of the hob EC_hob ** | 10,8 kW181.95 Wh/kg |
| Front left cooking zonePerformance*Energy consumption EC cooking zone** | 20.0x21.0 cm2000 / 2600 W178.3 Wh / kg |
| Rear left cooking zonePerformance*Energy consumption EC cooking zone** | 20.0x21.0 cm1500 / 2000 W180.1 Wh/kg |
| Centre back cooking zonePerformane*Energy consumption EC cooking zone** | 20.0x21.0 cm1500 / 2000 W180.1 Wh / kg |
| Front centre cooking zonePerformane*Energy consumption EC cooking zone** | 20.0x21.0 cm2000 / 2600 W178.3 Wh / kg |
| Rear right cooking zonePerformance*Energy consumption EC cooking zone** | 20.0x21.0 cm1500 / 2000 W180.1 Wh/kg |
| Cooking zone front rightPerformance*Energy consumption EC cooking zone** | 20.0x21.0 cm2000 / 2600 W178.3 Wh / kg |
* These performances may vary depending on the shape, size and quality of the pots.
** Energy consumption of the cooking zones/ hob, information according to EU Regulation 66/2014.
CHAPTER 11. DIMENSIONAL DRAWINGS
INSTALLATION DIMENSIONS
FLUSH INSTALLATION
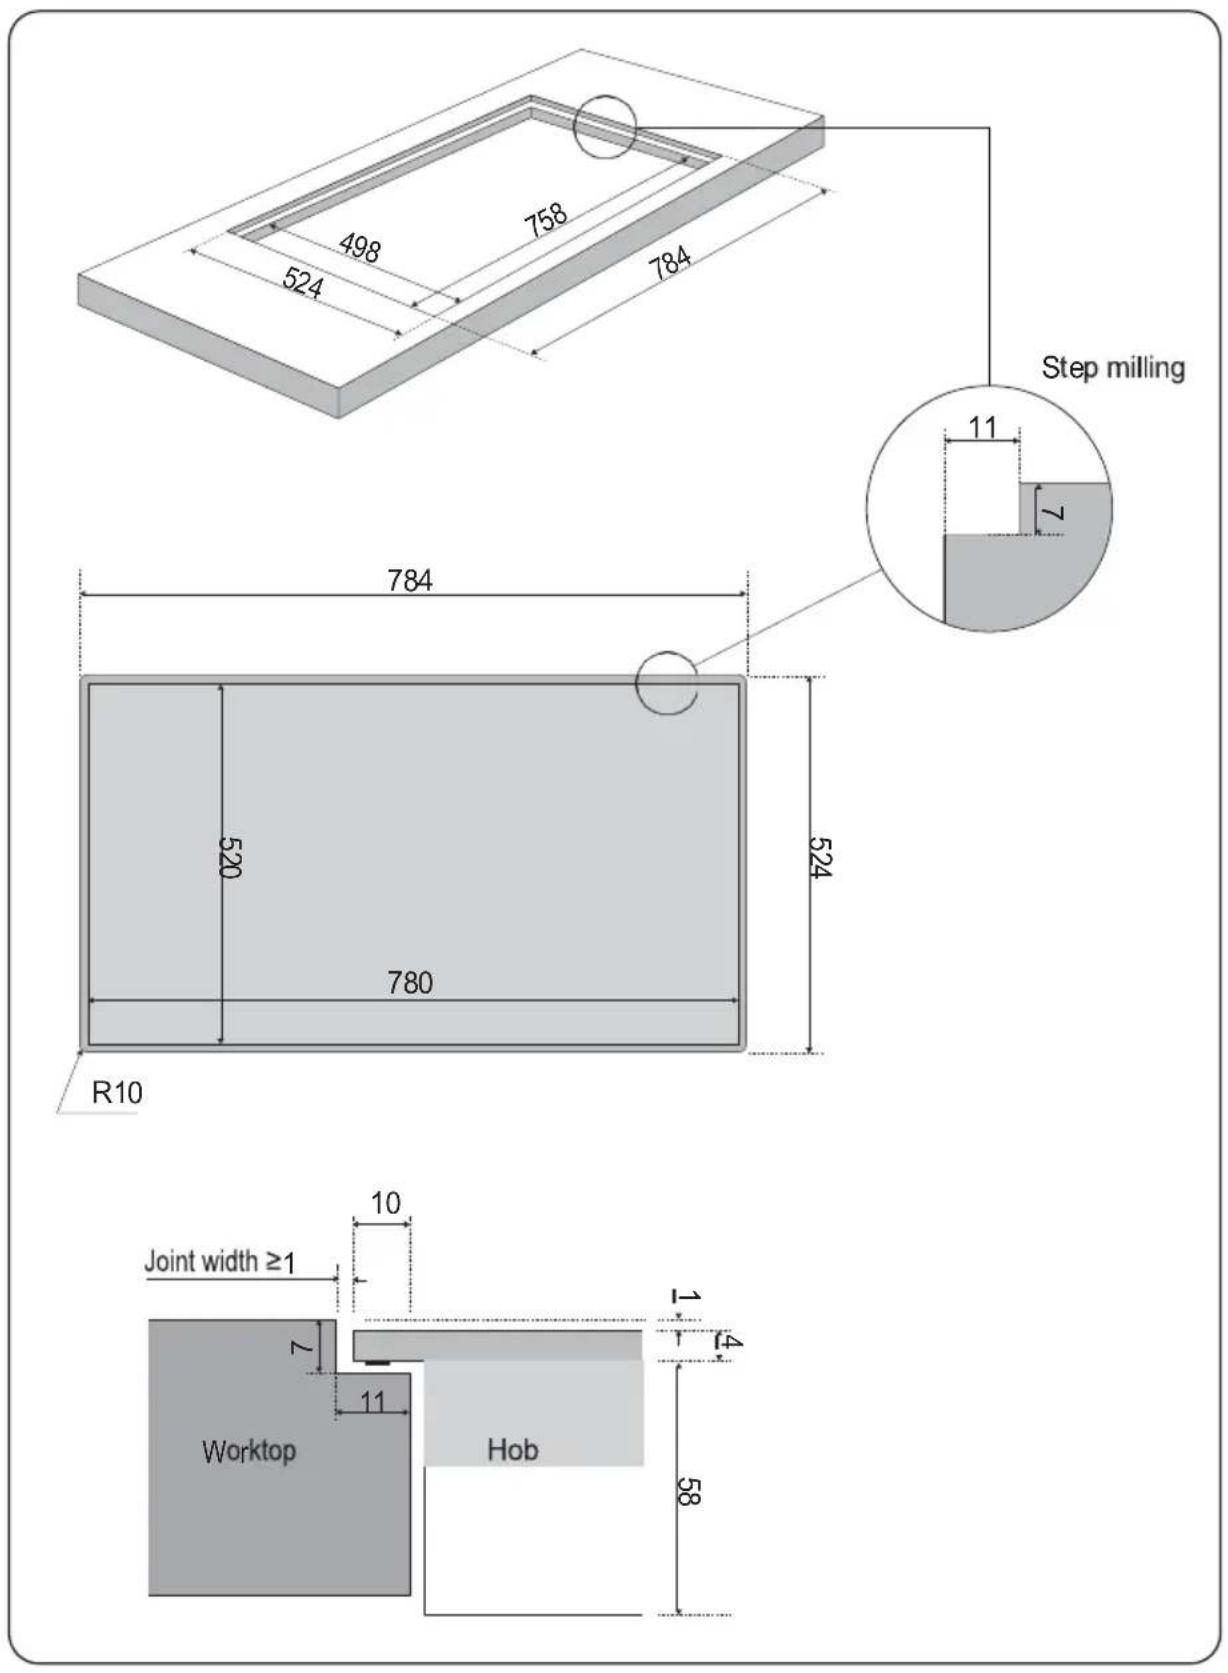
CHAPTER 12. INSTALLATION
Preparatory work:
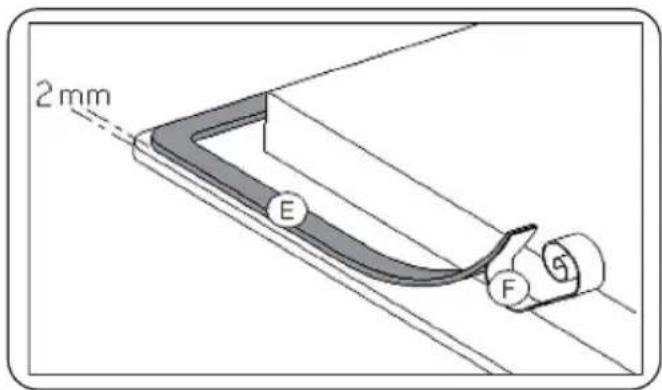
Before the induction hob can be removed from its packaging and inserted into the prepared cut-out in the worktop, a self-adhesive seal must be applied to the back of the hob.
Glue on the seal:
Leave the induction hob in the packaging box for the time being. Remove the protective film until the back is accessible.
Prepare the surrounding glass rim of the induction hob so that it is free of grease.
After removing the protective film (F), stick on the seal (E) at a distance of 2 mm from the outer edge of the glass.

WARNING!
Risk of electric shock
Installation and connection may only be carried out by an authorised specialist.
The user must ensure that the standards and regulations applicable at his place of residence are complied with.
Installation requirements:
- Veneers under the worktop must be processed with heat-resistant adhesive (100 °C).
- The wall finishing mouldings must be heat-resistant.
• The distance between the cut-out and a wall and/or a piece of furniture must be at least 50 mm.
• The cut-out must be sealed with special varnish, silicone adhesive or casting resin to prevent the worktop from swelling due to moisture. Ensure that the sealing tape supplied is carefully applied. - The hob must not be installed above ovens without their own domestic cooling, dishwashers, washing or drying appliances.
• If there is a drawer under the hob, no flammable objects may be placed in the drawer, e.g. aerosol cans. - It must be ensured that the connection cable of the hob is not exposed to any mechanical stress after installation, e.g. from a drawer.
• To ensure sufficient ventilation of the electronics in the hob, an air gap of 20 mm is required under the hob. An air gap on the front of the kitchen unit is not required.
CHAPTER 13. ELECTRICAL CONNECTION

Warning!
Risk of electric shock
Installation and connection may only be carried out by an authorised specialist.
The user must ensure that the standards and regulations applicable at his place of residence are complied with.
- Ask a qualified electrician to connect the hob to the mains.
- The legal regulations and connection requirements of the local electrical supply company must be fully complied with.
- The contact protection of operationally insulated parts must be ensured after installation.
• Before connecting the appliance to the power supply, it must be ensured that the characteristics of the local power supply correspond to the values on the rating plate attached to the appliance.
• If the appliance is not equipped with an accessible plug, other disconnection options must be taken into account for permanent installation in accordance with the installation instructions.
- When connecting the appliance, a device must be provided that allows all poles of the appliance to be disconnected from the mains with a contact opening width of at least 3 mm. Suitable disconnecting devices are circuit breakers, fuses and contactors. De-energise the appliance with one of these devices when connecting and repairing.
- The socket outlet or the all-pole switch must be easily accessible at all times when the appliance is installed.
• The installation must be protected by fuses. Electrical cables must be perfectly covered by the installation.
- The supply cable must be positioned so that it does not come into contact with the hot parts of the hob and is not exposed to temperatures above 75^ at any point.
Additionally for Austria:
In the event of a fault, electronic components can cause a fault current with a DC component of more than 6 mA or more than 20% of the total fault current.
It is therefore essential to use DC-sensitive residual current circuit breakers in the installation.
ASSIGNMENT OF THE CONNECTION BOX ON THE DEVICE:
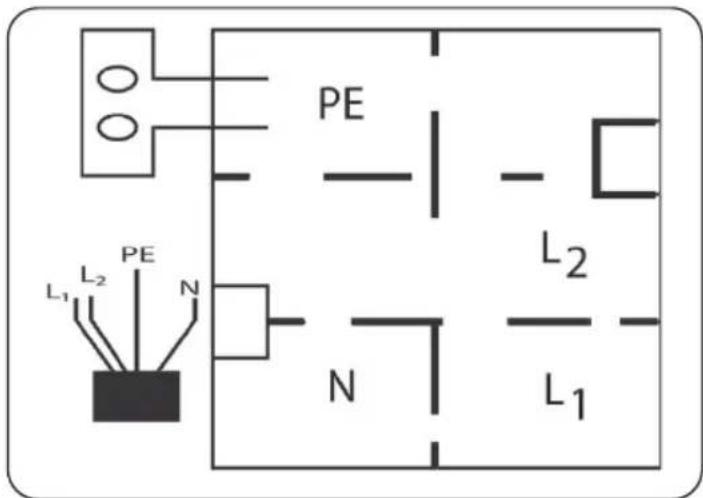
ASSIGNMENT OF THE MAINS CABLE:
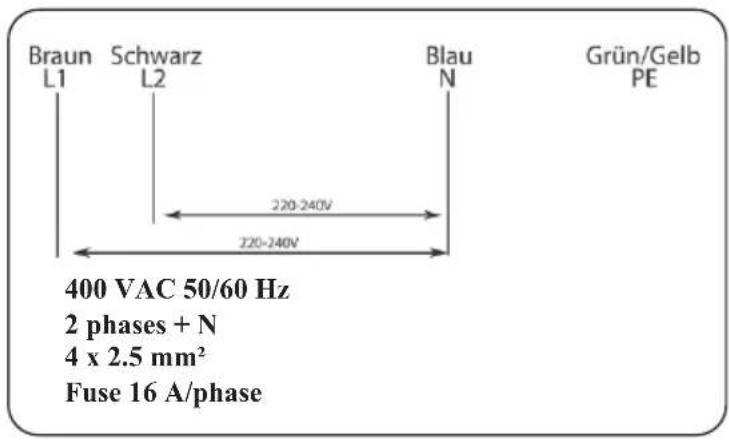
CHAPTER 14. CUSTOMER SERVICE
Customer service contact details can be found on the back of the operating instructions.
The article, version and serial number for the customer service request have ready.
This information can be found on the type plate attached to the underside of the hob.
CHAPTER 15. NOTES ON DISPOSAL
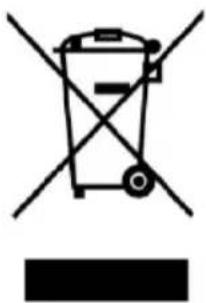
In accordance with the requirements of the European Directive 2012/19/EU on waste electrical and electronic equipment (WEEE), the symbol of a crossedout wheelic bin is shown on this product and the operating instructions:
natural_image
Symbol of a trash bin crossed with no text or numbers, representing waste sorting or restriction (no text present)Disposal of the appliance and packaging with normal household waste is not permitted!
- Dispose of this appliance at a recycling centre with a separate collection for electrical and electronic appliances.
• Disposal must be carried out in accordance with local waste disposal regulations.
- Please contact your local authority, your local household waste recycling centre or the retailer from whom you purchased this appliance for further information on the treatment, recycling and reuse of this product.
• Before disposing of the packaging, sort it according to material type, e.g. cardboard (paper), plastic film, etc.
• In doing so, you are making a valuable and positive contribution to protecting the environment and the health of your fellow human beings.
• In unsorted municipal waste, such a device could have negative consequences in this respect.
CHAPTER 16. DISPOSAL OF USED EQUIPENT
This device has been designed and manufactured of high-quality reusable materials and components.
The symbol of the crossed waste container placed on the product (Fig. A) means that the product is subject to selective collection in accordance with the provisions of Directive 2012/19/EU of the European Parliament and of the Council. a crossed-out wheelie bin symbol (Fig. B) placed on the product means that the product contains batteries that are subject to separate collection in accordance with the provisions of Directive 2006/66/EC of the European Parliament and of the Council. Such marking informs that electrical and electronic equipment and batteries (if any) must not be disposed of with other household waste after the period of use.
The user is obliged to return waste equipment and batteries (if any) to collection points for waste electrical and electronic equipment and batteries (if any). Collectors of such waste, including waste equipment collectors, treatment plants, distributors (shops), municipal waste separate collection points (municipal units), and other entities specified by law form an appropriate system to return this kind of equipment.
Correct disposal of waste equipment and batteries (if any) allows avoiding consequences that may be harmful to health and the environment, caused by the possible presence of hazardous components in the equipment and batteries, and inappropriate storage and processing of such equipment and batteries. Households play an important role in contributing to the reuse and recovery, including recycling, of waste equipment. At this stage, attitudes are formed, affecting the common good, which is a clean natural environment.
Moreover, households are one of the largest users of small equipment and the rational management thereof at this stage affects the recovery of secondary raw materials. Penalties may be imposed in accordance with national legislation for improper disposal of this product. If the device has a lock, please remove it for the safety of all persons who may later come into contact with the device. Some refrigerators and freezers contain insulation material and CFC refrigerant. Therefore, be careful not to pollute the environment when you dispose of your old refrigerator.
Fig. A
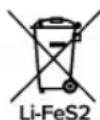
Fig. B
KERNAU
NÁVOD K OBSLUZE A MONTÁŽI
POVRCHOVÁ INDUKČNÍ VARNÁ DESKA KIH 8645-6B
natural_image
Pure geometric diagram with scattered dots and a small rectangle at the bottom (no text or symbols)natural_image
Simple line drawing of a cooking pot with a U-shaped magnet (no text or symbols)NEVHODNÉ KUCHYŃSKÉ NÁDOBÍ:
natural_image
Simple line drawing of a hand pointing upward with a circular icon on the index finger (no text or symbols)natural_image
Line drawing of a cooking pot on a stand with a flat surface (no text or symbols)natural_image
Simple line drawing of a hand pointing upward with a circular symbol on the index finger (no text or labels)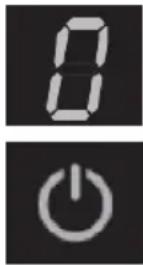
ZOBRAZENÍ UKAZATELE ZBYTKOVÉHO TEPLA

VAROVÁNÍ! NEBEZPEČÍ POPÁLENÍ
natural_image
Diagram showing various geometric shapes and symbols, including circular elements, rectangular blocks, and a central circle with cross marks (no text or labels)ZAPUŠTĚNÁ INSTALACE (LÍCUJÍCÍ)

VAROVÁNÍ!
natural_image
Symbol of a trash bin crossed out by two diagonal lines (no text or labels)
natural_image
Pure geometric lines and dots on a white background with no text or symbolsnatural_image
Simple line drawing of a cooking pot with a U-shaped tube attached to its side (no text or symbols)natural_image
Simple line drawing of a hand pointing upward with a circular icon on the index finger (no text or symbols)natural_image
Line drawing of a cooking pot on a stand with a flat surface (no text or symbols)natural_image
Simple line drawing of a hand pointing upward with a circular symbol on the index finger (no text or labels)natural_image
Diagram showing various geometric shapes and symbols, including circular elements, rectangular blocks, and a central circle with cross marks (no text or labels)natural_image
Symbol of a trash bin crossed with no text or labels, accompanied by a black rectangular block below (no text or symbols present)
- SZANOWNY KLIENCIE,
- NIEODPOWIEDNIE NACZYNIA KUCHENNE:
- WYŚWIETLANIE WSKAŹNIKA CIEPŁA RESZTKOWEGO
- OSTRZEŻENIE!
- Thank you for choosing this product.
- CONTENTS
- CHAPTER 1. Safety instructions....31
- CHAPTER 2. Your device at a glance....33
- CHAPTER 3. Operating elements....34
- CHAPTER 4. Control panel ....35
- CHAPTER 5. The right cookware....36
- CHAPTER 6. Using the surface induction hob....38
- CHAPTER 7. Cleaning and care....44
- CHAPTER 8. Safety devices....45
- CHAPTER 9. Error codes....46
- CHAPTER 10. Technical Data....47
- CHAPTER 11. Dimensional drawings....48
- CHAPTER 12. Installation ....50
- CHAPTER 13. Electrical connection....51
- CHAPTER 14. Customer service ....52
- CHAPTER 15. Notes on disposal ....52
- CHAPTER 16. Disposal of used equipment....53
- CHAPTER 1. SAFETY INSTRUCTIONS
- PRECAUTIONARY MEASURES BEFORE COMMISSIONING
- GENERAL SAFETY INSTRUCTIONS
- WARNING:
- CAUTION, RISK OF BURNS!
- PROTECTION AGAINST DAMAGE
- ATTENTION:
- FIRE HAZARD:
- PRECAUTIONARY MEASURES IN THE EVENT OF DEVICE FAILURE
- PROTECTION AGAINST FURTHER DANGERS
- NOTE:
- CHAPTER 2. YOUR DEVICE AT A GLANCE
- KIH 8645-6B
- CHAPTER 3. OPERATING ELEMENTS
- FUNCTION OF THE SENSOR BUTTONS
- SLIDER-OPERATION
- CHAPTER 4. CONTROL PANEL
- CHAPTER 5. THE RIGHT COOKWARE
- SUITABLE COOKWARE
- UNSUITABLE COOKWARE:
- DISPLAY OF UNSUITABLE / MISSING COOKWARE
- CHAPTER 6. USING THE SURFACE INDUCTION HOB
- Before switching on for the first time:
- SWITCH ON THE DEVICE
- COOKING OPERATION
- STOP COOKING
- SWITCH OFF THE DEVICE
- RESIDUAL HEAT DISPLAY
- WARNING! RISK OF BURNS
- Activate the „Power Boost“ performance level
- Deactivate the „Power Boost“ power level prematurely
- KEEP WARM FUNCTION
- Activate keep warm function
- Deactivating the keep warm function
- TIMER-FUNCTIONS
- PAUSE-FUNCTION
- Activate pause function
- Deactivate pause function
- CONTROL PANEL LOCK (CHILD LOCK)
- Activate the control panel lock:
- Deactivating the control panel lock:
- MAXI-ZONE
- CHAPTER 7. CLEANING AND CARE
- CAUTION:
- Possible causes of scratches
- How scratches can occur:
- CHAPTER 8. SAFETY DEVICES
- Protection against overheating
- Detection of small objects on the surface induction hob
- Protection through automatic switch-off
- CHAPTER 9. ERROR CODES
- CHAPTER 11. DIMENSIONAL DRAWINGS
- CHAPTER 12. INSTALLATION
- Preparatory work:
- Glue on the seal:
- WARNING!
- Risk of electric shock
- Installation requirements:
- CHAPTER 13. ELECTRICAL CONNECTION
- Additionally for Austria:
- ASSIGNMENT OF THE CONNECTION BOX ON THE DEVICE:
- ASSIGNMENT OF THE MAINS CABLE:
- CHAPTER 14. CUSTOMER SERVICE
- CHAPTER 15. NOTES ON DISPOSAL
- CHAPTER 16. DISPOSAL OF USED EQUIPENT
- NÁVOD K OBSLUZE A MONTÁŽI
- NEVHODNÉ KUCHYŃSKÉ NÁDOBÍ:
- ZOBRAZENÍ UKAZATELE ZBYTKOVÉHO TEPLA
- VAROVÁNÍ! NEBEZPEČÍ POPÁLENÍ
- VAROVÁNÍ!
Brand : Kernau
Model : KIH 8645-6B
Category : Cooker