
X3.2 - Action Camera Lamax - Free user manual and instructions
Find the device manual for free X3.2 Lamax in PDF.


| Product Type | Action Camera |
| Brand | Lamax |
| Model | X3.2 |
| Waterproof Depth (with case) | Up to 40 m |
| Battery Type | Li-ion (removable) |
| Charging Time | Approx. 4 hours |
| Charging Port | USB-C |
| Memory Card | microSD (TF card) |
| Video Resolution (max) | 4K at 30 fps |
| Additional Video Modes | Time-lapse, Loop Recording, Slow Motion |
| Photo Resolution (max) | 16 MP |
| Photo Features | Self-timer, Burst Mode |
| Wi-Fi | Yes (2.4 GHz) |
| Mobile App | Available (scan QR code) |
| Frequency Band | 2.41–2.475 GHz |
| Max RF Power | 6 dBi |
| Languages Supported | English, German, Czech, Slovak, Polish, Hungarian, Lithuanian |
| Auto Shutdown Timer | 1 min, 3 min, 5 min, or Off |
| Waterproof (camera only) | Only when placed in waterproof case |
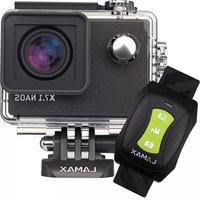
| Box Contents | Camera, Waterproof case, USB cable, Li-ion battery, Frame, Mounts |
| Warranty | 24 months (battery 24 months, capacitor 6 months) |
| Manufacturer | elem6 s.r.o., Prague, Czech Republic |
Frequently Asked Questions - X3.2 Lamax
User questions about X3.2 Lamax
0 question about this device. Answer the ones you know or ask your own.
Ask a new question about this device
Download the instructions for your Action Camera in PDF format for free! Find your manual X3.2 - Lamax and take your electronic device back in hand. On this page are published all the documents necessary for the use of your device. X3.2 by Lamax.
USER MANUAL X3.2 Lamax
natural_image
Front view of a gray LAMAX camera module with a circular lens and X3.2 branding (no additional text or symbols)EN - User Manual
natural_image
Exterior view of a gray LAMAX camera module (no text or symbols on body)CONTENTS
- BOX CONTENTS ....4
- GETTING TO KNOW THE CAMERA....5
- CAMERA CONTROLS 6
- CHARGING 6
- INSERT THE MEMORY CARD....6
- OPERATING THE CAMERA 6
- CAMERA FUNCTIONS....8
- CONNECTION TO PC....9
- WIFI - SMARTPHONE APPLICATION....9
- WATER RESISTANCE....9
- SAFETY PRECAUTIONS .... 10
1. BOX CONTENTS
A

natural_image
Exterior view of a gray LAMAX camera with a circular lens (no text or symbols on body)B

natural_image
Technical illustration of a mechanical device with mounting holes and a central circular component (no text or symbols)©

D

E

natural_image
Simple line drawing of a blank rectangular sign with two vertical bars at the bottom (no text or symbols)F

natural_image
Collection of mechanical component diagrams including brackets, mounts, and a housing (no text or symbols)A LAMAX X3.2 action camera
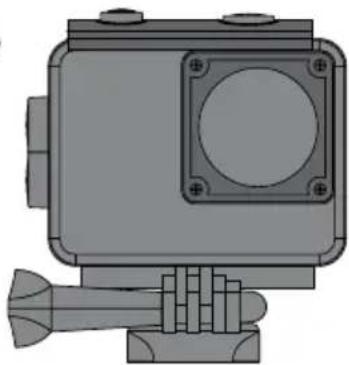
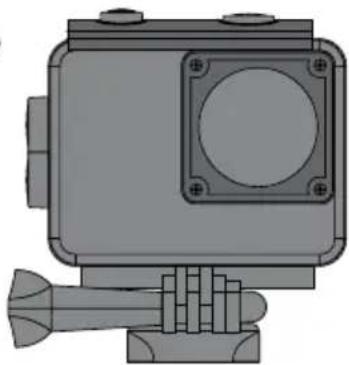
B Case waterproof up to 40 m
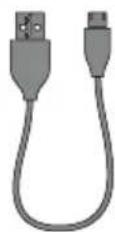
© USB cable for charging / file transfer
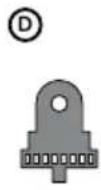
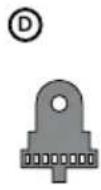
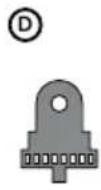
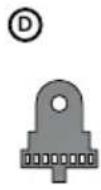
D Li-ion battery
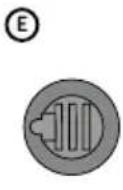
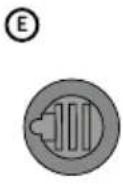
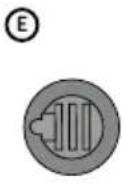
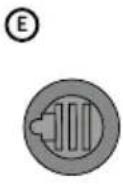
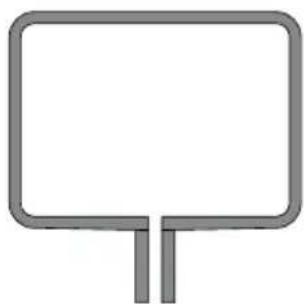
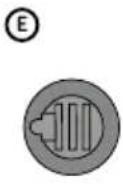
E Frame
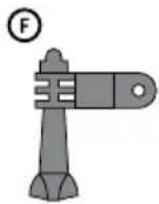
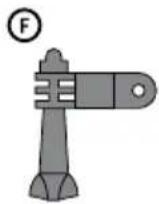
F Mounts
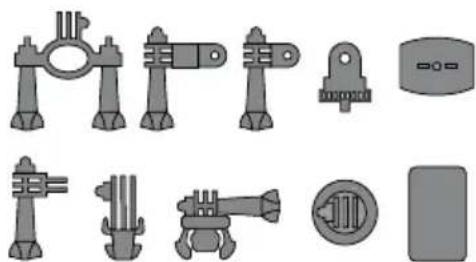
MOUNTS

natural_image
Mechanical component diagram with two vertical posts and a central circular feature (no text or symbols)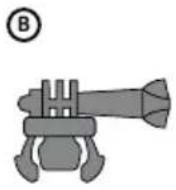



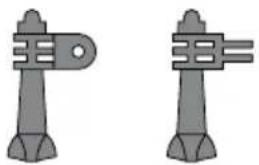
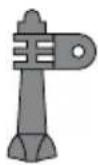
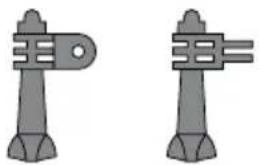
Ⓐ Pole mount – for attaching to handlebars
B Fast plug-in – for quickly snapping into the mount
© J mount – for quick snap-in with elevation
(D) Thread adapter – for connecting the camera without the case
E Tripod adapter – for connecting the camera in the case
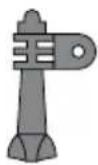
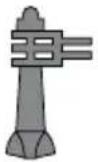
⑤ 3-axis connector – for mounting in any direction
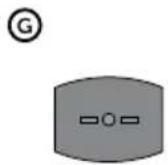
G Self-adhesive mount – for attaching to a smooth surface (helmet, bonnet)
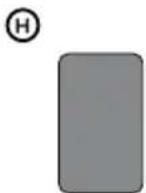
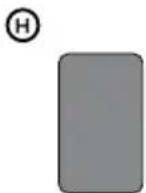
H Spare 3M pad – for reattaching the self-adhesive mount
2. GETTING TO KNOW THE CAMERA


Ⓐ Shutter button
B Up/down buttons
© System sounds
D Lens
E Power on/Mode button
F Memory card slot
© USB-C port
Note: Use only recommended accessories, otherwise the camera may be damaged.
3. CAMERA CONTROLS
| Power on / off | Press and hold the power button for 3 seconds. |
| Auto turn off | The camera switches off after 3 minutes of inactivity. |
| Start/stop recording | Press the shutter button to start recording, press the shutter button again to end recording. |
| Switch modes | Press the Mode button briefly. |
| Enter the menu | Press and hold the Mode selection button. |
| Movement in the menu | Press the up/down buttons. |
| Enter the selected menu item | Press the shutter button briefly. |
| Turn Wi-Fi on | Press and hold the up button. |
4. CHARGING
The action camera must be fully charged before first use.
The action camera can be charged by connecting it to a computer or to a suitable mains adapter (not included) using the supplied USB cable. Charging will start automatically, and the charging light will illuminate. Once the light goes off the action camera is fully charged.
Charging time takes approximately 4 hours.
When the low battery icon (☐) lights up on the display, the camera will automatically turn off and needs to be charged.
Note: If recording is in progress, the camera cannot be charged until you stop recording.
5. INSERT THE MEMORY CARD
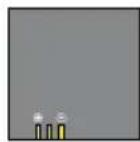
Insert the memory card into the slot so that the contacts face in the same direction as shown in the picture next to the slot. Otherwise, the action camera will not be able to identify it.
Insert the card only when the action camera is turned off and not connected to the computer.
Format the card directly in the camera before using it for the first time.
We recommend using memory cards with higher write speeds, especially if you want to record 4k, Full HD or HD videos.
Note: Use memory cards from reputable manufacturers. Non-branded cards do not guarantee proper functioning of the data storage.
If you need to remove the memory card, push it slightly with your finger towards the camera to release it from the slot and make it easier to remove.
Warning: Never remove the memory card from the action camera by force. There is a risk of damaging both the action camera and the memory card.
6. OPERATING THE CAMERA
TURNING ON THE ACTION CAMERA
Press and hold the power button for 3 seconds. The welcome screen appears, and the camera turns on in video mode.
TURNING OFF THE ACTION CAMERA
Press and hold the power button for 3 seconds while the camera is in idle mode (not recording, not starting playback, etc.) and the camera will turn off.
AUTOMATIC SHUTDOWN
The action camera will automatically turn off after 3 minutes of inactivity in idle mode.
SHUTDOWN ON LOW CHARGE
When the battery level is too low, the low battery icon (☐) lights up on the display and the camera turns off.
The camera is equipped with four operating modes:
Video mode: for taking recordings;
Photo mode: for taking pictures;
Motion mode: a special mode for recording in motion;
Playback mode: for playing back the current video/photo from the memory card.
After switching between the modes, briefly press the Mode button. The corresponding mode icon will appear on the top bar of the display:
Video mode:
Photo mode mode:
Motion mode:
Playback mode: ▶
VIDEO MODE
Action camera screen in video mode:
- Video mode icon
- Resolution and fps (frames per second)
- Remaining free capacity on the memory card
- Inserted memory card icon
- Wi-Fi icon
- Battery status icon
- Time Watermark
PHOTO MODE
Action camera screen in photo mode:
- Photo mode icon
- Resolution
- Remaining free capacity on the memory card
- Inserted memory card icon
- Wi-Fi icon
- Battery status icon
- Time Watermark
MOTION MODE
- Motion mode icon
- Resolution and fps (frames per second)
- Remaining free capacity on the memory card
- Inserted memory card icon
- Wi-Fi icon
- Battery status icon
- Time Watermark


PLAYBACK MODE
- Playback mode icon
- Current file number/total number of files
- Battery status icon

After selecting the playback operating mode, press the up/down buttons to select the file you want to play or view.
Press the trigger button to play or view the file. Press the trigger again to interrupt video playback.
Press the up/down fast-forward/rewind button while playing or viewing files.
Press the power button to stop video playback.
7. CAMERA FUNCTIONS
| Video Resolutio | Video resolution selection. |
| Recording Sound | Captures the audio track of the video using the built-in microphone. |
| Time-lapse Video | A technique that involves capturing individual frames at regular intervals and playing them back at an accelerated speed, thus displaying a long-term event in a short time. |
| Loop Recording | Allows continuous recording by overwriting old data. |
| Slow Motion | Enables playback of slowed-down footage for detailed tracking of fast actions. |
| Video bitrate | It determines the quality and size of the video – higher bitrate means better image quality, but also larger file size. |
| Photo Resolution | 2Mpx, 5Mpx, 8Mpx, 12Mpx, 16Mpx |
| Self-timer | 5s, 10s, 20s |
| Series of photos | Allows taking rapidly consecutive shots at short intervals, ideal for capturing fast actions or motion sequences. |
| Exposure | Adjusts the amount of light hitting the sensor, thereby affecting the brightness and darkness of captured images. |
| White Balance | Adjusts the color temperature of the images to match the current lighting conditions and ensure more accurate color reproduction. |
| Image Rotation | Allows rotation of the image. |
| Frequency | 50Hz, 60Hz |
| Indicator Light | It blinks when recording video. |
| Screen Saver | 10s, 20s, 30s |
| Auto Shutdown | 1 minute, 3 minutes, 5 minutes, Off |
| Time Watermark | Serves to insert the current date and time into the video, facilitating identification and organization of recordings. |
| System sounds | Allows users to individually adjust the volume of system sounds. |
| Language | English, German, Czech, Slovak, Polish, Hungarian, Lithuanian |
| Date-Time | Adds a timestamp to videos for easy identification, synchronization, and archiving of recordings. |
| Format | Restores the card to its default state. |
| Factory settings | Restores all camera settings to the original factory values. |
| Firmware Version | Indicates the current firmware version. |
8. CONNECTION TO PC
Connect the action camera to your computer using the supplied USB cable.
Open the folder with the connected external device and you can manage the saved files in the saved files folder.
Note: Do not disconnect the action camera from the computer or remove the memory card while downloading files. There is a risk of data loss.
If the action camera is connected in U-drive mode (MSDC mode), press the shutter button to switch it to Webcam mode (PCCAM), the display will show: PCCAM.
You can now launch the webcam via the application.
Press the shutter button briefly to return.
Note: The driver for Webcam mode (PCCAM mode) is not required for Windows XP (SP3) or higher.
9. WIFI – SMARTPHONE APPLICATION

flowchart
graph LR
    A["APPLICATION"] --> B["手机下载"]
    B --> C["Wi-Fi接入"]
    C --> D["手触屏与指纹"]
With the mobile app, you will be able to change camera modes and settings or view and download recorded videos and photos directly to your mobile device.
Ⓐ Scan the QR code to download the app or click the following link: https://www.lamax-electronics.com/x32/app/
B Install the app on your mobile device.
© Turn on the WiFi in the camera by pressing the UP button.
On your mobile device, connect to the WiFi network with the camera name. The WiFi password is displayed on the camera (default: 1234567890).
E After successful connection, open the app and click "Connect Camera" to enter the camera interface and control it.
10. WATER RESISTANCE
Resistance to immersion in water is guaranteed under the following conditions:
ACTION CAMERA:
The camera is waterproof only when placed in a waterproof case.
WATERPROOF CASE:
The case can withstand immersion to a depth of 40 metres. Before using the camera inside the case, make sure to close the case's rear door properly using the mechanism on the top of the case. The door and seal must be free of all debris such as dust, sand, etc. When using in salt water, rinse the case down afterwards with fresh water. Do not use any textile cloths or external heat sources (hair dryer, microwave, etc.) to dry the case and always allow it to dry slowly.
11. SAFETY PRECAUTIONS
The consumer is required to learn the principles of safe use of the product before first use.
PRECAUTIONS AND NOTICES
- For your own safety, do not use the camera's controls while driving.
- A window mount is needed when using the recorder in a car. Make sure that you place the recorder in an appropriate place, so as not to obstruct the driver's view or deployment of airbags.
- Make sure that no object is blocking the camera lens and no reflective material is placed near the lens. Please keep the lens clean.
- If the car's windshield is tinted or coated, it may impact the recording quality.
SAFETY PRECAUTIONS
- Do not use the charger in high moister environment. Never touch the charger when your hands or feet are wet.
- Allow adequate ventilation around the charger when using it to operate the device or to charge the battery. Do not cover the charger with paper or other objects that will reduce cooling. Do not use the charger while it is inside a carrying case.
- Connect the charger to a proper power source. The voltage requirements are found on the product case and/or on the packaging.
- Do not use the charger if it is visibly damaged. In case of damage, do not repair the equipment yourself!
– In case of device overheating, immediately disconnect the power source.
– Charge the device under supervision only. - Packaging contains small pieces, that can be dangerous for children. Store the product always out of reach of children. Bags or many of the pieces containing may cause suffocation after swallowing.
SAFETY NOTICES FOR LI-ION BATTERIES
– Before first use, fully charge the battery.
- For charging only use chargers, that is specified for this type of battery.
- Use standard cables for charging, otherwise it could damage the device.
- Never connect to a mechanically damaged charger or if the batteries are swollen. Do not use batteries in this condition due to risk of explosion.
- Do not use any damaged adapter or charger.
- Charge at room temperature, never charge at a temperature below 0°C or at a temperature higher than 40°C.
- Avoid dropping the battery, don't puncture, or mutilate it. Definitely do not attempt to repair a damaged battery.
- Do not expose the charger or battery to moisture, water, rain, snow or any kind of various liquids.
- Do not leave the battery in the car, do not expose to direct sunlight and do not place it near heat sources. Strong light or high temperatures can damage the battery.
- Never leave batteries without supervision during charging, short circuit or accidentally overcharge. Some batteries are unsuitable for fast charging or being charged excessively. This can cause a shock, or due to charger failure, may cause leakage of aggressive chemicals, explosion or subsequent fire!
- In the case of excessive heating of the battery during charging, immediately disconnect it from the power supply.
- Do not place charger and charging battery on or near flammable objects. Beware of curtains, carpets, tablecloths etc.
- Once the battery or device with integrated battery is fully charged, disconnect it from the power supply.
- Keep the battery out of the reach of children and animals.
- Never disassemble the charger or battery. If the battery is integrated, do not disassemble the device, unless stated otherwise. Any such attempt is dangerous and can cause injury or damage to the product and subsequent loss of warranty.
- Do not dispose worn or damaged batteries into the trash, fire or into heating devices, but hand them in at collection points for hazardous waste.
CARING FOR YOUR DEVICE
- Taking good care of your device will ensure trouble-free operation and reduce the risk of damage.
- Keep your device away from excessive moisture and extreme temperatures and avoid exposing your device to direct sunlight or strong ultraviolet light for extended periods of time.
- Do not drop your device or subject it to severe shock.
- Do not subject your device to sudden and severe temperature changes. This could cause moisture condensation inside the unit, which could damage your device. In the event of moisture condensation, allow the device to dry out completely before use.
- The screen surface can easily be scratched. Avoid touching it with sharp objects.
- Never clean your device when it is powered on. Use a soft, lint-free cloth to wipe the screen and the exterior of your device. Do not use paper towels to clean the screen.
- Never attempt to disassemble, repair or make any modifications to your device. Disassembly, modification or any attempt at repair could cause damage to your device and even bodily injury or property damage and will void any warranty.
- Do not store or carry flammable liquids, gases or explosive materials in the same compartment as your device, its parts or accessories.
- To discourage theft, do not leave the device and accessories in plain view in an unattended vehicle.
- Overheating may damage the device.
- In the case of contact with heavily chlorinated water or sea water, rinse the camera and all used accessories, in drinking water and dry it.
- Do not use an external heat source such as a microwave oven or hair dryer to dry the camera.
- Always make sure that the battery door or the power port door is not ajar before swimming or diving. If they are, close them. Otherwise, the camera will not remain watertight.
- Only wipe the display with a cloth that is designed for this purpose to avoid scratching it.
OTHER INFORMATION
1) For households: This marking indicates (✗) that this product should not be disposed with other household wastes throughout the EU. To prevent possible harm to the environment or human health from uncontrolled waste disposal, recycle it responsibly to promote the sustainable reuse of material resources. To return your used device, please use the return and collection systems or contact the retailer where the product was purchased. They can take this product for environmental safe recycling. In case of incorrect disposal of this kind of wastes user can be fined according to national laws. User information for disposal of electric and electronic devices in countries outside the EU: The symbol stated above (crossed recycle bin) is valid only in countries in European Union. For correct disposal of electric and electronic devices ask your city hall or distributor of these devices. Everything is expressed by the symbol of crossed recycle bin on product, cover or printed materials.
2) You can determine a warranty service at the place of purchase. In case of technical problems or queries contact your dealer who will inform you about the following procedure. Follow the rules for work with electric devices. User is not allowed to disassembly the device neither replace any of its components. To reduce the risk of electric shock, do not remove or open the cover. In case of incorrect setup and plug in of device you will expose yourself risk of electric shock.
The warranty period for products is 24 months, unless otherwise stated. The warranty does not cover damage caused by non-standard use, mechanical damage, exposure to extreme conditions, handling contrary to the manual or normal wear and tear. The warranty period for the battery is 24 months, and for its capacitor 6 months. For more information on the warranty, please visit www.elem6.com/warranty
The manufacturer, importer or distributor shall not be liable for any damage caused by the installation or improper use of the product.
EU DECLARATION OF CONFORMITY
elem6 s.r.o. hereby declares that LAMAX X3.2 are in compliance with the requirements and other relevant provisions of Directives 2014/30/EU, 2014/53/EU and RoHS 2011/65/EU Annex II 2015/863. The all LAMAX products are intended for sale without restrictions in Germany, the Czech Republic, Slovakia, Poland, Hungary and other EU member states. The declaration of conformity can be downloaded from https://www.lamax-electronics.com/support/doc/
Frequency band in which the radio equipment operates: 2.41–2.475 GHz
Maximum radio-frequency power transmitted in the frequency band in which the radio equipment operates: 6 dBi
MANUFACTURER:
elem6 s.r.o., Braškovská 308/158, 161 00 Praha 6 www.lamax-electronics.com

CE

Misprints and changes in the manual are reserved.
LAMAX
ELECTRONICS
LAMAX X3.2
ACTION CAMERA

natural_image
Exterior view of a gray LAMAX camera module (no text or symbols on body)INHALT
natural_image
Exterior view of a gray LAMAX camera with a circular lens (no text or symbols on body)B

natural_image
Technical illustration of a mechanical device with mounting holes and a central circular component (no text or symbols)©

D
E

natural_image
Simple line drawing of a blank rectangular frame with two vertical bars at the bottom (no text or symbols)F

natural_image
Collection of mechanical component diagrams including brackets, mounts, and a housing (no text or symbols)natural_image
Mechanical component diagram with two vertical posts and a central circular feature (no text or symbols)




flowchart
graph LR
    A["APPLICATION"] --> B["Download"]
    B --> C["Table with Wi-Fi icon"]
    C --> D["Hand interacting with smartphone"]
natural_image
Exterior view of a gray LAMAX camera module (no text or symbols on body)OBSAH
- OBSAH BALENÍ....2
- SEZNÁMENÍ S KAMEROU....3
- PŘEHLED OVLÁDÁNÍ KAMERY 4
- NABÍJENÍ....4
- VLOŽENÍ PAMĚTOVÉ KARTY 4
- OVLÁDÁNÍ KAMERY....4
- FUNKCE KAMERY 6
- PŘIPOJENÍ K POČÍTAČI 7
- WIFI - MOBILNÍ APLIKACE....7
- VODOTĚSNOST....7
- BEZPEČNOSTNÍ OPATŘENÍ 8
1. OBSAH BALENÍ
A

natural_image
Exterior view of a gray LAMAX camera with a circular lens (no text or symbols on body)B
natural_image
Technical illustration of a mechanical component with mounting holes and a central circular feature (no text or symbols)©

D

E

natural_image
Simple line drawing of a blank rectangular frame with two vertical bars at the bottom (no text or symbols)F

natural_image
Collection of mechanical component diagrams including bolts, brackets, and a door (no text or symbols)natural_image
Mechanical component diagram with two vertical posts and a central circular feature (no text or symbols)


natural_image
Two identical gray mechanical components with no visible text or symbols

flowchart
graph LR
    A["APPLICATION"] --> B["手机"]
    B --> C["Wi-Fi icon"]
    C --> D["Hand gesture pointing to payment icon"]
natural_image
Exterior view of a gray LAMAX camera module (no text or symbols on body)OBSAH
- OBSAH BALENIA....2
- ZOZNÁMENIE S KAMEROU....3
- PREHL'AD OVLÁDANIA KAMERY 4
- NABÍJANIE....4
- VLOŽENIE PAMÄTOVEJ KARTY 4
- OVLÁDANIE KAMERY 4
- FUNKCIE KAMERY 6
- PRIPOJENIE K POČÍTAČI 7
- WI-FI - MOBILNÁ APLIKÁCIA 7
- VODEODOLNOST .... 7
- BEZPEČNOSTNÉ OPATRENIA....8
1. OBSAH BALENIA
A

natural_image
Exterior view of a gray LAMAX camera with a circular lens (no text or symbols on body)B

natural_image
Technical illustration of a mechanical device with mounting holes and a central circular component (no text or symbols)©

D
E

natural_image
Simple line drawing of a blank rectangular sign with two vertical bars at the bottom (no text or symbols)F

natural_image
Collection of mechanical component diagrams including brackets, mounts, and a housing (no text or symbols)natural_image
Mechanical component diagram with two vertical posts and a central circular feature (no text or symbols)




flowchart
graph LR
    A["APPLICATION"] --> B["手机"]
    B --> C[" tablet scanning"]
    C --> D[" finger interaction"]
natural_image
Exterior view of a gray LAMAX camera module (no text or symbols on body)SPIS TREŚCI
- ZAWARTOŚĆ OPAKOWANIA....2
- ZAPOZNANIE Z KAMERA....3
- PRZEGLĄD STEROWANIA KAMEREM 4
- ŁADOWANIE....4
- WKŁADANIE KARTY PAMIĘCI....4
- STEROWANIE KAMEREM 4
- FUNKCJE KAMERY 6
- PODŁĄCZENIE DO KOMPUTERA....7
- WI-FI - APLIKACJA MOBILNA 7
- WODOODPORNY 7
- ŚRODKI BEZPIECZEŃSTWA....8
1. ZAWARTOŚĆ OPAKOWANIA
A

natural_image
Exterior view of a gray LAMAX camera with a circular lens (no text or symbols on body)B

natural_image
Technical illustration of a mechanical device with mounting holes and a central circular component (no text or symbols)©

D
E

natural_image
Simple line drawing of a blank rectangular sign with two vertical bars at the bottom (no text or symbols)F
natural_image
Collection of mechanical component diagrams including brackets, mounts, and a housing (no text or symbols)natural_image
Mechanical component diagram with two vertical posts and a central circular feature (no text or symbols)



natural_image
Exterior view of a gray LAMAX camera module (no text or symbols on body)TARTALOM
- A DOBOZ TARTALMA 2
- A KAMERA MEGISMERÉSE....3
- KAMERA VEZÉRLÓK....4
- FELTÖLTÉS 4
- HELYEZZE BE A MEMÓRIAKÁRTYÁT 4
- A KAMERA MÜKÖDTETÉSE 4
- KAMERA FUNKCIÓK 6
- CSATLAKOZÁS A SZÁMÍTÓGÉPHEZ 7
- WI-FI - OKOSTELEFONOS ALKALMAZÁS....7
- VÍZÁLLÓSÁG 7
- BIZTONSÁGI INTÉZKEDÉSEK 8
1. A DOBOZ TARTALMA
A

natural_image
Exterior view of a gray LAMAX camera with a circular lens (no text or symbols on body)B

natural_image
Technical illustration of a mechanical assembly with mounting holes and a central circular component (no text or symbols)©

D
E

natural_image
Simple line drawing of a blank rectangular sign with two vertical bars at the bottom (no text or symbols)F

natural_image
Collection of mechanical component diagrams including brackets, mounts, and a housing (no text or symbols)natural_image
Mechanical component diagram with two vertical posts and a central circular feature (no text or symbols)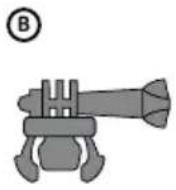


flowchart
graph LR
    A["APPLICATION"] --> B["Download"]
    B --> C["Hand Touch"]
    C --> D["Phone Interaction"]
natural_image
Exterior view of a gray LAMAX camera module (no text or symbols on body)VSEBINA
- VSEBINA PAKETA 2
- SPOZNAVANJE S KAMERO....3
- PREGLED NADZORA KAMERE 4
- POLNJENJE....4
- VSTAVITEV POMNILNIŠKE KARTICE 4
- NADZOR KAMERE....4
- FUNKCIJE KAMERE 6
- RAČUNALNIŠKA POVEZAVA 7
- WI-FI - MOBILNA APLIKACIJA 7
- VODOODPORNOST 7
- VARNOSTNI UKREPI 8
1. VSEBINA PAKETA
A

natural_image
Exterior view of a gray LAMAX camera with a circular lens (no text or symbols on body)B
natural_image
Technical illustration of a mechanical device with mounting holes and a central circular component (no text or symbols)©

D
E
natural_image
Simple line drawing of a blank rectangular frame with two vertical bars at the bottom (no text or symbols)F

natural_image
Collection of mechanical component diagrams including brackets, mounts, and a housing (no text or symbols)(A) Akcijska kamera LAMAX X3.2
B Vodoodporna embalaža do 40 m
© USB kabel za polnjenje/prenos datotek
D Li-ion baterija
© Okvir
F Prijemala
PRIJEMALA

natural_image
Mechanical component diagram with two vertical posts and a central circular feature (no text or symbols)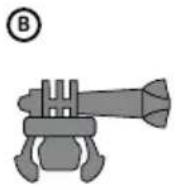


natural_image
Two identical gray mechanical components with no visible text or symbols

A Sprožilec
B Gumbi gor/dol
© Sistemske zvoke
D Objektiv
natural_image
Exterior view of a gray LAMAX camera module (no text or symbols on body)SADRŽAJ
- SADRŽAJ PAKIRANJA....2
- UPOZNAVANJE S KAMEROM....3
- PREGLED UPRAVLJANJA KAMEROM 4
- PUNJENJE 4
- UMETAK MEMORIJSKE KARTICE....4
- UPRAVLJANJE KAMEROM 4
- FUNKCIJE KAMERE 6
- POVEZIVANJE NA RAČUNALO 7
- WI-FI - MOBILNA APLIKACIJA 7
- VODONEPROPUSNOST 7
- SIGURNOSNE MJERE....8
1. SADRŽAJ PAKIRANJA
A

natural_image
Exterior view of a gray LAMAX camera with a circular lens (no text or symbols on body)B

natural_image
Technical illustration of a mechanical device with mounting holes and a central circular component (no text or symbols)©
D

E

natural_image
Simple line drawing of a blank rectangular sign with two vertical bars at the bottom (no text or symbols)F

natural_image
Collection of mechanical component diagrams and symbols, including brackets, gears, and a shield (no text or labels)(A) Akcijska kamera Lamax X3.2
B Vodootporno pakiranje do 40 m
© USB kabel za punjenje/prijenos datoteka
D Li-ion baterija
E Okvir
F Hvataljke
HVATALJKE

natural_image
Mechanical component diagram with two vertical posts and a central circular feature (no text or symbols)




A Okidač
B Tipke gore/dolje
© Sistemski zvukovi
D Objektiv
E Tipka za uključivanje/odabir načina rada
F Utor za memorijsku karticu
© USB-C priključak
Napomena: Koristite samo preporučenu dodatnu opremu, inače se kamera može oštetiti.
3. PREGLED UPRAVLJANJA KAMEROM
| Uključivanje i isključivanje | Pritisnite i držite gumb za napajanje 3 sekunde. |
| Automatsko isključivanje | Kamera se isključuje nakon 3 minute neaktivnosti. |
| Pokretanje/zaustavljanje snimanja | Pritisnite okidač za početak snimanja, ponovno pritisnite okidač za završetak snimanja. |
| Promjena načina rada | Kratko pritisnite tipku za odabir načina rada. |
| Ulazak u izbornik | Pritisnite i držite tipku za odabir načina rada. |
| Krećite se kroz izbornik | Pritisnite tipke gore/dolje. |
| Ulaz u odabranu stavku izbornika | Pritisnite kratko okidač. |
| Uključite Wi-Fi | Pritisnite i držite tipku gore. |
4. PUNJENJE
Akcijska kamera mora biti potpuno napunjena prije prve uporabe.
Akcijska kamera se može puniti spajanjem na računalo ili na odgovarajući mrežni adapter (nije uključen u pakiranje) pomoću priloženog USB kabela. Punjenje će započeti automatski i indikator punjenja će zasvi-jetliti. Čim se ugasi, akcijska kamera je potpuno napunjena.
Vrijeme punjenja traje otprilike 4 sata.
Kada ikona niske baterije (☐), zasvijetli na zaslonu, kamera se automatski isključuje i treba je napuniti.
Napomena: Ako je snimanje u tijeku, kamera se neće moći puniti dok ne zaustavite snimanje.
5. UMETAK MEMORIJSKE KARTICE
Umetnite memorijsku karticu u utor tako da kontakti budu okrenuti u istom smjeru kao što je prikazano na slici pored utora. U suprotnom akcijska kamera neće moći identificirati.
Karticu umetnite samo kada je akcijska kamera isključena i nije spojena na računalo.
Formatirajte karticu izravno u fotoaparatu prije prve uporabe.
Preporučamo korištenje memorijskih kartica s većom brzinom pisanja, posebno ako želite snimati 4k, Full HD ili HD videozapise.
Napomena: Koristite samo memorijske kartice renomiranih proizvođača. Kartice drugih proizvođača ne jamče ispravan rad pohrane podataka.
Ako trebate izvaditi memorijsku karticu, nježno je gurnite prstom prema fotoaparatu kako biste je oslobodili iz utora i lakše je izvadili.
Upozorenje: Nikada ne uklanjajte memorijsku karticu iz akcijske kamere na silu. Postoji opasnost od oštećenja akcijske kamere i memorijske kartice.
6. UPRAVLJANJE KAMEROM
UKLJUČITE AKCIJSKU KAMERU
Pritisnite i držite tipku za napajanje 3 sekunde. Pojavljuje se početni zaslon i kamera se uključuje u video modu.
ISKLJUČITE AKCIJSKU KAMERU
Pritisnite i držite tipku za napajanje 3 sekunde kada je kamera u stanju mirovanja (ne snima, ne reproducira itd.) i kamera će se isključiti.
AUTOMATSKO GAŠENJE
flowchart
graph LR
    A["APPLICATION"] --> B["手机"]
    B --> C[" tablet with Wi-Fi icon"]
    C --> D["手机操作按钮"]
Zahvaljujući mobilnoj aplikaciji, moći čete mijenjati režime i postavke kamere ili pregledavati i preuzimati snimljena videa i fotografije izravno na vaš mobilni uređaj.
A Skenirajte QR kôd za instaliranje aplikacije ili kliknite na sljedeću poveznicu: https://www.lamax-electronics.com/x32/app/
B Instalirajte aplikaciju na svoj mobilni uređaj.
© Uključite Wi-Fi u kameri dugim pritiskom na tipku gore.
D Povežite se na svom mobilnom uređaju na WiFi mrežu s nazivom kamere. Lozinka za WiFi prikazana je na zaslonu kamere (tvornički: 1234567890).
E Nakon uspješne veze, otvorite aplikaciju i kliknite „Poveži kameru“ za ulazak u sučelje kamere i upravljanje njome.
10. VODONEPROPUSNOST


- CONTENTS
- BOX CONTENTS
- MOUNTS
- GETTING TO KNOW THE CAMERA
- CAMERA CONTROLS
- CHARGING
- INSERT THE MEMORY CARD
- OPERATING THE CAMERA
- TURNING ON THE ACTION CAMERA
- TURNING OFF THE ACTION CAMERA
- AUTOMATIC SHUTDOWN
- SHUTDOWN ON LOW CHARGE
- VIDEO MODE
- PHOTO MODE
- MOTION MODE
- PLAYBACK MODE
- CAMERA FUNCTIONS
- CONNECTION TO PC
- WIFI – SMARTPHONE APPLICATION
- WATER RESISTANCE
- ACTION CAMERA:
- WATERPROOF CASE:
- SAFETY PRECAUTIONS
- PRECAUTIONS AND NOTICES
- SAFETY PRECAUTIONS
- SAFETY NOTICES FOR LI-ION BATTERIES
- CARING FOR YOUR DEVICE
- OTHER INFORMATION
- EU DECLARATION OF CONFORMITY
- MANUFACTURER:
- LAMAX
- ELECTRONICS
- LAMAX X3.2
- ACTION CAMERA
- INHALT
- OBSAH
- OBSAH BALENÍ
- OBSAH BALENIA
- SPIS TREŚCI
- ZAWARTOŚĆ OPAKOWANIA
- TARTALOM
- A DOBOZ TARTALMA
- VSEBINA
- VSEBINA PAKETA
- PRIJEMALA
- SADRŽAJ
- SADRŽAJ PAKIRANJA
- HVATALJKE
- PREGLED UPRAVLJANJA KAMEROM
- PUNJENJE
- UMETAK MEMORIJSKE KARTICE
- UPRAVLJANJE KAMEROM
- UKLJUČITE AKCIJSKU KAMERU
- ISKLJUČITE AKCIJSKU KAMERU
- AUTOMATSKO GAŠENJE
- VODONEPROPUSNOST
Brand : Lamax
Model : X3.2
Category : Action Camera