
55USL231 - TV ECG - Free user manual and instructions
Find the device manual for free 55USL231 ECG in PDF.


| Product Type | LED TV with Ultra HD (4K) resolution |
| Screen Size | 55 inches (139.7 cm) |
| Resolution | 3840 x 2160 pixels (Ultra HD) |
| Digital Tuner | DVB-T2, DVB-C, DVB-S2 |
| Power Consumption (Typical) | 140 W |
| Standby Power Consumption | < 2 W (Network Standby) |
| Audio Output | 2 x 10 W (Stereo), Dolby Atmos |
| Dimensions with Stand (W x H x D) | 1233 x 750 x 270 mm |
| Dimensions without Stand (W x H x D) | 1233 x 712 x 87 mm |
| VESA Mounting | 200 x 200 mm, M6 screws |
| Operating Voltage | 220-240 V AC, 50 Hz |
| Connectivity | 3 x HDMI (1 with ARC), 1 x USB, Ethernet, Wi-Fi 802.11 a/b/g/n, CI+ slot, Headphone jack, SPDIF optical audio output |
| Smart TV Features | Netflix, Prime Video, YouTube, Rakuten TV, Twitch, HbbTV, Web Browser |
| HDR Support | HDR10, HLG, Dolby Vision |
| Game Mode | Yes, with ALLM (Auto Low Latency Mode) |
| Media Playback | USB playback: video (MP4, MKV, AVI etc.), audio (MP3, AAC etc.), image (JPEG, PNG), subtitles (SRT, ASS) |
| Power Saving | Multiple modes (Off, Minimum, Medium, Maximum, Auto, Screen Off) |
| Child Lock | Yes, parental control with PIN |
| Hotel Mode | Yes, for commercial use with custom restrictions |
Frequently Asked Questions - 55USL231 ECG
User questions about 55USL231 ECG
0 question about this device. Answer the ones you know or ask your own.
Ask a new question about this device
Download the instructions for your TV in PDF format for free! Find your manual 55USL231 - ECG and take your electronic device back in hand. On this page are published all the documents necessary for the use of your device. 55USL231 by ECG.
USER MANUAL 55USL231 ECG
Read carefully and save for future use!
Warning: The safety measures and instructions, contained in this manual, do not include all conditions and situations possible. The user must understand that common sense, caution and care are factors that cannot be integrated into any product. Therefore, these factors shall be ensured by the user/s using and operating this appliance. We are not liable for damages caused during shipping, by incorrect use, voltage fluctuation or the modification or adjustment of any part of the appliance. To protect against a risk of fire or electric shock, basic precautions shall be taken while using electrical appliances, including the following:
- Be very careful when unpacking the device. In particular, protect the screen of the device. It is very easy to get damaged.
- Read all of the instructions carefully.
- Keep the instructions for future reference.
- Pay attention to warnings found in the manual.
- Follow all instructions.
- Do not use the device close to water.
- Clean only with dry cloth.
- Do not block exhaust vents. Place the device according to the manufacturer's instructions.
- Do not place the device near heating sources, such as radiators, heating units, stoves, or other appliances (including amplifiers) producing heat. Do not install the appliance near an open flame (for example, candles). Under no circumstances should an open flame (e.g. a burning candle) be placed on the product. Also, do not place hot objects or objects with open flames on or near the unit. High temperatures can melt plastic parts and cause fires.
- Connect the appliance only to proper and maintained wiring. Make sure that the voltage and frequency of your outlet match the voltage, frequency, and load rating listed on the equipment label and that the outlet is properly grounded. The outlet must be installed in accordance with applicable electrical codes according to EN.
- Protect the power cable from damage. Do not step on it or bend it.
- The power cord and plug must be protected. Care must be taken to ensure that no object is placed on the power cable that may damage the cable insulation.
- Use only accessories and optional accessories recommended by the manufacturer.
- Disconnect the appliance from the mains in the event of thunderstorms or other atmospheric phenomena. that you will not be using the appliance for an extended period of time or before servicing, unplug the power cord from the power outlet. Disconnect the power cord by pulling the plug – never by pulling the power cord.
- Refer to qualified service workers for all necessary repairs and in the event of a fault. Never tamper with the device and do not perform any technical interventions.
- The device requires service if it is damaged in any way. If the power cord or its plug is damaged, liquid or a foreign object has entered the power cord. If it has been exposed to rain or moisture, it has been dropped or is not functioning normally.
- The socket to which the TV is connected must be easily accessible at all times. Place the plug of the power cord of the device directly into a separate socket. Do not use splitters or extension leads. When unplugging, hold the plug, not the power cord
- Respect the ecological disposal of batteries.
- The appliance is designed for operation exclusively indoors and in temperate climates.
- Do not place any objects filled with liquid on the device, e.g. a vase with flowers.
- Electric discharge can lead to faults. Functionality can be manually restored by switching the appliance off and on again.
- This appliance may be used by children over 8 years of age and persons with limited physical and mental abilities and persons without experience and knowledge of the appliance, provided that supervision and/or instruction is provided with regard to the use of the appliance in a safe manner so that the hazards
associated with its use are understood. Children must not play with this appliance. Children cannot clean or otherwise maintain the appliance without supervision.
- DANGER TO CHILDREN: Children may not play with the packaging material. Do not let children play with the plastic bags. Risk of suffocation.
- This television receiver uses high voltage for operation. Do not remove the back cover of the device. Refer to qualified service workers for all necessary repairs.

Warning
Do not expose the appliance to rain or moisture. Do not immerse it in any liquid. There is a risk of electric shock.
Do not expose the appliance to rain or moisture. Risk of fire or electric shock.
- Protect the device from drops, shocks, impacts and vibrations. Further from dust and moisture.
• Prevent foreign objects entering the ventilation holes of the device. Protect the TV from spilling any liquids. - Never insert objects into the air vents of the device. This could cause a short circuit, electric shock or other damage. Also, do not pour any liquid into the device.
- If the unit is powered by an adapter, use only the supplied adapter.
Attention
Make sure that the power cord does not get caught under the TV.
Do not lean against the TV, tilt or push the device. Pay close attention to the presence of children. A falling device could cause serious injury.
Do not place the TV on unstable carts, stands, shelves or tables. A fall could damage the device or cause injury. Place the TV on a flat and stable surface.
Do not cover the ventilation holes on the back cover of the device. Sufficient ventilation is necessary for the proper functioning of electrical components.
When installing and operating the appliance, leave a clear space on all sides, which is necessary for proper air circulation. During operation, heat is generated and dissipated in this way. Under no circumstances operate the appliance in closed bookcases or shelves. Do not install it in direct sunlight or any place where heat is generated (radiators, stoves, heat exchangers, etc.).
Leave enough space around the appliance to prevent it from overheating (for example, when placed in a living room wall or other enclosed space). There is a risk of overheating of the TV, which can cause damage to the appliance or a fire.
- Unplug the device from the outlet before cleaning.
- Clean the product only with a dry cloth.
- Do not use solvents, thinners, abrasive cleaners or wire cloths for cleaning.
Remote control and battery

Warning
Protect the batteries from exposure to high temperatures. Do not expose them to direct fire or sunlight.
- Do not expose the remote control or batteries to direct sunlight.
- The remote control and battery must not be exposed to running or dripping water. Use the remote control indoors only.
- Insert the batteries into the controller in the correct direction (polarity). Improper insertion of the batteries may cause damage to the remote control or electrolyte leakage.
- Do not charge, heat, open or short-circuit the batteries.
- Do not throw batteries into the fire.
- Do not leave dead batteries in the remote control.
- If you do not use the remote control for a long time, remove the batteries.
-
Do not combine different types of batteries. Always use only one type. Also, do not combine old and new batteries.
-
If electrolyte leaks from the batteries into the remote control, stop using it and contact the relevant service centre.
- If the remote control does not work properly (performance decreases), replace the batteries with new ones.
- Small batteries can pose a risk of ingestion by children. Also, do not allow children to play with packaging material. Risk of suffocation.
When using headphones
To prevent possible hearing damage, avoid prolonged listening at high volume.
Excessive sound pressure from earphones can cause hearing damage.
Caution for wall mounting
- Before mounting the TV on the wall, read the instructions supplied with the bracket.
- Wall mounting kit is optional. If it is not included with your TV, you can get it from your local dealer.
- Do not install the TV on the ceiling or on a sloping wall.
- Use the included wall mounting screws and other accessories supplied with the bracket.
- Tighten the screws properly to prevent the TV from falling, but do not overtighten them.
SYMBOLS AND WARNINGS ON THE PRODUCT

ATTENTION
RISK OF ELECTRIC SHOCK, DO NOT OPEN

Attention! To avoid electric shock, do not open the cover. The repair can only be carried out by a service technician.

The lightning flash with arrowhead symbol, within an equilateral triangle, is intended to alert the user to the presence of uninsulated “dangerous voltage” within the product that may be of sufficiently high to constitute a risk of electric shock to persons.

An exclamation mark within an equilateral triangle is intended to alert the user to the presence of important operating and maintenance (servicing) instructions in the literature enclosed with the appliance.

This symbol means that the device is in the second protection class, with double insulation between dangerous mains voltage and user-accessible parts. Only use identical spare parts when performing service work.
Class 1 laser product: This product contains a Class 1 laser source that is safe under reasonably foreseeable operating conditions.
WARNING
Never place the TV in an unstable place. The TV can fall and cause serious injury or death.
Many injuries, especially to children, can be prevented by simple measures such as:
- Use the cabinets or stands recommended by the TV manufacturer.
- Only use furniture that can safely support the TV.
- Make sure that the TV does not extend over the edge of the furniture on which it is placed.
- Do not place the TV on tall furniture (such as cabinets or bookcases) without anchoring the furniture and the TV to a suitable support.
-
Do not place the TV on fabric or other materials that would come between the TV and furniture.
-
Teach children about the dangers of climbing on furniture to reach the TV or its controls. If you are keeping your existing TV and moving it, the same principles should be followed.
The pictures and illustrations in this manual are for informational purposes only and may differ from the actual appearance of the product. Product design and specifications are subject to change without notice.
Environmental information
This TV receiver has been designed to be environmentally friendly. To reduce energy consumption, follow these steps:
If you set Power Saver to Minimum, Medium, Maximum or Auto, the TV will reduce power consumption accordingly. To set the Backlight to a fixed value, set it as Custom and set the Backlight (located under the Power Saver setting) manually using the left or right button on the remote control. To disable this setting, set it to Off.
Note: The available Power Saver options may vary depending on the Mode selected in Settings > Picture.
You can find the Energy Saver settings in Settings > Picture. Some image settings cannot be changed. If you press the Right or Left button, the message "The screen will turn off in 15 seconds" will appear on the screen. Select Continue and press OK to turn off the screen immediately. If no button is pressed, the display will turn off after 15 seconds. To switch the picture back on, press any button on the remote control or TV.
Note: The Screen Off option is not available when Game mode is set.
When the TV is not in use, switch it off or unplug it from the mains. This will also reduce energy consumption.
REMOTE CONTROLLER
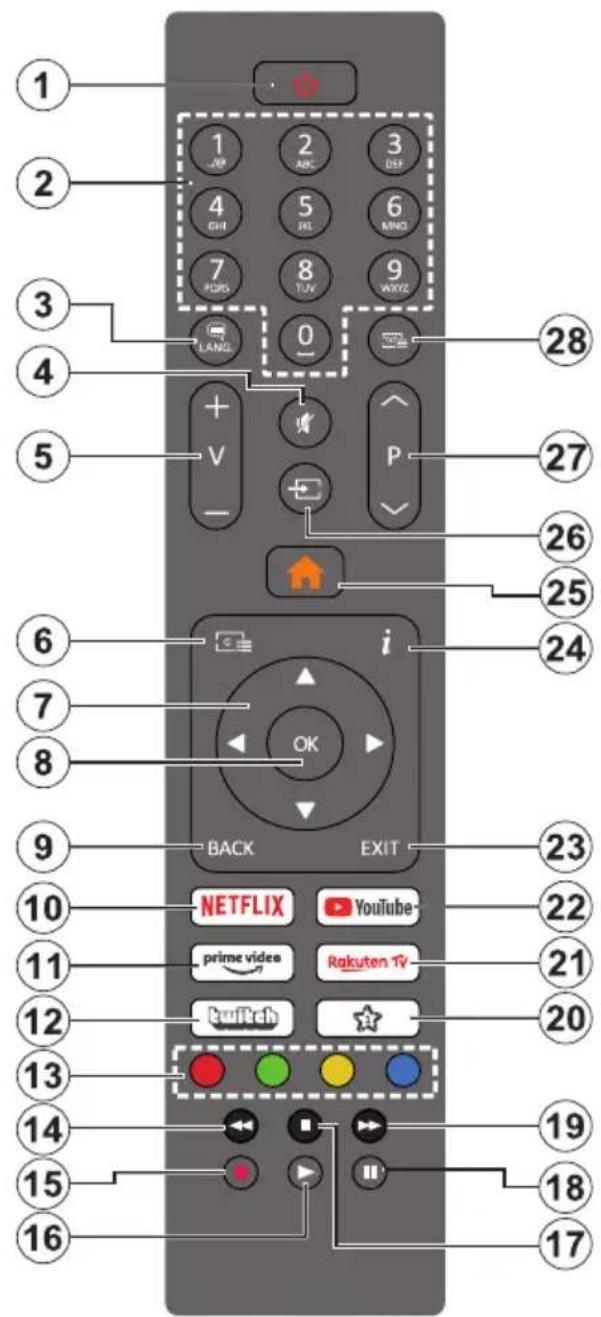
- Standby mode(*): Standby / On (short press), Reset / Off (press and hold)
- Number pad: Switches the channel, enters a number or letter in the text field on the screen.
- Language: Switches between audio modes (analog TV), displays and changes audio/subtitle language, and turns subtitles on and off (digital TV, if available)
- Mute: Turns off the TV sound completely
- Volume +/-
- Guide: Displays the electronic program guide
- Arrow buttons: Helps you navigate through menus, content, etc. and when you press the Right or Left button in TXT mode, subpages are displayed.
- OK: Confirms user selections, holds pages (in TXT mode), displays the Channels menu (DTV mode).
- BACK: Returns to previous screen, previous menu, opens indexing page (in TXT mode). Quickly cycles between previous and current programs or sources.
- Netflix: Launches the Netflix app
- Prime Video: Launches the Amazon Prime Video app
- Twitch: Launches the Twitch app.
- Color buttons: Follow the on-screen instructions for the colour button functions
- Rewind: Moves the image backwards in media such as movies
- Without function
- Play: Starts playback of the selected media
- Stop: Stops media playback
- Pause: Pauses media playback
- Fast-forward: Moves the image backwards in media such as movies
- My Button 1 (**)
- Rakuten TV: Launches the Rakuten TV app
- YouTube: Launches the YouTube app
- Leave: Closes and exits the displayed menus and returns to the previous screen
- Info: Displays information about the content on the screen, displays hidden information (reveal - in TXT mode)
- Menu: Displays the TV menu
- Source: Shows all available broadcasts and content sources
- Programme +/-
- Text: Displays teletext (if available), press again to display teletext over normal broadcast picture (mix)
(\*) Standby button
Press and hold the Standby button to view the other actions for that button. Highlight one of the Reset (Restart), Standby (Normal Standby), and Shutdown (Forced Standby) options and press OK to perform the selected action. If your TV stops responding to commands and the action menu cannot be displayed, the TV will restart if you hold the button down for about five seconds.
Press and release the button briefly to put the TV into standby mode or switch it on when it's in standby mode.
(\*\*) My Button 1:
This button may have a different default function depending on the model. However, you can set the special functions of this button by holding the button for more than three seconds on the desired source, channel or application. A confirmation message will appear on the screen. Now My Button 1 is assigned to the selected function.
If you perform the First Installation again, My Button 1 will revert back to its original function.
Switching on/off
Turning on the TV
Connect the power cord to a power source such as a power outlet (100-240V AC, 50/60 Hz).
You can choose one of the following options to switch on your TV from standby mode:
- Press the Standby, Program +/- or number button on the remote control.
- Press the control button on the TV.
Turning off the TV
Press the Standby button on the remote control.
Press the control button on the TV to display the function selection menu. Sharpening will be on the standby options. Hold the button for 2 seconds to activate this option. The colour of the options icon will change. Then press the button again and the TV will switch to standby mode.
To turn off the TV completely, unplug the power cord from the power outlet.
Note: If the TV is switched to standby mode, the standby LED may flash. This indicates that features such as Standby Search, Download, or Timer are active. The LED may also flash when you switch the TV from standby mode.
FEATURES
- Remote control colour TV
- Fully integrated digital/cable/satellite TV (DVB-T-T2/C/S-S2)
- HDMI input for connecting other devices with HDMI output
- USB IN
- OSD menu system
- Stereo sound system
- Teletext
- Connection for headphones
• Automatic programming system - Manual tuning
• Automatic shutdown after eight hours. - Sleep timer
- Child lock
• Automatic muting when there is no transmission. - NTSC Playback
• AVL (Automatic Volume Limiting) - PLL (Frequency search)
• Game mode (optional) - Hotel mode
- Features Turn off image
• 802.11 a/b/g/n built-in WLAN support
• Audio and Video Sharing
• HbbTV
Ultra HD (UHD)
Your TV supports Ultra HD (Ultra High Definition - also known as 4K) mode, which provides a resolution of 3840x2160 (4K:2K). This is equivalent to 4x the resolution of a Full HD TV by doubling the pixel count of a Full HD TV, both horizontally and vertically. HD content is supported via native and portal applications, HDMI, USB inputs and via DVB-T2 and DVB-S2 broadcasts.
Dolby Vision
Dolby Vision™ delivers a remarkable visual experience, with amazing brightness, exceptional contrast and vivid colours to bring your entertainment to life. It achieves this great picture quality by using HDR and wide-angle colour imaging technology. By increasing the brightness of the original signal and using a higher range of colour dynamics and contrast, Dolby Vision delivers an amazing amount of detail that other post-processing technologies on other TVs can't create. Dolby Vision is supported via native and portal applications, HDMI and USB inputs. Set the associated HDMI input source as Enhanced in Settings > System > Sourcesto watch Dolby Vision images when HDR/HLG content is received via the HDMI input. In this case, the source device should also be compatible with at least HDMI 2.0. If Dolby Vision content exists, two predefined picture modes will be available in Settings > Picture > Mode: Dolby Vision Bright and Dolby Vision Dark. Both allow users to enjoy content as the creator originally intended with different ambient lighting conditions. Included accessories
High Dynamic Range (HDR) / Hybrid Log-Gamma (HLG)
With this feature, the TV can reproduce a greater dynamic range of luminance by capturing and then combining several different exposures. HDR/HLG promises better image quality with brighter, more realistic highlights, more realistic colours and other improvements. It delivers the look that the filmmakers were trying to achieve, allowing hidden areas of dark shadows and sunlight to come through with full clarity, color and detail. HDR/HLG content is supported via native and portal applications, HDMI, USB inputs and via DVB-S broadcasting. Set the associated HDMI input source as Enhanced in Settings > System > Source to view HDR/HLG images when HDR/HLG content is received via the HDMI input. In this case, the source device should also be compatible with at least HDMI 2.0.
Included accessories
- Remote controller
- Batteries: 2 x AAA
- Operating manual
- Network cable
Emergency notifications
If the TV does not receive any signal (e.g. from an antenna or HDMI source) for 3 minutes, it will switch to standby mode. When the TV is switched on again, the following message appears: "The TV automatically switches to standby mode because it hasn't received any signal for a long time." You can disable this feature by setting the No signal timer option in Settings > Devices accordingly.
The Automatic TV off option (in Settings > System > More) can be set to between 1 and 8 hours by default. If this setting is not set to Off and the TV has been left on and not operated after the set time has elapsed, it will switch to standby mode after the set time has elapsed. When the TV is switched on again, the following message appears: "The TV automatically switches to standby mode because no operation has been performed for a long time." A dialog box appears before the TV switches to standby mode. If you do not press any buttons, the TV will switch to standby mode after 5 minutes. To immediately put the TV into standby mode, highlight the Yes button and press OK. If you highlight No and press OK, the TV will remain active. You can also deactivate the Auto Shutdownfeature in the dialog box. Mark Disable and press OK, the TV will remain active and the function will be cancelled. You can re-enable the feature by changing the settings for Auto Power Off in Settings > System > More.
CONTROL BUTTONS AND TV OPERATION
Note: The position of the control buttons may vary depending on the model.
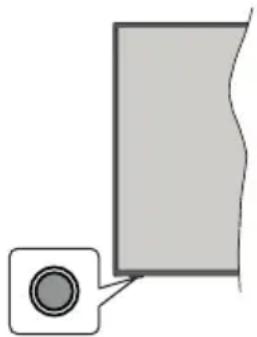
Your TV has a single control button. This button allows you to control functions on the TV such as Power/Source/Programs and TV.
One-button control
- Press the control button to display the function selection menu.
- Then press the button one at a time to focus on the option you need.
- Hold the button for 2 seconds to activate the selected option. The colour of the option icon will change when activated.
- Press the button again to use this function or to enter a submenu.
- To select a different function, you must first deactivate the last activated option.
- Press and hold the button to deactivate it. The colour of the option icon changes when you deactivate it.
- To close the function menu, do not press the button for approximately 5 seconds. The menu of feature options disappears.
natural_image
Simple diagram showing a circular object and a rectangular shape with curved lines, no text or symbols present.Turning off the TV: Press the control button to display the function options menu, the focus will be in Standby mode. Hold the button for 2 seconds to activate this option. The colour of the option icon will change when activated. Press the button again to turn off the TV.
Turning on the TV: Press the control button and the TV will switch on.
To change the volume: Press the control button to display the function menu and then press the button to move the focus to Volume + or Volume -. Hold the button for 2 seconds to activate the selected option. The colour of the option icon will change when activated. Then press the button to increase or decrease the volume.
To change channels: Press the control button to display the function menu and then press the button to move the focus to Program + or Program -. Hold the button for 2 seconds to activate the selected option. The colour of the option icon will change when activated. Then press the button to switch to the next or previous channel in the channel list.
To change the source: Press the control button to display the function menu and then press the button to move the focus to Source. Hold the button for 2 seconds to activate this option. The colour of the option icon will change when activated. Then press the button again to display the list of resources. Scroll through the available resources by pressing the button. The TV will automatically switch to the highlighted source.
Note: The main OSD menu cannot be displayed via the control button.
Remote control
Press the Menu button on the remote control to display the main menu screen. Use the directional buttons and the OKbutton to navigate and make settings. Press the BACK or Menu button to exit the screen menu.
Input selection
If you have connected all external devices to your TV, you can switch to different input sources. Press the Source button on the remote control to select the source directly.
Changing channels and volume
Use the Volume +/- and Program +/- buttons on the remote control to adjust the volume and change the channel.
Reset and power off using the standby button
Press and hold the Standby button to view the other actions for that button. Reset (Restart), Standby (Normal Standby) and Shutdown (Forced Standby) options will be available. Highlight one and press OK to perform the selected action. If there is a problem that prevents the TV from switching to standby mode correctly, you can use the Power Off option to force the TV to switch to standby mode.
If your TV stops responding to commands and the action menu cannot be displayed, the TV will restart if you hold the button down for approximately 5 seconds. This will end the process.
Using the TV Main Menu
When you press the Menu button, the main TV menu will appear on the screen. Use the directional buttons on the remote control to navigate the menu. To select a function or expand a side menu, highlight the tab and press the OKbutton. If you highlight one of the main menu options, a secondary menu may appear at the top of the screen to speed up access. To use Quick Access, highlight your choice, press OK and use the Left/Right directional buttons to set it. When you have finished, press the OK or BACK button to exit the menu.
You can also see location, weather, time and date information on the TV's main menu screen. Small green icons indicate the current status of time, network and app sync. If these icons appear in green, it means that the time information is updated, the network is connected and the synchronization is successfully completed. Otherwise, the icons will be displayed in white.
Depending on the country selection made during the initial installation, you can view the TV's lifetime information in hours by pressing the Menu button and then the Blue button. Due to the quality of our products, TVs are subjected to rigorous testing before they are released to the market, so it is possible that this value will not be zero when first installed.
Press the Exit button to close and exit the menu.
My TV
When the main menu is open, the My TV menu bar will be highlighted. The content of My TV can be customised. Go to the TV menu, highlight Edit home page and press OK. The My TV menu switches to edit mode. In edit mode, you can delete or reposition any item in the My TVmenu. Highlight this function and press OK. Select Delete or Scroll and press OK. To move an item, use the directional buttons to select the direction you want to move the item and confirm with OK.
You can also add options from other menus to My TV. Simply highlight the option and press the directional Down button on the remote control. If you see Add to My TV, you can add this feature to the My TV menu.
Search
Use this option to search for channels, guides, TV listings, apps, web, YouTube and videos. Press OK and enter the keyword using the virtual keyboard or the keypad on the remote control. Then highlight OK and press OK to start the search. The result will be displayed on the screen. Use the directional buttons to select the desired result and press OK to open it.
TV
Guide
Use this option to access the electronic programme guide. For more information, see the Electronic Programme Guide.
Channels
Use this option to access the Channelsmenu. For more information, see Using the channel list.
Timers
Use the options in this menu to set timers for future events. You can also revisit previously created timers in this menu. To add a new timer, select the Add Timer tab by pressing Left/Right and confirm OK. Set the side menu options as required and confirm OK to exit. A new timer will be created. To edit a previously created timer, highlight it, select the Edit Selected Timer tab, and confirm OK. Change the options in the side menu as required and confirm OK to save the settings.
To delete a previously created timer, highlight it, select the Delete Selected Timer tab and confirm OK. A confirmation dialog message appears. Highlight Yes and press OK to continue. The timer will be cancelled.
It is not possible to set timers for two or more programmes on individual channels broadcast at the same time interval. In this case, you will be asked to delete one of the timers.
Edit Home Page
Use this option to edit the content of the My TVmenu. Highlight and press OK. The My TV menu switches to edit mode. See My TV for details.
Other applications
You can use this option to manage the apps installed on your TV. Highlight and press OK. You can add an installed app to MyTV, launch it or delete it. Highlight the application and press OK to see the available options.
Shop
Use this option to add new apps from the app market. Highlight and press OK. The available apps will be displayed. You can also access the App Market from the More Apps menu.
Settings for the disabled
This option takes you directly to the access settings menu.
Privacy settings
This option takes you directly to the privacy settings menu. This feature may not be available in the First Installation process depending on the TV model and country selected.
Settings
Use the options in this menu to control your TV. For more information, see Settings menu contents.
Use the Reset App option to adjust your My TV customisation to the default values (availability depends on your TV model and features). Highlight and press OK. A confirmation dialog message appears. Highlight Yes and press OK to continue. Please note that you will not be able to perform this operation again within the next few minutes.
Sources
You can manage input source preferences using the options on this menu. To change an existing source, highlight the one you wish to use and confirm OK.
Settings Resources
This option takes you directly to the source settings menu. Here you can change names, enable or disable selected resources.
Inserting battery in the remote control
The battery compartment cover can be secured against accidental opening. To unlock, insert a blunt, pointed object (e.g. a paper clip) into the hole above the cover and push it in. At the same time, slide the cover in the direction indicated by the arrow. Insert two 1.5 V AAA batteries. Make sure the (+) and (-) markings match (make sure the polarity is correct). Do not mix old and new batteries. Replace only with the same or equivalent type. Put the cover back on and secure it again with the screw.
A message will appear on the display if the batteries are almost dead and need to be replaced. Note that if the battery level is low, the performance of the remote control may be impaired.
Batteries must not be exposed to excessive heat, such as sunlight, fire, etc.
TV CONNECTION
Plugging into power
IMPORTANT: The TV is designed for use with 220-240 V AC at 50 Hz. After unpacking, allow the TV to reach room temperature before plugging it in.
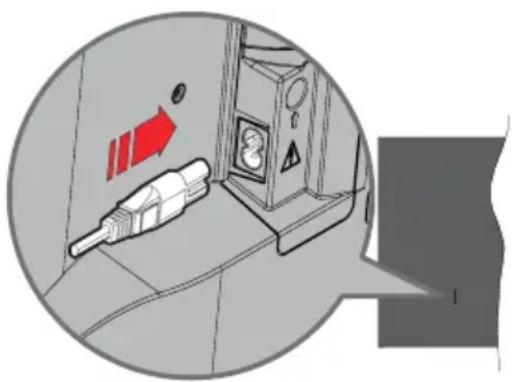
Plug one end (two-hole plug) of the supplied detachable power cord into the power cord socket on the back of the TV as shown above. Then plug the other end of the power cord into a power outlet.
Note: The position of the power cable input may vary depending on the model. The position of the switch may vary depending on the model.
natural_image
Diagram of a fuel pump inside a vehicle, showing airflow direction and component placement (no text or symbols)Antenna connection
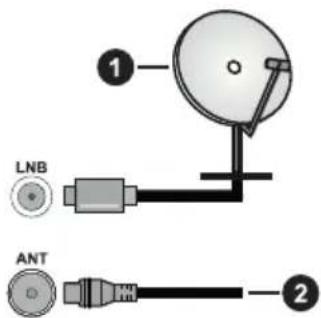
Connect the antenna or cable TV plug to the ANTENNA INPUT (ANT) jack or connect the satellite to the SATELLITE INPUT (LNB) jack on the front side of the TV.
The back of the TV
- Satellite
- Antenna or cable
Warning: To connect a device to the TV, make sure the TV and the device are switched off before making any connection. Once the connection has been made, you can switch on the units to use them.
Wireless LAN Transmitter Features
| Frequencies range Maximum output | power |
| 2400 - 2483.5 MHz (CH1-CH13) < 100 mW | |
| 5150 - 5250 MHz (CH36 - CH48) < 200 mW | |
| 5250 - 5350 MHz (CH52 - CH64) < 200 mW | |
| 5470 - 5725 MHz (CH100 - CH140) < 200 mW |
Restrictions by country
This instrument is intended for home and office use in all EU countries (and other countries using the relevant EU guidelines). The 5.15 - 5.35 GHz band is restricted to indoor use in EU countries.
| Landscape Restrictions | |
| Bulgaria A general permit is required for outdoor uses and utilities | |
| Italy If it is used outside its own premises, a general permit is required. Public use is subject to the general authorisation of the relevant service provider. | |
| Greece Indoor use only for the band from 5470 MHz to 5725 MHz | |
| Luxembourg A general authorisation is required for the supply of network and services (not spectrum) | |
| Norway Radio transmission is prohibited for geographical areas within a 20 km radius of the centre of Ny-Alesund | |
| Russian Federation For indoor use only | |
| Israel 5 GHz band only for the 5180 MHz - 5320 MHz range | |
The requirements for any country can be changed at any time. It is recommended that the user check with local authorities for the current status of national regulations for 5 GHz wireless LANs.
Available connectors
| Connection | Type | Cables | Facilities |
 | HDMI connection | 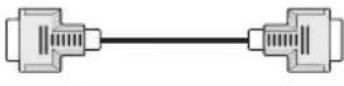 |  |
 | SPDIF (Optical output) |  | 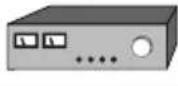 |
 | Headphone connector |  | |
 | USB port |  | 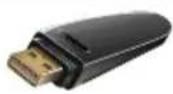 |
| Connection Type | Cables Facilities | ||
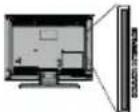 | CI connector |  | 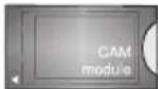 |
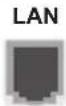 | Ethernet connection |  LAN/Ethernet cable LAN/Ethernet cable | 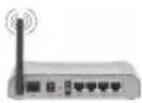 |
WARNING: To connect a device to the TV, make sure the TV and the device are switched off before making any connection. Once the connection is made, you can switch on the units and use them
- When using the wall mounting kit (available from external dealers if not included), we recommend that all cables are connected before wall mounting.
- Insert or remove the CI unit only when the TV is OFF. You should refer to the module's instruction manual for setup details.
• Each USB input on the TV supports devices up to 500mA. Connecting devices above 500mA can damage your TV. - When connecting your device to your TV using an HDMI cable to ensure sufficient parasitic RF immunity and seamless transmission of high-resolution signals such as 4K content, you will need to use a shielded HDMI cable with a ferity (quality) HDMI cable.
INSTALLATION AND SETUP
First time installation
The first time you turn it on, the Selection screen appears. Select the desired language and press OK. In the following steps of the installation wizard, use the directional buttons and the OKbutton to set your preferences. After selecting the language, you will be asked if you want to change the access settings. Highlight Yes and press OK to change. For detailed information about the available options, see System menu contents.
On the next screen, set your country preferences. Depending on your Country settings, you may be prompted to set and confirm your PIN at this time. The PIN code selected cannot be 0000. You will need to enter it later whenever you are prompted for your PIN during menu operations.
Note: The type of M7 operator (digital satellite service provider) will be defined in accordance with the Language and Country selection you made during Initial Installation.
At this point, you can activate Store Mode. This option configures your TV's storage settings and will be used depending on the TV model on which the supported features may appear as an information banner at the top side of the screen. This option is for in-store display purposes only. For home use, it is recommended to select Home Mode. This option will be available in Settings > System > More, and you can change your preferences for this setting later. Specify your choice and press OK to continue.
The image mode selection screen appears. If you want your TV to use less energy and be more environmentally friendly, select Natural and press OK to continue. You can change your selection later using the Mode option in Settings > Picture.
At this point, depending on your TV model, you may see the Privacy Settings menu. Use this menu to set your permissions. Highlight a feature and press OK to turn it on or off. Before making any changes, carefully read the relevant on-screen explanation for each highlighted function. Press the Right directional button to highlight the text and use the Program +/- or Up/Down directional buttons to scroll up and down to read the full text. You will be able to change your preferences at any time later in Settings > System > Privacy >
Privacy settings. If Internet Connection is disabled, the Network/Internet Settings screen is skipped and does not appear.
Highlight the Next button and press the OK button on the remote control to continue. The Network/Internet Settingsmenu will appear on the screen. To configure the network connection, see Connection. If you want your TV to consume less power in standby mode, you can turn off the Network Standby feature by setting it to Off. When you have finished setting up, highlight the Next button and press OK to continue.
On the next screen, you can set the types of broadcasts to search, encrypted channel search and time zone preferences (depending on the country selected). In addition, you can set the type of broadcast as your favorite. During the search, the selected broadcast type will take precedence and the channels will be listed at the top of the Channel List. When you're done, highlight the Next button and press OK to continue.
About the choice of the type of broadcast
To start searching for a certain type of broadcast, highlight it and press OK. The check box for the selected option is selected. To turn off the search option, uncheck the box by pressing the OK button after moving your attention to the desired broadcast type option.
Digital Antenna: If the search option D is enabled. Antenna Broadcast, the TV will search for digital terrestrial broadcasts after completing other initial settings.
Digital Cable: If the search option D is enabled. Cable, after completing the other initial settings, the TV will search for digital cable. Before you start the search, a message asks if you want to search the wired network. If you select Yes and press OK, you can select Network or set values such as Frequency, Network ID and Search Step on the following screen. If you select No and press OK, you will be able to set the Start Frequency, Stop Frequency and Search Step on the following screen. When you're done, highlight the Next button and press OK to continue.
Note: The search time varies according to the selected Search Steps.
Satellite: If the Satellite search option is enabled, the TV will search for satellite digital broadcasts after completing the other initial settings. Before performing a satellite search, you must make some settings. A menu will appear where you can choose to start the M7 operator installation or the standard installation. To start an M7 operator installation, set the Installation Type as Operator and the Satellite Operator as the appropriate M7 operator. Then highlight the Scan Preferences option and set as Auto Channel Tuning and press OK to start the automatic search. These options can be pre-selected depending on the Language and Country options you selected in the previous steps of the Initial Installation process. You may be prompted to select the HD/SD list or channel list by country, depending on your M7 operator type. Choose one of them and press OK to continue.
Wait for the scan to finish. Now the list is installed.
During the M7 operator installation procedure, if you want to use satellite installation parameters that differ from the default settings, select Preferred Scan as Manual Program Search and press OK to continue. The Antenna Type will then be displayed. After selecting the antenna type and the desired satellite in the following steps, press the OK button to change the installation parameter of the satellite in the inserted menu.
To search for other channels, such as M7 channels, you must run the standard installation. Select Installation Type as Standard and press OK to continue. The Antenna Type will then be displayed.
There are three options for antenna selection. You can select the antenna type as Direct, Simple Satellite Cable System or DiSEqC switch by using the Left or Right buttons. To view the subsequent options, after selecting your antenna, press OK. The Continue options will appear,
Transponder List and LNB Configuration
Use the related menu options to change the transponder and LNB settings.
- Right: If you have a single receiver and a direct satellite dish, select this type of antenna. Press OK to continue. On the following screen, select an available satellite and press OK to search for services.
- Simple satellite cable system: Choose this type of antenna if you have multiple receivers and a simple satellite cable system. Press OK to continue. Configure the settings as instructed on the following screen. Press OK to search for services.
- DiSEqC switch: If you have multiple satellites and a DiSEqC switch, select this antenna type. Then set the DiSEqC version and continue by pressing the OKbutton. On the next screen you can set up to four satellites (if available) for v1.0 and sixteen satellites for v1.1. Press OK to scan the first satellite in the list.
Note: Depending on the TV model, DiSEqC v1.1 may not be supported and therefore the DiSEqC version selection step may not be available.
Analog: If the Analog search option is enabled, the TV will search for Analog broadcasts after completing the other initial settings. Once the initial settings are complete, the TV will begin searching for available broadcasts of the selected broadcast types. During the search, the current results will be displayed at the bottom of the screen. You can cancel the search by pressing the Menu, Back or Exit button. Channels that have already been found are saved in the channel list.
Once all available stations have been saved, the Channels menu will appear. Here you can edit the channel list according to your preferences using the Edit tab options, or press the Menu button to exit and view the TV broadcast.
While the search is in progress, a message will appear asking if you want to sort channels by LCN*. Select Yes and press OK to confirm.
*LCN (Logical Channel Number) is a feature that allows channels to be automatically arranged according to their numbers in the order specified by the service provider
Notes:
- To search for M7 channels after the First Installation, you must perform the First Installation again. Or press the Menu button and enter Settings > Setup > Automatic programme search > Satellite. Then follow the same steps outlined above in the satellite section.
- Do not turn off the TV while the first installation is in progress. Note that some options may not be available depending on your choice of country.
Media Playback via USB input
You can connect a 2.5" and 3.5" inch external hard drive (HDD with external power supply) or USB memory to the TV's side USB input.
IMPORTANT! Back up your files on the storage device before connecting it to your TV. The manufacturer is not responsible for any damage or loss of data. Some types of USB devices (e.g. MP3 players) or USB hard drives/memory cards may not be compatible with this TV. The TV supports FAT32 and NTFS disk format.
Wait a moment before each connection and disconnection, as the player may still be reading files. Failure to follow this instruction may cause physical damage to the USB player and USB device. Do not remove the USB memory while the file is playing.
USB hub can be used. Disks with external power supply are recommended. If you are connecting a USB hard drive, plug it in directly.
Note: When viewing image files, the Media Browser menu can only display 1000 images stored on the connected USB device.
Media Browser
You can play music and movies and view photos stored on a USB drive by plugging it into your TV. Connect the USB drive to one of the USB inputs located on the side of the TV.
When you connect a USB storage device to your TV, the Sources bar will appear with USBx highlighted. Press OK, the Media Viewer menu will appear on the screen Select the file of your choice, press OK to visualize or play it. You can access the contents of a connected USB device at any time later from the Sources menu. You can also press the Source button on the remote control and then select a USB storage device from the list of sources.
Use the Settings window to set Media Viewer preferences. The Settings menu can be accessed via the information bar that appears at the bottom of the screen when playing a video or audio file or viewing an image file. If the info bar disappears, press the Infobutton, highlight the gear symbol located on the right side of the info bar and press OK. Depending on the type of media file and the model of TV and its features,
Picture Settings, Audio Settings, Media Browser Settings and Options may be available. The content of these menus may vary depending on the type of file you are currently opening. Only the Audio Settings menu will be available while audio files are playing.
| Operation in loop/mixed | |
| Start playback and activate | All files in the list are played once in their original order |
| Start playback and activate | The same file will play continuously (it will repeat) |
| Start playback and activate | All files in the list are played once in random order |
| Start playback and activate | All files in the list are played back once in the original order. |
To use the functions in the information bar, highlight the function symbol and press OK. To change the function status, highlight the function symbol and press OK as many times as necessary. If the symbol is crossed out with a red cross, it means that the function is not available.
FollowMe TV
With your mobile device, you can stream the latest broadcasts from your Smart TV using the FollowMe TV feature. Install the appropriate Smart Center app on your mobile device. Start the application. For more information on how to use this feature, see the instructions for the application you are using.
Note: Depending on the model, your TV may not support this feature. This app may not be compatible with all mobile devices. UHD (4K, Ultra HD) channels are not supported and both devices must be connected to the same network.
CEC
This feature allows you to control CEC devices that are connected via HDMI port, using the TV remote control. First, set the CEC option in Settings > Device to Enabled. Press the Source button and select the HDMI input of the connected CEC device from the Source List menu. When a new CEC source device is connected, it will be listed in the source menu under its own name, not under the name of the connected HDMI port (such as DVD player, Recorder 1, etc.).
The remote control will automatically be able to perform basic functions when the connected HDMI source is selected. To stop operation and control the TV again using the remote control, press and hold the "0 - Zero" button on the remote control for 3 seconds. You can disable CEC by setting the appropriate option in Settings > Devices.
The TV supports the ARC (Audio Return Channel) function. This function is an audio link to replace other cables between the TV and the audio system (A/V receiver or speaker system).
When ARC is active, the TV will automatically mute all audio outputs other than the headphone jack and the volume buttons will be directed to the connected audio device. To activate ARC, set Audio Output in Settings > Sound as HDMI ARC.
Note: ARC is supported via HDMI2 input.
Controlling the sound of a connected audio system
Allows for the Audio Amplifier/Receiver to be used with the TV. The volume can be controlled using the TV remote control. To activate this feature, set Audio Output in Settings > Sound as HDMI ARC. When HDMI ARC is selected, CEC is automatically set to Enabled if it is not already set. The TV speakers will be muted and the sound of the source you are watching will be broadcast from the connected sound system.
Note: The audio device must support System Audio Control.
Game mode
The TV can be set to deliver the lowest latency during games. Go to Settings > Picture and set Mode to Game. The Game option will be available when the TV's input source is set to HDMI. Once set up, the image will be optimized for low latency.
Low latency automatic mode
You can also enable ALLM (Auto Low Latency Mode) in Settings > Devices. If this function is enabled, the TV will automatically switch the picture mode to Game when the ALLM mode signal is received from the current HDMI source. When the ALLM signal is lost, the TV switches back to the previous picture mode setting. So you won't have to change the settings manually. If ALLM is enabled, the picture mode cannot be changed if the ALLM signal is received from the current HDMI source. For the ALLM function to work, the corresponding HDMI source setting must be set to Enhanced. You can change this setting in the Sources > Source Settings menu or in the Settings > System > Sourcesmenu.
E-Manual - E-handbook
You will find instructions for the functions of your TV in the electronic manual.
To use the electronic manual, go to the Settingsmenu, select Manual and press OK. For quick access to the electronic manual, press the Menu button and then the Informationbutton.
Use the directional buttons to select the desired category. Each category contains different topics. Select a topic and press OK to read the instructions. To close the E-Manual screen, press the Exit or Menubutton.
Note: Depending on the model, your TV may not support this feature. The content of the E-Handbook may vary depending on the model.
Contents of the Settings menu
| Equipment offer | |
| Virtual remote control Enables or disables the virtual driver function. | |
| Audio and Video Sharing This feature | allows you to share files stored on your smartphone or tablet. If you have a compatible smartphone or tablet and have the necessary software installed on it, you can share/play photos on your TV. If you share the software, see the instructions for more information. |
| ALLM The ALLM (Auto Low Latency Mode) | function allows the TV to activate or deactivate the low latency setting depending on the playback content. If this option is enabled, the picture mode is automatically set to Play when the ALLM mode signal is received from the current HDMI source. For more information, see Game mode. |
| Timer without signal If the TV does not receive any signal (e.g. from an antenna or HDMI source) for 3 minutes, it will switch to standby mode. You can enable or disable this feature by setting this option accordingly. | |
| CEC With this setting, you can enable or disable the CEC function completely. Use the Left or Right buttons to activate or deactivate the selected option. | |
| Automatic CEC switch-on This feature | allows you to connect an HDMI-CEC compatible device to turn on the TV and automatically switch to its input source. Use the Left or Right buttons to activate or deactivate the selected option. |
| Picture menu | ||
| Mode | The image mode can be changed to suit your needs. The picture mode can be set to one of the following options: Cinema, Game (optional), Sports, Dynamic and Natural.Note:The available options may vary depending on the input source.Dolby Vision modes:If Dolby Vision content is detected, Dolby Vision Dark and Dolby Vision Bright picture modes will be available instead of Cinema and Natural. | |
| Contrast Adjusts the lightness and darkness of the image. | ||
| Brightness Adjusts the brightness of the screen. | ||
| Sharpness Adjusts the sharpness of the object displayed on the screen. | ||
| Colour Adjusts the colour. | ||
| Save Power To set Energy Saver as Custom, Minimum, Medium, Maximum, Auto, Screen off or Off.Note:The available options may be inactive depending on the Mode selected. | ||
| Image format | Sets the desired image size format. | |
| Scrolling images This option varies depending on the Zoom Image setting Highlight and press OK, then use the directional buttons to move the image up or down. | ||
| Advanced Settings | Dynamic contrast | The dynamic contrast ratio can be set to the desired value. |
| Colour temperature | Sets the desired color temperature value. Cold, Normal, Warm and Custom options are available. | |
| White point This setting will be available when the Color Temperature option is set to Custom. Increase the "warmth" or "coolness" of the image by pressing the left or right button. | ||
| Blue extension | White Enhancement function, which makes the white colour cooler for a brighter image. Set to On to enable. | |
| Micro Dimming | Low, Medium, High and Off options are available. When Micro Dimming is active, the contrast for each defined zone is increased locally. | |
| Noise reduction | Low, Medium, High and Off options are available. If the signal is weak and the image is noisy, use the Noise Reduction setting. | |
| Movie Mode | Films are recorded at varying frame rates from normal television programmes. Turn this feature on when watching movies to better view fast-moving scenes. | |
| Skin tone | Skin tone can be set between -5 and 5. | |
| Colour shift | Sets the desired colour tone. | |
| Colour settings | Opens the Color Tuner settings. To set the Hue, Color, and Brightness values manually, set the Color Tuner to Enabled. | |
| Gamut Mapping | This option can be used to adjust the range of colours displayed on the TV screen. If set to On, the colors are set according to the source signal. When set to Off, the maximum colour capacity of the TV is used in the standard way (recommended option).Note: This option may not be available depending on the TV model and features. | |
| Gamma | You can use this option if you want to set gamma preferences. Press the left/right directional buttons to set Normal, Light or Dark.Note: This option may not be available depending on the TV model and its features. Depending on the current content, you may not be able to change this setting. | |
| Full HDMI | This feature is visible while viewing from an HDMI source. You can use this function to enhance the blacks in the image. | |
| Reset | Sets the picture to factory defaults (except in Game mode). | |
| Audio menu | ||
| Dolby Atmos | Your TV supports Dolby Atmos technology. Through this technology, sound moves around you in three-dimensional space, giving you the feeling of being inside the action. You'll get the best experience if the audio stream is Atmos. Options such as Automatic, On and Off will be available. If set to Auto, the TV will automatically switch between On and Off mode depending on the input audio bitstream information, if the input audio bitstream is Atmos, this function will operate as if it were set to On. Setting it to Off disables this option. | |
| Mode | Smart, Movie, Music, Messaging and Off will be available. Setting it to Off disables this option.Note: Some items in the Sound menu will be greyed out and unavailable if it is set to an option other than Off. | |
| Surround Sound | Spatial mode can be turned On or Off. | |
| Sound Output | Sets the audio output preset. TV, S/PDIF, HDMI ARC, Headphone Only and Lineout options will be available. There is no audio output except through the selected option and the headphone jack. If this option is set to Headphones Only, the TV speakers will be muted when headphones are connected.If you connect an external amplifier to the TV using the headphone jack, you can select Lineout. If you have headphones connected to the TV, select Headphones only. Before using headphones, please make sure that this menu item is set to Headphones Only. If it is set to Lineout, the output from the headphone jack will be set to maximum and may damage your hearing.When HDMI ARC is selected, the CEC function is activated.Note: Depending on the option you select, some items in the Sound menu will appear greyed out and will not be available. | |
| AVL (Automatic Volume Limiting) | Adjusts the sound to balance the output volume between programs.If the Dolby Audio menu item is set to an option other than Off the AVL setting options will be changed. Options such as Auto, Night, Normal and Off will be available. In Auto mode, the TV automatically switches to Normal or Night mode according to the current time information. If no time information is available, this function will always function as Normal. When the TV switches to Night mode after setting this option to Auto for the first time, an information bar appears on the screen.Please note that compared to Normal mode, Night mode provides more aggressive dynamic compression control that is suitable for quiet environments. | |
| Advanced Settings | Equalizer Selects the equalizer mode. User settings can only be changed in User mode. | |
| Dynamic Bass Enables or disables Dynamic Bass. | ||
| Sound Mode You can select an audio mode (if the channel displayed supports it). | ||
| Digital audio output | Sets the type of digital audio output. PCM, Auto and Passthrough options will be available.PCM: This option provides a two-channel uncompressed digital audio output. You can use this option if you have compatibility problems, for example if you can't hear the sound.Auto: This option provides multi-channel digital audio output (up to 5.1 channels).Passthrough: This option provides the original audio output as such in HDMI ARC. We recommend using this option if you have an eARC-enabled A/V receiver. If your A/V receiver does not support the source audio format, compatibility problems such as audible audio may occur. | |
| Headphone volume | Adjusts the volume of the headphones. This option will not be available if the Audio Output option is not set to Lineout.Before using the headphones, make sure the volume of the headphones is set to a low level to avoid damaging your hearing. | |
| Balance Adjusts the sound balance. This function is activated when Audio Output is set to TV or Headphones Only. The Balance item adjusts the balance level of the TV and headphone speakers. | ||
| Reset Restores some audio settings to factory defaults. | ||
| Offer Network | |
| Connection method | Disable the network connection or set the connection type to Wireless device. |
| Find wireless networks | Start searching for wireless networks. This option is only available if the Network Type is set to Wireless Device. |
| Disconnect To disconnect | ect from the wireless network and delete the saved wireless network profile (if previously saved), highlight this option and press OK. This option will not be available if you are not connected to a wireless network. For more information, see Connecting. |
| Press WPS on your router | If your modem/router has the WPS function, you can connect to it directly using this function. Highlight this option and press the OKbutton. To connect, press the WPS button on your modem/router. This option is only available if the Network Type is set to Wireless Device. |
| Connection speed test | Start a speed test to check the connection bandwidth. When finished, the result will appear on the screen. |
| Advanced Settings Change | the IP and DNS configuration on your TV. |
| Network standby mode | You can enable or disable this feature by setting it to On or Off. |
Note: For more information on the options for this offer, see Connecting.
| Installation menu | |
| Automatic program search (Retuning) | Displays the auto-tuning options.Ground: Searches and stores DVB antenna stations.Wired: Searches and stores DVB cable stations.Analog: Searches for and stores analogue stations.Satellite: Searches for and stores satellite stations. |
| Manual program search | This option is used for direct program tuning. |
| Scanning network channels | Searches for linked channels in the broadcast system.Ground: He's looking for terrestrial channels.Wired: He's looking for channels on the cable network.Satellite: It's looking for satellite network channels. |
| Tuning analogue reception | You can use this setting to tune the analog channels. This feature is not available if you have no analog channels stored or if the channel you are currently watching is not an analog channel. |
| Setting up satellite reception | Displays the settings.List of satellites: Displays the available satellites. You can Add, Delete satellites or Edit satellite settings in the list.Antenna installation: You can change the satellite dish settings and/or start a new satellite scan. |
| Installation Settings (Optional) | Displays the installation settings menu.Standby Search mode (*): While in standby mode, the TV will search for new or missing channels. All new broadcasts found will be displayed.Dynamic channel update (*): If this option is set to Enabled, changes to the broadcast, such as frequency, channel name, subtitle language, etc., will be applied automatically during viewing.* Availability depends on the model. |
| Home Transponder Settings (*) | Use this menu to edit the main and backup parameters of the home transponder, including the PID of the relevant M7 operator used to download the channel list. Set your preferences and press the Green button to save your settings. Then start the M7 operator installation using the Auto Channel Scan >Satellitemenu.* This option will only be available if the M7 operator is installed. |
| Delete service list | Use this function to delete stored channels. This setting is only visible if the Country menu is set to Denmark, Sweden, Norway or Finland. |
| Select an active network | This setting allows you to choose whether broadcasts within the selected network should be listed in the channel list. This feature is only available for the country selection Norway. |
| Signal information | You can use this menu item to monitor signal related information such as signal level/quality, network name, etc. for available frequencies. |
| First time installation | Clears all saved channels and settings and restores the TV to factory settings. |
| Offer System | ||
| Settings for the disabled | Displays the accessibility enhancement options for your TV. Some options will not be available if no channels are installed. | |
| High contrast Increase the contrast of menu options and texts to make them easier to read. White text, Yellow text and Off options will be available. | ||
| Hearing impairment | Enables any special functions sent by the broadcast. | |
| Audio Description | A spoken track will be played for blind and visually impaired viewers. Press the OK button to display all available options in the Audio Description menu. This feature is only available if the transmitter supports it.Note: Audio description function is not available in recording or time-shift mode (availability depends on TV model and features). | |
| Dialogue improvements | This feature provides additional audio processing options to enhance the dialog box. Low, Medium, High and Off options are available. Set according to your preferences.Note: This function only occurs when the input audio format is AC-4 and this effect is applied only to the TV's speaker output. | |
| Spoken subtitles | Use this setting to select the default preference for spoken subtitles. If you want spoken subtitles to have a higher priority than normal subtitles, set this option to On.This option may not be available depending on the TV model and is only visible when the source is set to TV. | |
| Zoom in Allows you to use a combination of buttons to enlarge the screen.The On and Off options are available. Set to On to enable.Zoom support will be turned on or off by long pressing the number button 5. The first quadrant of the screen on the top left will be zoomed in. When zoom support is enabled, long press the number buttons 2, 4, 6, 8 to move the zoomed area up, left, right and down. | ||
| Minimap The minimap is enabled and disabled by default. Activated when Zoom is enabled. This option will prevent the zoom function from displaying the minimap. | ||
| Click sound This option sets the click sound for the keys in the TV menu. To enable it, set it to On. | ||
| Highlight programmes using | ||
| [S] Subtitles If this option is enabled and if any of the events in the electronic program guide have the "Subtitle" access service, these events will be highlighted in a different color. | ||
| [SL] Sign languageIf this option is enabled and if any of the events in the electronic program guide have the "Sign Language" access service, these events will be highlighted in a different color. | ||
| [AD] Sound descriptionIf this option is enabled and if any event of the electronic program guide has the "Audio Description" access service, these events will be highlighted in a different colour. | ||
| Language You can set a different language depending on the broadcast and country. | ||
| Conditional Access | Controls conditional access, if available. | |
| Personal data protection | ||
| Privacy settings | Manage your privacy permissions for Smart TV-related apps. Press the OK button to enter the menu and adjust to your preferences. | |
| View all cookies. | Displays all saved cookies. | |
| Delete all cookies | Deletes all stored cookies. | |
| Unfollow This option allows you to set your preferences regarding the viewing behaviour of HbbTV services. | ||
| Parental control settings | To change the parental settings, enter the correct password. In this menu, you can easily set Menu Lock, Age Lock, Child Lock or Instructions. You can also use these options to set a new PIN or change the Default CICAM PIN.Note: Some options may not be available depending on the country selection during Initial Installation. The default PIN could be set to 0000 or 1234. If you have defined a PIN (required depending on country selection) during the First Installation, use the PIN you have defined. | |
| Date/Time Sets the date and time. | ||
| Sources Here you can change names, enable or disable selected resources. Normal, Advanced and Disabled options are available for HDMI sources. These options affect the color settings of the selected HDMI source. In order to watch a 4K or HDR image from an HDMI source, if the connected device is compatible with HDMI 2.0 and later versions, the settings of the respective source must be set to Enhanced. If the connected device is HDMI 1.4 compatible, set as Normal. You can disable the corresponding HDMI source by setting it to Disabled. | ||
| Netflix If your TV supports this feature, you can view the ESN* number and deactivate Netflix.* The ESN number is a unique Netflix identification number created specifically to identify your TV.Note: For 4K video streaming, an internet connection speed of at least 25 MB/s is required - more information on the requirements for streaming 4K content can be found, for example, on the Netflix website (https://help.netflix.com/en/node/13444).When you start streaming video content over the internet, the quality of your connection will be analysed and it may take less time to create full HD or 4K quality, or if your connection is slow, it may not be possible. If you are not sure, check your internet features with your internet provider. | ||
| Samba ACR Samba Interactive TV supports recommendations and other applications by collecting data about your on-screen consumption of specific content and enhancing your viewing experience. Use this option to access the Samba Interactive TV settings menu, review the Samba TV Terms of Service, Privacy Policy and manage your advertising preferences, etc. An internet connection will be required to access the HTML-based settings. You can enable or disable interactive TV at any time in Settings > System > Privacy > Privacy settings by ticking or unticking the checkbox next to the related items. This option may not be available depending on the country selected during the initial installation process, the TV model and its features. | ||
| Other settings This | will show you more options for setting up your TV. | |
| Offer time limit | Changes the time limit for displaying the menu screen. | |
| LED control If set to OFF, the standby LED will not light when the TV is in standby mode. | ||
| HBBTV You can enable or disable this feature by setting it to On or Off. For more information, see HbbTV System. | ||
| Device identi-fication | When this option is enabled, it causes an internal generation of a "device ID" for each web origin visited. If this option is deactivated, all current "Device IDs" are deleted for each site visited. You can enable or disable this feature by setting it to On or Off. This feature is available if channels are installed and the country option is set to Norway during initial installation. | |
| Software update | Ensures the latest firmware for your TV. Press OK to display the menu options. | |
| Application version | Displays the current version of the software. | |
| Automatic shut off | When not in use, sets the desired time to automatically switch the TV to standby mode. This option can be set from 1 to 8 hours in 1 hour increments. You can also disable this feature by setting it to Off. | |
| Subtitle mode Using this feature you can choose which caption mode will be on screen (DVB caption / Teletext caption) if both are available. The default value is the DVB header. This feature is only available for the country selectionNorway. | ||
| Biss key Biss is a satellite signal that is used by some broadcasters. If you need to specify Biss keys for broadcasting, you can use this setting. Highlight Biss Key and press OK to enter the key for the desired broadcast. This option will appear if satellite channels are installed. Availability depends on the TV model and features. | ||
| Shop mode Select this mode for in-store display purposes. When Store Mode is active, some functions may not be available in the TV menu. For some models, the Enabled with video option may also be available. If this option is set, the TV will switch to store mode and play the pre-installed video file. | ||
| Switch-on mode | This setting adjusts the shutdown mode options. Last Status and Standby options are available. | |
| OSS Displays license information for free software. | ||
| Restore default boot logo | Restores the default boot logo. A confirmation dialog message appears. Select Yes and press OK. This option may not be available depending on your TV model and features. | |
| Change the name assigned to the TV | Use this option to change the device name that is used to identify your TV when the device is connected wirelessly to the TV. If you leave the device name blank, or if you perform the first installation, the default device name is restored. | |
| Application priority | You can set this option according to the priority between broadcast applications and CICAM AppMMI applications. If CICAM is loaded into the TV and there is a conflict between applications, priority is given to the selected application type. | |
| Dolby Announcements | Sets the notification appearance preset for Dolby content. When set to On, when Dolby content is detected, the Dolby logo is displayed. | |
| Information about the model | Displays information such as model name, serial number, MAC address, etc. | |
Note: Some features may not be available in the first installation depending on the TV model and country selected.
TV OPERATION
Controlling the channel list
TV arranges all stored stations in the Channel List. You can edit this channel list, set favourites or active stations using the options in the Channels menu. Press the OK button to open the Channel List menu. Use the options on the Filter and Edit tabs to filter the listed channels or make advanced changes to the current list. To view the available options, highlight the tab you wish to use and confirm OK.
To add the channel you're currently watching to My TV, highlight Add to My TV in the Edit tab of the Channels menu and press OK.
Note: The Move to Position, Delete and Edit Title commands in the TV>Channels>Edit menu are not available for channels that are broadcast by M7.
Manage your Favourites list
You can create four different lists of your favourite channels. To open the Channels menu, go to TV>Channels or press OK. Highlight the Edit tab and confirm OK, the editing options will be displayed. Select Mark/Remark Channel. To select the appropriate channel, select it and confirm with OK. You can choose several options. You can also mark all channels in the list using the Mark/Remark Channel option. Then press the BACK button to return to the Edit menu options. Select Add/Remove Favourites and press OK. A list of favourite channels will be displayed. Set the desired list option to On. The selected channel(s) will be added to the list. In order to remove a channel or channels from the favourites list, follow the same steps and set the desired option in the list to Off.
To permanently filter the channels in the channel list according to your preferences, you can use the filter function in the Channels menu. For example, you can use the options on the Filter tab to set the favourite channels list to appear every time you open the channel list. The selected filtering options are displayed at the top of the Channels menu screen.
Configuring Parental Settings
By selecting the Parental Protection menu, users can be prohibited from viewing certain programmes, channels and using menus. These settings can be found in Settings > System > Parental control settings. To view the locked parental control menu options, you must enter your PIN. After entering the correct PIN, the Parental menu will appear.
OSD lock: This setting enables or disables access to all menus or installation menus on the TV. Instructions: This setting enables or disables access to some of the MHEG applications. Banned apps can be released by entering the correct PIN.
Parental control: If this option is set, the TV receives information about the accessibility of the broadcast programmes, if the programme is inappropriate for minors, it will disable access to the broadcast.
Note: If the Country option in the First Installation is set to France, Italy or Austria, the default value of Lock By Age will be set to 18.
Child lock: When this function is ON, the TV can only be operated with the remote control. In this case, the control buttons on the TV will not work.
Internet lock: If this option is set to ON, applications that use the Internet will be disabled. Set to OFF to release the app again.
PIN settings: Set a new PIN.
Default CICAM PIN: This option will be displayed as grey if no CI module is inserted in the CI slot of the TV. Use this option to change the default CI CAM PIN.
TV PIN*: By enabling or disabling this option, you can enable or restrict certain M7 operator channels by sending PIN requests. These PIN requirements provide access to the control mechanisms of the respective channels. If this option is On, channels that broadcast PIN code requests cannot be accessed without entering the correct PIN code.
* This option will only be available if the M7 operator is installed.
Note: The default PIN could be set to 0000 or 1234. If you have defined a PIN (required depending on country selection) during the First Installation, use the PIN you have defined. If you enter the PIN incorrectly five times in a row, the PIN will be blocked and you will not be able to enter a new PIN for 30 minutes. However, you can unblock PIN entry or reset the number of repeats by turning the TV off and on.
Some options may not be available depending on the model and/or country selection during Initial Installation.
Hotel mode
Hotel mode is a special mode that restricts some of the TV's functions and controls. This allows customers to use the TV in places such as hotels, prisons and hospitals. Possible restrictions are as follows:
- The user cannot increase the volume beyond the set limit. Can set a fixed volume value.
- The user can enable direct volume control of the headphones.
- The customer can restrict the display of certain offers.
- The user cannot use the buttons on the TV.
- The customer can limit the choice of input source.
- The customer can limit the last state of the TV.
- Teletext can be turned off or on.
- NVRAM data (e.g. service list, user preferences, etc.) can be copied to or from the USB device.
- The customer can restrict the use of Pin8 settings.
To access the hotel menu, press the Menu and 7-9-3-5 buttons in turn.
Hotel mode menu items
Hotel mode
Set as "On." to activate hotel mode. In hotel mode, the channel list and settings menu are blocked.
Pin 8
Set as "On" to allow the image mode to change according to Pin8.
The last state
Set as "On" to start the TV in the same state as when it was switched off. If set to "Off", the TV will remain in standby mode when plugged in again.
Deactivate buttons
Setting to "On." to disable the use of the buttons on the TV.
Deactivate the driver
Set as "On" to prevent the use of the remote control. To turn this option off, repeat the steps to open the hotel menu. The remote control will operate in standby mode regardless of the setting of this item. If this item is set to "Restricted", only the volume up/down, program scroll, number buttons, directional buttons, OK button, mute button and standby button will be functional on the remote control.
Default source
You can set the default source when you turn on the TV. Select the channel and/or source to start the next time you turn on the TV. The following options are available:
Auto: The TV will start with the last channel watched (if the TV was the last source) or the last source. TV: The TV will start with the channel you specify in the "Default Channel" menu item. Others: The TV will be started with the specified source (HDMI1 etc.).
Default channel
You can specify the channel to be displayed the next time you turn on the TV (if "Default Source" is set to "TV").
Volume control
Press the OK button to display the available options in the Volume Settings menu.
Volume limit - TV
Set the maximum volume value that can be used.
Volume limit - Headphones
Set the maximum headphone volume that can be used.
Adjusting the volume when switching on
Set to "On." to enable the use of the startup volume values that are set in the Volume - TV and Volume - Headphones menu items. If this option is set to "Off", these menu items cannot be set.
Volume - TV
Set the volume value when the TV starts up. This option cannot be set to a higher value than the value set in "Volume Limit - TV".
Volume - Headphones
To set the volume value when the TV is switched on with headphones plugged in. This option cannot be set to a higher value than the value set in "Volume limit - Headphones".
Set a fixed volume
Set to "On" to enable the fixed volume value that is set in the "Fixed volume value" menu item.
Fixed volume value
Set a fixed volume value. This option cannot be set to a higher value than the value set in "Volume Limit - TV".
Direct headphone volume
Set as "Activated" to control the volume of the headphones using the remote control. When this function is enabled, the volume control buttons will not change the main sound of the TV. You can change the TV sound using the left/right directional buttons on the remote control.
Note: If one of the Volume - TV and Fixed Volume options is set to "On", the other cannot be set.
Restrictions on menu display
The default value is set to "Deactivate menu settings" for hotel mode. By setting this item to "Disable all menus" you can block access to all menus. You can also deactivate this function by setting "Off".
The following settings menus will be hidden: Others menu: Network, Installation
Teletext
Setting this item as "On." or "Off." you can enable or disable Teletext (or MHEG, if available) services.
Copy to USB
With this option, you can copy the NVRAM data (service list, preferences, etc.) and the welcome image in the "hotel_wel.png" format to the USB device. Highlight Copy to USB and press OK to copy these files from the TV to USB. A folder named "clonexxxxx" is created on the USB device and the files are saved in this folder.
Copy from USB
Use this option to copy NVRAM data (service list, presets, etc.) and the welcome image from the USB device. Highlight Copy from USB and press OK, select the directory named "clonexxxxxxx" and press OK again to copy the NVRAM data files from USB to TV.
The welcome image should be named "hotel_wel.png" and placed in a directory named "CLONE00001" on the USB device. After selecting Copy from USB and pressing the OK button, highlight the "CLONE00001" folder and press the OK button. A menu of options will appear. Select Copy from USB and press OK to copy the welcome image from USB to TV. Switch the TV off and on again to display the new welcome picture.
Note: The USB device to be used for copying from USB must be formatted as FAT32.
Export channel list to USB (availability of this feature varies depending on TV model)
Use this option to copy the channel list from the TV to the USB device.
Import channel list from USB (availability of this feature varies depending on TV model)
Use this option to copy the channel list from the USB device to the TV.
Wake-up channel
Set the channel whose time data is to be used for wake-up. If this option is set to "0", the time data of the monitored channel will be used.
Note: If the hotel mode is active, the "Add wake-up timer" function will be available in the "TV/Timers" menu. After saving the new timer, the TV will automatically switch on at the desired time.
Wake-up volume
Setting the volume value when waking up with the TV. This value cannot be set to a higher value than the value set in the "Volume Limit - TV" menu item in the Volume Settings menu.
Fixed image mode
Set as "On." to turn off the image setup menus.
Digital tuner
Set as "Off" to turn off digital channels. When you start a digital channel from the channel list, the message "No signal" is displayed and digital channels do not appear in the list when you search manually or automatically.
Multiple remote control support (up to 4)
You can select one of the predefined remotes or set it as "Off". You can set the driver type in the "RCU menu". The abbreviation for this menu is RETURN/BACK-1-2-3-4.
Note: For all MHEG-enabled services, the INFO-RETURN/BACK-1-2-3-4 buttons must be pressed sequentially. Multi-remote support works on RC5 type remotes.
Welcome screen
After setting the value "On." the TV will display a welcome screen at startup. The welcome screen is a PNG image with a resolution of 3840 × 2160 pixels for UHD resolution, 1920 × 1080 pixels for FHD resolution and 1280 × 720 pixels for HD resolution. The welcome screen image can be changed as described in "Copy from USB".
Note: Files larger than 2048 kB are not supported.
NIT update
If this option is enabled, the Network Information Table (NIT) data will be updated automatically.
EPG display options
If you enable this option, the EPG menu will be available even when the TV is in hotel mode.
CEC enabled (availability of this feature varies depending on TV model)
The options available are Manual, Off. and Auto. The CEC function will work according to the settings.
Restore original values
Highlight this option and press the OK button on the remote control to restore the hotel mode menu to its default (factory) settings.
Electronic program guide
You can browse through the currently installed channels in the channel list via your TV's electronic programme guide function. It depends on the related broadcast whether this feature is supported or not.
To access the program guide, press the Guide button on the remote control. You can also use the Programme Guide function in the TV menu.
There are 2 different layout types, Timeline Schedule and Current/Next. To switch between these layouts, highlight the layout you wish to use at the top of the screen and press OK.
Use the direction buttons to navigate through the programme guide. Use the BACK button to use the options tabs at the top of the screen.
Schedule on the timeline
In this layout option, all channel events listed will be displayed on the timeline. You can use the directional buttons to scroll through the events listed. To display a menu of event options, highlight the event and press OK.
To use the available options, press the BACKbutton. To view the filtering options, highlight the Filter tab and press OK. To change the layout, highlight Current/Next and press OK. To view the previous and next day's events, you can use the Previous Day and Next Day options.
To view the options below, highlight the Extras tab and press OK.
Choose a genre: Highlights the Genre Selection menu. Select a genre and press the OKbutton. All events in the program guide that match the selected genre will be highlighted.
Search Guide: Displays the search options. Use this feature to search the Program Guide database for genres that match the selected criteria. The corresponding results will be sorted into a list.
Current: Displays the current event of the highlighted channel. Zoom To view events over a wider period of time, highlight and press the OKbutton.
List Current/Next
In this layout option, only current and future channel events will be listed. You can use the directional buttons to scroll through the events listed.
To use the available options, press the BACKbutton. To view the filtering options, highlight the Filter tab and press OK. To change the layout, highlight Timeline and press OK.
Event options
Use the directional buttons to highlight the event and press OK to open the Options menu. The following options are available.
Select Channel: Use this option to switch to the selected channel and watch it. The programme guide will close.
More information: View detailed information about the selected event. Use the up and down arrow buttons to scroll through the text.
Event timer / Delete event timer: Select Set timer on Event options and press OK. You can set timers for future events. To cancel an already set timer, highlight the event and press OK. Then select Delete timer per event. The timer will be cancelled.
Notes:
- If the timer is active on the current channel, you cannot switch to another channel.
- It is not possible to set a timer for two or more programmes in the same time interval.
Teletext services
Press the Text button to enter. Press again to activate Mix mode, which allows you to view the Teletext page and the TV broadcast simultaneously. To exit, press again. If available, sections of the teletext pages will be colour coded and can be selected by pressing the coloured buttons. Follow the on-screen instructions.
Digital teletext
To view the information from the digital teletext, press the Text button. Control it with the coloured buttons, arrow keys and OKbutton. Options may vary depending on the content of the digital teletext. Follow the instructions displayed on the digital teletext screen. When you press the Text button, the TV returns to watching TV.
Software update
Your TV can automatically search for and update firmware using an antenna signal or via the internet.
Search for software updates via the user interface
From the main menu, select Settings, then scroll to Software Update and press OK. Then select Search for Updates and press OK to check for a new software update. Software Update is also available in Settings > System > Other settings.
If a new update is found, it will start downloading. When the download is complete, a warning will appear, press OK to complete the software update process and restart the TV.
Search and update mode 3 AM
The TV will always search for new updates at 3:00 if you have enabled Auto Scan and if the TV is connected to an antenna signal or the Internet. If new software has been found and successfully downloaded, it will be installed the next time you switch on.
Note: Do not disconnect the power cord if the indicator light flashes during reboot. If the TV does not turn on after the update, unplug the TV for 2 minutes and plug it in again. All updates are done automatically. If a manual search is performed and no software is found, then it is the current version.
Troubleshooting and tips
TV won't turn on
Make sure the power cord is properly connected to the power outlet. Press the Standby button on the remote control.
Bad image
- Make sure you have tuned the TV correctly.
- A poor picture can be caused by a weak signal. Please check the antenna connection.
- If you have performed a manual tuning, check that you have selected the correct frequency.
No image
- The TV is not receiving any signal. Make sure the correct input source has been selected.
• Is the antenna connected correctly? - Is the antenna cable connected correctly?
- Are the appropriate plugs used to connect the antenna?
- If the content is received via the HDMI input, try changing the appropriate HDMI source input setting to Advanced or Normal from the Source Settings option in the Sources menu or the Sources option in the Settings > Systemmenu.
- If in doubt, contact the dealer.
No audio
- Check that the TV sound is not muted. To cancel the mute, press the Mute button or increase the volume.
- Sound can only come from one speaker. Check the balance settings from the sound menu.
- Check that the Sound Output option is set correctly in the Sound menu.
- If the content is received via the HDMI input, try changing the appropriate HDMI source input setting to Advanced or Normal from the Source Settings option in the Sources menu or the Sources option in the Settings > Systemmenu.
Remote controller does not operate
- The batteries may be dead. Replace old batteries with new ones.
- Maybe the batteries are inserted incorrectly. See "Inserting batteries in the remote control"
No signal on input source
- It is possible that no device is connected.
- Check the AV cables and connections from the device.
- Check that the device is switched on.
Information about DVB functions
This DVB receiver is only suitable for use in the country for which it was designed.
Although this DVB receiver complies with the latest DVB specification at the time of manufacture, we cannot guarantee compatibility with future DVB broadcasts due to changes that may occur in broadcast signals and technologies.
Some digital features may not be available in all countries.
We are constantly striving to improve our products and therefore specifications are subject to change without notice.
For advice on where to buy accessories, contact the store where you purchased the equipment.
AV and HDMI compatibility
| Source Supported signals Availability | |||
| HDMI | 480i 60 Hz O | ||
| 480p 60 Hz O | |||
| 576i, 576p 50 Hz O | |||
| 720p 50Hz,60Hz O | |||
| 1080i 50Hz,60Hz O | |||
| 1080p | 24Hz,25Hz,30Hz,50Hz,60 Hz | O | |
| 3840x2160p | 24Hz,25Hz,30Hz,50Hz,60 Hz | O | |
| 4096x2160p | 24Hz,25Hz,30Hz,50Hz,60 Hz | O | |
(X: Not available, O: Available)
In some cases, the TV signal may not be displayed correctly. The problem may be incompatibility with equipment (DVD, Set-top box, etc.). If you encounter this problem, contact your dealer as well as the equipment manufacturer.
CONNECTION
Cable connection
Connecting to a wired network
- You must have a modem/router connected to an active broadband connection.
- Connect the TV to the modem/router with an Ethernet cable. There is a LAN port on the back of your TV.
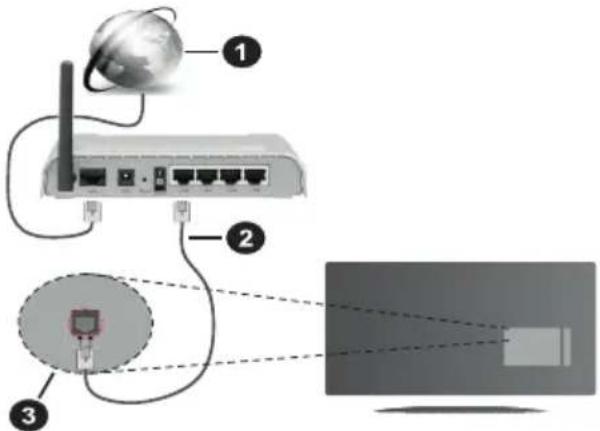
- Broadband connection to ISP
- LAN (Ethernet) cable
3. LAN input on the back of the TV
To configure your wired network settings, see the Settings menu for instructions.
- You should be able to connect the TV to your LAN depending on your network configuration. In this case, use an Ethernet cable to connect the TV directly to a network socket.
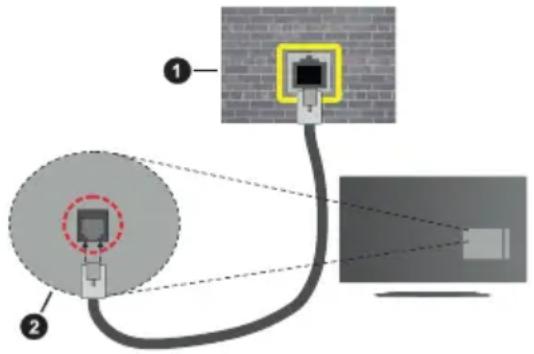
- Network socket
- LAN input on the back of the TV
Configuring Cable Device Settings
Connection method
The network type can be set to Wired, Wireless or Disabled depending on the active connection to the TV. If you are connected via Ethernet, set this option to Wired device.
Connection speed test
Highlight Internet connection speed test and press OK. The TV will measure the bandwidth of the internet connection and display the result when it is finished.
Advanced Settings
Highlight Advanced settings and press OK. On the next screen, you can change the IP and DNS settings of the TV. Select the desired address and press the Left or Right button to change the setting from Automatic to Manual. You can now manually enter IP and/or DNS values. Select the appropriate item from the drop-down menu and use the number buttons on the remote control to enter new values. When you are done and want to save the settings, highlight Save and press OK.
Wireless connection
Connecting to a wireless network
Your TV may have trouble connecting to some networks with hidden SSIDs. To make your modem's SSID visible, change the modem's settings in its system.
Broadband to ISP (1)
Wireless-N router (IEEE 802.11a/b/g/n) with simultaneous use of 2.4 and 5 GHz bandwidth is designed to increase bandwidth. It's optimised for smoother and faster HD video streaming, file transfers and wireless gaming.
- Frequencies and channels vary depending on the area.
- The transmission speed varies depending on the distance and number of obstacles between the transmission products, the configuration of the products, the radio wave conditions, the traffic and the products you are using. Transmission may also be interrupted or disconnected depending on radio wave conditions, DECT phones or any other WLAN 11b devices. The
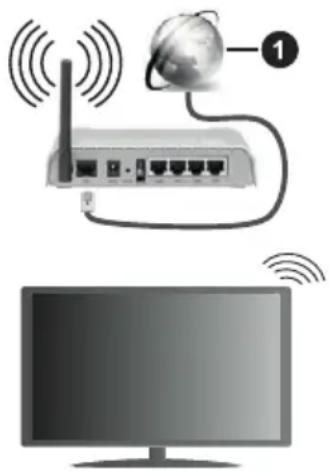
natural_image
Illustration of a network device with wireless signal waves and a monitor displaying a separate screen (no text or symbols)normal transmission rate values are the theoretical maximum for wireless standards. This is not an efficient data transfer rate.
- The locations where transmission is most effective vary depending on the user environment.
- Wireless TV option supports modem type 802.11 a,b,g & n. The use of the IEEE 802.11n communication protocol is strongly recommended to avoid potential problems when viewing video.
- If modems with the same SSID are located nearby, you must change the SSID of one of them. Otherwise, connection problems will occur.
Configure wireless device settings
You can start the connection process from the Network Settings menu, where you set the Connection Method to Wireless Device.
If you wish to search for available wireless networks, highlight Search wireless networks and press OK. A list of all the networks found will appear. To connect to the network, select the desired network from the list and press OK. A network with a hidden SSID cannot be discovered by other devices. To connect to a network with a hidden SSID, scroll down the list of wireless networks you've found, highlight Add new network, and press OK. Enter a network name and use the appropriate connection options to select the security type.
Note: If the modem supports N mode, you can set it up.
If the selected network is password protected, enter the correct password using the virtual keyboard. Use the directional buttons and the OK button on the remote control to use this keypad.
Wait until the IP address is displayed.
This means that the connection has been established. To disconnect from the wireless network, select Connection method and use the Left or Right button to set it to Off.
If you're connected to a wireless network, the Network menu will show Disconnect and your wireless network profile will be saved, so your TV will connect to the same network automatically whenever you switch to a wireless connection. To disconnect from the wireless network and delete the saved wireless network profile, highlight Disconnect and press OK.
If your router has WPS, you can connect directly to the modem/router without entering a password or adding a network first. Select WPS on your router and press OK. To connect, press the WPS button on your modem/router. After the devices have connected, a confirmation message will appear on your TV. Select OK to continue. No further setup is required.
Highlight Connection speed test and click OK to check the speed of your Internet connection. Highlight Advanced Settings and click OK to open the Advanced Settings menu. Use the directional and numeric buttons to adjust the settings. When you are done and want to save the settings, highlight Save and press OK.
More information
If a connection is established, the connection status is displayed as Connected or Not Connected and the current IP address.
Connect your mobile device via WLAN
- If your mobile device is WLAN-enabled, you can connect it to your TV via a router to access your device's content. In this case, your mobile device must have the appropriate sharing software.
- Follow the steps in the previous chapter to connect your TV to the router.
- Then connect your mobile devices to the same router (same Wi-Fi network) and launch the selected UPnP/DLNA casting app on your mobile device. Then select the files you want to share with your TV.
- If the connection is established correctly, you should now be able to access shared files from your mobile device via Audio Video Sharing, which is included with your TV.
- Highlight Audio and Video Sharing in the Sources menu and press OK to see the available devices on the network. Select your mobile device and press OK to continue.
- If available, you can download the virtual remote control app from your mobile app provider's server.
Note: This feature may not be supported on all mobile devices.
Network standby mode
Network standby is a standard that allows you to turn on or wake up the device via a network message. The message will be sent to the device via a program running on a remote device that is connected to the same local network as the smartphone.
Your TV is WoWLAN compatible. This feature may not be available during the First Installation process. To enable this feature, set the Network Standby option in the Network menu to On. The device from which the
network message will be sent to the TV and the TV must be connected to the same network. Network Standby is only supported for Android devices and can only be used through the YouTube and Netflix apps.
To use this feature, the TV and remote device should be connected while the TV is on. If the TV is switched off, the connection should be restored the next time you switch it on. Otherwise, this option will not be available. This does not apply when the TV is switched to standby mode.
The performance of some devices on the market may vary depending on the software architecture. To use the Network Standby feature with better performance, make sure your device has the latest firmware version. If you want your TV to consume less power in standby mode, you can disable this feature by setting Mains Standby to Off.
Wireless screen
Wireless screen is the standard for streaming video and audio content. This feature provides the ability to use the TV as a wireless display device.
Use with mobile devices
There's an easy way to project the content of your mobile device's display onto your TV. This way you can view (mirror) photos, videos and other content from your mobile device's display on the big screen TV. This feature also allows you to play audio.
Make sure your mobile device and TV are connected to the same router/Wi-Fi network. Then press the Source button on the remote control and scroll to the Wireless Display sources.
A screen will appear to indicate that the TV is ready to connect.
Open the sharing app on your mobile device. These applications are named differently for each brand of mobile phone and are usually pre-installed as part of the system. But you can also install third-party apps. In your phone's app store, look for apps labeled "screen mirroring" / "screen mirroring". Please refer to your mobile device's user manual for detailed information.
Search for your TV in the relevant app on your mobile phone and select it to connect. After you select your TV and connect, your device screen will be displayed on the TV.
Note: This feature can only be used if the mobile device supports this feature. If you experience connection problems, check that the version of the operating system you are using supports this feature. Incompatibility issues may occur with operating system versions that are released after this TV was manufactured. The scanning and attaching processes vary depending on the program you are using.
Internet browser
If you want to use a web browser, first open the Homemenu. Then launch the browser app that has the orange logo with the country symbol on it.
On the browser home screen, thumbnails from the predefined website links (if any) appear as speed dial options, along with Edit Speed Dial and Add to Speed Dial options.
Use the directional buttons on the remote control to go to the web browser. To view the browser options bar, move the cursor to the top of the page. Here you have the History, Tabs and Bookmarks options, and a browser bar that contains the Previous/Next buttons, the Update button and the address/search bar, Quick Dial and Vewdbrowser buttons.
To add the desired web page to the Quick Access Options list, move the cursor to the top of the page, or press.
The browser bar is displayed. Highlight the Speed dial button and press the OKbutton. Next, select Add to speed dial and press OK. Fill in the Name and Address fields, highlight OK, and press OK to add. When you are on the page you want to add to the speed dial list, highlight the Vewd button and press OK. Next, highlight
Add to speed dial and press OK. The Name and Address fields are automatically filled in depending on the pages you have visited. Highlight OK and press the OK button to add.
You can also use the Vewdmenu options to manage the browser. Highlight the Vewd button and click OK to view the available pages for both specific and general options.
There are different ways to search and browse websites using a web browser.
- Type the website address (URL) in the search/address bar, highlight the Enter button on the virtual keyboard, and press OK.
- To search for the desired website, type the keyword in the search/address bar, highlight the Enter button on the virtual keyboard, and press OK.
• To visit the desired website, highlight the Speed Dial thumbnail and press OK.
Your TV is compatible with the USB mouse. For easier and faster navigation, connect a mouse or wireless mouse adapter to the USB port on your TV.
Some websites contain flash content. These are not supported by the browser.
Your TV does not support any Internet download processes in your web browser.
Not all sites on the internet are supported. Depending on the location, content issues may arise. In some cases, you will not be able to play video content.
Troubleshoot connection problems
No wireless network available
- Make sure that each firewall on your network allows wireless TV connections.
- Try searching for wireless networks again using the Networks menu.
- Check the modem (router). If the router works, check the modem's internet connection.
Connection is slow
For more information about the modem's internal service area, connection speed, signal quality, and other settings, see the modem's user manual. You must have a high-speed modem connection. If the wireless network is not working properly, try using a wired network in your home. For more information on the procedure, see
Cable Connections. If the TV does not work with a wired connection, check the modem (router). If the router works, check the modem's internet connection.
Interruptions during playback or slow response
In this case, try the following:
- Keep a distance of at least three metres from microwave ovens, mobile phones, Bluetooth devices or other WLAN-compatible devices. Try changing the active channel on the WLAN router.
Internet connection not available / Audio and video sharing not working
If the MAC address (unique identification number) of your PC or modem has been registered temporarily, the TV may not connect to the Internet. In this case, the MAC address is verified every time you connect to the Internet. This is a measure against unauthorised access. Because your TV has its own MAC address, your ISP cannot verify your TV's MAC address. For this reason, you cannot connect to the TV. Contact your internet provider and ask for information about your internet connection. It is also possible that the connection failed because of the firewall. If you think this is causing your problem, contact your ISP. A firewall may be causing connection problems when using the TV in Audio and Video Sharing mode or when surfing through Audio and Video Sharing.
Invalid domain
Before sharing files in the media server program on your PC, make sure that you are logged in to the PC with a verified username/password and that your domain is active. If the domain is invalid, it may cause problems when viewing files in Audio and Video Sharing mode.
Using the Audio and Video Sharing network service
The Audio and Video Sharing feature uses a standard that simplifies the process of monitoring digital electronics and is therefore suitable for use on a home network.
This standard allows you to view and play photos, music and video stored on a media server that is connected to your home network.
Installing server software
The Audio and Video Sharing function cannot be used if the server software is not installed on the computer, or if the required media server software is not installed on the companion device. Install the correct server program on your computer.
Connect to a wired or wireless network
For more detailed configuration information, see the Wired/Wireless chapters.
Audio and Video Sharing
Go to Settings > Devices and turn on Audio and video sharing.
Playing Shared Files via Media Browser
Highlight Audio and Video Sharing in the Sources menu using the directional buttons and press OK. The available devices on the network are displayed. Choose one of them and press OK to continue. The media viewer appears.
For more information about playing files, see the Media Viewer menu.
If there is a problem with the network, unplug the TV from the socket and plug it back in. Trick mode and skipping are not supported with Audio and Video Sharing.
Note: Some computers may not be able to use Audio and Video Sharing because of administrator permissions and security settings (for example, corporate PCs).
Smart Center
TV Smart Centre is a mobile app that runs on iOS and Android platforms. You can easily stream your favourite concerts and programmes from your smart TV via your mobile device. Also, you can run your apps, use your mobile device as a TV remote and share multimedia files.
Note: The ability to use all the features of this app depends on the characteristics of your TV.
Let's start
To use the internet-enabled features, your modem/router must be connected to the internet.
IMPORTANT: Make sure your TV and mobile device are connected to the same network.
Audio and Video Sharing (if available) must be enabled for media sharing options. Press the Menu button on the remote control, select Settings > Devices and press OK. Mark Audio and Video Sharing and change to Activated. Now your TV is ready to connect to mobile devices. Install the TV Smart Centre app on your mobile device.
Launch the TV Smart Centre app on your mobile device. If all connections are configured correctly, the name of your TV will be displayed on your mobile device. If the name of your TV doesn't appear in the list, wait a moment and tap the Refresh widget. Select TV from the list.
Application
You can access the apps installed on your TV in the My TV menu. Press the Menu button on the remote control to display the My TV menu. Highlight the selected application and press OK to continue.
To manage the apps installed on your TV, you can use the More apps option in the TV menu. You can add an installed app to My TV, launch it or delete it. Highlight the application and press OK to see the available options.
You can also add new apps available in the app store. To access, select Shop from the TV menu and press OK. The available apps will be displayed. You can also access the App Market from the More Apps menu.
You can reset your customisations in My TV, including app-related customisations, to their default values using the Reset apps option in the Settings menu (availability depends on your TV model and features). Highlight this function and press the OKbutton. A confirmation dialog message appears. Highlight Yes and press OK to continue. Please note that you will not be able to perform this operation again within the next few minutes.
Notes:
- Possible problems with applications may be caused by application providers.
- Third-party Internet services are subject to change, interruption or limitation at any time.
HBBTV system
HbbTV (Hybrid Broadcast Broadband TV) is a new industry standard that seamlessly combines TV services delivered via broadcast with services delivered via broadband. It also allows access to consumer-only internet services using connected TV and set-top boxes. Services provided through HbbTV include traditional broadcast TV channels, catch-up services, video-on-demand, EPG, interactive advertising, personalisation, voting, games, social networking and other multimedia applications.
HbbTV apps are available on channels where they are designated by the broadcaster. The broadcast will mark one app as "auto launch" and it will launch on the platform automatically. Auto-launch apps are usually marked with a small red button icon to alert the user that an HbbTV app is available on that channel. Press the red button to open the app page. After the page is displayed, you can return to the original state of the red icon by pressing the red button. You can switch between the red button icon mode by pressing the red button. It should be noted that the ability to toggle the red button is provided by the application and some applications may behave differently (other colored buttons, such as green, yellow, blue, may be defined for some other functions, e.g. shortcuts).
If the user switches to another channel while the HbbTV app is active (in red button icon mode or full UI mode), the following can happen.
- The application can continue to run.
- The application can be terminated.
- The application can be terminated and another red button autostart application can be started.
HbbTV allows applications to run from both broadband and broadcast TV. The operator may offer both options or only one of them. If a platform does not have a working broadband connection, it can still run applications transmitted over the TV broadcast.
The red button app provides links to other apps. The user can then switch to other applications using the links provided. The application must provide a way to exit itself; usually the Exit button is used for this.
HbbTv apps use buttons on the remote control to interact with the user. When the HbbTV application is launched, the application controls some of the buttons. Example: numeric channel selection will not work on a teletext application where the numbers indicate the teletext pages.
HbbTV requires AV streaming capability for the platform. There are many apps that provide VOD (video on demand) and catch-up TV services. The user can use the start, pause, stop, forward and rewind buttons on the remote control to work with AV content.
If you need to change the TV's audio description settings, you should do so before starting HbbTV playback. You will not be able to access the relevant settings during playback. Go to Settings > System > Disability settings > Audio description and adjust them to suit your needs.
Note: You can enable or disable this feature from the More menu in Settings > System. Depending on the TV model and the country selected in the First Setup options, this feature may be available in Settings > System > Privacy > Privacy settings instead of Settings > System > More.
Note: You can enable or disable this feature from the Privacy menu in Settings > System.
TECHNICAL DATA
| Television broadcasting PAL BG/I/DK/ | SECAM BG/DK |
| Receiving channels VHF (BAND I/III) - UHF (BAND U) - Digital reception Fully integrated digital terrestrial-cable TV (DVB-T-C-S) support (DVB-T2, DVB-S2 compatible) | HYPERBAND |
| Number of preset channels 11,000 | |
| Channel indicator Display on the screen | |
| RF antenna input 75 ohms (unbalanced) | |
| Operating voltage 220-240V AC, 50Hz. | |
| Sound German + Nicam Stereo | |
| Sound power (WRMS.) (10% THD) 2x10 | |
| Consumption (W) | 140 W |
| Power consumption in Network Standby (W) | < 2 |
| TV dimensions DxLxH (with base) (mm) | 270 × 1233 × 750 |
| TV dimensions DxLxH (without base) (mm) | 87 × 1233 × 712 |
| Wall mounting dimensions (mm) VESA M6 200x200 | |
| Screen 55" | |
| Operating temperature and humidity 0°C to 40°C, max. humidity 85% | |
Supported file formats for USB mode
Video file formats
| File extension Video codec Sound | ||
| .mpg/.mpeg/.dat/.vob MPEG1/2, H.264, VC1 MPEG Layer 1/2/3, AC3 | ||
| .ts/.trp/.m2ts MPEG1/2, H.264, VC1, HEVC/H.265 MPEG Layer 1/2/3, AC3, E-AC3 | ||
| .avi MPEG1/2, MPEG4, H.264, MJPEG MPEG Layer 1/2/3, AC3, AAC, WMA | ||
| .mp4/.m4a/.m4v/.mov/.qt/.3gp/.3g2/.3gpp | MPEG1/2, H.263, MPEG4, H.264,HEVC/H.265, AV1 | MPEG Layer 1/2/3, AAC LC, AC3 |
| .mkv | MPEG 1/2, MPEG4, H.264,HEVC/H.265, AV1 | MPEG Layer 1/2/3, AAC, AC3 |
| flv Sorenson Spark, MPEG4, H.264 MPEG Layer 3, ADPCM, AAC LC | ||
| .asf/.wmv MPEG4, WMV3, VC1 | WMA, AMR-NB | |
| .webm | VP9, VP8, AV1 | OPUS, Vorbis |
Image file formats
| File extension Format | |
| .jpg/.jpeg JPEG, PJPEG | |
| .bmp | BMP |
| .png | PNG |
Audio file formats
| Extension | Sound |
| .mp3, | mp3 |
| .aac | AAC |
| .wma | WMA |
| .wav | MPEG Layer 1/2/3, AAC, PCM |
| .m4a | AAC |
Subtitle file formats
| External subtitles | |
| Extensions | Technical specifications |
| .ssa | SubStation Alpha |
| .ass | Advanced SubStation Alpha |
| .srt | Subripper |
| .sub Micro DVD / SubViewer | |
| TXT: Micro DVD / TMPlayer / MPL2 | |
| .smi | Sami |
| Internal subtitles | |
| Extensions | Technical specifications |
| .mkv | VOBSub |
| .mkv | ASS/SSA/TEXT |
| .dat, .mpg, .mpeg, .vob DVD Subtitles |
| .mp4, DVD Subtitles, TEXT |
Supported DVI resolution
If you are connecting devices to the TV connectors using DVI converter cables (DVI to HDMI cable - not supplied), see the following resolution information.
| 56 Hz 60 | Hz 66 Hz 70 | Hz 72 Hz 75 Hz | |||
| 640x400 X X | |||||
| 800x600 X X X | |||||
| 1024x768 X X X | |||||
| 1280x768 X X | |||||
| 1280x960 X | |||||
| 1360x768 X | |||||
| 1366x768 X | |||||
| 1280x1024 X X X | |||||
| 1400x1050 X | |||||
| 1600x900 X | |||||
| 1920x1080 X |
Notification of authorisation

The terms HDMI, HDMI High-Definition Multimedia Interface, HDMI Trade Dress and HDMI Logo are trademarks or registered trademarks of HDMI Licensing Administrator, Inc.
Dolby Vision·Atmos
Dolby, Dolby Vision, Dolby Atmos, and the double-D symbol are trademarks of Dolby Laboratories Licensing Corporation. Produced under license from Dolby Laboratories, Confidential unpublished work. Copyright © 2012-2022 Dolby Laboratories. All rights reserved.
Produced under license from Dolby Laboratories. Dolby, Dolby Audio and the double-D symbol are trademarks of Dolby Laboratories Licensing Corporation. "YouTube and the YouTube logo are trademarks of Google Inc. This product contains technology subject to Microsoft's intellectual property rights. Use or distribution of this technology outside of this product is prohibited without the appropriate license(s) from Microsoft.
Content owners use Microsoft PlayReady™ content access technology to protect their intellectual property, including copyrighted content. This device uses PlayReady technology to access PlayReady-protected content and/or WMDRM-protected content. In the event that the device ceases to properly enforce restrictions on content usage, content owners may require Microsoft to revoke the device's ability to consume PlayReady-protected content. The revocation should not affect unprotected content or content protected by other technologies. Content owners may require a PlayReady update to access their content. If you refuse the update, you will not be able to access the content that requires the update.
The "CI Plus" logo is a trademark of CI Plus LLP.
This product is protected by certain intellectual property rights of Microsoft Corporation. Use or distribution of such technology outside of this product is prohibited without a license from Microsoft or an authorized Microsoft subsidiary.
USE AND DISPOSAL OF WASTE
Wrapping paper and corrugated paperboard – deliver to scrapyard. Packing foil, PE bags, plastic elements – throw into plastic recycling containers.
DISPOSAL OF PRODUCTS AT THE END OF LIFETIME
European Union
These symbols indicate that electrical and electronic devices and batteries with this symbol must not be thrown away with normal household waste at the end of their life. Instead, the product as well as the batteries should be handed over to collection points for the recycling of electrical and electronic equipment, for proper treatment, recovery and recycling in accordance with your national legislation and Directives 2012/19/EU and 2013/56/EU.
By disposing of these products properly, you help to conserve natural resources and avoid potential negative environmental and human health impacts that could otherwise result from improper handling during disposal.
For more information about collection centres and recycling of these products, contact your local authority, waste disposal services or the shop where you bought the product.
Improper disposal of this waste may result in a fine depending on state law.
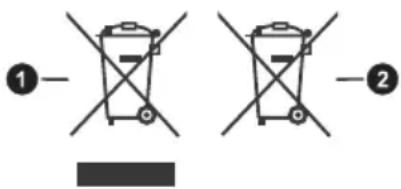
-
Products
-
Battery
For entrepreneurs
If you wish to dispose of this product, please contact your supplier and read the general terms and conditions of the purchase contract.
Other countries outside the European Union
These symbols are valid only in the European Union.
For information on how to dispose and recycle, contact your local authority.
Take the product and packaging to the recycling facility.
Some collection centres accept free products.
Note: Pb under the symbol means that the battery contains lead.
This product complies with the requirements of the EU directives on electromagnetic compatibility and electrical safety and the issue of heavy metals in electrical and electronic equipment.

Hereby, K + B Progres, a.s. declares that the type of radio equipment ECG 55USL231 is in compliance with the directive 2014/53 / EU.
The full Declaration of Conformity is available at www.ecg-electro.eu.
The operating manual is available at www.ecg-electro.eu.
Changes of text and technical parameters reserved.
SICHERHEITSHINWEISE
natural_image
Simple diagram showing a circular object and a rectangular shape with curved lines, no text or symbols present.natural_image
Diagram of a vehicle fuel injector with red directional arrows indicating flow or movement (no text or symbols)Antennenanschluss
natural_image
Illustration of a network device with wireless signal waves and a globe icon, connected to a monitor (no text or symbols)| 56 Hz | 60 Hz | 66 Hz | 70 Hz | 72 Hz | 75 Hz | |
| 640x400 | X | X | ||||
| 800x600 | X | X | X | |||
| 1024x768 | X | X | X | |||
| 1280x768 | X | X | ||||
| 1280x960 | X | |||||
| 1360x768 | X | |||||
| 1366x768 | X | |||||
| 1280x1024 | X | X | X | |||
| 1400x1050 | X | |||||
| 1600x900 X | ||||||
| 1920x1080 X |
- Read carefully and save for future use!
- Warning
- Do not expose the appliance to rain or moisture. Risk of fire or electric shock.
- Attention
- Remote control and battery
- When using headphones
- Caution for wall mounting
- SYMBOLS AND WARNINGS ON THE PRODUCT
- Environmental information
- (\*) Standby button
- (\*\*) My Button 1:
- Switching on/off
- Turning on the TV
- Turning off the TV
- FEATURES
- Ultra HD (UHD)
- Dolby Vision
- High Dynamic Range (HDR) / Hybrid Log-Gamma (HLG)
- Included accessories
- Emergency notifications
- CONTROL BUTTONS AND TV OPERATION
- One-button control
- Remote control
- Input selection
- Changing channels and volume
- Reset and power off using the standby button
- Using the TV Main Menu
- My TV
- Search
- TV
- Guide
- Channels
- Timers
- Edit Home Page
- Other applications
- Shop
- Settings for the disabled
- Privacy settings
- Settings
- Sources
- Settings Resources
- Inserting battery in the remote control
- TV CONNECTION
- Plugging into power
- Antenna connection
- The back of the TV
- Restrictions by country
- INSTALLATION AND SETUP
- First time installation
- About the choice of the type of broadcast
- Transponder List and LNB Configuration
- Notes:
- Media Playback via USB input
- Media Browser
- FollowMe TV
- CEC
- Controlling the sound of a connected audio system
- Game mode
- Low latency automatic mode
- E-Manual - E-handbook
- TV OPERATION
- Controlling the channel list
- Manage your Favourites list
- Configuring Parental Settings
- Hotel mode
- Hotel mode menu items
- Pin 8
- The last state
- Deactivate buttons
- Deactivate the driver
- Default source
- Default channel
- Volume control
- Volume limit - TV
- Volume limit - Headphones
- Adjusting the volume when switching on
- Volume - TV
- Volume - Headphones
- Set a fixed volume
- Fixed volume value
- Direct headphone volume
- Restrictions on menu display
- Teletext
- Copy to USB
- Copy from USB
- Wake-up channel
- Wake-up volume
- Fixed image mode
- Digital tuner
- Multiple remote control support (up to 4)
- Welcome screen
- NIT update
- EPG display options
- CEC enabled (availability of this feature varies depending on TV model)
- Restore original values
- Electronic program guide
- Schedule on the timeline
- List Current/Next
- Event options
- Teletext services
- Digital teletext
- Software update
- Search for software updates via the user interface
- Search and update mode 3 AM
- Troubleshooting and tips
- TV won't turn on
- Bad image
- No image
- No audio
- Remote controller does not operate
- No signal on input source
- Information about DVB functions
- CONNECTION
- Cable connection
- Connecting to a wired network
- LAN input on the back of the TV
- To configure your wired network settings, see the Settings menu for instructions.
- Configuring Cable Device Settings
- Connection method
- Connection speed test
- Advanced Settings
- Wireless connection
- Connecting to a wireless network
- Broadband to ISP (1)
- Configure wireless device settings
- More information
- Connect your mobile device via WLAN
- Network standby mode
- Wireless screen
- Use with mobile devices
- Internet browser
- Troubleshoot connection problems
- No wireless network available
- Connection is slow
- Interruptions during playback or slow response
- Internet connection not available / Audio and video sharing not working
- Invalid domain
- Using the Audio and Video Sharing network service
- Installing server software
- Connect to a wired or wireless network
- Audio and Video Sharing
- Playing Shared Files via Media Browser
- Smart Center
- Let's start
- IMPORTANT: Make sure your TV and mobile device are connected to the same network.
- Application
- HBBTV system
- Supported file formats for USB mode
- Supported DVI resolution
- Notification of authorisation
- Dolby Vision·Atmos
- USE AND DISPOSAL OF WASTE
- DISPOSAL OF PRODUCTS AT THE END OF LIFETIME
- European Union
- For entrepreneurs
- Other countries outside the European Union
- SICHERHEITSHINWEISE
- Antennenanschluss
Brand : ECG
Model : 55USL231
Category : TV