ZMW2131X - Microwaves Zelmer - Free user manual and instructions
Find the device manual for free ZMW2131X Zelmer in PDF.

| Product Type | Microwave oven with grill |
| Brand | Zelmer |
| Model | ZMW2131X |
| Capacity | 23 liters |
| Microwave Power Output | 800 W |
| Grill Power | 950-1000 W |
| Power Consumption (Microwave) | 1200-1250 W |
| Power Consumption (Grill) | 950-1000 W |
| Frequency | 2450 MHz |
| Turntable Diameter | 270 mm |
| External Dimensions (H x W x D) | 292.5 x 485 x 410 mm |
| Internal Dimensions (H x W x D) | 221 x 314 x 348 mm |
| Net Weight | 12.7 kg |
| Power Levels | 5 levels (P100, P80, P50, P30, P10) |
| Grill Modes | Grill only, Combination C-1 (55% microwave + 45% grill), C-2 (30% microwave + 70% grill) |
| Defrost Functions | By weight (100-2000 g) and by time (up to 95 min) |
| Auto Menus | 8 programs: Auto Reheat, Vegetables, Fish, Meat, Pasta, Potato, Pizza, Soup |
| Clock / Timer | 24-hour clock, programmable delayed start, multi-stage cooking (up to 3 stages) |
| Child Lock | Yes, press and hold Cancel/Stop for 3 seconds |
| Quick Start | Press Start to cook at full power for 1 minute, extendable |
| Interior Light | Automatic on/off, turns off after 10 min door open |
| Cooling Fan | Continues for 15 seconds after cooking |
| Cleaning | Wipe with damp cloth, mild detergent; glass tray dishwasher safe |
| Safety Features | Door interlocks, child lock, auto shut-off, grounding required |
| Accessories Included | Glass turntable, turntable ring, metal gridiron (for grill) |
Frequently Asked Questions - ZMW2131X Zelmer
User questions about ZMW2131X Zelmer
0 question about this device. Answer the ones you know or ask your own.
Ask a new question about this device
Download the instructions for your Microwaves in PDF format for free! Find your manual ZMW2131X - Zelmer and take your electronic device back in hand. On this page are published all the documents necessary for the use of your device. ZMW2131X by Zelmer.
USER MANUAL ZMW2131X Zelmer
natural_image
Two views of a white zelmer microwave oven, one open and one closed, with control panels and display screen (no visible text or symbols on the devices themselves)
INSTRUKCJA
UŻYTKOWANIA
Kuchenka mikrofalowa 29Z012; 29Z013 2–9

OD K POUŽITÍ
Mikrovlnná
20Z002; 29Z013 10-17

OD NA OBSLUHU
Mikrovlnná
29Z012; 29Z013 18-25

HASZNÁLATI
UTASÍTÁS
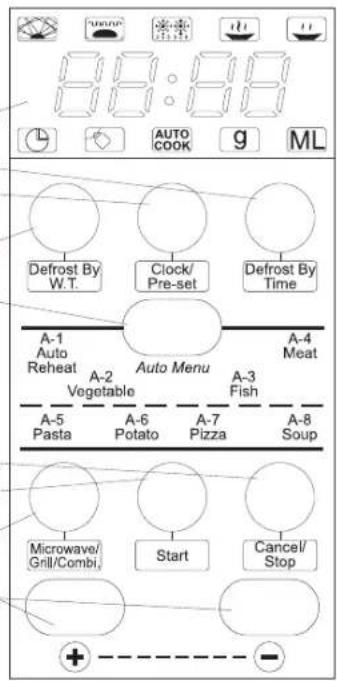
PANEL STEROWANIA
A-6: Potato (Ziemniaki)
A-7: Pizza (Pizza)
A-8: Soup (Zupa/Kawa)
PANEL STEROWANIA
A-6: Potato (Ziemniaki)
A-7: Pizza (Pizza)
A-8: Soup (Zupa/Kawa)
OVLÁDACÍ PANEL
OVLÁDACÍ PANEL
A-2: Vegetable (Zelenina)
A-3: Fish (Ryby)
A-4: Meat (Maso)
A-5: Pasta (Těstoviny)
A-6: Potato (Brambory)
A-7: Pizza (Pizza)
A-8: Soup (Polévky)
RIADIACI PANEL
Nastavovanie hodin (Clock/Pre-Set)
RIADIACI PANEL
VEZÉRLŐTÁBLA
VEZÉRLŐTÁBLA
PANOU DE COMANDĂ
A-2: Vegetable (Legume)
A-3: Fish (Peşte)
A-4: Meat (Carne)
A-5: Pasta (Macaroane)
A-6: Potato (Cartofi)
A-7: Pizza (Pizza)
A-8: Soup (Supă/Cafea)
6 Cancel/Stop (Anulare/Oprire)
7 Start (Start)
8 Micro/Grill/Combi. (Microunde/ Grill/Gătire combinată)
9 Butoane:
- Mărirea valori
Micşorarea valori
1
2
3
4
5
-
[Non-Text]
[Non-Text]
[Non-Text]
广力云
6
7
©
6
-
9
Reglarea ceasului
PANOU DE COMANDĂ
ПАНЕЛЬ УПРАВЛЕНИЯ
A-2: Vegetable (Овощи)
A-3: Fish (Рыба)
A-4: Meat (Мясо)
Установка времени
ПАНЕЛЬ УПРАВЛЕНИЯ
A-2: Vegetable (Овощи)
A-3: Fish (Рыба)
A-4: Meat (Мясо)
Установка времени
2
3
4
5
6
7
8
9
КОНТРОЛЕН ПАНЕЛ
ПАНЕЛЬ УПРАВЛІННЯ
ПАНЕЛЬ УПРАВЛИННЯ
Congratulations on your choice of our appliance and welcome among the users of Zelmer products.
In order to achieve best possible results we recommend using exclusively original Zelmer accessories. They have been specially designed for this product.
Please read this user manual carefully. Pay special attention to important safety instructions. Keep this user manual for future reference.
Write down the SERIAL NUMBER found on your oven in the box below and keep this information for future reference.
SERIAL NUMBER:
Table of contents
Precautions to avoid possible exposure to microwave energy ....66
Important safety instructions....66
Installation 67
Grounding instructions....67
Radio interference 67
Cleaning, maintenance and operation 67
Microwave cooking – tips 68
Additional functions 68
Kitchen utensils – tips....68
Glass tray installation 68
Before calling the service centre 68
MICROWAVE OVEN Type 29Z012....69
Microwave oven features....69
Control panel 69
Setting the microwave oven functions:
Setting the clock 69
Microwave cooking....69
Grill 69
Combination mode (microwaves + grill) 69
Defrosting by weight....70
Defrosting by time 70
Quick start 70
Automatic menu 70
Automatic menu table 70
Checking the mode 70
Setting the program at a given time 70
Multi stage cooking 70
MICROWAVE OVEN Type 29Z013....71
Microwave oven features 71
Control panel 71
Setting the microwave oven functions:
Setting the clock 71
Microwave cooking 71
Grill 71
Combination mode (microwaves + grill) 72
Start (Quick start) 72
Setting the program at a given time 72
Defrosting by weight 72
Defrosting by time 72
Checking the mode 72
Automatic menu 72
Automatic menu table 72
Multi stage cooking 72
Ecology – Environmental protection ....73
IMPORTANT INSTRUCTIONS CONCERNING OPERATIONAL SAFETY – READ CAREFULLY AND RETAIN FOR FUTURE REFERENCE
Precautions to avoid possible exposure to microwave energy
① Do not attempt to operate the microwave oven with the door open since this can result in harmful exposure to microwave energy. It is strictly forbidden to break or tamper with the safety interlocks.
② Do not place any objects between the microwave oven front face and the door or allow soil or cleaner residue to accumulate on the sealing surfaces.
③ Do not operate the microwave oven if it is damaged. It is particularly important that the oven door close properly and there is no visible damage:
• hinges and latches (no cracks or loosening),
• door seals and sealing surfaces, or
- "warping"
④ The oven can be adjusted or repaired only by qualified service personnel.
Important safety instructions
When using electrical appliances, observe basic safety precautions. In order to reduce the risk of burns, electric shock, fire, injury or exposure to microwave energy, observe the following rules:

DANGER! / WARNING! Risk of injury
- Use this appliance only for its intended use as described in this manual. Do not use or heat corrosive chemicals in the device. Oven is not designed for industrial or laboratory use.
- The microwave oven is intended for heating food and beverages. Drying of food or clothing and heating of warming pads, slippers, sponges, damp cloth and similar may lead to risk of injury, ignition or fire.
- Never operate the microwave oven if it has a damaged power cord or plug, or if it is not working properly or if it has been dropped or otherwise damaged.
- If the supply cord is damaged, it must be replaced by the manufacturer, its service agent or similarly qualified persons in order to avoid a hazard.
- The appliance may only be repaired by qualified service personnel. Improper repair may result in a serious hazard to the user. In case of defects we suggest that you contact a ZELMER specialist service centre.
- WARNING: If the door or door seals are damaged, the oven must not be operated until it has been repaired by a competent person.
- WARNING: Liquids and other foods must not be heated in sealed containers since they are liable to explode.
- Microwave heating of beverages can result in delayed eruptive boiling, therefore care must be taken when handling the container.
- Do not fry foods in the oven. Hot oil may damage the oven parts or accessories and even cause skin burns.
- Eggs in their shell and whole hard-boiled eggs should not be heated in microwave ovens since they may explode, even after microwave heating has ended.
- The contents of feeding bottles and baby food jars shall be stirred or shaken and the temperature checked before consumption, in order to avoid burns.
- Kitchen utensils may become hot due to heat transmission from the heated food. Use appropriate handles.
- WARNING: It is hazardous for anyone other than a competent person to carry out any service or repair operation that involves the removal of a cover which gives protection against exposure to microwave energy.
- This appliance can be used by children aged from 8 years and above and persons with reduced physical, sensory or mental capabilities or lack of experience and knowledge if they have been given supervision or instruction concerning use of the appliance in a safe way and understand the hazards involved. Children shall not play with the appliance. Cleaning and user maintenance shall not be made by children without supervision.
- Keep the appliance and its cord out of reach of children less than 8 years.
Caution, hot surface
- The door or the outer surface may get hot when appliance is operating.
• The accessible surface may be hot during operation. - Do not remove the mica cover inside the microwave ove cavity! It protects against radiation.
- Caution! Steam will escape, when opening lids wrapping foil.
• Use gloves if you remove any heated food.

WARNING! Risk of property damage
The microwave oven is designed to be used as a standalone unit and it should not be placed in a cupboard.
Connect the microwave oven only to a 230 V alternating current mains socket equipped with a grounding prong.
The appliance shall be placed against a wall.
WARNING: Do not install oven over a range cooktop or other heat-producing appliance. if installed could be damaged and the warranty would be avoid.
The appliance must not be placed in a cabinet.
Do not operate the microwave oven when it is empty.
In order to reduce the risk of fire inside the microwave oven:
- when heating food in plastic or paper containers, keep an eye on the oven due to the possibility of ignition,
- remove all wire twist-ties from paper or plastic containers/ bags before placing them in the microwave oven,
- if smoke is emitted, switch off or unplug the appliance and keep the door closed in order to stifle any flames.
- do not leave paper products, dishes and kitchen utensils or food inside the microwave oven when it is not in use.
The power cord should be kept away from heated surfaces and it must not obstruct any elements of the microwave oven.
The oven should be cleaned regularly and any food deposits removed.
Failure to maintain the oven in a clean condition could lead to deterioration of the surface that could adversely affect the life of the appliance and possibly result in a hazardous situation.
Do not use steam cleaner to clean the mwo.
This appliance is not intended to be operated by means of an external timer or separate remote-control system.
It is strictly forbidden to remove the foil located on the inner side of the door. This may cause damage to the appliance.
Please secure the turn table before you move the appliance to avoid damages.
Never remove the distance holder in the back or on the sides, as it ensures a minimum distance from the wall for air circulation.

Tips and information about the product and its use
This appliance is intended to be used in household and similar applications such as:
- staff kitchen areas in shops, offices and other working environments;
- farm houses;
• by clients in hotels, motels and other residential environments;
• bed and breakfast type environments.
The microwave oven is for household use only and not for commercial use.
The microwave oven is only used in freestanding.
Prick food covered with thick skin such as potatoes, whole marrows, apples and chestnuts before cooking.
Do not overcook food.
Only use utensils that are suitable for use in microwave ovens.
Do not use the microwave oven for storing any objects, such as bread, cakes, etc.
Installation
① Make sure all the packaging materials have been removed from the inside of the oven.
② Remove the protective film from the control panel and housing of the microwave oven.

Check for damage such as the curved or warped door, damaged door seals and sealing surfaces, broken or loosened hinges or latches, dents inside the microwave oven or on the door.

In case of any damage do not operate the appliance and contact qualified service personnel.
③ Place the microwave oven on an even and stable surface that is strong enough to support the oven and the heaviest foods you intend to place in it.
④ Do not expose the microwave oven to humidity. Do not place the microwave oven near flammable materials as well as above or close to heat-generating appliances.
⑤ The rear surface of appliance shall be placed against a wall. For the oven to work properly provide an appropriate airflow. Leave a clearance of 30 cm above the oven. A clearance of 7.5 cm is required at the sides. One side must be open.
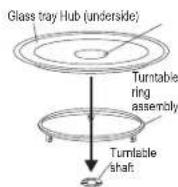
⑥ Do not operate the microwave oven without the glass tray and the turntable ring assembly, both properly installed.
⑦ Check to make sure that the power cord is not damaged, not placed under the microwave oven or above any hot or sharp surface, and that it does not hang over the edge of a table or countertop.
⑧ Ensure an easy access to the mains socket so that it will be possible to easily unplug the appliance in case of emergency.
⑨ Do not use or store the microwave oven outdoors.
Grounding instructions
Connect the power cord plug to a mains socket equipped with a grounding prong. Connection to a socket without a grounding prong will pose the risk of electric shock. In case of short circuit, grounding reduces the risk of electric shock.
It is advisable to use the oven in a separate electrical circuit.
In case of using an extension cord:
① The extension cord must be a three-wire conductor with a plug and a socket both enabling earthed connection.
② Arrange the extension cord away from hot and sharp surfaces so that it cannot get accidentally pulled or caught.

Improper connection can result in the risk of electric shock.

In case of any doubts concerning the grounding or electrical mains connection instructions contact a qualified electrician or service centre employee.

Both the manufacturer and the seller do not accept any liability for injury or damage to the microwave oven resulting from failure to comply with the instructions for electrical mains connection.
Radio interference
Microwave oven operation may interference with radio, television or other communication equipment reception.
Interference can be reduced or eliminated in the following way:
Clean the door and sealing surfaces of the oven,
Reorient your radio or TV receiving antenna,
Move the microwave oven away from the receiver,
Place the microwave oven as far as possible from the receiver,
Plug in the microwave oven to a different mains socket so that the microwave oven and the receiver are on different mains circuits.
Cleaning, maintenance and operation
① Turn off and unplug the microwave oven before cleaning.
② Keep the inside of the microwave oven clean. If necessary, remove food deposits or spilled liquid from the oven walls with a damp cloth. Use a mild detergent to remove heavy soil. Do not use spray cleaners and other strong cleaning agents as they may stain, streak or tarnish the surface of the oven and door.
③ Clean the outside surface of the oven with a damp cloth.
In order to avoid damaging the components inside the oven make sure that water does not penetrate the inside of the oven through the ventilation openings.
④ Regularly wipe both sides of the oven door and window, door seals and neighbouring parts with a damp cloth to remove food deposits or spilled liquid.

Do not use abrasive cleaners.

When cleaning the door seals, recesses and adjacent parts, it is forbidden to use any substances that can damage the sealing and cause microwave leakage.
⑤ For cleaning the oven housing, do not use abrasive cleaners such as emulsions, cream cleaners, polishes, etc. They may remove the graphic information symbols such as scales, marks, warning signs, etc.

To clean the glass surface of the door do not use cleaners that contain abrasives, as they can scratch the surface and, consequently, lead to the formation of cracks.
⑥ Do not allow the control panel to moisten. To clean it use a soft, damp cloth. In order to avoid accidental starting of the oven clean the control panel with the door open.
⑦ When condensed water vapour begins to appear on the inside or outside of the door, wipe it with a soft cloth.
Condensation may occur when the microwave oven is operating under high humidity conditions. In such a case it is a normal situation.
⑧ From time to time, take out and clean the glass tray. Wash it in warm water with an addition of washing-up liquid or in a dishwasher.
67GW29-016_v05
⑨ Regularly clean the turntable ring and the bottom of the microwave oven to prevent noise. Clean the bottom surface with a mild detergent. Wash the turntable ring in water with an addition of washing-up liquid or in the dishwasher. When replacing the turntable ring make sure to position it properly.
⑩ In order to get rid of unpleasant odours inside the microwave oven, boil about 200 ml of water with lemon juice and lemon peel in a microwave-safe bowl for 5 minutes.
Wipe the inside of the microwave oven thoroughly by means of a dry, soft cloth.
⑪ When it is necessary to replace the inside light bulb, call a SERVICE CENTRE.
⑫ Regularly clean the microwave oven and remove food deposits.

Failure to follow the above instructions may lead to a degradation of the surface which may affect the service life of the appliance and lead to a dangerous situation.
Microwave cooking – tips
① Carefully arrange the food. Place the thickest pieces next to the edges of the dish.
② Check the cooking time. Cook for the shortest time indicated and if necessary extend the cooking time. Heavily burned products may generate smoke or catch fire.
③ Cover the food while cooking. The cover shall prevent the food from "splashing out" and ensure even cooking.
④ During cooking turn products over in order to speed up the cooking process of such foods as chicken or hamburgers. Turn over large products such as roast meat at least once.
⑤ Halfway through the cooking time change the arrangement of food products such as meatballs. The products placed on the top should be moved to the bottom and those in the middle should be moved towards the edges of the dish.
Additional functions
In case of cooking for 5 or more minutes, the microwave oven will automatically switch off after the end of the cooking time, however, the fan will keep on operating for another 15 seconds.
INSIDE LIGHT AUTOMATIC SWITCH OFF
The inside light switches on after opening the door. If the door is open longer than 10 minutes without performing any actions, the light will be automatically switched off.
CHILD LOCK – security against child access
Child lock: In the standby mode press and hold the Cancel/Stop button for 3 seconds. You will hear a long beep indicating that the child lock has been set. The symbol will appear on the display.
To unblock the oven: Press and hold the Cancel/Stop button for 3 seconds. You will hear a long beep indicating that the microwave oven has been unblocked.
Kitchen utensils – tips
Use utensils suitable for use in microwave ovens. A container made of transparent material is ideal for use in microwave ovens as the microwaves can easily penetrate through it in order to heat the food.
① Do not use metal utensils or dishes with metal trims – microwaves do not penetrate through metal.
② Before cooking in the microwave oven remove wrappings made of recycled paper, as they may contain metal particles which may cause sparking and/or fire.
③ We recommend using oval/ round dishes rather than square/ rectangular ones, as food in the corners of the dish gets burned more often.
④ When grilling, protect the exposed areas from getting burned by covering them with narrow strips of aluminium foil. Remember to avoid the excess of foil and maintain the distance of minimum 3 cm between the foil and the oven internal walls.
The list below will facilitate the choice of the right dishes and utensils.
| Kitchen utensils Microwaves Grill | Combination mode | ||
| Heat-resistant glass | Yes | Yes | Yes |
| Non-heat-resistant glass | No | No | No |
| Heat-resistant ceramic utensils | Yes | Yes | Yes |
| Microwave safe plastic dishes | Yes | No | No |
| Parchment paper | Yes | No | No |
| Metal tray | No | Yes | No |
| Metal gridiron | No | Yes | No |
| Aluminum foil and foil containers | No | Yes | No |
Utensil test:
① Fill a dish/ container with 1 cup of cold water (250 ml) and place it in the microwave oven.
② Cook at the maximum power for 1 minute.
③ When the set time is over, carefully feel the dish/ container. If it is warm, do not use it for microwave cooking.

Do not exceed 1-minute cooking time.
Glass tray installation
① Never place the glass tray upside down. The glass tray movement should not be restricted.
② During cooking, both the glass tray and turntable ring assembly must always be present in the microwave oven.
③ During cooking, all food and food containers should always be placed on the glass tray.
④ In case the glass tray is broken or damaged contact your nearest service centre.
Before calling the service centre
Normal situation:
① The operation of the microwave oven may cause interference with radio and TV reception. This interference is similar to interference caused by small electrical appliances such as a food processor, fan, vacuum cleaner, etc.
② When cooking at low microwave power the inside light of the microwave oven may become dull.
③ During cooking, water vapour gets out of the food. Most of the water vapour escapes through the ventilation openings. However, condensed water vapour may also appear on the cool parts of the oven (e.g. on the door).
④ If the glass tray makes noise during operation, check to make sure that the oven bottom and turntable ring assembly are both clean. Clean following the instructions given in the "CLEANING, MAINTENANCE AND OPERATION" section.
If the microwave oven does not work:
① Check to make sure that the oven is properly plugged in. If not, unplug the appliance, wait 10 seconds and plug it in again.
② Check to make sure that the fuse is not blown or the circuit breaker tripped. If the above protective devices function properly check the mains socket by plugging in another electrical appliance.
③ Check to make sure that the control panel is properly programmed and the timer set.
④ Check to make sure that the door is properly locked. If not, the microwave energy will not be supplied to the oven.

If after completing the above steps the oven still does not operate, contact the service centre. You should never attempt to adjust or repair the microwave oven on your own.
MICROWAVE OVEN Type 29Z012
| Rated voltage: 230-240 V~ 50 HzEnergy consumption: 1200-1250 W (Microwaves); 950-1000 W (Grill)Rated output power (microwaves): 800 W | Microwave frequency: 2450 MHzCapacity: 23 ITurntable: ∅ 270 mm | External dimensions. (H x W xD.) 292.5 mm x 485 mm x 410 mmInternal dimensions. (H x W x D.) 221 mm x 314 mm x 348 mmNet weight : about 12.7 kg |
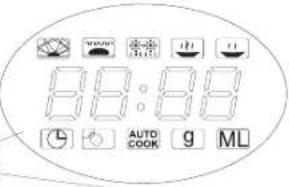
Display: indicators – signalling
| [5y8g] | Microwaves | Very high and high power | Defrosting | Child lock | Weight in grams | g | |||
| Grill | Very low and low power | Clock | AUTO COOK | Automatic cooking | ML Capacity in ml | ||||
[NO TEXT]
[NO TEXT]
[NO TEXT]
[NO TEXT]
[NO TEXT]
Keep pressing until the display will show C-1, or C-2. The symbols and will appear.
C-1 = 55% of the time – microwave cooking, 45% of the time – grilling
C-2 = 36% of the time – microwave cooking, 64% of the time – grilling

② Press ☑, ☑ set the cooking time. The cooking time can be set from 0:05 seconds, it can be increased by pressing ☑The cooking time can be decreased from 95:00 by pressing ☑The maximum cooking time is 95 minutes.
② Press Start to start cooking. You will hear a beep and the cooking program will start to operate. The symbols 📊 and 🌐 and the remaining cooking time will flash on the display.
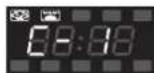
Defrosting by weight
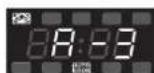
① Press the Defrost By W.T. button. The display will show dEF1 and the control lamps and will light.
② Press ☑, ☐ set the weight of the food to be defrosted. The display will show the letter "g". Press ☑ the display will show the numbers: 100 - 200 -300...1900 - 2000 or press, ☑ display them in reverse order.
③ Press Start to start defrosting. You will hear a beep and the defrosting program will start to operate. The symbols and the remaining defrosting time will flash on the display.
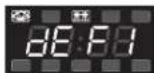
Defrosting by time
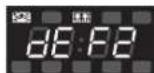
① Press the Defrost By Time button. The display will show dEF2 and the and control lamps will light.
② Press ☑ to set the defrosting time. The defrosting time can be set from 0:05, seconds. It can be increased by pressing ☑ and decreased from 95:00 by pressing ☑The maximum defrosting time is 95 minutes.
③ Press Start to start defrosting. The control lamps and will light.
Quick start
If the oven is in the stand-by mode, press Start to start cooking for 1 minute at full power. Each time you press the button the cooking time will be prolonged for one minute. The maximum cooking time is 95 minutes.
Automatic menu
① Press Auto menu several times to select the cooking menu. The 📄 and 📋 control lamps will appear on the display. The menu can be selected according to the table below in the following way:
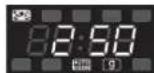
Auto reheat – Vegetables – Fish – Meat – Pasta – Potato – Pizza – Soup/Coffee, the display will show A-1, ..., A-8.
② Press ☑ to select the weight of the food to be cooked. The display will show Mt. 9
The weight or capacity can be increased by pressing + or -
③ Press Start to start cooking. You will hear a beep and the cooking program will start to operate. 9, or ML will light and the symbols 📋 and AUTO COOK together with the remaining cooking time will flash.
Automatic menu table
| Menu Number of pressings Weight Display | |||
| A-1Automaticreheat | 1 | 200 g | |
| 400 g | |||
| 600 g | |||
| A-2Vegetables | 2 | 200 g | |
| 300 g | |||
| 400 g | |||
| A-3Fish | 3 | 250 g | |
| 350 g | |||
| 450 g | |||
| A-4Meat | 4 | 250 g | |
| 350 g | |||
| 450 g | |||
70 GW29-016_v05
| Menu Number of pressings Weight Display | |||
| A-5Pasta | 5 | 50 g | |
| 100 g | |||
| A-6Potato | 6 | 200 g | |
| 400 g | |||
| 600 g | |||
| A-7Pizza | 7 | 200 g | |
| 400 g | |||
| A-8Soup | 8 | 200 ml | |
| 400 ml | |||
Checking the mode
While cooking using the Microwave/Grill/Combi. mode, press the Microwave/Grill/Combi. button, the current microwave power will appear on the display for 4 seconds. After 4 seconds the indicators will return to the previous state.
Setting the program at a given time
① Set the clock (see Setting the clock.)
② Enter a cooking program (see: Microwave cooking).
You can set up to 3 stages. The defrosting program should always be set as the first one.
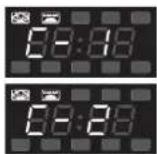
③ Press the Clock/Pre-Set button, the digits of the hour will start to flash and the clock control lamp will appear on the display.
④ Press ☑ to set the hour. You can select digits from 0 to 23.
⑤ Press the Clock/Pre-Set button, the digits will start to flash.
⑥ Press ☑ to set the minutes. You can select digits from 0 to 59.
⑦ Press Start to finish setting. The clock control lamp will start to flash. If the door is closed, after the set time is reached, you will hear two beeps, the cooking will start automatically, the clock control lamp will light out and the cooking control lamps will light: and e.g.
Multi stage cooking
You can set up to 3 cooking stages. In case of multi stage cooking, if defrosting is one of the cooking stages, the defrosting program will be automatically turned on as the first one. After a stage is finished, you will hear a beep and the next stage will start.
i Automatic cooking cannot be one of the programs of multi stage cooking.
EXAMPLE: To set the cooking for 10 minutes at 100% microwave power and for 15 minutes at 80% microwave power do the following:
① Press the Microwave/Grill /Combi. button to select 100% microwave power – P100.
② Press ☐ to set the cooking time for 10 minutes.
③ Press the Microwave/Grill /Combi. button twice to set the microwave power at 80% - P80. The display will show P80 and the symbols and .
④ Press ☐ to set the cooking time for 12 minutes.
⑤ Press Start to start cooking.
i Each time a mode ends you will hear a beep which indicates the end of operation.
MICROWAVE OVEN Type 29Z013
| Rated voltage: 230-240 V~ 50 HzEnergy consumption: 1200-1250 W (Microwaves); 950-1000 W (Grill)Rated output power (microwaves): 800 W | Microwave frequency: 2450 MHzCapacity: 23 ITurntable: ∅ 270 mm | External dimensions. (H x W xD.) 292,5 mm x 485 mm x 390 mmInternal dimensions. (H x W x D.) 221 mm x 314 mm x 348 mmNet weight : about 13.7 kg |

Microwaves
Grill

Very high and high power
Very low and low power
Display: indicators – signalling

Defrosting
Clock

Child lock
Automatic cooking

Weight in grams
Capacity in ml
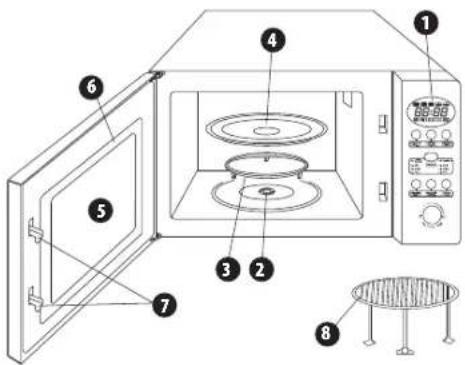
1 Control panel
2 Turntable shaft
3 Turntable ring assembly
4 Glass tray
5 Window
6 Door
7 Safety block – cuts off power if door is opened during operation
8 Metal gridiron (only be used In grill function and placed on the glass tray)
CONTROL PANEL
1 Display: clock + indicators
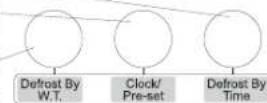
2 Defrost By Time
3 Clock/Pre-Set
4 Defrost By W.T. (Defrost by weight)
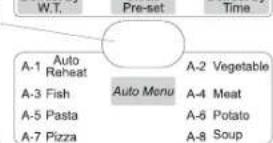
5 Auto Menu
A-1: Auto Reheat
A-2: Vegetable
A-3: Fish
A-4: Meat
A-5: Pasta
A-6: Potato
A-7: Pizza
A-8: Soup
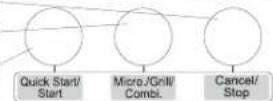
6 Cancel/Stop
7 Micro./Grill/Combi.
8 Quick Start/Start
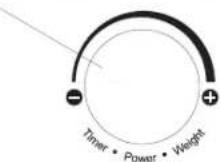
9 Knob:
- value increase towards the symbol +, clockwise - value decrease towards the symbol -, clockwise


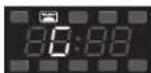
Setting the clock
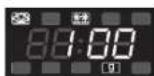
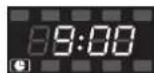
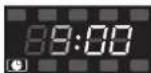
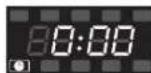
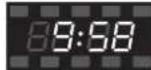
After plugging the microwave oven you will see "0:00" on the display and you will hear a single beep.
① Press the Clock/Pre-Set button, the hour digits will start to flash and the clock control lamp Will light on the display.
② Turn the knob to set the hour. You can set the digits from 0 to 23 by turning the knob towards +r from 23 to 0 by turning the knob towards -The display will show digits from 0 to 23 or from 23 to 0.
③ Press the Clock/Pre-Set button, the minute digits will begin to flash.
④ Turn the knob towards for , set the minutes. You can set the digits from 0-59 and from 59-0. The display will show digits from 0 to 59 or from 59 to 0.
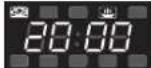
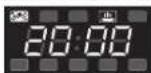
⑤ Press the Clock/Pre-Set button to finish setting the time. The clock control lamp will light out. The ":" symbol will light and the time will appear on the display.
Microwave cooking

Do not use the gridiron for microwave cooking! Always take out the gridiron from the inside of the oven before microwave cooking.
① Press the Micro./Grill/Combi. Button to select the required microwave power. "P100" will appear on the display. The and control lamps will light.
② To select other required microwave power e.g. P80 keep turning the knob towards + or - until the display will show P80 and the symbol.
③ Press the Micro./Grill/Combi. button and turn the knob towards + or -, to set the cooking time. The cooking time can be set from 0:05 and increased by turning the knob towards + or decreased by turning it towards - Start to decrease the cooking time from the value 95:00. The maximum cooking time is 95 minutes.
④ Press the QuickStart/Start button to start cooking.

EXAMPLE: In order to set the cooking time for 20 minutes at 80% microwave power do the following:
① Press the Micro./Grill/ Combi. button. The display will show P100 and the symbols and .
⑤ In order to set the required microwave power P80 keep turning the knob towards 📋, ⚪il the display shows P80 and the symbols and.
⑥ Press the Micro./Grill/Combi. button and turn the knob towards ⬣, set the time for 20 min. The set time will appear on the display.
⑦ Press the QuickStart/Start button to start cooking.
Microwave power table
| Power | Very high High Medium Low Very low | ||||
| Display | P100 P80 | P50 P30 P10 | |||
Notice:
The number of seconds/ minutes by which the time setting can be changed with the given time value is indicated in the table on the right.
| 0 – 1 minute every 5 seconds |
| 1 – 5 minutes every 10 seconds |
| 5 – 10 minutes every 30 seconds |
| 10 – 30 minutes every minute |
| 30 – 95 minutes every 5 minutes |
Grill
① Press the Micro./Grill/Combi. button. The display will show P100.
② In order to select the required grill mode G, keep turning the knob towards 🧑 or 🧑 all the display will show G and the symbol 🧑
③ Press the Micro./Grill/Combi. button and turn the knob towards + or - to set the grilling time. The grilling time can be set from 0:05. It can be increased towards +, or decreased towards -The grilling time can be decreased from the value 95:00. The maximum grilling time is 95 minutes.
④ Press the QuickStart/Start to start grilling. You will hear a beep and the grilling program will start to operate. The display will show the symbol and the remaining grilling time.

When the half of grilling time is over, the cooker shall stop and you shall hear double sound signal. It is normal. When it happens, please turn the food. In case you do not perform any activity within 1 minute, the cooker shall be switched on again and you will hear one sound signal.
Combination mode (microwaves + grill)

When the appliance is operated in the combination mode, children should only use the oven under adult supervision due to the high temperatures generated.
① Press the Micro./Grill/Combi. button. The display will show P100.
② To select the required mode turn the knob towards r. The display will show the following: P80, P50, P30, P10, G, C-1, C-2 and the symbols and.
C-1 = 55% of the time - microwave cooking
45% of the time – grilling
C-2 = 30% of the time - microwave cooking
70% of the time – grilling
③ After selecting the appropriate mode press the Micro./Grill/Combi. button and turn the knob towards 📋, to set the cooking time. The cooking time can be set from 0:05 and increased by turning the knob towards ⚠ decreased by turning it towards . ⚠rt to decrease the cooking time from the value 95:00. The maximum cooking time is 95 minutes.
④ Press the QuickStart/Start button to start cooking. You will hear a beep and the cooking program will start to operate. The symbols 📋 and 🌐 will flash on the display.
Start (Quick start)
If the oven is in the stand-by mode, press QuickStart/Start, to start cooking for 1 minute at full power. Each time you press the button the cooking time will be prolonged for one minute. The maximum cooking time is 95 minutes.
Setting the program at a given time
① Set the clock (see Setting the clock.)
② Enter a cooking program (see: Microwave cooking). You can set up to 3 stages. The defrosting program should always be set as the first one.
③ Press the Clock/Pre-Set button, the digits of the hour will start to flash and the display will show the clock control lamp
④ Turn the knob towards + or ⋯ set the time. You can select digits from 0-23 - direction ⚡ 23-0 - direction .
⑤ Press the Clock/Pre-Set button, the digits of the minutes will start to flash.
⑥ Turn the knob + or ⚙ set the minutes. You can select digits from 0 to 59 - direction ⚙ from 59 to 0 - direction .
⑦ Press the QuickStart/Start button to finish setting the time. The clock control lamp 📋 will start to flash. If the door is closed, after the set time is reached, you will hear two beeps, the cooking will start automatically, the clock control lamp 📋 will light out and the cooking control lamps will light: and 📋.
Defrosting by weight
① Press the Defrost By W.T. button. The display will show dEF1 and the control lamps and will light.
② Turn the knob towards +r to let the weight of the food to be defrosted. The display will show the letter g. The display will show 100-200...1900-2000 (or in reverse order) – direction
③ Press the QuickStart/Start to start defrosting. You will hear a beep and the defrosting program will start to operate. The symbols 📋 and 🌐 and the remaining defrosting time will flash on the display.
Defrosting by time
① Press the Defrost By Time button. The display will show dEF2 and the control lamps and will light.
② Turn the knob towards for set the defrosting time. The defrosting time can be set from 0:05. It can be increased by turning the knob towards and decreased by turning the knob towards . Start to decrease the time from the value 95:00. The maximum defrosting time is 95 minutes.
③ Press the QuickStart/Start button to start defrosting. The control lamps 📋 and 📃 will light.
Checking the mode
While cooking using the Microwave/Grill/Combi. mode, press the Microwave/Grill/Combi. button, the current microwave power will appear on the display for 4 seconds. Press the Clock/Pre-set button to display the current time. After 4 seconds the indicators will return to the previous state.
72 GW29-016_v05
Automatic menu
① Press Auto menu several times to select the cooking menu. The control lamps and will appear on the display. The menu can be selected according to the table below in the following way:
Turn the knob to select: Automatic reheat – Vegetables – Fish – Meat – Pasta – Potato – Pizza – Soup/Coffee, the display will show A-1, ..., A-8.
② After selecting the menu confirm by pressing the Auto menu button.
③ Tum the knob towards #r to select the weight of the food to be cooked. The display will show Mr . The weight or value can be increased by turning the knob towards #r decreased by turning it towards .
④ Press the QuickStart/Start button to start cooking. You will hear a beep and the cooking program will start to operate. And will light and the display will show the symbols and the remaining cooking time.
Automatic menu table
| Menu | Weight | Display |
| A-1Automaticreheat | 200 g | |
| 400 g | ||
| 600 g | ||
| A-2Vegetables | 200 g | |
| 300 g | ||
| 400 g | ||
| A-3Fish | 250 g | |
| 350 g | ||
| 450 g | ||
| A-4Meat | 250 g | |
| 350 g | ||
| 450 g | ||
| A-5Pasta | 50 g | |
| 100 g | ||
| A-6Potato | 200 g | |
| 400 g | ||
| 600 g | ||
| A-7Pizza | 200 g | |
| 400 g | ||
| A-8Soup | 200 ml | |
| 400 ml |
Multi stage cooking
You can set up to 3 cooking stages. In case of multi stage cooking, if defrosting is one of the cooking stages, the defrosting program will be automatically switched on as the first one. After a stage is finished, you will hear a beep and the next stage will start.

Automatic cooking cannot be one of the programs of multi stage cooking.
EXAMPLE: To set the cooking for 10 minutes at 100% microwave power and for 15 minutes at 80% microwave power do the following:
① Press the Micro./Grill /Combi. twice to select 100% microwave power – P100.
② Turn the knob towards + or - to set the cooking time for 10 minutes and confirm by pressing the Micro./Grill /Combi. button. The display will show "P100" and the symbols and
③ Turn the knob towards + or - to set 80% microwave power – P80 and confirm by pressing the Micro./Grill /Combi. button.
④ Turn the knob towards + or - to set the cooking time for 15 minutes and confirm by pressing the Micro./Grill /Combi. button.
⑤ Press the QuickStart/Start button to start cooking.

Each time a mode ends you will hear a beep which indicates the end of operation.
Ecology – Environmental protection
Each user can contribute to protect the environment. It is neither difficult nor expensive. In order to do so:
Return cardboard packages to recycling points.
Throw polyethylene (PE) bags into appropriate containers.
Return a worn out appliance to an appropriate collecting point as the components of the appliance may pose a threat to the environment.
Do not dispose the appliance with the municipal waste!
The manufacturer does not accept any liability for any damages resulting from unintended use or improper handling.
The manufacturer reserves his rights to modify the product any time in order to adjust it to law regulations, norms, directives, or due to construction, trade, aesthetic or other reasons, without notifying in advance.
GW29-016_v05
Zelmer Pro Sp. z o.o.