
10027399 - Steamer Klarstein - Free user manual and instructions
Find the device manual for free 10027399 Klarstein in PDF.


| Product Type | Steamer |
| Brand | Klarstein |
| Model | 10027399 |
| Number of Main Containers | 2 (front and back) |
| Control Type | Digital display with heater buttons and steam button |
| Water Reservoir Capacity | Approx. 60 minutes of steam at max level |
| Pre-set Cooking Programs | 7 (vegetables, soft egg, fish, chicken, sauce, root vegetables, rice) |
| Timer Adjustment | Up/Down buttons, increments of 1 minute |
| Keep Warm Function | Automatic after cooking, lasts 40 minutes |
| External Water Top-up | Yes, via extendable funnel |
| Water Level Gauge | External visible gauge |
| Accessories Included | Rice tray, sauce trays (2x), food plinth, divider wall |
| Dishwasher Safe Parts | Containers, lids, accessories, drip tray |
| Safety Features | Automatic stop when water level unsafe; alarm for low water |
| Warning | Use oven gloves to avoid burns; tilt lids away from body |
| Power Supply | Standard household electrical socket (voltage not specified) |
Frequently Asked Questions - 10027399 Klarstein
User questions about 10027399 Klarstein
0 question about this device. Answer the ones you know or ask your own.
Ask a new question about this device
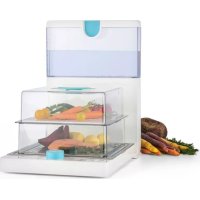
Download the instructions for your Steamer in PDF format for free! Find your manual 10027399 - Klarstein and take your electronic device back in hand. On this page are published all the documents necessary for the use of your device. 10027399 by Klarstein.
USER MANUAL 10027399 Klarstein
natural_image
Exterior view of a modern kitchen appliance with transparent lid and digital display (no visible text or symbols)Dampfgarer
10027399
KLARSTEIN
Einleitung
natural_image
Symbol of a trash bin crossed with a diagonal line, no text or numbers present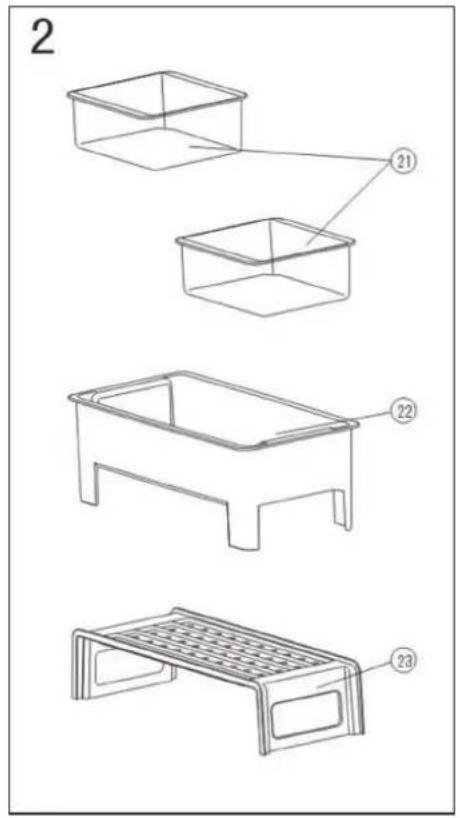
natural_image
Line drawing of two rectangular plastic containers with internal compartments and a grid of small objects (no text or symbols)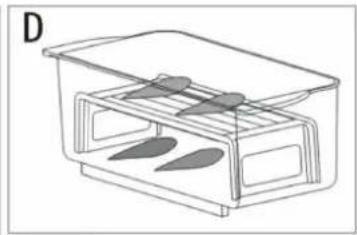
natural_image
Line drawing of a transparent container with two leaf-like shapes inside, labeled 'D' (no text or symbols on the diagram itself)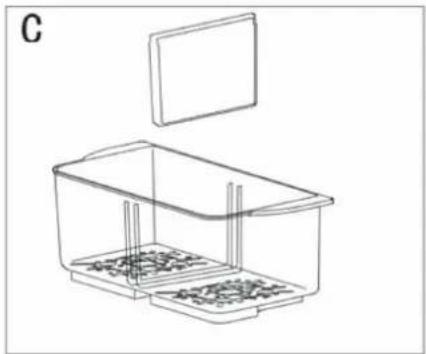
natural_image
Line drawing of a rectangular container with internal compartments and a lid, labeled 'C' (no text or symbols on the diagram itself)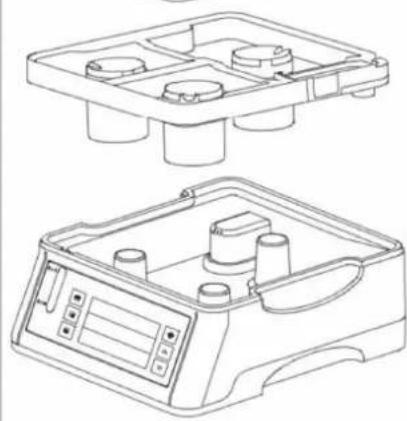
natural_image
Technical line drawing of a mechanical device with two views: top shows a tray with four circular components, bottom shows a control panel with buttons and ports (no text or symbols)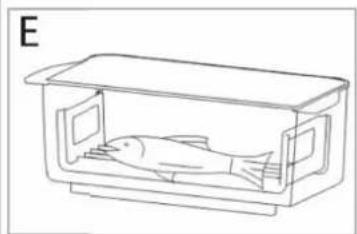
natural_image
Line drawing of a fish inside a rectangular enclosure (no text or symbols)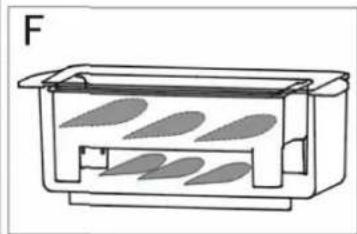
natural_image
Line drawing of a rectangular container with internal compartments and leaf-like patterns (no text or symbols)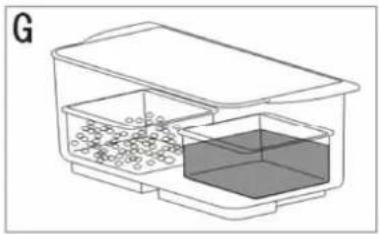
natural_image
Diagram of a container with two compartments filled with granular material, no text or symbols present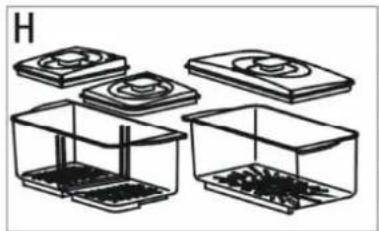
natural_image
Diagram of six different storage containers with different internal compartments, no text or symbols present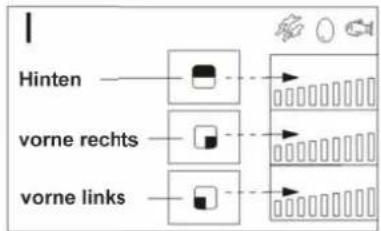
flowchart
graph TD
    A["Hinten"] --> B["Button"]
    C["vorne rechts"] --> D["Button"]
    E["vorne links"] --> F["Button"]
natural_image
Line drawing of a mechanical device with a cylindrical component and a directional arrow indicating motion (no text or symbols)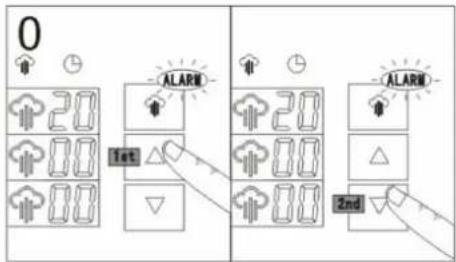

ACHTUNG
Thank you very much for choosing the Klarstein Steamer Please read this manual carefully. It contains important hints on installation, use, care and cleaning. Retain it for future reference and record the model an serial numbers of your machine. If you have any questions about the appliance or if you have problems with your appliance and require service quote this information to your dealer.

ATTENTION
Read and understant thoroughly this safety instructions before use. Any failure and losses caused by ignoring the mentioned items and cautions mentioned in the operation and installation instructions are not covered by our warranty and any liability.
Contents
Environment Concerns 9
Declaration of Conformity 9
Product Description and Accessory 10
Use 11
Using the Accessory 12
Display Keys and Symbols 12
Using pre-set Cook Time 13
Food Symbols and Cook Time 13
Adjusting the Timer 13
How to Cook Rice 14
Stop Steaming during Cooking 14
Keep warm Function 14
Water Refi II during Cooking 14
Removing Food from the Steamer 14
Cooking Hints and Tips 14
Easy Set-up Guide 15
Environment Concerns
natural_image
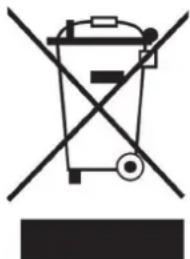
Symbol of a trash bin crossed out by a diagonal line, with no text or labels present.According to the European waste regulation 2002/96/EG this symbol on the product or on its packaging indicates that this product may not be treated as household waste. Instead it should be taken to the appropriate collection point for the recycling of electrical and electronic equipment. by ensuring this product is disposed of correctly, you will help prevent potential negative consequences for the environment and human health, which could otherwise be caused by inappropriate waste handling of this product. For more detailed information about recycling of this product, please contact your local council or your household waste disposal service.
Declaration of Conformity
This produkt is conform to the following European Directives:
2014/35/EU
2014/30/EU
2011/65/EG
Product Description and Accessory
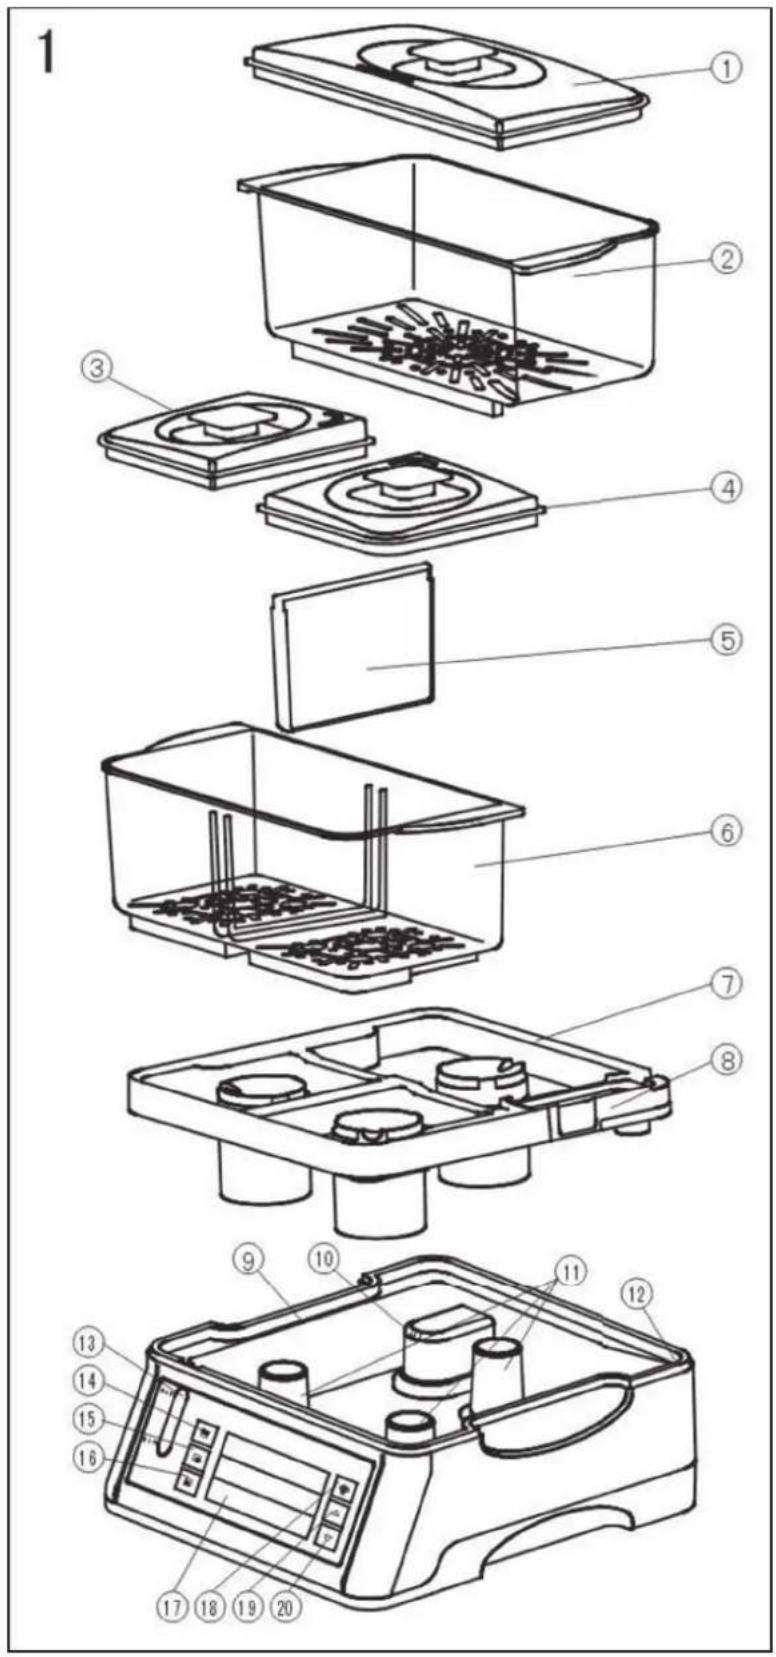
1 12 lid
2 12 steamer
3 14 left lid
4 14 right lid
5 Partition
6 14 steamer
7 External water top-up
8 Drip tray
9 Main base unit/water reservoir
10 Maximum water level indicator
11 Heaters
12 Pouring lip
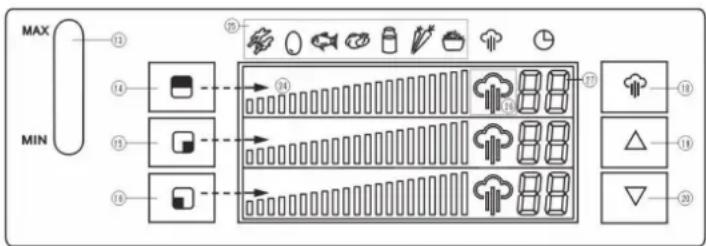
13 Water level gauge
14 12 heater button
15 ¼ right heater button
16 14 left heater button
17 Display screen
18 Steam button
19 Increase steam time button
20 Decrease steam time button
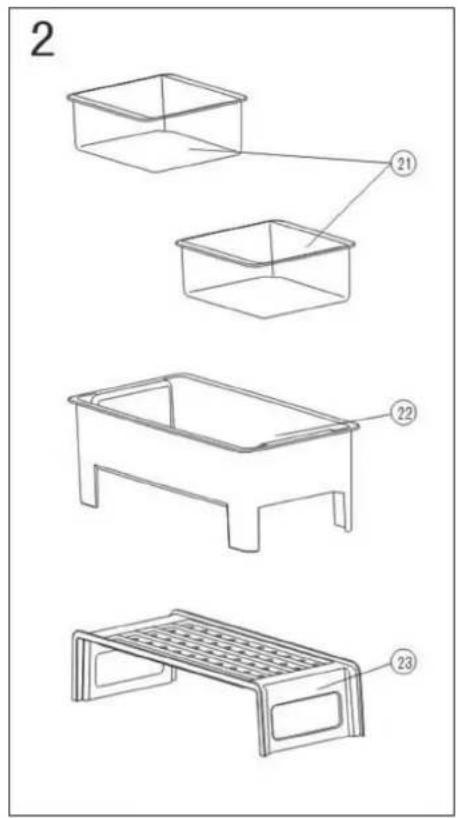
Accessory
21 Sauce trays (2x)
22 Rice tray
23 Food plinth
Use
natural_image
Line drawing of two plastic storage containers with internal compartments and a grid of small objects (no text or symbols)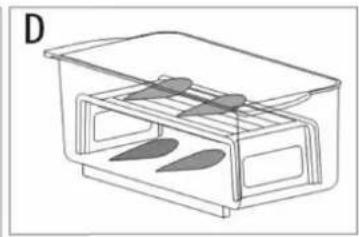
natural_image
Line drawing of a laboratory apparatus with two compartments and a lid (no text or symbols)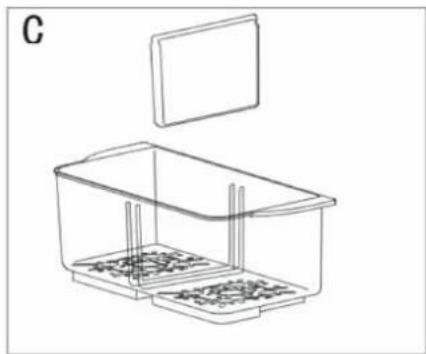
natural_image
Line drawing of a rectangular container with internal compartments and a lid, labeled 'C' (no text or symbols on the diagram itself)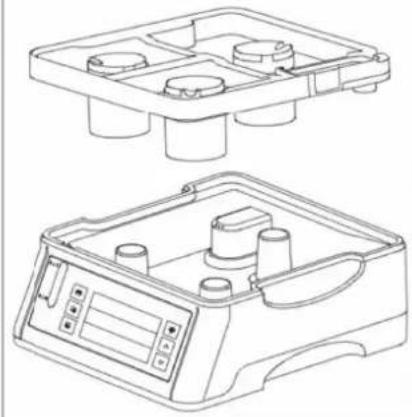
natural_image
Technical line drawing of a mechanical device with two views: top shows a tray with four circular components, bottom shows a control panel with buttons and a display (no text or symbols)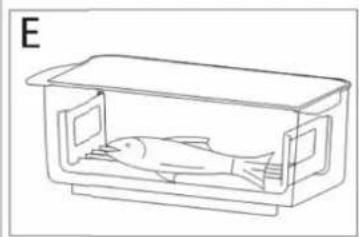
natural_image
Line drawing of a fish inside a rectangular enclosure (no text or symbols)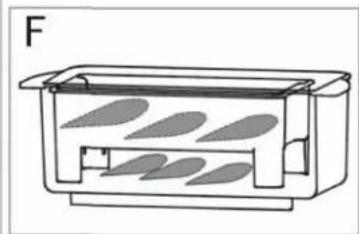
natural_image
Line drawing of a rectangular container with internal compartments and leaf-like patterns (no text or symbols)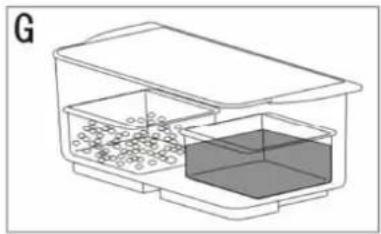
natural_image
Diagram of a container with two compartments, one containing granular material and the other filled with liquid (no text or symbols)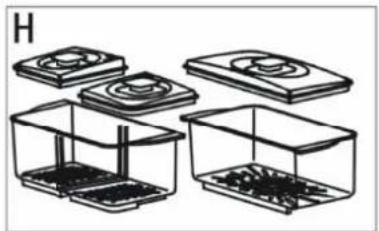
natural_image
Diagram of six different storage or processing units in transparent containers, showing internal compartments and housing (no text or symbols)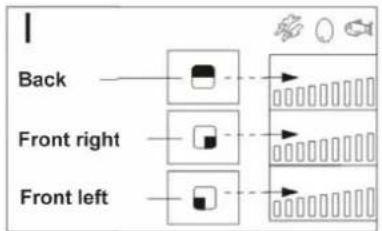
natural_image
Line drawing of a kitchen appliance with a hand operating the door (no text or symbols)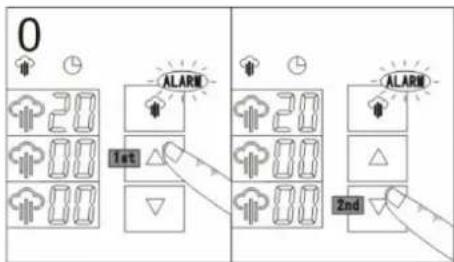

ATTENTION
The system is designed for cold water only. Do not add any other liquids or add anything to the water.
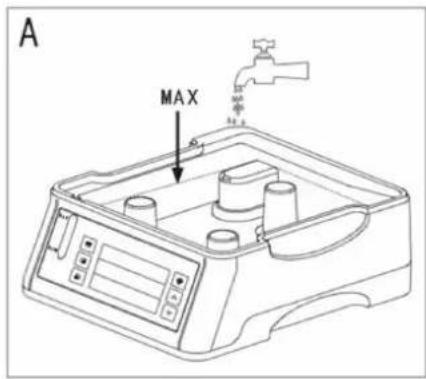
Fill the water reservoir (A)
Before using the steamer for the first time, wash all parts except the main base unit (9). Fill the water reservoir with cold water to the maximum level indicated (10). This will produce enough steam to cook for approximately 60 minutes.
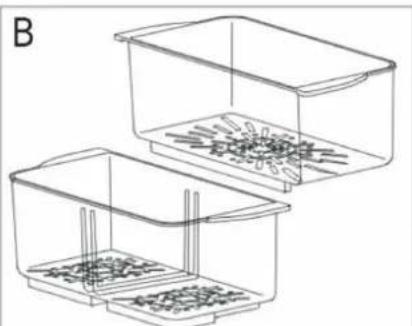
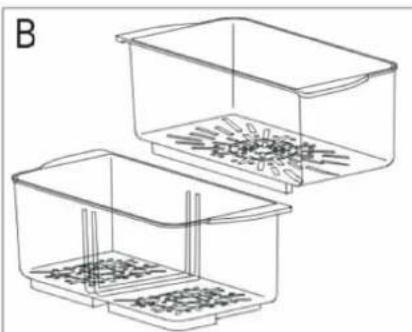
Fitting the drip tray and containers (B)
Fit the drip tray (8) to the main base, aligning the steam vents with the heaters (11). Fit the front (6) and back (2) containers to the drip tray, aligning them above the steam vents in the drip tray.
Using the Accessory
Place food directly into the containers or use accessories as required. The accessories are very versatile and be used in a number of ways (see C, D, E, F, G).
Divider wall
Use the divider wall (5) if cooking foods with different cook times. Alternatively, use the front container as one large container (C).
Foof plinth
Use in the 12 or 14 steamer. Use the plinth (23) in raised position to place food on and below (D). Alternatively, use the plinth upside down to place food on, using the legs as handles for easy removal (E).
Rice tray
Use in the 12 or 14 steamer. Use for cooking rice or pasta. Other foods may be cooked in the space below the rice tray (F).
Sauce trays
Use in the 1/2 or 1/4 steamer. Use for cooking sauce, peas or small portions of rice (G).

ATTENTION
If steaming meat, fi sh or poultry together with vegetables, always place the meat, fi sh or poultry separately so that the juices from raw or partially cooked meat cannot drip onto other foods.
Once food is arranged, place aillids1 34 back on the containers (H).
Display Keys and Symbols
- Water level gauge
- Back heater button
- ¼ right heater button
- 14 left heater button
- Display screen
- Steam button
- Increase steam time button
- Decrease steam time button
- Digital rectangle icons
- Food symbols
- Heating
- Timer column (minutes)
flowchart
graph TD
    A["MAX"] --> B["1"]
    C["MIN"] --> D["14"]
    C --> E["13"]
    C --> F["16"]
    B --> G["25"]
    D --> H["14"]
    E --> I["13"]
    F --> J["16"]
    G --> K["17"]
    H --> L["18"]
    I --> M["19"]
    J --> N["20"]
    K --> O["Cloud Icon 18"]
    L --> P["Cloud Icon 19"]
    M --> Q["Cloud Icon 20"]
Using Pre-set Cook Time
- Plug into the electrical socket.
- Set the time for each container using the corresponding heater buttons. If using the front container with the divider wall, use the separate right and left heater buttons (I).
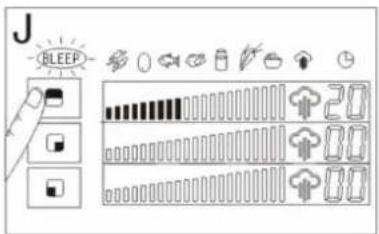
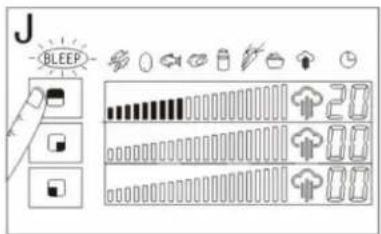
- Press the heater button to move the rectangle (24) until it appears under the required food symbol (refer to food symbols guide). A bleep will sound each time the heater button is pressed. The cook time for each food symbol will appear in the timer column. Repeat this process for each container, the rectangle will fl ash to indicate your last setting (J). If using the back container for foods with different cook times, set the times to the longest cook time. Alternatively, stop the appliance during cooking and add the food with the shortest cook time.
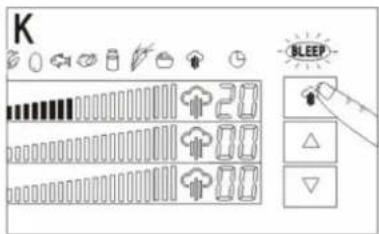
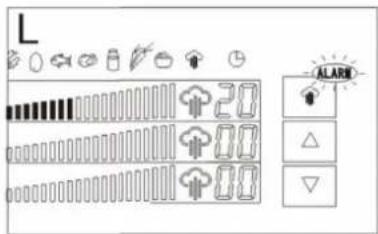
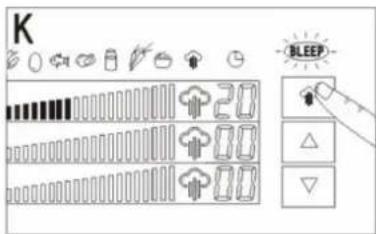
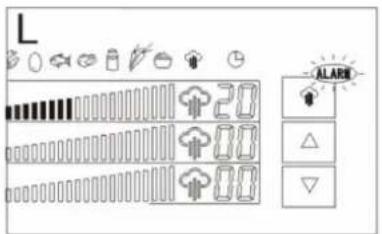
- Press the steam button 18 once to begin cooking. Ableep will sound and the display screen and steam button will illuminate brightly until cooking and keep warm fi nishes. The timer will count down from the longest cooktime so everything fi nishes together (K). When cooking has fi nished, the alarm will sound and the keep warm function will start automatically for 30 minutes. To stop, press the steam button once. After 30 minutes, the keep warm function will automatically turn off (L).

ATTENTION
Always check there is water in the water reservoir when using the keep warm function
Food Symbols and Cook Time
Pre-set times are a guide and based on approximately 4 portions. Refer to cooking guide for portion and specific food type adjustments.
 |  |  |  |  |  |  |
| Leaf and vegetables | Soft boiled egg | Fish Chicken Sauce | Root vegetables | Rice | ||
| Pre-set Time: 15 min. | Pre-set Time: 16 min. | Pre-set Time: 20 min. | Pre-set Time: 27 min. | Pre-set Time: 30 min. | Pre-set Time: 35 min. | Pre-set Time: 42 min. |
Adjusting the Timer
- The timer can be adjusted for portion sizes and specific food types (see cooking guide) or to suit your personal preferences
- Press the heater button until the rectangle appears under the food symbol you want to adjust.
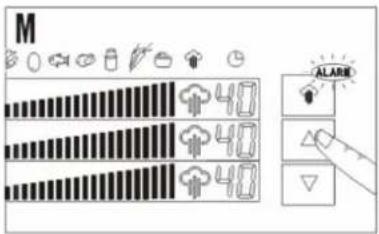
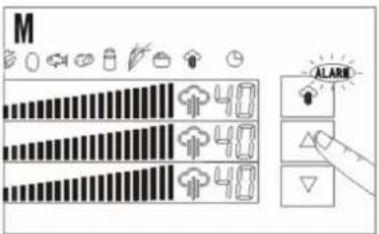
- Press the upwards arrow button to increase the cook time or the downwards arrow button is pressed, a bleep will sound and the time will increase/decrease by one minute (M).
- Repeat the process for each container as required.
Saving time adjustments
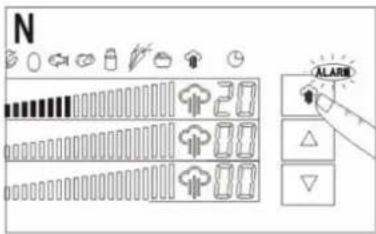
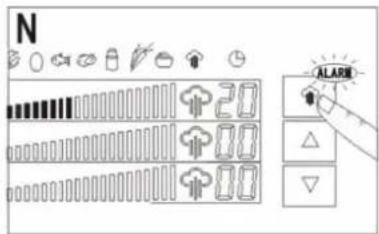
To save your personal time adjustments for future use hold down the steam button for two seconds. One bleep will sound, indicating steaming has begun, the second bleep indicates your time adjustments have been saved (N). If you do not want to save your personal time setting for future use, press the steam button once to start cooking.
Reverting back to pre-set times
Remove the plug and plug into the electrical socket again. Before pressing any other buttons, hold down the increase steam time button △ for 2 seconds, until a bleep is heard. Repeat for decrease steam time button ▽(0). Steamer is now set to the original pre-set.
How to Cook Rice
Add rice to the rice tray. For every 75 g of rice, add 122 ml of cold water and stir. Set the time using the pre-set time for rice or adjust if required.
Stop Steaming during Cooking
- To stop steaming, press the steam button once. The alarm will sound and the illuminated display screen and steam button will dim.
- To restart steaming press the steam button once. A bleep will sound and cooking will start from when it stopped.
Keep warm Function
- When cooking has finished, the alarm will sound and the keep warm function will start automatically for 40 minutes.
- To stop, press the steam button once.
• After 40 minutes the keep warm function will automatically turn off.

ATTENTION
Always check there is water in the water reservoir when using the keep warm function. To check the water level, use the external water gauge (13) and fill using the external water top-up (7).
Water Refi II during Cooking
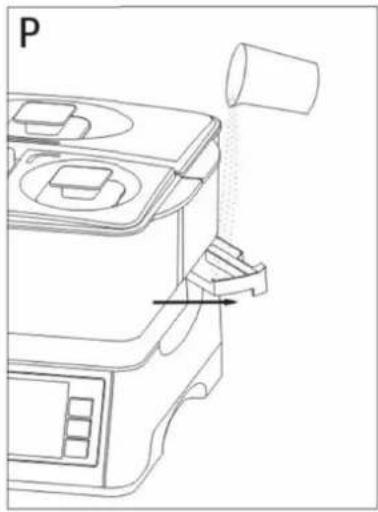
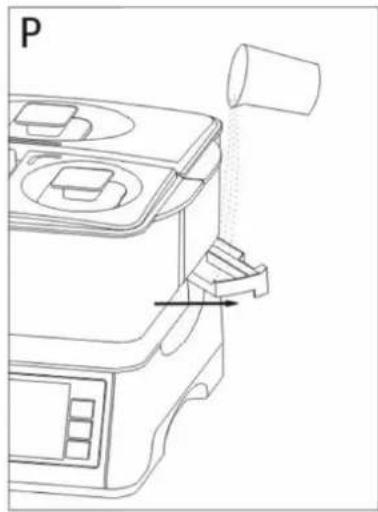
- If steaming for a long period, it may be necessary to add extra water. The water level can be checked using the external water gauge. To fi ll, fully extend the external water top-up (7) and slowly pour cold water through it using a suitable jug (P).
- If water in the water reservoir reaches unsafe levels, an alarm will sound, the digital will flash, and cooking will stop automatically. Immediately add more cold water by slowly pouring through the external water top-up. To restart cooking, press the steam button once. Cooking will re-start from when it stopped.
Removing food from the steamer

WARNING
Danger of burns! Use oven gloves to remove the lids and containers, ensuring the lids are tilted to direct the steam away from you. Do not remove the drip tray until it is completely cooled.
Cooking Hints and Tips
- For best results, use pieces of food that are similar in size. If pieces vary in size and layering is required, place smaller pieces on top.
- Do not crowd food in the containers or rice bowl. Arrange the food with spaces between pieces to allow for maximum steam flow.
- Never steam meat, poultry or seafood from frozen. Always completely thaw fi rst. Meat, poultry and seafood can be wrapped and cooked in cooking foil to retain juices.
Easy Set-up Guide
| A | 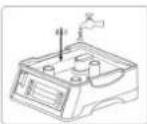 | Fill the water resevoir with cold water to the maximum level. This will produce enough steam to cook for approximately 60 minutes. |
| B | 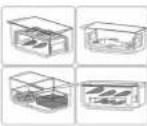 | Place food directly into the containers before setting the timer. Use the divider wall for the front container if cooking two different types of food. Use the accessories if required, see suggestions. |
| C | 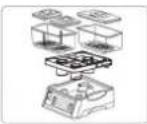 | Assemble the appliance, fi tting the drip tray and then the containers. |
| D | 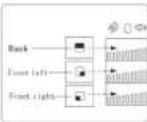 | Plug into the electrical socket. Set the time for each container, using the corresponding heater buttons. |
| E | Press the heater until the rectangle appears under the food type you are coo-king. The pre-set cook time will appear in the timer column.    [BAHG] [AXST] [B77X]Vegetable Soft egg Fish Chicken Sauce Roots RiceCook time: Cook time: Cook time: Cook time: Cook time: Cook time: Cook time:15 min. 16 Min. 20 Min. 27 Min. 30 Min. 35 Min. 42 Min. [BAHG] [AXST] [B77X]Vegetable Soft egg Fish Chicken Sauce Roots RiceCook time: Cook time: Cook time: Cook time: Cook time: Cook time: Cook time:15 min. 16 Min. 20 Min. 27 Min. 30 Min. 35 Min. 42 Min. | |
| F | 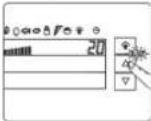 | The pre-set cook time is based on cooking four portions (see Cooking guide, for portion and specifi c food type adjustments). To adjust the time, press the upwards and downwards arrows. |
| G | 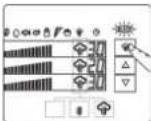 | To begin cooking, press the steam button once. One bleep will sound. To save adjusted times for future use, hold the steam button down for two seconds, until a second bleep is heard. During heating, the icon will cycle beating. |
| H | 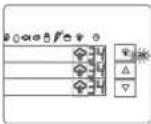 | The container with the longest cook time will begin steaming fi rst. The timer count down so all food fi nishes together. After cooking has fi nished, the alarm will sound and the keep warm function will start automatically for 40 minutes. To stop the keep warm function, press the steam button. |
| I | 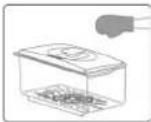 | WARNINGDanger of burning! Use oven gloves to remove the lids and containers, ensuring the lids are tilted to direct the steam away from you.Do not remove the drip tray until it is comple tely cooled. |
| J | 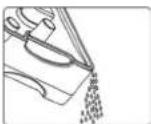 | Pour away excess water from the main base unit, using the pouring lip at the back. The containers, lids, accessories and drip tray may be washed in a dishwasher. |


- Dampfgarer
- KLARSTEIN
- Einleitung
- ACHTUNG
- ATTENTION
- Contents
- Environment Concerns
- Declaration of Conformity
- Product Description and Accessory
- Accessory
- Use
- Fill the water reservoir (A)
- Fitting the drip tray and containers (B)
- Using the Accessory
- Divider wall
- Foof plinth
- Rice tray
- Sauce trays
- Display Keys and Symbols
- Using Pre-set Cook Time
- Food Symbols and Cook Time
- Adjusting the Timer
- Saving time adjustments
- Reverting back to pre-set times
- How to Cook Rice
- Stop Steaming during Cooking
- Keep warm Function
- Water Refi II during Cooking
- Removing food from the steamer
- WARNING
- Cooking Hints and Tips
- Easy Set-up Guide
Brand : Klarstein
Model : 10027399
Category : Steamer