
XENON C 222 - Hi-Fi System ECG - Free user manual and instructions
Find the device manual for free XENON C 222 ECG in PDF.


| Product Type | Hi-Fi System / CD Microsystem |
| Model | XENON C 222 |
| Brand | ECG |
| Power Supply | AC 100-240 V, 50/60 Hz |
| Power Consumption | 20 W (operation), < 0.5 W (standby) |
| Compatible Discs | CD, CD-R, CD-RW, MP3 |
| USB Playback | Yes (USB port for mass storage devices) |
| Radio Tuner | FM stereo, 87.5-108 MHz |
| Audio Output | 2 x 5 W (max.) |
| Frequency Response (CD) | 20 Hz - 20 kHz |
| Signal-to-Noise Ratio (CD) | > 80 dB (1 kHz) |
| Dynamic Range (CD) | ≥ 70 dB (1 kHz) |
| Distortion (CD) | ≤ -60 dB (1 kHz) |
| Inputs | LINE IN (RCA), USB, FM antenna |
| Outputs | Speaker terminals, headphone jack (3.5 mm) |
| Remote Control | Yes, with full functionality |
| Equalizer Modes | Multiple presets (EQ button) |
| Additional Functions | Program playback, random, repeat, intro scan, sleep timer, mute |
| Operating Temperature | -10 °C to +35 °C |
| Humidity | 5 % to 90 % |
| Safety Class | Class 1 laser product |
| Included Accessories | Remote controller, user manual |
Frequently Asked Questions - XENON C 222 ECG
User questions about XENON C 222 ECG
0 question about this device. Answer the ones you know or ask your own.
Ask a new question about this device
Download the instructions for your Hi-Fi System in PDF format for free! Find your manual XENON C 222 - ECG and take your electronic device back in hand. On this page are published all the documents necessary for the use of your device. XENON C 222 by ECG.
USER MANUAL XENON C 222 ECG
natural_image
Black and silver ECG audio workstation with two speakers and a digital display (no visible text or symbols on main body)XENON C 222
CD MIKROSYSTÉM
NÁVOD K OBSLUZE
CD MIKROSYSTÉM
NÁVOD NA OBSLUHU
MINIWIEŻA CD
INSTRUKCJA OBSŁUGI
CD MIKRO HIFI RENDSZER
HASZNÁLATI ÚTMUTATÓ
CD-MIKROSYSTEM
BEDIENUNGSANLEITUNG
CD MICROSYSTEM
INSTRUCTION MANUAL
CZ
SK
PL
HU
DE
EN
OBSAH
BEZPEČNOSTNÍ UPOZORNĚNÍ 3
VLASTNOSTI 4
POPIS....4
ZAPOJENÍ......5
DÁLKOVÉ OVLÁDÁNÍ......6
ZÁKLADNÍ REPRODUKCE 6
ŘEŠENÍ POTÍŽÍ 8
TECHNICKÉ ÚDAJE 9
BEZPEČNOSTNÍ UPOZORNĚNÍ
ZADNÍ PANEL:
POHLED SHORA:
natural_image
Simple line drawing of a rectangular device with a base and a small circular component, no text or symbols present.natural_image
Diagram of a mechanical component with an arrow indicating direction (no text or symbols)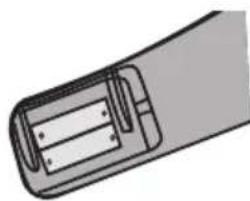
natural_image
Diagram of a cylindrical device with internal components, no text or symbols present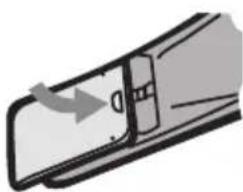
natural_image
Diagram of a door handle with an arrow indicating direction (no text or symbols)Poznámka:
ZADNÝ PANEL:
POHL'AD ZHORA:
natural_image
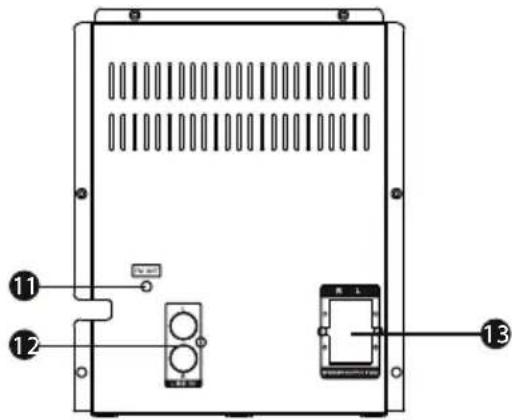
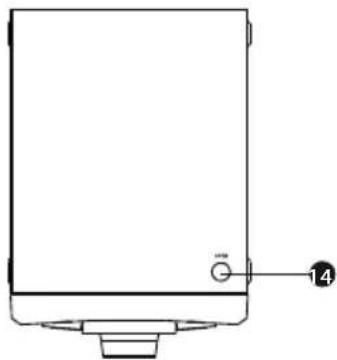
Simple line drawing of a rectangular device with a base and a small circular mark labeled '14' (no text or symbols beyond the number)- DISPLEJ 12. VSTUP LINE IN
- PLAY (prehrávanie/pauza) 13. REPRODUKTOROVÉ SVORKY
- PREDCHÁDZAJÚCI 14. PUSH (otvorenie CD
- STANDBY (zapnutie/vypnutie) priehradky)
- KONEKTOR SLÚCHADIEL
- STOP
- NASLEDUJÚCI
- SOURCE (zdroj signálu)
- OVLÁDAČ HLASITOSTI
- VSTUP USB
- KONEKTOR FM ANTÉNY
Počúvanie so slúchadlami
natural_image
Diagram of a mechanical component with an arrow indicating direction (no text or symbols)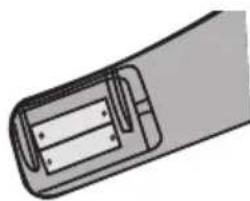
natural_image
Diagram of a cylindrical battery with internal compartments (no text or symbols)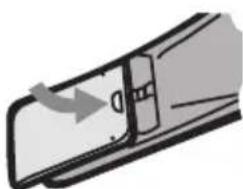
natural_image
Diagram of a mechanical component with an arrow indicating direction (no text or symbols)Poznámka:
- Ak nebudete dialkový ovládač dlhšie používať, batérie vyberte.
- Nekombinujte navzájom staré a nové batérie alebo rôzne typy batérií.
- Vybité batérie môžu vytiect' a spôsobit' poškodenie dialkového ovládača.
- Batérie nevystavujte prílišnému teplu, napr. slnečnému svetlu, ohňu a podobne.
- Bud'te oh'laduplní k životnému prostrediu a staré batérie likvidujte v súlade s miestne platnými predpismi.
DIALKOVÉ OVLÁDANIE
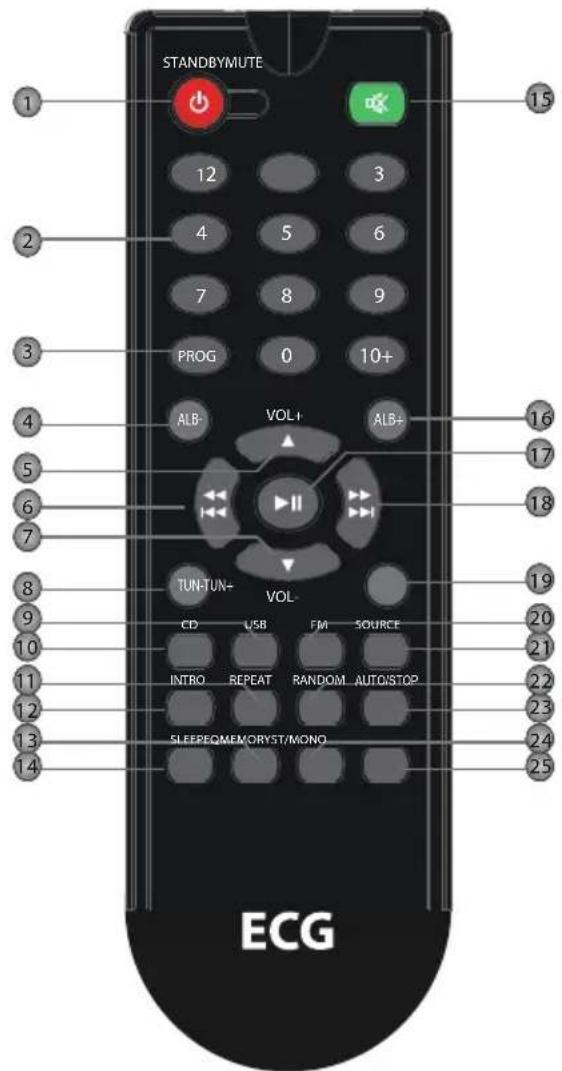
- STANDBY (zapnutie/vypnutie)
- NUMERICKÉ TLAČIDLÁ
- PROGRAM
- ALB-
- HLASITOST+
- POSUN SPÄT / PREDCHÁDZAJÚCI
- HLASITOST-
- LADENIE -
- USB
- CD
- REPEAT (opakovanie)
- INTRO
- EQ (ekvalizér)
- SLEEP (časový spínač)
- MUTE (stlmenie zvuku)
- ALB+
- PREHRÁVANIE/PAUZA
- POSUN VPRED / NASLEDUJÚCI
- LADENIE +
- FM
- SOURCE (prepne zdroj signálu)
- RANDOM (náhodné poradie skladieb)
- AUTO / STOP
- MEMORY (uloženie do pamäte)
- ST/MONO
ZÁKLADNÁ REPRODUKCIA
Ovládanie CD
STANDBY

USB

CD

FM

SOURCE

PANEL TYLNY:
WIDOK Z GÓRY:
natural_image
Simple line drawing of a rectangular device with a base and a small circular mark labeled '14' (no text or symbols beyond the number)Wyjście na głośniki

Używanie pilota
natural_image
Diagram of a mechanical component with an arrow indicating direction (no text or symbols)natural_image
Diagram of a cylindrical device with internal components, no text or symbols visiblenatural_image
Diagram of a door handle with an arrow indicating direction (no text or symbols)Uwaga:
HÁTLAP
FELÜLNÉZET
natural_image
Simple line drawing of a rectangular device with a base and a small circular mark labeled '14' (no text or symbols beyond the number)natural_image
Diagram of a mechanical component with an arrow indicating direction (no text or symbols)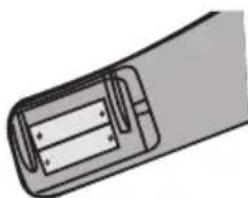
natural_image
Diagram of a cylindrical device with internal components, no text or symbols present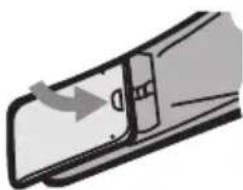
natural_image
Diagram of a door handle with an arrow indicating direction (no text or symbols)Megjegyzés:
HINTERER PANEL:
OBENANSICHT:
natural_image
Simple line drawing of a device with a labeled component (no text or symbols present)natural_image
Diagram of a mechanical component with an arrow indicating direction (no text or symbols)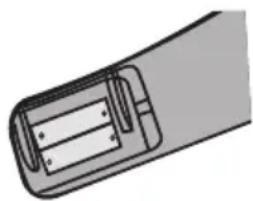
natural_image
Diagram of a cylindrical device with internal components, no text or symbols present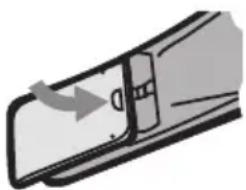
natural_image
Diagram of a door handle with an arrow indicating direction (no text or symbols)Anmerkung:
SAFETY INFORMATION....41
FEATURES 42
DESCRIPTION....42
CONNECTION 43
REMOTE CONTROL....44
BASIC PLAYBACK 44
TROUBLESHOOTING....46
TECHNICAL SPECIFICATIONS....47
SAFETY INFORMATION
Read carefully and keep for future use!
- Read this manual thoroughly before connecting and using the device. Keep the manual for future reference.
- Do not open the device box. There are no elements inside that can be configured by the user. Have a qualified service technician perform repairs on the device.
- Turn the equipment off when you are not using it. If you do not plan on using the device for a longer period of time, turn it off and unplug the device. (The plug enabling the complete disconnection from the power network should be easy to access.)
- Do not place the system in areas exposed to heat sources or direct sunlight.
- Do not place the system in areas exposed to moistness or rain.
- The device should not be exposed to dripping or splashing water and objects containing liquids should not be placed upon it, for example vases.
- Place the device on a horizontal, flat and solid surface with good ventilation. Do not cover the air vents. Doing so may damage the device by overheating.
- Use a soft and clean towel to clean the outer surface. Do not use chemicals or cleaning detergents for cleaning the device.
- This document is only an guide for using the device and is not considered an authoritative criterion for configuration.
- Use only accessories recommended by the manufacturer.
WARNING:
Do not expose batteries to excessive temperatures, e.g. direct sunlight, fire etc.
ATTENTION:
Danger of explosion if the batteries are replaced improperly. Batteries shall only be replaced with the same type.
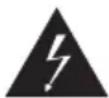
The lightning symbol warns the user about dangerous voltage inside the device box, which could cause injury by shock upon coming into contact with the internal elements of the device.

The exclamation mark symbol warns the user about vital information in the manual.
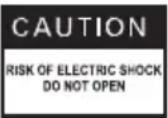
To reduce the risk of fire or electric shock, do not remove the cover of the device. a qualified service technician perform repairs on the device.
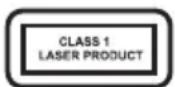
This symbol represents that the device is classified under the class 1 laser equipment group. Harmful radiation may result in the laser ray coming into direct contact with the human body.
FEATURES
Thank you for purchasing this device. Read this guide thoroughly before connecting and using the device. Keep the manual for future reference.
- Compatible with CD, CD-R, CD-RW, MP3 etc.
- USB slot for playing media from a USB memory disk.
- All functions can be controlled using a remote controller.
- FM Stereo radio.
Package contents:
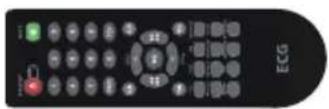
Operating manual Remote controller
DESCRIPTION
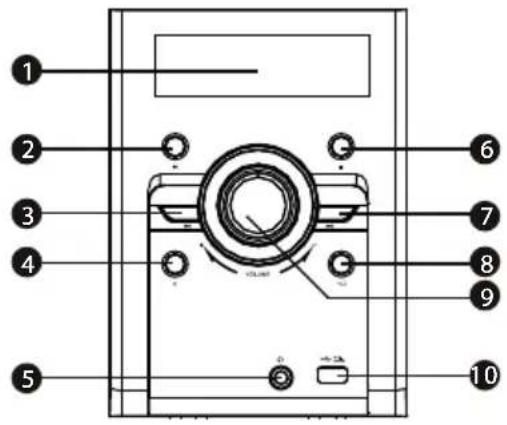
FRONT PANEL:
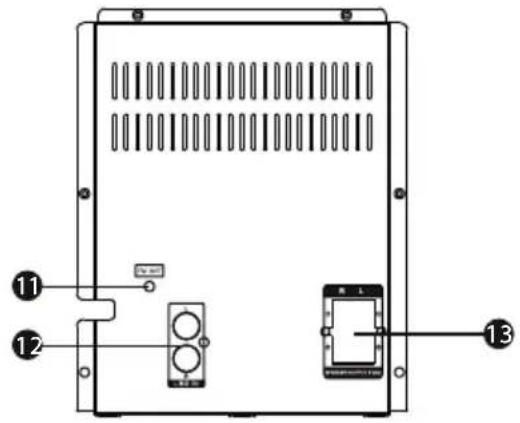
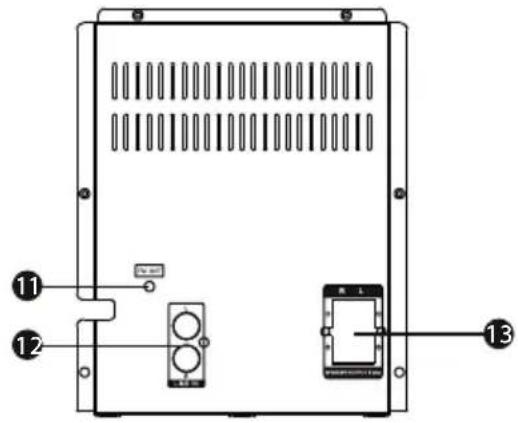
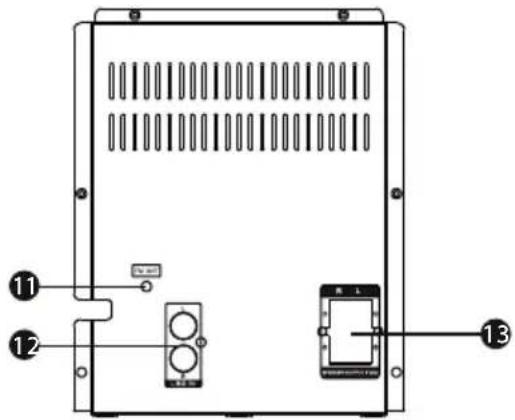
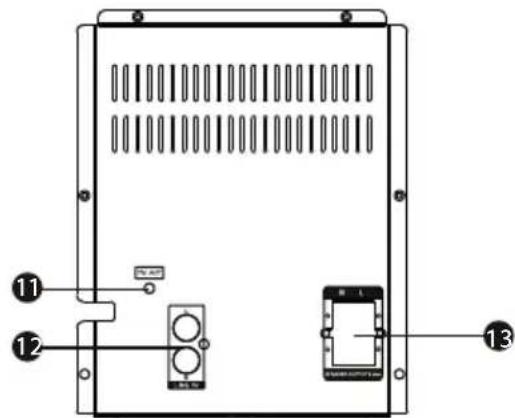
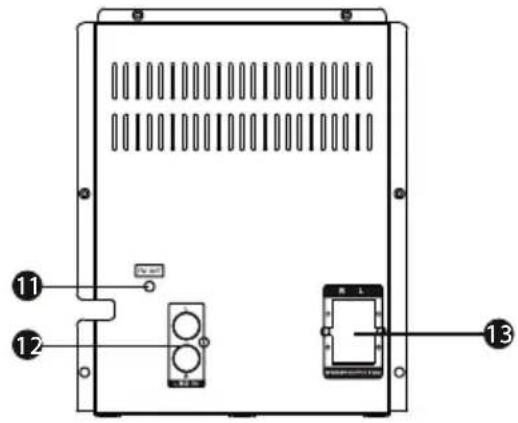
BACK PANEL:
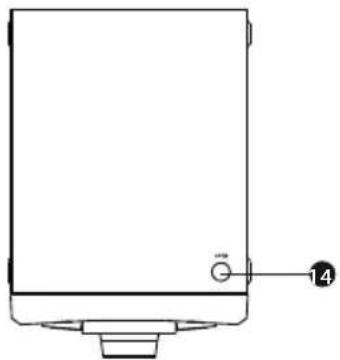
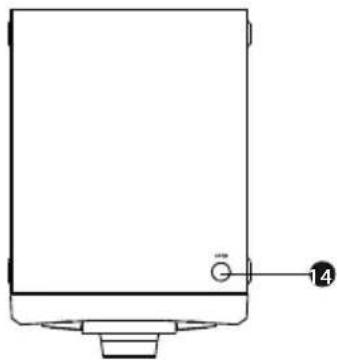
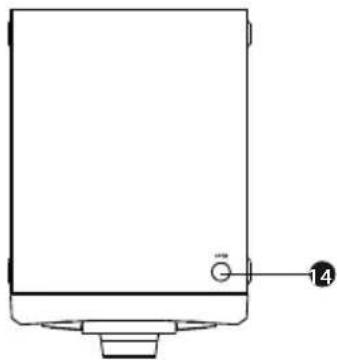
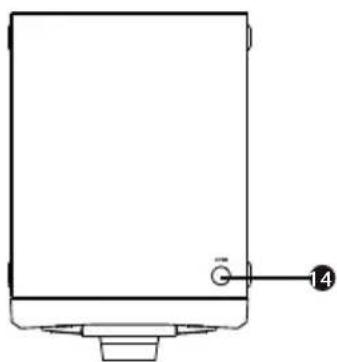
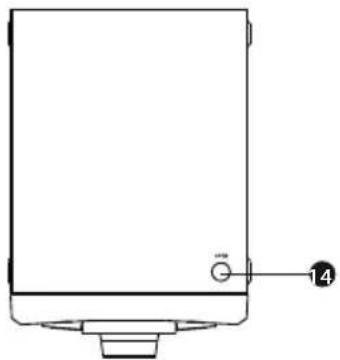
VIEW FROM ABOVE:
natural_image
Simple line drawing of a rectangular device with a base and a small circular component, no text or symbols present.- DISPLAY
- PLAY (play/pause)
- PREVIOUS
- STANDBY (ON/OFF)
- HEADPHONES JACK
- STOP
- NEXT
- SOURCE
- VOLUME CONTROL
- USB PORT
-
FM ANTENNA CONNECTOR
-
LINE IN
- SPEAKER TERMINALS
- PUSH (opens the CD tray)
EN
Listening with headphones
Lower the volume before connecting headphones, and after connecting them, increase the volume as necessary. No sound will come from the speakers once headphones are connected.
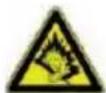
WARNING: Excessive acoustical pressure from headphones can cause hearing damage.
CONNECTION
Speakers output
Plug the speakers into the respective speaker terminals using audio cables (white to +, red to -).
LINE IN
This device is equipped with audio input connectors which can be used to lead an analog stereo audio signal to the device from external systems, such as VCD or CD players, video cameras or MP3 players etc. Using an audio cable with CINCH connectors (red for right channel, white for left channel), connect the output terminals of the external player with the LINE IN input of this device.
You can listen to music from the connected external source by pressing the SOURCE on the device or remote controller.
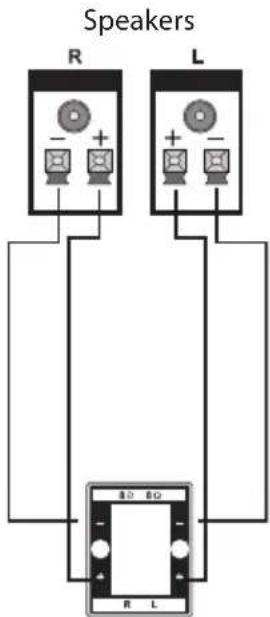
Speakers output
Using the remote controller
Insert batteries into the remote controller. Direct the controller towards the remote controller sensor on the head panel. The remote controller operates with a reach of 8 metres under a maximum angle of 30 degrees horizontally.
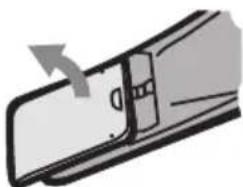
Inserting the batteries
-
Remove the cover of the battery compartment on the back side of the remote controller.
-
Insert two AAA/1.5 V batteries into the battery compartment. Make sure the battery polarity correct, marked + and - on the inside of the battery compartment with symbols.
-
Return the cover to its place.
natural_image
Diagram of a mechanical component with an arrow indicating direction (no text or symbols)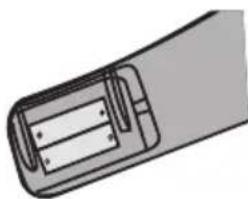
natural_image
Diagram of a cylindrical battery with internal components (no text or symbols)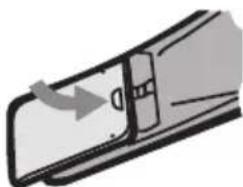
natural_image
Diagram of a door handle with an arrow indicating direction (no text or symbols)Note:
- If you do not plan to use the remote controller for a longer period of time, take the batteries out.
- Do not combine old and new batteries or different types of batteries.
- Dead batteries can leak and damage the remote controller.
- Do not expose batteries to excessive heat, e.g. direct sunlight, fi re etc.
- Be considerate towards the environment and dispose of old batteries according to local valid regulations.

REMOTE CONTROL
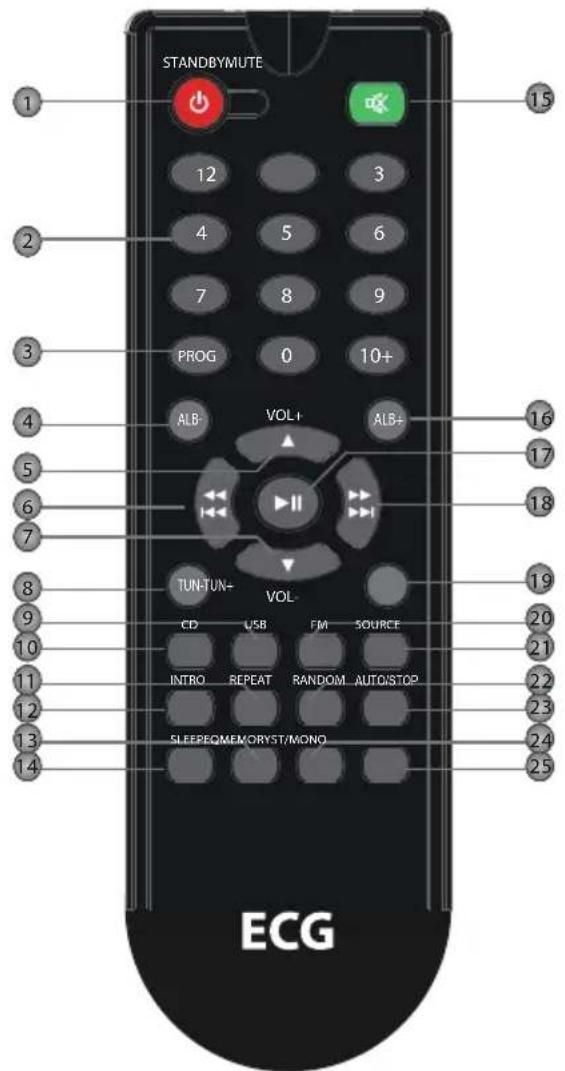
-
STANDBY (ON/OFF)
-
NUMERICAL BUTTONS
-
PROGRAM
-
ALB-
-
VOLUME+
-
BACK / PREVIOUS
-
VOLUME-
-
TUNING -
-
USB
-
CD
-
REPE AT
-
INTRO
-
EQ
-
SLEEP (timer switch)
-
MUTE
-
ALB+
-
PLAY/PAUSE
-
FORWARD / NEXT
-
TUNING +
-
FM
-
SOURCE
-
RANDOM
-
AUTO / STOP
-
MEMORY
-
ST/MONO
BASIC PLAYBACK
CD control
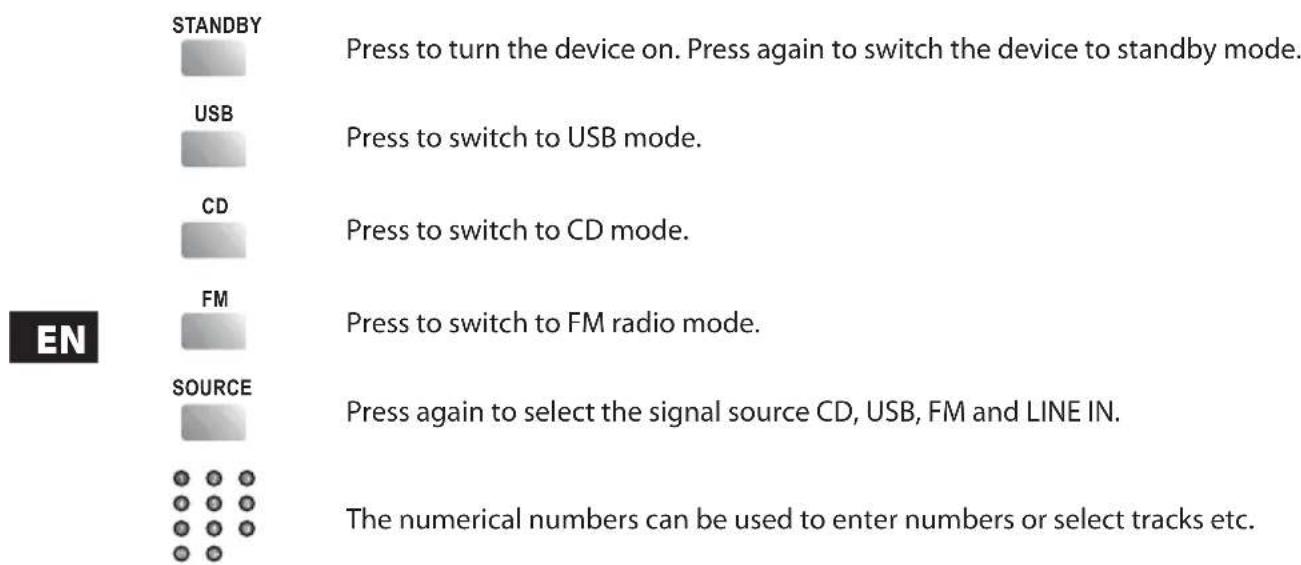
AUTO/STOP

Press to stop playback.

Press to pause playback. Press again to resume playback.

Press to skip to next chapter/track.

Hold to skip forward quickly.

Press to return to previous chapter/track.

Hold to skip back quickly.
VOL+

Press VOLUME+ to increase the volume.
VOL-

Press VOLUME- to decrease the volume.
PROGRAM

With playback stopped, insert a CD and press PROGRAM to enter programming mode.
Select a track directly using the numerical buttons or use / and press PROGRAM
again to confirm the selection. Press 🏠 to begin program playback.
MUTE

Press to temporarily mute sound. Press again to restore sound.
RANDOM

Press to start random playback.
REPEAT

Switch between repeat playback functions with each press of the button.
SLEEP

Press again to set the sleep timer or select SLEEP OFF to cancel the automatic shutdown function. The device will automatically turn off after the time set lapses. Press STANDBY to restart the device.
INTRO

Pressing this button will play the first 10 seconds of each track on the disk.
EQ

Pressing this button switches equalizer modes.
ALB +/-

Pressing this button skips between directories containing tracks, only for MP3.
FM radio control
The following buttons are used to operate the FM radio. Press SOURCE to select FM radio mode.
ST/MONO

Press to switch between Mono and Stereo modes of FM reception.
TUN +/-

- TUN+: press to fi ne tune the frequency (up).
- TUN-: press to fi ne tune the frequency (down).
- Hold TUN+/- to continuously browse up/down through frequencies.
MEMORY

After tuning a new station, press MEMORY and select the preset number under which you wish to store the station. Confirm by pressing MEMORY again.
EN
Preset stations can be selected via numerical buttons.
For example, pressing 2 will select preset 2. To tune preset 15, first press 10+ and then 1 and 5.

Press to skip to next preset.

Press to skip to previous preset.
NOTE: In FM radio mode, buttons VOLUME+/-, MUTE are also active. For more information see "CD control".
TROUBLESHOOTING
Before bringing the device to the repair centre, please check the following table.
| Symptom Cause Correction | ||
| No power • The power supply is not properly connected to the socket. | • Check the proper connection of the power supply. | |
| SoundNo sound or distorted sound. | • Audio cables are not connected properly.• The volume is set to min. • Increase the• The sound is muted. | • Connect the audio cables properly.volume.• Press MUTE on the controller to activate the sound.• Press PLAY/PAUSE. |
| Cannot play disk | • The disk is inserted improperly.• The parent lock classification coded on the disk is higher than the parent lock level set on the device.• The disk is not compatible with this device.• The disk is contaminated. | • Make sure the disk is inserted with the label facing upward.• Change the parent lock settings.Clean the disk |
| After connecting a USB device, the device stops working | • The connected USB device most likely is a certified type. | • The device does not play uncertified USB devices. In case the player stops working, turn it off , unplug the power cord from the socket and remove the USB device. Plug the power cord back in. The device should work normally. |
| The buttons on the device do not work | • The device is experiencing interference caused by static electricity etc. | • Turn the device off and unplug from the socket. Plug the power cord back in and turn on the device. |
| Symptom Cause Correction | ||
| The remote controller does not work | There are no batteries in the remote controller.The batteries are dead.The remote controller is not directed at the remote controller sensor.The remote controller is outside of its operating range.The device is turned off . | Insert two AAA/1.5 V batteries.Replace the batteries with a new set.Make sure the remote controller is directed at the remote controller sensor.Make sure the remote controller is close enough to the device.Turn the device off and unplug from the socket. Turn the device back on. |
TECHNICAL SPECIFICATIONS
| Power AC ~100–240 V, 50/60 Hz | ||
| Power input 20 W | ||
| Standby power input < 0.5 W | ||
| Operating conditions | Temperature -10 °C ~ | +35 °C |
| Relative humidity 5 % ~ | 90 % | |
| CD | Frequency characteristic 20 | Hz ~ 20 kHz |
| S/N ratio (fi Iter A) >80 dB | (1 kHz) | |
| Dynamic range ≥70 dB | (1 kHz) | |
| Distortion and noise | ≤-60 dB (1 kHz) | |
| Fluctuation | Under measurable level | |
| Tuner | FM band range | 87.5 ~ 108 MHz |
| Power output (max.) | 5 W × 2 | |
| Frequency characteristic | ±1.5 dB (20 Hz ~ 20 kHz) | |
USE AND DISPOSAL OF WASTE
Wrapping paper and corrugated paperboard – deliver to scrapyard. Packing foil, PE bags, plastic elements – throw into plastic recycling containers.
DISPOSAL OF PRODUCTS AT THE END OF LIFETIME
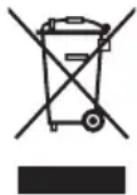
Disposal of electric and electronic equipment (valid in EU member countries and other European countries with an implemented recycling system)
The represented symbol on the product or package means the product shall not be treated as domestic waste. Hand over the product to the specified location for recycling electric and electronic equipment. Prevent negative impacts on human health and the environment by properly recycling your product.
Recycling contributes to preserving natural resources. For more information on the recycling of this product, refer to your local authority, domestic waste processing organization or store, where you purchased the product.
This product complies with EU directive requirements on electromagnetic compatibility and electrical safety.
Changes in text and technical parameters reserved.
08/05

EN
www.ecg.cz

- XENON C 222
- CD MIKROSYSTÉM
- MINIWIEŻA CD
- CD MIKRO HIFI RENDSZER
- CD-MIKROSYSTEM
- CD MICROSYSTEM
- OBSAH
- BEZPEČNOSTNÍ UPOZORNĚNÍ
- Poznámka:
- Počúvanie so slúchadlami
- ZÁKLADNÁ REPRODUKCIA
- Używanie pilota
- Uwaga:
- Megjegyzés:
- Anmerkung:
- SAFETY INFORMATION
- Read carefully and keep for future use!
- WARNING:
- ATTENTION:
- FEATURES
- Package contents:
- DESCRIPTION
- EN
- Listening with headphones
- CONNECTION
- Speakers output
- LINE IN
- Using the remote controller
- Inserting the batteries
- Note:
- BASIC PLAYBACK
- AUTO/STOP
- PROGRAM
- RANDOM
- REPEAT
- SLEEP
- INTRO
- FM radio control
- ST/MONO
- MEMORY
- TROUBLESHOOTING
- USE AND DISPOSAL OF WASTE
- DISPOSAL OF PRODUCTS AT THE END OF LIFETIME
- Disposal of electric and electronic equipment (valid in EU member countries and other European countries with an implemented recycling system)
- www.ecg.cz
Brand : ECG
Model : XENON C 222
Category : Hi-Fi System