
FZS 2050-E - Corded Lawn Mower Fieldmann - Free user manual and instructions
Find the device manual for free FZS 2050-E Fieldmann in PDF.


| Product Type | Electric String Trimmer / Brush Cutter |
| Model | FZS 2050-E |
| Brand | Fieldmann |
| Power Supply | 230-240V~, 50 Hz |
| Motor Power Input | 1400 W |
| Idle Speed | 10,000 rpm |
| Cutting Coverage | 42 cm |
| Trimmer Line Diameter | 1.6 mm |
| Head Type | Semi-automatic (tap & go) |
| Blade Options | Nylon line head and metal 3-tooth blade included |
| Weight | 6.0 kg |
| Safety Features | Safety guard, start/stop trigger safety lock, protective guard with line cutter |
| Handle | Adjustable auxiliary handle with ergonomic grip |
| Shoulder Strap | Included for comfortable operation |
| Cutting Functions | Trimming, clearing, edging, and brush cutting |
| Maintenance | Clean with damp cloth and mild soap; store line in plastic bag with moisture; sharpen line cutter regularly |
| Spare Parts | Use only original accessories and replacement nylon line (1.6 mm) |
| Protective Equipment Required | Eye protection, gloves, hearing protection, sturdy footwear, and long trousers |
| Safety Distance | Keep bystanders and pets at least 15 m away |
| Class | Class II (double insulated) |
| Environmental Protection | Do not expose to rain; dispose of packaging and machine at recycling centres |
Frequently Asked Questions - FZS 2050-E Fieldmann
User questions about FZS 2050-E Fieldmann
0 question about this device. Answer the ones you know or ask your own.
Ask a new question about this device
Download the instructions for your Corded Lawn Mower in PDF format for free! Find your manual FZS 2050-E - Fieldmann and take your electronic device back in hand. On this page are published all the documents necessary for the use of your device. FZS 2050-E by Fieldmann.
USER MANUAL FZS 2050-E Fieldmann
natural_image
Abstract black-and-white spiral pattern with no text or symbolsFIELDMANN®
Home & Garden Performance
natural_image
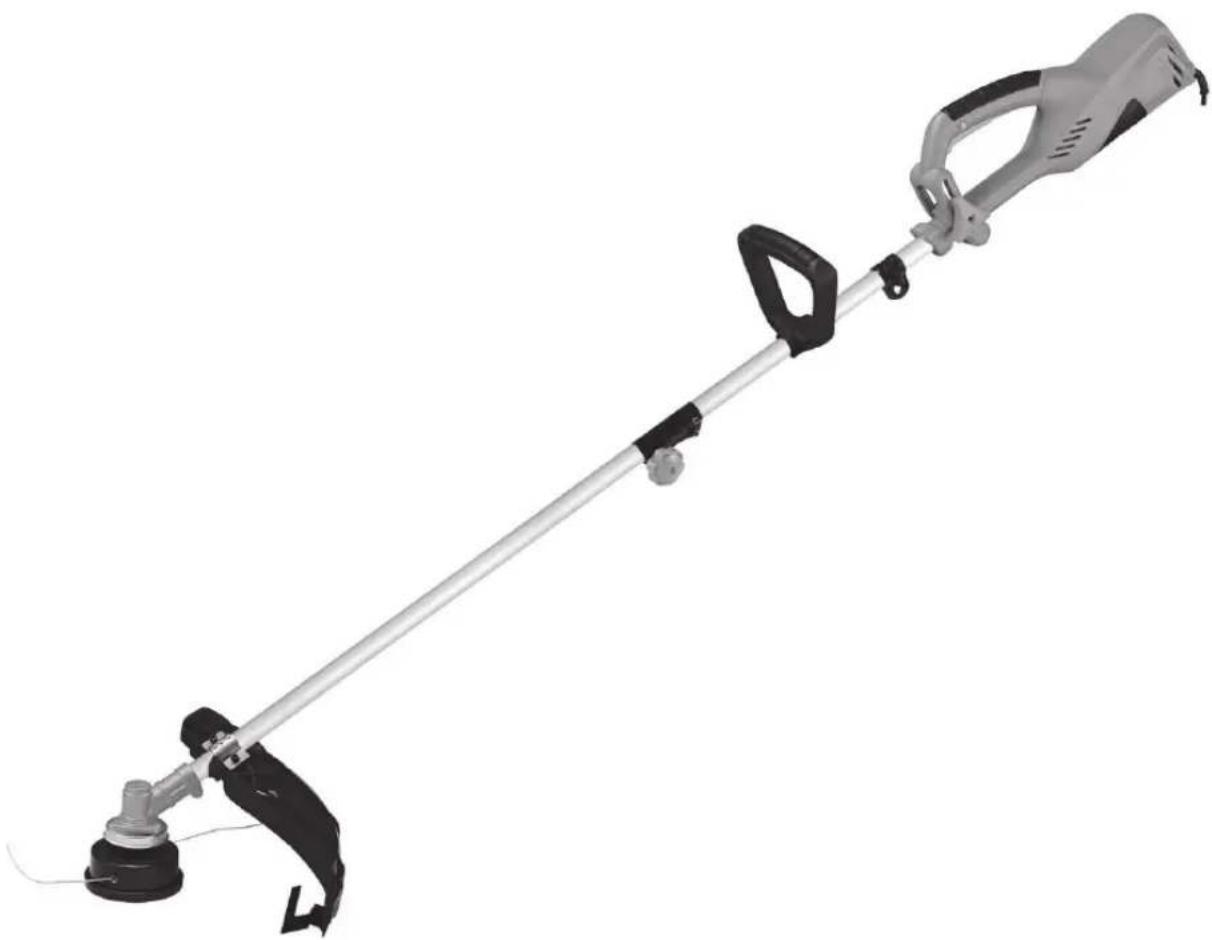
Metal tool with adjustable arm and base, isolated on white background (no text or symbols)FZS 2050-E
Electric string trimmer
USER'S MANUAL
Thank you for purchasing this electric string trimmer. Before you start using it, please, carefully read this user's manual and save it for possible future use.
TABLE OF CONTENTS
- GENERAL SAFETY INSTRUCTIONS......4
- EXPLANATION OF INSTRUCTION LABELS ON THE POWER TOOL 5
- SAFETY INSTRUCTIONS 7
- DESCRIPTION OF THE POWER TOOL 8
- ASSEMBLY....9
- STARTING THE TRIMMER....11
- CUTTING....12
- MAINTENANCE....14
- DISPOSAL 15
- DECLARATION OF CONFORMITY 16
- TECHNICAL SPECIFICATIONS.... 17
1. GENERAL SAFETY INSTRUCTIONS
Important safety notice
Carefully unpack the product and take care not to throw away any part of the packaging before you find all the parts of the product.
Store the product in a dry place out of reach of children.
Read all warnings and instructions. Not following warnings or instructions may lead to injury by electrical shock, a fire and/or serious injuries.
Packaging
The product is packed in a package that prevents damage during transport. This package is a resource and so can be handed over for recycling.
Operating instructions
Before you start working with the power tool, read the following safety and usage instructions. Understand the operating elements and the correct use of the power tool. Keep the user's manual in a safe place where it can be easily retrieved for future use. Save the original packaging, including the internal packing material, warranty card and proof of purchase receipt, at least for the duration of the warranty. If you need to ship this power tool, pack it in the original cardboard box to ensure maximum protection during shipping or transport (e.g. when moving or when you need to send this power tool for repair to a service centre).

Note: If you hand over the power tool to somebody else, do so together with this user's manual. Following the instructions in the included user's manual is a prerequisite for the proper use of the tool. The user's manual also contains operating, maintenance and repair instructions.
The manufacturer takes no responsibility for accidents or damages resulting from not following the instructions in this manual.
2. EXPLANATION OF INSTRUCTION LABELS ON THE MACHINE

Warning!

Read the user's manual before using.
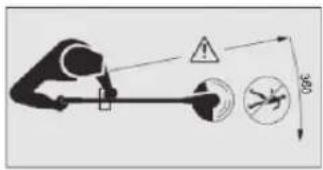
Keep other persons at a suffi cient distance away!

Do not use in rain or in wet conditions.

natural_image
Black and white icon of a person wearing glasses inside a circle (no text or symbols)Always wear eye protection.

natural_image
Icon of two gloves inside a dark circle (no text or symbols)While working use protective gloves.

natural_image
Simple icon of a boots inside a circle (no text or symbols)Use solid insulating work footwear.

natural_image
Icon of a person wearing headphones inside a circular frame (no text or symbols)Use hearing protection.
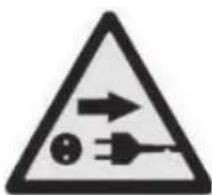
In the event that the power cord is damaged, immediately disconnect it from the power supply.
natural_image
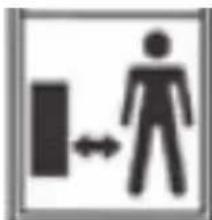
Symbol of a person walking with a block and double-headed arrow, representing mobility or safety (no text present)DANGER! Do not use the power tool if there are children, other persons or animals in your vicinity.
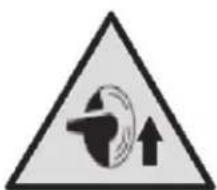
Be careful not to be hit by deflect objects.
3. SAFETY INSTRUCTIONS
ATTENTION!
Adhere to safety rules when using this power tool. For your safety and the safety of other people, please carefully read these instructions before using this power tool. Please store these instructions for possible future reference.
Wear safety glasses when working with this power tool.
* Wear gloves when working with this power tool.
Do not expose this power tool to rain or high moisture/humidity.
Acquaint yourself with the controls and the correct operation of this string trimmer.
Never allow children or other persons not acquainted with these instructions to use this string trimmer.
* Prevent children and other persons and pets from approaching this string trimmer as the grass that is being trimmed and is flying around may contain stones or fragments. If there are other people in the vicinity, especially children, stop using the string trimmer.
When working with the string trimmer, do not permit other persons or pets to come closer than 15 metres.
Only use the string trimmer during daylight hours or with good artificial lighting.
Prior to using the string trimmer or after any impact, always inspect it for signs of wear or damage, and repair it if necessary. Do not use the sting strimmer if the cutting tool is not properly secured in place or if it is damaged.
Always check that the string trimmer is in good working order, if not, it may endanger the user.
Always use protective guards when using the string trimmer.
Do not use the string trimmer if the protective guards are damaged.
Remove from the work area all stones, metal pieces, roots, other hard items and plastic bags, nylon string and other items that cannot be cut up.
Prior to starting the string trimmer, make sure that the nylon cutting edge is not touching stones or fragments.
Always keep your hands away from the cutting area, especially when starting the motor.
Protect yourself against injury caused by the cutting edge at the length of the trimming line. After spooling on a new trimming line, always return the string trimmer to its normal operating position before starting it.
Do not use spare parts or accessories not supplied or recommended by the manufacturer.
Always ensure that the ventilation openings are free of fragments.
To prevent accidental start up, do not carry the power tool with a finger on the start/stop trigger.
- Maintain a stable and safe stance when working with the string trimmer.
Remove wire, stones and fragments from the area where you will be working.
Do not cut hard items. This could result in injury or damage to the string trimmer.
ATTENTION!
Cutting elements continue to rotate even after the motor is turned off!
Do not attempt to stop the cutting tool (nylon line) using your hands. Always allow it to stop on its own. This applies also for the metal three tooth blade.
Do not use the string trimmer for cutting grass that is not touching the ground, for example grass on walls or rock gardens, etc.
Do not pass over sand or gravel paths with the string trimmer still running.
4. DESCRIPTION OF THE MACHINE
- Start/stop trigger safety lock
- Start/stop trigger
- Handle setting screw
- Shoulder strap hitch
- Handle
- Split shaft coupler
- Split shaft coupler fastening screw
- Protective safety guard
- Trimmer line cutter
- Semi-automatic string trimmer head / metal three tooth blade
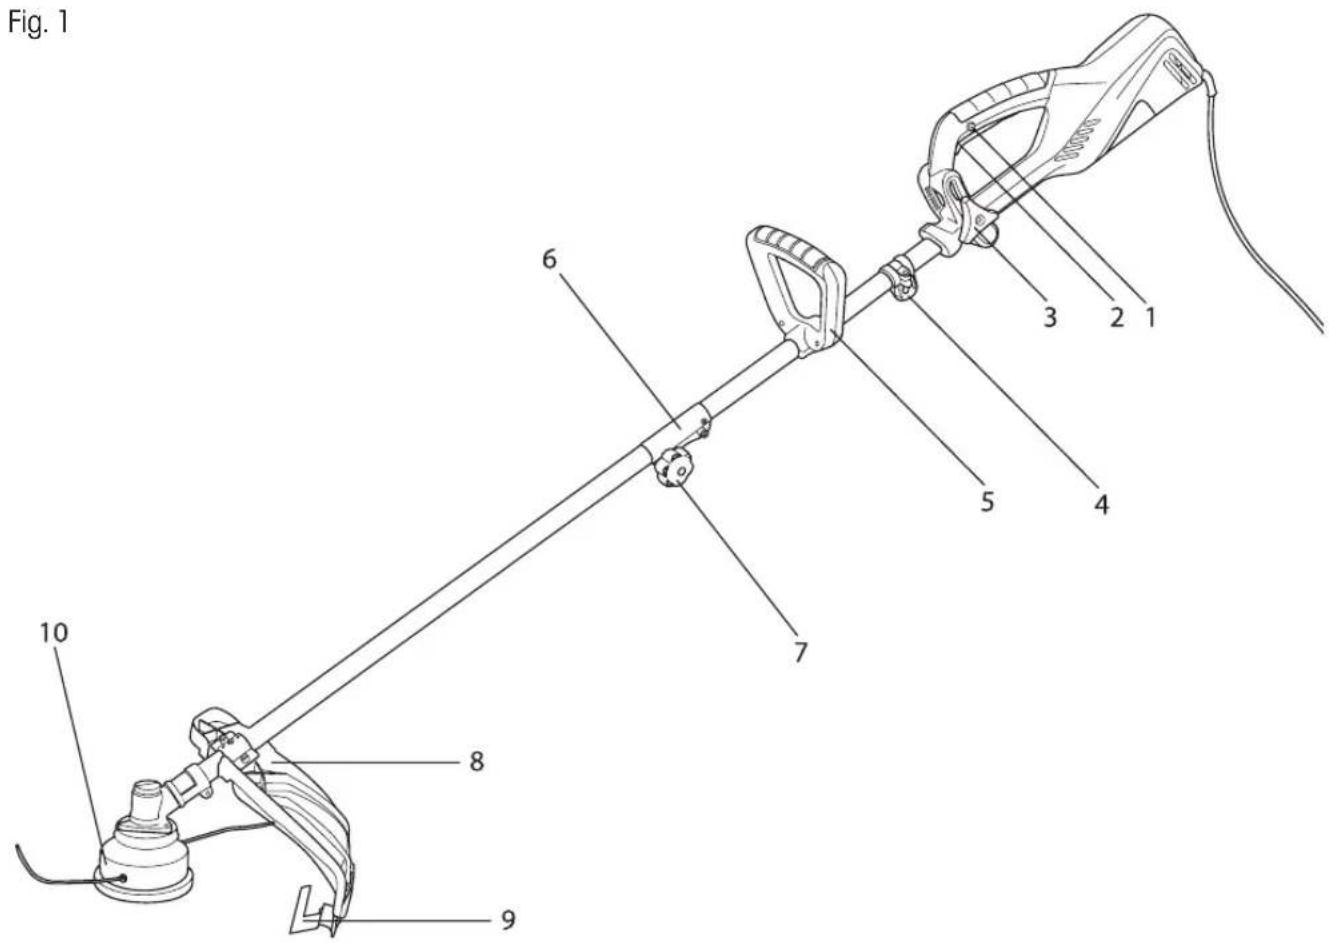
Included contents:
Electric trimmer, string trimmer head, metal three tooth blade, shoulder strap, tool set
5. ASSEMBLY
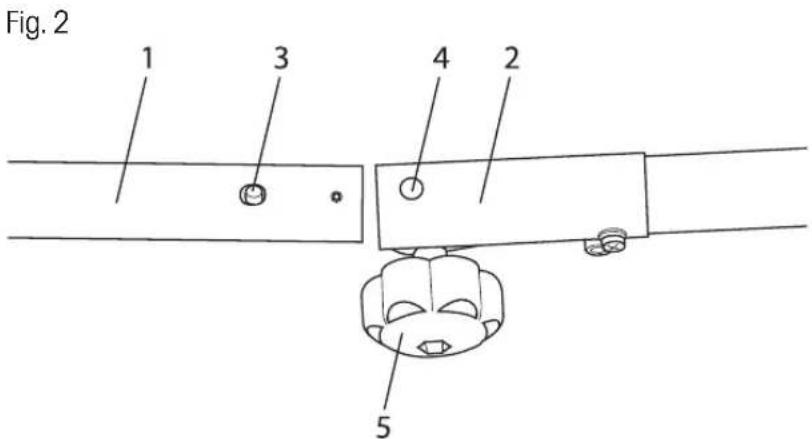
* Connect the shaft of the trimmer (Fig 2). Insert the bottom part of the shaft (Fig 2, point 1) into the coupling (Fig 2, point 2), which is a part of the top part of the shaft. The locking pin (Fig 2, point 3) must fit into the hole (Fig 2, point 4). Then secure both parts in place by tightening the screw (Fig 2, point 5). For easier transport of the trimmer, the shaft can again be separated.
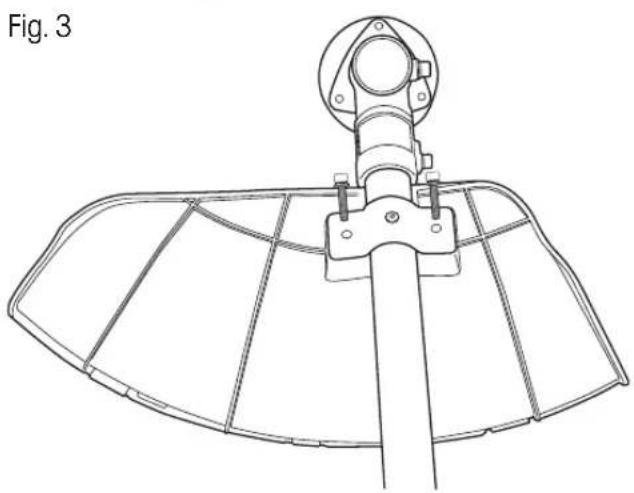
* Install the protective guard on to the shaft using the supplied screws. The nuts are integrated into the plastic cover (see Fig. 3).
Install the handle (Fig 1, point 5) using the included screws. The handle can be moved along the shaft. In this way, everybody can select the ideal comfortable working position.
After selecting the ideal working position, tighten the screws.
Installing the string trimmer head.
- Lock the shaft in place by inserting the included hex key (see Fig. 4). To achieve this, it is necessary to align the hole in the protective guard with the hole in the shaft and insert the hex key. Align the holes by turning the protective guard.
natural_image
Technical line drawing of a satellite dish antenna assembly (no text or symbols)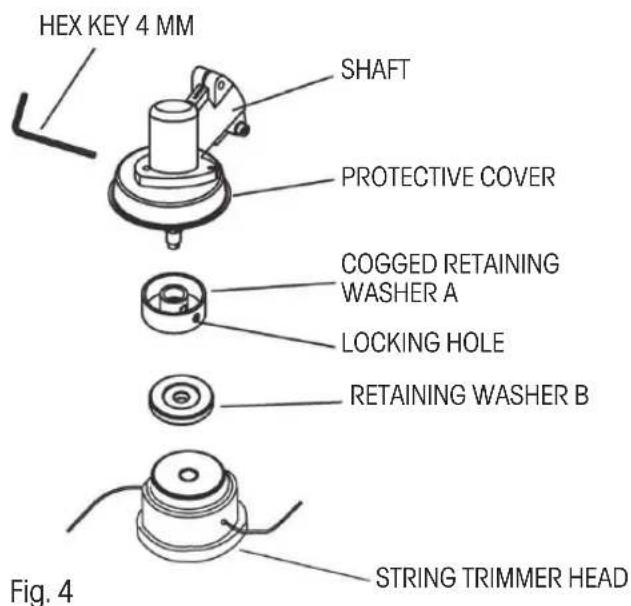
- Install the individual components in the following order:
- Cogged retaining washer A (also equipped with a retaining hole)
- Retaining washer B
- String trimmer head
- Screw the string trimmer head on to the shaft by turning it clockwise (attention: reverse thread) and tighten firmly.
- Take the hex key out of the retaining hole.
Winding string trimmer line on to the trimmer head
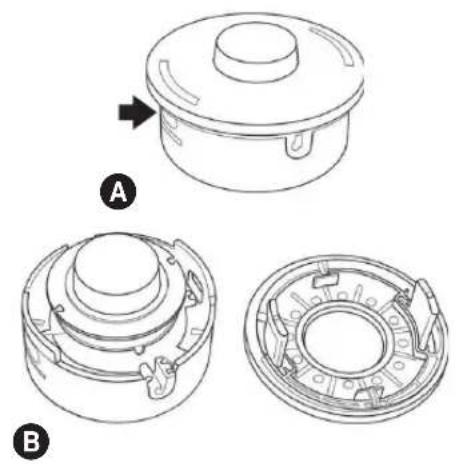
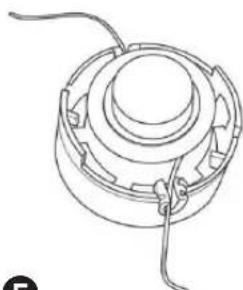
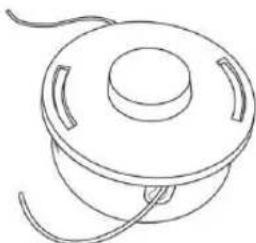
- Push in the retaining latches on the side of the head and take off the cover (see Fig. 5, points A&B)
- Take the spool out of the string trimmer head. Prepare about 2-3 m of string trimmer line with a diameter of 1.6 mm.
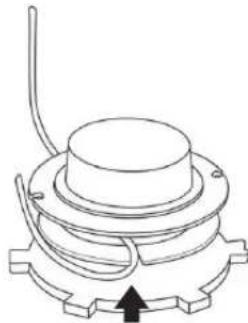
- Bend the string trimmer line in the middle and secure the bend in the groove (see Fig. 5, point C)
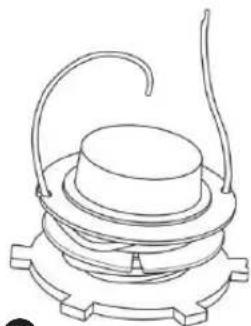
- Wind both ends in parallel on to the spool in a clockwise direction. Secure the ends of the wound on string trimmer line into the prepared holes (see Fig. 5, point D)
- Return the spool back into the string trimmer head and secure in place with the cover (see Fig. 5, points E&F)
WARNING
Use only good quality nylon string trimmer line with a diameter of 1.6 mm. Never use wire or wire-reinforced string trimmer line instead of the nylon string trimmer line. Only use the original string trimmer head.
Fig. 5
natural_image
Technical line drawing of a mechanical component with a central shaft and gear base (no text or symbols)©
natural_image
Technical line drawing of a mechanical component with gears and a central cylindrical housing (no text or symbols)D
natural_image
Technical line drawing of a mechanical component with no visible text or symbolsE
natural_image
Line drawing of a mechanical component with a central hub and coiled cable (no text or symbols)F
Installing the metal three tooth blade
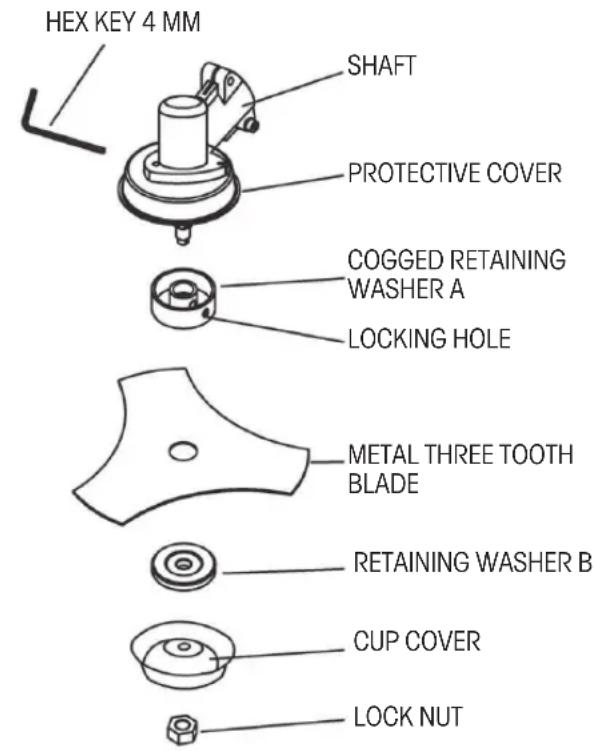
- Lock the shaft in place by inserting the included 4mm hex key (see Fig. 6). To achieve this, it is necessary to align the hole in the protective guard with the hole in the shaft and insert the hex key. Align the holes by turning the protective guard.
- Install the individual components in the following order:
- Cogged retaining washer A (also equipped with a retaining hole)
- Metal three tooth blade
- Retaining washer B
- Cup cover
- Lock nut
- Make sure that the blade is correctly seated in the distancing part of the cogged retaining washer A
- Using the supplied socket wrench, turn the blade fastening nut clockwise (attention: reverse thread) until it is securely tightened.
- Take the hex key out of the retaining hole.
WARNING
IN THE EVENT OF EXCESSIVE VIBRATIONS - IMMEDIATELY STOP THE MOTOR
Fig. 6
Excessive vibrations of the blade mean that this blade is not installed correctly. Immediately turn off the motor and check the blade. An incorrectly installed blade may cause injuries. Only use original accessories when performing maintenance or servicing this product.
6. STARTING THE TRIMMER
POINTS TO CHECK BEFORE STARTING WORK
- Check whether any screws, nuts and installation elements are loose. Tighten any loose screws.
- Make sure that the plastic head guard and the blade is securely fastened in place.
- Check the blade or the string trimmer head for damage.
WARNING
Prior to starting the trimmer, make sure that the cutting blade/string trimmer head can move freely and is not touching any foreign objects.
Hold the trimmer firmly with both hands.. Always stand so that your body is on the left of the shaft tube. Never hold the handle with crossed arms. These instructions also apply to left-handers.
ATTENTION: Exposure to vibrations may damage the health of persons that suffer from circulatory or nerve system problems. If any physical problems become evident, such as desensitisation, loss of sensitivity, loss of usual strength or changes in skin colour, please contact a doctor. These systems usually manifest themselves on fingers, hands or wrists.
Starting the trimmer
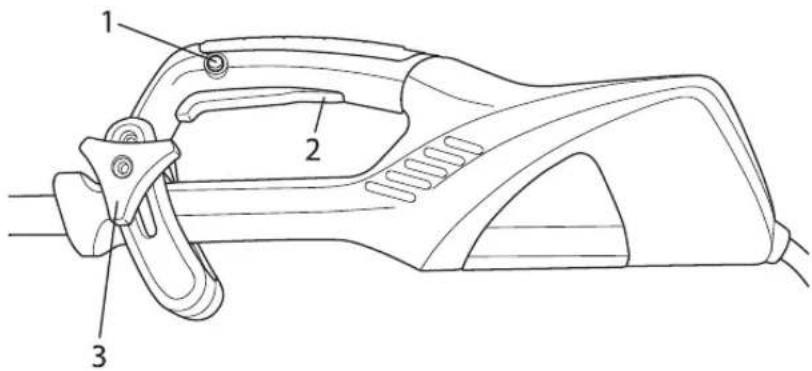
First press the start/stop trigger safety lock (Fig. 7, point 1)
Then press the start/stop trigger (Fig. 7, point 2). The trimmer will run at maximum speed.

Note: The position of the handle on which the trigger safety lock and the start/stop trigger are located can be set to an appropriate position after loosening the screws (Fig. 7, point 3).
Fig. 7
Turn off the motor
Release the start/stop trigger (fi g. 7, point 2).
7. CUTTING
WARNING!
When working with any string trimmer or brush cutter model, there is a danger of deflecting stones, metal or small objects and the cut material. Carefully read all the safety directives.
Follow all the instructions provided in this user's manual.
WARNING!
Use head, eye, face and hearing protection. Use appropriate footwear that will protect your feet and which will ensure a firm stance on slippery surfaces. Do not wear ties, jewellery or loose clothing that could become caught in the moving parts of the tool. Do not wear footwear with an open tip. Do not work barefoot or with bare legs. In certain situations you must use full face and head protection.
Take care to avoid recoil and jamming of the blade.
WARNING
Always use the shoulder strap.
Set the shoulder strap and its hitch on the tool so that the brush cutter is suspended several centimetres above the terrain. The head of the brush cutter and the metal guard must be level in all directions. Hang the brush cutter on the right side of the body.
DANGER ZONE
NOBODY APART FROM THE OPERATOR MAY ENTER THE DANGER ZONE OF A 15 METRE RADIUS. THE OPERATOR MUST USE APPROPRIATE EYE, HEARING, FACE, FOOT, LEG AND BODY PROTECTION. PERSONS LOCATED IN THE DANGER ZONE OR IN THE RISK ZONE AFTER THE DANGER ZONE MUST USE EYE PROTECTION AGAINST DEFLECTED OBJECTS. THE RISK IS REDUCED WITH INCREASING DISTANCE FROM THE DANGER ZONE.
CUTTING WITH THE NYLON STRING TRIMMER HEAD
The string trimmer head rotates CLOCKWISE.
The trimmer line is extended out semi-automatically. While trimming, simply gently tap the head on the ground, which will push down the button on the underside of the head and the string trimmer line will slide out. The string trimmer line is then shortened to the maximum permitted length on the blade integrated in the plastic guard.
TRIMMING GRASS
During this activity, carefully move the trimmer into the material that you wish to trim. Slowly tilt the head so that the trimmed material is ejected away from you. If you are trimming all the way up to obstacles such as fences, walls and trees, then approach at such an angle that all material is ejected away from you. Slowly move the head with the nylon string trimmer line from right to left until the grass is trimmed all the way to the obstacle but avoid the string trimmer line coming into contact with the obstacle.
When trimming in the vicinity of a wire fence or enclosure, proceed carefully so as not to come into contact with the wires. If you exceed the minimum distance from the fence, the string trimmer line will be shortened after impact.
When cutting weeds, it is possible to cut one stem at a time. Place the trimmer head with string trimmer line at the bottom part of the weed - never the top because the stem may start quivering and the string trimmer line may become caught in it. Rather than attempting to cut the weed directly, it is better to use only the end of the string trimmer line and to cut the stem slowly.
CLEARING AND TRIMMING EDGES
Both these tasks are performed using the head with the nylon line tilted at large angle. Clearing means removing the top vegetation after which only soil remains.
* Trimming edges means trimming the grass at the edge of lawns that extends on to footpaths and roads.
While clearing and trimming edges, hold the tool at a steep angle and in a position where dirt, cut material and stones will not be ejected backwards towards you in the event that they ricochet from a hard surface. Despite the pictures showing how to perform clearing and trimming of edges, every user must find their own position that will suit their body dimensions and working conditions.
WARNING
If a head with a nylon line is used, the correct protective guard must be fitted. If the nylon line extends out too far, it may start fl uttering. If you use a head with a nylon line, always use the protective plastic guard with the cutter blade.
WARNING
Be very careful when working above soil or gravel because the nylon line may deflect small stones at a very high speed.
The protective guard on this tool cannot stop objects that ricochet off hard surfaces.
WARNING
Do not trim in places where there are wires and wire mesh. Use protective aids. Do not trim in locations where you cannot see what the trimmer is trimming.
CUTTING USING THE BLADE
CUTTING WEEDS
This is cutting performed by a pendular movement of the blade in an arch shape. In this way you can quickly clear a large area of dense grass and weed. Brush cutting should be used for cutting large and tough weeds or woody vegetation.
Brush cutting may be performed in both directions or only in one direction, which will mean that the cut material will be ejected away from you. With this type of cutting, the part of the blade moving away from you will do the work. Slightly tilt the blade down to the same side. If you will be brush cutting in both directions, you will be hit by some deflected material.
Note: Do not use the brush cutter blade for cutting trees with a diameter larger than 12 mm.
WARNING
DO NOT TOUCH THE FOLLOWING OBJECTS WITH THE BLADE:
METAL POLES, ELECTRICAL WIRE, RUBBER, MASONRY, STONES, FENCES
WARNING
Do not cut if the metal blade is blunt, cracked or damaged.
Before starting to cut, check that there are no obstacles in the work area such as rocks, metal poles or wound up wires. If you cannot remove these obstacles, mark them out so that they do not come in contact with the blade.
Rocks or metal objects will blunt or damage the blade. Wires may wind on to the blade head or may be deflected and cause injuries.
8. MAINTENANCE
The string trimmer line may dry out over time. To maintain it in excellent condition, store spare pre-wound spools or loose trimmer line in a plastic bag with a spoon of water.
For cleaning the power tool, use only gentle soap and a damp cloth. Do not submerge the power tool in water or spray it with a hose. Do not allow any liquid to enter inside. Do not clean with pressurised water.
The trimmer line cutter on the edge of the protective guard may become blunt over time. We recommend that it is regularly resharpened with a fi le.
9. DISPOSAL
INSTRUCTIONS AND INFORMATION REGARDING THE DISPOSAL OF USED PACKAGING MATERIALS
Dispose of used packaging material at a site designated for waste in your municipality.
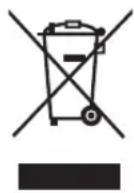
The machine and its accessories are manufactured from various materials, e.g. metal and plastic.
Take damaged parts to a recycling centre. Inquire at the relevant government department.
Changes in the text, design and technical specifications may be made without prior notice and we reserve the right to make these changes.
User's manual in original language.
10. DECLARATION OF CONFORMITY
CE DECLARATION OF CONFORMITY
Manufacturer:
FAST ČR, a. s.
Černokostelecká 2111, 100 00 Prague 10, Czech Republic
Tax ID number: CZ26726548
Product/brand: ELECTRIC BRUSH CUTTER AND STRING TRIMMER / FIELDMANN
Type/model: FZS 2050 E
230 V, 1 400 W, 50 Hz, Class II
This product meets the directives below:
ES Directive No. 2000/14/ES for noise emissions of outdoor equipment
ES Council Directive No. 2006/42/ES for Machinery
ES Directive No. 2004/108/ES for electromagnetic compatibility (EMC)
EC Directive No. 2002/95/ES for RoHS
and norms:
EN 60335-1/A15:2011
EN 60335-2-91:2003
EN 62233:2008
EN ISO 11806-1:2011
EN 55014-1:2006+A1:2009+A2:2011
EN 55014-2:1997+A1:2001+A2:2008
EN 61000-3-2:2006+A1:2009+A2:2009
EN 61000-3-11:2000
CE mark: 14
FAST ČR, a.s. is authorised to act on behalf of the manufacturer.
Place of issue: Prague Name: Ing. Zdeněk Pech Chairman of the Board of Directors
Date of issue: 7.5.2014 Signature:
Voltage/Frequency....230-240V\~/50Hz
Electric motor power input 1,400 W
Cutting coverage 42 cm
Type of string trimmer head....Semi-automatic
Idling speed....10,000 rpm
Trimmer line diameter....1.6 mm
Weight without fuel and cutting tools....6.0 kg


- FIELDMANN®
- Electric string trimmer
- USER'S MANUAL
- TABLE OF CONTENTS
- GENERAL SAFETY INSTRUCTIONS
- Important safety notice
- Packaging
- Operating instructions
- EXPLANATION OF INSTRUCTION LABELS ON THE MACHINE
- SAFETY INSTRUCTIONS
- ATTENTION!
- DESCRIPTION OF THE MACHINE
- Included contents:
- ASSEMBLY
- WARNING
- Installing the metal three tooth blade
- STARTING THE TRIMMER
- POINTS TO CHECK BEFORE STARTING WORK
- Starting the trimmer
- Turn off the motor
- CUTTING
- WARNING!
- DANGER ZONE
- CUTTING WITH THE NYLON STRING TRIMMER HEAD
- TRIMMING GRASS
- CLEARING AND TRIMMING EDGES
- CUTTING USING THE BLADE
- CUTTING WEEDS
- MAINTENANCE
- DISPOSAL
- INSTRUCTIONS AND INFORMATION REGARDING THE DISPOSAL OF USED PACKAGING MATERIALS
- DECLARATION OF CONFORMITY
- CE DECLARATION OF CONFORMITY
- Manufacturer:
- This product meets the directives below:
- and norms:
- CE mark: 14
Brand : Fieldmann
Model : FZS 2050-E
Category : Corded Lawn Mower