
FZR 2010-E - Lawn mower Fieldmann - Free user manual and instructions
Find the device manual for free FZR 2010-E Fieldmann in PDF.


| Product type | Lawn mower |
| Brand | Fieldmann |
| Model | FZR 2010-E |
| Power source | Electric (corded) |
| Rated power | 1500 W |
| Cutting width | 45 cm (approx.) |
| Cutting height adjustment | 6 positions (2.5–7.5 cm) |
| Grass collection bag capacity | 40 L |
| Weight | 12 kg |
| Dimensions (folded) | 68 x 48 x 32 cm |
| Dimensions (unfolded) | 145 x 48 x 105 cm |
| Safety features | Motor brake, safety switch, overload protection |
| Maintenance | Regular blade sharpening, cleaning of underside |
| Spare parts availability | Blades, wheels, grass bag, motor brushes |
| Warranty | 2 years |
| Noise level | 85 dB(A) |
| Vibration level | 2.5 m/s² |
Frequently Asked Questions - FZR 2010-E Fieldmann
User questions about FZR 2010-E Fieldmann
0 question about this device. Answer the ones you know or ask your own.
Ask a new question about this device
Download the instructions for your Lawn mower in PDF format for free! Find your manual FZR 2010-E - Fieldmann and take your electronic device back in hand. On this page are published all the documents necessary for the use of your device. FZR 2010-E by Fieldmann.
USER MANUAL FZR 2010-E Fieldmann
natural_image
Abstract black-and-white spiral pattern with no text or symbolsFIELDMANN®
Home & Garden Performance
natural_image
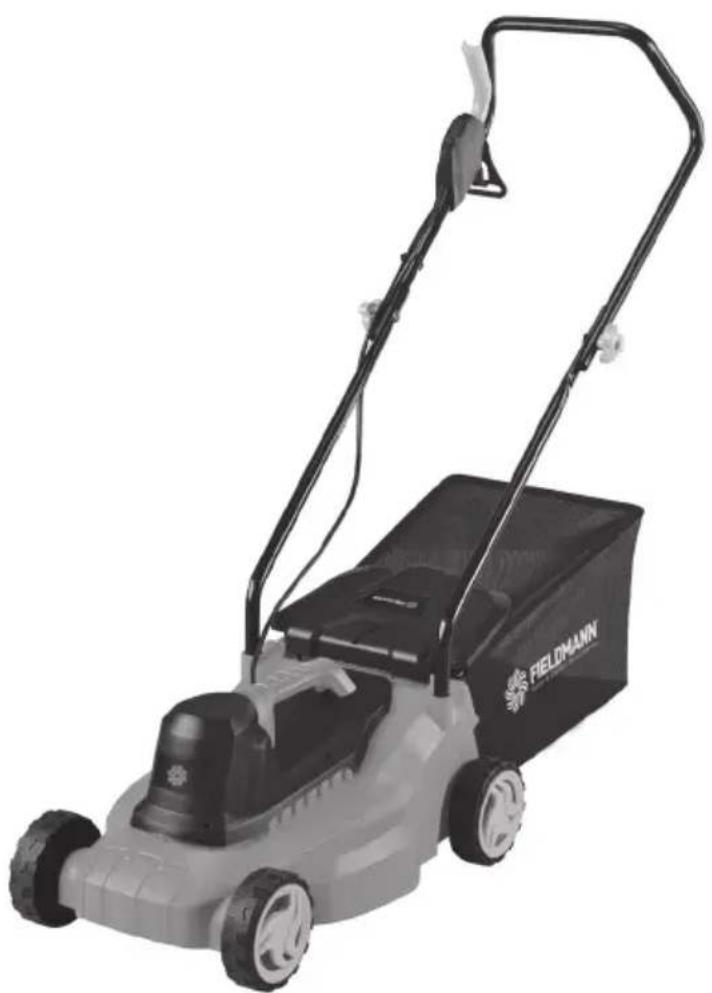
Black and white photo of a Fieldhmann lawn mower with attached cover (no visible text or symbols on the device body)FZR 2010-E
English 7
Čeština 23
Slovenčina 41
Magyarul 59
Polski 77
Русский 95
7
natural_image
Close-up of a lawn mower being adjusted with a screwdriver, showing the blade and wheel (no text or symbols visible)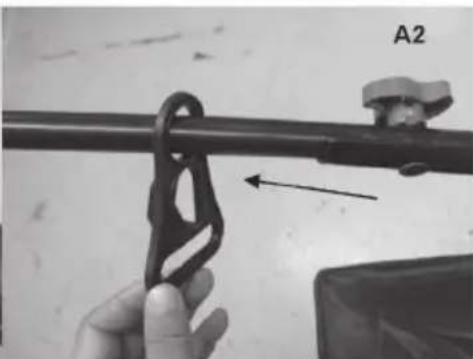
natural_image
Close-up of a hand holding a black mechanical clamp or bracket with an arrow indicating direction (no text or symbols visible)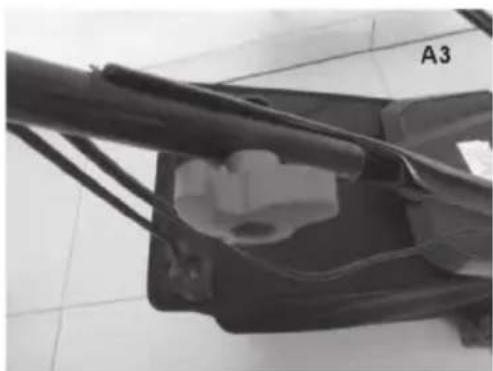
natural_image
Close-up of a mechanical component with wires and a labeled section A3 (no readable text or symbols)B
natural_image
Close-up of a hand adjusting a mechanical component with a tool, no visible text or symbols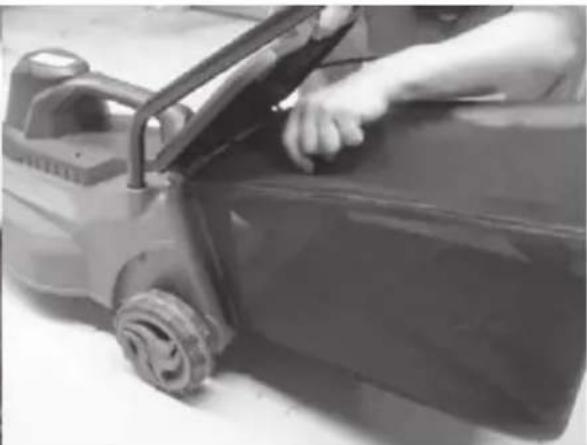
natural_image
Close-up of a person using a lawn mower to clean or adjust the wheel (no visible text or symbols)C
natural_image
Close-up of a mechanical component with a circular base and internal structure, labeled C1 (no text or symbols on the main subject)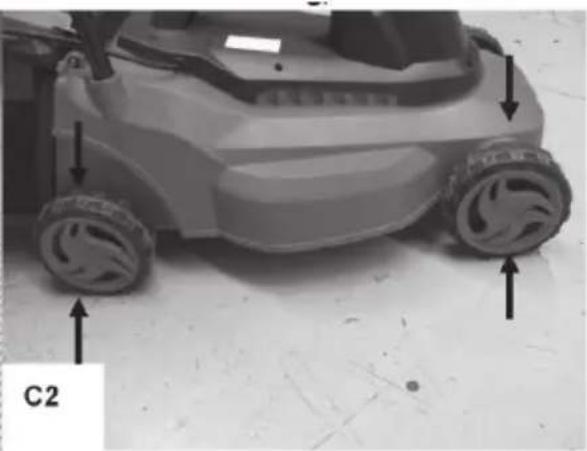
natural_image
Close-up of a lawn mower on a flat surface, showing wheels and a labeled component 'C2' (no text or symbols on the main subject)D
natural_image
Close-up of a black plastic tube with a white plug inserted, mounted on a black base (no visible text or symbols)E
natural_image
Close-up of two hands adjusting a black cable with a plug, labeled parts 1 and 2 (no text or symbols on the diagrams)F
natural_image
Diagram showing airflow or particle movement around a vehicle with directional arrows indicating direction (no text or symbols)G
natural_image
Close-up of a mechanical fan component with a magnified inset showing a pin labeled '1' and '2' (no text or symbols on the fan itself)Electric Lawnmower
OPERATING INSTRUCTIONS
Thank you for purchasing this electric rotary lawnmower. Before you start using it, please read carefully this operating manual and keep it for future reference.
TABLE OF CONTENTS
PICTURE ANNEX.... 3
- GENERAL SAFETY REGULATIONS....8
Important safety notices
Packaging
Instructions for use
-
SYMBOLS 9
-
MACHINE DESCRIPTION AND PACKAGE CONTENT.... 10
-
PRINCIPLES OF WORKING SAFETY 11
-
PURPOSE OF USE 14
-
LAWNMOWER HANDLE ASSEMBLY.... 15
-
GRASS CATCHER BOX ASSEMBLY 15
-
CUTTING HEIGHT ADJUSTMENT.... 15
-
EXTENSION CABLE ATTACHMENT.... 16
-
STARTING AND STOPPING THE ENGINE.... 16
-
MOWING.... 16
-
MAINTENANCE.... 17
-
CUTTING BLADE MAINTENANCE.... 17
-
STORING THE LAWNMOWER.... 18
-
POSSIBLE PROBLEMS AND TROUBLESHOOTING.... 18
-
TECHNICAL DATA 19
-
DECLARATION OF CONFORMITY.... 20
-
LIQUIDATION 21
-
WARRANTY.... 22
WARRANTY CERTIFICATE 114
WARRANTY TERMS 115
1. GENERAL SAFETY INSTRUCTIONS
Important safety warnings
* Unpack the product carefully and be sure not to throw away any part of the package before having found all components of the product.
- Keep the product in a dry place out of reach of children.
Read all cautions and instructions. The failure to adhere to warning cautions and instructions may result in an accident, fire and/or a serious injury.
Packaging
The product is placed in a package preventing damage during transport. This package is a raw material therefore it can be handed-over for recycling.
Instructions for use
Before beginning to work with the machine, read the following safety rules and instructions for use. Familiarize with operating elements and the proper use of the device. Keep the manual in a safe place for future reference. We recommend keeping the original package including the inner packaging materials, cash voucher and guarantee card for a period of warranty at minimum. For a case of transportation, pack the machine into the original box from the manufacturer, thus ensuring a maximum protection of the product during a possible transport (e.g. moving or sending into a service station).

Note: If you hand the machine over to next persons, hand it over together with the manual. Adherence to the attached instructions for use is a precondition for the proper use of the machine. The operation manual includes also instructions for operation, maintenance and repairs.
The manufacturer does not take any responsibility for accidents or damages resulting from the failure to adhere to this manual.
2. SYMBOLS

Read the operating instructions before using this machine.
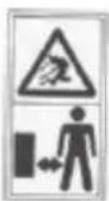
Keep bystanders away.
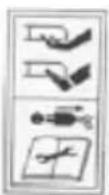
Beware of sharp blades. Blades continue to rotate even after the engine has been switched off. Before maintenance or if the cable is damaged, unplug the machine from the mains.
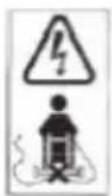
Keep the power supply cable away from the blades.

Blades continue to rotate even after the machine has been switched off. Before any contact with all parts of the machine, wait until the machine has fully stopped.

Do not mow when it is raining and do not leave the lawnmower in the open when it is raining.
3. MACHINE DESCRIPTION AND ITEMS DELIVERED
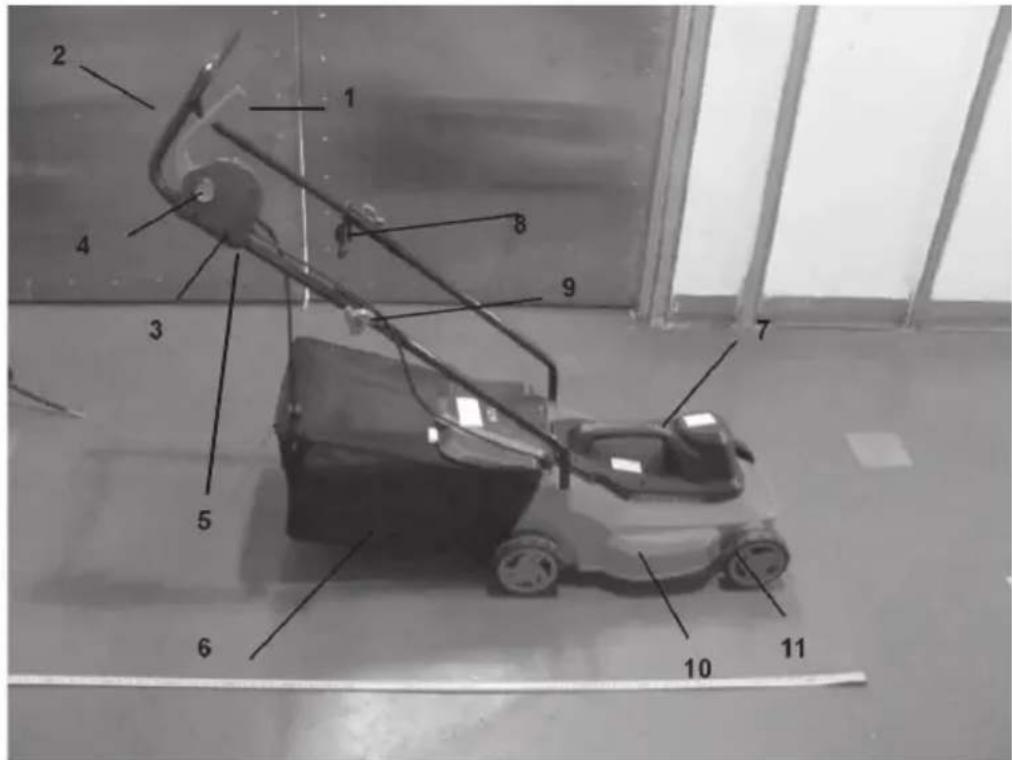
Machine Description (See fig. 1)
1 - Switch lever
2 - Upper handle
3 - Switch box
4 - Safety switch
5 - Plug (connector)
6 - Grass catcher box
7 - Engine cover
8 - Extension cord retainer
9 - Bolt and nut for handle attachment
10 - Lawnmower chassis
11 - Wheel
Items Delivered
Remove the machine carefully from the packaging and check the completeness of the following parts:
2x lower part of the handle
* 1x upper part of the handle
2x bolt for attaching the lower part of the handle
2x nut and bolt for joining the lower and upper part of the handle
1x supply cable holder
1x grass catcher box
4x wheel
4x split pin and washer for mounting the wheel
4x wheel cover
4. PRINCIPLES OF WORKING SAFETY
* Never use the equipment if the supply cable is damaged or visibly worn out.
If you connect the lawnmower to the power source using a damaged cable and subsequently touch a spot with defective insulation before disconnecting the lawnmower from the power source, you expose yourself to the risk of electric shock.
Also, never touch the blades until the equipment is disconnected from the power source and until the blades stopped rotating completely.
* Prevent the extension cables from getting into contact with the blades. The blades could damage the cable insulation which would result in the risk of electric shock in the event of contact of any part of the body and the naked wire if the wire is energized.
* Disconnect the equipment from the power supply (i.e. unplug the plug of the supply cable from the mains socket outlet):
If you have to leave the equipment unattended •
If you are about to remedy a defect •
Before each inspection, cleaning or repair •
If you hit a foreign object while mowing •
If the equipment generates excessive vibrations.
Read carefully the principles of working safety with the equipment and the operating manual.
Recommendations: Only connect the equipment to the power source protected by a residual current device (RCD) with leakage current of no more than 30 mA.
If the power cord is damaged, it must be replaced by the manufacturer or the manufacturer's customer service.
This equipment may not be operated by persons with limited physical, sensual or mental capacities (including children). It may also not be operated by inexperienced persons or by persons who clearly lack adequate technical knowledge to operate this equipment. Such persons may only operate the equipment under the supervision by a competent person or after being duly instructed about the principles of working safety.
If children are in the vicinity, they must be supervised to prevent them from playing with the equipment.
* Tingling sensation in the hands or even if hands became insensible to any feeling is a sign of excessive vibrations. In such case, cut short the work, interrupt it by adequate breaks, divide it among several people or, in case of a lengthy lawnmower operation, use special anti-vibration gloves.
Noise generated during the lawnmower operation constitutes an inevitable side effect of its use. Therefore, carry out noisy work only during the dedicated hours or whenever it is common to perform such activities. Respect the period of rest and try to reduce the time of work to absolute minimum. We also recommend that both you and the persons situated in close proximity to the lawnmower use the hearing protection.
Other Risks
Even though our products are designed to comply with applicable technical standards and safety regulations, some risks connected with operation of the equipment still persist for the user:
Stones or stone fragments can chip off from the cutting mechanism are.
If the operator does not use hearing protection, s/he is exposed to the risk of • consequent loss of hearing.
Finger injury during the blade maintenance •
Inhaling the cut grass particles •
Electric shock upon contact of uninsulated parts.
This equipment may not be operated by persons with limited physical, sensual or mental capacities (including children) or by inexperienced persons or by persons who clearly lack adequate technical knowledge to perform the given task; such persons may only operate the equipment under the supervision by a competent person or after being duly instructed about the principles of working safety with the equipment by such competent person.
If children are in the vicinity, they must be supervised to prevent them from playing with the equipment.
ATTENTION! Before using this lawnmower, read carefully this operating manual. Make sure to thoroughly familiarize with all of its controls. By adhering to the principles of working safety with the equipment you minimise the risk of fire, electric shock or mechanical injury.
* Keep the operating instructions in a safe place for future reference.
Incorrect use of the equipment creates the risk of injury. The lawnmower may cause serious injury to the user or other persons situated in its vicinity; therefore, it is necessary to continuously follow the rules for its safe use to prevent such risk as much as possible. In this respect, the user is responsible for safety while working with the equipment. Also, never use the equipment if any of the safety devices is missing or is not fully functional.
Before you start using the lawnmower
Read carefully all the instructions specified in this operating manual. Familiarize thoroughly with the controls of the equipment and the rules for using it correctly.
* Never allow children and strangers of whom you are not certain of being familiarized with the controls and rules of working safety with the equipment in order for them to operate the lawnmower on their own. The national legislation may also stipulate minimum age from which persons are permitted to operate this type of equipment on their own. Please familiarize with the relevant legislation regulating these matters in your country.
Never use the lawnmower while persons, especially children, or pets are nearby.
* Keep in mind that the user of the equipment is fully responsible for possible injuries or damage to properly resulting from operation of the equipment.
Preparation for operation
* While mowing, always wear appropriate footwear and long trousers. Do not operate the lawnmower when barefoot or wearing open sandals.
* Prior to commencement of the work, thoroughly inspect the working area and remove all objects which can be thrown by the machine.
ATTENTION! Before each use of the equipment, make sure that the cutting blade, blade bolts or generally the whole construction of the lawnmower are not damaged or excessively worn out. If you wish to replace any damaged or worn-out part which is not a solitary part of the equipment, always replace the whole set of parts to avoid unbalance.
Operation
Use the equipment only in daylight or in good artificial light.
- Avoid mowing in wet grass, where feasible.
* Always be sure of your footing and posture while mowing.
Walk at normal pace while mowing, never run.
The following general rules apply to mowing: When mowing on slopes, never mow up and dow but always across slopes, i.e. horizontally, perpendicularly to slope inclination.
Exercise extreme caution when changing direction on slope.
Do not mow excessively steep slopes.
Use extreme caution when pulling the lawnmower toward you or reversing the lawnmower.
* Always stop the blades when transporting the lawnmower to and from the area to be mowed and/or when crossing surfaces other than grass.
* Never operate the lawnmower with defective guards or shields, or without, for example deflectors and/or grass catchers, in place.
* Always start the engine as described in the operating manual; in doing so, always keep your feet well away from the blades.
Do not tilt the lawnmower when starting the engine except if the lawnmower has to be tilted to start. In such case, lift only the part of the lawnmower which is further away from you.
* Never put your hands or feet under the lawnmower, especially not under the rotating parts. Keep clear of the discharge opening at all times.
* Never carry the lawnmower while the engine is running.
Always stop the engine first and unplug the plug of the supply cable from the socket; • only then you can begin to remedy defects or empty the grass catcher box.
Follow the same procedure each time you check, clean or repair the lawnmower.
Or possibly if you strike a foreign object while mowing inspect the lawnmower for damage and make repairs before restarting the engine.
Or if the lawnmower starts to vibrate abnormally (check immediately!) •
* Always stop the engine whenever you leave the lawnmower.
Maintenance and Storage
* Keep all nuts, bolts and screws tight to ensure the equipment is in good working condition.
* Check the grass catcher box frequently for damage or excessive wear.
* Immediately replace worn or damaged parts by new ones to facilitate safe operation of your lawnmower.
When adjusting adjustable elements, be careful not squeeze your fingers between the moving blades and the fixed part of the lawnmower. Before storing the lawnmower in a confined space, let the engine cool down first.
5. PURPOSE OF USE
Your lawnmower was developed according to the latest technology trends and top quality materials were used in its production: the aim is to offer the user a product operating without any problems and meeting the strictest safety standards. By maintaining your lawnmower properly you ensure its long and reliable operation.
What this lawnmower is intended for
The lawnmower is suitable for grassland mowing.
The lawnmower is driven by an electric motor and the cutting height from the ground plane is adjusted by travelling wheels.
This type of lawnmower is intended solely for mowing grass plots in gardens.
It is important not to use this lawnmowers to mow wet grass - otherwise it could result in engine stalling, grass box overflow and poor mowing quality.
The lawnmower may only be used outdoors (garden).
While operating the lawnmower, the operator must wear appropriate protective equipment specified in this operating manual and indicated on warning labels located on the equipment.
Maximum mowing area recommended for this model is 450 sq. m.
What this lawnmower is not intended for
Using the FIELDMANN lawnmower for purposes other than those specified above is not permitted by the manufacturer. The manufacturer disclaims any liability for possible personal injury or damage to property caused by any such use; liability in such case is borne solely by the user.
Repairs and maintenance of the lawnmower can only be made using spare parts and blades approved by the manufacturer.
* Any modification of construction of the lawnmower made by the user or use of parts other than those prescribed by the manufacturer shall automatically result in the loss of warranty and shall exclude any claims for facultative compensation by the manufacturer.
The lawnmower is not suitable for fragmentation of solid and hard materials such as stones or metals.
6. LAWNMOWER HANDLE ASSEMBLY (Fig. A)
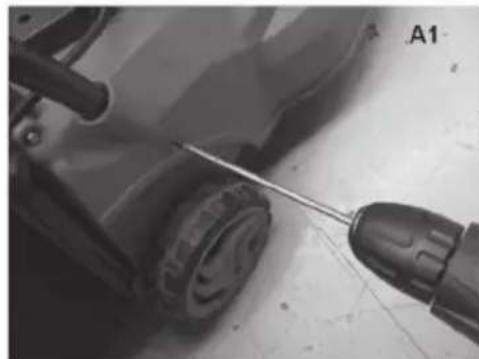
Insert both ends of the lower parts of the handle into the respective holes and secure them using bolts (A1).
* Attach the supply cable holder to the upper part of the handle (A2)
* Attach the upper part of the handle using bolts and star-shaped nut (A3).
Now you can fix the handle using the star-shaped nut (A3)
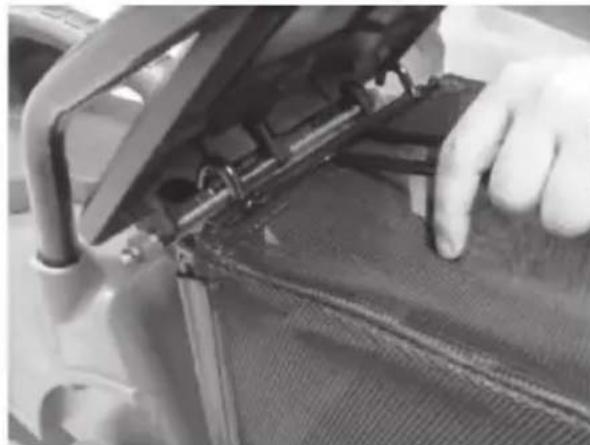
7. GRASS CATCHER BOX ASSEMBLY (Fig. B)
Mounting the assembled grass catcher box onto the lawnmower.
Lift the safety guard
Make sure the discharge chute is not contaminated by soil or stones.
Attach the completed grass catcher box onto the positioning marks at the back of the lawnmower as indicated in the photograph.
Close the safety guard on the grass catcher box and make sure it fits correctly.
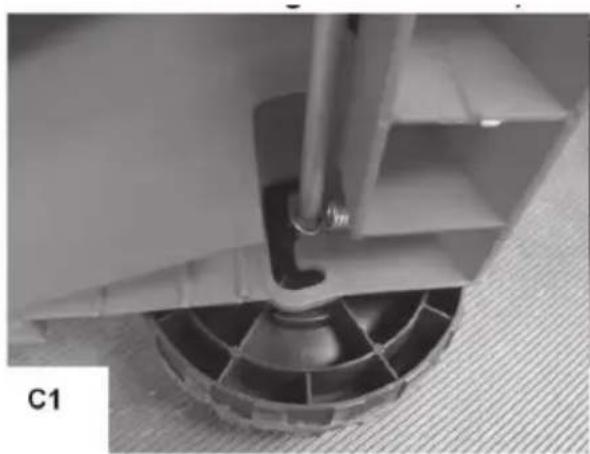
8. CUTTING HEIGHT ADJUSTMENT (Fig. C)
ATTENTION! Before adjusting the cutting height, release the lever 1 and wait until the engine completely stops. After switching the engine off, the cutting blades continue to rotate for a few seconds; be careful to avoid the risk of injury by the rotating blades.
The cutting height can be adjusted by changing the attachment height of the front and rear travelling wheels. (see Fig. C1 and C2); in total, the lawnmower has three possible cutting heights.
| CUTTING HEIGHT WHEEL POSITION | |
| Low 25 mm | |
| Medium 43 mm | |
| High 62 mm | |

Note: For most lawns, the medium cutting height is the most suitable one. If you adjust too small cutting height, you could impair the quality of mowing.
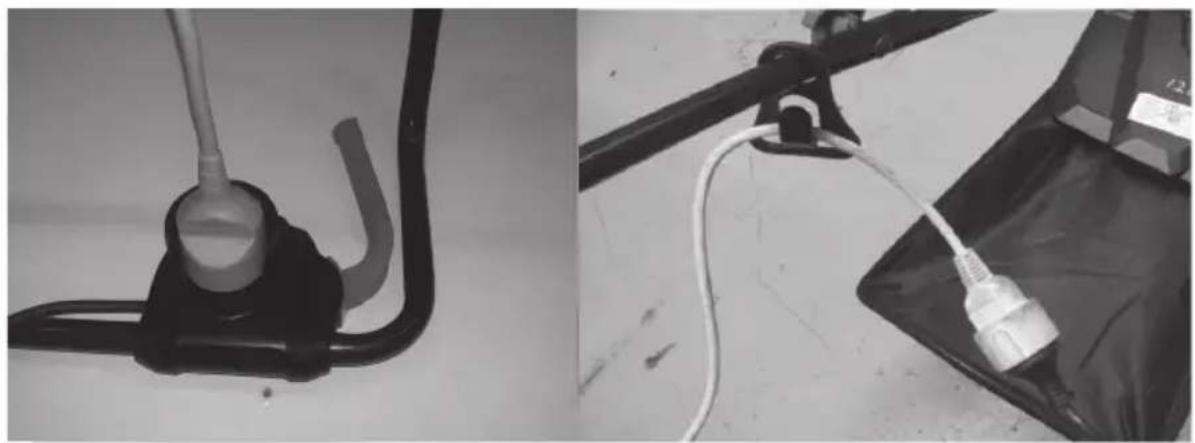
9. EXTENSION CABLE ATTACHMENT (Fig . D)
Insert the plug of the extension cable into the socket of the switch box.
The extension cable should be of the type H05VV-F 2X 1.5 mm2.
Insert the extension cable into the holder to prevent its damage by the cutting blade.
⚠️ ATTENTION! Then, it is advisable to check whether the cable is properly lodged in the holders.
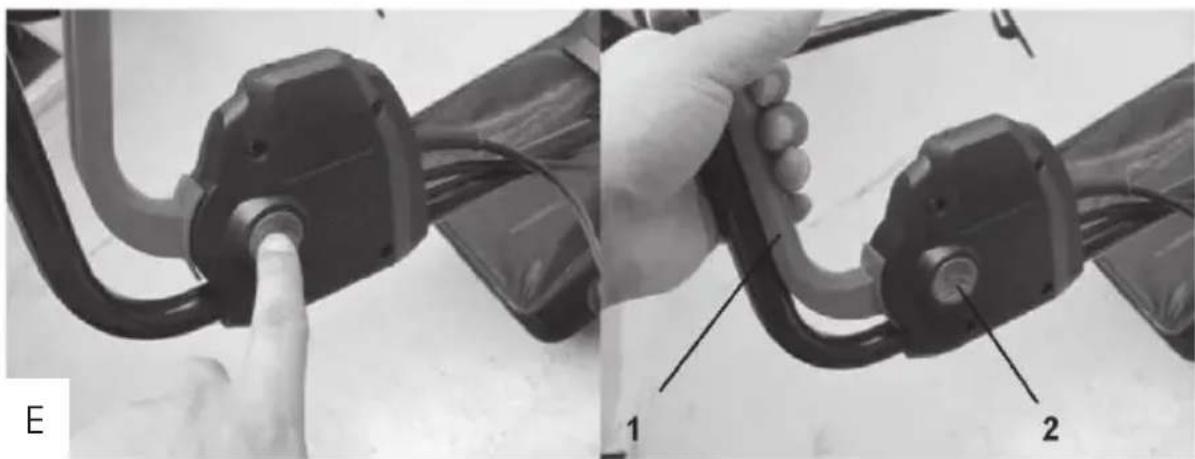
10. STARTING AND STOPPING THE ENGINE (Fig. E)
⚠️ ATTENTION! Before you switch the lawnmower on, make sure the cutting blade is not rotating. Never switch the engine rapidly on and off.
Starting the engine:
* Press and hold the safety button. (2).
Pull the switch lever (1) towards the handle.
Stopping the engine:
Release the switch lever. (1)
11. MOWING (Fig. F)
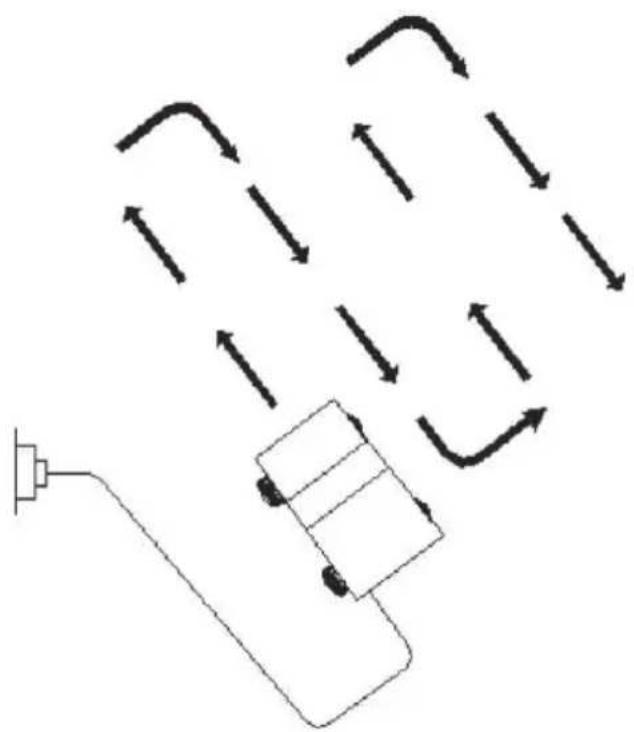
We recommend to start mowing from the power supply and to work your way away from the power supply. Mow the lawn at a right angle from the power supply and place the power cable only to the side which has already been cut. (F).
⚠️ ATTENTION! Never allow the engine to labour. When the engine labours you will hear a change in the engine sound accompanied by drop of the speed of the engine. When this occurs stop mowing, release the switch lever and increase the cutting height. Failure to do so could damage the engine.
ATTENTION! The engine is protected by a safety cut-out which is automatically activated when the blade becomes jammed or if the engine is overloaded. When this occurs, stop the machine and remove the plug of the supply cable from the socket outlet. The safety cut-out will only reset when the switch lever 1 is released. Clear any obstructions and wait for a few minutes for the safety cut-out to reset. During this time do not operate the switch lever 1 as
this will prolong the time to automatically reset the safety cut-out. If the problem is repeated, we recommend increasing the cutting height to reduce the load of the engine.
12. MAINTENANCE
ATTENTION! Before removing the grass catcher box, stop the lawnmower and unplug the plug of the extension cable from the socket outlet.
Note: In order to ensure long and reliable operation of the lawnmower, carry out the following maintenance tasks on a regular basis.
* Check the machine visually on a regular basis in order to timely detect visible defects such as loose, displaced or damaged blade and/or damaged or excessively worn-out parts.
Also check regularly whether the protective covers and guards are undamaged and correctly attached to the lawnmower.
Before using the lawnmower, always carry out any necessary repairs and maintenance.
Should a failure occur, despite regular maintenance, please contact our Customer Service; the repair should be carried out by our service partner at any Kingclean professional workshop.
13. CUTTING BLADE MAINTENANCE (Fig. G)
For this task, we recommend contacting the authorized service centre. List of these service centres is available at www.fieldmann.cz
ATTENTION! Never carry out any assembly operation or adjustment until the plug of the extension cable is removed from the socket outlet. Before starting the work, always make sure that all the controls are in "Off" position and that the plug of the power cord has been removed from the socket outlet. Exercise extreme caution when handling the cutting blade - in order to prevent injury, handle the blade while wearing work gloves.
Tilt the mower to the right side in order to check the cutting blade or ventilator for damage. If you find any damaged part, replace it.
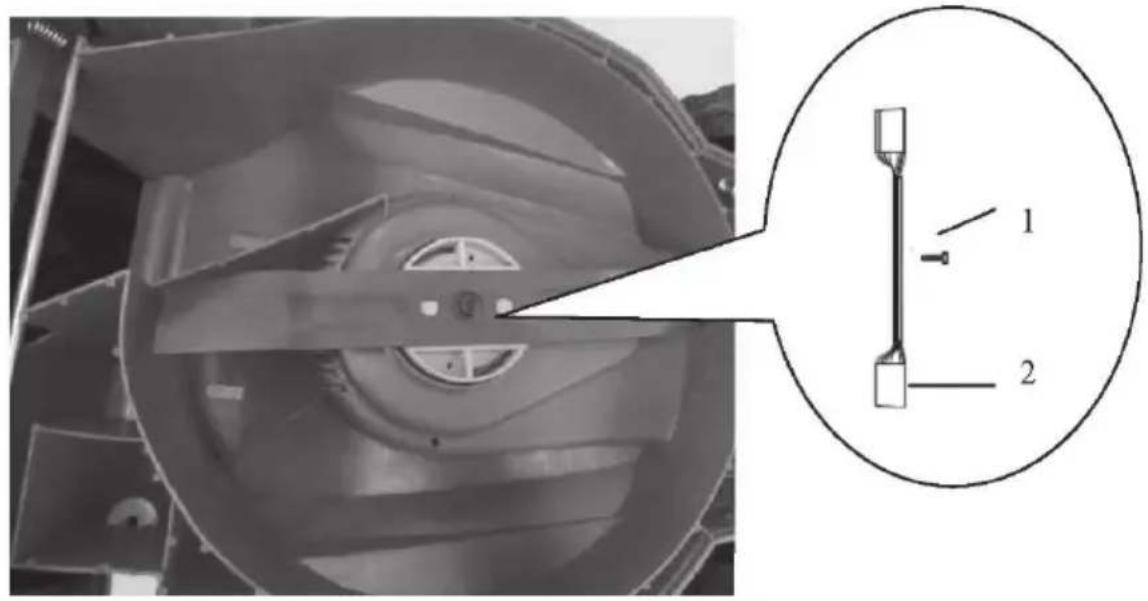
Disassembly and replacement of the cutting blade can be made as follows: Grip the blade with your hand protected by garden gloves (not part of the supply) and using a handle (supplied) loosen and remove the bolt (Pos. 1 in Fig. G) and the cutting blade (Pos. 2 in Fig. G); replace the cutting blade by a new one. Make sure the cutting blade is in a correct position as shown in Fig. G and then tighten the blade holder bolt.
14. STORING THE LAWNMOWER
Before storing, clean the outer surface of the lawnmower using a soft brush and cloth. Do not use water, solvents and polishing agents. Remove any grass remains, particularly from the vents.
Tilt the machine on the side and clean the blade mechanism. Grass remains in the blade mechanism can be removed it using a wooden or plastic tool. Store the lawnmower in a dry place. Do not place any objects on top of the lawnmower.
* Unscrew the nut 9 and fold the upper handle 2.
When folding/unfolding the handle, make sure the power cable is not hitched on any part of the lawnmower. When folding the handle, never let the folded part of the handle fall down.
15. POSSIBLE PROBLEMS AND TROUBL SHOOTING
The following table shows examples of defects which could prevent trouble-free operation of the lawnmower and methods of remedying these defects. If the problem persists, despite the suggested measures, please contact the Customer Service.
⚠️ ATTENTION! Before trouble-shooting, switch off the lawnmower and unplug the plug from the socket.
| PROBLEM POSSIBLE | CAUSE SOLUTION | |
| Lawnmower will not start | The lawnmower has not been switched on, defective socket, damaged extension cable, Blown fuse, engine protection activated, engine protection activated | Switch the lawnmower on, Use another socket Check the cable and replace it if necessary Replace the fuse Increase the cutting height and tilt the lawnmower on the side Let it cool down and then increase the cutting height Let the lawnmower cool down for a few minutes and then increase the cutting height During this time do not operate the switch lever 1 as this will prolong the time to automatically reset the safety cut-out |
| Interrupted lawnmower operation | Damaged extension cable, Damaged internal wiring Engine protection activated, Engine protection activated | Check the cable and replace it if necessary. Contact the Customer Service Let the lawnmower cool down for a few minutes and then increase the cutting height During this time do not operate the switch lever 1 as this will prolong the time to automatically reset the safety cut-out |
| Engine is “Choking” Cutting | height adjustment too low Dull cutting blade Clogged lower part of the lawnmower The cutting blade is attached the other way round | Increase the cutting height (see Cutting Height Adjustment) Replace the cutting blade (see Cutting Blade Maintenance) Clean the lawnmower (see Storing the Lawnmower) Remove the blade and attach it correctly (see Cutting Blade Maintenance) |
| Cutting blade will not rotate | The blade is jammed Loose blade holder bolt | Dislodge the blade Tighten the bolt |
| Extremely strong vibrations / Excessive noise during operation | Loose nuts / bolts Damaged cutting blade | Tighten the nuts / bolts Replace the blade |
16. TECHNICAL SPECIFICATIONS
Lawnmower ...... FZR 2010-E
Rated voltage 230 - 240V
Rated frequency 50 Hz
Rated input....1000 W
Idle operation ....3300 rpm.
Width of cut 320 mm
Weight 9.5 kg
Guaranteed sound pressure level 79.2 dB(A) KpA:3.0 dB(A)
Guaranteed sound power level 96 dB(A)
Vibrations....2.50 m/s ^4 K 1.5 m/s ^2
Instructions Manual - language version only.
17. DECLARATION OF CONFORMITY
Product/Name: ELECTRIC LAWNMOWER / FIELDMANN
Type/Model: FZR 2010 E....230V,1000W,IPX4
The product complies with the following directives:
The Directive of the European Parliament and the Council No. 2006/95/EC dated 12 December 2006 on the harmonisation of the laws of Member States relating to electrical equipment designed for use within certain voltage limits.
The Directive of the European Parliament and the Council No. 2004/108/EC dated 15 December 2004 on the harmonisation of the laws of the Member States relating to electromagnetic compatibility and repealing Directive No. 89/336/EEC.
The Directive of the European Parliament and the Council No. 2006/42/EC dated 17 May 2006 on machinery, and amending Directive No. 95/16/EC.
The Directive of the European Parliament and the Council No. 2002/95/EC dated 27 January 2003 on the restriction of the use of certain hazardous substances in electrical and electronic equipment.
and standards:
EN 60335-1:2002+A1:2004+A11:2004+A12:2006+A2:2006+A13:2008+A14:2010+A15:2011
EN 60335-2-77:2010
EN 62233:2008
EN 55014-1:2006+A1:2009+A2:2011
EN 55014-2:1997+A1+A2
EN 61000-3-2:2006+A1:2009+A2:2009
EN 61000-3-3:2008
CE Certification: 13
FAST ČR, a.s. is authorised to act on behalf of the manufacturer.
Manufacturer:
FAST ČR, a.s.
Signature and stamps:
18. DISPOSAL
INSTRUCTIONS AND INFORMATION ON DISPOSAL OF USED PACKAGING.
Put any used package material to the place determined by the municipality for waste disposal.
DISPOSAL OF USED ELECTRIC AND ELECTRONIC EQUIPMENT
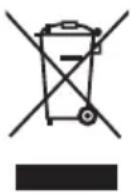
This symbol on products or accompanying documents means that used electric or electronic products must not be put to ordinary municipal waste. Hand over such products to determined collection points for proper disposal, restoration and recycling. Alternatively, in some countries of the European Union or other European countries you can return your products to your local dealer when you buy an equivalent new product. By dutiful disposal of this product you can preserve precious natural resources and you help prevent any potential adverse effects on the environment and human health which could be the results of wrong waste disposal. Ask your local authority or the nearest collection point for additional details. In case of improper disposal of this waste kind penalties can be imposed in accordance with national regulations.
For companies in the European Union countries
Should you want to dispose of electric and electronic devices, ask your dealer or vendor for necessary information. Disposal in other countries outside the European Union. Should you want to dispose of this product, ask your local authorities or your dealer for necessary information about disposal method.

This product fulfils all basic requirements of the EU directives that apply to it.
Text, design and technical specifications can change without prior notice and we reserve the right for their change.
19. WARRANTY
For the purposes of this warranty, household usage means any use of the product within a real property belonging to the purchaser and comprising part of the garden zone of his/her residence.
The warranty period is 2 years for components and 2 years for work from the date of purchase.
To carry out repair under this warranty
Bring the product to the authorized service representative
* Present the dated purchase receipt
Present this warranty
Warranty is not valid if
* You cannot present the dated purchase receipt.
The product was resold by the original purchaser (this does not apply to the Republic of Ireland) or was used based on lease.
The product was modified to such an extent that the specification of the manufacturer has been changed or non-original components have been used with the product.
* Any previous repair was carried by a person other than the authorised service representative.
The failure resulted from incorrect adjustment, incorrect use, negligence or accidental damage.
The failure resulted from inadequate lubrication or maintenance.
Damage to any part, especially the drive and cutting mechanism, resulted from an impact of the product on solid objects.
The failure of the product resulted from abnormal use.
The failure resulted from usual wear and tear. The following parts are considered to be expendable. Their lifetime depends on regular maintenance and thus are not usually covered by the warranty:
Blades •
Bearings •
Cables •
The warranty does not cover the costs of routine maintenance of the product.
It is in your best interest to follow the operating instructions of your equipment because proper care of your product should provide you with many years of excellent service.
* Should you require replacement of any components, always insist on using original spare parts. The warranty does not cover any damage caused by the use of assembly parts.
This warranty in no way affects your statutory rights.
6. MONTÁŽ MADLA SEKAČKY (obr. A)
GWARANCJA I JEJ WARUNKI 114
1. OGÓLNE PRZEPISY BEZPIECZEŃSTWA
Home & Garden Performance
Dóvod poruchy: | Dóvod poruchy: | Cause of defect: | Przyczyna awarii: | Hlaa skin
Conditions of guarantee
This product is warranted for the period of 24 months from the date of purchase to the end-user. Warranty is limited to the following conditions. Warranty is referred only to the customer goods using for common domestic use. The claim for service can be applied either at dealer's shop where the product was bought, or at below mentioned authorized service shop. The end-user is obligated to set up a claim immediately when the defects appeared but only till the end of warranty period. The end-user is obligated to cooperate to certify the claiming defects. Only completed and clean (according to hygienic standards) product will be accepted. In case of eligible warranty claim the warranty period will be prolonged by the period from the date of claim application till the date of taking over the product by end-user, or the date the end-user is obligated to take it over. To obtain the service under this warranty, end-user is obligated to certify his claim with only completed following documents: receipt, certificate of warranty, certificate of installation...
This warranty is void especially if apply as follows: ■ Defects which were put on sale. ■ Wear-out or damage caused by common use.
■ The product was damaged by unprofessional or wrong installation, used in contrary to the applicable instruction manual, used in contrary to legal enactment and common process of use or used for another purpose which has been designed for. ■ The product was damaged by uncared for or insufficient maintenance. ■ The product was damaged by dirt, accident of force mixture (natural dustlet, fire, flood, ...). ■ Defects on functionality caused by low clarity of signal, electromagnetic field interference etc. ■ The product was mechanically damaged (e.g. broken button, fall ...). ■ Damage caused by use of unsuitable media, filings, expendable supplies (batteries) or by unsuitable working conditions (e.g. high temperatures, high humidity, quaker, ...). ■ Repair, modification or other failure action to the product by unauthorized person. ■ End-user did not prove enough his right to claim (time and place of purchase). ■ Data on presented documents differs from data on products. ■ Cases when the claiming product can not be identified according to the presented documents (e.g. the serial number or the warranty real has been damaged).
natural_image
Exterior view of a lawn mower with a black body and attached hose (no visible text or symbols)
FIELDMANN®
Home & Garden Performance

- FIELDMANN®
- Home & Garden Performance
- Electric Lawnmower
- OPERATING INSTRUCTIONS
- TABLE OF CONTENTS
- GENERAL SAFETY INSTRUCTIONS
- Important safety warnings
- Packaging
- Instructions for use
- SYMBOLS
- MACHINE DESCRIPTION AND ITEMS DELIVERED
- Machine Description (See fig. 1)
- Items Delivered
- PRINCIPLES OF WORKING SAFETY
- Other Risks
- Before you start using the lawnmower
- Preparation for operation
- Operation
- Maintenance and Storage
- PURPOSE OF USE
- What this lawnmower is intended for
- What this lawnmower is not intended for
- LAWNMOWER HANDLE ASSEMBLY (Fig. A)
- GRASS CATCHER BOX ASSEMBLY (Fig. B)
- CUTTING HEIGHT ADJUSTMENT (Fig. C)
- EXTENSION CABLE ATTACHMENT (Fig . D)
- STARTING AND STOPPING THE ENGINE (Fig. E)
- Starting the engine:
- Stopping the engine:
- MOWING (Fig. F)
- MAINTENANCE
- CUTTING BLADE MAINTENANCE (Fig. G)
- STORING THE LAWNMOWER
- POSSIBLE PROBLEMS AND TROUBL SHOOTING
- TECHNICAL SPECIFICATIONS
- DECLARATION OF CONFORMITY
- The product complies with the following directives:
- and standards:
- Manufacturer:
- DISPOSAL
- INSTRUCTIONS AND INFORMATION ON DISPOSAL OF USED PACKAGING.
- DISPOSAL OF USED ELECTRIC AND ELECTRONIC EQUIPMENT
- For companies in the European Union countries
- WARRANTY
- To carry out repair under this warranty
- Warranty is not valid if
- MONTÁŽ MADLA SEKAČKY (obr. A)
- OGÓLNE PRZEPISY BEZPIECZEŃSTWA
- Conditions of guarantee
Brand : Fieldmann
Model : FZR 2010-E
Category : Lawn mower