
FZP 2002-E - Saw Fieldmann - Free user manual and instructions
Find the device manual for free FZP 2002-E Fieldmann in PDF.


| Product Type | Electric chain saw |
| Model | FZP 2002-E |
| Rated Power | 2200 W |
| Rated Voltage | 230-240 V AC |
| Mains Frequency | 50 Hz |
| Weight (with 16" guide & chain) | 5.1 kg |
| Weight (without guide & chain) | 4.4 kg |
| Recommended Guide Length | 16" (405 mm) |
| Actual Cutting Length | 16" (405 mm) |
| Chain Type | Oregon 91PJ, 3/8" pitch, 0.050" gauge |
| Number of Drive Links | 57 |
| Chain Speed (at rated output) | 12.5 m/s |
| Oil Tank Capacity | 0.13 L |
| Oil Pump | Automatic |
| Sound Pressure Level (LpA) | 105 dB(A) |
| Vibration Emission (front handle) | 2.788 m/s² |
| Vibration Emission (rear handle) | 3.536 m/s² |
| Protection Class | Double insulation |
| Safety Features | Chain brake, anti-kickback protection, front hand guard |
| Power Cord | With plug; extension cord max 30 m, cross-section min 1 mm² |
| Maintenance | Regular chain tension check, lubrication, air vent cleaning, brake inspection |
| Included Accessories | Guide (16"), chain (Oregon 91PJ), guide guard, oil tank, manual |
Frequently Asked Questions - FZP 2002-E Fieldmann
User questions about FZP 2002-E Fieldmann
0 question about this device. Answer the ones you know or ask your own.
Ask a new question about this device
Download the instructions for your Saw in PDF format for free! Find your manual FZP 2002-E - Fieldmann and take your electronic device back in hand. On this page are published all the documents necessary for the use of your device. FZP 2002-E by Fieldmann.
USER MANUAL FZP 2002-E Fieldmann
natural_image
Abstract black and white spiral pattern with no text or symbolsFIELDMANN®
Home & Garden Performance
natural_image
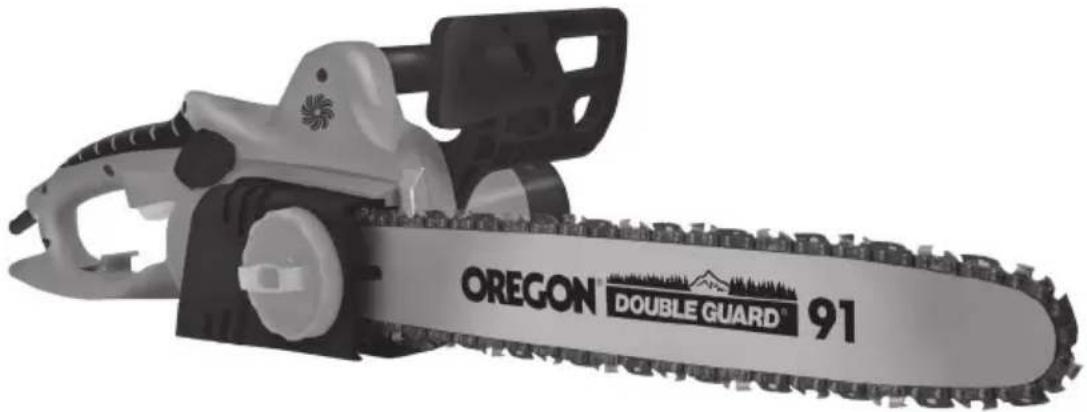
Black and white photo of a Oregon Double Guard 91 chain-linking tool (no text or symbols on the device itself)FZP 2002-E
English 69 - 27
Čeština 29 - 47
Slovenčina 49 - 67
Magyarul 69 - 88
Polski 89 - 109
Русский 111 - 132
natural_image
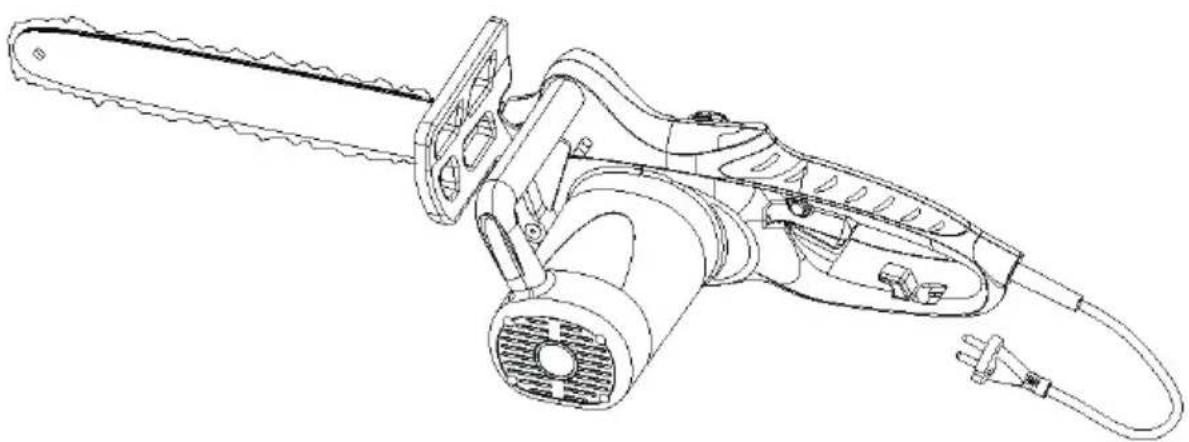
Technical line drawing of a single-hand chain saw with visible blades and mounting base (no text or symbols)7
2
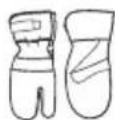
natural_image
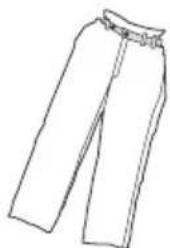
Line drawing of two trousers with a buckle (no text or symbols)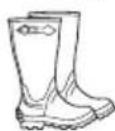
3
natural_image
Illustration of two hands performing a rope or cable manipulation technique with directional arrows (no text or symbols)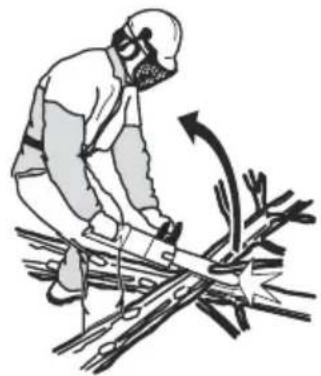
natural_image
Illustration of a worker in safety gear using a tool to cut metal beams, with an arrow indicating motion (no text or symbols)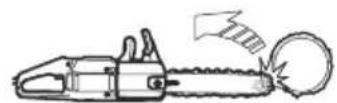
natural_image
Illustration of a worker in protective gear using a tool to lift a cylindrical object (no text or symbols)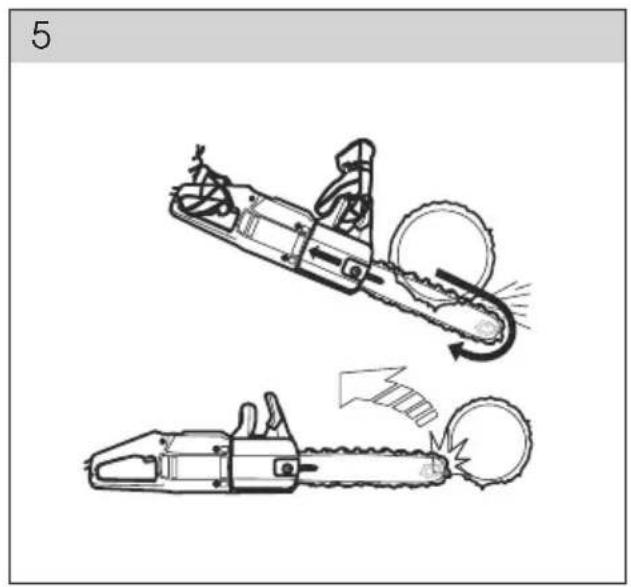
natural_image
Illustration of two chains' cutting process with motion arrows indicating cutting speed (no text or symbols)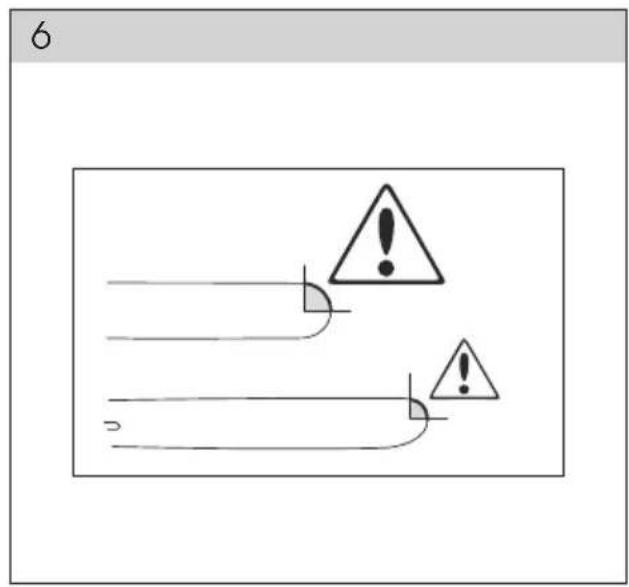
natural_image
Diagram of a vehicle's side profile with an arrow indicating direction (no text or symbols)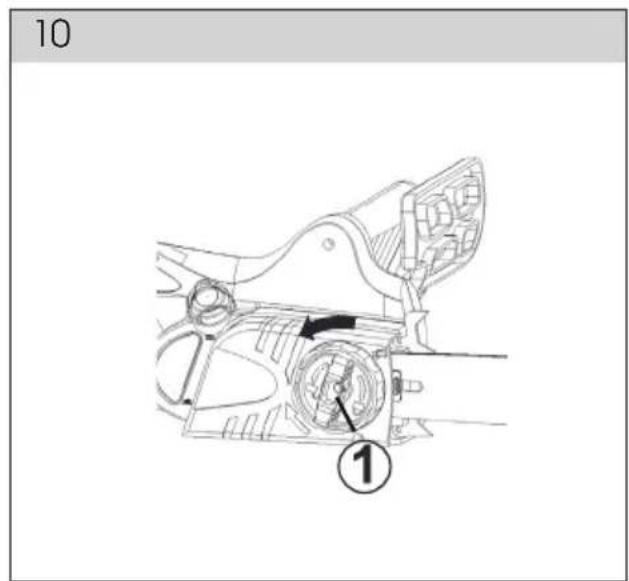
11
12
13
141516
natural_image
Three technical diagrams showing mechanical components with no visible text or symbols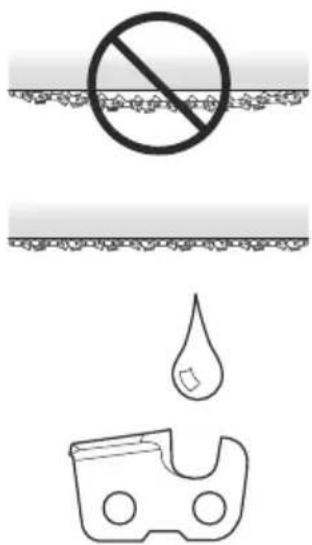
17 18 19
natural_image
Illustration of a person using a chainsaw to clean tree bark (no text or symbols)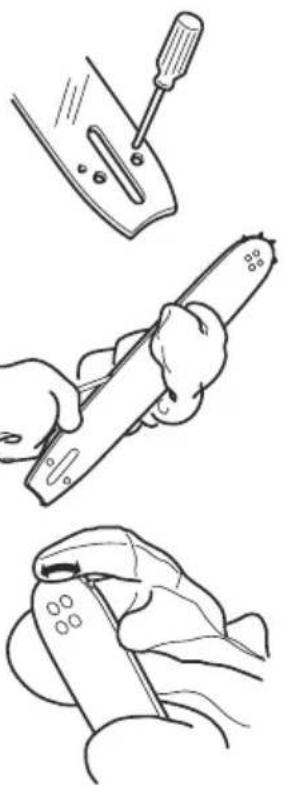
natural_image
Illustration of three different hand tools: a screwdriver, a pen-like tool, and a glove (no text or symbols present)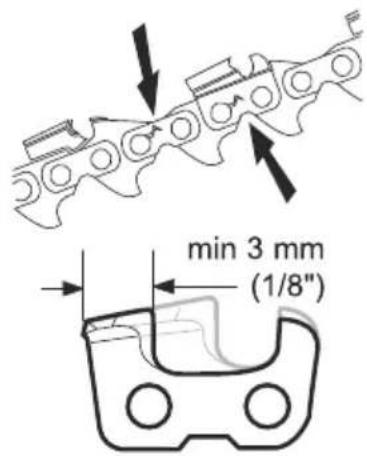
20 21 22
natural_image
Line drawing of a mechanical device with a foot and base, no text or symbols present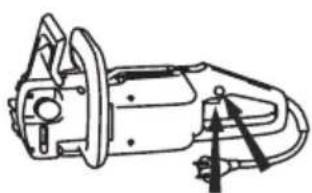
natural_image
Technical line drawing of a mechanical device with no visible text or symbols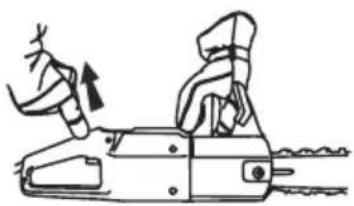
natural_image
Line drawing of a mechanical tool with an arrow indicating motion (no text or symbols)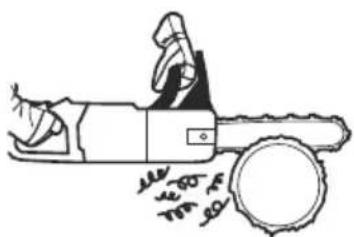
natural_image
Line drawing of a mechanical tool with a circular base and gear-like components (no text or symbols)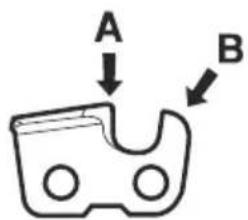
natural_image
Technical line drawing of a mechanical tool with a curved handle and a cross-sectional view (no text or symbols)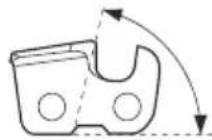
Electrical Chain Saw
OPERATING INSTRUCTIONS
Thank you for purchasing this electrical saw. Before you start using it, please read the operating instructions carefully and retain it for further use.
TABLE OF CONTENTS
PICTURES 2
- GENERAL SAFETY INSTRUCTIONS .... 10
Important safety warnings
Packaging
Instructions for use
-
EXPLANATION OF LABELS WITH INSTRUCTIONS ON THE MACHINE .... 11
-
MACHINE DESCRIPTION AND CONTENT OF DELIVERY 12
-
GENERAL INSTRUCTIONS BEFORE CHAIN SAW USE 13
-
INSTRUCTIONS FOR SAFE USE 14
-
PROTECTION AGAINST RECOIL 16
-
CHAIN BRAKE WITH PROTECTION AGAINST RECOIL 17
-
RIGHT PROTECTIVE GUARD 19
-
GUIDE AND CHAIN ASSEMBLY 19
-
CUTTING PARTS 20
-
CHAIN AND GUIDE LUBRICATION 20
-
PUTTING INTO SERVICE 21
-
INSTRUCTIONS FOR PROPER USE 22
-
MAINTENANCE AND STORAGE 25
-
TECHNICAL DATA 26
-
DISPOSAL 27
1. GENERAL SAFETY INSTRUCTIONS
Important safety warnings
* Unpack the product carefully and be sure not to throw away any part of the package before having found all components of the product.
Keep the product in a dry place out of reach of children.
Read all cautions and instructions. The failure to adhere to warning cautions and instructions may result in an accident, fire and/or a serious injury.
Packaging
The product is placed in a package preventing damage during transport. This package is a raw material therefore it can be handed-over for recycling.
Instructions for use
Before beginning to work with the machine, read the following safety rules and instructions for use. Familiarize with operating elements and the proper use of the device. Keep the manual in a safe place for future reference. We recommend keeping the original package including the inner packaging materials, cash voucher and guarantee card for a period of warranty at minimum. For a case of transportation, pack the machine into the original box from the manufacturer, thus ensuring a maximum protection of the product during a possible transport (e.g. moving or sending into a service station).

Note: If you hand the machine over to next persons, hand it over together with the manual. Adherence to the attached instructions for use is a precondition for the proper use of the machine. The operation manual includes also instructions for operation, maintenance and repairs.
The manufacturer does not take any responsibility for accidents or damages resulting from the failure to adhere to this manual.
2. EXPLANATION OF LABELS WITH INSTRUCTIONS ON THE MACHINE

Before machine use read carefully the operating instructions.

This product is manufactured in compliance with approved standards.

natural_image
Warning symbol: black exclamation mark inside a triangle (no text or numbers)ATTENTION! Chain saws are dangerous! Careless or improper use can cause serious or fatal injury.

natural_image
Circular icon with a stylized skull wearing sunglasses and a helmet, enclosed in a circle (no text or symbols)When operating the machine always use:
- protective helmet
- protective headphones
- protective goggles

natural_image
Simple geometric diagram with two concentric squares (no text or symbols)Chain saw features double protective insulation.
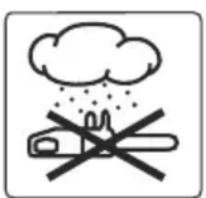
Do not expose to rain or moisture.
natural_image
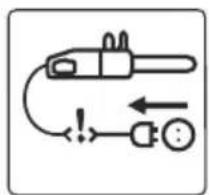
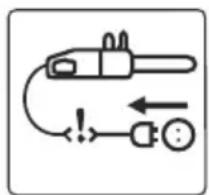
Pure diagram of a mechanical device with no text, numbers, or symbolsWhen cabling gets damaged, pull the plug out of mains.
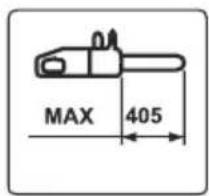
Maximum acceptable length of guide.
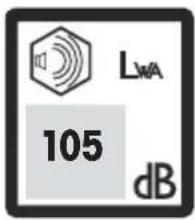
Noise level and its impact on the environment complies with the European standard. Electrical saw noise level is specified in chapter "Technical Data" and is shown on the machine label.
3. MACHINE DESCRIPTION AND CONTENT OF DELIVERY
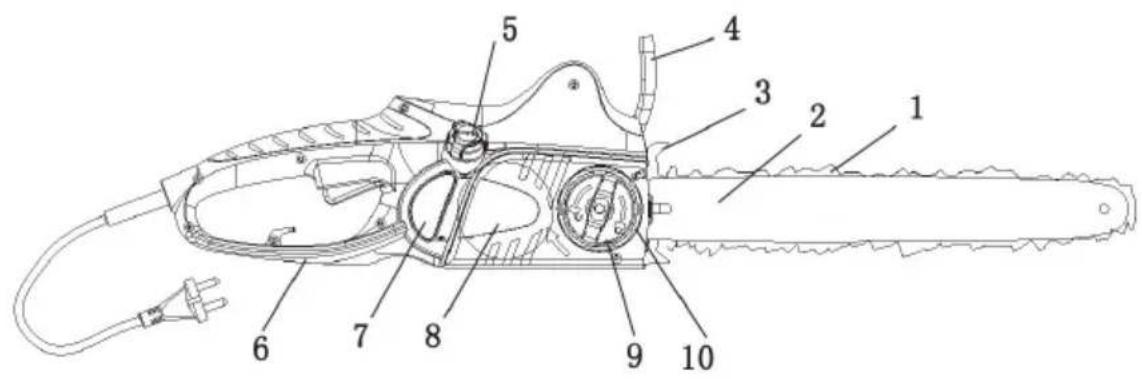
Machine description (see Fig. 1)
1 - Chain Oregon
2 - Guide Oregon
3 - Grab stop
4 - Protective guard
5 - Oil refill hole for chain lubrication
6 - Protection of right hand
7 - Oil control tank for chain lubrication
8 - Chain drive cover
9 - Sprocket wheel
10 - Fast tightening handgrip
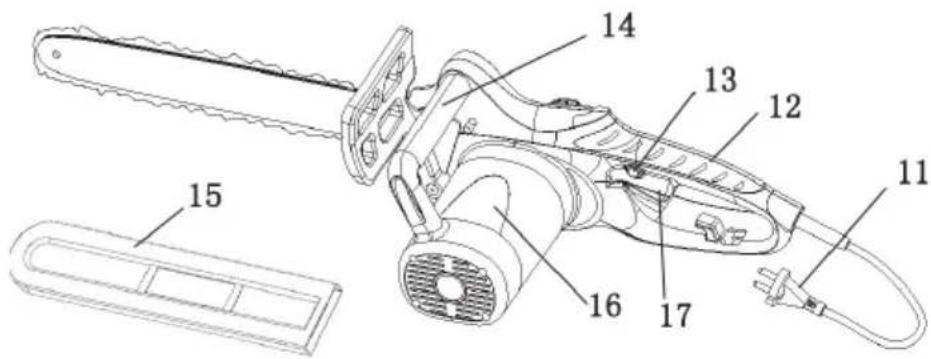
11 - Cord with plug
12 - Rear handle
13 - Switch safeguard
14 - Front handle
15 - Protective guard of guide
16 - Serial number
17 - Switch
Content of delivery
Take the machine out of package and check whether the following parts are complete:
ATTENTION! Sharp guides!
Chain saw
Guide Oregon
Chain Oregon
Guide guard
Oil tank
Operating instructions
If any parts are missing or damaged, please refer to the dealer you purchased the machine from.
4. GENERAL INSTRUCTIONS BEFORE CHAIN SAW USE
ATTENTION! Never modify the chain saw. Use just original accessories and spare parts. The manufacturer is not responsible for the damages caused by machine modification or in the instances when the safety instructions for chain saw operating included in this operating manual are not observed. Unauthorized modifications or non-original spare parts can cause serious or fatal injury.
Read carefully the operating instructions.
Always follow „safety instructions».
* Check proper assembly and adjustment of chain and guide.
Do not start cutting until sufficient amount of oil gets into the chain.
Improper tightening of chain increases the wear of chain, chain cover and guide and can cause serious damage of these parts.
Improper manipulation with extension cord can lead to serious motor damage.
ATTENTION!
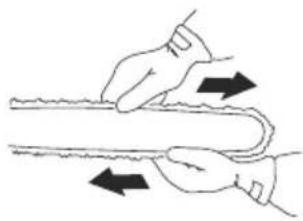
- Do not use a coiled extension cord.
- Minimum conductor cross-section: 1 mm ^4
- Maximum cable length: 30m
- Voltage: 230 V-240V
5. INSTRUCTIONS FOR SAFE USE
ATTENTION! Never hold electrical saw with just one hand, an operator or passers-by can get seriously injured. Electrical chain saw is designed in such a way that it can be operated with both hands.
⚠️ ATTENTION! The use of accessories that is not compliant with the recommendations included in the operating manual can lead to serious injuries.
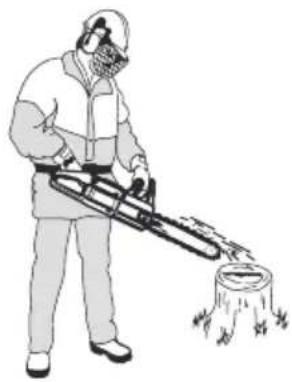
* Wear protective clothing. Do not wear jewels or loose clothing that can get caught by moving parts of the saw. We recommend to use approved safety gloves and solid footwear for stable work posture (the same applies to helpers).
Wear the following items approved for this purpose:
- protective shield or protective glasses
- protective headphones
- helmet
- safety footwear with protective framework, steel tip and anti-slip sole
- clothing that is comfortable but not loose
- approved strengthened protective gloves
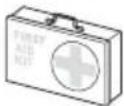
- always have a first-aid kit with yourself!
Make sure that other persons keep sufficient distance from the workplace when saw chain is on. Keep passers-by, children and domestic animals out of work area. Do not allow inexperienced persons to operate electric saw or power cord.
* Keep workplace clean and well lit. Do not use the saw under the conditions of rain, snow, moisture or near water. Water (moisture) penetration into the motor can cause its short circuit.
Do not use the machine when you are under the influence of alcohol or narcotics or if you are tired or exhausted. Do not use the machine in case you take the medication that could influence and limit your decision-making abilities at safe machine operation. When the saw motor is on, keep all parts of your body in sufficient distance from the chain. Before the motor is turned on, make sure that the saw chain does not get in touch with any unwanted item.
* Pay high attention to avoid electric current injury. Do not touch grounded metal items.
Pay high attention to the manipulation with power cord. Never lift up or move electrical saw using the power cord. Do not unplug saw from the socket by pulling out with the cord. Keep the cord away from water, oil and sharp items. Avoid putting the cord under doors, fences or other conductive metal objects.
Before use check chain saw and power cord. Do not use the saw with a damaged cord. Have it repaired in an authorized service facility. Keep handles dry, clean and free from oil stains.
Before plugging the saw to mains make sure that all tools and covers are removed from electrical saw.
Make sure that the extension cord is in a good shape and approved for outdoor use. Make sure that cord dimension is sufficient considering chain saw output. See section „GENERAL
INSTRUCTIONS BEFORE CHAIN SAW USE".
Carry the saw using front handle, turned off and in safe distance from your body. Do not touch the switch. Whenever you carry or store the saw, always put the guide cover on.
Plug chain saw to the socket equipped with a current protector.
Double protective insulation! Your electrical chain saw features double protective insulation for increased protection against electric shock injury. The double protective insulation comprises two separate electric insulation layers or one double-thick insulation layer between operator and machine conductive cable. Double protective insulation machines can be plugged to an ordinary 220-240 VAC socket. Follow the same safety measures similarly as with other electrical devices. Double protective insulation provides increased protection only against faulty insulation.
* Tighten the chain so firmly that it can be easily moved manually.
Cut only wood. Do not use saw for other than intended purpose. Do not use saw for cutting metal, plastic, masonry or non-wood building materials. Do not use guide for moving away branches, roots or other items.
At work keep stable posture and make sure that you can move safely in the work area. Pay increased attention when moving over roots, stones, branches, holes, etc. Pay special attention to work at slopes. Work in such a way that a trunk is at your right-hand side and is located between yourself and the guide. Always hold the saw with both hands and as close to your body as possible for easy control. Whenever possible let the trunk bear the weight of chain saw. When moving forward keep the trunk between yourself and the guide.
At cutting do not push saw very much. Too large pressure on saw at completing trunk cutting can cause the loss of balance.
Before cutting adjust and firmly fix shorter wood pieces.
Pay extraordinary attention to cutting thin branches and trunks as the fragile material can be caught with chain, hurled against the operator, and thus it can cause balance loss or possibly serious injury.
We recommend to cut only such trunks the diameter of which corresponds to guide length so that it is possible to make cutting with just one cut. (See „Technical data” where you can find recommended guide lengths for your chain saw model).
Before chain saw repair or maintenance always unplug it from socket.
Your chain saw complies with all respective safety standards. Repairs can be made by just professional personnel using strictly original parts.
Before use check carefully damaged saw parts in order to prevent any possible defects and secure safe operation. Check whether all movable saw parts are well put on and adjusted. Except for the maintenance works described in this operating manual all damaged parts and switch can be replaced in an authorized service facility. In case the switch does not work properly, do not use the saw.
Store the saw at a safe and dry place, out of children reach, unplugged from mains, and protective cover put on the guide.
6. PROTECTION AGAINST RECOIL
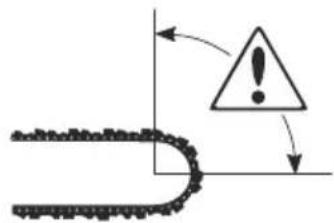
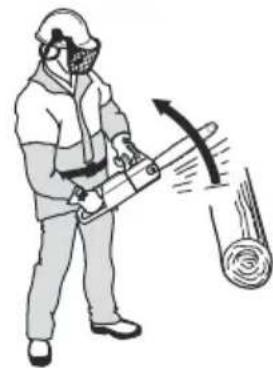
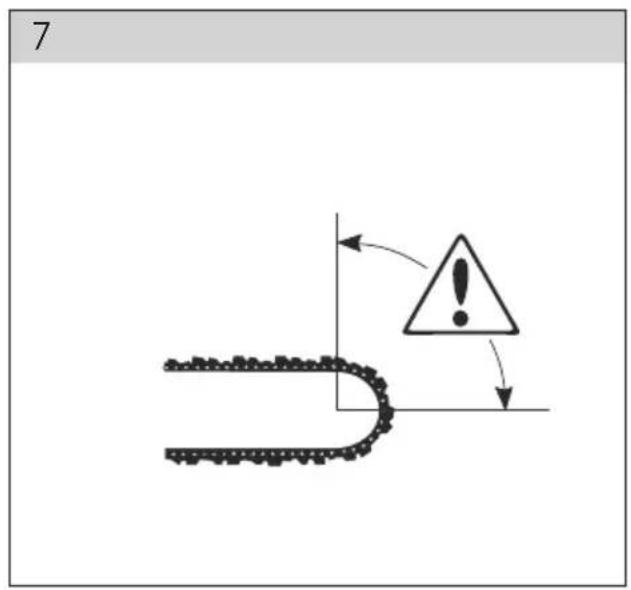
ATTENTION! A recoil can occur when the guide front part gets in touch with an object or when cut material grasps chain in the cut. In touch with the object the saw can get hurled backwards and at the same time the guide can move upwards and backwards in operators direction. Chain grasp in the cut can lead to quick guide backward movement towards the operator. Both of these reactions can cause the loss of control over the saw with subsequent serious injury. That is why it is indispensable for users to get familiar with recoil reasons and thus prevent its occurrence applying appropriate care and proper work procedures.
ATTENTION! Before each use it is extremely important to check chain brake functionality and chain sharpening status in order to maintain the saw safety level at recoil. See „Technical Data“.
ATTENTION! Make sure that chain does not get in touch with ground or foreign objects. Wire fences mean impending recoil danger. Observe all safety instructions in order to prevent the risk of occurrence of recoil and other accidents that can cause serious injuries.
A recoil can occur when the guide front part gets in touch with a foreign object.
Recoil direction is in the same plane with guide. In touch with the object the saw can get hurled backwards and at the same time the guide can move upwards and backwards in operators direction. Electrical saw can be thrown also in other directions depending on saw position at the recoil moment.
Basic rules
* Becoming aware of recoil reasons and nature helps reduce or eliminate the moment of an unexpected situation. The moment of surprise increases accident risk. Most of recoils are weak, however some of them are very dangerous and all happen very quickly.
Hold the chain saw firmly with both of your hands. When the motor is on, have you right hand at the rear handle and your left hand at the front handle. Hold handle firmly with all your fingers that embrace the saw handle. Firm holding will help reduce recoil and enable to have the entire saw under your control.
Most of the accidents caused by recoil occur in association with removing branches. Keep stable posture. Make sure that the place where you do cutting is free from any obstacles that could cause the loss of your balance. Do not let the guide tip touch a log, branch or any obstacle that could be hit at saw operation and cause recoil.
Do your cutting at the height not exceeding shoulder level. Do not cut with guide tip.
Do not operate chain saw with just one hand!
At cutting maintain the maximum number of revolutions.
Pay special attention to cutting with the end of guide / chain (at the bottom side of log). The power of chain revolutions pushes the saw backwards and unless the operator has enough
control, the recoil dangerous zone can get closer to the notch and thus cause recoil. Cutting by means of the chain bottom part (at the log upper side) pushes the saw forward. This pushes the power against the tree and provides constant support as well as gives more control over the saw to the operator and subsequently the control of recoil dangerous zone.
Observe the instructions for maintenance and sharpening of chain and guide. When replacing chains and guides use only the options recommended by the manufacturer. See „Technical Data“.
The smaller the radius at cutting with the guide end, the smaller the risk of recoil occurrence.
* Using the cutting device and maintaining sharp chain significantly reduces the risk of recoil power.
7. CHAIN BRAKE WITH PROTECTION AGAINST RECOIL
Saw is equipped with an automatic brake that stops chain movement if there is recoil at cutting. The chain brake reduces the risk of accident but only the operator can prevent accident occurrence.
⚠️ ATTENTION! Pay high attention when operating chain saw and do not allow any contact with a foreign object in the recoil dangerous zone.
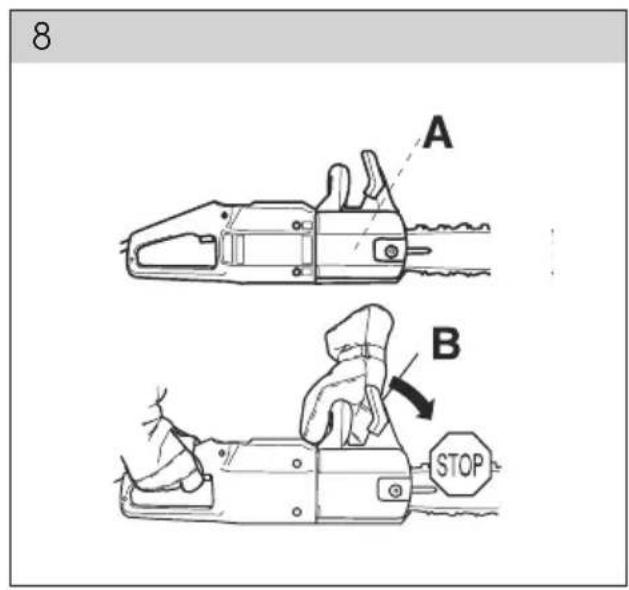
Brake (Fig. 8, A) turns on either manually (using left hand) or automatically by means of inertia force at the weight located under the front cover. Nevertheless once it is activated, the protection mechanism against recoil works in the opposite direction against recoil power. Saw features a sliding connector that protects saw against overload. If chain stops although motor is on, saw was overloaded. Reduce the push on saw to such extent till the chain turns on again. In case the saw is stuck inside tree, stop the saw immediately and release it.
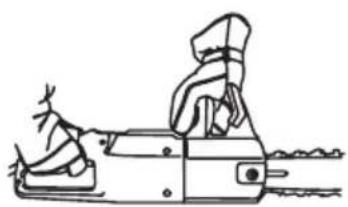
* Brake can also be activated manually by lowering front protective cover (Fig. 8, B) downwards to the guide.
The purpose of protective guard against recoil is not only the activation of chain brake. Its another important function is to reduce the risk of contact with saw chain in case an operator loses control over the grip of front handle.
Use chain brake as a „parking brake“ when you move the saw or put it on ground. Besides automatic turning on in case of recoil the brake can also be activated manually and must be activated in case of unintentional contact with rotating chain.
* You can release brake by pulling protective guard in the backward direction to front handle.
As it has been stated, recoil is quite dangerous and occurs very quickly. Most of recoils is weak and when they occur, chain brake does not turn on. When such a situation happens, it is key for you to maintain firm saw grip and not to let it fall.
* Chain brake can be activated manually or by means of inertia force depending on recoil power and on saw direction in relation to the object which got in touch with recoil dangerous zone.
- When recoil is too strong and your left hand is too far from protective guard, chain brake gets activated through the inertia force of the chain brake against recoil power.
- When recoil is weak or your left hand is close to protective guard, chain brake is activated manually by means of your left hand.
If chain saw is turned to a side and the operator holds the side of front handle, in case of recoil the protective guard does not hit your left hand and thus chain brake does not get activated. In such a situation inertia is the only way how to activate chain brake but similarly as in case of manual activation this procedure need not work in every situation.
Control of brake belts
⚠️ ATTENTION! Before cleaning or maintenance works always pull the plug out of mains socket.
ATTENTION! Clean saw regularly.
Remove sawdust, resin and other dirt from chain brake and connector drum. Wear and dirt have an impact on chain brake functionality.
* Check regularly brake belts and make sure their thickness is no less than 0.6 mm.
Control of protective guard against recoil
⚠️ ATTENTION! Before cleaning or maintenance works always pull the plug out of mains socket.
ATTENTION! Examine machine properly.
* Check any visible protective guard defects such as cracks.
Move protective guard forward and backward. Make sure that it moves freely and nothing prevents its movement.
Control of manual function of chain brake turning on
⚠️ ATTENTION! Before repair or maintenance works always pull the plug out of mains socket.
* Check chain brake daily or at each use. During operation hold saw firmly with your left hand at front handle and with your right hand at rear handle. Turn your left wrist and touch protective guard which activates chain brake without having to release the front handle. The chain should stop immediately.
If chain brake does not work properly, have it repaired in an authorized service facility.
8. RIGHT PROTECTIVE GUARD
Right protective guard protects your right hand in case the chain gets blocked or gets out of the groove or against hitting by the branches that would imperil holding right handle. Make sure that right protective guard is not damaged.
9. GUIDE AND CHAIN ASSEMBLY
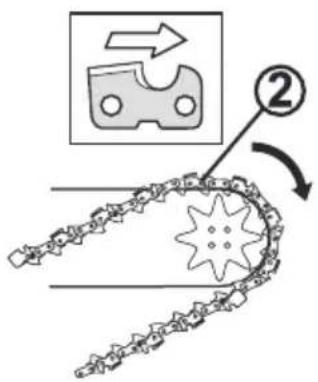
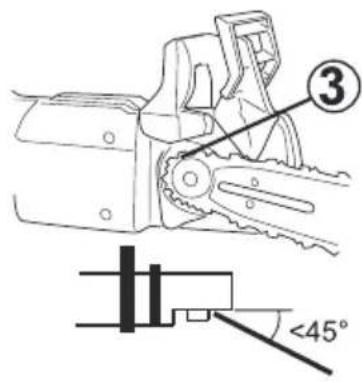
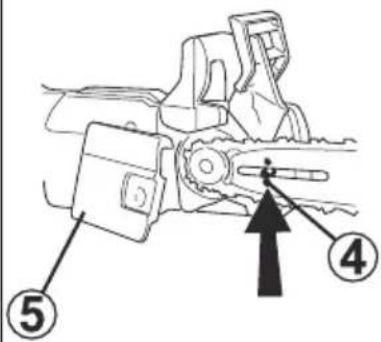
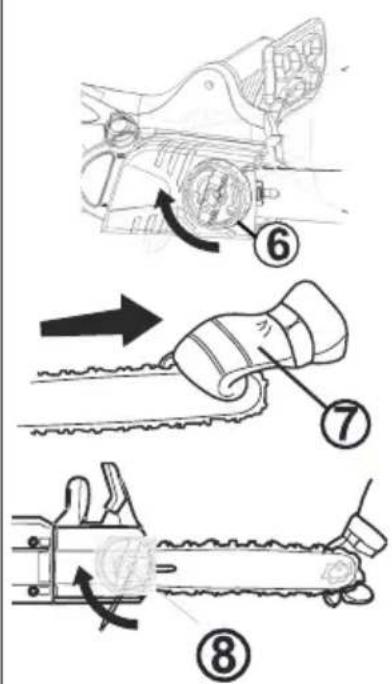
(see Fig. 10 to 14)
⚠️ ATTENTION! Before cleaning or maintenance works always pull the plug out of mains socket.
⚠️ ATTENTION! When manipulating with chain use protective gloves!
ATTENTION! Clean saw regularly.
ATTENTION! Released chain can get out of the groove and cause serious injury or, in extreme cases, one's life can be put in jeopardy.
Disassemble quick tightening handgrip (Fig. 10, 1) and remove chain drive cover.
Place the chain (Fig. 11, 2) at guide tip so that teeth points at the upper side of the guide direct upwards.
Hold the chain above guide tip (Fig. 12, 3) and place the rear guide end opposite the sprocket so that its angle towards driving head is 45^ . Wind the chain end around the sprocket, slide the guide through a connecting bolt against the driving head, and insert the chain in the guiding groove.
Put the pin (Fig. 13, 4) in the guide respective.
Attach chain drive cover (Fig. 13, 5).
Tighten slightly fast tightening handgrip, tighten the chain by turning sprocket wheel (Fig. 14, 6) clockwise.
The indication of properly tightened chain is that it fully sits on the guide but at the same time it can be easily lifted by hand from the guide (Fig. 14, 7).
Lift guide tip and at the same time tighten sprocket wheel and then tighten fast tightening handgrip (Fig. 14, 8).
Tightening of newly placed chain must be checked regularly until it fits in its place. Check it regularly further on as it has principal effect on saw performance and lifetime.
Chain tightening gets loosen through its use. That is why it should be tightened regularly.
* Check chain tightening at least whenever you refill chain lubrication oil.
10. CUTTING PARTS
This section explains how to properly use and maintain the right cutting parts:
it eliminates the risk of recoil
it eliminates the risk of falling the chain out of groove and its damage
it improves cutting efficiency
it extends chain lifetime
Five basic rules
- Use just recommended cutting parts
See „Technical Data“ - From the viewpoint of saw optimum functionality it is important to keep cutting teeth sharp!
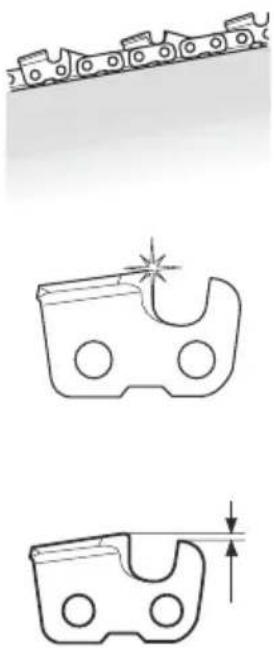
Proceed as per the instructions and apply sharpening recommendations. Damaged or poorly maintained chain increases the risk of accident. - Maintain the right height of depth gauge! (Fig. 21, B)
Worn out depth gauge increases recoil danger! - Keep the chain properly tightened!
Loose chain gets easily released from guide groove and increases the risk of its wear! - Ensure the right function of automatic lubrication and the right maintenance of cutting elements!
11. CHAIN AND GUIDE LUBRICATION
ATTENTION! Use of improper oil carries the risk of cutting elements damage and, in extreme cases, also threat to life.
Chain lubrication oil
Chain and guide are lubricated by the automatic lubrication system. We recommend to apply exclusively the oil intended for chain saws that features good adhesion and viscosity irrespective of weather. When selecting oil it is important that viscosity properties of chosen oil correspond to the effect of the season in which the saw is used.
We recommend you to use biodegradable oil taking into account both the protection of your saw and the environment.
If you do not have oil intended for chain saws, you can apply transmission oil, type EP 90.
If you need to consult the selection of suitable oil, please refer to our service department.
ATTENTION! Never apply used motor oil!
* Used motor oil contains the impurities that can do harm to oil pump, guide and chain.
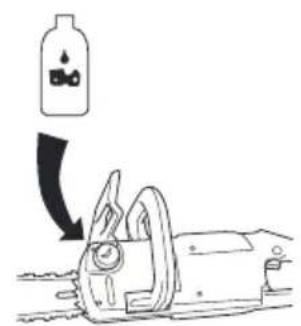
Oil refill hole for chain lubrication
The model of your chain saw is equipped with the automatic lubrication system.
Control of automatic lubrication system
To check the automatic lubrication system turn the saw on and hold guide approximately 20 cm from a fixed light object. Let the saw run in the medium revolution range; light oil trace gets created on the light object.
Oil in the tank is sufficient for about 20 minutes of continuous operation.
If you have doubts on lubrication system functionality and even the next steps do not improve this state, have the saw repaired in an authorized service facility.
- Check whether there is any oil trace left on guide and if this is the case, wipe the oil.
- Check guide groove and if necessary, clean the rest of oil.
* Check whether sprocket at saw tip got fouled up. If necessary, clean and lubricate it.
Chain wear control
⚠️ ATTENTION! Before cleaning or maintenance works always pull the plug out of mains socket.
⚠️ ATTENTION! Examine machine properly.
Before each use check whether the chain:
has any rivets and joints broken
is stiffened
has any rivets and links worn out
has tooth length at least 3 mm (1/8")
Each of such deficiencies indicates chain wear and it should be replaced.
Control of driving sprocket wheel
⚠️ ATTENTION! Before cleaning or maintenance works always pull the plug out of mains socket.
ATTENTION! Examine machine properly.
* Check driving sprocket wheel regularly. Once it gets significantly worn out, replace it.
12. PUTTING INTO SERVICE
Saw turn on and off
⚠️ ATTENTION! When turning the saw on, always take up stable posture on flat and solid base. Saw chain must not touch anything else that just the currently cut wood.
⚠️ ATTENTION! Keep other persons away from work area.
Turning on
* Firmly take hold of front handle with your left hand
* Firmly take hold of rear handle with your right hand.
* Press and hold switch safety lock with your thumb and press the switch with your forefinger.
Turning off
* Saw is turned off by releasing the switch.
If the saw does not stop, release chain brake and unplug power cord.
13. INSTRUCTIONS FOR PROPER USE
Chain sharpening with a file
ATTENTION! Poorly sharpened teeth edges increase the risk of recoil!
General instruction on saw sharpening
* Never cut wood using a saw with blunt chain. In case it is necessary during cutting to apply more strength, the reason is that chain teeth are blunt. Another indicator of saw blunt is generating sawdust instead of shavings.
At cutting, sharp cuts generate large shavings and penetrate wood smoothly.
The chain part that do cutting is called a cutting link. It consist of a tooth (Fig. 21, A) and depth gauge (Fig. 21, B). The difference between those two elements is key for cut depth.
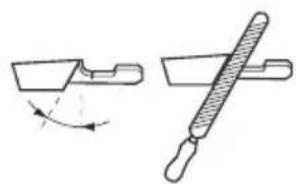
When sharpening saw with a file, pay attention to:
- upper slice angle
- cut angle
- horizontal filing angle
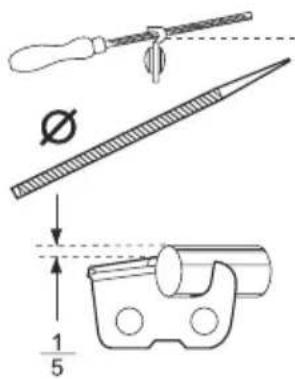
- file diameter
- file depth
More detailed information can be found in section „Technical Data“.
Saw chain filing is quite demanding without respective tools. We recommend you to use a special file holder. Its use guarantees sufficient sharpening and thus reduces the risk of recoil.
Chain teeth filing
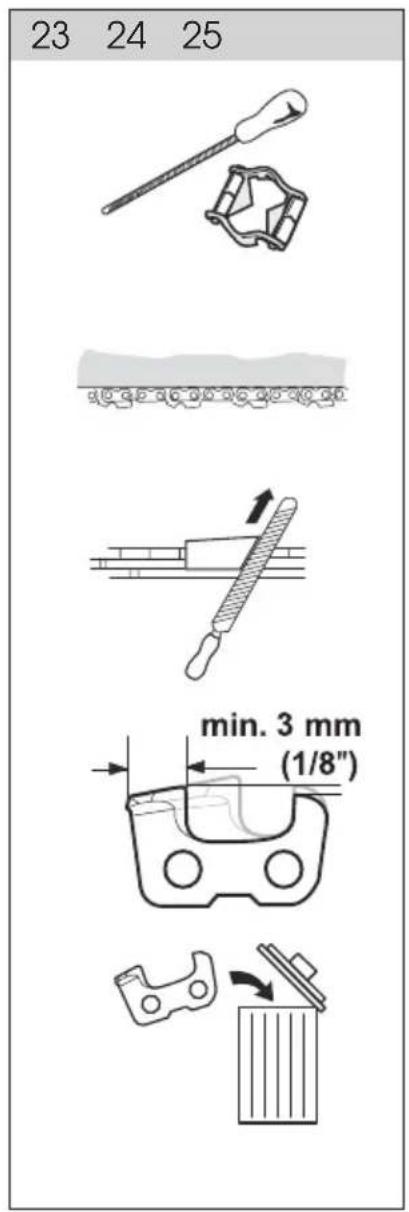
To sharpen teeth properly you need to use a round file and file holder.
To get the right file parameters and its holder see section „Technical Data“.
File the saw just when it is properly tightened. Loose chain makes filing harder.
* Always file from the inner tooth side outwards. At backward pull lift the file.
* First sharpen teeth tips on one side. Then turn the saw and file teeth tips on the other side.
* Sharpen teeth tips so that they have the same length. Once horizontal length drops below 3 mm (1/8"), the chain is worn out and cannot be used any more.
Sawing through
ATTENTION! Once saw chain gets stuck in cut, turn the saw off!
⚠️ ATTENTION! Do not try to release it by tugging. The chain could get released unexpectedly and you could get injured. Release the saw carefully by pulling.
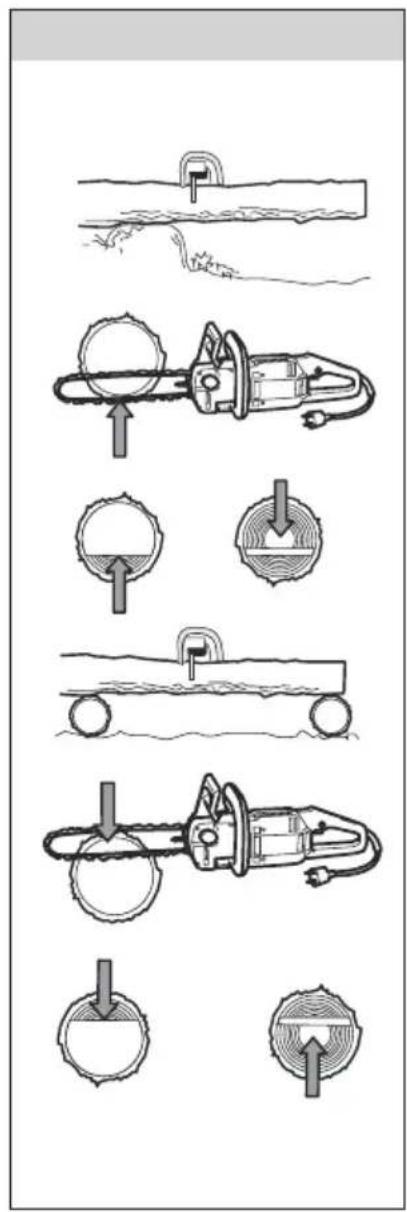
At cutting a trunk lying on ground there is a risk that the saw gets stuck or the trunk splits. However, it is hard to minimize this risk.
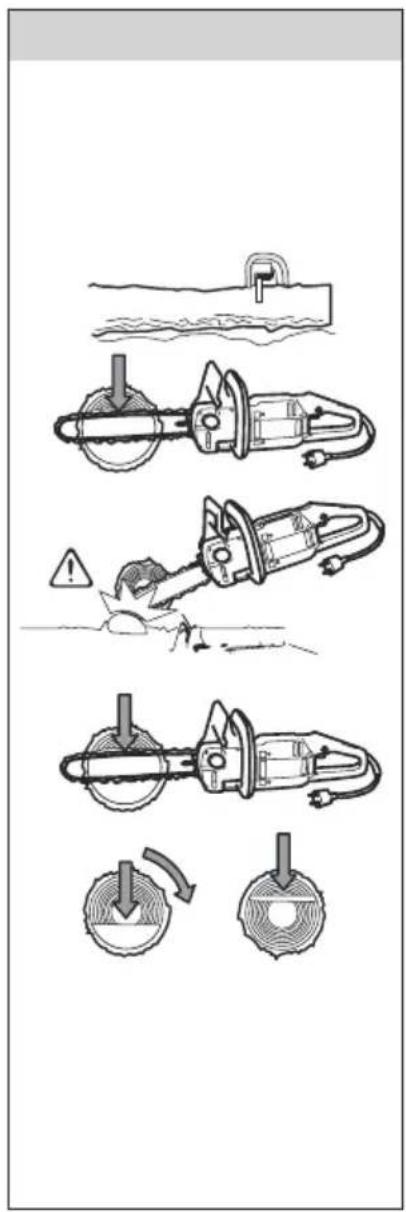
* Run a direct cut through trunk. When finishing the cut, pay attention and make sure you do not cut the saw in ground. Make the cut with saw set to maximum revolutions. Get prepared for trunk cutting at cut end.
- If the trunk can be turned, stop cutting when you reach 2/3 of the trunk.
- Turn the trunk and finish the remaining 1/3 of cross-section from top.
When cutting the trunk placed on one side it is very probable that the trunk gets split if you run a direct cut from top downwards.
- First cut the trunk from the bottom (approximately to 1/3 of trunk diameter).
- Complete the cut from top.
When cutting the trunk supported at both ends there is high probability in running a direct cut from top that the saw gets stuck in the middle of the cut.
- Make a trunk cut from above (approx. 1/3 of trunk diameter).
- Complete the cut from the bottom.
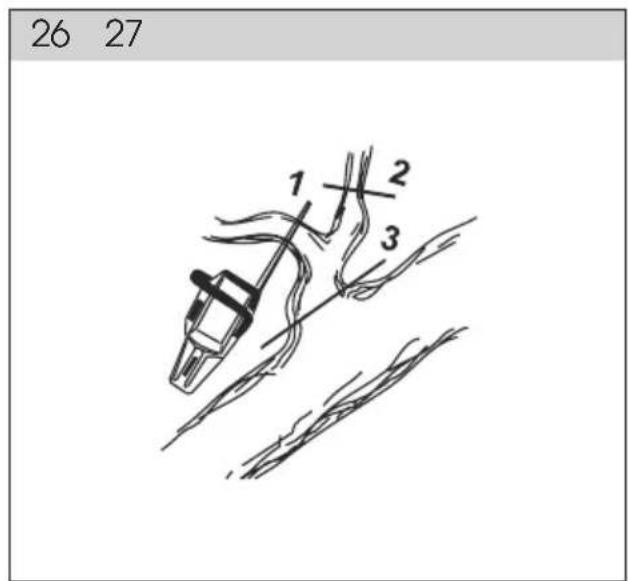
Lopping
⚠️ ATTENTION! Most of the accidents caused by recoil occur at removing branches. That is why you should pay maximum attention to eliminating this risk.
All principles used above in the section on sawing through apply also to cutting thick branches.
Make complicated lopping in several stages.
Assume safe posture through removing all objects that you could trip over. Always have the tree trunk that you cut at your right hand. For better control, keep saw body as close to your body as possible.
Felling
⚠️ ATTENTION! Felling is the work requiring a lot of experience. If you are not experienced in tree felling, do not do this work! Do not do any works for which you are not experienced enough!
⚠️ ATTENTION! Beginning chain saw users should start getting experience with saw cutting of supported trunks, e.g. on a wooden saw-horse.
⚠️ ATTENTION! We recommend the users having no experience not to fell the trunks with larger diameter than the guide length of their saw.
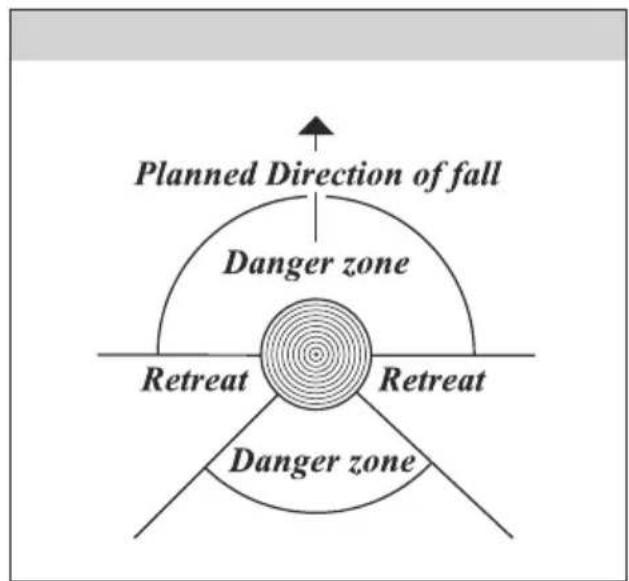
Dangerous zone
Dangerous zones are in immediate proximity of trees, within the distance that is the 2.5 multiple of tree height. Make sure that no person gets into the zone throughout felling.
Fell direction
Before tree felling remove any foreign objects from the work zone that could make felling and subsequent lopping more difficult. The key prerequisite of safe work is free movement and stable posture.
It is also important to prevent two trees from getting stuck. A stuck tree is very dangerous.
Even though you determine the direction of tree fall, always anticipate the possibility that the tree falls somewhere else.
Tree fall direction is effected also by other factors such as natural tree lean, wind direction, location and density of branches, or snow.
After all these factors are considered you see that you have no choice and your preferred, in theory planned fall direction is not feasible.
Another key factor effecting your personal safety is possible existence of dry branches that could jeopardize your safety throughout felling.
Sawing through of standing tree branches / Retreat zone
Remove any branches around tree base that could obstruct your work. The safest way is to cut from top to bottom while tree trunk should be between yourself and saw chain. Never cut the branches that are above the level of your shoulders. Clean undergrowth around the tree and determine your retreat and escape zone taking into account impending obstacles (stones, branches, holes, etc.). Your retreat zone must be oriented under the angle of approx. 135° backwards from the falling tree.
Felling
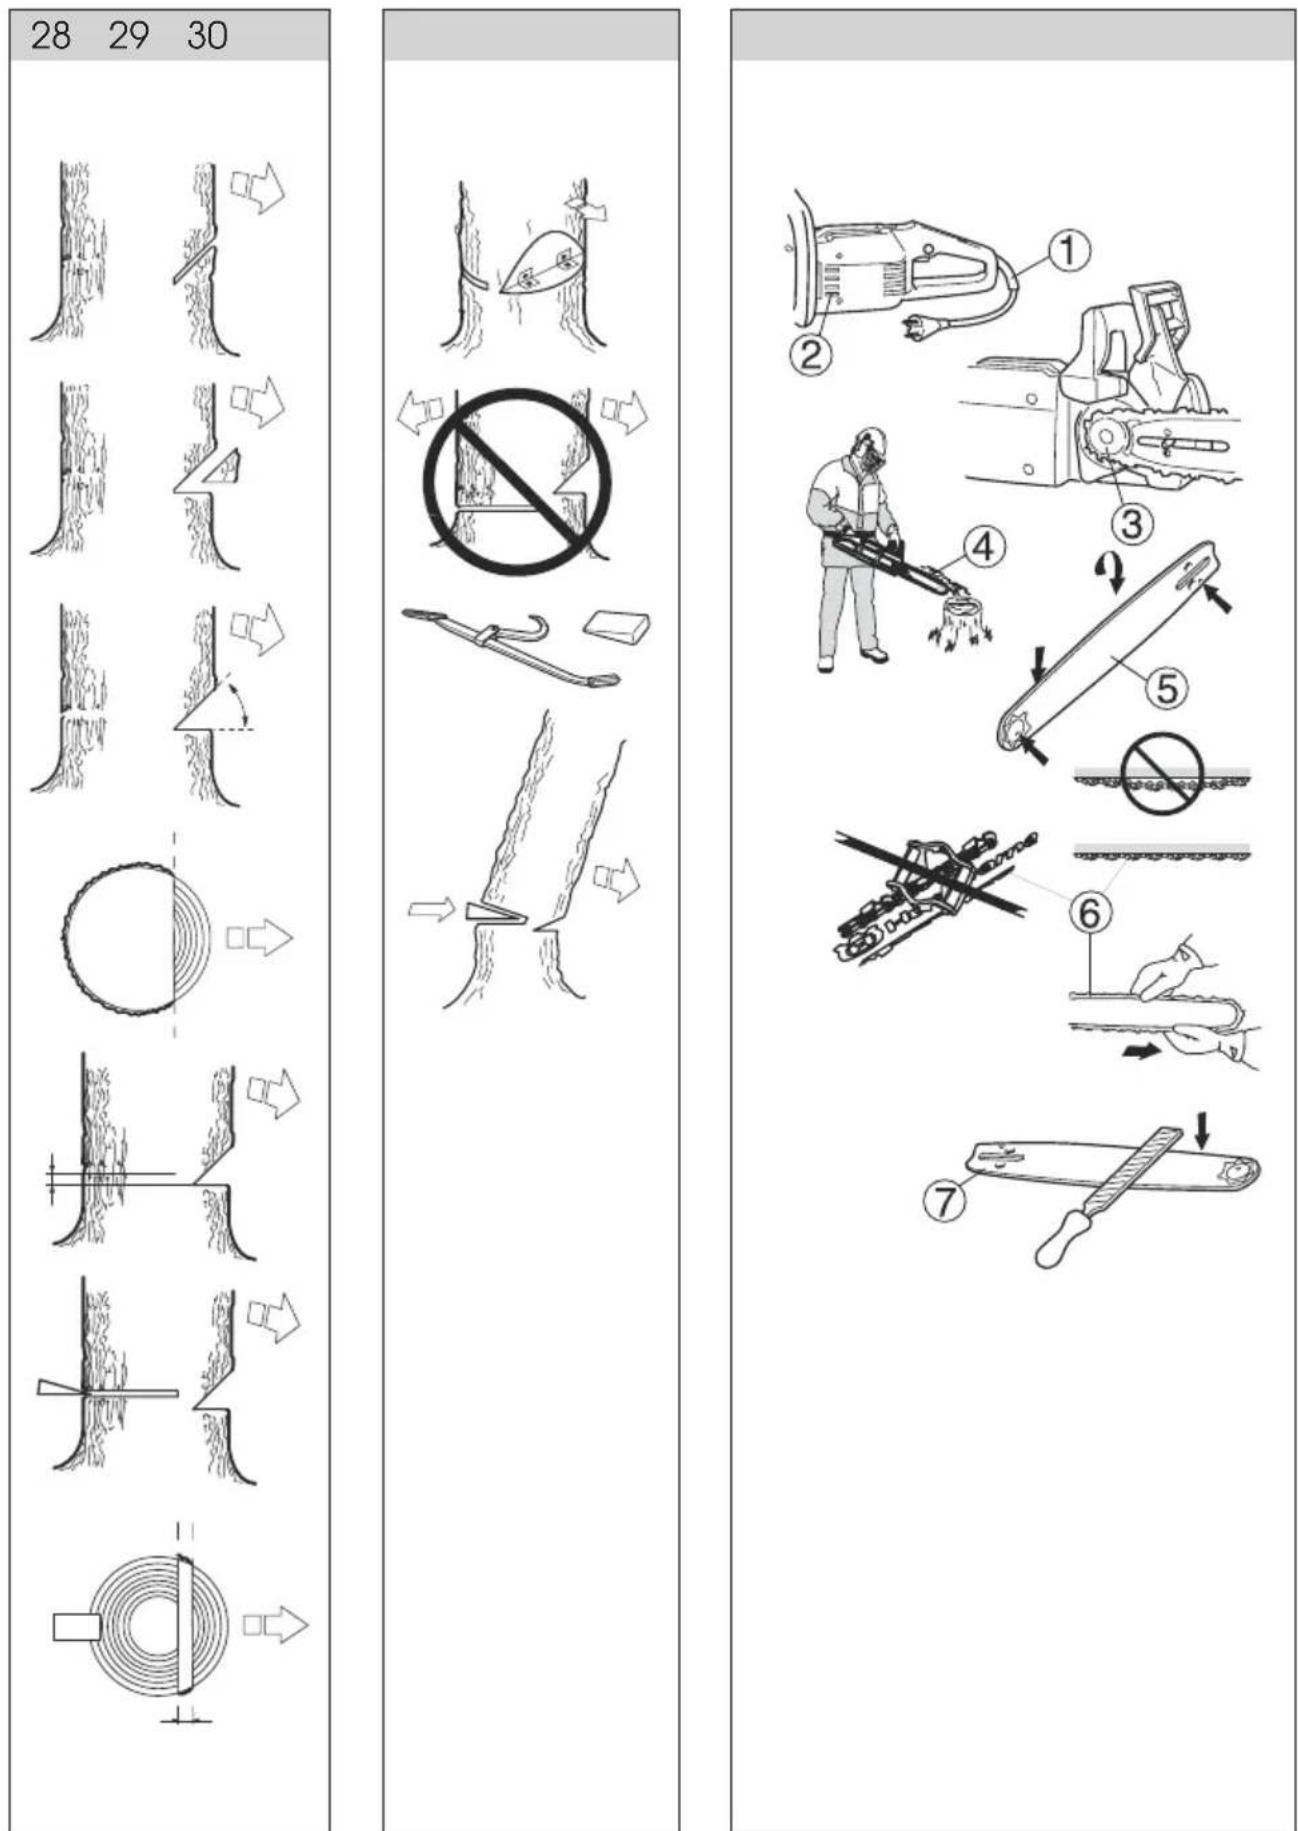
Felling is done through three cuts. So called „upper cut“, then so called „lower“ or „horizontal“ cut make so called „notch“ that is determining for the direction of tree fall. The final cut is so called „felling cut“ after which the tree fells.
Notch
In order to make a notch, start with the cut of upper notch. Using bottom part of guide make a cut within the 45^ inclination in the right angle to the direction of planned fall.
Then make a lower notch so that it meets exactly the lower side of the upper notch.
Notch height should be approx. 1/4 of tree diameter in the 45^ angle.
The line of inner notch angle must be horizontal, namely exactly in the right angle to fall direction.
Main („felling“) cut
* Felling cut is made from the rear part of tree and must also be horizontal.
* Position yourself so that you have the tree at your left hand and make a cut with the lower part of guide (chain pulling).
* Place the main cut approx. 3-5 cm (1½ - 2") above the lower notch.
Make the cut while the saw runs at maximum revolutions. Slowly penetrate to the tree with the saw. Pay attention to tree movement in the opposite direction than your required fall direction. Insert a wedge or felling insert to the main cut once cut depth allows that.
After the cut is completed, the main cut has to be parallel with the notch and at the same time a wood slice, so called remaining cut, with the minimum width of 1/10 of tree diameter must be left.
The purpose of remaining cut is to serve as a piece securing required fall direction.
If a remaining cut is too small or was split or the notch and main cut did not meet, tree fall direction is out of control.
If the main cut and notch correspond, the tree starts falling on its own or using the wedge or felling insert.
14. MAINTENANCE AND STORAGE
⚠️ ATTENTION! Always turn off motor before cleaning and maintenance!
Here are several instructions related to the maintenance of your chain saw. If you in any doubt as to any of them, contact your service centre.
* Check power cord and plug for any damage. Damaged cord or plug must be replaced.
* Maintain ventilation holes clean and open.
* Clean chain brake and secure its proper function.
* Check the automatic lubrication system.
* Check guide regularly from all sides. Check whether oil channel is clean. Clean guide groove.
* Check chain tightening, teeth tips and chain operation (rotating).
* Check sprocket state and in case of wear, it must be replaced.
Remove any wear at guide edges.
15. TECHNICAL DATA
Model ...... FZP 2002-E
Motor 2200
Nominal voltage 230-240 VAC
Nominal output 2200 W
Mains frequency 50 Hz
Clutch Yes
Electronic start control .... Yes
Weight
Excluding guide and chain 4,4 kg
including 16" guide and chain 5,1 kg
Chain lubrication
Oil tank capacity 0.13 liter
Oil pump .... automatic
Noise level
Equivalent of noise intensity as per international standards 105 dB(A)
Vibrations
Front handle 2,788 m/s²
Rear handle 3,536 m/s ^4
Chain / guide
Recommended guide length 16"/405 mm
Actual cutting length 16"/405 mm
Chain speed, nominal output 12,5 m/sec., 7 teeth/drive
Number of driving links 16"/57
| inch | inch/mm | inch/mm | 。 | 。 | 。 | inch/mm | inch/mm/dl |
| S 36 3/8" Oregon 91PJ | .050/1,3 | 5/32" / 4,0 | 85° | 30° | 0° | .025/0,65 | 16"/405/57 |
(" = Inch = palec)
16. DISPOSAL
INSTRUCTIONS AND INFORMATION ON DISPOSAL OF USED PACKAGING.
Put any used package material to the place determined by the municipality for waste disposal.
DISPOSAL OF USED ELECTRIC AND ELECTRONIC EQUIPMENT
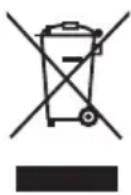
This symbol on products or accompanying documents means that used electric or electronic products must not be put to ordinary municipal waste. Hand over such products to determined collection points for proper disposal, restoration and recycling. Alternatively, in some countries of the European Union or other European countries you can return your products to your local dealer when you buy an equivalent new product. By dutiful disposal of this product you can preserve precious natural resources and you help prevent any potential adverse effects on the environment and human health which could be the results of wrong waste disposal. Ask your local authority or the nearest collection point for additional details. In case of improper disposal of this waste kind penalties can be imposed in accordance with national regulations.
For companies in the European Union countries
Should you want to dispose of electric and electronic devices, ask your dealer or vendor for necessary information. Disposal in other countries outside the European Union. Should you want to dispose of this product, ask your local authorities or your dealer for necessary information about disposal method.

This product fulfils all basic requirements of the EU directives that apply to it.
Text, design and technical specifications can change without prior notice and we reserve the right for their change.
natural_image
Circular icon with a stylized face wearing sunglasses and a helmet, enclosed in a circle (no text or symbols)natural_image
Simple geometric diagram with a square inside a larger square (no text or symbols)natural_image
Simple line drawing of a mechanical device with arrows indicating motion or force (no text or symbols)natural_image
Warning symbol: black exclamation mark inside a triangle (no text or numbers)natural_image
Circular icon with a stylized face wearing sunglasses and a helmet, enclosed in a circle (no text or symbols)natural_image
Simple geometric diagram with two concentric squares (no text or symbols)Nevystavujte dažđu ani vlhku.
natural_image
Simple line drawing of a mechanical device with arrows indicating motion (no text or symbols)natural_image
Warning symbol: black exclamation mark inside a triangle (no text or numbers)natural_image
Circular icon with a stylized face wearing sunglasses and a helmet, enclosed in a circle (no text or symbols)natural_image
Simple geometric diagram with two concentric squares (no text or symbols)natural_image
Pure electrical circuit lines without any symbolsnatural_image
Circular icon with a stylized face wearing sunglasses and a helmet, enclosed in a black border (no text or symbols)natural_image
Pure electrical circuit lines without any symbolsnatural_image
Circular icon with a stylized white skull wearing sunglasses and a helmet, enclosed in a black border (no text or symbols)natural_image
Simple geometric diagram with a square inside a larger square (no text or symbols)natural_image
Oregon Double Guard 91 chain saw (no text or symbols on the instrument itself)
FIELDMANN®
Home & Garden Performance

- FIELDMANN®
- Electrical Chain Saw
- OPERATING INSTRUCTIONS
- TABLE OF CONTENTS
- GENERAL SAFETY INSTRUCTIONS
- Important safety warnings
- Packaging
- Instructions for use
- EXPLANATION OF LABELS WITH INSTRUCTIONS ON THE MACHINE
- MACHINE DESCRIPTION AND CONTENT OF DELIVERY
- Machine description (see Fig. 1)
- Content of delivery
- ATTENTION! Sharp guides!
- GENERAL INSTRUCTIONS BEFORE CHAIN SAW USE
- ATTENTION!
- INSTRUCTIONS FOR SAFE USE
- Wear the following items approved for this purpose:
- PROTECTION AGAINST RECOIL
- Basic rules
- CHAIN BRAKE WITH PROTECTION AGAINST RECOIL
- Control of brake belts
- Control of protective guard against recoil
- Control of manual function of chain brake turning on
- RIGHT PROTECTIVE GUARD
- GUIDE AND CHAIN ASSEMBLY
- CUTTING PARTS
- Five basic rules
- CHAIN AND GUIDE LUBRICATION
- Chain lubrication oil
- Oil refill hole for chain lubrication
- Control of automatic lubrication system
- Chain wear control
- Control of driving sprocket wheel
- PUTTING INTO SERVICE
- Saw turn on and off
- Turning on
- Turning off
- INSTRUCTIONS FOR PROPER USE
- Chain sharpening with a file
- General instruction on saw sharpening
- Chain teeth filing
- Sawing through
- Lopping
- Felling
- Dangerous zone
- Fell direction
- Sawing through of standing tree branches / Retreat zone
- Notch
- Main („felling“) cut
- MAINTENANCE AND STORAGE
- TECHNICAL DATA
- Motor 2200
- Weight
- Chain lubrication
- Noise level
- Vibrations
- Chain / guide
- DISPOSAL
- INSTRUCTIONS AND INFORMATION ON DISPOSAL OF USED PACKAGING.
- DISPOSAL OF USED ELECTRIC AND ELECTRONIC EQUIPMENT
- For companies in the European Union countries
Brand : Fieldmann
Model : FZP 2002-E
Category : Saw