
MO17DS - Microwave GORENJE - Free user manual and instructions
Find the device manual for free MO17DS GORENJE in PDF.


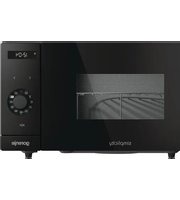
| Product Type | Microwave Oven |
| Brand | Gorenje |
| Model | MO17DS |
| Power Consumption | 230V~50Hz, 1200W |
| Output Power | 700W |
| Operating Frequency | 2450MHz |
| Outside Dimensions | 452mm(W) x 262mm(H) x 358mm(D) |
| Oven Cavity Dimensions | 315mm(W) x 198mm(H) x 294mm(D) |
| Oven Capacity | 17 litres |
| Net Weight | Approx. 10.5 kg |
| Noise Level | Lc < 58 dB(A) |
| Control Panel | Computer control with digital display |
| Clock Setting | 12 or 24 hour cycle |
| Quick Start | Yes, up to 10 minutes at full power |
| Preset Function | Yes, delayed start |
| Child Lock | Yes, via holding STOP/CANCEL for 3 seconds |
| Defrost Functions | Auto defrost by weight and speed defrost by time |
| Auto Cook Programs | 8 pre-set programs (milk/coffee, rice, spaghetti, potatoes, auto reheat, fish, popcorn, pizza) |
| Power Levels | 6 levels: 100%, 80%, 60%, 40%, 20%, 0% |
| Multistage Cooking | Up to 2 stages (including defrost as first stage) |
| Safety Features | Door safety lock system, earth connection, internal 250V 10A fuse |
| Cleaning | Removable glass tray and roller ring; wipe interior with damp cloth; mild detergent recommended |
| Installation Clearances | 8 cm from sides, 10 cm from rear, 10 cm from top |
| Interior Light | Replaceable by qualified service agent |
| Included Accessories | Glass tray, roller ring, coupling, instruction manual |
Frequently Asked Questions - MO17DS GORENJE
User questions about MO17DS GORENJE
0 question about this device. Answer the ones you know or ask your own.
Ask a new question about this device
Download the instructions for your Microwave in PDF format for free! Find your manual MO17DS - GORENJE and take your electronic device back in hand. On this page are published all the documents necessary for the use of your device. MO17DS by GORENJE.
USER MANUAL MO17DS GORENJE
MO 17 DW
MO 17 DS
| Mikrovalovna pečica | Navodila za uporabo | SI |
| Mikrovalovna pećnica | Upute za uporabu | BIH HR |
| Mikrotalasna rerna | Uputstvo za upotrebu | BIH SRB MNE |
| Микробрановата печка | Упатства за употреба | MK |
| Microwave oven | Instruction manual | GB |
| Mikrohullámú sütő | Használati utasítás | H |
| Kuchenka mikrofalowa | Instrukcja obsługi | PL |
| Microunde | Manual de utilizare | RO |
| Mikrovlnná rúra | Návod na obsluhu | SK |
| Mikrovlnná trouba | Návod na použití | CZ |
| Микровълновата фурна | Инструкции за употреба | BG |
| Мікрохвильова піч | Інцтрукція з експлуатації | UA |
| Микроволновая печь | Инструкция по эксплуатации | RUS |
| Forno a microonde | Istruzioni d'uso | I |
SI Instructions for use 3
- DISPLAY
• SCREEN
• SCREEN
- INDICATOR
Read the Instructions carefully and Keep for Future Reference.
SPECIFICATIONS
Power consumption: 230V~50Hz,1200W
Output: 700W
Operating Frequency: 2450MHz
Outside Dimensions: 452mm(W) X 262mm(H) X 358mm(D)
Oven Cavity Dimensions: 315mm(W) X 198mm(H) X 294mm(D)
Oven Capacity: 17 litres
Uncrated Weight: Approx. 10.5 kg
Noise level: Lc < 58 dB(A)
This appliance is marked according to the European directive 2002/96/EC on Waste Electrical and Electronic Equipment (WEEE). This guideline is the frame of a European-wide validity of return and recycling on Waste Electrical and Electronic Equipment.
Before you call for service
- If the oven will not perform at all, the display does not appear or the display disappeared:
a) Check to ensure that the oven is plugged in securely. If it is not, remove the plug from the outlet, wait 10 seconds and plug it in again securely.
b) Check the premises for a blown circuit fuse or a tripped main circuit breaker. If these seem to be operating properly, test the outlet with another appliance.
- If the microwave power will not function:
a) Check to see whether the timer is set.
b) Check to make sure that the door is securely closed to engage the safety interlocks. Otherwise, the microwave energy will not flow into the oven.
If none of the above rectify the situation, then contact the nearest authorized service agent.
The appliance for household use for heating food and beverages using electromagnetic energy, for indoor use only.
Radio interference
Microwave oven may cause interference to your radio, TV, or similar equipment. When interference occurs, it may be eliminated or reduced by the following procedures.
a) Clean the door and sealing surface of the oven.
b) Place the radio, TV, etc. as far away from your microwave oven as possible.
c) Use a properly installed antenna for your radio, TV, etc. to get a strong signal reception.
Installation
- Make sure all the packing materials are removed from the inside of the door.
- Inspect the oven after unpacking for any visual damage such as:
- Misaligned Door
- Damaged Door
- Dents or Holes in Door Window and Screen
- Dents in Cavity If any of the above are visible, DO NOT use the oven.
- This Microwave Oven weighs 10.5 kg and must be placed on a horizontal surface strong enough to support this weight.
- The oven must be placed away from high temperature and steam.
- DO NOT place anything on top of the oven.
- Keep the oven at least 8 cm away from both sidewalls and 10 cm away from rear wall to ensure the correct ventilation.
- DO NOT remove the turn-table drive shaft.
- As with any appliance, close supervision is necessary when used by children. WARNING-THIS APPLIANCE MUST BE EARTHED.
- The plug socket should be within easy reach of the power cord.
- This oven requires 1.2 KVA for its input; consultation with a service engineer is suggested when installing the oven.
CAUTION: This oven is protected internally by a 250V, 10 Amp fuse.
IMPORTANT
The wires in this mains lead are coloured in accordance with the following code:
Green-and-yellow: Earth
Blue: Neutral
Brown: Live
As the colors of the wires in the mains leads of the appliance may not correspond with the colored markings identifying the terminals in your plug, proceed as follows:
- The wire which is colored green-and-yellow must be connected to the terminal in the plug which is marked with the letter E or by the earth symbol colored green or green-and-yellow.
- The wire which is colored blue must be connected to the terminal which is marked with the letter N or colored black.
- The wire which is colored brown must be connected to the terminal which is marked with the letter L or colored red.
Important safety instructions
- WARNING: When the appliance is operated in the combination mode, children should only use the oven under adult supervision due to the temperatures generated; (Only for the model with grill function)
- WARNING: If the door or door seals are damaged, the oven must not be operated until it has been repaired by a competent person;
- WARNING: It is hazardous for anyone other than a competent person to carry out any service or repair operation that involves the removal of a cover which gives protection against exposure to microwave energy;
- WARNING: Liquids and other foods must not be heated in sealed containers since they are liable to explode.
- WARNING: This appliance is not intended for use by persons (including children) with reduced physical, sensory or mental capabilities, or lack of experience and knowledge, unless they have been given supervision or instruction concerning use of the appliance by a person responsible for their safety.
- Children should be supervised to ensure that they do not play with the appliance.
- The oven must have sufficient air flow. Keep 8 cm space at back; 10 cm at both sides and 10 cm from top of the oven. Don't remove oven's feet, do not block air vents of the oven.
- Only use utensils that are suitable for use in microwave ovens.
- When heating food in plastic or paper containers, keep an eye on the oven due to the possibility of ignition.
- If smoke is observed, switch off or unplug the appliance and keep the door closed in order to stifle any flames.
- Microwave heating of beverages can result in delayed eruptive boiling, therefore care must be taken when handling the container.
- The contents of feeding bottles and baby food jars shall be stirred or shaken and the temperature checked before consumption, in order to avoid burns.
- Eggs in their shell and whole hard-boiled eggs should not be heated in microwave ovens since they may explode, even after microwave heating has ended.
- When cleaning surfaces of door, door seal, cavity of the oven, use only mild, nonabrasive soaps, or detergents applied with a sponge or soft cloth.
- The oven should be cleaned regularly and any food deposits removed.
- Failure to maintain the oven in a clean condition could lead to deterioration of the surface that could adversely affect the life of the appliance and possibly result in a hazardous situation.
- If the supply cord is damaged, it must be replaced by the manufacturer, its service agent or similarly qualified persons in order to avoid a hazard.
Safety instructions for general use
Listed below are, as with all appliances, certain rules to follow and safeguards to assure top performance from this oven:
- Always have the glass tray, roller arms, coupling and roller track in place when operating the oven.
- Do not use the oven for any reason other than food preparation, such as for drying clothes, paper, or any other nonfood items, or for sterilizing purposes.
- Do not operate the oven when empty. This could damage the oven.
- Do not use the oven cavity for any type of storage, such as papers, cookbooks, etc.
- Do not cook any food surrounded by a membrane, such as egg yolks, potatoes, chicken livers, etc., without first being pierced several times with a fork.
- Do not insert any object into the openings on the outer case.
- Do not at any time remove parts from the oven such as the feet, coupling, screws, etc.
- Do not cook food directly on the glass tray. Place food in/on proper cooking utensil before placing in the oven.
IMPORTANT - COOKWARE NOT TO USE IN YOUR MICROWAVE OVEN
- Do not use metal pans or dishes with metal handles.
- Do not use anything with metal trim.
- Do not use paper covered wire twist-ties on plastic bags.
- Do not use melamine dishes as they contain a material which will absorb microwave energy. This may cause the dishes to crack or char and will slow down the cooking speed.
- Do not use Centura Tableware. The glaze is not suitable for microwave use. Corelle Livingware closed handle cups should not be used.
- Do not cook in a container with a restricted opening, such as a pop bottle or salad oil bottle, as they may explode if heated in a microwave oven.
- Do not use conventional meat or candy thermometers.
- There are thermometers available specifically for microwave cooking. These may be used.
- Microwave utensils should be used only in accordance with manufacturer's instructions.
- Do not attempt to deep-fry foods in this oven.
- Please remember that a microwave oven only heats the liquid in a container rather than the container itself. Therefore, even though the lid of a container is not hot to the touch when removed from the oven, please remember that the food/liquid inside will be releasing the same amount of steam and/or spitting when the lid is removed as in conventional cooking. Always test the temperature of cooked food yourself especially if you are heating or cooking food/liquid for babies. It is advisable never to consume food/liquid straight from the oven but allow it to stand
for a few minutes and stir food/liquid to distribute heat evenly.
- Food containing a mixture of fat and water, e.g. stock, should stand for 30-60 seconds in the oven after it has been turned off. This is to allow the mixture to settle and to prevent bubbling when a spoon is placed in the food/liquid or a stock cube is added.
- When preparing/cooking food/liquid, remember that there are certain foods, e.g. Christmas puddings, jam and mincemeat, which heat up very quickly. When heating or cooking foods with a high fat or sugar content do not use plastic containers.
- Cooking utensil may become hot because of heat transferred from the heated food. This is especially true if plastic wrap has been covering the top and handles of the utensil. Potholders may be needed to handle the utensil.
- To reduce the risk of fire in the oven cavity: a) Do not overcook food. Carefully attend microwave oven if paper, plastic, or other combustible materials are placed inside the oven to facilitate cooking. b) Remove wire twist-ties from bags before placing bag in oven. c) If materials inside the oven should ignite, keep oven door closed, turn the oven off at the wall switch, or shut off power at the fuse or circuit breaker panel.
Computer control panel

- MENU ACTION SCREEN
Cooking time, power, action indicators, and clock time are displayed.
- POWER LEVEL
Touch this button a number of times to set microwave cooking power level.
- CLOCK
Touch this button to enter the correct time of day.
- WEIGHT ADJUST
Touch this button to select specify food weight or number of servings.
- AUTO DEF.
Touch to defrost food by weight.
- SPEED DEF.
Touch to defrost food by time.
• MULTI STAGE COOKING
Use to set a 2 cooking program.
- MENU/Time(dial)
Turn the dial to input cooking time.
Rotate to select the cooking menu.
• START / QUICK START(dial)
Touch to start a cooking program.
- PAUSE/CANCEL
Press to cancel setting or reset the oven before setting a cooking program.
Press once to temporarily stop cooking, or twice to cancel cooking altogether.
It is also used for setting child lock.
- PRESET
Press to set a program to start a cooking program at an appoint time.
Feature diagram

- Door Safety Lock System
- Oven Window
- Oven Air Vent
- Roller Ring
- Glass Tray
- Control Panel
Operation Instruction
1. SETTING DIGITAL CLOCK
Suppose you want to set the oven clock time to 8:30.
- In standby mode, press the CLOCK button repeatedly to set the clock in 12 or 24 hour cycle.
- Turn the TIME/MENU dial to indicate the hour digit 8.
- Press the CLOCK button.
- Turn the TIME/MENU dial to indicate the minute digits until the screen shows 8:30.
- Press CLOCK to confirm the setting.
Note: You can press the CLOCK button once to check clock time during cooking.
For microwave cooking, the longest cooking time is 95 minutes; you can select power level by pressing POWER LEVEL repeatedly:
| Display (Power level) | Cooking Power |
| 1x | 100% |
| 2x | 80% |
| 3x | 60% |
| 4x | 40% |
| 5x | 20% |
| 6x | 00% |
For example, suppose you want to cook for 1 minute at 60% of microwave power.
- Press the POWER LEVEL button repeatedly to select power level.
- Turn the TIME/MENU dial to 1:00.
- Press the START/QUICK START button.
Note: You can check the cooking power when cooking is in progress by pressing the POWER LEVEL button.
After the cooking/defrosting time elapses, the oven will signal and "End" will show up on the screen, press the STOP/CANCEL button or open the oven door to clear the screen.
3. QUICK START

This feature allows you to start the oven quickly. The longest cooking time is 10 minutes. In standby mode, press the START/QUICK START button in quick succession to set the cooking time, the oven starts working at full power level immediately.
You can extend the cooking time during cooking process by pressing START/QUICK.
4. PRESET
Preset function allows the oven to start up in a later time. Suppose now the clock running at 11:10 and you want the oven to start cooking at 11:30.
- Set a cooking program.
- Press the PRESET button.
- Rotate the WEIGHT/TIME dial to enter hour digit 11.
- Press the PRESET button.
- Rotate the WEIGHT/TIME dial to enter minute digit 30.
- Press PRESET to confirm.
Note:
- When set, you can check the preset time by pressing PRESET. To cancel the feature, touch PRESET and then STOP/CANCEL.
- When it reaches the preset time, beeps can be heard to signal the preset cooking program begins.
- Weight Defrost and Quick Start can not be preset.
5. CHILD LOCK
Use to prevent unsupervised operation of the oven by little children. The child lock indicator will show up on display screen, and the oven can not be operated while the Child Lock is set.
To set: In standby or preset mode, hold down the STOP/CANCEL button for 3 seconds, a beep sounds and lock indicator lights. In the locked mode, all buttons are disabled.
To cancel: Hold down the STOP/CANCEL button for 3 seconds until lock indicator on display goes off.
6. AUTO COOK
For food or the following cooking mode, it is not necessary to program the duration and the cooking power. It is sufficient to indicate the type of food that you wish to cook as well as the weight of this food. You may need to turn food over at the middle of cooking time to obtain uniform cooking.
For example: to cook 400g of fish.
- In standby mode, press AUTO COOK repeatedly to select corresponding food code.
- Rotate the WEIGHT/TIME dial to indicate a weight of 400g.
- Press the START/QUICK START button.
| Code | Food/cooking mode | For milk/coffee, potato, parameters are not food weight but number of servings.For popcorn, there is only one choice.For spaghetti, add boiled water before cooking.The result of auto cook depends on factors such as fluctuation of voltage, the shape and size of food, your personal preference as to the doneness of certain foods and even how well you happen to place food in the oven. If you find the result at any rate not quite satisfactory, please adjust the cooking time a little bit accordingly. |
| 01 | Milk/Coffee (200ml/cup) | |
| 02 | Rice (g) | |
| 03 | Spaghetti (g) | |
| 04 | Potatoes (230g/unit) | |
| 05 | Auto Reheat (g) | |
| 06 | Fish (g) | |
| 07 | Popcorn (99g) | |
| 08 | Pizza (g) |
7. AUTO DEFROST
The oven allows the defrosting of meat, poultry, and seafood. The time and the defrosting power are adjusted automatically once the weight is programmed. The range weight of frozen foods varies between 100g and 1800g.
FOR EXAMPLE: Suppose you want to defrost 600g of shrimp.
- Place the shrimp to be defrosted into the oven.
- Press AUTO DEF. button once.
- Press WEIGHT ADJUST button repeatedly to select the weight.
- Press START button.
Note: Defrost power divides into three stages, each stage needs 1/3 time, after defrosting 2/3 time the system will sound remind you to turn over the food and pause until you depress the button START to enter into the next defrosting stage, and the system resume
8. SPEED DEFROST
The oven can quickly defrost food to the set time you entered.
FOR EXAMPLE: Suppose you want to defrost shrimp.
- Place the shrimp to be defrosted into the oven.
- Press SPEED DEF. button once.
- Turn MENU/TIME dial to set cooking time.
- Press START button.
Note: Defrost power is divided into three stages, each stage requires 1/3 of the time. After 2/3 of the defrosting time has elapsed, the system will sound a reminder for you to turn
over the food and pause until you press the START button to enter the next defrosting stage, at which point the system resumes.
9. MULTISTAGE COOKING
The oven can be programmed according to your wishes in up to two steps. If the defrost function is part of the programme, it can only be selected as the first step.
Example: defrost frozen meat for 10 minutes and then cook with microwaves (60% power) for 5 minutes.
- Press the SPEED DEFROST button.
- Turn the TIME/MENU dial to set the preparation time (10 min).
- Press the MULTI STAGE cooking button.
- Press the POWER LEVEL button to select level (60%).
- Turn the TIME/MENU dial to set the preparation time (5 min).
- Press START/QUICK START button.
You can also set another combination programme (microwave - microwave).
Care of your microwave oven
- Turn the oven off and remove the power plug from the wall socket before cleaning.
- Keep the inside of the oven clean. When food splatters or spilled liquids adhere to oven walls, wipe with a damp cloth. The use of harsh detergent or abrasives is not recommended.
- The outside oven surface should be cleaned with a damp cloth. To prevent damage to the operating parts inside the oven, water should not be allowed to seep into the ventilation openings.
- Do not allow the Control Panel to become wet. Clean with a soft, damp cloth. Do not use detergents, abrasives or spray-on cleaners on the control panel.
- If steam accumulates inside or around the outside of the oven door, wipe with a soft cloth. This may occur when the microwave oven is operated under high humidity conditions and in no way indicates malfunction of the unit.
- It is occasionally necessary to remove the glass tray for cleaning. Wash the tray in warm sudsy water or in a dishwasher.
- The roller ring and oven cavity floor should be cleaned regularly to avoid excessive noise. Simply wipe the bottom surface of the oven with mild detergent, water or window cleaner and dry. The roller ring may be washed in mild sudsy water or dish
washer. Cooking vapours collect during repeated use but in no way affect the bottom surface or roller ring wheels. When removing the roller ring from cavity floor for cleaning, be sure to replace it in the proper position.
- Remove odors from your oven by combining a cup of water with the juice and skin of one lemon in a deep microwaveable bowl. Microwave for 5 minutes, wipe thoroughly and dry with a soft cloth.
- When it becomes necessary to replace the oven light, please consult a dealer to have it replaced.
Environment
Do not throw away the appliance with the normal household waste at the end of its life, but hand it in at an official collection point for recycling. By doing this, you help to preserve the environment.
Guarantee & service
If you need information or if you have a problem, please contact the Gorenje Customer Care Centre in your country (you find its phone number in the worldwide guarantee leaflet). If there is no Customer Care Centre in your country, go to your local Gorenje dealer or contact the Service department of Gorenje domestic appliances.
For personal use only!
Additional recommendations for cooking with microwave, grill and useful advices can be found on web side:
http://microwave.gorenje.com
WISHES YOU A LOT OF PLEASURE WHILE USING YOUR APPLIANCE
gorenje
- DISPLAY
- Menu action screen
1. SETTING THE DIGITAL CLOCK
| Afişaj (Power level) | Putere de gătire |
| 1x | 100% |
| 2x | 80% |
| 3x | 60% |
| 4x | 40% |
| 5x | 20% |
| 6x | 00% |
- MENU ACTION SCREEN
• DISPLAY OF ACTIVITIES ACCORDING TO MENUS
• MENU
FOR EXAMPLE: Suppose you want to defrost 600g of shrimp.
• MENU ACTION SCREEN
• MENU SCREEN

- SCREEN
- INDICATOR
- SPECIFICATIONS
- BEFORE YOU CALL FOR SERVICE
- RADIO INTERFERENCE
- INSTALLATION
- IMPORTANT
- GREEN-AND-YELLOW: EARTH
- BLUE: NEUTRAL
- BROWN: LIVE
- IMPORTANT SAFETY INSTRUCTIONS
- SAFETY INSTRUCTIONS FOR GENERAL USE
- IMPORTANT - COOKWARE NOT TO USE IN YOUR MICROWAVE OVEN
- COMPUTER CONTROL PANEL
- MENU ACTION SCREEN
- POWER LEVEL
- CLOCK
- WEIGHT ADJUST
- AUTO DEF
- SPEED DEF
- MULTI STAGE COOKING
- MENU/TIME(DIAL)
- START / QUICK START(DIAL)
- PAUSE/CANCEL
- PRESET
- FEATURE DIAGRAM
- OPERATION INSTRUCTION
- SETTING DIGITAL CLOCK
- QUICK START
- NOTE
- CHILD LOCK
- AUTO COOK
- AUTO DEFROST
- SPEED DEFROST
- MULTISTAGE COOKING
- CARE OF YOUR MICROWAVE OVEN
- ENVIRONMENT
- GUARANTEE & SERVICE
- FOR PERSONAL USE ONLY
- DISPLAY
- SETTING THE DIGITAL CLOCK
- MENU
- MENU SCREEN
Brand : GORENJE
Model : MO17DS
Category : Microwave