
ORT2300 - Radio PHILIPS - Free user manual and instructions
Find the device manual for free ORT2300 PHILIPS in PDF.
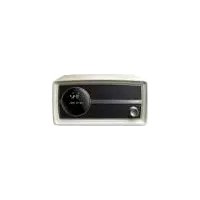


| Product Type | Portable DAB+/FM Radio with Bluetooth |
| Dimensions (W x H x D) | 245 x 123 x 122 mm |
| Weight | 1.1 kg |
| Power Supply | AC adaptor: Input 100-240V~, 50/60Hz, 350 mA; Output 5.9V 2A |
| Operation Power Consumption | 10 W |
| Tuner Bands | FM (87.50 - 108.00 MHz), DAB (174.928 - 239.200 MHz) |
| Preset Stations | 20 FM + 20 DAB |
| Bluetooth Version | Bluetooth 2.0, supports A2DP and AVRCP profiles |
| Speaker Driver | 3" full range, 4 Ohm |
| Sensitivity | > 82 dB/m/W |
| Output Power (RMS) | 3 W |
| Frequency Response | 60 Hz - 16 kHz, ±3 dB |
| Signal to Noise Ratio | > 65 dBA |
| Audio Input | AUDIO-IN (3.5 mm) for external devices, AUX mode |
| USB Charging | USB socket for charging devices (5V output, charging only) |
| Display | LCD display with adjustable brightness |
| Clock | Manual set or automatic synchronization via DAB |
| Alarm Timer | Dual alarms with snooze (9 min) and choice of FM, DAB, or buzzer |
| Sleep Timer | Selectable 15/30/45/60/90 minutes |
| Countdown Timer | Adjustable up to 99 hours? (hour/min/sec setting, buzzer alert) |
| RDS | Radio Data System support for FM (station name, text, program type) |
| DAB Features | Full scan, manual tune, DRC (Dynamic Range Control), remove invalid stations |
| Antenna | Extendable antenna for FM/DAB reception |
| Safety | Do not expose to water or heat; use only specified power supply |
Frequently Asked Questions - ORT2300 PHILIPS
User questions about ORT2300 PHILIPS
0 question about this device. Answer the ones you know or ask your own.
Ask a new question about this device
Download the instructions for your Radio in PDF format for free! Find your manual ORT2300 - PHILIPS and take your electronic device back in hand. On this page are published all the documents necessary for the use of your device. ORT2300 by PHILIPS.
USER MANUAL ORT2300 PHILIPS
Always there to help you
Register your product and get support at
www.philips.com/welcome

ORT2300

User manual
PHILIPS
Contents
1 Safety 2
2 Your docking system 3
Introduction 3
What's in the box 3
Overview of the product 4
Know about the LCD display 5
3 Get started 6
Assemble the AC power adaptor 6
Connect power 6
Power on 6
Adjust brightness 7
4 Set the clock 8
5 Use the alarm timer 9
Set an alarm 9
Deactivate a preset alarm 9
Snooze the alarm 9
Stop the alarm 9
6 Listen to FM radio stations 10
Switch to FM mode 10
Search for a radio station automatically 10
Search for a radio station manually 10
Store radio stations automatically 10
Program radio stations manually 10
Display RDS information 11
Adjust FM settings 11
7 Listen to DAB radio stations 12
Switch to DAB mode 12
For the first time use 12
Tune to a stored radio station 12
Program radio stations 12
Display DAB information 13
Use DAB menus 13
8 Play audio via Bluetooth 15
Switch to Bluetooth mode 15
Connect a device 15
Disconnect a device 15
Reconnect a device 15
Control play 16
9 Listen to an external device 17
10 Charge your devices 18
11 Use the sleep timer 19
12 Use the countdown timer 20
13 Adjust volume 21
14 Use system menus 22
Check the current software version 22
Upgrade the software 22
Reset the product 22
15 Troubleshooting 23
General 23
About Bluetooth connection 23
16 Product information 24
General information 24
Tuner 24
Speakers 24
Amplifier 24
Bluetooth 24
17 Notice 25
Compliance 25
Care of the environment 25
Trademark notice 25
Copyright 25
1 Safety
Read and understand all instructions before you use this product. If damage is caused by failure to follow the instructions, the warranty does not apply.
Risk of electric shock or fire!
- Never remove the casing of the product.
- Never expose the product and accessories to rain or water. Never place liquid containers, such as vases, near the product. If liquids are spilt on or into the product, disconnect it from the power outlet immediately. Contact Philips Consumer Care to have the product checked before use.
- Never place the product and accessories near naked flames or other heat sources, including direct sunlight.
- Never insert objects into the ventilation slots or other openings on the product.
- Where the mains plug or an appliance coupler is used as the disconnect device, the disconnect device shall remain readily operable.
- Disconnect the product from the power outlet before lightning storms.
- When you disconnect the power cord, hold the plug securely, never the cable.
Risk of short circuit or fire!
- Use only power supplies listed in the user manual
- Before you connect the product to the power outlet, make sure that the power voltage matches the value printed on the back of the product. Never connect the product to the power outlet if the voltage is different.
- Never expose the product to rain, water, sunshine, or excessive heat.
- Avoid force coming onto power plugs. Loose power plugs can cause arcing or fire.
Risk of injury or damage to the product!
• This product shall not be exposed to dripping or splashing!
- Do not place any sources of danger on this product (e.g. liquid filled objects, lighted candles).
- Never place the product or any objects on power cords or on other electrical equipment.
- If the product is transported in temperatures below 5°C, unpack the product and wait until its temperature matches room temperature before connecting it to the power outlet.
Risk of overheating!
- Never install this product in a confined space. Always leave a space of at least four inches around the product for ventilation.
- Make sure that curtains or other objects never cover the ventilation slots on the product.

Note
•The rated power voltage is printed on the back of the product. The model number and serial number are printed on the bottom.
2 Your docking system
Congratulations on your purchase, and welcome to Philips! To fully benefit from the support that Philips offers, register your product at www.philips.com/welcome.
Introduction
With this product, you can:
- listen to FM radio stations (RDS supported),
- listen to DAB radio stations,
- listen to audio from an external device through the AUDIO-IN socket,
- listen to audio from an external device via Bluetooth connection, and
- wake up to alarms.
What's in the box
Check and identify the contents of the package:


① Digital radio
② User manual
③ AC power adaptor
④ Plug converter for AC power adaptor X 2
Overview of the product

① TIMER
- Press and hold to start setting the countdown timer.
② MENU / INFO
• In standby mode, press and hold to start setting time and date.
- In FM or DAB mode, press and hold to access the menus.
- When listening to an RDS or DAB station, press repeatedly to display available information.
③ SLEEP
- Press repeatedly to set the sleep timer.
④ SOURCE
- Press to switch to another source.
⑤ LED Bluetooth indicator
- Indicate the status of Bluetooth connection.
⑥ Power and volume knob
- Press to power on or off the product.
- Rotate to adjust the volume.
⑦ LCD display
⑧ AL1/AL2
- Press and hold to start setting the alarm timer.
- When an alarm rings, press to stop the alarm.
- Press to view the alarm settings.
⑨ PRESET▶II
- Press to access the list of stored radio stations.
- During playing tracks via Bluetooth connection, press to pause or resume play.
⑩ /
- Press repeatedly to tune to a station.
- Press and hold to tune to the previous or next strong station automatically.
- Press to toggle through menus or options.
- During playing tracks via Bluetooth connection, press to skip to the previous or next track.
⑪ SCAN / SELECT
- Press and hold to start storing radio stations.
- Press to confirm an option.
⑫ SNOOZE/BRIGHTNESS
- Press to adjust the brightness of LCD display.
- When an alarm rings, press to snooze the alarm.
Know about the LCD display

① The first alarm is activated.
② The second alarm is activated.
③ The clock
④ Text information
⑤ The sleep timer is activated.
⑥ The countdown timer is activated.
⑦ The current source
3 Get started
Always follow the instructions in this chapter in sequence.
Assemble the AC power adaptor

1 Align the plug converter to the holes on the power adaptor.
2 Push the plug converter downwards until you hear a "click".
Replace a plug converter

1 Press down the clip.
2 Slide the plug converter outwards.
3 Pull the plug converter out.
4 Fix another plug converter to the power adaptor.
Connect power

Connect the AC power adaptor between
- the DC-IN socket on the back panel, and
• the AC power outlet.
→ The product switches to standby mode.
→ [0:00] blinks.
Power on
Press the power and volume knob.
→ The product is powered on and switches to the last mode.
Switch to standby mode
Press the power and volume knob again.
If the clock is neither manually set nor automatically synchronized with a DAB radio station, [0:00] blinks.
If the clock is manually set or automatically synchronized with a DAB radio station, the time and date is displayed.
The product switches to standby mode automatically under the following conditions.
- In Bluetooth mode, the Bluetooth connection is lost for 15 minutes.
- In DAB mode, no program is broadcast in 15 minutes.
Adjust brightness
Press BRIGHTNESS repeatedly to adjust the brightness of the LCD display.
4 Set the clock

Note
•To manually set the clock, switch the product to standby mode first.
1 In standby mode, press and hold MENU / INFO until [Set time] is displayed.
→ The hour digits blink.
2 Press 📄 to set the hour, and then press SCAN / SELECT to confirm.
→ The minute digits blink.
3 Press ⬆ to set the minute, and then press SCAN / SELECT to confirm.
→ The date is displayed with the day digits blink.
4 Press 🔍 to set the day, and then press SCAN / SELECT to confirm.
→ The month digits blink.
5 Press 📄 to set the month, and then press SCAN / SELECT to confirm.
→ The year digits blink.
6 Press 📄 to set the year, and then press SCAN / SELECT to confirm.
→ [Time saved] flashes, and then the set clock and date are displayed.

Tip
- When a DAB radio station that transmits time signals is broadcast, the product synchronizes its clock with the DAB radio station automatically.
5 Use the alarm timer

Note
•Make sure that you have set the clock correctly.
Set an alarm
You can set two alarms.
1 Press and hold AL1 (or AL2) for two seconds.
→ [Alarm 1] (or [Alarm 2]) is displayed with AL1 (or AL2) blinking.
→ The current alarm time is displayed with hour digits blinking.
2 Press 📋 to set the hour, and then press SCAN / SELECT to confirm.
→ The minute digits begin to blink.
3 Press 🔍 to set the minute, and then press SCAN / SELECT to confirm.
→ The alarm source name begins to blinks: [DAB], [FM], or [Buzzer].
4 Press ⚫ to select an alarm source, and then press SCAN / SELECT to confirm.
- If [DAB] or [Buzzer] is selected as the alarm source, press SCAN / SELECT to select a preset radio station or the last listened station.
→ The alarm frequency blinks: [Daily] (daily), [Weekdays] (weekdays), [Weekends] (weekends), or Once.
5 Press 🔍 to select a frequency, and then press SCAN / SELECT to confirm. → The alarm volume level blinks.
6 Press ▶ to select the volume level, and then press SCAN / SELECT to confirm. → [Alarm Saved] flashes.
Deactivate a preset alarm
1 Press AL1 (or AL2) to view alarm settings.
2 Press AL1 (or AL2) again.
→ [Alarm 1] (or [Alarm 2]) and [On] is displayed.
3 Press AL1 (or AL2) repeatedly to select [On] or [Off].
• [On]: The preset alarm is activated.
• [Off]: The preset alarm is deactivated.
→ AL1 (or AL2) is displayed when the preset alarm is activated.
→ AL1 (or AL2) disappears when the preset alarm is deactivated.
Snooze the alarm
When an alarm sounds, press SNOOZE.
→ The alarm repeats after 9 minutes.
Stop the alarm
When the first (or second) alarm sounds, press AL1 (or AL2).
→ The alarm stops and then repeats at the set time.
6 Listen to FM radio stations

Note
- For optimal reception, fully extend the antenna and adjust its position.
- You can store a maximum of 20 FM radio stations.
Switch to FM mode

Press SOURCE repeatedly until [FM Mode] is displayed.
→ FM is highlighted.
→ The current frequency is displayed.
Search for a radio station automatically
Press and hold ↗ until [Scanning...] is displayed.
→ After a strong radio station is detected, the search stops and the radio station is broadcast.
Search for a radio station manually
Press 📋/ repeatedly until the frequency of target radio station is displayed.
Store radio stations automatically
Press and hold SDANTI [SEATO] is displayed.
→ After the search is complete, the first stored radio station is broadcast.
- To tune to a stored radio station, press PRESET to access the list of stored radio stations, and then press ▶/ ▶repeatedly.
Program radio stations manually
1 Tune to a radio station.
2 Press and hold PRESET until [Preset store] is displayed.
3 Press ▶ repeatedly to select a preset sequence number.
4 Press PRESET to confirm.
→ The radio station is stored with the selected sequence number.
5 Repeat steps 1-4 to program more radio stations.
- To tune to a stored radio station, press PRESET to access the list of stored radio stations, and then press 📄/ ▲repeatedly.

Note
- If you store a radio station with the sequence number of another one, the earlier one is overwritten.
Display RDS information
Radio Data System (RDS) is a service that allows FM stations to transmit additional information. When you tune to an FM radio station that transmits RDS signals, the station name is displayed.
1 Tune to an RDS station.
2 Press MEN beanedly to scroll through the following information (if available):
- Station name
- Radio text
- Program type such as [NEWS] (news), [SPORT] (sport), [POP M] (pop music)...
- Stereo/Mono
RDS program types
| NOTYPENo RDS programme type | |
| NEWS News services | |
| AFFAIRS Politics and current affairs | |
| INFO Special information programs | |
| SPORT Sports | |
| EDUCATE Education and advanced training | |
| DRAMA Radio plays and literature | |
| CULTURE | Culture, religion and society |
| SCIENCE | Science |
| VARIED | Entertainment programs |
| POP M Pop music | |
| ROCK M | Rock music |
| MOR M | Light music |
| LIGHT M | Light classical music |
| CLASSICS | Classical music |
| OTHER M | Special music programs |
| WEATHER | Weather |
| FINANCE | Finance |
| CHILDREN | Children's programs |
| SOCIAL | Social Affairs |
| RELIGION | Religion |
| PHONE IN Phone In | |
| TRAVEL | Travel |
| LEISURE | Leisure |
| JAZZ | Jazz Music |
| COUNTRY | Country Music |
| NATION M | National Music |
| OLDIES | Oldies Music |
| FOLK M | Folk Music |
| DOCUMENT | Documentary |
| TES | Alarm Test |
| ALARM | Alarm |
Adjust FM settings
1 Press and hold menu address the FM menu.
2 Press 🎨 / ▲ to display the [Scan setting] menu.
3 Press SCAN / SELECT to access sub-menus.
4 Press ▶/ ▶to select an option.
• [Strong stations]: Search for strong stations only.
- [All stations]: Search for all stations no matter whether the signal strength of a station is strong or weak.
5 Press SCAN / SELECT to confirm the option.
7 Listen to DAB radio stations

Note
- For optimal reception, fully extend the antenna and adjust its position.
- You can program a maximum of 20 DAB radio stations
- Check with local retailer or go to www.WorldDAB.org for applicable DAB radio frequencies in your area.
Switch to DAB mode

Press SOURCE repeatedly until [DAB Mode] is displayed.
→ DAB is highlighted.
For the first time use
1 Press SOURCE repeatedly to switch the product to DAB mode.
2 Press ▲ repeatedly until the [Full scan] menu is displayed.
3 Press SCAN/SELECT the automatic search.
→ This product automatically stores radio stations with sufficient signal strength.
→ After the search is complete, the first stored radio station is broadcast automatically.
4 Press ▲ to select a station, and then press the ◆ knob to start listening.

Tip
• You can re-scan to update the list of stored stations (see 'Re-scan for stations' on page 13).
- You can tune to a station manually (see 'Tune to a station manually' on page 13).
About special symbols
Some symbol may be displayed before the name of a station.
• H: The station is one of your 10 favorite stations.
- ?: The station is unavailable or inactive.
• >> : The station is a primary station with secondary service.
• «: The station is a secondary station.
Tune to a stored radio station
1 Press ▷/ repeatedly to select a station.
2 Press PRESET to start listening.
Program radio stations
1 Tune to a DAB radio station.
2 Press and hold PRESET to activate the programming.
3 Press ▶ repeatedly to select a preset sequence number.
4 Press PRESET to confirm.
→ The radio station is stored with the selected sequence number.
5 Repeat steps 1-4 to program more radio stations.
- To tune to a stored radio station, press PRESET to access the list of stored radio stations, and then press ▶/ ▶repeatedly.

Note
- If you store a radio station with the sequence number of another one, the earlier one is overwritten.
Display DAB information
The name of current DAB station is displayed. You can also view the other information.
To cycle through available information, press MENU / INFO repeatedly.
• Dynamic label segment (DLS)
- Signal strength
- Program type (PTY)
- Ensemble name
- Frequency
- Signal error rate
- Bitrate codec
Use DAB menus
1 Press and hold menu address the DAB menus.
2 Press ▶ repeatedly to toggle through the menus.
Re-scan for stations
Full scan is used to perform a wide range search for DAB radio stations.

Press SODAN / SELECT canning for available DAB stations.
→ After the scanning is complete, the first stored station is broadcast.
Tune to a station manually
With this feature, you can tune to a specific channel/frequency manually. In addition to antenna orientation for better radio reception, the optimal reception can also be obtained with this feature.

1 Press SCAN/SELECT the station list.
2 Press ▶ repeatedly to select a station from 5A to 13F.

3 Press SCAN/SELECT the option.
DRC (Dynamic Range Control)
DRC adds or removes a degree of compensation for the differences in the dynamic range between radio stations.

1 Press SCAN/SELECT the sub-menus.
2 Press ▶ repeatedly to select an option. (The asterisk behind the option indicates the current setting.)
• [DRC off]: No compensation applied.
• [DRC low]: Medium compensation applied.
• [DRC high]: Maximum compensation applied.
3 Press TO confirm the option.
Remove invalid stations
Some stations in the list have no service when you travel to another area. In front of the station name of an invalid station, a question mark (?) is displayed.

1 Press SCAN/SELECT the sub-menus.
2 Press 📋 repeatedly to select an option.
• [No]: Return to the previous menu.
• [Yes]: Remove invalid stations from the station list.
3 Press SCAN/SELECT the option.
System menus

1 Press SCAN/SELECT system menus.
2 Press ▶ repeatedly to select a sub-menu.
- For details, refer to the section 'Use system menus'.
8 Play audio via Bluetooth
With this product, you can stream audio from a Bluetooth player.
An application Philips DigitalRadio is available on Apple App Store and Google Play. To fully enjoy features of this product, download and install the application to your smart device.

Note
- Philips does not guarantee the compatibility with all Bluetooth devices.
- Before pairing a device with this system, read its user manual for Bluetooth compatibility.
- The product can memorize a maximum of 4 paired devices.
- Make sure that Bluetooth function is enabled on your device, and your device is set as visible to all other Bluetooth devices.
- The operational range between this system and a Bluetooth device is approximately 10 meters (30 feet).
- Any obstacle between this system and a Bluetooth device can reduce the operational range.
- Keep away from any other electronic device that may cause interference.
Switch to Bluetooth mode
Press SOURCE repeatedly until [Bluetooth Mode] is displayed.
→ If no Bluetooth device is connected, [Bluetooth No Connection] (No Bluetooth connection) scrolls.
Connect a device
1 On your device, search for Bluetooth devices.
2 In the device list, select ORT2300.
- If a message prompts for the permission for Bluetooth connection with ORT2300, confirm it.
If the connection succeeds, [BT Connected] is displayed on the LCD display of this product.
Bluetooth indicator
The LED indicator beside the power and volume knob indicates the status of Bluetooth connection.
Indicator Bluetooth connection
Off Waiting for connection
Blinking Connecting
Solid Connected
Disconnect a device
- On this product, press and hold SCAN / SELECT for 3 seconds.
- On your device, break the Bluetooth connection with this product.
Reconnect a device
- For a paired Bluetooth device on which the automatic reconnection is enabled, this product reconnects with it once it is detected.
- For a paired Bluetooth device that does not support the automatic reconnection, reconnect it with this product manually.
Control play
If the connected Bluetooth device supports Advanced Audio Distribution Profile (A2DP), you can listen to tracks that are stored on the device through the system. If the device also supports Audio Video Remote Control Profile (AVRCP) profile, you can control play on this product.
1 Play a track on the connected device.
2 Control play on this product.
- To pause or resume play, press PRESET/▶II
- To skip to the previous or next track, press ◀ / ▶
- To display available information about the current track, press MENU / INFO repeatedly.

Note
- If the connected device does not support the AVRCP profile, control play on the connected device.
9 Listen to an external device
You can also listen to an external audio device, for example, MP3 player, through this product.
1 Press SOURCE repeatedly to switch the source to [AUX IN].
→ AUX is highlighted.

2 Connect an audio input cable with a 3.5 mm connector on both ends to
- the AUDIO-IN socket on the back panel of this product, and - the headphone socket on the external device.

3 Play audio on the external device (refer to its user manual).
10 Charge your devices
Connect your device to the USB socket on the back of the product.
Once the device is recognized, the charging starts.

Note
•Philips does not guarantee the compatibility of this product with all devices.
• The USB socket is for charging only.
11 Use the sleep timer
You can set a time period after which the product switches to standby mode automatically.

Press SLEEP repeatedly to select a time period (in minutes).
→ When the sleep timer is activated, appears.
→ After the set period, the product switches to standby mode.
• To deactivate the sleep timer, press SLEEP repeatedly until [Sleep off] appears.
12 Use the countdown timer
You can set a time period after which the product buzzes.
1 Press and hold TIMER until ④blinks. → The hour digits blink.
2 Press ▶ repeatedly to set the hour, and then press SCAN / SELECT to confirm. → The minute digits blink.
3 Press ▶ repeatedly to set the minute, and then press SCAN / SELECT to confirm. → The second digits blink.
4 Press 📋 repeatedly to set the second, and then press SCAN / SELECT to confirm. → 🔒 stops blink.
• To stop the buzzer, press TIMER or the power and volume knob.
13 Adjust volume
- To increase the volume, turn the power and volume knob clockwise.
- To decrease the volume, turn the power and volume knob anti-clockwise.
14 Use system menus
Use the system menus to
- check the version of current software of this product,
- upgrade the software, and
- reset the product to factory default status.
Check the current software version

Press to display the version of current software.
Upgrade the software


1 Go to www.philips.com/support.
2 Search for support information about this product with "ORT2300C/10" as the keyword.
When an upgrade packet is available, the link of "Installation instructions" under "Software & drivers" is accessible. The exact wording of link names may vary in different languages.
3 Click the link of "Installation instructions".
4 Read and understand the instructions on software upgrade.
5 Follow the instructions to complete the upgrade.
Reset the product

1 Press SCAN/SELECT the options.
2 Press 📋 repeatedly to select an option.
• [No]: Return to the previous menu.
• [Yes]: Reset the product to factory default status.
3 Press SCAN/SELECT the option.
15 Troubleshooting

Warning
• Never remove the casing of this product.
To keep the warranty valid, never try to repair the product yourself.
If you encounter problems when using this product, check the following points before requesting service. If the problem remains unsolved, go to the Philips Web page (www.philips.com/support). When you contact Philips, make sure that the product is nearby and the model number and serial number are available.
General
No power
- Make sure that the AC power cord is properly connected.
- Make sure that there is power at the AC power outlet.
No sound
- Adjust the volume.
- When listening to an external device, make sure that the external device is not muted.
No response from the product
• Make sure that the power is available.
- Turn off the product, and then turn it on again.
Poor radio reception
- Due to the interference from other electrics or building obstacles, the signals become weak. Move the product to a place free of interference.
- Make sure that the antenna is fully extended. Adjust the position of the antenna.
Clock/alarm setting is erased.
• Power has been interrupted, or the AC power adaptor has been disconnected.
- Set the clock/alarm again.
About Bluetooth connection
Music playback is unavailable on this product even after successful Bluetooth connection.
- The device cannot be used with this product to play music.
The audio quality is poor after connection with a Bluetooth-enabled device.
- The Bluetooth reception is poor. Move the device closer to this product or remove any obstacle between.
Cannot connect with this product.
- The device does not support the profiles required for this product.
- The Bluetooth function of the device is not enabled. Refer to the user manual of the device to find out how to enable the function.
• This product is not in the pairing mode. - This product is already connected with another Bluetooth-enabled device. Disconnect that device and then try again.
The paired mobile device connects and disconnects constantly.
- The Bluetooth reception is poor. Move the device closer to this product or remove any obstacle between.
- Some mobile phones may connect and disconnect constantly when you make or end calls. This does not indicate any malfunction of this product.
- For some devices, the Bluetooth connection may be deactivated automatically as a power-saving feature. This does not indicate any malfunction of this product.
16 Product information

Note
- Product information is subject to change without prior notice.
General information
| AC power adaptor Model No.: OH-1015E0592000U1Brand name: PhilipsInput: 100-240V~,50/60Hz, 350 mA;Output: 5.9 V== 2 A | |
| Operation power consumption | 10 W |
| Dimensions:- Main unit(W x H x D) | 245 x 123 x 122 mm |
| Weight:- Main unit | 1.1 kg |
Tuner
| Tuning Range FM: 87.50 - 108.00MHz;DAB: 174.928-239.200 MHz | |
| Tuning grid 50 kHz | |
| DAB sensitivity(EN50248) | < -95 dbm |
| Total HarmonicDistortion | < 2% |
| Signal to Noise Ratio > 50 dBA | |
| Number of preset radio stations | 20 (FM), 20 (DAB) |
Speakers
| Speaker Impedance 4 Ohm |
| Speaker Driver 3" full range |
| Sensitivity > 82 dB/m/W |
Amplifier
| Output Power 3 W RMS | |
| Frequency Response 60 Hz - 16 kHz, ±3 dB | |
| Signal to Noise Ratio | >65 dBA |
| Audio Input | 0.5 V RMS 20 kOhm |
Bluetooth
| Communication system | Bluetooth Standard version 2.0 |
| Output | Bluetooth Standard Power Class 2 |
| Maximum communication range | Line of sight approx. 10m (30 feet) |
| Frequency band | 2.4 GHz band (2.4000 GHz - 2.4835 GHz) |
| Compatible Bluetooth profiles | Advanced Audio Distribution Profile (A2DP)Audio Video Remote Control Profile (AVRCP) |
| Supported codecs | |
| - Receive | SBC (Sub Band Codec) |
| - Transmit | SBC (Sub Band Codec) |
17 Notice
Any changes or modifications made to this device that are not expressly approved by Philips Consumer Lifestyle may void the user's authority to operate the equipment.
Compliance
CE0890
This product complies with the radio interference requirements of the European Community. To check the EC DECLARATION OF CONFORMITY, go to http://download.p4c.philips.com/files/o/ORT2300c_10/ORT2300c_10_doc_eng.pdf.

This is CLASS II apparatus with double insulation, and no protective earth provided.
Care of the environment

Your product is designed and manufactured with high quality materials and components, which can be recycled and reused.

When this crossed-out wheeled bin symbol is attached to a product it means that the product is covered by the European Directive 2002/96/EC. Please inform yourself about the local separate collection system for electrical and electronic products.
Please act according to your local rules and do not dispose of your old products with your normal household waste.
Correct disposal of your old product helps to prevent potential negative consequences for the environment and human health.
Environmental information
All unnecessary packaging has been omitted. We have tried to make the packaging easy to separate into three materials: cardboard (box), polystyrene foam (buffer) and polyethylene (bags, protective foam sheet.) Your system consists of materials which can be recycled and reused if disassembled by a specialized company. Please observe the local regulations regarding the disposal of packaging materials, exhausted batteries and old equipment.
Trademark notice
The Bluetooth ® word mark and logos are registered trademarks owned by Bluetooth SIG, Inc. and any use of such marks by Philips is under license.
Copyright
2013 © Koninklijke Philips Electronics N.V. Specifications are subject to change without notice. Trademarks are the property of Koninklijke Philips Electronics N.V or their respective owners. Philips reserves the right to change products at any time without being obliged to adjust earlier supplies accordingly.

Specifications are subject to change without notice
All rights reserved.
ORT2300_10_UM_V1.0


- ALWAYS THERE TO HELP YOU
- USER MANUAL
- PHILIPS
- CONTENTS
- SAFETY
- YOUR DOCKING SYSTEM
- GET STARTED
- SET THE CLOCK
- USE THE ALARM TIMER
- LISTEN TO FM RADIO STATIONS
- LISTEN TO DAB RADIO STATIONS
- PLAY AUDIO VIA BLUETOOTH
- LISTEN TO AN EXTERNAL DEVICE
- CHARGE YOUR DEVICES
- USE THE SLEEP TIMER
- USE THE COUNTDOWN TIMER
- ADJUST VOLUME
- USE SYSTEM MENUS
- TROUBLESHOOTING
- PRODUCT INFORMATION
- NOTICE
- RISK OF ELECTRIC SHOCK OR FIRE
- RISK OF SHORT CIRCUIT OR FIRE
- RISK OF INJURY OR DAMAGE TO THE PRODUCT
- RISK OF OVERHEATING
- NOTE
- INTRODUCTION
- WITH THIS PRODUCT, YOU CAN
- WHAT'S IN THE BOX
- OVERVIEW OF THE PRODUCT
- ① TIMER
- ② MENU / INFO
- ③ SLEEP
- ④ SOURCE
- ⑤ LED BLUETOOTH INDICATOR
- ⑥ POWER AND VOLUME KNOB
- ⑦ LCD DISPLAY
- ⑧ AL1/AL
- ⑨ PRESET▶II
- ⑩
- ⑪ SCAN / SELECT
- ⑫ SNOOZE/BRIGHTNESS
- ASSEMBLE THE AC POWER ADAPTOR
- CONNECT POWER
- POWER ON
- SWITCH TO STANDBY MODE
- ADJUST BRIGHTNESS
- TIP
- SET AN ALARM
- DEACTIVATE A PRESET ALARM
- SNOOZE THE ALARM
- STOP THE ALARM
- SWITCH TO FM MODE
- SEARCH FOR A RADIO STATION AUTOMATICALLY
- SEARCH FOR A RADIO STATION MANUALLY
- STORE RADIO STATIONS AUTOMATICALLY
- PROGRAM RADIO STATIONS MANUALLY
- DISPLAY RDS INFORMATION
- ADJUST FM SETTINGS
- SWITCH TO DAB MODE
- FOR THE FIRST TIME USE
- ABOUT SPECIAL SYMBOLS
- TUNE TO A STORED RADIO STATION
- PROGRAM RADIO STATIONS
- DISPLAY DAB INFORMATION
- USE DAB MENUS
- RE-SCAN FOR STATIONS
- TUNE TO A STATION MANUALLY
- DRC (DYNAMIC RANGE CONTROL)
- REMOVE INVALID STATIONS
- SYSTEM MENUS
- SWITCH TO BLUETOOTH MODE
- CONNECT A DEVICE
- BLUETOOTH INDICATOR
- INDICATOR BLUETOOTH CONNECTION
- DISCONNECT A DEVICE
- RECONNECT A DEVICE
- CONTROL PLAY
- CHECK THE CURRENT SOFTWARE VERSION
- UPGRADE THE SOFTWARE
- RESET THE PRODUCT
- WARNING
- GENERAL
- NO POWER
- NO SOUND
- NO RESPONSE FROM THE PRODUCT
- POOR RADIO RECEPTION
- CLOCK/ALARM SETTING IS ERASED
- ABOUT BLUETOOTH CONNECTION
- MUSIC PLAYBACK IS UNAVAILABLE ON THIS PRODUCT EVEN AFTER SUCCESSFUL BLUETOOTH CONNECTION
- THE AUDIO QUALITY IS POOR AFTER CONNECTION WITH A BLUETOOTH-ENABLED DEVICE
- CANNOT CONNECT WITH THIS PRODUCT
- THE PAIRED MOBILE DEVICE CONNECTS AND DISCONNECTS CONSTANTLY
- COMPLIANCE
- CE
- CARE OF THE ENVIRONMENT
- ENVIRONMENTAL INFORMATION
- TRADEMARK NOTICE
- COPYRIGHT
Brand : PHILIPS
Model : ORT2300
Category : Radio