
CT-X8000IN - Musical instrument CASIO - Free user manual and instructions
Find the device manual for free CT-X8000IN CASIO in PDF.


| Product Type | Digital Keyboard |
| Model | CT-X8000IN |
| Brand | CASIO |
| Number of Keys | 61 (Standard Size) |
| Number of Tones | 800 (including DSP tones) |
| Number of Rhythms | 250 |
| Number of Songs (Demo) | 3 |
| Effects | Reverb (25 types), Chorus (16 types), Delay (21 types), DSP |
| Polyphony | 64 notes (max) |
| Split/Layer | Up to 4 parts (UPPER 1/2, LOWER 1/2) |
| Arpeggiator | 150+ types |
| Metronome | Yes (0-16 beats, 4/8 denominator) |
| Phrase Pads | 4 pads with recording/playback |
| MIDI Recorder | Yes (system track + 4 solo tracks) |
| USB Flash Drive Support | Yes (playback/recording of audio and MIDI files) |
| Computer Connectivity | USB MIDI |
| Audio Input | AUDIO IN (3.5mm stereo mini) |
| Headphone Output | PHONES/OUTPUT (6.3mm stereo jack) |
| Pedal Connections | PEDAL1 (sustain), PEDAL2/EXPRESSION |
| Power Supply | AC Adaptor AD-A12150LW (12V DC) or 6 D-size batteries (not included) |
| Power Consumption | Approx. 12V DC 1.5A (AC adaptor) |
| Speaker Output | Built-in stereo speakers (2 x 6W) |
| Dimensions (approx.) | Width: 945 mm, Height: 120 mm, Depth: 350 mm (estimated) |
| Weight (approx.) | 5.2 kg (without batteries) |
| Auto Power Off | After 30 minutes of inactivity (configurable) |
| Auto Resume | Retains most settings after power off |
Frequently Asked Questions - CT-X8000IN CASIO
User questions about CT-X8000IN CASIO
0 question about this device. Answer the ones you know or ask your own.
Ask a new question about this device
Download the instructions for your Musical instrument in PDF format for free! Find your manual CT-X8000IN - CASIO and take your electronic device back in hand. On this page are published all the documents necessary for the use of your device. CT-X8000IN by CASIO.
USER MANUAL CT-X8000IN CASIO
Please keep all information for future reference.
Safety Precautions
Before trying to use the Digital Keyboard, be sure to read the separate "Safety Precautions".
About Music Score data
You can use a computer to download music score data from the CASIO Website. For more information, visit the URL below.
http://world.casio.com/
Important!
Please note the following important information before using this product.
- Before using the AD-E24250LW/AD-A12150LW Adaptor to power the unit, be sure to check the AC Adaptor for any damage first. Carefully check the power cord for breakage, cuts, exposed wire and other serious damage. Never let children use an AC adaptor that is seriously damaged.
- The product is not intended for children under 3 years.
- Use only CASIO AD-E24250LW/AD-A12150LW adaptor.
• The AC adaptor is not a toy. - Be sure to disconnect the AC adaptor before cleaning the product.
CT-X8000IN only
- Never attempt to recharge batteries.
- Do not use rechargeable batteries.
- Never mix old batteries with new ones.
- Use recommended batteries or equivalent types.
• Always make sure that positive (+) and negative (−) poles are facing correctly as indicated near the battery compartment.
- Replace batteries as soon as possible after any sign they are getting weak.
- Do not short-circuit the battery terminals.
Declaration of Conformity According to EU Directive

Manufacturer:
CASIO COMPUTER CO., LTD.
6-2, Hon-machi 1-chome, Shibuya-ku, Tokyo 151-8543, Japan
Responsible within the European Union:
Casio Europe GmbH
- Any reproduction of the contents of this manual, either in part or its entirety, is prohibited. Except for your own, personal use, any other use of the contents of this manual without the consent of CASIO is prohibited under copyright laws.
• IN NO EVENT SHALL CASIO BE LIABLE FOR ANY DAMAGES WHATSOEVER (INCLUDING, WITHOUT LIMITATION, DAMAGES FOR LOSS OF PROFITS, BUSINESS INTERRUPTION, LOSS OF INFORMATION) ARISING OUT OF THE USE OF OR INABILITY TO USE THIS MANUAL OR PRODUCT, EVEN IF CASIO HAS BEEN ADVISED OF THE POSSIBILITY OF SUCH DAMAGES. - The contents of this manual are subject to change without notice.
- The actual appearance of the product may be different from that shown in the illustrations in this User's Guide.
- Company and product names used in this manual may be registered trademarks of others.
Contents
General Guide EN-4
Preparing the Music Stand .... EN-7
Returning the Digital Keyboard to Its Factory Default Settings .... EN-7
Preparing a Power Supply EN-8
Using the AC Adaptor EN-8
CT-X8000IN: Using Batteries ..... EN-9
Turning Power On or Off. EN-9
Adjusting Display Contrast ..... EN-10
Connecting to Audio Equipment EN-11
Digital Keyboard Audio Output ..... EN-11
Using Headphones ..... EN-11
Outputting Keyboard Notes to Audio Equipment ...... EN-12
Playing an External Device from the Digital Keyboard .... EN-13
CT-X9000IN: Outputting Sound from a Microphone. EN-13
Operations Common to All Modes EN-14
About this manual ...... EN-14
Numeric Input EN-14
Other Functions of 12 Number Keys ..... EN-14
4 CATEGORY Button.... EN-15
Text Character Input ..... EN-15
FUNCTION Indicator..... EN-16
Listening to Demo Play EN-17
Playing on the Keyboard EN-18
Selecting a Tone ..... EN-18
Sounding Multiple Tones (Layer and Split) ..... EN-19
Selecting an Effect for a Tone (Reverb, Chorus, Delay) ...... EN-22
Using Equalization ..... EN-25
Using the Metronome ..... EN-27
Sounding Arpeggio Phrases Automatically (Arpeggiator).... EN-27
Changing Keyboard Response to Touch Pressure (Touch Response)..... EN-28
Controlling Sounds EN-29
Using a Pedal ...... EN-29
Sliding Smoothly Between Pitches (Portamento).... EN-32
Using the Pitch Bend Wheel ..... EN-32
CT-X9000IN: 39 MODULATION/ ASSIGNABLE button....EN-32
Changing the Pitch in Semitone Steps (Transpose).... EN-34
Changing the Pitch of Each Part in Octave Units (Octave Shift).... EN-34
Performing Master Digital Keyboard and Individual Part Pitch Adjustment ..... EN-36
Selecting a Scale EN-36
Playing a Built-in Song or a Song on a USB Flash Drive (Song Bank Mode) EN-38
Selecting a Built-in Song for Playback .....EN-38
Looping Playback of Specific Song Measures (A-B Repeat).....EN-39
Playing Back with One Hand's Part Muted.....EN-39
Playing Back a Song from a USB Flash Drive . . . .EN-41
Playing Back an Audio File on a USB Flash Drive (Audio Mode) EN-41
Using Auto Accompaniment (Rhythm Mode) EN-42
Selecting a Rhythm....EN-42
Using Auto Accompaniment .....EN-43
Changing Auto Accompaniment Speed (Tempo) . .EN-45
Creating a Song with an Auto Accompaniment (Accompaniment Pattern)....EN-46
Starting and Stopping Auto Accompaniment with the Accompaniment Keyboard (Synchro Start, Synchro Stop). . . . . . . . . . . . . . . . . . . . . . . . . . . . . . . . . . . . . . . . . . . . . . . . . . . . . . . . . . . . EN-47
Changing Accompaniment Keyboard Settings . . . .EN-47
Advanced Split Settings....EN-49
Using Recommended Tones and Tempos (One-Touch Presets).....EN-51
Adding Harmony to Melody Notes (Auto Harmonize) ....EN-51
Using Music Presets EN-52
Using Phrase Pads EN-53
Changing to Another Phrase Set....EN-53
Starting and Stopping Phrase Playback .....EN-53
Configuring Phrase Playback Setups .....EN-54
Recording a Phrase .....EN-55
Configuring Phrase Recording Settings .....EN-56
Managing Phrase Sets .....EN-57
Editing a Phrase....EN-57
Muting Specific Parts (Part Mode) EN-60
Turning a Part On or Off....EN-60
Part On/Off Function Part Groups .....EN-61
Using the Mixer EN-62
Mixer Operation ....EN-62
List of Parts for Each Mixer Part Group .....EN-63
Advanced Mixer Settings .....EN-64
Registering and Restoring a Setup (Registration) EN-65
Registering a Setup ....EN-66
Recalling a Registered Setup....EN-67
Using a Pedal to Cycle Through Multiple Setups (Registration Sequence)....EN-68
Editing a Tone (User Tones) EN-69
Creating a User Tone ....EN-69
Tone Editing Item List.....EN-72
Creating an Auto Accompaniment (User Rhythm) EN-74
Creating and Editing a User Rhythm..... EN-75
User Rhythm Part Playback Settings ..... EN-83
Operations Affecting All the Accompaniment Patterns in a Rhythm.... EN-85
Using the MIDI Recorder to Record EN-87
Starting a Recording ..... EN-88
Recording Keyboard Play EN-89
Re-recording Part of a Recorded Track (Overdubbing, Punch-in Recording) ..... EN-92
Playing Back a Recorded Song ..... EN-93
Copying a Recorded Song, Deleting a Recorded Song or Track.... EN-94
Song Editing Mode ..... EN-95
Editing an Entire Song in Measure Units (Song Editing) EN-96
Editing a Recorded Song in Track Units ..... EN-97
Editing a Track of a Recorded Song in Measure Units EN-98
Editing a Recorded Song in Event Units (Event Editor)...... EN-100
Inputting Notes and Chords One-by-one (Step Input) EN-103
Recorded Song Mixer Settings ..... EN-106
Configuring Function Settings EN-107
Examination Mode EN-113
Batch Deleting Data from Digital Keyboard Memory. EN-113
USB Flash Drive EN-114
Connecting a USB Flash Drive to and Detaching It from the Digital Keyboard ..... EN-114
Formatting a USB Flash Drive ..... EN-115
USB Flash Drive Operations..... EN-116
Using a Computer to Copy General Song Data to a USB Flash Drive. EN-118
Connecting a Computer EN-119
Connecting a Computer ..... EN-119
MIDI Settings. EN-120
Transferring Data Between the Digital Keyboard and a Computer ..... EN-120
Reference EN-121
Troubleshooting....EN-121
Error Messages ....EN-123
Specifications....EN-125
DSP Effect List....EN-127
Digital Keyboard Sound Source Configuration and MIDI Channel Assignment .....EN-137
Operating Precautions....EN-139
Appendix A-1
Song List....A-1
Fingering Guide A-1
Chord Example List A-3
Block Diagram A-4
MIDI Implementation Chart
Included Accessories
●Music Stand
●Leaflets
- Safety Precautions
- Appendix
- Other (Warranty, etc.)
Items included as accessories are subject to change without notice.
Separately Available Accessories
- You can get information about accessories that are separately for this product from the CASIO catalog available from your retailer, and from the CASIO website at the following URL.
http://world.casio.com/
General Guide
- All of the illustrations in this manual show the CT-X9000IN.
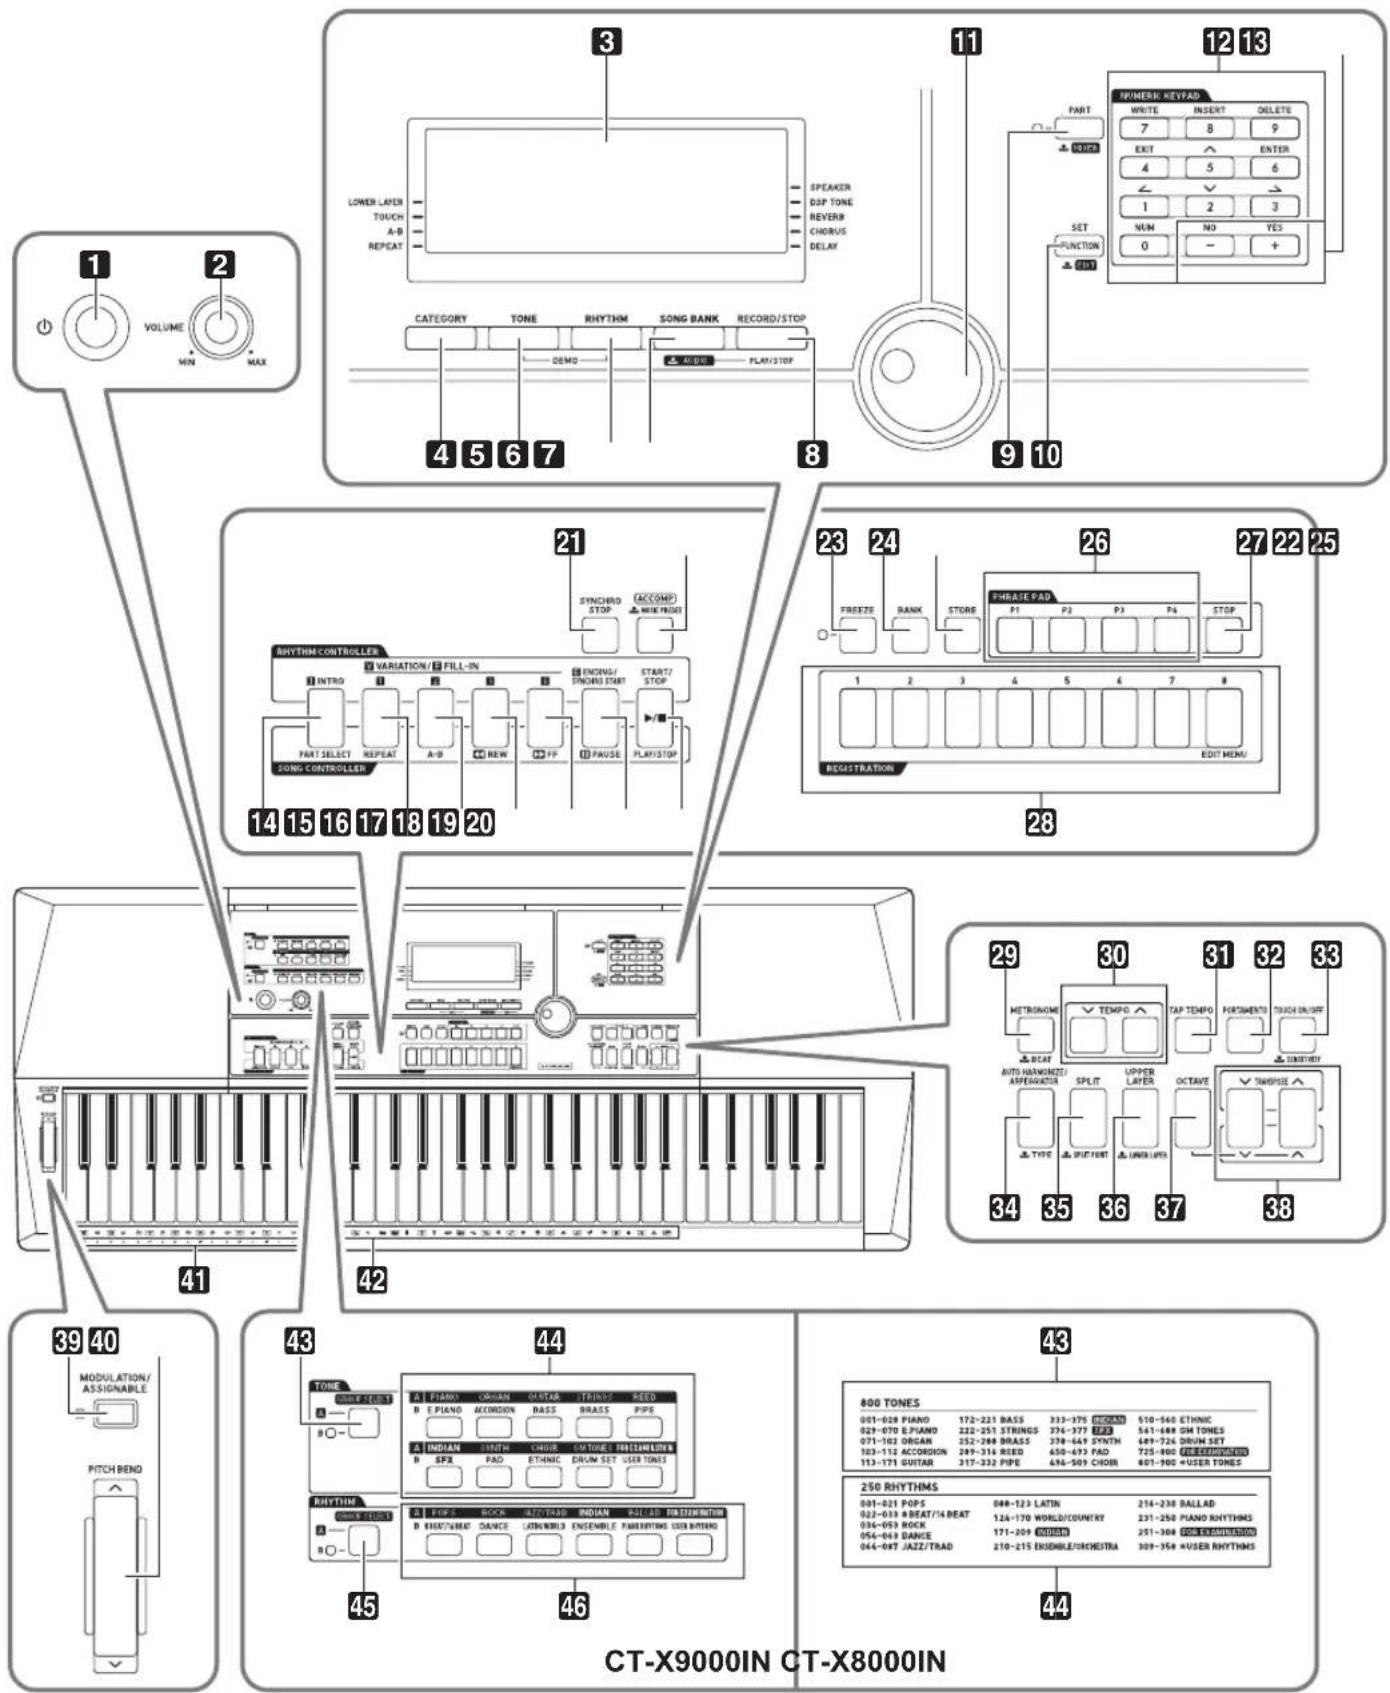
- Some of the button names shown here include the ↓ mark. This indicates that you need to long-press the button to perform its operation.
- This manual uses the numbers and names below to refer to buttons, keys, and controllers.
1 (Power) button
2VOLUME knob
3 Display
4 CATEGORY button
5 TONE button
6 RHYTHM button
7 SONG BANK, ↓AUDIO button
8 RECORD/STOP, AUDIO PLAY/STOP button
9 PART, ↓ MIXER button
10 FUNCTION, SET, ↓EDIT button
11 Dial
12 Number keys
13[-], [+] keys
14 INTRO, PART SELECT button
15 VARIATION/FILL-IN 1, REPEAT button
16 VARIATION/FILL-IN 2, A-B button
17 VARIATION/FILL-IN 3, ◀REW button
18 VARIATION/FILL-IN 4, ▶▶FF button
19 ENDING/SYNCHRO START, II PAUSE button
20 START/STOP, PLAY/STOP button
21 SYNCHRO STOP button
22 ACCOMP, ↓ MUSIC PRESET button
23 FREEZE button
24 BANK button
25 STORE button
26PHRASE PAD buttons
27 STOP button
28 REGISTRATION buttons
29 METRONOME, ↓BEAT button
30 TEMPO buttons
31 TAP TEMPO button
35 SPLIT, ↓SPLIT POINT button
36 UPPER LAYER, ↓LOWER LAYER button
37OCTAVE button
38 TRANSPOSE buttons
39 MODULATION/ASSIGNABLE button (CT-X9000IN only)
40 PITCH BEND wheel
41 CHORD root names
42 Percussion instrument list
CT-X9000IN
43 TONE GROUP SELECT button
44 TONE Category buttons
45 RHYTHM GROUP SELECT button
46 RHYTHM Category buttons
CT-X8000IN
43 Tone list
44 Rhythm list
■Back
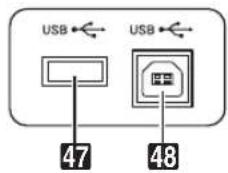
CT-X9000IN

CT-X8000IN

47USB flash drive port
48USB port
49 LINE OUT R, L/MONO jacks (CT-X9000IN only)
50 CT-X9000IN: PHONES jack
CT-X8000IN: PHONES/OUTPUT jack*
51MIC IN jack (CT-X9000IN only)
52MIC VOLUME knob (CT-X9000IN only)
53 AUDIO IN jack
54 PEDAL1 jack
55 PEDAL2/EXPRESSION jack
56 CT-X9000IN: DC 24V terminal
CT-X8000IN: DC 12V terminal
* In this manual, this jack is referred to as the 50 PHONES jack.
■Display
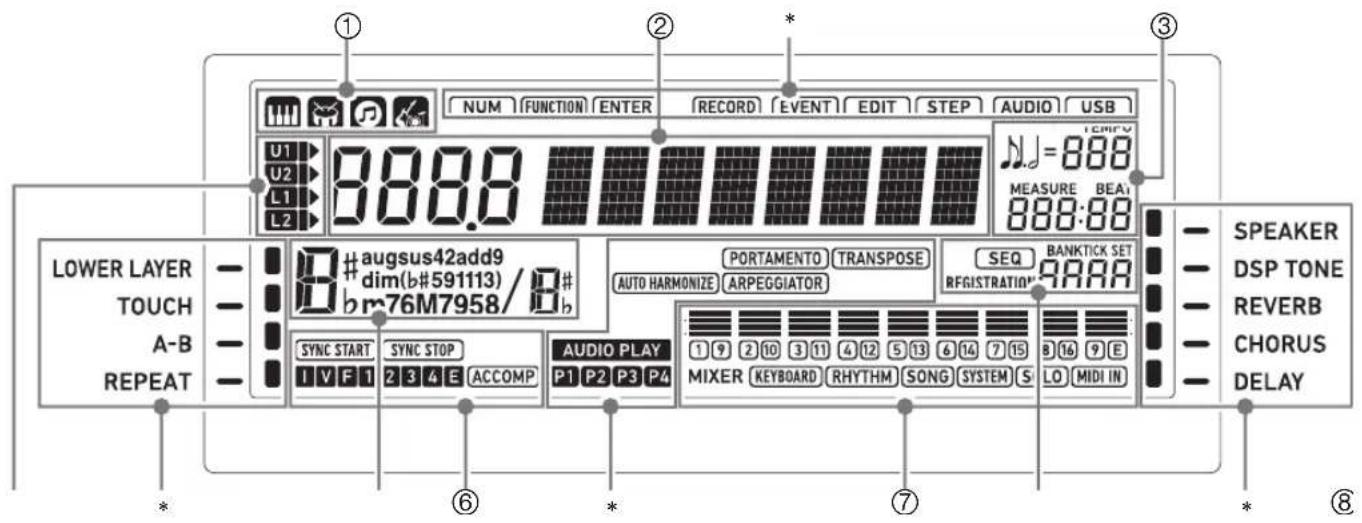
① Tone indicator
Rhythm indicator
Song Bank indicator
Music Preset indicator
② Number/setting value display (left), name display (right)
③ Tempo, measure, beat
④ Keyboard part indicators
⑤ Chord name
⑥ Auto Accompaniment indicators
⑦ Mixer info display area
⑧ Registration display, event edit display
*Other Indicators
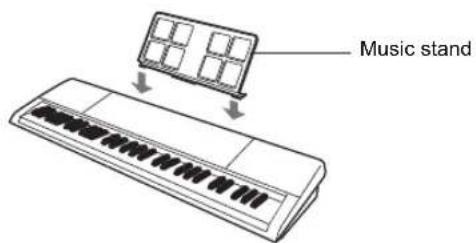
Preparing the Music Stand
Returning the Digital Keyboard to Its Factory Default Settings
There are two ways to reset the Digital Keyboard to its default settings: a "setting reset" that initializes settings only without deleting data, and a "factory reset" that initializes settings and deletes all data, returning the Digital Keyboard to the state it was in when it left the factory.
For details, see "Batch Deleting Data from Digital Keyboard Memory" (page EN-113).
Preparing a Power Supply
Your Digital Keyboard uses an AC adaptor for power.

NOTE
- Though the CT-X8000IN supports battery operation, use of an AC adaptor is generally recommended.
Using the AC Adaptor
Make sure that you use only the AC adaptor specified for this Digital Keyboard. Use of a different type of AC adaptor can cause malfunction.
CT-X9000IN: Connecting the AC Adaptor
Specified AC Adaptor: AD-E24250LW
CT-X8000IN: Connecting the AC Adaptor
Specified AC Adaptor: AD-A12150LW

IMPORTANT!
- Never connect the AC adaptor (JEITA Standard, with unified polarity plug) that comes with this Digital Keyboard to any other device besides this Digital Keyboard. Doing so creates the risk of malfunction.
- Be sure to turn off Digital Keyboard power before connecting or disconnecting the AC adaptor.
- The AC adaptor will become warm to the touch after very long use. This is normal and does not indicate malfunction.
- Note the following important precautions to avoid damage to the power cord.
During Use
- Never pull on the cord with excessive force.
- Never repeatedly pull on the cord.
- Never twist the cord at the base of the plug or connector.
During Movement
- Before moving the Digital Keyboard, be sure to unplug the AC adaptor from the power outlet.
During Storage
- Loop and bundle the power cord, but never wind it around the AC adaptor.
- Never insert metal, pencils, or any other objects into the product's DC24V (CT-X9000IN) or DC12V (CT-X8000IN) terminal. Doing so creates the risk of accident.
- Do not try to use the power cord that comes with the product with another device.
- Use the AC adaptor so its label surface is pointed downwards. The AC adaptor becomes prone to emitting electromagnetic waves when the label surface is facing upwards.
- Plug the AC adaptor into a power outlet that is close to the Digital Keyboard. This lets you immediately unplug from the power outlet should any problem occur.
- The AC adaptor is intended for indoor use only. Do not leave it in a location where it can become wet. Also, do not place a vase or any other container of liquid on the AC adaptor.
- Make sure that the AC adaptor does not become covered with a newspaper, table cloth, curtain, or any other type of fabric.
- If you do not plan to use the Digital Keyboard for a long time, unplug the AC adaptor from the power outlet.
- The AC adaptor cannot be repaired. If your AC adaptor malfunctions or becomes damaged, you need to purchase a new one.
• AC Adaptor Usage Environment Temperature: 0 to 40°C Humidify: 10% to 90%RH
• Output Polarity: ◇—●—⊕
CT-X8000IN: Using Batteries
You can use six D-size batteries for power.

IMPORTANT!
- Be sure to turn off power before loading batteries.
-
It is up to you to prepare six commercially available batteries. Do not use oxyride batteries or any other nickel based batteries.
-
Open the battery cover on the bottom of the Digital Keyboard.
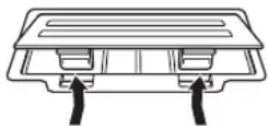
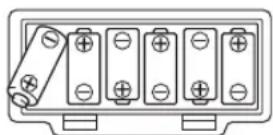
- Load six D-size batteries into the battery compartment.
- Make sure the positive and negative ends of the batteries are facing as shown in the illustration.
- Insert the tabs of the battery cover into the holes on the side of the battery compartment, and close the cover.
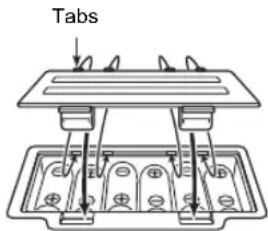
■Low Battery Indication
The indicators shown below start to flash to let you know when battery power is low. Replace the batteries with new ones.
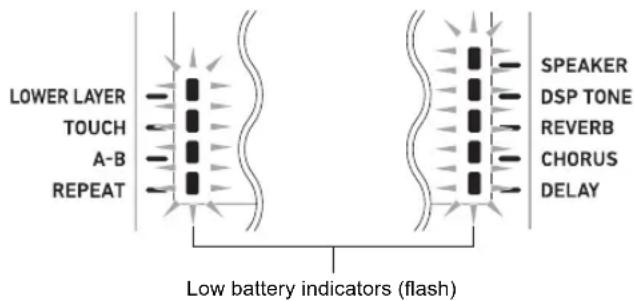
Turning Power On or Off
- Connect the Digital Keyboard to a power supply.
- See "Using the AC Adaptor" (page EN-8) or "CT-X8000IN: Using Batteries" (page EN-9).
-
Press 1 (power) to turn on power. • Use 2 VOLUME to adjust volume.
-
To turn off power, hold down 1 (power) again.
The message "Bye" will appear on the display and then power will turn off.

IMPORTANT!
- If you press ⏻ (power) only lightly, the display will light up momentarily but power will not turn on. This does not indicate malfunction. Press ⏻ (power) firmly and completely to turn on power.
- Turning off the Digital Keyboard causes most current settings to be cleared. While Auto Resume function (page EN-10) is turned on, most settings are retained even when power is turned off.
- Never try to perform any operation while the “Wait...” or “Bye” message is displayed. The “Wait...” or “Bye” message indicates that an internal data save operation is being performed. Turning off the Digital Keyboard can cause Digital Keyboard data to be deleted or become corrupted.

NOTE
- Pressing ⏻ (power) to turn off power actually puts the Digital Keyboard into a standby state. Minute amounts of current continue to flow within the Digital Keyboard in the standby state. If you do not plan to use the Digital Keyboard for a long time or if there is a lightning storm in your area, be sure to unplug the AC adaptor from the power outlet.
Auto Power Off
If you do not perform any operation on the Digital Keyboard for about 30 minutes, power will turn off automatically.

NOTE
- You can disable Auto Power Off to ensure that power is not turned off automatically during a concert, etc. Perform the procedure under "To configure function settings with the 10 FUNCTION button" (page EN-107) and disable the following setting: Other (Other) → Auto Power Off (AutoOff) (page EN-112).
Auto Resume
While Auto Resume is turned on, the current settings of the items described below are retained even when power is turned off (as long as power continues to be supplied to the Digital Keyboard, and power is turned off normally by pressing
1 (power) or by triggering of Auto Power Off.
●Current settings of the items below
Tone (UPPER 1, LOWER 1, UPPER 2, LOWER 2), Rhythm, Song number, Music Preset number, Tempo, Transpose, Octave Shift, [ACCOMP] indicator displayed/not displayed status
●On/off status of the functions below
Split, Layer, Portamento, Auto Harmonize or Arpeggiator, CT-X9000IN: Modulation/Assignable*1, Part Mode
●Function setting\* 2 (page EN-107) status
●Mixer (page EN-62) setting status
- CT-X9000IN: Category selection, tone and rhythm category selection status, last selected tone/rhythm in each tone/rhythm category
*1 When the setting configured with the following operation is "2 Toggle": MODULATION/ASSIGNABLE (Mod/Asgn) → Button operation (Btn Act) (page EN-109).
*2 Including Reverb, Chorus, Delay, and other effect settings included in the function settings.
The next time power is turned on, the Digital Keyboard is returned to its setup state when power was last turned off. Perform the procedure under "To configure function settings with the 10 FUNCTION button" (page EN-107) and turn on Auto Resume: Other (Other) → Auto Resume (AtResume) (page EN-112).

NOTE
- Regardless of Auto Resume is on or off, the settings of the items below, which are included in function settings (page EN-107), are retained even when power is turned off (as long as power continues to be supplied to the Digital Keyboard, and power is turned off normally by pressing
1 (power) or by triggering of Auto Power Off). Equalizer, Tuning, Registration Memory Freeze Target, Pedal 2 type, Expression pedal calibration, Tap rhythm start, Examination Mode, Display contrast - Auto Resume does not restore the status of the setting items below. Touch on/off status, Note value setting, Phrase recording setting, Synchro standby, Audio Mode file selection and playback state, Local control setting.
Adjusting Display Contrast
- Press 10FUNCTION.
- Press the [1] (∠) 12 number key to display "Other".
Other
- Press the [6] (ENTER) 12 number key.
- Use the [1] (∠) and [3] (△) 12 number keys to display "Contrast".
Current setting value
09 Contrast
- Use 13 [-] and [+] or the 11 dial to change the setting value.
- When the setting is the way you want, long-press the [4] (EXIT) 12 number key to exit the setting screen.
Connecting to Audio Equipment
Digital Keyboard Audio Output
Your Digital Keyboard outputs audio from its built-in speakers and/or the PHONES jack. (CT-X9000IN: Also outputs audio from the LINE OUT jacks.)
- There will be an indicator mark next to [SPEAKER] while built-in speaker output is enabled.
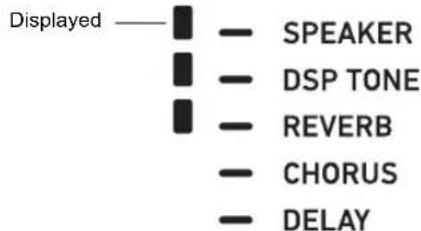
- There will be no indicator mark next to [SPEAKER] while built-in speaker output is disabled.
Built-in speaker output is disabled in the cases described below.
- When there is a plug in the PHONES jack.*
- When the following setting is disabled (Off): Speakers (Speaker) → Speaker on/off (Enabled) (page EN-112).
- The Digital Keyboard automatically adjusts the sound to make it suitable for headphones (or, in the case of the CT-X9000IN, the LINE OUT jacks) while speaker output is disabled, and for speakers while speaker output is enabled.
*When the following setting is disabled (Off): Speakers (Speaker) → Enabled when PHONES connected (PhoneSpk) (page EN-112).

IMPORTANT!
- If there is no sound output even though there is an indicator mark next to [SPEAKER], check the current settings of the ② VOLUME knob and/or volume related settings.
To enable and disable speaker output
Perform the procedure under "To configure function settings with the 10 FUNCTION button" (page EN-107) and configure the following setting: Speakers (Speaker) → Speaker on/off (Enabled) (page EN-112).
To output from the speakers while headphones are connected
Perform the procedure under "To configure function settings with the 10 FUNCTION button" (page EN-107) and enable the following setting: Speakers (Speaker) → Enabled when PHONES connected (PhoneSpk) (page EN-112). This will leave speaker output enabled even if there is a plug in the PHONES jack.
Using Headphones
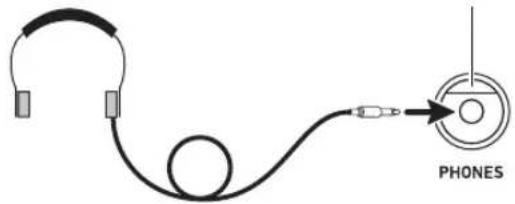
Using headphones normally cuts off* output from the built-in speakers, which means you can practice playing even late at night without disturbing others.
*When the following setting is disabled (Off): Speakers (Speaker) → Enabled when PHONES connected (PhoneSpk) (page EN-112).
50 PHONES jack
(Stereo standard jack (6.3mm))

IMPORTANT!
- Before connecting headphones, be sure to use 2VOLUME to turn the volume down to a low level. After connecting, you can adjust the volume to the level you want.
- Do not listen to very high volume output over headphones for long period. Doing so creates the risk of hearing damage.
- If you are using headphones that require an adaptor plug, make sure you do not leave the adaptor plugged in when removing the headphones.

NOTE
- Headphones do not come with the Digital Keyboard. Use commercially available headphones. See page EN-3 for information about options.
Outputting Keyboard Notes to Audio Equipment
You can connect audio equipment or a music amplifier to the Digital Keyboard and then play through external speakers for more powerful volume and better sound quality.

IMPORTANT!
- Turn off the external device when making connections. After connecting, turn down the Digital Keyboard and external device volume levels whenever turning power on or off.
• After connecting, turn on the Digital Keyboard and then the external device. - If keyboard notes sound distorted when they are sounded from external audio equipment, lower the Digital Keyboard's volume setting.
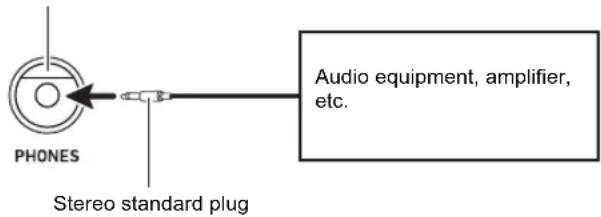
To connect an external device to the Digital Keyboard's PHONES jack
Connection requires commercially available connecting cords, supplied by you.
- The connecting cords should have a stereo standard plug on one end and a plug that matches the configuration of the external device on the other end.
50 PHONES jack (Stereo standard jack (6.3mm))
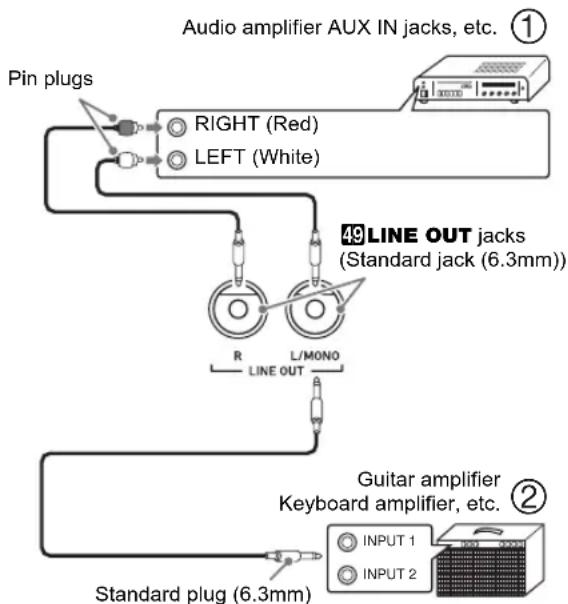
CT-X9000IN: To connect an external device to the Digital Keyboard's LINE OUT jacks
Connection requires commercially available connecting cords, supplied by you.
flowchart
graph TD
    A["Pin plugs"] --> B["RIGHT (Red)"]
    A --> C["LEFT (White)"]
    B --> D["49 LINE OUT jacks (Standard jack (6.3mm))"]
    C --> D
    D --> E["Guitar amplifier Keyboard amplifier, etc."]
    E --> F["INPUT 1"]
    E --> G["INPUT 2"]
    style A fill:#f9f,stroke:#333
    style D fill:#ccf,stroke:#333
    style E fill:#cfc,stroke:#333
■Connecting to Audio Equipment (Figure ①)
Use commercially available cables to connect the external audio equipment to the Digital Keyboard's LINE OUT jacks as shown in Figure ①. LINE OUT R jack output is right channel sound, while LINE OUT L/MONO jack output is left channel sound. It is up to you to purchase connecting cables like the ones shown in the illustration for connection of audio equipment. Normally in this configuration you must set the audio equipment's input selector to the setting that specifies the terminal (such as AUX IN) to which the Digital Keyboard is connected.
■Connecting to a Musical Instrument Amplifier (Figure ②)
Use commercially available cables to connect the amplifier to the Digital Keyboard's LINE OUT jacks as shown in Figure ②. LINE OUT R jack output is right channel sound, while LINE OUT L/MONO jack output is left channel sound. Connecting to the LINE OUT L/MONO jack only outputs a mixture of both channels. It is up to you to purchase a connecting cable like the one shown in the illustration for connection of the amplifier.
Playing an External Device from the Digital Keyboard
Connection requires commercially available connecting cords, supplied by you.
- The connecting cords should have a stereo mini plug on one end and a plug that matches the configuration of the external device on the other end.

IMPORTANT!
- Turn off the Digital Keyboard when making connections. After connecting, turn down the Digital Keyboard and external device volume levels whenever turning power on or off.
• After connecting, turn on the external device and then the Digital Keyboard. - If notes from an external device that are played on the Digital Keyboard sound distorted, lower the volume setting of the external device.
Center Cancel (Vocal Cut)
Enabling Vocal Cut cuts (mutes or minimizes) the vocal in the sound being input from the AUDIO IN jack. Note that this function cancels the sound in the center position of the audio, which may (depending on how the original audio was mixed) end up canceling something else other than the vocal part. How vocal cut is performed depends on the sound being input.
Perform the procedure under "To configure function settings with the 10 FUNCTION button" (page EN-107) and configure the following setting: Other (Other) → Audio In Center Cancel (AIn CCan) (page EN-112).

NOTE
- Digital Keyboard built-in effects (reverb, chorus, delay, DSP) are not applied to AUDIO IN jack input.
CT-X9000IN: Outputting Sound from a Microphone
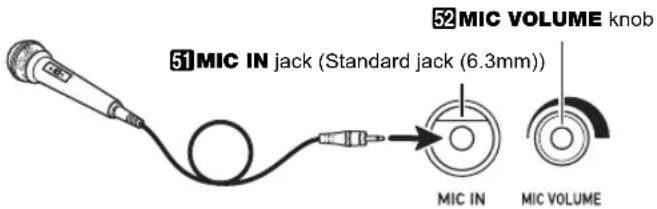
You can connect a commercially available microphone* to the MIC IN jack and output the sound from the microphone through the Digital Keyboard's speakers.
*Use a dynamic microphone.
You can adjust the volume level of microphone input with
52MIC VOLUME. Microphone volume control is independent from overall keyboard volume.

IMPORTANT!
- Before connecting a microphone, make sure that the Digital Keyboard and microphone are turned off.
- Before connecting, set both 2 VOLUME and 52 MIC VOLUME to low levels. Adjust volume settings to appropriate levels after connecting the microphone.
- Microphone input is disabled during demo play.
Microphone Settings
You can use the Mixer to make individual adjustments to the reverb, chorus, and delay effects that are applied to microphone input.
See "Using the Mixer" (page EN-62).
Operations Common to All Modes
About this manual
Unless otherwise specifically noted, all of the procedures in this manual assume that the Digital Keyboard is in its initial power on state (immediately after you turn on power). If you run into problems with a procedure, turn keyboard power off and back on, and then try performing the procedure again.

IMPORTANT!
- Note that turning off Digital Keyboard power during a procedure causes any pending unsaved data to be deleted.
Numeric Input
The [NUM] indicator on the display means that numeric input is enabled.
![[NUM] indicator NUM 001 StagePno](/content/2026/05/842159/images/23b8b89ff35685de46ca596936c1e8e69391438521be52d123fdb191677ef2d6.jpg)
Use the procedures below to input tone numbers, setting values, etc.
■ Using the 12 Number Keys
When entering a number or value, input all the required digits. The number of digits you need to input depends on what you are inputting. For example, to input the tone number 015 (all three digits required), input the following: [0] → [1] → [5]. In this case, the numbers being input flash until you input the final 5. The input value is registered (and 015 is displayed without flashing) after you input all of the required digits.
- The range of allowable input values depends on what you are inputting. If you attempt to input a value that is outside an allowable range, the value will change to the value within the range that is closest to the one you input.
- To specify a value without inputting a leading zero, enter the desired value and then press 10 FUNCTION. For example, when inputting a three-digit tone number, the following operation would result in input of tone number 010: [1] → [0] → 10 FUNCTION.
- To discard input without finalizing it, long-press [4] (EXIT) 12 number key.
■ Using the 13 [-] and [+] Keys
- Pressing [-] reduces the currently displayed number or value by one, while [+] increases it by one. Holding down either button will sequentially increase or decrease the displayed number or value until you release the button. Pressing both buttons at the same time will return the number or value to its initial default or recommended setting.
- If input of a negative value is allowed, pressing [-] while the value is flashing on the display will add a minus sign (-) to the left of the value. Pressing [+] while a value is flashing changes back to a positive value.
■Using the 11 Dial
You can also change a displayed number or value by rotating the dial.
Other Functions of 12 Number Keys
The table below describes other functions that the 12 number keys perform while the [NUM] indicator is not displayed. Some keys also perform operations that are specific to certain functions.
| Key Main | Function |
| [0] (NUM) Pressing this key while a setting item is one that allows input of a value is displayed will enable numeric input ([NUM] indicator displayed). | |
| [1] (∠)[3] (△) | Use these keys while a setting menu is displayed to switch between menu items. With some functions, these keys are used to switch between parts in order to configure part settings. |
| [2] (√)[5] (∧) | Use these keys to switch between setting items in the Mixer Mode (page EN-62) and when editing MIDI Recorder events (page EN-100). |
| [4] (EXIT) With certain functions, pressing this key will exit the function. | |
| [6] (ENTER) Pressing [6] (ENTER) executes the currently displayed menu item, and goes to the applicable sub-menu or executes some operation. | |
| [7] (WRITE) Press this key to save a user tone (page EN-69) or user rhythm (page EN-74). | |
| [8] (INSERT)[9] (DELETE) | Use these keys during text input (page EN-15) to insert or delete characters.[9] (DELETE) is also used when editing MIDI recorder events (page EN-100). |
4 CATEGORY Button
The many tones of the Digital Keyboard are divided into 20 categories to help make it possible for you to find a particular tone quickly and easily. You can use the 4 CATEGORY button to select the last tone you selected in a category. Under initial default settings, pressing 4 CATEGORY will select the first tone in a category.
• The example below shows how to select a tone using
4 CATEGORY. Rhythms, songs, and music presets are also divided into categories, and you can also use the
4 CATEGORY button to scroll between them.
To switch between tone categories
1. Press 5 TONE.
This displays (none indicator). You can select a tone while the tone indicator is displayed.
2. Press 4 CATEGORY.
This displays the letter "C", followed by the currently selected category number and name for a few seconds.
Category number Category name
C O1Piano
- After a few seconds, the tone number and tone name will appear, and Will start to flash. You can select tones only within the current category while flashing. (See step 4.)
3. While "C" is displayed, press 4 CATEGORY to advance to the next category.
This displays the next category number and name.
- The category tone that was last selected when exited a category (the first category tone under initial default settings) will be selected first when you re-enter it.
- You can also use 13 [-] (back) and [+] (forward) in place of 4 CATEGORY to scroll between categories.
- Pressing 13 [-] and [+] at the same time will jump to Category 1, and select the tone that was selected the last time you exited Category 1.
4. To select tones only within the currently displayed category, wait until 1 starts to flash, or press 10 FUNCTION to make 10 flash.
- While 📄 is flashing, use 13 [−] or [+], or the 11 dial to scroll through the tones of currently selected category.
- To select a tone in another category, press 5 TONE. This causes to stop flashing.
To navigate between categories
1. Press 5 TONE.
2. While a tone name is displayed, hold down 4 CATEGORY as you press 13 [-] or [+].
[−] jumps to the first tone in the category before the one where the displayed tone is located, while [+] jumps to the first tone in the next category.
Text Character Input
Use the procedures below to input user data names and other text.
Cursor (flashing)
80 | No Na me
To insert characters
- Use the [1] (∠) and [3] (△) 12 number keys to move the cursor to the position where you want to insert a character.
2. Press the [8] (INSERT) 12 number key.
- This inserts "A" at the cursor position.
To modify characters
-
Use the [1] (∠) and [3] (△) 12 number keys to move the cursor to the position of the character you want to change.
-
Use 13 [-] and [+] to change the character.
-
Repeat steps 1 and 2 as required.
- Input of the characters shown in the table below is supported when saving a file to a USB flash drive.
| 0 | 1 | 2 | 3 | 4 | 5 | 6 | 7 | 8 | 9 |
| A | B | C | D | E | F | G | H | I | J |
| K | L | M | N | O | P | Q | R | S | T |
| U | V | W | X | Y | Z | $ | & | _ | ' |
| ( | ) | - | ^ | { | } | @ | ~ | ` |
- If you input a similarity symbol ( ), it will be displayed as a right arrow () .
- Input of the characters shown in the table below is supported when saving a file to Digital Keyboard memory.
| ! | " | # | $ | % | & | ' | ( | ) | * |
| + | - | . | / | 0 | 1 | 2 | 3 | ||
| 4 | 5 | 6 | 7 | 8 | 9 | : | ; | < | = |
| > | ? | @ | A | B | C | D | E | F | G |
| H | I | J | K | L | M | N | O | P | Q |
| R | S | T | U | V | W | X | Y | Z | [ |
| ' | ] | ^ | _ | ` | a | b | c | d | e |
| f | g | h | i | j | k | l | m | n | o |
| p | q | r | s | t | u | v | w | x | y |
| z | { | | | } | ||||||
To delete characters
- Use the [1] (∠) and [3] (△) 12 number keys to move the cursor to the position of the character you want to delete.
- Press the [9] (DELETE) 12 number key.
FUNCTION Indicator
The [FUNCTION] indicator is displayed or flashes when you perform a Digital Keyboard function setting (page EN-107) or other special setting operation. The meanings of the text that appears along with a displayed or flashing [FUNCTION] indicator are described below.
| Displayed Setting item name displayed.* |
| Flashing Setting of the currently displayed setting item displayed. |
*Only while a setting item that is a function setting is displayed.
The example below shows how the [FUNCTION] indicator is displayed.
Example: To configure the Touch Response setting
- Press 10FUNCTION.
- Press the [3] ( ) 12 number key a number of times until “Touch” (Touch Response) is displayed.
"Touch" is a setting item name, so the [FUNCTION] indicator appears.
Displayed
FUNCTION
3 Touch
Setting value number Setting item name
3. Use 13 [-] and [+] or the 11 dial to change the Touch Response setting value.
This operation scrolls through the available Touch Response settings: Off, Light, Normal, and Heavy. Since these are Touch Response settings, the [FUNCTION] indicator flashes while they are displayed.
Flashing
![CASIO CT-X8000IN - Use 13 [-] and [+] or the 11 dial to change the Touch Response setting value. - 1](/content/2026/05/842159/images/aad5c0d678c04b3e21dcf4af8579696033d69da14783c222137137dd0a027222.jpg)
2 Light
Setting value number Setting value
4. To return to the setting item display, press 10FUNCTION.
This displays the [FUNCTION] indicator.
5. When the setting is the way you want, long-press the [4] (EXIT) 12 number key to exit the setting screen.
This causes the [FUNCTION] indicator to disappear.
Listening to Demo Play
1. Press 5 TONE and 6 RHYTHM at the same time.
This causes (song bank indicator) to flash on the display and start play of the three demo songs.
- During demo play, you can use 13 [-] and [+] to jump to the beginning of the previous or next song.
- Demo song play will repeat until you perform the operation in step 2 below.
2. To stop demo play, press 20 PLAY/STOP or 5 TONE and 6 RHYTHM at the same time.
This causes the (song bank indicator) to disappear.
NOTE
- If Auto Power Off is enabled, power will turn off automatically after about 30 minutes of non-operation, even if demo play is being performed. You can disable Auto Power Off, if you want. Perform the procedure under "To configure function settings with the 10 FUNCTION button" (page EN-107) and disable the following setting: Other (Other) → Auto Power Off (AutoOff) (page EN-112).
Playing on the Keyboard
Selecting a Tone
Your Digital Keyboard comes with a large collection of tones. Select a tone and play something on the keyboard to see what it sounds like.
To select a tone
1. Press 5 TONE.
This displays (tone indicator). You can select a tone while the tone indicator is displayed.
Tone number Tone name
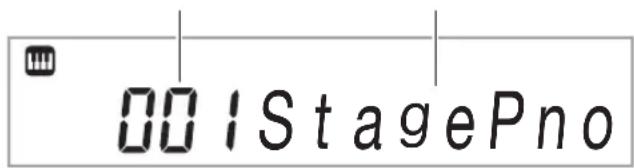
2. Use the 12 number keys, 13 [-] and [+], or the 11 dial to select the number of the tone you want to assign to keyboard play.
- See "Numeric Input" (page EN-14) for information about how to specify a number.
- Tones are divided into categories. You can easily find the tone you want by going to the piano category, organ category, etc. For more information, see "4 CATEGORY Button" (page EN-15).
- For details about tone categories and types, refer to the separate "Appendix".
3. Play something on the keyboard to hear what your selected tone sounds like.
NOTE
- Selecting a tone that is in a drum set category causes various percussion instruments to be assigned to keyboard keys.
■DSP Tones
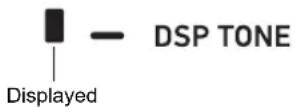
The Digital Keyboard has a number of "DSP tones", which are tones with special effects. There will be an indicator mark next to [DSP TONE] while a DSP tone is selected.
CT-X9000IN: To use the TONE Category buttons to select a category
NOTE
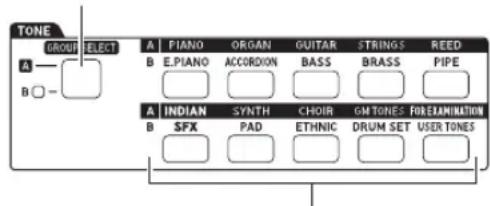
- You can use the 44 TONE Category buttons to quickly and easily navigate between categories.
43 TONE GROUP SELECT button
44 TONE Category buttons
Tone categories are divided between two groups: Group A (A) and Group B (B). Which category (group) a 44 TONE Category button selects depends on whether or not the indicator lamp to the left of 43 TONE GROUP SELECT is lit.
- Press the 48 TONE GROUP SELECT button to toggle between category Group A (indicator lamp unlit) and Group B (indicator lamp lit).
- To select a category, press its 44 TONE Category button.
- This causes (none indicator) to flash on the display.
- Pressing a 44 TONE Category button will select the last selected tone in the corresponding category. While (tone indicator) is flashing, you can select one of the tones included in the category. To exit category tone selection, press 5 TONE. This causes to stop flashing.
- Use the 12 number keys, 13 [-] and [+], or the 11 dial to select the number of the tone you want to assign to keyboard play.
Sounding Multiple Tones (Layer and Split)
You can split the keyboard into left and right area and assign different tones to each area, and also layer two tones to play at the same time. Split and layer can be used at the same time, which means that you perform with up to four keyboard parts (UPPER 1, LOWER 1, UPPER 2, LOWER 2) at the same time as shown in the illustration below.

| LOWER 1 UPPER 1 | |
| LOWER 2(LOWER LAYER) | UPPER 2(UPPER LAYER) |
■Keyboard Part Indicators
You can determine the current split/layer status by checking the keyboard part indicators in the upper left corner of the display. The keyboard parts whose indicators are shown will sound when you play on the keyboard.
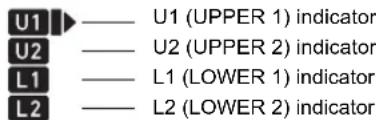
NOTE
- You can adjust the volume level, effect intensity, and other settings for each part. For details, see "Using the Mixer" (page EN-62).
- If you use DSP tones for multiple parts, tone effects will be removed and tone quality may change.
To split the keyboard between two tones (Split)
- After confirming that the part indicator in the upper left corner of the display looks like U1▶, select a tone.
• This will be the UPPER 1 part tone.
- Press 35SPLIT.
- This will display the [L1] indicator, and will move to the right of the [L1]. This indicates you can select the LOWER 1 part tone.
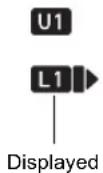
- Select the tone you want to assign to LOWER 1.
- Play something on the keyboard.
- For information about how to change the tone assigned to each part, see "To change the tones assigned to each split/layer part" (page EN-21).
- To cancel a split (return the entire keyboard to the UPPER 1 part), press 35 SPLIT.
This causes the [L1] indicator to disappear.
To move the keyboard split point
- Hold down 35 SPLIT until "Split Pt" is displayed.
-
Use 13 [-] and [+] or the 11 dial to specify the name of the note (the lowest note of the desired UPPER part) where you want the split point to be.
-
You can also specify the split point by holding down 35SPLIT and pressing the key where you want the split point to be.
- This displays the specified current split point as shown below.
Example: After C4 was specified as the split point
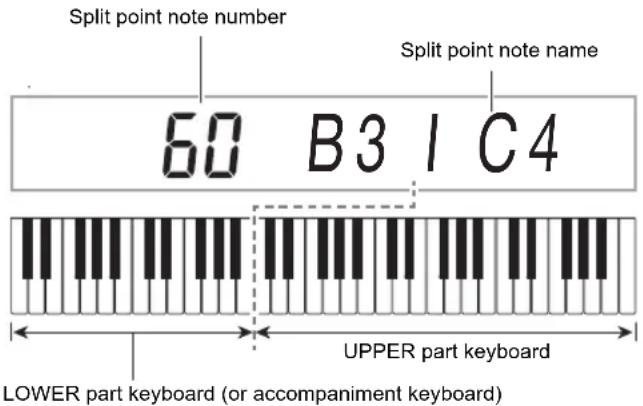
- The LOWER part keyboard specified by this operation is also used as an accompaniment keyboard (page EN-43).
- When the setting is the way you want, long-press the [4] (EXIT) 12 number key to exit the setting screen.
NOTE
- Specifying a split point puts the LOWER part keyboard and the accompaniment keyboard in the same area. You can also specify different areas for these two keyboards. You can also configure a setting so the LOWER part tone does not sound in the area where the LOWER part keyboard and accompaniment keyboard overlap. For details, see the "Advanced Split Settings" (page EN-49).
To layer two tones
- After confirming that the keyboard part indicator in the upper left corner of the display looks like oct a tone.
- This will be the UPPER 1 part tone.
- Press 36 UPPER LAYER.
- This will display the [U2] indicator, and will move to the right of the [U2]. This indicates you can select the UPPER 2 part tone.
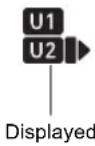
- Select the tone you want to assign to UPPER 2.
-
Play something on the keyboard.
-
For information about how to change the tone assigned to each part, see “To change the tones assigned to each split/layer part” (page EN-21).
- Here, pressing 35SPLIT will enable use of the UPPER 1 and UPPER 2 layered tones, in addition to the LOWER 1 part created with the keyboard split.
- To cancel a layer (return the entire keyboard to the UPPER 1 part), press 36 UPPER LAYER.
This causes the [U2] indicator to disappear.
To use split and layer together
- Perform steps 1 through 3 under "To split the keyboard between two tones (Split)" (page EN-19).
- Perform the procedure below to layer two UPPER part tones.
(1) Press 36 UPPER LAYER and confirm that the [U2] indicator is displayed.
(2) Select the tone you want to assign to UPPER 2.
- Perform the procedure below to layer two LOWER part tones.
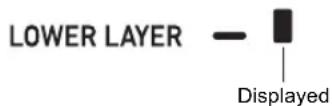
(1) Long-press 36 UPPER LAYER until the [L2] indicator appears. This displays an indicator mark next to [LOWER LAYER].
(2) Select the tone you want to assign to LOWER 2.
- Play something on the keyboard.
- For information about how to change the tone assigned to each part, see “To change the tones assigned to each split/layer part” (page EN-21).
NOTE
- When using split and layer together, the UPPER 2 part is called the "upper layer", while the LOWER 2 part is called the "lower layer".
- To disable the upper layer only after performing steps 1 through 3 of the procedure above, press 36 UPPER LAYER and confirm that the [U2] indicator is not displayed. To disable the lower layer only, long-press 36 UPPER LAYER (LOWER LAYER) until the [L2] indicator disappears ([LOWER LAYER] indicator mark also disappears).
- There will be an indicator mark next to [LOWER LAYER] while the lower layer is enabled, regardless of whether the keyboard is split. The mark disappears when the lower layer is disabled.
- Pressing 35 SPLIT after performing steps 1 through 3 above disables the split, so the [L1] and [L2] indicators disappear, and the keyboard becomes layered with the UPPER parts (UPPER 1 and UPPER 2) only.
To change the tones assigned to each split/layer part
- Press 5 TONE.
This displays (tone indicator).
- Long-press 5 TONE until ▶ moves to the right of the keyboard part indicator (page EN-19).
- Repeat this operation as many times as required to move to the right of the keyboard part indicator (U1, U2, L1, L2) of the part (UPPER 1, LOWER 1, UPPER 2, LOWER 2) whose tone setting you want to change.
- Change the tone of the keyboard part you selected in step 2.
- Repeat steps 2 and 3 above for each of the keyboard parts whose tone setting you want to change.
Selecting an Effect for a Tone (Reverb, Chorus, Delay)
Your Digital Keyboard includes reverb, chorus, and delay effects, which you can use to enhance the sound of tones.
●Reverb (REVERB)
Reverb simulates ambient spaces, such as a room or hall.
●Chorus (CHORUS)
Chorus adds a rich, shimmering quality to a sound. This digital keyboard applies a preset chorus setting that is suitable for each tone.
●Delay (DELAY)
Delay stores a sound and repeats it periodically with a slight delay before each repeat, which creates an echo effect. Delay is different from reverb, which creates a reverberation effect. This digital keyboard applies a preset delay setting that is suitable for each tone.
NOTE
- You can determine the current enabled/disabled status of each effect by checking the indicator marks on the right side of the display.
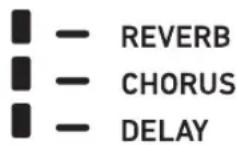
- Preset chorus effect and delay effects are applied to each tone even when there is no indicator mark next to [CHORUS] and [DELAY].
- You can adjust how tone effects are applied to each part. For details, see "Using the Mixer" (page EN-62). The setting items that are used for adjustment correspond to the following: Reverb Send, Chorus Send, Delay Send (see "Advanced Mixer Settings" on page EN-64).
To select a digital effect
NOTE
- The procedure below explains how to select the reverb (steps 2 and 3), chorus (4 and 5), and delay (6 and 7) settings. You can skip any of the steps for any effect whose settings you don't need to change.
1. Press 10FUNCTION.
2. Use the [1] (∠) and [3] (△) 12 number keys to display "Reverb".
Current setting value
!!Reverb
3. Use 13 [-] and [+] or the 11 dial to change the setting value.
- For information about the reverb types that correspond to each setting value, see the “Reverb Effect List” (page EN-23).
4. Use the [1] (∠) and [3] (△) 12 number keys to display "Chorus".
Current setting value
☐1Chorus
5. Use 13 [-] and [+] or the 11 dial to change the setting value.
- For information about the chorus types that correspond to each setting value, see the "Chorus Effect List" (page EN-24).
6. Use the [1] (∠) and [3] (△) 12 number keys to display "Delay".
Current setting value
01Delay
7. Use 13 [-] and [+] or the 11 dial to change the setting value.
- For information about the delay types that correspond to each setting value, see the "Delay Effect List" (EN-24).
8. When the setting is the way you want, long-press the [4] (EXIT) 12 number key to exit the setting screen.
Reverb Effect List
CT-X9000IN
| Setting Value | Setting Type Display | |
| 1 | O f f | O f f |
| 2 Room 1 Room 1 | ||
| 3 Room 2 Room 2 | ||
| 4 Room 3 Room 3 | ||
| 5 Room 4 Room 4 | ||
| 6 Room 5 Room 5 | ||
| 7 Room 6 Room 6 | ||
| 8 Room 7 Room 7 | ||
| 9 Room 8 Room 8 | ||
| 10 Room 9 Room 9 | ||
| 11 Large Room 1 L.Room 1 | ||
| 12 Large Room 2 L.Room 2 | ||
| 13 Hall 1 Hall 1 | ||
| 14 Hall 2 Hall 2 | ||
| 15 Hall 3 Hall 3 | ||
| 16 Hall 4 Hall 4 | ||
| 17 Hall 5 Hall 5 | ||
| 18 Hall 6 Hall 6 | ||
| 19 Hall 7 Hall 7 | ||
| 20 Hall 8 Hall 8 | ||
| 21 Hall 9 Hall 9 | ||
| 22 Stadium 1 Stadium1 | ||
| 23 Stadium 2 Stadium2 | ||
| 24 Stadium 3 Stadium3 | ||
| 25 Plate 1 Plate 1 | ||
| 26 Plate 2 Plate 2 | ||
| 27 Plate 3 Plate 3 | ||
| 28 Delay Delay | ||
| 29 Pan Delay PanDelay | ||
| 30 Long Delay 1 L.Delay1 | ||
| 31 Long Delay 2 L.Delay2 | ||
| 32 Church Church | ||
| 33 Cathedral Cathedrl | ||
CT-X8000IN
| Setting Value | Setting Type Display | |
| 1 | O f f | O f f |
| 2 Room 1 Room 1 | ||
| 3 Room 2 Room 2 | ||
| 4 Room 3 Room 3 | ||
| 5 Room 4 Room 4 | ||
| 6 Room 5 Room 5 | ||
| 7 Large Room1 L.Room 1 | ||
| 8 Large Room2 L.Room 2 | ||
| 9 Hall 1 Hall 1 | ||
| 10 Hall 2 Hall 2 | ||
| 11 Hall 3 Hall 3 | ||
| 12 Hall 4 Hall 4 | ||
| 13 Hall 5 Hall 5 | ||
| 14 Hall 6 Hall 6 | ||
| 15 Stadium 1 Stadium1 | ||
| 16 Stadium 2 Stadium2 | ||
| 17 Stadium 3 Stadium3 | ||
| 18 Plate 1 Plate 1 | ||
| 19 Plate 2 Plate 2 | ||
| 20 Delay Delay | ||
| 21 Pan Delay PanDelay | ||
| 22 Long Delay 1 L.Delay1 | ||
| 23 Long Delay 2 L.Delay2 | ||
| 24 Church Church | ||
| 25 Cathedral Cathedrl | ||
Chorus Effect List
CT-X9000IN
| Setting Value | Setting Type Display |
| 1 Tone *Tone | |
| 2 Chorus 1 Chorus 1 | |
| 3 Chorus 2 Chorus 2 | |
| 4 Chorus 3 Chorus 3 | |
| 5 Chorus 4 Chorus 4 | |
| 6 FB Chorus FBChorus | |
| 7 Soft Chorus Soft C | |
| 8 Bright Chorus Bright C | |
| 9 Deep Chorus Deep C | |
| 10 Flanger 1 Flanger1 | |
| 11 Flanger 2 Flanger2 | |
| 12 Flanger 3 Flanger3 | |
| 13 Flanger 4 Flanger4 | |
| 14 Short Delay 1 S.Delay1 | |
| 15 Short Delay 2 S.Delay2 | |
| 16 Short Delay 3 S.Delay3 | |
| 17 Short Delay 4 S.Delay4 |
CT-X8000IN
| Setting Value | Setting Type Display |
| 1 Tone *Tone | |
| 2 Chorus 1 Chorus 1 | |
| 3 Chorus 2 Chorus 2 | |
| 4 Chorus 3 Chorus 3 | |
| 5 Chorus 4 Chorus 4 | |
| 6 FB Chorus FBChorus | |
| 7 Deep Chorus Deep C | |
| 8 Flanger 1 Flanger1 | |
| 9 Flanger 2 Flanger2 | |
| 10 Flanger 3 Flanger3 | |
| 11 Flanger 4 Flanger4 | |
| 12 Short Delay 1 S.Delay1 | |
| 13 Short Delay 2 S.Delay2 |
*Though selecting setting value 1 (Tone) causes the indicator mark next to [CHORUS] to disappear, preset chorus effects are applied to each tone.
Delay Effect List
CT-X9000IN
| Setting Value | Setting Type Display | ||
| 1 Tone | *Tone | ||
| 2 Short | 1 Short 1 | ||
| 3 Short | 2 Short 2 | ||
| 4 | E c h o | E c | |
| 5 Tempo | Sync Short | TSync S | |
| 6 Tempo | Sync Middle | TSync M | |
| 7 Tempo | Sync Long | TSync L | |
| 8 Ambience | Ambience | ||
| 9 | M i d | 1 | M |
| 10 Mid | 2 | Mid 2 | |
| 11 Long | 1 Long 1 | ||
| 12 Long | 2 Long 2 | ||
| 13 Mid | Pan | Mid Pan | |
| 14 Long | Pan 1 | LongPan1 | |
| 15 Long | Pan 2 | LongPan2 | |
| 16 Long | Pan 3 | LongPan3 | |
| 17 Short | Single | ShrtSngl | |
| 18 Mid | Single | Mid Sngl | |
| 19 Long | Single LongSngl | ||
| 20 Long | Double | Long Dbl | |
| 21 Long | Triple | LongTrpl | |
CT-X8000IN
| Setting Value | Setting Type Display | |
| 1 Tone | *Tone | |
| 2 Short | 1 Short 1 | |
| 3 Short | 2 Short 2 | |
| 4 | E c h o | E c |
| 5 Tempo | Sync Short TSync S | |
| 6 Tempo | Sync Middle TSync M | |
| 7 Tempo | Sync Long TSync L | |
| 8 Ambience | Ambience | |
| 9 Mid | Mid 1 | |
| 10 | Mid 2 | Mid 2 |
| 11 | Long 1 Long 1 | |
| 12 | Long 2 Long 2 | |
| 13 | Mid Pan | Mid Pan |
| 14 | Long Pan 1 | LongPan1 |
| 15 | Long Pan 2 | LongPan2 |
| 16 | Long Pan 3 | LongPan3 |
*Though selecting setting value 1 (Tone) causes the indicator mark next to [DELAY] to disappear, preset delay effects are applied to each tone.
Using Equalization
You can use equalization to select from among presets that boost or cut specific frequency ranges.
The CT-X9000IN also includes a four-band equalizer that allows user-configured settings (User Equalizer).
To select an equalization setting
-
Press 10FUNCTION.
-
Use the [1] (∠) and [3] (△) 12 number keys to display "Equalizr".
-
Use 13 [-] and [+] or the 11 dial to change the setting value.
- The settings that correspond to each of the setting values are described below.
| Setting Value | Display | Description | |
| 1 Standard | Standard setting | ||
| 2 Bass | + | Boosts the low range. | |
| 3 Treble | + | Boosts the high range. | |
| 4 Loudness | Boosts everything. | ||
| 5 Mellow | Creates a soft feeling. | ||
| 6 Bright | Creates a bright feeling. | ||
| 7 | R o | Creates a sound optimized for rock music. | |
| 8 Dance | Creates a sound optimized for dance music. | ||
| 9 | J a | Creates a sound optimized for jazz music. | |
| 10 | Classic | Creates a sound optimized for classical music. | |
| 11 | User | CT-X9000IN: Applies User Equalizer settings. | |
- When the setting is the way you want, long-press the [4] (EXIT) 12 number key to exit the setting screen.
CT-X9000IN: To configure User Equalizer settings
1. Press 10FUNCTION.
2. Use the [1] (∠) and [3] (△) 12 number keys to display "User EQ", and then press [6] (ENTER).
3. Configure settings for reach frequency range.
(1) Use the [1] (∠) and [3] (△) 12 number keys to display the menu of the range you want to adjust.
| To adjust this range: Display this: | |
| Low-range (50 Hz to 800 Hz) EQ Low | |
| Mid-range 1 (100 Hz to 8 kHz) EQ Mid1 | |
| Mid-range 2 (100 Hz to 8 kHz) EQ Mid2 | |
| High-range (2 kHz to 16 kHz) EQ High |
(2) Press [6] (ENTER).
- This automatically changes the "Equalizr" setting to "User". See "To select an equalization setting" (page EN-25).
(3) Use the [1] (∠) and [3] (△) keys to display “***Freq” (Center Frequency or Cutoff Frequency) or “***Gain” (Gain). What appears in place of “***” in the above menu items depends on the frequency range being equalized.
(4) Use 13 [-] and [+] or the 11 dial to change the setting value.
For details about setting values and their settings, see the "User Equalizer Setting List" below.
(5) Press the [4] (EXIT) 12 number key.
(6) Repeat steps (1) through (5) as required to configure the settings of other frequency ranges.
4. Configure input level and output level settings as required.
(1) Use the [1] (∠) and [3] (△) 12 number keys to display "Input Lv" (Input Level), and then use 13 [-] and [+] or the 11 dial to change the setting value.
(2) Use the [1] (∠) and [3] (△) keys to display "OutputLv" (Output Level), and then use 13 [-] and [+] or the 11 dial to change the setting value.
5. When the setting is the way you want, long-press the [4] (EXIT) 12 number key to exit the setting screen.
■User Equalizer Setting List
| Setting Item Display | Settings | |
| Low-range EQ Low | ||
| Cutoff Frequency Low Freq | 1 to 13 * | 1 |
| Gain Low Gain -12 to 12 | ||
| Mid-range 1 | EQ Mid1 | |
| Center Frequency | Mid1Freq | 1 to 20 *2 |
| Gain Mid1Gain -12 to 12 | ||
| Mid-range 2 | EQ Mid2 | |
| Center Frequency | Mid2Freq | 1 to 20 *2 |
| Gain Mid2Gain -12 to 12 | ||
| High-range | EQ High | |
| Cutoff Frequency HighFreq | 1 to 10 * | 3 |
| Gain HighGain -12 to 12 | ||
| Input Level | Input Lv | 0 to 127 |
| Output Level | OutputLv | 0 to 127 |
*1 Setting values 1 through 13 (A in the table below) correspond to cutoff frequencies 50 Hz to 800 Hz (B in the table below).
| A | 1 | 2 | 3 | 4 | 5 |
| B | 50Hz | 63Hz | 80Hz | 100Hz | 125Hz |
| A | 6 | 7 | 8 | 9 | 10 |
| B | 160Hz | 200Hz | 250Hz | 315Hz | 400Hz |
| A | 11 | 12 | 13 | ||
| B | 500Hz | 630Hz | 800Hz | ||
*2Setting values 1 through 20 (A in the table below) correspond to center frequencies 100Hz to 8.0kHz (B in the table below).
| A | 1 | 2 | 3 | 4 | 5 |
| B | 100Hz | 125Hz | 160Hz | 200Hz | 250Hz |
| A | 6 | 7 | 8 | 9 | 10 |
| B | 315Hz | 400Hz | 500Hz | 630Hz | 800Hz |
| A | 11 | 12 | 13 | 14 | 15 |
| B | 1.0kHz | 1.3kHz | 1.6kHz | 2.0kHz | 2.5kHz |
| A | 16 | 17 | 18 | 19 | 20 |
| B | 3.2kHz | 4.0kHz | 5.0kHz | 6.3kHz | 8.0kHz |
*3Setting values 1 through 10 (A in the table below) correspond to cutoff frequencies 2.0kHz to 16kHz (B in the table below).
The metronome sounds a regular tone to mark time. Use the metronome when you want to practice playing at a regular tempo.
To start or stop the metronome
1. Specify the time signature.
- You can specify a time signature numerator (0 to 16) and denominator (4 or 8).
(1) Hold down 29 METRONOME until "BeatNume" is displayed.
(2) Use 13 [-] and [+] or the 11 dial to change the time signature numerator setting value within the range of 0 to 16 (Default: 4).
| Setting Value | Accent |
| 2 to 16 | Specifies numerator from 2 to 16. An accent sounds on the first beat only. |
| 1 All beats accented. | |
| 0 All beats unaccented. | |
(3) Use the [1] (∠) and [3] (△) 12 number keys to display "BeatDeno".
(4) Use 13 [-] and [+] to specify the time signature denominator.
- The setting value 1 is (quarter note beats), while setting value 2 is (eighth note beats).
(5) Press the [4] (EXIT) 12 number key.
2. Use the 30 TEMPO [∨] and [∧] buttons to change the tempo setting.
- For information about the tempo setting, see "Changing Auto Accompaniment Speed (Tempo)" (page EN-45).
3. Press 29 METRONOME.
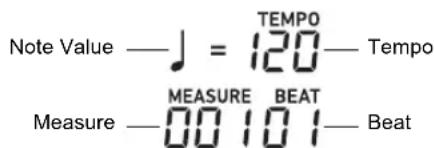
This starts the metronome. The number of measures since the metronome was started is indicated in the upper right corner of the display.
4. To stop the metronome, press 29 METRONOME again.
To adjust the balance between metronome and keyboard volume
Perform the procedure under "To configure function settings with the 10 FUNCTION button" (page EN-107) and configure the following setting: Metronome (Metronom) → Metronome Volume (Volume) (page EN-112).
Sounding Arpeggio Phrases Automatically (Arpeggiator)
With the arpeggiator, you can play various arpeggios and other phrases automatically by simply pressing keys on the keyboard. You can select from a number of different arpeggio options, including playing arpeggios from a chord, playing various phrases automatically, and more.
- A single button is used to control the arpeggiator and auto harmonize (page EN-51). Because of this, auto harmonize cannot be used while the arpeggiator is in use.
To turn on the arpeggiator
1. Press 34 AUTO HARMONIZE/ARPEGGIATOR and confirm that the [ARPEGGIATOR] indicator is displayed.
![CASIO CT-X8000IN - Press 34 AUTO HARMONIZE/ARPEGGIATOR and confirm that the [ARPEGGIATOR] indicator is displayed. - 1](/content/2026/05/842159/images/0408e4f664e5de19ae489a17a732b17461835eab650769e4b20b7f88519ed273.jpg)
- Playing a chord or single notes on the keyboard will play back the currently selected arpeggio.
2. To turn the arpeggiator off, press 34 AUTO HARMONIZE/ARPEGGIATOR.
This causes the [ARPEGGIATOR] indicator to disappear.
IMPORTANT!
- If the [AUTO HARMONIZE] indicator is displayed instead of the [ARPEGGIATOR] in step 1 of the above procedure, you will need to change the function assigned to the button.
Perform the procedure under "To configure function settings with the 10 FUNCTION button" (page EN-107) and select "2 Arpeg." for the following setting: Auto Harmonize/Arpeggiator (AHar/Arp) → AUTO HARMONIZE/ARPEGGIATOR button assignment (BtnAsign) (page EN-109).
NOTE
- Use the following procedure when you want an arpeggio pattern to keep playing after you release the keyboard keys.
Perform the procedure under "To configure function settings with the 10 FUNCTION button" (page EN-107) and enable the following setting: Auto Harmonize/Arpeggiator (AHar/Arp) → Arpeggiator Hold (ArpegHld) (page EN-109). - While you are using split (page EN-19), you can use the UPPER 1 part or LOWER 1 part to sound the arpeggiator. Perform the procedure under "To configure function settings with the 10 FUNCTION button" (page EN-107) and change the following setting: Auto Harmonize/Arpeggiator (AHar/Arp) → Arpeggiator Part (ArpegPart) (page EN-109).
To select an arpeggiator type
-
Perform the procedure under "To turn on the arpeggiator" and confirm that the [ARPEGGIATOR] indicator is displayed.
-
Long-press 34 AUTO HARMONIZE/ARPEGGIATOR until the [FUNCTION] indicator flashes on the display.
This displays the currently selected arpeggiator type number and name.
-
Use 13 [-] and [+] or the 11 dial to display the arpeggiator type you want to select.
-
While the arpeggiator type is displayed, long-pressing 34 AUTO HARMONIZE/ARPEGGIATOR will select the tone that is recommended for the displayed type.
-
For details about arpeggiator types, refer to the separate "Appendix".
-
When the setting is the way you want, long-press the [4] (EXIT) 12 number key to exit the setting screen.
Changing Keyboard Response to Touch Pressure (Touch Response)
Touch Response alters tone volume in accordance with keyboard pressure (speed). This provides you some of the same expressivity you get on an acoustic piano.
To enable and disable Touch Response
1. Press 33 TOUCH ON/OFF.
Each press toggles the indicator mark next to [TOUCH] to appear and disappear.
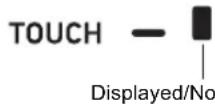
- The indicator mark next to [TOUCH] disappears when Touch Response is turned off. The indicator mark is displayed while Touch Response is some setting other than off.
- For information about the Touch Response setting, see "To change Touch Response sensitivity" below.
To change Touch Response sensitivity
- Long-press 33 TOUCH ON/OFF until the [FUNCTION] indicator appears.
This displays the current Touch Response setting value.
- Use 13 [-] and [+] or the 11 dial to change the setting value.
- The table below shows setting values and their corresponding Touch Response sensitivity.
| Setting Value | Sensitivity (Display) | Description |
| 01 Off | (Off) Touch Res | ponse is turned off.Sound volume is fixed,regardless of key press speed. |
| 02 Light | (Light) Strong | sound, even with light pressure |
| 03 Normal(Normal) | Normal Touch Response | |
| 04 Heavy(Heavy) | Normal sound, even with strong pressure |
- There is an indicator mark next to [TOUCH] while the touch setting is something other than off.
- When the setting is the way you want, long-press the [4] (EXIT) 12 number key to exit the setting screen.
Controlling Sounds
Using a Pedal
Connecting a pedal lets you perform pedal operations that add various effects during your performances. You can use a pedal to start and stop Auto Accompaniment and Song Bank (page EN-38) song play.
- A pedal unit does not come with the Digital Keyboard. Purchase one separately from your retailer. See page EN-3 for information about options.
- You can also use a pedal to switch the Digital Keyboard registration setup. For details, see "Using a Pedal to Cycle Through Multiple Setups (Registration Sequence)" (page EN-68).
Connecting a Pedal
Depending on the type of operation you want the pedal to perform, connect the pedal's cable either to the Digital Keyboard's 54 PEDAL1 jack or 55 PEDAL2/EXPRESSION jack.
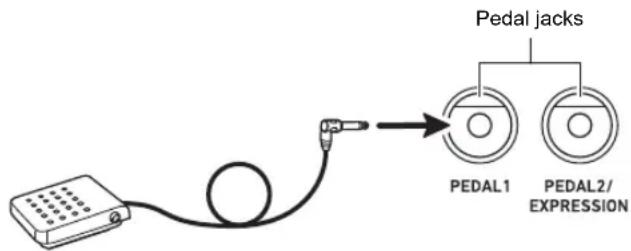
- You can connect a CASIO sustain pedal ("Separately Available Accessories", page EN-3) to the 54 PEDAL1 jack. The 55 PEDAL2/EXPRESSION jack can be used to connect a CASIO sustain pedal or a commercially available expression pedal.

IMPORTANT!
- If you use the 55 PEDAL2/EXPRESSION jack to connect a commercially available expression pedal, you will need to specify the polarity type of the pedal and also calibrate the pedal before you use it. To do this, perform the procedure under "To connect a pedal to the 55 PEDAL2/EXPRESSION jack" (page EN-30).
To connect a pedal to the 54 PEDAL1 jack
- Connect a pedal to the 54 PEDAL1 jack.
- Press 10FUNCTION.
- Use the [1] (∠) and [3] (△) 12 number keys to display "Cntrler", and then press [6] (ENTER).
-
Use the [1] (∠) and [3] (△) keys to display "Pedal", and then press [6] (ENTER).
This displays "Pd1Efect". This is the Pedal 1 function selection mode. -
Use 13 [-] and [+] or the 11 dial to change the setting value.
- For details about the function that is assigned by each setting value, refer to the "Pedal Function List" (page EN-31).
- Turn pedal effects on or off for each keyboard part* as required.
(1) Use the [1] (∠) and [3] (△) 12 number keys to display "Pd1Enabl".
(2) Press the [6] (ENTER) 12 number key.
(3) Use the [1] (∠) and [3] (△) keys to display the part whose setting you want to change.
(4) Use 13 [-] and [+] to switch between on and off.
- The pedal effect is applied to parts that are turned on, and not applied to parts that are turned off.
- The Auto Harmonize (page EN-51) sound depends on the UPPER 1 part setting.
- When the setting is the way you want, long-press the [4] (EXIT) 12 number key to exit the setting screen.
*See "Sounding Multiple Tones (Layer and Split)" (page EN-19).
To connect a pedal to the 55 PEDAL2/EXPRESSION jack
- Connect a pedal to the 55PEDAL2/EXPRESSION jack.
- Press 10FUNCTION.
- Use the [1] (∠) and [3] (△) 12 number keys to display "Cntrller", and then press [6] (ENTER).
- Use the [1] (∠) and [3] (△) keys to display "Pedal", and then press [6] (ENTER).
- Use the [1] (∠) and [3] (△) keys to display "Pd2 Type".
- Use 13 [-] and [+] or the 11 dial to change the setting value.
| To use this type of pedal: Select this setting: | |
| Foot switch pedal 1 Foot Sw | |
| Expression pedal (Type 1 polarity*) | 2 ExpType1 |
| Expression pedal (Type 2 polarity*) | 3 ExpType2 |
* For details, see "Connectable Expression Pedals" (page EN-31).
IMPORTANT!
- If a pedal does not work correctly after configuring settings, it could mean that the connected pedal is not compatible with the "Pd2 Type" setting above. Try changing the "Pd2 Type" to a different setting and see if this results in correct operation.
- Depending on the selected pedal type, perform one of the operations below.
■Foot Switch Pedal
Select the pedal effect.
(1) Use the [1] (∠) and [3] (△) 12 number keys to display "Pd2Efect".
(2) Use 13 [-] and [+] or the 11 dial to change the setting value.
- For details about pedal effects that correspond to each setting value, see the “Pedal Function List” (page EN-31).
■Expression Pedal
Selecting "2 ExpType1" or "3 ExpType2" in step 6 of this procedure automatically causes "5 Exp." (Expression) to be selected for "Pd2Efect". If you connect an expression pedal to the 55 PEDAL2/EXPRESSION jack, use the procedure below to calibrate the pedal before using it.
(1) Use the [1] (∠) and [3] (△) 12 number keys to display "ExPCalib", and then press [6] (ENTER). This displays "Sure?"
(2) Press 13 [+] (YES) to start adjustment or 13 [-] (NO) to cancel the adjustment operation.
(3) While "Highest" is displayed, depress the pedal and press [6] (ENTER).
(4) While "Lowest" is displayed, release the pedal and press [6] (ENTER).
- The message "Complete" will appear when the operation is complete.
- To have an expression pedal connected to the 55 PEDAL2/EXPRESSION jack perform the same operation (sustain, etc.) as a foot switch pedal, perform the operation under “■ Foot Switch Pedal” above to select a pedal effect.
- Turn pedal effects on or off for each keyboard part as required.
- Perform step 6 under "To connect a pedal to the 54 PEDAL1 jack" (page EN-29). Note, however, that you should display "Pd2Enabl" in step (1).
- When the setting is the way you want, long-press the [4] (EXIT) 12 number key to exit the setting screen.
■ Pedal Function List
| Setting Value | Function(Display) | Description |
| 1 | S u(Sustain) | Sustains notes played whilerthe pedal is depressed, even if the keyboard key is subsequently released.Organ and other tones that are sustained as long as keyboard key are depressed continue to sound as long as the pedal is depressed. |
| 2 Sostenuto(Sostenut) | Only the notes of the keys that are depressed when the pedal is pressed are sustained, even if the keyboard keys are released, until the pedal is released. | |
| 3 Soft (Soft) Slightly lowers and softens notes played while the pedal is depressed. | ||
| 4 Rhythm/Song(Rhy/Song) | Starts or stops Auto Accompaniment or song playback. | |
| 5 Expression(Exp.) | This function can be selected only when “2 ExpType1” or “3 ExpType2” is selected in step 6 of the procedure under “To connect a pedal to the 55PEDAL2/EXPRESSION jack” (page EN-30).With this function, the effect is applied in accordance with how far the expression pedal attached to the 55PEDAL2/EXPRESSION jack is depressed. | |
■ Connectable Expression Pedals
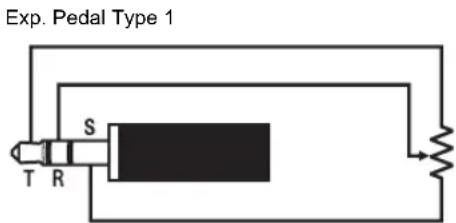
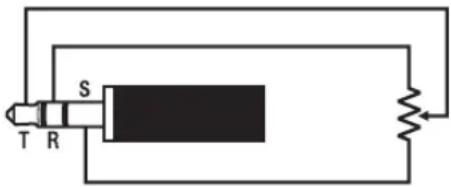
You can connect a commercially available expression pedal that satisfies the specifications below to the 55PEDAL2/EXPRESSION jack. Use of a pedal whose operation has been confirmed (see below) is recommended.
• Maximum resistance value: 10k ± 20% to 50k ± 20%
- Note that pedal polarity depends on the manufacturer. To configure the pedal polarity type setting, perform the procedure under "To connect a pedal to the 55PEDAL2/EXPRESSION jack" (page EN-30).
Exp. Pedal Type 2*
natural_image
Pure electrical circuit lines without any symbols*Operation Confirmed Pedals Roland EV-5 (Set minimum volume to 0.) KURZWEIL CC-1 FATAR VP-25, VP-26
Sliding Smoothly Between Pitches (Portamento)
Portamento makes it possible to slide smoothly between notes as is done with string and woodwind instruments.
1. Press 32 PORTAMENTO.
This displays the [PORTAMENTO] indicator.
- While the above indicator is displayed, sequentially pressing two keyboard keys causes the first pitch to slide smoothly into the next.
2. To disable portamento, press
32 PORTAMENTO and confirm that the [PORTAMENTO] indicator is not displayed.
NOTE
- You can configure settings for the keyboard tones of each part that control the speed of the slide between pitches when 32 PORTAMENTO is pressed. Perform the procedure under "To configure function settings with the 10 FUNCTION button" (page EN-107) and configure the following setting: Controller (Cntrller) → Portamento (Portamnt) (page EN-108).
Using the Pitch Bend Wheel
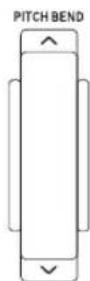
You can use the pitch bend wheel to slide the pitch of notes smoothly upwards and downwards. This capability makes it possible to reproduce saxophone and electric guitar choking effects.
1. While playing a note on the keyboard, rotate the 40 PITCH BEND wheel on the left of the keyboard upwards or downwards.
The amount the note bends depends on how much you rotate the pitch bend wheel.
- Do not touch the wheel as you turn on the keyboard.
NOTE
- You also can configure pitch bend wheel operation by specifying the amount of pitch change at maximum rotation in either direction. Perform the procedure under "To configure function settings with the 10 FUNCTION button" (page EN-107) and configure the following setting: Controller (Cntrller) → Pitch Bend (PitchBnd) → Pitch Bend Range (Range) (page EN-108).
CT-X9000IN: 39 MODULATION/ASSIGNABLE button
You can use the 89 MODULATION/ASSIGNABLE button to apply vibrato to notes (default setting). You can also change the function of the button so it change how DSP effects are applied to tones.
To apply vibrato to notes
NOTE
- The procedure below assumes that the Digital Keyboard is configured with initial default settings.
1. Hold down 39 MODULATION/ASSIGNABLE. The button's indicator lamp remains lit while the button is depressed.
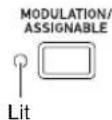
- Vibrato is applied keyboard plays while the indicator is lit.
2. To disable the effect, release the button.
This causes the button's indicator lamp to go out.
NOTE
- You can change the intensity of the vibrato effect while the indicator lamp is lit. Perform the procedure under "To configure function settings with the 10 FUNCTION button" (page EN-107) and configure the following setting: Controller (Cntrller) → MODULATION/ASSIGNABLE (Mod/Asgn) → Value when modulation is on (ModValue) (page EN-108).
To change the operation performed when 39MODULATION/ASSIGNABLE is pressed
- Press 10FUNCTION.
- Use the [1] (∠) and [3] (△) 12 number keys to display “Cntrller”, and then press [6] (ENTER).
- Use the [1] (∠) and [3] (△) keys to display "Mod/Asgn", and then press [6] (ENTER). This displays "Btn Act".
- Use 13 [-] and [+] to select the 39MODULATION/ASSIGNABLE operation.
| To select this operation: | Select this setting value: |
| Enable the function assigned to the button only while the button is pressed. | 1 Moment |
| Toggle the function between enabled and disabled each time the button is pressed. | 2 Toggle |
- The indicator lamp to the left of the button is lit when the assigned function is enabled, and unlit when it is disabled.
- When the setting is the way you want, long-press the [4] (EXIT) 12 number key to exit the setting screen.
To change the function assigned to 39 MODULATION/ASSIGNABLE
- Perform steps 1, 2, and 3 under "To change the operation performed when Ⓤ9MODULATION/ASSIGNABLE is pressed" (page EN-33).
- Use the [1] (∠) and [3] (△) 12 number keys to display "Btn Func".
- Use 13 [-] and [+] to change the function assigned to 39 MODULATION/ASSIGNABLE.
| To change to this function: | Select this setting value: |
| Vibrato 1 Mod | |
| Change how DSP effects are applied to tones in accordance with user settings.* | 2 DSP |
*For information about the setting operation see "To change how DSP effects applied when 39 MODULATION/ASSIGNABLE is pressed" (page EN-33).
4. When the setting is the way you want, long-press the [4] (EXIT) 12 number key to exit the setting screen.
To specify the keyboard part to which an effect is applied when 39MODULATION/ASSIGNABLE is pressed
- Perform steps 1, 2, and 3 under "To change the operation performed when 39MODULATION/ASSIGNABLE is pressed" (page EN-33).
- Use the [1] (∠) and [3] (△) 12 number keys to display "PartEnbl", and then press [6] (ENTER).
- Use the [1] (∠) and [3] (△) keys to display the part whose setting you want to change.
- Use the 13 [-] and [+] to switch between on and off.
• The effect is applied to parts that are turned on, and not applied to parts that are turned off.
- When the setting is the way you want, long-press the [4] (EXIT) 12 number key to exit the setting screen.
NOTE
- For details about keyboard parts, see "Sounding Multiple Tones (Layer and Split)" (page EN-19).
To change how DSP effects applied when 39 MODULATION/ASSIGNABLE is pressed
NOTE
- The DSP module registered with the procedure below are elements of this Digital Keyboard's DSP effect. For details about DSP effect configuration and parameters, see "DSP Editing" (page EN-70).
- Perform steps 1, 2, and 3 under "To change the operation performed when 39MODULATION/ASSIGNABLE is pressed" (page EN-33).
- Use the [1] (∠) and [3] (△) 12 number keys to display "Btn Func".
- Use 13 [-] and [+] to change the setting to "2 DSP".
- Use the [1] (∠) and [3] (△) keys to display "DSPModule" (the target DSP module). This displays a DSP module name.
Module number DSP module name
Mon1B EQ
- Use 13 [-] and [+] or the 11 dial to specify a DSP module.
- Use the [1] (∠) and [3] (△) 12 number keys to display "DSPParam" (the target DSP parameter).
This displays the name of the first parameter of the DSP module you selected in step 5.
Parameter number Parameter name
! EQ Ga i n
- Use 13 [-] and [+] or the 11 dial to display the parameter you want to change when 39 MODULATION/ASSIGNABLE is pressed.
- Use the [1] (∠) and [3] (△) keys to display "DSPValue" (value when DSP is turned on).
- Use 13 [-] and [+] or the 11 dial to change the setting value applied when 39MODULATION/ASSIGNABLE is pressed.
- When the setting is the way you want, long-press the [4] (EXIT) 12 number key to exit the setting screen.
NOTE
- The assigned DSP modules depend on the tone. To check the DSP modules for each tone, perform the procedure under "To use DSP editing to edit an effect" (page EN-70).
Changing the Pitch in Semitone Steps (Transpose)
The transpose feature lets you raise or lower the overall pitch of the Digital Keyboard in semitone steps. You can use this feature to adjust keyboard pitch to a key that better matches a vocalist, another musical instrument, etc.
To change the pitch in semitone units
-
Press the 38 TRANSPOSE [∨] or [^] button. This displays "Trans."
-
You can change the pitch of the keyboard within the range of -12 to 00 to +12 .
- While "Trans." is displayed, you can use the 12 number keys, 13 [-] and [+], or the 11 dial to change the setting value.
- Pressing 10 FUNCTION or not performing an operation for some time causes "Trans." to disappear.
NOTE
- The [TRANSPOSE] indicator will be displayed while the transpose setting is something other than 0 (zero).
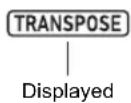
Changing the Pitch of Each Part in Octave Units (Octave Shift)
Octave Shift lets you raise or lower the pitch of the keyboard in octave units. You can configure individual octave shift settings for each of the keyboard parts* (UPPER 1, LOWER 1, UPPER 2, LOWER 2).
- You can also specify the number of octaves to shift for each part.
- With Quick Octave Shift, you can quickly shift octaves in accordance with settings that are pre-configured for a part.
*See "Sounding Multiple Tones (Layer and Split)" (page EN-19).
NOTE
- The Octave Shift setting changes automatically when some tones are selected. For details, refer to the "Octave Shift" column of the tone list in the separate "Appendix".
- The Auto Harmonize (page EN-51) sound depends on the UPPER 1 part setting.
To configure the octave shift amount setting for each part
1. Press 37 OCTAVE.
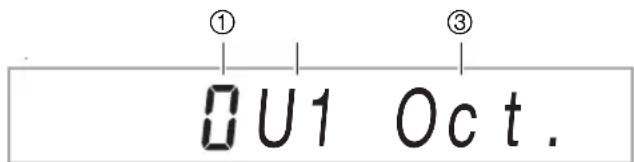
① Number of octaves shifted. 0 (zero) indicates no shifting, 1 indicates one octave up, and -1 indicates one octave down. You can specify a value in the range of -3 to +3.
② Keyboard part. For details about keyboard parts and how they are indicated, see "Keyboard Part Indicators" (page EN-19).
③ Indicates the octave shift setting screen.
-
Use the [1] (∠) and [3] (△) 12 number keys to select the keyboard part you want to octave shift.
-
Use 13 [-] and [+] to octave shift the keyboard part you selected in step 2.
2U2 Oct.
-
Repeat steps 2 and 3 to octave shift other parts as required.
-
To exit the procedure and return to the state the Digital Keyboard was in before step 1 of this procedure, press 37 OCTAVE or the [4] (EXIT) 12 number key.
To use Quick Octave Shift
-
While holding down 37 OCTAVE, press the 38 TRANSPOSE [∨] or [∧] button.
-
Pressing [√] shifts the specified keyboard parts one octave down, while [^] shifts one octave up.
- Use the Quick Octave Shift keyboard part selection procedure below to select the parts that are affected by a Quick Octave Shift operation.
To select Quick Octave Shift keyboard parts
- Press 37 OCTAVE.
This displays "U1 Oct."
- Use the [1] (∠) and [3] (△) 12 number keys to display "Btn Trgt", and then press [6] (ENTER).
This displays "U1OctBtn".
-
Use the [1] (∠) and [3] (△) keys to display the part whose setting you want to change.
-
Use the 13 [-] and [+] to switch between on and off.
- Selecting on causes the keyboard part's octave to be shifted by the Quick Octave Shift operation under "To use Quick Octave Shift" (page EN-35).
-
Repeat steps 3 and 4 as required for other parts.
-
When the setting is the way you want, long-press the [4] (EXIT) 12 number key to exit the setting screen.
Performing Master Digital Keyboard and Individual Part Pitch Adjustment
Use the procedure below to perform master Digital Keyboard pitch adjustment. When making adjustments, the A4 note (A above middle C) is the tuning standard.
To fine tune a pitch (Tuning)
1. Press 10FUNCTION.
2. Use the [1] (∠) and [3] (△) 12 number keys to display "Tune", and then press [6] (ENTER). This displays "MstrTune".
3. Use the 12 number keys, 13 [-] and [+], or the 11 dial to change the setting value.
- The setting range is 415.5 to 465.9 Hz (Default: 440.0 Hz).
- Use the 12 number keys to input integers.
- You can use 13 [-] and [+] or the 11 dial to change the frequency in 0.1Hz steps
4. When the setting is the way you want, long-press the [4] (EXIT) 12 number key to exit the setting screen.
To fine tune the pitch of each keyboard part (Part Coarse Tuning, Part Fine Tuning)
When using layer and split, you can individually fine-tune the pitch of each part (UPPER 1, LOWER 1, UPPER 2, LOWER 2).
Perform the procedure under "To configure function settings with the 10 FUNCTION button" (page EN-107) and configure the following settings: Tuning (Tune) → Part Coarse Tune (PrtCoars) and Part Fine Tune (Prt Fine) (page EN-110).
NOTE
- Part coarse tuning changes the pitch in semitone steps, while part fine tuning adjusts pitch in cent units.
- The Auto Harmonize (page EN-51) sound depends on the UPPER 1 part setting.
Selecting a Scale
You can select from among 17 different scales, including those that a suitable for classical music of specific eras, Arabian music, etc.
Scale List
| No. | Scale name Display | |
| 01 | Equal Temperament Equal | |
| 02 | Pure Major PureMajr | |
| 03 | Pure Minor PureMinr | |
| 04 | Pythagorean Pythagor | |
| 05 | Kirnberger 3 Kirnbrg3 | |
| 06 | Werckmeister Wercmeis | |
| 07 | Mean-Tone MeanTone | |
| 08 | Rast Rast | |
| 09 | Bayati | Bayati |
| 10 | Hijaz | Hijaz |
| 11 | Saba | Saba |
| 12 | Dashti | Dashti |
| 13 | Chahargah | Chaharga |
| 14 | Segah | Segah |
| 15 | Gurjari Todi | GujrTodi |
| 16 | Chandrakauns | Cndrkuns |
| 17 | Charukeshi | Carukesi |
NOTE
- You can fine tune the pitch of each note of the scale (from C to B) in one-cent units. After selecting one of the preset scales, you can modify its tuning as desired. For details, see "To fine tune a scale (Scale Fine Tuning)" (page EN-37).
- You can fix the scale of Auto Accompaniment as equal temperament, regardless of the currently selected scale. To do so, use the procedure under "To change the scale setting used for Auto Accompaniments" to turn off the Accompaniment Scale (AcompScl) setting (page EN-37).
To select the temperament of keyboard play
- Press 10FUNCTION.
- Use the [1] (∠) and [3] (△) 12 number keys to display "Scale", and then press [6] (ENTER). This displays "Type".
- Use 13 [-] and [+] or the 11 dial to change the setting value.
- For details about the scales that corresponds to each setting value, see the "Scale List" (page EN-36).
- Press the [3] ( ) 12 number key to display "Root".
- Use 13 [-] and [+] or the 11 dial to select the root note.
- When the setting is the way you want, long-press the [4] (EXIT) 12 number key to exit the setting screen.
To fine tune a scale (Scale Fine Tuning)
- Perform steps 1 and 2 under "To select the temperament of keyboard play" (page EN-37).
- Use the [1] (∠) and [3] (△) 12 number keys to display "FineTune", and then press [6] (ENTER).
This displays "C Tune".
- You can fine tune the pitch of each individual note in the scale.
(1) Use the [1] (∠) and [3] (△) keys to display the name of the note (C to B) whose pitch you want to fine tune.
(2) Use 13 [-] and [+] or the 11 dial to fine-tune the pitch of the currently displayed note.
- You can change pitch within a range of -99 to +99 cents.
(3) Repeat steps (1) and (2) as many times as necessary to fine tune the pitches of the notes you want.
- When the setting is the way you want, long-press the [4] (EXIT) 12 number key to exit the setting screen.
To change the scale setting used for Auto Accompaniments
- Perform steps 1 and 2 under "To select the temperament of keyboard play" (page EN-37).
- Use the [1] (∠) and [3] (△) 12 number keys to display “AcompScl”.
- Use 13 [-] and [+] to turn the setting on or off.
On: The scale selected by the procedure under "To select the temperament of keyboard play" is also applied to Auto Accompaniment. Off: The scale of Auto Accompaniment is always equal temperament. - When the setting is the way you want, long-press the [4] (EXIT) 12 number key to exit the setting screen.
Playing a Built-in Song or a Song on a USB Flash Drive (Song Bank Mode)
Your Digital Keyboard comes with 30 built-in songs.* You can use built-in songs for listening enjoyment, or you can mute the part of one hand of the piano part and play along for practice. You can also connect a USB flash drive to the Digital Keyboard and use the same operations as those for built-in songs to play MIDI files (SMF or CMF).
*With this Digital Keyboard, the term "song" is used to refer to a musical piece.
NOTE
- The functions and operations below cannot be used while a built-in song or a CMF format song stored on a USB flash drive is playing.
– Mixer function (page EN-62)
- Part Mode (page EN-60) part ON/OFF switching (You can, however, check the currently part selection status.)
Selecting a Built-in Song for Playback
To select a single built-in song for playback
1. Press 7SONG BANK.
This displays (Song bank indicator) and enters the Song Bank Mode.
Song number Song name
001SaintsGo
2. Use the 12 number keys, 13 [-] and [+], or the 11 dial to select a song number.
- See "Numeric Input" (page EN-14) for information about how to specify a number.
• See page A-1 for a list of songs.
NOTE
- This operation automatically changes the beat setting of the metronome (page EN-27) to the beat of the selected song. Even if the beat of a song is outside the allowable setting range of the metronome, it is still applied as the metronome setting.
- This operation changes the reverb setting (page EN-22) to match the currently selected song.
- Selecting some songs will initially cause "Lod" to be displayed for TEMPO (see the illustration under step 3). This indicates that data is being loaded.
3. Press 20PLAY/STOP.
- This starts song playback. The playback tempo, current measure, and current beat are shown in the upper right corner of the display.
$$ \begin{array}{l} \text { Note Value } \quad \text { = } \quad 1 2 0 \text { —Tempo } \ \text { Measure } \quad \text { —MEASUREBEAT—Beat } \end{array} $$
• The operations below are supported during song playback.
| To perform this operation: Do this: | |
| Stop a song part way through. | Press 20 PLAY/STOP. |
| Pause or unpause a song. | Press 19 II PAUSE. |
| Change the song playback speed. | Press the 30 TEMPO [√] or [^] button. |
| Jump to the beginning of the next measure. | Press 18 ▶FF. |
| Fast forward the song | Hold down 18 ▶FF. |
| Jump to the beginning of the previous measure. | Press 17 ◀REW. |
| Fast reverse the song | Hold down 17 ◀REW. |
- While a song is playing back, you can play along on the keyboard using the tone (including split and layer tones) that was selected before song playback was started.
4. To stop song playback, press 20 PLAY/STOP.
- The song plays in a continuous loop (repeat on) until you press 20 PLAY/STOP. To turn off repeat, press 15 REPEAT and confirm that there is no indicator mark next to [REPEAT].
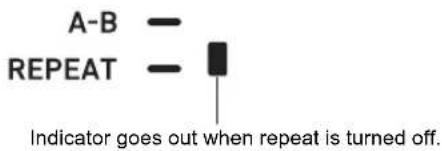
To select a tone for keyboard play in the Song Bank mode
1. In the Song Bank mode, press 5 TONE.
This displays tone indicator). (song bank indicator) will also remain on the display.
2. Use the 12 number keys, 13 [-] and [+], or the 11 dial to select the number of the tone you want to assign to keyboard play.
- While is displayed, you can perform the split and/or layer tone selection operation. For more information, see "Selecting a Tone" (page EN-18).
NOTE
- To change a tone number you selected using the procedure above, press 7 SONG BANK. This causes 📄 to disappear, leaving only displayed.
To adjust the balance between song and keyboard volume
Perform the procedure under "To configure function settings with the 10 FUNCTION button" (page EN-107) and configure the following setting: Song Volume (Song Vol) (page EN-110).
Looping Playback of Specific Song Measures (A-B Repeat)
To loop a range of measures in a song, you need to specify the start measure and end measure of the section you want to repeat.
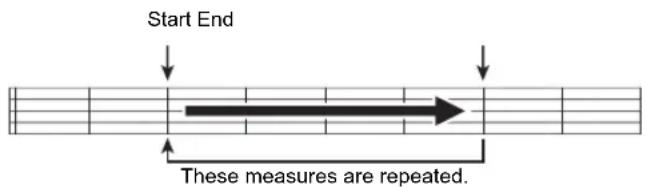
To loop a specific phrase
- If there is no indicator mark next to [REPEAT], press 15 REPEAT to display it.
- Perform steps 1, 2, and 3 under "To select a single built-in song for playback" (page EN-38) to start song playback.
3. When playback reaches the beginning of the section you want to loop, press 16 A-B.
This will make the beginning of the measure that is playing when you press 16 A-B the beginning of the loop, and cause the indicator mark next to [A-B] to start to flash.
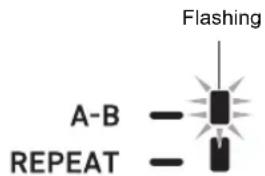
4. When playback reaches the end of the section you want to repeat, press 16A-B again.
This will make the end of the measure that is playing when you press 16 A-B the end of the loop, and cause the indicator mark next to [A-B] to stop flashing.
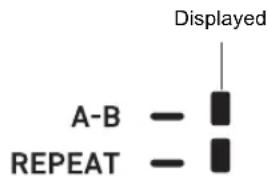
5. To return to normal playback, press 16 A-B.
This causes the indicator mark next to [A-B] to disappear.
Playing Back with One Hand's Part Muted
You can mute one of the hand parts of a song for playback. Then you can practice by playing the muted part on the keyboard. The following types of songs can be used for such practice: built-in songs, ^ or CMF format (one type of CASIO MIDI file) songs ^ stored on a USB flash drive.
*These songs have part channel information (page EN-40).
To play back with one hand's part muted
- Press 7 SONG BANK.
- Use the 12 number keys, 13 [-] and [+], or the 11 dial to select a song number.
- Press 20 PLAY/STOP to start song playback.
4. Use 14 PART SELECT to select a part to practice.
• Each press of 14 PART SELECT causes the indicators below to appear or disappear in accordance with the type of song that is selected.
■Song with One Left-hand and One Right-hand Part
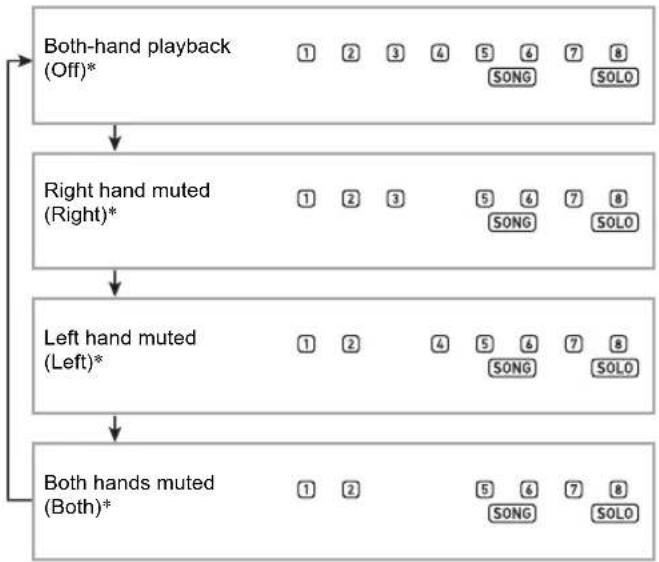
flowchart
graph TD
    A["Both-hand playback (Off)*"] --> B["Right hand muted (Right)*"]
    B --> C["Left hand muted (Left)*"]
    C --> D["Both hands muted (Both)*"]
    style A fill:#f9f,stroke:#333
    style B fill:#f9f,stroke:#333
    style C fill:#f9f,stroke:#333
    style D fill:#f9f,stroke:#333
■Song with Chord Accompaniment on the Left-hand Side and Melody on the Right-hand Side
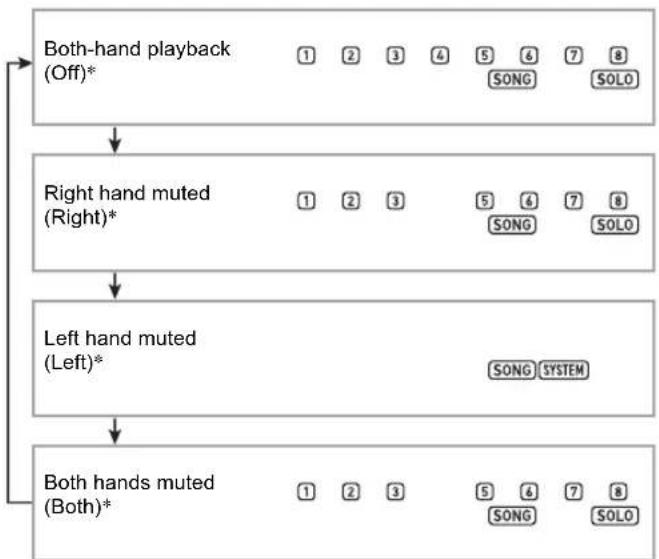
flowchart
graph TD
    A["Both-hand playback (Off)*"] --> B["Right hand muted (Right)*"]
    B --> C["Left hand muted (Left)*"]
    C --> D["Both hands muted (Both)*"]
    style A fill:#f9f,stroke:#333
    style B fill:#f9f,stroke:#333
    style C fill:#f9f,stroke:#333
    style D fill:#f9f,stroke:#333
* Each press of 14 PART SELECT cycles through these settings, with the current setting appearing momentarily on the display.
5. To stop song playback, press 20 PLAY/STOP.
■Part Channel Information
In built-in songs and CMF format songs, parts where left-hand play is recorded and parts where right-hand play is recorded are separate. These songs have "part channel information", which is information that controls to which Digital Keyboard parts left-hand and right-hand play should be assigned. The part channel information contained in built-in songs and general CMF format songs is described below.
| Song Type | Left Hand Part: | Right-hand Part |
| Normal piano song with one tone for both hands | Part 3 of SONG SOLO Part Group | Part 4 of SONG SOLO Part Group |
| Song with Auto Accompaniment for the left-hand part and melody for the right-hand part | Part 1 through 8 of RHYTHM Part Group | Part 4 of SONG SOLO Part Group |
Though standard MIDI files (SMF format) stored on a USB flash drive can also be played back by the Digital Keyboard, such files do not have part channel information. Use the procedure below to specify whether the right-hand part or left-hand part should be muted when 14 PART SELECT is pressed for playback of such a file.
To specify a part channel
Perform the procedure under "To configure function settings with the 10 FUNCTION button" (page EN-107) and change the part channel settings: Other (Other) → Right Hand (Melody) Part Channel (PartR Ch), Left Hand Part Channel (PartL Ch) (page EN-112).
NOTE
- The above setting is applied only for playback of a song that does not have part channel information. When a song has part channel information, this setting is ignored and the part channel information is given priority.
Playing Back a Song from a USB Flash Drive
You can use the same operations as those for built-in songs to play back MIDI files* stored in the MUSICDAT folder on a USB flash drive. For information about the procedure for saving a MIDI file to a USB flash drive, see "Using a Computer to Copy General Song Data to a USB Flash Drive" (page EN-118).
*Standard MIDI files (SMF format 0/1) and CASIO MIDI files (CMF format)
To play back a song from a USB flash drive
1. Insert the USB flash drive into the Digital Keyboard's USB flash drive port.
- When you perform a USB flash drive operation or turn on the Digital Keyboard while a USB flash drive is plugged in, the Digital Keyboard initially needs to perform a “mounting” sequence to prepare for data exchange with the USB flash drive. Digital Keyboard operations may be momentarily disabled while a mounting sequence is being performed. The [USB] indicator will flash on the display while the USB flash drive is being mounted. It may take up to 10 or 20 seconds or even longer for a USB flash drive to be mounted. The message “Listing” will be displayed while the mounting operation is in progress. Do not attempt to perform any operation on the Digital Keyboard while a mounting sequence is in progress. A USB flash drive needs to be mounted each time it is connected to the Digital Keyboard.
2. Perform the procedure under "To select a single built-in song for playback" (page EN-38).
- Song numbers are assigned automatically in sequence to MIDI files on the USB flash drive. The files are sorted on their file names, and the first MIDI file is assigned song number 41.
Playing Back an Audio File on a USB Flash Drive (Audio Mode)
You can use your Digital Keyboard to play back audio files (WAV format, 44.1 kHz 16bit) stored in the MUSICDAT folder on a USB flash drive. For information about the procedure for saving an audio file to a USB flash drive, see "Using a Computer to Copy General Song Data to a USB Flash Drive" (page EN-118).
NOTE
- While audio file playback is in progress, you can perform normal keyboard play, and you can use layer, split operations.
- For information about handling USB flash drives, see "USB Flash Drive" (page EN-114).
To play back an audio file
- Plug a USB flash drive where a supported audio file is stored into the Digital Keyboard's USB port.
- Long-press 7 SONG BANK (AUDIO) until the [AUDIO] indicator appears.
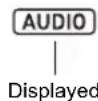
This means that the Digital Keyboard is in the Audio Mode and is standing by for audio file playback.
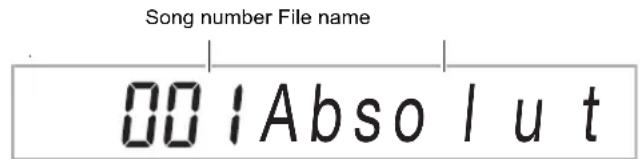
- Song numbers are assigned automatically in sequence to audio files on the USB flash drive.
-
Use the 12 number keys, 13 [-] and [+], or the 11 dial to select the number of the audio file you want to play back.
-
To start playback, press 8 AUDIO PLAY/STOP.
This displays [AUDIO PLAY] indicator.
- The operations below are supported during playback.
| To perform this operation: Press this button: | |
| Skip to the next file 13 [+] | |
| Skip to the previous file 13 [-] | |
5. To stop playback, press 3 AUDIO PLAY/STOP.
This causes the [AUDIO PLAY] indicator to disappear.
6. To exit the Audio Mode, press 7 SONG BANK (AUDIO).
This causes the [AUDIO] indicator to disappear.
NOTE
- Playback of an audio file continues even if you exit the Audio Mode. In this case as well, press ⑧ AUDIO PLAY/STOP to stop playback.
- You can loop playback of an audio file. Perform the procedure under "To configure function settings with the 10FUNCTION button" (page EN-107) and turn on the repeat setting: Audio Playback (AudioPly) → Audio playback looping (Repeat) (page EN-111).
To adjust the balance between audio file playback and keyboard volume
Perform the procedure under "To configure function settings with the 10 FUNCTION button" (page EN-107) and change the volume setting: Audio Playback (AudioPIy) → Audio playback volume (Volume) (page EN-111).
Center Cancel (Vocal Cut)
Enabling Vocal Cut mutes or minimizes the vocal part in the audio file playback. Note that this function cancels the sound in the center position of the audio, which may (depending on how the original audio was mixed) end up canceling something else other than the vocal part. How vocal cut is performed depends on the sound being input.
Perform the procedure under "To configure function settings with the 10 FUNCTION button" (page EN-107) and change the Center Cancel setting: Audio Playback (AudioPly) → Audio playback Center Cancel (C Cancel) (page EN-111).
Using Auto Accompaniment (Rhythm Mode)
With Auto Accompaniment, simply select the accompaniment rhythm you want and the matching accompaniment (bass, guitar, and other instruments) will sound automatically when you play a chord with your left hand. It's like having your own personal backup group along with you wherever you go. You can edit built-in rhythms and produce original Auto Accompaniments (user rhythms) and save them in memory. For details, see "Creating an Auto Accompaniment (User Rhythm)" (page EN-74).
Selecting a Rhythm
To select a rhythm
1. Press 6 RHYTHM.
This displays 📊 rhythm indicator) and enters the Rhythm Mode.
Rhythm number Rhythm name
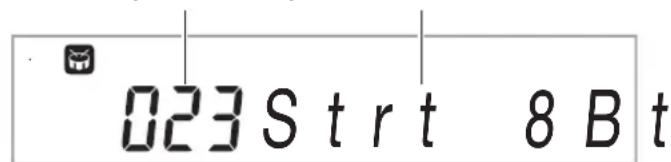
2. Use the 12 number keys, 13 [-] and [+], or the 11 dial to select a rhythm number.
- See "Numeric Input" (page EN-14) for information about how to specify a number.
- Rhythms are divided into multiple categories, and are arranged for quick and easy navigation between categories. For more information, see
"4 CATEGORY Button" (page EN-15). - For details about rhythm categories and types, refer to the separate "Appendix".
NOTE
- This operation automatically changes the beat setting of the metronome (page EN-27) to the beat of the selected rhythm. Even if the beat of a rhythm is outside the allowable setting range of the metronome, it is still applied as the metronome setting.
3. Press 20 START/STOP to start play of the selected rhythm.
- This starts Auto Accompaniment with rhythm (drum and percussion) only. To stop rhythm play, press 20 START/STOP again.
CT-X9000IN: To use the RHYTHM Category buttons to select a category
- You can use the 46 RHYTHM Category buttons to quickly and easily navigate between categories.
45 RHYTHM GROUP SELECT button
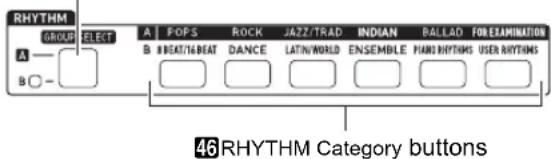
Rhythm categories are divided between two groups: Group A (A) and Group B (B). Which category (group) a 46 RHYTHM Category button selects depends on whether or not the indicator lamp to the left of 45 RHYTHM GROUP SELECT is lit.
- Press the 45 RHYTHM GROUP SELECT button to toggle between category Group A (indicator lamp unlit) and Group B (indicator lamp lit).
-
To select a category, press its 46 RHYTHM Category button.
-
This causes 📂 (hythm indicator) to flash on the display.
-
Pressing a 46 RHYTHM Category button will select the last selected rhythm in the corresponding category. While flashing, you can select one of the rhythms included in the category. To exit category rhythm selection, press 6 RHYTHM. This causes to stop flashing.
-
Use the 12 number keys, 13 [-] and [+], or the 11 dial to select the number of the rhythm you want to sound.
Using Auto Accompaniment
To play an Auto Accompaniment
- Use the procedure under "Selecting a Rhythm" (page EN-42) to select the rhythm you want to sound.
- Press 22 ACCOMP and confirm that the [ACCOMP] indicator is displayed.
- For details about this indicator, see "Auto Accompaniment Parts and the ACCOMP Indicator" (page EN-44).
- Press 19 ENDING/SYNCHRO START.
- This enters synchro start standby (page EN-47).
- Play the chord you want on the accompaniment keyboard.
Auto Accompaniment will start playing when you play the chord. Example: Play a C chord (C-E-G).
Accompaniment keyboard
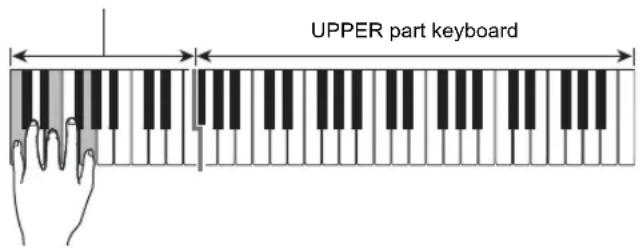
5. Use the 30 TEMPO [∨] and [∧] buttons to change the tempo setting.
$$ \begin{array}{c} \text { TEMPO } \ \text { Tempo } \ \text { Measure } - \text { MEASURE } - \text { BEAT } \ \text { Beat } \end{array} $$
- You can also configure the tempo setting before starting Auto Accompaniment.
- For information about the tempo setting, see "Changing Auto Accompaniment Speed (Tempo)" (page EN-45).
6. Play other chords with your left hand as you play the melody with your right hand.
- You can use "CASIO CHORD" or other simplified chord fingering modes to play chords. See "To select a chord fingering mode" (page EN-49).
- You can change the accompaniment using buttons 15 VARIATION/FILL-IN 1 to 18 VARIATION/
FILL-IN 4. See "Creating a Song with an Auto Accompaniment (Accompaniment Pattern)" (page EN-46).
7. To stop Auto Accompaniment, press 20 START/STOP.
- Pressing 19 ENDING/SYNCHRO START instead of 20 START/STOP will play an ending pattern before stopping the Auto Accompaniment. See “Creating a Song with an Auto Accompaniment (Accompaniment Pattern)” (page EN-46).
NOTE
- With the above procedure, you finger chords to be played by the Auto Accompaniment. You also can use music presets to sound Auto Accompaniment using a chord progression based on the music genre you want to perform, without inputting chords. For details, see "Using Music Presets" (page EN-52).
■Auto Accompaniment Parts and the ACCOMP Indicator
The Digital Keyboard's Auto Accompaniment sounds up to eight parts (Drums, Percussion, Bass, Chords 1 to 5) simultaneously. The [ACCOMP] indicator indicates whether only percussion parts (Drums, Percussion) will sound, or all accompaniment parts will sound. Each press of
22 ACCOMP toggles the [ACCOMP] indicator between displayed and not displayed.
- When the [ACCOMP] indicator is not displayed, only the rhythm (drum and percussion) of the accompaniment pattern sounds.
- When the [ACCOMP] indicator is displayed, bass, chords, and other parts sound in accordance with the chord played on the accompaniment keyboard.
NOTE
- You can use the procedure under "Muting Specific Parts (Part Mode)" (page EN-60) to quickly and easily mute or unmute multiple parts.
- You can also make fine-adjustments to the volume, effect level, and other settings for each part. For details, see "Using the Mixer" (page EN-62).
To adjust the balance between Auto Accompaniment and keyboard volume
Perform the procedure under "To configure function settings with the 10 FUNCTION button" (page EN-107) and configure the following setting: Auto Accompaniment volume (AcompVol) (page EN-110).
Changing Auto Accompaniment Speed (Tempo)
There are two ways to change the tempo.
- Specifying a beats-per-minute value
- Tapping a beat with the 31 TAP TEMPO button (tap input)
Note Value Indicator and Tempo Value
The current tempo value setting is always displayed in the upper right corner of the display.
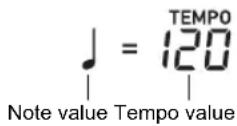
The tempo value is always shown in combination with a note value. The example above indicates 120 quarter note beats per minute.
To specify a tempo value
- Change the note value as required.
- See "To change the displayed note value" below.
- Use the 30 TEMPO [∨] and [^] buttons to change the tempo setting.
Current setting value
060 TEMPO
- The allowable tempo value setting range depends on the currently displayed note value as shown in the table below.
| Note Value Tempo Value Range | |
| Quarter note (♩) 20 to 255 | |
| Eighth note (♩) 40 to 510 | |
| Half note (♩) 10 to 128 | |
| Dotted quarter note (♩.) 13 to 170 |
- When the note value is a quarter note, the tempo value corresponds to the actual number of beats per minute. When the note value is an eighth note the number of beats per minute is twice that of the tempo value. When the note value is a half note, the number of beats is half that of the tempo value.
To change the displayed note value
- Long-press 31 TAP TEMPO until the displayed note value changes.
• Each long-press of 31 TAP TEMPO cycles through the note value settings in the sequence shown below.
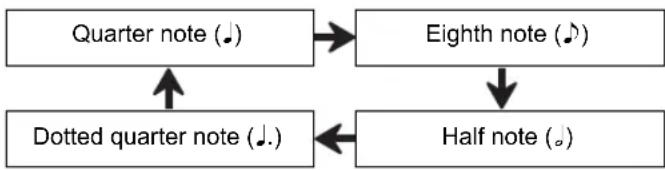
flowchart
graph TD
    A["Quarter note (♩)"] --> B["Eighth note (♩)"]
    C["Dotted quarter note (♩.)"] --> A
    C --> D["Half note (♩)"]
To set the tempo by tapping a beat
- Tap 31 TAP TEMPO multiple times at as steady a beat as possible.
This will set a tempo that is as close as possible to the timing of the beat you tap.
- It helps to use this method to specify the approximate tempo in combination with a procedure like the one under "To specify a tempo value" (page EN-45).
NOTE
- A tempo value that is input using this method has no relation to the currently displayed note value. Depending on the rhythm selected with the above operation, a quarter note or eighth note tempo value is input.
To start rhythm play with the 31 TAP TEMPO button
You can configure settings to automatically start rhythm play when you specify a tempo using the procedure under "To set the tempo by tapping a beat" above.
To do so, perform the procedure under "To configure function settings with the 10 FUNCTION button" (page EN-107) and enable the following setting: Other (Other) → Tap rhythm start (Tap Rhy) (page EN-112).
Creating a Song with an Auto Accompaniment (Accompaniment Pattern)
Generally, the progress of a musical piece starts with an intro, transitions to verses that are interspersed with interludes and other changes, and then returns to the main theme before reaching an ending. The Digital Keyboard's Auto Accompaniment function provides a selection of accompaniment patterns that are suited to the progress of a musical composition.
Accompaniment Patterns
This section describes the different types of accompaniment patterns of the Auto Accompaniment function.
■Variations (Four Types)
This is an accompaniment pattern that can be used in the verse or chorus of a piece. A variation repeats anywhere from one measure to multiple measures.
To play a variation
Press one of the VARIATION/FILL-IN buttons (15 to 18). This sounds the variation accompaniment pattern assigned to the button that is pressed.
Indicator displayed while Variation 2 is sounding
NOTE
- Pressing 20 START/STOP sounds the Variation 1 pattern.
■Fill-Ins (Four Types)
These accompaniment patterns are used to insert short one- or two-measure fill-ins into a piece. When a fill-in button is pressed, the fill-in will start immediately, or on the first beat after one measure or two measures, and then return to the original variation accompaniment pattern.
To play a fill-in
While Variation 1 is sounding, press 15VARIATION/FILL-IN 1. If a different variation (2, 3, 4) is sounding, press the button (16, 17, 18) that corresponds to it.
VF1
Indicator displayed while Fill-In 1 is sounding
■Intro (One Type)
This is an accompaniment pattern that can be used at the beginning of a piece. After a multiple-measure intro accompaniment pattern sounds, accompaniment transition to Variation 1.
To play an intro
Press 14INTRO.
To change the variation played following the intro
While an intro is sounding, press the button for the variation you want to sound (16 VARIATION/FILL-IN 2,
17 VARIATION/FILL-IN 3, 18 VARIATION/FILL-IN 4)
after the intro is complete.

Indicator displayed while Intro is sounding
■Ending (One Type)
This is an accompaniment pattern that can be used at the end of a piece. After a multiple-measure ending sounds, Auto Accompaniment ends.
To play an ending
While an Auto Accompaniment is sounding, press
19 ENDING/SYNCHRO START.

Indicator displayed while Ending is sounding
Starting and Stopping Auto Accompaniment with the Accompaniment Keyboard (Synchro Start, Synchro Stop)
You can configure settings so Auto Accompaniment starts as soon as you play a chord on the accompaniment keyboard (synchro start) and stops as soon as you release all of the keys on the accompaniment keyboard (synchro stop).
To use Synchro Start to start Auto Accompaniment play
1. Press 19 ENDING/SYNCHRO START.
This enters synchro start standby, and causes the [SYNC START] indicator and v n i cator to flash.
Flashing
- If you want to start with an intro, press 14 INTRO here. This causes the 1 indicator to flash.
- If you want to start with a particular variation, press the button for the variation you want to start with
(16 VARIATION/FILL-IN 2, 17 VARIATION/FILL-IN 3, 18 VARIATION/FILL-IN 4). The v indicator and a number indicator (1 to 4) that corresponds to the button you press flash on the display.
2. Play the chord you want on the accompaniment keyboard.
This starts Auto Accompaniment.
NOTE
- To exit synchro start standby, press 19 ENDING/SYNCHRO START.
To use Synchro Stop to stop Auto Accompaniment play
1. Press 21 SYNCHRO STOP.
This enters synchro stop standby.
2. While Auto Accompaniment is sounding, release all of the accompaniment keyboard keys at the point where you want it to stop.
This stops Auto Accompaniment.
- The Digital Keyboard automatically enters synchro start standby at this time.
NOTE
• To exit synchro stop standby, press 21 SYNCHRO STOP.
Changing Accompaniment Keyboard Settings
Selecting a Chord Input Mode
You can select from among the following six chord input modes.
- CASIO CHORD
• FINGERED 1
• FINGERED2
• FINGERED ON BASS
• FINGERED ASSIST
• FULL RANGE CHORD
For details, see "To select a chord fingering mode" (page EN-49).
■CASIO CHORD
With CASIO CHORD, you can use simplified fingerings to play the four types of chords described below.
Chord Type
Major Chords
Pressing a single accompaniment area key in the CASIO CHORD mode will play the major chord whose name is marked above the key. All of the accompaniment area keys that are marked with the same chord name play exactly the same chord.
Example: C (C Major)

Minor Chords
To play a minor chord, press the accompaniment area key that corresponds to the major chord, while also pressing one other accompaniment area key to the right.
Example: Cm (C Minor)

Seventh Chords
To play a seventh chord, press the accompaniment area key that corresponds to the major chord, while also pressing two other accompaniment area keys to the right.
Example: C7 (C Seventh)

Minor Seventh Chords
To play a minor seventh chord, press the accompaniment area key that corresponds to the major chord, while also pressing three other accompaniment area keys to the right.
Example: Cm7 (C Minor Seventh)

- When playing a minor, seventh, or minor seventh chord, it makes no different whether the additional keys you press are black or white.
■FINGERED
With these input modes, you play chords on the accompaniment keyboard using their normal chord fingerings. Some chord forms are abbreviated, and can be fingered with one or two keys.
See page A-1 for information about chords that are supported and how they are fingered on the keyboard.
●FINGERED 1
Play the component notes of the chord on the keyboard.
●FINGERED 2
Unlike FINGERED 1, 6th input is not possible. m7 or m7 ^5 is input.
●FINGERED ON BASS
Unlike FINGERED 1, allows input of fraction chords with the lowest keyboard note as the bass note.
●FINGERED ASSIST
Produces an effect that is different from FINGERED 1 when two or three keys are pressed. Pressing a root key and any white key to the left of the root key plays a seventh chord, while a black key plays a minor chord. Pressing both a white and black key together plays a minor seventh chord. In addition to FINGERED 1, you can also use the methods below to play the three types of chords described below.
Chord Type
Minor Chords
To play a minor chord, press the accompaniment keyboard key that specifies the major chord, while also adding the closest black key to the left of the major chord key.
Example: Cm (C Minor)

Seventh Chords
To play a seventh chord, press the accompaniment keyboard key that specifies the major chord, while also adding the closest white key to the left of the major chord key.
Example: C7 (C Seventh)

Minor Seventh Chords
To play a minor seventh chord, press the accompaniment keyboard key that specifies the major chord, while also adding the closest white and black keys to the left of the major chord key.
Example: Cm7 (C Minor Seventh)

FULL RANGE CHORD
With this mode, you can use the full area of the keyboard to play chords and the melody. See page A-1 for information about chords that are supported.
To select a chord fingering mode
1. Press 10FUNCTION.
2. Use the [1] (∠) and [3] (△) 12 number keys to display "ChordMod".
3. Use 13 [-] and [+] or the 11 dial to change the setting value.
- The table below shows the relationship between setting values and chord fingering modes.
| Setting value | Chord Fingering Modes Display |
| 1 CASIO CHORD CASIO Cd | |
| 2 FINGERED 1 Fingerd1 | |
| 3 FINGERED 2 Fingerd2 | |
| 4 FINGERED ON BASS FgOnBass | |
| 5 FINGERED ASSIST FgAssist | |
| 6 FULL RANGE CHORD FulRange |
- The accompaniment keyboard ranges for each chord fingering mode is shown in the illustration below. The split point (page EN-20) shown in the illustration is the initial default split point.
FULL RANGE CHORD

■Not FULL RANGE CHORD
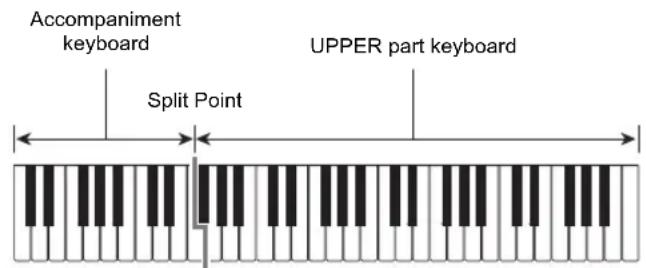
4. When the setting is the way you want, long-press the [4] (EXIT) 12 number key to exit the setting screen.
Accompaniment Keyboard Range Setting
Specifying a split point (page EN-20) puts the LOWER part keyboard and the accompaniment keyboard in the same area. You can also specify different areas for each of these two keyboards. You can also configure a setting so the LOWER part tone does not sound in the area where the LOWER part keyboard and accompaniment keyboard overlap. For details, see the "Advanced Split Settings" (page EN-49).
Advanced Split Settings
Your Digital Keyboard can be split into three areas: an UPPER part keyboard, a LOWER part keyboard, and an accompaniment keyboard.
You can specify a split point (page EN-20) as shown in the illustration below.
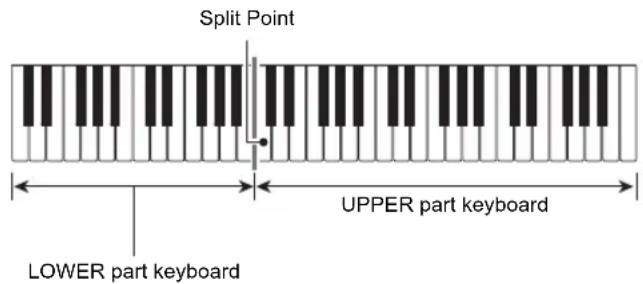
You can specify a lower point and a chord point, to assign different areas as a LOWER part keyboard and an accompaniment keyboard.
●Lower Point
Specifying the lower limit of the UPPER part keyboard results in a configuration like the one shown below. The accompaniment keyboard range is not affected in this case.
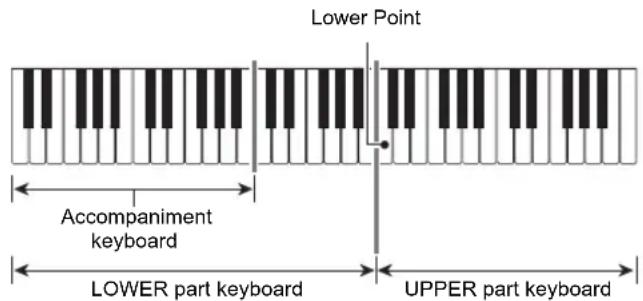
●Chord Point
The illustration below shows a keyboard with a chord point specified. The LOWER part keyboard range is not affected in this case.
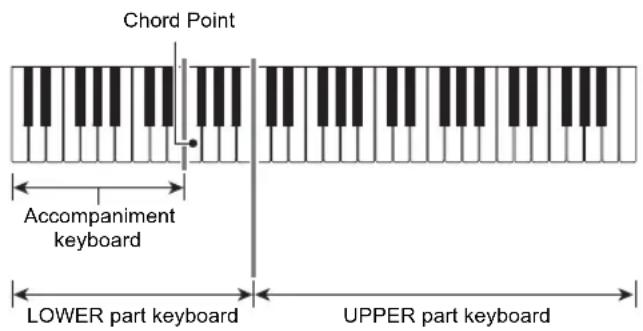

NOTE
- While the Chord Input Priority Mode (page EN-50) is turned on, the LOWER part tone does not sound in the area where the LOWER part keyboard and accompaniment keyboard overlap.
To specify the lower point
- Hold down 35 SPLIT until "Split Pt" is displayed.
- Use the [1] (∠) and [3] (△) 12 number keys to display "Lower Pt".
- Use 13 [-] and [+] or the 11 dial to specify the note name of the lower point note (the lower limit of the UPPER part keyboard).
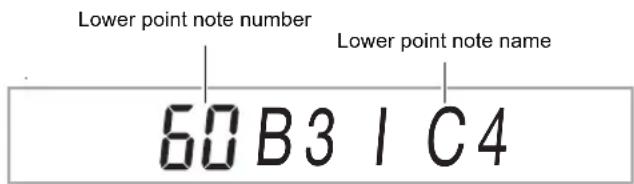
- You can also specify the lower point by holding down 35SPLIT and pressing the keyboard key where you want the lower point to be.

IMPORTANT!
- You cannot specify a lower point that is lower than (to the left of) the chord point. If you do, the chord point will be forced to be the same key as the lower point.
- When the setting is the way you want, long-press the [4] (EXIT) 12 number key to exit the setting screen.
To specify the chord point
- Hold down 35SPLIT until "Split Pt" is displayed.
- Use the [1] (∠) and [3] (△) 12 number keys to display "Chord Pt".
- Use 13 [-] and [+] or the 11 dial to specify the note name of the chord point (page EN-50).
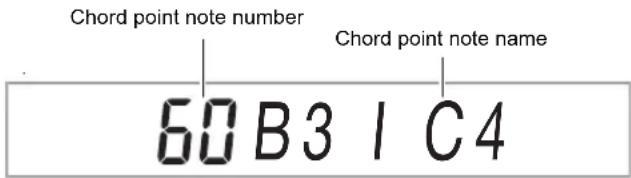
- You can also specify the chord point by holding down 35SPLIT and pressing the keyboard key where you want the chord point to be.

IMPORTANT!
- You cannot specify a chord point that is higher than (to the right of) the chord point. If you do, the lower point will be forced to be the same key as the chord point.
- When the setting is the way you want, long-press the [4] (EXIT) 12 number key to exit the setting screen.
To turn the Chord Input Priority Mode on or off
- Hold down 35SPLIT until "Split Pt" is displayed.
- Use the [1] (∠) and [3] (△) 12 number keys to display "CdPrior".
- Use 13 [-] and [+] to switch the Chord Input Priority Mode between on and off.
- While Chord Input Priority Mode is turned on, the LOWER part tone does not sound in the area where the LOWER part keyboard and accompaniment keyboard overlap.
- When the setting is the way you want, long-press the [4] (EXIT) 12 number key to exit the setting screen.
Using Recommended Tones and Tempos (One-Touch Presets)
One-Touch Preset gives you one-touch access to tone and tempo settings that go well with the currently selected Auto Accompaniment rhythm pattern.
1. Hold down 6 RHYTHM until the tone name is displayed.
This automatically applies the One-Touch Preset settings in accordance with the rhythm pattern that is currently selected.
2. Play a chord on the keyboard.
This immediately starts Auto Accompaniment.
Adding Harmony to Melody Notes (Auto Harmonize)
Auto Harmonize lets you add harmony to melody notes you play with your right hand for more melodic depth. You can select any one of 12 Auto Harmonize types.
- A single button is used to control auto harmonize and the arpeggiator (page EN-27). Because of this, the arpeggiator cannot be used while auto harmonize is in use.
To turn on Auto Harmonize
1. Press 34 AUTO HARMONIZE/ARPEGGIATOR and confirm that the [AUTO HARMONIZE] indicator is displayed.
![CASIO CT-X8000IN - Press 34 AUTO HARMONIZE/ARPEGGIATOR and confirm that the [AUTO HARMONIZE] indicator is displayed. - 1](/content/2026/05/842159/images/6a1143e81ea9a1795751a92ffe9fd4020034cccb4020078bd2b8c523f3e654a5.jpg)
- Fingering a chord on the accompaniment keyboard as you play the melody on the UPPER part keyboard will add chords to your melody play.
2. To turn Auto Harmonize off, press 34 AUTO HARMONIZE/ARPEGGIATOR.
This causes the [AUTO HARMONIZE] indicator to disappear.
IMPORTANT!
- If the [ARPEGGIATOR] indicator is displayed instead of the [AUTO HARMONIZE] indicator in step 1 of the above procedure, you will need to change the function assigned to the button.
Perform the procedure under "To configure function settings with the 10 FUNCTION button" (page EN-107) and select "1 A.Har." for the following setting: Auto Harmonize/Arpeggiator (AHar/Arp) → AUTO HARMONIZE/ARPEGGIATOR button assignment (BtnAsign) (page EN-109).
To select the Auto Harmonize type
- Perform the procedure under "To turn on Auto Harmonize" and confirm that the [AUTO HARMONIZE] indicator is displayed.
- Long-press 34 AUTO HARMONIZE/ARPEGGIATOR until the [FUNCTION] indicator flashes on the display.
This displays the currently selected auto harmonize number and name.
- Use 13 [-] and [+] or the 11 dial to specify the auto harmonize type.
- For details about types, see "Auto Harmonize Type List" (page EN-51).
- When the setting is the way you want, long-press the [4] (EXIT) 12 number key to exit the setting screen.
■Auto Harmonize Type List
| Type number | Type Name | Description |
| 01 Duet 1 | Adds close | (separated by 2 to 4 degrees) 1-note harmony below the melody note. |
| 02 Duet 2 | Adds open | (separated by more than 4 to 6 degrees) 1-note harmony below the melody note. |
| 03 Country | Adds country | style harmony. |
| 04 Octave | Adds the note | from the next lower octave. |
| 05 5th | Adds the fifth degree note. | |
| 06 3-Way Open | Adds 2 | -note open harmony, for a total of three notes. |
| 07 3-Way Close | Adds 2 | -note close harmony, for a total of three notes. |
| 08 Strings | Adds harmony that is optimal for strings. | |
| 09 4-Way Open | Adds 3 | -note open harmony, for a total of four notes. |
| 10 4-Way Close | Adds 3 | -note close harmony, for a total of four notes. |
| 11 Block | Adds block chord notes. | |
| 12 Big | Band | Adds big band style harmony. |
Using Music Presets
Music Presets are a collection of setups with chord progression data. With the touch of a button you can recall one of 310 presets that include tone, rhythm, and other setting data, along with Auto Accompaniment chord progressions, all of which are combined to match specific musical genres and melodies.
For details about music preset categories and types, refer to the separate "Appendix".
To perform using a music preset
1. Press 6 RHYTHM.
2. Long-press 22 ACCOMP until the [ACCOMP] indicator starts to flash.
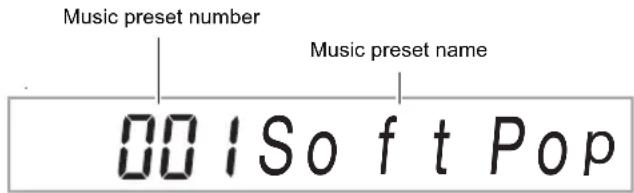
- The flashing [ACCOMP] indicator indicates that the Digital Keyboard is in the Music Preset Mode.
3. Use the 12 number keys, 13 [-] and [+], or the 11 dial to select a music preset number.
This changes the displayed music preset name. At the same time, settings are recalled for the tone, rhythm, chord progression, and data that matches the genre or melody indicated by the name.
- See "Numeric Input" (page EN-14) for information about how to specify a number.
- Music presets are divided into nine categories. You can easily find the music preset you want by going to the dance category, classic category, etc. For more information, see “4 CATEGORY Button” (page EN-15).
4. Press 20 START/STOP or 14 INTRO.
This starts Auto Accompaniment play in accordance with the preset chord progression.
5. Play along on the keyboard with the Auto Accompaniment.
6. To stop Auto Accompaniment, press 20 START/STOP or 19 ENDING/SYNCHRO START.
7. To exit the Music Preset Mode, press 22ACCOMP.
- At this time the tone and rhythm settings configured by the Music Preset Mode remain in effect.
NOTE
- With some music presets, selecting a number in step 3 causes the [SYNC START] indicator to start to flash, indicating that the Digital Keyboard is in synchro start standby (page EN-47). If this happens, Auto Accompaniment can be started by playing something on the keyboard instead of pressing 20 START/STOP. For information about operations that can be performed while in synchro start standby, see step 1 under “To use Synchro Start to start Auto Accompaniment play” (page EN-47).
- The accompaniment pattern operations (page EN-46) can be used during a performance with a music preset.
- The operations below cannot be used during play that employs a music preset.
– Rhythm setting change (page EN-42)
– Synchro stop (page EN-47)
– One-Touch Preset (page EN-51)
- Registration (page EN-65)
To change the key of a chord progression
Perform the procedure under "To configure function settings with the 10 FUNCTION button" (page EN-107) and configure the following setting: Other (Other) → Music preset key change (MP Key) (page EN-112).
Settings Changed by Music Preset
Each selection of a music preset automatically changes the Digital Keyboard settings below. Changed settings are maintained even after the Music Preset Mode is exited.
- Tempo
- Layer (on/off)
- Split (on/off)
• 34 AUTO HARMONIZE/ARPEGGIATOR button assignment
• Auto Harmonize (on/off, type)
• Arpeggiator (on/off, type)
• Arpeggiator Hold (on/off) - Tone number (UPPER 1, LOWER 1, UPPER 2, LOWER 2 parts)
- Octave Shift (UPPER 1, LOWER 1, UPPER 2, LOWER 2 parts)
- Reverb, Chorus, Delay (on/off, type)
Using Phrase Pads
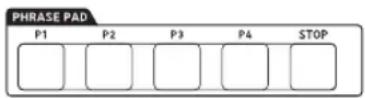
Short phrases can be recorded and assigned to each of the four phrase pads. Pressing a pad will loop playback its recorded phrase. You can sound phrases individually, or you can sound multiple phrases at the same time. The explanations in this section refer to phrases assigned to the phrase pads as Phrase 1 through Phrase 4.
■Phrase Sets and Phrase Storage Locations
A group of four phrases assigned to the four phrase pads are called a "phrase set". There are 25 phrase sets numbered 1 through 25, which means that up to 100 phrases (25 phrase sets with 4 phrases each) can be stored as user phrases. When you record a phrase, you specify a storage location using a phrase set number (1 to 25) and a phrase number 1 to 4.
Changing to Another Phrase Set
You can use the procedure below to change the phrase set currently assigned to the phrase pads to another set.
To change the phrase set
- Press 10FUNCTION.
- Use the [1] (∠) and [3] (△) 12 number keys to display “Phr Pad”, and then press [6] (ENTER).
This displays "Phr Set". You can select a phrase set number at this time.
- Use 13 [-] and [+] or the 11 dial to select a phrase set number.
- When the setting is the way you want, long-press the [4] (EXIT) 12 number key to exit the setting screen.
Starting and Stopping Phrase Playback
Before playing back a phrase, you must first change to the phrase set where the phrase is located if it is not already assigned to the phrase pads. For details, see "Changing to Another Phrase Set" (page EN-53).
To start and stop phrase playback
- Press one of the phrase pads. For example, press 26 PHRASE PAD [P1].
This starts playback of Phrase 1 and displays the [P1] indicator.
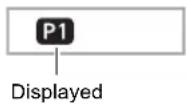
- Press a different phrase pad. For example, press 26 PHRASE PAD [P3].
This starts playback of Phrase 3, and plays Phrase 1 and Phrase 3 at the same time. In addition to the [P1] indicator, the [P3] indicator also appears.
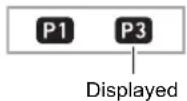
- To stop playback of only one of the phrases, hold down 27 STOP and press the 26 PHRASE PAD where the phrase you want to stop is assigned.
For example, holding down 27 STOP and pressing 26 PHRASE PAD [P1] will stop playback of Phrase 1 and allow Phrase 3 to continue sounding. The [P1] indicator disappears at this time.
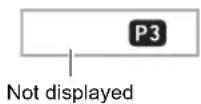
- To stop phrase playback while a single phrase is playing, press 27 STOP.
- You can also stop phrase playback by performing the same operation as that in step 3.
NOTE
- Pressing the pad of a phrase that is playing back will restart the phrase from the beginning.
To stop playback of all phrases
- To stop phrase playback while a multiple phrases are playing, press 27 STOP.
To synchronize phrase playback with Auto Accompaniment
NOTE
- The procedure below starts phrase playback and, at the same time, starts Auto Accompaniment in accordance with the operation (pressing 20 START/STOP or 14 INTRO, etc.) performed in step 2.
- While holding down 19 ENDING/SYNCHRO START, press the phrase pad (for example, 26 PHRASE PAD [P1]) whose phrase you want to start playing along with Auto Accompaniment.

- If you want playback of multiple phrases to start simultaneously, repeat the above operation for the other phrases as well.
-
To cancel phrase and Auto Accompaniment simultaneous start standby, hold down 19 ENDING/ SYNCHRO START as you press the phrase pad you want to cancel.
-
Press 20 START/STOP to start Auto Accompaniment.
This simultaneously starts Auto Accompaniment and phrase playback.
Configuring Phrase Playback Setups
Phrase playback setups control how the phrase assigned to a phrase pad (1 to 4) plays when you press the pad. The setups you configure here are recorded to the corresponding pad.
To configure a phrase playback setup
- Specify the phrase pad whose playback setup you want to configure.
(1) Press 10 FUNCTION and confirm that the [FUNCTION] indicator is displayed.
(2) Use the [1] (∠) and [3] (△) 12 number keys to display "Phr Pad", and then press [6] (ENTER). This displays "Phr Set".
(3) Use the [1] (∠) and [3] (△) keys to specify the phrase pad (Pad 1 to Pad 4) whose playback setup you want to configure, and then press [6] (ENTER).
- Use the [1] (∠) and [3] (△) keys to select the item whose setting you want to change.
- For information about setting items, see "Phrase Playback Setup Items" below.
- Use 13 [-] and [+] or the 11 dial to change the setting.
- Repeat steps 2 and 3 for each of the items whose setting you want to configure.
- When the setup is the way you want, long-press the [4] (EXIT) 12 number key to exit the setting screen.
Phrase Playback Setup Items
| Setup Item(Display) | Description Settings | |
| Looped playback(Loop) | Specifies whether or not to perform loop playback.Off: Plays the phrase all the way through and then stops.On: Loops the phrase. | On, Off |
| Key shift(KeyShift) | Changes the playback pitch in semitone units. A lower setting value lowers the playback pitch, while a higher setting value raises the pitch. | -24 to 24 |
| Timing Sync(TimingSy) | Specifies whether playback timing and speed when a phrase pad is pressed should be synced with a previously playing Auto Accompaniment, phrase, or song recorded with the MIDI recorder.Off: No syncing.Beat: Forces correction of deviation in beat units.Measure: Forces correction of deviation in measure units. | Off, Beat, Measure |
| Chord Sync(ChordSyn) | Enabling this function automatically adjusts the pitch of the phrase in accordance with the chords of an Auto Accompaniment that is playing.Important!Note that Chord Sync can be applied to a phrase recorded in C Major only. Play and record the phrase in C Major and assign it to the applicable pad. Next, turn on Chord Sync for the pad. | On, Off |
| Break Point(Break Pt) | This setting is applied while Chord Sync is turned on. It specifies a note key, from C to B, as the point at which the phrase notes drop one octave. | C to B |
Recording a Phrase
A phrase is created by recording notes played manually on the keyboard. Up to 16 measures can be specified for the length of the phrase to be recorded, and up to approximately 1,000 notes can be recorded. As with playback, recording also loops back to the first measure when the end of the number of measures specified for the phrase is reached. You can add notes while listening to playback of previously recorded content.
NOTE
- The [RECORD] indicator will start to flash during recording when the number of remaining note count is 100 or lower. When there are no more remaining notes, recording stops automatically and the [RECORD] indicator disappears.
To record a phrase
- Select the tone you want to use for phrase recording.
• See "Selecting a Tone" (page EN-18).
- You cannot use layer or split when recording a phrase.
-
Press 10FUNCTION.
-
Use the [1] (∠) and [3] (△) 12 number keys to display "Phr Pad", and then press [6] (ENTER).
This displays "Phr Set".
- Use the 13 [-] and [+], or the 11 dial to select the phrase set number you want to use for phrase recording.
- Press 8 RECORD/STOP.
This enters record standby and causes the [RECORD] indicator to flash. Also, the [P1] indicator will be flashing.
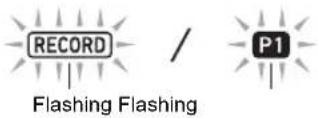
- The indicators ([P2] through [P4]) of the phrase pads that have phrases recorded will appear on the display.
- The [P1] indicator flashes even if there is already a phrase recorded to the P1 phrase pad. You can determine whether or not there is a phrase recorded to the P1 phrase pad by pressing any 26 PHRASE PAD button other than [P1] in step 6. If the [P1] indicator is displayed, it means there is a phrase recorded. If the indicator is not displayed, it means nothing is recorded to the P1 phrase pad.
- If you want to change mixer settings, perform the procedure under "To configure mixer settings" (page EN-62). To configure mixer settings of the phrase to be recorded, configure the mixer settings of the corresponding part (Part 6 through Part 9) of the KEYBOARD part group. For example, when recording to Phrase Pad 1, configure the mixer settings of Part 6 (Phrase Pad 1) of the KEYBOARD part group.
6. Press a 26 PHRASE PAD button ([P1] to [P4]) to specify the phrase number of the recording destination.
- This causes the indicator of the pad you press (P1 to P4) to flash on the display.
7. To start recording, press 20 PLAY/STOP or play something on the keyboard.
Playing on the keyboard automatically starts recording. This displays the [RECORD] indicator.
- The number of measures and beats are counted up in the upper right corner of the display. When the final beat of the length (number of measures)* specified for the phrase being edited is reached, the count restarts from 001:01.
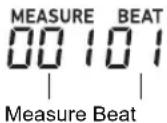
*For information about the number of measure setting, see "Configuring Phrase Recording Settings" below.
8. Timing in accordance with the MEASURE and BEAT values on the display, play something on the keyboard when required.
- What you record will play back when the display returns to the measure and beat where it was recorded. You can overdub the recording as many times as you like while listening to the playback. - Playback while recording is in progress is sound produced by the KEYBOARD part group's Part 6 (Phrase Pad 1) to Part 9 (Phrase Pad 4). If you want to the change the mixer settings for playback during phrase recording, select the part of pad currently being recorded as the target for the operation under "To configure mixer settings" (page EN-62).
9. When you are finished recording, press 8 RECORD/STOP.
This causes the [RECORD] indicator to disappear.
Configuring Phrase Recording Settings
If you change phrase recording settings, those settings will be in effect for the subsequent recording operation as well. Change the recording settings as required when recording a new phrase.
To configure phrase recording settings
- Press 10FUNCTION.
- Use the [1] (∠) and [3] (△) 12 number keys to display "Phr Pad", and then press [6] (ENTER).
This displays "Phr Set". - Press 8RECORD/STOP.
This causes the [RECORD] indicator to flash. - Long-press 8 RECORD/STOP until "Length" is displayed.
- This enters the phrase recording setting mode.
- Use the [1] (∠) and [3] (△) keys to select the item whose setting you want to change.
- For information about setting items, see "Phrase Recording Setting Items" (page EN-56).
- When all the settings are the way you want, press 8 RECORD/STOP.
This causes the [RECORD] indicator to disappear.
Phrase Recording Setting Items
| Item Name(Display) | Description Settings | |
| Number of measures (Length) | Specifies the length (number of measures) of the phrase to be recorded. | 1 to 16 |
| Quantize (Quantize) | Specify either recording of notes in the timing they are played on the keyboard or automatic alignment of notes based on a note value. Selecting a setting other than “Off” displays a note value (4: quarter note, d: dotted note, t: triplets). | Off, 4, 8, 16, 32, 4d, 8d, 16d, 32d, 4t, 8t, 16t, 32t |
| Metronome (Metronom) | Specifies whether or not the metronome should sound during recording. | On, Off |
| Pre-count (Precount) | Specifies whether or not to sound a pre-count when recording. | On, Off |
Managing Phrase Sets
You can use the procedures in this section to copy and delete phrase sets.
To copy a phrase set
- Perform the procedure 1 through 3 under "To change the phrase set" (page EN-53) to select the number of the phrase set you want to copy.
- Long-press 8 RECORD/STOP until "Copy" is displayed.
- Press the [6] (ENTER) 12 number key.
This displays "Phr Set" and stands by for selection of the copy destination.
- Use 13 [-] and [+] or the 11 dial to select the copy destination phrase set number.
- Be sure to specify an empty area as the copy destination.
- Press [6] (ENTER).
This displays "Sure?"
- Press 13 [+] (YES) to execute or 13 [-] (NO) to cancel.
- Pressing 13 [+] (YES) displays the message "Wait..." (operation in progress). Do not perform any operation while this message is displayed. "Complete" appears after the operation is complete.
- To exit the operation, long-press the [4] (EXIT) 12 number key.
To delete a phrase set
- Perform the procedure 1 through 3 under "To change the phrase set" (page EN-53) to select the number of the phrase set you want to delete.
- Long-press 8 RECORD/STOP until "Copy" is displayed.
- Use the [1] (∠) and [3] (△) 12 number keys to display "Clear", and then press [6] (ENTER). This displays "Sure?"
- Press 13 [+] (YES) to delete or 13 [-] (NO) to cancel the delete operation.
- Pressing 13 [+] (YES) displays the message "Wait..." (operation in progress). Do not perform any operation while this message is displayed. "Complete" is displayed after the operation is complete.
- To exit the operation, long-press the [4] (EXIT) 12 number key.
Editing a Phrase
You can use the procedures in this section to edit individual phrases. You can delete or copy a phrase, and configure quantize, key shift, and mixer settings.
- Quantize automatically corrects the timing of recorded notes to match a note value being used as the quantize reference.
• Key shift offsets the pitch of recorded sounds in semitone steps.
To edit a phrase, enter the phrase editing mode.
To enter the Phrase Editing mode
- Press 10FUNCTION.
- Use the [1] (∠) and [3] (△) 12 number keys to display "Phr Pad", and then press [6] (ENTER).
This displays "Phr Set".
- Use 13 [-] and [+] or the 11 dial to select the number of the phrase set that includes the phrase you want to edit.
- Long-press 10 FUNCTION until the [EDIT] indicator appears.

- This enters the phrase editing mode. "Clear" will appear at this time.
To delete a phrase
- Use the procedure under "To enter the Phrase Editing mode" (page EN-57) to enter the Phrase Editing mode.
- Press the [6] (ENTER) 12 number key.
This displays "Phrase" and causes the [P1] indicator to flash on the display.
- Use 13 [-] and [+] or the 11 dial to select the number of the phrase you want to delete, and then press [6] (ENTER).
This displays "Sure?"
-
Press 13 [+] (YES) to execute or 13 [-] (NO) to cancel.
-
Pressing 13 [+] (YES) displays the message "Wait..." (operation in progress). Do not perform any operation while this message is on the display. "Complete" is displayed after the operation is complete.
- To exit the operation, long-press the [4] (EXIT) 12 number key.
To copy a phrase To delete all data from a phrase except note
- Use the procedure under "To enter the Phrase Editing mode" (page EN-57) to enter the Phrase Editing mode.
- Use the [1] (∠) and [3] (△) 12 number keys to display "Copy", and then press [6] (ENTER). This displays "Src Set".
- Use 13 [-] and [+] or the 11 dial to specify the number of the phrase set that contains copy source phrase, and then press [6] (ENTER).
This displays "Src Phr" and causes the [P1] indicator to appear.
- Use 13 [-] and [+] or the 11 dial to specify the copy source phrase number, and then press [6] (ENTER).
This displays "Dst Phr" and causes the [P1] indicator to flash on the display.
- Use 13 [-] and [+] or the 11 dial to select the copy destination phrase number, and then press [6] (ENTER).
This displays "Sure?"
- Press 13 [+] (YES) to execute or 13 [-] (NO) to cancel.
- Pressing 13 [+] (YES) displays the message "Wait..." (operation in progress). Do not perform any operation while this message is displayed. "Complete" is displayed after the operation is complete.
-
To exit the operation, long-press the [4] (EXIT) 12 number key.
-
Use the procedure under "To enter the Phrase Editing mode" (page EN-57) to enter the Phrase Editing mode.
- Use the [1] (∠) and [3] (△) 12 number keys to display “Other Clr”, and then press [6] (ENTER).
This displays "Phrase" and causes the [P1] indicator to flash on the display.
- Use 18 [-] and [+] or the 11 dial to specify the phrase whose data (except for note events) you want to delete, and then press [6] (ENTER). This displays "Sure?"
- Press 13 [+] (YES) to execute or 13 [-] (NO) to cancel.
- Pressing 13 [+] (YES) displays the message "Wait..." (operation in progress). Do not perform any operation while this message is displayed. "Complete" is displayed after the operation is complete.
- To exit the operation, long-press the [4] (EXIT) 12 number key.
To quantize a phrase
- Use the procedure under "To enter the Phrase Editing mode" (page EN-57) to enter the Phrase Editing mode.
- Use the [1] (∠) and [3] (△) 12 number keys to display "Quantize", and then press [6] (ENTER).
This displays "Phrase" and causes the [P1] indicator to flash on the display.
- Use 13 [-] and [+] or the 11 dial to select the number of the phrase you want to quantize, and then press [6] (ENTER).
This displays "Value".
- Use 13 [-] and [+] or the 11 dial to select the note value to be used as the quantize reference note.
| Display Description | |
| 4, 8, 16, 32 Quarter note, eighth note, sixteenth note, thirty-second note | |
| 4d, 8d, 16d, 32d Dotted notes | |
| 4t, 8t, 16t, 32t Triplet notes |
- Press [6] (ENTER). This displays "Sure?"
- Press 13 [+] (YES) to execute or 13 [-] (NO) to cancel.
- Pressing 13 [+] (YES) displays the message "Wait..." (operation in progress). Do not perform any operation while this message is displayed. "Complete" is displayed after the operation is complete.
- To exit the operation, long-press the [4] (EXIT) 12 number key.
To key shift a phrase
- Use the procedure under "To enter the Phrase Editing mode" (page EN-57) to enter the Phrase Editing mode.
- Use the [1] (∠) and [3] (△) 12 number keys to display "KeyShift", and then press [6] (ENTER).
This displays "Phrase" and causes the [P1] indicator to flash on the display.
- Use 13 [-] and [+] or the 11 dial to select the number of the phrase you want to key shift, and then press [6] (ENTER).
This displays "Value".
- Use 13 [-] and [+] or the 11 dial to specify the key shift setting value.
- You can specify a value in the range of -24 to 24 . Lowering the setting value by one lowers the pitch by one semitone, while raising the value raises the pitch.
- Press [6] (ENTER).
This displays "Sure?" - Press 13 [+] (YES) to execute or 13 [-] (NO) to cancel.
- Pressing 13 [+] (YES) displays the message "Wait..." (operation in progress). Do not perform any operation while this message is displayed. "Complete" is displayed after the operation is complete.
- To exit the operation, long-press the [4] (EXIT) 12 number key.
To configure phrase mixer settings
- Use the procedure under "To enter the Phrase Editing mode" (page EN-57) to enter the Phrase Editing mode.
- Long-press 9 PART (MIXER) until the [MIXER] indicator appears.
This displays the [KEYBOARD] indicator and mixer part indicator.
- Mixer part indicators through correspond to phrase numbers 1 through 4.
- Use the [1] (∠) and [3] (△) 12 number keys to select the phrase whose mixer settings you want to configure.
- Use the [2] (√) and [5] (∧) 12 number keys to display the menu item you want to change.
- Initial default setting values are indicated by an asterisk (*).
| Item Name(Display) | Description Settings | |
| Tone (Tone) | Changes the phrase tone. | 0 to 900 |
| Volume(Volume) | Adjusts the phrase volume level. | 0 to 100* to 127 |
| Pan (Pan) | Adjusts the stereo position of the phrase. 0 indicates the center, while a smaller value shifts to the left and a larger value shifts to the right. | -64 to 0* to 63 |
| Reverb Send(Rev Send) | Specifies how much reverb is applied to the selected part. | 0 to 40* to 127 |
| Chorus Send(Cho Send) | Specifies how much chorus is applied to the selected part. | 0* to 127 |
| Delay Send(Dly Send) | Specifies how much delay is applied to the selected part. | 0* to 127 |
- Use 13 [-] and [+] or the 11 dial to change the setting value.
- To exit the operation, long-press the [4] (EXIT) 12 number key.
Muting Specific Parts (Part Mode)
Your Digital Keyboard produces Auto Accompaniment and keyboard play notes using multiple parts. You can use the part on/off function to easily mute and unmute one or more parts. For example, you can mute all parts except for the drum, percussion, and bass parts of the Auto Accompaniment.
Turning a Part On or Off
The example below shows how to turn each Auto Accompaniment part on or off. If you perform this operation while an Auto Accompaniment is sounding, you can compare what the accompaniment sounds like with and without the part.
To turn each part on or off
1. Press 9PART.
This causes the indicator lamp to the left of the button to light (Part Mode).
This displays the name of the currently selected part group.
1-9 Keyboard
- For details about part groups, see "Part On/Off Function Part Groups" (page EN-61).
2. Use 13 [-] and [+] to select the part group of the part you want to turn on or off.
- For example, display the [RHYTHM] indicator. While the [RHYTHM] indicator is displayed, you can turn each Auto Accompaniment part on or off. The mixer part indicator numbers that correspond to the currently sounding Auto Accompaniment will be shown on the display.
![CASIO CT-X8000IN - Use 13 [-] and [+] to select the part group of the part you want to turn on or off. - 1](/content/2026/05/842159/images/6800c1f778332d7c7c74aa16cfee44f0387549126ca0416a5cec506efba18ac0.jpg)
flowchart
graph TD
    A["1"] --> B["2"]
    B --> C["3"]
    C --> D["4"]
    D --> E["5"]
    E --> F["6"]
    F --> G["7"]
    G --> H["8"]
    I["RHYTHM"] --> J["[RHYTHM"] indicator displayed]
- For information about the mixer part indicator numbers and their parts, see "List of Parts for Each Mixer Part Group" (page EN-63).
3. To turn a part on or off, press the 12 number key that corresponds to the part number.
- For example, each press of the [2] 12 number key toggles the drum part between off (indicator not displayed) and on (indicator displayed).
- The SONG SOLO and MIDI IN part groups have 16 parts, and only eight parts (1 to 8, or 9 to 16) are displayed at a time. While parts 9 through 16 are displayed, first subtract 8 from the part number. Next, press the 12 number key that corresponds to the result. For part 14 for example, press the [8] 12 number key.
4. To exit the Part mode, press 9 PART.
- Part on/off settings are maintained even if you exit the Part Mode.
Part On/Off Function Part Groups
Besides the Auto Accompaniment in the explanation above, the Digital Keyboard also uses other parts in order to generate sounds for manual keyboard play, song playback, and MIDI message input from external devices. The part on/off function divides these parts into multiple part groups.
■Part Group and Indicator List
| Part Group Name(Indicator) | Description |
| Keyboard play(KEYBOARD) | Hand play, Phrase Pads 1 to 4,and Auto Harmonize parts |
| Auto Accompaniment(RHYTHM) | Auto Accompaniment parts |
| Song System(SONG SYSTEM) | MIDI recorder system trackparts (Part configuration sameas KEYBOARD.) |
| Song Solo(SONG SOLO) ^*1 | Song bank song and MIDIrecorder solo track parts |
| MIDI Input (MIDI IN) ^*1 | MIDI IN parts |
| Microphone input ( E^*2 ) Microphone input part | |
*1 Since SONG SOLO and MIDI IN use the same sound source parts, parameters of the same part numbers are shared.
*2 is displayed on the right end of the mixer part indicators. Mixer part indicator is displayed while microphone input is turned on.
- For information about the parts in each part group and their corresponding mixer part indicator numbers, see “List of Parts for Each Mixer Part Group” (page EN-63).
Using the Mixer
Your Digital Keyboard produces Auto Accompaniment and keyboard play notes using multiple parts. You can use the mixer function to make fine-adjustments to the volume, effect level, and other settings for each of these parts.

NOTE
- You can quickly and easily mute and unmute parts. For details, see “Muting Specific Parts (Part Mode)” (page EN-60).
Mixer Operation
To configure mixer settings
1. Long press 9 PART (MIXER) until the [MIXER] indicator appears.
This causes the mixer info display area to change as shown in the example below.
Mixer part indicator
![Level indicator 1 2 3 4 5 6 7 8 9 MIXER KEYBOARD Part group indicator (displayed) [MIXER] indicator (displayed) Mixer info display area](/content/2026/05/842159/images/ec19a60418df0a59dcaa2fdeb1a281b3e52fad1f48590e9e515c50df1162ad05.jpg)
- The [MIXER] indicator on the display indicates that the Digital Keyboard is in the Mixer Mode.
- The displayed part group indicator ([KEYBOARD] in this example) indicates the KEYBOARD part group (hand-played performance part) currently being affected by mixer operations. The flashing mixer part indicator (in this example) indicates the part (UPPER 1 part in the case of the KEYBOARD part group) whose setting is currently being configured. For details about part groups and parts, see “List of Parts for Each Mixer Part Group” (page EN-63).
2. Select the part group whose mixer settings you want to configure.
(1) Press 9 PART and confirm that the indicator lamp to the left of the button is lit.
(2) Use 13 [-] and [+] to select the part group whose settings you want to configure.
| To select this part group: Displays this indicator: | |
| KEYBOARD Part Group KEYBOARD | |
| RHYTHM Part Group RHYTHM | |
| SONG SYSTEM Part Group SONG and SYSTEM | |
| SONG SOLO Part Group SONG and SOLO | |
| MIDI IN Part Group MIDI IN | |
| External Part Group(Microphone Input) | E^*1 |
*1 is displayed on the right end of the mixer part indicators. Mixer part indicator is also displayed at this time.
(3) After selecting a part group, press 9 PART and confirm that the indicator lamp to the left of the button is unlit.
3. Use the [1] (∠) and [3] (△) 12 number keys to select the part whose settings you want to configure with the mixer.
- Pressing [3] ( ) while the rightmost part is selected or [1] ( ) while the leftmost part is selected will scroll to another part group. ^*2
*2 Pressing [3] ( ) while Part 8 of the SONG SOLO or MIDI IN part group is selected changes to display of parts 9 to 16 of the same part group. Pressing [1] ( ) while Part 9 is selected changes to display of parts 1 to 8. - You can use the 12 number keys to quickly select parts. See "To select parts with the 12 number keys" (page EN-63).
4. Use the [2] (√) and [5] (∧) 12 number keys to select the item whose setting you want to configure.
Current setting value Setting item name
100 Vo l ume
This displays a level indicator of each part setting value for the currently selected setting item.
- For details about setting items, see the “Advanced Mixer Settings” (page EN-64).
5. Use 13 [-] and [+] or the 11 dial to change the setting value.
6. To exit the Mixer mode, press the [4] (EXIT) 12 number key.
NOTE
- The displayed, flashing, and not displayed status of mixer part indicators depends on the part on/off status in the Part Mode. For details, see "Muting Specific Parts (Part Mode)" (page EN-60).
To select parts with the 12 number keys
1. Perform steps 1 and 2 under "To configure mixer settings" (page EN-62) to select the part group whose mixer settings you want to configure.
2. Press 9PART.
This causes the indicator lamp to the left of the button to light (Part Mode in the Mixer Mode).
3. To select a part, press the 12 number key that corresponds to the part number.
- For part for example, press the [2] 12 number key.
- The SONG SOLO and MIDI IN part groups have 16 parts, and only eight parts (1 to 8, or 9 to 16) are displayed at a time. While parts 9 through 16 are displayed, first subtract 8 from the part number. Next, press the 12 number key that corresponds to the result. For part 14 for example, press the [8] 12 number key.
4. To exit the Part mode, press 9 PART.
This causes the indicator lamp to the left of the button to go out.
List of Parts for Each Mixer Part Group
The tables below show Mixer Mode part groups and the parts included in each group.
●KEYBOARD Part Group
This is the hand-played performance part, and it includes Auto Harmonize and phrase pads.
| Part Number | Corresponding Part | ||||
| 1 UPPER 1 | |||||
| 2 UPPER 2 | |||||
| 3 | L | O | W | E | R |
| 4 | L | O | W | E | R |
| 5 Auto Harmonize | |||||
| 6 Phrase Pad 1 | |||||
| 7 Phrase Pad 2 | |||||
| 8 Phrase Pad 3 | |||||
| 9 Phrase Pad 4 | |||||
●RHYTHM Part Group
Auto Accompaniment parts.
| Part Number | Corresponding Part | ||||
| 1 Percussion | |||||
| 2 | D | r | u | m | s |
| 3 | B | a | s | s | |
| 4 Chord | 1 | ||||
| 5 Chord | 2 | ||||
| 6 Chord | 3 | ||||
| 7 Chord | 4 | ||||
| 8 Chord | 5 | ||||
●SONG SYSTEM Part Group
These are the parts of the system track in songs recorded with the MIDI recorder.
| Part Number | Corresponding Part | ||||
| 1 UPPER 1 | |||||
| 2 UPPER 2 | |||||
| 3 | L | O | W | E | R |
| 4 | L | O | W | E | R |
| 5 Auto Harmonize | |||||
| 6 Phrase | Pad 1 | ||||
| 7 Phrase | Pad 2 | ||||
| 8 Phrase | Pad 3 | ||||
| 9 Phrase | Pad 4 | ||||
●SONG SOLO Part Group
These are the parts of song bank songs and the solo track in songs recorded with the MIDI recorder.
| Part Number Corresponding Part | |
| 1 to 8 Song Part 1 to Part 8 | |
| 9 to 16 Song Part 9 to Part 16 |
●MIDI IN Part Group
MIDI receive parts.
| Part Number | Corresponding Part |
| 1 to 8 MIDI | Receive Part 1 to Part 8 |
| 9 to 16 MIDI | Receive Part 9 to Part 16 |
●External Part Group
Microphone input.
| Part Number | Corresponding Part |
| 1 Microphone input | |
Advanced Mixer Settings
Setting Items for Each Part Group
Initial default setting values are indicated by an asterisk (*).
| Item Name(Display) | Description Settings | |
| Part on/off(Part)*1 *2 | Specifies on/off for the selected part. | On*, Off |
| Volume(Volume) | Adjusts the volume level of the selected part. | 0 to 100* to 127 |
| Pan (Pan)*3 | Specifies the stereo pan position of each part. 0 indicates the center, while a smaller value shifts to the left and a larger value shifts to the right. | -64 to 0* to 63 |
| Reverb Send(Rev Send) | Specifies how much reverb is applied to the selected part. | 0 to 40* to 127 |
| Chorus Send(Cho Send) | Specifies how much chorus is applied to the selected part. | 0* to 127 |
| Delay Send(Dly Send) | Specifies how much delay is applied to the selected part. | 0* to 127 |
*1 The level indicators of all the parts for which this setting is turned on are displayed, while all the parts for which it is turned off are not displayed.
*2 While this setting item is displayed, you can sound only the selected part, if you want. See "To sound only a selected part" (page EN-65).
*3The pan setting status is indicated by the level indicators as shown below. The indicator on the far left is included to show all of the segments only.

natural_image
Abstract pattern of black horizontal lines on white background (no text or symbols)(All Segments) Negative Value 0 Positive Value
To sound only a selected part
- Perform steps 1 through 4 under "To configure mixer settings" (page EN-62).
- To sound only the part whose setting is being configured, press the [6] (ENTER) 12 number key.
This causes the mixer part indicator of the part whose setting is being configured, the level indicator above it, and marks to the left and right of the level indicators to flash.
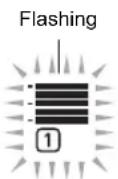
- This enables sounding of the part whose setting is being configured, and disables sounding of all other parts.
- To re-enable the other parts, press [6] (ENTER) again.
- Using the [1] (∠) and [3] (△) 12 number keys to change to another part will re-enable the other parts.
Registering and Restoring a Setup (Registration)
You can use the registration function to register the setup of the Digital Keyboard (tone, rhythm, and other settings). You can recall a registered setup as required to perform a particular song, etc.
NOTE
- Registration can be used in the Rhythm Mode (page EN-42).
- The registration function cannot be used while in the Song Bank Mode (page EN-38), during demo play (page EN-17), or while configuring function settings (page EN-107).
■Setup Storage Locations
Setup registrations are stored in memory locations that are divided into 16 banks. Each bank has eight storage areas, which means you can register up to 128 (16 banks × 8 areas) setups.
- Use the 24BANK button to specify a bank.
- Specify an area using the 28 REGISTRATION buttons ([1] to [8]).
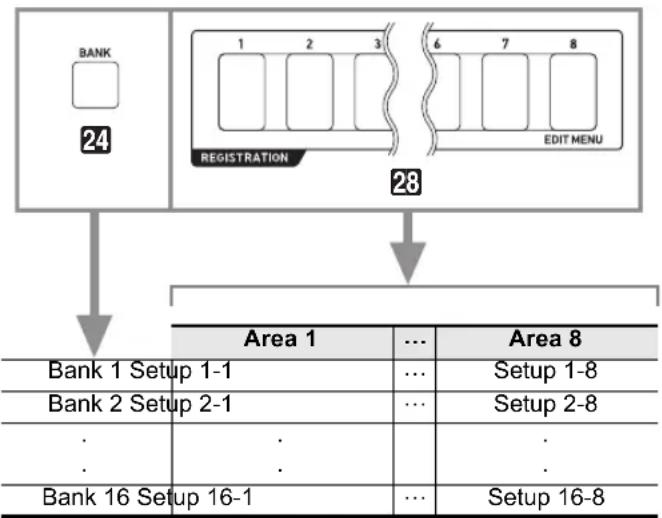
flowchart
graph TD
    A["Bank 24"] --> B["Registration"]
    B --> C["28"]
    C --> D["Area 1"]
    C --> E["Area 8"]
    D --> F["Bank 1 Setup 1-1"]
    D --> G["Bank 2 Setup 2-1"]
    D --> H["..."]
    D --> I["..."]
    E --> J["Setup 1-8"]
    E --> K["Setup 2-8"]
    F --> L["..."]
    G --> M["..."]
    H --> N["..."]
    I --> O["..."]
    J --> P["..."]
    K --> Q["..."]
    L --> R["Bank 16 Setup 16-1"]
    M --> S["..."]
    N --> T["..."]
    O --> U["..."]
    P --> V["..."]
    Q --> W["..."]
Registering a Setup
Registration Setting Items
Setting items that can be registered are shown below.
●Keyboard Play
- Tone number (UPPER 1, LOWER 1, UPPER 2, LOWER 2 parts)
- Layer (on/off)
- Split (on/off)
- Reverb, Chorus, Delay (on/off, type)
●Note Control
- Transpose
- Octave Shift (UPPER 1, LOWER 1, UPPER 2, LOWER 2 parts)
• 33 TOUCH ON/OFF button (on/off, setting mode) - Pedal 1 and Pedal 2 effects (Pedal 2 type is not recorded)
- Scale, scale fine tune, part fine tune, part coarse tune
• 32 PORTAMENTO button (on/off, setting mode) - CT-X9000IN: 39 MODULATION/ASSIGNABLE button (on/off, setting mode)
Split Settings
- Split Point
- Lower Point
- Chord Point
- Chord Input Priority Mode
●Auto Accompaniment
- Rhythm Number
- ACCOMP on/off ([ACCOMP] indicator displayed/not displayed status)
- Tempo, Note value display setting
- Chord Fingering Mode
- Synchro start
• Auto Accompaniment volume - Accompaniment pattern selection status
●AUTO HARMONIZE/ARPEGGIATOR
• 34 AUTO HARMONIZE/ARPEGGIATOR button assignment
• Auto Harmonize (on/off, type)
• Arpeggiator (on/off, type)
• Arpeggiator Hold (on/off)
-Phrase Pad
- Phrase set number
- Phrase playback setups
●Mixer
- Part on/off setting
• Volume, Pan, Reverb send, Chorus send, Delay send settings
To register a setup
IMPORTANT!
- Specifying a bank and area that already has data stored to it in the procedure below causes the recorded data to be deleted. For information about banks and areas, see “Setup Storage Locations” (page EN-65).
- Set up the Digital Keyboard with the tone, rhythm and other settings to suit the song you will play.
- Select the bank where you want to store the registration.
(1) Press 24 BANK.
- “Bank” will appear on the display along with the currently selected bank number.
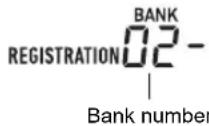
(2) While "Bank" and the bank number are displayed, use 13 [-] and [+] or the 11 dial to select a bank number.
- While "Bank" and the bank number are displayed, each press of 24 BANK cycles through the bank numbers.
- While holding down 25 STORE, press one of the 28 REGISTRATION buttons ([1] to [8]) to select the area you want to specify as the registration destination.
Pressing the two buttons registers the current Digital Keyboard setup to the bank and area you specified in steps 2 and 3.
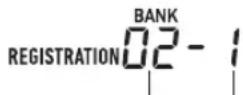
Bank number Area number
Recalling a Registered Setup
To recall a setup
1. As required, press 23 FREEZE to toggle the freeze function between on and off.
- The indicator lamp is lit when the function is on, and unlit when it is off.

- For details about the freeze function, see "Freeze Function" below.
2. Use 24 BANK to select the bank that contains the setup you want to recall.
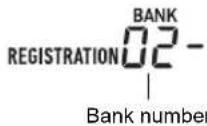
3. Press one of the 28 REGISTRATION buttons ([1] to [8]) to select the area whose setup you want to recall.
This causes the Digital Keyboard's settings to change in accordance with the setup you recalled.
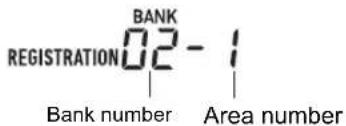
Freeze Function
Recalling a registered setup normally overwrites all of the settings shown under "Registration Setting Items" (page EN-66).
You can also use the freeze function to specify particular settings that should not be overwritten when a setup registration is recalled.
Perform the procedure under "To configure function settings with the 10 FUNCTION button" (page EN-107) and enable or disable the items on each sub-menu that appears when you perform the following operation: Registration Memory (Reg Mem) → Registration Memory Freeze Target (RMFrzTgt) (page EN-111).
Setting items that can be specified are shown below.
| Display | Setting that is not changed when a setup is recalled |
| Rhythm Rhythm Number, ACCOMP on/off,Synchro start/stop status | |
| Tempo Tempo | |
| Tone Tone number, Layer (on/off), Split (on/off), Octave Shift, KEYBOARD part group mixer settings | |
| Split Pt Split Point, Lower Point, Chord Point,Chord Input Priority Mode | |
| AHar/Arp Auto Harmonize/Arpeggiator | |
| Trans. Transpose | |
| Scale Scales | |
| Touch Touch Response | |
| Effect Effect type (Reverb, Chorus, Delay on/off) | |
| PartTune Coarse Tune, Fine Tune | |
| Phr Pad Phrase Pad | |
| Cntrller | Setting items included under Controller (Cntrller) in the “Function Setting Item List” (page EN-108). |
- Under initial default settings, Rhythm and Tempo are on while all other settings are off.
Using a Pedal to Cycle Through Multiple Setups (Registration Sequence)
Each press of the pedal cycles through the currently selected bank's registrations (setups) in area number sequence.
To play with a Registration Sequence
- Press 10FUNCTION.
- Use the [1] (∠) and [3] (△) 12 number keys to display "Reg Mem" (Registration Memory), and then press [6] (ENTER).
- Use the [1] (∠) and [3] (△) keys to display "Reg Seq" (Registration sequence).
- Use 13 [-] and [+] to select the pedal jack that will be used for the registration sequence operation.
| To select this pedal jack: Display this: | |
| 54 PEDAL1 jack Pedal1 | |
| 55 PEDAL2/EXPRESSION jack Pedal2(Turn off registration function) Off | |
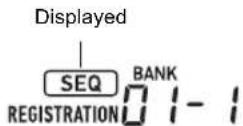
- This displays the [SEQ] indicator, which indicates that the registration sequence function is enabled.
-
The purpose of the pedal connected to the jack selected here is registration setup recall only. Normal pedal functions (functions assigned to the pedal with the "Using a Pedal" operation, page EN-29) cannot be used.
-
When the setting is the way you want, long-press the [4] (EXIT) 12 number key to exit the setting screen.
- Connect a sustain pedal (see "Separately Available Accessories", page EN-3) to the jack you selected in step 4.
- At the point when you want to recall the registration setup, press the pedal.
• Each press of the pedal cycles through the currently selected bank's registration setups in sequence from Area 1.
- Pressing the pedal while the Area 8 setup is recalled cycles back to the Area 1 setup.
- After you are finished recalling the registration setups using the pedal, perform steps 1 through 5 to turn off the registration sequence function.
This causes the [SEQ] indicator to disappear.
Editing a Tone (User Tones)
You can edit a built-in tone to create a user tone, and save up to 100 user tones for later recall.
■Saving to an External Device
User tones can be saved to a USB flash drive or a computer. For details, see "To save Digital Keyboard data to a USB flash drive" (page EN-116) and "Transferring Data Between the Digital Keyboard and a Computer" (page EN-120).
Creating a User Tone
To edit a tone
1. Select the tone you want to edit.
- Be sure to select the UPPER 1 part tone (page EN-19). The UPPER 1 part tone will be the tone being edited.
- You cannot select a drum set tone for editing.
2. Long-press 10 FUNCTION until the [EDIT] indicator appears.
![CASIO CT-X8000IN - Long-press 10 FUNCTION until the [EDIT] indicator appears. - 1](/content/2026/05/842159/images/265ba631ff2009470e2fdf3ea3e6c197700f4ba1ca441adf9607fa338c31a307.jpg)
- This enters the Tone Editing Mode and displays the tone editing screen.
Current setting value Editing item name
000 At k. Time
- For details about editable parameters, see the "Tone Editing Item List" (page EN-72).
3. Use the [1] (∠) and [3] (△) 12 number keys to display the editing item you want to modify.
- If the [ENTER] indicator is displayed, press [6] (ENTER) to enter the sub-menu and then use the [1] (∠) and [3] (△) keys to display the editing item you want to modify.
• To return to a main menu from a sub-menu, press the [4] (EXIT) 12 number key. - Using the "DSP Edit" editing item, you can configure precise DSP effects for a tone using a wide variety of parameters. For details about the configuration of Digital Keyboard DSP effects and an overview of DSP editing, see "DSP Editing" (page EN-70). For details about the DSP editing operation, see "To use DSP editing to edit an effect" (page EN-70).
4. Use 13 [-] and [+] or the 11 dial to change the setting value.
5. Repeat steps 3 and 4 above for each of the editing items you want to change.
- You can sound the tone you are editing by playing something on the keyboard. This means you can immediately check to see how your edits are affecting the tone.
6. To save the edited tone, press the [7] (WRITE) 12 number key.
- If the tone you are editing is a user tone, the message "Replace?" will appear here. Press 13 [+] (YES) to replace the original tone data with the new data, or 13 [-] (NO) to save the new data without replacing the original data.
- If there are already 100 user tones stored in memory, the error message "Data Full" will appear when you press 13 [-] (NO) to indicate that you cannot save the new tone.
- The message "Wait..." remains on the display while the tone save operation is being performed. Do not perform any operation while this message is on the display. "Complete" appears on the display after the operation is complete.
7. To exit the Tone Editing Mode, long-press the [4] (EXIT) 12 number key.
- If you did not perform any editing after executing the operation in step 6, the Tone Editing Mode will be exited and the [EDIT] indicator will disappear from the display.
- If you performed any editing after executing the operation in step 6, the message "Exit?" will be displayed here. Perform one of the operations below.
| To do this: Perform this operation: | |
| Continue editing without exiting the Tone Editing Mode | Press 13 [-] (NO). |
| Save edited data and exit the Tone Editing Mode | (1) Press 13 [+] (YES).(2) When “Write?” appears on the display, press 13 [+] (YES) again. |
| Discard edited data and exit the Tone Editing Mode | (1) Press 13 [+] (YES).(2) When “Write?” appears on the display, press 13 [-] (NO). |
NOTE
- If you are saving the data as a new user tone, the save destination tone number will be the lowest one in memory that currently does not have any data stored. The newly saved user tone will be selected after this operation is complete.
Tone number Tone name
80 | No Na me
- If there is no data stored for a user tone number, "No Data" will be displayed for the tone name. If there is data stored, "No Name" will be displayed. For information about renaming, see "To rename a user tone" (page EN-71).
DSP Editing
A DSP (Digital Signal Processor) is a type of effect that is connected between the sound source and output. DSP types are equalizer, tremolo, limiter, wah, etc. Many of the built-in tones of your Digital Keyboard are preset with DSPs that are suited for each tone. Such tones are called "DSP tones". The tone editing function of the Digital Keyboard includes a DSP Edit setting item for editing DSPs. The Digital Keyboard DSPs that can be edited using DSP Edit are configured as shown below.
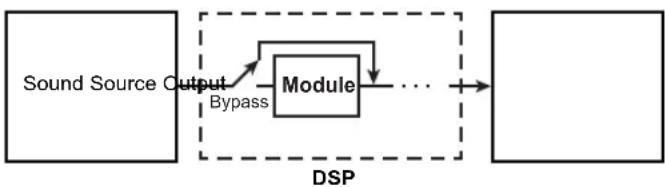
flowchart
graph LR
    A["Sound Source Output"] --> B["Module"]
    B --> C["..."]
    C --> D["DSP"]
    B -->|Bypass| B
- A DSP consists of one or more DSP modules ("Module" in the above illustration).
- Your Digital Keyboard comes with hundreds of preset DSPs. For DSP editing, you can start with a preset DSP that is one assigned to a built-in tone, or a DSP that is provided especially for DSP editing.
- The number of DSP modules and the type of each module (equalizer, limiter, wah, etc.) are different for each DSP.
To perform DSP editing, you first select a preset DSP and then edit its parameters in accordance with the DSP module(s).
For details about the DSP modules and the parameters of each DSP module, see "DSP Effect List" (page EN-127).
To use DSP editing to edit an effect
- Perform steps 1 and 2 under "To edit a tone" (page EN-69).
- Use the [1] (∠) and [3] (△) 12 number keys to display "DSP Edit", and then press [6] (ENTER).
This displays "On/Off". - If the setting is turned off, press 13 [-] or [+] to turn it on.
- Press [3] ( ) to display “DSP Num”.
- To select the DSP to be edited, use 13 [-] and [+] or the 11 dial to specify the DSP number (1 to 900), and then press [6] (ENTER).
-
See the "DSP number" item in the "Tone Editing Item List" (page EN-72).
-
Use the [1] (∠) and [3] (△) 12 number keys to select the DSP module whose parameters you want to change.
- What appears here is the DSP module name. For details about DSP modules, see "DSP Module List" (page EN-127).
Module number DSP module name
Mono 3EQ
- If the DSP you selected in step 5 has one DSP module, the display will not change if you press [1] (∠) or [3] (△). Check the DSP module name and then proceed to step 7.
-
Press the [6] (ENTER) 12 number key. This displays "Bypass".
-
Use the [1] (∠) and [3] (△) 12 number keys to display the parameter whose setting you want to change.
- For details about parameters whose settings can be configured for each DSP module, see "DSP Parameter List" (page EN-128).
-
Use 13 [-] and [+] or the 11 dial to change the setting value.
-
Repeat steps 8 and 9 as required to configure settings of other parameters.
-
Press the [4] (EXIT) 12 number key.
-
Repeat steps 6 through 11 as required to configure settings of DSP modules.
-
Perform step 6 and 7 under "To edit a tone" (page EN-69).
To rename a user tone
- Select the user tone you want to rename.
- Hold down 8 RECORD/STOP until "ToneName" appears.
- Press the [6] (ENTER) 12 number key. This displays the renaming screen.
- Input the new name.
- See "Text Character Input" (page EN-15) for information about how to enter text.
-
Press [6] (ENTER). This displays "Sure?"
-
Press 13 [+] (YES) to execute the rename operation or 13 [-] (NO) to cancel.
-
To exit the operation, press the [4] (EXIT) 12 number key.
To copy a user tone
- Select the user tone you want to copy.
- Hold down 8 RECORD/STOP until "ToneName" appears.
- Use the [1] (∠) and [3] (△) 12 number keys to display "ToneCopy", and then press [6] (ENTER).
- Use 13 [-] and [+], or the 11 dial to select the copy destination tone number and then press [6] (ENTER).
This displays "Sure?"
- If there is already a user tone stored at the tone number you specified as the copy destination, the message "Replace?" will appear.
- Press 13 [+] (YES) to execute the copy operation or 13 [-] (NO) to cancel.
- The message "Wait..." remains on the display while the copy operation is being performed. Do not perform any operation while this message is on the display. "Complete" appears on the display after the operation is complete.
- To exit the operation, press the [4] (EXIT) 12 number key.
To delete a user tone
- Select the user tone you want to delete.
- Hold down 8 RECORD/STOP until "ToneName" appears.
- Use the [1] (∠) and [3] (△) 12 number keys to display "ToneClr", and then press [6] (ENTER). This displays "Sure?"
- Press 13 [+] (YES) to delete or 13 [-] (NO) to cancel the delete operation.
- To exit the operation, press the [4] (EXIT) 12 number key.
Tone Editing Item List
| Item Name Display Description Settings | ||||||||
Attack Time Atk.Time Adjusts the time after a key is pressed from when the note starts to sound until it reaches maximum volume. A larger value specifies a slower attack.Volume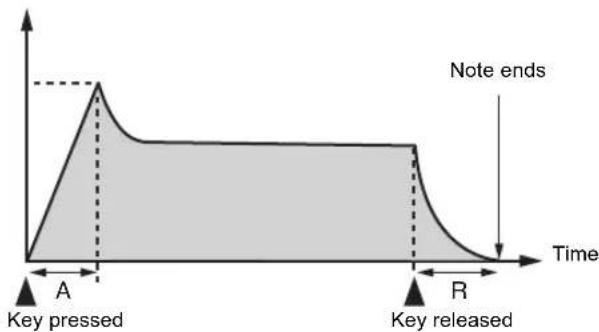 A : Attack timeR : Release time A : Attack timeR : Release time | 0 to 127 | |||||||
| Release Time Rel.Time Adjusts how long notes linger after keyboard keys are released. A larger values specifies a longer release. | 0 to 127 | |||||||
| Cutoff Frequency Cutoff F Adjusts timbre by attenuating the components of a note's frequency characteristics that are higher than a certain frequency (cutoff frequency). A larger value specifies a brighter, harder sound, while a lower value specifies a mellower, softer sound. | 0 to 127 | |||||||
| Resonance Resonance Adjusts the gain of harmonic tones in the vicinity of the cutoff frequency specified above. A larger value creates a more unusual sound. | 0 to 127 | |||||||
| Vibrato Vibrato Sub-menu of vibrato setting items. | ||||||||
| Vibrato Type Vib.Type Selects the vibrato waveform. Sin, Tri, Saw, | Sqr | |||||||
| Setting | Description Waveform | |||||||
| Sin | Sine wave | ~~~ | ||||||
| Tri | Triangle wave | ~~~ | ||||||
| Saw | Sawtooth wave | ~~~ | ||||||
| Sqr | Square wave | ~~~ | ||||||
| Vibrato Depth VibDepth | Specifies the depth of vibrato. 0 to 127 | |||||||
| Vibrato Rate | Vib.Rate | Adjusts the speed of vibrato. | 0 to 127 | |||||
| Vibrato Delay | VibDelay | Adjusts the time until vibrato starts after a note is sounded. | 0 to 127 | |||||
| Octave Shift | OctShift | Shifts the pitch upwards or downwards in octave steps. | -3 to 0 to 3 | |||||
| Volume | Volume | Specifies the volume level of a tone. A larger value sets a higher volume level. | 0 to 127 | |||||
| Item Name | Display | Description | Settings | |||||
| Velocity Sense Vel.Sens S | specifies how much the | tone and/or volume should be affected by keyboard touch (pressure). A larger positive value specifies more brightness and greater volume as keyboard touch becomes stronger. A larger negative value specifies more softness and less volume as keyboard touch becomes stronger. A value of 0 specifies no change in accordance with keyboard touch. | -64 to 0 to 63 | |||||
| Reverb Send Rev.Send Sp | specifies how much rever | b is applied to a tone. 0 to 127 | ||||||
| Chorus Send Cho.Send Sp | specifies how much chorus | is applied to a tone. 0 to 127 | ||||||
| Delay Send Dly.Send Spec | ifies how much delay is | applied to a tone. 0 to 127 | ||||||
| DSP Edit DSP Edit Sub-menu of DSP effect setting items. | ||||||||
| On, Off On/Off On: DSP | effect applied to the tone. | Off: DSP effect not applied to the tone. | On, Off | |||||
| DSP number DSP Num | Selects a preset DSP w | when applying a DSP effect.·Built-in tone numbers 1 through 800 include tones with DSP (DSP tones). Only a DSP tone can be specified here, and other (non-DSP) tones cannot be specified.·Numbers 801 through 900 are for DSP editing only. For details, refer to the “DSP List” in the separate “Appendix”. | 1 to 900 | |||||
| DSP Module 1 | *1 | Sub-menu for configuring setting of DSP modules included in the selected DSP. | ||||||
| Bypass | Bypass | On: Bypass this DSP module.Off: Enable this DSP module. | On, Off | |||||
| (Depends on the DSP module.*2) | ||||||||
| DSP Module 2 and beyond *3 | *1 | Sub-menu for configuring setting of DSP modules included in the selected DSP. | ||||||
| (Same as the Module 1 parameters.) | ||||||||
*1 Shows the name (Compressor, Limiter, Enhancer, etc.) of the DSP module. For details about DSP modules, see "DSP Module List" (page EN-127).
*2 The number of parameters that can be configured and their details depend on the DSP module. For details, see "DSP Parameter List" (page EN-128).
*3 Not displayed when the DSP selected for editing has only one DSP module. When there are multiple DSP modules included in a DSP, a sub-menu will appear for each of them.
Creating an Auto Accompaniment (User Rhythm)
You can create accompaniment patterns that sound while using the Digital Keyboard's Auto Accompaniment function and store them as user rhythms.
The storage locations and the number of rhythms that can be stored depend on the Digital Keyboard model.
CT-X9000IN: Rhythm numbers 309 to 408 (up to 100 rhythms)
CT-X8000IN: Rhythm numbers 309 to 358 (up to 50 rhythms)
■Saving to an External Device
User rhythms can be saved to a USB flash drive or a computer. For details, see "To save Digital Keyboard data to a USB flash drive" (page EN-116) and "Transferring Data Between the Digital Keyboard and a Computer" (page EN-120).
Rhythm Configurations
The structure of each rhythm is as shown below.
Rhythm
| Accompaniment Pattern [V1] to [V4] | Accompaniment Pattern [F1] to [F4] |
| Percussion Percussion | |
| Drums Drums | |
| Bass Bass | |
| Chords 1 to 5 Chords | 1 to 5 |
| Accompaniment Pattern[I] | Accompaniment Pattern[E] |
| Percussion Percussion | |
| Drums Drums | |
| Bass Bass | |
| Chords 1 to 5 Chords | 1 to 5 |
[V]: Variation, [F]: Fill-in, [I]: Intro, [E]: Ending
Each rhythm includes 10 accompaniment patterns, and each accompaniment pattern is made up of eight parts. To create a single user rhythm from scratch, you need to record eight parts of each of the 10 accompaniment patterns. You can also use a built-in rhythm as a base, and replace parts of it with new recordings, or you can copy and edit accompaniment patterns, if you want.
- For details about accompaniment patterns, see "Accompaniment Patterns" (page EN-46).
Data Recordable to Each Part
You can record keyboard play (note data) and pitch bend wheel operations to an accompaniment pattern part.
Creating a User Rhythm
- Creating an Accompaniment with All New Parts
You can record each part of an accompaniment pattern, if you want.
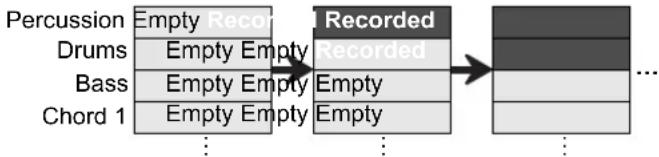
flowchart
graph LR
    A["Percussion"] --> B["Empty Record"]
    C["Drums"] --> D["Empty Empty"]
    E["Bass"] --> F["Empty Empty"]
    G["Chord 1"] --> H["Empty Empty"]
    B --> I["Recorded"]
    D --> I
    F --> I
    H --> I
    I --> J["..."]
- The "Empty" blocks in the above illustration are special memory areas (user areas) for editing, and one is provided for each part. After you record something to a block, it becomes "Recorded".
●Editing an Existing Accompaniment Pattern\* 1
You can use the accompaniment pattern of an existing rhythm as a base and add new recordings of keyboard play to empty parts. Note that this operation is possible for variations and fill-ins only.*2
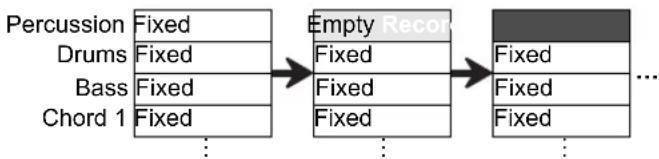
flowchart
graph LR
    A["Percussion Fixed"] --> B["Empty Record"]
    C["Drums Fixed"] --> B
    D["Bass Fixed"] --> B
    E["Chord 1 Fixed"] --> B
    B --> F["..."]
- In the above illustration, "Fixed" indicates rhythm data that must be used as it is. It cannot be edited by you.
*1 Built-in rhythm or previously-saved user rhythm
*2This operation is not supported for an existing intro or ending. You can make all parts empty and create a new pattern from scratch.
●Copying and Editing the Accompaniment Pattern of an Existing Rhythm
You can copy the accompaniment pattern of an existing rhythm to a user area and then edit the copied data.
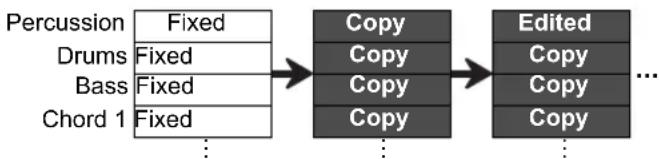
flowchart
graph LR
    A["Percussion Fixed"] --> B["Copy"]
    C["Drums Fixed"] --> B
    D["Bass Fixed"] --> B
    E["Chord 1 Fixed"] --> B
    B --> F["Edited Copy"]
    B --> G["..."]
- In the above illustration, "Copy" and "Edited" are both the same status as "Recorded".
- You can add notes and delete unwanted notes in real time while listening to playback of the copied data.
In addition to the operations described above, you can keep all of the accompaniment pattern parts of an existing rhythm "Fixed", change just the mixer settings, and save the result as a user rhythm.
Creating and Editing a User Rhythm

NOTE
- For information about the mixer part indicator numbers and the part of each accompaniment pattern in the procedure below, see "RHYTHM Part Group" under "List of Parts for Each Mixer Part Group" (page EN-63).
To create a totally new rhythm and save it

NOTE
- You can copy the accompaniment pattern of an existing rhythm to a user area and then edit (add and delete) notes recorded in each part. You can copy an entire accompaniment pattern (step 3 below) or copy a particular part only (step 5 below). Refer to each of these procedures as required.
1. Select a user rhythm where there is no data stored.
• See "Selecting a Rhythm" (page EN-42).
- "No Data" is displayed for the rhythm name while a user rhythm where there is no data stored is selected.
2. Long-press 10 FUNCTION until the [EDIT] indicator appears.
![CASIO CT-X8000IN - Long-press 10 FUNCTION until the [EDIT] indicator appears. - 1](/content/2026/05/842159/images/b1244d2f3d6ed696ebec48a940182d5c576dd22e288ebbd32aa64b8921f44d33.jpg)
- This enters the Rhythm Editing Mode and displays the rhythm editing screen.
- V indicators will be flashing on the display. This indicates that Variation 1 of the accompaniment pattern is selected for editing.
- "Drum" is displayed for the part to be edited.
3. Select the accompaniment pattern to be edited.
| To select this: Press this button: | |
| Intro 14INTRO | |
| Ending 19ENDING/SYNCHRO START | |
| Variation 1 to 4,Fill-in 1 to 4 | 15VARIATION/FILL-IN 1 to18VARIATION/FILL-IN 4* |
* Each press of the button toggles between Variation and Fill-in.
• The indicator for the currently selected accompaniment pattern (page EN-46) will flash.
- At this point, you could copy an existing accompaniment pattern to a user area. See "To copy an existing accompaniment pattern for editing" (page EN-81).
4. Specify the number of measure and the time signature of the accompaniment pattern you want to create.
(1) Press 28 REGISTRATION [8] (EDIT MENU).
(2) Use the [1] (∠) and [3] (△) 12 number keys to display "Element", and then press [6] (ENTER).
(3) Use the [1] (∠) and [3] (△) keys to display "Measure", and then use 13 [-] and [+], or the 11 dial to change the setting value.
| Accompaniment Pattern Settings | |
| Intro, Ending 01 to 16 | |
| Variation 01 to 16 | |
| Fill-in 01 to 02 | |
(4) Use the [1] (∠) and [3] (△) keys to display "Beat" (time signature), and then use 13 [-] and [+], or the 11 dial to change the setting value (Setting Ranges: 2/4 to 8/4, 2/8 to 16/8).
(5) Press the [4] (EXIT) 12 number key.
5. Select the part to be edited.
(1) Press 9 PART and confirm that the lamp to the left of the button is lit.
(2) Use the 12 number keys [1] through [8] to select the part to be edited.
| To select this part: Press this number key: | |
| Percussion [1] | |
| Drums | [2] |
| Bass | [3] |
| Chord 1 to Chord 5 | [4] to [8] |
• This displays the mixer part indicator that corresponds to the selected part to flash.
(3) Press 9 PART and confirm that the lamp to the left of the button is unlit.
- At this point, you could copy a part in an existing rhythm to a user area (except when the accompaniment pattern is an intro or ending). See "To copy an existing rhythm part for editing" (page EN-81).
6. Configure the tone and octave shift settings of the part, if you want.
(1) Select the tone you want to use for part recording. See "Selecting a Tone" (page EN-18).
- Only drum set tones can be selected for Drums and Percussion parts. Drum set sounds cannot be selected for the bass and the Chord 1 through Chord 5 parts.
(2) Configure the part's octave shift setting. While holding down 37 OCTAVE, press the 38 TRANSPOSE [^] or [∨] button.
(3) If there are recorded parts (the accompaniment pattern of an existing rhythm, copied part, or part recorded by performing the procedure up to step 10 at least once), pressing 20 START/STOP here starts looped playback of all the available recorded parts. This means you can monitor the effects of your settings as you configure them.
(4) If there are recorded parts, pressing the [6] (ENTER) 12 number key will play back only the notes of the part being edited.
- This causes the mixer part indicator of the part being edited and the level indicator above it to flash.
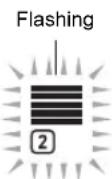
When the part being edited is a drum part
- To exit the above state, press [6] (ENTER) again.
7. Configure playback settings of the part being edited as desired.
- See "To configure the playback settings of a user rhythm part" (page EN-83).
8. Record keyboard play for the part being edited.
- See "To record keyboard play to each part" (page EN-78).
9. Configure the mixer settings of the part being edited as desired.
- See "To configure mixer settings of a part being edited" (page EN-80).
10. Perform steps 5 through 9 for all parts.
11. Perform steps 3 through 10 for all accompaniment patterns.
12. Save the edited rhythm using the procedure under "To save a user rhythm" (page EN-83).
To edit an existing rhythm and save it
NOTE
- When editing the accompaniment pattern of an existing rhythm, you can perform new recording operations for each of the following parts: Variations 1 through 4 and Fill-ins 1 through 4. In the case of intro and ending, you need to first clear all parts and then record new parts.
- You can copy the accompaniment pattern of an existing rhythm to a user area and then edit (add and delete) notes recorded in each part. You can copy an entire accompaniment pattern (step 3 below) or copy a particular part only (step 5 below). Refer to each of these procedures as required.
1. Select the built-in rhythm or previously-saved user rhythm you want to edit.
- See "Selecting a Rhythm" (page EN-42).
2. Long-press 10 FUNCTION until the [EDIT] indicator appears.
![CASIO CT-X8000IN - Long-press 10 FUNCTION until the [EDIT] indicator appears. - 1](/content/2026/05/842159/images/f97dfa9445579899bac02935770fe5f6015c023683b4cbcfd786c019b18f3f5d.jpg)
- This enters the Rhythm Editing Mode and displays the rhythm editing screen.
- This causes the indicator to flash. This indicates that Variation 1 of the accompaniment pattern is selected for editing.
- "Drum" is displayed for the part to be edited.
3. Select the accompaniment pattern to be edited.
| To select this: Press this button: | |
| Intro 14INTRO | |
| Ending 19ENDING/SYNCHRO START | |
| Variation 1 to 4, Fill-in 1 to 4 | 15VARIATION/FILL-IN 1 to 18VARIATION/FILL-IN 4* |
* Each press of the button toggles between Variation and Fill-in.
- The indicator for the currently selected accompaniment pattern (page EN-46) will flash.
- At this point, you could copy an existing accompaniment pattern to a user area. See “To copy an existing accompaniment pattern for editing” (page EN-81).
4. Depending on the accompaniment pattern you selected, perform one of the operations below.
■If you selected Variation 1 to 4 or Fill-in 1 to 4
Advance directly to step 5.
■If you selected Intro or Ending
Clear all the parts of the accompaniment pattern.
(1) Perform steps 2 through 4 under "To batch clear the recorded data in all parts included in a single accompaniment pattern" (page EN-82).
(2) Press 28 REGISTRATION [8] (EDIT MENU).
(3) Use the [1] (∠) and [3] (△) 12 number keys to display "Element", and then press [6] (ENTER).
(4) Use the [1] (∠) and [3] (△) 12 number keys to display "Measure", and then use 13 [-] and [+], or the 11 dial to change the setting value.
| Accompaniment Pattern Settings | |
| Intro, Ending 01 to 16 | |
| Variation 01 to 16 | |
| Fill-in 01 to 02 | |
(5) Use the [1] (∠) and [3] (△) keys to display "Beat" (time signature), and then use 13 [-] and [+], or the 11 dial to change the setting value (Setting Ranges: 2/4 to 8/4, 2/8 to 16/8).
(6) Press the [4] (EXIT) 12 number key.
5. Select the part to be edited
(1) Press 9 PART and confirm that the lamp to the left of the button is lit.
(2) Use the 12 number keys [1] through [8] to select the part to be edited.
| To select this part: Press this number key: | |
| Percussion [1] | |
| Drums [2] | |
| Bass [3] | |
| Chord 1 to Chord 5 [4] to [8] | |
- This displays the mixer part indicator that corresponds to the selected part to flash.
(3) Press 9 PART and confirm that the lamp to the left of the button is unlit.
- At this point, you could copy a part in an existing rhythm to a user area (except when the accompaniment pattern is an intro or ending). See "To copy an existing rhythm part for editing" (page EN-81).
6. Configure the tone and octave shift settings of the part, if you want.
(1) Select the tone you want to use for part recording. See "Selecting a Tone" (page EN-18).
- Only drum set tones can be selected for Drums and Percussion parts. Drum set sounds cannot be selected for the bass and the Chord 1 through Chord 5 parts.
(2) Configure the part's octave shift setting. While holding down 37 OCTAVE, press the 38 TRANSPOSE [^] or [√] button.
(3) Pressing 20 START/STOP here starts looped playback of all the parts of the accompaniment pattern you are currently editing. This means you can monitor the effects of your settings as you configure them.
(4) If there are recorded parts, pressing the [6] (ENTER)
12 number key will play back only the notes of the part being edited.
- This causes the mixer part indicator of the part being edited and the level indicator above it to flash.
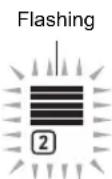
When the part being edited is a drum part
- To exit the above state, press [6] (ENTER) again.
7. Configure playback settings of the part being edited as desired.
- See "To configure the playback settings of a user rhythm part" (page EN-83).
8. Record keyboard play for the part being edited.
- See "To record keyboard play to each part" (page EN-78).
9. Configure the mixer settings of the part being edited as desired.
- See "To configure mixer settings of a part being edited" (page EN-80).
10. Perform steps 5 through 9 for all parts.
11. Perform steps 3 through 10 for all accompaniment patterns.
12. Save the edited rhythm using the procedure under "To save a user rhythm" (page EN-83).
To configure only the mixer settings of an existing rhythm and save it
- Select the built-in rhythm or previously-saved user rhythm you want to edit.
- See "Selecting a Rhythm" (page EN-42).
- Long-press 10 FUNCTION until the [EDIT] indicator appears.
- Perform step 3 under "To edit an existing rhythm and save it" (page EN-76).
- Perform step 5 under "To edit an existing rhythm and save it" (page EN-76).
- Perform the procedure under "To configure mixer settings of a part being edited" (page EN-80).
- Perform steps 4 and 5 for all parts whose mixer settings you want to configure.
- Perform steps 3 through 6 for all accompaniment patterns whose mixer settings you want to configure.
- Save the edited rhythm using the procedure under "To save a user rhythm" (page EN-83).
To record keyboard play to each part
NOTE
- The operation shown here is performed as the steps of the procedures below.
- Step 8 under "To create a totally new rhythm and save it" (page EN-75)
- Step 8 under "To edit an existing rhythm and save it" (page EN-76)
1. Press 8 RECORD/STOP.
This enters recording standby and displays "Recorded" or "Empty".
If "Fixed" is displayed here, it means that the currently selected part cannot be recorded. After a few seconds, the display will return to what was shown before you pressed 8 RECORD/STOP.
- For details about these indicators, see "Part Data Status Indicators" (page EN-79).
- To exit recording standby, press 8 RECORD/STOP. This causes the [RECORD] indicator to disappear.
2. Configure recording settings as desired.
- The settings of recording items that you configured in the past will still be in effect. Items you have not changed will be configured with their default settings. For details about setting items, see the “User Rhythm Recording Settings” (page EN-80).
- To configure settings, perform the steps below.
(1) Long-press 8 RECORD/STOP until "Quantize" appears.
(2) Use the [1] (∠) and [3] (△) 12 number keys to display the menu for the changes you want to make.
(3) Use 13 [-] and [+] or the 11 dial to change the setting value.
(4) When settings are the way you want, press the 8 RECORD/STOP again.
3. Practice what you will play as required.
• To sound the parts of the accompaniment pattern and practice what you plan to play on the keyboard before actually recording it, perform the procedure below.
(1) Long-press 22 ACCOMP until the [ACCOMP] indicator starts to flash. This enters the Rehearsal Mode.
- The Rehearsal Mode causes the keyboard to operate the same way as it does during recording, without recording anything.
(2) Press 20 START/STOP.
This plays back data that is already recorded to each part of the accompaniment pattern.
- The bass part and chord parts 1 through 5 play in the key of C Major. The key and the chord types do not change even if you play something on the accompaniment keyboard.
(3) Play on the keyboard in time with the playback. Keyboard play will sound using the tone you selected before entering recording standby.
(4) To exit the Rehearsal Mode, long-press 22ACCOMP until the [ACCOMP] indicator disappears from the display.
4. To start recording, press 20 START/STOP.
- The message "Record.." also appears.
- The number of measures and beats are counted up in the upper right corner of the display. When the final beat of the length (number of measures) specified for the accompaniment pattern is reached, the count restarts from 001:01.
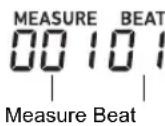
5. Timing in accordance with the "MEASURE" and "BEAT" values on the display, play something on the keyboard when required.
- 40 PITCH BEND wheel operations are also included in the recording.
- 39 MODULATION/ASSIGNABLE button operations are also included in the recording (CT-X9000IN only).
- What you record will play back when the display returns to the measure and beat where it was recorded.
- To delete specific recorded notes, hold down 28 REGISTRATION [2]. When playback reaches the note you want to delete, press the keyboard key that corresponds to the note to be deleted. Holding down 28 REGISTRATION [2] along with one or more keyboard keys while playback is being performed will delete all of the notes that correspond to the keyboard keys as they played while the button and keys are held down.
- Until you perform step 6 below, you can layer keyboard notes and delete recorded notes as many times as you like.
6. When you are finished recording, press 8 RECORD/STOP.
This causes the [RECORD] indicator to disappear.
- Pressing 20 START/STOP starts looped playback of recorded data.
- To try normal keyboard play with recorded data as back up (with the keyboard part tone and not the recorded part tone), long-press 5 TONE. This will display part indicator ▶1 ▶ upper left corner of the display. This displays the name of the tone assigned to the keyboard and enables play of that tone on the keyboard.
■Part Data Status Indicators
The table below explains the status indicators for parts being edited on the rhythm editing screen.
| This indicator: Means this: | |
| Fixed (Fixed Data) | Data that was recalled from a built-in rhythm or a previously stored user rhythm, not user area data. Real-time recording of keyboard notes is not allowed. The only editing operation supported is configuring mixer settings. |
| Recorded (Recorded Data) | Already recorded editable user area data. Mixer settings and real-time recording of keyboard notes are possible with this status. |
| Empty (No Data) User area where nothing is recorded. Mixer settings and real-time recording of keyboard notes are possible with this status. | |
■User Rhythm Recording Settings
Initial default setting values are indicated by an asterisk (*).
| Item Name(Display) | Description Settings | |
| Quantize(Quantize) | Specify either recording of notes in the timing they are played on the keyboard or automatic alignment of notes based on a note value. Selecting a setting other than “Off” displays a note value (4: quarter note, d: dotted note, t: triplets). | Off*, 4, 8, 16, 32, 4d, 8d, 16d, 32d, 4t, 8t, 16t, 32t |
| Precount(Precount) | Specifies whether a precount should sound before recording starts after20 START/STOPis pressed in recording standby. Selecting “1” sounds a one-measure precount, while “2” sounds a two-measure precount. Selecting “Off” turns off the precount, so recording starts as soon as20 START/STOPor a keyboard key is pressed. | Off, 1*, 2 |
| Play Chord(PlayChrd) | Starting recording of an accompaniment pattern starts repeat playback of all the parts of the pattern, except for the part being recorded. During such repeat playback, you can use this setting to specify the chord type to be used for playback by bass and chord parts. Available settings are “C” (C major), “C7” (C 7th), and “Cm” (C minor). Selecting “Off” turns off bass and chord part notes. | Off, C*, C7, Cm |
| Metronome(Metronom) | Specifies whether or not the metronome should sound during recording. | On, Off* |
To configure mixer settings of a part being edited
NOTE
- The operation shown here is performed as the steps of the procedures below.
- Step 9 under "To create a totally new rhythm and save it" (page EN-75)
- Step 9 under "To edit an existing rhythm and save it" (page EN-76)
- Step 5 under "To configure only the mixer settings of an existing rhythm and save it" (page EN-78)
1. Long-press 9 PART (MIXER) until the [MIXER] indicator appears.
This displays the Part On/Off status of the part being edited.
2. Use the [2] (√) and [5] (∧) 12 number keys to display the menu item you want to change.
- Initial default setting values are indicated by an asterisk (*).
| Item Name(Display) | Description Settings | |
| Part On/Off(Part) | Specifies on/off for the selected part. | On*, Off |
| Part tone(Tone) | Specifies the tone of the selected part. | *1 |
| Volume(Volume) | Adjusts the volume level of the selected part. | 0 to 127* |
| Pan (Pan) Specifies the stereo pan position of the selected part. 0 indicates the center, while a smaller value shifts to the left and a larger value shifts to the right. | -64 to 0* to 63 | |
| Reverb Send(Rev Send) | Specifies how much reverb is applied to the selected part. | 0 to 40* to 127 |
| Chorus Send(Cho Send) | Specifies how much chorus is applied to the selected part. | 0* to 127 |
| Delay Send(Dly Send) | Specifies how much delay is applied to the selected part. | 0* to 127 |
*1 Only drum set tones can be selected for Drums and Percussion parts. Drum set sounds cannot be selected for the bass and the Chord 1 through Chord 5 parts.
3. Use 13 [-] and [+] or the 11 dial to change the setting value.
4. When mixer settings are the way you want, press the [4] (EXIT) 12 number key.
To copy an existing accompaniment pattern for editing
1. In the Rhythm Editing Mode, select the copy destination accompaniment pattern.
- Perform steps 1 to 3 under “To create a totally new rhythm and save it” (page EN-75), or steps 1 to 3 under “To edit an existing rhythm and save it” (page EN-76).
2. Press 28 REGISTRATION [1].
This displays "Element".
3. Press the [6] (ENTER) 12 number key.
This displays the currently selected rhythm number and rhythm name.
4. Use 13 [-] and [+], or the 11 dial to select the number of the rhythm you want to use as the source of the accompaniment pattern copy operation.
5. Select the accompaniment pattern you want to use as the copy source.
The indicator for the currently selected accompaniment pattern (page EN-46) will flash.
| To select this: Press this button: | |
| Intro 14INTRO | |
| Ending 19ENDING/SYNCHRO START | |
| Variation 1 to 4, Fill-in 1 to 4 | 15VARIATION/FILL-IN 1 to 18VARIATION/FILL-IN 4* |
* Each press of the button toggles between Variation and Fill-in.
- Select an intro when the copy destination is an intro, or an ending when the copy destination is an ending.
- When the copy destination is Variation 1 to 4, select any one of Variation 1 to 4.
- When the copy destination is Fill-in 1 to 4, select any one of Fill-in 1 to 4.
- Pressing 20 START/STOP here starts looped playback of the accompaniment pattern you selected as the copy source.
6. To execute the copy operation, press [6] (ENTER).
This displays "Sure?"
7. Press 13 [+] (YES) to execute the copy operation or 13 [-] (NO) to cancel.
- The message "Wait..." remains on the display while the copy operation is being performed. Do not perform any operation while this message is on the display. "Complete" appears on the display after the operation is complete.
To copy an existing rhythm part for editing
IMPORTANT!
- You cannot copy parts included in an intro or an ending.
1. In the Rhythm Editing Mode, select the copy destination part.
- Perform steps 1 to 5 under “To create a totally new rhythm and save it” (page EN-75), or steps 1 to 5 under “To edit an existing rhythm and save it” (page EN-76).
2. Press 28 REGISTRATION [1].
This displays "Element".
3. Use the [1] (∠) and [3] (△) 12 number keys to display "Part", and then press [6] (ENTER). This displays the currently selected rhythm number and rhythm name.
4. Use 13 [-] and [+], or the 11 dial to select the number of the rhythm you want to use as the source of the accompaniment pattern copy operation.
5. Select the accompaniment pattern that includes the part you want to use as the copy source.
The indicator for the currently selected accompaniment pattern (page EN-46) will flash.
| To select this: Press this button: | |
| Variation 1 to 4,Fill-in 1 to 4 | 15VARIATION/FILL-IN 1 to18VARIATION/FILL-IN 4* |
* Each press of the button toggles between Variation and Fill-in.
6. Select the part you want to use as the copy source.
(1) Press 9 PART and confirm that the lamp to the left of the button is lit.
(2) Use the 12 number keys [1] through [8] to select the part to be copied.
| To select this part: Press this number key: | |
| Percussion [1] | |
| Drums [2] | |
| Bass [3] | |
| Chord 1 to Chord 5 [4] to [8] | |
(3) Press 9 PART and confirm that the lamp to the left of the button is unlit.
- Pressing 20 START/STOP here starts looped playback of only the part you selected as the copy source.
7. To execute the copy operation, press [6] (ENTER).
This displays "Sure?"
8. Press 13 [+] (YES) to execute the copy operation or 13 [-] (NO) to cancel.
- The message "Wait..." remains on the display while the copy operation is being performed. Do not perform any operation while this message is on the display. "Complete" appears on the display after the operation is complete.
To batch clear the recorded data in all parts included in a single accompaniment pattern
- In the Rhythm Editing Mode, select the accompaniment pattern whose parts you want to batch clear.
- Perform steps 1 to 3 under "To edit an existing rhythm and save it" (page EN-76).
- Press 28 REGISTRATION [2].
This displays "Element".
- Press the [6] (ENTER) 12 number key.
This displays "Sure?"
- Press 13 [+] (YES) to execute the clear operation or 13 [-] (NO) to cancel.
- This clears all the parts in the selected accompaniment pattern.
To clear the recorded data in a particular part included in a single accompaniment pattern
NOTE
- You cannot clear parts of an intro or an ending.
- In the Rhythm Editing Mode, select the part you want to clear.
- Perform steps 1 to 5 under "To edit an existing rhythm and save it" (page EN-76).
- Press 28 REGISTRATION [2].
This displays "Element".
- Use the [1] (∠) and [3] (△) 12 number keys to display "Part", and then press [6] (ENTER).
This displays "Sure?"
- Press 13 [+] (YES) to execute the clear operation or 13 [-] (NO) to cancel.
• This clears the selected part.
To save a user rhythm
NOTE
- The operation shown here is performed as the steps of the procedures below.
- Step 12 under "To create a totally new rhythm and save it" (page EN-75)
- Step 12 under "To edit an existing rhythm and save it" (page EN-76)
- Step 8 under "To configure only the mixer settings of an existing rhythm and save it" (page EN-78)
1. Press the [7] (WRITE) 12 number key.
- If the rhythm you are editing is a user rhythm, the message "Replace?" will appear here. Press 13 [+] (YES) to replace the original rhythm data with the new rhythm data. To save the data as a new rhythm, press 13 [-] (NO).
- If there are already the maximum number of allowable user rhythms stored in memory (CT-X9000IN: 100, CT-X8000IN: 50), the error message "Data Full" will appear when you press 13 [-] (NO) to indicate that you cannot save the new rhythm.
- The message "Wait..." remains on the display while the rhythm save operation is being performed. Do not perform any operation while this message is on the display. "Complete" appears on the display after the operation is complete.
2. To exit the Rhythm Editing Mode, long-press the [4] (EXIT) 12 number key.
- If you did not perform any editing after executing the operation in step 1, the Rhythm Editing Mode will be exited and the [EDIT] indicator will disappear from the display.
- If you performed any editing after executing the operation in step 1, the message "Exit?" will be displayed here. Perform one of the operations below.
| To do this: Perform this operation: | |
| Continue editing without exiting the Rhythm Editing Mode | Press 13 [-] (NO). |
| Save edited data and exit the Rhythm Editing Mode | (1) Press 13 [+] (YES).(2) When “Write?” appears on the display, press 13 [+] (YES) again. |
| Discard edited data and exit the Rhythm Editing Mode | (1) Press 13 [+] (YES).(2) When “Write?” appears on the display, press 13 [-] (NO). |
NOTE
- If you are saving the data as a new user rhythm, the save destination rhythm number will be the lowest one in memory that currently does not have any data stored. The newly saved user rhythm will be selected after this operation is complete.
Rhythm number Rhythm name
309 No Na me
- If there is no data stored for a user rhythm number, "No Data" will be displayed for the rhythm name. If there is data stored, "No Name" will be displayed. For information about renaming, see "To rename a user rhythm" (page EN-86).
User Rhythm Part Playback Settings
To configure the playback settings of a user rhythm part
NOTE
- The operation shown here is performed as the steps of the procedures below.
- Step 7 under "To create a totally new rhythm and save it" (page EN-75)
- Step 7 under "To edit an existing rhythm and save it" (page EN-76)
-
Press 28 REGISTRATION [8] (EDIT MENU).
-
Use the [1] (∠) and [3] (△) 12 number keys to display "Part", and then press [6] (ENTER).
-
Use the [1] (∠) and [3] (△) keys to display the menu item you want to change.
-
Use 13 [-] and [+] or the 11 dial to change the setting value.
- Menu items and setting ranges are shown below.
| Item Name (Display) Settings | |
| Chord Conversion Table (Table) 01 to 19 | |
| Break Point (Break Pt) C to B | |
| Invert (Invert) On, Off, 7th | |
| Retrigger (Retrig.) On, Off | |
| Bend Range (BndRng) 00 to 24 |
- For details about each item, see the "User Rhythm Part Playback Setting Details" (page EN-84).
- Press the [4] (EXIT) 12 number key.
User Rhythm Part Playback Setting Details
■Chord conversion table (Table)
Recording of each accompaniment pattern is normally performed using C major (root of C, major type). When playing an Auto Accompaniment, you can use a root other than C and a chord type other than major, if you want. This is accomplished by using a "chord conversion table" to convert the C major recorded data to another root and/or chord type. Regardless of what root or chord type you specify, the currently selected chord table is used to make corrections to suit the instrument parts and the type of music being played in order to ensure musically natural accompaniment.
With this parameter, you can select from among the 19 types of chord conversion tables listed below.
| Number | Table Name * | 1 | Parts Description |
| 01 | Bass Basic * | 2 | Bass Normally used for a bass part. |
| 02 | Bass f-root * | 2 | Bass Variation of number 01. Always makes the first note the root note when changing chords. |
| 03 | Bass 7th * | 2 | Bass Used for a bass part recorded with a 7th chord. |
| 04 | Bass 7th f-root * | 2 | Bass Variation of number 03. Always makes the first note the root note when changing chords. |
| 05 | Chord Basic * | 2 | Chord Normally used for a chord part. |
| 06 | Chord Var2 * | 2 | Chord Used for a chord part that has a tension chord. |
| 07 | Chord Var3 * | 2 | Chord When a 7th chord is specified while playing, the 5th note is converted to a 7th note. In the case of C7, for example, G becomes B'. |
| 08 | Chord Var4 * | 2 | Chord Variation of number 05 (Chord Basic). |
| 09 | Chord 7th * | 2 | Chord Used for a chord part recorded with a 7th chord. |
| 10 | Chord Minor * | 2 | Chord Used for a chord part recorded with a minor chord. |
| 11 | Phrase * | 2 | Chord Used for the chord part to which a phrase (such as a major scale) was recorded. |
| 12 | Chord Minor * | 2 | Bass Used for a bass part recorded with a minor chord. |
| 13 | Chord Minor f-root * | 2 | Bass Variation of number 12. Always makes the first note the root note when changing chords. |
| 14 | Penta Phrase * | 2 | Chord Used for a chord part recorded with a pentatonic scale phrase. |
| 15 | Intro n-minor * | 3 | Bass/chord When a minor chord is specified while playing, converts to a natural minor. |
| 16 | Intro m-minor * | 3 | Bass/chord When a minor chord is specified while playing, converts to a melodic minor (ascending). |
| 17 | Intro h-minor * | 3 | Bass/chord When a minor chord is specified while playing, converts to a harmonic minor. |
| 18 | Intro no Change * | 3 | Bass/chord Recording of original as-is, with no minor/major conversion in accordance with chord specified while playing. |
| 19 | Intro dorian * | 3 | Bass/chord When a minor chord is specified while playing, converts to a dorian scale. |
*1Accompaniment Pattern
*2For Variation and Fill-in
*3For Intro and Ending
■Break Point (Break Pt)
This parameter specifies the key, from C to B, that is the point at which Auto Accompaniment bass and chord notes drop one octave.
For example when F is specified as the break point, a C major chord recorded as C3E3G3 (CEG) becomes D3F#3A3 (DF#A raised one note each) when D is fingered on the chord keyboard, E3G#3B3 (EG#B raised one note each) when E is fingered, and F2A2C3 (FAC dropped one octave) when F is fingered.
■Inversion (Invert)
This parameter specifies whether or not chords during Auto Accompaniment play should mirror inverted forms of the original chord (EGC and GCE for CEG).
For example, let's say that the original recorded C major chord is CEG and an F chord is fingered on the chord keyboard. If "Off" is selected for this setting, the chord will be directly converted to FAC. If "On" (or "7th") is selected, the chord will be converted to CFA, which is the inverted form that is nearest to CEG. The transition of chord notes during playback when "On" (or "7th") is selected is smaller, so accompaniment sounds more natural.
Note that you should select "7th" in place of "On" only if "C7" was specified for the "PlayChrd" setting* when recording the accompaniment pattern and if you selected "09 (Chord 7th)" for the chord conversion table.
*For information about "PlayChrd", see the "User Rhythm Recording Settings" (page EN-80).
NOTE
- When selecting "On" (or "7th") for this setting, make sure that you select "C" for the "Break Point" (Break Pt) setting.
■Retrigger (Retrig.)
This parameter specifies how accompaniment pattern play is affected by a chord change that occurs part way through a pattern. When "On" is selected, the pattern "retriggers," which causes the currently playing note to change to the corresponding note of the newly fingered chord. When "Off" is selected, a chord change causes the currently sounding note to be cut off, and the next note of the pattern of the newly fingered chord to be played.
■Bend Range (BndRng)
This parameter specifies the bend range for pitch bend wheel operation in semitone steps.
Operations Affecting All the Accompaniment Patterns in a Rhythm
To configure mixer settings for a rhythm
- While editing a rhythm in the Rhythm Editing Mode, press 28 REGISTRATION [8] (EDIT MENU).
-
Use the [1] (∠) and [3] (△) 12 number keys to display "Rhythm", and then press [6] (ENTER).
This displays "Volume". -
Use the [1] (∠) and [3] (△) keys to display the menu item you want to change.
| Item Name(Display) | Description Settings | |
| Volume(Volume) | Adjusts the overall rhythm volume. | 0 to 127 |
| Reverb Type(Reverb) | Specifies the reverb type to be applied to the entire rhythm. | *1 |
| Chorus Type(Chorus) | Specifies the chorus type to be applied to the entire rhythm. | *2 |
| Delay Type(Delay) | Specifies the delay type to be applied to the entire rhythm. | *3 |
*1 See "Reverb Effect List" (page EN-23).
*2See "Chorus Effect List" (page EN-24).
*3 See "Delay Effect List" (page EN-24).
-
Use 13 [-] and [+] or the 11 dial to change the setting value.
-
Press the [4] (EXIT) 12 number key.
To batch clear data recorded in all the accompaniment patterns of a rhythm
-
Perform steps 1 and 2 under "To configure mixer settings for a rhythm" (page EN-85).
-
Use the [1] (∠) and [3] (△) 12 number keys to display "All Clear", and then press [6] (ENTER).
This displays "Sure?"
-
Press 13 [+] (YES) to execute the batch clear operation or 13 [-] (NO) to cancel.
-
Press the [4] (EXIT) 12 number key.
To rename a user rhythm
- Select the user rhythm you want to rename.
- Hold down ③ RECORD/STOP until "Rhy Name" appears.
- Press the [6] (ENTER) 12 number key. This displays the renaming screen.
- Input the new name.
- See "Text Character Input" (page EN-15) for information about how to enter text.
- Press [6] (ENTER). This displays "Sure?"
- Press 13 [+] (YES) to execute the rename operation or 13 [-] (NO) to cancel.
- To exit the operation, press the [4] (EXIT) 12 number key.
To copy a user rhythm
- Select the user rhythm you want to copy.
- Hold down 8 RECORD/STOP until "Rhy Name" appears.
- Use the [1] (∠) and [3] (△) 12 number keys to display “Rhy Copy”, and then press [6] (ENTER).
- Use 13 [-] and [+], or the 11 dial to select the copy destination rhythm number and then press [6] (ENTER).
This displays "Sure?"
- If there is already a user rhythm stored at the rhythm number you specified as the copy destination, the message "Replace?" will appear.
- Press 13 [+] (YES) to execute the copy operation or 13 [-] (NO) to cancel.
- The message "Wait..." remains on the display while the copy operation is being performed. Do not perform any operation while this message is on the display. "Complete" appears on the display after the operation is complete.
- To exit the operation, press the [4] (EXIT) 12 number key.
To delete a user rhythm
- Select the user rhythm you want to delete.
- Hold down ③ RECORD/STOP until "Rhy Name" appears.
- Use the [1] (∠) and [3] (△) 12 number keys to display “Rhy Clr”, and then press [6] (ENTER).
This displays "Sure?"
- Press 13 [+] (YES) to delete or 13 [-] (NO) to cancel the delete operation.
- To exit the operation, press the [4] (EXIT) 12 number key.
Using the MIDI Recorder to Record
You can use the MIDI recorder for real-time recording of your Digital Keyboard play.
- You can record up to 10 songs in Digital Keyboard memory. Recorded content is saved in Song Bank song numbers 31 to 40 (user songs).
- One song can have up to 999 measures, or a total of approximately 40,000 notes in all of its tracks. Recording stops automatically when either of these limits is reached.
- You can play along with a recorded song on the keyboard.

IMPORTANT!
- CASIO COMPUTER CO., LTD. takes no responsibility for any damages, lost profits, or claims by third parties arising from the deletion of recorded data due to malfunction, repair, or for any other reason.
■MIDI Recorder
Keyboard performance information is recorded as MIDI data* to a system track or 16 solo tracks (storage areas for keyboard performance data) in Digital Keyboard memory.
- Keyboard performance information (keyboard keys press/release, touch pressure, etc.) is recorded as MIDI data.
- The size of MIDI data is much smaller when compared with audio data, making it easier to edit later on a computer, etc.
- The MIDI recorder sounds the Digital Keyboard's sound source based on recorded MIDI data.
\* MIDI
MIDI is short for “Musical Instrument Digital Interface”. It is a universal standard that makes it possible for musical instruments, computers, and other devices to exchange performance information (keyboard key press/release, touch pressure, etc.) regardless of manufacturer. Performance data in this case is called “MIDI data”.
■Recording Track and Recorded Data
●System Track
Records operations of the various different performance functions of the Digital Keyboard, including Auto Accompaniment, phrase pads, layer, split, etc.
●Solo Tracks 1 to 16
Record keyboard play using one tone (UPPER 1). These tracks can be overdubbed as shown below.
| System recording Recorded | |
| Solo 1 Empty | |
| Solo 2 Empty Empty | |
| ⋮ | ⋮ |
| Solo 16 Empty Empty | |
The data recorded to each track is shown below.
| This type of track: | Records this: |
| System Track | Keyboard play, tone number (UPPER 1, UPPER 2, LOWER 1, LOWER 2), rhythm number, tempo, time signature, rhythm controller operations, chord specification, phrase pad operations, Auto Accompaniment volume, effect settings (reverb, chorus, delay), layer, split, auto harmonize/arpeggiator play, scale settings (preset scale type and root, scale fine tune, Auto Accompaniment scale on/off setting), part fine tune, part coarse tune, octave shift setting, pedal operations, pitch bend wheel operations, bend range setting, mixer settings, PORTAMENT button operationsCT-X9000IN: MODULATION/ASSIGNABLE button operations (vibrato, DSP parameter setting) |
| Solo Tracks | Keyboard play, tone number (UPPER 1), arpeggiator play, octave shift setting, pedal operations, pitch bend wheel operations, bend range setting, part fine tune, part coarse tune, mixer settings, PORTAMENT button operationsCT-X9000IN: MODULATION/ASSIGNABLE button operations (vibrato, DSP parameter setting) |
■Saving to an External Device
Songs recorded with the MIDI recorder can be saved to a USB flash drive or a computer. For details, see "To save Digital Keyboard data to a USB flash drive" (page EN-116) and "Transferring Data Between the Digital Keyboard and a Computer" (page EN-120).
Starting a Recording
Recording can be stared from either of the modes below.
●Rhythm Mode
Press 8 RECORD/STOP and then play something on the keyboard to start recording. This makes it quick and easy to start recording to the system track.
●Song Bank Mode
After first selecting a recording destination song number, press 8 RECORD/STOP to start recording.
Note that what happens when you press 8 RECORD/
STOP depends on which of the above modes you are in. Try performing the operations below before you start to record.
When starting from the Rhythm Mode
-
Press 6 RHYTHM to enter the Rhythm Mode.
-
Press 8 RECORD/STOP.
This enters recording standby and causes the [RECORD] indicator to flash.
- You can select a rhythm and tone.
-
Recording starts when you play something on the keyboard. Pressing 20 START/STOP starts the rhythm and recording at the same time.
-
Long-press 8 RECORD/STOP.
This displays the recording setting screen and displays "RecTrkSy".
The [RECORD] indicator continues to flash.
- Pressing 20 START/STOP starts recording, but does not start rhythm play. Use this method to start recording when you want to insert rests at the beginning.
-
On this screen, you can configure recording settings, such as the recording destination track, etc.
-
Press 8 RECORD/STOP.
This returns to recording standby.
- To exit recording standby, press 3RECORD/STOP.
This causes the [RECORD] indicator to disappear.
- Recording using this operation automatically selects the lowest song number (31 to 40) that does not have anything recorded to it yet as the recording destination.
When starting from the Song Bank Mode
- Press 7 SONG BANK to enter the Song Bank Mode.
- Use the 12 number keys, 13 [-] and [+], or the 11 dial to select a song number from 31 to 40 (user recording).
- Press 8 RECORD/STOP.
This displays the recording setting screen and displays "RecTrkSy".
- This is the same display as the one that appears on step 3 under "When starting from the Rhythm Mode" above.
- Press 8 RECORD/STOP again.
This enters recording standby.
- This is the same display as the one that appears on step 2 under "When starting from the Rhythm Mode" above.
-
Here, long-press 8 RECORD/STOP to return to the recording setting screen.
-
To exit recording standby, press 3RECORD/STOP again.
This causes the [RECORD] indicator to disappear.
Recording Keyboard Play
NOTE
- The [RECORD] indicator will start to flash during recording when the number of remaining note count is 100 or lower. When there are no more remaining notes, recording stops automatically and the [RECORD] indicator disappears.
- To make a new recording by selecting the recording destination song number first, see “To change the recording destination song number during recording standby” (page EN-91).
- You can configure settings to sound a pre-count before recording starts or the metronome while recording is in progress. See "To sound a pre-count or the metronome" (page EN-92).
- You can exit recording standby at any time ([RECORD] indicator flashing) by pressing 8 RECORD/STOP once or twice so the [RECORD] indicator is not displayed.
To record a new system track
1. Press 6 RHYTHM.
2. Specify the tempo to use at the start of recording.
- See "Changing Auto Accompaniment Speed (Tempo)" (page EN-45).
3. Select the rhythm and tone you want to use at the start of recording.
- See "Selecting a Rhythm" (page EN-42) and "Selecting a Tone" (page EN-18).
- If you want to change mixer settings of each of the system track parts, perform the procedure under “To configure mixer settings” (page EN-62). Configure the mixer settings of each part of the KEYBOARD part group.
- Layer and split settings, as well as other settings are also recorded. For details about recorded data, see "Recording Track and Recorded Data" (page EN-87).
4. Press 8 RECORD/STOP.
This enters recording standby.
- The [SONG] and [SYSTEM] indicators are also displayed at this time, and the mixer part indicators (10) all start to flash. This indicates that the system track is the recording target.
5. Playing on the keyboard automatically starts recording.
- Pressing 20 START/STOP starts the rhythm and recording at the same time.

- While recording is in progress, the number of measures since recording started is indicated in the upper right corner of the display.
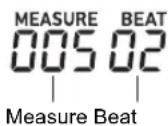
6. When you are finished recording, press 8 RECORD/STOP.
This causes the [RECORD] indicator to disappear.
- Pressing 20 PLAY/STOP will play back the recorded data.
NOTE
- Recording using the above operation automatically selects the lowest song number (31 to 40) that does not have anything recorded to it yet as the recording destination.
To record a new solo track
1. Specify the tempo to use at the start of recording.
- See "Changing Auto Accompaniment Speed (Tempo)" (page EN-45).
2. Select the tone you want to use at the start of recording.
• See "Selecting a Tone" (page EN-18).
- You cannot use layer or split when recording.
- If you want to change mixer settings of solo track being recorded, perform the procedure under "To configure mixer settings" (page EN-62). Configure the mixer settings of the UPPER 1 part of the KEYBOARD part group.
- For details about data recorded to the solo track, see "Recording Track and Recorded Data" (page EN-87).
3. Press 8 RECORD/STOP.
This enters recording standby.
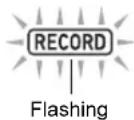
- The [SONG] and [SYSTEM] indicators are also displayed at this time, and mixer part indicators to all start to flash. This indicates that the system track is the recording target.
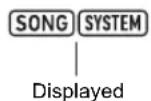
4. Select the solo track to which you want to record.
(1) Long-press 8 RECORD/STOP.
- This displays the recording setting screen that you can use to select the recording target track.

- "RecTrkSy" indicates that the current recording target track is the system track.
(2) Use 13 [-] and [+], or the 11 dial to display the [SONG] and [SOLO] indicators, and select the solo track to which you want to record.
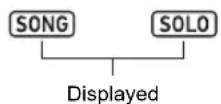

- "RecTrk" indicates that the current recording target track is a solo track, and the number is the track number.
- At this time, the corresponding mixer part number (to) also flashes.
(3) Press 8 RECORD/STOP to return to recording standby.
- To insert a rest at the beginning of the recording, press 20 START/STOP in place of 8 RECORD/STOP. This starts recording and inserts rests until you play something on the keyboard.
5. Playing on the keyboard automatically starts recording.

6. When you are finished recording, press 8 RECORD/STOP.
This causes the [RECORD] indicator to disappear.
- Pressing 20 PLAY/STOP will play back the recorded data.
To overdub another solo track while playing back recorded tracks
1. Press 7SONG BANK.
2. Use the 12 number keys, 13 [-] and [+], or the 11 dial to select the number of the song you want to overdub.
- Select a user recording song that has at least one track recorded.
3. Select the tone you want to use at the start of recording.
(1) Press 5 TONE.
(2) Use the 12 number keys, 13 [-] and [+], or the 11 dial to select the number of the tone.
- You cannot use layer or split when recording.
- For details about data recorded to the solo track, see "Recording Track and Recorded Data" (page EN-87).
4. Press 8 RECORD/STOP.
This enters recording standby.
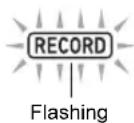
- At this time, "RecTrkSy" is displayed along with the [SONG] and [SYSTEM] indicators. Also, mixer part indicators to all start to flash. This indicates that the system track is the recording target.
5. Use 13 [-] and [+], or the 11 dial to display the [SONG] and [SOLO] indicators, and select the solo track to which you want to record.
- While the [SONG] and [SOLO] indicators are displayed, mixer part indicators to indicate the status of the solo tracks. A displayed indicator means that a solo track is recorded, while a flashing indicator means that the solo track is the recording target.
- Selecting a track that is already recorded causes the current data of that track to be overwritten by the new recording.
6. Press 8 RECORD/STOP to enter recording standby.
- To insert a rest at the beginning of the recording, press 20 START/STOP in place of 8 RECORD/STOP. Starting playback of another track that is already recorded simultaneously starts recording and inserts rests until you play something on the keyboard.
7. Playing on the keyboard automatically starts recording.
Starting playback of a recorded track simultaneously starts recording to the track you selected in step 5.
8. When you are finished recording, press 8 RECORD/STOP.
This causes the [RECORD] indicator to disappear.
- Pressing 20 PLAY/STOP will play back the recorded data.
9. Repeat steps 3 through 8 above for each of the tracks you want to overdub.
To change the recording destination song number during recording standby
1. Press 8 RECORD/STOP.
- If you started the operation from the Rhythm Mode, this enters recording standby. Advance to step 2.
- If you started the operation from the Song Bank Mode, the Digital Keyboard will display the recording setting screen, so step 2 is not necessary. Proceed to step 3.
- For information about the recording standby and recording setting screen, see "Starting a Recording" (page EN-88).
2. Long-press 8 RECORD/STOP.
This displays the recording setting screen and displays "RecTrkSy".
☐ RecTr kSy
3. Use the [1] (∠) and [3] (△) 12 number keys to display "MltRec 1".
031Mlt Rec 1
4. Use 13 [-] and [+], or the 11 dial to select the number of the song to which you want to record.
5. Press 8 RECORD/STOP.
This exits the recording setting screen and returns to recording standby.
To sound a pre-count or the metronome
1. Press 8 RECORD/STOP.
- If you started the operation from the Rhythm Mode, this enters recording standby. Advance to step 2.
- If you started the operation from the Song Bank Mode, the Digital Keyboard will display the recording setting screen, so step 2 is not necessary. Proceed to step 3.
- For information about the recording standby and recording setting screen, see "Starting a Recording" (page EN-88).
2. Long-press 8 RECORD/STOP.
This displays the recording setting screen and displays "RecTrkSy".
3. Use the [1] (∠) and [3] (△) 12 number keys to display the menu item whose setting you want to change.
- Initial default setting values are indicated by an asterisk (*).
| Item Name(Display) | Description Settings | |
| Precount(Precount) | Specifies whether or not to sound a pre-count before recording starts after you press20START/STOPwhile the recording setting screen is displayed.On: Sounds a one-measure pre-count.Off: Recording starts as soon as you press20START/STOPor play something on the keyboard, without sounding a pre-count. | On, Off* |
| Metronome(Metronom) | On: Sounds the metronome while recording.Off: Disables the metronome. | On, Off* |
4. Use 13 [-] and [+] to change the setting.
5. Press 8 RECORD/STOP.
This exits recording setting screen and returns to recording standby.
Re-recording Part of a Recorded Track (Overdubbing, Punch-in Recording)
The recording operations described in the table below can be performed on a recorded track.
| Overdub Recording | Records by adding performance data to a recorded track, without deleting the previously recorded data. |
| Punch-in Recording | Used for re-recording of specific parts of a song to correct errors, etc. |
Use fast forward and fast reverse to navigate to the location where you want to start overdubbing or punch-in recording, and then start recording. If you know the start point and end point of the section you want to re-record, you can also play back the song and start performing at the desired location.
To perform overdubbing or punch-in recording
- Press 7SONG BANK.
- Use the 12 number keys, 13 [-] and [+], or the 11 dial to select the number of the song that contains the track where you want to perform overdubbing or punch-in recording.
- Press 8 RECORD/STOP.
This displays the recording setting screen and causes the [RECORD] indicator to flash. - Use the [1] (∠) and [3] (△) 12 number keys to display "Rec Type".
- Use 13 [-] and [+] or the 11 dial to display either of the settings below.
| To perform this operation: Display this: | |
| Overdub Recording Over Dub | |
| Punch-in Recording Punch In | |
This causes "MEASURE" and "BEAT" to flash in the upper right corner of the display.
NOTE
- If you want to change mixer settings while recording, perform the procedure under "To configure mixer settings" (page EN-62). When recording to the system track, configure the mixer settings of each part of the SONG SYSTEM part group. When recording to a solo track, configure the mixer settings of the corresponding part of the SONG SOLO part group. (For example, when recording to Solo Track 3, configure the mixer settings of Part 3 of the SONG SOLO part group.)
6. Press 20 PLAY/STOP.
This starts song playback.
• Here, you could jump to step 9 of this procedure and immediately start recording.
- To stop the overdub recording/punch-in recording operation, press 20 PLAY/STOP again. This will cause the [RECORD] indicator to disappear from the display.
7. Use 18▶FF and 17◀REW to navigate to the location from which you want to start recording.
- Use 19 II PAUSE to pause or unpause song playback.
• After step 8, playing something on the keyboard in step 9 will start recording. After determining the point where you want to start recording, navigate to a location just before it, and then advance to step 9.
8. Press 22ACCOMP.
This causes "MEASURE" and "BEAT" to flash at high speed in the upper right corner of the display. If playback is paused, it becomes unpaused at this time.
- If you are recording to the system track, rhythm operation buttons become enabled at this time.
9. Use one of the operations below to start recording.
- Play something on the keyboard.
- If you are performing punch-in recording, you can also start recording by pressing 25 STORE. In this case, rests are inserted at the beginning of the song until you start playing something on the keyboard.
This will cause the "MEASURE" and "BEAT" indicators to stop flashing. The [RECORD] indicator also appears.
10. When you are finished recording, press 8 RECORD/STOP.
This causes the [RECORD] indicator to disappear.
To specify the recording start point and end point, and then perform overdubbing or punch-in recording
- Perform the procedure under "Looping Playback of Specific Song Measures (A-B Repeat)" (page EN-39).
- When performing the procedure, select the number of the song that contains the track where you want to perform overdubbing or punch-in recording.
- Perform steps 3 to 7 under "To perform overdubbing or punch-in recording" (page EN-92).
- Press 22ACCOMP.
This causes "MEASURE" and "BEAT" to flash at high speed in the upper right corner of the display.
- Recording will start automatically when playback reaches the start of the section you specified in step 1.
This will cause the "MEASURE" and "BEAT" indicators to stop flashing. The [RECORD] indicator also appears.
- Play the required notes on the keyboard.
- When playback reaches the end of the specified section, the [RECORD] indicator will disappear and recording will stop automatically.
Playing Back a Recorded Song
To play back a recorded song
- Press 7 SONG BANK.
- Use the 12 number keys, 13 [-] and [+], or the 11 dial to select the song number of a recorded song.
- Select the song you want to playback from among song numbers 31 to 40 (MltRec 1 to MltRec 10).
- Press 20PLAY/STOP.
This starts song playback.
- Operations that are supported during playback are almost the same as those for built-in song playback (with some exceptions). See "Playing a Built-in Song or a Song on a USB Flash Drive (Song Bank Mode)" (page EN-38).
To mute specific tracks
- Press 7 SONG BANK.
- Use the 12 number keys, 13 [-] and [+], or the 11 dial to select the song number of a recorded song.
- Press 14PART SELECT.
This displays "TrSyMute".
Current setting Setting name (Indicates system track)
oFF Tr SyMute
- Use the [1] (∠) and [3] (△) 12 number keys to select the track you want to mute.
- Use 13 [-] or [+] to mute or unmute the track you selected in step 4.
- Pressing 13 [+] mutes the track, while 13 [-] unmutes the track.
- Repeat steps 4 and 5 as required for other tracks.
- Press the [4] (EXIT) 12 number key.
- Press 20PLAY/STOP.
- This starts song playback in accordance with the track mute/unmute settings you configured.
- To stop song playback, press 20 PLAY/STOP.
- You can perform overdub recording while some tracks are muted. After performing the operation above, perform the procedure starting from step 3 under "To overdub another solo track while playing back recorded tracks" (page EN-91).
Copying a Recorded Song, Deleting a Recorded Song or Track
To copy a recorded song
- Press 7SONG BANK.
- Use the 12 number keys, 13 [-] and [+], or the 11 dial to select the number of the song you want to copy.
- Hold down 8 RECORD/STOP until "Song CIr" appears.
- Use the [1] (∠) and [3] (△) 12 number keys to display "SongCopy", and then press [6] (ENTER).
- Use 13 [-] and [+], or the 11 dial to select the copy destination song number and then press [6] (ENTER).
This displays "Sure?" - If there is already a user recording stored at the song number you specified as the copy destination, the message "Replace?" will appear.
- Press 13 [+] (YES) to execute the copy operation or 13 [-] (NO) to cancel.
- The message "Wait..." remains on the display while the copy operation is being performed. Do not perform any operation while this message is on the display. "Complete" appears on the display after the operation is complete.
- To exit the operation, press the [4] (EXIT) 12 number key.
To delete a recorded song
- Press 7 SONG BANK.
- Use the 12 number keys, 13 [-] and [+], or the 11 dial to select the number of the song you want to delete.
- Hold down 8 RECORD/STOP until "Song Clr" appears.
- Press the [6] (ENTER) 12 number key. This displays "Sure?"
- Press 13 [+] (YES) to delete or 13 [-] (NO) to cancel the delete operation.
- To exit the operation, press the [4] (EXIT) 12 number key.
To delete a specific track from a recorded song
- Press 7 SONG BANK.
- Use the 12 number keys, 13 [-] and [+], or the 11 dial to select the number of the song that contains the track you want to delete.
- Hold down 8 RECORD/STOP until "Song CIr" appears.
- Use the [1] (∠) and [3] (△) 12 number keys to display "TrkSyClr".
- Use 13 [-] and [+], or the 11 dial to select the track you want to delete.
- Press the [6] (ENTER) 12 number key. This displays "Sure?"
- Press 13 [+] (YES) to delete or 13 [-] (NO) to cancel the delete operation.
- Repeat steps 5 through 7 above for each of the tracks you want to delete.
- To exit the operation, press the [4] (EXIT) 12 number key.
Song Editing Mode
Enter the Song Editing Mode to perform the operations below.
- Editing an entire song in measure units (page EN-96)
- Editing a recorded song in track units (page EN-97)
- Editing a track of a recorded song in measure units (page EN-98)
- Editing a recorded song in event units (page EN-100)
- Inputting notes and chords one-by-one (page EN-103)
• Recorded song mixer settings (page EN-106)
To enter the Song Editing Mode
- Press 7 SONG BANK.
- Use the 12 number keys, 13 [-] and [+], or the 11 dial to select the number of the song you want to edit.
- Long-press 10 FUNCTION until the [EDIT] indicator appears.

- This enters the Song Editing Mode and "Song" appears on the display.
To exit the Song Editing Mode operation
NOTE
- Perform the operation below at the end of Song Editing Mode operation.
- Press 13 [+] (YES) to execute the Song Editing Mode operation, or 13 [-] (NO) to cancel.
- Pressing 13 [+] (YES) displays the message "Wait..." (operation in progress). Do not perform any operation while this message is on the display. "Complete" appears on the display after the operation is complete.
- To exit the Song Editing Mode, long-press the [4] (EXIT) 12 number key.
Editing an Entire Song in Measure Units (Song Editing)
Use the procedure below to edit an entire song (all of the tracks included in the song) in measure units.

NOTE
- In the procedure below, you specify a start measure (Point A or simply Point), and an end measure (Point B). The section specified by the procedure under “Looping Playback of Specific Song Measures (A-B Repeat)” (page EN-39) is used as the initial default for these settings.
To clear a specific range of measures within a song

NOTE
- Performing this operation makes the measures within the specified range blank measures. It does not affect the total number of measures in the song.
- Perform the procedure under "To enter the Song Editing Mode" (page EN-95).
- Press the [6] (ENTER) 12 number key. This displays "Clear".
- Press [6] (ENTER) again. This displays "Point A".
- Use 13 [-] and [+], or the 11 dial to select the number of the first measure of the range you want to clear, and then press [6] (ENTER). This displays "Point B".
- Use 13 [-] and [+], or the 11 dial to select the number of the last measure of the range you want to clear, and then press [6] (ENTER). This displays "Sure?"
- Perform the procedure under "To exit the Song Editing Mode operation" (page EN-95).
To copy an entire song in measure units and insert them into a specified location of the same song
- Perform the procedure under "To enter the Song Editing Mode" (page EN-95).
- Press the [6] (ENTER) 12 number key. This displays "Clear".
- Use the [1] (∠) and [3] (△) 12 number keys to display "Copy", and then press [6] (ENTER). This displays "Point A".
- Use 13 [-] and [+], or the 11 dial to select the number of the first measure of the range you want to copy, and then press [6] (ENTER). This displays "Point B".
- Use 13 [-] and [+], or the 11 dial to select the number of the last measure of the range you want to copy, and then press [6] (ENTER). This displays "DstPoint".
- Use 13 [-] and [+], or the 11 dial to select the number of the first measure of the copy destination, and then press [6] (ENTER). This displays "Sure?"
- Perform the procedure under "To exit the Song Editing Mode operation" (page EN-95).
To insert blank measures at a specified location in a song
- Perform the procedure under "To enter the Song Editing Mode" (page EN-95).
- Press the [6] (ENTER) 12 number key. This displays "Clear".
- Use the [1] (∠) and [3] (△) 12 number keys to display "Insert", and then press [6] (ENTER). This displays "Point".
- Use 13 [-] and [+], or the 11 dial to select the measure from which you want to insert blank measures, and then press [6] (ENTER). This displays "Length".
- Use 13 [-] and [+], or the 11 dial to specify the number of blank measures you want to insert, and then press [6] (ENTER). This displays "Sure?"
- Perform the procedure under "To exit the Song Editing Mode operation" (page EN-95).
To delete a specific range of measures from a song

NOTE
- Performing this procedure deletes the measures in the specified range, shifting the measures following the deleted range forward to fill in the space that is created. The total number of measures in the song is reduced by the number of measures that are deleted.
- Perform the procedure under "To enter the Song Editing Mode" (page EN-95).
- Press the [6] (ENTER) 12 number key. This displays "Clear".
- Use the [1] (∠) and [3] (△) 12 number keys to display "Delete", and then press [6] (ENTER). This displays "Point A".
- Use 13 [-] and [+], or the 11 dial to select the number of the first measure of the range you want to delete, and then press [6] (ENTER). This displays "Point B".
- Use 13 [-] and [+], or the 11 dial to select the number of the last measure of the range you want to delete, and then press [6] (ENTER). This displays "Sure?"
- Perform the procedure under "To exit the Song Editing Mode operation" (page EN-95).
Editing a Recorded Song in Track Units
The editing operations in this section affect an entire track in a recorded song.
To delete a specified track
- Perform the procedure under "To enter the Song Editing Mode" (page EN-95).
- Use the [1] (∠) and [3] (△) 12 number keys to display "WholeTrk", and then press [6] (ENTER). This displays "Clear".
- Press [6] (ENTER) again. This displays "Trk Sy"
- Use 13 [-] and [+] or the 11 dial to specify the target track, and then press [6] (ENTER). This displays "Sure?"
- Perform the procedure under "To exit the Song Editing Mode operation" (page EN-95).
To copy a specified solo track to another solo track
- Perform the procedure under "To enter the Song Editing Mode" (page EN-95).
- Use the [1] (∠) and [3] (△) 12 number keys to display "WholeTrk", and then press [6] (ENTER). This displays "Clear".
- Use the [1] (∠) and [3] (△) keys to display "Copy", and then press [6] (ENTER). This displays "SrcTrk 1".
- Use 13 [-] and [+] or the 11 dial to specify the source track of the copy operation, and then press [6] (ENTER). This displays "DstTrk 1".
- Use 13 [-] and [+] or the 11 dial to specify the destination track of the copy operation, and then press [6] (ENTER). This displays "Sure?"
- Perform the procedure under "To exit the Song Editing Mode operation" (page EN-95).
To delete specific data from a specified track

NOTE
- The operation below deletes only the data in the table below from the specified tracks.
| Target Track Deleted Data | |
| System Track Note events | |
| Solo track Note events | |
- Perform the procedure under "To enter the Song Editing Mode" (page EN-95).
- Use the [1] (∠) and [3] (△) 12 number keys to display "WholeTrk", and then press [6] (ENTER).
This displays "Clear".
- Use the [1] (∠) and [3] (△) keys to select the data you want to delete.
| To delete this: Display this: | |
| Note events Note Clr | |
| System track accompaniment operation data | AcompClr |
| All data except system track accompaniment operations and note events | OtherClr |
| All data except solo track note events |
- If you selected "AcompClr", advance to step 6. If you selected anything else, advance to step 4.
- Press [6] (ENTER).
This displays "Trk Sy". - Use 13 [-] and [+] or the 11 dial to specify the target track.
- Press [6] (ENTER).
This displays "Sure?" - Perform the procedure under "To exit the Song Editing Mode operation" (page EN-95).
Editing a Track of a Recorded Song in Measure Units
You can quantize, key shift, delete, or perform other operations in measure units for each track included in a recorded song.

NOTE
- Quantize automatically corrects the timing of notes recorded in a track to match a note value being used as the quantize reference (note event note on timing).
• Key shift offsets the pitch of recorded notes (note events) in semitone steps. - In the procedure below, you specify a start measure (Point A or simply Point), and an end measure (Point B). The section specified by "Looping Playback of Specific Song Measures (A-B Repeat)" (page EN-39) is used as the initial default for this specification.
To quantize a specified track in measure units
- Perform the procedure under "To enter the Song Editing Mode" (page EN-95).
- Use the [1] (∠) and [3] (△) 12 number keys to display “Trk Meas”, and then press [6] (ENTER).
This displays "Quantize". - Press [6] (ENTER) again.
This displays "Trk Sy" - Use 13 [-] and [+] or the 11 dial to specify the target track, and then press [6] (ENTER).
This displays "Point A". - Use 13 [-] and [+], or the 11 dial to select the number of the first measure of the range you want to quantize, and then press [6] (ENTER).
This displays "Point B". - Use 13 [-] and [+], or the 11 dial to select the number of the last measure of the range you want to quantize, and then press [6] (ENTER).
This displays "Value". - Use 13 [-] and [+] or the 11 dial to specify the note value to be used as the quantize reference note.
| Display Description | |
| 4, 8, 16, 32 Quarter note, eighth note, sixteenth note, thirty-second note | |
| 4d, 8d, 16d, 32d Dotted notes | |
| 4t, 8t, 16t, 32t Triplet notes |
-
Press [6] (ENTER). This displays "Sure?"
-
Perform the procedure under "To exit the Song Editing Mode operation" (page EN-95).
To key shift a specified track in measure units
- Perform the procedure under "To enter the Song Editing Mode" (page EN-95).
- Use the [1] (∠) and [3] (△) 12 number keys to display "Trk Meas", and then press [6] (ENTER). This displays "Quantize".
- Use the [1] (∠) and [3] (△) keys to display "KeyShift", and then press [6] (ENTER). This displays "Trk Sy"
- Use 13 [-] and [+] or the 11 dial to specify the target track, and then press [6] (ENTER). This displays "Point A".
- Use 13 [-] and [+], or the 11 dial to select the number of the first measure of the range you want to key shift, and then press [6] (ENTER). This displays "Point B".
- Use 13 [-] and [+], or the 11 dial to select the number of the last measure of the range you want to key shift, and then press [6] (ENTER). This displays "Value".
- Use 13 [-] and [+], or the 11 dial to specify the key shift setting value.
- You can specify a value of the range of -24 to 24 . Lowering the setting value by one lowers the pitch by one semitone, while raising the value raises the pitch.
- Press [6] (ENTER). This displays "Sure?"
- Perform the procedure under "To exit the Song Editing Mode operation" (page EN-95).
To delete a specified track in measure units
- Perform the procedure under "To enter the Song Editing Mode" (page EN-95).
- Use the [1] (∠) and [3] (△) 12 number keys to display "Trk Meas", and then press [6] (ENTER). This displays "Quantize".
- Use the [1] (∠) and [3] (△) keys to display "Clear", and then press [6] (ENTER). This displays "Trk Sy"
- Use 13 [-] and [+] or the 11 dial to specify the target track, and then press [6] (ENTER). This displays "Point A".
- Use 13 [-] and [+], or the 11 dial to select the number of the first measure of the range you want to delete, and then press [6] (ENTER). This displays "Point B".
- Use 13 [-] and [+], or the 11 dial to select the number of the last measure of the range you want to delete, and then press [6] (ENTER). This displays "Sure?"
- Perform the procedure under "To exit the Song Editing Mode operation" (page EN-95).
To copy a specified track in measure units and insert them into a specified location of the same track
- Perform the procedure under "To enter the Song Editing Mode" (page EN-95).
- Use the [1] (∠) and [3] (△) 12 number keys to display “Trk Meas”, and then press [6] (ENTER).
This displays "Quantize". - Use the [1] (∠) and [3] (△) keys to display "Copy", and then press [6] (ENTER).
This displays "Trk Sy" - Use 13 [-] and [+] or the 11 dial to specify the target track, and then press [6] (ENTER).
This displays "Point A". - Use 13 [-] and [+], or the 11 dial to select the number of the first measure of the range you want to copy, and then press [6] (ENTER).
This displays "Point B". - Use 13 [-] and [+], or the 11 dial to select the number of the last measure of the range you want to copy, and then press [6] (ENTER).
This displays "DstPoint". - Use 13 [-] and [+], or the 11 dial to select the number of the first measure of the copy destination, and then press [6] (ENTER).
This displays "Sure?" - Perform the procedure under "To exit the Song Editing Mode operation" (page EN-95).
Editing a Recorded Song in Event Units (Event Editor)
The MIDI recorder records operations as data called "events". For example, pressing a keyboard key causes multiple events to be recorded: the timing of the key press, the pressed key (pitch), press time (note length), and key pressure (note volume).
Event editing can be used to edit the events below.
- Note events
- Tone number events
• Rhythm number events (system track only)
• Auto Accompaniment chord events (system track only)
Event Display
During event editing, you can use the [2] (√) or [5] (∧) 12 number keys to scroll between individual events. Each event appears on the display as described below.
Note Events
With this Digital Keyboard, you can edit the following three note event parameters: note number, velocity, and gate time. If a note event is displayed during event editing, the first parameter that appears is the note number.
●Note Number Display
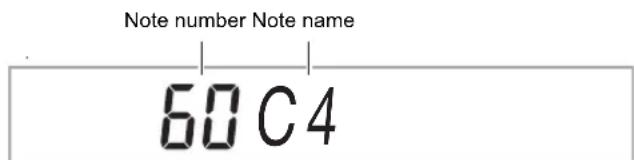
Each press of the [1] (∠) or [3] (△) 12 number key switches the displayed note event to another parameter.
●Velocity Display

●Gate Time (Beat) Display

●Gate Time (Tick) Display

■Tone Number Event
The tone number is displayed by the event name "Tone".
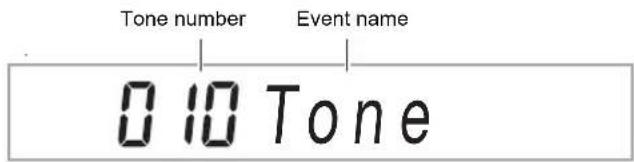
■Rhythm Number Event
The rhythm number is displayed by the event name "Rhythm".
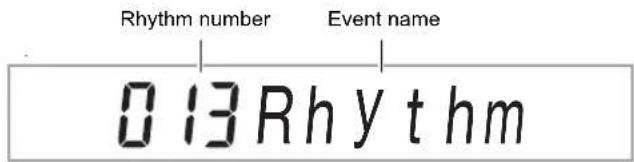
■Auto Accompaniment Chord Event
Only the chord root and type of Auto Accompaniment chords are displayed.
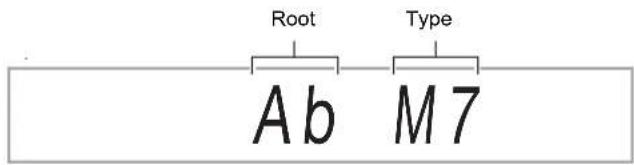
An event named "NonChord" is displayed when a chord is configured not to sound.
■End of Track
"EOT" (End Of Track) is displayed when the end of the target track (part) is reached.
EOT
Event Setting Ranges
The ranges of the event settings are shown in the table below.
| Event Parameter (Display) Settings | ||
| Notes Note Number | Number (C1 to G9) 0 to 127 | |
| Velocity (Velocity) 1 to 127 | ||
| Gate Time Beat (GateBeat) 0 to 340 | ||
| Gate Time Tick (GateTick) 0 to 95 | ||
| Tone Number | Tone Number (Tone) 1 to 900 | |
| Rhythm Number | Rhythm Number (Rhythm) * | 1 |
| Chord Chord type or “NonChord”* 2 | *3 | |
*1CT-X9000IN: 1 to 408, CT-X8000IN: 1 to 358
*2See "Auto Accompaniment Chord Event" (page EN-101).
*3 All chord types that can be fingered on the accompaniment keyboard or "NonChord". See "Fingering Guide" (page A-1).
To edit an event
- Perform the procedure under "To enter the Song Editing Mode" (page EN-95).
- Use the [1] (∠) and [3] (△) 12 number keys to display "TrkEvent", and then press [6] (ENTER).
This displays "Trk Sy"
- Use 13 [-] and [+] or the 11 dial to specify the event edit target track, and then press [6] (ENTER).
This displays the [EVENT] indicator to the left of the [EDIT] indicator.
• This displays the event at the beginning of the track.
- Use the [2] (√) and [5] (∧) 12 number keys to display the event whose parameters you want to change.
- Event location information (measure, beat, tick) is shown on the right side of the display.
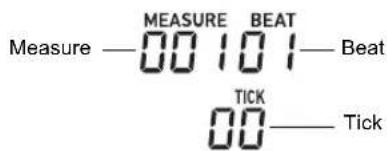
- Displaying a note event causes a confirmation tone (the note of the note event) to sound.
- While editing the system track, one of the indicators below will be displayed. The displayed indicator indicates the part where the displayed event is recorded.
| Part | Display |
| UPPER 1 | U1 |
| UPPER 2 | U2 |
| LOWER 1 | L1 |
| LOWER 2 | L2 |
| Auto Harmonize | AUTO HARMONIZE |
| Phrase Pad 1 to 4 | P1 to P4 |
-
Depending on the event you are editing, perform one of the procedures below.
-
For information about event status indicators and how to interpret indicators, see "Event Display" (page EN-100).
- Pressing 20 PLAY/STOP while editing an event will play back the recorded data from the beginning of the measure that includes the displayed event.
Note Events
(1) Use the [2] (∨) and [5] (∧) 12 number keys to display a note event.
(2) Use the [1] (∠) and [3] (△) keys to display the parameter you want to change.
(3) Use 13 [-] and [+] or the 11 dial to change the setting value of the displayed parameter.
- You can also use the keyboard to specify note numbers.
- The gate time beat (GateBeat) can be specified in the range of 0 to 340 for a song with a time signature from 2/4 to 8/4, and in the range of 0 to 680 for a song with a time signature from 2/8 to 16/8.
- The gate time tick (GateTick) can be specified in the range of 0 to 95 for a song with a time signature from 2/4 to 8/4, and in the range of 0 to 47 for a song with a time signature from 2/8 to 16/8.
(4) Repeat steps (2) and (3) for each of the parameters you want to change.
NOTE
- While a note event is displayed, you can use the [2] (√) and [5] (∧) 12 number keys to scroll between events. If the event you scroll to is a note event, the same parameter remains displayed.
■Tone Number Events
(1) Use the [2] (∨) and [5] (∧) 12 number keys to display “Tone” (Tone Number Event).
(2) If you want to check the name of the tone assigned to the event, press 10 FUNCTION.
- This displays the tone name. If you want to leave the tone name displayed while changing the tone number, go to step (3).
- Press 10 FUNCTION again to return to the "Tone" display.
(3) Use 13 [-] and [+] or the 11 dial to change the tone number.
• To jump between categories, hold down
4 CATEGORY and press 13 [-] (first tone in the previous category) or [+] (first tone in the next category).
■Rhythm Number Event (System Track Only)
(1) Use the [2] (√) and [5] (∧) 12 number keys to display "Rhythm" (Rhythm Number Event).
(2) If you want to check the name of the rhythm assigned to the event, press 10 FUNCTION.
- This displays the rhythm name. If you want to leave the rhythm name displayed while changing the rhythm number, go to step (3).
- Press 10 FUNCTION again to return to the "Rhythm" display.
(3) Use 13 [-] and [+] or the 11 dial to change the rhythm number.
• To jump between categories, hold down
4 CATEGORY and press 13 [-] (first rhythm in the previous category) or [+] (first rhythm in the next category).
■Chord Event (System Track Only)
(1) Use the [2] (∨) and [5] (∧) 12 number keys to display a chord event.
(2) If there is no [ACCOMP] indicator displayed, press 22 ACCOMP to display it.
(3) Play the chord you want on the accompaniment keyboard.
- This changes the chord type to the chord you play.
-
For details about chord fingering modes, see "Changing Accompaniment Keyboard Settings" (page EN-47).
-
To exit the event editing operation, press the [4] (EXIT) 12 number key.
- To exit the Song Editing Mode, long-press the [4] (EXIT) 12 number key again.
To delete an event
- Perform the procedure under "To enter the Song Editing Mode" (page EN-95).
- Perform steps 2 and 3 under "To edit an event" (page EN-101).
- Use the [2] (√) and [5] (∧) 12 number keys to display the event you want to delete.
- Press the [9] (DELETE) 12 number key. • This deletes the displayed event.
To key shift events in measure units
- Perform the procedure under "To enter the Song Editing Mode" (page EN-95).
- Perform steps 2 and 3 under "To edit an event" (page EN-101).
- Press 28 REGISTRATION [8] (EDIT MENU).
- Use the [1] (∠) and [3] (△) 12 number keys to display "KeyShift", and then press [6] (ENTER).
- Perform steps 5 through 9 under "To key shift a specified track in measure units" (page EN-99).
To delete events in measure units
- Perform the procedure under "To enter the Song Editing Mode" (page EN-95).
- Perform steps 2 and 3 under "To edit an event" (page EN-101).
- Press 28 REGISTRATION [8] (EDIT MENU).
- Use the [1] (∠) and [3] (△) 12 number keys to display “Clear”, and then press [6] (ENTER).
- Perform steps 5 through 7 under "To delete a specified track in measure units" (page EN-99).
To copy events in measure units
- Perform the procedure under "To enter the Song Editing Mode" (page EN-95).
- Perform steps 2 and 3 under "To edit an event" (page EN-101).
- Press 28 REGISTRATION [8] (EDIT MENU).
- Use the [1] (∠) and [3] (△) 12 number keys to display "Copy", and then press [6] (ENTER).
- Perform steps 5 through 8 under "To copy a specified track in measure units and insert them into a specified location of the same track" (page EN-100).
Inputting Notes and Chords One-by-one (Step Input)
Step input is an event editor function. You can use step input to specify the length and pitch of each individual note (note event). In the system track, you also can perform step input of Auto Accompaniment chords (chord events) as well.
NOTE
- Performing step input into a track that already contains recorded data will not delete the existing data. This means you can use step input to add to existing recorded data.
- During step input, use the 28 REGISTRATION buttons to input notes, rests, etc.
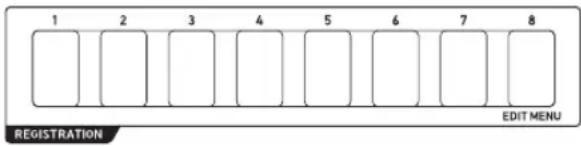
To input note events using step input
- Perform the procedure under "To enter the Song Editing Mode" (page EN-95).
- Perform steps 2 and 3 under "To edit an event" (page EN-101), and confirm that the [EVENT] indicator is displayed.
- Use the [2] (√) and [5] (∧) 12 number keys to display the event within the measure from which you want to start step input.
-
The step input start point is the beginning of the measure.
-
Press 28 REGISTRATION [1].
This displays the [STEP] indicator and enters the Step Input Mode.
- During a step input operation, the current input point (measure, beat, tick) is shown on the right side of the display.
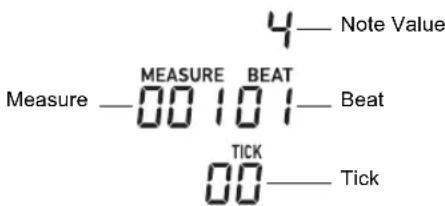
5. When you are editing the system track, you can specify the event input target part.
• See "Selecting a System Track Part" (page EN-105).
- This step is not necessary when you are editing a solo track. Proceed to step 6.
6. If necessary, specify the velocity (keyboard touch) and gate time rate (actual length) of the note event you are about to input.
- The velocity and gate time rate settings you specify here are applied to all of the note events you input until you change them.
- Velocity can be specified as a value (1 to 127) or by actually pressing a key (which sets a velocity in accordance with your key pressure). The initial default is 100.
- The gate time rate specifies the note length as a percentage (1 to 100%) of the note value you specify in step 7. For example, when the gate time rate is 80% (initial default), a quarter note (96 ticks) becomes 76 ticks (96×0.8=76.8, decimal part cut off).
| To specify this: Perform this operation: | |
| Velocity | (1) Press28 REGISTRATION [4].(2) Use13 [-] and [+], or the11 dial to specify a value or select “Key On”.*(3) Press the [4] (EXIT)12 number key. |
| Gate Time Rate | (1) Press28 REGISTRATION [5].(2) Use13 [-] and [+] or the11 dial to specify a percent value.(3) Press the [4] (EXIT)12 number key. |
*When "Key On" is selected, the velocity of the keyboard press when inputting the note event is reflected in the velocity value.
7. Specify the note value (event length) of the event you are about to input in step 8.
| To input this note value: | Press this 12 number key: |
| Whole [1] | |
| Half [2] | |
| Quarter [3] | |
| Eighth [4] | |
| Sixteenth [5] | |
| Thirty-second [6] | |
| Dotted note*1 | [7] |
| Triplet*1 | [8] |
- The note value specified in accordance with the key input will appear on the right side of the display.
*1 If you want to input a dotted note or triplet note, first press a key from [1] to [6], and then press [7] or [8]. To input a dotted quarter note, for example, press [3] and then [7].
8. Specify the event to be input.
| To input this: Perform this operation: | |
| Note event | After specifying a note value in step 7, press the keyboard key for the note you want to input. Pressing multiple keyboard keys at the same time inputs a chord. |
| Rest | After specifying a note value in step 7, press23REGISTRATION [2]. |
| Tie*2 | After specifying a note value of a note to tie with the previous note event in step 7, press28REGISTRATION [3]. |
*2Extends the length of the previously input note event. For example, if you input a quarter note event and wish to extend it by an eighth note, perform the following button operation: 12 number key [4] (eighth note) -
28 REGISTRATION [3] (Tie).
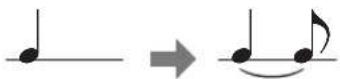
- Inputting an event advances the input point by the note value amount you specified in step 7.
9. Repeat steps 5 through 8 as required.
- The operation in step 5 is not necessary as long as the target part remains the same.
10. To exit the Step Input Mode, press 28 REGISTRATION [1].
This causes the [STEP] indicator to disappear.
■Selecting a System Track Part
When the system track is specified as the event edit target track, you can use the buttons below to select the part to be edited. You can find out the selection status of each part by checking for the indicators shown in the "Display" column of the table.
| To select this part: | Press this button: Display | |
| UPPER 128 | REGISTRATION [7] | U1 |
| UPPER 236 | UPPER LAYER | U2 |
| LOWER 135 | SPLIT | L1 |
| LOWER 2 | 36 UPPER LAYER(Long-press) | L2 |
| Auto Harmonize | 34 AUTO HARMONIZE | AUTO HARMONIZE |
| Phrase Pad 1 | 26 PHRASE PAD [P1] | P1 |
| Phrase Pad 2 | 26 PHRASE PAD [P2] | P2 |
| Phrase Pad 3 | 26 PHRASE PAD [P3] | P3 |
| Phrase Pad 4 | 26 PHRASE PAD [P4] | P4 |
- The UPPER 1 and UPPER 2 parts can be selected at the same time. The LOWER 1 and LOWER 2 parts can be selected at the same time. Step inputting an event while two parts are selected will simultaneously input the same event into both parts.
- Auto harmonize part and the parts of phrase pads 1 through 4 can only be selected individually. Selecting these parts will cause the indicators of the other parts to disappear.
To input chord events using step input
- Perform the procedure under "To enter the Song Editing Mode" (page EN-95).
- Use the [1] (∠) and [3] (△) 12 number keys to display "TrkEvent", and then press [6] (ENTER).
This displays "Trk Sy"
- Use 13 [-] and [+] or the 11 dial to specify the system track, and then press [6] (ENTER).
This displays the [EVENT] indicator. - If there is no [ACCOMP] indicator displayed, press 22 ACCOMP to display it.
- Use the [2] (√) and [5] (∧) 12 number keys to display the event within the measure from which you want to start step input.
- The step input start point is the beginning of the measure.
- Press 28 REGISTRATION [1].
This displays the [STEP] indicator and enters the Step Input Mode. - If necessary, specify the chord event velocity (keyboard touch).
- For information about how to specify the setting, see step 6 under "To input note events using step input" (page EN-103).
- Specify the event length of the event you will input in step 9.
- For information about how to specify the setting, see step 7 under "To input note events using step input" (page EN-103).
- Specify the event to be input.
| To input this: Perform this operation: | |
| Chord Event After | specifying an event length in step 8, use the accompaniment keyboard to specify a chord.*1 |
| Rest (NonChord) | After specifying an event length in step 8, press23REGISTRATION [2]. |
| Tie*2 | After specifying the event length of a chord to tie with the previous chord event in step 8, press28REGISTRATION [3]. |
*1 For details about chord fingering modes, see "Changing Accompaniment Keyboard Settings" (page EN-47).
*2For information about how to specify this setting, see step 8 under "To input note events using step input" (page EN-103).
- Repeat steps 7 through 9 as required.
- To exit the Step Input Mode, press 28 REGISTRATION [1].
This causes the [STEP] indicator to disappear.
Recorded Song Mixer Settings
You can configure the mixer settings of each part of the system track and the solo tracks of a recorded song.
To configure the mixer settings of a recorded song
1. Perform the procedure under "To enter the Song Editing Mode" (page EN-95).
2. Long-press 9 PART (MIXER) until the [MIXER] indicator appears.
- To configure the mixer settings of the system track, configure the settings of each part of the SONG SYSTEM part group. To configure the mixer settings of a solo track, configure the settings of each part of the SONG SOLO part group. For information about the parts within a part group, see "List of Parts for Each Mixer Part Group" (page EN-63).
3. Select the part group whose mixer settings you want to configure.
(1) Press 9 PART and confirm that the lamp to the left of the button is lit.
(2) Use 13 [-] and [+] to select the part group (SONG SYSTEM or SONG SOLO) whose settings you want to configure.
(3) Press 9 PART and confirm that the lamp to the left of the button is unlit.
4. Use the [1] (∠) and [3] (△) 12 number keys to select the part whose settings you want to configure with the mixer.
5. Use the [2] (√) and [5] (∧) 12 number keys to display the menu item you want to change.
- Initial default setting values are indicated by an asterisk (*).
| Item Name(Display) | Description Settings | |
| Part On/Off(Part) | Specifies on/off for the selected part. | On*, Off |
| Tone (Tone) S | Specifies the tone of the selected part. | 1 to 900 |
| Volume(Volume) | Adjusts the volume level of the selected part. | 0 to 127* |
| Pan (Pan) Spec | Specifies the stereo pan position of the selected part. 0 indicates the center, while a smaller value shifts to the left and a larger value shifts to the right. | -64 to 0* to 63 |
| Coarse Tune(Coarse) | Shifts the pitch of the part in semitone steps. | -24 to 0* to 24 |
| Fine Tune(Fine) | Fine tunes the pitch of the part in cent units. | -99 to 0* to 99 |
| Bend Range(Bend Rng) | Adjusts how much the sound changes when the pitch bend wheel is rotated. | 0 to 2* to 24 |
| Reverb Send(Rev Send) | Specifies how much reverb is applied to the selected part. | 0 to 40* to 127 |
| Chorus Send(Cho Send) | Specifies how much chorus is applied to the selected part. | 0* to 127 |
| Delay Send(Dly Send) | Specifies how much delay is applied to the selected part. | 0* to 127 |
6. Use 13 [-] and [+] or the 11 dial to change the setting value.
7. When mixer settings are the way you want, press the [4] (EXIT) 12 number key.
Configuring Function Settings
Use the procedures in this section to configure master Digital Keyboard settings. The procedure uses the 10 FUNCTION button.

IMPORTANT!
- When power is turned off by pressing ⏻ (power) or by triggering of Auto Power Off (page EN-9) while Auto Resume (page EN-10) is turned off, all settings, except for those below, are returned to their initial defaults. Equalizer, Tuning, Registration Memory Freeze Target, Pedal 2 type, Expression pedal calibration, Tap rhythm start, Examination Mode, Display contrast
To configure function settings with the 10 FUNCTION button
1. Press 10FUNCTION.
This displays the [FUNCTION] indicator and the main menu item.
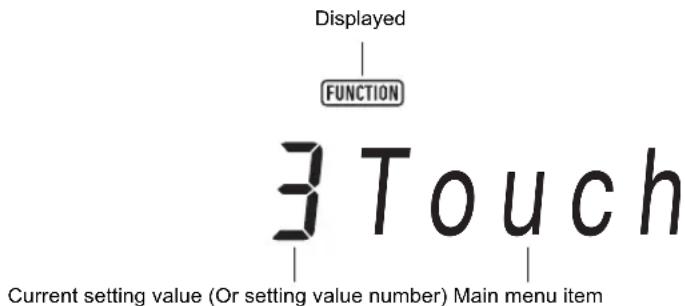
- The display shown here is one example for explanatory purposes. The actual display that appears when you press 10FUNCTION is different.
2. Use the [1] (∠) and [3] (△) 12 number keys to display the menu item you want to change.
- If the [ENTER] indicator is displayed, execute the steps below. If it is not displayed, advance to step 3.
(1) Press the [6] (ENTER) 12 number key. This changes to the sub-menu item display.
(2) Use the [1] (∠) and [3] (△) keys to display the sub-menu for the changes you want to make.
• After the sub-menu item appears, advance to step 3.
- To return to a main menu item from a sub-menu item, press the [4] (EXIT) 12 number key.
- If the [ENTER] indicator is displayed while a sub-menu item is displayed, it means there is another sub-menu under the currently displayed one. In this case, repeat steps (1) and (2).
3. Use 13 [-] and [+] or the 11 dial to change the setting value.
- Pressing the [0] (NUM) 12 number key displays the [NUM] indicator, indicating that numeric input with the 12 number keys is enabled (page EN-14). However, a setting item that inputs a value with a decimal part, only the integer part can be input using the 12 number keys. The decimal part must be specified using 13 [-] and [+] or the 11 dial.
4. When the setting is the way you want, long-press the [4] (EXIT) 12 number key to exit the setting screen.
This causes the [FUNCTION] indicator to disappear.
Function Setting Item List
| Function Name | Display | Settings | See Page |
| Touch Response Touch 1 to 4 EN-28 | |||
| Chord Mode ChordMod 1 to 6 EN-49 | |||
| Phrase Pad Phr Pad – EN-53 | |||
| Phrase set switching Phr Set 1 to 25 EN-53 | |||
| Pad 1 Pad 1 – | EN-54 | ||
| Looped playback | Loop On, Off | ||
| Key shift | KeyShift –24 to 24 | ||
| Timing sync | TimingSy | 1 to 3 | |
| Chord Sync | ChordSyn | On, Off | |
| Break point | Break Pt | 1 to 12 | |
| Pad 2*1 | Pad 2 | – | |
| Pad 3*1 | Pad 3 | – | |
| Pad 4*1 | Pad 4 | – | |
| Controllers | Cntrller | – | – |
| Pedals | Pedal | – | EN-29 |
| Pedal 1 effect | Pd1Efect | 1 to 4 | |
| Target part for Pedal 1 effect | Pd1Enabl | – | |
| Pedal 1 effect on/off for tone part UPPER 1 | U1Pd1Enb | On, Off | |
| Pedal 1 effect on/off for tone part UPPER 2 | U2Pd1Enb | On, Off | |
| Pedal 1 effect on/off for tone part LOWER 1 | L1Pd1Enb On, Off | ||
| Pedal 1 effect on/off for tone part LOWER 2 | L2Pd1Enb On, Off | ||
| Pedal 2 effect | Pd2Efect | 1 to 4 | |
| Target part for Pedal 2 effect | Pd2Enabl | – | |
| Pedal 2 effect on/off for tone part UPPER 1 | U1Pd2Enb | On, Off | |
| Pedal 2 effect on/off for tone part UPPER 2 | U2Pd2Enb | On, Off | |
| Pedal 2 effect on/off for tone part LOWER 1 | L1Pd2Enb On, Off | ||
| Pedal 2 effect on/off for tone part LOWER 2 | L2Pd2Enb On, Off | ||
| Pedal 2 type | Pd2 Type | 1 to 3 | |
| Expression pedal calibration | ExPCalib | – | |
| Pitch Bend | PitchBnd | – | EN-32 |
| Pitch Bend Range | Range | 0 to 24 | |
| Tone Part UPPER 1 pitch bend on/off | U1Enable | On, Off | |
| Tone Part UPPER 2 pitch bend on/off | U2Enable | On, Off | |
| Tone Part LOWER 1 pitch bend on/off | L1Enable | On, Off | |
| Tone Part LOWER 2 pitch bend on/off | L2Enable | On, Off | |
| CT-X9000IN: MODULATION/ASSIGNABLE Mod/Asgn - EN-32 | |||
| Button operation Btn Act 1 to 2 EN-33 | |||
| Button function Btn Func 1 to 2 EN-33 | |||
| Value when modulation is on ModValue 0 to 127 EN-33 | |||
| Target DSP module DSPModule 1 to 28 | EN-33Target DSI | ||
| ^2 | |||
| Value when DSP is on | DSPValue | - | |
| Target part for MODULATION/ASSIGNABLE button | PartEnbl | - | EN-33 |
| Tone part UPPER 1 effect on/off | U1Enable | On, Off | |
| Tone part UPPER 2 effect on/off | U2Enable | On, Off | |
| Tone part LOWER 1 effect on/off | L1Enable | On, Off | |
| Tone part LOWER 2 effect on/off | L2Enable | On, Off | |
| Portamento | Portamento | - | EN-32 |
| Tone part UPPER 1 portamento time | U1 Port. | 0 to 127 | |
| Tone part UPPER 2 portamento time | U2 Port. | 0 to 127 | |
| Tone part LOWER 1 portamento time | L1 Port. | 0 to 127 | |
| Tone part LOWER 2 portamento time | L2 Port. | 0 to 127 | |
| Auto Harmonize/Arpeggiator | AHar/Arp | - | EN-27, 51 |
| AUTO HARMONIZE/ARPEGGIATOR button assignment | BtnAsign | 1 to 2 | EN-27, 51 |
| Auto Harmonize type | AHarType 1 to 12 | EN-51 | |
| Arpeggiator type | Arp Type | 1 to 150 | EN-27 |
| Arpeggiator hold | ArpegHld | On, Off | |
| Arpeggiator part | ArpgPart | 1 to 2 | |
| Octave Shift | Octave | - | EN-34 |
| Tone Part UPPER 1 Octave Shift | U1 Oct. | -3 to 3 | |
| Tone Part UPPER 2 Octave Shift | U2 Oct. | -3 to 3 | |
| Tone Part LOWER 1 Octave Shift | L1 Oct. -3 to 3 | ||
| Tone Part LOWER 2 Octave Shift | L2 Oct. -3 to 3 | ||
| Octave Shift button corresponding part | Btn Trgt | - | |
| Tone Part UPPER 1 button part on/off | U1OctBtn | On, Off | |
| Tone Part UPPER 2 button part on/off | U2OctBtn | On, Off | |
| Tone Part LOWER 1 button part on/off | L1OctBtn | On, Off | |
| Tone Part LOWER 2 button part on/off | L2OctBtn | On, Off | |
| Split Split - EN-20, 49 | |||
| Split Point Split Pt 36 to 96 EN-20 | |||
| Lower Point Lower Pt 36 to 96 EN-50 | |||
| Chord Point Chord Pt 36 to 96 EN-50 | |||
| Chord Input Priority Mode Cd Prior On, Off EN-50 | |||
| Auto Accompaniment volume AcompVol 0 to 127 EN-44 | |||
| Song volume Song Vol 0 to 127 EN-39 | |||
| Tuning | Tune | - | EN-36 |
| Master Digital Keyboard tuning | MstrTune | 415.5 to 465.9 | EN-36 |
| Part coarse tune | PrtCoars - | EN-36 | |
| Tone part UPPER 1 coarse tune | U1CsTune | -24 to 24 | |
| Tone part UPPER 2 coarse tune | U2CsTune | -24 to 24 | |
| Tone part LOWER 1 coarse tune | L1CsTune | -24 to 24 | |
| Tone part LOWER 2 coarse tune | L2CsTune | -24 to 24 | |
| Part fine tune | Prt Fine | - | EN-36 |
| Tone part UPPER 1 fine tune | U1FnTune | -99 to 99 | |
| Tone part UPPER 2 fine tune | U2FnTune | -99 to 99 | |
| Tone part LOWER 1 fine tune | L1FnTune -99 to 99 | ||
| Tone part LOWER 2 fine tune | L2FnTune -99 to 99 | ||
| Scales | Scale | - | EN-36 |
| Preset scale type | Type | 1 to 17 | EN-37 |
| Preset scale root | Root | 1 to 12 | |
| Auto Accompaniment scale | AcompScl | On, Off EN-37 | |
| Scale fine tune | FineTune | - | EN-37 |
| Part fine tune for C notes | C Tune | -99 to 99 | |
| Part fine tune for Dbnotes | DbTune | -99 to 99 | |
| : | : | : | |
| Part fine tune for B notes | B Tune | -99 to 99 | |
| Reverb | Reverb | *3 | EN-22 |
| Chorus | Chorus | *3 | EN-22 |
| Delay | Delay | *3 | EN-22 |
| Equalizer | Equalizr | *3 | EN-25 |
| CT-X9000IN: Equalizer user settings User EQ - | EN-26 | ||
| Low-range setting EQ Low - | |||
| Low-range cutoff frequency Low Freq 1 to 13 | |||
| Low-range gain Low Gain -12 to 12 | |||
| Mid-range 1 setting EQ Mid1 - | |||
| Mid-range 1 center frequency Mid1Freq 1 to 20 | |||
| Mid-range 1 gain Mid1Gain -12 to 12 | |||
| Mid-range 2 setting EQ Mid2 - | |||
| Mid-range 2 center frequency Mid2Freq 1 to 20 | |||
| Mid-range 2 gain Mid2Gain -12 to 12 | |||
| High-range setting EQ High - | |||
| High-range cutoff frequency | HighFreq | 1 to 10 | |
| High-range gain | HighGain -12 to 12 | ||
| Input level | Input Lv 0 to 127 | ||
| Output level | OutputLv | 0 to 127 | |
| Audio Playback | AudioPly | - | EN-42 |
| Audio playback looping | Repeat | On, Off | |
| Audio playback volume | Volume | 0 to 127 | |
| Audio playback Center Cancel | C Cancel | On, Off | |
| Registration Memory | Reg Mem | - | EN-68 |
| Registration Memory Freeze Target | RMFrzTgt | - | EN-67 |
| Freeze effect for rhythm on/off | Rhythm | On, Off | |
| Freeze effect for tempo on/off | Tempo | On, Off | |
| Freeze effect for tone on/off | Tone | On, Off | |
| Freeze effect on/off for split point | Split Pt | On, Off | |
| Freeze effect on/off for auto harmonize/arpeggiator | AHar/Arp | On, Off | |
| Freeze effect for transpose on/off | Trans. | On, Off | |
| Freeze effect for scale on/off Scale On, Off | |||
| Freeze effect for Touch Response on/off | Touch | On, Off | |
| Freeze effect for effects on/off | Effect | On, Off | |
| Freeze effect on/off for coarse tune, fine tune | PartTune | On, Off | |
| Freeze effect for phrase pads on/off | Phr Pad | On, Off | |
| Freeze effect for controller on/off | Cntrller | On, Off | |
| Registration sequence | Reg Seq 1 to 3 | EN-68 | |
| Metronome Metronom - | EN-27 | ||
| Metronome time signature numerator BeatNume 0 to 16 | |||
| Metronome time signature denominator BeatDeno 1 to 2 | |||
| Metronome volume Volume 0 to 127 | |||
| Speakers Speaker - | EN-11Speaker or | ||
| Enabled when PHONES connected PhoneSpk On, Off | |||
| MIDI | MIDI | - | EN-120 |
| Keyboard channel | Keybd Ch | 1 to 16 | |
| Local control | Local | On, Off | |
| Accomp out | AcompOut On, Off | ||
| Media*4 | Media | - | EN-114 |
| Other | Other | - | - |
| Tap rhythm start | Tap Rhy | On, Off | EN-45 |
| Right-hand (melody) part channel | PartR Ch | 1 to 16 | EN-40 |
| Left-hand part channel | PartL Ch | 1 to 16 | |
| Music preset key change | MP Key | -5 to 6 | EN-52 |
| Audio In Center Cancel | Aln CCan | On, Off | EN-13 |
| Examination Mode | ExamMode | On, Off | EN-113 |
| Display contrast | Contrast | 1 to 17 | EN-10 |
| Auto Power Off | AutoOff On, Off | EN-9 | |
| Auto resume | AtResume | On, Off | EN-10 |
| Reset | Reset | - | EN-113 |
| Setting reset | Setting | - | |
| Factory reset | Factory | - | |
*1 Includes the same sub-menus as Pad 1.
*2Depends on the "Target DSP module" (DSPModule) specification.
*3Setting range depends on the Digital Keyboard model.
| Function Name | Settings | |
| CT-X9000IN | CT-X8000IN | |
| Reverb | 1 to 33 | 1 to 25 |
| Chorus | 1 to 17 | 1 to 13 |
| Delay | 1 to 21 | 1 to 16 |
| Equalizer | 1 to 11 | 1 to 10 |
*4 Includes sub-menu for USB flash drive operations. For details about the operation, see "USB Flash Drive Operations" (page EN-116).
Examination Mode
The Examination Mode changes the operation of the Digital Keyboard as described below to provide support for those taking a musical instrument grade test.
●Accompaniment Pattern Operations
- If the Digital Keyboard is in synchro start standby (page EN-47) while ACCOMP is off ([ACCOMP] indicator not displayed), rhythm will start when you play something anywhere on the keyboard. Synchro start standby is exited at this time.
- Rhythm will not start even if you press 14 INTRO, or 15 VARIATION/FILL-IN 1 to 18 VARIATION/FILL-IN
4 while rhythm play is stopped. Instead, each accompaniment pattern becomes selected and the corresponding indicators ([ I ], [V1] to [V4]) flash on the display.
- Pressing 15 VARIATION/FILL-IN 1 to 18 VARIATION/FILL-IN 4 while an accompaniment pattern's intro is sounding immediately sounds a fill-in (1 to 4) and sounds the variation that corresponds to the button that was pressed.
- Pressing 15 VARIATION/FILL-IN 1 to 18 VARIATION/FILL-IN 4 while variation 1 to 4 of an accompaniment pattern is sounding immediately switches to the accompaniment pattern, even part way through a measure.
- The registration function saves the accompaniment pattern selection status.
●Split Point Settings
- The correspondence between note numbers and note names is Note Number 60 = C3. (C4 when Examination Mode is turned off.)
- For the split point, lower point, and chord point explained under “Advanced Split Settings” (page EN-49), you press a keyboard key to specify the upper limit of the LOWER part keyboard (or accompaniment keyboard) in the Examination Mode.
To enter the Digital Keyboard's Examination mode
- Press 10FUNCTION.
- Use the [1] (∠) and [3] (△) 12 number keys to display "Other", and then press [6] (ENTER).
- Use the [1] (∠) and [3] (△) keys to display "ExamMode".
- Press 13 [-] or [+] to turn on the setting.
- When the setting is the way you want, long-press the [4] (EXIT) 12 number key to exit the setting screen.
Batch Deleting Data from Digital Keyboard Memory
You can use the procedure below to return the data and settings to their initial factory defaults.
To return all Digital Keyboard settings and data to their initial factory defaults (Factory Reset)
IMPORTANT!
- The procedure below deletes all of the following data stored in Digital Keyboard memory: user tones, user rhythms, registration data, MIDI recorder song data. Backup of important data to a USB flash drive (page EN-114) or computer (page EN-120) is recommended.
- Press 10FUNCTION.
- Use the [1] (∠) and [3] (△) 12 number keys to display "Other", and then press [6] (ENTER).
- Use the [1] (∠) and [3] (△) keys to display "Reset", and then press [6] (ENTER).
- Use the [1] (∠) and [3] (△) keys to display "Factory", and then press [6] (ENTER). This displays "Sure?"
- Press 13 [+] (YES) to execute the factory reset or 13 [-] (NO) to cancel. • To exit the operation, long-press the [4] (EXIT) 12 number key.
To return all Digital Keyboard settings to their initial factory defaults (Setting Reset)
You can use 10 FUNCTION to return all Digital Keyboard settings to their initial factory defaults.
Perform the procedure under "To configure function settings with the 10 FUNCTION button" (page EN-107), and perform the following operation to select setting reset:
Other (Other) → Reset (Reset) → Setting reset (Setting) (page EN-112). Next, execute the reset.
USB Flash Drive
Your Digital Keyboard supports the use of a commercially available USB flash drive to perform the operations below.
- Formatting the USB flash drive
- Saving user tones, user rhythms, and other data stored in Digital Keyboard memory to a USB flash drive
- Importing user tones, user rhythms, and other data from a USB flash drive to Digital Keyboard memory
- Playing back, on the Digital Keyboard, general song data (MIDI file or WAV format audio file) copied to USB flash drive using a computer
- For information about the procedure for copying song data to a USB flash drive, see "Using a Computer to Copy General Song Data to a USB Flash Drive" (page EN-118).
- For information about playback procedures, see "Playing Back a Song from a USB Flash Drive" (page EN-41) and "Playing Back an Audio File on a USB Flash Drive (Audio Mode)" (page EN-41).
USB Flash Drive and USB Flash Drive Port Handling Precautions

IMPORTANT!
- Be sure to observe the precautions provided in the documentation that comes with the USB flash drive.
- Avoid using a USB flash drive under the following conditions. Such conditions can corrupt data stored on the USB flash drive.
- Areas subjected to high temperature, high humidity, or corrosive gas
- Areas subjected to strong electrostatic charge and digital noise
- Never remove the USB flash drive while data is being written to or loaded from it. Doing so can corrupt the data on the USB flash drive and damage the USB flash drive port.
- Never insert anything besides a USB flash drive into the USB flash drive port. Doing so creates the risk of malfunction.
- A USB flash drive can become warm after very long use. This is normal and does not indicate malfunction.
- Static electricity conducted to the USB flash drive port from your hand or from a USB flash drive can cause malfunction of the Digital Keyboard. If this happens, turn the Digital Keyboard off and then back on again.
Copyrights
You are allowed to use recordings for your own personal use. Any reproduction of an audio or music format file, without the permission of its copyright holder, is strictly prohibited under copyright laws and international treaties. Also, making such files available on the Internet or distributing them to third parties, regardless of whether such activities are conducted with or without compensation, is strictly prohibited under copyright laws and international treaties. CASIO COMPUTER CO., LTD. shall not be held in any way liable for any use of this Digital Keyboard that is illegal under copyright laws.
Connecting a USB Flash Drive to and Detaching It from the Digital Keyboard

IMPORTANT!
- Never plug any other device besides a USB flash drive into the USB flash drive port.
- When you perform a USB flash drive operation or turn on the Digital Keyboard while a USB flash drive is plugged in, the Digital Keyboard initially needs to perform a “mounting” sequence to prepare for data exchange with the USB flash drive. Digital Keyboard operations may be momentarily disabled while a mounting sequence is being performed. The [USB] indicator will flash on the display while the USB flash drive is being mounted. It may take up to 10 or 20 seconds or even longer for a USB flash drive to be mounted. Do not attempt to perform any operation on the Digital Keyboard while a mounting sequence is in progress. A USB flash drive needs to be mounted each time it is connected to the Digital Keyboard.
To connect a USB flash drive to the Digital Keyboard
1. As shown in the illustration below, insert the USB flash drive into the Digital Keyboard's USB flash drive port.
- Carefully push the USB flash drive in as far as it will go. Do not use undue force when inserting the USB flash drive.
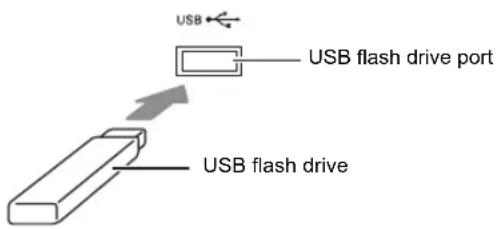
To remove a USB flash drive from the Digital Keyboard
1. Check to confirm that there is no data exchange operation being performed, and then pull the USB flash drive straight out.
Formatting a USB Flash Drive

IMPORTANT!
- Be sure to format a USB flash drive on the Digital Keyboard before using it for the first time.
- Formatting a USB flash drive deletes all data currently stored on it. Before formatting a USB flash drive, make sure it does not have any valuable data stored on it.
- The format operation performed by this Digital Keyboard is a “quick format”. If you want to completely delete all of the data in USB flash drive, format it on your computer or some other device.
Supported USB Flash Drives
This Digital Keyboard supports USB flash drives formatted to FAT32. If your USB flash drive is formatted to a different file system, use the Windows format function to reformat it to FAT32. Do not use quick format.
To format a USB flash drive
- Insert the USB flash drive to be formatted into the Digital Keyboard's USB flash drive port.
- Press 10FUNCTION.
- Use the [1] (∠) and [3] (△) 12 number keys to display "Media", and then press [6] (ENTER). This displays the [USB] indicator.
- Use the [1] (∠) and [3] (△) keys to display "Format", and then press [6] (ENTER). This displays "Sure?"
- Press 13 [+] (YES) to execute the format or 13 [-] (NO) to cancel.
- Pressing 13 [+] (YES) starts formatting and displays the message "Wait..." (operation in progress). Do not perform any operation while this message is displayed. "Complete" is displayed after the operation is complete.
- To exit the operation, long-press the [4] (EXIT) 12 number key.
This cause the [USB] indicator to disappear.
NOTE
- Formatting a USB flash drive on the Digital Keyboard will create a folder named MUSICDAT in its root directory. Use this folder when exchanging data between the Digital Keyboard and USB flash drive.
USB Flash Drive Operations
You can use Digital Keyboard operations to perform data storage, data import, data delete, and data renaming operations for a USB flash drive plugged into the Digital Keyboard.
These operations can be performed on the data listed below.
- User tones created with the Digital Keyboard
- User rhythms created with the Digital Keyboard
- Songs recorded with the Digital Keyboard's MIDI recorder
- Setup data registered with the Digital Keyboard's registration function
- User phrases recorded to Digital Keyboard phrase pads
■Sub Menu/File Name Extension List
The table below shows the sub-menus that are used for the operations described in this section, and the file name extensions for data types.
| Data Type Sub Menu | File Name Extension | |
| User Tones Tone TON | ||
| User Rhythms Rhythm | AC7, CKF, Z00 | |
| User Recording MltRec | MltR SMF | MRF MID (Save only) |
| Registration (Bank unit) | RegMemBk RBK | |
| User Phrases (Phrase set unit) | Phrs Set PHS | |
| All the above data All Data DAL | ||
To save Digital Keyboard data to a USB flash drive
- Insert the USB flash drive into the Digital Keyboard's USB flash drive port.
- Press 10 FUNCTION.
- Use the [1] (∠) and [3] (△) 12 number keys to display "Media", and then press [6] (ENTER).
-
Use the [1] (∠) and [3] (△) keys to display "Save", and then press [6] (ENTER).
-
Use the [1] (∠) and [3] (△) keys to display a sub-menu of options that correspond to the type of data being saved.
• See "Sub Menu/File Name Extension List" (above).
- Press [6] (ENTER).
- If "All Data" is selected in step 5, step 7 is not required. Proceed to step 8.
-
Use 13 [-] and [+] or the 11 dial to select the data to be saved, and then press [6] (ENTER).
-
Input the file name you want to use.
- See "Text Character Input" (page EN-15) for information about how to enter text.
- Press [6] (ENTER).
This displays "Sure?"
- The message "Replace?" will appear if there is already data with the same name on the USB flash drive. If this happens, pressing 13 [+] (YES) in step 10 below will overwrite the existing data with the new data.
- Press 13 [+] (YES) to save.
• To cancel the operation, press 13 [-] (NO).
- Pressing 13 [+] (YES) displays "Wait..." (operation in progress). Do not perform any operation while this message is displayed. "Complete" is displayed after the operation is complete.
- To exit the operation, long-press the [4] (EXIT) 12 number key.
To load data from a USB flash drive to Digital Keyboard memory
- Perform steps 1, 2, and 3 under "To save Digital Keyboard data to a USB flash drive" (page EN-116).
- Use the [1] (∠) and [3] (△) 12 number keys to display "Load", and then press [6] (ENTER).
- Use the [1] (∠) and [3] (△) keys to display a sub-menu of options that correspond to the type of data being imported.
- See "Sub Menu/File Name Extension List" (page EN-116).
- Press [6] (ENTER).
This displays a file name of data that can be imported.
-
Use 13 [-] and [+] or the 11 dial to select the data you want to import into Digital Keyboard memory.
-
If "All Data" is selected in step 3, steps 6 and 7 below are not required. Proceed to step 8.
-
Pressing 10 FUNCTION at this time will display the file name extension of the currently selected data file. (Note that this operation is possible only if the [FUNCTION] indicator is flashing.) Press 10 FUNCTION again to return to the file name.
-
Press [6] (ENTER).
-
Use 13 [-] and [+] or the 11 dial to specify the number of the user area where imported data should be stored.
- Pressing 13 [−] and [+] at the same time displays the lowest numbered empty user area. If there is no empty user area, the lowest numbered area is displayed.
- Press [6] (ENTER).
This displays "Sure?"
- If you displayed "All Data" in step 3 of this procedure or if the user area you specified in step 7 already contains data, the message "Replace?" will appear. If this happens, pressing 13 [+] (YES) in step 9 below will overwrite the existing data in the user area with the imported data.
-
Press 13 [+] (YES) to import.
-
To cancel the operation, press 13 [-] (NO).
-
Pressing 13 [+] (YES) displays "Wait..." (operation in progress). Do not perform any operation while this message is displayed. "Complete" is displayed after the operation is complete.
-
To exit the operation, long-press the [4] (EXIT) 12 number key.
To delete USB flash drive data
- Perform steps 1, 2, and 3 under "To save Digital Keyboard data to a USB flash drive" (page EN-116).
- Use the [1] (∠) and [3] (△) 12 number keys to display "Delete", and then press [6] (ENTER).
- Use the [1] (∠) and [3] (∩) keys to display a sub-menu of options that correspond to the type of data being deleted.
- See "Sub Menu/File Name Extension List" (page EN-116).
- Press [6] (ENTER).
- Use 13 [-] and [+] or the 11 dial to select the data to be deleted, and then press [6] (ENTER). This displays "Sure?"
-
To delete the data, press 13 [+] (YES).
-
To cancel the operation, press 13 [-] (NO).
- Pressing 13 [+] (YES) displays "Wait..." (operation in progress). Do not perform any operation while this message is displayed. "Complete" is displayed after the operation is complete.
- To exit the operation, long-press the [4] (EXIT) 12 number key.
To rename USB flash drive data
- Perform steps 1, 2, and 3 under "To save Digital Keyboard data to a USB flash drive" (page EN-116).
- Use the [1] (∠) and [3] (△) 12 number keys to display "Rename", and then press [6] (ENTER).
- Use the [1] (∠) and [3] (△) keys to display a sub-menu of options that correspond to the type of data being renamed.
- See "Sub Menu/File Name Extension List" (page EN-116).
- Press [6] (ENTER).
This enables specification of the data to be renamed. - Use 13 [-] and [+] or the 11 dial to select the data to be renamed, and then press [6] (ENTER).
- Rename the file.
- See "Text Character Input" (page EN-15) for information about how to enter text.
- Press [6] (ENTER).
This displays "Sure?"
- The message “Replace?” will appear if there is already data with the same name on the USB flash drive. If this happens, pressing 13 [+] (YES) in step 8 below will overwrite the existing data with the new data.
-
To change the name, press 13 [+] (YES).
-
To cancel the operation, press 13 [-] (NO).
-
Pressing 13 [+] (YES) displays "Wait..." (operation in progress). Do not perform any operation while this message is displayed. "Complete" is displayed after the operation is complete.
-
To exit the operation, long-press the [4] (EXIT) 12 number key.
Using a Computer to Copy General Song Data to a USB Flash Drive
You can use the same operations as those for built-in songs to play back files of the formats below, which are stored in the MUSICDAT folder.
-
Standard MIDI files (SMF format 0/1) or CASIO MIDI files (CMF format)
• WAV format audio files (16 bit, 44.1 kHz) -
Connect the USB flash drive to your computer.
- Create a folder named MUSICDAT in the root directory of the USB flash drive.
- This step is not required is there is already a MUSICDAT folder in the USB flash drive's root directory.
- Copy song data you want to play back on the Digital Keyboard to the MUSICDAT folder.
- For information about playback procedures, see "Playing Back a Song from a USB Flash Drive" (page EN-41) and "Playing Back an Audio File on a USB Flash Drive (Audio Mode)" (page EN-41).
Connecting a Computer
Connecting a Computer
You can connect the Digital Keyboard to a computer and exchange MIDI data between them. You can send play data from the Digital Keyboard to music software running on your computer, or you can send MIDI data from your computer to the Digital Keyboard for playback.
Minimum Computer System Requirements
The following shows the minimum computer system requirements for sending and receiving MIDI data. Check to make sure that your computer complies with these requirements before connecting the Digital Keyboard to it.
●Operating System
Windows Vista *1
Windows 7 *2
Windows 8.1 *3
Windows 10 *4
macOS (OS X/Mac OS X) 10.7, 10.8, 10.9, 10.10, 10.11, 10.12
*1 Windows Vista (32-bit)
*2Windows 7 (32-bit, 64-bit)
*3Windows 8.1 (32-bit, 64-bit)
*4Windows 10 (32-bit, 64-bit)
●USB port

IMPORTANT!
- Never connect to a computer that does not conform to the above requirements. Doing so can cause problems with your computer.

NOTE
- For the latest news about supported operating systems, visit the website at the URL below. http://world.casio.com/
Connecting the Digital Keyboard to Your Computer

IMPORTANT!
- Make sure you follow the steps of the procedure below exactly. Connecting incorrectly can make data send and receive impossible.
- Turn off the Digital Keyboard and then start up your computer.
- Do not start up the music software on your computer yet!
- After starting up your computer, use a commercially available USB cable to connect it to the Digital Keyboard.
- Use a USB 2.0 or 1.1 A-B connector type USB cable.
- Turn on the Digital Keyboard.
- If this is the first time you are connecting the Digital Keyboard to your computer, the driver software required to send and receive data will be installed on your computer automatically.
-
Start up commercially available music software on your computer.
-
Configure the music software settings to select "CASIO USB-MIDI" as the MIDI device.
- For information about how to select the MIDI device, see the user documentation that comes with the music software you are using.

IMPORTANT!
- Be sure to turn on the Digital Keyboard first before starting up your computer's music software.
- USB send and receive is disabled during playback of a Song Bank song (page EN-38).
MIDI Settings
Keyboard Channel
This parameter specifies the channel to be used when keyboard performance information is sent from this Digital Keyboard to a computer.
Perform the procedure under "To configure function settings with the 10 FUNCTION button" (page EN-107) and configure the following setting: Keyboard Channel (Keybd Ch) (page EN-112).
Local Control
This parameter can be used when using an external sound source to play Digital Keyboard notes to specify that the notes should not be sounded by the Digital Keyboard.
Perform the procedure under "To configure function settings with the 10 FUNCTION button" (page EN-107) and configure the following setting: Local Control (Local) (page EN-112).
Accomp Out
This parameter specifies whether or not Auto Accompaniment data should be sent.
Perform the procedure under "To configure function settings with the 10 FUNCTION button" (page EN-107) and configure the following setting: Accomp Out (AcompOut) (page EN-112).
Transferring Data Between the Digital Keyboard and a Computer
You can transfer recorded songs, and other data in Digital Keyboard memory to a computer for storage. You also can load Auto Accompaniment data you download from the CASIO website to the Digital Keyboard, which greatly expands Auto Accompaniment patterns available to you. A special Data Manager application is required in order to transfer data to and from the Digital Keyboard.
Data Types Supported for Data Transfer
You can transfer the types of data listed below between the Digital Keyboard and a computer.
- User tone data (page EN-69)
- User rhythm data (page EN-74)
- User-recorded songs (page EN-87)
- Registration (bank unit) (page EN-65)
- User Phrase (phrase set unit) (page EN-53)
Downloading Data Manager
-
Go to the CASIO WORLDWIDE site at the following URL. http://world.casio.com/
-
At the site, select a geographic area or country.
-
After accessing the area site, navigate to the minimum computer system requirements for Data Manager for this product.
-
You should be able to find a link to Data Manager information on the product introduction page of this product. If you cannot find such a link, use the search form of the area site where you are located to enter the model name of this product and search for it.
-
Note that site contents are subject to change without notice.
-
Check if your computer system complies with the minimum requirements for Data Manager.
-
Download Data Manager and its user's guide to your computer.
-
Follow the procedure in the user's guide that you downloaded in step 5 to install and use Data Manager.
- You can download accompaniment data from the Internet Data Expansion system of the CASIO MUSIC SITE (http://music.casio.com/) and load it into the memory of this Digital Keyboard. Note that there is not any accompaniment data intended specifically for this model, so you should use data for other models.
NOTE
- Since the accompaniment data is for other models, you may experience some abnormalities when playing it on this model.
- For information about accompaniment data compatibility between models, see the Data Manager user's guide you download in step 5 of the above procedure.
Troubleshooting
| Symptom Action | |
| Included Accessories | |
| I can't find something that should be here. | Carefully check inside all of the packing materials. |
| Power Requirements | |
| Power will not turned on. • Check the AC adaptor (page EN-8). | • CT-X8000IN: Make sure that the batteries are facing correctly(page EN-9). Replace the batteries with new ones (page EN-9) orswitch over to AC adaptor power (page EN-8). |
| The display lights up momentarily but power doesnot turn on when I press the 1 (power) button. | Press 1 (power) firmly and completely to turn on power. |
| The Digital Keyboard outputs a loud sound and thensuddenly powers down. | CT-X8000IN: Replace the batteries with new ones (page EN-9) orswitch over to AC adaptor power (page EN-8). |
| The Digital Keyboard suddenly powers down afterabout 30 minutes. | This happens when Auto Power Off (page EN-9) is triggered. |
| Display | |
| The display keeps going out or are flashing. | CT-X8000IN: Replace the batteries with new ones (page EN-9) orswitch over to AC adaptor power (page EN-8). |
| Screen contents are visible only from straight ahead. | This is dues to production limitations. It does not indicate malfunction. |
| Sound | |
| Nothing happens when I press any keyboard key. • Adjust the volume setting (page EN-11). | • Check if something is plugged into 50 on the back of the DigitalKeyboard. |
| • Turn power off and then back on to initialize all keyboard settings(page EN-9). | |
| Nothing happens or notes do not play normally whenI play notes on the left side of the keyboard. | Press 22 to disable chord input in the accompaniment keyboard area(page EN-43). |
| Nothing happens when I start an AutoAccompaniment. | • With rhythms 241 to 250, nothing will sound until you play a chordon the keyboard. Try playing a chord (page EN-47). |
| • Check and adjust the accompaniment volume setting (pageEN-44). | |
| • If there is no user rhythm stored in memory, Auto Accompanimentwill not start when you press 20 while a rhythm in the range of 309to 408 (CT-X9000IN) / 309 to 358 (CT-X8000IN) is selected (pageEN-74). | |
| • Turn power off and then back on to initialize all Digital Keyboardsettings (page EN-9). | |
| Nothing happens when I start playback of a built-insong. | • It takes a little time after you press the button until the song starts toplay. Wait for a moment for the song to start. |
| • Check and adjust the song volume (page EN-39). | |
| • With song numbers 31 through 40, pressing 20 will not start thesong if there is no MIDI recorder data stored to the song (pageEN-87). | |
| • Turn power off and then back on to initialize all Digital Keyboardsettings (page EN-9). | |
| The metronome does not sound. • Check and adjust the metronome volume setting (page EN-27). | • Turn power off and then back on to initialize all Digital Keyboardsettings (page EN-9). |
| Notes keep sounding, without stopping. | • Turn power off and then back on to initialize all Digital Keyboardsettings (page EN-9). |
| • CT-X8000IN: Replace the batteries with new ones (page EN-9) orswitch over to AC adaptor power (page EN-8). | |
| Some notes are cut off while they are playing. | Notes are cut off whenever the number of notes being sounded exceeds the maximum polyphony value of 64 (32 for some tones). This does not indicate malfunction. |
| The volume or tone setting I made has changed. • Adjust the volume setting (page EN-11) and the equalizer setting (page EN-25).• Turn power off and then back on to initialize all Digital Keyboard settings (page EN-9).• CT-X8000IN: Replace the batteries with new ones (page EN-9) or switch over to AC adaptor power (page EN-8). | |
| Output volume does not change even though I change my keyboard touch. | • Change the Touch Response setting (page EN-28).• Turn power off and then back on to initialize all Digital Keyboard settings (page EN-9). |
| In certain keyboard ranges, the volume and tone quality sound are slightly different from those in other keyboard ranges. | This is due to system limitations. It does not indicate malfunction. |
| With some tones, octaves do not change at the far ends of the keyboard. | This is due to system limitations. It does not indicate malfunction. |
| The pitch of the notes does not match other accompanying instruments or sounds strange when played long with other instruments. | • Check and adjust the transpose (page EN-34), tuning (page EN-36), part coarse tuning and part fine tuning settings (page EN-36).• Turn power off and then back on to initialize all Digital Keyboard settings (page EN-9). |
| The reverb of notes seems to change suddenly. | • Check and adjust the reverb and delay settings (page EN-22).• Turn power off and then back on to initialize all Digital Keyboard settings (page EN-9). |
| Operation | |
| Tone, rhythm, and other settings revert to their initial defaults whenever you turn on the Digital Keyboard. | Though Digital Keyboard settings reset when you turn off the Digital Keyboard (page EN-9), you can save setups to registration memory for instant recall whenever you need them (page EN-65). If Auto Resume function (page EN-10) is turned on, most settings are saved while power is turned off. |
| Computer Connection | |
| I can't exchange data between the Digital Keyboard and a computer. | • Check to make sure that the USB cable is connected to the Digital Keyboard and computer, and that the device is selected correctly with your computer's music software settings (page EN-119).• Turn off the Digital Keyboard and then exit the music software on your computer. Next, turn the Digital Keyboard back on and then restart the music software on your computer. |
Error Messages
| Display Cause | Use Action | |
| Err Limit You are | attempting to record more than 999 measures. | Make your recordings up to 999 measures long. |
| Err Mem Full You | are attempting a recording that exceeds the allowable per-song limit. | Keep song recordings with the allowable per-song limit. |
| You are attempting a recording that exceeds the allowable per-phrase limit. | Keep phrase recordings with the allowable per-phrase limit. | |
| You are attempting a recording that exceeds the allowable per-user-rhythm limit. | Keep user rhythm recordings with the allowable per-user-rhythm limit. | |
| Err DataFull You | are attempting to record more than 10 songs. Delete some of the songs in memory. | |
| You are attempting to store user tones that cause the maximum allowable limit to be exceeded. | Delete unneeded user tones. | |
| You are attempting to store user rhythms that cause the maximum allowable limit to be exceeded. | Delete unneeded user rhythms. | |
| Err No Media The | USB flash drive is not plugged correctly into the USB flash drive port. | Correctly plug the USB flash drive into the USB flash drive port. |
| The USB flash drive was removed while some operation was in progress. | Do not remove the USB flash drive while any operation is in progress. | |
| The USB flash drive is write-protected. Write-enable the USB flash drive. | ||
| The USB flash drive is protected by anti-virus software. | Use a USB flash drive that is not protected by anti-virus software. | |
| Err No File There | is no loadable or playable file in the MUSICDAT folder. | Move the file you want to load into the “MUSICDAT” folder or the file you want to play into the “MUSICDAT” folder (page EN-118). |
| Err No Data You | are selecting a user data item that does not have any data stored to it. | Select a user data item that has data stored to it. |
| Err ReadOnly A | read-only file with the same name you are trying to use is already stored on USB flash drive. | · Change the name and then save the new data. · Remove the read-only attribute from the existing USB flash drive file and overwrite it with the new data. · Use a different USB flash drive. |
| Err Mediaful There | is not enough space available on the USB flash drive. | Delete some of the files on the USB flash drive to make room for new data or use a different USB flash drive. |
| Err ManyFile | There are too many files on the USB flash drive. | Delete some of the files on the USB flash drive to make room for new data. |
| Err NotSMF01 You | you are attempting to play back SMF Format 2 song data. | Playback of SMF Format 0 or Format 1 only is supported. |
| Err Large Sz | The SMF file on the USB flash drive cannot be played because it is too big | Playback of SMF files up to approximately 320 KB in size is supported. |
| The data you are trying to import cannot be imported because it is too big. | The maximum data size (per data item) when loading data into Digital Keyboard memory is shown below. Rhythms: Approximately 64 KB Phrases: Approximately 8 KB | |
| Err WrongDat The | USB flash drive data is corrupted. – | |
| USB flash drive contains data that is not supported by this Digital Keyboard. | – | |
| Err Format The U | USB flash drive format is not compatible with this Digital Keyboard. | • Use a computer or other device to change the USB flash drive format to something that is compatible with the Digital Keyboard (page EN-115).• Use a different USB flash drive. |
| USB flash drive memory is corrupted. Use a different U | SB flash drive. | |
Specifications
| Model CT-X9000IN CT-X8000IN | ||
| Keyboard 61 standard size keysTouch Response Sensitivity: 3 types | Off | |
| Maximum Polyphony 64 notes (32 for certain tones) | ||
| TonesPreset Tones 800User Tones 100 (See “Tone Editing” item of these specifications.)Other Layer, split (configurable split point, lower point, chord point settings) | ||
| System EffectsReverb 32 types, Off 24 types, OffChorus 16 types, Tones 12 types, TonesDelay 20 types, Tones 15 types, TonesDSP 100 types* | ^1 , DSP tones 100 types* | ^1 , DSP tones |
| Master Effects Equalizer (10 presets) | 4-band User Equalizer | Equalizer (10 presets) |
| External Input Effects | Center cancel (vocal cut) for input from the Audio In jack | |
| MetronomeBeat 0 (accented tone off), 1 to 16Tempo | Tempo value: 20 to 255 | |
| Demo Songs | 3 | |
| Song BankBuilt-in SongsUser-recorded SongsUSB Memory Songs | 3010 (See the “MIDI Recorder” item of these specifications.)Playback of standard MIDI files (SMF format 0/1), CASIO MIDI files (CMF format) on a USB flash drive is supported. | |
| USB Audio PlaybackSupported File FormatsOther Functions | Playback of audio files on a USB flash drive is supported.WAV format, 44.1 kHz 16 bitCenter Cancel (Vocal Cut) | |
| Auto AccompanimentBuilt-in RhythmsUser RhythmsOne Touch Presets | 250100 (See the “Rhythm Editing” item of these specifications.)250 | 25050 (See the “Rhythm Editing” item of these specifications.)250 |
| Music Presets | 310 (With chord progressions) | |
| Phrase PadsNumber of PadsUser PhrasesMemory CapacityEditing Mode | 4100 (4 phrases × 25 pads)Approximately 1,000 notes (per phrase)Copy, delete, phrase editing | |
| Mixer functionAffected PartsParameters Part on/off, volume, pan | Sound source parts, microphone input partreverb send, chorus send, delay send | |
| Registration | Maximum 128 setups (8 setups × 16 banks), registration sequence | |
| Tone Editing | Preset tone editing, DSP editingMemory for storage of edited tones (up to 100) | |
| Rhythm Editing | New rhythm creation, rhythm editingMemory for storage of created/edited rhythms (CT-X9000IN: Up to 100, CT-X8000IN: Up to 50) | |
| Model | CT-X9000IN | CT-X8000IN |
| MIDI Recorder Real-time recording, playback | ||
| Keyboard Performance Recording 10 songs, 17 tracks (1 system track, 16 solo tracks) | ||
| Memory Capacity Approximately 40,000 notes (per song) | ||
| Editing Mode Song editing, track editing, event editing, step input | ||
| Other Functions Overdubbing, punch-in recording | ||
| Pedals Sustain, sostenuto, soft, rhythm/song, expression | ||
| Controllers Pitch bend wheel, TOUCH | ON/OFF button, PORTAMENTO button, MODULATION/ ASSIGNABLE button | Pitch bend wheel, TOUCH ON/OFF button, PORTAMENTO button |
| Other Functions | ||
| Transpose ±1 octaves (-12 to 0 to +12 semitones) | ||
| Octave Shift Upper 1/Upper 2/Lower | 1/Lower 2, ±3 octaves | |
| Tuning A4 = 415.5 to 465.9 Hz (Initial Default: 440.0 Hz) | ||
| Part coarse tune For each keyboard part, ±2 octaves (-24 to 0 to +24 semitones) | ||
| Part fine tune For each keyboard part, ±99 cents | ||
| Scales | 17 preset scales, scale fine tuning | |
| Auto Harmonize | 12 types | |
| Arpeggiator | 150 types | |
| MIDI | 16ch multi-timbre received, GM Level 1 standard | |
| Inputs/Outputs | ||
| USB Flash Drive Port | Type A | |
| USB Port | Type B | |
| Pedal 1 Jack Standard jack (6.3 mm) | ||
| Pedal 2, Expression Jack | Standard jack (6.3 mm) | |
| Headphones Jack | Stereo standard jack (6.3 mm) | |
| Audio Input Jack | Stereo mini jack (3.5 mm) | |
| Input impedance: 9 kΩ; Input sensitivity; 200 mV | ||
| Line Out Jack (CT-X9000IN) | Standard jacks (6.3 mm) × 2 | |
| Output impedance: 2.3 kΩ; Output voltage: 1.9 V (RMS) MAX | ||
| Microphone Input Jack (CT-X9000IN) | Standard jack (6.3 mm) (Connect a dynamic microphone.) | |
| Input impedance: 3 kΩ; Input sensitivity; 10 mV | ||
| Power Jack | DC 24V | DC 12V |
| Power Supply | AC adaptor only | 2-way |
| AC Adaptor | AD-E24250LW | AD-A12150LW |
| Batteries | - | 6 D-size alkaline batteries |
| Battery Life | - | Approximately 10 hours continuous operation on alkaline batteries |
| Auto Power Off | Approximately 30 minutes after last operation; Can be disabled. | Approximately 30 minutes after last operation; Can be disabled. |
| Speakers | 10cm×2 (Output: 15W + 15W) | 10cm×2 (Output: 6W + 6W) |
| Power Consumption | 24V --- 15 W | 12V --- 8 W |
| Dimensions | 94.8 × 38.4 × 11.6 cm (37 5/16 × 15 1/8 × 4 9/16 inch) | |
| Weight | Approximately 7.0 kg (15.4 lbs) | Approximately 6.9 kg (15.2 lbs) (without batteries) |
*1 Can be applied to user tones using DSP editing (page EN-70).
- Design and specifications are subject to change without notice.
DSP Effect List
DSP Module List
| Module Number | Module Name Display Description | ||
| 1 | Mono 1-Band EQ Mono 1EQ This is a single-band monaural equalizer. | ||
| 2 | Mono 2-Band EQ Mono 2EQ This is a dual-band monaural equalizer. | ||
| 3 | Mono 3-Band EQ Mono 3EQ This is a three-band monaural equalizer. | ||
| 4 | Stereo 1-Band EQ Stereo1EQ This is a single-band stereo equalizer. | ||
| 5 | Stereo 2-Band EQ Stereo2EQ This is a dual-band stereo equalizer. | ||
| 6 | Stereo 3-Band EQ Stereo3EQ This is a three-band stereo equalizer. | ||
| 7 | Tone Control ToneCtrl | Provides monaural tone control for adjusting low-range, mid-range, and high-range frequencies. | |
| 8 | Tremolo Tremolo Shifts the volume of the input signal using an LFO. | ||
| 9 | Auto Pan Auto Pan Shifts the continual left-right panning of the input signal using an LFO. | ||
| 10 | Compressor Compress | Compresses the input signal, which can have the effect of suppressing level variation. | |
| 11 | Limiter Limiter Limits the input signal level so it does not rise above a preset level. | ||
| 12 | Enhancer | Enhancer | Enhances the profiles of the low range and high range of the input signal. |
| 13 | Phaser Phaser | Produces a distinctive pulsating, broad sound by using an LFO to change the phase of the input signal and then mixes it with the original input signal. | |
| 14 | Chorus | Chorus | Gives notes depth and breadth. |
| 15 | Flanger | Flanger | Applies wildly pulsating and metallic reverberation to notes. Selects the LFO waveform. |
| 16 | Rotary | Rotary | This effect is a rotary speaker simulator. |
| 17 | Drive Rotary | DriveRot | This is a rotary speaker simulator that makes overdrive possible. |
| 18 | Pitch Shifter | Pitch | This effect transforms the pitch of the input signal. |
| 19 | Ring Modulator | Ring Mod | Multiplies the input signal with an internal oscillator signal to create a metallic sound. |
| 20 | Reflection | Reflect | Simulates the initial reflection of reverberation. Applies acoustic ambiance and presence to notes. |
| 21 | Delay | Delay | Delays the input signal and feeds it back to create a repeating effect. |
| 22 | Piano Effect | Piano This effect is suited to acoustic piano play. | |
| 23 | LFO Wah LFO Wah | This is a “wah” effect that can automatically affect the frequency using an LFO. | |
| 24 | Auto Wah | Auto Wah | This is a “wah” effect that can automatically shift the frequency in accordance with the level of the input signal. |
| 25 | Modeling Wah | ModelWah | Simulates various types of wah pedals. This effect can automatically shift the frequency in accordance with the level of the input signal. |
| 26 | Distortion | Distort | Distortion, wah, and amp simulator combined into a single effect. |
| 27 | Drive | Drive | Simulates the drive of a musical instrument amplifier. |
| 28 | Amp Cab | Amp Cab | Simulates the amp and speaker cabinet without drive and distortion. |
DSP Parameter List
| Module Name | Description Settings | ||
| Display Parameter Data | |||
| 1 Mono 1-Band EQ This is a single-band monaural equalizer. | |||
| EQ Freq | EQ Frequency | Adjusts the center frequency of Equalizer. | *1 |
| EQ Gain EQ Gain Adjusts the gain of Equalizer. -12 to 00 to 12 | |||
| In Level Input Level Adjusts the input level. 000 to 127 | |||
| WetLevel Wet Level Adjusts the level of the effect sound. 000 to 127 | |||
| DryLevel Dry Level Adjusts the level of the direct sound. 000 to 127 | |||
| 2 Mono 2-Band EQ This is a dual-band monaural equalizer. | |||
| EQ1 Freq | EQ1 Frequency | Adjusts the center frequency of Equalizer 1. | *1 |
| EQ1 Gain EQ1 Gain Adjusts the gain of Equalizer 1. -12 to 00 to 12 | |||
| EQ2 Freq | EQ2 Frequency | Adjusts the center frequency of Equalizer 2. | *1 |
| EQ2 Gain EQ2 Gain Adjusts the gain of Equalizer 2. -12 to 00 to 12 | |||
| In Level Input Level Adjusts the input level. 000 to 127 | |||
| WetLevel Wet Level Adjusts the level of the effect sound. 000 to 127 | |||
| DryLevel Dry Level Adjusts the level of the direct sound. 000 to 127 | |||
| Module Name | Description | Settings | |
| Display Parameter Data | |||
| 6 Stereo 3-Band EQ This is a three-band stereo equalizer. | |||
| EQ1 Freq | EQ1 Frequency | Adjusts the center frequency of Equalizer 1. | *1 |
| EQ1 Gain EQ1 Gain Adjusts the gain | of Equalizer 1. -12 to 00 to 12 | ||
| EQ2 Freq | EQ2 Frequency | Adjusts the center frequency of Equalizer 2. | *1 |
| EQ2 Gain EQ2 Gain Adjusts the gain | of Equalizer 2. -12 to 00 to 12 | ||
| EQ3 Freq | EQ3 Frequency | Adjusts the center frequency of Equalizer 3. | *1 |
| EQ3 Gain EQ3 Gain Adjusts the gain | of Equalizer 3. -12 to 00 to 12 | ||
| In Level Input Level Adjusts the input level. 000 to 127 | |||
| WetLevel Wet Level Adjusts the level of the effect sound. 000 to 127 | |||
| DryLevel Dry Level Adjusts the level of the direct sound. 000 to 127 | |||
| 7 Tone Control | Provides monaural tone control for adjusting low-range, mid-range, and high-range frequencies. | ||
| Low Freq | Low Frequency | Adjusts the cutoff frequency of Low-range | *2 |
| Low Gain | Low Gain Adjusts the Low-range gain. | -12 to 00 to 12 | |
| Mid Freq | Mid Frequency | Adjusts the center frequency of Mid-range. | *1 |
| Mid Gain | Mid Gain | Adjusts the Mid-range gain. | -12 to 00 to 12 |
| HighFreq | High Frequency | Adjusts the cutoff frequency of High-range | *3 |
| HighGain High Gain Adjusts the High-range gain. | -12 to 00 to 12 | ||
| In Level Input Level Adjusts the input level. 000 to 127 | |||
| WetLevel Wet Level Adjusts the level of the effect sound. 000 to 127 | |||
| DryLevel Dry Level Adjusts the level of the direct sound. 000 to 127 | |||
| 8 Tremolo | Shifts the volume of the input signal using an LFO. | ||
| Rate | LFO Rate | Adjusts the LFO rate. | 000 to 127 |
| Depth | LFO Depth Adjusts the LFO depth. | 000 to 127 | |
| Waveform | LFO Waveform | Selects the LFO waveform. | Sine, Triangle, Trapzoid |
| WetLevel Wet Level Adjusts the level of the effect sound. 000 to 127 | |||
| DryLevel Dry Level Adjusts the level of the direct sound. 000 to 127 | |||
| 9 Auto Pan | Shifts the continual left-right panning of the input signal using an LFO. | ||
| Rate | LFO Rate | Adjusts the LFO rate. | 000 to 127 |
| Depth | LFO Depth Adjusts the LFO depth. | 000 to 127 | |
| Waveform | LFO Waveform | Selects the LFO waveform. | Sine, Triangle, Trapzoid |
| Manual | Manual | Adjusts the pan (stereo position). -64 is full left, 0 is center, and +63 is full right. | -64 to 00 to 63 |
| WetLevel Wet Level Adjusts the level of the effect sound. 000 to 127 | |||
| DryLevel Dry Level Adjusts the level of the direct sound. 000 to 127 | |||
| 10 Compressor | Compresses the input signal, which can have the effect of suppressing level variation. | ||
| Attack Attack Adjusts the time until compression goes into effect. A smaller value causes prompt compressor operation, which suppresses the attack of the input signal. A larger values delays compressor operation, which causes the attack of the input signal to be output as-is. | 000 to 127 | ||
| Release Release Adjusts the time until compression is released after the input signal drops below a prescribed level. When an attack feeling is desired (no compression at the onset of the sound), set this parameter to as low a value as possible. To have compression applied at all times, set a high value. | 000 to 127 | ||
| Ratio Ratio Adjusts the compression ratio of the audio signal. 1:1, 2:1, 4:1, 8:1, | 16:1, 32:1, Inf:1 | ||
| WetLevel Wet Level Adjusts the level of the effect sound. Output volume changes in accordance with the Ratio setting and the characteristics of the input tone. | 000 to 127 | ||
| DryLevel Dry Level Adjusts the level of the direct sound. 000 to 127 | |||
| 11 Limiter Limits the input signal level so it does not rise above a preset level. | |||
| Limit | Limit | Adjusts the volume level of the limit at which limiting is applied. | 000 to 127 |
| Attack Attack Adjusts the time until the compression effect starts. A smaller value causes prompt limiter operation, which suppresses the attack of the input signal. A larger values delays limiter operation, which causes the attack of the input signal to be output as-is. | 000 to 127 | ||
| Release Release Adjusts the time until compression is released after the input signal drops below a prescribed level. | 000 to 127 | ||
| WetLevel Wet Level Adjusts the level of the effect sound. Output volume changes in accordance with the Limit setting and the characteristics of the input tone. Use this parameter to correct for such changes. | 000 to 127 | ||
| DryLevel Dry Level Adjusts the level of the direct sound. 000 to 127 | |||
| 12 Enhancer | Enhances the profiles of the low range and high range of the input signal. | ||
| Low Freq | Low Frequency | Adjusts the low range enhancer frequency. | 000 to 127 |
| Low Gain | Low Gain Adjusts the low range enhancer gain. 000 to 127 | ||
| HighFreq | High Frequency | Adjusts the high range enhancer frequency. | 000 to 127 |
| HighGain High Gain Adjusts the high range enhancer gain. 000 to 127 | |||
| In Level | Input Level | Adjusts the input level. | 000 to 127 |
| WetLevel Wet Level Adjusts the level of the effect sound. 000 to 127 | |||
| DryLevel Dry Level Adjusts the level of the direct sound. 000 to 127 | |||
| Module Name | Description Settings | ||
| Display | Parameter Data | ||
| 13 Phaser | Produces a distinctive pulsating, broad sound by using an LFO to change the phase of the input signal and then mixes it with the original input signal. | ||
| Resonanc Resonance Adjusts the strength of feedback 000 to 127 | |||
| Manual Manual Adjusts the reference phaser shift amount. -64 to 00 to 63 | |||
| Rate LFO Rate Adjusts the LFO rate 000 to 127 | |||
| Depth LFO Depth Adjusts the LFO depth. 000 to 127 | |||
| Waveform LFO Waveform Selects the LFO waveform. Sine, Triangle, | Random | ||
| In Level | Input Level Adjusts the input level. 000 to 127 | ||
| WetLevel | Wet Level | Adjusts the level of the effect sound. | 000 to 127 |
| DryLevel | Dry Level | Adjusts the level of the direct sound. | 000 to 127 |
| 14 Chorus | Gives notes depth and breadth. | ||
| Rate LFO Rate Adjusts the LFO rate 000 to 127 | |||
| Depth LFO Depth Adjusts the LFO depth. 000 to 127 | |||
| Waveform LFO Waveform Selects the LFO waveform. Sine, Triangle | |||
| Feedback | Feedback | Adjusts the strength of feedback -64 to 00 to 63 | |
| WetLevel | Wet Level | Adjusts the level of the effect sound. | 000 to 127 |
| Polarity | Polarity | Inverts the LFO of one channel. | Negative, Positive |
| In Level | Input Level Adjusts the input level. 000 to 127 | ||
| DryLevel | Dry Level | Adjusts the level of the direct sound. | 000 to 127 |
| 15 Flanger | Applies wildly pulsating and metallic reverberation to notes. Selects the LFO waveform. | ||
| Rate LFO Rate Adjusts the LFO rate 000 to 127 | |||
| Depth LFO Depth Adjusts the LFO depth. 000 to 127 | |||
| Waveform LFO Waveform Selects the LFO waveform. Sine, Triangle, | Random | ||
| Feedback | Feedback | Adjusts the strength of feedback -64 to 00 to 63 | |
| WetLevel | Wet Level | Adjusts the level of the effect sound. | 000 to 127 |
| In Level | Input Level Adjusts the input level. 000 to 127 | ||
| DryLevel | Dry Level | Adjusts the level of the direct sound. | 000 to 127 |
| 16 Rotary | This effect is a rotary speaker simulator. | ||
| Type Type | Selects the rotary speaker type. 0 to 3 | ||
| Speed | Speed | Switches the speed mode between fast and slow. | Slow, Fast |
| Brake | Brake | Stops speaker rotation. | Rotate, Stop |
| FallAcel | Fall Accel | Adjusts acceleration when the speed mode is switched from fast to slow. | 000 to 127 |
| RiseAcel | Rise Accel | Adjusts acceleration when the speed mode is switched from slow to fast. | 000 to 127 |
| SlowRate | Slow Rate | Adjusts the speaker rotation speed in the slow speed mode. | 000 to 127 |
| FastRate | Fast Rate | Adjusts the speaker rotation speed in the fast speed mode. | 000 to 127 |
| Vib/Cho | Vibrato/Chorus | Selects the vibrato and the chorus type. | Off, Vibrato1, Chorus 1, Vibrato2, Chorus 2, Vibrato3, Chorus 3 |
| WetLevel | Wet Level | Adjusts the level of the effect sound. | 000 to 127 |
| DryLevel | Dry Level | Adjusts the level of the direct sound. | 000 to 127 |
| Module Name | Description | Settings | |
| Display | Parameter Data | ||
| 17 Drive Rotary | This is a rotary speaker simulator that makes overdrive possible. | ||
| Type Type Selects the rotary speaker type. 0 to 3 | |||
| OD Gain Overdrive Gain Adjusts overdrive gain. 000 to 127 | |||
| OD Level Overdrive Level Adjusts the overdrive output level. 000 to 127 | |||
| Speed Speed Switches the speed mode between fast and slow. Slow, Fast | |||
| Brake Brake Stops speaker rotation. | Rotate, Stop | ||
| FallAcel | Fall Accel | Adjusts acceleration when the speed mode is switched from fast to slow. | 000 to 127 |
| RiseAcel | Rise Accel | Adjusts acceleration when the speed mode is switched from slow to fast. | 000 to 127 |
| SlowRate | Slow Rate | Adjusts the speaker rotation speed in the slow speed mode. | 000 to 127 |
| FastRate | Fast Rate | Adjusts the speaker rotation speed in the fast speed mode. | 000 to 127 |
| Vib/Cho | Vibrato/Chorus | Selects the vibrato and the chorus type. | Off, Vibrato1, Chorus 1, Vibrato2, Chorus 2, Vibrato3, Chorus 3 |
| WetLevel | Wet Level | Adjusts the level of the effect sound. | 000 to 127 |
| DryLevel | Dry Level | Adjusts the level of the direct sound. | 000 to 127 |
| 18 Pitch Shifter | This effect transforms the pitch of the input signal. | ||
| Pitch Pitch Adjusts the pitch shift amount in quarter tone steps. -24 to 00 to 24 | |||
| HighDamp | High Damp | Adjusts the high-range damp. A smaller number increases damping. | 000 to 127 |
| Feedback | Feedback | Adjusts the feedback amount. | 000 to 127 |
| In Level | Input Level | Adjusts the input level. | 000 to 127 |
| WetLevel | Wet Level | Adjusts the level of the effect sound. | 000 to 127 |
| DryLevel | Dry Level | Adjusts the level of the direct sound. | 000 to 127 |
| Fine | Fine | Adjusts the pitch shift amount. -50 is a quarter note decrease, while +50 is a quarter note increase. | -50 to 00 to 50 |
| 19 Ring Modulator | Multiplies the input signal with an internal oscillator signal to create a metallic sound. | ||
| OSC Freq | OSC Frequency | Sets the reference frequency of the internal oscillator. | 000 to 127 |
| Rate | LFO Rate | Adjusts the LFO rate. | 000 to 127 |
| Depth | LFO Depth | Adjusts the LFO depth. | 000 to 127 |
| Tone | Tone | Adjusts the timbre of the ring modulator input sound. | 000 to 127 |
| WetLevel | Wet Level | Adjusts the level of the effect sound. | 000 to 127 |
| DryLevel | Dry Level | Adjusts the level of the direct sound. | 000 to 127 |
| Module Name | Description | Settings | |||||||
| Display Parameter Data | |||||||||
| 20 Reflection | Simulates the initial reflection of reverberation. Applies acoustic presence to notes. | ||||||||
| WetLevel Wet Level Adjusts the level | of the effect sound. 000 to 127 | ||||||||
| Feedback Feedback Adjusts the repeat | at of the reflected sound. 000 to 127 | ||||||||
| Tone Tone Adjusts the tone of the reflected sound. 000 to 127 | |||||||||
| In Level Input Level Adjusts the input level. 000 to 127 | |||||||||
| DryLevel Dry Level Adjusts the level of the direct sound. 000 to 127 | |||||||||
| 21 Delay | Delays the input signal and feeds it back to create a repeating effect. | ||||||||
| Time | Delay Time | Adjusts the total delay time in 1 ms units. | 0001 to 1099 | ||||||
| TmRatioL | Delay Ratio L | Adjusts the ratio of the left channel relative to the total delay time. | 000 to 127 | ||||||
| TmRatioR | Delay Ratio R | Adjusts the ratio of the right channel relative to the total delay time. | 000 to 127 | ||||||
| Level L | Delay Level L | Adjusts the level of the left channel. | 000 to 127 | ||||||
| Level R | Delay Level R | Adjusts the level of the right channel. | 000 to 127 | ||||||
| FdbkType | Feedback Type | Selects the feedback type.Stereo: Stereo feedbackCross: Cross feedback | Stereo, Cross | ||||||
| Fdbk Lvl | Feedback Adjusts the feedback amount. 000 to 127 | ||||||||
| Hi Damp | High Damp Adjusts the high-range damp. A smaller number increases damping. | 000 to 127 | |||||||
| TmpoSync | Delay Tempo Sync | Specifies how the actual total delay time is synced with tempo.Off: Uses Delay Time value.1/4 to 1: Uses value in accordance with number of beats. | Off, 1/4, 1/3, 3/8, 1/2,2/3, 3/4, 1 | ||||||
| In Level Input Level Adjusts the input level. 000 to 127 | |||||||||
| DryLevel Dry Level Adjusts the level of the direct sound. 000 to 127 | |||||||||
| WetLevel Wet Level Adjusts the level of the effect sound. 000 to 127 | |||||||||
| 22 Piano Effect | This effect is suited to acoustic piano play. | ||||||||
| Lid Type | Lid Type | Adjusts how sound resonates in accordance with the opening state of a piano lid. | Closed, SemiOpen, FullOpen | ||||||
| RefLevel | Reflection Level | Adjusts the level of the initial reflection. | 000 to 127 | ||||||
| In Level Input Level Adjusts the input level. 000 to 127 | |||||||||
| WetLevel Wet Level Adjusts the level of the effect sound. 000 to 127 | |||||||||
| DryLevel Dry Level Adjusts the level of the direct sound. 000 to 127 | |||||||||
| 23 LFO Wah | This is a “wah” effect that can automatically affect the frequency using an LFO. | ||||||||
| In Level Input Level Adjusts the input level. The input signal can become distorted when the level of the sound being input, the number of chords, or the Resonance value is large. Adjust this parameter to eliminate such distortion. | 000 to 127 | ||||||||
| Resonanc | Resonance | Adjusts the strength of feedback | 000 to 127 | ||||||
| Manual | Manual | Adjusts the wah filter reference frequency. | 000 to 127 | ||||||
| Rate | LFO Rate | Adjusts the LFO rate. | 000 to 127 | ||||||
| Depth | LFO Depth Adjusts the LFO depth. 000 to 127 | ||||||||
| Waveform | LFO Waveform | Selects the LFO waveform. | Sine, Triangle, Random | ||||||
| WetLevel Wet Level Adjusts the level of the effect sound. 000 to 127 | |||||||||
| DryLevel Dry Level Adjusts the level of the direct sound. 000 to 127 | |||||||||
| Module Name | Description Settings | ||||||||
| Display | Parameter Data | ||||||||
| 24 Auto Wah | This is a “wah” effect that can automatically shift the frequency in accordance with the level of the input signal. | ||||||||
| In Level Input Level | Level Adjusts the input | level. The input signal can become distorted when the level of the sound being input, the number of chords, or the Resonance value is large. Adjust this parameter to eliminate such distortion. | 000 to 127 | ||||||
| Resonance Resonance Adjusts the strength of feedback 000 to 127 | |||||||||
| Manual Manual Adjusts the wah filter | reference frequency. 000 to 127 | ||||||||
| Depth Depth Adjusts the depth of the wah in accordance with the level of the input signal. Setting a positive value causes the wah filter to open in direct proportion with the size of the input signal, producing a bright sound. Setting a negative value causes the wah filter to close in direct proportion with the size of the input signal, producing a dark sound. | -64 to 00 to 63 | ||||||||
| WetLevel Wet Level Adjusts the level of the effect sound. 000 to 127 | |||||||||
| DryLevel | Dry Level | Adjusts the level of the direct sound. | 000 to 127 | ||||||
| 25 Modeling Wah | Simulates various types of wah pedals. This effect can automatically shift the frequency in accordance with the level of the input signal. | ||||||||
| OutLevel Level | Adjusts the wah level. 000 to 127 | ||||||||
| Type Type | Selects the wah type. 1 to 8 | ||||||||
| 1 | CAE | 3 | IBZ | 5 | FAT | 7 | 7STR | ||
| 2 | CRY | 4 | VO | 6 | LIGHT | 8 | RESO | ||
| Manual Manual Adjusts the wah filter | reference frequency. 000 to 127 | ||||||||
| Depth Depth Adjusts the depth of the wah in accordance with the level of the input signal. Setting a positive value causes the wah filter to open in direct proportion with the size of the input signal, producing a bright sound. Setting a negative value causes the wah filter to close in direct proportion with the size of the input signal. producing a dark sound. | -64 to 00 to 63 | ||||||||
| WetLevel Wet Level Adjusts the level of the effect sound. 000 to 127 | |||||||||
| DryLevel | Dry Level | Adjusts the level of the direct sound. | 000 to 127 | ||||||
| Module Name | Description | Settings | |||||||
| Display | Parameter Data | ||||||||
| 26 Distortion Distortion, wah, and amp | simulator combined into a single effect. | ||||||||
| DistGain Dist Gain Adjusts the distortion input signal gain. 000 to 127 | |||||||||
| Dist Lvl Dist Level Adjusts the distortion output level. 000 to 127 | |||||||||
| Dist Low Dist Low Adjusts the distortion low-range gain. 000 to 127 | |||||||||
| DistHigh Dist High Adjusts the distortion high-range gain. 000 to 127 | |||||||||
| Wah Type Wah Type Specifies the wah type. 1 to 6 | |||||||||
| WahDepth | Wah Depth | Adjusts the depth of the wah in accordance with the level of the input signal. | -64 to 00 to 63 | ||||||
| Wah Manu | Wah Manual | Adjusts the wah filter reference frequency. | 000 to 127 | ||||||
| Routing | Routing | Specifies the distortion and wah connection. | Dist, Wah, Wah-Dist, Dist-Wah | ||||||
| Amp | Amp | Specifies the amp type. | 0 to 16 | ||||||
| 0 | Bypass | 5 | FD-DXRV | 10 | FD-TWRV2 | 15 | FD-BMAN | ||
| 1 | FD-PRNST | 6 | VX-AC3 | 11 | SL-SLO | 16 | BASS-STK | ||
| 2 | FD-TWRV1 | 7 | ML-DC3 | 12 | MB-RCTF | ||||
| 3 | RL-J12 | 8 | MB-MK1 | 13 | PV-51-SK | ||||
| 4 | FD-TWD | 9 | MS-STK | 14 | BASS-CMB | ||||
| WetLevel | Wet Level | Adjusts the level of the effect sound. | 000 to 127 | ||||||
| DryLevel | Dry Level | Adjusts the level of the direct sound. | 000 to 127 | ||||||
| 27 Drive | Simulates the drive of a musical instrument amplifier. | ||||||||
| Type | Drive Type Selects | the drive type.* 4 | 1 to 20 | ||||||
| Gain | Gain | Adjusts the driver input signal gain. | 000 to 127 | ||||||
| OutLevel | Level | Adjusts the drive output level. | 000 to 127 | ||||||
| WetLevel | Wet Level | Adjusts the level of the effect sound. | 000 to 127 | ||||||
| DryLevel | Dry Level | Adjusts the level of the direct sound. | 000 to 127 | ||||||
| 28 Amp Cab | Simulates the amp and speaker cabinet without drive and distortion. | ||||||||
| Type | Type | Selects the amp cabinet type.*5 | 1 to 92 | ||||||
| Vari | Variation | Selects a variation that changes the setup of the currently selected amp. The number of variations*5 depends on the amp type. | 1 to 4 | ||||||
| WetLevel | Wet Level | Adjusts the level of the effect sound. | 000 to 127 | ||||||
| DryLevel | Dry Level | Adjusts the level of the direct sound. | 000 to 127 | ||||||
*1 100Hz, 125Hz, 160Hz, 200Hz, 250Hz, 315Hz, 400Hz, 500Hz, 630Hz, 800Hz, 1.0kHz, 1.3kHz, 1.6kHz, 2.0kHz, 2.5kHz, 3.2kHz, 4.0kHz, 5.0kHz, 6.3kHz, 8.0kHz
*2 50Hz, 63Hz, 80Hz, 100Hz, 125Hz, 160Hz, 200Hz, 250Hz, 315Hz, 400Hz, 500Hz, 630Hz, 800Hz
*3 2.0kHz, 2.5kHz, 3.2kHz, 4.0kHz, 5.0kHz, 6.0kHz, 8.0kHz, 10kHz, 13kHz, 16kHz
*4
| Settings | Drive Type | Display | Description |
| 1 to 4 | Clean1 to 4 | Clean1 to 4 | Simulates a clean sound with little distortion. |
| 5 to 8 | Crunch1 to 4 | Crunch1 to 4 | Simulates a crisp crunch sound with little distortion. |
| 9 to 12 | Overdrive1 to 4 | Overdrv1 to 4 | Simulates an overdrive sound with mellow distortion. |
| 13 to 16 | Distortion1 to 4 | Distort1 to 4 | Simulates a hard, straight distortion sound. |
| 17 to 20 | Metal1 to 4 | Metal1 to 4 | Simulates an extreme and weighty distortion sound that is suitable for heavy metal music. |
*5(V: Number of variations)
| Settings V Display | |||
| 1 | 1 | F | D |
| 2 | 1 | F | D |
| 3 | 1 | R | L |
| 4 | 1 | F | D |
| 5 | 1 | F | D |
| 6 1 VX-AC3 | |||
| 7 1 ML-DC3 | |||
| 8 | 1 | M | B |
| 9 | 1 | M | S |
| 10 1 FD-TWRV2 | |||
| 11 1 SL-SLO | |||
| 12 1 MB-RCTF | |||
| 13 1 PV-51-SK | |||
| 14 1 BASS-CMB | |||
| 15 1 FD-BMAN | |||
| 16 1 BASS-STK | |||
| 17 3 65-MQ | |||
| 18 3 AD-MP+CA | |||
| 19 2 BC-HC30 | |||
| 20 3 BN-SHV | |||
| 21 3 BN-ECS | |||
| 22 3 BN-UBR | |||
| 23 3 CV-LG3 | |||
| 24 2 DR-MZ38 | |||
| Settings V Display | |||
| -25 2 DZ-V4 | R | N | |
| -26 2 DZ-HA | W | R | |
| -27 4 EG-TWK1 | 2 | ||
| -28 3 EG-VEN W | D | ||
| -29 2 EN-G15 X | R | ||
| 30 1 EN-INV | |||
| 31 1 EN-BM | |||
| -32 2 EM-53+DIK | 1 | ||
| -33 4 E8-51III T | K | ||
| 34 3 FD-CHMP | |||
| 35 3 FD-TWN | |||
| 36 3 FD-TWRV3 | |||
| 37 2 FU-OD | |||
| 38 2 GB-LANC | |||
| 39 3 HK-TM18 | |||
| 40 3 HK-SBL | |||
| 41 2 KH-STDT | |||
| 42 3 KR-RV | |||
| 43 4 LY-IRST | |||
| 44 3 MB-MK3 | |||
| 45 3 MB-F3+DI | |||
| 46 1 MB-D5 | |||
| 47 4 MB-DRCT | |||
| 48 1 MB-TX+.5 | |||
| Settings V Display |
| S 49 4 MB-TX+DI |
| V 50 4 MS-VS80 |
| 51 4 MS-J800 |
| 52 2 MS-J2401 |
| V 53 3 MS-J2000 |
| 54 2 MS-J2+MB |
| 55 3 MS-PLX |
| 56 2 MS-J1+DI |
| 57 4 MT-CFT |
| 58 4 OR-O15 |
| 59 2 PN-P7 |
| 60 3 PR-SE3 |
| 61 4 PV-51II |
| 62 4 PV-65MH |
| 63 3 RA-NBK |
| 64 2 RL-J20 |
| 65 2 RL-J120 |
| 66 2 RV-30 |
| 67 4 SA-PS1 |
| 68 2 SL-X8 |
| 69 2 SL-X9 |
| 70 3 SP-1624 |
| 71 3 SP-1695 |
| 72 3 SU-BGR3 |
| Settings V Display |
| 73 2 VH-SP6 |
| 74 3 VX-A15 |
| 75 2 VX-A15TB |
| 76 3 VX-A30 |
| 77 3 VX-A30TB |
| 78 4 YM-DG8 |
| 79 2 AC-360 |
| 80 2 AP-SV4DI |
| 81 2 EB-C450 |
| 82 2 FD-BMNtw |
| 83 2 FD-BMNsv |
| 84 2 FD-BMNbk |
| 85 2 FD-STBAS |
| 86 3 GK-150 |
| 87 3 MK-T501 |
| 88 3 SW-PB20 |
| 89 3 SW-SM50 |
| 90 1 RL-CBKB |
| 91 1 LY-3C-AC |
| 92 4 AC-SIM |
Digital Keyboard Sound Source Configuration and MIDI Channel Assignment
The sound source of the Digital Keyboard is divided among four part groups: KEYBOARD, RHYTHM, SONG SYSTEM, SONG SOLO. The roles assigned to each part of the part groups are a shown in the "Part" column of the table below.
| Part Group | Part Number | Part | MIDI OUT Channel*1 |
| KEYBOARD | n1 repU draobyeK1 | ||
| 1 + n2 repU draobyeK2 | |||
| 2 + n1 rewoL draobyeK3 | |||
| 3 + n2 rewoL draobyeK4 | |||
| 5 | Auto Harmonize | n + 4 | |
| 6 | Phrase PAD 1 | ||
| 7 | Phrase PAD 2 | ||
| 8 | Phrase PAD 3 | ||
| 9 | Phrase PAD 4 | ||
| RHYTHM | 1 | Accomp Percussion | 9 |
| 2 | Accomp Drum | 10 | |
| 3 | Accomp Bass | 11 | |
| 4 | Accomp Chord 1 | 12 | |
| 5 | Accomp Chord 2 | 13 | |
| 6 | Accomp Chord 3 | 14 | |
| 7 | Accomp Chord 4 | 15 | |
| 8 | Accomp Chord 5 | 16 | |
| SONG SYSTEM | 1 | MIDI Recorder System Track Upper 1 | |
| 2 | MIDI Recorder System Track Upper 2 | ||
| 3 | MIDI Recorder System Track Lower 1 | ||
| 4 | MIDI Recorder System Track Lower 2 | ||
| 5 | MIDI Recorder System Track Auto Harmonize | ||
| 6 | MIDI Recorder Phrase PAD 1 | ||
| 7 | MIDI Recorder Phrase PAD 2 | ||
| 8 | MIDI Recorder Phrase PAD 3 | ||
| 9 | MIDI Recorder Phrase PAD 4 | ||
| MIDI IN Channel MIDI IN ↓→ ↓→ ↓→ ↓→ ↓→ ↓→ ↓→ ↓→ ↓→ ↓→ ↓→ ↓→ ↓→ ↓→ ↓→ ↓→ ↓→ ↓→ ↓→ ↓→ ↓→ ↓→ ↓→ ↓→ ↓→ ↓→ ↓→ ↓→ ↓→ ↓→ ↓→ ↓→ ↓→ ↓→ |
■ Sounding of the Digital Keyboard Sound Source by Digital Keyboard Operations or by MIDI IN Input
- Sounds generated during a performance on the keyboard are assigned to parts 1 through 5 of the KEYBOARD part group. Phrase pads are assigned to parts 6 through 9 of the KEYBOARD part group.
- Sounds generated by Auto Accompaniment are assigned to the parts of the RHYTHM part group.
- Sounds generated by the system track and phrase pads during song playback (Song Bank Mode) are assigned to the parts of the SONG SYSTEM part group.
- Sounds generated by the solo tracks sounded during song playback (Song Bank Mode) and sounds generated by messages input from MIDI IN are assigned to the parts of the SONG SOLO part group.
■External MIDI Device Operations by the Digital Keyboard
- For the MIDI OUT channel of keyboard performance data output, the n-value specified by "Keyboard Channel" (page EN-120) is applied to the Upper 1 part. MIDI OUT channels for the following are based on the MIDI OUT channel of the Upper 1 part: Upper 2 = n+1, Lower 1 = n+2, Lower 2 = n+3, and Auto Harmonize = n+4.
- While the "Accomp Out" (page EN-120) setting is turned on, the performance data of the Auto Accompaniment parts is output to MIDI OUT channels CH9 through CH16.
AC Adaptor Handling Precautions
Model: AD-E24250LW/AD-A12150LW
- Read these instructions.
- Keep these instructions on hand.
- Heed all warnings.
- Follow all instructions.
- Do not use this product near water.
- Clean only with a dry cloth.
- Do not install near radiators, heat registers, stoves, or any other source of heat (including amplifiers).
- Use only attachments and accessories specified by the manufacturer.
- Refer all servicing to qualified service personnel. Servicing is required after any of the following occurs: when the product is damaged, when the power supply cord or plug is damaged, when liquid is spilled into the product, when a foreign object falls into the product, when the product is exposed to rain or moisture, when the product does not operate normally, when the product is dropped.
- Do not allow the product to be exposed to dripping or splashing liquid. Do not place any object containing liquid on the product.
- Do not allow the electrical load output to exceed the label rating.
- Make sure the surrounding area is dry before plugging into a power source.
- Make sure the product is oriented correctly.
- Unplug the product during lightning storms or when you do not plan to use it for a long time.
- Do not allow product ventilation openings to become blocked. Install the product in accordance with the manufacturer's instructions.
- Take care the power cord is located where it will not be stepped upon or bent severely, particularly in locations close to plugs and convenience receptacles, and in locations where it exits from the product.
- The AC adaptor should be plugged into a power outlet as close to the product as possible to allow immediate disconnection of the plug in case of emergency.
The symbol below is an alert indicating un-insulated hazardous voltage inside the product's enclosure, which may be sufficient to constitute the risk of electric shock to users.

The symbol below is an alert indicating the presence of important operating and maintenance (servicing) instructions in the documentation that accompanies the product.

Operating Precautions
Be sure to read and observe the following operating precautions.
■Location
Avoid the following locations for this product.
- Areas exposed to direct sunlight and high humidity
- Areas subjected to temperature extremes
- Near a radio, TV, video deck, or tuner
The above devices will not cause malfunction of the product, but interference from the product can cause audio or video interference of a nearby device.
■User Maintenance
- Never use benzine, alcohol, thinner, or other chemical agents to clean the product.
- To clean the product or its keyboard, wipe with a soft cloth moistened in a weak solution of water and a mild neutral detergent. Wring all excess moisture from the cloth before wiping.
■Included and Optional Accessories
Use only accessories that are specified for use with this product. Use of unauthorized accessories creates the risk of fire, electric shock, and personal injury.
■Weld Lines
Lines may be visible on the exterior of the product. These are “weld lines” that result from the plastic molding process. They are not cracks or scratches.
■Musical Instrument Etiquette
Always be aware of others around you whenever using this product. Be especially careful when playing late at night to keep the volume at levels that do not disturb others. Other steps you can take when playing late at night are closing the window and using headphones.
Appendix
Song List
| No. Title |
| WORLD (CATEGORY : 01) |
| 001 WHEN THE SAINTS GO MARCHING IN |
| 002 AMAZING GRACE |
| 003 HOME ON THE RANGE |
| 004 SANTA LUCIA |
| 005 WALTZING MATILDA |
| 006 CAMPTOWN RACES |
| PIANO/CLASSICS (CATEGORY : 02) |
| 007 JE TE VEUX |
| 008 SONATA op.13 “PATHÉTIQUE” 2nd Mov. |
| 009 HABANERA FROM “CARMEN” |
| 010 MINUET IN G MAJOR |
| 011 ODE TO JOY |
| 012 GYMNOPÉDIES no.1 |
| 013 FÜR ELISE |
| 014 TÜRKISH MARCH (MOZART) |
| 015 ETUDE op.10 no.3 “CHANSON DE L’ADIEU” |
| 016 THE ENTERTAINER |
| 017 FRÖHLICHER LANDMANN |
| 018 LA CHEVALERESQUE |
| 019 SONATA K.545 1st Mov. |
| 020 LA PRIÈRE D’UNE VIERGE |
| 021 VALSE op.64 no.1 “PETIT CHIEN” |
| 022 LIEBESTRÄUME no.3 |
| 023 JESUS BLEIBET MEINE FREUDE |
| 024 CANON (PACHELBEL) |
| 025 SERENADE FROM “EINE KLEINE NACHTMUSIK” |
| 026 MARCH FROM “THE NUTCRACKER” |
| 027 LA FILLE AUX CHEVEUX DE LIN |
| 028 HUMORESKE (DVORÁK) |
| 029 TRÄUMEREI |
| 030 NOCTURNE op.9 no.2 (CHOPIN) |
| USER RECORDS (CATEGORY : 03) |
| 031 - 040 USER RECORD 1 - 10 |
Fingering Guide
FINGERED 1, FINGERED 2 Chords
| C | 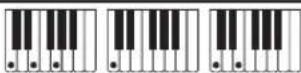 |
| Cm | 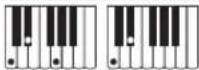 |
| Cdim |  |
| Caug *3 |  |
| C5 |  |
| Csus4 *3 |  |
| Csus2 *3 |  |
| C7 | 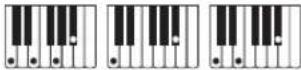 |
| Cm7 *3 | 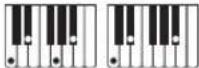 |
| CM7 | 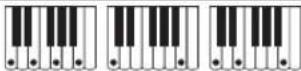 |
| CmM7 | 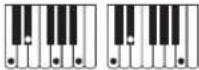 |
| Cdim7 *3 | 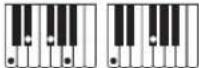 |
| CdimM7 |  |
| C7b5 *3 |  |
| Cm7b5 *3 |  |
| CM7b5 |  |
| Caug7 |  |
| CaugM7 |  |
| C7sus4 |  |
| C6 *1 *3 |  |
| Cm6 *2 *3 |  |
| Cadd9 |  | |
| Cmadd9 |  | |
| C69 *3 |  | |
| Cm69 *3 |  | |
| C7(♭9) |  | |
| C7(9) |  | |
| C7(#9) |  | |
| C7(#11) |  | |
| C7(♭13) |  | |
| C7(13) |  | |
| Cm7(9) |  | |
| Cm7(11) *3 |  | |
| CM7(9) |  | |
| CmM7(9) |  | |
| C5 *4 |  | |
| C8 *5 |  |
*1 With FINGERED 2, interpreted as Am7.
*2With FINGERED 2, interpreted as Am7 ^15 .
*3Inverted form not supported in some cases.
*4Chord consisting of root and 5th only.
*5 Not a standard chord, but used when you want Auto Accompaniment with the root note only, or the root with an octave added.
FINGERED ON BASS, FULL RANGE CHORD
In addition to the chords that can be fingered with FINGERED 1 and FINGERED 2, the following chords also are recognized.
| ^\#C · · · ^\#C · · ^bC · · ^bC · ^\#mC · · |
| ^\#mC · · ^bmC · · ^2mC · · ^\#dimC · |
| · ^\#dimC · · ^bdimC · · · 7C · ^b7C |
| 7C · 7C · ^bM7C · ^\#m7^b5C · 7C · 7C · ^aadd9C |
NOTE
- With FINGERED ON BASS, the lowest note fingered is interpreted as the base note. Inverted forms are not supported.
- With FULL RANGE CHORD, when the lowest note fingered is a certain distance from the neighboring note, the chord is interpreted as a fraction chord.
- Unlike FINGERED 1, 2, and FINGERED ON BASS, FULL RANGE CHORD requires pressing of at least three keys to form a chord.
Chord Example List
| *1*2 | C | C^2/(D^b) | D | (D^2)/E^b | E | F | F^2/(G^b) | G | (G^2)/A^b | A | (A^2)/B^b | B |
| M | ||||||||||||
| m | ||||||||||||
| dim | ||||||||||||
| aug | ||||||||||||
| sus4 | ||||||||||||
| sus2 | ||||||||||||
| 7 | ||||||||||||
| m7 | ||||||||||||
| M7 | ||||||||||||
| m7^6 | ||||||||||||
| 7^k5 | ||||||||||||
| 7sus4 | ||||||||||||
| add9 | ||||||||||||
| madd9 | ||||||||||||
| mM7 | ||||||||||||
| dim7 | ||||||||||||
| 69 | ||||||||||||
| 6 | ||||||||||||
| m6 |
- You can use the split point to change the size of the accompaniment keyboard range (page EN-20, 49). *1 Root *2 Chord Type
Block Diagram
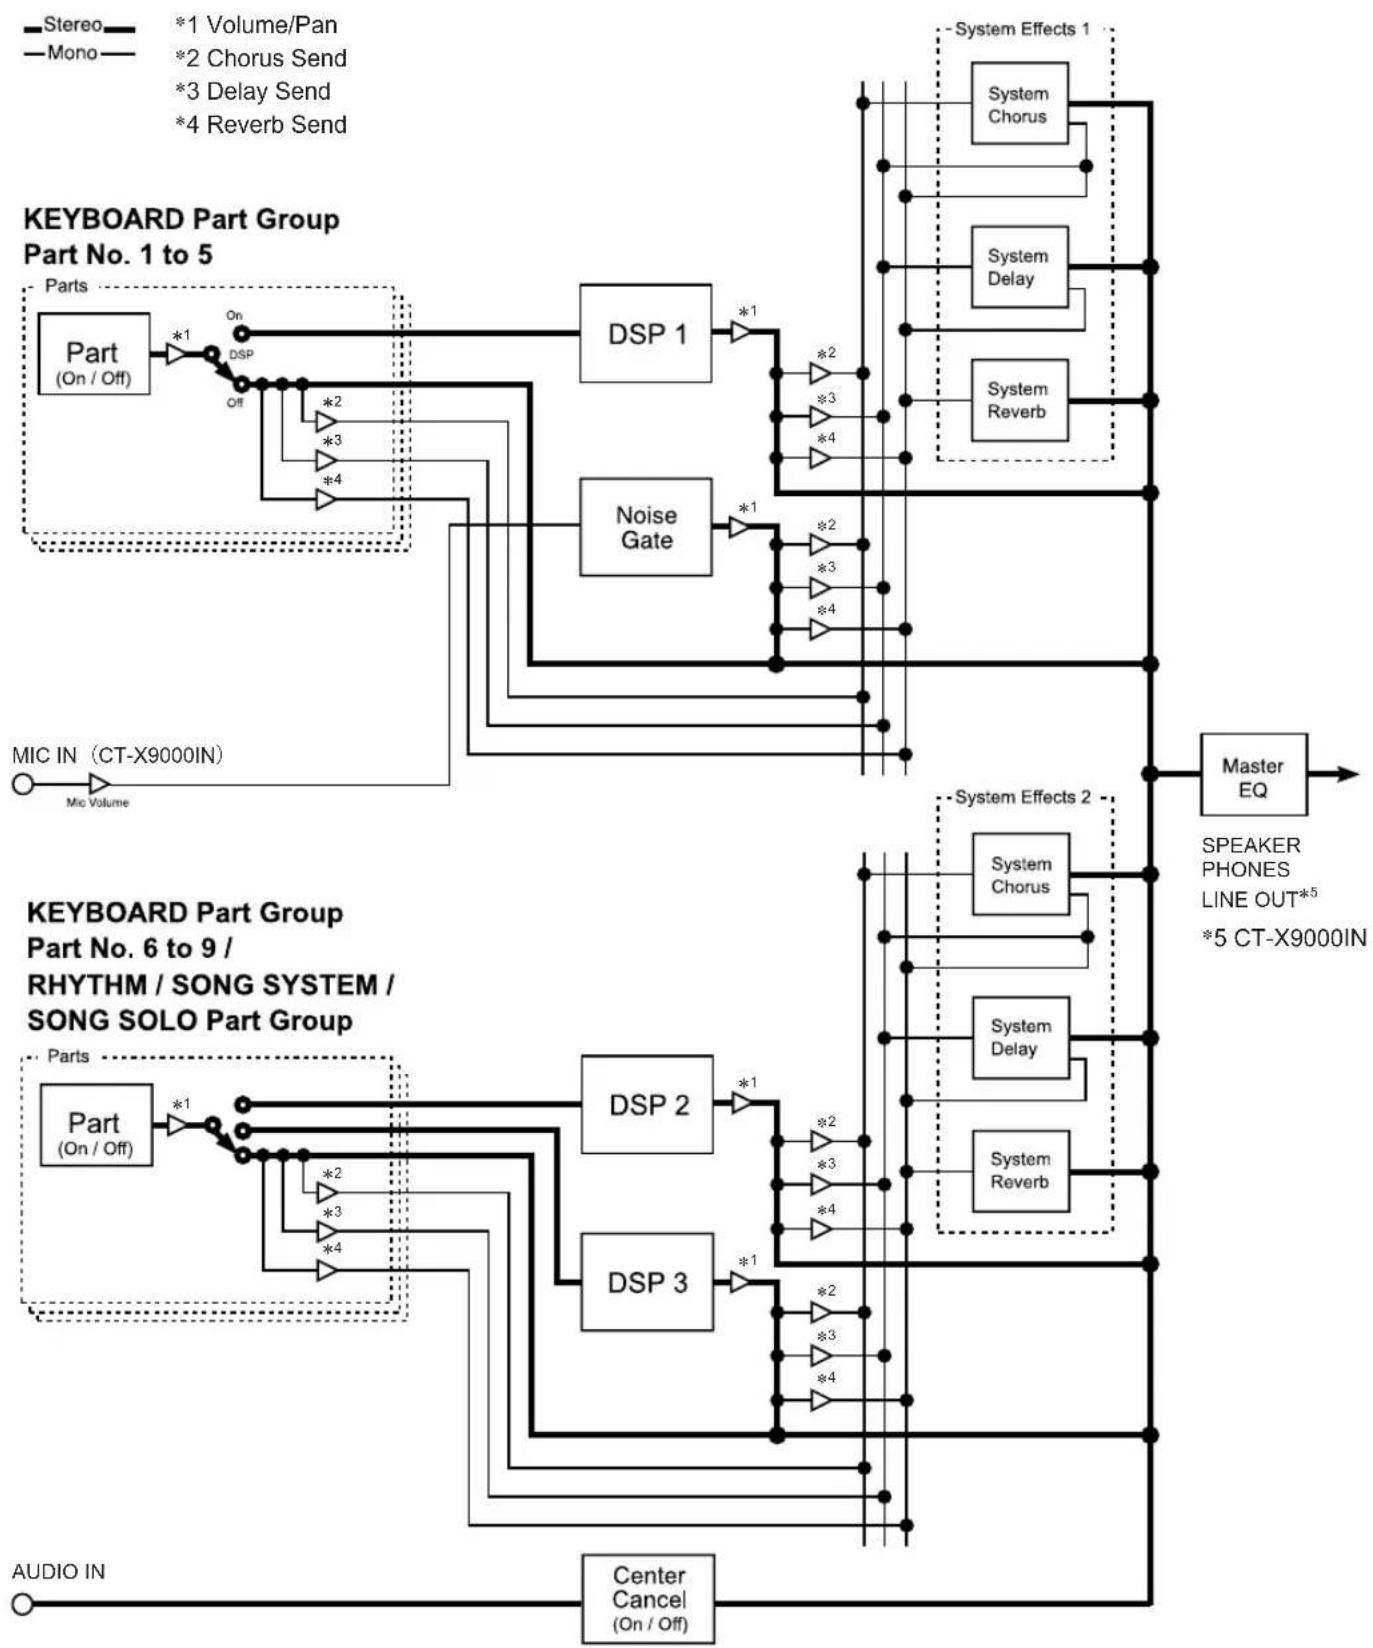
flowchart
graph TD
    subgraph "KEYBOARD Part Group Part No. 1 to 5"
        A["Parts"] --> B["Part (On / Off)"]
        B --> C["On"]
        C --> D["DSP"]
        D --> E["Off"]
        E --> F["*1"]
        F --> G["+"]
        G --> H["+"]
        H --> I["*2"]
        I --> J["*3"]
        J --> K["*4"]
        K --> L["+"]
        L --> M["DSP 1"]
        M --> N["Noise Gate"]
        N --> O["*1"]
        O --> P["*2"]
        P --> Q["*3"]
        Q --> R["*4"]
        R --> S["+"]
        S --> T["+"]
        T --> U["DSP 2"]
        U --> V["+"]
        V --> W["*1"]
        W --> X["*2"]
        X --> Y["*3"]
        Y --> Z["*4"]
        Z --> AA["+"]
        AA --> AB["DSP 3"]
        AB --> AC["*1"]
        AC --> AD["*2"]
        AD --> AE["*3"]
        AE --> AF["*4"]
        AF --> AG["+"]
        AG --> AH["+"]
        AH --> AI["+"]
    end

    subgraph "KEYBOARD Part Group Part No. 6 to 9 /
          RHYTH / SONG SYSTEM / SONG SOLO Part Group"
        B --> I
        I --> J
        J --> K
        K --> L
        L --> M
        M --> N
        N --> O
        O --> P
        P --> Q
        Q --> R
        R --> S
        S --> T
        T --> U
        U --> V
        V --> W
        W --> X
        X --> Y
        Y --> Z
        Z --> AA
        AA --> AB
        AB --> AC
        AC --> AD
        AD --> AE
        AE --> AF
        AF --> AG
        AG --> AH
    end

    subgraph "AUDIO IN"
        A --> AI
        AI --> AJ["Center Cancel (On / Off)"]
    end

    subgraph "MIX IN (CT-X9000IN)"
        B --> AK["Mic Volume"]
    end

    subgraph "System Effects 1"
        M --> AL["System Chorus"]
        M --> AM["System Delay"]
        M --> AN["System Reverb"]
    end

    subgraph "Master EQ"
        M --> AO["System Chorus"]
        M --> AP["System Delay"]
        M --> AQ["System Reverb"]
    end

    subgraph "Speaker Phones LINE OUT*5"
        AO --> AR["SPEAKER PHONES *5 CT-X9000IN"]
    end

    subgraph "Rhythm / SONG SYSTEM / SONG SOLO Part Group"
        A --> AS["Parts"]
        AS --> AT["*1"]
        AT --> AU["*2"]
        AU --> AV["*3"]
        AV --> AW["*4"]
    end

    subgraph "Audio IN"
        AI --> AX["AUDIO IN"]
    end

    style "KEYBOARD Part Group Part No. 1 to 5" fill:#f9f,stroke:#333,stroke-width:2px
    style "RHYTH / SONG SYSTEM / SONG SOLO Part Group" fill:#ccf,stroke:#333,stroke-width:2px
Models: CT-X9000IN / CT-X8000IN Version : 1.0
MIDI Implementation Chart
| Function Transmitted | Recognized Remarks | |||
| Basic Channel | Default Changed | 1 1 - 16 | 1 - 16 1 - 16 | |
| Mode | Default Messages Altered | Mode 3 X * * * * * * * | Mode 3 X * * * * * * * | |
| Note Number | True voice | 12 - 120 * * * * * * * | 0 - 127 0 - 127 *1 | |
| Velocity | Note ON Note OFF | O 9nH v = 1 - 127 O 8nH v = 0 - 127 | O 9nH v = 1 - 127 O 8nH v = 0 - 127, 9nH v = 0 | |
| After Touch | Key's Ch's | X X | X O | |
| Pitch Bender | O | O | ||
| Control Change | 0 1 5 6.38 7 10 11 64 65 66 67 71 72 737476777884919394100, 101 | O CT-X9000IN:O CT-X8000IN:X X *2 O *3 O *3 O *3 O *3 O *4 X *4 X *4 X *4X *4X *4X *4X *4X X O O O O *2 | O O O O *2 O O O O O O O O O O O O O O O O O O O O O O O O O O O O O O O O O O O O O O O O O O O O O O O O O O O O O O O O O O O O O O O O O O O O O O O O O O O O O O O O O O O O O O O O O O O O O O O O O O O OOOOOOOO *2 | Bank select Modulation Portamento Time Data entry LSB, MSB Volume Pan Expression Hold 1 Portamento Switch Sostenuto Soft pedal Filter resonance Release time Attack timeFilter cutoffVibrato rateVibrato depthVibrato delayPortamento ControlReverb send levelChorus send levelDelay send levelRPN LSB, MSB |
| Program Change :True # | O 0 - 127***** | O 0 - 127 | ||
| System Exclusive | O *2 | O *2 | ||
| System Common : Song Pos : Song Sel : Tune | XXX | XXX | ||
| System Real Time : Clock : Commands | XX | XX | ||
| Aux Messages : All sound off : Reset all controller : Local ON/OFF : All notes OFF : Active Sense : Reset | X *4X *4XX | OOXX | ||
| Remarks | *1: Depends on tone.*2: For details about RPN and system exclusive messages, see MIDI Implementation at http://world.casio.com/.*3: In accordance with pedal effect setting.*4: Output along with certain operations. | |||
O: Yes
X: No
Mode 2: OMNI ON, MONO
Mode 4: OMNI OFF, MONO
CASIO®
- About Music Score data
- Important!
- CT-X8000IN only
- Contents
- General Guide EN-4
- Preparing a Power Supply EN-8
- Connecting to Audio Equipment EN-11
- Operations Common to All Modes EN-14
- Listening to Demo Play EN-17
- Playing on the Keyboard EN-18
- Controlling Sounds EN-29
- Playing a Built-in Song or a Song on a USB Flash Drive (Song Bank Mode) EN-38
- Playing Back an Audio File on a USB Flash Drive (Audio Mode) EN-41
- Using Auto Accompaniment (Rhythm Mode) EN-42
- Using Music Presets EN-52
- Using Phrase Pads EN-53
- Muting Specific Parts (Part Mode) EN-60
- Using the Mixer EN-62
- Registering and Restoring a Setup (Registration) EN-65
- Editing a Tone (User Tones) EN-69
- Creating an Auto Accompaniment (User Rhythm) EN-74
- Using the MIDI Recorder to Record EN-87
- Configuring Function Settings EN-107
- USB Flash Drive EN-114
- Connecting a Computer EN-119
- Reference EN-121
- Appendix A-1
- MIDI Implementation Chart
- Included Accessories
- ●Music Stand
- ●Leaflets
- Separately Available Accessories
- General Guide
- Preparing the Music Stand
- Returning the Digital Keyboard to Its Factory Default Settings
- Preparing a Power Supply
- NOTE
- Using the AC Adaptor
- CT-X9000IN: Connecting the AC Adaptor
- CT-X8000IN: Connecting the AC Adaptor
- During Use
- During Movement
- During Storage
- CT-X8000IN: Using Batteries
- ■Low Battery Indication
- Turning Power On or Off
- Auto Power Off
- Auto Resume
- ●Current settings of the items below
- ●On/off status of the functions below
- ●Function setting\* 2 (page EN-107) status
- ●Mixer (page EN-62) setting status
- - CT-X9000IN: Category selection, tone and rhythm category selection status, last selected tone/rhythm in each tone/rhythm category
- Adjusting Display Contrast
- Connecting to Audio Equipment
- Digital Keyboard Audio Output
- To enable and disable speaker output
- To output from the speakers while headphones are connected
- Using Headphones
- Outputting Keyboard Notes to Audio Equipment
- To connect an external device to the Digital Keyboard's PHONES jack
- CT-X9000IN: To connect an external device to the Digital Keyboard's LINE OUT jacks
- ■Connecting to Audio Equipment (Figure ①)
- ■Connecting to a Musical Instrument Amplifier (Figure ②)
- Playing an External Device from the Digital Keyboard
- Center Cancel (Vocal Cut)
- CT-X9000IN: Outputting Sound from a Microphone
- Microphone Settings
- Operations Common to All Modes
- About this manual
- Numeric Input
- ■ Using the 12 Number Keys
- ■ Using the 13 [-] and [+] Keys
- ■Using the 11 Dial
- Other Functions of 12 Number Keys
- CATEGORY Button
- To switch between tone categories
- Press 5 TONE.
- Press 4 CATEGORY.
- While "C" is displayed, press 4 CATEGORY to advance to the next category.
- To select tones only within the currently displayed category, wait until 1 starts to flash, or press 10 FUNCTION to make 10 flash.
- To navigate between categories
- While a tone name is displayed, hold down 4 CATEGORY as you press 13 [-] or [+].
- Text Character Input
- To insert characters
- Press the [8] (INSERT) 12 number key.
- To modify characters
- To delete characters
- FUNCTION Indicator
- Use 13 [-] and [+] or the 11 dial to change the Touch Response setting value.
- To return to the setting item display, press 10FUNCTION.
- When the setting is the way you want, long-press the [4] (EXIT) 12 number key to exit the setting screen.
- Listening to Demo Play
- Press 5 TONE and 6 RHYTHM at the same time.
- To stop demo play, press 20 PLAY/STOP or 5 TONE and 6 RHYTHM at the same time.
- Playing on the Keyboard
- Selecting a Tone
- To select a tone
- Use the 12 number keys, 13 [-] and [+], or the 11 dial to select the number of the tone you want to assign to keyboard play.
- Play something on the keyboard to hear what your selected tone sounds like.
- ■DSP Tones
- CT-X9000IN: To use the TONE Category buttons to select a category
- Sounding Multiple Tones (Layer and Split)
- ■Keyboard Part Indicators
- To split the keyboard between two tones (Split)
- To move the keyboard split point
- To layer two tones
- To use split and layer together
- To change the tones assigned to each split/layer part
- Selecting an Effect for a Tone (Reverb, Chorus, Delay)
- ●Reverb (REVERB)
- ●Chorus (CHORUS)
- ●Delay (DELAY)
- To select a digital effect
- Press 10FUNCTION.
- Use the [1] (∠) and [3] (△) 12 number keys to display "Reverb".
- Use 13 [-] and [+] or the 11 dial to change the setting value.
- Use the [1] (∠) and [3] (△) 12 number keys to display "Chorus".
- Use 13 [-] and [+] or the 11 dial to change the setting value.
- Use the [1] (∠) and [3] (△) 12 number keys to display "Delay".
- Use 13 [-] and [+] or the 11 dial to change the setting value.
- When the setting is the way you want, long-press the [4] (EXIT) 12 number key to exit the setting screen.
- Chorus Effect List
- Delay Effect List
- Using Equalization
- To select an equalization setting
- CT-X9000IN: To configure User Equalizer settings
- Use the [1] (∠) and [3] (△) 12 number keys to display "User EQ", and then press [6] (ENTER).
- Configure settings for reach frequency range.
- Configure input level and output level settings as required.
- To start or stop the metronome
- Specify the time signature.
- Use the 30 TEMPO [∨] and [∧] buttons to change the tempo setting.
- Press 29 METRONOME.
- To stop the metronome, press 29 METRONOME again.
- To adjust the balance between metronome and keyboard volume
- Sounding Arpeggio Phrases Automatically (Arpeggiator)
- To turn on the arpeggiator
- Press 34 AUTO HARMONIZE/ARPEGGIATOR and confirm that the [ARPEGGIATOR] indicator is displayed.
- To turn the arpeggiator off, press 34 AUTO HARMONIZE/ARPEGGIATOR.
- To select an arpeggiator type
- Changing Keyboard Response to Touch Pressure (Touch Response)
- To enable and disable Touch Response
- Press 33 TOUCH ON/OFF.
- To change Touch Response sensitivity
- Controlling Sounds
- Using a Pedal
- Connecting a Pedal
- To connect a pedal to the 54 PEDAL1 jack
- To connect a pedal to the 55 PEDAL2/EXPRESSION jack
- ■Foot Switch Pedal
- ■Expression Pedal
- ■ Connectable Expression Pedals
- Sliding Smoothly Between Pitches (Portamento)
- Press 32 PORTAMENTO.
- To disable portamento, press
- Using the Pitch Bend Wheel
- While playing a note on the keyboard, rotate the 40 PITCH BEND wheel on the left of the keyboard upwards or downwards.
- CT-X9000IN: 39 MODULATION/ASSIGNABLE button
- To apply vibrato to notes
- Hold down 39 MODULATION/ASSIGNABLE. The button's indicator lamp remains lit while the button is depressed.
- To disable the effect, release the button.
- To change the operation performed when 39MODULATION/ASSIGNABLE is pressed
- To change the function assigned to 39 MODULATION/ASSIGNABLE
- To specify the keyboard part to which an effect is applied when 39MODULATION/ASSIGNABLE is pressed
- To change how DSP effects applied when 39 MODULATION/ASSIGNABLE is pressed
- Changing the Pitch in Semitone Steps (Transpose)
- To change the pitch in semitone units
- Changing the Pitch of Each Part in Octave Units (Octave Shift)
- To configure the octave shift amount setting for each part
- Press 37 OCTAVE.
- To use Quick Octave Shift
- To select Quick Octave Shift keyboard parts
- Performing Master Digital Keyboard and Individual Part Pitch Adjustment
- To fine tune a pitch (Tuning)
- Use the [1] (∠) and [3] (△) 12 number keys to display "Tune", and then press [6] (ENTER). This displays "MstrTune".
- Use the 12 number keys, 13 [-] and [+], or the 11 dial to change the setting value.
- When the setting is the way you want, long-press the [4] (EXIT) 12 number key to exit the setting screen.
- To fine tune the pitch of each keyboard part (Part Coarse Tuning, Part Fine Tuning)
- Selecting a Scale
- To select the temperament of keyboard play
- To fine tune a scale (Scale Fine Tuning)
- To change the scale setting used for Auto Accompaniments
- Playing a Built-in Song or a Song on a USB Flash Drive (Song Bank Mode)
- Selecting a Built-in Song for Playback
- To select a single built-in song for playback
- Press 7SONG BANK.
- Use the 12 number keys, 13 [-] and [+], or the 11 dial to select a song number.
- Press 20PLAY/STOP.
- To stop song playback, press 20 PLAY/STOP.
- To select a tone for keyboard play in the Song Bank mode
- In the Song Bank mode, press 5 TONE.
- To adjust the balance between song and keyboard volume
- Looping Playback of Specific Song Measures (A-B Repeat)
- To loop a specific phrase
- When playback reaches the beginning of the section you want to loop, press 16 A-B.
- When playback reaches the end of the section you want to repeat, press 16A-B again.
- To return to normal playback, press 16 A-B.
- Playing Back with One Hand's Part Muted
- To play back with one hand's part muted
- Use 14 PART SELECT to select a part to practice.
- To stop song playback, press 20 PLAY/STOP.
- ■Part Channel Information
- To specify a part channel
- Playing Back a Song from a USB Flash Drive
- To play back a song from a USB flash drive
- Insert the USB flash drive into the Digital Keyboard's USB flash drive port.
- Perform the procedure under "To select a single built-in song for playback" (page EN-38).
- Playing Back an Audio File on a USB Flash Drive (Audio Mode)
- To play back an audio file
- To stop playback, press 3 AUDIO PLAY/STOP.
- To exit the Audio Mode, press 7 SONG BANK (AUDIO).
- To adjust the balance between audio file playback and keyboard volume
- Using Auto Accompaniment (Rhythm Mode)
- Selecting a Rhythm
- To select a rhythm
- Press 6 RHYTHM.
- Use the 12 number keys, 13 [-] and [+], or the 11 dial to select a rhythm number.
- Press 20 START/STOP to start play of the selected rhythm.
- CT-X9000IN: To use the RHYTHM Category buttons to select a category
- Using Auto Accompaniment
- To play an Auto Accompaniment
- Use the 30 TEMPO [∨] and [∧] buttons to change the tempo setting.
- Play other chords with your left hand as you play the melody with your right hand.
- To stop Auto Accompaniment, press 20 START/STOP.
- ■Auto Accompaniment Parts and the ACCOMP Indicator
- To adjust the balance between Auto Accompaniment and keyboard volume
- Changing Auto Accompaniment Speed (Tempo)
- Note Value Indicator and Tempo Value
- To specify a tempo value
- TEMPO
- To change the displayed note value
- To set the tempo by tapping a beat
- To start rhythm play with the 31 TAP TEMPO button
- Creating a Song with an Auto Accompaniment (Accompaniment Pattern)
- Accompaniment Patterns
- ■Variations (Four Types)
- To play a variation
- ■Fill-Ins (Four Types)
- To play a fill-in
- VF1
- ■Intro (One Type)
- To play an intro
- To change the variation played following the intro
- VARIATION/FILL-IN 3, 18 VARIATION/FILL-IN 4)
- ■Ending (One Type)
- To play an ending
- ENDING/SYNCHRO START.
- Starting and Stopping Auto Accompaniment with the Accompaniment Keyboard (Synchro Start, Synchro Stop)
- To use Synchro Start to start Auto Accompaniment play
- Press 19 ENDING/SYNCHRO START.
- Play the chord you want on the accompaniment keyboard.
- To use Synchro Stop to stop Auto Accompaniment play
- Press 21 SYNCHRO STOP.
- While Auto Accompaniment is sounding, release all of the accompaniment keyboard keys at the point where you want it to stop.
- Changing Accompaniment Keyboard Settings
- Selecting a Chord Input Mode
- ■CASIO CHORD
- Chord Type
- Major Chords
- Minor Chords
- Seventh Chords
- Minor Seventh Chords
- ■FINGERED
- ●FINGERED 1
- ●FINGERED 2
- ●FINGERED ON BASS
- ●FINGERED ASSIST
- FULL RANGE CHORD
- To select a chord fingering mode
- Use the [1] (∠) and [3] (△) 12 number keys to display "ChordMod".
- ■Not FULL RANGE CHORD
- Accompaniment Keyboard Range Setting
- Advanced Split Settings
- ●Lower Point
- ●Chord Point
- To specify the lower point
- To specify the chord point
- Using Recommended Tones and Tempos (One-Touch Presets)
- Hold down 6 RHYTHM until the tone name is displayed.
- Play a chord on the keyboard.
- Adding Harmony to Melody Notes (Auto Harmonize)
- To turn on Auto Harmonize
- Press 34 AUTO HARMONIZE/ARPEGGIATOR and confirm that the [AUTO HARMONIZE] indicator is displayed.
- To turn Auto Harmonize off, press 34 AUTO HARMONIZE/ARPEGGIATOR.
- To select the Auto Harmonize type
- Using Music Presets
- To perform using a music preset
- Long-press 22 ACCOMP until the [ACCOMP] indicator starts to flash.
- Use the 12 number keys, 13 [-] and [+], or the 11 dial to select a music preset number.
- Press 20 START/STOP or 14 INTRO.
- Play along on the keyboard with the Auto Accompaniment.
- To stop Auto Accompaniment, press 20 START/STOP or 19 ENDING/SYNCHRO START.
- To exit the Music Preset Mode, press 22ACCOMP.
- To change the key of a chord progression
- Settings Changed by Music Preset
- Using Phrase Pads
- ■Phrase Sets and Phrase Storage Locations
- Changing to Another Phrase Set
- To change the phrase set
- Starting and Stopping Phrase Playback
- To start and stop phrase playback
- To stop playback of all phrases
- To synchronize phrase playback with Auto Accompaniment
- Configuring Phrase Playback Setups
- To configure a phrase playback setup
- Recording a Phrase
- To record a phrase
- Press a 26 PHRASE PAD button ([P1] to [P4]) to specify the phrase number of the recording destination.
- To start recording, press 20 PLAY/STOP or play something on the keyboard.
- Timing in accordance with the MEASURE and BEAT values on the display, play something on the keyboard when required.
- When you are finished recording, press 8 RECORD/STOP.
- Configuring Phrase Recording Settings
- To configure phrase recording settings
- Managing Phrase Sets
- To copy a phrase set
- To delete a phrase set
- Editing a Phrase
- To enter the Phrase Editing mode
- To delete a phrase
- To copy a phrase To delete all data from a phrase except note
- To quantize a phrase
- To key shift a phrase
- To configure phrase mixer settings
- Muting Specific Parts (Part Mode)
- Turning a Part On or Off
- To turn each part on or off
- Press 9PART.
- Use 13 [-] and [+] to select the part group of the part you want to turn on or off.
- To turn a part on or off, press the 12 number key that corresponds to the part number.
- To exit the Part mode, press 9 PART.
- Part On/Off Function Part Groups
- Using the Mixer
- Mixer Operation
- To configure mixer settings
- Long press 9 PART (MIXER) until the [MIXER] indicator appears.
- Select the part group whose mixer settings you want to configure.
- Use the [1] (∠) and [3] (△) 12 number keys to select the part whose settings you want to configure with the mixer.
- Use the [2] (√) and [5] (∧) 12 number keys to select the item whose setting you want to configure.
- To exit the Mixer mode, press the [4] (EXIT) 12 number key.
- To select parts with the 12 number keys
- Perform steps 1 and 2 under "To configure mixer settings" (page EN-62) to select the part group whose mixer settings you want to configure.
- Press 9PART.
- To select a part, press the 12 number key that corresponds to the part number.
- List of Parts for Each Mixer Part Group
- ●KEYBOARD Part Group
- ●RHYTHM Part Group
- ●SONG SYSTEM Part Group
- ●SONG SOLO Part Group
- ●MIDI IN Part Group
- ●External Part Group
- Advanced Mixer Settings
- Setting Items for Each Part Group
- To sound only a selected part
- Registering and Restoring a Setup (Registration)
- ■Setup Storage Locations
- Registering a Setup
- Registration Setting Items
- ●Keyboard Play
- ●Note Control
- Split Settings
- ●Auto Accompaniment
- ●AUTO HARMONIZE/ARPEGGIATOR
- -Phrase Pad
- ●Mixer
- To register a setup
- Recalling a Registered Setup
- To recall a setup
- As required, press 23 FREEZE to toggle the freeze function between on and off.
- Use 24 BANK to select the bank that contains the setup you want to recall.
- Press one of the 28 REGISTRATION buttons ([1] to [8]) to select the area whose setup you want to recall.
- Freeze Function
- Using a Pedal to Cycle Through Multiple Setups (Registration Sequence)
- To play with a Registration Sequence
- Editing a Tone (User Tones)
- ■Saving to an External Device
- Creating a User Tone
- To edit a tone
- Select the tone you want to edit.
- Long-press 10 FUNCTION until the [EDIT] indicator appears.
- Use the [1] (∠) and [3] (△) 12 number keys to display the editing item you want to modify.
- Use 13 [-] and [+] or the 11 dial to change the setting value.
- Repeat steps 3 and 4 above for each of the editing items you want to change.
- To save the edited tone, press the [7] (WRITE) 12 number key.
- To exit the Tone Editing Mode, long-press the [4] (EXIT) 12 number key.
- DSP Editing
- To use DSP editing to edit an effect
- To rename a user tone
- To copy a user tone
- To delete a user tone
- Creating an Auto Accompaniment (User Rhythm)
- Rhythm Configurations
- Data Recordable to Each Part
- Creating a User Rhythm
- - Creating an Accompaniment with All New Parts
- ●Editing an Existing Accompaniment Pattern\* 1
- ●Copying and Editing the Accompaniment Pattern of an Existing Rhythm
- Creating and Editing a User Rhythm
- To create a totally new rhythm and save it
- Select a user rhythm where there is no data stored.
- Select the accompaniment pattern to be edited.
- Specify the number of measure and the time signature of the accompaniment pattern you want to create.
- Select the part to be edited.
- Configure the tone and octave shift settings of the part, if you want.
- Configure playback settings of the part being edited as desired.
- Record keyboard play for the part being edited.
- Configure the mixer settings of the part being edited as desired.
- Perform steps 5 through 9 for all parts.
- Perform steps 3 through 10 for all accompaniment patterns.
- Save the edited rhythm using the procedure under "To save a user rhythm" (page EN-83).
- To edit an existing rhythm and save it
- Select the built-in rhythm or previously-saved user rhythm you want to edit.
- Depending on the accompaniment pattern you selected, perform one of the operations below.
- ■If you selected Variation 1 to 4 or Fill-in 1 to 4
- ■If you selected Intro or Ending
- Select the part to be edited
- To configure only the mixer settings of an existing rhythm and save it
- To record keyboard play to each part
- Press 8 RECORD/STOP.
- Configure recording settings as desired.
- Practice what you will play as required.
- To start recording, press 20 START/STOP.
- Timing in accordance with the "MEASURE" and "BEAT" values on the display, play something on the keyboard when required.
- When you are finished recording, press 8 RECORD/STOP.
- ■Part Data Status Indicators
- ■User Rhythm Recording Settings
- To configure mixer settings of a part being edited
- Long-press 9 PART (MIXER) until the [MIXER] indicator appears.
- Use the [2] (√) and [5] (∧) 12 number keys to display the menu item you want to change.
- When mixer settings are the way you want, press the [4] (EXIT) 12 number key.
- To copy an existing accompaniment pattern for editing
- In the Rhythm Editing Mode, select the copy destination accompaniment pattern.
- Press 28 REGISTRATION [1].
- Press the [6] (ENTER) 12 number key.
- Use 13 [-] and [+], or the 11 dial to select the number of the rhythm you want to use as the source of the accompaniment pattern copy operation.
- Select the accompaniment pattern you want to use as the copy source.
- To execute the copy operation, press [6] (ENTER).
- Press 13 [+] (YES) to execute the copy operation or 13 [-] (NO) to cancel.
- To copy an existing rhythm part for editing
- In the Rhythm Editing Mode, select the copy destination part.
- Use the [1] (∠) and [3] (△) 12 number keys to display "Part", and then press [6] (ENTER). This displays the currently selected rhythm number and rhythm name.
- Select the accompaniment pattern that includes the part you want to use as the copy source.
- Select the part you want to use as the copy source.
- To execute the copy operation, press [6] (ENTER).
- Press 13 [+] (YES) to execute the copy operation or 13 [-] (NO) to cancel.
- To batch clear the recorded data in all parts included in a single accompaniment pattern
- To clear the recorded data in a particular part included in a single accompaniment pattern
- To save a user rhythm
- Press the [7] (WRITE) 12 number key.
- To exit the Rhythm Editing Mode, long-press the [4] (EXIT) 12 number key.
- User Rhythm Part Playback Settings
- To configure the playback settings of a user rhythm part
- User Rhythm Part Playback Setting Details
- ■Chord conversion table (Table)
- ■Break Point (Break Pt)
- ■Inversion (Invert)
- ■Retrigger (Retrig.)
- ■Bend Range (BndRng)
- Operations Affecting All the Accompaniment Patterns in a Rhythm
- To configure mixer settings for a rhythm
- To batch clear data recorded in all the accompaniment patterns of a rhythm
- To rename a user rhythm
- To copy a user rhythm
- To delete a user rhythm
- Using the MIDI Recorder to Record
- ■MIDI Recorder
- \* MIDI
- ■Recording Track and Recorded Data
- ●System Track
- ●Solo Tracks 1 to 16
- Starting a Recording
- ●Rhythm Mode
- ●Song Bank Mode
- Note that what happens when you press 8 RECORD/
- When starting from the Rhythm Mode
- When starting from the Song Bank Mode
- Recording Keyboard Play
- To record a new system track
- Specify the tempo to use at the start of recording.
- Select the rhythm and tone you want to use at the start of recording.
- Press 8 RECORD/STOP.
- Playing on the keyboard automatically starts recording.
- To record a new solo track
- Specify the tempo to use at the start of recording.
- Select the tone you want to use at the start of recording.
- Press 8 RECORD/STOP.
- Select the solo track to which you want to record.
- Long-press 8 RECORD/STOP.
- To overdub another solo track while playing back recorded tracks
- Use the 12 number keys, 13 [-] and [+], or the 11 dial to select the number of the song you want to overdub.
- Select the tone you want to use at the start of recording.
- Use 13 [-] and [+], or the 11 dial to display the [SONG] and [SOLO] indicators, and select the solo track to which you want to record.
- Press 8 RECORD/STOP to enter recording standby.
- Playing on the keyboard automatically starts recording.
- When you are finished recording, press 8 RECORD/STOP.
- Repeat steps 3 through 8 above for each of the tracks you want to overdub.
- To change the recording destination song number during recording standby
- Long-press 8 RECORD/STOP.
- Use the [1] (∠) and [3] (△) 12 number keys to display "MltRec 1".
- Use 13 [-] and [+], or the 11 dial to select the number of the song to which you want to record.
- Press 8 RECORD/STOP.
- To sound a pre-count or the metronome
- Use the [1] (∠) and [3] (△) 12 number keys to display the menu item whose setting you want to change.
- Use 13 [-] and [+] to change the setting.
- Re-recording Part of a Recorded Track (Overdubbing, Punch-in Recording)
- To perform overdubbing or punch-in recording
- Press 20 PLAY/STOP.
- Use 18▶FF and 17◀REW to navigate to the location from which you want to start recording.
- Press 22ACCOMP.
- Use one of the operations below to start recording.
- When you are finished recording, press 8 RECORD/STOP.
- To specify the recording start point and end point, and then perform overdubbing or punch-in recording
- Playing Back a Recorded Song
- To play back a recorded song
- To mute specific tracks
- Copying a Recorded Song, Deleting a Recorded Song or Track
- To copy a recorded song
- To delete a recorded song
- Song Editing Mode
- To enter the Song Editing Mode
- To exit the Song Editing Mode operation
- Editing an Entire Song in Measure Units (Song Editing)
- To clear a specific range of measures within a song
- To copy an entire song in measure units and insert them into a specified location of the same song
- To insert blank measures at a specified location in a song
- To delete a specific range of measures from a song
- Editing a Recorded Song in Track Units
- To delete a specified track
- To copy a specified solo track to another solo track
- To delete specific data from a specified track
- Editing a Track of a Recorded Song in Measure Units
- To quantize a specified track in measure units
- To key shift a specified track in measure units
- To delete a specified track in measure units
- Editing a Recorded Song in Event Units (Event Editor)
- Event Display
- Note Events
- ●Note Number Display
- ●Velocity Display
- ●Gate Time (Beat) Display
- ●Gate Time (Tick) Display
- ■Tone Number Event
- ■Rhythm Number Event
- ■Auto Accompaniment Chord Event
- ■End of Track
- EOT
- To edit an event
- ■Tone Number Events
- ■Rhythm Number Event (System Track Only)
- ■Chord Event (System Track Only)
- To delete an event
- To key shift events in measure units
- To delete events in measure units
- To copy events in measure units
- Inputting Notes and Chords One-by-one (Step Input)
- To input note events using step input
- When you are editing the system track, you can specify the event input target part.
- If necessary, specify the velocity (keyboard touch) and gate time rate (actual length) of the note event you are about to input.
- Specify the note value (event length) of the event you are about to input in step 8.
- Specify the event to be input.
- Repeat steps 5 through 8 as required.
- To exit the Step Input Mode, press 28 REGISTRATION [1].
- ■Selecting a System Track Part
- To input chord events using step input
- Recorded Song Mixer Settings
- To configure the mixer settings of a recorded song
- Perform the procedure under "To enter the Song Editing Mode" (page EN-95).
- Long-press 9 PART (MIXER) until the [MIXER] indicator appears.
- Select the part group whose mixer settings you want to configure.
- Use the [1] (∠) and [3] (△) 12 number keys to select the part whose settings you want to configure with the mixer.
- Use the [2] (√) and [5] (∧) 12 number keys to display the menu item you want to change.
- Use 13 [-] and [+] or the 11 dial to change the setting value.
- When mixer settings are the way you want, press the [4] (EXIT) 12 number key.
- Configuring Function Settings
- To configure function settings with the 10 FUNCTION button
- Use the [1] (∠) and [3] (△) 12 number keys to display the menu item you want to change.
- Examination Mode
- ●Accompaniment Pattern Operations
- ●Split Point Settings
- To enter the Digital Keyboard's Examination mode
- Batch Deleting Data from Digital Keyboard Memory
- To return all Digital Keyboard settings and data to their initial factory defaults (Factory Reset)
- To return all Digital Keyboard settings to their initial factory defaults (Setting Reset)
- USB Flash Drive
- USB Flash Drive and USB Flash Drive Port Handling Precautions
- Copyrights
- Connecting a USB Flash Drive to and Detaching It from the Digital Keyboard
- To connect a USB flash drive to the Digital Keyboard
- As shown in the illustration below, insert the USB flash drive into the Digital Keyboard's USB flash drive port.
- To remove a USB flash drive from the Digital Keyboard
- Check to confirm that there is no data exchange operation being performed, and then pull the USB flash drive straight out.
- Formatting a USB Flash Drive
- Supported USB Flash Drives
- To format a USB flash drive
- USB Flash Drive Operations
- ■Sub Menu/File Name Extension List
- To load data from a USB flash drive to Digital Keyboard memory
- To delete USB flash drive data
- To rename USB flash drive data
- Using a Computer to Copy General Song Data to a USB Flash Drive
- Connecting a Computer
- Minimum Computer System Requirements
- ●Operating System
- ●USB port
- Connecting the Digital Keyboard to Your Computer
- MIDI Settings
- Keyboard Channel
- Local Control
- Accomp Out
- Transferring Data Between the Digital Keyboard and a Computer
- Data Types Supported for Data Transfer
- Downloading Data Manager
- DSP Effect List
- Digital Keyboard Sound Source Configuration and MIDI Channel Assignment
- ■ Sounding of the Digital Keyboard Sound Source by Digital Keyboard Operations or by MIDI IN Input
- ■External MIDI Device Operations by the Digital Keyboard
- AC Adaptor Handling Precautions
- Operating Precautions
- ■Location
- ■User Maintenance
- ■Included and Optional Accessories
- ■Weld Lines
- ■Musical Instrument Etiquette
- Appendix
- Song List
- Fingering Guide
- FINGERED ON BASS, FULL RANGE CHORD
- Block Diagram
- CASIO®
Brand : CASIO
Model : CT-X8000IN
Category : Musical instrument