
BAF5437 - Deep fryer Becken - Free user manual and instructions
Find the device manual for free BAF5437 Becken in PDF.


| Product Type | Air Fryer |
| Brand | Becken |
| Model | BAF5437 |
| Power Supply | 220-240 V~ AC |
| Temperature Range | 80 °C to 200 °C |
| Timer Range | 0 to 60 minutes |
| Control Type | Two dials (temperature and timer) |
| Indicator Lights | Power (orange), Heat On (green) |
| Basket Material | Non-stick coating |
| Dishwasher Safe Parts | Frying basket and crisping tray (top rack) |
| Safety Features | Auto shut-off, basket interlock, overheat protection |
| Warranty | 2 years for manufacturing defects |
| Included Accessories | Frying basket, crisping tray |
| Usage | Household use only |
| Cleaning Instructions | Allow to cool; basket and tray washable in soapy water or dishwasher; wipe body with damp cloth |
| Repair | No user-serviceable parts; contact customer support |
Frequently Asked Questions - BAF5437 Becken
User questions about BAF5437 Becken
0 question about this device. Answer the ones you know or ask your own.
Ask a new question about this device
Download the instructions for your Deep fryer in PDF format for free! Find your manual BAF5437 - Becken and take your electronic device back in hand. On this page are published all the documents necessary for the use of your device. BAF5437 by Becken.
USER MANUAL BAF5437 Becken
MANUAL DE INSTRUÇÕES

natural_image
White bowl filled with cooked sweet potatoes, no text or symbols visibleDear client,
Thank you for purchasing this product.
The quality of this appliance has been certified by several laboratory tests. This instructions manual is provided to simplify the use of the appliance as well as to guarantee a safe use.
Please read carefully the instructions and safety measures described in this manual.
We sincerely hope you will be satisfied when using your new appliance.
INDEX
1. SAFETY INSTRUCTIONS 4
1.1. Power Supply 5
1.2. Power Cord and Other Cables 5
1.3. Humidity and Water 5
1.4. Cleaning 6
1.5. General Precautions 6
2. OPERATING INSTRUCTIONS 9
2.1. Product Description 9
2.2. Using the Product 10
2.3. Maintenance 15
3. POST-SALE SERVICE 16
4. ENVIRONMENTAL PROTECTION 17
BECKEN
1. SAFETY INSTRUCTIONS
 | WARNING |  |
| RISK OF ELECTRIC SHOCKDO NOT OPEN | ||
| Warning: to avoid the risk of electric shock, do not remove the cover. The interior does not contain any parts that can be repaired by the user. Ask for assistance from the Customer Support Service. | ||
Important Warnings
Before using your appliance read these instructions manual carefully and keep it in a safe place as you may need to consult it in the future.
Before turning on your appliance, and to ensure a safe and correct operation, do not use if:
• It has fallen to the ground;
- You notice any evidence of damage;
- Any anomaly occurs during its operation.
To avoid hazards or deterioration of your appliance through incorrect use it is advisable to read these instructions thoroughly.
Your appliance should not be used for other purposes than the ones intended and solely for household use. Any damage resulting from using the appliance outside this scope, any incorrect use, as well as any manual modifications to the product will not be covered and automatically voids the warranty.
Assistance
In case of malfunction, take your appliance to a qualified technician for assistance.
This appliance can be used by children from the age of 8 and by people with reduced physical, sensorial or mental capabilities and/or lack of experience and knowledge if they have been given instructions on using the appliance safely and if they understand the hazards involved. Children may not play with the appliance. Cleaning and maintenance must not be carried out by children without supervision.
These instructions are also available at www.suporteworten.pt
1.1. Power Supply
Make sure the main voltage is compatible with the appliance's. If this is not the case, please consult the Customer Support Service.
1.2. Power Cord and Other Cables
Do not tangle the cord or pull it to disconnect the appliance. Also, keep the cord away from warm surfaces.
Never use the appliance if it has a damaged cable or socket.
Take it to the Technical Support Service for replacement.
1.3. Humidity and Water
Do not use your appliance in humid places. Do not allow the appliance to become wet under any circumstances as this may be dangerous.
To avoid fire hazard or electric shock do not expose your appliance to humidity or water. Furthermore, do not place your appliance under water (e.g. for cleaning).
1.4. Cleaning
Before cleaning, be sure to switch off the appliance and remove the plug from the main power supply. Always allow the unit to cool down before cleaning.
BECKEN
To clean the exterior of the product use a dry soft cloth only.
1.5. General Precautions
- Please follow the instructions in the user manual which will help you to properly install and operate this product and enjoy its advanced features. Please keep the instructions for future reference.
- Read all instructions before using the product.
- Maintenance and service operations are only to be carried out by authorized professionals.
- Any damage caused by manual modifications to the product is not covered by the warranty.
- If this product is used for other purposes than the ones originally intended, or if it is not correctly connected, the product may become damaged and the warranty will be voided.
- Do not touch hot surfaces. Use handles, knobs, oven mitts or potholders.
- To protect against electric shock, do not immerse cord, plugs, or appliance in water or other liquid.
- Unplug from the outlet when not in use and before cleaning. Allow to cool before putting/removing parts and before cleaning.
- Do not operate any appliance with a damaged cord or plug or after the appliance malfunctions or has been damaged in any manner. Bring it to a qualified technician for examination, repair or electrical or mechanical adjustment.
- The use of accessory attachments not recommended by the appliance manufacturer may cause injuries.
- Do not use outdoors.
- Do not let cord hang over edge of table or counter or touch hot surfaces.
- Do not place on or near a hot gas or electric burner, or in a heated oven.
- Extreme caution must be used when moving an appliance containing hot oil or other hot liquids.
-
To disconnect, turn both the timer dial and temperature dial to OFF. Then, remove plug from the wall outlet.
-
Do not use appliance for other than intended use.
- Make sure the crisping tray is in place before adding food to be air fried.
- Make sure the frying basket is locked securely into the front of the air fryer, while the air fryer is in operation.
WARNING: The air fryer will not operate unless the frying basket is fully closed.
CAUTION: After hot air frying, extreme caution must be used when handling the hot frying basket, crisping tray and cooked foods.
CAUTION HOT SURFACES: This appliance generates heat and escaping steam during use. Proper precautions must be taken to prevent the risk of burns, fires, or other injury to persons or damage to property.
CAUTION: This appliance is hot during operation and retains heat for some time after turning OFF. Always use oven mitts when handling hot materials and allow metal parts to cool before cleaning. Do not place anything on top of the appliance while it is operating or while it is hot.
- All users of this appliance must read and understand this instruction manual before operating or cleaning this appliance.
- This appliance's cord should be plugged into a 220-240V AC electrical outlet only.
- If this appliance begins to malfunction during use, immediately unplug the cord. Do not use or attempt to repair the malfunctioning appliance.
- Do not leave this appliance unattended during use.
- Do not immerse power cord in any liquid. If the power cord to this appliance is damaged, it must be replaced by contacting Consumer Service.
- Keep the cord out of reach from children and infants to avoid the risk of electric shock and choking.
- Place the air fryer on a flat, heat-resistant work area.
- Do not obstruct the air outlet or air inlets on the back and sides of the air fryer with any objects. Avoid escaping steam from the air outlet during air frying.
- Keep appliance at least 15 cm away from walls or other objects
BECKEN
during operation.
• Always use the frying basket handle to open the frying basket.
WARNING: After air frying, make sure to place the frying basket on a flat, heat-resistant surface.
WARNING: Under or over-filling the frying basket may damage the air fryer and could result in serious personal injury.
- Never move a hot air fryer or an air fryer containing hot food. Allow to cool before moving.
PLASTICIZER WARNING
CAUTION: To prevent Plasticizers from migrating to the finish of the counter top or table top or other furniture, place non-plastic coasters or mats between the appliance and the counter top or table top. Failure to do so may cause the counter top finish to darken; have permanent blemishes, or be stained.
ELECTRIC POWER
If the electrical circuit is overloaded with other appliances, your appliance may not operate properly. It should be operated on a separate electrical circuit from other appliances.
2. OPERATING INSTRUCTIONS
2.1. Product Description
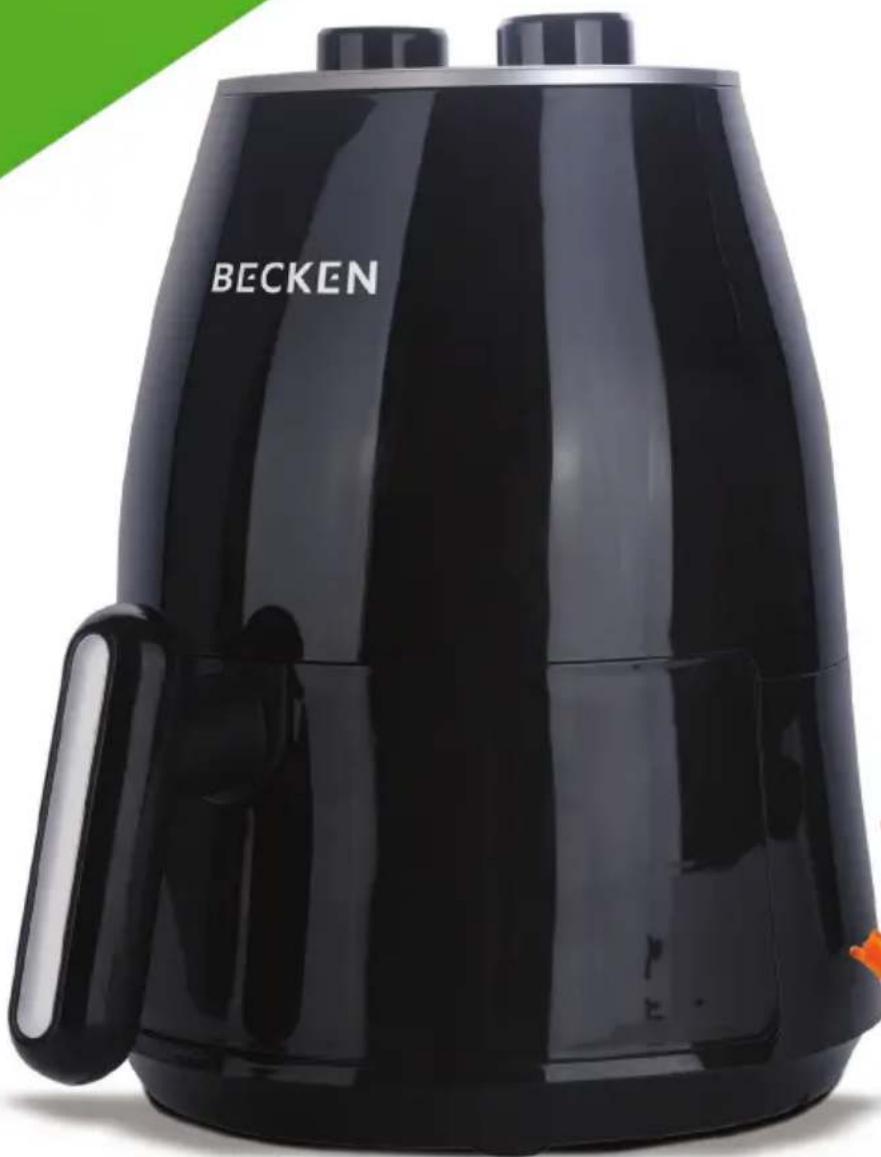
Figure 1

Temperature Control Dial
- Select air frying temperature from 80 °C to 200 °C. Temperatures can be adjusted at any time.
- The green HEAT ON light will illuminate when the set temperature is reached.
- The green HEAT ON light and heating element will cycle ON and OFF to maintain the selected temperature.
60 Minute Countdown Timer Dial
- Once the timer dial is set, the orange POWER light will illuminate to show the air fryer is heating.
- To assure an even cooking/browning, open the frying basket halfway through the cooking time. Check, turn or vigorously shake foods in the frying basket.
BECKEN
IMPORTANT: When you pull the basket out from the air fryer body, the orange POWER light and the air fryer will turn OFF. The timer will continue to count down when the basket is opened. Allow for additional cook time as necessary.
• Heating will resume when the basket is replaced.
- One beep will sound when the set air frying time has reached 0. The air fryer will turn OFF automatically. Both the orange POWER light and the green HEAT ON light will turn off.
IMPORTANT: When all air frying is finished, turn both the temperature control dial and the timer dial to 0 (OFF). Unplug the air fryer when not in use.
2.2. Using the Product
Before the first use
- Your air fryer is shipped with the frying basket locked into the front of the air fryer body.
Firmly grasp the handle to open frying basket, then remove the basket from the machine and place on a flat, clean work area. - Remove all packing material and labels from the inside and outside of the air fryer. Check that there is no packaging underneath and around the frying basket.
- Wash the frying basket and crisping tray in hot, soapy water.
- DO NOT IMMERSE THE AIR FRYER BODY IN WATER. Wipe the air fryer body with a damp cloth. Dry all parts thoroughly.
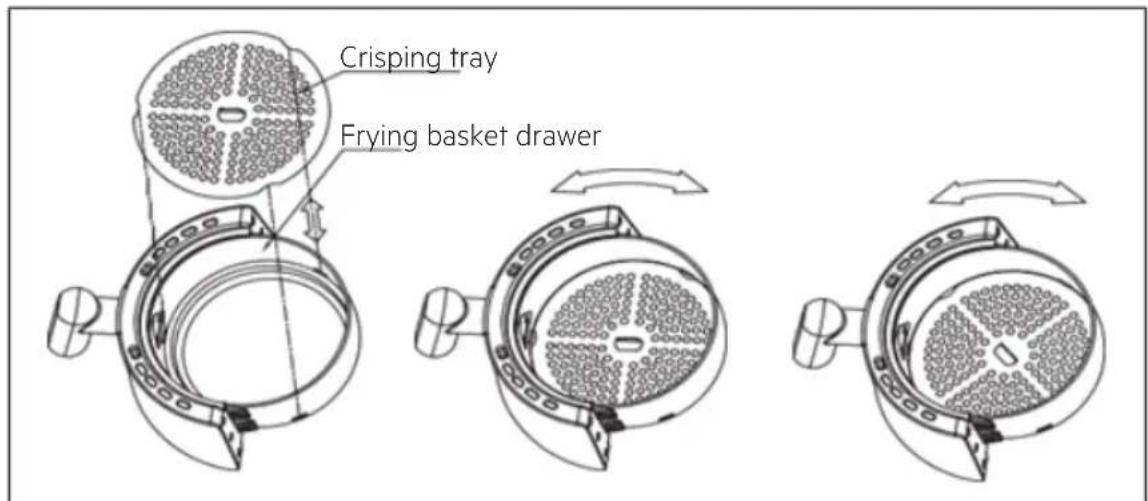
- Line the notches in the tray with the bumps in the wall of the basket. Turn until the tray drops down.
- Lock the tray in place into the base of the basket by turning the tray clockwise or counter-clockwise till the notches and bumps on the basket wall are not aligned. (See Figure 2). Insert and lock the clean frying basket into the front of the air fryer.
Figure 2
Operating Instructions
WARNING! This unit should never be used to boil water or heat oil.
NOTE: During first use, the air fryer may emit a slight odour. This is normal and will not affect food cooked.
- Place the air fryer on a flat, heat-resistant work area, close to an electrical outlet.
- Firmly grasp the frying basket handle to open frying basket; then remove from the machine and place on a flat, clean surface.
- Place the crisping tray into the base of the frying basket.
- Arrange food on top of the crisping tray. Do not overfill the frying basket with food. To ensure proper cooking and air circulation, NEVER fill any frying basket more than 2/3 full. When air frying fresh vegetables, we do not recommend adding more than 1-11/2 cups of food to the frying basket.
- Fully insert the frying basket into the front of the air fryer.
- Plug the cord in a wall outlet.
- Select air frying temperature from 80 °C to 200 °C.
- Turn the timer dial to the desired air frying time plus 3 minutes for preheat if the air fryer is cold. The green HEAT ON light and the orange POWER light will illuminate and the air fryer will start heating.
IMPORTANT: The air fryer will not heat if the timer dial has not been set or if the frying basket is not fully closed.
BECKEN
- The green HEAT ON light will illuminate when set temperature is reached.
NOTE: During air frying, the green HEAT ON light will cycle on and off as proper air frying temperature is maintained.
- To assure even cooking/browning, open the basket halfway through the frying time and check, turn or shake foods in the frying basket. Adjust temperature if needed. The timer will continue to count down when the basket is opened, but the air fryer will stop heating until the basket is replaced.
WARNING: Extreme caution must be used when handling the hot frying basket and crisping tray.
Avoid escaping steam from the frying basket and hot food.
CAUTION: Hot oil can collect at the base of the drawer. To avoid risk of burns or personal injury, or to avoid oil from contaminating air fried foods, always use a pair of tongs or a long wooden spoon to remove the foods from the frying basket. NEVER turn the basket upside down containing air fried foods.
NOTE: The air fryer can be turned OFF at any time by turning the timer dial to 0.
-
One beep will sound when the set air frying time has expired. The air fryer will turn OFF automatically. Both the orange POWER light and the green HEAT ON light will turn off.
-
Shake the frying basket vigorously and check food for browning and doneness. If additional air frying is needed, adjust the temperature if desired and set the timer for 3-minute intervals until fully cooked.
-
Allow cooked food to rest for 5 to 10 seconds before removing the basket from air fryer or food from frying basket.
-
When air frying is finished, remove the basket from the machine and place on a flat, heat resistant surface.
-
Use tongs or a long fork to remove air fried foods onto a serving plate. Promptly replace the frying basket into the front of the air fryer. Continue with subsequent batches, if any.
-
When all air frying is completed, turn both the temperature control dial and the timer dial to O (OFF). Both the orange POWER light and the green HEAT ON light will turn off.
-
Unplug the air fryer when not in use.
Helpful Hints
- Spray olive oil or vegetable oil works well for air frying.
- Use your air fryer to cook pre-packaged foods with a fraction of the oil, in a fraction of the time. As a rule of thumb, lower the recipe baking temperature by 5 °C, up to 10 °C and reduce the cooking time by 30 % to 50 % depending on the food and amount.
- For best results, some foods need to be shaken vigorously or turned over during the air fry time. Consult the Air Frying Chart as a general guide.
- To avoid excess smoke, when cooking naturally high fat foods, such as chicken wings or sausages, it may be necessary to empty fat from the frying basket between batches.
- Always pat food dry before cooking to encourage browning and avoid excess smoke.
- Air fry small batches of freshly breaded foods. Press breading onto food, place on a cooling rack and refrigerate to help breading adhere. Arrange in frying basket so that food is not touching to allow air flow on all surfaces.
- The air fryer is perfect for reheating food. Set the temperature to 160^ C for up to 10 minutes.
Air Frying Chart
WARNING! ALWAYS USE A MEAT THERMOMETER TO ENSURE THAT MEAT, POULTRY AND FISH ARE COOKED THOROUGHLY
BEFORE EATING. The following chart is intended as a guide only. The quantity of food air fried at one time, the thickness or density of the food, and whether the food is fresh, thawed, or frozen may alter the total cooking time necessary.
-
To assure even cooking/browning, open the frying basket halfway through the cooking time. Check, turn or vigorously shake foods in the frying basket. This chart lists average total air frying time, the time at which some action is required, and what action is to be taken for best results.
-
Remember, frying smaller batches will result in shorter cooking
BECKEN
times and higher food quality. Adjust air frying temperatures and times as necessary to suit your taste.
- IMPORTANT NOTE: Unless food is pre-packaged and pre-oiled, for browned and crispy results, all foods should be lightly oiled before air frying.
- Oil may be sprayed or brushed onto foods.
- Spray oils work well as oil is evenly distributed and smaller quantities of oil are needed.
- To ensure crispy results, make sure foods are dried before adding oil.
- Cut pieces smaller to create more surface area for crispier results.
- Blanching is a term that refers to pre-cooking foods at a lower temperature before the final air fry.
- Add 3 minutes to the air fry time to allow the cold air fryer to preheat.
| Food Min-max | amount | Time (min)° | C Extra | information |
| Potatoes & fries | ||||
| Thin frozen fries 300-700 9-16 200 | Shake | |||
| Thick frozen fries 300-700 11-20 200 | O Shake | |||
| Home-made fries | 300-800 | 16-10 | 200 | Add 1⁄2 tbsp of oil; shake |
| Home-made potato wedges | 300-800 | 18-22 | 180 | Add 1⁄2 tbsp of oil; shake |
| Home-made potato cubes | 300-750 12-18 | 180 | Add 1⁄2 tbsp of oil; shake | |
| Rösti | 250 | 15-18 | 180 | Shake |
| Potato gratin | 500 | 15-18 200 | shake | |
| Meat & Poultry | ||||
| Steak | 100-500 | 8-12 | 180 | |
| Pork chops 100-500 | 10-14 180 | |||
| Hamburger 100-500 | 7-14 180 | |||
| Sausage roll 100-500 | 13-15 200 | |||
| Drumsticks 100-500 | 18-22 180 | |||
| Chicken breast 100-500 | 500 10-15 180 | |||
| Snacks | ||||
| Spring rolls 100-400 | 8-10 200 Shake | |||
| Frozen chicken nuggets | 100-500 6-10 | 200 Shake | ||
| Frozen fish fingers | 100-400 6-10 | 200 | ||
| Frozen breadcrumb cheese snacks | 100-400 8-10 | 180 | ||
| Stuffed vegetables | 100-400 10 | 160 | ||
| Baking | ||||
| Cake | 400 | 20-25 | 160 | |
| Quiche | 300 | 20-22 | 180 | |
| Muffins | 300 | 15-18 | 200 | |
| Sweet snacks | 400 | 20 | 160 | |
Storing Instructions
- Make sure the air fryer is unplugged and all parts are clean and dry before storing.
- Never store the air fryer while it is hot or wet.
- Store the air fryer in its box or in a clean, dry place.
2.3. Maintenance
User Maintenance Instructions
This appliance requires little maintenance. It contains no user-serviceable parts. Any servicing requiring disassembly other than
BECKEN
cleaning must be performed by the Customer Support Service.
Care & Cleaning Instructions
WARNING! Allow the air fryer to cool fully before cleaning.
- Unplug the air fryer. Remove the frying basket. Make sure the frying basket and crisping tray have cooled completely before cleaning them. Use the centre hole of the crisping tray to lift the crisping tray up and out of the frying basket.
- Wash the frying basket and crisping tray in hot soapy water. Do not use metal kitchen utensils or abrasive cleansers or cleaning products as this may damage the non-stick coating.
- The frying basket and crisping tray are dishwasher-safe. For best results, place in the top rack of your dishwasher to clean.
3. POST-SALE SERVICE
Becken has designed this appliance in order to guarantee maximum reliability. However, if a problem occurs do not attempt to open the appliance - there is a risk of electrical shock. If you are not able to solve the problem, please contact the Customer Support Service of any Worten, Modelo or Continente store in order to be assisted. Worten Equipamentos para o Lar provides a 2-year warranty for manufacturing defects from the date of purchase of the appliance.
WARNING: any attempt to repair the appliance without contacting the manufacturer or seller will void the warranty.
All users must be familiar with these instructions. Knowing what could go wrong can help prevent problems from occurring.
4. ENVIRONMENTAL PROTECTION
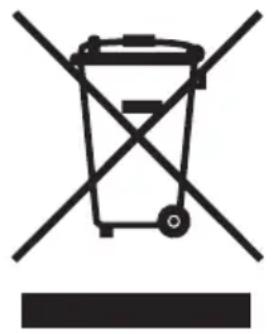
In order to protect the environment, we strive to reduce the volume of packaging used, limiting it to three easily sorted materials: cardboard, paper and plastic. The appliance is manufactured using recyclable materials after disassembled by a specialized company. Please comply with local regulations concerning the recycling of all materials.
natural_image
Symbol of a trash bin crossed with no text or numbers, representing waste sorting or disposal (no text present)Estimado cliente:
natural_image
Symbol of a trash bin crossed with no text or numbers, representing waste sorting or restriction (no text present)ES
Caro(a) cliente,
natural_image
Symbol of a trash bin crossed with no text or numbers, representing waste sorting or disposal (no text present)PT

bar
| Category | Value | |---|---| | Category 1 | 100 | | Category 2 | 100 | | Category 3 | 100 | | Category 4 | 100 | | Category 5 | 100 | | Category 6 | 100 | | Category 7 | 100 | | Category 8 | 100 | | Category 9 | 100 | | Category 10 | 100 |BECKEN
Imported, produced and distributed by:
Worten Equipamentos p/o Lar S.A.
- INDEX
- SAFETY INSTRUCTIONS 4
- OPERATING INSTRUCTIONS 9
- POST-SALE SERVICE 16
- ENVIRONMENTAL PROTECTION 17
- BECKEN
- SAFETY INSTRUCTIONS
- Important Warnings
- Assistance
- Power Supply
- Power Cord and Other Cables
- Humidity and Water
- Cleaning
- General Precautions
- PLASTICIZER WARNING
- ELECTRIC POWER
- OPERATING INSTRUCTIONS
- Product Description
- Temperature Control Dial
- Minute Countdown Timer Dial
- Using the Product
- Before the first use
- Operating Instructions
- Helpful Hints
- Air Frying Chart
- WARNING! ALWAYS USE A MEAT THERMOMETER TO ENSURE THAT MEAT, POULTRY AND FISH ARE COOKED THOROUGHLY
- Storing Instructions
- Maintenance
- User Maintenance Instructions
- Care & Cleaning Instructions
- POST-SALE SERVICE
- ENVIRONMENTAL PROTECTION
Brand : Becken
Model : BAF5437
Category : Deep fryer