
Ultimate SU655 - SSD ADATA - Free user manual and instructions
Find the device manual for free Ultimate SU655 ADATA in PDF.


| Product Type | Internal SSD (2.5-inch) |
| Brand | ADATA |
| Model | Ultimate SU655 |
| Interface | SATA III 6Gbps (backward compatible with SATA II) |
| Form Factor | 2.5-inch, 7mm thickness |
| Capacity Options | 120GB, 240GB, 480GB, 960GB |
| Sequential Read Speed | Up to 520MB/s |
| Sequential Write Speed | Up to 450MB/s |
| Dimensions (L x W x H) | 100.45 x 69.85 x 7.0 mm |
| Weight | Approximately 47g |
| Operating Temperature | 0°C to 70°C |
| Storage Temperature | -40°C to 85°C |
| Shock Resistance | 1500G/0.5ms (half sine wave) |
| MTBF | 1,000,000 hours |
| Power Consumption (Active) | Typical 2.0W |
| Power Consumption (Idle) | Typical 0.3W |
| Warranty | 3 years limited warranty |
| NAND Flash Type | 3D NAND |
| Controller | High-performance SATA controller |
| Key Features | Supports TRIM, S.M.A.R.T., NCQ, and ECC |
| Dimensions | 100.45 x 69.85 x 7.0 mm |
| Maintenance & Cleaning | No physical maintenance required. Monitor health via ADATA SSD Toolbox software. Keep firmware updated. |
| Safety | Not user-serviceable. Do not open casing. Avoid static discharge. Handle with care. |
| Spare Parts & Repairability | No user-replaceable parts. In case of failure, replace the drive. Warranty covers defects. |
| General Information | For use in desktops and laptops with SATA interface. Ideal for upgrading from HDD for faster boot and application loading. |
Frequently Asked Questions - Ultimate SU655 ADATA
User questions about Ultimate SU655 ADATA
0 question about this device. Answer the ones you know or ask your own.
Ask a new question about this device
Download the instructions for your SSD in PDF format for free! Find your manual Ultimate SU655 - ADATA and take your electronic device back in hand. On this page are published all the documents necessary for the use of your device. Ultimate SU655 by ADATA.
USER MANUAL Ultimate SU655 ADATA
natural_image
Colorful hummingbird logo with wings spread against blue background (no text or symbols)ADATA®
INDEX
INSTALLING AN 2.5" SATA SSD ON A DESKTOP PC
Chinese traditional 03
Chinese simple 07
English 11
German 15
Japanese 19
Korean 23
Portuguese 27
Russian 31
Romanian 35
Spanish 39
INSTALLING AN 2.5" SATA SSD ON A LAPTOP PC
Chinese traditional 43
Chinese simple 47
English 51
German 55
Japanese 59
Korean 63
Portuguese 67
Russian 71
Romanian 75
Spanish 79
如何在桌機安裝
2.5吋 SATA固態硬碟

更換前準備步驟
natural_image
Interior view of a computer tower case with visible internal components and a small electronic device on the right (no text or symbols)1. 準備工具
2. 備份資料
3. 請確實關機
natural_image
Hand inserting a rack into a server rack with multiple drive bays (no visible text or labels)natural_image
Hand placing a hard disk into a black server rack with visible internal components and a digital display (no text or symbols)1. 將主機機殼卸下
natural_image
Interior view of a computer motherboard showing exposed circuit boards, cables, and connectors (no visible text or symbols)natural_image
Close-up of hands installing a CD-ROM drive into an electronic device (no visible text or symbols)3. 取下支架與排線
natural_image
Close-up of hands installing a blue SBJ900 memory card into a computer motherboard (no visible text or symbols on the chip or background)natural_image
Close-up of a hand inserting a CPU into a black internal device, with no visible text or symbols on the device itself.5. 重新裝上機殼
natural_image
Hand pointing at a black server rack with ventilation grilles and connectors (no visible text or symbols)更换前准备步骤

natural_image
Interior view of a computer tower case with visible internal components and a small electronic device on the right (no text or symbols)1. 准备工具
natural_image
Hand inserting a rack into a server rack with visible socket and ventilation slots (no text or symbols)natural_image
Hand placing a hard disk into a black server rack with visible internal components and a digital display (no text or symbols)1. 将电脑侧板卸下
natural_image
Interior view of a computer motherboard showing exposed circuit boards, cables, and connectors (no visible text or symbols)natural_image
Close-up of hands installing a red cable and a black plastic device on a laptop chassis (no visible text or symbols)3. 取下支架与扁平电缆
natural_image
Close-up of hands installing a blue SBJ900 memory card into a computer motherboard (no visible text or symbols on the chip or background)natural_image
Close-up of a hand inserting a CPU into a black internal OS drive, with a small electronic device nearby (no visible text or symbols)5. 重新装上机箱侧板
natural_image
Hand pointing at a black server rack with ventilation grilles and connectors (no visible text or symbols)BEFORE INSTALLATION

natural_image
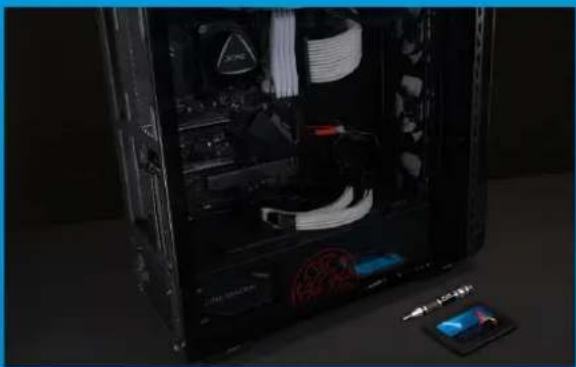
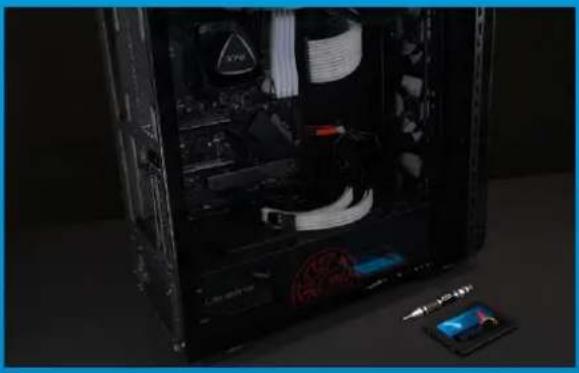
Interior view of a computer tower case with visible internal components and a close-up of a monitor displaying blue LED (no text or symbols)1. GATHER THE THINGS YOU'LL NEED
PC, Phillips screwdriver, and ADATA 2.5" SATA SSD
*Please use a standard Phillips screwdriver (3.5mm) for disassembling the case.
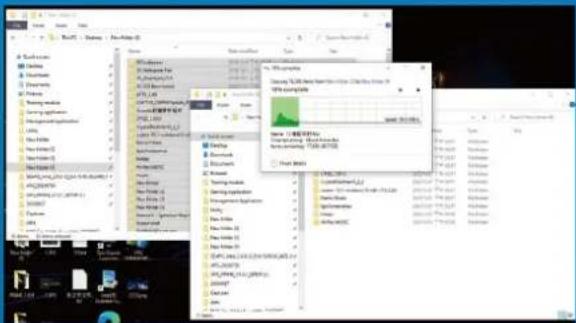
Make sure to backup the important data on your PC to an external device, such as an external HDD, before starting installation.

After backing up your data, power off your PC to avoid data loss or damage to other components during installation.
natural_image
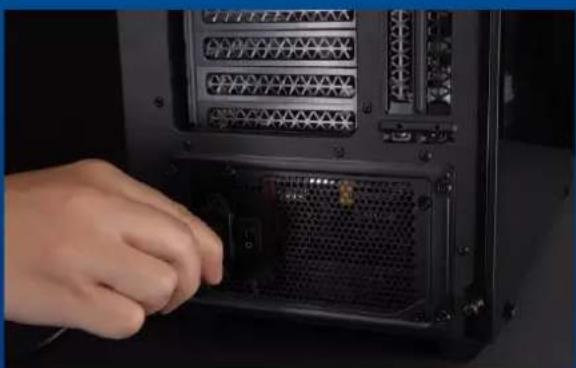
Hand placing a socket into a server rack with multiple drive bays (no visible text or labels)4. SWITCH OFF THE POWER SWITCH AND UNPLUG POWER CORD
This action is necessary to discharge residual power that can damage your PC and its components.
INSTALLATION

natural_image
Hand placing a hard disk into a black server rack with visible internal components and a digital display (no text or symbols)1. REMOVE THE PC CASE
Use the standard Philips screwdriver to remove the screws and then remove the PC case
natural_image
Interior view of a computer motherboard showing exposed circuit boards, cables, and connectors (no visible text or symbols)2. CONFIRM THE POSITION OF THE 2.5" SLOT AND REMOVE THE BRACKET
*Please check the side of the motherboard to find the unused 2.5" bracket

natural_image
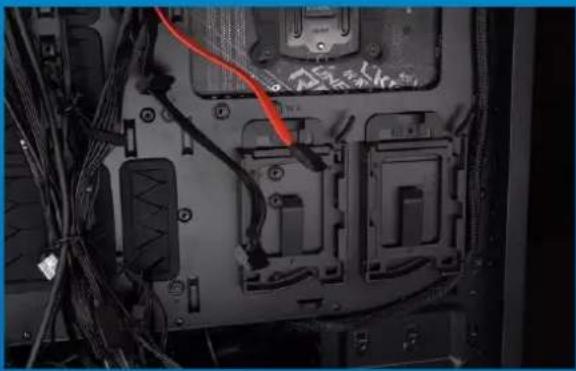
Close-up of hands installing a red cable on an electronic device with cables and connectors (no visible text or symbols)3. REMOVE THE BRACKET AND CABLE
*Each PC has different ways to fix drives. There may be drawers or brackets to place the solid state hard drives. The way to remove them will involve pulling out the bracket or support frame.
**When removing the stand, please check the screws on the top or side carefully, these screws may be fixed on it.
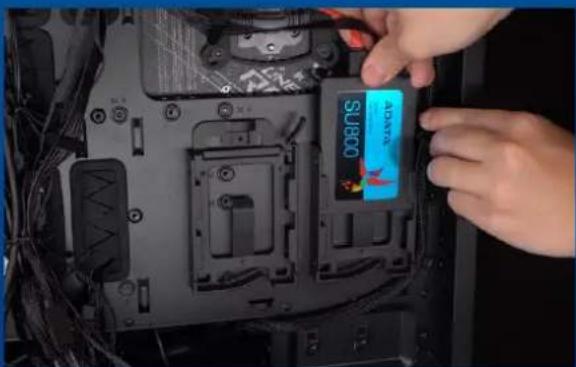
4. CONNECT CABLES AND ATTACH BRACKET TO THE NEW 2.5" SATA SSD. PUT THE BRACKET IN THE SLOT TO FIX DRIVES
There is a row of pins on the cable as well as on the SSD. Align to the correct orientation and place the bracket back into the slot.
*The slot has a foolproof design. Please insert the SSD in the direction corresponding to the pins on the solid state drive and the slot.. Do not insert it forcibly to avoid damage to the product.

natural_image
Close-up of a hand inserting a CPU into a black internal OS drive, with a small electronic device nearby (no visible text or symbols)5. RESEMBLE THE CASE
*Do not overtighten the screws as it may damage the screws ad back plate

natural_image
Hand pointing at a black server rack with ventilation grilles and connectors (no visible text or symbols)6. PLUG IN THE POWER CORD AND POWER ON THE PC TO COMPLETE INSTALLATION
EINE 2,5-ZOLL-SATA-SSD AN EINEM DESKTOP-PC INSTALLIEREN

VOR DER INSTALLATION

natural_image
Interior view of a computer tower case with visible internal components and a small electronic device on the right (no text or symbols)1. ALLES NÖTIGE ZUSAMMENTRAGEN
2. IHRE DATEN SICHERN
3. IHREN PC ABSCHALTEN
natural_image
Hand inserting a drive into a server rack with multiple drive bays (no visible text or labels)natural_image
Hand placing a hard disk into a black server rack with visible internal components and a digital display (no text or symbols)1. PC-GEHÄUSE ENTFERNEN
natural_image
Interior view of a computer motherboard showing exposed circuit boards, cables, and connectors (no visible text or symbols)natural_image
Close-up of hands installing a CD-ROM drive into an electronic device (no visible text or symbols)natural_image
Close-up of hands installing a blue SBJ900 memory card into a computer motherboard (no visible text or symbols on the chip or background)natural_image
Close-up of a hand inserting a CPU into a black internal OS drive, with a small electronic device nearby (no visible text or symbols)natural_image
Hand pointing at a black server rack with ventilation grilles and connectors (no visible text or symbols)natural_image
Interior view of a computer tower case with visible internal components and a small electronic device on the right (no text or symbols)1. 準 備するもの
natural_image
Hand placing a socket into a server rack with multiple drive bays (no visible text or labels)natural_image
Hand placing a hard disk into a black server rack with visible internal components and a digital display (no text or symbols)1. パソコン本 体のケースを取り外す
natural_image
Interior view of a computer motherboard showing exposed circuit boards, cables, and connectors (no visible text or symbols)natural_image
Close-up of hands installing a red cable and a black plastic device on a laptop chassis (no visible text or symbols)3. ブラケットとケーブルを取り外す
natural_image
Close-up of hands installing a blue SBJ300 card into a computer motherboard (no visible text or symbols on the chip or background)natural_image
Close-up of a hand inserting a CPU into a black internal OS drive, with a small electronic device nearby (no visible text or symbols)5. ケースを元の位置に取り付ける
natural_image
Hand pointing at a black server rack with ventilation grilles and connectors (no visible text or symbols)설치하기 전에

natural_image
Interior view of a computer tower case with visible internal components and a small display panel (no text or symbols)1. 필요한 도구 준비
natural_image
Hand placing a socket into a black rack-mounted server unit (no visible text or labels)natural_image
Hand placing a hard disk into a black server rack with visible internal components and a digital display (no text or symbols)1. PC 케이스 제거
natural_image
Interior view of a computer motherboard showing exposed circuit boards, cables, and connectors (no visible text or symbols)natural_image
Close-up of hands installing a red cable and a black plastic device on a laptop chassis (no visible text or symbols)3.브래킷과 케이블 제거
natural_image
Close-up of hands installing a blue SBJ900 memory card into a computer motherboard (no visible text or symbols on the chip or background)natural_image
Close-up of a hand inserting a CPU into a black internal OS drive, with a small electronic device nearby (no visible text or symbols)5. 케이스 재조립
natural_image
Hand pointing at a black server rack with ventilation grilles and connectors (no visible text or symbols)ANTES DA INSTALAÇÃO

natural_image
Interior view of a computer tower case with visible internal components and a close-up of a monitor displaying blue LED (no text or symbols)1. REÚNA AS COISAS QUE VOCÊ PRECISA
3. DESLIGUE SEU PC
natural_image
Hand inserting a rack into a server rack with multiple drive bays (no visible text or labels)natural_image
Hand placing a hard disk into a black server rack with visible internal components and a digital display (no text or symbols)1. REMOVA O GABINETE DO PC
natural_image
Interior view of a computer motherboard showing exposed circuit boards, cables, and connectors (no visible text or symbols)natural_image
Close-up of hands installing a CD-ROM drive into an electronic device (no visible text or symbols)3. REMOVA O SUPORTE E O CABO
natural_image
Close-up of hands installing a blue SBJ900 memory card into a computer motherboard (no visible text or symbols on the chip or background)4. CONECTE OS CABOS E PRENDA O SUPORTE AO NOVO SSD SATA DE 2,5". COLOQUE O SUPORTE NO SLOT PARA FIXAR AS UNIDADES
natural_image
Close-up of a hand inserting a CPU into a black internal device, with no visible text or symbols on the device itself.natural_image
Hand pointing at a black server rack with ventilation grilles and connectors (no visible text or symbols)natural_image
Interior view of a computer tower case with visible internal components and a close-up of a monitor displaying blue LED (no text or symbols)2. ЗАРЕЗЕРВИРУЙТЕ ДАННЫЕ
natural_image
Hand placing a socket into a server rack with multiple drive bays (no visible text or labels)natural_image
Hand placing a hard disk into a black server rack with visible internal components and a digital display (no text or symbols)natural_image
Interior view of a computer motherboard showing exposed circuit boards, cables, and connectors (no visible text or symbols)natural_image
Close-up of hands installing a red cable and a black plastic device on a laptop chassis (no visible text or symbols)3. СНИМИТЕ КРОНШТЕЙН И ОТСОЕДИНИТЕ КАБЕЛЬ
natural_image
Close-up of hands installing a blue SBJ300 card into a computer motherboard (no visible text or symbols on the chip or background)4. ПРИСОЕДИНИТЕ КАБЕЛИ И ПРИКРЕПИТЕ КРОНШТЕЙН К НОВОМУ ТВЕРДОТЕЛЬНОМУ НАКОПИТЕЛЮ 2,5 ДЮЙМА SATA. ВСТАВЬТЕ КРОНШТЕЙН В СЛОТ, ЧТОБЫ ЗАКРЕПИТЬ НАКОПИТЕЛИ
natural_image
Close-up of a hand inserting a CPU into a black internal device, with no visible text or symbols on the device itself.natural_image
Hand pointing at a black server rack with ventilation grilles and connectors (no visible text or symbols)ÎNAINTE DE INSTALARE
natural_image
Interior view of a computer tower case with visible internal components and a small electronic device on the right (no text or symbols)1. ADUNATI LUCRURILE DE CARE VETI AVEA NEVOIE
3. OPRITI PC-UL
natural_image
Hand inserting a rack into a server rack unit (no visible text or labels)4. DECONECTATI ALIMENTAREA CU ENERGIE ŞI CABLUL DE ALIMENTARE
natural_image
Hand placing a hard disk into a black server rack with visible internal components and a monitor on the right (no text or symbols)1. SCOATEȚI CARCASA PC-ULUI
natural_image
Interior view of a computer motherboard showing cable and connectors (no visible text or symbols)2. CONFIRMAȚI POZIȚIA FANTEI 2,5" ȘI SCOATEȚI CONSOLA
natural_image
Close-up of hands installing a red cable and a black GPU chip on a laptop chassis (no visible text or symbols)3. SCOATEȚI SUPORTUL ȘI CABLUL
natural_image
Close-up of hands installing a S1800 memory card into a computer motherboard (no visible text or symbols on the chip or background)4. CONECTATI CABLURILE SI ATAŞATI SUPORTUL LA NOUL SSD SATA 2,5" PUNETI SUPORTUL IN FANTĂ PENTRU A FIXA UNITĂ TILE.
natural_image
Close-up of a hand inserting a device into a black server room with visible internal components (no text or symbols)5. REASAMBLATI CARCASA
natural_image
Hand pointing at a black server rack with a mesh vent, no visible text or symbols6. CONECTATI CABLUL DE ALIMENTARE ȘI PORNITI PC-UL PENTRU A FINALIZA INSTALAREA
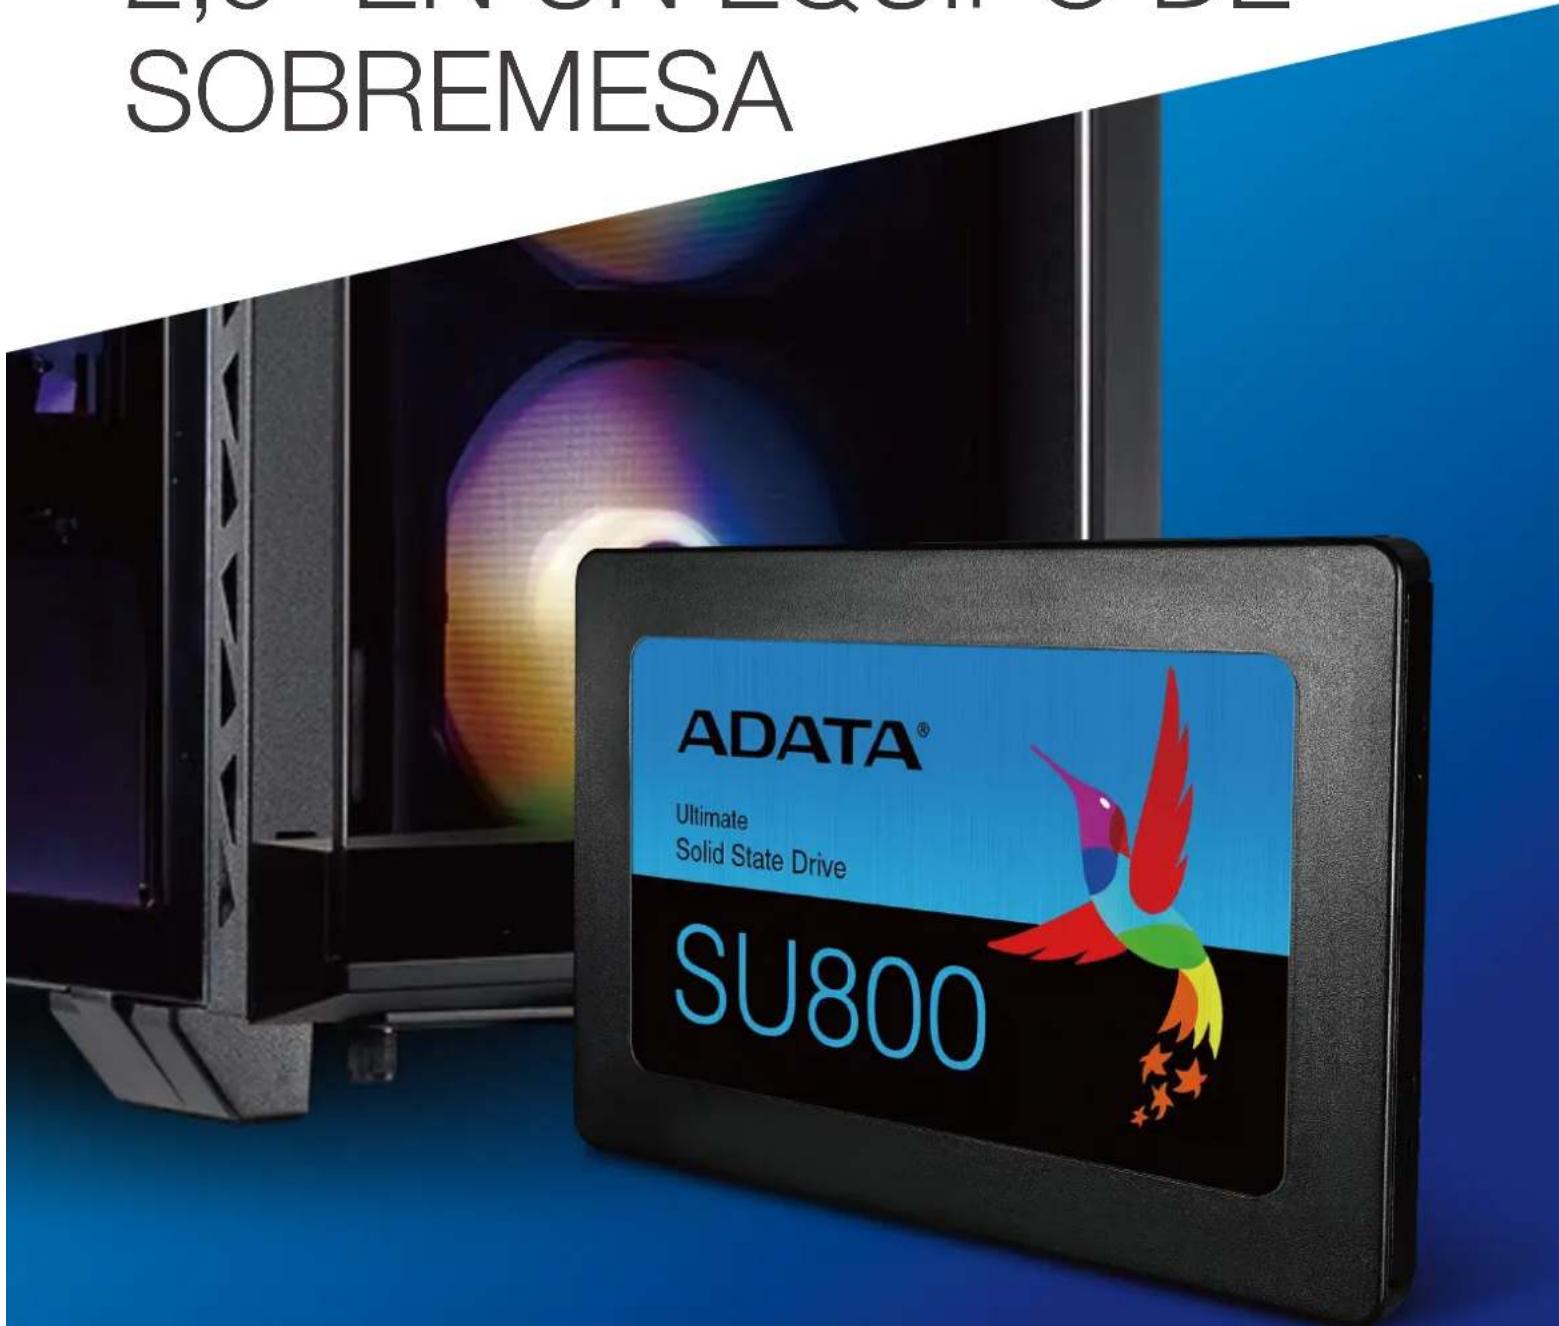
INSTALAR UNA UNIDAD DE ESTADO SÓLIDO SATA DE 2,5" EN UN EQUIPO DE SOBREMESA
natural_image
Interior view of a computer tower case with visible internal components and a close-up of a monitor displaying blue LED (no text or symbols)1. REUNIR LOS ELEMENTOS QUE SE NECESITARÁN
natural_image
Hand placing a socket into a server rack with multiple drive bays (no visible text or labels)natural_image
Hand placing a hard disk into a black server rack with visible internal components and a digital display (no text or symbols)1. QUITAR LA CARCASA DEL EQUIPO
natural_image
Interior view of a computer motherboard showing exposed circuit boards, cables, and connectors (no visible text or symbols)natural_image
Close-up of hands installing a red cable on an electronic device with cables and connectors (no visible text or symbols)natural_image
Close-up of a hand inserting a CPU into a black internal device, with no visible text or symbols on the device itself.5. VOLVER A MONTAR LA CARCASA
natural_image
Hand pointing at a black server rack with ventilation grilles and connectors (no visible text or symbols)更換前準備步驟

natural_image
Top-down view of a silver HP laptop with a small electronic device and cable on the side (no visible text or symbols)1. 準備工具
2. 備份資料
natural_image
Top-down view of hands operating a HP laptop on a dark surface, with a small electronic device and pen nearby (no visible text or symbols)4. 將電源線及電池拔除
natural_image
Close-up of hands holding a small object on a black laptop cover (no visible text or symbols)1. 將主機背板卸下
natural_image
Person assembling a laptop with visible circuit board and drive components (no text or symbols)2. 取下支架與排線
natural_image
Two hands holding a black rectangular electronic device on a dark surface (no text or symbols visible)4. 重新蓋上背板
natural_image
Top-down view of hands holding a HP laptop with a small screen displaying a logo (no visible text or symbols on the device)更换前准备步骤

natural_image
Top-down view of a silver HP laptop with a small electronic device and cable on the side (no visible text or symbols)1. 准备工具
2. 备份数据
natural_image
Top-down view of hands operating a HP laptop on a dark surface, with a small electronic device and pen nearby (no visible text or symbols)4. 将电源线及电池拔除
natural_image
Close-up of hands holding a small object on a black laptop cover (no visible text or symbols)1. 将电脑背板卸下
natural_image
Person assembling a laptop with visible circuit board and drive slots (no text or symbols)2. 取下支架与扁平电缆
natural_image
Close-up of hands installing a hard drive into a motherboard, no visible text or symbols on the device itself.natural_image
Two hands holding a black rectangular electronic device against a dark background (no text or symbols visible)4. 重新盖上背板
再以螺丝起子固定M.2固态硬盘。
natural_image
Top-down view of hands holding a HP laptop with a small screen showing a logo (no visible text or symbols on the device)BEFORE INSTALLATION

natural_image
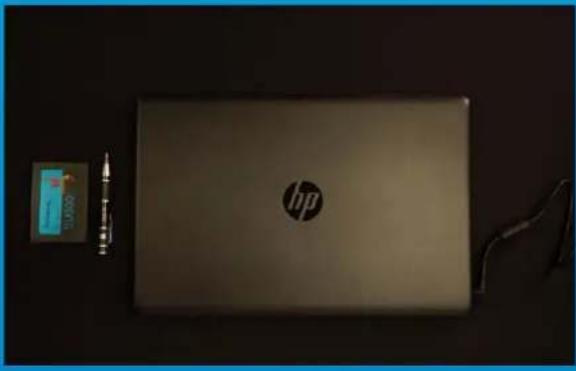
Top-down view of a silver HP laptop with a small electronic device and cable on the side (no visible text or symbols)1. GATHER THE THINGS YOU'LL NEED
PC, Phillips screwdriver, and ADATA 2.5" SATA SSD
*Please use a standard Phillips screwdriver (3.5mm) for disassembling the case.

Make sure to backup the important data on your PC to an external device, such as an external HDD, before starting installation.

After backing up your data, power off your PC to avoid data loss or damage to other components during installation.

natural_image
Top-down view of hands operating a HP laptop on a dark surface, with a small electronic device and pen nearby (no visible text or symbols)4. UNPLUG POWER CORD AND BATTERY
This action is necessary to discharge residual power that can damage your PC and its components.
*The battery removal step applies only to laptops when it's possible to remove the battery. To see how to remove the battery, refer to your user manual.
INSTALLATION

natural_image
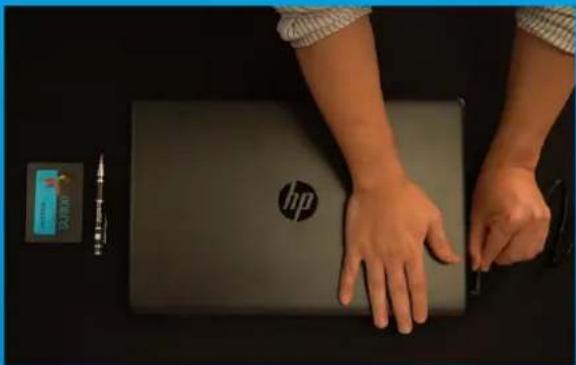
Close-up of hands holding a small object on a black laptop cover (no visible text or symbols)1. REMOVE YOUR PC'S BACK PLATE
Use your standard Phillips screwdriver to loosen the screws and then remove the back plate.
*If you are unsure how to do this, refer to your user manual
natural_image
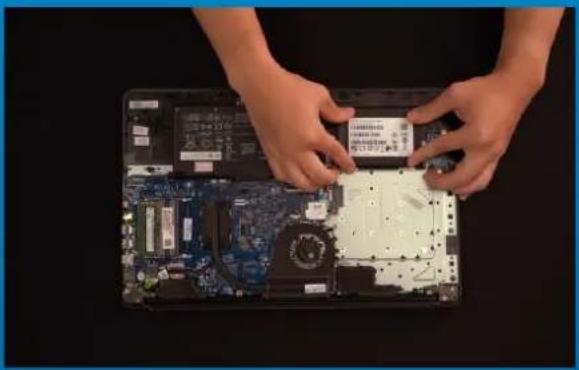
Person assembling a laptop with visible circuit board and drive components (no text or symbols)2. REMOVE THE MOUNTING BRACKET AND CABLES
*The bracket is used to secure the solid state drive, because the slot is not exactly the same size as the solid state drive.

natural_image
Close-up of hands installing a hard drive into a computer motherboard (no visible text or symbols)3. CONNECT CABLES AND ATTACH BRACKET TO THE NEW 2.5" SSD.
There is a row of pins on the cable as well as on the SSD. Align to the correct orientation and place the bracket back into the slot.
*The slot has a foolproof design. Please insert the SSD in the direction corresponding to the pins on the solid state drive and the slot. Do not insert it forcibly to avoid damage to the product.
natural_image
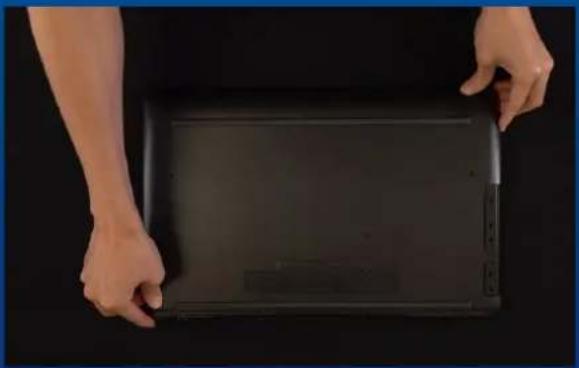
Two hands holding a black electronic device with a small screen (no visible text or symbols)4. SECURE THE BACK PLATE INTO PLACE
*Do not overtighten the screws as it may cause damage
natural_image
Top-down view of hands holding a HP laptop with a small screen showing a logo (no visible text or symbols on the device)5. PLUG IN THE POWER CORD AND POWER ON THE PC TO COMPLETE INSTALLATION
EINE 2,5-ZOLL-SATA-SSD AN EINEM LAPTOP-PC INSTALLIEREN
VOR DER INSTALLATION

natural_image
Top-down view of a silver HP laptop with a small electronic device and cable on the side (no visible text or symbols)1. ALLES NÖTIGE ZUSAMMENTRAGEN
2. IHRE DATEN SICHERN
natural_image
Top-down view of hands operating a HP laptop on a dark surface, with a small electronic device and pen nearby (no visible text or symbols)4. NETZKABEL UND AKKU TRENNEN
natural_image
Close-up of hands holding a small object on a black laptop cover (no visible text or symbols)natural_image
Person assembling a laptop with visible circuit board and drive components (no text or symbols)natural_image
Close-up of hands installing a hard drive into a computer motherboard (no visible text or symbols)natural_image
Two hands holding a black rectangular electronic device against a dark background (no text or symbols visible)4. RÜCKPLATTE WIEDER EINSETZEN
natural_image
Top-down view of hands holding a HP laptop with a small screen showing a logo (no visible text or symbols on the device)交換前の準備

natural_image
Top-down view of a silver HP laptop with a small electronic device and cable on the side (no visible text or symbols)1. 準 備するもの
2. データの バックアップ
natural_image
Top-down view of hands operating a HP laptop on a dark surface, with a small electronic device and pen nearby (no visible text or symbols)natural_image
Close-up of hands holding a small object on a black laptop cover (no visible text or symbols)1. パソコンのバックパネルを取り外す
natural_image
Person assembling a laptop with visible circuit board and drive slots (no text or symbols)2. ブラケットとケーブルを取り外す
natural_image
Close-up of hands installing a hard drive into a motherboard, no visible text or symbols on the device itself.natural_image
Two hands holding a black rectangular electronic device against a dark background (no text or symbols visible)natural_image
Top-down view of hands holding a HP laptop with a small screen showing a logo (no visible text or symbols on the device)설치하기 전에

natural_image
Top-down view of a silver HP laptop with a small electronic device and cable on the side (no visible text or symbols)1. 필요한 도구 준비
2. 데이터 백업
natural_image
Top-down view of hands operating a HP laptop on a dark surface, with a small electronic device and pen nearby (no visible text or symbols)4. 전원 코드와 배터리 분리
natural_image
Close-up of hands holding a small object on a black laptop cover (no visible text or symbols)1. PC 뒤판 제거
natural_image
Person assembling a laptop with visible circuit board and drive components (no text or symbols)2.마운팅 브래킷과 케이블 제거
natural_image
Close-up of hands installing a hard drive into a motherboard, no visible text or symbols on the device itself.natural_image
Two hands holding a black rectangular electronic device on a dark surface (no text or symbols visible)4. 뒤판 제자리에 고정
natural_image
Top-down view of hands holding a HP laptop with a small screen showing a logo (no visible text or symbols on the device)ANTES DA INSTALAÇÃO

natural_image
Top-down view of a silver HP laptop with a small electronic device and cable on the side (no visible text or symbols)1. REÚNA AS COISAS QUE VOCÊ PRECISA
2. FAÇA BACKUP DE SEUS DADOS
natural_image
Top-down view of hands operating a HP laptop on a dark surface, with a small electronic device and pen nearby (no visible text or symbols)natural_image
Close-up of hands holding a small object on a black laptop cover (no visible text or symbols)1. REMOVA A PLACA TRASEIRA DO SEU PC
natural_image
Person assembling a laptop with visible circuit board and drive slots (no text or symbols)2. REMOVA O SUPORTE DE MONTAGEM E OS CABOS
3. CONECTE OS CABOS E PRENDA O SUPORTE AO NOVO SSD DE 2,5".
natural_image
Two hands holding a black rectangular electronic device on a dark surface (no text or symbols visible)4. PRENDA A PLACA TRASEIRA NO LUGAR
natural_image
Top-down view of hands holding a HP laptop with a small screen showing a logo (no visible text or symbols on the device)natural_image
Top-down view of a silver HP laptop with a small electronic device and cable on the side (no visible text or symbols)2. ЗАРЕЗЕРВИРУЙТЕ ДАННЫЕ
natural_image
Top-down view of hands operating a HP laptop on a dark surface, with a small electronic device and pen nearby (no visible text or symbols)natural_image
Close-up of hands holding a small object on a black laptop cover (no visible text or symbols)1. СНИМИТЕ ЗАДНЮЮ ПЛАСТИНУ ПК
natural_image
Person assembling a laptop with visible circuit board and drive slots (no text or symbols)natural_image
Close-up of hands installing a hard drive into a computer motherboard (no visible text or symbols)3. ПРИСОЕДИНИТЕ КАБЕЛИ И ПРИКРЕПИТЕ КРОНШТЕЙН К НОВОМУ ТВЕРДОТЕЛЬНОМУ НАКОПИТЕЛЮ 2,5 ДЮЙМА.
natural_image
Two hands holding a black rectangular electronic device against a dark background (no text or symbols visible)4. ЗАКРЕПИТЕ ЗАДНЮЮ ПЛАСТИНУ НА МЕСТЕ
natural_image
Top-down view of hands holding a HP laptop with a small screen displaying a logo (no visible text or symbols on the device)ÎNAINTE DE INSTALARE
natural_image
Top-down view of a HP laptop with a small electronic device and cable on the surface (no visible text or symbols)1. ADUNATI LUCRURILE DE CARE VETI AVEA NEVOIE
2. FACETI O COPIE DE REZERVĂ A DATELOR
3. OPRITI PC-UL
natural_image
Top-down view of hands operating a HP laptop on a dark surface, with a small electronic device and pen nearby (no visible text or symbols)4. DECONECTATI CABLUL DE ALIMENTARE ȘI BATERIA
natural_image
Close-up of hands holding a small object on a black electronic device casing (no visible text or symbols)1. SCOATEȚI PLACA DIN SPATE A PC-ULUI
natural_image
Person assembling a laptop with visible circuit board and battery cover (no text or symbols)2. SCOATEȚI SUPORTUL DE MONTARE ȘI CABLURILE
natural_image
Close-up of hands installing a hard drive into a computer motherboard (no visible text or symbols)3. CONECTATI CABLURILE ŞI ATAŞATI SUPORTUL LA NOUL SSD SATA 2,5".
natural_image
Close-up of hands holding a black rectangular electronic device against a dark background (no text or symbols visible)4. FIXAREA PLĂCII DIN SPATE ÎN POZITIE
natural_image
Top-down view of hands operating a HP laptop on a dark surface, with a small monitor and pen nearby (no visible text or symbols)5. CONECTATI CABLUL DE ALIMENTARE ȘI PORNIȚI PC-UL PENTRU A FINALIZA INSTALAREA
INSTALAR UNA UNIDAD DE ESTADO SÓLIDO SATA DE 2,5" EN UN EQUIPO DE SOBREMESA

natural_image
Interior view of a computer tower case with visible internal components and a small electronic device on the right (no text or symbols)1. REUNIR LOS ELEMENTOS QUE SE NECESITARÁN
natural_image
Hand placing a socket into a server rack with multiple drive bays (no visible text or labels)natural_image
Hand placing a hard disk into a black server rack with visible internal components and a digital display (no text or symbols)1. QUITAR LA CARCASA DEL EQUIPO
natural_image
Interior view of a computer motherboard showing exposed circuit boards, cables, and connectors (no visible text or symbols)natural_image
Close-up of hands installing a red cable on an electronic device with cables and connectors (no visible text or symbols)natural_image
Close-up of a hand inserting a CPU into a black internal space, with a monitor and screwdriver nearby (no visible text or symbols)5. VOLVER A MONTAR LA CARCASA
natural_image
Hand pointing at a black server rack with ventilation grilles and connectors (no visible text or symbols)

- ADATA®
- INDEX
- INSTALLING AN 2.5" SATA SSD ON A DESKTOP PC
- INSTALLING AN 2.5" SATA SSD ON A LAPTOP PC
- 如何在桌機安裝
- 2.5吋 SATA固態硬碟
- 更換前準備步驟
- 準備工具
- 備份資料
- 請確實關機
- 將主機機殼卸下
- 取下支架與排線
- 重新裝上機殼
- 更换前准备步骤
- 准备工具
- 将电脑侧板卸下
- 取下支架与扁平电缆
- 重新装上机箱侧板
- BEFORE INSTALLATION
- GATHER THE THINGS YOU'LL NEED
- SWITCH OFF THE POWER SWITCH AND UNPLUG POWER CORD
- INSTALLATION
- REMOVE THE PC CASE
- CONFIRM THE POSITION OF THE 2.5" SLOT AND REMOVE THE BRACKET
- REMOVE THE BRACKET AND CABLE
- CONNECT CABLES AND ATTACH BRACKET TO THE NEW 2.5" SATA SSD. PUT THE BRACKET IN THE SLOT TO FIX DRIVES
- RESEMBLE THE CASE
- PLUG IN THE POWER CORD AND POWER ON THE PC TO COMPLETE INSTALLATION
- EINE 2,5-ZOLL-SATA-SSD AN EINEM DESKTOP-PC INSTALLIEREN
- VOR DER INSTALLATION
- ALLES NÖTIGE ZUSAMMENTRAGEN
- IHRE DATEN SICHERN
- IHREN PC ABSCHALTEN
- PC-GEHÄUSE ENTFERNEN
- 準 備するもの
- パソコン本 体のケースを取り外す
- ブラケットとケーブルを取り外す
- ケースを元の位置に取り付ける
- 설치하기 전에
- 필요한 도구 준비
- PC 케이스 제거
- 3.브래킷과 케이블 제거
- 케이스 재조립
- ANTES DA INSTALAÇÃO
- REÚNA AS COISAS QUE VOCÊ PRECISA
- DESLIGUE SEU PC
- REMOVA O GABINETE DO PC
- REMOVA O SUPORTE E O CABO
- CONECTE OS CABOS E PRENDA O SUPORTE AO NOVO SSD SATA DE 2,5". COLOQUE O SUPORTE NO SLOT PARA FIXAR AS UNIDADES
- ЗАРЕЗЕРВИРУЙТЕ ДАННЫЕ
- СНИМИТЕ КРОНШТЕЙН И ОТСОЕДИНИТЕ КАБЕЛЬ
- ПРИСОЕДИНИТЕ КАБЕЛИ И ПРИКРЕПИТЕ КРОНШТЕЙН К НОВОМУ ТВЕРДОТЕЛЬНОМУ НАКОПИТЕЛЮ 2,5 ДЮЙМА SATA. ВСТАВЬТЕ КРОНШТЕЙН В СЛОТ, ЧТОБЫ ЗАКРЕПИТЬ НАКОПИТЕЛИ
- ÎNAINTE DE INSTALARE
- ADUNATI LUCRURILE DE CARE VETI AVEA NEVOIE
- OPRITI PC-UL
- DECONECTATI ALIMENTAREA CU ENERGIE ŞI CABLUL DE ALIMENTARE
- SCOATEȚI CARCASA PC-ULUI
- CONFIRMAȚI POZIȚIA FANTEI 2,5" ȘI SCOATEȚI CONSOLA
- SCOATEȚI SUPORTUL ȘI CABLUL
- CONECTATI CABLURILE SI ATAŞATI SUPORTUL LA NOUL SSD SATA 2,5" PUNETI SUPORTUL IN FANTĂ PENTRU A FIXA UNITĂ TILE.
- REASAMBLATI CARCASA
- CONECTATI CABLUL DE ALIMENTARE ȘI PORNITI PC-UL PENTRU A FINALIZA INSTALAREA
- INSTALAR UNA UNIDAD DE ESTADO SÓLIDO SATA DE 2,5" EN UN EQUIPO DE SOBREMESA
- REUNIR LOS ELEMENTOS QUE SE NECESITARÁN
- QUITAR LA CARCASA DEL EQUIPO
- VOLVER A MONTAR LA CARCASA
- 將電源線及電池拔除
- 將主機背板卸下
- 取下支架與排線
- 重新蓋上背板
- 备份数据
- 将电源线及电池拔除
- 将电脑背板卸下
- 取下支架与扁平电缆
- 重新盖上背板
- UNPLUG POWER CORD AND BATTERY
- REMOVE YOUR PC'S BACK PLATE
- REMOVE THE MOUNTING BRACKET AND CABLES
- CONNECT CABLES AND ATTACH BRACKET TO THE NEW 2.5" SSD.
- SECURE THE BACK PLATE INTO PLACE
- PLUG IN THE POWER CORD AND POWER ON THE PC TO COMPLETE INSTALLATION
- EINE 2,5-ZOLL-SATA-SSD AN EINEM LAPTOP-PC INSTALLIEREN
- NETZKABEL UND AKKU TRENNEN
- RÜCKPLATTE WIEDER EINSETZEN
- 交換前の準備
- データの バックアップ
- パソコンのバックパネルを取り外す
- ブラケットとケーブルを取り外す
- 데이터 백업
- 전원 코드와 배터리 분리
- PC 뒤판 제거
- 2.마운팅 브래킷과 케이블 제거
- 뒤판 제자리에 고정
- FAÇA BACKUP DE SEUS DADOS
- REMOVA A PLACA TRASEIRA DO SEU PC
- REMOVA O SUPORTE DE MONTAGEM E OS CABOS
- CONECTE OS CABOS E PRENDA O SUPORTE AO NOVO SSD DE 2,5".
- PRENDA A PLACA TRASEIRA NO LUGAR
- СНИМИТЕ ЗАДНЮЮ ПЛАСТИНУ ПК
- ПРИСОЕДИНИТЕ КАБЕЛИ И ПРИКРЕПИТЕ КРОНШТЕЙН К НОВОМУ ТВЕРДОТЕЛЬНОМУ НАКОПИТЕЛЮ 2,5 ДЮЙМА.
- ЗАКРЕПИТЕ ЗАДНЮЮ ПЛАСТИНУ НА МЕСТЕ
- FACETI O COPIE DE REZERVĂ A DATELOR
- DECONECTATI CABLUL DE ALIMENTARE ȘI BATERIA
- SCOATEȚI PLACA DIN SPATE A PC-ULUI
- SCOATEȚI SUPORTUL DE MONTARE ȘI CABLURILE
- CONECTATI CABLURILE ŞI ATAŞATI SUPORTUL LA NOUL SSD SATA 2,5".
- FIXAREA PLĂCII DIN SPATE ÎN POZITIE
- CONECTATI CABLUL DE ALIMENTARE ȘI PORNIȚI PC-UL PENTRU A FINALIZA INSTALAREA
Brand : ADATA
Model : Ultimate SU655
Category : SSD