
HD 200 C V2 - Receiver MEGASAT - Free user manual and instructions
Find the device manual for free HD 200 C V2 MEGASAT in PDF.


| Product Type | DVB-C Digital HD Cable Receiver |
| Brand | Megasat |
| Model | HD 200 C V2 |
| Dimensions (W x D x H) | 168 x 93 x 38 mm |
| Weight | 234 g |
| Power Supply | AC 220-240 V, 50/60 Hz; DC 12 V, 1 A |
| Power Consumption | Max 6 W (operation), < 0.5 W (standby) |
| Video Output Resolution | Up to 1080p (HDMI) |
| HDMI Upscaling | Yes |
| USB 2.0 Port | 1x (front panel) for media playback and firmware update |
| Digital Audio Output | 1x S/PDIF (optical) |
| Tuner Frequency Range | 114 - 858 MHz |
| Demodulation | 256, 128, 64, 32, 16 QAM |
| Video Decoding | MPEG-2, MPEG-4 AVC/H.264, H.265 |
| Audio Decoding | MPEG-1 Layer 1 & 2 |
| Channel List Capacity | Up to 1000 channels (approximate) |
| Parental Lock | Yes, with age rating and PIN protection |
| EPG | 7-day Electronic Program Guide |
| Media Playback (USB) | Music, photos, videos |
| Timer | Up to 20 programmable timers |
| WiFi Capability | Via external USB WiFi stick (RT5370 chipset, not included) |
| Safety | Read manual, avoid liquids, do not open housing, ensure ventilation |
| Cleaning | Unplug, clean with soft dry cloth |
| Spare Parts / Repairability | Contact qualified service; no user-serviceable parts |
Frequently Asked Questions - HD 200 C V2 MEGASAT
User questions about HD 200 C V2 MEGASAT
0 question about this device. Answer the ones you know or ask your own.
Ask a new question about this device
Download the instructions for your Receiver in PDF format for free! Find your manual HD 200 C V2 - MEGASAT and take your electronic device back in hand. On this page are published all the documents necessary for the use of your device. HD 200 C V2 by MEGASAT.
USER MANUAL HD 200 C V2 MEGASAT
5. Hauptmenü
Sperren (ROTE TASTE)
Manuelle Suche
5. Hauptmenü
Sprache
TV-Einstellung
Safety Instructions 03
1. Genaral
1.1 General Features....04
1.2 Delivery 04
2. Designations and key assignment
2.1 Front side 05
2.2 Rear side 05
2.3 Remote control 06
-
Connecting the receiver....07
-
First installation....08
-
Main menu....09
5.1 Channel list 10
5.2 Channel search....12
5.3 Language....13
5.4 AV-settings 14
5.5 Time settings 15
5.6 System 16
5.7 Media-Center....18
5.8 Network 20
- Troubleshooting....21
- Specifications 22
PRODUCT REGISTRATION
Registering your Megasat product gives you access to our automatic e-mail notifications. If your product requires new firmware, you will be notified by e-mail.
For registration please visit our homepage www.megasat.tv
You can find the form in Support Product registration
Safety Instructions
Please read the user manual carefully before using the device. Incorrect or improper handling will invalidate the warranty claim.
Power supply
Before commissioning, please check the correct operating voltage of your power connection. Please refer to the technical data in this manual for the operating voltage of the device.
Overload
Do not overload the wall socket, extension cable or adapter. Do not use a damaged power cord or touch it with a wet hand as this may result in electric shock.
Liquid
The device must not be exposed to dripping, splashing water or other liquids.
Ventilation
Keep the ventilation slots on the top of the device clear to allow sufficient air circulation inside the device. Do not expose the device to direct sunlight or other heat sources such as a heater. Do not place any other electrical devices on top of the device.
Risk of suffocation
Do not let children play with foils or other packaging parts, there is a danger of suffocation.
Cleaning
Unplug the device from the power outlet before cleaning it. Clean the device with a soft cloth.
Opening the device
Do not open the housing to avoid the risk of electric shock. Contact qualified and licensed service personnel to repair the device or contact your dealer.
1. Genaral
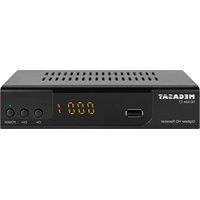
1.1 General Features 2.1 Front side
- DVB-C reception
- 4-digit display
- 3 keys front operation
- PAL/NTSC conversion
- Variable aspect ratio (4.3, 16:9) with Pan Vector or LetterBox
■ Resolution up to 1080p - HDMI with upscaling function to improve the picture quality
- Lists of favourites
- Parental lock
- OSD with full color resolution
- Teletext and subtitie support (OSD)
- 7-day EPG (Electronic Program Guide)
- Multilingual menu
■ Digital audio output (S/PDIF) - USB 2.0 port (media playback)
1.2 Delivery
- Megasat HD 200 CV2
- Remote control
- Batteries
- 230/12 Volt power supply
- User manual
2. Designations and key assignment
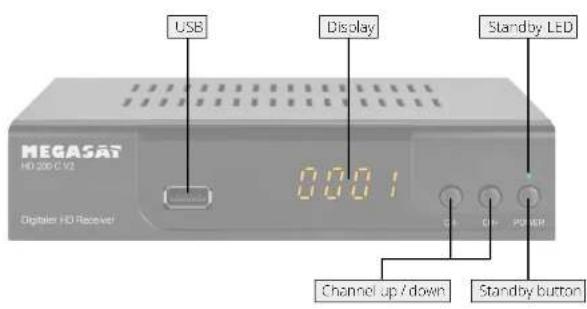
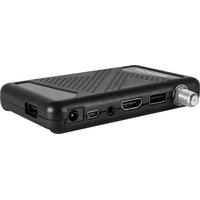
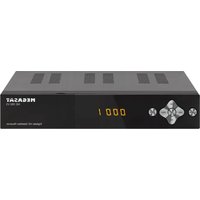
2.1 Rear side
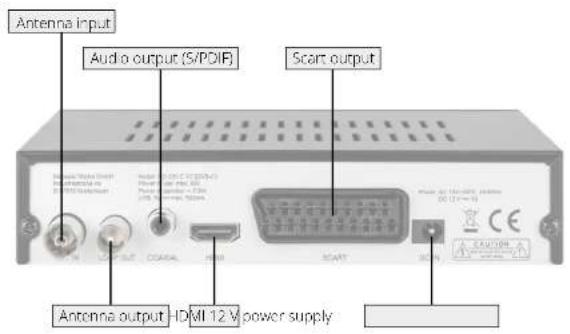
2. Designations and key assignment
2.3 Remote control

Area 1
POWER Switches the receiver on or off (standby) MUTE Mutes the sound
RED Function key
GREEN Function key
YELLOW Function key
BLUE Function key / Timer list
◀/▶ Rewinds forwards / rewinds backwards
◀◀/▶◀Title forward / Title back
▶▶▶ Start / Break
■ Stop
= /SAT Repeat mode in media playback/
Enabling or disabling AD mode
LIST Accessing the record menu (optional)
SUBTITLE Subtitle display (if available)
TXT Shows the text of the respective channel.
RECALL Switches between last and current channel
AUDIO Select or change the audio track.
Area 2
MENU To enter the main menu.
INFO Shows information of the current channel (press again for more information)
◀▶ Volume control / menu navigation
▲▼ Switches channels (up/down) / Navigation in menu
OK Confirm the selection / open the program list
EPG Shows the EPG (Electronic Program Guide)
EXIT Exits the current menu step by step
Area 3
VOL +/- Adjust volume
CH +/- Changes TV/Radio channels (up/down)
FAV Shows the favorites list (if favorites exist)
REC Starts recording (optional)
Number keypad (0-9) Program change / number entry
GOTO Function key in various submenus
TV/RADIO Switching between TV and radio reception
3. Connecting the receiver
- Connect the coaxial cable to the cable connector and the antenna input on the receiver.
- Connect the HDMI or Scart cable with your TV.
- Make sure your TV has the corresponding input channel is selected (e.g. HDMI 1).
DVB-C-terminal

4. First installation
After you have connected all necessary components and the receiver starts, the window with the initial installation appears. Select a menu item with the ▲▼ buttons. Then press the OK button to make the appropriate settings.

OSD language Select the menu language here
Country Select the country in which you are located.
FTA Select whether only free-to-air channels (On) or also encrypted channels (Off) should be searched.
Channel search Starts the automatic channel search
EXIT Cancels the installation.
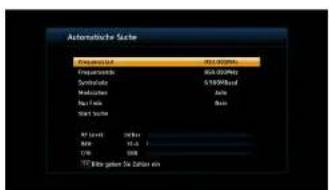
Automatic search
After you have opened the program search, enter the start and end frequency of the tape if necessary. The subsequent search will only search for stations in this range. If necessary, the symbol rate values and the modulation can also be adjusted. With the "Free only" item you can select whether only free-to-air (YES) or also encrypted (NO) stations are to be searched for. Select "Start Search" to start the search process.
The basic navigation in the menu is done with the ▲▼ buttons (up/down), or with the ◀▶ but tons (right/left). To enter a menu item, press the OK button. To exit an item, press the MENU or EXIT button, Press the MENU or EXIT button again to exit the menu.
The main menu consists of 8 submenus:
- Channel list
- Channel search
Language - AV settings
■ Time display
■ system
■ Media Center
Network
Note:
The menu is partly password protected. The factory password is: 0 0 0 0
5.1 Channel list
TV channel list
In this menu item you can move, skip, lock, delete, rename or assign channels to favourite groups.

Favorites (FAV)
Select a channel and then press the FAV button to assign the channel to one or more Favourites lists. Several favourite groups are available (movie, news, sports, music, ...). For example, select "Movie" to assign the channel to the favourite group. The favourite group is then marked with a star symbol.

Press EXIT to return to the channel list. Repeat the procedure with all other channels that
you want to assign to favourite lists. In normal TV mode, press the FAV key to call up the favourite lists. Use the pq buttons to switch between the different favourite lists. Under each category, the channels that you have marked as favorites will appear.
For example, to delete a channel from the favourite lists, change 'Movies' in the favourite selection and press OK to deactivate the channel's you want to remove.
5. Main menu
Lock (RED button)
Select a program and then press the RED button to lock the program. You will be asked to enter a password (default: 0000). You will then be asked whether only this program or the complete transponder on which the program is located should be locked. Confirm your selection. The program or the respective transponder is now locked (indicated by the blue lock symbol). To access this program in future, the password must be entered. To unlock programs again, select them and confirm with the RED button.
Skip (GREEN button)
Select a channel and then press the GREEN button to skip the channel in the future when scrolling the channel list. The channel will be marked with an arrow symbol.
Move (YELLOW button)
Press the YELLOW button to activate "Move". Press OK to select one or more channels you want to move. Use the ▲▼ buttons to navigate to the position in the channel list where you want to move the channels. Then press the INFO button to position the channels. Repeat the process with other channels to adjust the channel list to your needs. Exit the move mode with Exit.
Edit (BLUE button)
Press the BLUE button to enter the advanced menu:
RED button: Here you can sort the channel list by "Name (A-Z)", Name (Z-A), etc...
GREEN button: Here you can rename the name of a channel.
BLUE button: Activates the DFL ETF function. Select all channels you want to delete. The respective channel is marked with an X symbol. If you now press EXIT, you will be asked if you really want to delete. Confirm with OK or press EXIT to cancel the process.
Radio channel list
The radio channel list is edited in the same way as the TV channel list.
5. Main menu
Parental lock
To access this menu item you must first enter the password (the default password is: 0 0 0 0)
Age limit
Select from which age the lock should be activated (7, 12, 15 or 18 years). Alternatively, you can release all channels or lock all channels. In the case of a "lock", the password must always be entered in advance to access the respective station.

If you select this option with "On", the password must be entered when entering the menu. If you select "Off", you will enter the menu without entering the password.
PIN
Select "On" to activate the parental lock. Select "Off" to deactivate the parental lock.
New password
Enter a new, 4-digit password that you want to use for parental control or menu lock in the future.
Confirm password
Confirm the previously entered password by repeating the 4-digit entry.
Channel type
AV Sync:
Audio output is delayed to minimize the time gap between audio output and image display.
Stable:
The audio output is not delayed.
5. Main menu
5.2 Channel search
Cable menu
In this menu item you can search for channels automatically or manually.

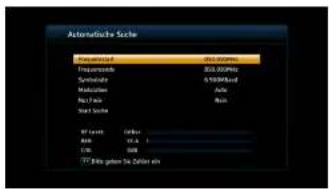
Automatic search
If necessary, enter the start and end frequency of the tape. The subsequent search will only search for stations in this range. If necessary, you can also adjust the symbol rate and modulation values. Select "Start Search" to start the search process.
Manual search
Enter the corresponding frequency and symbol rate manually. Further adjustments such as modulation, NIT search can be made if required. Under "Free only", select whether you want to search only free to air stations or also encrypted stations. Select "Start Search" to start the search process.

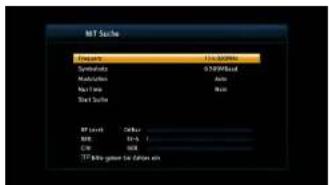
NIT-Search
The NIT search (Network Information Table) automatically searches a list provided by the cable network operator. You do not need to change any settings for this type of search. Select "Start Search" to start the search process.
5. Main menu
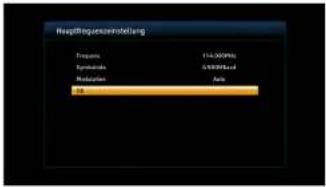
Frequency channel
Manually enter the frequency and symbol rate you want to search. The modulation can be adjusted if necessary. Select "OK" to start the search process on this one frequency.
5.3 Language
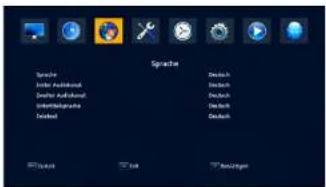
In this menu item you can set various language settings.
Language
Use the ◀▶ buttons to select the desired language of the main menu.
First audio channel
Use the ◀▶ buttons to select the desired language of the first audio channel.
Second audio channel
Use the ◀▶ buttons to select the desired language of the second audio channel. This audio channel is preferred if the first audio channel is not available.
Subtitle language
Use the ◀▶ buttons to select the desired subtitle language. Subtitles are not supported for every programme or channel.
Teletext
Select the desired teletext language with the ◀▶ buttons.
5. Main menu
5.4 AV-settings
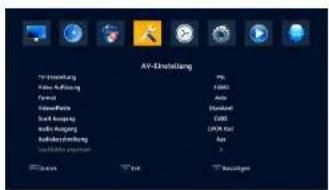
In this menu item you can adjust various settings for audio and video formats.
TV-settings
Use the ◀▶ buttons to select between PAL, NTSC or Auto. When using EU TV sets, the TV setting PAL is used.
Videorresolution
Select the maximum resolution that your TV can play back. If you select a higher resolution than your TV can play, the TV may not be able to play back any picture. Select from 576i, 576p, 720p, 1080i or 1080p (Full HD).
Format
Select the appropriate aspect ratio. Choose between AUTO, 4:3 LetterBox, 4:3 PanScan, or 16:9.
Video-Effect
Choose between Standard and Vivid. Vivid" slightly increases the sharpness and contrast of the image.
Scart-output
Use the ◀▶ buttons to select between RGB and CVBS.
Audio-output
Use the ◀▶ buttons to select between LPCM (uncompressed surround sound), BS (bitstream) or Convert (compressed stereo sound).
Audio description
Use the ◀▶ buttons to select between ON and OFF. When the function is activated (ON), a speaker will describe the current situation of the movie or series. This function is suitable for the visually impaired, but not available for every channel, movie or series.
Audio volume offset
Controls the volume of the speaker (audio description). This function is only available if the audio description option is enabled.
5. Main menu
5.5 Time settings
In this menu item you can set various settings for the time display.

GMT usage
Use the ◀▶ buttons to select whether you want to use automatic time setting ("On"). If you select, "Off", you can set the time manually.
GMT difference
Select the time difference with the ◀▶ buttons. In Germany the difference is +1.00 hours. This item is only activated when the automatic time setting is set.
Summertime
Use the ◀▶ buttons to select whether summer time is to be activated.
Date
Change the date manually by entering the date using the number buttons on the remote control. This item is only enabled when the automatic time setting is set.
Time
Change the time manually by entering the number buttons on the remote control. This item is only enabled when the automatic time setting is set.
5. Main menu
5.6 System
In this menu you can see various information about the firmware status of the receiver. Reset the receiver to the factory settings or update the firmware.
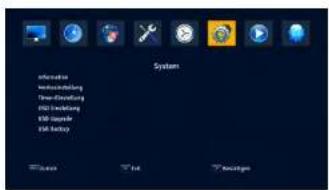
Information
This item displays current information about the hardware and software status of the receiver.
Factory setting
If you want to reset the receiver to the factory settings, confirm this menu item with OK. You are requested to enter a password. By default, the password is: 0 0 0 0. The receiver then starts with the initial installation.
ATTENTION: All settings that you have made in the receiver menu as well as the saved channels will be lost!
Timer setting
Select the first timer slot and confirm with OK. Subsequently, a new window opens to set the data.

TV/Radio Select whether to turn on a TV or radio program.
Repeat Select when the timer should be active (Once, Daily, Weekly).
Channel Select which program the receiver should switch to.
Wakeup Select on which day (date) the timer should be active.
Start time Select when (time) the receiver should turn on.
End time Select when (time) the receiver should switch off again.
Mode (No change necessary)
When you have made all the settings, press "Save" at the bottom of the screen to transfer the timer to the timer list. Repeat the procedure if you want to set additional timers. There are a total of 20 different timers available.
5. Main menu
OSD settings
-
Subtitle: Enable or disable the subtitle (if available).
-
OSD display duration: Set the seconds how long menu displays should last.
-
OSD Transparency: Adjust the transparency of the menu
-
Auto-Slandby: Set the time when the receiver automatically switches off if no operation is made on the device.
USB-Upgrade
Select this option if a new firmware is available. You can always find the latest firmware on our homepage www.megasat.tv.
- Copy the new firmware to a USB stick (to the main directory without subfolders) and plug it into the USB port on the front of the receiver.
- Select "All" in "Upgrade Mode" to update the firmware and the channel list contained in it. If you only want to upgrade the firmware, select "Maincode".
- If they have previously copied the appropriate firmware to the USB stick, the appropriate file is automatically displayed under "Upgrade File" (e.g. firmware.bin).
- Now select "Start" to start the upgrade process. ATTENTION: Never disconnect the power supply to the receiver during the update process!
- After successful update the receiver restarts.
USB-Backup
To make a backup of the current settings and the channel list, select "All" in "Backup Mode". If you only want to save the channel list, select "Channel List". Now select "Start" to start the backup process. After successful backup, the data will be saved to the USB stick. You can reload them under USB Upgrade.
5. Main menu
5.7 Media-Center
In this menu item you can play music, videos or photos via a USB medium.
Note:
Make sure that a USB stick or a USB hard disk with suitable media is inserted.

Use the keypad on the remote control to control playback:

| Music Photos Videos | |||
| 1 | rewind | without function | rewind |
| 2 | fast-forward | without function | fast-forward |
| 3 | previous title | previous picture | previous video |
| 4 | next title | next picture | next video |
| 5 | starts / pauses title | starts / pauses slideshow | starts / pauses video |
| 6 | stops title | stops slideshow | stops video |
Music
Switch to the Music submenu. Music files stored on the USB medium are then displayed. If there are musicfiles in a subfolder, first switch to the respective folder and confirm with OK. To play a title, select it with the ▲▼ buttons and confirm with OK.
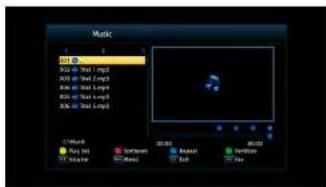
5. Main menu
Explanation of the colour keys:
YELLOW Plays the saved playlist (if available, mostly "MBU files")
RED Sorts the files from "Name A-Z" or "Name Z-A"
BLUE Sets the various playback options.
-
all titles in succession
-
repetition of all titles
-
random playback
-
repeats the current title
GREEN If there are several partitions on the USB medium, you can select the desired partition here.
Photos
Switch to the Photos submenu. Photo files stored on the USB media will be displayed. If there are photo files in a sufolder, first switch to the respective folder and confirm with OK. To play back a photo, select it with the ▲▼ buttons and confirm with OK.
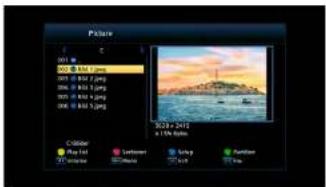
Explanation of the colour keys:
YELLOW Plays the saved playlist (if available, mostly "M3U files")
RED Sorts the files from "Name A-Z" or "Name Z-A
BLUE Sets the various playback options.
-
slide show (OFF or 1-9 seconds per photo)
-
slide show repeat (ON or OFF)
GREEN If there are several partitions on the USB medium, you can select the desired partition here.
Videos
Switch to the Videos submenu. Then video files stored on the USB media will be displayed. If there are video files in a subfolder, first switch to the respective folder and confirm with OK. To play a video, select it with the ▲▼ buttons and confirm with OK. The video will first be displayed in the preview window.

Explanation of the colour keys:
YELLOW Displays the video in full screen mode.
GREEN If there are several partitions on the USB medium, you can select the desired partition here.
5. Main menu
5.8 Network
In this menu item you can connect the receiver to your network. Afterwards you can use various internet apps.
Note:
The connection to the network can only be made with a suitable WiFi USB stick. This is not included in the delivery.


Suitable Wi-Fi USB stick must include the RT5370 chipset
6. Troubleshooting
If you have problems with the receiver, please check the following situations to determine the source of the error:
| Problem Possible causes What must you do? | ||
| LED does not light up on the front. | Power cable is not connected. | Check that the power cable is connected correctly. |
| Bad or jerky picture. DVB-C reception may be too weak. | Make sure that the coaxial cable is connected correctly and that it is not damaged. If not, please contact your cable provider to check whether there may be a fault in the network. | |
| No picture when starting the receiver. | The receiver is connected via HDMI, but the TV is not in proper HDMI mode. | Switch the television to the correct HDMI mode (e.g. HDMI 1). |
| The remote control does not work. | The batteries are low or the remote control is not pointing exactly at the receiver. | Replace the batteries. Make sure that there is nothing between the receiver and the remote control. Oostacles may reduce reception. |
| You have forgotten your password? | The default password is 0000. Contact your dealer if you have forgotten the password you assigned yourself. | |
7. Specifications
| Processor | |
| Chipset Powerful dual MIPS CPU | |
| SDRAM 512 MB DDR-2 | |
| Flash memory 32 MB | |
| Processor 552 MHz | |
| Tuner & Demodulator | |
| RF input 1x IEC-TYPE, IEC169-2, female | |
| Frequency range 114 - 858 MHz | |
| Bandwidth 8 MHz | |
| Input impedance 75 Ω | |
| Noise figure 2.9 dB | |
| Decoding | |
| Video decoding MPEG4 AVC/H.265 HP@L4 / MPEG2 MP@ML.HL | |
| Aspect ratio 4:3 / 16:9 | |
| Video output SCART, HDMI (576i, 576o, 720p, 1080i, 1080p) | |
| Demodulation 256 QAM, 128 QAM, 64 QAM, 32 QAM, 16 QAM | |
| Audio decoding MPEG-1 (Layer 1 & 2) | |
| Audio mode | Single Channel / Dual Channel / Joint stereo / Stereo |
| Sampling | 32, 44.1 und 48 KHz |
| Connections | |
| Tuner | 1x Antenna input / 1x Antenna output |
| Data connection | 1x USB (Front side) |
| Scart | 1x to the television |
| HDMI | 1x HDMI output |
| S/PDIF | 1x Digital audio output |
| Power supply | |
| Power supply | AC 220~240 V, 50/60Hz // DC 12V, 1A |
| Power consumption | max. 6 W (in use) / < 0.5 W (standoy) |
| Other | |
| Dimensions (W/D/D) | 168 x 38 x 93 mm |
| Weight | 23⁄4 g |
Note:
Weight and dimensions are not the absolute exact values.
Technical details can be changed at any time and without prior notice.
Conformity information
Megasat Werke GmbH hereby declares that the following device is in compliance with the essential requirements and other relevant provisions of Directives 2014/30/EU (EMC), 2014/35/EU (LVD) and 2014/53/EU (RED).
Megasat HD 200 C V2 (Art-No. 0201142)
The declaration of conformity for this product is available from: Megasat Werke GmbH, Industriestraße 4a, D-97618 Niederlauc
You can download the declaration of conformity from our homepage. www.megasat.tv/support/downloads
Notes


- Hauptmenü
- Sperren (ROTE TASTE)
- Manuelle Suche
- Sprache
- TV-Einstellung
- Genaral
- Designations and key assignment
- PRODUCT REGISTRATION
- Safety Instructions
- Power supply
- Overload
- Liquid
- Ventilation
- Risk of suffocation
- Cleaning
- Opening the device
- General Features 2.1 Front side
- Delivery
- Area 1
- Area 2
- Area 3
- Connecting the receiver
- First installation
- Automatic search
- Note:
- Channel list
- TV channel list
- Favorites (FAV)
- Main menu
- Lock (RED button)
- Skip (GREEN button)
- Move (YELLOW button)
- Edit (BLUE button)
- Radio channel list
- Parental lock
- Age limit
- PIN
- New password
- Confirm password
- Channel type
- AV Sync:
- Stable:
- Channel search
- Cable menu
- Manual search
- NIT-Search
- Frequency channel
- Language
- Language
- First audio channel
- Second audio channel
- Subtitle language
- Teletext
- AV-settings
- TV-settings
- Videorresolution
- Format
- Video-Effect
- Scart-output
- Audio-output
- Audio description
- Audio volume offset
- Time settings
- GMT usage
- GMT difference
- Summertime
- Date
- Time
- System
- Information
- Factory setting
- Timer setting
- OSD settings
- USB-Upgrade
- USB-Backup
- Media-Center
- Music
- Photos
- Videos
- Network
- Troubleshooting
- Specifications
- Conformity information
- Notes
Brand : MEGASAT
Model : HD 200 C V2
Category : Receiver