
PPIC90520C - Security Camera ABUS - Free user manual and instructions
Find the device manual for free PPIC90520C ABUS in PDF.


| Brand | ABUS |
| Model | PPIC90520C |
| Product Type | Indoor/Outdoor IP Security Camera |
| Image Sensor | 1/2.8-inch CMOS |
| Resolution | 1920 x 1080 (Full HD) |
| Lens | 2.8 mm fixed |
| Field of View | Horizontal: 100°, Vertical: 54° |
| Night Vision | Up to 30 m with IR LEDs |
| Dimensions (W x H x D) | 7.5 cm x 7.5 cm x 12.5 cm |
| Weight | 0.4 kg |
| Power Supply | 12 V DC / PoE |
| Power Consumption | Max. 5 W |
| Protection Rating | IP67 |
| Operating Temperature | -30°C to +50°C |
| Main Functions | Motion detection, two-way audio, microSD card recording, ONVIF support |
| Security | Password protection, encrypted video transmission |
| Maintenance & Cleaning | Periodically wipe lens with soft cloth; ensure vents are clear |
| Spare Parts & Repairability | Replacement power adapter and bracket available; professional repair required for internal components |
| General Information | Manual available at notice-facile.com in PDF (88 pages) |
Frequently Asked Questions - PPIC90520C ABUS
User questions about PPIC90520C ABUS
0 question about this device. Answer the ones you know or ask your own.
Ask a new question about this device
Download the instructions for your Security Camera in PDF format for free! Find your manual PPIC90520C - ABUS and take your electronic device back in hand. On this page are published all the documents necessary for the use of your device. PPIC90520C by ABUS.
USER MANUAL PPIC90520C ABUS
Bedienungsanleitung
www.abus.com/product/PPIC90000 www.abus.com/product/PPIC90010 www.abus.com/product/PPIC90200 www.abus.com/product/PPIC90520
2.2. Halterung


Achtung!


Achtung!








Hinweis
Instruction manual
Important notes and FAQs about this product and other products can be found on the webpage
https://.akku-cam.abus.com
Version 1.3
inauguration
Dear customer, dear customer,
Thank you for purchasing this product.
ABUS Security Center hereby declares that the base station and camera PPIC90000, PPIC90010, PPIC90200, PPIC90520 comply with RED Directive 2014/53/EU. The devices also meet the requirements of the following EU Directives: EMC Directive 2014/30/EU and RoHS Directive 2011/65/EU. The full text of the EU Declaration of Conformity is available at the following Internet addresses:
www.abus.com/product/PPIC90000 www.abus.com/product/PPIC90010 www.abus.com/product/PPIC90200 www.abus.com/product/PPIC90520
In order to maintain this condition and ensure safe operation, the user must observe these operating instructions!
Before putting the product into operation, read through the complete operating manual and observe all operating and safety instructions!
All contained company names and product names are trademarks of their respective owners. All rights reserved.
If you have any questions, please contact your specialist dealer or visit us on the Internet at https://akku-cam.abus.com

Data storage is subject to country-specific data protection guidelines.

Warning in the sense of § 201 StGB:
Anyone who unauthorizedly records the non-publicly spoken word of another person on a sound carrier and uses such a recording or makes it available to a third party can be punished with imprisonment or a fine!
Similarly, an unauthorised person may be punished if he or she intercepts with a tapping device the non-publicly spoken word of another person which is not intended for his or her knowledge or if he or she communicates publicly, in full or in part, the recorded or intercepted non-publicly spoken word of another person.

Disclaimer
These operating instructions have been prepared with the utmost care. Should you nevertheless notice any omissions or inaccuracies, please let us know in writing at the above address.
ABUS Security Center GmbH accepts no liability whatsoever for technical and typographical errors and reserves the right to make changes to the product and operating instructions at any time without prior notice.
ABUS Security Center shall not be liable or responsible for any direct or indirect consequential damages in connection with the equipment, performance and use of this product. No guarantee is given for the content of this document.
table of contents
1. Scope of delivery 5
2. Hardware description....6
2.1.Wi-Fi Battery Cam 6
2.2. Mounting....8
2.3. base station 8
3. Assembly / Installation....9
3.1. Installing the Camera Without a Wall Mount....9
3.2. Installing the Camera with Wall Bracket 9
3.3. Alignment and detection range of the camera 10
3.4. Installing the base station.... 13
3.5. Installing the Camera and Base Station.... 14
4. App2Cam Plus: First Access 18
4.1. Download App.... 18
4.2. Camera setup.... 18
4.2.1.Wi-Fi setup 18
4.2.2. Alternative Installation 20
4.2.3. Add already configured base station.... 21
4.2.4. Pairing a new camera with a base station 21
4.3. App2Cam Plus: Compatibility.... 22
4.4. App2Cam Plus: Overview 22
4.4.1. Menu bar 23
4.4.2. Camera bar 23
4.4.3. Info / App Settings 23
4.5. App2Cam Plus: Live view 24
4.5.1. Live View Functions 24
4.5.2. Active/Deactive Function.... 25
4.5.3. Camera Indicators 25
4.5.4. Stream Indicators 26
4.6. App2Cam Plus: Event List / Playback.... 27
4.6.1. Event list....27
4.6.2. Event list Functions 27
4.6.3. Mode (iOS only) 27
4.7. Playback....28
4.7.1. Playback Functions 28
4.7.2. Download & Forwarding 29
4.8. Advanced Settings 29
4.8.1. Login data....29
4.8.2.Open advanced settings 30
4.8.3. Automatic login.... 30
4.8.4. Advanced settings Base station 30
4.8.5. Advanced Settings Camera 37
English
- Firmware update....40
5.1. Update via server 40
5.2. Manual update 40
5.3. Current firmware version....40
- Overview voice commands .... 41
- Battery FAQs....42
- Troubleshooting tips.... 43
1. Scope of delivery
| 1 |  | 2 | 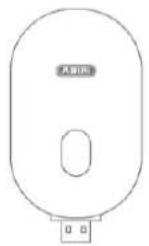 |
| 3 |  | 4 |  |
| 5 |  | 6 |  |
| 7 |  | 8 |  |
PPIC90000
• Wi-Fi Battery Cam (1)
- Base station (2)
- wall bracket (3)
- USB power supply (4)
• USB to micro-USB cable (5)
- Drilling template (6)
- Reset tool (7)
- Mounting material (8)
PPIC90010
- Base station (2)
- USB power supply (4)
PPIC90200
• 2x Wi-Fi Battery Cam (1)
- Base station (2)
- 2x wall bracket(3)
- USB power supply (4)
• USB to micro-USB cable (5)
- Drilling template (6)
- 2x reset tool (7)
- 2x mounting material (8)
PPIC90520
- Wi-Fi Battery Cam (1)
- wall bracket (3)
• USB to micro-USB cable (5) - Drilling template (6)
- Reset tool (7)
- Mounting material (8)
2. Hardware description
2.1. Wi-Fi Battery Cam
Front view

| 1 | Light sensor | 2 | Internal antenna* |
| 3 | Lens | 4 | Microphone |
| 5 | PIR Sensor(Passive Infrared Sensor) | 6 | White light LED(lights up blue during the pairing process) |
| 7 | Loudspeakers | ||
* Radio frequency: 2.4Ghz (802.11 b/g/n)
Max. Transmitting power: 20dBm
* Radio frequency: 2.4Ghz (802.11 b/g/n)
Max. Transmission power: 20dBm
Rear view

| 8 | Pairing buttonPress 1x shortly to turn on the camera,Press 3x shortly, the camera is ready for pairing,Press and hold the button for at least 5 seconds to turn off the camera. |
| 9 | Status LEDFlashes during charging.When fully charged and in cable operation, it shines red permanently.During a recording or a live view, the LED lights up permanently. |
| 10 | Micro-USB connectionConnection for charging the integrated rechargeable batteries |
| 11 | 1/4" Thread for fixing the bracketEach bracket with 1/4" thread is supported. |

Attention!
If the Micro-USB cable is used permanently, the weather protection capability of the camera will expire.
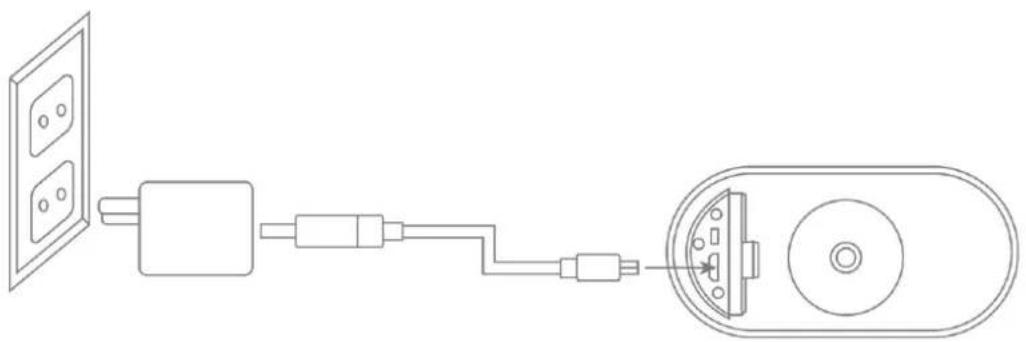
Loading the Camera
Remove the camera from the bracket and connect the included Micro-USB cable. Use a 5VDC / 2A power plug to charge the camera, the base station's AC adapter is suitable for quick charging of the camera. The camera will be fully charged in about 4 hours. During charging, the red LED on the back flashes when the charging process is completed and the LED shines permanently. The battery lasts up to 13 months, depending on the trigger frequency, live image access and external environmental influences. More information can be found at the menu item 13. Battery FAQs.
2.2. Mounting

| 1 | Fixing ring | 2 | Cover |
| 3 | Ball joint | 4 | Rubber |
| 5 | Back panel |
2.3. base station
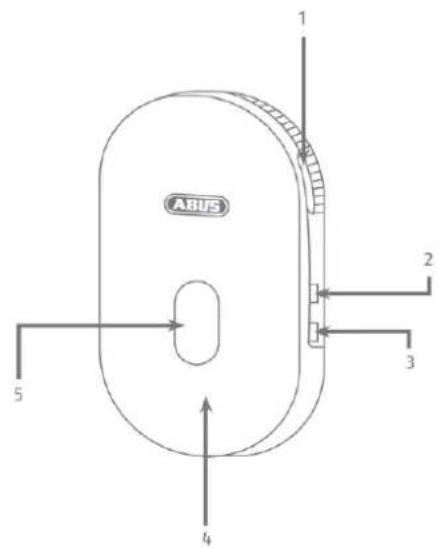

| 1 | MicroSD card slot (max. 128 GB) | 2 | Pairing buttonPress the Pairing button for approx. 3 seconds until the LED lights up red. |
| 3 | Reset buttonPress and hold the reset button for approx. 5 seconds until the status LED flashes red. | 4 | Internal antenna |
| 5 | Status LED | 6 | Loudspeakers and ventilation openings |
| 7 | USB connector for power supply | ||
3. Assembly / Installation

ATTENTION!
The camera must be disconnected from the mains voltage during installation.
3.1. Installing the Camera Without a Wall Mount
You have the option of placing the camera on a flat surface, such as a shelf or cupboard. There should be no large objects between the camera and the base station as these may affect the transmission between the devices.


Attention!
Place the camera on the edge of the shelf, otherwise the white light LED may cause cross fading in the camera image.
Please note that no objects are placed directly in front of the camera lens to avoid crossfades.
The camera should not be placed on a glass shelf as reflections may occur.

installation site
The camera is suitable for both outdoor and indoor use.
Do not place the camera near heaters, stoves, other heat sources or in direct sunlight. Operate the device only in locations with temperatures within the permissible ambient temperature range of -20°50°C .
3.2. Installing the Camera with Wall Bracket

Pre-drill the holes using the drilling template. Unscrew the cover of the wall bracket and mount the floor plate to the wall / ceiling using the supplied mounting material.
Insert the ball joint and screw on the cover, do not tighten it to align the camera.

Now screw the fixing ring and the camera onto the bracket. Now you can align the camera using your smartphone. Once the desired viewing angle is reached, screw the cover on tightly.

Watch your step!
Place the camera under a canopy or similar to avoid direct sunlight. The camera should not be placed directly at a light source or the sun.
3.3. Alignment and detection range of the camera
The passive infrared sensor (PIR) of the camera has a maximum detection range of 8 meters, this can be achieved at an installation height of 2 meters and an tilt angle of 12.5°. The PIR viewing angle is 112°. The PIR reacts to heat movement and triggers an image upon detection.
Optimum alignment:
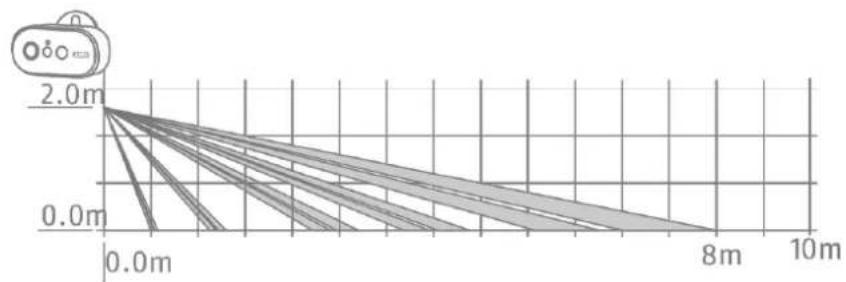

The higher the camera is installed, the greater the downward tilt angle must be. This affects the range of the PIR sensor.
| Installation height | Tilt angle | Max. PIR Range |
| 1,5 m | 0° | 8 meters |
| 2,0 m | 12,5° | 8 meters |
| 3,0 m | 24° | 7 meters |
| 4,0 m | 34° | 6 meters |
| 5,0m | 43° | 5 meters |
| 6,0 m | 50° | 4 - 5 meters |
The viewing angle of the camera is larger than the PIR viewing angle. During an installation it can occur that people are visible on the live image but do not trigger a recording.
Since the person is outside the PIR detection range of 8 meters.

Camera Alignment
The camera needs a small moment to connect to the base station after motion detection. Therefore the movement should ideally be detected in the outer area of the PIR detection angle in order to record the object longer in the video sequence.

If the movement is detected in the front area of the PIR detection range, the object may not be completely visible on the video sequence.
 | Please note that detection only takes place in the specified PIR detection range. Objects that move outside the PIR range will not trigger recordings but may be visible when the camera image is viewed live. |
3.4. Installing the base station
A microSD card is required for recording, which is optionally available. Please insert as shown below and make sure that it clicks into place.

Next, plug the base station into the USB power supply and plug it into a wall outlet.
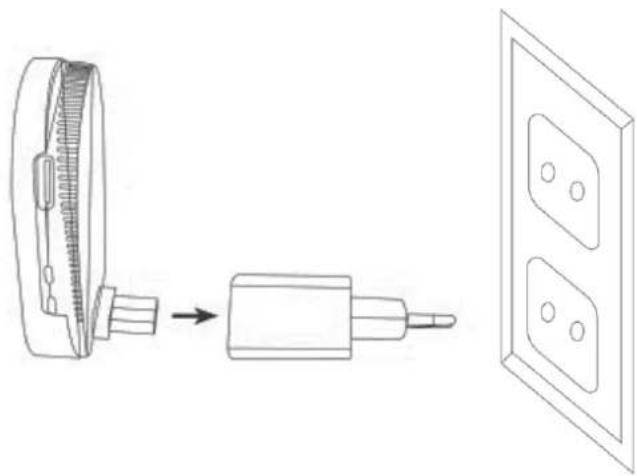
 | Attention!Place the base station so that it is not covered by objects.Ensure optimum ventilation of the base station. |
3.5. Installing the Camera and Base Station
The camera with protection class IP65 is suitable for outdoor use. The base station is intended for indoor installation only. The base station supports up to two battery cams. The pairing process of the base station into the app is described under 4. App2Cam Plus: First Access. For external access to the camera, you need a 2.4 GHz router with Internet access.

reference
Place the base station so that it is not covered by objects.
Ensure optimum ventilation of the base station.
Routers with 5 GHz frequency are not supported. For dual frequency routers it is recommended to separate the two frequencies by name.

Positioning camera and base station
When installing the camera and base station, make sure that the base station is within optimal range of the router. The base station can only be accessed if the Wi-Fi signal to the router is sufficient. Ideally, install the base station close to the camera.
Please note that structural conditions can influence the transmission.
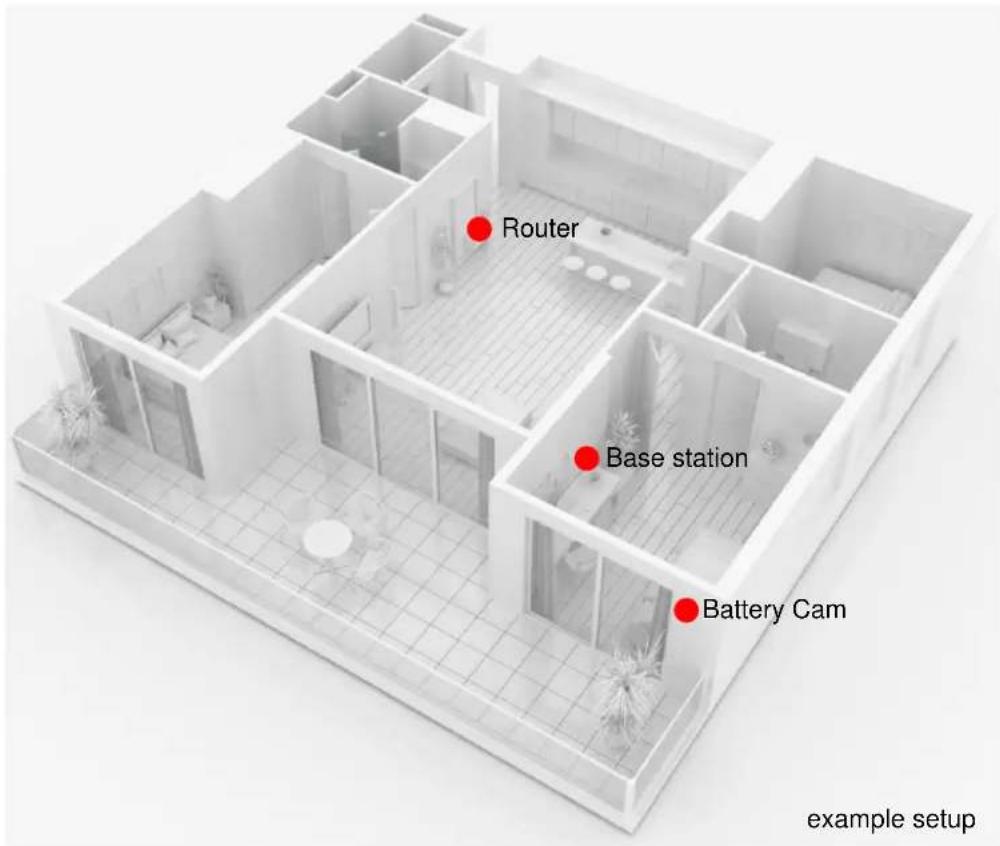
When installing with two cameras, the base station should be centered so that both cameras are within range of the base station. The range of the individual camera to the base station is shown in the live image of the camera by the icon.
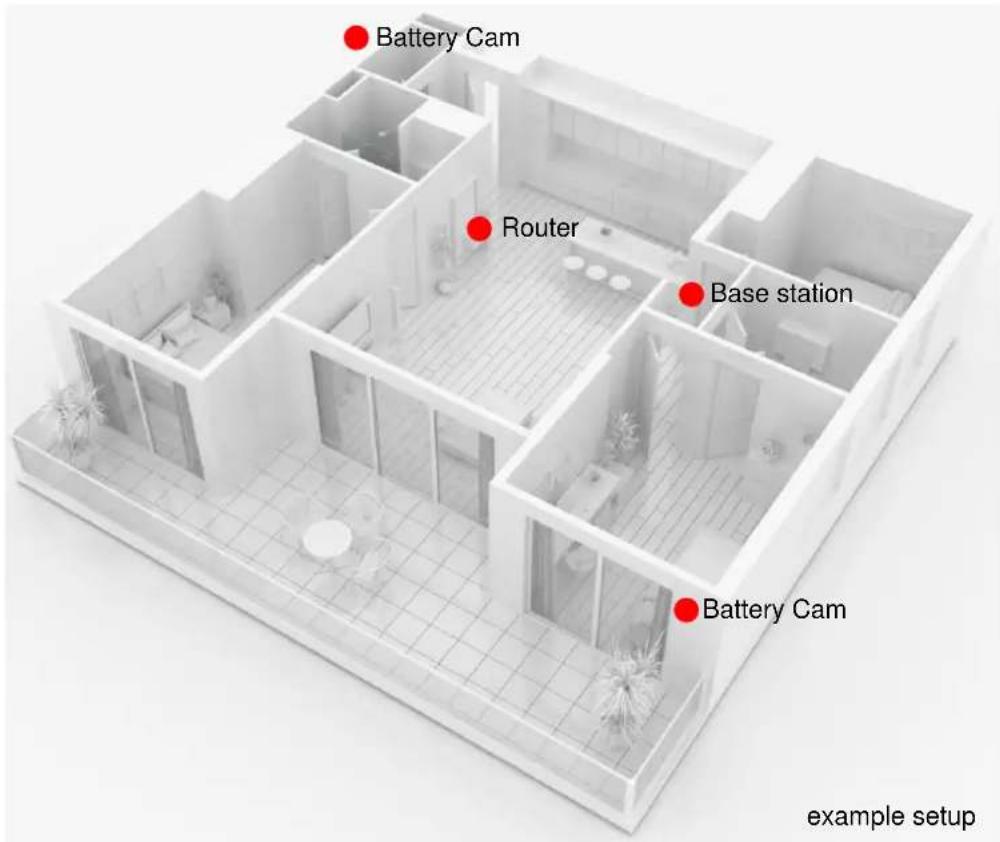
For installations in larger objects with two or more cameras, a second base station (PPIC90010) is recommended to optimize the range.

4. App2Cam Plus: First Access
4.1. Download App
Download the App2Cam Plus app from Google Playstore or Apple Appstore for first access.
App
- App2Cam Plus-
4.2. Camera setup
4.2.1. Wi-Fi setup


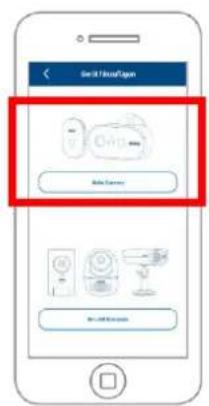

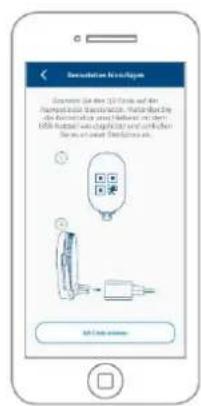
Before starting the installation, turn on the camera by pressing the Power On button on the back panel.
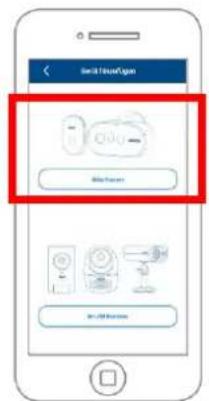
Open the app and click on the "+" to add a base station then click on the Battery Cam. Click on "New Camera" during the initial installation. Base stations that are already connected to the network can be added by clicking on "Existing device".
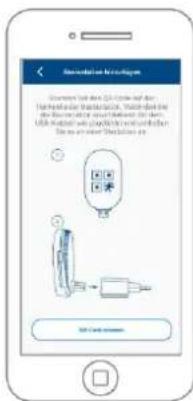
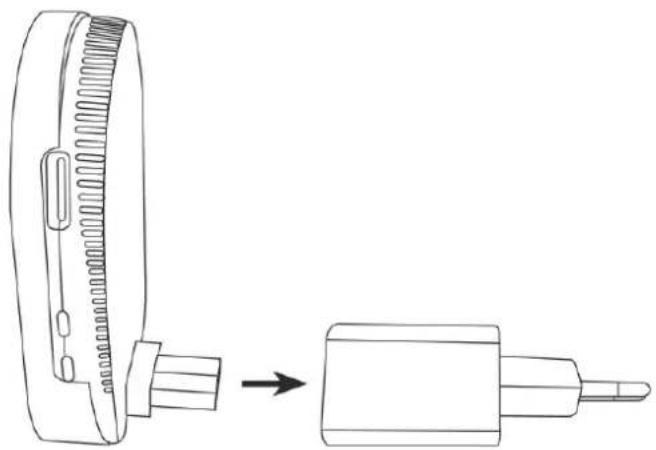
In the next step, scan the QR code on the back of the base station. Now connect it to the USB power supply and plug it into an wall outlet.

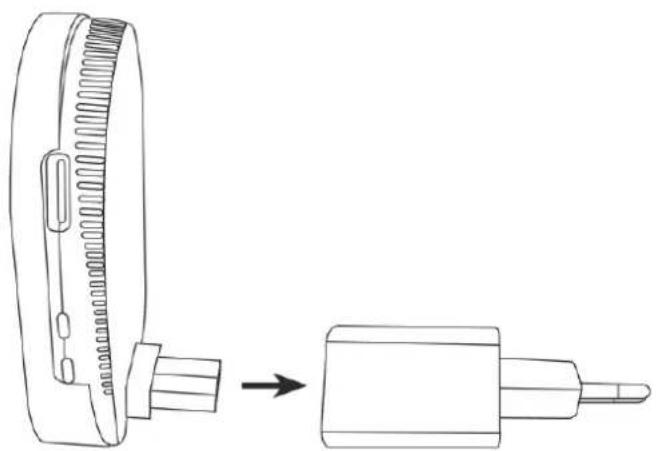


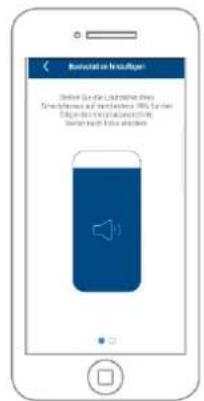
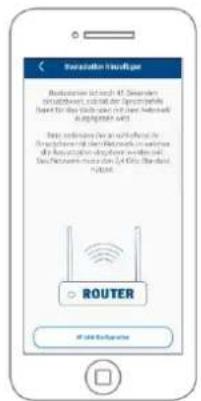
The base station is ready for use after approx. 45 seconds as soon as the voice command "Ready to connect to the network" is issued. Connect your smartphone to the network in which the base station is to be taught-in. The network must use the 2.4 GHz standard.
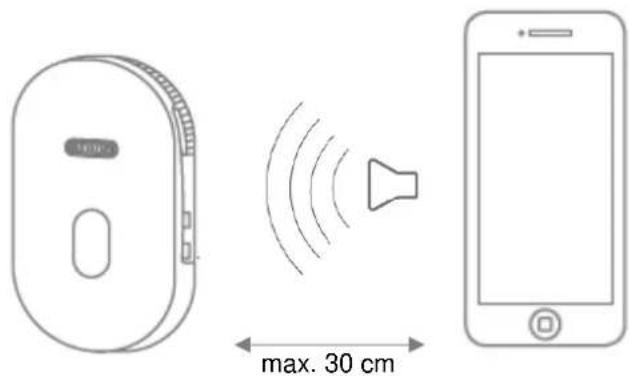
Now set the media volume of your smartphone to at least 70%. In the next step, the app transmits the sound information to the base station. Please note that the distance between the base station and the smartphone must not exceed 30 cm.

Note
Please note that external ambient noise may drown out the sound information. Try performing the installation in a quiet environment.


Click on "Send sound information now" to start the transmission. If the transmission was successful, the base station issues the voice command "Receive network information". Confirm this with "OK,
confirmation received", with "No, resend" you can retransmit the information. The camera now connects to the network. This can take up to 120 seconds. You can now access the live image of the camera.
4.2.2. Alternative Installation





![0 AMIS - 13 [ ] C [ ] to: www.amis.com](/content/2026/05/831871/images/654025db684dc33a55370ca7284ba40f24ac99e46014509b756e2018e61e6ce6.jpg)
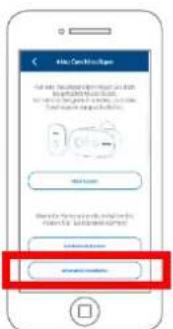
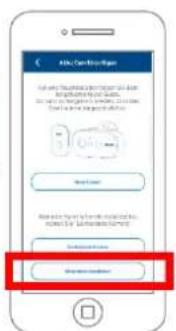
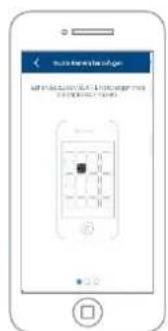
Open the app and click on the "+" to add a base station. Click "Alternative Installation" to add the base station.
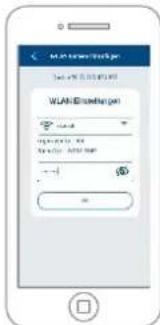
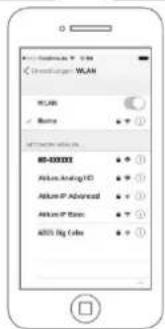
Go to the network settings of your device as described in the app and connect to the WLAN access point of the base station. This can be recognized by the name "HD-XXXXXX". The password for the Wi-Fi access point of the base station is: "12345678".
When the connection is established, click "OK" in the app. Select the WLAN of your home network from the list of Wi-Fi networks and enter the password of the Wi-Fi of your home network. Press "OK" to establish the connection.
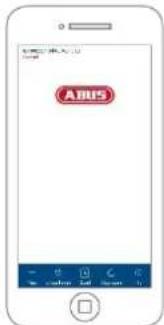
The base station will now connect to the network. This can take up to 120 seconds. You can now access the live image from the camera.
The base station takes about 120 seconds to connect to the Wi-Fi network. If the base station cannot be reached after setup, reset the base station using the reset button and perform the steps again.
4.2.3. Add already configured base station
To set up a base station that is already set up with the network, please proceed as follows.
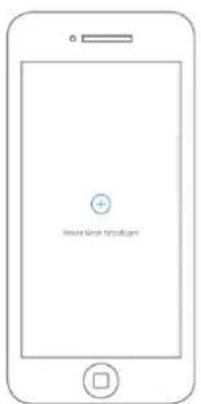
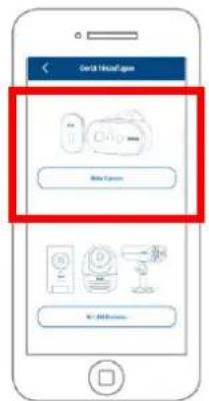


Open the app and click on the "+" to add a base station click on the battery cam. Click on "Existing device" to add the base station already learned in the network to another smartphone.
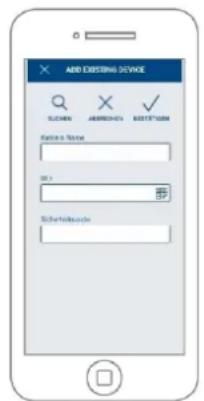
Enter a name for your camera. To enter the DID, you have the following options, scan the QR code on the back of the base station, search for the base station in the network using the "Search" button, or enter the DID of the camera manually.
The camera's default security code is "123456". If the base station has already been set up, enter the security code assigned to the base station.
Press the "Confirm" button to add the camera.

Note
If the base station with the default security code "123456" is added, it must be changed the first time the camera's Live screen is accessed.

Note
If a base station has already been set up from another phone or user, select this method to add base stations that have already been set up.
4.2.4. Pairing a new camera with a base station

Press the pairing button for at least 3 seconds until the LED flashes blue. The voice command "Ready for Camera Connection" is played. If the camera has already been paired in another base station, please delete it from the camera list in the app beforehand.

Shortly press the power icon 3 times to turn the camera on. The red LED on the back and the blue LED at the white light LED flash alternately during the teach-in process. If the connection is successful, the voice command "Camera connection successfully completed" is played back.
4.3. App2Cam Plus: Compatibility
The App2Cam Plus is compatible with the following devices:
• PPIC90000 / PPIC90010 / PPIC90200
• PPIC32020 / PPIC32520 / PPIC34520
- PPIC35520 / PPIC36520

Note
Please note that some features explained or shown in this manual may not be compatible with older generation cameras, or the camera functionality may differ due to hardware differences.
4.4. App2Cam Plus: Overview

Note
The displayed screenshots and icons were taken from the iOS App.
There may be slight differences compared with the Android App in the description, arrangement or functionality. This is described in the respective points or mentioned with an addition (iOS only) or (Android only).
In the overview you can open the live view of the camera by clicking on one of the thumbnails. You can use further functions in the menu bar, camera bar and in the Info / App setting.

 |  |  | ||
| Open base station settings | ||||
| Delete base station | ||||
| Open event list | ||||
4.4.3. Info / App Settings
| PIN Settings | App PinMenu for assigning an app pin. If activated and assigned, this will be requested at every app start. |
| About | AboutCheck here for the latest app version, privacy policy and API version. |
| User Manual / Instruction | instructionsGo to the product page of the selected camera. Here you can download the manual in the download sector. |
| Video Ccceleration (Android only) | Activate/Deactivate Hardware DecodingHardware decoding is available for Android. Some Android devices have special hardware features that optimize the decoding of video streams.With older products or older Android devices, this can lead to a deterioration in performance. |
| Notify me (Android only) | Activation / deactivation of push notifications |
| Rate Me! | App RatingRate our app and send us your suggestions for improvement. |
4.5. App2Cam Plus: Live view
Various functions are available in the live view depending on the camera model. The functions are also available in landscape mode. Click on the thumbnail of the camera to go to the live view.

4.5.1. Live View Functions
 | Create SnapshotHere you have the possibility to take a screenshot of your live image. The image will then be stored in your photo gallery on your mobile device.The saved images are timestamped and saved in the Photo Gallery. |
 | Activate/deactivate audioHere you can activate or deactivate audio for live view. |
 | Starting Manual RecordingHere you have the possibility to start a manual recording on SD card. The recording time for one camera is changeable, for two cameras it is fixed on 15 seconds. The icon appears during recording. |
 | Switching between Camera 1 and Camera 2If two cameras are paired at the base station, you can switch between the two camera views. |
 | Intercom functionYou can intercom by using the microphone of the mobile device on the camera.Press and hold the icon to activate the intercom function.As soon as you release the icon, the transmission is deactivated. |

Back
Click here to return to the camera overview.
4.5.2. Active/Deactive Function
By clicking on the "Arm" or "Disarm" button you can activate or deactivate the camera. The input of the admin password is always required, as soon as the auto-login is activated in the settings, the password will not be asked again.
 | Camera is activeIn the "arm" state, the camera records detected movements and sends messages (push or e-mail). |
Disarm  | Camera is disabledIn the "Disarm" state, the camera does not perform any further actions on detected movements. |
4.5.3. Camera Indicators
ABUS Akku Cam(Channel1)Live  Verbunden Verbunden | |
| ABUS Akku Cam(Channel1) | Name of the base station(Channel 1 / 2) displays the currently selected camera.You can change the names of the base station / cameras in the advanced settings. |
| Live | Display of connection strength between base station and Battery Cam |
| [7c8T] | Battery Status of the selected camera |
4.5.4. Stream Indicators
| Full HD, Direkt, N=1, Normal, 122.7 KB/s | |
| CIFVGAHDFull HD | Display of the resolution of the current stream |
| Direct / relay server | Display of the current connection statusDirect:The Peer2Peer server was able to establish a direct connection between your device and the camera.Relay server*:The Peer2Peer server could not establish a direct connection. The video data is stored for a short time on the relay server so that your device can obtain the data from the server. This causes a delay in the stream. |
| Low normal good | Display of the current assessment of the connectionThis is the connection between the base station and the router. |
| xxx KB/s | Display of currently consumed kilobits per second |
 | *NoteIf the connection to your camera is always made via the relay server, please check the following settings:Check if UPnP is enabled in your routerCheck whether a hardware firewall or software firewall denies a direct connectionCheck whether several "hops" (routers) are installed between the terminal device and the Internet. |
4.6. App2Cam Plus: Event List / Playback
4.6.1. Event list
You can define a start and end time in the event list. For this filter, the app displays all recorded events for setup time. Click Camera1 to switch between recordings of the 2 cameras.
![Endgposition [ID-Karke] Mious Klarna 201 Stellen Sie Insgrofilter Startolt 2019/09/10 10:34 Endzeit 2019/09/10 11:24 Abanuch OK](/content/2026/05/831871/images/777a4e6905b95088356c21a93c5aaba0d6dd12a0bf3e9db09ae0012eacd4ecdb.jpg)
4.6.1

4.6.2

4.6.3
4.6.2. Event list Functions
 | Delete all eventsWith this selection all events in the list are deleted. |
 | Delete individual eventsDelete individual events from the list |
 | Set event filter againTo filter events better, you can set the period again here. |

4.6.3. Mode (iOS only)
By clicking on the "Mode" button, you can choose whether you want to view the files on the SD card in the specified period or the files already downloaded on your device in the specified period.
4.7. Playback
Various functions are available in the playback of events, depending on the camera model. In landscape mode a full view without functions is shown.
The events usually require a short buffer time until the event can be played.
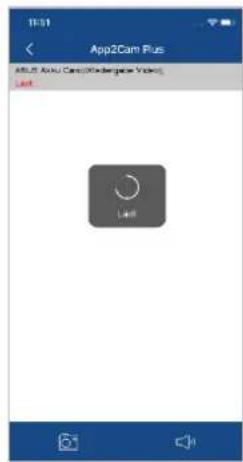
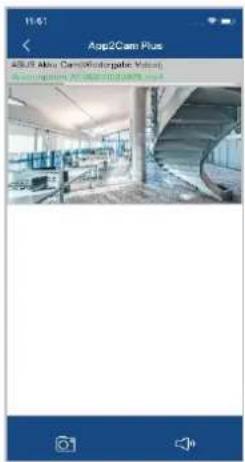

Note
When events are played back, the event is automatically downloaded to your mobile device. We therefore recommend that you operate the playback primarily via Wi-Fi in order to keep the consumption of data volume low.
4.7.1. Playback Functions
 | Create SnapshotHere you have the possibility to take a screenshot of your played video. The image will then be stored in your photo gallery on your mobile device.The saved images are timestamped and saved in the Photo Gallery. |
 | Activate/deactivate audioHere you can activate or deactivate audio for playback. |
4.7.2. Download & Forwarding


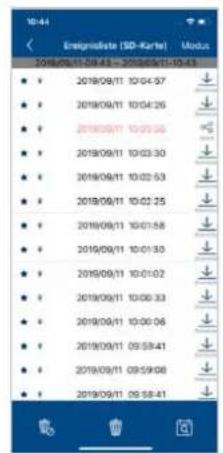
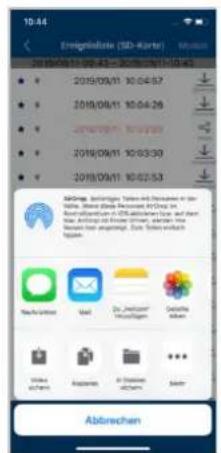
To download a file to your smartphone, click on the download icon to the right of the event. The file will now be downloaded and will then be displayed in red in the event list. Now you have the possibility to share the file by clicking on Share.

Note
The downloaded data is stored differently on the operating systems iOS and Android.
iOS: The events are stored on the device and can only be played back with iTunes.
Andorid: The stored data can be found in the Device Manager under "Internal Memory/Record/Camera DID".
4.8. Advanced Settings


4.8.1. Login data
In the settings, you can change the base station login data manually:
System name: Change the name of the base station here.
DID: Here you can manually change the DID of the base station.
Security code: Enter the security code of the base station here.
The "Search" button allows you to automatically replace the DID of the base station with another found base station. Discard changes with the "Cancel" button or save them with the "Save" button.
4.8.2. Open advanced settings
The button "Advanced settings" opens the settings of the base station.
Use the default password "123456" for the first call. The app then prompts you to change the admin password.

Note
The admin password is a purpose password and not a security password and is intended to help you grant other people the live view and notifications of the base station, but deny the advanced settings.
4.8.3. Automatic login
When entering the admin password, you can use the "Auto Login" button to save the admin password on your terminal device so that it no longer has to be entered on your terminal device the next time you call up the advanced settings. This does not apply to access from other devices.
4.8.4. Advanced settings Base station


Note
The arrangement of the individual points differs from Android. Despite this, the functionalities are available and identical on both platforms.

Note
Please always make changes to the settings (e.g. password changes) of the base station in the local network of the base station. We strongly recommend that you do not change any settings in a public Wi-Fi, as it is always possible for other people to record your settings here.
| Base station settings | 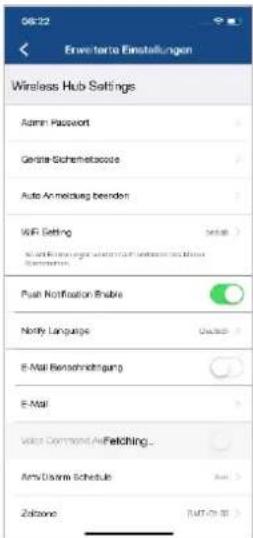 | Make the settings for the base station here. The changes in the settings are only saved after leaving the menu. |
| Admin Password |  | The Admin password allows access to the advanced settings and enables / disables the camera recordings.The default password is "123456" and must be changed the first time the settings are accessed.If you have forgotten your password, you can reset the base station by pressing the reset button for about 5 seconds.Attention:All settings including the network connection will be lost. |
| Security Code |  | The security code is used to set up the base station in the app.The default code is "123456" and must be changed during the initial installation.If you have forgotten your security code, you can reset the base station by pressing the reset button for about 5 seconds.Attention:All settings including the network connection will be lost. |
| End Auto Login | 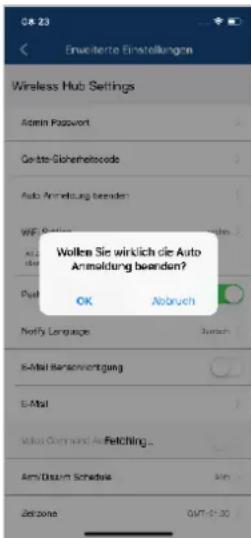 | If you have already activated the Auto Login function, you can deactivate it here.This menu item is only displayed if the function has already been activated. |
| Wi-Fi Settings | 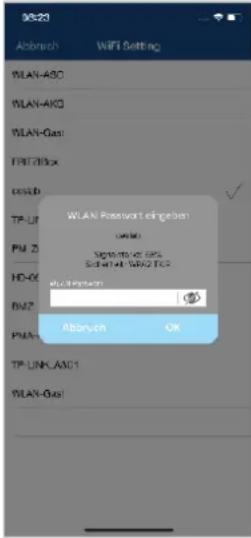 | At the Wi-Fi settings, you can select the desired network to which the camera should be connected.When the menu item is selected, all networks in the environment are displayed.Select your network and enter your own Wi-Fi password.The password entry window also shows you the signal strength to the network, make sure you have enough signal strength to avoid transmission problems.Enter the password and confirm with OK.The settings are only accepted after leaving the menu. To avoid access by unauthorized persons, protect your network by encrypting it with WPA/ WPA2/ WPA2-PSK. To avoid access by unauthorized persons, protect your network by encrypting it with WPA/ WPA2/ WPA2-PSK. The settings are only accepted after leaving the menu. The settings are only accepted after leaving the menu. If the connection was not successful or incorrect Wi-Fi information was entered, press the reset button for 5 seconds to reset the base station to factory settings. If the connection was not successful or incorrect Wi-Fi information was entered, press the reset button for 5 seconds to reset the base station to factory settings. |
| Activate PUSH notification/ notification language |  | Enable notifications to receive PUSH messages on your phone when motion is detected.You have the option of changing the language of the notification under Notification language. |
| E-Mail notification / E-Mail |  | Email SettingsThe e-mail settings are required for sending a notification.Use SSLActivate the checkbox to transfer the e-mail encrypted. You can obtain the necessary settings from your e-mail provider.SMTP server:Enter the SMTP server address here.e.g. smtp.test.comSMTP port:Enter the SMTP port here.e.g. 465Username:Enter the sender e-mail address here.e.g. xxx@test.comPassword:Enter the password of the sender e-mail here.Receiver:Enter the recipient's e-mail address here.e.g. xxxx123@test.comPress OK to save the settings. When leaving the advanced settings, press "Confirm". Only then will the e-mail settings be accepted. We recommend the use of "googlemail" to send e-mails.Activate the e-mail notification afterwards.Please contact your e-mail provider to find out whether certain authorizations need to be activated. We recommend the use of "googlemail" to send e-mails.Activate the e-mail notification afterwards.Please contact your e-mail provider to find out whether certain authorizations need to be activated. |
| Activate voice commands | You have the possibility to deactivate the voice commands of the base station. | |
| Schedule Settings | 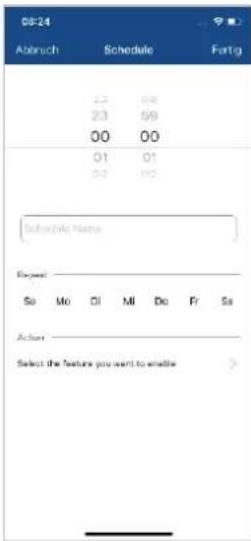 | Schedule settingsPress the plus sign to add a schedule.Separate activations are created for the start time and the end time.Select the start time and give it a name.Select the days for the repetition and the action (Enable / Disable) for the start time.Save by clicking on "Done".Press the plus symbol again for the end time.Now enter the end time, the name and the reaction. Please select the contrast to the previous one and save it by clicking on "Done".e.g.Start time 21.00 hrs from Mon-Fri, action activationEnd time 06:00 from Mon-Fri, action deactivationThe camera records only between 9 p.m. and 6 a.m. when motion is detected |
| time zone |  | The world time zones are listed in the selection list. Select the time zone in which the camera will be installed.If the world time zone uses daylight saving time, activate daylight saving time. |
| Format SD Card | 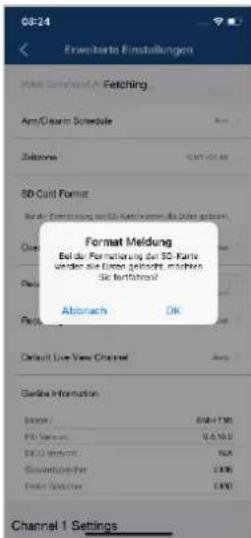 | Formatting the SD card. For permanent use of an SD card, please use an SD card of class 10. Formatting the SD card deletes all data.Please save the data before formatting. Formatting the SD card deletes all data.Please save the data before formatting. |
| Ring memory SD card |  | There are several ways to overwrite the events on the SD card.OFF Once the SD card is full, no more recordings will be saved.Unlimited When this function is enabled, the oldest recordings will be overwritten with newer ones as soon as the SD card is full.3 / 7 / 30 days The data on the SD card are deleted or overwritten after the selected number of days. |
| Recording without audio | Activate the function to save the recordings without audio.During live viewing it is possible to activate audio. | |
| Recording time | 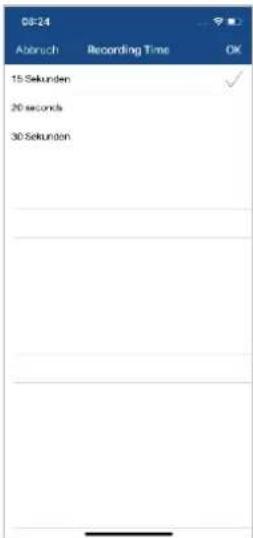 | Here you can set the recording time for events, you can choose between 15 / 20 / 25 seconds.As soon as two cameras have been paired with the base station, the events are recorded with 15 seconds by default.Please note that a longer recording time reduces the battery life! |
| Live view Camera selection |  | If two cameras are connected to the device, you can decide here which camera should be displayed first in the live view by default.Auto The base station automatically displays the camera that has been programmed as camera 1 walls. Camera 1/2 Select the camera to be displayed first for the live view. |
4.8.5. Advanced Settings Camera
| Camera Settings | 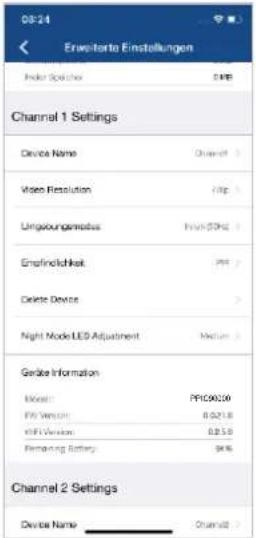 | Make the settings for the cameras here. The changes in the settings are only accepted after leaving the menu. |
| Camera Name |  | Change the camera name of the paired cameras here.The name is displayed in the live view as well as in the push notifications. |
| Video Resolution | 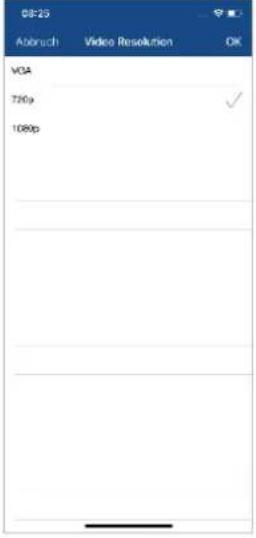 | Here you have the possibility to change the resolution for the live view.At a lower resolution, you can get a smoother image with external access, but less image detail is available.The value set here has no effect on the recording, which is always stored in Full HD. |
| Environment mode |  | Here you have the possibility to select the mains frequency for your camera.The following options are available: Indoor (50Hz), Indoor (60Hz) and Outdoor.Standard value Germany: 50 Hz |
| PIR Sensitivity |  | Here you can set the sensitivity of the PIR sensor.With a high sensitivity setting, the camera triggers at low heat movement. This can lead to false alarms.Heat sources such as heaters or fan heaters can cause false alarms, so do not point the camera at them. |
| Delete device |  | You can delete a camera from the base station. Confirm the deleting process by clicking OK.To pair a camera in a base station, press the pairing button on the base station and wait for the voice command "Ready for camera connection". Now press the power button on the camera three times. As soon as the camera connection has been established, the voice command "Camera connection successfully completed" is issued. |
White light LED settings

Here you can adjust the intensity of the white light LED.
Adjust the LED intensity according to the environmental conditions. As soon as objects are in the near of the camera, it is recommended to set the intensity to low to avoid reflections in the image, but the range of the LED will be reduced.
5. Firmware update
You can update the firmware of your base station in two different ways. Please note that with both methods, the base station settings are retained, so you do not have to reset them.
 | Please note that a MicroSD card is required for both versions. |
 | Updating the base station takes about 3-5 minutes. Do not disconnect the base station from the power supply during this time! |
5.1. Update via server
The base station checks in a 6-hour interval whether a new firmware is available on the firmware server for the camera and base station. Insert a MicroSD card into your base station so that it can automatically download the firmware. After the base station has downloaded the firmware, the next time you enter the advanced settings, a message appears so that you can start updating. The first step is a firmware update of the base station, which then updates the firmware of the camera automatically.
5.2. Manual update
Alternatively, you can download the latest firmware from the "Downloads" tab on the product website: www.abus.com/product/Artikelnummer. (Example: www.abus.com/product/PPIC90000)
Copy the two files (rootfs-SMH-T1R.img, rootfs-SMH-T1R.md5) to an empty MicroSD card.
Now disconnect the base station from the socket and insert this MicroSD card into it. Now plug the base station back into the power socket, the update will now start and can last up to 5 minutes.
The battery cam itself is automatically updated by the base station as soon as the firmware of the base station has been updated and the base station contains a firmware update for the camera.

If you want to update more base stations, delete the files on the MicroSD card and copy them to the card again.
5.3. Current firmware version
Some functions for the base station and cameras are only available with the latest firmware version. Therefore, make sure that your devices are always up to date.
The latest firmware versions can be found on the respective product page: http://www.abus.com/product/PPIC90000
6. Overview voice commands
Thanks to the voice commands of the base station, installation and operation are simplified. In the advanced settings, you can disable the voice commands after the initial installation.
Below you will find help for the various voice commands.
| Voice command | Assistance |
| Ready for network setup. | During the initial installation, the base station is ready for use after approx. 45 seconds. Do not start the installation until this voice command is issued. |
| Receive network setup information. | During the installation of the base station, the Wi-Fi data is transmitted to the base station via sound information. The transmission was successful after this voice command was issued. |
| Network setup successful. | The Wi-Fi data has been transferred and the base station has successfully connected to the network. |
| Network disconnected. | The base station issues this voice command as soon as the connection to the network has been disconnected. In this case, please check the status of your router. |
| Waiting for camera pairing. | To add a second camera to your base station, press the pairing button and wait for the voice command to output.Then press the power button 3 times on the back of the camera. |
| Camera pairing successful | The camera connection was successful and the camera is now taught-in in the base station. |
| Camera pairing failed. | The pairing process of the camera into the base station was not successful. Repeat the process. |
| Maximum amount of cameras reached. Remove camera in the APP and try again. | Two cameras have already been programmed in the base station.To teach in a new camera, delete one of the existing cameras in the advanced settings and then start the teach-in process. |
| Unable to find network in the APP. | In this case please check the status of your router, the base station cannot establish a connection to the network. |
| Firmware update successfully | This voice command is issued after a successful automatic or manual firmware update. |
| Firmware update failed, please try again. | The automatic firmware update could not be executed successfully.Please check if there is enough memory on the SD card. With the "Off" ring buffer setting, there may not be enough memory available. |
| Connection to the network failed, please try again. | The connection setup during the installation was not successful,please restart the installation and check your entered Wi-Fi password. |
7. Battery FAQs
The battery life of the Battery Cam depends on various factors such as trigger frequency, environmental influences and environmental factors. To increase the battery lifetime you will find some tips here.
When should I charge the battery?
As soon as the battery capacity drops below 15%, you will receive a push message, live viewing and recording will continue.
Below 5% you will receive another push message that the battery should be charged. The live view and recording are no longer available.
Charging the battery
Remove the camera from the bracket and plug in the microUSB cable.
For charging, use either the plug-in power supply of the base station or another plug-in power supply with 5 VDC / 2A. The battery is fully charged again in approx. 4 hours as soon as the LED on the rear panel lights up red permanently. When using a power supply with a lower power output, the charging time is extended.
Battery life
Thanks to stand-by mode and intelligent motion detection, up to 13 months of operation are possible. However, this is influenced by environmental circumstances. With frequent releases, the battery life decreases many times over, and you can improve this by reorienting the camera.
Outdoor installation
Low outdoor temperatures can adversely affect the battery life of the camera. In this case, you will see a faster drop in capacity, please check the status in the camera settings and reload the camera early enough.
Can other Wi-Fi networks influence the runtime?
Wi-Fi overlays in the next surroundings of the camera can have a negative effect on the runtime.
Check the Wi-Fi interference signals with suitable programs and try to reposition the camera.
Different battery life for two cameras
If you have paired two cameras with your base station, the cameras may run for different times.
Depending on where and at what distance the cameras were installed, the batteries can be subjected to different loads.
The following factors can influence this:
- Triggering Frequency
• Wi-Fi Interference signals
• Temperature differences, outdoor installations - Distance of the cameras to the base station, the closer the cameras are to the base station, the less battery is used.
- Recording at night, as the LED requires more power.
- Permanent or longer live view / camera activation
8. Troubleshooting tips
Installation distances between the base station and the cameras
The distance between two cameras should be at least 2m. Please install the cameras at a minimum distance of approx. 1m from the base station to avoid interference.
If you install it outside the range of the base station, you will get a stagnant image or no image at all. Please check if the signal strength symbol in the live image is sufficient, at least 2 dashes should be displayed.
Place the base station closer to the camera for a smoother image. The following factors can negatively influence the transmission: thick brick walls, exterior walls, glass, water pipes and metal.
Camera image is not displayed
Check the signal strength in the live view
Check the battery charge in the advanced settings.
Is the camera connected to the base station?
Is there an internet connection?
Push messages are not received
Is the camera deactivated? Also check the schedules.
Are the push messages deactivated?
Is there an internet connection?
Is the base station unplugged?
How can I set my base station to factory settings?
Press the reset button on the base station for at least 5 seconds. The LED on the front will start flashing red. Once the factory settings are loaded and the base station is ready for setup, the voice command "Ready to connect to the network" is issued.
Manual update of the base station not possible.
Please load the update files onto an empty microSD card, take the base station off the power and insert the microSD card. Wait at least 5 seconds before plugging in the base station again.
The base station is not found
Please check the following points:
- Make sure your network supports DHCP.
- Are the mobile device and the base station in the same network? Make sure that both devices are in the same network during the initial configuration.
- The router has no power supply.
- The base station has no power supply.
- Try adding the camera by manually entering the data.
Your Wi-Fi is not displayed in the selection list in the camera app.
If your personal Wi-Fi network is not displayed in the selection list, please check the following:
- Make sure that the SSID of your router is visible.
- Change the encryption type of your router to WPA / WPA2 /WPA2-PSK.
- Is the 5 GHz frequency enabled in your router?
Low network signal or poor picture quality
Possible causes could be:
- Wi-Fi network devices can interfere with signal transmission, ensure enough distance between the base station, camera and other Wi-Fi devices.
Possible disturbance factors can be: thick brick walls, exterior walls, glass, water pipes and metal.
- Remove dirt from the camera. These can have a negative effect on the image quality.
What could be the reasons why the device does not record when it moves?
Possible causes could be:
- Is the SD card inserted correctly?
- Is the camera activated?
- Are the schedules set correctly?
- Format the SD card before initial operation.
- Make sure you are using a Class 10 SD card.
- In the camera settings, check the sensitivity of the PIR, which may be set too low.
The camera image is superimposed (white areas in the image).
The camera has a white LED for night operation. The light is reflected on reflecting surfaces such as glass or white surfaces. Do not place the camera in front of glass surfaces and be sure to install it in protected outdoor areas.
What could be the cause of an SD card error.
Please check the following:
- Make sure that the SD card is properly inserted and formatted. Please save important data before formatting, they will not be available afterwards.
- Be sure to use only a Class 10 SD card.
The time and date display is incorrect.
Possible causes could be:
- Are the date and time settings of your mobile device set correctly? The system takes the time from your mobile device.
- Is the correct time zone selected?
- Restart the base station by plugging it in again after about 5 seconds.
Base station repeatedly issues voice command "Successfully connected to network".
If the base station repeatedly issues the voice command, please check the connection quality of the base station to your router. If the connection is bad, the base station tries to reconnect to the router if the connection is interrupted, so the voice command is issued repeatedly.


- BEDIENUNGSANLEITUNG
- HALTERUNG
- ACHTUNG
- HINWEIS
- INSTRUCTION MANUAL
- INAUGURATION
- WARNING IN THE SENSE OF § 201 STGB
- DISCLAIMER
- TABLE OF CONTENTS
- SCOPE OF DELIVERY 5
- HARDWARE DESCRIPTION....6
- ASSEMBLY / INSTALLATION....9
- APP2CAM PLUS: FIRST ACCESS 18
- ENGLISH
- SCOPE OF DELIVERY
- PPIC90000
- PPIC90010
- PPIC90200
- PPIC90520
- HARDWARE DESCRIPTION
- WI-FI BATTERY CAM
- REAR VIEW
- ATTENTION
- LOADING THE CAMERA
- MOUNTING
- BASE STATION
- ASSEMBLY / INSTALLATION
- INSTALLING THE CAMERA WITHOUT A WALL MOUNT
- INSTALLATION SITE
- INSTALLING THE CAMERA WITH WALL BRACKET
- WATCH YOUR STEP
- ALIGNMENT AND DETECTION RANGE OF THE CAMERA
- CAMERA ALIGNMENT
- INSTALLING THE BASE STATION
- INSTALLING THE CAMERA AND BASE STATION
- REFERENCE
- POSITIONING CAMERA AND BASE STATION
- APP2CAM PLUS: FIRST ACCESS
- DOWNLOAD APP
- CAMERA SETUP
- WI-FI SETUP
- NOTE
- ALTERNATIVE INSTALLATION
- ADD ALREADY CONFIGURED BASE STATION
- PAIRING A NEW CAMERA WITH A BASE STATION
- APP2CAM PLUS: COMPATIBILITY
- APP2CAM PLUS: OVERVIEW
- INFO / APP SETTINGS
- APP2CAM PLUS: LIVE VIEW
- LIVE VIEW FUNCTIONS
- BACK
- ACTIVE/DEACTIVE FUNCTION
- CAMERA INDICATORS
- STREAM INDICATORS
- APP2CAM PLUS: EVENT LIST / PLAYBACK
- EVENT LIST
- EVENT LIST FUNCTIONS
- MODE (IOS ONLY)
- PLAYBACK
- PLAYBACK FUNCTIONS
- DOWNLOAD & FORWARDING
- ADVANCED SETTINGS
- LOGIN DATA
- OPEN ADVANCED SETTINGS
- AUTOMATIC LOGIN
- ADVANCED SETTINGS BASE STATION
- ADVANCED SETTINGS CAMERA
- WHITE LIGHT LED SETTINGS
- FIRMWARE UPDATE
- UPDATE VIA SERVER
- MANUAL UPDATE
- CURRENT FIRMWARE VERSION
- OVERVIEW VOICE COMMANDS
- BATTERY FAQS
- WHEN SHOULD I CHARGE THE BATTERY
- CHARGING THE BATTERY
- BATTERY LIFE
- OUTDOOR INSTALLATION
- CAN OTHER WI-FI NETWORKS INFLUENCE THE RUNTIME
- DIFFERENT BATTERY LIFE FOR TWO CAMERAS
- TROUBLESHOOTING TIPS
- INSTALLATION DISTANCES BETWEEN THE BASE STATION AND THE CAMERAS
- CAMERA IMAGE IS NOT DISPLAYED
- PUSH MESSAGES ARE NOT RECEIVED
- HOW CAN I SET MY BASE STATION TO FACTORY SETTINGS
- MANUAL UPDATE OF THE BASE STATION NOT POSSIBLE
- THE BASE STATION IS NOT FOUND
- YOUR WI-FI IS NOT DISPLAYED IN THE SELECTION LIST IN THE CAMERA APP
- LOW NETWORK SIGNAL OR POOR PICTURE QUALITY
- WHAT COULD BE THE REASONS WHY THE DEVICE DOES NOT RECORD WHEN IT MOVES
- THE CAMERA IMAGE IS SUPERIMPOSED (WHITE AREAS IN THE IMAGE)
- WHAT COULD BE THE CAUSE OF AN SD CARD ERROR
- THE TIME AND DATE DISPLAY IS INCORRECT
- BASE STATION REPEATEDLY ISSUES VOICE COMMAND "SUCCESSFULLY CONNECTED TO NETWORK
Brand : ABUS
Model : PPIC90520C
Category : Security Camera