
IAN 362147 - Uncategorized CRIVIT - Free user manual and instructions
Find the device manual for free IAN 362147 CRIVIT in PDF.

| Brand | Crivit |
| Model | IAN 362147 |
| Product Type | Household Electronic Device |
| Dimensions (approx.) | 200 x 150 x 50 mm |
| Weight | 0.5 kg |
| Power Supply | 2 x AAA batteries (not included) |
| Power Consumption | 0.1 W (standby) |
| Display | LCD |
| Main Functions | On/Off, auto-off after 60 seconds, low battery indicator |
| Material | Plastic housing, glass platform |
| Cleaning | Wipe with soft damp cloth; do not use abrasive cleaners |
| Water Resistance | Not waterproof; keep away from moisture |
| Operating Temperature | 10°C to 40°C |
| Storage Temperature | -10°C to 50°C |
| Safety Precautions | Do not disassemble; keep out of reach of children |
| Spare Parts Availability | Not available for this model |
| Warranty | 2 years (from date of purchase) |
| Manual Languages | EN, DE, ET, FI, LT, LV, PL, SV |
Frequently Asked Questions - IAN 362147 CRIVIT
User questions about IAN 362147 CRIVIT
0 question about this device. Answer the ones you know or ask your own.
Ask a new question about this device
Download the instructions for your Uncategorized in PDF format for free! Find your manual IAN 362147 - CRIVIT and take your electronic device back in hand. On this page are published all the documents necessary for the use of your device. IAN 362147 by CRIVIT.
USER MANUAL IAN 362147 CRIVIT

natural_image
Line drawing of a helmet with cutouts and internal geometric patterns (no text or symbols)
BICYCLE HELMET SP-107/ LED REAR LIGHT SP-09
GB
BICYCLE HELMET SP-107/ LED REAR LIGHT SP-09
owner's manual
PL
KASK ROWEROWY SP-107/ LAMPKA LED ŚWIATŁA WSTECZNEGO SP-09
| Safety information 05 |
| User information 05 |
| 1. The correct helmet position 05 |
| 2. Adjusting the single-hand twisting fastener 06 |
| 3. Adjusting the strap divider 06 |
| 4. Adjusting the chin strap 06 |
| 5. Visor 06 |
| 6. Cleaning and care 07 |
| 7. Disposal 07 |
LED - Rear light SP-09 07
| Safety information 07 | |
| User information 08 | |
| 1. Before the first use 08 | |
| 2. Removal and attachment of the tail light | 08 |
| 3. Functions | 08 |
| 4. Changing the batteries 08 | |
| 5. Cleaning and care 09 | |
| 6. Disposal 09 | |
Declaration of Conformity
09
BICYCLE HELMET SP-107
Dear Customer!
We are pleased that you have decided to purchase one of our high-quality products, which are manufactured and certified in strict adherence to the currently valid safety standards.
Familiarize yourself with this product before first use. Carefully read the operating instructions and the safety information. Use the product only as described and for the indicated purposes. Keep these instructions. If you give the product to a third party, be sure to include all the documents with it.
Safety information
- Warning! This helmet should not be used by children while climbing or doing other activities when there is a risk of strangulation/hanging if the child gets trapped with the helmet.
- Your helmet was specially designed for protection during cycling ⏻, skateboarding ⏻, roller-skating ⏻ and riding a scooter ⏻. It must not be used for other types of sport or for motorcycling ⏻. This helmet is not suitable for downhill riding.
- Please note that the helmet can only provide protection if it fits correctly. Please ensure you try out a range of different sizes before buying.
- Please be aware that despite correct adjustment your helmet cannot always protect you from all injuries.
- The helmet should be checked for visible deficiencies at regular intervals.
- The helmet needs to be replaced after any hard impact, blow or deep scratch, as it thereby loses its protective function.
- The helmet must also be replaced when it no longer fits properly or no later than 5 years after the date of manufacture, even if no damage can be detected.
- Any adjustment to or removal of the original parts of the helmet can extremely impair its protective function. The helmet may not be altered in order to make additions in a way not recommended by the manufacturer.
- Clean the inner padding with lukewarm water and mild soap and then let it air dry.
- High temperatures, from as low as 60^ C, can seriously damage the helmet. Uneven helmet surfaces and the formation of small blisters are signs of such damage. Do not store behind panes of glass, e.g. in the car or close to sources of heat or warmth.
User information
1. The correct helmet position
- The helmet must always be levelly horizontal on your head (Fig. A).
- If the helmet is too far forward, it can impair your vision.
- If the helmet is too far back, your forehead is not sufficiently protected (Fig. B).
2. Adjusting the single-hand twisting fastener
The integrated size-adjusting system can be adjusted using a turning knob at the back of one's head (Fig. C):
- smaller = twist clockwise
- bigger = twist anti-clockwise
3. Adjusting the strap divider
- Open the strap divider (Fig. D).
- The strap divider must be positioned in such a way, that the straps are taut but comfortable. The strap divider must be below the ear, and the straps must not cover the ears.
- Close the strap divider (Fig. E).

An open strap divider can lead to slipping of the helmet in the event of an accident and thus to a loss of protection!!!
4. Adjusting the chin strap
- The chin strap (Fig. G.3) has been adjusted correctly if you feel slight pressure when you open your mouth. The buckle shall not be positioned on the jawbone.
- If the chin strap (Fig. G.3) is too loose it must be pulled tight using the winding (Fig. G.2) on the fastener (Fig. G.1).
- If the chin strap (Fig. G.3) is too tight it must be loosened also using the winding (Fig. G.2) on the fastener (Fig. G.1).

Please note that you must always make sure that the fastener is closed before you ride !!! (Fig. F)

Please be aware that the helmet can only protect if it fits properly. Please try out different sizes and choose the one in which the helmet fits comfortably and sits firmly upon your head.
5. Visor
- Carefully pull out the pins on the visor from the pin holes on the helmet shell to remove the visor (Fig. H).

Attention: The pin holes on the helmet can expand through excessive use. In this case, the visor may no longer be used.
6. Cleaning and care
- All chemicals, paints and stickers can seriously impair the protective effect of the helmet.
- Only clean your helmet with lukewarm water, mild soap and a soft cloth.
• After every use, leave your helmet exposed to the air in order for it to dry.
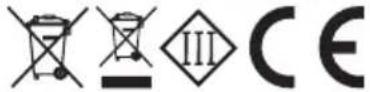
7. Disposal
- Please contact your local waste disposal company for the disposal of the helmet.
LED-REAR LIGHT SP-09
Safety information
- The LED rear light is not a substitute for the light equipment stipulated by the German standard StVZO (§ 67).
- When used correctly, the LED rear light gives better visibility. The LED backlight should not be used during rainy weather. It cannot be guaranteed to work if it gets wet.
- Please only use the LED rear light together with this cycle helmet and always put it onto the rotating wheel of the size-adjustment system.
- The LED rear light is only intended for personal use.
- Please make sure that, during use, the LED cannot be covered or obscured by collars, rucksacks or movements of the head.
- The LED light can under certain circumstances come loose without this being noticed, if it becomes caught on jackets, rucksacks or other objects.
- Please be aware that the battery of the LED light can fall out or become flat. Therefore, check the light regularly for proper functioning.
- The batteries must not be exposed to excessive heat such as sunshine, fire or the like. In the event that the batteries are incorrectly changed there exists the risk of explosion. Only replace the batteries with the same or an equivalent battery type.
- Parents should ensure that their child also checks to make sure that the LED backlight is working on a regular basis.
- The LED rear light is not suitable for use by children under 4 years of age.
- The LED rear light is not a toy and its use by children is only permitted if they are
under the supervision of adults.
- The light source of this light cannot be replaced. Once the light source has reached the end of its life, the whole light must be replaced.
• - If the battery leaks, avoid any contact with the skin as this can lead to skin irritation.
- Leaking batteries must be disposed of immediately.
User information
1. Before the first use
Take the tail light off the helmet (Fig. J). Before the first use, remove the safety strips from the reverse of the LED tail light (Fig. I).
2. Removal and attachment of the tail light
- Release the LED back light from below with the help of a coin or similar (Fig. J).
- To remove the rear light, pull the rear light out of the holder (Fig. J).
- To attach it, the LED rear light must be re-plugged on the holder provided for this purpose.
3. Functions
The LED rear light has three different functions, each of which can be used as desired (Fig. K).
- Press x1: continuous light,
- press x2: flashing light,
- press x3: colour chaser,
- press x4: light off.
4. Changing the batteries
The LED tail light comes equipped with a CR 1620 (3V) battery.
- To replace the battery, unlock the screws at the back of the light using a small Phillips type head screwdriver.
- Subsequently, lift off the lid and the circuit board, exchange the battery and remount the circuit board and the lid. In doing so, please make sure that the polarity is correct when installing the new battery (Fig. L).
- Now, attach the lid again using the four screws (Fig. L).
- Battery type: 1x CR 1620, 3V 0,2W
5. Cleaning and care
The housing of the LED rear light can be cleaned with a damp cloth.
6. Disposal
Please do not dispose of flat batteries via the household waste, but instead use the collecting container intended for this purpose.
Declaration of Conformity
The complete Declaration of Conformity can be found at www.speq.de/konformitaetserklaerung.