
d-Copia 2301 - Printer OLIVETTI - Free user manual and instructions
Find the device manual for free d-Copia 2301 OLIVETTI in PDF.


| Product Type | Digital Multifunction System (Copier), Desktop |
| Dimensions (W x D x H) | 623 mm x 609.5 mm x 785.5 mm (24.5" x 24" x 30.9") |
| Weight | Approx. 47 kg (103.7 lbs) without toner cartridge |
| Power Supply | Local voltage ±10% (see nameplate), Max. 1.4 kW |
| Copy Speed (A4, 600 dpi) | Up to 23 copies/min |
| First Copy Time | Approx. 4.8 seconds |
| Warm-up Time | Approx. 23 seconds |
| Paper Capacity (Standard) | 2 x 500-sheet trays + 100-sheet bypass tray |
| Copy Resolution | 600 dpi (normal), 1200 dpi (Super Photo mode) |
| Zoom Range (600 dpi) | 25% to 400% in 1% increments |
| Maximum Copy Quantity | 999 copies |
| Key Copy Features | Automatic two-sided copying, Sort, Group, Staple sort (optional finisher), Margin shift, Erase, Dual page, Pamphlet, Multi shot (2-in-1, 4-in-1), Cover, B/W reverse, Job build |
| Exposure Modes | Auto, Text, Text/Photo, Photo, Super Photo (adjustable 5 levels) |
| Supported Paper Types | Plain, Recycled, Color, Letterhead, Heavy paper (up to 200 g/m²), Thin paper, Labels, Transparency film, Envelopes |
| Maintenance | Replace toner cartridge, clean document glass and bypass roller, remove misfeeds, replace staple cartridge (optional finisher) |
| Safety Features | Laser Class 1, auto power shut-off, preheat mode, warnings for hot fuser area and laser radiation |
| Optional Accessories | Finisher (AR-FN5N) with stapling, 500-sheet paper feed unit, 2 x 500-sheet paper feed unit, Reversing Single Pass Feeder (RSPF), Job separator tray, Printer/Fax/Network scanner expansion kits |
| Environmental Compliance | ENERGY STAR, RoHS, FCC Class A, CE |
Frequently Asked Questions - d-Copia 2301 OLIVETTI
User questions about d-Copia 2301 OLIVETTI
0 question about this device. Answer the ones you know or ask your own.
Ask a new question about this device
Download the instructions for your Printer in PDF format for free! Find your manual d-Copia 2301 - OLIVETTI and take your electronic device back in hand. On this page are published all the documents necessary for the use of your device. d-Copia 2301 by OLIVETTI.
USER MANUAL d-Copia 2301 OLIVETTI
d-Copia 2301 d-Copia 2701
DIGITAL MULTIFUNCTION SYSTEM SADDLE STITCH FINISHER OPERATION MANUAL

natural_image
Line drawing of a printer with open lid and internal structure (no text or symbols)PUBLICATION ISSUED BY:
Olivetti S.p.A.
Copyright © 2006, Olivetti
All rights reserved
The C€ mark affixed to the product certifies that the product satisfies the basic quality requirements.

The manufacturer reserves the right to carry out modifications to the product described in this manual at any time and without any notice.

ENERGY STAR is a U.S. registered mark.
The ENERGY STAR program is an energy reduction plan introduced by the United States Environmental Protection Agency in response to environmental issues and for the purpose of advancing the development and utilization of more energy efficient office equipment.
Your attention is drawn to the following actions which could compromise the conformity attested to above, as well as the characteristics of the product:
- incorrect electrical power supply;
- incorrect installation, incorrect or improper use or use not in compliance with the warnings provided in the User's Manual supplied with the product;
- replacement of original components or accessories with others of a type not approved by the manufacturer, or performed by unauthorised personnel.
All rights reserved. No part of this material may be reproduced or transmitted in any form or by any means, electronic or mechanical, including photocopying, recording or by any information storage and retrieval system, without permission in writing from the Publisher.
CONTENTS
CAUTIONS....3
- CAUTIONS ON USING THE MACHINE....3
- IMPORTANT POINTS WHEN SELECTING AN INSTALLATION SITE .... 3
- CAUTIONS ON HANDLING THE MACHINE....4
• ENVIRONMENTAL INFORMATION......5
USING THE MANUAL 5
• ABOUT THE OPERATION MANUALS......5
- THE MEANING OF "R" IN ORIGINAL AND PAPER SIZE INDICATIONS 6
- CONVENTIONS USED IN THIS MANUAL....6
MAIN FEATURES....7
1 BEFORE USING THE MACHINE
PART NAMES AND FUNCTIONS...... 8
- PAPER....15
- LOADING PAPER....17
- CHANGING A TRAY'S PAPER TYPE AND PAPER SIZE SETTINGS....19
2COPY FUNCTIONS
MAIN SCREEN OF COPY MODE 21
NORMAL COPYING 22
• COPYING FROM THE DOCUMENT GLASS ....22
• COPYING FROM THE RSPF......23
- POINTS TO NOTE WHEN MAKING COPIES ...24
- BYPASS FEED (special paper) ......26
AUTOMATIC TWO-SIDED COPYING...... 27
• USING THE DOCUMENT GLASS.....27
• USING THE RSPF......28
EXPOSURE ADJUSTMENT.... 29
- SELECTING THE ORIGINAL IMAGE TYPE AND MANUALLY ADJUSTING THE EXPOSURE.....29
REDUCTION/ENLARGEMENT/ZOOM.... 30
• AUTOMATIC RATIO SELECTION .....30
• MANUAL RATIO SELECTION....31
- SELECTING THE VERTICAL AND HORIZONTAL COPY RATIOS SEPARATELY (XY ZOOM copying)....32
INTERRUPTING A COPY RUN.... 34
3CONVENIENT COPY FUNCTIONS
COPY FINISHING FUNCTIONS.... 35
- SORT COPY 35
- GROUP COPY 35
- OFFSET FUNCTION 35
- STAPLE SORT (when the finisher (AR-FN5N) is installed).... 37
- ORIENTATION OF THE ORIGINAL AND STAPLING POSITIONS.... 37
SPECIAL MODES.... 39
- GENERAL PROCEDURE FOR USING THE SPECIAL FUNCTIONS.... 40
• MARGIN SHIFT COPY 41
• ERASE COPY 42
• DUAL PAGE COPY 43
• PAMPHLET COPY 44 - JOB BUILD MODE.... 45
- MULTI SHOT COPY 46
• ORIGINAL SIZE...... 47
• COVER COPY 48
• B/W REVERSE COPY 50
• CARD SHOT....50a
4USER SETTINGS
CUSTOM SETTINGS.... 51
- GENERAL PROCEDURE FOR CUSTOM SETTINGS .... 52
- SETTINGS 53
JOB PROGRAM MEMORY.... 54
• STORING A JOB PROGRAM.... 54
- EXECUTING A JOB PROGRAM .... 55
- DELETING A STORED JOB PROGRAM..... 55
AUDITING MODE 56
- COPYING WHEN AUDITING MODE IS ENABLED .... 56
5 TROUBLESHOOTING AND MAINTENANCE
DISPLAY MESSAGES.... 58
TROUBLESHOOTING.... 60
MISFEED REMOVAL.... 64
• MISFEED REMOVAL GUIDANCE .....64
• MISFEED IN THE RSPF....65
• MISFEED IN THE BYPASS TRAY .....66
- MISFEED IN THE MACHINE....66
• MISFEED IN THE CENTRE TRAY....68
• MISFEED IN THE UPPER PAPER TRAY .....68
• MISFEED IN THE LOWER PAPER TRAY .....69
- MISFEED IN THE UPPER EXIT AREA (when a job separator tray kit or finisher (AR-FN5N) is installed)....70
- MISFEED IN AN OUTPUT TRAY (when a finisher (AR-FN5N) is installed)....70
REPLACING THE TONER CARTRIDGE ..... 72
STAPLE CARTRIDGE REPLACEMENT...... 73
• STAPLE JAM REMOVAL ....74
CHECKING THE TONER QUANTITY AND TOTAL OUTPUT COUNT....74
CLEANING THE MACHINE.... 75
- DOCUMENT GLASS AND DOCUMENT COVER/RSPF....75
- THE BYPASS TRAY PAPER FEED ROLLER....75
6 PERIPHERAL DEVICES AND SUPPLIES
PERIPHERAL DEVICES.... 76
• FINISHER (AR-FN5N) 77
- 500-SHEET PAPER FEED UNIT/
2 x 500-SHEET PAPER FEED UNIT......78
- REVERSING SINGLE PASS FEEDER .....79
STORAGE OF SUPPLIES.... 79
• PROPER STORAGE .....79
7APPENDIX
SPECIFICATIONS 80
INDEX....90
- INDEX BY PURPOSE....93
CAUTIONS
Follow the cautions below when using this machine.
CAUTIONS ON USING THE MACHINE
▲ Warning:
- The fusing area is hot. Exercise care in this area when removing misfed paper.
- Do not look directly at the light source. Doing so may damage your eyes.
Caution:
- Do not switch the machine rapidly on and off. After turning the machine off, wait 10 to 15 seconds before turning it back on.
• Machine power must be turned off before installing any supplies. - Place the machine on a firm, level surface.
- Do not install the machine in a humid or dusty location.
- When the machine is not used for a long time, for example, during prolonged holidays, turn the power switch off and remove the power cord from the outlet.
- When moving the machine, be sure to turn the power switch off and remove the power cord from the outlet.
- Do not cover the machine with a dust cover, cloth or plastic film while the power is on. Doing so may prevent heat dissipation, damaging the machine.
- Use of controls or adjustments or performance of procedures other than those specified herein may result in hazardous laser radiation exposure.
- The socket-outlet should be installed near the machine and should be easily accessible.
IMPORTANT POINTS WHEN SELECTING AN INSTALLATION SITE
Improper installation may damage the machine. Please note the following during initial installation and whenever the machine is moved.

If the machine is moved from a cool place to a warm place, condensation may form inside the machine. Operation in this condition will cause poor copy quality and malfunctions. Leave the machine at room temperature for at least 2 hours before use.
Do not install your machine in areas that are:
- damp, humid, or very dusty

• exposed to direct sunlight

natural_image
Diagram showing a printer emitting light rays into a screen (no text or symbols present)• poorly ventilated


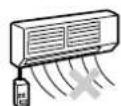
- subject to extreme temperature or humidity changes, e.g., near an air conditioner or heater.

natural_image
Illustration of a printer and a printer with a warning symbol (no text or labels present)The machine should be installed near an accessible power outlet for easy connection and disconnection.
Be sure to connect the power cord only to a power outlet that meets the specified voltage and current requirements. Also make certain the outlet is properly grounded.

Connect the machine to a power outlet which is not used for other electric appliances. If a lighting fixture is connected to the same outlet, the light may flicker.
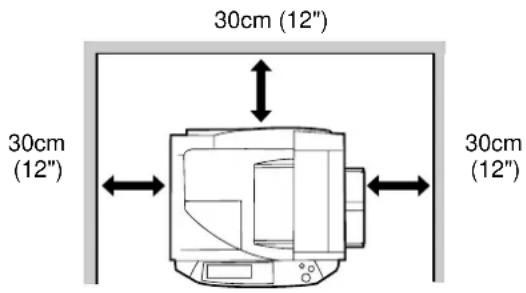
Be sure to allow the required space around the machine for servicing and proper ventilation.
CAUTIONS ON HANDLING THE MACHINE
Observe the following precautions when handling the machine to maintain top performance.
Do not drop the machine, subject it to shock or strike it against any object.
Store spare toner cartridges in a cool dry place without removing from the package before use.
- If they are exposed to direct sunlight or excessive heat, poor copies may result.
Do not touch the photoconductive drum (green portion).
- Scratches or smudges on the drum will cause dirty copies.
CAUTIONS ON LASER
| Wave length 785 nm + 10 nm/- 15 nm |
| Pulse times (5.871 μs ± 0.1 μs)/7 mm |
| Output power 0.4 mW ± 0.04 mW (600 dpi)0.2 mW ± 0.02 mW (1200 dpi) |
Trademark acknowledgements
- Micr ^ Windows ^ operating system is a trademark or copyright of Microsoft Corporation in the U.S.A. and other countries.
- Windows ^® 95, Windows ^® 98, Windows ^® Me, Windows NT ^® 4.0, Windows ^® 2000, and Windows ^® XP are trademarks or copyrights of Microsoft Corporation in the U.S.A. and other countries.
- IBM and PC/AT are trademarks of International Business Machines Corporation.
- Acrobat® Reader Copyright © 1987-2002 Adobe Systems Incorporated. All rights reserved. Adobe, the Adobe logo, Acrobat, and the Acrobat logo are trademarks of Adobe Systems Incorporated.
- PostScript ^ is a registered trademark of Adobe Systems Incorporated.
• Macintosh, Power Macintosh, Mac OS, LaserWriter, and AppleTalk are trademarks of Apple Computer, Inc. - All other trademarks and copyrights are the property of their respective owners.
ENVIRONMENTAL INFORMATION

The ENERGY STAR program is an energy reduction plan introduced by the United States Environmental Protection Agency in response to environmental issues and for the purpose of advancing the development and utilization of more energy efficient office equipment.
USING THE MANUAL
This machine has been designed to provide convenient copying features in a minimum amount of office space and with maximum operational ease. To get full use of all machine features, be sure to familiarise yourself with this manual and the machine. For quick reference during machine use, keep this manual in a handy location.
ABOUT THE OPERATION MANUALS
The operation manuals for the machine are as follows:
Operation Manual for copier/finisher (this manual)
This manual contains explanations of the product and procedures for using the machine as a copier and for using it as a . a saddle stitch finisher.
Online manual (for printer)
This manual is on the CD-ROM, and explains the procedures for using the machine as a printer, network printer, and network scanner.
Software setup guide (for printer)
This manual contains instructions for installing the software that allows the machine to be used with your computer and procedures for establishing initial printer settings.
Operation manual (for network scanner) (When the network scanner is installed)
This manual contains explanations of the product and procedures for using the machine as a network scanner.
Key operator's guide/software setup guide
This explains key operator programs for machine management and copier related functions. Key operator programs for the fax functions are explained in the operation manual for facsimile.
The GDI Setup Guide explains how to install and configure the software that is required for the printer function of the machine.
THE MEANING OF "R" IN ORIGINAL AND PAPER SIZE INDICATIONS
An "R" appearing at the end of an original or paper size A4R (8-1/2" x 11"R), etc. indicates that the original or paper is oriented horizontally as shown below.

natural_image
Technical line drawing of a mechanical device with no visible text or symbolsSizes that can be placed only in the horizontal (landscape) orientation (B4, A3 (8-1/2" x 14", 11" x 17)), do not contain the "R" in their size indication.
CONVENTIONS USED IN THIS MANUAL

Warns that injury may result if the contents of the warning are not properly followed.

Cautions that damage to the machine or one of its components may result if the contents of the caution are not properly followed.

Notes provide useful information on the specifications, functions, performance, and operation of the machine.
Explanation of words and illustration
- This operation manual refers to the Reversing Single Pass Feeder as the "RSPF".
- The illustrations in this manual show the d-Copia 2301 / d-Copia 2701 with the optional reversing single pass feeder (AR-RP7) and the optional job separator tray kit (AR-TR3) installed.
The appearance of your machine may be different depending on the model and options installed, however, the basic operations are the same. - For peripheral devices that can be installed, see "PERIPHERAL DEVICES" (p. 76).

MAIN FEATURES
High-speed laser copying
- First-copy time ^1 at 600 dpi ^2 is only 4.8 seconds.
- Copying speed is 23 copies/min. (d-Copia 2301) or 27 copies/min. (d-Copia 2701) at 600 dpi (not in the super photo mode). This is ideal for business use and provides a big boost to workplace productivity.
*1 First-Copy time may vary depending on the power-supply voltage, ambient temperature, and other operating conditions.
*2 "dpi" ("dots per inch") is unit that is used to measure resolution. Resolution indicates how much detail can be reproduced in a printed or scanned image.
High-quality digital image
- High-quality copying at 600 dpi or 1200 dpi (super photo mode) is performed.
- In addition to automatic exposure adjustment, four original type modes are available: "TEXT mode" for text-only originals, "TEXT/PHOTO mode" for mixed text and photo originals, "PHOTO mode" for photos, and "SUPER PHOTO mode" for high-quality reproduction of photos. The exposure can be manually adjusted to 5 levels in each mode.
Enhanced copying features
- Zoom copies can be made from 25% to 400% in increments of 1%.
- Continuous copying of up to 999 copies is possible.
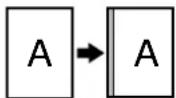
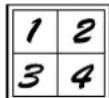
• Automatic two-sided copying can be performed. - Useful special features such as erase, margin shift, 2 in 1 and 4 in 1, pamphlet copy, dual page copy and cover copy are available.


Erase copy Margin shift copy 2in1 copy 4in1 copy

Pamphlet copy

Dual page copy

Cover copy
- Key operator programs allow the setting or modification of functions to meet your specific needs. The key operator programs can also be used to enable audit mode, which allows the machine administrator to control use of the machine.
Black and white LCD touch panel makes it easy to operate the machine
- Employing a backlit black and white LCD display, the touch panel provides step-by-step guidance for each function of the machine. The touch panel even provides instructions for removing paper misfeeds and other problems that occur.
Optional features
- An optional finisher allows automatic stapling of up to 30 sheets.
- This machine can be used as a network printer if the optional printer expansion kit is installed.
- This machine can be used as a facsimile machine if the optional facsimile expansion kit is installed.
- This machine can be used as a network scanner if the optional network scanner expansion kit is installed.
Environment and people friendly design
- Preheat and auto power shut-off modes are provided to reduce power consumption when the machine is not in use.
- A universal design has been implemented in the product whereby the height of the operation panel and shape of the keys are designed to be useable by as many people as possible.
1
Chapter 1
BEFORE USING THE MACHINE
This chapter contains basic information that should be read before using the machine.
PART NAMES AND FUNCTIONS
Exterior

① Reversing single pass feeder (RSPF) (optional)
Place the original(s) that you wish to scan face up here. (p.23)
② Document cover (optional)
Place an original on the document glass and close the document cover before copying starts.
③ Document glass
Place an original that you wish to scan face down here. (p.22)
④ Power switch
Press to turn the machine power on and off. (p.13)
⑤ Handles
Use to move the machine.
⑥ Operation panel
Contains operation keys and the touch panel.
(p.10)
⑦ Job separator tray (upper tray) (optional)
Print jobs and received faxes are delivered to this tray.
⑧ Centre tray
Finished copies are delivered to the centre tray.
⑨ Front cover
Open to remove paper misfeeds and perform machine maintenance. (p.66)
⑩ Paper trays
Each tray holds 500 sheets of copy paper. (p.15)
⑪ Upper right side cover
Open to remove misfeeds when an optional job separator tray kit or a optional finisher is installed. (p.70)
⑫ Side cover
Open to remove misfeeds. (p.66)
⑬ Side cover handle
Pull to open the side cover. (p.66)
⑭ Bypass tray paper guides
Adjust to the width of the paper. (p.18)
Interior


⑮ Bypass tray
Regular paper and special paper (such as transparency film) can be fed from the bypass tray. (p.18)
⑯ Bypass tray extension
Pull out the bypass tray extension before placing paper in the bypass tray. (p.18)
⑰ Toner cartridge lock release lever
Use to unlock the toner cartridge. (p.72)
⑱ Toner cartridge
Contains toner. (p.72)
⑲ Roller rotating knob
Turn to remove misfed paper. (p.66)
20 Photoconductive drum
Copy images are formed on the photoconductive drum.

Do not touch the photoconductive drum (green portion). Doing so may damage the drum and cause smudges on copies.
②1 Fusing unit release levers
To remove a paper misfeed in the fusing unit, push up on these levers and remove the paper. (p.67)
The fusing unit is hot. Do not touch the fusing unit when removing misfed paper. Doing so may cause a burn or injury.
②2 Fusing unit paper guide
Open to remove misfed paper. (p.67)

The model name is on the front cover of the machine.
OPERATION PANEL

① Touch panel
The machine status, messages and touch keys are displayed on the panel. The display will show the status of printing, copying or network scanning according to the mode that is selected. For details see the next page.
② Mode select keys and indicators
Use to change modes and the corresponding display on the touch panel.
[COPY] key
Press to select copy mode.
[PRINT] key/ONLINE indicator/ DATA indicator
Press to select print mode.
• ONLINE indicator
Print jobs can be received when this indicator is lit.
- DATA indicator
A print job is in memory. The indicator lights steadily while the job is held in memory, and blinks while the job is printed.
[SCAN] key/DATA indicator (When the network scanner option is installed.)
Press to select network scan mode when the network scanner option is installed.
- DATA indicator
Lights steadily or blinks while a scanned image is being sent.
(See "Operation manual (for network scanner)".)
[FAX] key/LINE indicator/DATA indicator (When the fax option is installed.)
Press to select fax mode when the fax option is installed.
• LINE indicator
this lights up while faxes are being sent or received.
- DATA indicator
Blinks when a fax has been received to memory and lights steadily when a fax is waiting in memory for transmission.
(See operation manual for facsimile.)
③ [JOB STATUS] key
Press to display the current job status. (p.12)
④ [CUSTOM SETTINGS] key
Use to adjust various settings of the machine including the contrast of the touch panel and key operator programs. (p.52)
⑤ Numeric keys
Use to enter numeric values for various settings.
⑥ [ACC.#-C] key (☐)
When auditing mode is enabled, press this key after finishing a job to return the machine to account number entry standby.
⑦ [#/P] key (#P)
Use this key to execute a job program in copy mode. The key is also used to dial in fax mode.
⑧ [CLEAR] key ( )
Press to clear a copy number setting or cancel a job.
⑨ [START] key (⑨)
Press in copy mode, scanner mode, or fax mode to begin copying, network scanning, or faxing. This key blinks when auto power shut mode has activated. Press the key to return to normal operation.
⑩ [INTERRUPT] key (∅)
Use to perform an interrupt copy job. (p.34)
⑪ [CLEAR ALL] key (A)
Resets the settings to the initial settings.
TOUCH PANEL
Using the touch panel
[Example 1]

Items on the touch panel are selected by touching the key associated with the item. A beep will sound to confirm that the item was selected and the key will be highlighted.
* A double-beep is sounded when an invalid key is touched.
[Example 2]

Keys which are greyed out cannot be selected.
The confirmation beeps can be disabled in the key operator programs. (See the "Key operator's guide".)
The touch panel screens shown in this manual are printed images and may differ from the actual screens.
Selecting a function
[Example 1]
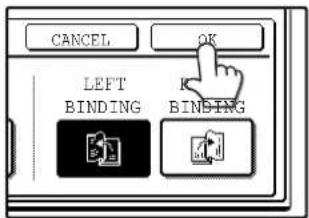
Items which are highlighted at the time a screen appears are already selected and will take effect when the [OK] key is touched.
[Example 2]
If you need to cancel a selection, simply press the key once again so that it is not highlighted.
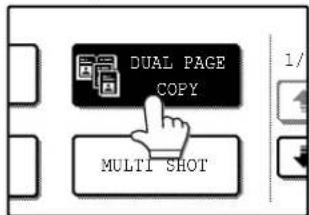

The key is no longer highlighted and the selection is cancelled.
[Example 3]

When the machine is used in copy mode or fax mode and a special mode is selected, a icon representing the feature will appear on the touch panel. If this icon is touched, the setting screen of the function (or a menu screen) will appear, allowing the settings to be checked, adjusted, or cancelled.
Job status screen (common to copy, print, network scan and fax)
This screen appears when the [JOB STATUS] key on the operation panel is pressed.
A job list showing the current job and the stored jobs or a list showing completed jobs can be displayed.
The contents of jobs can be viewed and jobs can be deleted from the queue. The following screen shows the job queue for print jobs.

① Job list
Shows stored jobs and the job currently being executed. Touch one of keys ③ to ④ in the above illustration to select the type of job. The icon next to each job name indicates the mode of the job as follows:

Copy mode Printer mode

Network scanner mode

Fax mode (Send jobs)

Fax mode (Receive jobs)
The jobs in the job list appear in the form of keys. To give priority to a job or pause or delete a job, touch the key of the job and then use the key described in ⑦or . ⑧
\*1:"PAPER EMPTY" in the job status display
"PAPER EMPTY" in the job status display indicates that the machine is out of the specified size of paper. Add the specified size of paper. If the specified size of paper is not available and you are in printer mode, another size of paper can be loaded in the bypass tray to allow printing to take place. (See the "Online manual".)
② Mode switching keys
Use to select the job list mode: "JOB QUEUE" (Stored/currently executing jobs) or "COMPLETE" (Finished jobs).
"JOB QUEUE":
Shows jobs that have been stored and the job that is currently being executed.
"COMPLETE":
Shows the jobs that have been finished. Note that copy jobs do not appear in this list. If the power is turned off, or if auto power shut-off mode activates when there are no jobs, the jobs in the
"COMPLETE" list will be erased.
③ [PRINT JOB] key
Use to view the list of output jobs for all modes (print, copy, and fax).
④ [E-MAIL/FTP] key
Displays a network scanner job (When the network scanner function is installed.).
⑤ [FAX JOB] key
This displays stored fax jobs and the fax job currently being executed (When the fax option is installed.).
⑥ Display switching keys
Use to change the page of the displayed job list.
⑦ [STOP/DELETE] key
Use to pause or delete a job currently being executed, or to delete a stored job. Copy jobs and received faxes cannot be paused or deleted with this key. Copy jobs can be cancelled by pressing the [CLEAR] key ( ) [CLEAR ALL] key ( ).
⑧ [PRIORITY] key
Touch this key after selecting a stored job in this [JOB QUEUE] list to print the job ahead of the other jobs.
⑨ [DETAIL] key
Shows information on the selected job. This cannot be used for a received fax.
POWER ON AND OFF
The power switch is located on the left side of the machine.

When the power switch is turned on, the machine starts up in the previously used mode. The following explanations assume that the previously used mode was copy mode.
POWER ON
Turn the power switch to the "ON" position.
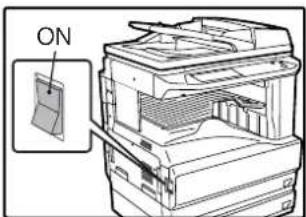
- When the power switch is turned to the "ON" position, the message "WARMING UP. A COPYING JOB CAN BE SET NOW." will appear in the message display and the machine will start warming up. When "READY TO COPY." appears, the machine is ready to copy. Copy settings can be selected during warm-up.
- If auditing mode is enabled, "ENTER YOUR ACCOUNT NUMBER." will appear. When a valid account number is entered, the account status will appear on the main screen for several seconds. Then copying can be performed. (See "Key operator's guide".)
POWER OFF
When the machine is not used for a long time, be sure to turn it off.
Make sure that the machine is not in operation and then turn the power switch to the "OFF" position.

If the power switch is turned off while the machine is in operation, a misfeed may occur and the job that was in progress will be cancelled.

If the fax option is installed, be sure to keep the power turned on. Faxes cannot be received when the power is turned off.
INITIAL SETTINGS
The machine reverts to the initial settings when it is first turned on, when the [CLEAR ALL] key (CA) is pressed, or the preset "auto clear time" elapses after the last copy is made in any mode. When the machine reverts to the initial settings, all settings and functions selected to that point are cancelled. The auto clear time can be changed in the key operator programs. (See the "Key operator's guide".)
The initial settings that appear in the display are shown below.

Functions and settings are explained based on the above screen as applicable.
Copy ratio: 100%, Exposure: Automatic, Copy quantity: 0, Automatic two-sided: One side to One side, Auto paper selection: On
Paper tray: Upper paper tray

The initial settings can be changed in the key operator programs. (See the "Key operator's guide".)
For the initial settings (initial screen) of printer, fax, and scanner modes, see the operation manuals of those modes.
POWER SAVE MODES
The machine has two power save modes to reduce overall power consumption and thereby reduce the cost of operation. These modes help conserve natural resources and reduce environmental pollution. The two power save modes are "Preheat mode" and "Auto power shut-off mode".
The time settings for each mode can be changed in the key operator programs. (See the "Key operator's guide".)
Preheat mode
When the set time elapses, the temperature of the fusing unit is automatically lowered to reduce power consumption while on standby. The factory default setting is 15 minutes. To return to normal operation, touch any key on the operation panel. To make a copy when the machine is in this mode, simply select the desired copy selections and then press the [START] key (②)
Auto power shut-off mode
When the set time elapses, the power to the fusing unit automatically turns off to reduce power consumption (This is based on the guidelines of the International Energy Star Program.). The factory default setting is 60 minutes. When the machine enters this mode, the touch panel screen turns off and only the [START] key ( Ⓤ ) blinks. To return to normal operation, press the [START] key ( ⏻To copy after warm-up starts, make desired copy selections and press the [START] key ( ⏱)
LOADING PAPER
When a tray runs out of paper, a message appears in the touch panel. Load paper in the tray.

PAPER
The specifications for the types and sizes of paper that can be loaded in the paper trays are shown below. For best results, use only OLIVETTI recommended paper.
| Tray No. | Paper tray type | Paper type | Size | Weight | Capacity | |
| 1 Upper paper tray *1 | Plain paperLetterhead paperRecycled paperColour paper | A5 to A3(5-1/2" x 8-1/2" to 11" x 17") | 56 g/m2 to 105 g/m2(15 lbs. to 28 lbs.) | 500 sheets*4 | ||
| 2 Lower paper tray *2 | ||||||
| 3 500-sheet paper feed unit/Upper paper tray of 2 x 500-sheet paper feed unit | ||||||
| 4 Lower paper tray of 2 x 500-sheet paper feed unit | ||||||
| Bypass tray Plain paper | Letterhead paperRecycled paperColour paper | A6 to A3(5-1/2" x 8-1/2" to 11" x 17") | 56 g/m2 to 128 g/m2(15 lbs. to 34.5 lbs.)*3 | 100 sheets*4 | ||
| Thin paper 52 g/m | 2 to 56 g/m2(14 lbs. to 15 lbs.) | 100 sheets | ||||
| Heavy paper Max. 200 g/m | 2(54 lbs.) | 30 sheets | ||||
| Labels 40 sheets | ||||||
| Transparency film 40 sheets | ||||||
| Envelope | International DL(110 x 220 mm)International C5(162 x 229 mm)Commercial 10(4-1/8" x 9-1/2") | 5 sheets | ||||
*1 A5 (5-1/2" x 8-1/2") size paper can only be loaded in tray1 and the bypass tray.
*2 B5 size paper cannot be loaded in tray2 (However, B5R paper can be loaded.).
*3 When loading paper larger than A4 (8-1/2" x 11") size, do not use paper of weight greater than 105 g/m² (28 lbs.).
*4 The number of sheets of paper which can be loaded varies depending on the weight of the paper.
Special papers
Follow these guidelines when using special papers.
Envelopes
Do not use the following envelopes (Misfeeds will occur.).
- Envelopes with metal tabs, clasps, strings, holes, or windows.
- Envelopes with rough fibbers, carbon paper, or glossy surfaces.
- Envelopes with two or more flaps.
- Envelopes with tape, film, or paper attached to the flap.
- Envelopes with a fold in the flap.
- Envelopes with glue on the flap to be moistened for sealing.
- Envelopes with labels or stamps.
- Envelopes that are slightly inflated with air.
- Envelopes with glue protruding from the seal area.
- Envelopes with part of the seal area peeled off.
Letterhead paper
Letterhead paper is paper with information pre-printed at the top such as a company name and address.
OLIVETTI
- Use OLIVETTI recommended transparency film and label sheets. Using other than OLIVETTI recommended paper may result in misfeeds or smudges on the output. If other than OLIVETTI recommended media must be used, feed each sheet one at a time using the bypass tray (Do not attempt continuous copying or printing.).
- There are many varieties of special paper available on the market, and some cannot be used with this machine. Before using special paper, contact your authorised service representative.
- Before using other than OLIVETTI recommended paper, make a test copy to see if the paper is suitable.
LOADING PAPER
Make sure that the machine is not copying, printing, or printing a received fax, and then follow these steps to load paper.
Loading the paper in the paper tray
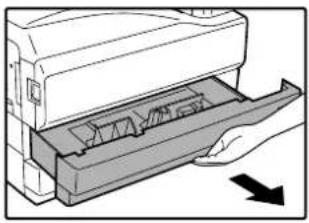
1 Pull out the paper tray until it stops.
natural_image
Illustration of a hand inserting a device into a tray with arrows indicating direction (no text or symbols)If you are loading the same size of paper as was loaded previously, go to step 4. If you are loading a different size of paper, continue with the following step.
2 Squeeze the lock lever of the front guide and slide the front guide to match the width of the paper.
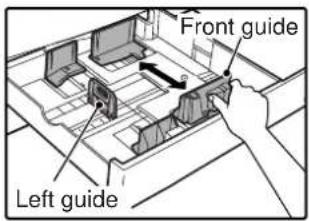
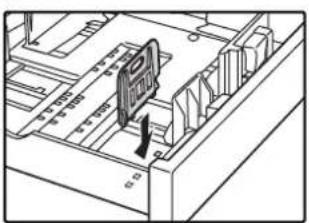
3 Move the left guide to the appropriate slot as marked on the tray.
natural_image
Technical line drawing of a mechanical assembly with no visible text or symbolsWhen using 11" x 17" copy paper, store the left guide in the slot at the left front of the paper tray.
4 Fan the copy paper.

natural_image
Illustration of two hands holding a folded paper or card (no text or symbols visible)5 Load paper in the tray.


- Load the paper with the print side facing up.
- Insert the paper along the guides.
- The tray holds up to 500 sheets of 80g / m^2 (21 lbs.) paper.
- Do not load paper above the maximum height line.
- When adding paper, first remove any paper remaining in the tray, combine it with the paper to be added, and then reload as a single stack.
6 Push the paper tray firmly back into the machine.

natural_image
Illustration of a hand inserting a plastic into a printer holder (no text or symbols visible)If you loaded a different size of paper that was loaded previously, place the appropriate paper size card in the front of the paper tray to indicate the new paper size.
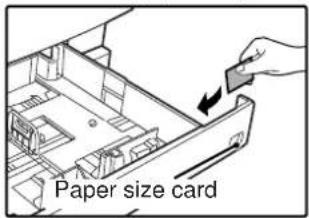
Paper size card
Front
| EXTRA | EIXAB | |
| A5 | 8X11 |
Back

If you loaded a different size of paper that was loaded previously, go to "CHANGING A TRAY'S PAPER TYPE AND PAPER SIZE SETTINGS" (p.19).
Loading paper in the bypass tray
1 Unfold the bypass tray.
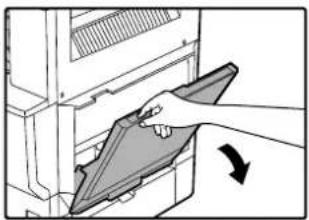
natural_image
Illustration of a hand holding a folder with an arrow indicating direction (no text or symbols)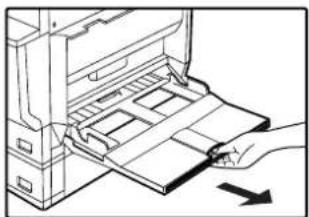
natural_image
Line drawing of a hand inserting a card into a printer (no text or symbols)To enable correct detection of the paper size, be sure to pull out the bypass tray extension.
2 Set the paper guides to the copy paper width.
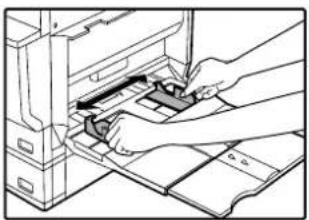
natural_image
Illustration of hands operating a file transfer machine (no text or symbols visible)Important points when inserting paper in the bypass tray
- Be sure to place envelopes horizontally as shown in the following diagram.
- Load the paper with the print side facing down.

flowchart
graph LR
    A["Layout"] --> B["Landscape orientation"]
    B --> C["Portrait orientation"]
    C --> D["Envelope"]
- When loading envelopes, make sure that they are straight and flat and do not have loosely glued construction flaps (not the closure flap).
- When adding paper, first remove any paper remaining in the bypass tray, combine it with the paper to be added, and then reload as a single stack. The paper to be added must be the same size and type as the paper already in the bypass tray.
- Do not use paper that is smaller than the original image. This may cause smudges or unclean images.
- Do not use paper that has already been printed on by a laser printer or plain paper fax machine. This may cause smudges or unclean images.
3 Insert the copy paper (print side down) all the way into the bypass tray.
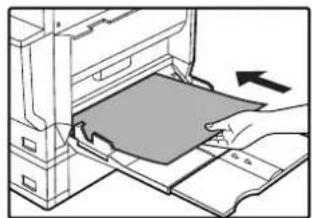
natural_image
Illustration of a hand inserting a card into a device (no text or symbols visible)CHANGING A TRAY'S PAPER TYPE AND PAPER SIZE SETTINGS
When you change the paper in a tray, follow the steps below to change the tray's paper type and paper size settings. The settings cannot be changed when operation has stopped because the paper ran out or a misfeed occurred, or when an interrupt copy job is being performed.
Even in copy mode, the settings cannot be changed while a print job or received fax is being printed.

- A5 (5-1/2" x 8-1/2") size paper can only be set for tray1.
- B5 size paper cannot be set for tray2 (However, B5R size paper can be set.).
- Tray settings for trays other than the bypass tray can be prohibited in the key operator programs. (See the "Key operator's guide".)
1 Load paper in the tray as explained in "Loading the paper in the paper tray" (p.17).
2 Press the [CUSTOM SETTINGS] key.

The custom settings menu screen will appear.
3 Touch the [TRAY SETTINGS] key.

The tray settings screen will appear.
4 Select the tray in which you loaded paper.

For the tray numbers, see "PAPER" (p.15). If the desired tray does not appear in the display, use the key or key to scroll until it appears.
5 Select the size and type of paper that is loaded in the tray.
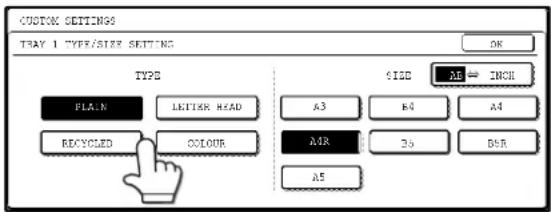
The currently selected paper type will be highlighted.
- To change the paper type selection, touch the appropriate type key.
- To change the paper size selection, touch the appropriate size key.
- To change the displayed size selections to AB sizes, touch [AB INCH].
6 Touch the [OK] key.
7 A message appears prompting you to check the paper in the tray. Check the paper and then touch the [OK] key.
You will return to the tray settings screen.
Setting the paper type in the bypass tray
Use either of the following two methods to set the bypass tray's paper type setting. (p.23)
From the [CUSTOM SETTINGS] key
1 Load paper in the bypass tray as explained in "Loading paper in the bypass tray" (p.18).
2 Press the [CUSTOM SETTINGS] key.
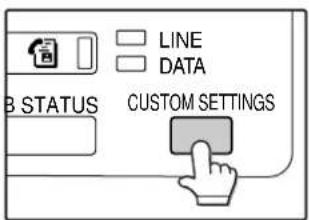
The custom settings menu screen will appear.
3 Touch the [TRAY SETTINGS] key.

The tray settings screen will appear.
4 Touch the [BYPASS TRAY] key.
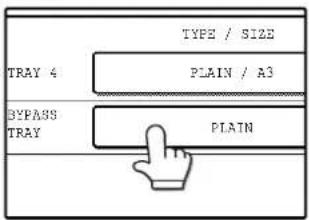
5 Select the type of paper that is loaded in the tray.

"JAPANESE P/C" refers to official postcards used in Japan.
6 Touch the [OK] key.
You will return to the tray settings screen.
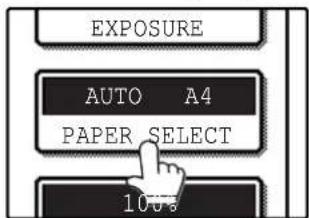
From the [PAPER SELECT] key
1 Load paper in the bypass tray as explained in "Loading paper in the bypass tray" (p.18).
2 Touch the [PAPER SELECT] key.
![OLIVETTI d-Copia 2301 - From the [PAPER SELECT] key - 1](/content/2026/05/825301/images/1782a21eb121558e2926172693cb3c0e76e13e1d339ade3bbd2dd868fda2ab01.jpg)
flowchart
graph TD
    A["EXPOSURE"] --> B["AUTO A4"]
    B --> C["PAPER SELECT"]
    C --> D["100%"]
3 Touch the paper type selection key.

4 Select the paper type.

"JAPANESE P/C" refers to official postcards used in Japan.
5 Touch the [PAPER SELECT] key.
You will return to the main screen of copy mode.
This chapter explains basic copying functions such as normal copying, reduction or enlargement, and exposure adjustment.
MAIN SCREEN OF COPY MODE
The main screen of copy mode shows messages, keys, and settings that are used for copying. Touch a key to make a selection. The main screen of copy mode appears when the [COPY] key is pressed (Except when the custom settings screen appears.).

- The message will vary depending on the country and the region.
- The screen will vary depending on the equipment installed.
① Message display
Status messages are displayed here.
② Copy number display
Displays the selected number of copies before the [START] key ( )s pressed or the number of remaining copies after the [START] key ( )s pressed. A single copy can be made when "0" is displayed.
③ [2-SIDED COPY] key (p.27)
Touch to open the duplex copy mode setting screen.
④ [OUTPUT] key (p.35)
Touch to select sort, group, staple sort, and other output settings.
⑤ [SPECIAL MODES] key (p.39)
Touch to open the special modes selection screen.
⑥ Original feed display
This appears when an original is placed in the RSPF.
⑦ Paper size display
This shows the location of the paper trays, the size of the paper in the trays. "Indicates whether or not there is paper. A paper tray can be touched to change the paper tray selection.
⑧ Original size display
Displays the original size only when an original is placed for copying.
⑨ Exposure display
Displays the icon of the selected exposure type and the exposure scale.
⑩ [EXPOSURE] key (p.29)
Use this key to adjust the copy exposure.
⑪ Paper select display
Displays the selected paper size. When auto paper select mode is selected, "AUTO" appears when auto paper select mode is selected.
⑫ [PAPER SELECT] key (p.22, p.26)
Use this key to select the paper size.
⑬ Copy ratio display
Displays the selected copy ratio.
⑭ [COPY RATIO] key (p.30)
Use this key to select the copy ratio.
NORMAL COPYING
COPYING FROM THE DOCUMENT GLASS

If "AUDITING MODE" (p.56) has been enabled, enter your 5-digit account number.
1 Open the document cover/RSPF and place the original face down on the document glass.

natural_image
Diagram of a printer or scanner with an open lid and a hand inserting a cable (no text or symbols visible)[How to place the original]
Align the corner or the original with the tip of the arrow () at the left rear corner of the glass as shown in the illustration.
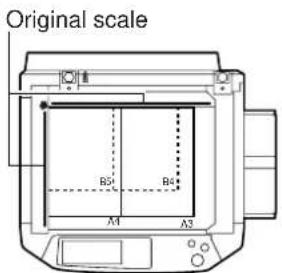

2 Close the document cover/RSPF.

natural_image
Illustration of a printer with an open lid and a hand holding it, showing no text or symbols.The original size appears in the touch panel.

If the original size is not automatically detected, manually set the original size. (p.47)
3 Make sure that the same size of paper as the original is automatically selected.

The selected tray is highlighted. If the tray contains a different size of paper than the original, "LOAD xxxx PAPER." will appear.
Even if the message above is displayed, copying can be performed using the selected paper tray.

- To load paper, see "LOADING PAPER" (p.15). If you change the paper size in the tray, you will also need to change the tray's paper size and paper type settings. (p.19) - The paper types for the auto paper selection function can be selected, or the function disabled, in the key operator programs. (See the "Key operator's guide".)
Manually selecting the paper size (paper tray)
If auto paper selection is disabled in the key operator programs, or if you wish to use a different size of paper than the original, touch the [PAPER SELECT] key and select the paper tray with the desired paper size. (The selected paper will be highlighted and the paper selecting screen will close.) To close the screen without selecting a paper size, touch the [PAPER SELECT] key again.

4 Select the number of copies and any other desired copy settings, and then press the [START] key ( )

- The number in the copy quantity display will decrease by 1 each time a copy is made.
- If you are only making a single copy, the copy can be made with the copy number display showing "0".
• To clear a mistake, press the [CLEAR] key ( )c
![OLIVETTI d-Copia 2301 - Select the number of copies and any other desired copy settings, and then press the [START] key ( ) - 2](/content/2026/05/825301/images/3b86352c2e7550f78e4440f8450be75b8175e58267766b795a58bf6c2e46e613.jpg)
- Press the [CLEAR] key (to stop copying in the middle of a run. - To repeat the same copy sequence for a different original, simply replace the original and press the [START] key () - If copying stops because the tray has run out of paper, you can resume copying by touching the [PAPER SELECT] key and selecting the bypass tray or a paper tray that has the same size and type of paper loaded in the same orientation.
COPYING FROM THE RSPF

- If "AUDITING MODE" (p.56) is enabled, enter your 5-digit account number.
- If the RSPF is disabled in the key operator programs, the RSPF cannot be used. See the "Key operator's guide".
1 Make sure that an original has not been left on the document glass and then close the RSPF.
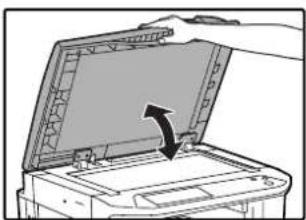
natural_image
Illustration of a hand opening a printer with an arrow indicating the open lid (no text or symbols present)If an original remains on the document glass after a copy was made, "REMOVE THE ORIGINAL FROM THE DOCUMENT GLASS." will appear in the touch panel.
2 Adjust the original guides to the size of the original.

natural_image
Line drawing of a hand using a tool to press or adjust a document on a printer (no text or symbols visible)3 Place the originals face up in the document feeder tray.

Insert the originals all the way into the feed slot. The original size appears in the touch panel.

- Up to 100 pages (90 g/m ^2 (24 lbs.)) can be inserted at once.
- If the original size is not automatically detected, manually set the original size. (p.47)
4 Make sure that the same size of paper as the original is selected.
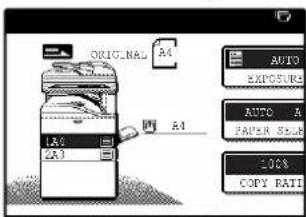
The selected tray is highlighted. If none of the trays have the same size of paper as the original, "LOAD xxxx PAPER." will appear.
Even if the message above is displayed, copying can be performed using the selected paper tray.

- To load paper, see "LOADING PAPER" (p.15). If you change the paper size in the tray, you will also need to change the tray's paper size and paper type settings. (p.19)
- If needed, manually select the paper tray that has the desired size of paper as explained on page 22.
- The paper types for the auto paper selection function can be selected, or the function disabled, in the key operator programs. (See the "Key operator's guide".)
- If the original size is larger than the paper size, the result of copying from the document glass may differ from the result of copying from the RSPF. (p.22)
5 Select the number of copies and any other desired copy settings, and then press the [START] key ( )

- The number in the copy quantity display will decrease by 1 each time a copy is made.
- If you are only making a single copy, the copy can be made with the copy number display showing "0".
• To clear a mistake, press the [CLEAR] key (☐)
![OLIVETTI d-Copia 2301 - Select the number of copies and any other desired copy settings, and then press the [START] key ( ) - 2](/content/2026/05/825301/images/9b2892e8fd465237ad6d48c145e4b73762e946826624e8b2768af03b83fe6e5a.jpg)
- Press the [CLEAR] key (☐to) stop copying in the middle of a run.
- If copying stops because the tray has run out of paper, you can resume copying by touching the [PAPER SELECT] key and selecting the bypass tray or a paper tray that has the same size and type of paper loaded in the same orientation.
Stream feeding mode
If stream feeding mode is enabled in the key operator programs, "SET ORIGINALS FOR STREAM FEEDING." will appear in the touch panel for approximately 5 seconds after the originals are fed. Any new originals placed in the RSPF while this message appears will be fed and copied automatically.
Copying a large number of originals
Job Build mode is useful when you need to copy more originals that can be placed in the RSPF at once. For information on Job Build mode, see "JOB BUILD MODE" (p.45).
POINTS TO NOTE WHEN MAKING COPIES
Document glass and RSPF
- Paper in a different orientation from the original can be selected if the auto paper select or auto image function has been selected. In this case, the image of the original will be rotated.
- When copying a book or an original that has been folded or crumpled, press down gently on the document cover/RSPF. This will reduce shadow lines caused by uneven contact between the original and the document glass.
- When the centre tray counter function is enabled, the number of pages that can be delivered to the output tray is limited to 500 (A4 and 8-1/2" x 14" sizes only; the limit for all other sizes is 300 pages). When the offset function is used, the limit is approximately 300 pages. When the limit is reached, copying stops and the [START] key ( ♦ ) light turns off. Remove the copies from the centre tray and then press the [START] key ( ♦ ) to resume copying. The centre tray counter function can be disabled in the key operator programs. (See the "Key operator's guide".)
Originals that can be used in the RSPF
A maximum of 100 sheet originals of equal size (A4, 90 g/m ^2 (8-1/2" x 11", 24 lbs.)) can be placed in the RSPF. Originals of different length can be placed together in the RSPF as long the widths are equal; however, some copy functions may not operate correctly.
Acceptable originals
Originals of size A5 to A3 (5-1/2" x 8-1/2" to 11" x 17") having a weight of 35 g/m ^2 to 128 g/m ^2 (9 lbs. to 34 lbs.) or 52 g/m ^2 to 105 g/m ^2 (14 lbs. to 28 lbs.) for two-sided originals can be used.
Other considerations
- Use originals that are within the specified size and weight ranges. Originals outside the specified ranges may cause misfeeds.
- Make sure that there are no paper clips or staples on the original.
- If an original has damp spots from correction fluid or ink, or glue from pasteups, be sure it has dried completely before using it to make a copy. Otherwise the interior of the RSPF or the document glass may become soiled.
- The following originals cannot be used. These may cause misfeeds, smudging, and unclear images.
- Transparencies, tracing paper, other transparent or translucent paper, photographs
- Carbon paper
- Thermal paper
• Originals that are creased, folded, or torn - Glued originals, cut-out originals
• Originals with binder holes - Originals printed using an ink ribbon (thermal transfer printing), originals printed on thermal transfer paper
Removing the document cover
- To copy large originals like newspaper, remove the document cover.
- To remove it, open the document cover and lift it at a slightly backward angle. To replace the cover, do the reverse.
• The RSPF cannot be removed.

natural_image
Illustration of hands installing a device panel into a battery pack (no text or symbols)Copying originals of mixed length (Mixed feeding)
When using the RSPF, originals of mixed length can be fed together as long as the width of the originals is the same.
To copy originals of mixed length, follow these steps:
1 Touch the [SPECIAL MODES] key.
![OLIVETTI d-Copia 2301 - Touch the [SPECIAL MODES] key. - 1](/content/2026/05/825301/images/23e282f55ed54397f2a29e12b0fc9ca9a6ac9dcb010468ee46b583b59536ad1a.jpg)
flowchart
graph TD
    A["SPECIAL MODES"] --> B["2-SIDED COPY"]
2 Touch the key and then the [ORIGINAL SIZE] key.
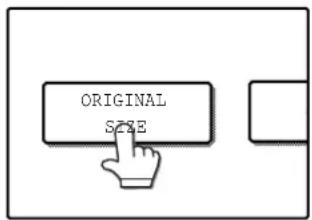
3 Select the "MIX SIZE ORIGINAL FEEDING MODE" checkbox.
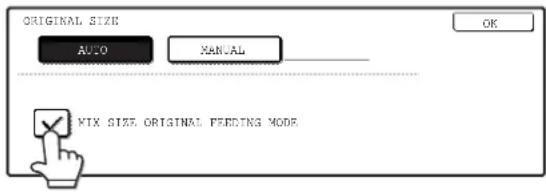
4 Touch the [OK] key.

The setting is entered and you return to the main screen. The original size icon changes to ( ) to indicate that mixed feeding is selected.
![OLIVETTI d-Copia 2301 - Touch the [OK] key. - 2](/content/2026/05/825301/images/aa8a6dd0c04ed924812084cd2aa612ef85165be76b4c11350ac363643f930840.jpg)
When copying is started in mixed feeding mode, all originals are scanned before copying begins.
2
Automatic copy image rotation (rotation copying)
If the originals are placed in a different orientation than the copy paper, the original image will be automatically rotated 90^ . (When an image is rotated, a message will be displayed.) If a function is selected that is not suitable for rotation, such as enlarging the copy to greater than A4 (8-1/2" x 11") size or margin shift copy, rotation will not be possible.
[Example]
Orientation of the placed original
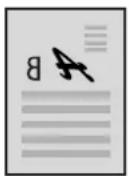
Orientation of the loaded paper

Copy after rotation


Face down Face down
- This function operates in both the auto paper select and auto image modes. Rotation copying can be disabled in the key operator programs. (See the "Key operator's guide".)
BYPASS FEED (special paper)
The bypass tray must be used to feed special papers such as transparency film and labels. The bypass tray can also be used to feed standard copy paper.
1 Place the original(s). (p.22, p.23)
2 Insert the paper (print face down) all the way into the bypass tray.

natural_image
Illustration of a hand inserting a card into a printer case (no text or symbols visible)For paper that can be used in the bypass tray, see "PAPER" (p.15). To load paper, see "Loading paper in the bypass tray" (p.18).
3 Touch the [PAPER SELECT] key or the tray in the image of the machine in the touch panel, and select the bypass tray.

Set the type of paper that you loaded in the bypass tray. (p.20)
4 Select the number of copies and any other desired copy settings, and then press the [START] key ( Ⓤ )

Shifting the starting position of copying
When copying on a special size of paper in the bypass tray, the starting position of printing can be shifted vertically for fine adjustment of the image position. To adjust the starting position of printing, follow the steps below. This function can only be used when feeding special sizes of paper from the bypass tray.
1 Touch the [PAPER SELECT] key and then touch the [EXTRA IMAGE ADJUST] key on the bypass tray.
2 Use the key or key to adjust the printing position, and then touch the [OK] key.
- The position can be adjusted from -10 mm to +10 mm in 0.5 mm increments (-0.5 inch to +0.5 inch in 0.02 inch increments).
- When a setting from -10 mm to -0.5 mm (-0.5 inch to -0.02 inch) is selected, the starting position of printing is moved to front from the standard position. When a setting from +0.5 mm to +10 mm
(+0.02 inch to +0.5 inch) is selected, the starting position of printing is moved to rear.

AUTOMATIC TWO-SIDED COPYING
Two originals can be automatically copied onto both sides of a single sheet of paper. When the RSPF is used, two-sided copies of two-sided originals can easily be made.
| Original → Paper | |||
| Document glass | One-sided original → Two sides (11·2) 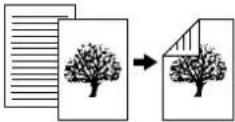 | ||
| RSPF | One-sided original → Two sides (11·2) 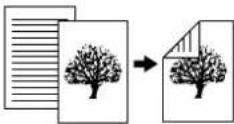 | Two-sided original → Two sides (2·2)  | Two-sided original → One side (2·1) 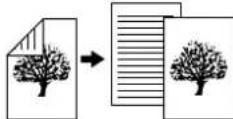 |

- Paper sizes that can be used are A5, B5, B5R, A4, A4R, B4, and A3 (8-1/2" x 11", 8-1/2" x 11"R, 8-1/2" x 13", 8-1/2" x 14" and 11" x 17").
- When making two-sided copies on letterhead paper, place the side with the letterhead face down if using a tray, or face up if using the bypass tray (This is the opposite of normal.).
- Automatic two-sided copying is not possible on thick paper, thin paper, labels, transparency film, envelopes, and other special types of paper.
- If automatic two-sided copying is performed using super photo mode, the memory may become full ("MEMORY IS FULL, SELECT ANOTHER EXPOSURE MODE." will appear.). Touch the [OK] key to cancel automatic two-sided copying, set the exposure setting to other than super photo mode, and select automatic two-sided copying once again.
- Automatic two-sided copying can be disabled in the key operator programs. (See the "Key operator's guide".)
- When dual page copy (p.43) is selected, two-sided original to two sides or two-sided original to one side cannot be used.
USING THE DOCUMENT GLASS
1 Place the original on the document glass. (p.22)
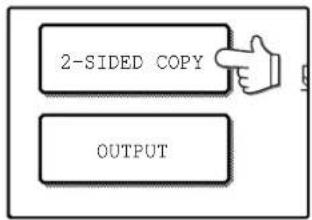
2 Touch the [2-SIDED COPY] key.
flowchart
graph TD
    A["2-SIDED COPY"] --> B["OUTPUT"]
3 Touch the [One-sided to two-sided copy] key.

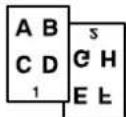
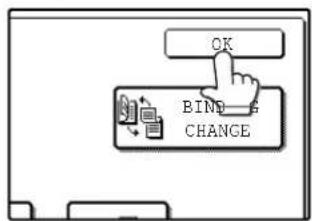
Touch the [BINDING CHANGE] key when making the tablet binding, or when making automatic two-sided copies of a one-sided A3 (11" x 17") or B4 (8-1/2" x 14") size portrait original, touch the [BINDING CHANGE] key.
Portrait-oriented original (A3 or B4 (11" x 17" or 8-1/2" x 14") size) Before [BINDING CHANGE] After [BINDING CHANGE]

4 Touch the [OK] key.
5 Make sure that a suitable paper size is automatically selected, or select another size using the [PAPER SELECT] key.

6 Select the number of copies and any other desired copy settings, and then press the [START] key ( )
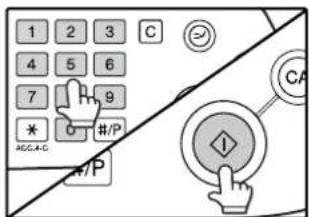
The original for the front side is scanned.
USING THE RSPF
1 Place the original(s) in the document feeder tray. (p.23)
2 Touch the [2-SIDED COPY] key.

flowchart
graph TD
    A["2-SIDED COPY"] --> B["OUTPUT"]
3 Touch the desired copy mode.
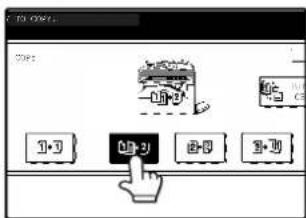
Touch the [BINDING CHANGE] key when making the tablet binding, or when making automatic two-sided copies of a one-sided A3 (11" x 17") or B4 (8-1/2" x 14") size portrait original, touch the [BINDING CHANGE] key.
Portrait-oriented original (A3 or B4 (11" x 17" or 8-1/2" x 14") size) Before [BINDING CHANGE] After [BINDING CHANGE]


7 Remove the first original and then place the original for the back side on the document glass. Close the document cover/RSPF and then press the [START] key (®)

To cancel automatic two-sided copying, press the [CLEAR] key (xC)

When making two-sided copies of an odd number of originals, touch the [READ-END] key after scanning the last original.
4 Touch the [OK] key.

5 Make sure that a suitable paper size is automatically selected, or select another size using the [PAPER SELECT] key.
6 Select the number of copies and any other desired copy settings, and then press the [START] key ( )

EXPOSURE ADJUSTMENT
SELECTING THE ORIGINAL IMAGE TYPE AND MANUALLY ADJUSTING THE EXPOSURE
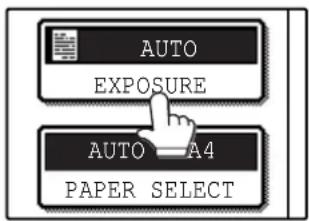
[AUTO] is selected by default for automatic adjustment of the image according to the original. If you wish to specify the original image type or manually adjust the exposure, place the original in the RSPF or on the document glass, check the paper size, and then perform the following steps.
1 Touch the [EXPOSURE] key.
2 Select [TEXT], [TEXT/PHOTO], [PHOTO], or [SUPER PHOTO] as appropriate for the original.
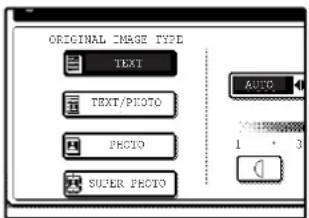
Selecting the original image type
- Four original image type selections are available.
| TEXT | Use for regular text, blueprints, and light pencil writing. |
| TEXT/PHOTO | Use for mixed text/photo originals and printed photos. |
| PHOTO | Use for photos and when you desire clearer halftones. |
| SUPER PHOTO | Use to copy photos at a high resolution of 1200 dpi. |
- Automatic exposure adjustment can only be selected when [TEXT] is selected for the original image type.
3 Manually adjust the copy exposure.

If [TEXT] was selected for the original image type, touch the [AUTO ◆ MANUAL] key to select [MANUAL] and then adjust the copy exposure.
Touch the key to make darker copies. Touch the key to make lighter copies.

Exposure value guidelines
1 - 2 Dark originals like newspapers
3 Normal originals
4 - 5 Light coloured text or text written in pencil
To change back to automatic exposure adjustment, follow these steps:
1 Touch the [EXPOSURE] key.
2 Touch the [TEXT] key.
The [AUTO ◀MANUAL] key appears when [TEXT] is selected.
3 Touch the [AUTO ◆MANUAL] key so that [AUTO] is highlighted.
4 Touch the [OK] key.
4 Touch the [OK] key.
You will return to the main screen of copy mode.
5 Check the paper size, select the number of copies and any other desired copy settings, and then press the [START] key ( )

REDUCTION/ENLARGEMENT/ZOOM
There are three ways to enlarge and reduce copies:
- Automatic ratio selection according to the paper size ....AUTOMATIC RATIO SELECTION (below)
- Specifying a ratio with the reduce key, enlarge key, or zoom key....MANUAL RATIO SELECTION (p.31)
- Separately selecting vertical and horizontal ratios ....... XY ZOOM copying (p.32)
Ratios that can be selected vary depending on the following conditions:
| Original type setting Original position Selectable ratios | ||
| Other than super photo mode | Document glass 25 to 400% | |
| RSPF 50 to 200% | ||
| Super photo mode | Document glass 50 to 200% | |
| RSPF 50 to 141% | ||
AUTOMATIC RATIO SELECTION
The ratio is automatically selected based on the original size and paper size.
1 Place the original(s). (p.22, p.23)
The original size appears in the touch panel.

- If the original size does not appear in the touch panel, specify the original size manually. (p.47)
- Automatic ratio selection is not possible if the original or paper is a non-standard size.
2 Touch the [PAPER SELECT] key and then select the desired paper size.
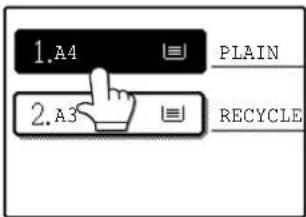
The selected key is highlighted and the paper selection screen closes.
![OLIVETTI d-Copia 2301 - Touch the [PAPER SELECT] key and then select the desired paper size. - 2](/content/2026/05/825301/images/2811e26b71a05162742cacf104da027d8fdcd75c256055b18797b078e2e03d63.jpg)
If paper of the desired size is not loaded in any of the trays, load paper of the required size in a paper tray or in the bypass tray. (p.19)
3 Touch the [AUTO IMAGE] key.

A suitable ratio is selected based on the original size and selected paper size. (The ratio appears in the touch panel.)
![OLIVETTI d-Copia 2301 - Touch the [AUTO IMAGE] key. - 2](/content/2026/05/825301/images/183ccd3963a2197b27737ca3b02f3938825536670418c20e0ba8ac55410163c5.jpg)
- When automatic ratio selection is selected, the [AUTO IMAGE] key is highlighted in the main screen.
- If the original and paper are in different orientations, the image is automatically rotated to match the paper orientation (for paper sizes A4 (8-1/2" x 11") or less).
- Rotation of the image can be disabled in the key operator programs. (See the "Key operator's guide".)
- If "IMAGE IS LARGER THAN THE COPY PAPER." appears in the touch panel, part of the image will be cut off in the copy.
4 Select the number of copies and any other desired settings, and then press the [START] key (®)
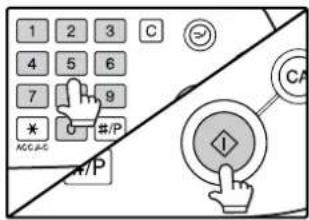
![OLIVETTI d-Copia 2301 - Select the number of copies and any other desired settings, and then press the [START] key (®) - 2](/content/2026/05/825301/images/b14fa51fbb8b90468b565c321a8cb26c3bdaf469dd0a4cca299b6e37ba54491c.jpg)
To cancel automatic ratio selection, touch the [AUTO IMAGE] key.
To cancel automatic ratio selection, touch the [AUTO IMAGE] key. Automatic ratio selection also turns off automatically when the enlargement key, the reduction key, or a [ZOOM] key (☐/☐) is touched to allow the ratio to be selected.
MANUAL RATIO SELECTION
There are five (four) preset reduction ratios and five (four) preset enlargement ratios. In addition, the [ZOOM] keys (☐) can be pressed to select the ratio in increments of 1%.
1 Place the original(s). (p.22, p.23)
2 Touch the [COPY RATIO] key.

3 Use the [MENU] key to select menu [br menu [ ] f2 copy ratio selection.
Menu 1
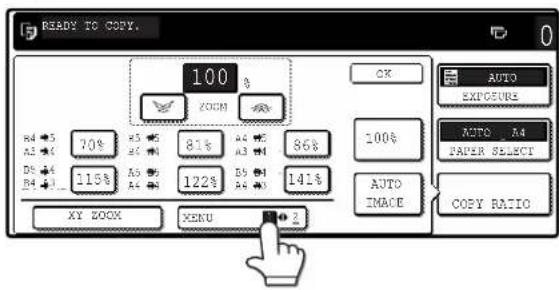
- Preset reduction keys : 70%, 81%, 86% (64%, 77%)
- Preset enlargement keys: 115%, 122% (121%, 129%), 141%
• [100%] key 100%
Menu 2
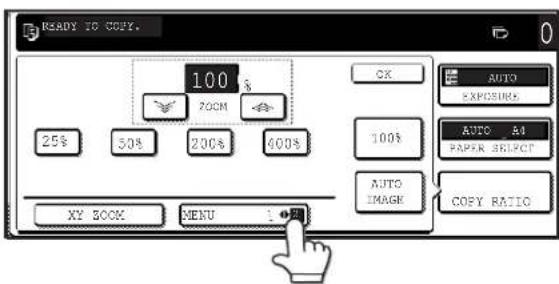
- Preset reduction keys : 25%, 50%
- Preset enlargement keys: 200%, 400%
• [100%] key 100%
4 Use the enlargement key or reduction key, or the [ZOOM] key (☐) to set the desired copy ratio.


The [ZOOM] keys (√) can be used to change the ratio in increments of 1% Touch the key to increase the ratio or the √ key to decrease the ratio. Continuing to touch a [ZOOM] key (√) makes the ratio change faster.

- Touch a reduction or enlargement key to set the approximate ratio, then touch the [key to decrease the ratio or the key to increase the ratio.
- If "IMAGE IS LARGER THAN THE COPY PAPER." appears, the selected copy ratio is too large for the paper size. However, if you press the [START] key ( ), a copy will be made.
5 Touch the [OK] key.

6 Make sure that a suitable paper size is automatically selected, or select another size using the [PAPER SELECT] key.
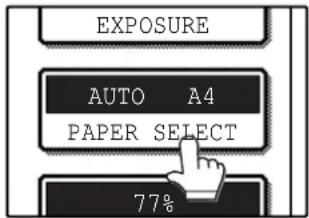
If AUTO PAPER SELECT is enabled, the appropriate copy paper size is automatically selected based on the original size and selected copy ratios.
7 Select the number of copies and any other desired copy settings, and then press the [START] key (®)

![OLIVETTI d-Copia 2301 - Select the number of copies and any other desired copy settings, and then press the [START] key (®) - 2](/content/2026/05/825301/images/1bb7978a9024f0c809144acf24b905da5e67b88329a38509fbccdb26af9fa065.jpg)
To return the ratio setting to 100%, touch the [COPY RATIO] key to display the ratio menu and then touch the [100%] key. (p.31, step 3)
SELECTING THE VERTICAL AND HORIZONTAL COPY RATIOS SEPARATELY (XY ZOOM copying)
The XY ZOOM feature allows the horizontal and vertical copy ratios to be changed independently.
Example: Vertical ratio set to 100% and horizontal ratio set to 50%.


- The AUTO IMAGE/MULTI SHOT/PAMPHLET COPY feature cannot be used in combination with the XY ZOOM function.
- To use the XY ZOOM feature with the DUAL PAGE COPY feature (p.43), set the DUAL PAGE COPY feature first and then the XY ZOOM feature.
1 Place the original(s). (p.22, p.23)
2 Touch the [COPY RATIO] key.

3 Touch the [XY ZOOM] key.

4 Touch the [X] key.

The [X] key is selected (highlighted) by default, so there is normally no need to perform this step (Go to step 5.). If the [X] key is not highlighted, perform this step.
5 Use the reduction, enlargement, and [ZOOM] keys (☐) to change the copy ratio in the horizontal (X) direction.

A fixed ratio key will not become highlighted when touched.

The [ZOOM] keys (☐) can be used to change the ratio in increments of 1% Touch the key to increase the ratio, or the ☐ key to decrease the ratio. Continuing to touch a [ZOOM] key (☐) makes the ratio change faster.
![OLIVETTI d-Copia 2301 - Use the reduction, enlargement, and [ZOOM] keys (☐) to change the copy ratio in the horizontal (X) direction. - 3](/content/2026/05/825301/images/e99258d091bb736ad650e19dd7daed21f9f195bc9988003c6609905a8c9a8379.jpg)
Touch a reduction or enlargement key to set the approximate ratio, then touch the [ ]key to decrease the ratio or the [ ]key to increase the ratio.
6 Touch the [Y] key.

7 Use the reduction, enlargement, and [ZOOM] keys (☐) to change the copy ratio in the vertical (Y) direction.

A fixed ratio key will not become highlighted when touched.
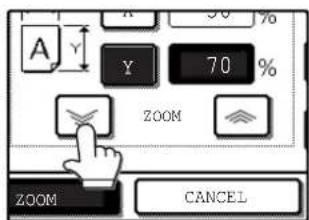
If you need to readjust the horizontal ratio, touch the [X] key again.
8 Touch the [OK] key.
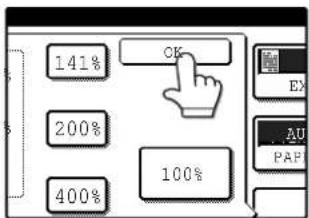
9 Make sure that a suitable paper size is automatically selected, or select another size using the [PAPER SELECT] key.

If AUTO PAPER SELECT is enabled, the appropriate copy paper size is automatically selected based on the original size and selected copy ratios.
10 Select the number of copies and any other desired copy settings, and then press the [START] key ( Ⓞ)
![OLIVETTI d-Copia 2301 - Select the number of copies and any other desired copy settings, and then press the [START] key ( Ⓞ) - 1](/content/2026/05/825301/images/d2d5d5c01821c4caef34b415117e789a3eebf152bb12471f51719293aee45221.jpg)
To cancel this function, touch the [CANCEL] key in the XY ZOOM screen.
INTERRUPTING A COPY RUN
A copy run can be temporarily interrupted to allow another copy job to be performed. When the other job is finished, the copy run will resume using the original copy settings.

Automatic two-sided copying, sort/group copying, staple sort, cover copy, pamphlet copy, mixed feeding, job build, job programs, or multi shot copying cannot be used for interrupt copying.
1 Press the [INTERRUPT] key (②to interrupt the copy run.
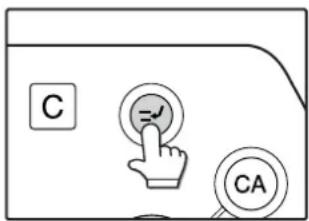
The [INTERRUPT] key ( ) blinks until the machine is ready for the interrupt job, after which it lights steadily.
If you decide to cancel the interrupt job while selecting settings, press the [INTERRUPT] key (⊕)
![OLIVETTI d-Copia 2301 - Press the [INTERRUPT] key (②to interrupt the copy run. - 2](/content/2026/05/825301/images/8018dbc837514b1b9d8a0c22a07cab6bbf3cbe0b87b2c6516cf8a8bb47b148b6.jpg)
- If audit mode is enabled, a message will appear prompting you to enter your account number. Enter your account number with the numeric keys. The copies that you make will be added to your account's count.
- If an original is being scanned when the [INTERRUPT] key (⊕is pressed, the interrupt job will begin after the original is scanned. If a copy is being printed, the interrupt job will begin after the copy is printed.
4 When the copy job is finished, press the [INTERRUPT] key (⊕ and remove the original(s).

5 Replace the previous original(s) and press the [START] key ( ) to resume copying.
Replace only the originals that have not yet been scanned.
2 Remove the previous original(s) and place the original(s) of the interrupt copy job. (p.22, p.23)
3 Select the number of copies and any other desired copy settings, and then press the [START] key (②)

The interrupt copies will be offset from the previous copies. (Offset function, p.35)
This chapter explains special finishing functions and other convenient functions.
COPY FINISHING FUNCTIONS
This section explains the sort, group, and offset functions, as well as the staple sort function which is used to staple output collated with the sort function when a finisher is installed.
SORT COPY
This function is used to collate sets of copies. The copies are delivered to the centre tray, and to other trays when a job separator tray or finisher is installed.

flowchart
graph TD
    A["1"] --> B["2"]
    A --> C["3"]
    B --> D["4"]
    C --> E["5"]
    D --> F["6"]
    E --> F
    style A fill:#ccc
    style B fill:#ccc
    style C fill:#ccc
    style D fill:#ccc
    style E fill:#ccc
    style F fill:#ccc
GROUP COPY
This function is used to group sets of copies by page. The copies are delivered to the centre tray, and to other trays when a job separator tray or finisher is installed.

flowchart
graph TD
    A["1"] --> B["2"]
    A --> C["3"]
    B --> D["4"]
    C --> D
    D --> E["5"]
    D --> F["6"]
    D --> G["7"]
OFFSET FUNCTION
Each set of copies is offset from the previous set in the output tray, making it easy to distinguish one set from another. (The offset function can be used in the centre tray or in the offset tray of the finisher.)
Offset function "ON" Offset function "OFF"

natural_image
Two 3D illustration of stacked rectangular panels, no text or symbols presentEnabling the offset function
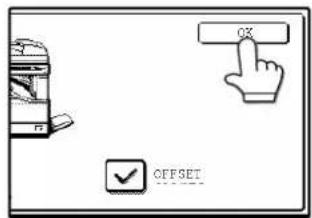
The offset function operates when a checkmark appears in the [OFFSET] checkbox, which is displayed by touching the [OUTPUT] key. (If a checkmark doesn't appear, touch the checkbox.)
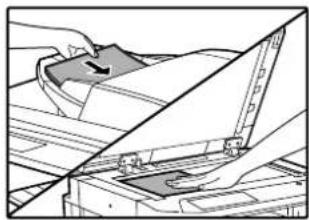
1 Place the originals in the RSPF or on the document glass. (p.22, p.23)
natural_image
Illustration of a hand operating a mechanical device with a ruler, no text or symbols presentIf originals are placed in the RSPF, the sort function is automatically selected. (To disable this function, see the "Key operator's guide".)
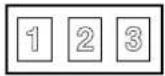
Example: 5 sets of copies or 5 copies per page of 3 originals
Originals
2 Touch the [OUTPUT] key.
![OLIVETTI d-Copia 2301 - Touch the [OUTPUT] key. - 1](/content/2026/05/825301/images/b624b4c8017c2616392aaa227efafc8ef5e5f206b050b219d3d927588fec29de.jpg)
flowchart
graph TD
    A["2-SIDED COPY"] --> B["OUTPUT"]
3 Touch the [SORT] or [GROUP] key.

4 Touch the output tray that you wish to use.

The output tray can only be selected when a job separator or finisher is installed.

To enable the offset function (p.35), touch the [OFFSET] checkbox so that a checkmark appears. To disable the offset function, touch the [OFFSET] checkbox again to clear the checkmark.
5 Touch the [OK] key.
6 Select the number of copies and any other desired copy settings, and then press the [START] key ( )

7 [When using the RSPF:]
Copying will start after all the originals are scanned.
[When using the document glass:]
Replace the original with the next original and press the [START] key ( ) Repeat this step until all originals have been scanned, and then touch the [READ-END] key.
![PLACE NEXT ORIGINAL PRESS [START]. ALAIN FINISHED, PRINTS [READ END]. READ END](/content/2026/05/825301/images/4e378b27dd79984074a5941d88c2273b110d7552da7fda9308923a535090fbca.jpg)
The copies are grouped as follows:
Sort Group
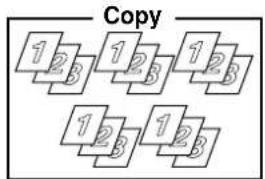

5 sets of copies 5 copies per page
If the memory becomes full while scanning the originals, "MEMORY IS FULL. PRESS [START] TO BEGIN COPYING OR [CA] TO CANCEL." will appear. To copy only the originals that have been scanned, press the [START] key (To cancel the job, press the [CLEAR ALL] key (
![OLIVETTI d-Copia 2301 - [When using the document glass:] - 4](/content/2026/05/825301/images/f81ef5777ca2bec024a828f297494f23f1cb513ef261f1744da849ba4294a0ba.jpg)
The number of originals that can be scanned into memory can be increased by increasing the memory allocation in the key operator programs, or by installing more memory. (See the "Key operator's guide".)
STAPLE SORT
(when the finisher (AR-FN5N) is installed)
This function collates the copies, staples each set, and delivers the sets to the offset tray. The staple sort function can only be used when a finisher is installed.
| Stapling position | Portrait orientation | Landscape orientation | ||
| Top left corner | 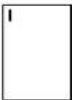 | Available paper sizes:A4 and B5 (8-1/2" x 11")Stapling capacity:For each size, up to 30 sheets can be stapled. |  | Available paper sizes: A3, B4 and A4R, (11" x 17", 8-1/2" x 14", 8-1/2" x 13", 8-1/2" x 11" R)Stapling capacity:For each size, up to 30 sheets can be stapled. |
ORIENTATION OF THE ORIGINAL AND STAPLING POSITIONS
If the orientation of the originals does not match that of the copy paper, the images will be rotated. The stapling position varies with the orientation of the original.
Using the RSPF
Insert the originals face up.
Using the document glass
Place each original face down.


When copying B4 or A3 (8-1/2" x 14" or 11" x 17") vertically oriented originals, the copies will be stapled at the position shown below.
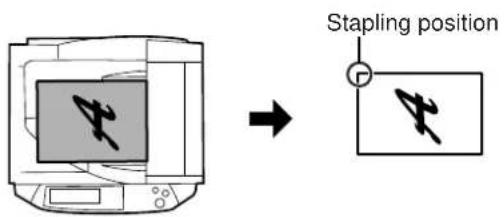
RSPF
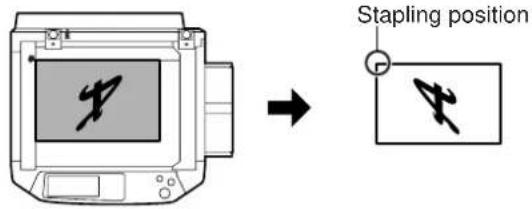
Document glass

- When using letterhead paper in the staple sort, load the paper with the letterhead to the front or to the right as shown in the diagram.


- Different sized originals cannot be copied on the corresponding sizes of paper.
- The staple sort function cannot be used if disabled in the key operator programs. (See the "Key operator's guide".)
• The offset function (p.35) cannot be used.
1 Place the original(s). (p.22, p.23)
2 Touch the [OUTPUT] key.
flowchart
graph TD
    A["2-SIDED COPY"] --> B["OUTPUT"]
3 Touch the [STAPLE SORT] key.

When the [STAPLE SORT] key is selected, the offset tray is automatically selected as the output tray. The top tray and centre tray cannot be used.
4 Touch the [OK] key.

5 Select the number of copies and other copy settings, and then press the [START] key (♀)

6 [When using the RSPF:]
Copying will start after all originals have been scanned.
[When using the document glass:]
Replace the original with the next original and press the [START] key ( ) Repeat this step until all originals have been scanned, and then touch the [READ-END] key.
![PLACE NEXT ORIGINAL. PRESS [STARI]; ADMIN FINISHING. PRESS [READ-END]. READ-RED](/content/2026/05/825301/images/25a1794fe8cef5425ac48eb3b1385d392b3bef959c8064198c4f56ae9b63ab56.jpg)
If the memory becomes full while scanning the originals, "MEMORY IS FULL. PRESS [START] TO BEGIN COPYING OR [CA] TO CANCEL." will appear. To copy only the originals that have been scanned, press the [START] key (To cancel the job, press the [CLEAR ALL] key (A

The number of originals that can be scanned into memory can be increased by increasing the memory allocation in the key operator programs, or by installing more memory. (See the "Key operator's guide".)
SPECIAL MODES
When the [SPECIAL MODES] key in the main screen of copy mode is touched, the special modes screen will appear. This screen contains the following special function keys.
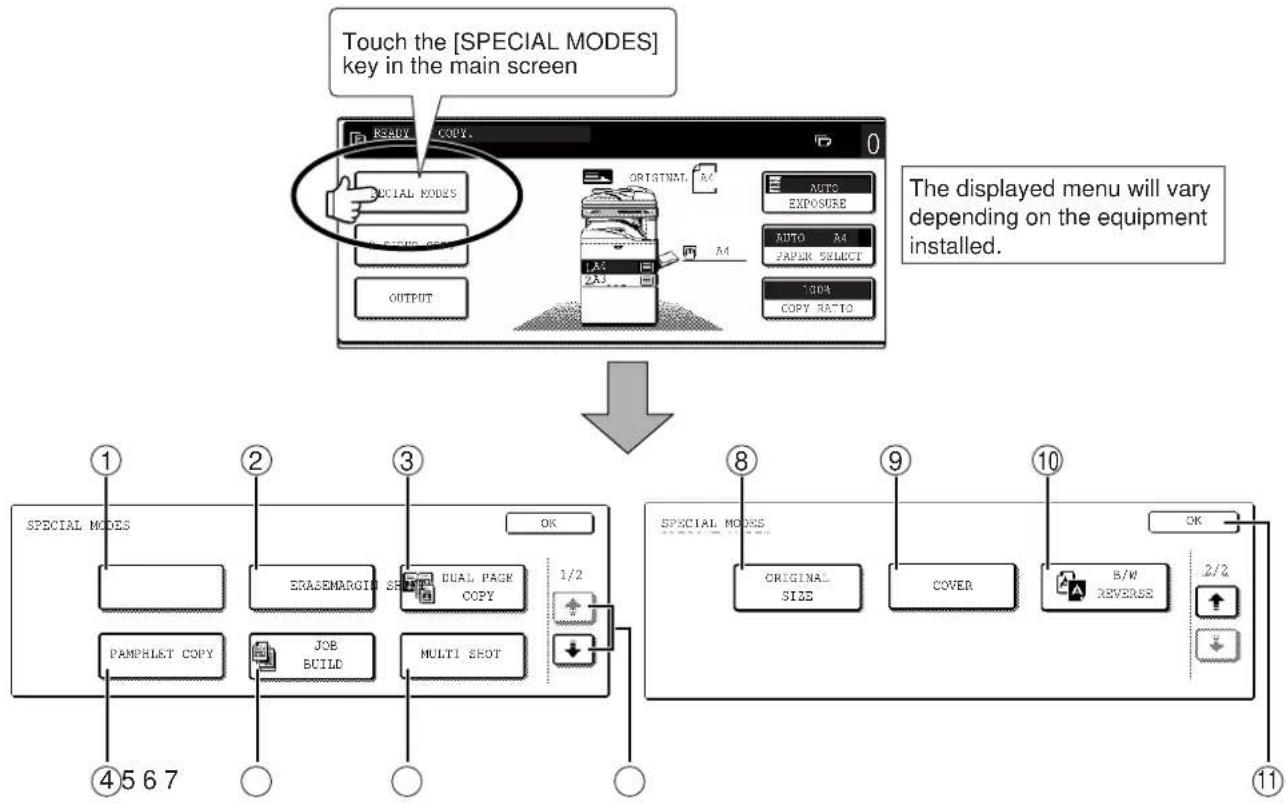
flowchart
graph TD
    A["Touch the [SPECIAL MODES"] key in the main screen] --> B["Rebuild COPY"]
    B --> C["ORIGINAL M4"]
    C --> D["AUTO M4"]
    D --> E["PAPER SELECT"]
    E --> F["1003 COPY RATIO"]
    G["SPECIAL MODES"] --> H["OK"]
    H --> I["DUAL PAGE COPY"]
    I --> J["1/2"]
    J --> K["PAMPHLET COPY"]
    K --> L["JOE BUILD"]
    L --> M["MULTI SHOT"]
    N["SPECIAL MODES"] --> O["ORIGINAL SIZE"]
    O --> P["COVER"]
    P --> Q["B/W REVERSE"]
    Q --> R["2/2"]
    R --> S["OK"]
    style A fill:#f9f,stroke:#333
    style G fill:#ccf,stroke:#333
    style N fill:#cfc,stroke:#333
① [MARGIN SHIFT] key (p.41)
Use this to shift the image on the copy paper to create binding margins.
② [ERASE] key (p.42)
Use this to erase peripheral shadows that occur when making copies of books and other thick originals.
③ [DUAL PAGE COPY] key (p.43)
Use this to make separate copies of the left and right pages of bound documents.
④ [PAMPHLET COPY] key (p.44)
The pamphlet copy function is used to arrange copies in the proper order for centre-stapling and folding into a booklet. Two original pages are copied onto each side of the paper, such that a total of four pages are copied onto one sheet.
⑤ [JOB BUILD] key (p.45)
Use this when you need to copy more originals than can be placed in the RSPF at once. This allows you to divide the originals into sets and scan them sequentially in the RSPF.
⑥ [MULTI SHOT] key (p.46)
The multi shot copy function is used to copy two or four originals onto one sheet of copy paper in any of four layout patterns.
⑦ (key, () key
Use these to change pages in the special functions screen.
⑧ [ORIGINAL SIZE] key (p.47)
Use to manually select the original size. When the original size is selected, the auto ratio select function will automatically select an appropriate ratio based on the paper size.
⑨ [COVER] key (p.48)
Press this to use a different type of paper for front and back covers (When the RSPF is installed.).
⑩ [B/W REVERSE] key (p.50)
Use to reverse black and white areas.
⑪ [OK] key
Touch to return to the main screen of the copy mode.

Some functions cannot be used in combination with each other. If a prohibited combination of functions has been selected, a message will appear in the touch panel.
GENERAL PROCEDURE FOR USING THE SPECIAL FUNCTIONS
1 Touch the [SPECIAL MODES] key.
![OLIVETTI d-Copia 2301 - Touch the [SPECIAL MODES] key. - 1](/content/2026/05/825301/images/80f564bf6c3cf75d6c5119b5e7aa887221d25b248a2e7a0acd10d0b80417f130.jpg)
flowchart
graph TD
    A["SPECIAL MODES"] --> B["2-SIDED COPY"]
2 Touch the key of the desired special mode.
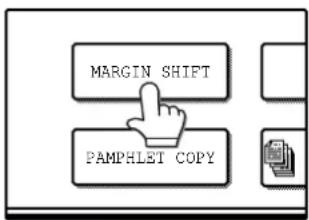
Example: Selecting the margin shift function
Procedures for modes that require further settings are explained starting on the next page.
MARGIN SHIFT COPY
The margin shift function is used to automatically shift the text or image on the copy paper approximately 10 mm (1/2") in its initial setting.
One-sided copying
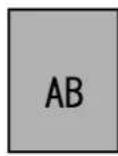

Image shifted to the right
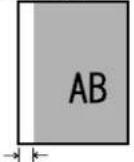
Margin
Image shifted to the left

Margin
Image shifted down
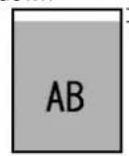
Margin
Two-sided copying

Or
Image shifted to the right


Margin
Image shifted to the left

Margin
Image shifted down

Margin
• Right, left or down can be selected for the shift direction as shown in the illustration.
- The shift width (margin) can be set from 0 mm to 20 mm in increments of 1 mm (0" to 1" in increments of 1/8").
- If [DOWN] key is selected, set the original(s) so that the margin to be increased is set to the rear side of the RSPF or the document glass.

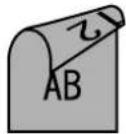
1 Touch the [MARGIN SHIFT] key in the special modes screen.

The margin shift setting screen will appear.
The margin shift icon (etc.) will also appear in the screen to indicate that the function is turned on.
2 Select the shift direction.

Touch the [RIGHT], [LEFT], or [DOWN] key. The selected key will be highlighted.
3 Adjust the shift width as needed and touch the [OK] key.
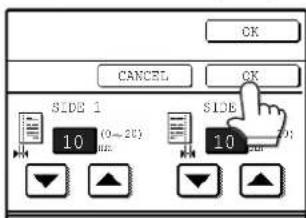
Use the and keys to set the shift width. The shift width can be set from 0 mm to 20 mm in increments of 1 mm (0" to 1" in increments of 1/8").
4 Touch the [OK] key in the special modes screen.
You will return to the main screen of copy mode.
About the steps that follow
If you are using the document glass, see page 22. If you are using the RSPF, see page 23.

- When margin shift is selected, rotation copying will not function.
- This feature cannot be used with paper that is not a standard size.
- To cancel the margin shift function, touch the [CANCEL] key in the margin shift setting screen. (See the screen of step 3.)
ERASE COPY
The erase function is used to erase the shadow lines on copies that are produced when copying thick originals or books. The erase modes that can be selected are shown below. The erase width is initially set to 10 mm (1/2").

flowchart
graph TD
    A["A"] --> B["A"]
    A --> C["AB"]
    C --> D["AB"]
    E["AB"] --> F["AB"]
EDGE ERASE
Eliminates shadow lines around the edges of copies caused when heavy paper or a book is copied.
CENTRE ERASE
Eliminates shadow lines produced by the bindings of bound documents.
EDGE + CENTRE ERASE
Eliminates both the shadow lines around the edges of copies and the shadow at the centre.
1 Touch the [ERASE] key in the special modes screen.
![OLIVETTI d-Copia 2301 - Touch the [ERASE] key in the special modes screen. - 1](/content/2026/05/825301/images/bf184a8dd45b87605cc875663920a426520b7618a4bdcf464d524872dce74dad.jpg)
flowchart
graph TD
    A["ERASEFT"] --> B["JOB BUILD"]
    C["XY"] --> B
    D["MU"] --> B
The erase setting screen will appear.
The erase icon (etc.) will also appear in the screen to indicate that the function is turned on.
2 Select the desired erase mode.

Select one of the three erase modes. The selected key will be highlighted.
3 Adjust the erase width as needed and touch the [OK] key.

Use the and keys to adjust the erase width. The erase width can be set from 0 mm to 20 mm in increments of 1 mm (0" to 1" in increments of 1/8").
4 Touch the [OK] key in the special modes screen.
You will return to the main screen of copy mode.
About the steps that follow
If the document glass is being used, see page 22. If the RSPF is being used, see page 23.

- This feature cannot be used with non-standard size originals.
- This feature cannot be selected when mixed feeding (p.25) is used.
- To cancel the erase copy function, touch the [CANCEL] key in the erase setting screen. (See the screen of step 3.)
DUAL PAGE COPY
The dual page copy function produces separate copies of two adjoining pages on the document glass. It is especially useful when copying books and other bound documents.
[Example] Copying the right and left pages of a book
Book original Dual page copy

- A reduction setting can be selected when using the dual page copy function, however, an enlargement setting cannot be selected.
- The dual page copy function can only be used when copying from the document glass. The RSPF cannot be used.
• B5 and A4 (8-1/2" x 11") paper can be used.
1 Touch the [DUAL PAGE COPY] key in the special modes screen.
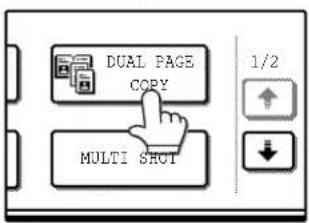
The [DUAL PAGE COPY] key is highlighted to indicate that the function is enabled, and the dual page copy icon (which will appear in the screen.
2 Touch the [OK] key in the special modes screen.
You will return to the main screen of copy mode.
3 Place the originals on the document glass. (p.22)

When copying book originals:
When copying a thick book, press down gently on the book to flatten it against the document glass.

natural_image
Diagram of a hand pressing down on a mechanical component (no text or symbols visible)4 Make sure that B5 or A4 (8-1/2" x 11") size paper is selected.
If B5 or A4 (8-1/2" x 11") size paper is not selected, touch the [PAPER SELECT] key to select B5 or A4 (8-1/2" x 11") paper.
5 Select the number of copies and any other desired copy settings, and then press the [START] key ( )

![OLIVETTI d-Copia 2301 - Select the number of copies and any other desired copy settings, and then press the [START] key ( ) - 2](/content/2026/05/825301/images/4ad4088d45a515130a368815061bdb556fdcc37ef6f58583116ad2804c8095dc.jpg)
- To cancel the dual page copy function, touch the [DUAL PAGE COPY] key in the special modes screen. (The key will no longer be highlighted.) (See the screen of step 1.) - To erase shadows caused by the document binding, use the edge erase function (p.42) (Centre Erase and Edge + Centre Erase cannot be used with the dual page copy function.)
PAMPHLET COPY
The pamphlet copy function is used to arrange copies in the proper order for centre-stapling and folding into a booklet. Two original pages are copied onto each side of the copy paper, such that a total of four pages are copied onto each sheet.
This function is convenient for arranging copies into an attractive booklet or pamphlet.
[Example]: Copying 8 originals with pamphlet copy
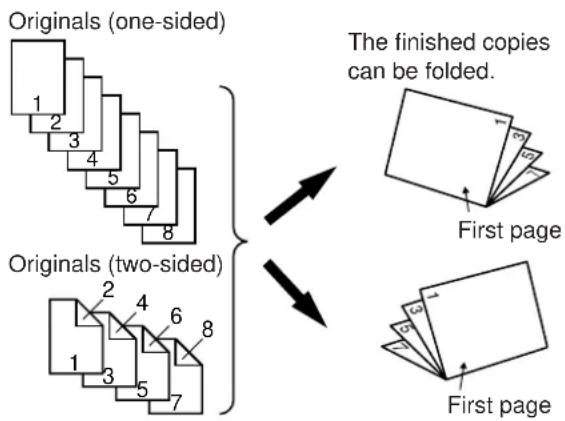
1 Touch the [PAMPHLET COPY] key in the special modes menu screen.
The pamphlet copy setting screen will appear. The pamphlet copy icon (etc.) will also appear in the upper left corner of the screen to indicate that the function is enabled.
2 Specify whether 1-sided or 2-sided originals will be copied.

3 Select the binding position ([LEFT BINDING] or [RIGHT BINDING]) and then touch the [OK] key in the pamphlet copy setting screen.

You will return to the special modes menu screen.
- Scan the originals in order from the first page to the last page. The order of copying will be automatically adjusted by the machine.
- Either left binding (opening from right to left) or right binding (opening from left to right) can be selected.
- Four originals will be copied onto one sheet. Blank pages may be automatically added at the end, depending on the number of the originals.
4 Touch the [OK] key in the special modes screen.
You will return to the main screen of copy mode.
5 Place the original(s). (p.22, p.23)
6 Make sure that a suitable paper size has been automatically selected.

If the desired copy paper size is not selected, use the [PAPER SELECT] key to select the paper size. After the paper size is selected, touch the [AUTO IMAGE] key. A suitable ratio will be automatically selected.
7 Select the number of copies and any other desired copy settings, and then press the [START] key ( Ⓞ
8 [When using the RSPF:]
Copying will start after all originals have been scanned.
[When using the document glass:]
Replace the original with the next original and press the [START] key ( ) Repeat this step until all originals have been scanned, and then touch the [READ-END] key.
When the pamphlet copy function is selected, two-sided copying will be automatically enabled.
![OLIVETTI d-Copia 2301 - [When using the document glass:] - 1](/content/2026/05/825301/images/75829bdf5fe1c005b9494ae0d4bc1683b3565bdb49a91affee0e1593340e8261.jpg)
To cancel the pamphlet copy function, touch the [CANCEL] key in the pamphlet copy setting screen. (See the screen of step 2.)
JOB BUILD MODE
Use this function when you need to copy more originals than can be placed in the RSPF at once. (The maximum number of originals that can be placed in the RSPF at once is 100.)

- If the memory becomes full while scanning the originals, "MEMORY IS FULL. PRESS [START] TO BEGIN COPYING OR [CA] TO CANCEL." will appear. To copy only the originals that have been scanned, press the [START] key ( ) To cancel the job, press the [CLEAR ALL] key ( ).
- Depending on the content of the originals, the memory may become full before 100 originals have been scanned. In this case, press the [START] key (①) to copy the originals that have been scanned, and then place the originals that weren't scanned in the RSPF once again and repeat the copy procedure.
- To increase the number of originals that can be scanned, install more memory or increase the memory allocation in the key operator programs. (See the "Key operator's guide".)
Example: Copying 130 sheets (A4 (8-1/2" x 11") size originals)
Originals

100 sheets 30 sheets
* Divide the originals into sets so that each set is no more than 100 pages. Scan the sets in order beginning from the first page of set A.
1 Touch the [JOB BUILD] key in the special modes menu screen.
![OLIVETTI d-Copia 2301 - Touch the [JOB BUILD] key in the special modes menu screen. - 1](/content/2026/05/825301/images/163e0ccb4796db73dbe9e0b50bfd70b8c7f446674066d5a6c9b030e9c51f7618.jpg)
flowchart
graph TD
    A["ERASE"] --> B["JOB BUILD"]
    C["MUT"] --> B
    D["Y"] --> B
The [JOB BUILD] key is highlighted.
The job build copy icon
(☐will also appear in the screen to indicate that the function is enabled.
2 Touch the [OK] key in the special modes screen.

You will return to the main screen of copy mode.
3 Place the original(s) in the RSPF. (p.23)
4 Make sure that a suitable paper size is selected, select the number of copies and any other desired copy settings, and then press the [START] key ( )

Scanning begins. When scanning of the first set of originals (A in the above example) is finished, insert the second set and press the [START] key ( )
Repeat this step until all the remaining originals (B in the above example) have been scanned. Remove each scanned set of originals before inserting the next set.
5 Touch the [READ-END] key.
![PLACE NEXT ORIGINAL. PRESS [START]. WHEN FTYSFED, PRESS [READ-END]. MAKE THE .1.](/content/2026/05/825301/images/7449007de99f81e334cb998577412d69905a4955b3eb3e3ae298c4553b550b60.jpg)
Copying begins.
![OLIVETTI d-Copia 2301 - Touch the [READ-END] key. - 2](/content/2026/05/825301/images/fe32b9352c4b5bc368941670659023b3d3431f7d4ecb4e587b45ac0cec8a382a.jpg)
To cancel the job build mode function, touch the [JOB BUILD] key in the special modes screen so that it is no longer highlighted. (See the screen of step 1.)
MULTI SHOT COPY
The multi shot copy function is used to copy two or four originals onto one sheet of copy paper in a specified order.
Example: Copying four originals onto one sheet of paper
(Page number: 4 in 1 ( ) layout: ( ))
One-sided copy of one-sided original

flowchart
graph TD
    A["1"] --> B["2"]
    B --> C["3"]
    C --> D["4"]
    D --> E["5"]
    E --> F["6"]
    F --> G["7"]
    H["1"] --> I["2"]
    I --> J["3"]
    J --> K["4"]
    K --> L["5"]
    L --> M["6"]
    M --> N["7"]
    O["1"] --> P["2"]
    P --> Q["3"]
    Q --> R["4"]
    R --> S["5"]
    S --> T["6"]
    T --> U["7"]
    V["1"] --> W["2"]
    W --> X["3"]
    X --> Y["4"]
    Y --> Z["5"]
    Z --> AA["6"]
    AA --> AB["7"]
    AC["1"] --> AD["2"]
    AD --> AE["3"]
    AE --> AF["4"]
    AF --> AG["5"]
    AG --> AH["6"]
    AH --> AI["7"]
    AJ["1"] --> AK["2"]
    AK --> AL["3"]
    AL --> AM["4"]
    AM --> AN["5"]
    AN --> AO["6"]
    AO --> AP["7"]
    AQ["1"] --> AR["2"]
    AR --> AS["3"]
    AS --> AT["4"]
    AT --> AU["5"]
    AU --> AV["6"]
    AV --> AW["7"]
1 Touch the [MULTI SHOT] key in the SPECIAL MODES menu screen.

The multi shot copy setting screen will appear. The multi shot copy icon (1, 2, 3, 4 etc.) will also appear in the screen to indicate that the function is enabled.
2 Select the number of originals to be copied onto one sheet in the multi shot copy selection screen.

3 Select the layout.

Select the order in which the originals will appear on the copy.
- When using the multi shot copy function, place the originals, select the desired paper size, and select the copy mode before selecting the multi shot copy function in the special modes screen.
- When using the multi shot copy function, the appropriate copy ratio will be automatically set based on the original size, paper size, and the number of originals to be copied onto one sheet. The minimum reduction ratio is 25%. (The minimum ratio is 50% when SUPER PHOTO is selected for the original image type in the copy exposure settings or when the RSPF is used.) Depending on the original size, paper size, and the number of originals to be copied onto one sheet, portions of original images may be cut off.
4 Select a borderline setting.

Select [☐], o☐ [☐].
5 Touch the [OK] key in the multi shot setting screen.
You will return to the special modes menu screen.
6 Touch the [OK] key in the special modes menu screen.
You will return to the main screen of copy mode.
7 Select the number of copies and any other desired copy settings, and then press the [START] key ( Ⓞ)
8 [When using the RSPF:]
Copying will start after all originals have been scanned.
[When using the document glass:]
Replace the original with the next original and press the [START] key ( ) Repeat this step until all originals have been scanned, and then touch the [READ-END] key if necessary.
![OLIVETTI d-Copia 2301 - [When using the document glass:] - 1](/content/2026/05/825301/images/2359f6d1be59633d0d38ebfde950c47aba634967fccafe84e2d356c94005dd3a.jpg)
- The images may be rotated depending on the number of originals and the orientation of the originals and copy paper.
- To cancel the multi shot copy function, touch the [CANCEL] key in the multi shot setting screen (the screen of step 2).
ORIGINAL SIZE
If you wish to use the paper other than the automatically selected original size, original size setting is specified by the special modes. The mix feeding setting (p.25) is also selected here.
1 Touch the □key and then touch the [ORIGINAL SIZE] key in the special modes menu screen.
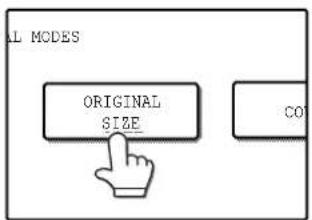
The original size setting screen will appear.
5 Touch the [OK] key in the special modes menu screen.
You will return to the main screen of the copy mode.
![OLIVETTI d-Copia 2301 - Touch the [OK] key in the special modes menu screen. - 1](/content/2026/05/825301/images/75701b8291037abd1ffd8fcbfbddd621db1070dedcd95dbb8ed852f7bf7a3c3c.jpg)
To select mixed feeding, select the "MIX SIZE ORIGINAL FEEDING MODE" checkbox. Mixed feeding is explained on page 25.
2 Touch the [MANUAL] key.

3 Select the original size.
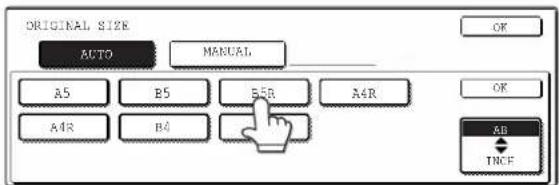
[MANUAL] key is highlighted and the selected paper size is displayed.

To select an INCH size original, touch the [INCHAB] key. INCH sizes will appear.
4 Touch the inside [OK] key.
You will return to the special modes menu screen.
COVER COPY
Cover copy mode is used to add a cover to the front or back, or both the front and back, of a multipage document. To use cover copy mode, the RSPF must be used.
Copying onto a cover Not copying onto a cover
One-sided copies from one-sided or two-sided originals

flowchart
graph TD
    A["One-sided originals"] --> B["Cover original"]
    B --> C["One-sided copies (copying onto a cover)"]
    C --> D["Back cover (no copying)"]
    C --> E["Front cover (can copy onto front side)"]
    F["Two-sided originals"] --> G["Cover original"]
    G --> H["One-sided copies (copying onto a cover)"]
    H --> I["Back cover (no copying)"]
    H --> J["Front cover (can copy onto front side)"]
Two-sided copies from one-sided or two-sided originals

- A front cover, back cover, or both a front and a back cover can be selected.
- You can specify whether or not the front cover is copied on.
- Copying is not possible on either side of a back cover.
One-sided copies from one-sided or two-sided originals
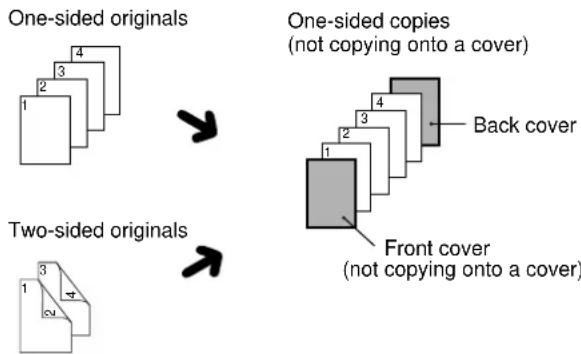
flowchart
graph TD
    A["One-sided originals"] --> B["Two-sided originals"]
    B --> C["One-sided copies (not copying onto a cover)"]
    C --> D["Back cover"]
    C --> E["Front cover (not copying onto a cover)"]
Two-sided copies from one-sided or two-sided originals

- A front cover, back cover, or both a front and a back cover can be selected.
1 Touch the ☐ key and then touch the [COVER] key in the special modes menu screen.

The cover setting screen will appear.
The cover icon (etc.) will also appear in the screen to indicate that the function is turned on.
2 Select the cover(s) that you wish to add.

To add only a front cover, touch the [FRONT] key. To add only a back cover, touch the [BACK] key. To add both a front and back cover, touch the [FRONT+BACK] key.
3 Specify whether or not the front cover is to be copied on.

Select [YES] or [NO] in the touch panel. If [YES] is selected, the first page of the document will be copied onto the front cover sheet.
4 Touch the [OK] key in the cover setting screen.
Return to the special modes screen.
5 Touch the [OK] key in the special modes screen.
You will return to the main screen of copy mode.
6 Load the cover paper to be used into the bypass tray.

natural_image
Illustration of a hand inserting a card into a device (no text or symbols visible)Load the same size of paper as the paper to be used for the copy job.
About the steps that follow See page 23.

- It is not possible to copy on the inside of a front cover, nor on either side of a back cover.
- Be sure to place the originals in the RSPF. The document glass cannot be used for this function.
- During cover copying, stream feeding mode will not function even if enabled in the key operator programs. (See the "Key operator's guide".)
- To cancel the cover copy function, select the cover copy function again and touch the [CANCEL] key. (See the screen of step 2.)
B/W REVERSE COPY
The B/W REVERSE feature is used to reverse black and white in a copy to create a negative image.
original B/W reverse copy

When the B/W reverse function is selected, the exposure mode will be automatically set to TEXT mode. Other exposure modes cannot be selected. If B/W reverse is cancelled, TEXT mode will not automatically be cancelled.
1 Touch the □key and then touch the [B/W REVERSE] key in the special modes menu screen.

The [B/W REVERSE] key is highlighted.
The B/W reverse icon
(A) will also appear in the screen to indicate that the function is enabled.
2 Touch the [OK] key in the special modes screen.
You will return to the main screen of copy mode.
About the steps that follow
If the document glass is being used, see page 22. If the RSPF is being used, see page 23.
![OLIVETTI d-Copia 2301 - Touch the [OK] key in the special modes screen. - 1](/content/2026/05/825301/images/bcef017a3d3599ce547ddaac4ca7c5333affb3879cb5bc62eb1bca5e8a8468f7.jpg)
To cancel the B/W reverse copy function, touch the [B/W REVERSE] key in the special modes screen. (The key will no longer be highlighted.) (See the screen of step 1.)
CARD SHOT
The front and back of a card can be copied onto one sheet of paper.
This function is convenient for making copies for certification purposes and helps save paper.

flowchart
graph LR
    A["Original CARD Front of card Back of card"] --> B["Copy CARD"]
    B --> C["Example: Portrait 8-1/2" x 11" (A4) size"]
    B --> D["Example: Landscape 8-1/2" x 11" (A4) size"]
● Copying is only possible on standard size paper.
● The image cannot be rotated when using this function.
1 Make sure that a suitable paper size is selected, or select another size using the [PAPER SELECT] key.
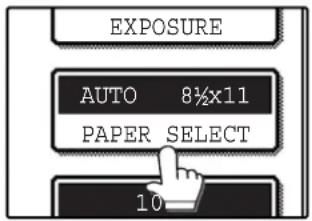
3 Enter the X dimension (width) and Y dimension (length) of the original card with the keys

2 Touch the ☐ key and then touch the [CARD SHOT] key in the special modes screen.

The CARD SHOT setting screen will appear. A card shot icon (☐) will also appear in the upper left corner of the screen to indicate that the function is turned on.
- X (width) is initially selected. Enter X dimension and then touch the Y (Y key to enter Y dimension.
- To change the X or Y value back to the default value, touch the [SIZE RESET] key. The default values can be changed in the key operator programs. (See "CARD SHOT SETTINGS" on page 5 of this manual.)
- To have the images enlarged or reduced by a suitable ratio based on the entered original size so that the front and back sides fit into the selected paper size, touch the [FIT TO PAGE] key.
4 Touch the outer [OK] key.
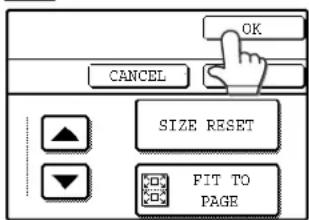
You will return to the main screen of copy mode.
5 Place the original on the document glass.
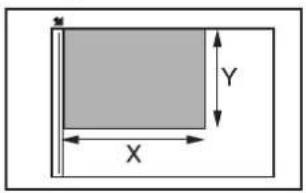
Place the front side of the original face down and close the document cover/RSPF.
6 Select the number of copies and any other desired copy settings, and then press the [START] key ( )
The front side of the card is scanned.
7 Place the back side of the original face down on the document glass.
8 Press the [START] key (①)
The back side of the card is scanned and copying begins.
![OLIVETTI d-Copia 2301 - Press the [START] key (①) - 2](/content/2026/05/825301/images/1cffce3888e6f72c93928798d51f4e3a8e21c8a48c3f1d25721d2e66582212e8.jpg)
- The original must be placed on the document glass. The RSPF cannot be used.
- Even when [FIT TO PAGE] is selected, you can touch the [COPY RATIO] key in the main screen of copy mode to manually select the ratio.
- To cancel the card shot function, touch the [CANCEL] key in the card shot setting screen (the screen of step 4).
CUSTOM SETTINGS
The custom settings let you adjust certain features of the machine to better suit your needs. The custom settings include the following settings:
- TOTAL COUNT...... This displays the number of pages output by the machine. (p.53)
- DISPLAY CONTRAST ...... This is used to adjust the contrast of the touch panel. (p.53)
- LIST PRINT* 1....This is used to print a setting list or a font list. (p.53)
- CLOCK.... This is used to set the date and time of the machine's built-in clock. (p.53)
- TRAY SETTINGS ....This is used to configure the paper type and paper size settings for each tray, and select whether or not automatic switch over to another tray with the same size and type of paper will take place if the paper runs out during continuous printing. (p.53)
The following settings are explained in detail in the operation manual for facsimile.
- ADDRESS CONTROL ^2 ......If your machine has the fax option, this setting is used to store fax numbers for automatic dialling. Group keys and user indexes can also be programmed.
- RECEIVE MODE* ^2 .....This is used to select the fax receive mode (automatic or manual).
- FAX DATA FORWARD* 2...... This is used to forward faxes received in memory to another destination.
- KEYBOARD SELECT* 3 ....When using the fax or network scanner function, use this setting to change the layout of the keyboard in the letter entry screen. (p.53)
- KEY OPERATOR PROGRAMS.. Settings for key operators (administrators of this machine). A key appears for these settings in the custom settings menu screen. For explanations of the settings, see the Key operator's guide. (For explanations of key operator programs for the fax option, see the operation manual for facsimile.)
*1 The fax option or network printer function must be installed.
*2 The fax option must be installed.
*3 The fax option or network scanner function must be installed.
GENERAL PROCEDURE FOR CUSTOM SETTINGS
1 Press the [CUSTOM SETTINGS] key.

2 Touch the key of the desired setting. The setting screen will appear.
Each of the custom settings is explained on the following pages.
The [TRAY SETTINGS] key is selected in the following example.

When the [TRAY SETTINGS] key is selected, the following screen appears.


- When a checkbox appears next to an item in a screen, touch the checkbox ( ) to select the item. A checkmark ( ) will appear to indicate that the item is selected.
In the above settings, tray 1 can be used for printer, copy, and fax mode. Tray 2 and tray 3 can only be used for copy mode.
- For a detailed explanation of the trays, see "CHANGING A TRAY'S PAPER TYPE AND PAPER SIZE SETTINGS" (p.19).
3 Touch the [OK] key in the setting screen to close it.
4 When you are ready to exit the custom settings, touch the [EXIT] key.
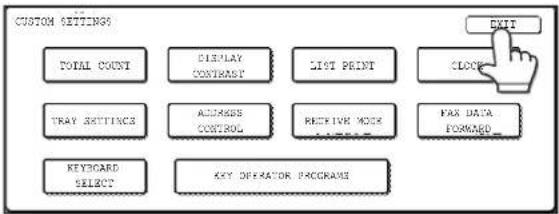
SETTINGS
Total count
The total page count display shows the following counts:
• Total number of copies and printed pages
• Number of pages fed through the RSPF
• Number of two-sided copies
• Number of times the stapler was used
• Number of pages sent using the network scanner function
• Number of sent and received fax pages
The counts that appear will vary depending on the peripheral equipment installed.
• Each sheet of paper that is A3 (11" x 17") size is counted as two sheets.
• Each sheet of paper used for automatic two-sided copying is counted as two sheets (A3 (11" x 17") paper is counted as four sheets.).
Display contrast
Screen contrast adjustment is used to make the touch panel easier to view under various lighting conditions. Touch the [LIGHTER] key to make the screen lighter, or the [DARKER] key to make the screen darker.
List print
Use this to print the PRINTER TEST PAGE, the FAX REPORT, or the SENDING ADDRESS LIST.
Clock
Use this to set the date and time of the machine's built-in clock. The date and time are used for functions that require date and time information.
Tray settings
The paper type, paper size, and enabled modes can be set for each tray. Automatic tray switching and disabling of two-sided printing on letterhead paper can also be set. See page 19 and 20 for details on setting the paper type and paper size.
- To select which trays can be used in each of copy, printer, and fax modes, select the checkboxes (☑) of the desired trays in each mode.
- When a tray runs out of paper in the middle of a job, the auto tray switching function automatically switches the paper source to another tray that has the same paper size and paper type settings.
(The auto tray switching function cannot be set for the bypass tray.)
Keyboard select
When using the fax or network scanner function, you can change the layout of the keyboard that appears in the letter entry screen. Select the layout that you find easiest to use.
The following three keyboard configurations are available:
- Keyboard 1 (QWERTY configuration)*
- Keyboard 2 (AZERTY configuration)
- Keyboard 3 (ABCDEF configuration)
*The default setting is "Keyboard 1".
(Example: Letter entry screen when Keyboard 3 is selected.)

4
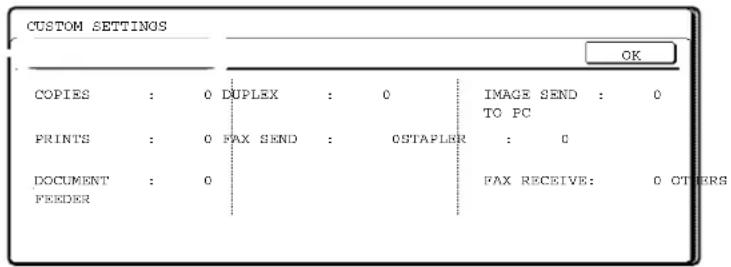
JOB PROGRAM MEMORY
If you frequently use the same settings for copy jobs, you can store in the settings in a job program. Up to 10 job programs can be stored, and the programs are retained even when the power is turned off. By storing frequently used copy settings in a program, you can eliminate the bother of selecting the settings each time you use them for a copy job.
- After a job program is stored, if any settings of the key operator programs related to the stored job program are prohibited, the related settings in the job program will not be recalled.
- If the overwriting of job programs is prohibited in the key operator programs, it will not be possible to overwrite or delete a job program.
- To exit job program memory mode, exit the job memory mode, press the [CLEAR ALL] key (CA) on the operation panel or touch the [EXIT] key on the touch panel.
STORING A JOB PROGRAM
1 Press the [#/key.

4 Select the copy settings that you wish to store in the program.
![IC STORE, MAKE SELECTIONS AND PRESS [OK], TO DELETE, PRESS (CANCEL). SPECIAL MODES 2-SLIDE COPY OUTPUT](/content/2026/05/825301/images/92e5df47df0c252c6fe122f6d8e9e9af1e4296b2ac9dd751eb59fb68a5b6b056.jpg)
The number of copies cannot be stored.
2 Touch the [STORE/DELETE] key.
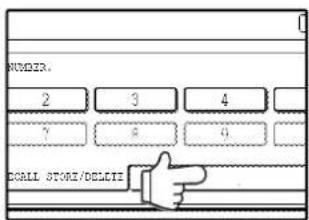
5 Touch the [OK] key.
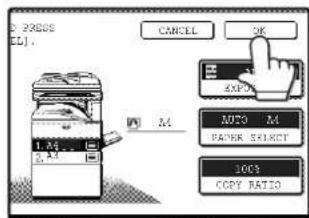
The selected settings will be stored under the program number selected in step 3.
3 Touch a program number from 1 to 10 in the storage register screen.
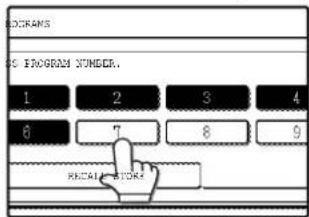

If a numeric key is selected that has already been programmed, a confirmation screen will appear. To replace the existing program with the new program, touch the [STORE] key and continue from step 4. If you do not wish to replace the existing program, touch the [CANCEL] key to return to the above screen and select a different numeric key.
EXECUTING A JOB PROGRAM
1 Press the [#/key.

2 Touch the program number key of the desired program.
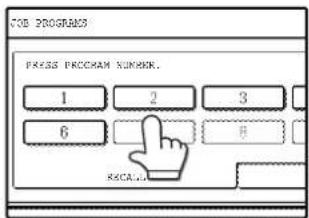
The job program will be executed. A number for which no job program has been stored cannot be selected.
3 Place the original, check the original size, and then set the number of copies and any other desired copy settings not stored in the program. When finished, press the [START] key (◦).
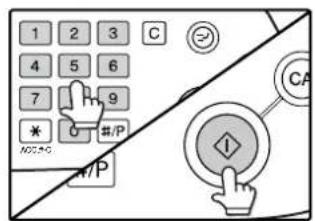
DELETING A STORED JOB PROGRAM
1 Press the [#/key.

2 Touch the [STORE/DELETE] key.

3 Select the program number of the program to be deleted.

If a number key for which no job program has been stored is selected, the proceed to step 4 on the previous page (for storing a job program).
4 Touch the [DELETE] key.
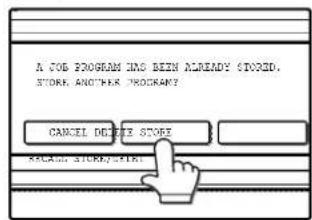
The selected program will be deleted and you will return to the screen of step 3. If the [CANCEL] key is touched, you will return to the screen of step 3 without deleting the program.
If you are finished deleting programs, touch the [EXIT] key in the screen of step 3 to exit.
AUDITING MODE
When auditing mode is enabled, a count is kept of the number of pages printed or copied by each account (maximum of 100 accounts). The counts can be viewed whenever necessary.

- Auditing mode can be enabled for all modes (copy mode, fax mode, network scanner mode, and printer mode) in the key operator programs. (See the "Key operator's guide".)
- To print in printer mode when auditing mode is enabled, enter your account number in the printer driver setup screen on your computer.
COPYING WHEN AUDITING MODE IS ENABLED
When auditing mode is enabled, the following account number entry screen appears.

1 Enter your account number (5 digits) with the numeric keys.

Each digit is indicated by an asterisk "*

- When a valid account number is entered, the number of copies already made by that account appears for several seconds on the initial screen.
- If a limit has been set in the key operator programs for the number of copies that can be made by the account, the remaining number that can be made is displayed in the message display together with the number of copies already made. (See the "Key operator's guide".)
2 When the copy job is finished, press the [ACC.#-C] key ()\*

The screen reverts to the account number entry screen.
![OLIVETTI d-Copia 2301 - When the copy job is finished, press the [ACC.#-C] key ()\* - 2](/content/2026/05/825301/images/c534244a14b20b7dc3efe0c9bad69d7504f80656dc484d700d9c94bb574b2af4.jpg)
- To perform an interrupt job when auditing mode is enabled, press the [INTERRUPT] key (The account number entry screen will appear. Enter your account number. When the interrupt job is finished, be sure to press the [INTERRUPT] key (For the [CLEAR ALL] key (To end interrupt mode.
- If an invalid account number is entered in step 1, the account number entry screen reappears.
- When ACCOUNT NUMBER SECURITY in the key operator programs is enabled (See the "Key operator's guide."), the following message will appear and operation will not be permitted for 1 minute if an invalid account number is entered 3 times in a row.
![OLIVETTI d-Copia 2301 - When the copy job is finished, press the [ACC.#-C] key ()\* - 3](/content/2026/05/825301/images/49fbbc453c1b53f22ad4b2bf2afa364bf8abf0f51360542786f1d295b700363f.jpg)
This chapter describes troubleshooting, misfeed removal, replacing the toner cartridge and cleaning the machine.
DISPLAY MESSAGES....58
TROUBLESHOOTING 60
| Trouble Page | |
| Problems related to machine operation | 60 |
| The machine does not operate. | |
| The power is on but copying is not possible. | |
| Two-sided copying is not possible. | |
| Wrong paper size is displayed for paper in the bypass tray. | |
| A copy job stops before it is finished. | |
| The contrast of the touch panel is too high or too low. | |
| Image cannot be rotated. | |
| Original size is not selected automatically, or copying does not take place on paper that matches the original size. | 61 |
| Paper size for a paper tray cannot be set. | |
| Order of copies is incorrect. | |
| The job is cancelled after the originals were being scanned. | |
| Not all pages are copied. | |
| The RSPF cannot be used. | |
| Lighting fixture flickers. | |
| Paper feeding problems | 62 |
| When using paper fed from the bypass tray, the copied image is skewed. | |
| Paper from the bypass tray misfeeds. | |
| Paper misfeeds. | |
| Image quality problems | 63 |
| Copies are too dark or too light. | |
| Text is not clear in a copy. | |
| Part of the copied image is cut off. | |
| Blank copies. | |
| Paper is wrinkled or the copied image comes off when the paper surface is rubbed. | |
| Copies are smudged or dirty. | |
| White or black lines appear copies. |
MISFEED REMOVAL....64
REPLACING THE TONER CARTRIDGE 72
STAPLE CARTRIDGE REPLACEMENT....73
STAPLE JAM REMOVAL 74
CHECKING THE TONER QUANTITY AND TOTAL OUTPUT COUNT 74
CLEANING THE MACHINE....75
DOCUMENT GLASS AND DOCUMENT COVER/RSPF 75
If one of the following messages appears in the display, take prompt action as instructed by the message.
| Message Cause and solution Page | ||
| ENTER YOUR ACCOUNT NUMBER. | Auditing mode is enabled. Enter your account number. | 56 |
| A MISFEED HAS OCCURRED. Remove the misfeed as explained in "MISFEED REMOVAL". 64 | ||
| 2-SIDED COPIES CANNOT BE MADE ON THIS PAPER TYPE. | This appears when you attempt to make two-sided copies on special paper that cannot be used for two-sided copying. Cancel two-sided copying or change the paper. | 15, 27 |
| REMOVE PAPER FROM THE <^*>TRAY . | The indicated output tray is full. Remove the output from the tray. ( <^*>indicates the tray that is full.) | - |
| CLOSE THE <^**>COVER . | The indicated cover is open. Close the cover. ( <^**>indicates the cover that is open.) | - |
| PLEASE EXTEND BYPASS-TRAY. | When copying from the bypass tray, be sure to pull out the bypass tray extension. | 18 |
| COVER SHEETS MUST BE THE SAME SIZE AS THE COPY PAPER USED. | When adding a cover, load paper in the bypass tray that is the same size as the paper in the tray selected for copying. 48 | |
| TONER SUPPLY IS LOW. The toner cartridge must be replaced soon. 72 | ||
| CHANGE THE TONER CARTRIDGE. | The toner cartridge is out of toner. Replace the toner cartridge. 72 | |
| CHECK THE TONER CARTRIDGE. | Make sure that the toner cartridge is installed correctly. | 72 |
| THE DOCUMENT FEEDER IS DISABLED. | The RSPF has been disabled in the key operator programs. Use the document glass. | 22 |
| SELECTED PAPER TRAY IS PROHIBITED. PLEASE SELECT ANOTHER PAPER TRAY. | This appears when a tray is selected that has been prohibited in "TRAY SETTINGS" in the custom settings. 53 | |
| PLEASE CHECK THE PAPER SIZE OF TRAY <^***> . | The tray's paper size setting is different from the actual paper size. Load the correct size of paper. The tray is indicated in <^***> . | 17 |
| ADD STAPLES. The finisher is out of staples. Replace the staple cartridge as explained in "STAPLE CARTRIDGE REPLACEMENT". | 73 | |
| PLEASE REMOVE PAPER FROM THE STAPLER COMPILER. | Paper remains in the stapler compiler. Remove the paper. | 70 |
| MEMORY IS FULL. PRESS [START] TO BEGIN COPYING OR [CA] TO CANCEL. | The memory becomes full while scanning originals. Press the [START] key (⑨) to copy only the originals that have been scanned, or press the [CLEAR ALL] key (⑩) to cancel the job. | - |
| SELECTED PAPER TRAY IS OUT OF SERVICE. | Contact your authorised service representative. | - |
| CHECK STAPLER POSITION OR STAPLE JAM. | Staples are jammed in the finisher or the staple case is not attached correctly. Check the staple case. If the message still appears after removing the jammed staples, disable the stapler using "DISABLING OF STAPLER" in the key operator programs (See the "Key operator's guide.), and your authorised service representative. | 74 |
| (CALL FOR SERVICE SOON.) | It will soon be time for regular maintenance. Contact your authorised service representative. | - |
| (MAINTENANCE REQUIRED.) | It is time for regular maintenance. Contact your authorised service representative. | - |
| CALL FOR SERVICE.CODE: **-** | Turn off the power and then turn it back on. If this does not clear the message, write down the 2-digit main code and 2-digit sub-code and promptly contact your authorised service representative. | - |
| PLEASE CHECK THE ORIGINAL SIZE. JOB IS CANCELED. | The original in the RSPF is longer than the size that was detected. Reinsert the original, make sure that the size indicated in the touch panel is the same as the actual size, and begin copying. You can also select mixed feeding to copy onto paper that matches each original size after all originals have been scanned. | - |
TROUBLESHOOTING
If you experience difficulty using the machine, check the following troubleshooting guide before calling for service. Many problems can be easily resolved by the user. If you are unable to solve the problem using the troubleshooting guide, turn off the power switch, unplug the machine, and contact your authorised service representative. The following problems are related to the general operation of the machine and copying. For problems related to the printer, fax, and network scanner functions, see the corresponding operation manuals.
Problems related to machine operation
| Problem Cause and solution Page | ||
| The machine does not operate. | Power switch OFF.→ Turn the power switch ON. | 13 |
| The machine is warming up.→ The machine requires about 23 seconds to warm up after the power switch is turned on. While the machine is warming up, copy settings can be selected but copying is not possible. Wait until "READY TO COPY." appears. | 13 | |
| Out of paper.→ Load paper. | 17 | |
| Out of toner.→ Replace the toner cartridge. | 72 | |
| Misfeed occurs.→ Remove the misfed paper. | 64 | |
| The power is on but copying is not possible. | The machine is in auto power shut-off mode.→ If only the [START] key (💡) blinks, auto power shut-off mode has activated. Press the [START] key (💡to return the machine to normal operation. | 14 |
| Copy mode is not selected.→ Press the [COPY] key to select copy mode. | 10 | |
| Two-sided copying is not possible. | Automatic two-sided copying was attempted on paper that is not suitable for automatic two-sided copying.→ Two-sided copying is not possible on special paper. Use paper that is suitable for automatic two-sided copying. | 27 |
| Two-sided copying is prohibited in the key operator programs.→ Change the setting in the key operator programs to permit two-sided copying. | Key operator's guide | |
| Wrong paper size is displayed for paper in the bypass tray. | The bypass tray extension is not pulled out.→ To detect the paper size correctly, the bypass tray extension must be pulled out when the paper is loaded. | 18 |
| A copy job stops before it is finished. | Too many pages have accumulated in the output tray, causing the tray full sensor to activate. Further copying is not possible until the pages are removed.→ Remove the pages from the output tray. | - |
| The contrast of the touch panel is too high or too low. | The display contrast has not been adjusted.→ Adjust the contrast using "DISPLAY CONTRAST" in the custom settings. | 53 |
| Image cannot be rotated. | Neither auto paper selection nor auto image mode are selected.→ Rotation copy functions only if auto paper select mode or auto image mode is selected. | 25, 30 |
| Rotation copy is prohibited in the key operator programs.→ Change the setting in the key operator programs to permit rotation copying. | Key operator's guide | |
| Original size is not selected automatically, or copying does not take place on paper that matches the original size. | The document cover/RSPF was not opened completely when the original was placed on the document glass.→ Open the document cover/RSPF completely, place the original on the document glass, and close the RSPF. | - |
| The original contains large black solid areas.→ If the original contains any large black solid areas, the original size may not be detected automatically. Use the [SPECIAL MODES] key to select the original size. | 47 | |
| The original is smaller than A5 (5-1/2" x 8-1/2") size.→ When the original is smaller than A5 (5-1/2" x 8-1/2") size, the size cannot be detected. Use the [PAPER SELECT] key to select the desired paper size. | 47 | |
| The original is not a standard size.→ When the original is not a standard size, the size cannot be detected. Manually select the closest standard original size, or use the [PAPER SELECT] key to select the desired paper size. | 47 | |
| Paper size for a paper tray cannot be set. | A copy, print job, or received fax is being printed.→ Set the correct paper size after printing is finished. | - |
| Operation has temporarily stopped because the tray is out of paper or a misfeed occurred.→ Load paper or remove the misfeed, finish the copy job, and then set the paper size. | 19, 64 | |
| During an interrupt copy job.→ Set the correct paper size after the interrupt copy job is finished. | 34 | |
| Misfeed occurs.→ Remove the misfed paper. | 64 | |
| Paper tray settings are prohibited in the key operator programs.→ Change the setting in the key operator programs to permit paper tray settings. | Key operator's guide | |
| Order of copies is incorrect. | The originals were placed in the wrong order.→ When using the document glass, scan the originals one sheet at a time beginning from the first page. When using the RSPF, insert the originals with the first page on top and facing up. | 23 |
| The job is cancelled after the originals were being scanned. | The memory become full while the originals were being scanned.→ When using a function such as pamphlet copy or multi shot copy where all original pages are scanned into memory before copying begins, scanning will stop and copying will not take place if the memory becomes full. The number of pages that can be scanned into memory can be increased by installing more memory. | 79 |
| Not all pages are copied. | The memory become full while the originals were being scanned.→ When the memory becomes full while the originals are being scanned, you can select whether you want to continue the job and print only those originals that were scanned, or cancel the job. If you continue the job, copies will only be made of the originals that were scanned, and thus all originals cannot be copied at once. | - |
| The RSPF cannot be used. | Use of the RSPF has been prohibited in the key operator programs.→ Enable use of the RSPF in the key operator programs. | Key operator's guide |
| Lighting fixture flickers. | The same power outlet is used for the lighting fixture and the machine.→ Connect the machine to a power outlet which is not used for other electric appliances. | 4 |
Paper feeding problems
| Problem Cause and solution Page | ||
| When using paper fed from the bypass tray, the copied image is skewed. | The number of sheets placed on the bypass tray exceeds the maximum number.→ Do not place more than the maximum number of sheets. | 15 |
| The bypass guide is not adjusted to the size of the loaded paper.→ Adjust the bypass guide to the size of the loaded paper. | 18 | |
| Paper from the bypass tray misfeeds. | The paper type setting is not correct.→ When using a special paper, be sure to set the correct paper type. | 20 |
| The number of sheets placed on the bypass tray exceeds the maximum number.→ Do not place more than the maximum number of sheets. | 15 | |
| The bypass guide is not adjusted to the size of the loaded paper.→ Adjust the bypass guide to the size of the loaded paper. | 18 | |
| Paper misfeeds. | The paper is outside of the specified size and weight range.→ Use copy paper within the specified range. | 15 |
| Paper is curled or damp.→ Do not use curled or crimped paper. Replace with dry copy paper. During periods when the machine is not used for a long time, remove the paper from the tray and store it in a dark place in a bag to prevent moisture absorption. | 79 | |
| Paper is not loaded properly.→ Make sure the paper is properly loaded. | 17 | |
| Pieces of paper remain inside machine.→ Remove all pieces of misfed paper. | 64 | |
| Sheets of paper stick together.→ Fan the paper well before loading it. | 17 | |
Image quality problems
| Problem Cause and solution Page | ||
| Copies are too dark or too light. | The image of the original is too light or too dark.→ Select the correct original image type in the exposure setting and adjust the copying exposure. | 29 |
| The copying exposure is set to "AUTO".→ The "EXPOSURE ADJUSTMENT" key operator program can be used to adjust the exposure level used for "AUTO" exposure.Consult the administrator of the machine. | Key operator's guide | |
| The original type that is most suitable for the original has not been selected in the copy exposure setting screen.→ Change the original type selection to "AUTO", or manually select the most suitable original type setting. | 29 | |
| Text is not clear in a copy. | The correct original type has not been selected in the copy exposure setting screen.→ Change the original type setting to "TEXT". | 29 |
| Part of the copied image is cut off. | The original was placed in the wrong position.→ Place the original in the correct position. When using the document glass, place the original against the far left side. | 22, 23 |
| A suitable ratio for the original size and paper size has not been selected.→ Use auto ratio selection to obtain the correct ratio for the copy. | 30 | |
| The tray's paper size setting was not changed when a different size of paper was loaded in the tray.→ Be sure to change the tray's paper size setting when loading a different size of paper in the tray. | 19 | |
| An inch paper size is being used.→ When using copy paper that is an inch size, set the original size manually. | 47 | |
| Blank copies. | The original is not placed face up in the RSPF or face down on the document glass.→ Place the original face up in the RSPF or face down on the document glass. | 22, 23 |
| Paper is wrinkled or the copied image comes off when the paper surface is rubbed. | The paper is outside of the specified size and weight range.→ Use copy paper within the specified range. | 15 |
| The paper type setting is not correct.→ Set the correct paper type. To set the paper type for a tray, see "CHANGING A TRAY'S PAPER TYPE AND PAPER SIZE SETTINGS". | 19, 20 | |
| Paper is curled or damp.→ Do not use curled or wrinkled paper. Replace with dry copy paper. During periods when the machine is not used for a long time, remove the paper from the tray and store it in a dark place in a bag to prevent moisture absorption. | 14 | |
| Copies are smudged or dirty. | The document glass or the underside of the RSPF is dirty.→ Clean regularly. | 75 |
| The original is smudged or blotchy.→ Use a clean original. | - | |
| White or black lines appear copies. | The scanner glass for the RSPF is dirty.→ Clean the long, narrow scanning glass. | 75 |
MISFEED REMOVAL
When a misfeed occurs during copying, the message "MISFEED HAS OCCURRED." will appear in the touch panel and printing will stop.
- If the misfed paper tears during removal, remove the torn pieces. Take care not to touch the photoconductive drum while removing the pieces. Nicks and scratches on the drum will cause dirty copies.
First, locate the misfeed

① Misfeed in the RSPF (p.65)
② Misfeed in the finisher (p.70)
③ Misfeed in the machine (p.66, p.67)
④ Misfeed in the bypass tray (p.66)
⑤ Misfeed in the upper paper tray (p.68)
⑥ Misfeed in the lower paper tray (p.69)

If the fax option is installed, all received faxes are stored in memory. The faxes are automatically printed after the misfeed is removed.
MISFEED REMOVAL GUIDANCE
Misfeed removal guidance can be displayed by touching the [INFORMATION] key on the touch panel after a misfeed has occurred.

MISFEED IN THE RSPF
1 Remove the misfed original.

Check sections A, B, and C in the illustration at left and remove the misfed original.
Section A
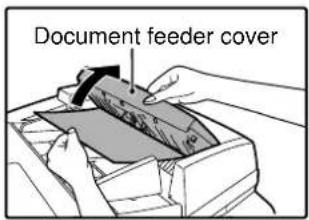
Open the document feeder cover and carefully remove the misfed original from the document feeder tray. Close the document feeder cover.
Section B

Open the RSPF and rotate the release roller in the direction of the arrow to feed the original out. Close the RSPF and then carefully remove the original.

natural_image
Line drawing of a printer with a clasp, showing internal structure without any text or symbolsIf the misfed original cannot be removed, open the document transport cover (below), and rotate the release roller again.
If a small original (A5 (5-1/2" x 8-1/2"), etc.) is misfed, or if an original misfeed occurs in the reversing tray of the RSPF, lift the document transport cover knob, open the document transport cover, and remove the original.

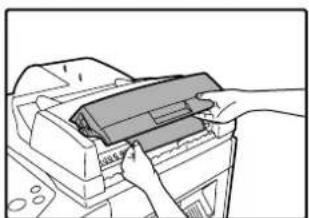
natural_image
Line drawing of hands inserting a card into a printer (no text or symbols visible)Section C
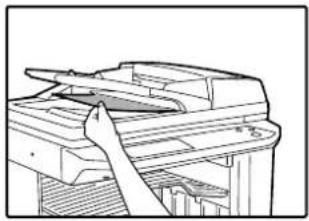
natural_image
Line drawing of a printer with paper feeding into a stack (no text or symbols)Carefully remove the misfed original from the exit area.
If the misfed original cannot be easily removed from the exit area, open the moveable part of the document feeder tray and remove the reversing tray, and then remove the original.
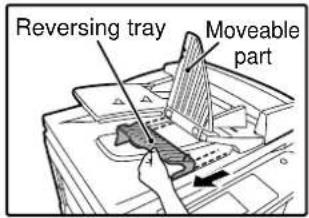

natural_image
Illustration of a hand inserting a triangular object into a machine (no text or symbols visible)
After removing a misfed original from the exit area, be sure to attach the reversing tray securely to the exit area (When the RSPF is installed.).
2 Open and close the RSPF to clear the misfeed message from the touch panel.

natural_image
Illustration of a printer's open lid with a hand holding the lid, showing a rotation arrow (no text or symbols)The message can also be cleared by opening and closing the document feeder cover or the document transport cover.
After the misfeed is removed and the misfeed message is cleared, a message will appear indicating the number of originals that must be reinserted in the RSPF.
3 Reinsert the originals that still must be scanned (Including the original that was being scanned when the misfeed occurred.), and press the [START] key( )
Copying of the remaining originals will resume.
MISFEED IN THE BYPASS TRAY
1 Carefully pull the misfed paper out.

natural_image
Illustration of a hand pressing a printer with a paper cover and arrow indicating compression (no text or symbols)2 Open and close the side cover.

natural_image
Diagram of a hand inserting a device into a rack, showing internal components and arrows indicating movement (no text or symbols)Make sure that the misfeed message is cleared.
The message can also be cleared by opening and closing the front cover.
If the message is not cleared, see "A. Misfeed in the paper feed area".
MISFEED IN THE MACHINE
Determine the location of the misfeed and remove it appropriately as indicated below.
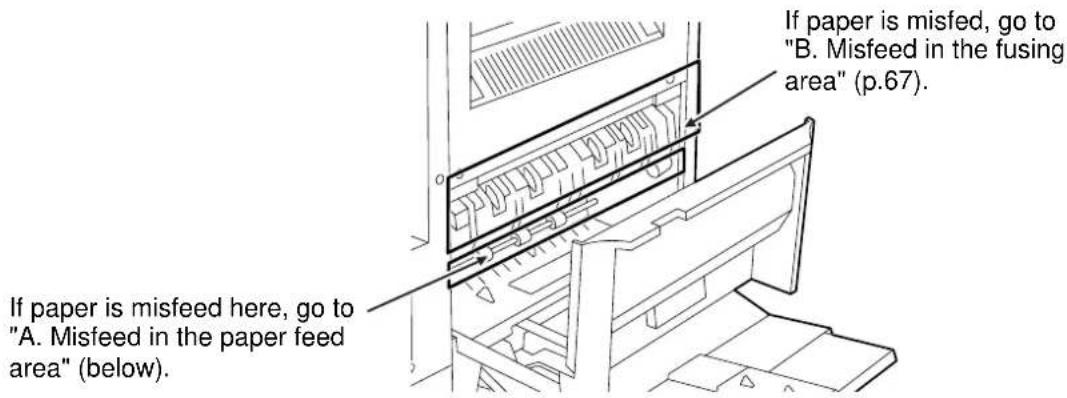
A. Misfeed in the paper feed area
1 Open the bypass tray and the side cover.
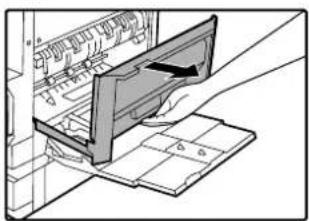
natural_image
Diagram of a hand inserting a device into a storage unit (no text or symbols visible)3 Carefully remove the misfed paper. Turn the roller rotating knob in the direction of the arrow to assist in removing it.
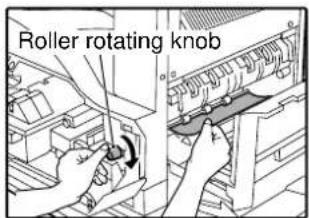
Be careful not to tear the misfed paper during removal.
2 Press gently on both sides of the front cover and pull it open.

natural_image
Diagram of a printer's internal structure showing paper feeding into a printer (no text or symbols visible)
The fusing unit is hot. Do not touch the fusing unit when removing misfed paper. Doing so may cause a burn or injury.

Do not touch the photoconductive drum (green portion) when removing the misfed paper. Doing so may damage the drum and cause smudges on copies.
4 Close the front cover and side cover.
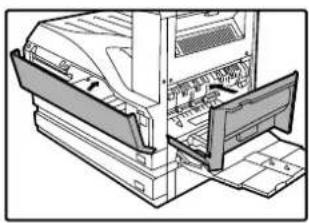
natural_image
Technical illustration of a computer motherboard with monitor and tower (no text or symbols)Make sure that the misfeed message is cleared.
B: Misfeed in the fusing area
1 Open the bypass tray and the side cover.

natural_image
Diagram of a hand inserting a device into a storage panel (no text or symbols visible)2 Press and pull it open gently on both sides of the front cover.
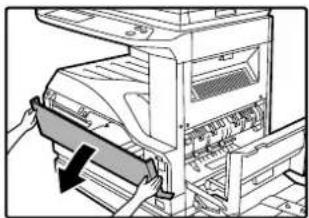
natural_image
Diagram of a printer's internal structure showing paper feeding into a printer (no text or symbols visible)3 Turn the roller rotating knob in the direction of the arrow.

4 Lift the fusing unit release levers and carefully remove the misfed paper.


The fusing unit is hot. Do not touch the fusing unit when removing misfed paper. Doing so may cause a burn or injury.
5 If you were unable to remove the misfeed in step 4, press down on the fusing unit paper guide knob to open the paper guide, and carefully remove the misfed paper.

natural_image
Illustration of hands operating a computer drawer with a scroll wheel (no text or symbols visible)
- Do not touch the photoconductive drum (green portion) when removing the misfed paper. Doing so may damage the drum and cause smudges on copies. - Take care not to let unfixed toner on the misfed paper soil your hands or clothes.
6 Close the fusing unit paper guide and press down on the fusing unit release levers.
7 Close the front cover and side cover.

natural_image
Technical line drawing of a printer internal structure with paper sheets and a printer cover (no text or symbols)Make sure that the misfeed message is cleared.
MISFEED IN THE CENTRE TRAY
Remove the paper by pulling it into the centre tray.

natural_image
Technical line drawing of a mechanical assembly with layered components (no text or symbols)MISFEED IN THE UPPER PAPER TRAY
Make sure that there is no misfed paper in the machine before pulling the tray out. (p.66)
1 Lift and pull out the upper paper tray and then remove the misfed paper.
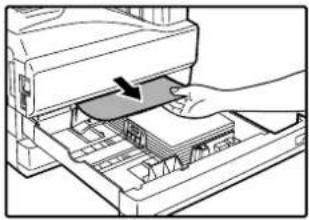
natural_image
Diagram of a printer being inserted into a slot, showing the blade and paper layout (no text or symbols)Be careful not to tear the misfed paper during removal.
2 Replace the upper paper tray.

natural_image
Illustration of a hand inserting a device into a tray with internal components (no text or symbols)Push the upper paper tray in completely.
3 Open and close the side cover.

Make sure that the misfeed message is cleared. The message can also be cleared by opening and closing the front cover.
MISFEED IN THE LOWER PAPER TRAY
- Make sure that there is no misfed paper in the machine before pulling the tray out. (p.66)
- Use the following procedure to remove misfeeds that occur in the 500-sheet paper feed unit or 2 x 500-sheet paper feed unit.
1 Open the lower side cover.

natural_image
Illustration of a hand pressing down on a computer tower with a black arrow indicating downward motion (no text or symbols)2 Remove the misfed paper.

natural_image
Line drawing of a hand pressing down on a device component with an arrow indicating upward motion (no text or symbols)Be careful not to tear the misfed paper during removal.
3 If the misfed paper is not visible in step 2, lift and pull out the lower paper tray and remove the misfed paper.
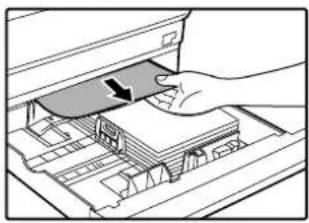
natural_image
Illustration of a hand inserting a card into a device with a highlighted card (no text or symbols)Be careful not to tear the misfed paper during removal.
4 Replace the lower paper tray.
Push the lower paper tray in completely.
5 Close the lower side cover.

natural_image
Illustration of a hand pressing down on a computer tower with an arrow indicating left motion (no text or symbols)Make sure that the misfeed message is cleared.
MISFEED IN THE UPPER EXIT AREA (when a job separator tray kit or finisher (AR-FN5N) is installed)
If a job separator tray kit or a finisher is installed, a misfeed may occur in the upper exit area.
1 Open the upper right side cover.

natural_image
Diagram of a computer oven with a ventilation grille and a black arrow pointing to a door handle (no text or symbols present)3 Close the upper right side cover.
Make sure that the misfeed message is cleared.
2 Gently pull the misfed paper out.
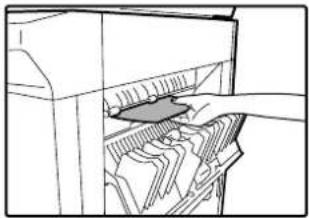
natural_image
Line drawing of a hand inserting a card into a computer case (no text or symbols)Be careful not to tear the misfed paper during removal.
MISFEED IN AN OUTPUT TRAY (when a finisher (AR-FN5N) is installed)
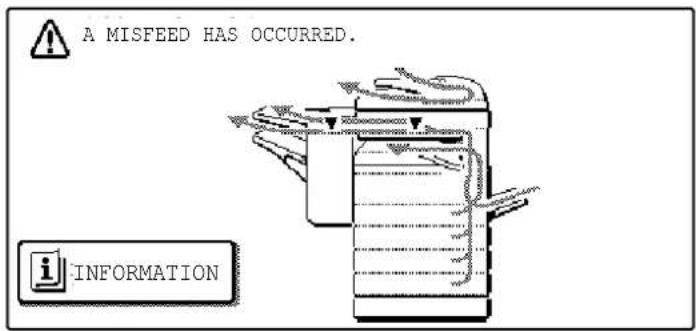
1 Grasp the handle of the stapler compiler cover and pull to open the cover.
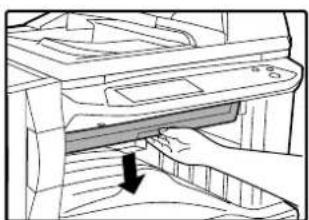
natural_image
Diagram of a mechanical component with an arrow indicating direction, no visible text or symbols2 Remove any misfed paper from the transport area.

natural_image
Line drawing of a hand inserting a card into a machine (no text or symbols)3 If staple sort copying is being performed, open the paper guide and remove any misfed paper from the stapler compiler.

natural_image
Line drawing of hands inserting a card into a printer (no text or symbols)4 Close the stapler compiler cover.

natural_image
Line drawing of a hand inserting a keyboard into a printer (no text or symbols)5 If the offset tray is being used, remove any misfed paper from the offset tray.

natural_image
Line drawing of a hand holding a tool interacting with a device (no text or symbols visible)6 If the top tray is being used, open the top cover, remove any misfed paper, and close the top cover.

natural_image
Illustration of a hand inserting a card into a printer (no text or symbols visible)Make sure that the misfeed message is cleared.

natural_image
Diagram of a car being loaded into a conveyor belt system (no text or symbols visible)REPLACING THE TONER CARTRIDGE
To check how much toner remains in the toner cartridge (p.74), hold down the [COPY] key. The amount of toner remaining will appear in the display. When less than 25% of the toner remains, obtain a new toner cartridge as soon as possible. When "TONER SUPPLY IS LOW." appears in the display, be sure to have a new cartridge on hand for replacement at any time as little toner remains. When "CHANGE THE TONER CARTRIDGE." appears in the touch panel, the toner cartridge must be replaced. Follow these steps to replace the cartridge.

When running long copy jobs or copying originals with many areas of solid black, "TONER REPLENISHMENT IN PROGRESS." may appear in the touch panel and copying may stop even though the cartridge still has toner. When this occurs, the toner is being replenished. Replenishment will last about two minutes. When the [START] key ( ) illuminates, press the [START] key () to resume copying.
1 Press gently on both sides of the front cover and pull it open.
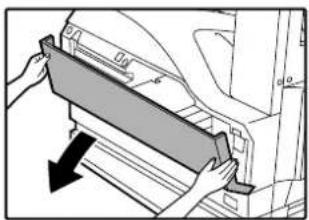
natural_image
Illustration of hands installing a panel on a vehicle door (no text or symbols visible)2 Pull the toner cartridge out while pressing the lock release lever.

When pulling out the toner cartridge, place your other hand on the green part of the cartridge.

- After removing the toner cartridge, do not shake it or tap it. Doing so may cause toner to leak from the cartridge. Put the old cartridge immediately in the bag provided with the new cartridge. - Dispose of the old toner cartridge in accordance with local regulations.
3 Remove the new toner cartridge from the bag. Grasp both ends of the cartridge and shake it horizontally about 20 times. After shaking the cartridge, remove the tape.

Grasp the hand grip to hold the cartridge. Do not hold the cartridge by the shutter. Be sure to only shake the cartridge before the tape is removed.
4 While pushing the lock release lever, gently insert the toner cartridge along the guides until it clicks into place.

natural_image
Architectural floor plan with a magnified inset showing a mechanical component (no text or symbols)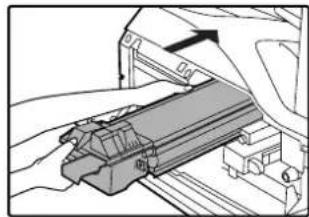
natural_image
Technical line drawing of a mechanical assembly or lifting operation (no text or symbols visible)
If dirt or dust adheres to the toner cartridge, remove it before installing the cartridge.
5 Remove the tape from the shutter. Pull the shutter out of the toner cartridge as shown in the illustration.
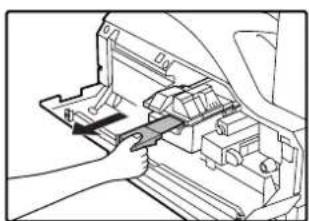
natural_image
Diagram of a hand using a tool to adjust or install a mechanical component, no text or symbols visibleDiscard the shutter.
6 Close the front cover.

natural_image
Diagram showing hands installing a panel on a vehicle door (no text or symbols visible)STAPLE CARTRIDGE REPLACEMENT (when the finisher (AR-FN5N) is installed)
When the message "ADD STAPLES." appears, replace the staple cartridge as follows:
1 Open the stapler cover.

natural_image
Line drawing of a hand using a tool to adjust or install a mechanical component (no text or symbols visible)2 Grasp the green portion of the staple box and remove the staple box from the stapler.
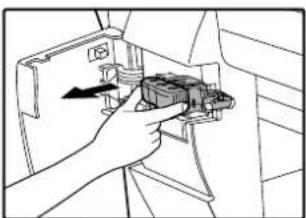
natural_image
Hand inserting a component into a device panel (no text or symbols visible)3 Remove the staple cartridge from inside the staple box.

natural_image
Illustration of a hand holding a mechanical component with an arrow indicating direction (no text or symbols)4 Insert the new staple cartridge into the box until it clicks into place.
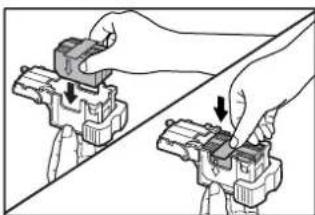
natural_image
Illustration of hands using a tool to adjust or install a mechanical component (no text or symbols visible)Insert the new cartridge by aligning the arrows on the cartridge with those on the box. Check that the cartridge has locked into place by pulling it slightly.
5 Remove the tape from the cartridge.

natural_image
Illustration of hands using a tool to adjust or install a mechanical component (no text or symbols visible)6 Insert the staple box into the stapler unit until it clicks into place.
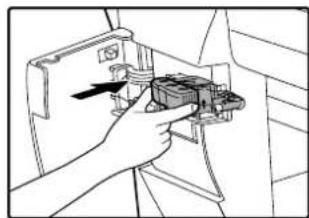
natural_image
Line drawing of a hand using a tool to adjust or install a mechanical component (no text or symbols visible)7 Close the stapler cover.
STAPLE JAM REMOVAL
If staples become jammed in the stapler, the message "CHECK STAPLER POSITION OR STAPLE JAM." will appear. Follow these steps to remove the jammed staples.
1 Open the stapler cover.

natural_image
Illustration of hands using a tool to adjust or install a component, no text or symbols visible2 Grasp the green portion of the staple box and remove the staple box from the stapler.

natural_image
Hand holding a mechanical component with an arrow indicating direction (no text or symbols visible)3 Raise the lever at the end of the staple box and remove the jammed staples.

natural_image
Illustration of hands holding a device with directional arrows indicating rotation (no text or symbols)4 Return the lever to its original position.
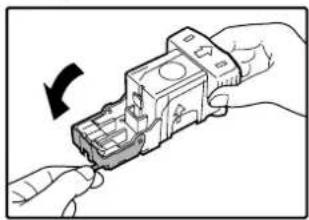
natural_image
Illustration of hands holding a small electronic device with an arrow indicating rotation (no text or symbols)5 Insert the staple box into the stapler unit until it clicks into place.
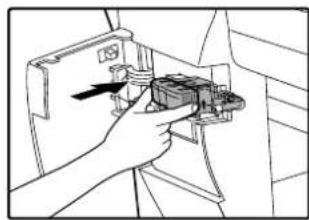
natural_image
Line drawing of a hand holding a device with a tool, no text or symbols present6 Close the stapler cover.
CHECKING THE TONER QUANTITY AND TOTAL OUTPUT COUNT
The approximate quantity of toner remaining and the total output count can be displayed as explained below.
- The output count shows the combined output total of the copy, fax, and printer functions.
Checking the total output count and toner quantity
Hold down the [COPY] key. The total output count and toner quantity appear while the key is held down.



• Each A3 (11" x 17") page is counted as two pages. Two sided pages are also counted as two pages.
- The amount of toner consumed will vary depending on conditions of usage and the type of originals copied. The toner quantity display should only be used as an approximate guide.
CLEANING THE MACHINE
DOCUMENT GLASS AND DOCUMENT COVER/RSPF
If the document glass, document cover/RSPF, or scanning glass for originals fed from the RSPF (the long narrow glass surface on the right side of the document glass) become dirty, the dirt may appear on copies. Always keep these parts clean.
Stains or dirt on the document glass/document cover/RSPF will also be copied. Wipe the document glass, the document cover, the RSPF and the scanning window on the document glass with a soft, clean cloth.
If necessary, dampen the cloth with water. Do not use thinner, benzene, or similar volatile cleaning agents.

Do not spray flammable cleaner gas. Gas from the spray may come in contact with the internal electrical components or high-temperature parts of the fusing unit, creating a risk of fire or electrical shock.

natural_image
Line drawing of a printer or printer with an open lid and a brush applying material (no text or symbols)
natural_image
Illustration of hands cleaning a flatboard with a sponge (no text or symbols)Surface of document glass Underside of document cover/RSPF

Scanning glass
If misfeeds occur frequently when feeding envelopes or other thick paper from the bypass tray, wipe the paper feed roller at the feed slot of the bypass tray with a soft, clean cloth moistened with alcohol or water.

Optional equipments and supplies are explained in this chapter. To purchase optional equipment and supplies contact your authorised service representative.
PERIPHERAL DEVICES
| FINISHER (AR-FN5N) See page 77. |
| 500-SHEET PAPER FEED UNIT (AR-D21) See page 78. |
| 2 x 500-SHEET PAPER FEED UNIT (AR-D22) See page 78. |
| DOCUMENT COVER (AR-VR6) |
| REVERSING SINGLE PASS FEEDER (AR-RP7) See page 79. |
| SADDLE STITCH FINISHER (AR-F14) See page 79a |
| JOB SEPARATOR TRAY KIT (AR-TR3)This enables separation of output locations by mode (copy, printer, etc.). |
| PRINTER EXPANSION KIT (AR-P17)This allows the machine to be used as a network printer. |
| PRINT SERVER CARD (AR-NC5J)* ^1 This optional expansion kit adds the network printer function (10/100 BASE-TX). |
| PS3 EXPANSION KIT (AR-PK1)* ^1 This kit offers PostScript 3 compatibility. |
| BARCODE FONT KIT (AR-PF1)* ^1 This font set adds barcode printing capability. |
| NETWORK SCANNER EXPANSION KIT (AR-NS2)* ^2 This allows the machine to be used as a network scanner. |
| FACSIMILE EXPANSION KIT (AR-FX7)This allows the machine can be used as a facsimile machine. |
| 8MB FAX MEMORY (AR-MM9)Image memory can be expanded by installing the optional fax expansion memory. |
| 256MB EXPANSION MEMORY BOARD (AR-SM5)512MB EXPANSION MEMORY BOARD (AR-SM6)Additional memory can be installed in the machine. There are two DIMM slots in this machine, and the memory can be expanded to a maximum of 1056 MB. |
*1 Requires installation of the PRINTER EXPANSION KIT (AR-P17).
*2 Requires installation of the PRINTER EXPANSION KIT (AR-P17), and 128MB or more of memory must be extended.

- A commercial 64/128/256/512MB (the 168 pin SDRAM DIMM) memory module can be used to expand memory in this unit. For more information, consult your authorised service representative.
- Some options may not be available in some countries and regions.
FINISHER (AR-FN5N)
When an optional finisher (AR-FN5N) is installed, the machine can automatically staple the sorted copies. Each collated set of copies or group of copies can be stacked offset from the previous set. (Offset function p.35)
Part names
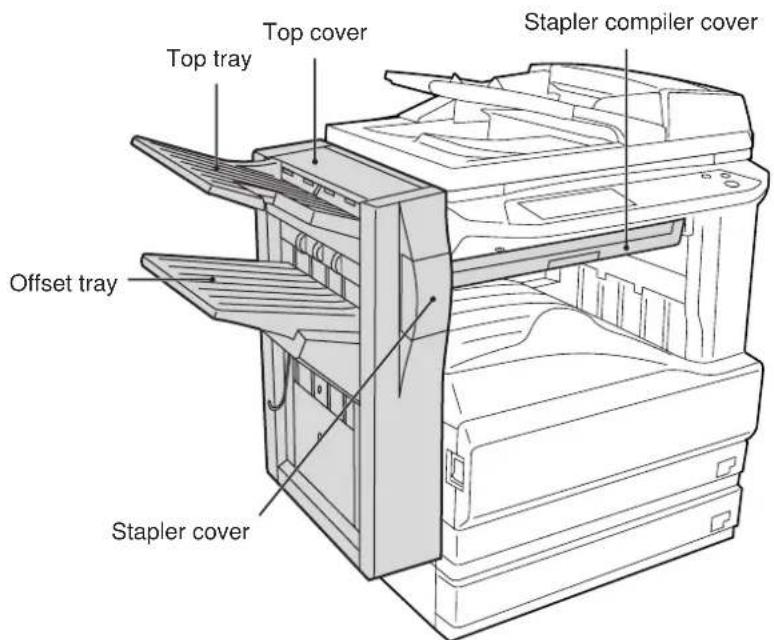
Specifications
| AR-FN5N | ||
| Tray capacity | Top tray 100 sheets | |
| Offset tray 1,000 s | sheets (500 sheets for sizes larger than A4 (8-1/2" x 11")) | |
| Paper size | Size | Top tray: A5 to A3 (5-1/2" x 8-1/2" to 11" x 17") |
| Offset tray: B5 to A3 (8-1/2" x 11" to 11" x 17") | ||
| Weight 52 g/m | ^2 to 128 g/m ^2 (14 lbs. to 34 lbs.) | |
| Offset Approx. 27 mm (1") | ||
| Paper sizes that can be stapled | B5, A4, A4R, B4, A3 (8-1/2" x 11", 8-1/2" x 11"R, 8-1/2" x 13", 8-1/2" x 14", 11" x 17") | |
| Stapling capacity | 30 sheets (80 g/m ^2 (21 lbs.)) | |
| Power supply Drawn from | the machine | |
| Weight | Approx. 19 kg (42 lbs.) | |
| Dimensions Exit area | 470 mm (W) x 511 mm (D) x 540 mm (H)(18-33/64" (W) x 20-1/8" (D) x 21-17/64" (H)) | |
| Stapler compiler | 562 mm (W) x 444 mm (D) x 109 mm (H)(22-9/64" (W) x 17-31/64" (D) x 4-19/64" (H)) | |

As a part of our policy of continuous improvement, OLIVETTI reserves the right to make design and specification changes for product improvement without prior notice. The performance specification figures indicated are nominal values of production units and there may be some deviations from these values in individual units.
500-SHEET PAPER FEED UNIT/2 x 500-SHEET PAPER FEED UNIT
These paper feed units provide the convenience of increased paper capacity for the machine and a greater choice of paper sizes readily available for copying.
The AR-D21 contains one 500-sheet paper tray and the AR-D22 contains two 500-sheet paper trays.
Part names
500-SHEET PAPER FEED UNIT (AR-D21)

2x500-SHEET PAPER FEED UNIT (AR-D22)

Specifications
| AR-D21 AR-D22 | |||
| Paper | Size B5 to A3 (8-1/2" x 11" to 11" x 17") | ||
| Weight 56 g/m ^2 to 105 g/m ^2 (15 lbs. to 28 lbs.) | |||
| Paper capacity | Upper tray | 500 sheets 500 sheets | |
| Lower tray | — | 5 0 | |
| Weight | Approx. 6.1kg (13.5 lbs.) | Approx. 11.8kg (26.1 lbs.) | |
| Dimensions | 596 mm (W) x 498 mm (D) x 97 mm (H)(23-15/32" (W) x 19-39/64" (D) x 3-53/64" (H)) | 596 mm (W) x 498 mm (D) x 194 mm (H)(23-15/32" (W) x 19-39/64" (D) x 7-53/64" (H)) | |
| Power supply Drawn from the machine | |||

As a part of our policy of continuous improvement, OLIVETTI reserves the right to make design and specification changes for product improvement without prior notice. The performance specification figures indicated are nominal values of production units and there may be some deviations from these values in individual units.
REVERSING SINGLE PASS FEEDER
The reversing single pass feeder (RSPF) can automatically feed multi-page documents.
If the RSPF is installed, two-sided originals can be copied automatically without having to manually turn them over.
Part names
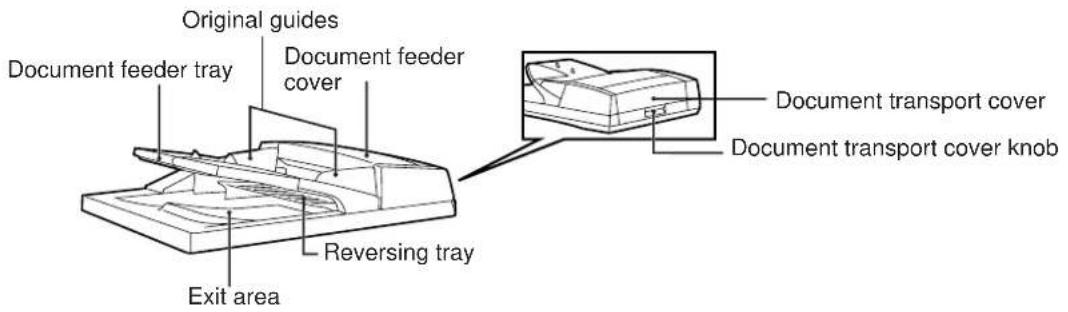
Specifications
| AR-RP7 | ||
| Acceptable originals | Weight | 35 g/m2 to 128 g/m2 (9 lbs. to 34 lbs.) (52 g/m2 to 105 g/m2 (14 lbs. to 28 lbs.) for two-sided original) |
| Size | A5 to A3 (5-1/2" x 8-1/2" to 11" x 17") | |
| Capacity Up | to 100 sheets (Thickness 13 mm (33/64) and below) | |
| Power supply Drawn from the machine | ||
| Detectable original sizes | A5, A4, A4R, B4, A3 (5-1/2" x 8-1/2", 5-1/2" x 8-1/2" R, 8-1/2" x 11", 8-1/2" x 11" R, 8-1/2" x 14", 11" x 17") | |
| Weight | Approx. 7.5 kg (16.6 lbs.) | |
| Dimensions | 586 mm (W) x 457 mm (D) x 145 mm (H) (22-61/64" (W) x 17-9/64" (D) x 5-1/4" (H)) | |

As a part of our policy of continuous improvement, OLIVETTI reserves the right to make design and specification changes for product improvement without prior notice. The performance specification figures indicated are nominal values of production units and there may be some deviations from these values in individual units.

STORAGE OF SUPPLIES
Standard supplies for this product that are to be replaced by the user are paper and the toner cartridge.
OLIVETTI

GENUINE SUPPLIES
For best copying results, be sure to use only OLIVETTI products. Only genuine OLIVETTI consumables carry the Genuine Supplies label.
PROPER STORAGE
Store the supplies in a location that is:
- clean and dry,
• at a stable temperature, - not exposed to direct sunlight.
Store paper in the wrapper and lying flat.
Paper stored out of the wrapper or in packages standing on end may curl or get damp, resulting in paper misfeeds.
SADDLE STITCH FINISHER
The saddle stitch finisher features the offset function, which makes it easy to distinguish sets of output, and the saddle stitch (pamphlet) function, which automatically staples and folds output down the center. An optional punch unit can also be installed to punch holes in output.
PARTS OF THE SADDLE STITCH FINISHER
Stapler section
Open the front cover and pull out this section to replace the staple cartridge or remove a staple jam.
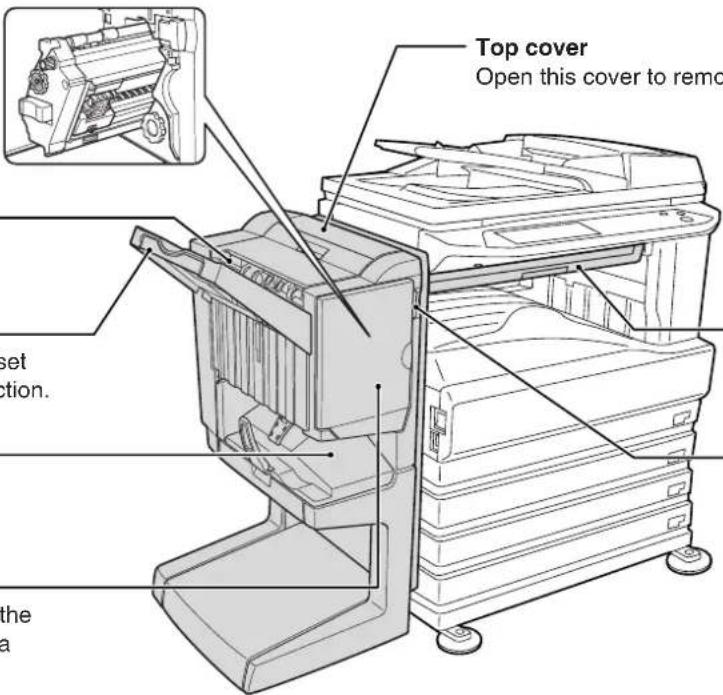
Open this cover to remove a paper misfeed.
Stapler compiler
Paper to be stapled is temporarily stacked here.
Offset tray
This tray is used for the offset function and the staple function.
Saddle stitch tray
Saddle stitch output is delivered to this tray.
Front cover
Open this cover to replace the staple cartridge or remove a staple jam.
Center cover
Paper moves through here when output to the saddle stitch finisher.
Detach button
Press this button when a paper misfeed or other problem occurs to detach the saddle stitch finisher from the machine.

Caution
- Do not press down on or place heavy objects on the saddle stitch finisher (or on its trays in particular).
- During output to the offset tray, the offset tray may move up and down.
Display screens, messages, and key names shown in this manual may differ from the actual screens, messages, and key names due to modifications made for improvement.
This operation manual is described based on the American spelling standard.
SPECIFICATIONS
| Name Saddle Stitch Finisher | |
| Number of trays 2 | |
| Paper output Face down | (when using the offset tray) |
| Tray types Upper tray: Offset tray Lower tray: Saddle stitch tray | |
| Tray capacity^*1 | Upper tray:Without stapling 8-1/2" x 11" / A4 size or less: Approx. 1000 sheets*28-1/2" x 13" / B4 size or greater (21 lbs.(80 g/m2)): 500 sheets maximumStapling 8-1/2" x 11" / A4 size or less: 30 sets and approx. 1000 sheets*28-1/2" x 13" / B4 size or greater (21 lbs. (80 g/m2)): 30 sets and 500 sheets maximumLower tray (saddle stitch): Number of sheets that can be stapled 10sets x 6-10 sheets per set, or 20 sets x 1-5 sheets per set |
| Paper size | Upper tray: 11" x 17", 8-1/2" x 14", 8-1/2" x 13", 8-1/2" x 11", 8-1/2" x 11"R,5-1/2" x 8-1/2", A3, B4, A4, A4R, B5, B5R, A5Lower tray (saddle stitch): 11" x 17", 8-1/2" x 11"R, A3, B4, A4R |
| Paper weight | Upper tray: 16 lbs. to 54 lbs. (60 g/m2to 200 g/m2)Lower tray (saddle stitch): 16 lbs. to 28 lbs. (60 g/m2to 105 g/m2) |
| Paper type | Upper tray: plain paper, heavy paper, letterhead paper, recycled paper, color paperLower tray (saddle stitch): plain paper, letterhead paper, recycled paper, color paper |
| Paper full detection Upper tray / lower tray (saddle stitch): Yes | |
| Offset function Upper tray only | |
| Allowed paper sizes for stapling | Upper tray: 11" x 17", 8-1/2" x 14", 8-1/2" x 13", 8-1/2" x 11", 8-1/2" x 11"R, A3, B4, A4, A4R, B5, B5RLower tray (saddle stitch): 11" x 17", 8-1/2" x 11"R, A3, B4, A4R |
| Number of pages that can be stapled | 8-1/2" x 11", A4 or smaller: 50 sheets (21 lbs. (80 g/m2))8-1/2" x 13", B4 or greater: 25 sheets (21 lbs. (80 g/m2)) |
| Stapling positions | Upper tray: 3 positions (top left staple, two left staples, lower left staple)Lower tray (saddle stitch): 4-23/32"(120 mm) pitch from center of paper |
| Paper feeding | Center reference |
| Power supply | From power unit of multifunction machine |
| Dimensions | 28-1/32" (W) x 23-3/4" (D) x 40-3/64" (H)(712 mm (W) x 603 mm (D) x 1017 mm (H))(two trays or four trays installed)28-1/32" (W) x 23-3/4" (D) x 36-7/64" (H)(712 mm (W) x 603 mm (D) x 917 mm (H)(three trays installed) |
| Weight | Approx. 99.2 lbs. (45 kg)(finisher: 83.8 lbs. (38 kg), joint: 15.4 lbs. (7 kg)) |
*1 The tray capacity varies depending on the type of paper, the storage conditions of the paper, and ambient conditions in the installation location.
*2 Based on 64g/m ^2 when using AB size paper or based on 75g/m ^2 (20 lbs.) when using inch size paper.
| Name Punch module | ||||
| Model*1 | AR-PN1A | AR-PN1B*2 | AR-PN1C*3 | AR-PN1D*3 |
| Number of holes | 2 | 3 or 2 | 4 | 4 |
| Paper sizes for hole punching | 11" x 17",8-1/2" x 14",8-1/2" x 13",8-1/2" x 11",8-1/2" x 11"R,A3, B4, A4, A4R,B5, B5R | 3 holes: 11" x 17",8-1/2" x 11", A3, A42 holes: 8-1/2"x14",8-1/2" x 13",8-1/2" x 11"R | A3, A4 | 11" x 17",8-1/2" x 14",8-1/2" x 13",8-1/2" x 11",8-1/2" x 11"R,A3, B4, A4, A4R,B5, B5R |
*1 Multiple punch modules cannot be installed together. Some models may not be available in some regions.
*2 With AR-PN1B, two or three holes can be punched depending on the paper size.
*3 With AR-PN1C and AR-PN1D, the number of holes is the same. The hole interval, however, is not the same.
Diagrams and contents are subject to change without notice.
Supplies
The following staple cartridge is required as a supply for the saddle stitch finisher:
●AR-SC2
Staple Cartridge (approx. 5000 staples x 3)
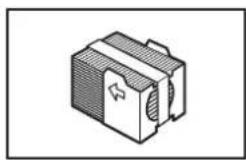
FUNCTIONS OF THE SADDLE STITCH FINISHER
■ Sort function
Collates printed pages

flowchart
graph LR
    A["1"] --> B["2"] --> C["3"]
    C --> D["123"] --> E["123"] --> F["123"] --> G["OutputOriginals"]
■ Group function
Groups printed pages by page

flowchart
graph LR
    A["1"] --> B["2"] --> C["3"]
    C --> D["1"] --> E["2"] --> F["3"] --> G["3"]
    style A fill:#fff,stroke:#000
    style B fill:#fff,stroke:#000
    style C fill:#fff,stroke:#000
    style D fill:#fff,stroke:#000
    style E fill:#fff,stroke:#000
    style F fill:#fff,stroke:#000
    style G fill:#fff,stroke:#000
    subgraph OutputOriginals
        D
        E
        F
        G
    end
■ Offset function
Offset function "ON" Offset function "OFF"

natural_image
Two identical line drawings of stacked rectangular panels, no text or symbols presentThe offset function offsets each set of output from the previous set for easy separation. (On the saddle stitch finisher, the offset function is only possible using the offset tray.)
The offset function does not operate when the staple sort function is selected.
■ Staple sort function
Each set of output is collated by the sort function, stapled, and delivered to the upper (offset) tray. Three stapling positions are available: top left staple, two left staples, or lower left staple.
■ Saddle stitch function
Each set of output is stapled in two places along the centerline of the paper, folded (with the side facing up inside), and delivered to the lower (saddle stitch) tray. In the factory default settings, the saddle stitch finisher is set to staple and fold sets after "Pamphlet copy" is performed. If desired, the "Pamphlet copy" function can be disabled using the key operator programs.

natural_image
Abstract geometric line drawing of stacked books or layers with no text or symbols
"Pamphlet copy" is used to copy two originals onto the front side and two originals onto the back side of each sheet of paper for easy creation of a pamphlet (See the operation manual for copier).
■ Punch function (only when a punch unit is installed)
When an optional punch unit is installed on the saddle stitch finisher, holes can be punched in the output. Punched output is delivered to the offset tray.
The punch function cannot be used in combination with the saddle stitch function.
For paper sizes that can be punched, see the specifications on page 2.
[Example]

Original 2 Punch hole positions

flowchart
graph LR
    A["B"] --> B[":B"]
Caution
• The following types of paper cannot be stapled:
Transparency film, heavy paper*, label sheets, envelopes, postcards, thin paper
- The following types of paper cannot be punched:
Transparency film, label sheets, envelopes, postcards, thin paper
- Be sure to select the same paper size for the output. Stapling and punching are not possible when different sizes are mixed together. Note, however, that if the widths are the same, the "mix size original feeding mode"** function can be used to staple and punch different sizes of paper (saddle stitch is not possible).
**Stapling and punching are not possible if "mix size original feeding mode" includes sizes that cannot be stapled (such as 5-1/2" x 8-1/2" and A5).
*When performing cover copy, heavy paper used for covers can be stapled.
USING THE SADDLE STITCH FINISHER FUNCTIONS
■ Using the saddle stitch finisher functions in copy mode
Touch the [OUTPUT] key in the main screen of copy mode to display the screen for selecting saddle stitch finisher functions. Selections include the sort function, staple sort function, saddle stitch function, group function, and output tray.

① [GROUP] key (p.3)
Select this function to have output grouped by page.
② [STAPLE SORT] key (p.3)
Select this function to have output collated into sets and stapled. The output is delivered to the offset tray (without being offset).
③ [SORT] key (p.3)
Select this function to have output collated into sets.
④ Icon display
When the sort, staple sort, group, or saddle stitch function is selected, the corresponding icon appears here.
⑤ [OFFSET TRAY] key (p.1)
Select this key to have output delivered to the offset tray. (When the staple sort function is selected, the offset tray is automatically selected.)
⑥ [CENTER TRAY] key
Select this key to have output delivered to the center tray.
⑦ [OK] key
Touch this key to close the screen and return to the main screen.
⑧ [OFFSET] key (p.3)
When a checkmark appears, the offset function operates. When the checkmark is removed, the offset function does not operate. (The offset function does not operate when the staple sort function or the saddle stitch function is selected.)
⑨ [SADDLE STITCH] key (p.3)
Each set of output is stapled along the centerline of the paper and folded.
When this function is selected, the "Pamphlet copy" function is automatically selected.

When "AUTOMATIC SADDLE STITCH" is disabled in the key operator programs, the "Pamphlet copy" is not automatically selected (p.15).
⑩ [PUNCH] key (p.4)
When a punch unit is installed, select this key to punch holes in the output.
* When a function is selected, it is highlighted.

When the saddle stitch finisher is disabled in the key operator programs, the saddle stitch finisher functions cannot be used (p.15).
■ Using the saddle stitch finisher functions in printer mode
To use the staple function, select "Left", "Right", or "Top" for "Binding Edge" and "1 Staple" or "2 Staples" for "Staple" in the "Finishing" field on the "Main" tab of the printer driver setup screen (shown at right).
To use the pamphlet function, select the "Pamphlet Style" radio button in the "Document Style" field and then select "Tiled Pamphlet" or "2-Up Pamphlet". In the "Finishing" field, select "2 Staples" for "Staple".

The "Pamphlet Style" function is not available unless the printer expansion kit is installed.
PCL printer driver on the Windows XP as an example
![OLIVETTI d-Copia 2301/2701 Printing Preferences More Paper Advanced Mathematica Frequently used setting Copers 1 □ Callone Document Style ○ 1-Sided ○ 2-Sided[Book] ○ 2-Sided[Tablet] ● PunchStyle Tired PunchStyle User Settings Unified Save... Finishing... Binding Edge Left Staples 2 Staples □ Punch □ No Other Job Control... □ Auto Job Control Review OK Cancel Apply Help Punch](/content/2026/05/825301/images/8c75e93e78834fd012486652d8e73d8a55658bcb34b69f54f710dee569b7043d.jpg)
Using the punch function when an optional punch unit is installed
To use the punch function, select the "Punch" checkbox in the "Finishing" field of the "Main" tab shown above.

- To use the above printer function, the peripheral device installation settings must be correctly configured in the printer driver properties. To configure the peripheral device installation settings, right-click the icon of the installed printer driver, select "Properties", and then select the "Configuration" tab. (In Windows 95/98/Me/NT 4.0, select "Properties", select the "Setup" tab, and then select the "Configuration" tab.)
- The paper selection and combination of functions already selected may prevent some settings from being selected. For detailed explanations of the settings, see the Help file for the printer driver.
USING THE SADDLE STITCH FINISHER TO MAKE COPIES
■ Orientation of the original when using the saddle stitch finisher function
When using the saddle stitch finisher to staple, make pamphlets, or punch holes, place the original as shown below. Staple and punch positions vary depending on the staple position setting and the orientation of the original.
Using the RSPF
Place the original face up. Place the original face down.
Using the document glass
Staple positions (example)


natural_image
Diagram of a printer or scanner device with a labeled section 'S' (no text or symbols beyond the label)


Top left staple Two left staples
(11" x 17", 8-1/2" x 14" and 8-1/2" x 13" (A3 and B4) size portrait originals)


natural_image
Line drawing of a vintage electronic device with a screen displaying a stylized symbol (no text or labels present)
lower left staple

- When loading letterhead paper in the tray, orient the paper so that the letterhead is away from you or to the left, as shown at right.
- When the staple sort or punch function is used, the automatic original image rotation function does not operate.
The procedure for using the staple sort function is explained below.
1 Place the original (p.6).
2 Touch the [OUTPUT] key.
![OLIVETTI d-Copia 2301 - Touch the [OUTPUT] key. - 1](/content/2026/05/825301/images/0c32e7cbe293f875516c412b14ba9b72972362d28799e8f11939ffc9071592f9.jpg)
flowchart
graph TD
    A["2-SIDED COPY"] --> B["OUTPUT"]
3 Touch the [STAPLE SORT] key.
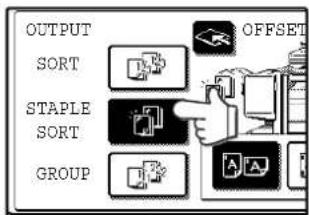
When the [STAPLE SORT] key is selected, the offset tray is automatically selected. Output to the center tray is not possible.
4 Select the staple position.

Select top left staple, two staples, or lower left staple as appropriate for the original. For one upper left staple when the original is a size such as 11" x 17" or 8-1/2" x 14" (A3 or B4) in the portrait orientation, select the lower left staple (
5 Touch the [OK] key.
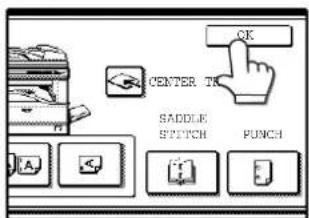
6 Select the number of copies and other copy settings, and touch the [START] key (①)

7 Using the RSPF
Copying begins after all pages are scanned.
Using the document glass
Place the next page on the document glass and press the [START] key ( ) Repeat until all pages have been scanned and then touch the [READ END] key on the panel.
![PLAYS NEXT ORIGINAL: PAYS [START]. WHEN FINISHED, PAYS [READ END]. 5.00-80](/content/2026/05/825301/images/d62331392625c4123411795c07bebfc66e8c08baad0143cef6075d7b4901376b.jpg)
If the memory becomes full while the pages are being scanned, "MEMORY IS FULL. PRESS [START] TO BEGIN COPYING OR [CA] TO CANCEL." will appear in the display. To copy only the pages that have been scanned to that point, press the [START] key ( )To cancel the job and clear the scanned pages from memory, press the [CLEAR ALL] key ( )

To increase the number of pages that can be scanned into memory, increase the memory allocation in the key operator programs or install more memory. (See "Key operator's guide".)
REPLACING THE STAPLE CARTRIDGE AND REMOVING STAPLE JAMS
A message will appear in the display when the staple cartridge needs replacement or a staple jam occurs. Follow the procedures below to replace the cartridge or remove the jam.
■ Replacing the staple cartridge
1 Open the front cover.

natural_image
Illustration of a hand inserting a device into a computer case (no text or symbols visible)2 Pull the stapler section forward.
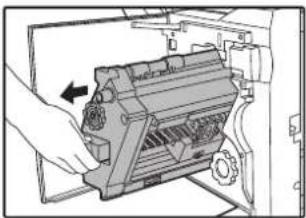
natural_image
Mechanical assembly diagram showing a hand operating a device with a circular arrow indicating motion (no text or symbols present)3 Rotate roller rotating knob A in the direction of the arrow to move the staple unit all the way forward.

Rotate the roller rotating knob A until the triangle mark and indicator are aligned as shown in the illustration.
4 Remove the empty staple box.
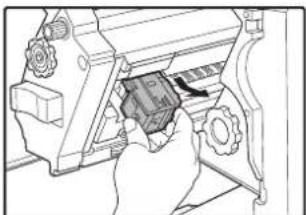
natural_image
Line drawing of a hand operating a mechanical device with a gear and handle (no text or symbols)5 Remove the empty staple cartridge.

natural_image
Two-panel illustration showing a mechanical component being adjusted, with arrows indicating movement (no text or symbols)Press the lock button to release the lock on the staple box cover and remove the staple cartridge.

The staple cartridge cannot be removed if staples remain in it.
6 Install the new staple cartridge in the staple box.

natural_image
Two-panel illustration showing a mechanical device being adjusted, with arrows indicating the process (no text or symbols present)Insert the staple cartridge into the staple box and then press down on the staple box cover to lock the staple cartridge.

- Do not remove the seal that holds the staples before installing the staple cartridge in the staple box.
- Make sure that the new staple cartridge is locked securely in the staple box. Press down on the staple box cover until you hear a "click" indicating that the staple cartridge is locked.
7 Pull the seal that holds the staples straight out.

natural_image
Hand holding a small mechanical component with an arrow indicating rotation (no text or symbols)8 Push in the staple box.

natural_image
Illustration of hands installing or adjusting a mechanical component (no text or symbols visible)Push until you hear a "click".
9 Push in the stapler section.
10 Close the front cover.

Make a test print or copy in staple sort mode to verify that stapling takes place correctly.
■ Removing a staple jam
1 Press the detach button and separate the saddle stitch finisher from the machine.

natural_image
Illustration of hands operating a computer tower with a rack and monitor (no text or symbols visible)!Caution
The saddle stitch finisher and the machine are connected at the rear. Exercise caution when pulling them apart.
2 Open the front cover.
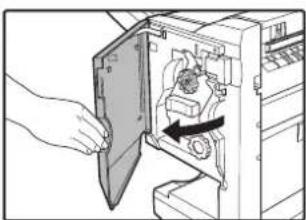
natural_image
Illustration of a hand opening a computer case with an arrow indicating the process (no text or symbols present)3 Rotate roller rotating knob C until the blue indicator appears as shown below.

4 Remove the paper from the stapler compiler.

natural_image
Illustration of a printer being inserted into a slot, showing the blade and handle (no text or symbols)5 Open the saddle stitch section cover.
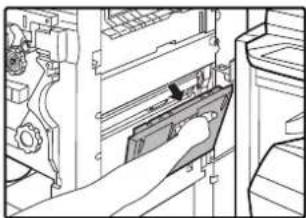
natural_image
Line drawing of a hand inserting a component into a device (no text or symbols visible)6 Remove any misfed paper.

natural_image
Technical line drawing of a mechanical device with a hand operating a component (no visible text or symbols)Remove the paper gently without tearing it.
7 Close the saddle stitch section cover.

natural_image
Line drawing of a hand inserting a component into a machine (no text or symbols visible)8 Pull the stapler section forward.

natural_image
Diagram of a mechanical device inside a container with an arrow indicating direction (no text or symbols present)9 Rotate roller rotating knob A in the direction of the arrow to move the staple unit all the way forward.

Rotate the roller rotating knob A until the triangle mark and indicator are aligned as shown in the illustration.
10 Remove the staple box.
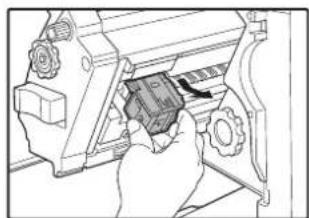
natural_image
Illustration of a hand operating a mechanical device with gears and a handle (no text or symbols visible)11 Raise the lever on the front edge of the staple box.
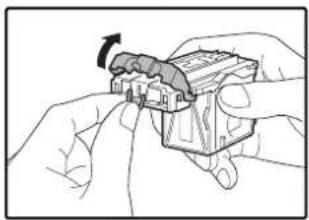
natural_image
Illustration of hands assembling a mechanical component with a rotating arrow (no text or symbols)If the leading staple is bent, be sure to cut it off. If a bent staple is used for stapling, a staple jam will result.
13 Push in the staple box.
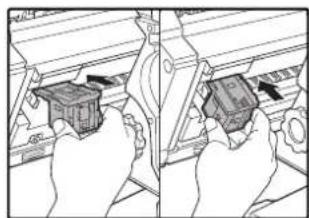
natural_image
Illustration of hands installing or adjusting a small mechanical component (no text or symbols visible)Push the staple box all the way in until you hear a "click".
12 Replace the front edge lever.

natural_image
Illustration of hands holding a small object with an arrow indicating rotation (no text or symbols)14 Push in the stapler section.
15 Close the front cover.
16 Push the saddle stitch finisher back onto the machine.

Make a test print or copy in staple sort mode to verify that stapling takes place correctly.
■ Discarding punch waste (when a punch unit is installed)
1 Press the detach button and separate the saddle stitch finisher from the machine.
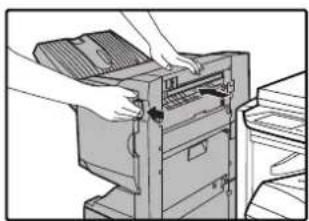
natural_image
Illustration of hands operating a computer tower with a rack and ventilation unit (no text or symbols visible)3 Replace the punch waste receptacle.

natural_image
Illustration of a hand inserting a device into a rack (no text or symbols visible)
The saddle stitch finisher and the machine are connected at the rear. Exercise caution when pulling them apart.
4 Push the saddle stitch finisher back onto the machine.

natural_image
Illustration of hands operating a computer tower with a rack, no text or symbols visible2 Gently pull the punch waste receptacle forward and discard the punch waste.

natural_image
Illustration of a hand inserting a device into a rack (no text or symbols visible)Empty the punch waste receptacle into a garbage bag or other container, taking care not to let punch waste scatter.
REMOVING PAPER MISFEEDS
When a paper misfeed occurs during copying, a message and picture will appear in the display of the operation panel as shown below and copying will automatically stop. Follow the procedures below to remove the misfeed.


When a misfeed occurs, you can touch the [INFORMATION] key to display brief instructions for removing the misfeed.
■ Misfeed in the relay path
1 Grasp the hand hold on the center cover and open the cover.

natural_image
Diagram of a printer's internal structure showing paper feeding into a tray (no text or symbols)2 Remove the misfed paper from the conveyor unit.

natural_image
Illustration of a hand inserting a card into a machine (no text or symbols visible)Remove the paper slowly, taking care not to tear it.
3 Close the center cover.

natural_image
Diagram of a printer's internal structure showing a paper feeding into a slot (no text or symbols present)■ Misfeed in the saddle stitch finisher
1 Press the detach button and separate the saddle stitch finisher from the machine.

natural_image
Illustration of hands operating a computer tower with a rack and handle (no text or symbols visible)Caution
The saddle stitch finisher and the machine are connected at the rear. Exercise caution when pulling them apart.
2 Remove any misfed paper from the machine.
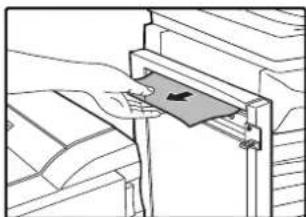
natural_image
Line drawing of a hand pressing a mechanical component with an arrow indicating force (no text or symbols)3 If there was no misfed paper in step 2, pull roller rotating knob B on the punch unit toward you and rotate it. (Only when an optional punch unit is installed.)

Rotating roller rotating knob B releases the caught paper.
4 Open the top cover.
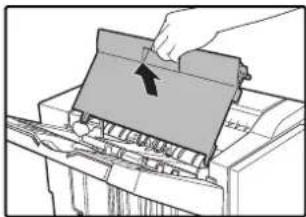
natural_image
Illustration of a hand pressing down a stack of paper sheets with an arrow indicating the process (no text or symbols present)5 Remove the misfed paper.
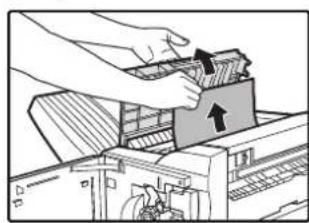
natural_image
Illustration of hands installing or removing a device into a machine (no text or symbols visible)Remove the paper gently, taking care not to tear it.
6 Close the top cover.

natural_image
Illustration of a hand pressing down a mechanical component with an arrow indicating downward motion (no text or symbols present)7 Remove any misfed paper from the stapler compiler.

natural_image
Illustration of a hand pressing down on a printer's side panel (no text or symbols visible)Remove the paper gently, taking care not to tear it.
8 Open the cover of the saddle stitch section.

natural_image
Technical line drawing of a mechanical assembly with a hand inserting a component (no text or symbols visible)9 Remove the misfed paper.

natural_image
Diagram of a hand inserting a device into a rack, showing mechanical components and a highlighted section (no text or symbols present)Remove the paper gently, taking care not to tear it.
10 Open the front cover.

natural_image
Illustration of a hand opening a computer case with an arrow indicating the process (no text or symbols present)15 Push the saddle stitch finisher back onto the machine.

natural_image
Illustration of hands operating a computer tower with a rack, no text or symbols visible11 Rotate roller rotating knob D in the direction of the arrow.

12 Remove any misfed paper from the saddle stitch tray.

natural_image
Technical line drawing of a mechanical assembly with a hand operating a tool (no text or symbols present)Remove the paper gently, taking care not to tear it.
13 Close the cover of the saddle stitch section.
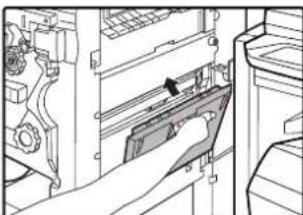
natural_image
Line drawing of a hand inserting a device into a rack (no text or symbols visible)14 Close the front cover.

natural_image
Illustration of a hand inserting a device into a computer case (no text or symbols visible)TROUBLESHOOTING (RELATED TO SADDLE STITCH FINISHER)
If you experience difficulty with the saddle stitch finisher, check the following troubleshooting guide before calling for service. Many problems can be resolved by the user.
| Problem Cause and solution Page | ||
| Stapling position is not correct | The staple function is not set correctly for the desired staple position.Check the possible staple positions and adjust appropriately. | 7 (step 4) |
| The saddle stitch finisher does not operate | The top cover or front cover of the saddle stitch finisher is open.Close all covers. | 1 |
| A message appears instructing you to remove paper from the stapler compiler.Remove all paper that remains in the stapler compiler as explained in step 4 on page 9. | 9 | |
| Stapling does not take place (including saddle stitch) | A message appears instructing you to check the staple unit.Remove the staple jam. | 9 |
| A message appears informing you that staples are needed.Replace the staple cartridge. Make sure that the staple box has been installed. | 8 | |
| Different widths of paper are mixed together.Stapling of different widths of paper is not possible. | - | |
| The paper is badly curled and is not stapled when output.Some qualities and types of paper result in bad curling when output. Remove the paper from the tray or the bypass tray, turn it around to reverse the top and bottom, and reload it. | - | |
| Incorrect punch position*1 | The punch function is not set for the desired punch position.Check the possible punch positions and adjust appropriately. | 4 |
| Punching does not take place*1 | A message appears instructing you to check the punch unit.Discard the punch waste. | 10 |
| Different widths of paper are mixed together.Punching of different widths of paper is not possible. | - | |
| The paper is badly curled and is not punched when output.Some qualities and types of paper result in bad curling when output. Remove the paper from the tray or the bypass tray, turn it around to reverse the top and bottom, and reload it. | - | |
| "CALL FOR SERVICE.CODE:F1-53." is displayed. | The cable between the machine and the saddle stitch finisher is not connected.Turn off the power of the machine, connect the cable on the back of the saddle stitch finisher to the connector on the machine, and then turn on the machine power. | - |
*1 When an optional punch unit is installed.
USING THE KEY OPERATOR PROGRAMS
When the saddle stitch finisher is installed on the multifunction machine, the key operator programs indicated below are added or changed. For information on "USING THE KEY OPERATOR PROGRAMS", see page 2 of the "Key operator's guide" that comes with the machine.
■ Added programs
The following two programs are added to "DEVICE CONTROL" (page 12 of the "Key operator's guide"):
Disabling of finisher
This program is used to prohibit use of the saddle stitch finisher. The program is also used if the finisher fails. When use of the finisher is prohibited, the staple function, saddle stitch function, punch function, and output destination are grayed out.
Saddle stitch position adjust
This program is used to adjust the stapling position (folding position) when the saddle stitch function is used. The position can be shifted within a range of ±3.0 mm from the base position in increments of 0.1 mm. When "AUTOMATIC SADDLE STITCH" is disabled and "SADDLE STITCH" is selected in "OUTPUT", the display does not change to the pamphlet setting screen.

Base position
■ Changed programs
The "OUTPUT TRAYS" and "INITIAL STATUS SETTINGS" programs are changed when the saddle stitch finisher is installed.
Output trays
A combination of output destinations can be selected for copying, printing, and fax in "OUTPUT TRAYS" in "DEVICE CONTROL". When the saddle stitch finisher is installed, the combinations that can be selected are as shown at right.
| Selections Description | |
| PATTERN 1 Copying: | Offset trayPrinting: Center trayFax: Center tray |
| PATTERN 2 Copying: | Center trayPrinting: Offset trayFax: Center tray |
| PATTERN 3 Copying: | Center trayPrinting: Offset trayFax: Offset tray |
| PATTERN 4 Copying: | Offset trayPrinting: Center trayFax: Offset tray |

If the machine does not have the fax function, "PATTERN 3" and "PATTERN 4" do not appear and the tray positions in "PATTERN 1" and "PATTERN 2" change.
Initial status settings
The stapling position when the copy settings are returned to the default settings can be selected. Select the stapling position for the staple sort function in "OUTPUT" in "INITIAL STATUS SETTINGS" of the "COPY FUNCTION SETTINGS".
SPECIFICATIONS
| Model | d-Copia 2301 | d-Copia 2701 |
| Type Digital Multifunction System, Desktop | ||
| Photoconductive type OPC drum | ||
| Document glass type Fixed | ||
| Copy system Dry, electrostatic transfer | ||
| Originals Sheets, bound documents | ||
| Originals size Max. A3 (11" x 17") | ||
| Copy size | Max. A3 (11" x 17")Min. A6 (5-1/2" x 8-1/2")Image loss: Max. 4 mm (5/32") (leading and trailing edges)Max. 6 mm (11/64") (along other edges in total) | |
| Copying speed(one-sided copying at 100% copy ratio) | 600dpi12 copies/min. A3 (11" x 17")13 copies/min. 8-1/2" x 14"14 copies/min. B4 (8-1/2" x 13")16 copies/min. A4R (8-1/2" x 11"R)18 copies/min. B5R23 copies/min. A5, B5, A4 (5-1/2" x 8-1/2", 8-1/2" x 11") | 600dpi14 copies/min. 11" x 17"15 copies/min. A316 copies/min. 8-1/2" x 14"17 copies/min. B4 (8-1/2" x 13")18 copies/min. A4R (8-1/2" x 11"R)21 copies/min. B5R27 copies/min. A5, B5, A4 (5-1/2" x 8-1/2", 8-1/2" x 11") |
| 1200dpi7.5 copies/min. A3 (11" x 17")8 copies/min. 8-1/2" x 14"8.5 copies/min. B4 (8-1/2" x 13")9 copies/min. A4R (8-1/2" x 11"R)10.5 copies/min. B5R13.5 copies/min. A5, B5, A4 (5-1/2" x 8-1/2", 8-1/2" x 11") | 1200dpi7.5 copies/min. A3 (11" x 17")8 copies/min. 8-1/2" x 14"8.5 copies/min. B4 (8-1/2" x 13")9 copies/min. A4R (8-1/2" x 11"R)10.5 copies/min. B5R13.5 copies/min. A5. B5, A4 (5-1/2" x 8-1/2", 8-1/2" x 11") | |
| Continuous copy Max. 999 | copies; subtractive counter | |
| First-copy time* Approx. 4 | 8 sec. | |
| Warm-up time* Approx. 23 | sec. | |
| Copy ratio | 600 dpi:Variable: 25% to 400%, in 1% increments (total 376 steps)Fixed preset: 25%, 50%, 70%, 81%, 86%, 100%, 115%, 122%, 141%, 200%, 400%(25%, 50%, 64%, 77%, 100%, 121%, 129%, 200%, 400%) | |
| 1200 dpi:Variable: 50% to 200%, in 1% increments (total 151 steps)Fixed preset: 50%, 70%, 81%, 86%, 100%, 115%, 122%, 141%, 200%(50%, 64%, 77%, 100%, 121%, 129%, 200%) | ||
| Exposure system | Document glass: Moving optical source, slit exposure (stationary platen) with automatic exposure functionRSPF: Moving original | |
| Paper feed | Two automatic feeding paper trays (500 sheets x 2) + bypass tray (100 sheets) | |
| Fusing system Heat rollers | ||
| Developer system Magnetic brush development | |
| Light source Xenon lamp | |
| Resolution | Scan: 400 dpi Output: 600 dpi (AUTO/TEXT/PHOTO mode)Scan: 400 dpi Output: 1200 dpi (SUPER PHOTO mode) |
| Gradation | Scanning: 256Printing: 2 value |
| Power supply | Local voltage ±10% (For this machine power supply requirements, see the name plate located on the back of the machine.) |
| Power consumption Max. | 1.4 kW |
| Overall dimensions (with bypass tray folded) | 623 mm (W) x 609.5 mm (D) (24-17/32" (W) x 24" (D)) |
| Weight | Approx. 47 kg (103.7 lbs.) (Not includes toner cartridge) |
| Dimensions | 623mm (W) x 609.5mm (D) x 785.5mm (H)(24-17/32" (W) x 24" (D) x 30-15/16" (H)) |
| Operating conditions Temperature: 15°C to 30°C (59°F to 86°F), Humidity: 20% to 85% | |
| Noise level | Sound Power Level LwA(1B=10dB)Copying: 6.3[B]Standby: 3.6[B]Sound Pressure Level LpA (bystander positions)Copying: 50[dB(A)]Standby: 25[dB(A)]Sound Pressure Level LpA (operator position)Copying: 51[dB(A)]Standby: 20[dB(A)]Noise emission measurement in accordance with ISO 7779. |
| Emission concentration (measured according to RAL-UZ62) | Ozone: 0.02 mg/m ^3 or lessDust: 0.075 mg/m ^3 or lessStyrene: 0.07 mg/m ^3 or less |
* The first-copy time and warm-up time may vary depending on the power-supply voltage, ambient temperature, and other operating conditions.

As a part of our policy of continuous improvement, OLIVETTI reserves the right to make design and specification changes for product improvement without prior notice. The performance specification figures indicated are nominal values of production units. There may be some deviations from these values in individual units.
INDEX
Symbols
/P key 10, 54, 55
2 - 8
2 x 500-sheet paper feed unit 69, 76, 78
256MB expansion memory board 76
2-SIDED COPY key 21, 27, 28
500-sheet paper feed unit 69, 76, 78
512MB expansion memory board 76
8MB fax memory 76
A
ABCDEF configuration 53
ACC.#-C key 10,56
Account number 56
Adjusting the exposure.... 29
Audting mode 56
AUTO IMAGE key 30
Auto tray switching 53
Automatic ratio selection 30
Automatic two-sided copying
- Document glass 27
- RSPF 28
AZERTY configuration 53
B
B/W reverse copy.... 50
B/W REVERSE key.... 39, 50
Barcode font kit 76
BINDING CHANGE key 27
Bypass feed 26
Bypass tray 9, 26, 66, 75
Bypass tray extension 9, 18
BYPASS TRAY key....20
Bypass tray paper feed roller 75
Bypass tray paper guides....9
C
Card shot....50a
Cautions on handling the machine ....4
Cautions on using the machine.... 3
Centre tray 8,68
Centre tray counter function.... 24
Changing a tray's paper tray
and paper size settings 19
Checking the toner quantity 74
Cleaning the machine
- Bypass tray paper feed roller 75
- Document glass 75
- RSPF 75
CLEAR ALL key 10, 14
CLEAR key.... 10, 22, 23
Clock 51
Colour paper 15
Copy finishing functions
- Group copy 35
- Offset function.... 35
- Sort copy.... 35
- Staple sort.... 37
COPY key 21,72,74
Copy number display 21
Copy ratio display.... 21
COPY RATIO key 21, 31, 32
Cover copy 48
COVER key 39,49
Custom settings 51
CUSTOM SETTINGS key 10, 19, 20, 52
D
DELETE key.... 55
DETAIL key 12
Disabling of two-sided printing on
letterhead paper 53
Display contrast.... 51, 53
Display message.... 58
Display switching key 12
Document cover 8, 22, 24, 76
Document feeder cover 8,65
Document feeder tray.... 8, 23, 65
Document glass 8
Document transport cover 8,65
Document transport cover knob 8,65
Dual page copy 43
DUAL PAGE COPY key 39,43
E
E-MAIL/FTP key 12
Enlargement key 31
Envelope 15, 16
Erase copy 42
ERASE key 39,42
Erase mode
- Centre erase 42
- Edge erase.... 42
- Edge+centre erase.... 42
Erase width 42
Error message.... 58
Exit area 8,65
Exposure adjustment 29
Exposure display.... 21
EXPOSURE key 21, 29
Exposure value guidelines 29
Extra image adjust 26
F
Facsimile expansion kit 76
FAX JOB key.... 12
FAX key
- DATA indicator 10
- LINE indicator.... 10
Finisher 37, 70, 73, 76, 77
Front cover 8,66,67,72
Fusing unit paper guide.... 9, 67
Fusing unit release lever 9,67
G
Greyed out 11
Group copy.... 35
GROUP key 36
H
Handles....8
Heavy paper.... 15
How to place the original
- Document glass 22
- RSPF 23
|
icon (Job status screen).... 12
Important points when inserting paper
in the bypass tray.... 18
Important points when selecting an installation site.. 3
INFORMATION key 64
Initial settings 14
INTERRUPT key.... 10, 34
Interrupting copy 34
J
JOB BUILD key.... 39, 45
Job build mode.... 23, 45
Job list.... 12
Job program
- Deleting.... 55
- Executing 55
- Storing.... 54
Job separator tray 8,76
JOB STATUS key 10, 12
Job status screen.... 12
L
Label 15
Layout 46
Letterhead paper.... 15, 16, 27
List print.... 51, 53
Loading paper 15
Loading paper in the bypass tray.... 18
Loading the paper in the paper tray 17
M
Main screen of copy mode.... 21
MANUAL key.... 47
Manual ratio selection 31
Margin shift copy.... 41
MARGIN SHIFT key.... 39, 41
Material safety data sheet.... 82
MENU key.... 31
Message display 21
Misfed original.... 65
Misfeed in an output tray.... 70
Misfeed in the bypass tray 66
Misfeed in the centre tray.... 68
Misfeed in the fusing area.... 67
Misfeed in the lower paper tray.... 69
Misfeed in the machine 66
Misfeed in the paper feed area 66
Misfeed in the upper exit area.... 70
Misfeed in the upper paper tray 68
Misfeed removal
- Bypass tray 66
- Centre tray 68
- Lower paper tray 69
- Machine.... 66
- Output tray 70
- RSPF 65
- Upper exit tray.... 70
- Upper paper tray 68
Misfeed removal guidance 64
Mixed feeding.... 25
Mode select keys 10
Mode switching key.... 12
Multi shot copy 46
MULTI SHOT key.... 39, 46
N
Network scanner expansion kit 76
Normal copying
- document glass.... 22
- RSPF 23
Number of pages fed through the RSPF.... 53
Number of pages sent using the
network scanner function 53
Number of sent and received fax pages 53
Number of times the stapler was used.... 53
Number of two-sided copies.... 53
Numeric keys 10
0
Offset function 35, 36
Offset tray.... 35, 71, 77
Operation panel.... 8
Optional equipment.... 76
Orientation of the original (Staple sort) 37
Original feed display.... 21
Original guides 8
Original image type
- Photo.... 29
- Super photo.... 29
- Text 29
- Text/photo 29
Original size 22, 23, 24, 47
Original size display 21
ORIGINAL SIZE key 39,47
Originals that can be used in the RSPF 24
OUTPUT key.... 21, 35, 36, 38
Output tray 70
P
Pamphlet copy 44
PAMPHLET COPY key 39,44
Paper.... 15
Paper capacity 15
Paper guide.... 71
Paper misfeeds 62
Paper select display 21
PAPER SELECT key 20, 21, 22, 23, 26
Paper size 15, 19
Paper size card 17
Paper size display 21
Paper tray.... 9, 15, 17, 19, 68
Paper type.... 15, 19, 20
Paper weight 15
Part names and functions
- Operation panel 10
Peripheral devices.... 76
Photoconductive drum 9,66
Plain paper.... 15
Points to note when making copies.... 24
Power off.... 13
Power on.... 13
Power outlet 4
Power save modes
- Auto power shut-off mode.... 14
- Preheat mode 14
Power switch.... 8, 13
Preset enlargement ratios.... 31
PRINT JOB key.... 12
PRINT key
- DATA indicator.... 10
- ONLINE indicator.... 10
Print server card.... 76
Printer expansion kit.... 76
PRIORITY key.... 12
PS3 expansion kit 76
Q
QWERTY configuration.... 53
R
READ-END key.... 36, 38, 45, 46
Recycled paper 15
Reduction key 31
Reduction/enlargement/zoom 30
Release roller.... 65
Replacing the toner cartridge.... 72
Reversing tray.... 8, 65
Roller rotating knob.... 9, 66, 67
Rotation copying 25
RSPF 8, 23, 24, 65, 76, 79
S
Saddle stich finisher....79a
SCAN key
- DATA indicator.... 10
Selecting the original image type 29
Setting the paper type in the bypass tray
- CUSTOM SETTINGS key.... 20
- PAPER SELECT key 20
Shift direction 41
Side cover 9,67
Side cover handle 9
Sort copy.... 35
SORT key.... 36
Special modes
- B/W reverse copy.... 50
- Cover copy.... 48
- Dual page copy.... 43
- Erase copy.... 42
- Job build mode.... 45
- Margin shift copy.... 41
- Multi shot copy.... 46
- Original size 47
- Pamphlet copy 44
SPECIAL MODES key 21, 39, 40
Special papers
-Envelope 16
- Letterhead paper.... 16
special papers 26
Specifications.... 80
Staple box 73
Staple cartridge.... 73
Staple cartridge replacement 73
Staple cover 74, 77
Staple jam removal 74
Staple sort.... 37
STAPLE SORT key.... 38
Stapler compiler 71
Stapler compiler cover 70
Stapler cover.... 73
Stapling positions.... 37
START key.... 10, 22, 23
STOP/DELETE key.... 12
Storage of supplies 79
STORE/DELETE key 54, 55
Stream feeding mode.... 23
T
Thin paper.... 15
Toner cartridge.... 9,72
Toner cartridge lock release lever.... 9,72
Top cover 77
Top tray.... 71, 77
Total count 51, 53
Total number of copies and printed pages.... 53
Total output count 74
Touch panel 10, 11
Transparency film.... 15, 16, 27
Tray number.... 15, 19
Tray settings.... 19, 20, 51, 53
TRAY SETTINGS key 19,20
Troubleshooting 60
U
Upper exit area.... 70
Upper right side cover 9,70
Using the touch panel 11
W
warm-up 13
x
X key 33
XY ZOOM copying 32
XY ZOOM key 32
Y
Y key 33
INDEX BY PURPOSE
Preparations
Bypass tray, loading paper in....18
Document cover, removing ....24
Initial settings, returning to 14
Paper size, changing....19
Paper type, changing 19
Paper, loading....17
Power, turning off....13
Power, turning on....13
Making copies
Auditing mode, copying when enabled ....56
Automatic two-sided copying
- Document glass ......27
- RSPF 28
Bypass tray, copying from....26
Copy run, stopping....22, 23
Copying
- Document glass ......22
- RSPF 23
Document glass, copying from....22
Enlarging/reducing copies
- Automatic ratio selection....30
- Manual ratio selection....31
- XY zoom copying....32
Exposure, adjusting....29
Exposure, selecting....29
Image orientation, changing....27, 28
Interrupt copying 34
Mixed feeding....25
Original image type, selecting....29
Paper size (tray), selecting manually .....22
RSPF, copying from....23
Special paper, copying on....26
Stream feeding mode, using 23
Using convenient copy functions
Black and white reverse copying....50
Cover, adding to copies ....48
Dual page copying 43
Erase copying 42
Group copying, using 35
Large number of originals, copying....45
Margin, creating ....41
Multi shot copying 46
Offset function, using 35
Original size, specifying 47
Pamphlet copying....44
Selecting finishing functions
- Group copying....35
- Offset function....35
- Sort copying....35
- Staple sort function ......37
Sort copying, using....35
Special modes, using
- B/W reverse copy.... 50
- Cover copy.... 48
- Dual page copy 43
- Erase copy 42
- Job build mode.... 45
- Margin shift copy.... 41
- Multi shot copy 46
- Original size 47
- Pamphlet copy 44
Staple sort function, using.... 37
Making the machine easier to use
Cancelling a job.... 12
Cancelling a job in progress.... 12
Date and time, setting 53
Deleting a job 12
Display contrast, adjusting 53
Job details, displaying.... 12
Job program, deleting 55
Job program, executing.... 55
Job program, storing 54
Keyboard, changing 53
Lists, printing 53
Priority, giving to a specified job.... 12
Total count, displaying 53
Trays, configuring settings 53
User settings, configuring.... 51
Troubleshooting and maintenance
Cleaning the machine 75
Misfeeds, removing
- Bypass tray 66
- Centre tray 68
- Lower paper tray 69
- Machine.... 66
- Output tray 70
- RSPF 65
- Upper exit area.... 70
- Upper paper tray 68
Staple cartridge, replacing 73
Staple jams, removing.... 74
Toner cartridge, replacing 72
Toner, checking.... 74
Total output count, checking 74
Troubleshooting 60

natural_image
Line drawing of a computer monitor with a cable inserted, showing no text or symbolsVAROITUS!
LAITTEEN KÄYTTÄMINEN
MUULLA KUIN TÄSSÄ
KÄYTTÖOHJEESSA MAINITULLA
TAVALLA SAATTAA ALTISTAA KÄYTTÄJÄN
TURVALLISUUSLUOKAN 1
YLITTÄVÄLLE
NÄKYMÄTTÖMÄLLE
LASERSÄTEILYLLE.
WARNING
OM APPARATEN ANVÄNDS PÅ
ANNAT SÄTT ÄN I DENNA
BRUKSANVISNING
SPECIFICERATS, KAN
ANVÄNDAREN UTSÄTTAS FÖR
OSYNLIG LASERSTRÄLNING,
SOM ÖVERSKRIDER GRÄNSEN
FÖR LASERKLASS 1.

Laserstrahl
CAUTION INVISIBLE LASER RADIATION WHEN OPEN AND INTERLOCKS DFEATED. AVOID EXPOSURE TO BEAM.
This connector is only intended for service purposes.
Any connection to this terminal may cause malfunctions of the copy machine.
Instruction for service technician:
The cable length for the service terminal has to be less than 3 m (10 feet).

LUOKAN 1 LASERLAITE
KLASS 1 LASERAPPARAT
CLASS 1 LASER PRODUCT
LASER KLASSE 1
For users in the USA
This device complies with Part 15 of the FCC rules. Operation is subject to the following two conditions: (1) This device may not cause harmful interference, and (2) this device must accept any interference received, including interference that may cause undesired operation.
WARNING:
FCC Regulations state that any unauthorized changes or modifications to this equipment not expressly approved by the manufacturer could void the user's authority to operate this equipment.
Note:
This equipment has been tested and found to comply with the limits for a Class A digital device, pursuant to part 15 of the FCC Rules. These limits are designed to provide reasonable protection against harmful interference when the equipment is operated in a commercial environment. This equipment generates, uses, and can radiate radio frequency energy and, if not installed and used in accordance with the operation manual, may cause harmful interference to radio communications. Operation of this equipment in a residential area is likely to cause harmful interference in which case the user will be required to correct the interference at his own expense.
Warning
This is a Class A product. In a domestic environment this product may cause radio interference in which case the user may be required to take adequate measures.
This equipment complies with the requirements of Directive 89/336/EEC as amended by 93/68/EEC.
The CE mark logo label is affixed on an equipment in case that the directives described in the above sentence are applicable to the product. (This sentence is not applicable in any country where the above directives are not required.)
DIRECTIVE 2002/96/CE ON THE TREATMENT, COLLECTION, RECYCLING AND DISPOSAL OF ELECTRIC AND ELECTRONIC DEVICES AND THEIR COMPONENTS
INFORMATION
1. FOR COUNTRIES IN THE EUROPEAN UNION (EU)
The disposal of electric and electronic devices as solid urban waste is strictly prohibited: it must be collected separately.
The dumping of these devices at unequipped and unauthorized places may have hazardous effects on health and the environment.
Offenders will be subjected to the penalties and measures laid down by the law.
To dispose of our devices correctly:
a) Contact the Local Authorities, who will give you the practical information you need and the instructions for handling the waste correctly, for example: location and times of the waste collection centres, etc.
b) When you purchase a new device of ours, give a used device similar to the one purchased to our dealer for disposal.

The crossed dustbin symbol on the device means that:
- when it to be disposed of, the device is to be taken to the equipped waste collection centres and is to be handled separately from urban waste;
- The producer guarantees the activation of the treatment, collection, recycling and disposal procedures in accordance with Directive 2002/96/CE (and subsequent amendments).
2. FOR OTHER COUNTRIES (NOT IN THE EU)
The treatment, collection, recycling and disposal of electric and electronic devices will be carried out in accordance with the laws in force in the country in question.
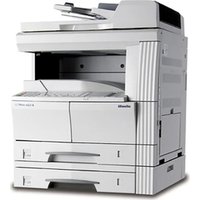
- d-Copia 2301 d-Copia 2701
- PUBLICATION ISSUED BY:
- CONTENTS
- CAUTIONS....3
- USING THE MANUAL 5
- MAIN FEATURES....7
- BEFORE USING THE MACHINE
- PART NAMES AND FUNCTIONS...... 8
- 2COPY FUNCTIONS
- MAIN SCREEN OF COPY MODE 21
- NORMAL COPYING 22
- AUTOMATIC TWO-SIDED COPYING...... 27
- EXPOSURE ADJUSTMENT.... 29
- REDUCTION/ENLARGEMENT/ZOOM.... 30
- INTERRUPTING A COPY RUN.... 34
- 3CONVENIENT COPY FUNCTIONS
- COPY FINISHING FUNCTIONS.... 35
- SPECIAL MODES.... 39
- 4USER SETTINGS
- CUSTOM SETTINGS.... 51
- JOB PROGRAM MEMORY.... 54
- AUDITING MODE 56
- TROUBLESHOOTING AND MAINTENANCE
- DISPLAY MESSAGES.... 58
- TROUBLESHOOTING.... 60
- MISFEED REMOVAL.... 64
- REPLACING THE TONER CARTRIDGE ..... 72
- STAPLE CARTRIDGE REPLACEMENT...... 73
- CHECKING THE TONER QUANTITY AND TOTAL OUTPUT COUNT....74
- CLEANING THE MACHINE.... 75
- PERIPHERAL DEVICES AND SUPPLIES
- PERIPHERAL DEVICES.... 76
- STORAGE OF SUPPLIES.... 79
- 7APPENDIX
- SPECIFICATIONS 80
- INDEX....90
- CAUTIONS
- CAUTIONS ON USING THE MACHINE
- ▲ Warning:
- Caution:
- IMPORTANT POINTS WHEN SELECTING AN INSTALLATION SITE
- Do not install your machine in areas that are:
- CAUTIONS ON HANDLING THE MACHINE
- CAUTIONS ON LASER
- Trademark acknowledgements
- ENVIRONMENTAL INFORMATION
- USING THE MANUAL
- ABOUT THE OPERATION MANUALS
- Operation Manual for copier/finisher (this manual)
- Online manual (for printer)
- Software setup guide (for printer)
- Operation manual (for network scanner) (When the network scanner is installed)
- Key operator's guide/software setup guide
- THE MEANING OF "R" IN ORIGINAL AND PAPER SIZE INDICATIONS
- CONVENTIONS USED IN THIS MANUAL
- Explanation of words and illustration
- MAIN FEATURES
- High-speed laser copying
- High-quality digital image
- Enhanced copying features
- Black and white LCD touch panel makes it easy to operate the machine
- Optional features
- Environment and people friendly design
- 1
- Chapter 1
- BEFORE USING THE MACHINE
- PART NAMES AND FUNCTIONS
- Interior
- OPERATION PANEL
- ① Touch panel
- ② Mode select keys and indicators
- [COPY] key
- [PRINT] key/ONLINE indicator/ DATA indicator
- [SCAN] key/DATA indicator (When the network scanner option is installed.)
- [FAX] key/LINE indicator/DATA indicator (When the fax option is installed.)
- ③ [JOB STATUS] key
- ④ [CUSTOM SETTINGS] key
- ⑤ Numeric keys
- ⑥ [ACC.#-C] key (☐)
- ⑦ [#/P] key (#P)
- ⑧ [CLEAR] key ( )
- ⑨ [START] key (⑨)
- ⑩ [INTERRUPT] key (∅)
- ⑪ [CLEAR ALL] key (A)
- TOUCH PANEL
- Using the touch panel
- Selecting a function
- [Example 2]
- Job status screen (common to copy, print, network scan and fax)
- ① Job list
- \*1:"PAPER EMPTY" in the job status display
- ② Mode switching keys
- ③ [PRINT JOB] key
- ④ [E-MAIL/FTP] key
- ⑤ [FAX JOB] key
- ⑥ Display switching keys
- ⑦ [STOP/DELETE] key
- ⑧ [PRIORITY] key
- ⑨ [DETAIL] key
- POWER ON AND OFF
- POWER ON
- POWER OFF
- INITIAL SETTINGS
- POWER SAVE MODES
- Preheat mode
- Auto power shut-off mode
- LOADING PAPER
- PAPER
- Special papers
- Envelopes
- Letterhead paper
- Loading the paper in the paper tray
- Pull out the paper tray until it stops.
- Squeeze the lock lever of the front guide and slide the front guide to match the width of the paper.
- Move the left guide to the appropriate slot as marked on the tray.
- Fan the copy paper.
- Load paper in the tray.
- Push the paper tray firmly back into the machine.
- Paper size card
- Loading paper in the bypass tray
- Unfold the bypass tray.
- Set the paper guides to the copy paper width.
- Important points when inserting paper in the bypass tray
- Insert the copy paper (print side down) all the way into the bypass tray.
- CHANGING A TRAY'S PAPER TYPE AND PAPER SIZE SETTINGS
- Load paper in the tray as explained in "Loading the paper in the paper tray" (p.17).
- Press the [CUSTOM SETTINGS] key.
- Touch the [TRAY SETTINGS] key.
- Select the tray in which you loaded paper.
- Select the size and type of paper that is loaded in the tray.
- Touch the [OK] key.
- A message appears prompting you to check the paper in the tray. Check the paper and then touch the [OK] key.
- Setting the paper type in the bypass tray
- From the [CUSTOM SETTINGS] key
- From the [PAPER SELECT] key
- MAIN SCREEN OF COPY MODE
- NORMAL COPYING
- COPYING FROM THE DOCUMENT GLASS
- Open the document cover/RSPF and place the original face down on the document glass.
- [How to place the original]
- Close the document cover/RSPF.
- Make sure that the same size of paper as the original is automatically selected.
- Manually selecting the paper size (paper tray)
- Select the number of copies and any other desired copy settings, and then press the [START] key ( )
- COPYING FROM THE RSPF
- Make sure that an original has not been left on the document glass and then close the RSPF.
- Adjust the original guides to the size of the original.
- Place the originals face up in the document feeder tray.
- Make sure that the same size of paper as the original is selected.
- Select the number of copies and any other desired copy settings, and then press the [START] key ( )
- Stream feeding mode
- Copying a large number of originals
- POINTS TO NOTE WHEN MAKING COPIES
- Document glass and RSPF
- Originals that can be used in the RSPF
- Acceptable originals
- Other considerations
- Removing the document cover
- Copying originals of mixed length (Mixed feeding)
- Touch the [SPECIAL MODES] key.
- Touch the key and then the [ORIGINAL SIZE] key.
- Select the "MIX SIZE ORIGINAL FEEDING MODE" checkbox.
- Touch the [OK] key.
- Automatic copy image rotation (rotation copying)
- BYPASS FEED (special paper)
- Shifting the starting position of copying
- AUTOMATIC TWO-SIDED COPYING
- USING THE DOCUMENT GLASS
- USING THE RSPF
- EXPOSURE ADJUSTMENT
- SELECTING THE ORIGINAL IMAGE TYPE AND MANUALLY ADJUSTING THE EXPOSURE
- Touch the [EXPOSURE] key.
- Select [TEXT], [TEXT/PHOTO], [PHOTO], or [SUPER PHOTO] as appropriate for the original.
- Selecting the original image type
- Manually adjust the copy exposure.
- Exposure value guidelines
- Check the paper size, select the number of copies and any other desired copy settings, and then press the [START] key ( )
- REDUCTION/ENLARGEMENT/ZOOM
- AUTOMATIC RATIO SELECTION
- Place the original(s). (p.22, p.23)
- Touch the [PAPER SELECT] key and then select the desired paper size.
- Touch the [AUTO IMAGE] key.
- Select the number of copies and any other desired settings, and then press the [START] key (®)
- MANUAL RATIO SELECTION
- Make sure that a suitable paper size is automatically selected, or select another size using the [PAPER SELECT] key.
- Select the number of copies and any other desired copy settings, and then press the [START] key (®)
- SELECTING THE VERTICAL AND HORIZONTAL COPY RATIOS SEPARATELY (XY ZOOM copying)
- Touch the [COPY RATIO] key.
- Touch the [XY ZOOM] key.
- Touch the [X] key.
- Use the reduction, enlargement, and [ZOOM] keys (☐) to change the copy ratio in the horizontal (X) direction.
- Touch the [Y] key.
- Use the reduction, enlargement, and [ZOOM] keys (☐) to change the copy ratio in the vertical (Y) direction.
- Touch the [OK] key.
- Make sure that a suitable paper size is automatically selected, or select another size using the [PAPER SELECT] key.
- Select the number of copies and any other desired copy settings, and then press the [START] key ( Ⓞ)
- INTERRUPTING A COPY RUN
- Press the [INTERRUPT] key (②to interrupt the copy run.
- When the copy job is finished, press the [INTERRUPT] key (⊕ and remove the original(s).
- Replace the previous original(s) and press the [START] key ( ) to resume copying.
- Remove the previous original(s) and place the original(s) of the interrupt copy job. (p.22, p.23)
- Select the number of copies and any other desired copy settings, and then press the [START] key (②)
- COPY FINISHING FUNCTIONS
- SORT COPY
- GROUP COPY
- OFFSET FUNCTION
- Enabling the offset function
- Place the originals in the RSPF or on the document glass. (p.22, p.23)
- Touch the [OUTPUT] key.
- Touch the [SORT] or [GROUP] key.
- Touch the output tray that you wish to use.
- Touch the [OK] key.
- Select the number of copies and any other desired copy settings, and then press the [START] key ( )
- [When using the RSPF:]
- [When using the document glass:]
- STAPLE SORT
- (when the finisher (AR-FN5N) is installed)
- ORIENTATION OF THE ORIGINAL AND STAPLING POSITIONS
- SPECIAL MODES
- GENERAL PROCEDURE FOR USING THE SPECIAL FUNCTIONS
- Touch the key of the desired special mode.
- MARGIN SHIFT COPY
- Touch the [MARGIN SHIFT] key in the special modes screen.
- Select the shift direction.
- Adjust the shift width as needed and touch the [OK] key.
- Touch the [OK] key in the special modes screen.
- About the steps that follow
- ERASE COPY
- EDGE ERASE
- CENTRE ERASE
- EDGE + CENTRE ERASE
- Touch the [ERASE] key in the special modes screen.
- Select the desired erase mode.
- Adjust the erase width as needed and touch the [OK] key.
- DUAL PAGE COPY
- Touch the [DUAL PAGE COPY] key in the special modes screen.
- Touch the [OK] key in the special modes screen.
- Place the originals on the document glass. (p.22)
- When copying book originals:
- Make sure that B5 or A4 (8-1/2" x 11") size paper is selected.
- PAMPHLET COPY
- Touch the [PAMPHLET COPY] key in the special modes menu screen.
- Specify whether 1-sided or 2-sided originals will be copied.
- Select the binding position ([LEFT BINDING] or [RIGHT BINDING]) and then touch the [OK] key in the pamphlet copy setting screen.
- Place the original(s). (p.22, p.23)
- Make sure that a suitable paper size has been automatically selected.
- Select the number of copies and any other desired copy settings, and then press the [START] key ( Ⓞ
- [When using the RSPF:]
- JOB BUILD MODE
- Touch the [JOB BUILD] key in the special modes menu screen.
- Place the original(s) in the RSPF. (p.23)
- Make sure that a suitable paper size is selected, select the number of copies and any other desired copy settings, and then press the [START] key ( )
- Touch the [READ-END] key.
- MULTI SHOT COPY
- Touch the [MULTI SHOT] key in the SPECIAL MODES menu screen.
- Select the number of originals to be copied onto one sheet in the multi shot copy selection screen.
- Select the layout.
- Select a borderline setting.
- Touch the [OK] key in the multi shot setting screen.
- Touch the [OK] key in the special modes menu screen.
- Select the number of copies and any other desired copy settings, and then press the [START] key ( Ⓞ)
- ORIGINAL SIZE
- Touch the □key and then touch the [ORIGINAL SIZE] key in the special modes menu screen.
- Touch the [OK] key in the special modes menu screen.
- Touch the [MANUAL] key.
- Select the original size.
- Touch the inside [OK] key.
- COVER COPY
- Copying onto a cover Not copying onto a cover
- Touch the ☐ key and then touch the [COVER] key in the special modes menu screen.
- Select the cover(s) that you wish to add.
- Specify whether or not the front cover is to be copied on.
- Touch the [OK] key in the cover setting screen.
- Touch the [OK] key in the special modes screen.
- Load the cover paper to be used into the bypass tray.
- About the steps that follow See page 23.
- B/W REVERSE COPY
- Touch the □key and then touch the [B/W REVERSE] key in the special modes menu screen.
- CARD SHOT
- Make sure that a suitable paper size is selected, or select another size using the [PAPER SELECT] key.
- Enter the X dimension (width) and Y dimension (length) of the original card with the keys
- Touch the ☐ key and then touch the [CARD SHOT] key in the special modes screen.
- Touch the outer [OK] key.
- Place the original on the document glass.
- Place the back side of the original face down on the document glass.
- Press the [START] key (①)
- CUSTOM SETTINGS
- The following settings are explained in detail in the operation manual for facsimile.
- GENERAL PROCEDURE FOR CUSTOM SETTINGS
- Press the [CUSTOM SETTINGS] key.
- Touch the key of the desired setting. The setting screen will appear.
- Touch the [OK] key in the setting screen to close it.
- When you are ready to exit the custom settings, touch the [EXIT] key.
- SETTINGS
- Total count
- Display contrast
- List print
- Clock
- Tray settings
- Keyboard select
- JOB PROGRAM MEMORY
- STORING A JOB PROGRAM
- Press the [#/key.
- Select the copy settings that you wish to store in the program.
- Touch the [STORE/DELETE] key.
- Touch a program number from 1 to 10 in the storage register screen.
- EXECUTING A JOB PROGRAM
- Touch the program number key of the desired program.
- Place the original, check the original size, and then set the number of copies and any other desired copy settings not stored in the program. When finished, press the [START] key (◦).
- DELETING A STORED JOB PROGRAM
- Select the program number of the program to be deleted.
- Touch the [DELETE] key.
- AUDITING MODE
- COPYING WHEN AUDITING MODE IS ENABLED
- Enter your account number (5 digits) with the numeric keys.
- When the copy job is finished, press the [ACC.#-C] key ()\*
- TROUBLESHOOTING
- MISFEED REMOVAL
- First, locate the misfeed
- MISFEED REMOVAL GUIDANCE
- MISFEED IN THE RSPF
- Remove the misfed original.
- Open and close the RSPF to clear the misfeed message from the touch panel.
- Reinsert the originals that still must be scanned (Including the original that was being scanned when the misfeed occurred.), and press the [START] key( )
- MISFEED IN THE BYPASS TRAY
- Carefully pull the misfed paper out.
- Open and close the side cover.
- MISFEED IN THE MACHINE
- Misfeed in the paper feed area
- Open the bypass tray and the side cover.
- Carefully remove the misfed paper. Turn the roller rotating knob in the direction of the arrow to assist in removing it.
- Press gently on both sides of the front cover and pull it open.
- Close the front cover and side cover.
- B: Misfeed in the fusing area
- MISFEED IN THE CENTRE TRAY
- MISFEED IN THE UPPER PAPER TRAY
- Lift and pull out the upper paper tray and then remove the misfed paper.
- Replace the upper paper tray.
- Open and close the side cover.
- MISFEED IN THE LOWER PAPER TRAY
- Open the lower side cover.
- Remove the misfed paper.
- If the misfed paper is not visible in step 2, lift and pull out the lower paper tray and remove the misfed paper.
- Replace the lower paper tray.
- Close the lower side cover.
- MISFEED IN THE UPPER EXIT AREA (when a job separator tray kit or finisher (AR-FN5N) is installed)
- Open the upper right side cover.
- Close the upper right side cover.
- Gently pull the misfed paper out.
- MISFEED IN AN OUTPUT TRAY (when a finisher (AR-FN5N) is installed)
- Grasp the handle of the stapler compiler cover and pull to open the cover.
- Remove any misfed paper from the transport area.
- REPLACING THE TONER CARTRIDGE
- Press gently on both sides of the front cover and pull it open.
- Pull the toner cartridge out while pressing the lock release lever.
- Remove the new toner cartridge from the bag. Grasp both ends of the cartridge and shake it horizontally about 20 times. After shaking the cartridge, remove the tape.
- While pushing the lock release lever, gently insert the toner cartridge along the guides until it clicks into place.
- Remove the tape from the shutter. Pull the shutter out of the toner cartridge as shown in the illustration.
- Close the front cover.
- STAPLE CARTRIDGE REPLACEMENT (when the finisher (AR-FN5N) is installed)
- STAPLE JAM REMOVAL
- Open the stapler cover.
- Grasp the green portion of the staple box and remove the staple box from the stapler.
- Raise the lever at the end of the staple box and remove the jammed staples.
- Return the lever to its original position.
- Insert the staple box into the stapler unit until it clicks into place.
- Close the stapler cover.
- CHECKING THE TONER QUANTITY AND TOTAL OUTPUT COUNT
- Checking the total output count and toner quantity
- CLEANING THE MACHINE
- DOCUMENT GLASS AND DOCUMENT COVER/RSPF
- FINISHER (AR-FN5N)
- Part names
- 500-SHEET PAPER FEED UNIT/2 x 500-SHEET PAPER FEED UNIT
- REVERSING SINGLE PASS FEEDER
- STORAGE OF SUPPLIES
- PROPER STORAGE
- Store the supplies in a location that is:
- Store paper in the wrapper and lying flat.
- SADDLE STITCH FINISHER
- PARTS OF THE SADDLE STITCH FINISHER
- Stapler section
- Stapler compiler
- Offset tray
- Saddle stitch tray
- Front cover
- Center cover
- Detach button
- Caution
- Supplies
- FUNCTIONS OF THE SADDLE STITCH FINISHER
- ■ Sort function
- ■ Group function
- ■ Offset function
- ■ Staple sort function
- ■ Saddle stitch function
- ■ Punch function (only when a punch unit is installed)
- USING THE SADDLE STITCH FINISHER FUNCTIONS
- ■ Using the saddle stitch finisher functions in copy mode
- ■ Using the saddle stitch finisher functions in printer mode
- Using the punch function when an optional punch unit is installed
- USING THE SADDLE STITCH FINISHER TO MAKE COPIES
- ■ Orientation of the original when using the saddle stitch finisher function
- Staple positions (example)
- Place the original (p.6).
- Touch the [STAPLE SORT] key.
- Select the staple position.
- Select the number of copies and other copy settings, and touch the [START] key (①)
- Using the RSPF
- REPLACING THE STAPLE CARTRIDGE AND REMOVING STAPLE JAMS
- ■ Replacing the staple cartridge
- Open the front cover.
- Pull the stapler section forward.
- Rotate roller rotating knob A in the direction of the arrow to move the staple unit all the way forward.
- Remove the empty staple box.
- Remove the empty staple cartridge.
- Install the new staple cartridge in the staple box.
- Pull the seal that holds the staples straight out.
- Push in the staple box.
- Push in the stapler section.
- Close the front cover.
- ■ Removing a staple jam
- Raise the lever on the front edge of the staple box.
- Push in the staple box.
- Replace the front edge lever.
- Push in the stapler section.
- Close the front cover.
- Push the saddle stitch finisher back onto the machine.
- ■ Discarding punch waste (when a punch unit is installed)
- Press the detach button and separate the saddle stitch finisher from the machine.
- Replace the punch waste receptacle.
- Push the saddle stitch finisher back onto the machine.
- Gently pull the punch waste receptacle forward and discard the punch waste.
- REMOVING PAPER MISFEEDS
- ■ Misfeed in the relay path
- ■ Misfeed in the saddle stitch finisher
- Open the front cover.
- Push the saddle stitch finisher back onto the machine.
- Rotate roller rotating knob D in the direction of the arrow.
- Remove any misfed paper from the saddle stitch tray.
- Close the cover of the saddle stitch section.
- Close the front cover.
- TROUBLESHOOTING (RELATED TO SADDLE STITCH FINISHER)
- USING THE KEY OPERATOR PROGRAMS
- ■ Added programs
- Disabling of finisher
- Saddle stitch position adjust
- ■ Changed programs
- Output trays
- Initial status settings
- INDEX
- Symbols
- /P key 10, 54, 55
- - 8
- A
- B
- C
- D
- E
- F
- G
- H
- |
- J
- L
- M
- N
- 0
- P
- Q
- R
- S
- T
- U
- W
- x
- Y
- INDEX BY PURPOSE
- Preparations
- Making copies
- Using convenient copy functions
- Making the machine easier to use
- Troubleshooting and maintenance
- VAROITUS!
- WARNING
- Instruction for service technician:
- For users in the USA
- WARNING:
- Note:
- DIRECTIVE 2002/96/CE ON THE TREATMENT, COLLECTION, RECYCLING AND DISPOSAL OF ELECTRIC AND ELECTRONIC DEVICES AND THEIR COMPONENTS
- INFORMATION
- FOR COUNTRIES IN THE EUROPEAN UNION (EU)
- To dispose of our devices correctly:
- FOR OTHER COUNTRIES (NOT IN THE EU)
Brand : OLIVETTI
Model : d-Copia 2301
Category : Printer