
Icon Edge 2953F - Vacuum Cleaner BISSELL - Free user manual and instructions
Find the device manual for free Icon Edge 2953F BISSELL in PDF.


User questions about Icon Edge 2953F BISSELL
0 question about this device. Answer the ones you know or ask your own.
Ask a new question about this device
Download the instructions for your Vacuum Cleaner in PDF format for free! Find your manual Icon Edge 2953F - BISSELL and take your electronic device back in hand. On this page are published all the documents necessary for the use of your device. Icon Edge 2953F by BISSELL.
USER MANUAL Icon Edge 2953F BISSELL
natural_image
Woman using a vacuum cleaner in a modern living room with a child and a dog nearby (no visible text or symbols)
Go online for a comprehensive walkthrough of your product!
This guide has everything you need to get ready for first use, including setting up, using and maintaining your machine, but online you'll find additional resources like tips and troubleshooting, videos, product registration, parts, and more. Go to BISSELL.com.
IMPORTANT SAFETY INSTRUCTIONS
READ ALL INSTRUCTIONS BEFORE USING YOUR APPLIANCE.
When using an electrical appliance, basic precautions should be observed, including the following:
WARNING
TO REDUCE THE RISK OF FIRE, ELECTRIC SHOCK OR INJURY:
- This appliance is not intended for use by persons (including children) with reduced physical, sensory or mental capabilities, or lack of experience and knowledge, unless they have been given supervision or instruction concerning use of the appliance by a person responsible for their safety.
- Children should be supervised to ensure that they do not play with the appliance.
- Keep hair, loose clothing, fingers, and all parts of body away from openings and moving parts of the appliance and its accessories.
- Do not use with damaged cable or plug.
- If the charger supply cable is damaged, it must be replaced by the manufacturer, its service agent or similarly qualified person in order to avoid a hazard.
- Do not incinerate the appliance even if it is severely damaged. The batteries can explode in a fire.
- The battery is to be disposed of safely.
- This appliance contains batteries that are only replaceable by skilled persons.
- Under abusive conditions, liquid may be ejected from the battery; avoid contact. If contact accidentally occurs, flush with water. If liquid contacts eyes, additionally seek medical help. Liquid ejected from the battery may cause irritation or burns.
- Recharge only with the charger specified by the manufacturer. A charger that is suitable for one type of battery pack may create a risk of fire when used with another battery pack.
- Unplug charger from electrical socket when not in use, before cleaning, maintaining or servicing the appliance, and if your appliance has an accessory tool with a moving brush, before connecting or disconnecting the tool.
-
Do not use with damaged cable or charger. If appliance is not working as it should, has been dropped, damaged, left outdoors, or dropped into water, return it to a service center.
-
Turn OFF all controls before unplugging.
- Do not pull or carry charger by cable, use cable as a handle, close door on cable, or pull cable around sharp edges or corners.
- Keep charger cable away from heated surfaces.
• To unplug, grasp the charger plug, not the cable. - Do not handle charger plug or appliance with wet hands.
- Battery pack and charger base output terminals are not to be short-circuited.
- Do not charge the machine outdoors.
- The appliance must be disconnected from the supply mains when removing the battery.
- Do not recharge, disassemble, heat above 60^ , or incinerate.
- Keep batteries out of reach of children.
- Dispose of used batteries promptly.
- Never put batteries in mouth. If swallowed, contact your physician or local poison control.
- Prevent unintentional starting. Ensure the switch is in the OFF-position before picking up or carrying the appliance. Carrying the appliance with your finger on the switch or energising appliance that have the switch on invites accidents.
- Do not use appliance that is damaged or modified. Damaged or modified batteries may exhibit unpredictable behavior resulting in fire, explosion or risk of injury.
- Do not expose appliance to fire or excessive temperature. Exposure to fire or temperature above 130^ may cause explosion.
- Follow all charging instructions and do not charge the appliance outside of the temperature range specified in the instructions. Charging improperly or at temperatures outside of the specified range may damage the battery and increase the risk of fire.
- Have servicing performed by a qualified repair person using only identical replacement parts. This will ensure that the safety of the product is maintained.
- Do not modify or attempt to repair the appliance except as indicated in the instructions for use and care.
- Keep the temperature range of between 4-30°C when charging battery, storing machine or during use.
- Plastic film can be dangerous. To avoid danger of suffocation, keep away from children.
- Use only as described in this user guide.
- Use only manufacturer's recommended attachments.
- If appliance is not working as it should, has been dropped, damaged, left outdoors, or dropped into water; do not attempt to operate it and have it repaired at an authorised service center.
- Do not put any object into openings.
- Do not use with any opening blocked; keep free of dust, lint, hair, and anything that may reduce air flow.
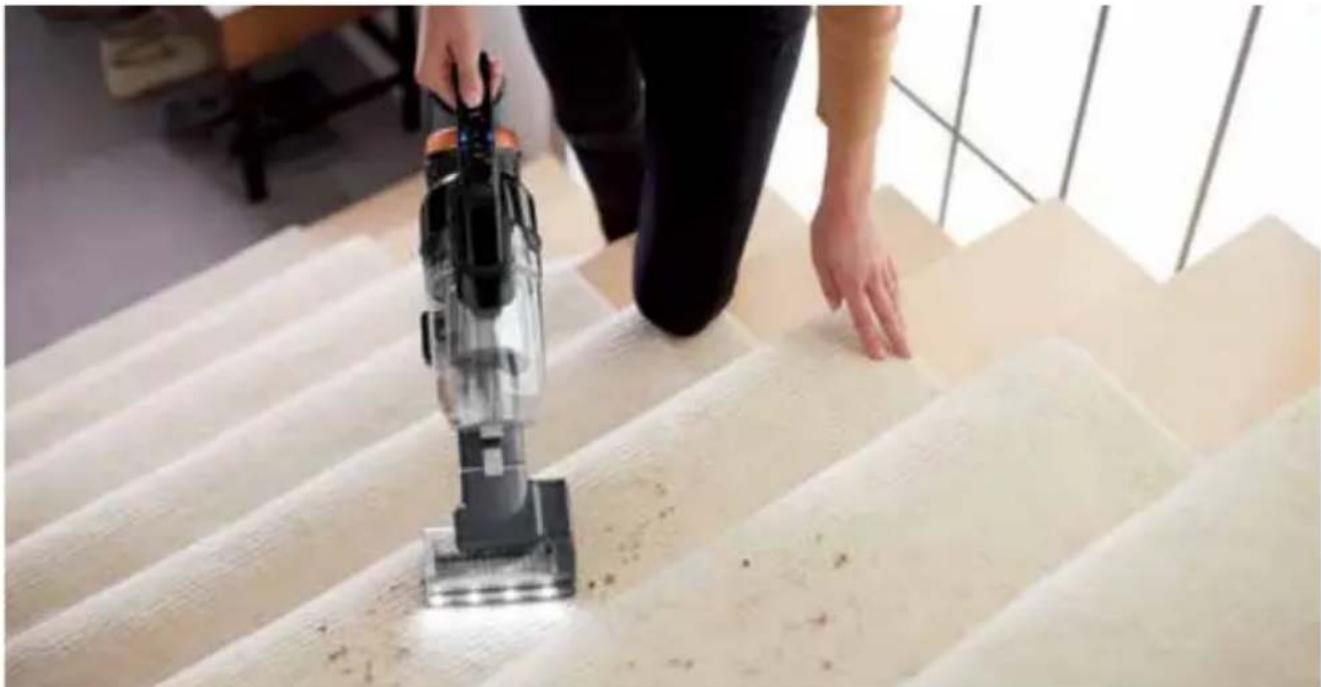
- Use extra care when cleaning on stairs.
- Do not use to pick up flammable or combustible liquids, such as petroleum, or use in areas where they may be present.
- Do not pick up toxic material (chlorine bleach, ammonia, drain cleaner, etc.).
- Do not use appliance in an enclosed space filled with vapours given off by oil-based paint, paint thinner, some moth-proofing substances, flammable dust, or other explosive or toxic vapours.
- Do not pick up anything that is burning or smoking, such as cigarettes, matches or hot ashes.
- Do not use without filters in place.
- Do not use on wet surfaces. Do not expose to rain. Store indoors.
- Use only the detachable supply unit provided with this appliance, Model SSC-320110AU.
SAVE THESE INSTRUCTIONS
ORIGINAL INSTRUCTIONS. FOR OPERATION ON A 220-240 VOLT A.C. 50-60 HZ POWER SUPPLY ONLY.
THIS MODEL IS FOR HOUSEHOLD USE ONLY.
D-□-C
Detachable power supply unit.
natural_image
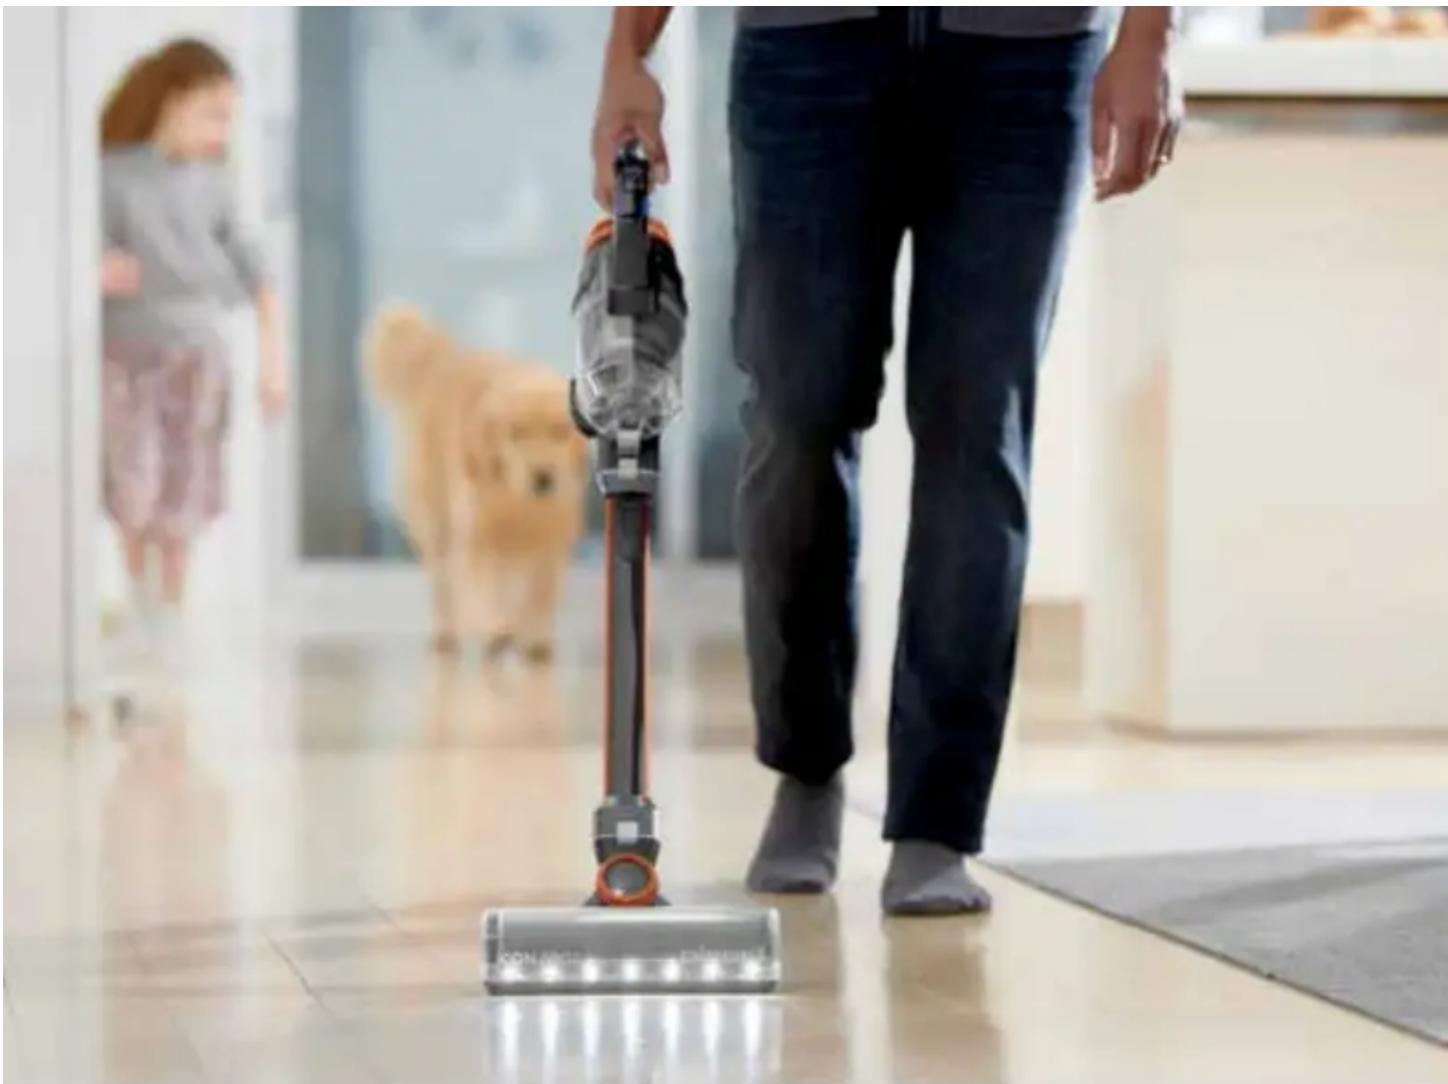
Person standing in a hallway with a vacuum cleaner, another dog visible in the background (no text or symbols)We're so happy you chose the ICON™ EDGE High-Powered Cordless Vacuum. We put this guide together to help you set up, use and maintain your cordless vacuum. We've also included some tips we think will come in handy when you first start using your cordless vacuum, so let's get started!
For a comprehensive walkthrough of your product, go to BISSELL.com.
What's in the Box? 4
Product View 4
Assembly 5
Installing the Wall Storage & Charging Station .... 5
Charging the Battery 6
Using the Vacuum .... 7
Emptying the Dirt Tank 8
Cleaning & Replacing the Filters .... 9
Maintaining the Brush Roll ..... 10
Disposing of the Batteries ..... 10
Troubleshooting.... 11
Warranty....12
What's in the Box?
Standard accessories may vary by model. To identify what should be included with your purchase, please refer to the "Carton Contents" list located on the underside of the insert inside the carton.
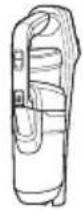 | ### | 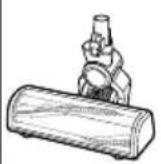 | 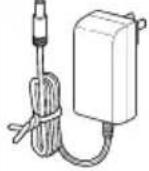 | 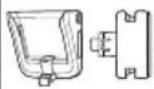 | 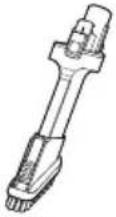 | 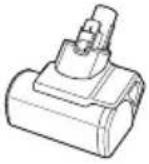 | ### |
| HandVacuumAssembly | ExtensionWand | MotorisedFloorCleaningFoot | BatteryCharger | WallStorage &ChargingStation | LightedCrevice Tool& DustingBrush | LightedMotorised | HandVacuumAttachmentHose |
Product View
For additional support videos and information about your vacuum, visit BISSELL.com.
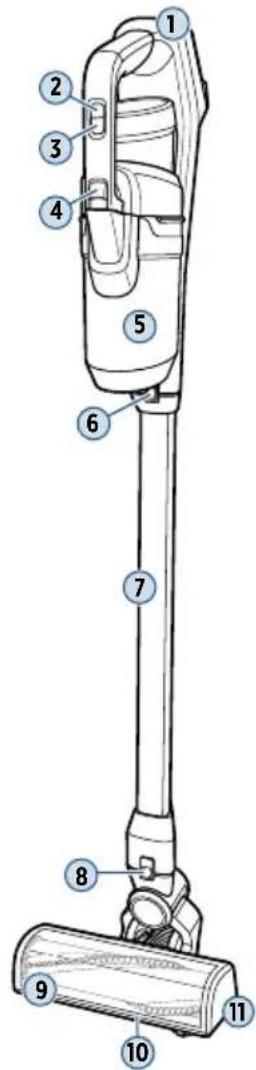
Product View
- Hand Vacuum Assembly
- Power Button
- Cleaning Mode Button
- Tank Release Button
- Dirt Tank
- Hand Vacuum Release Button
- Extension Wand
- Foot Release Button
- Tangle-Free Brush Roll
- LED Headlights
- Motorised Floor Cleaning Foot
- Charging Port
- Post-Motor Filter
- Foot Hose
text_image
Labeled diagram of a vacuum cleaner with numbered parts for identification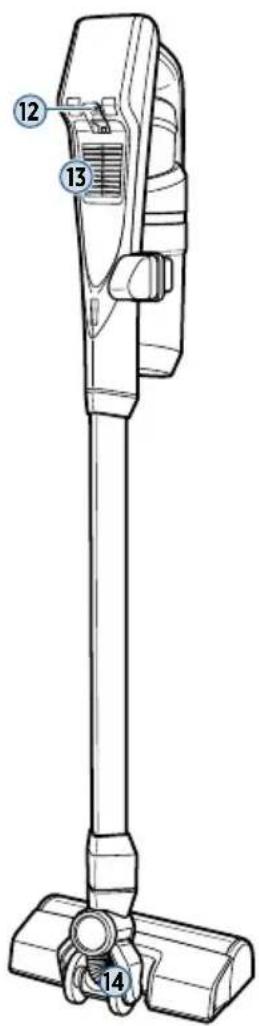
text_image
Technical diagram of a vacuum cleaner with numbered parts labeled 12, 13, and 14Assembly
Go to BISSELL.com for assembly videos.
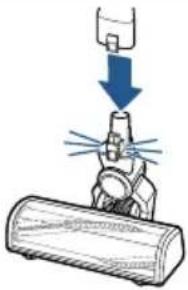 | 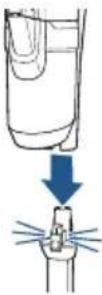 |  |
| 1. Connect the Extension Wand to Motorised Floor Cleaning Foot. You'll hear a “click” when they're connected. | 2. Connect the Hand Vacuum Assembly to the Extension Wand. You'll hear a “click” when they're connected. | 3. Make sure to charge your stick vacuum before first use. Refer to page 6, “Charging the Battery” for instructions. |
Installing the Wall Storage & Charging Station
Go to BISSELL.com for more tips and video instructions.
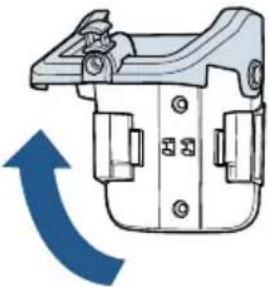 | 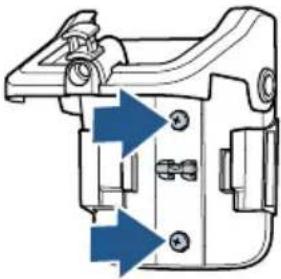 | 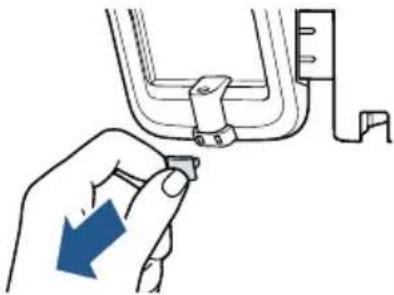 |
| 1. Install the Wall Mount & Charging Station near a wall outlet. Open the Wall Storage & Charging Station, use the bubble level to ensure it is level. | 2. Insert two screws to secure to wall. | 3. Insert the tool holder into the side of the Wall Storage & Charging Station. Remove the power cable clip. |
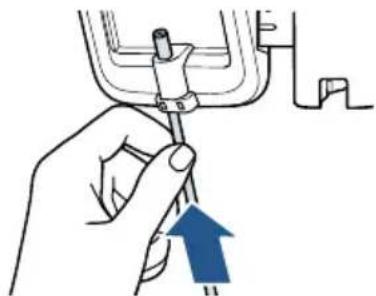
natural_image
Hand holding a tool interacting with a mechanical component (no text or symbols visible)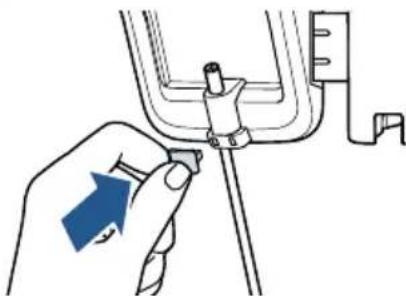
natural_image
Hand holding a pen inserted into a U-shaped pipe fitting (no text or symbols visible)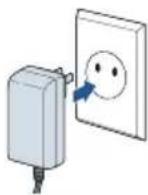
-
Insert the charging cable.
-
Secure with the charging cable clip.
-
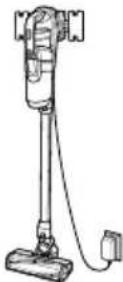
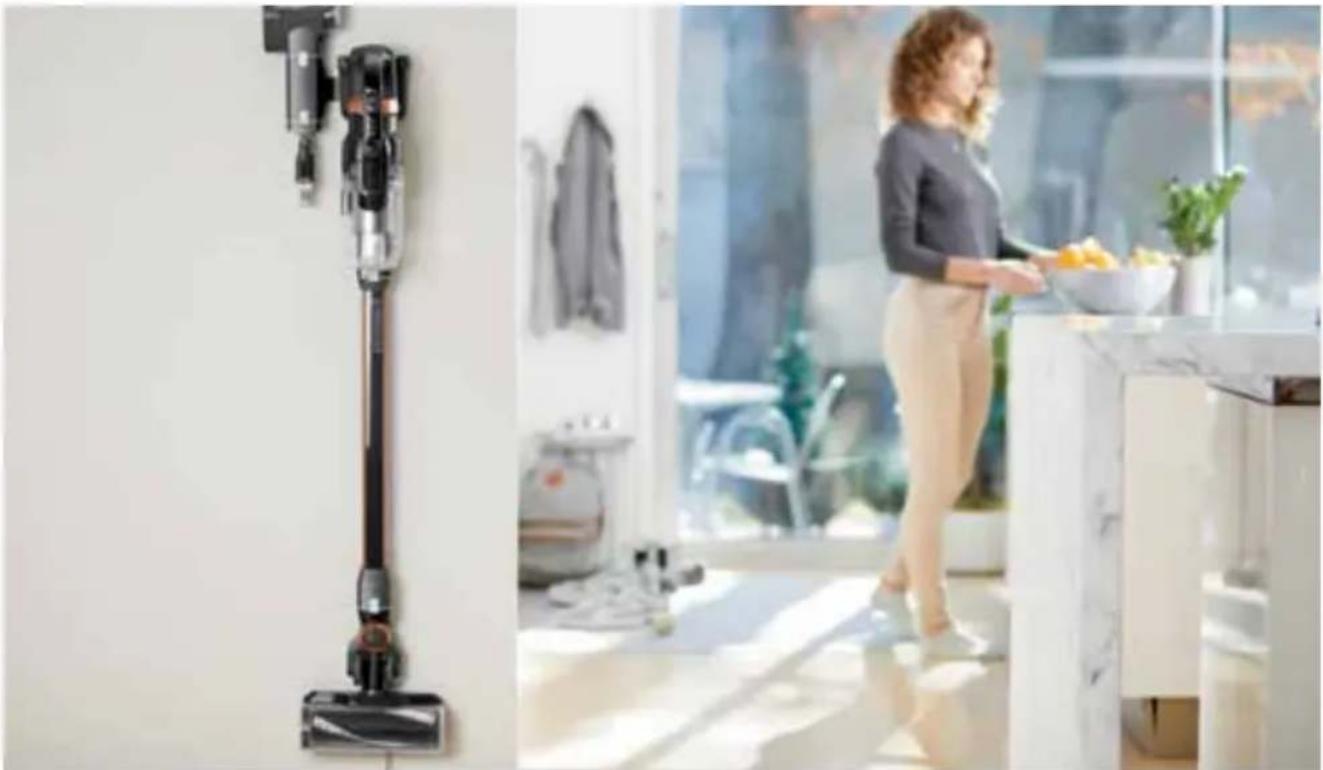
Plug the power adapter into the wall and place the machine on the station for charging. Refer to page 6, "Charging the Battery" for instructions.
natural_image
Interior kitchen scene with a vacuum cleaner and a woman preparing food; no visible text or symbols.Charging the Battery
Go to BISSELL.com for additional how-to videos.
Before first use, make sure to fully charge your stick vacuum for 4 hours to get a full charge.
Charging with the Hand Vacuum
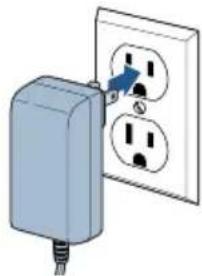 | 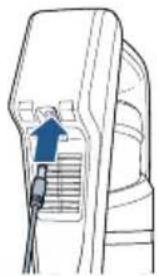 | 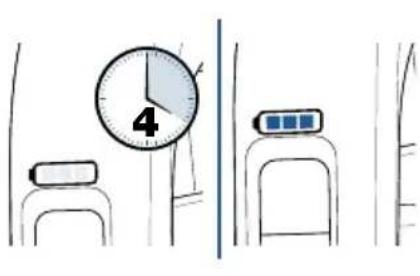 |
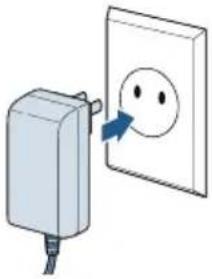
| 1. Plug the Battery Charger into the wall. | 2. Plug the charger into the charging port on the back of the hand vacuum. | 3. Let the hand vacuum charge for 4 hours or until all three sections of the battery charge icon are illuminated. |
Charging with the Wall Storage & Charging Station
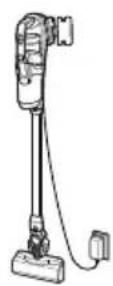 | 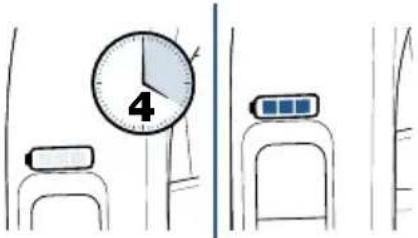 |
| 1. Follow instructions on page 5 for installing the Wall Storage & Charging Station. Once installed, hang the vacuum onto the station. | 2. Let the vacuum charge for 4 hours or until all three sections of the battery charge icon are illuminated. |

natural_image
Person in blue gloves handling a red cable near a device labeled 'ICON EDGE BIBBELL' (no other text or symbols visible)Using the Vacuum
Looking for more guidance? Go to BISSELL.com for tips and 24-7 support.
natural_image
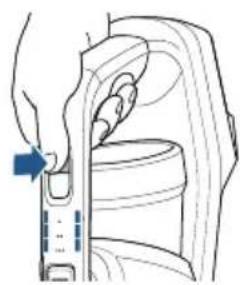
Line drawing of a hand inserting a component into a device (no text or symbols)- Press the Power Button to begin cleaning and to turn OFF the machine when finished cleaning.
natural_image
Line drawing of a hand pressing down on a mechanical component (no text or symbols)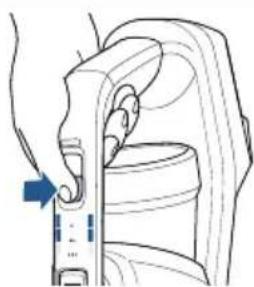
natural_image
Diagram of a mechanical device with a blue arrow pointing to a component (no text or symbols present)
natural_image
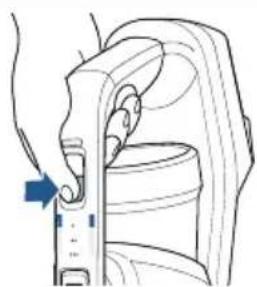
Line drawing of a hand operating a mechanical device with a blue arrow indicating motion (no text or symbols)- Press the Cleaning Mode Button to toggle between the three settings:
Recommended for maximum suction. It's the most powerful setting which is great for cleaning carpets, however it has the shortest run time. This is the default suction mode when the vacuum is turned ON.
Recommended for everyday cleaning. It's great for hard floors, low pile carpets and area rugs. It balances power and run time.
- Recommended for the longest run time. It's great for hard floors and offers the quietest sound.
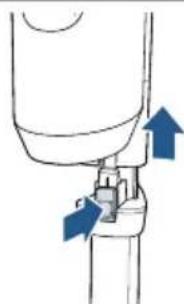
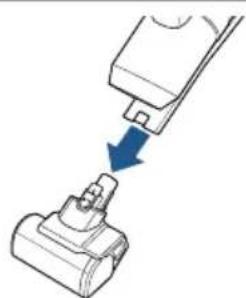
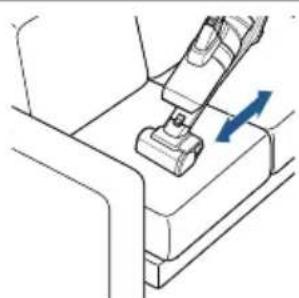
Attaching Tools for Hand Vac Use
Clean stairs or furniture easily with the tools provided. Pair your desired tool with the hand vacuum or extension wand. Go to BISSELL.com for tips on using the above floor cleaning tools.
natural_image
Diagram of a mechanical component with blue arrows indicating direction (no text or symbols)- Press the release button to disconnect the Extension Wand.
natural_image
Diagram showing a mechanical component being inserted into a cylindrical housing, with a blue arrow indicating the process (no text or symbols present)- Attach your chosen tool.
natural_image
Technical line drawing of a mechanical assembly with a blue arrow indicating direction (no text or symbols)- Use the tool to clean furniture, stairs or other surfaces in your home.
WARNING
Do not use your vacuum until you are familiar with all instructions and operating procedures.
natural_image
Person using a vacuum cleaner on a staircase with patterned flooring (no visible text or symbols)Emptying the Dirt Tank
More of a video person? Go to BISSELL.com for additional how-to videos.
natural_image
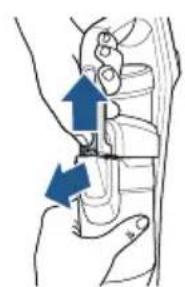
Anatomical diagram showing a joint with two blue arrows indicating direction of movement (no text or labels present)- Turn OFF your machine. Remove the Dirt Tank from the hand vacuum by sliding the latch on the front of the tank.
natural_image
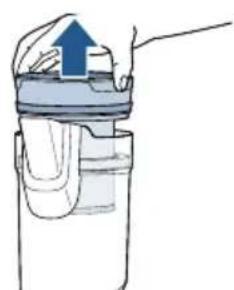
Diagram of a mechanical device with an upward arrow indicating motion (no text or symbols)- Grab the top of the tank and pull up. This will activate a wiping feature to remove debris from the mesh filter screen.
natural_image
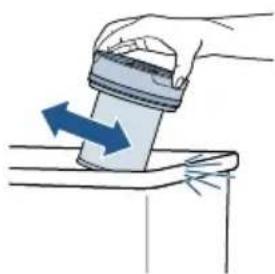
Illustration of a hand pressing a cup with a blue arrow indicating motion (no text or symbols)- Fully remove the separator from the tank and tap the mesh screen on the side of the trash bin.
natural_image
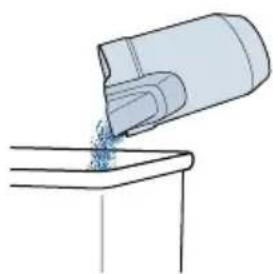
Simple line drawing of a container pouring liquid into a container on a surface (no text or symbols)- Dump dirt from the tank into the trash bin.
natural_image
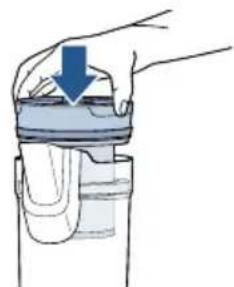
Illustration of a hand holding a container with a blue arrow indicating downward motion (no text or symbols)- Slide the separator back into the tank, ensuring the notch is seated into the tank correctly.
text_image
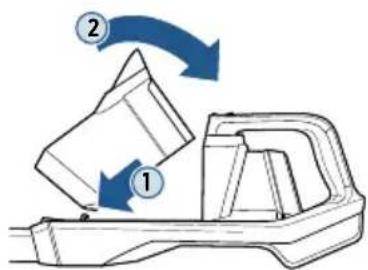
Diagram showing a mechanical component with two labeled arrows (1 and 2) indicating motion or transformation.- Put the whole tank into the hand vacuum by guiding the notched out area on the bottom of the tank onto the hook on the hand vacuum. Push into place.
WARNING
» Before using your vacuum, make sure that the Dirt Tank is in locked position and that all filters, both pre and post-filters, are in place. DO NOT operate your vacuum without these filters.
Cleaning & Replacing the Filters
Go to BISSELL.com for tips on maintaining and replacing your vacuum filters.
Pre-Motor Filters
For best cleaning performance, always clean your pre-motor filter after each use.
 | 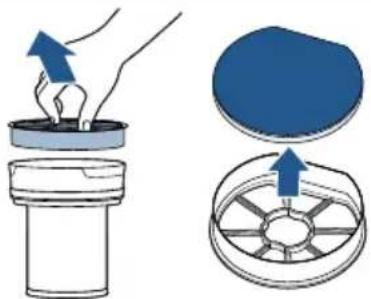 | 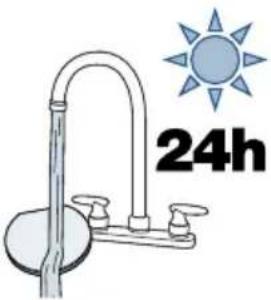 |
| 1. To clean the pre-motor filter, turn OFF machine and remove Dirt Tank from the hand vacuum. | 2. Pull filter from the top of the tank. Remove the filter from the filter frame housing. Tap the filter against the side of a trash bin to remove dust and debris. | 3. To clean, rinse under warm water and squeeze to remove dirt. Lay out for 24 hours, until completely dry. Make sure to replace your filter in the frame with the tag side down (touching the frame) before using your machine. |
Post-Motor Filter
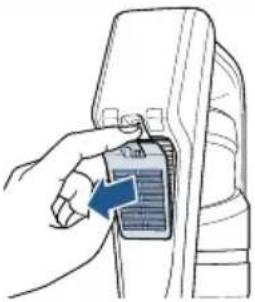 | 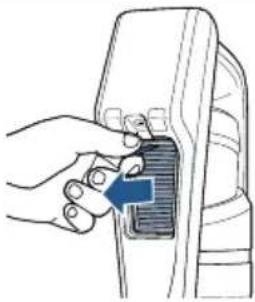 | 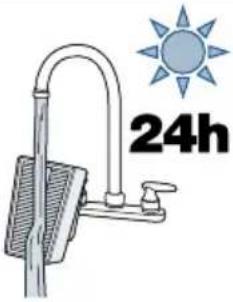 |
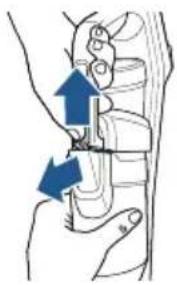
| 1. To clean your Post-Motor Filter, turn OFF machine and press the latch on the back of the hand vacuum. | 2. Remove the Post-Motor Filter from the vacuum. | 3. If there's debris on the filter, tap it on a trash bin and rinse under warm water. Let dry for at least 24 hours before putting it back in the vacuum and replacing the filter cover. |
WARNING
» Do not use your vacuum until you are familiar with all instructions and operating procedures.
» Before using your vacuum, make sure that the Dirt Tank is in locked position and that all filters, both pre and post-filters, are in place. DO NOT operate your vacuum without these filters.
Maintaining the Brush Roll
Go to BISSELL.com for tips on maintaining and replacing your Brush Roll.
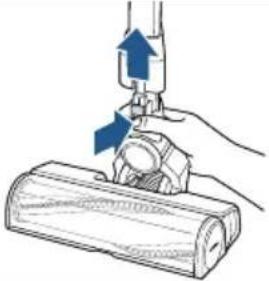 | 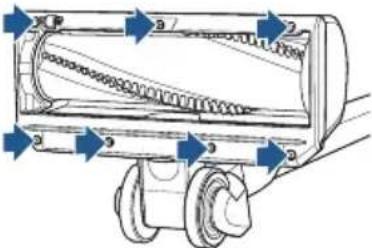 | 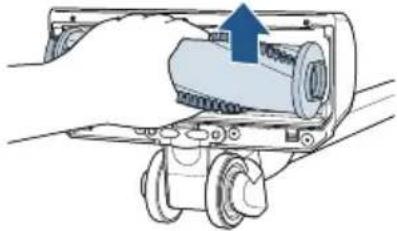 |
| 1. Turn the machine OFF and press the Foot Release Button to disconnect the Motorised Floor Cleaning Foot from the Extension Wand. | 2. Remove the sole plate from the bottom of the foot by unscrewing the seven screws with a Phillips-head screw driver. | 3. Pull the Brush Roll straight up and out of the chamber to remove.To reinsert, push the Brush Roll straight down into the chamber with the flat side of the Brush Roll against the flat side of the chamber wall. |
Disposing of the Batteries
Go to BISSELL.com for additional support and how-to videos.
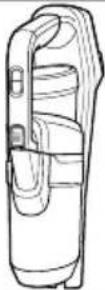 | 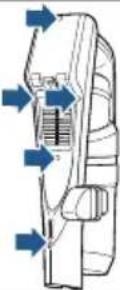 | 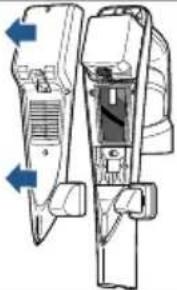 | ||||
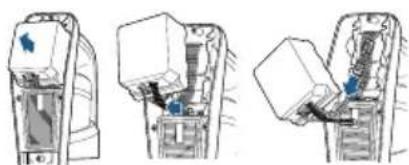
| 1. Run the battery out.Make sure the machine is disconnected from the charger and turned OFF and the hand vacuum is disconnected from the extension wand. | 2. Remove five screws from the back of the machine. | 3. Pull the bottom cover off of the back of the machine. | ||||
natural_image
Three technical line drawings showing mechanical components or assemblies, no text or symbols present.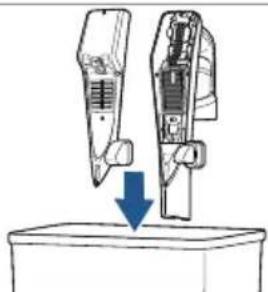
natural_image
Diagram of two mechanical components with a downward arrow indicating motion or force (no text or symbols)-
Disconnect and remove entire battery assembly by unplugging the two sockets from the vacuum.
-
Properly discard remainder of product.
NOTE: Keep Battery Pack together – DO NOT separate individual batteries.
NOTICE Disconnecting the battery will destroy the appliance and invalidate the warranty.
Troubleshooting
For a comprehensive walkthrough of your product and support visit BISSELL.com.
This guide has everything you need to get ready for first use, including setting up, using and maintaining your machine, but online you'll find additional resources like tips and troubleshooting, videos, product registration, parts, and more.
| Problem Possible Cause Remedies | ||
| Vacuum won't pick up dirt | Filters are dirty. Remove and rinse filters. Allow enough time for them to dry properly before reinserting. | |
| There is a clog in the vacuum. Remove the foot and Extension Wand from the hand vacuum. Check for debris buildup or clogs in each of these sections. Clear any debris or clogs before reassembling. | ||
| Dirt Tank is not seated correctly. Remove the tank and reseat properly. | ||
| Dirt is escaping from the vacuum | Dirt Tank is full. Empty the tank. | |
| Filters are missing or dirty. Check to see if the filters are in place and clean. Clean filters if necessary. | ||
| There is a clog in the vacuum. Remove the foot and Extension Wand from the hand vacuum. Check for debris buildup or clogs in each of these sections. Clear any debris or clogs before reassembling. | ||
| Vacuum won't charge | Wrong charger is being used. Use only the charger that comes with the machine. | |
| Charger is not plugged into the machine properly. | Remove the charger and reinstall into the hand vacuum. | |
Errors
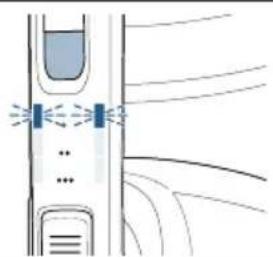 | 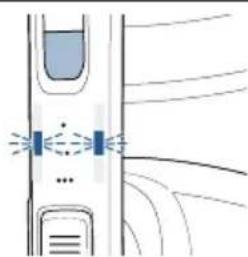 | 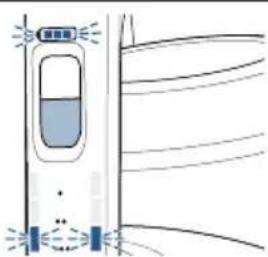 | 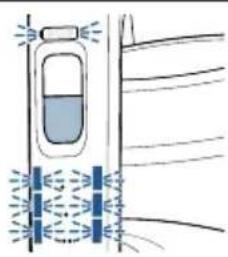 |
| Cause: Suction motor fault.Remedy: Turn machine OFF. Check and clean filters. Check for and clear any clogs. If this doesn’t solve the problem, contact Consumer Care. | Cause: Brush Roll stall.Remedy: Turn machine OFF. Check for and clean any debris from the Brush Roll. Turn machine ON. | Cause: Battery issue.Remedy: Contact Consumer Care. | Cause: Air flow issue.Remedy: Turn machine OFF. Check and clean filters. Check for and clear any clogs. If this doesn’t solve the problem, contact Consumer Care. |
Warranty
This warranty gives you specific legal rights, in addition to rights you may have under the Australian Consumer Law. If you need additional instruction regarding this warranty or have questions regarding what it may cover, please contact your local BISSELL Consumer Care on the details set out below.
It may be necessary to obtain some of your personal information, such as a mailing address, to fulfill terms of this warranty. Any personal data will be handled pursuant to BISSELL's Privacy Policy, which can be found at global.BISSELL.com/privacy-policy.
BISSELL® Two-Year Warranty
Subject to the *conditions identified below, BISSELL will repair or replace (with new, refurbished, lightly used, or remanufactured components or products), at BISSELL's option, free of charge from the date of purchase by the original purchaser, for two years any defective or malfunctioning part due to manufacturer defect. This warranty applies to product used for personal purposes, and not commercial or rental service. This warranty does not apply to fans or routine maintenance or consumable components such as filters, belts, brush rolls, etc., damage or malfunction caused by negligence, abuse, neglect, unauthorized repair, or any other use not in accordance with the user guide. BISSELL recommends that the original packaging be kept for the duration of the warranty period in case such need arises within the warranty period that the item needs re-packing and transportation.
\*Conditions of Warranty
Subject to whether such loss is reasonably foreseeable, BISSELL and its in-country distributors are not liable for incidental or consequential damages of any nature associated with the use of this product.
For Australian Consumers Only: Our goods come with guarantees that cannot be excluded under the Australian Consumer Law. You are entitled to a replacement or refund for a major failure and for compensation for any other reasonably foreseeable loss or damage. You are also entitled to have the goods repaired or replaced if the goods fail to be of acceptable quality and the failure does not amount to a major failure.
This guarantee is in addition to other rights or remedies under law. Nothing in this guarantee excludes, limits or modifies any liability of BISSELL which is imposed by law, or limits or modifies any remedy available to the consumer which is granted by law. To make a claim under this guarantee contact BISSELL Australia PTY LTD (details below). Contact BISSELL prior to returning any goods. Where agreed, BISSELL will reimburse reasonable postage / handling costs (if any) for returning goods to BISSELL. To claim expenses incurred in making a claim under this guarantee please provide BISSELL with a copy of the receipt of the expenses by email or post.
Consumer Care
Australia
Telephone: 1300 247 735
Website: www.BISSELL.com.au
New Zealand
Telephone: 0800 247 735
Website: www.BISSELL.co.nz
But wait, there's more!
Join us online for a complete guide to your new product, including troubleshooting, parts and more. Go to BISSELL.com.



VIDEOSINFOPARTS