
Zing 1665 - Vacuum Cleaner BISSELL - Free user manual and instructions
Find the device manual for free Zing 1665 BISSELL in PDF.


| Product Type | Bagless Canister Vacuum |
| Brand | BISSELL |
| Model | Zing 1665 Series |
| Power Supply | 120V AC, 60Hz |
| Filtration System | Pre-motor and post-motor washable filters |
| Dust Collection | Bagless dirt container |
| Cleaning Modes | Hard Floor Mode and Carpet Mode (via floor tool) |
| Attachments Included | Floor tool, 2-in-1 tool, two extension wands, handle and hose |
| Hose Type | Main hose with cord reel |
| Onboard Storage | Floor tool slides into holder on back of unit |
| Safety Features | Polarized plug; safety instructions for wet, flammable, and toxic materials |
| Warranty | Limited 1-year warranty |
| Maintenance | Empty dirt container; clean pre-motor and post-motor filters (allow 24h to dry) |
| Usage | Household use only; dry indoor surfaces |
| Country of Origin | Printed in China |
| Customer Support | 1-800-237-7691 (USA), 1-800-263-2535 (Canada) |
| Registration | Product registration available at www.BISSELL.com/registration |
| Service | Authorized service centers; do not return to store |
Frequently Asked Questions - Zing 1665 BISSELL
User questions about Zing 1665 BISSELL
0 question about this device. Answer the ones you know or ask your own.
Ask a new question about this device
Download the instructions for your Vacuum Cleaner in PDF format for free! Find your manual Zing 1665 - BISSELL and take your electronic device back in hand. On this page are published all the documents necessary for the use of your device. Zing 1665 by BISSELL.
USER MANUAL Zing 1665 BISSELL
Bagless Canister Vacuum
USER GUIDE
1665 SERIES
For How-To
videos, go to
www.BISSELL.com

Sections marked
with this video
icon have more
information online.
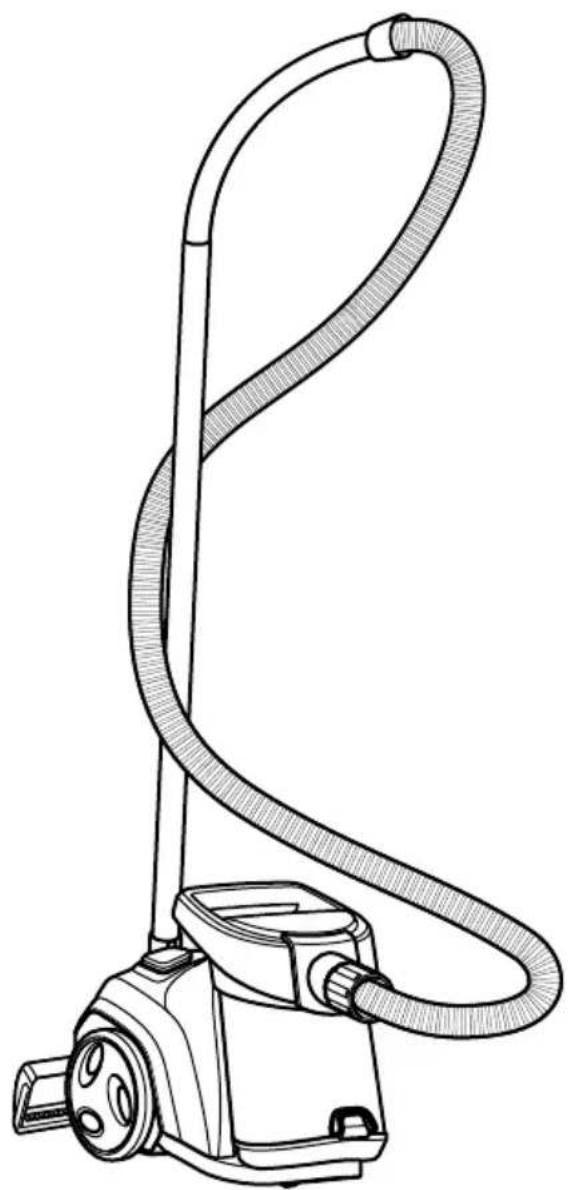
natural_image
Line drawing of a vacuum cleaner with coiled hose and handle (no text or symbols)IMPORTANT SAFETY INSTRUCTIONS
READ ALL INSTRUCTIONS BEFORE USING YOUR CANISTER VACUUM.
Always connect to a polarized outlet (one slot is wider than the other). Unplug from outlet when not in use and before conducting maintenance. When using an electrical appliance, basic precautions should be observed, including the following:

WARNING
TO REDUCE THE RISK OF FIRE, ELECTRIC SHOCK, OR INJURY:
» Always connect to a polarized outlet (one slot is wider than the other). Do not modify the polarized plug to fit a non-polarized outlet or extension cord.
» Do not leave vacuum cleaner when it is plugged in. Unplug from outlet when not in use and before servicing.
» Do not use outdoors or on wet surfaces.
» Do not allow to be used as a toy. Close attention is necessary when used by or near children.
» Do not use for any purpose other than described in this User's Guide. Use only manufacturer's recommended attachments.
» Do not use with damaged cord or plug. If appliance is not working as it should, has been dropped, damaged, left outdoors, or dropped into water, have it repaired at an authorized service center.
» Do not pull or carry by cord, use cord as a handle, close a door on cord, or pull cord around sharp edges or corners. Do not run appliance over cord. Keep cord away from heated surfaces.
» Do not unplug by pulling on cord. To unplug, grasp the plug, not the cord.
» Do not handle plug or vacuum cleaner with wet hands.
» Do not put any object into openings. Do not use with any opening blocked; keep openings free of dust, lint, hair, and anything that may reduce air flow.
» Keep hair, loose clothing, fingers, and all parts of body away from openings and moving parts.
» Turn off all controls before plugging or unplugging vacuum cleaner.
» Use extra care when cleaning on stairs.
» Do not use to pick up flammable or combustible materials (lighter fluid, gasoline, kerosene, etc.) or use in areas where they may be present.
» Do not use vacuum cleaner in an enclosed space filled with vapors given off by oil base paint, paint thinner, some moth proofing substances, flammable dust, or other explosive or toxic vapors.
» Do not use to pick up toxic material (chlorine bleach, ammonia, drain cleaner, etc.).
» Do not pick up anything that is burning or smoking, such as cigarettes, matches, or hot ashes.
» Do not use without filters in place.
» Do not pick up hard or sharp objects such as glass, nails, screws, coins, etc.
» Use only on dry, indoor surfaces.
» Keep appliance on a level surface.
» Do not carry the vacuum cleaner while it is running.
» Hold plug when rewinding onto cord reel. Do not allow plug to whip when rewinding.
SAVE THESE INSTRUCTIONS
This model is for household use only.
WARNING
» Plastic film can be dangerous. To avoid danger of suffocation, keep away from children.
» Do not plug in your vacuum cleaner UNTIL you are familiar with all instructions and operating procedures.
» To reduce the risk of electrical shock, turn power switch off and disconnect polarized plug from electrical outlet BEFORE performing maintenance or troubleshooting checks.
THIS APPLIANCE HAS A POLARIZED PLUG
To reduce the risk of electric shock, this appliance has a polarized plug (one blade is wider than the other). This plug will fit in a polarized outlet only one way. If the plug does not fit fully in the outlet, reverse the plug. If it still does not fit, contact a qualified electrician to install a proper outlet. Do not change the plug in any way.

Package Contents
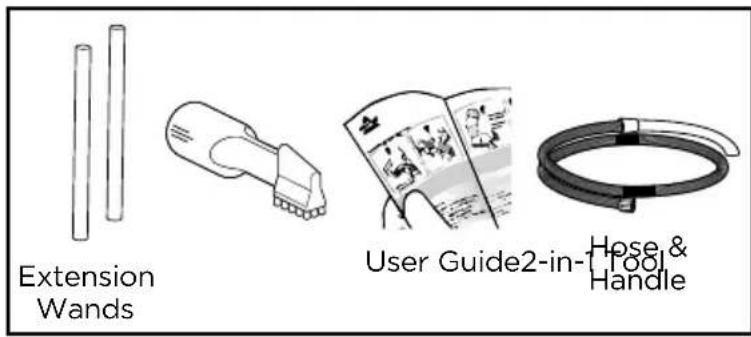
NOTE: Standard accessories may vary by model. Additional tools may vary - check carton for contents.

Thanks for buying a BISSELL vacuum
We're glad you purchased a BISSELL vacuum. Everything we know about floor care went into the design and construction of this complete, high-tech home cleaning system.
Your BISSELL vacuum is well made, and we back it with a limited one-year warranty. We also stand behind it with a knowledgeable, dedicated Consumer Care department, so, should you ever have a problem, you'll receive fast, considerate assistance.
My great-grandfather invented the floor sweeper in 1876. Today, BISSELL is a global leader in the design, manufacture, and service of high quality homecare products like your BISSELL vacuum.
Thanks again, from all of us at BISSELL.
man 1.7 moseo Mark J. Ricoll
Mark J. Bissell
Chairman & CEO
Safety Instructions.....2
Product View.....4-5
Assembly 6
Maintenance & Care ..... 7-9
Troubleshooting ..... 10
Warranty 11
Service....11
Contact Information ..... 11
Product Registration.....12
Parts & Supplies ..... 12
Product View

Product View

natural_image
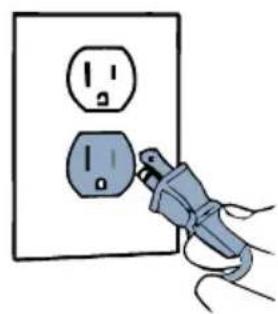
Illustration of a plug inserted into an open electrical outlet (no text or symbols)Plug into a polarized outlet Remove floor tool with hose from holder and press Power Button.

Assembly

WARNING
Do not plug in your vacuum until you are familiar with all instructions and operating procedures.
You will need the following to assemble:

natural_image
Line drawing of a vacuum cleaner device with no text or symbolsBody

Handle & Hose
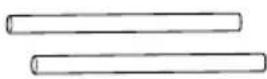
Extension Wands


Floor Tool 2-in-1 Tool


1 - Connect one extension wand to the handle.

2 - Connect both extension wands together.

3 - Connect the bottom extension wand to floor tool.

4 - To use 2-in-1 tool, attach to end of wand when needed.


Twist right until you hear a click to secure.
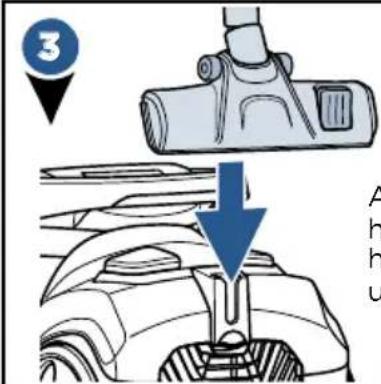
Attach floor tool to hose and slide in holder on back of unit to store.

Floor Tool Cleaning Modes:

natural_image
Line drawing of a vacuum cleaner with a numbered label (1) indicating part number, no text or symbols present.1 - Hard Floor Cleaning Mode
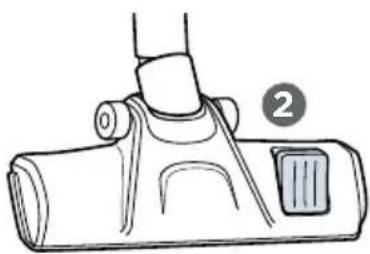
natural_image
Line drawing of a mechanical device with a handle and a button, labeled with number 2 (no text or symbols on the device itself)2 - Carpet Cleaning Mode
Maintenance: Emptying the Dirt Container
WARNING
To reduce the risk of electrical shock, turn power switch off and disconnect polarized plug from electrical outlet before performing maintenance or troubleshooting checks.

natural_image
Line drawing of a mechanical device with no visible text or symbols


Maintenance: Cleaning Filters
Pre-Motor Filter Cleaning Instructions


natural_image
Illustration of a cylindrical mechanical component with internal structure, next to a cylindrical housing (no text or symbols)Clean both filter & filter screen with mild detergent, rinse, and squeeze out all excess water.
Allow filters to dry for 24 hours before reassembling.
Maintenance: Cleaning Filters
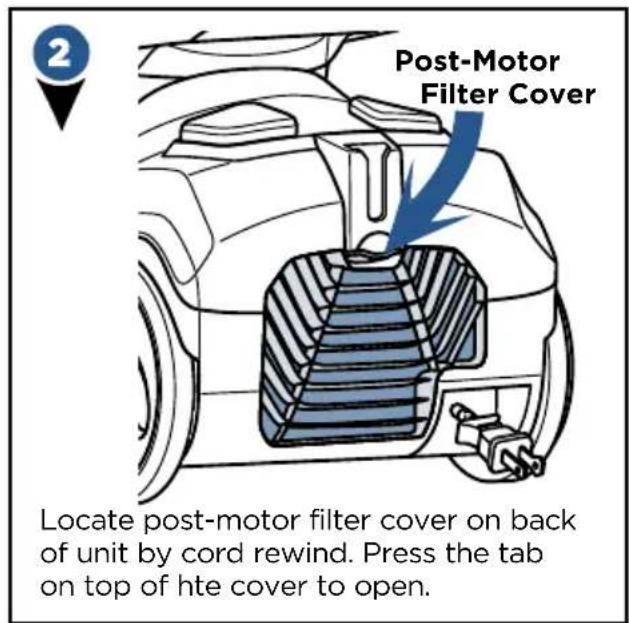
Post-Motor Filter Cleaning Instructions



Troubleshooting
WARNING
To reduce the risk of electric shock, turn power switch off and disconnect plug from electrical outlet before performing maintenance or troubleshooting checks.
| Problem Possible causes Remedies | ||
| Vacuum won't pick up dirt | Filters are dirty | Remove and rinse pre-motor and post-motor filters. Allow enough time for them to dry properly before reinserting |
| The Main Hose is not connected | Locate the Main Hose and reconnect by pushing the hose connection to secure the latch | |
| There is a crack or hole in the Main Hose | If there is a crack or hole, order a new Main Hose from the BISSELL website | |
| There is a clog in the vacuum | Remove debris and any other entanglements that may be restricting suction. If there is a clog in the wand or the hose, run a broomstick handle through to clear the clog | |
| The Dirt Container is not seated correctly | Press the Release Button to remove the Dirt Container. To reseat properly insert the bottom of the Dirt Contrainer first, and then press until you hear the top click into place | |
| Dirt is escaping from the vacuum | The Dirt Container is full Empty the | Dirt Container |
| Filters are missing Check to see if all | of the Pre-Motor and Post-Motor filters are in place | |
| The Dirt Container is not seated properly | Press the Release Button and remove the Dirt Container. Insert the bottom first and pivot the Dirt Container towards the vacuum. Listen for a “click” sound, indicating that it snapped into place | |
Please do not return this product to the store.
Other maintenance or service not included in the manual should be performed by an authorized service representative.
For any questions or concerns, BISSELL is happy to be of service. Contact us directly at 1-800-237-7691.
Warranty
This warranty gives you specific legal rights, and you may also have other rights which may vary from state to state. If you need additional instruction regarding this warranty or have questions regarding what it may cover, please contact BISSELL Consumer Care by E-mail or telephone as described below.
Limited One-Year Warranty
Subject to the *EXCEPTIONS AND EXCLUSIONS identified below, upon receipt of the product BISSELL will repair or replace (with new or remanufactured components or products), at BISSELL's option, free of charge from the date of purchase by the original purchaser, for one year any defective or malfunctioning part.
See information below on "If your BISSELL product should require service".
This warranty applies to product used for personal, and not commercial or rental service. This warranty does not apply to fans or routine maintenance components such as filters, belts, or brushes. Damage or malfunction caused by negligence, abuse, neglect, unauthorized repair, or any other use not in accordance with the User's Guide is not covered.
BISSELL IS NOT LIABLE FOR INCIDENTAL OR CONSEQUENTIAL DAMAGES OF ANY NATURE ASSOCIATED WITH THE USE OF THIS PRODUCT. BISSELL'S LIABILITY WILL NOT EXCEED THE PURCHASE PRICE OF THE PRODUCT.
Some states do not allow the exclusion or limitation of incidental or consequential damages, so the above limitation or exclusion may not apply to you.
\*EXCEPTIONS AND EXCLUSIONS FROM THE TERMS OF THE LIMITED WARRANTY
THIS WARRANTY IS EXCLUSIVE AND IN LIEU OF ANY OTHER WARRANTIES EITHER ORAL OR WRITTEN. ANY IMPLIED WARRANTIES WHICH MAY ARISE BY OPERATION OF LAW, INCLUDING THE IMPLIED WARRANTIES OF MERCHANTABILITY AND FITNESS FOR A PARTICULAR PURPOSE, ARE LIMITED TO THE ONE YEAR DURATION FROM THE DATE OF PURCHASE AS DESCRIBED ABOVE.
Some states do not allow limitations on how long an implied warranty lasts so the above limitation may not apply to you.
NOTE: Please keep your original sales receipt. It provides proof of date of purchase in the event of a warranty claim.
Service
If your BISSELL product should require service:
Contact BISSELL Consumer Care to locate a BISSELL Authorized Service Center in your area. If you need information about repairs or replacement parts, or if you have questions about your warranty, contact BISSELL Consumer Care.
Website:
www.BISSELL.com Canada.BISSELL.com
E-mail:
www.BISSELL.com/email-us Canada.BISSELL.com/support/contact-us
Call:
BISSELL USA Consumer Care 1-800-237-7691
BISSELL Canada Consumer Care 1-800-263-2535
Monday- Friday 8am -10pm ET Saturday 9am - 8pm ET Sunday 10am - 7pm ET
Register your product today!
Registering is quick, easy and offers you benefits over the lifetime of your product.
You'll receive:
BISSELL Rewards Points
Automatically earn points for discounts and free shipping on future purchases.
Faster Service
Supplying your information now saves you time should you need to contact us with questions regarding your product.
Product Support Reminders and Alerts
We'll contact you with any important product maintenance reminders and alerts.
Special Promotions
Optional: Register your email to receive notice of offers, contests, cleaning tips and more!
Visit www.BISSELL.com/registration!
Visit the BISSELL website: www.BISSELL.com
When contacting BISSELL, have model number of cleaner available.
Please record your Model Number: ____
Please record your Purchase Date: ____
NOTE: Please keep your original sales receipt. It provides proof of purchase date in the event of a warranty claim. See Warranty on page 11 for details.
Parts & Supplies
For Parts and Supplies, go to www.BISSELL.com and enter your model number in the search field.
We can't wait to hear from you!
Rate this product and let us (and millions of your closest friends) know what you think!
www.BISSELL.com

©2016 BISSELL Homecare, Inc
Grand Rapids, Michigan
All rights reserved. Printed in China
Part Number 160-6623 01/16
Visit our website at: www.BISSELL.com
Bissell®
ZING®
natural_image
Line drawing of a vacuum cleaner with coiled hose and handle (no text or symbols)natural_image
Illustration of a blue electrical plug plugged into a white wall socket with an exclamation mark (no text or symbols)natural_image
Line drawing of a vacuum cleaner with a handle and button, labeled with number 1 (no text or symbols on the device itself)natural_image
Line drawing of a mechanical device with a numbered label (2) and internal components, no readable text or symbols present.natural_image
Line drawing of a mechanical device with no visible text or symbols
natural_image
Illustration of a cylindrical container with internal structure, next to a cylindrical fan-like object (no text or symbols)www.Canada.BISSELL.com/supports/contact-us
Llame al:
Grand Rapids, Michigan
- Bagless Canister Vacuum
- IMPORTANT SAFETY INSTRUCTIONS
- READ ALL INSTRUCTIONS BEFORE USING YOUR CANISTER VACUUM.
- WARNING
- TO REDUCE THE RISK OF FIRE, ELECTRIC SHOCK, OR INJURY:
- SAVE THESE INSTRUCTIONS
- THIS APPLIANCE HAS A POLARIZED PLUG
- Package Contents
- Thanks for buying a BISSELL vacuum
- Product View
- Assembly
- Maintenance: Emptying the Dirt Container
- Maintenance: Cleaning Filters
- Pre-Motor Filter Cleaning Instructions
- Post-Motor Filter Cleaning Instructions
- Troubleshooting
- Please do not return this product to the store.
- Warranty
- Limited One-Year Warranty
- \*EXCEPTIONS AND EXCLUSIONS FROM THE TERMS OF THE LIMITED WARRANTY
- Service
- If your BISSELL product should require service:
- Website:
- E-mail:
- Call:
- Register your product today!
- You'll receive:
- BISSELL Rewards Points
- Faster Service
- Product Support Reminders and Alerts
- Special Promotions
- Visit www.BISSELL.com/registration!
- Visit the BISSELL website: www.BISSELL.com
- Parts & Supplies
- Bissell®
- ZING®
- Llame al:
Brand : BISSELL
Model : Zing 1665
Category : Vacuum Cleaner