
APM 3011 - Air purifier AMICA - Free user manual and instructions
Find the device manual for free APM 3011 AMICA in PDF.

| Product Type | Air Purifier |
| Brand | Amica |
| Model | APM 3011 |
| Dimensions (H x W x D) | 400 x 250 x 250 mm |
| Weight | 3.0 kg |
| Power Supply | 220-240 V, 50 Hz |
| Power Consumption | 50 W (max) |
| Coverage Area | Up to 30 m² |
| CADR (Clean Air Delivery Rate) | 150 m³/h |
| Filtration Stages | Pre-filter, HEPA (H13), Activated Carbon |
| Fan Speeds | 3 speeds (Low, Medium, High) |
| Timer | 2/4/8 hours |
| Noise Level | 25 – 50 dB(A) |
| Air Quality Indicator | Yes (PM2.5 sensor) |
| Night Mode | Yes (lights off, low noise) |
| Filter Replacement Indicator | Yes |
| Auto Shut-Off | Yes (when filter cover opened) |
| Filter Type | Combination HEPA + Carbon (replaceable) |
| Filter Replacement Interval | Every 6-12 months (depending on usage) |
| Cleaning | Pre-filter washable every 2 weeks |
| Safety Features | Overheat protection, tip-over switch |
| Certifications | CE, RoHS |
Frequently Asked Questions - APM 3011 AMICA
User questions about APM 3011 AMICA
0 question about this device. Answer the ones you know or ask your own.
Ask a new question about this device
Download the instructions for your Air purifier in PDF format for free! Find your manual APM 3011 - AMICA and take your electronic device back in hand. On this page are published all the documents necessary for the use of your device. APM 3011 by AMICA.
USER MANUAL APM 3011 AMICA
natural_image
White Amica air purifier with digital display and ventilation grille (no visible text or symbols on body)PL INSTRUKCJA OBSŁUGI....6
EN OPERATING INSTRUCTIONS....12
2
natural_image
Simple line drawing of a hand cleaning a cylindrical object (no text or symbols)
natural_image
Illustration of a mobile phone with a screen showing the same body (no text or symbols visible)
natural_image
Illustration of hands holding a rectangular object with a circular lens (no text or symbols visible)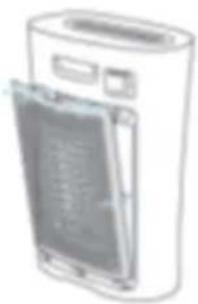
natural_image
Illustration of a cylindrical device with a transparent cover showing internal components (no text or symbols visible)3
4
DZIEKUJEMY ZA WYBÓR SPRZĘTU MARKI AMICA
GWARANCJA I OBSŁUGA POSPRZEDAŻOWA
Gwarancja
OPIS WYROBU / OBSŁUGA
THANK YOU FOR PURCHASING AN AMICA APPLIANCE
DEAR CUSTOMER,
Your Amica appliance is exceptionally easy to use and extremely efficient. Before being packaged and leaving the manufacturer, the appliance was thoroughly checked with regard to safety and functionality.
Before using the appliance, please carefully read these Operating Instructions CONTENTS
Warranty and after sales service....12
Safety instructions for use....13
Description of the appliance....15
Cleaning and maintenance....17
Problem solving....18

The appliance is designed for household use only.
The manufacturer reserves the right to introduce changes, which do not affect operation of the appliance.
The pictures in this operating instructions are for illustration only.
DISPOSING/SCRAPPING OF USED EQUIPMENT
UNPACKING
During transportation, protective packaging was used to protect the appliance against any damage. After unpacking, please dispose of all elements of packaging in a way that will not cause damage to the environment. All materials used for packaging the appliance are environmentally friendly; they are 100% recyclable and are marked with the appropriate symbol.
Important! During unpacking, keep the packaging material (polyethylene bags, polystyrene pieces, etc.) out of reach of children.
DISPOSAL OF THE APPLIANCE
At the end of its useful life, this product must not be disposed of with normal municipal waste. Instead, it should be taken to an electronic waste collection and recycling point. It is indicated by the symbol on the product itself, or on the Operating Instructions or packaging.
The materials used in making of this appliance can be reused, as indicated. By reusing or recy-
cling the materials or parts, you will be playing an important part in protecting our environment. Information about the relevant disposal points for worn-out electrical goods is available from your local authorities.
WARRANTY AND AFTER SALES SERVICE
Warranty
Warranty service as stated on the warranty card.
The manufacturer shall not be held liable for any damage caused by improper use of the product.
Manufacturer's Declaration
The manufacturer hereby declares that this product meets the requirements of the following European directives:
• Low Voltage Directive 2014/35/EC
• Electromagnetic Compatibility (EMC) Directive 2014/30/EC
• ErP Directive 2009/125/EC
• Directive RoHS 2011/65/EC
and has thus been marked with the symbol and been issued with a declaration of compliance made available to market regulators.
SAFETY INSTRUCTIONS FOR USE
- Do not use this appliance in wet or high temperature environment (like bathroom, toilet and kitchen).
- Before replacing the filter, please stop this appliance and cut off power.
- Do not place other items on top of the appliance, and forbid sitting or standing on this appliance.
- Please use the original filter provided by the factory. In case of other filters, the best results cannot be achieved.
- Do not use damaged or aged power cords; Forbid replacing the power cord without authorization. If the power cord is damaged, it must be replaced by the manufacturer, its service department or professional from similar department to avoid danger
- Do not insert the fingers or objects into the air inlets or air outlets to prevent the product from physical damages or malfunction.
- Please unplug the power cord immediately and contact the service center in time when the appliance suffers abnormal sound or burnt smell or smoke.
- Do not spray flammable substances near the appliance; • Do not spray water directly on the appliance or use chemical cleaners like alcohol or hydrochloric acid, etc.; Do not place water containers, medicines, or flammable materials on the appliance.
- Do not block the air inlets/outlets of the appliance with any item;
- This appliance cannot replace natural ventilation and other appliances like the vacuum cleaner, kitchen ventilator, etc. When the appliance is working, it must be placed on a dry, flat and stable floor, with at least 30 cm space reserved around it.
- Do not put it in a place with direct sunlight.
- To prevent electromagnetic disturbance, the appliance must keep a certain distance from the TV, radio, microwave oven and others.
- The mist produced by the ultrasonic humidifier may affect the PM2.5 detection of this appliance, and both should maintain a certain distance.
SAFETY INSTRUCTIONS FOR USE
- Do not disassemble or modify this appliance without authorization to avoid accidents.
- Do not pull the power cord to move the appliance.
- Please take care of the children and make sure that the children do not touch the appliance to avoid accidents.
- This appliance can be used by children aged from 8 years and above and persons with reduced physical, sensory or mental capabilities or lack of experience and knowledge if they have been given supervision or instruction concerning use of the appliance in a safe way and understand the hazards involved.
• Children shall not play with the appliance.
DESCRIPTION OF THE APPLIANCE
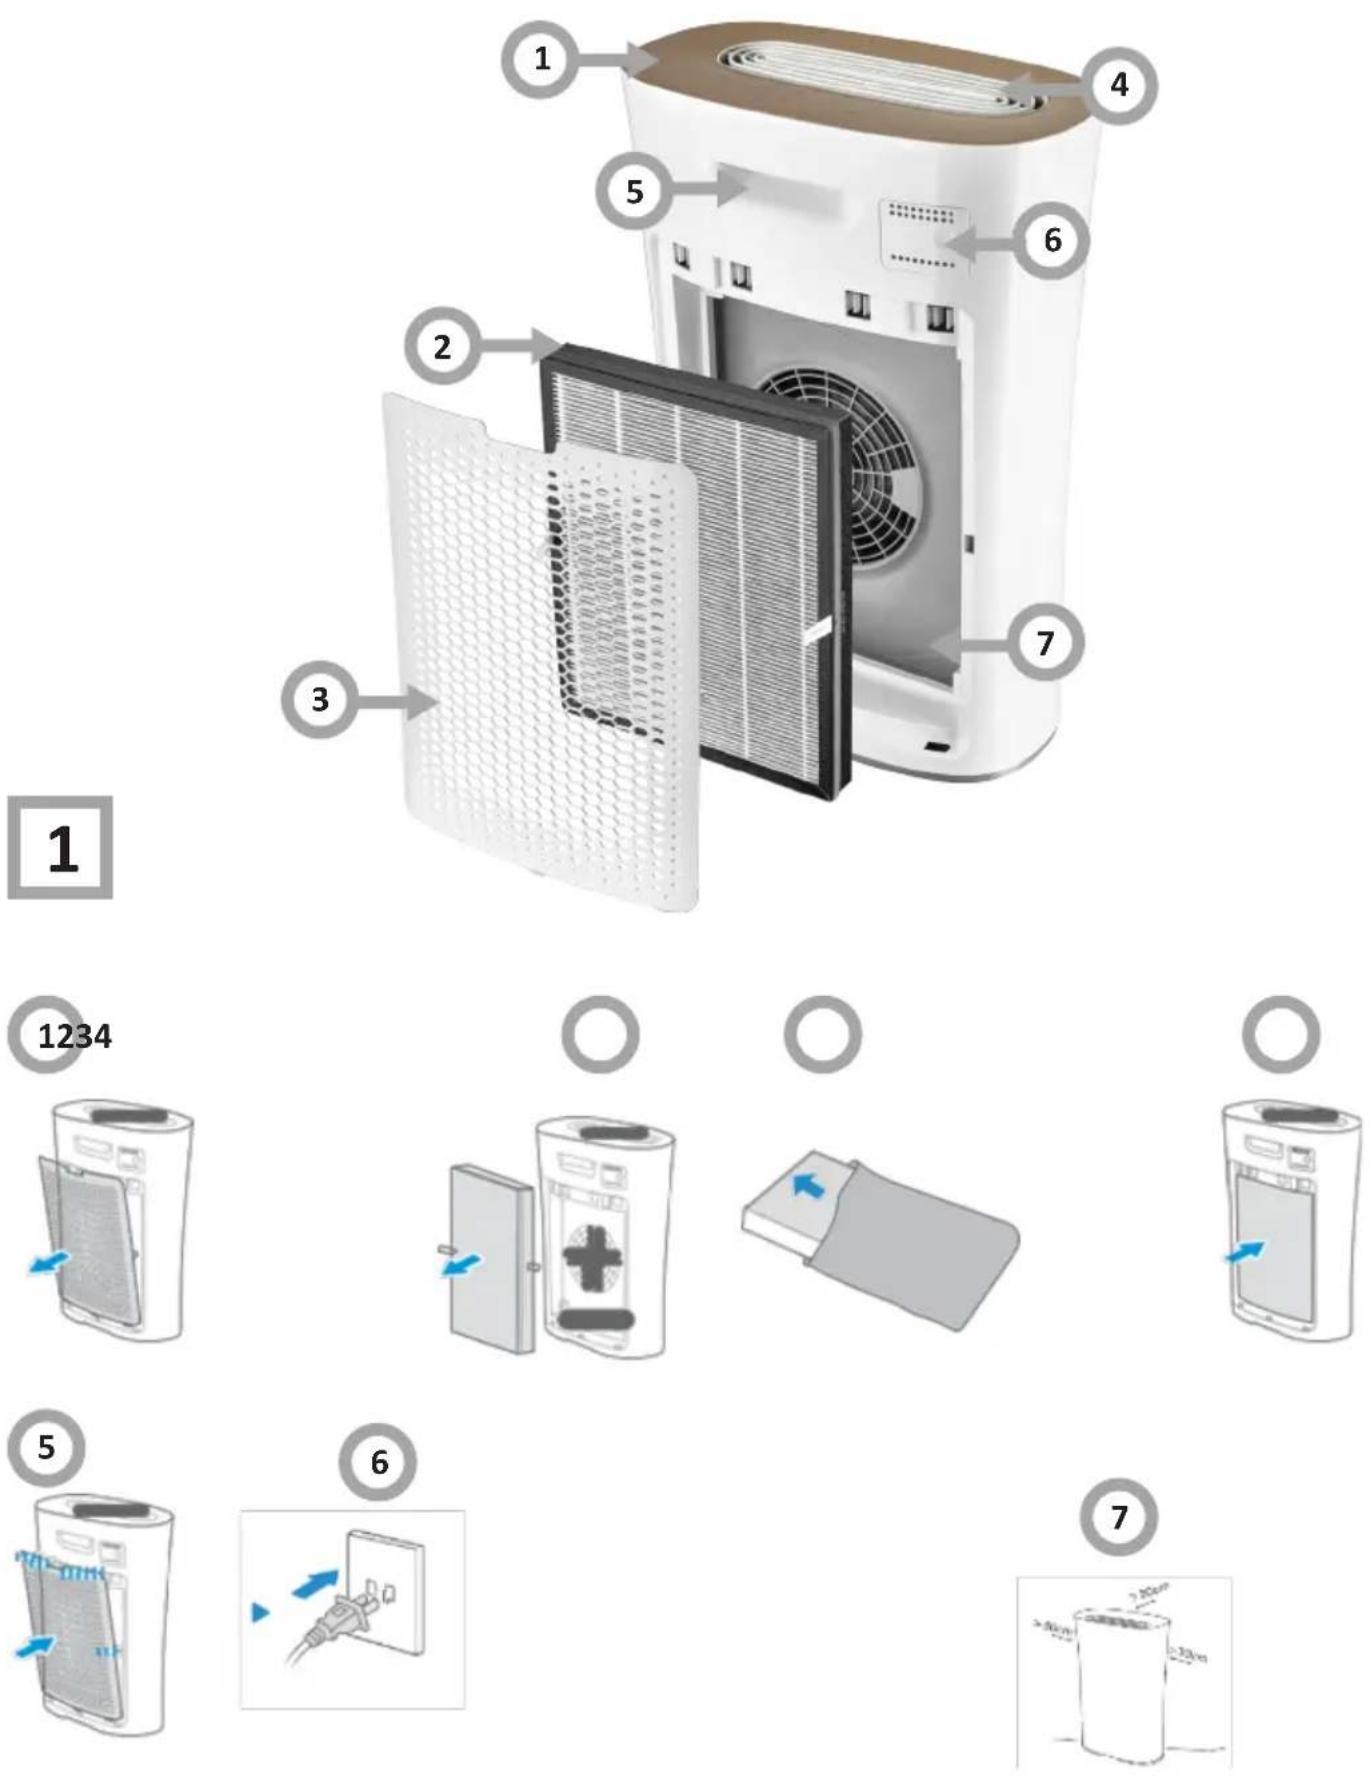
Name of components (fig. 1)
- Control panel
- Filter Assembly
- Rear case
- Air outlet
- Handle
- Particulate sensor
- Air inlet
Assembly procedures (fig. 2)
- Remove rear case. Grab the buckle and pull it out, and then remove the rear case (1).
- Take out the filter assembly. Hold both sides of the filter assembly with both hands, and take it out (2).
- Remove the protective film of the filter assembly (3).
● Mount the filter assembly (4). - Mount the rear case (5).
- Plug in the power cord, and the filter starts up (6).
Proper placement (fig. 2).
- To achieve better purification effects and avoid metallic shield effect affecting the communication, please be sure that the air purifier is over 30cm away from shelters like the walls, and is also over 50cm away from the metal/home appliance (7).
Control panel (fig. 3)
● Air quality tips (1).
● Air quality tips (2).
- POWER (3).
- Purifying rate - FAN (4).
The FAN mode has four options for adjusting the fan speed: „Turbo”, „High”, „Mid” and „Low”.
Additional option for FAN mode:
- possibility to switch on simultaneously: FAN + ION
- possibility to turn on the time function for each fan speed with the TIMER button: 1H, 2H, 4H, 8H, continuous mode (when the continuous mode is selected, no LED by the TIMER button is on). This also applies to simultaneously activated modes: FAN + ION.
● Auto Shutdown - TIMER (5).
Optional 1h, 2h, 4h and 8h for the auto shutdown.
● Auto mode - AUTO (6).
AUTO mode:
- the purifier has the so-called „Light detection function”. The program automatically changes the mode: from AUTO to SLEEP mode or from SLEEP to AUTO - this only applies when you select the „AUTO” mode, and also when you select simultaneously: AUTO + ION.
- the program automatically adjusts the fan speed depending on the level of detection of pollution in the room (on the panel there is an icon that changes color, informing about the quality of air pollution: red - BAD, orange - NORMAL, green - GOOD. The more polluted the air in the room, the faster the speed fan speed will be faster (automatic function to adjust the fan speed to the pollution degree in the room - this only applies to „AUTO” mode).
Additional option for AUTO mode:
- possibility of simultaneously activating the time function: 1H, 2H, 4H, 8H, continuous mode - using the TIMER button;
- simultaneous activation: AUTO + ION.
- Sleep mode - SLEEP (7). SLEEP mode:
- works continuously, always at the lowest fan speed: LOW. The program does not adjust the fan speed to the quality of the pollution in the room.
- in SLEEP mode, no possibility to change the fan speed (manual change of the fan speed causes deactivation of the SLEEP mode)
- „icon blanking function” - if the SLEEP program is selected, the remaining information / active icons are blanked - only the SLEEP program icon is on. Touching the button again, no matter what button, activates the buttons again for about 5 seconds.
Additional option for SLEEP mode:
- possibility of switching on the time function: 1H, 2H, 4H, 8H, continuous mode - with the TIMER button
- possibility of activating simultaneously: SLEEP + ION.
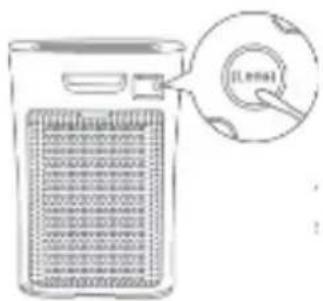
- Anion Function Filter resetting - ION (8). When the Clean indicator light is on, and the filter is replaced, long press „ION” for 3s to reset the filter.
- Clean Prompts (9).
● Child Lock Prompts (10).
- Child Lock (11). It prevents unintentional changes to the settings (locking with the button: FAN + TIMER, unlocking with the button: FAN + TIMER).
DESCRIPTION OF THE APPLIANCE
| Speed value Speed of the purifier | |
| 1~16 Low speed, low speed indicator light | |
| 17~42 Medium speed, medium speed indicator light | |
| 43~70 High speed, high speed indicator light | |
| 71~100 Great speed, great speed indicator light |
Notes: Step-less speed regulation function is only applicable to some of purifiers.
Clean Prompts When „Filter” indicator light is on, it prompts the users to clean the filter; after the cleaning is finished, press the „ION” for 3s to restart the timing.
Notes: Light sensing function In the automatic mode, the purifier can automatically sense the ambient light level, and activate the sleep mode or exit the sleep mode. Air quality Prompt function:
| Air quality (particulate) Air quality indicator light color | |
| GOOD Green | |
| NORMAL Orange | |
| BAD Red | |
CLEANING AND MAINTENANCE
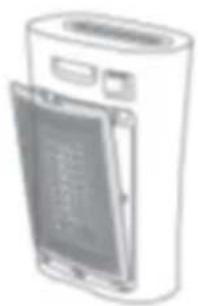
Body cleaning (fig. 4)
Notes:
Be sure to turn it off before any maintenance, and cut off power.
- Main body (1)
Wipe the body with a soft towel.
- Open the rear case, vacuum the dust up with a vacuum cleaner, and then wipe the body with a wet cloth ipe the body with a soft towel (2).
● Particulate sensor (3).
A dry cotton swab is used to clean the sensor lens.
● To ensure normal operation of the particulate sensor, please clean it every 2 months.
Filter cleaning/replacement HEPA H13 with carbon filter.
Notes:
Be sure to turn it off before any maintenance, and cut off power.
Cleaning:
● Tips for filter cleaning/replacement: When the display light is purple.
● Cleaning method: Clean the filter with a vacuum cleaner or a brush.
- Filter reset: After cleaning and replacing the filter, long press „ION“ on the panel for 3 seconds to reset the filter.
Recommended:
- It is recommended to replace the filter once every six months (the cleaning and replacement cycle can be adjusted according to the operating environment);
- Do not wash the filter with water;
- It is recommended to use a small soft brush or household vacuum cleaner when cleaning the filter;
- When cleaning with a brush, the brush should be traversed along the filter. Avoid vertical brush as far as possible, so as not to damage the filter;
- When cleaning with a vacuum cleaner, keep the suction port 5-10 mm away from the surface of the filter to avoid damaging the filter.
- When used under the strong odor of cigarettes, grilled meat, etc., the filter may have odors within a few weeks or months. Please clean and air the filter (2-5 days) at this time. If the odor still cannot be removed, replace the filter.
When replacing the filter, choose the one that fits your device's model. You can buy such a filter. Detailed information on our website:
https://czescizamienne.amica.pl/Product/Part
Please confirm the following contents before the entrusted maintenance:
| Problems encountered Reason Troubleshooting | ||
| The air quality indicator keeps red during continuous operation. | Maybe the room area exceeds the purification capacity of the machine; The filter components may not have been installed. | Please keep the purifier running continuously; Please install the filter components correctly. |
| The purifier can't run. The power cord may not be plugged in, or the power cord may not be in good contact; The power switch may not have been turned on. | Please plug in the power and make good contact; Please turn on the power switch. | |
| The effect of removing smoke and odor is poor. | Maybe the filter components are not installed; Maybe the filter components have expired; Maybe the air inlet is blocked by foreign objects. | Please install the filter components correctly; Please replace the new filter assembly; Please remove the foreign matter from the air inlet. |
| The air quality indicator does not change. | It may be that the sensitivity of the sensor is unstable for a period of time after the start of operation. If it doesn't change after turning green, the air may be in a clean state; It may be placed in a location where dirt monitoring is difficult, or the sensor is dirty; The strong indoor odor may cause the sensor sensitivity to decrease. | Please wait, after a few minutes of operation, the sensor will stabilize; Blow the cigarette to the sensor. If the indicator color changes, it is normal; Please move the purifier or clean the sensor; Please adjust the fan speed to high grade and run for several hours to 1 day. |
| Filter cleaning light does not go out; | It may be that after cleaning the filter components, the „negative ion” button was not long pressed for 3 seconds. | After cleaning the filter components, long press the „negative ion” button for 3 seconds. |
| Odor and smoke are difficult to remove. | It may be that the filter assembly is still wrapped in the package. | Please remove the packing bag outside the filter components. |
If the following conditions occur, please send for repair:
1. The operation is not normal or not running, it is invalid to deal with according to the above method;
2. Foreign matter or water enters, and the operation is not normal.
Amica S.A.
ul.Mickiewicza 52
64-510 Wronki
tel. 67 25 46 100
fax 67 25 40 320
www.amica.pl

- DZIEKUJEMY ZA WYBÓR SPRZĘTU MARKI AMICA
- GWARANCJA I OBSŁUGA POSPRZEDAŻOWA
- Gwarancja
- OPIS WYROBU / OBSŁUGA
- THANK YOU FOR PURCHASING AN AMICA APPLIANCE
- DEAR CUSTOMER,
- DISPOSING/SCRAPPING OF USED EQUIPMENT
- UNPACKING
- DISPOSAL OF THE APPLIANCE
- WARRANTY AND AFTER SALES SERVICE
- Warranty
- Manufacturer's Declaration
- SAFETY INSTRUCTIONS FOR USE
- DESCRIPTION OF THE APPLIANCE
- Name of components (fig. 1)
- Assembly procedures (fig. 2)
- Proper placement (fig. 2).
- Control panel (fig. 3)
- AUTO mode:
- CLEANING AND MAINTENANCE
- Body cleaning (fig. 4)
- Filter cleaning/replacement HEPA H13 with carbon filter.
- Cleaning:
- Recommended:
Brand : AMICA
Model : APM 3011
Category : Air purifier