
HG600 - Contact grill KENWOOD - Free user manual and instructions
Find the device manual for free HG600 KENWOOD in PDF.


| Product Type | Contact Grill |
| Brand | Kenwood |
| Model | HG600 |
| Power Supply | 230 V, 10 A (approx. 2300 W) |
| Cooking Positions | 3 positions: Contact grilling (closed), Browning (open 90°), Barbecue/Party Grilling (flat open) |
| Grill Plates | Removable, non-stick coated, top and bottom |
| Temperature Control | Adjustable knob with pilot light |
| Pilot Light | Indicates when set temperature is reached |
| Drainage Vent | For collecting surplus fat; use heatproof container |
| Safety Features | Heat-insulated handle, automatic shut-off not available, must be unplugged after use |
| Cleaning | Removable plates dishwasher safe; wipe exterior with damp cloth |
| Non-Stick Coating Care | Do not use sharp tools or abrasive cleaners |
| Intended Use | Domestic indoor use only; not for commercial or outdoor use |
| Safety Compliance | Conforms to EEC Directive EN 55014; materials contact food per EC 1935/2004 |
| First Use | Heat for 5 minutes in barbecue position with no food to eliminate new appliance smell |
| Spare Parts | Contact authorized Kenwood repairer for cord replacement or service |
| Country of Origin | Designed in UK, Made in China |
| Warranty | Refer to shop where purchased |
Frequently Asked Questions - HG600 KENWOOD
User questions about HG600 KENWOOD
0 question about this device. Answer the ones you know or ask your own.
Ask a new question about this device
Download the instructions for your Contact grill in PDF format for free! Find your manual HG600 - KENWOOD and take your electronic device back in hand. On this page are published all the documents necessary for the use of your device. HG600 by KENWOOD.
USER MANUAL HG600 KENWOOD
Instructions for use
Gebrauchsanweisung
natural_image
Line drawing of a mechanical component with ribbed ends and a central curved shape (no text or symbols)ELECTRICAL CONNECTION (UK ONLY)
A) If your appliance comes fitted with a plug, it will incorporate a 13 Amp fuse. If it does not fit your socket, the plug should be cut off from the mains lead, and an appropriate plug fitted, as below. WARNING: Very carefully dispose of the cut off plug after removing the fuse: do not insert in a 13 Amp socket elsewhere in the house as this could cause a shock hazard.
With alternative plugs not incorporating a fuse, the circuit must be protected by a 15 Amp fuse. If the plug is a moulded-on type, the fuse cover must be re-fitted when changing the fuse using a 13 Amp Asta approved fuse to BS 1362. In the event of losing the fuse cover, the plug must NOT be used until a replacement fuse cover can be obtained from your nearest electrical dealer. The colour of the correct replacement fuse cover is that as marked on the base of the plug.
B) If your appliance is not fitted with a plug, please follow the instructions provided below:
WARNING - THIS APPLIANCE MUST BE EARTHED
IMPORTANT
The wires in the mains lead are coloured in accordance with the following code:
Green and yellow: Earth
Blue: Neutral
Brown: Live

As the colours of the wires in the mains lead may not correspond with the coloured markings identifying the terminals in your plug, proceed as follows:
The green and yellow wire must be connected to the terminal in the plug marked with the letter E or the earth symbol ± or coloured green or green and yellow.
The blue wire must be connected to the terminal marked with the letter N or coloured black. The brown wire must be connected to the terminal marked with the letter L or coloured red.
En
DESCRIPTION OF APPLIANCE
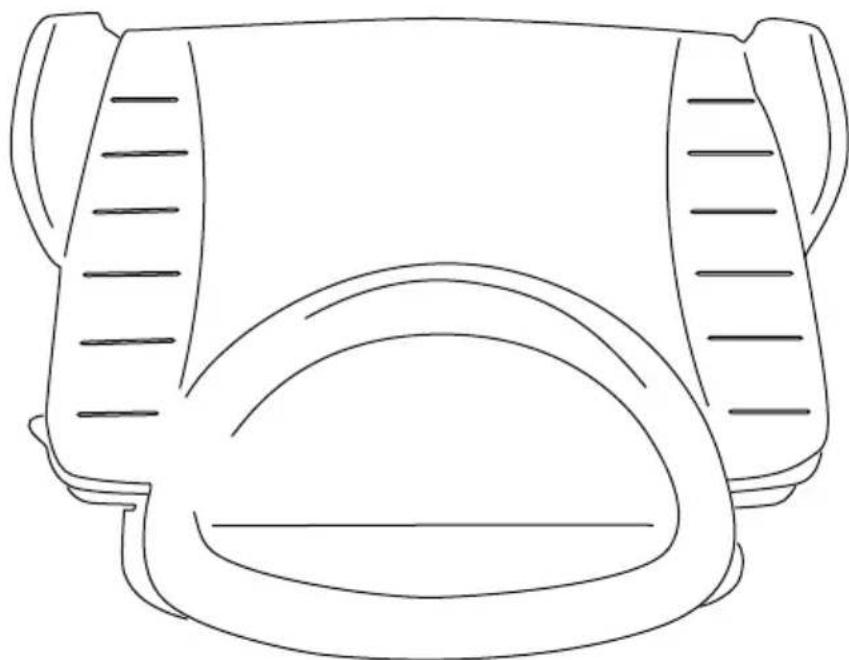
A Top of appliance
B Heat-insulated handle
C Top non-stick grill plate, removable
D Base of appliance
E Temperature control knob
F Grill plate release catch
G Pilot light
H Drainage vent
Bottom non-stick grill plate, removable
De
TEILE DES GERÄTES
natural_image
Line drawing of a mechanical component with a rounded rectangular body and a tapered end (no text or symbols)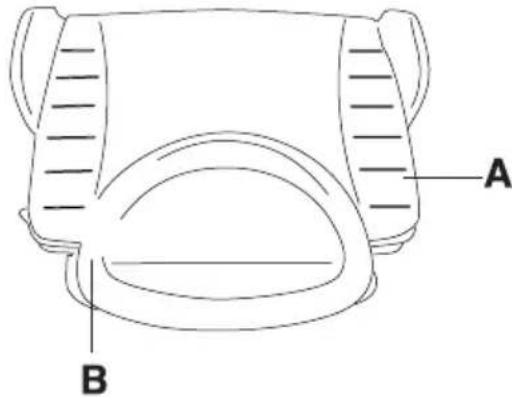
Pos. 2
natural_image
Simple line drawing of two rectangular objects with a rounded corner, no text or symbols present.Pos. 3
natural_image
Line drawing of a mechanical component with a rectangular frame and curved ends (no text or symbols)EN
IMPORTANT SAFETY INSTRUCTIONS
- Read the following safety instructions carefully before using the grill, to obtain the best results and avoid making any errors.
- This appliance is designed to cook food and should not be used for any other purposes, or modified or tampered with in any way.
- The appliance is designed and produced for domestic use only. It is not suitable for use in: staff kitchens in shops, offices and other workplaces, farm houses, hotels, motels or other holiday accommodation, guest houses.
- The appliance is not intended for use by persons (including children) with reduced physical, sensory or mental capabilities, or lack of experience and knowledge, unless they have been given supervision or instruction concerning use of the appliance by a person responsible for their safety. Children should be supervised to ensure that they do not play with the appliance.
- This appliance can be used by children aged 8 upwards and by persons with reduced physical, sensory or mental capabilities or who lack of experience and knowledge if they are supervised or have been given instructions concerning use of the appliance in a safe way and understand the hazards involved. Children must not play with the appliance. Cleaning and user maintenance must not be carried out by children unless they are older than 8 and supervised. Keep the appliance and its cord out of the reach of children under 8 years of age.
- Make sure that the supply cord does not come into contact with any part of the grill that generates heat when the appliance is being used. If the supply cord is damaged, it must be replaced by the manufacturer, its service agent in order to avoid a hazard.
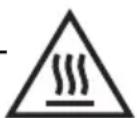
- The temperature of accessible surfaces may be high when the appliance is operating.
- Never insert anything into the ventilation openings. Make sure they are unobstructed.
- Wash the two non-stick grill plates thoroughly before using the grill.
- Grill plates must be perfectly dry before being fitted onto the appliance.
- Keep out of the reach of children and never leave the appliance unattended when switched on.
- Always disconnect the appliance from the mains:
- before storing away the appliance or removing the grill plates
• before cleaning or maintenance
- after use.
- Always use approved extension cords.
- Do not use outdoors. Do not change the supply cord without expert assistance as special equipment is required. If the supply cord is damaged, it must be replaced by the manufacturer, or its service agent in order to avoid a hazard.
- Do not unplug the appliance by pulling the supply cord.
- Only switch the appliance on with the grill plates fitted.
- WARNING: charcoal or similar combustible fuels must not be used with this appliance.
- Do not immerse the appliance in water.
- Allow the appliance to cool down completely before storing it away.
- Do not use sharp tools on the grill plates as these may damage the non-stick coating.
- This appliance conforms to EEC Directive EN 55014 regarding the suppression of radio disturbance.
- Appliance is not intended to be operated by means of an external timer or separate remote-control system.
- Materials and accessories coming into contact with food conform to EC regulation 1935/2004.
INSTALLING THE GRILL
- Before using the grill, make sure that it has not been damaged in any way during transportation.
- Place the appliance on a flat surface well out of the reach of children, as high temperatures are generated during use.
- Before plugging the appliance into the mains, check that:
- the supply voltage corresponds to that indicated on the rating plate fitted on the appliance;
- the power on the mains socket is minimum 10A;
- the mains socket is suitable for the type of
plug fitted on the appliance; if not it should be changed;
- the mains socket is earthed. The manufacturer does not accept any liability for damage caused as a result of non-compliance with this requirement.
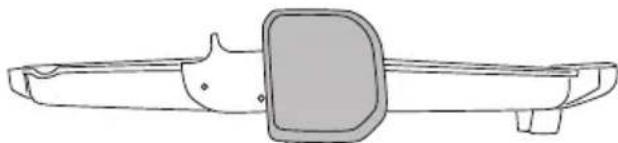
- Before using the grill for the first time, switch it on and leave it to heat up in the barbecue/party grill position (see pg.3, pos.3) without any food, for at least 5 minutes; open the window in order to eliminate any unpleasant smell that tends to be given off when an appliance is new.
FUNCTION POSITIONS
The appliance can be operated in three different positions:
- Contact grilling:
ideal for all kinds of meat, vegetables, polenta, toasted sandwiches (pos. 1 pag.3).
- Browning:
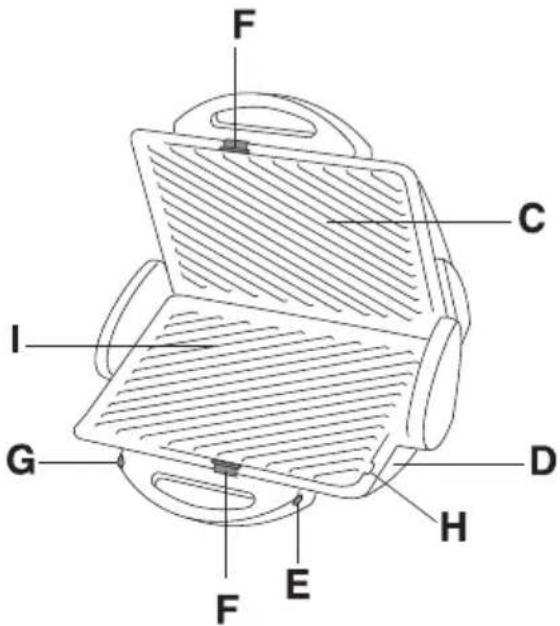
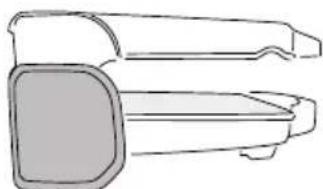
ideal for fish and pizza (pos. 2, pag.3). To set this position, lift up the top of the appliance and turn it towards you.
- Barbecue - Party Grilling:
This position can be used to grill all types of food except pizzas (pos. 3, pag.3). Open the grill out flat.
USING THE APPLIANCE
- Connect the appliance to the mains supply and turn the temperature control knob (E) to the desired setting; the pilot light (G) will come on. Allow the appliance to heat up with the grill plates closed.
- The pilot light switches off when the set temperature has been reached.
- Place the food on the grill plate.
- Set the appliance in the desired position, 1, 2 or 3.
- Place a heatproof container under the drainage vent to catch surplus fat.
- To switch off the appliance, turn the temperature control knob counterclockwise until it stops.
- After grilling, unplug the appliance and allow to cool.
Do not use sharp tools on the grill plates as these may damage the non-stick coating.
COOKING TIPS
- Thawed and marinaded meat should be dried thoroughly before being placed on the grill.
- Meat should be seasoned before grilling but salt should be added at time of serving.
- Food which is to be contact-grilled should be
uniformly thick to ensure even browning.
- Always oil the lower plate (I) before grilling fish.
- A number of recipes suitable for the grill have been provided.
Please note that the cooking times given are only approximate.
They may vary, depending on the characteristics of the food being cooked (temperature prior to cooking, water content) and individual preference.
CLEANING
- Always unplug the appliance and allow it to cool before cleaning.
- Clean the appliance after each use to prevent unpleasant smells or fumes from being emitted when it is next used.
- Remove the 2 grill plates, pulling the release catches (F) and wash either by hand in hot water or in a dishwasher.
- Leave the plates to soak in warm water to remove any residue left during cooking.
- Do not use abrasive tools or cleaning agents as these may scratch or damage the non-stick coating.
- Refit the clean plates on the appliance making sure that they are perfectly dry.
SERVICE AND CUSTOMER CARE
- If the cord is damaged it must, for safety reasons, bereplaced by KENWOOD or an authorised KENWOOD repairer.
If you need help with:
- using your KENWOOD machine or
- servicing or repairs
- Contact the shop where you bought your appliance.
- Designed and engineered by Kenwood in the UK.
- Made in China.
IMPORTANT INFORMATION FOR CORRECTDI- SPOSAL OF THE PRODUCT IN ACCORDAN- CEWITH EC DIRECTIVE 2002/96/EC.
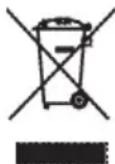
At the end of its working life, the product must not be disposed of as urban waste. It must be taken to a special local authority differentiated waste collection centre or to a dealer providing this service. Disposing of a household appliance separately avoidspossible negative consequences for the environment andhealth deriving from inappropriate disposal and enablesthe constituent materials to be recovered to obtainsignificant savings in energy and resources. As a reminderof the need to dispose of household appliancesseparately, the product is marked with a crossed-outwheeled dustbin.
| FOOD | TEMP. SETTING | GRILL POSITION | TIME | REMARKS & TIPS |
| Chop | 5 | 1 | Chops should be of even thickness. | |
| Beefburger 5 1 3'-5' | Wait 2-3' before opening the plate, otherwise the burgers will break up. | |||
| Beef steak 5 1 2'-3' | Meat cooked rare in time indicated | |||
| Pork steak 5 1 2'-3' | Meat cooked rare in time indicated | |||
| Spare ribs 5 1 15'-18' | Turn ribs after 10' | |||
| Liver | 5 | 1 | Clean liver thoroughly | |
| Kebabs | 5 | 1 | Turb after 4-5' | |
| Chicken | 4 | 1 | 20'exch in half, do not turn | |
| Sausage 5 1 3'-5 | Cut in half | |||
| Fresh sausage 5 1 7'-9' | Cut in half | |||
| Salmon trout fillet 4 2 16'-20' | Oil the plate and turn halfway through cooking | |||
| Salmon steak 4 2 16'-20' | Oil the plate and turn halfway through cooking | |||
| Sole 5 2 18'-22' | Oil the plate and turn halfway through cooking | |||
| Aubergines | 5 1 6'-8' | Slice evenly | ||
| Courgettes | 5 1 6'-8' | Slice evenly | ||
| 1 pepper/capsicum (quarters) | 5 1 6'-8' | Close the grill plates and press down | ||
| Onions (sliced) 5 1 6'-8' | Slice evenly | |||
| Polenta (slices) 5 1 10'-15' | Cut into 1.5 cm. thick slices. Leave to cook with plates closed for 10' | |||
| Filled bread rolls | 4 | 1 2'-4' | Use soft rolls | |
| To a s t e d sandwich | 4 | 1 | 2'-3' | Place only half a cheese slice in each sandwich as it tends to spill as it melts. |
| Pizza | 3 2 30'-35' | Remove the bottom grill before turning on the grill and spread out the pizza dough on the top. Replace the plate and add topping. |
WICHTIGE HINWEISE
HEAD OFFICE: Kenwood Limited, 1-3 Kenwood Business Park, New Lane, Havant, Hampshire PO9 2NH
kenwoodworld.com
KENWOOD
CREATE MORE

- ELECTRICAL CONNECTION (UK ONLY)
- IMPORTANT
- En
- DESCRIPTION OF APPLIANCE
- De
- TEILE DES GERÄTES
- IMPORTANT SAFETY INSTRUCTIONS
- INSTALLING THE GRILL
- FUNCTION POSITIONS
- USING THE APPLIANCE
- Do not use sharp tools on the grill plates as these may damage the non-stick coating.
- COOKING TIPS
- CLEANING
- SERVICE AND CUSTOMER CARE
- IMPORTANT INFORMATION FOR CORRECTDI- SPOSAL OF THE PRODUCT IN ACCORDAN- CEWITH EC DIRECTIVE 2002/96/EC.
- WICHTIGE HINWEISE
- KENWOOD
Brand : KENWOOD
Model : HG600
Category : Contact grill