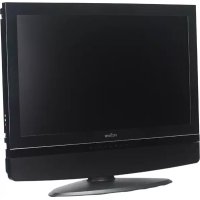
MH-422HUB - TV Proview - Free user manual and instructions
Find the device manual for free MH-422HUB Proview in PDF.


User questions about MH-422HUB Proview
0 question about this device. Answer the ones you know or ask your own.
Ask a new question about this device
Download the instructions for your TV in PDF format for free! Find your manual MH-422HUB - Proview and take your electronic device back in hand. On this page are published all the documents necessary for the use of your device. MH-422HUB by Proview.
USER MANUAL MH-422HUB Proview
1.1 Opening the carton
1.2 Installing your plasma display
- Safety instructions.... 3
- Product features.... 9
- Standard accessories 10
- Name and function of different parts of your plasma display.... 11
5.1 Side panel
5.2 Front panel
5.3 Back panel
5.4 Remote controller
- Connecting an external device to your plasma display...... 20
6.1 PC module
6.2 VIDEO module
6.3 Connecting external speakers
- Basic operation of your plasma display.... 24
7.1 Turning your plasma display on and off
7.2 Selecting input mode
7.3 Adjusting OSD item settings
7.4 Adjusting volume
7.5 Zooming in to/out of pictures
7.6 Miscellaneous functions
7.7 OSD functions
- Optional accessories 33
8.1 Connect to antenna
8.2 Input and Output Connection
8.3 Operating Instructions
8.4 Advanced Functions
- TV Instruction 41
10......Technical specification
42
11....Factory default
46" Plasma Display
43
12.... Cleaning your plasma display and troubleshooting
44
Getting started:
Your plasma display is a 46" WVGA (wide-screen VGA resolution) plasma display. It is ultra slim, high picture quality, super flat and emits no radiation. It has been tested to comply with the EMI Class B, UL and CSA safety standards and is suitable for both commercial and home use.
Your plasma display is a highly delicate electronic device. Follow the instructions below to maintain the proper performance of your plasma display.
1.1 Opening the carton:
- Inside the carton, you will find your plasma display and the standard accessories. Operational accessories, if any, will be packed in separate boxes.
- Your plasma display is about 37kg in weight. As it is quite big, we recommend you to carry it with two people.
- The protective glass and glass filter are located on the front of your plasma display. They are fragile and can easily be scratched. Handle with care. Do not place your plasma display with the glass downward, unless protected with soft padding.
- Check if your plasma display is damaged and if any accessories are missing from the carton.
- Carry your plasma display by the handles located at the back.
1.2 Installing your plasma display:
- Read this manual carefully before installing your plasma display.
- This plasma display consumes about 340-350W of electricity, which is higher than regular CRT TVs. Connect it to an independent power source. If it needs an extension cord, please contact your technicians for an extension cord that can resist higher voltage. Do not use ordinary extension cords to prevent hazards.
- Put your plasma display on a flat and solid surface to prevent it from falling. Keep the back of your plasma display away from the wall to ensure good ventilation.
- Fumes, moisture and dust will shorten the life of electronic parts. Do not install your plasma display in the kitchen or bathroom.
- Install your plasma display with the lower edge level. Improper installation of your plasma display, such as turning it on end, will cause damage to electronic parts due to bad internal ventilation.
- Avoid displaying a still picture for a long time to extend the life of your plasma display.
- Your plasma display must be installed by your dealer or technicians of our authorized dealers; otherwise, you may not be eligible for our full warranty service.
Safety instructions:
Your plasma display has been tested to comply with various safety standards for ordinary uses. Improper use or operation of your plasma display may cause electric shock or fire. You must follow the safety instructions below during installing, using and maintaining your plasma display in order to prevent damage to the unit. Read the following safety instructions carefully before use.
To ensure that you can use your plasma display properly and to prevent physical and property damage, we have used the following symbols in this manual.

Warning---- Mistakes due to negligence may cause physical or even life-threatening injuries.

Caution---- Mistakes due to negligence may cause physical or material damage.
Examples of warning and caution messages:

Prohibition symbol
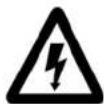
RISK OF ELECTRIC SHOCK—warning (caution) symbol.

Warning
Place plasma display only on a flat and solid surface.
Placing plasma display on unstable surface may risk the plasma display falling.
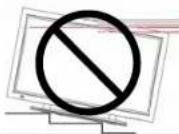
Connect plasma display to correct voltage.
Improper voltage may cause fire or electric shock.
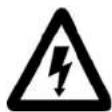
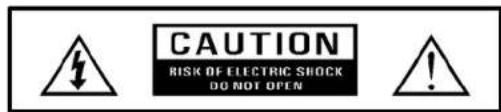
text_image
CAUTION RISK OF ELECTRIC SHOCK DO NOT OPEN46" Plasma Display
Do not expose plasma display to wet locations.
* Do not use plasma display in places containing water.
* Prevent water from entering plasma display by avoiding placing it near windows or outdoors to avoid fire or electric shock.
* Disconnect plasma display from power source and contact your dealer immediately when water enters plasma display. Continuing use of plasma display may cause fire or electric shock.


Warning
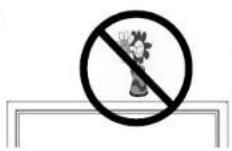
Do not put water containers or small metal articles on top of plasma display.
Do not put glasses containing liquid, decorative plants, cosmetics or chemical liquids or small metal articles on top of plasma display. It may cause a short circuit and fire or electric shock when liquid spills into plasma display.
Do not damage power cord.
Do not damage or modify power cord. Pressure, heat and pulling may damage power cord and cause fire or electric shock.
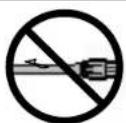
Do not modify or open plasma display.
Modification of plasma display may cause fire or electric shock. Do not open plasma display, it may cause fire or electric shock. Contact your dealer for service or adjustment.


Warning
Do not use plasma display under the following condition.
If smoke or a strange smell comes out of plasma display, disconnect it from power source immediately and contact your dealer after the smoke stops. Continuing use of plasma display may cause fire or electric shock. Do not repair it on your own.

Do not drop plasma display or damage its case.
When the plasma display's case is damaged after falling, it may cause damage to its internal parts. Disconnect it from power source immediately and contact your dealer for service. Continuing use of plasma display may cause fire or electric shock.


Warning
Do not touch power source during thunderstorms.
It may cause electric shock.


Caution
Keep plasma display out of fumes and steam.
It may cause fire or electric shock.

Keep plasma display out of dust and moisture.
It may cause fire or electric shock.

Handle with care.
Disconnect all cords and cables from plasma display before moving it. Make sure to carry it with at least 2 people.
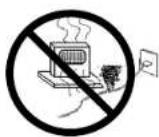
Keep power cord away from heat sources.
It may cause fire or electric shock if the cord jacket melts.
Hold the plug
Hold the plug when disconnecting from power source.
Pulling the wire may damage the power cord and cause fire or electric shock.

Do not touch plug with wet hands.
It may cause electric shock.


Caution
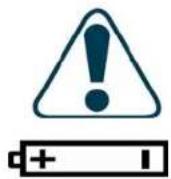
Install remote control batteries correctly.
Install batteries according to the polarity as indicated inside the battery compartment by (+) and (-) marks. Incorrect battery installation may cause leaking of battery fluid or battery explosion. Chemicals of battery fluid may cause physical injuries or contaminate remote control. Do not recharge batteries that come with plasma display to prevent hazard.
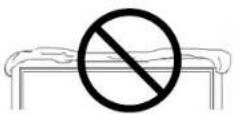
Do not cover vent.
When vent is covered, heat inside plasma display may cause fire. Contact with hot case may burn your skin. Place plasma display in places with good ventilation and do not cover it with table cloth, blanket or cleaning cloth.
Disconnect plasma display from power source.
For safety reasons, disconnect plasma display from power source when not in use for a long time.

Disconnect from power source
- Read this manual and all safety instructions carefully before use.
- Keep this manual for future reference.
- Pay attention to the warnings on the plasma display and in this manual.
- Operate the plasma display according to the instructions in this manual.
- Disconnect the plasma display from the power source before cleaning. Clean the unit with a wet cloth. Do not use chemicals or detergents in any form.
- Use only the accessories recommended by the original manufacturer. Use of other accessories may cause hazard.
- Keep the plasma display away from water. Condensation will take place inside the plasma display when moving it from a cooler to a hotter environment; allow condensation to evaporate before turning the power on. Otherwise it may cause fire, electric shock or other hazards.
- Do not place the plasma display on an unstable cart, rack or table. The plasma display may fall on the ground and damage. Follow the instructions of the manufacturer and use the rack recommended by manufacturer as instructed to install the plasma display.
- Avoid stopping cart abruptly when the plasma display is on the cart. Pull the cart gently and slowly. Avoid pulling cart over uneven surface. Otherwise the plasma display may fall on the ground and suffer damage.
- Vents are located at the back of the plasma display to ensure the reliable operation of the plasma display. Do not block or cover the vents. Make sure that the vents are free from obstruction when placing the plasma display on a bed, couch, rug or furniture of similar surface. Do not put the plasma display in a rack or bookshelf, unless there is good ventilation. Put the plasma display in a proper location as instructed by the manufacturer.
- Connect the plasma display to a power source with voltage exactly the same as indicated. If you are not sure about the voltage of the power source, contact your dealer or the local power company.
12 The plasma display is designed for use on a 3-prong power source. Connect the plasma display only to a grounded power source. Ask a qualified electrician to have your power outlet modified if it does not fit the plug. Do not remove the grounding pin on the plug. - Plug in the power cord properly. Keep power cord out of passageway and avoid heavy objects pressing on top. Fix the power cord properly at doors, plugs, power outlet and socket.
- Disconnect the power cord from the power outlet when there is a thunderstorm or the plasma display will not be used for a long time. Remove the CATV cable to prevent damage due to power surge.
- Do not overload the power outlet to which the plasma display is connected. Use of extension cords or sockets that come with other appliances can cause fire or electric shock due to overload.
- Do not put objects into the plasma display's vents. It may cause fire or
Keep the plasma display at least 10cm away from any furniture to ensure good ventilation.
electric shock due to high voltage inside the plasma display or short circuit of parts. Do not allow liquid to enter the plasma display.
- To avoid risk of electric shock or other hazard, do not remove cover (or back). Refer servicing to qualified service personnel. Do not repair the plasma display on your own.
- If the plasma display does not work properly, adjust it by following this user manual. It may take a longer time for qualified service personnel to fix damage caused by improper adjustments.
-
Disconnect the plasma display from the power source and contact qualified service personnel immediately under any of the following circumstances:
-
Either the power cord or plug is damaged.
- Liquid or a foreign object enters the plasma display.
• The plasma display is exposed to rain. - The plasma display falls on the ground and suffers damage.
-
There is a critical change in the function of the plasma display.
-
Make sure that only genuine parts or equivalent parts can be used on the plasma display. Use of unqualified parts may cause fire, electric shock or other hazard.
- The plasma display must be inspected and tested by qualified service personnel after servicing to ensure normal operation.
- Keep the plasma display at least one foot away from any heat source, such as radiators, electric heaters, electric cookers or other appliances (including stereo amplifiers).
- When connecting other equipment to the plasma display, such as a VCR or PC, turn the power off before connecting to avoid electric shock.
- Use only the connection cable designed for the plasma display to avoid electric shock.
- The required voltage for the plasma display is 100-120VAC/50-60Hz and 220-240VAC/50-60Hz. Connect the plasma display to a power source with voltage exactly the same as indicated. Use only the power cord provided by the dealer to ensure safety and EMC compliance.
- Use different power cords for different voltage settings. Contact your dealer for details.
- Operating environment:
• Temperature: 32°F to 104°F (0°C to 40°C)
- Relative humidity: 20% to 85% , no condensation condition.
• Pressure: 800 to 1100hPa
Product features:
Your plasma display uses a slim design at only 9.8cm thick. Its excellent picture quality is perfect for multimedia applications.
1. Multiple inputs:
Your plasma display comes with different input modules as shown below.
- PC module: RGB (D-sub 15-pin), DVI, and RS-232 (D-sub 9-pin male) inputs.
- VIDEO module: CVBS (RCA) x 2, S-video (DIN 4-pin) x 2 and composite (RCA) inputs; audio (R/L) and CVBS (RCA) x 1 outputs for connecting with DVD players, HDTV (480P/720P/1080i) and TV signals (NTSC, PAL and SECAM systems).
-
Resolution for PC module: SXGA (1280X1024), 60Hz.
-
Power management: Equipped with energy saving functionality.
- Fan-free design: Your plasma display has been design to reduce energy consumption, so there is no cooling fan inside. As a result, you will not be disturbed by the noise of a cooling fan.
- Miscellaneous:
- PIP/POP function: It allows you to display pictures from different sources in six different picture-in-picture (PIP) or picture-on-picture (POP) modes.
- Includes a pair of high-definition built-in speakers (7W+7W). You can purchase a pair of external speakers (15W+15W) to enjoy better sound.
- Three EQ options allow you to adjust the sound for the best effect.
Standard accessories:
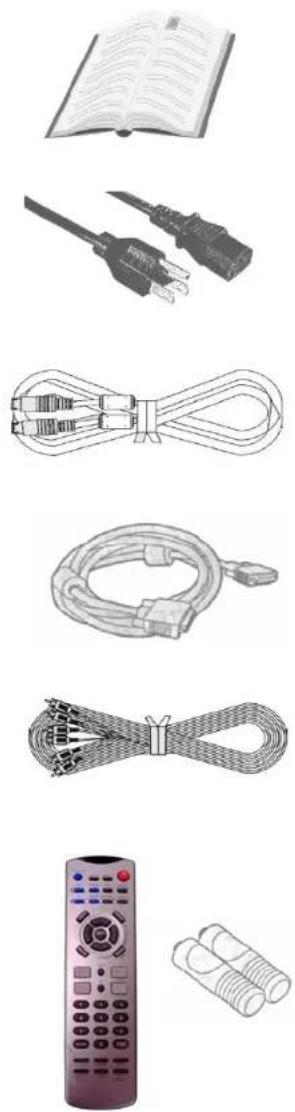
User's Manual x 1
Power cord x 1
NB:
Cord specification is subject to change according to local requirements.
S-video cable x 1
D-sub 15pin cable x 1
AV-cable x 1
Remote controller x 1
UM-4 batteries x 2
Name and function of different parts of your plasma display:
5.1 Side:
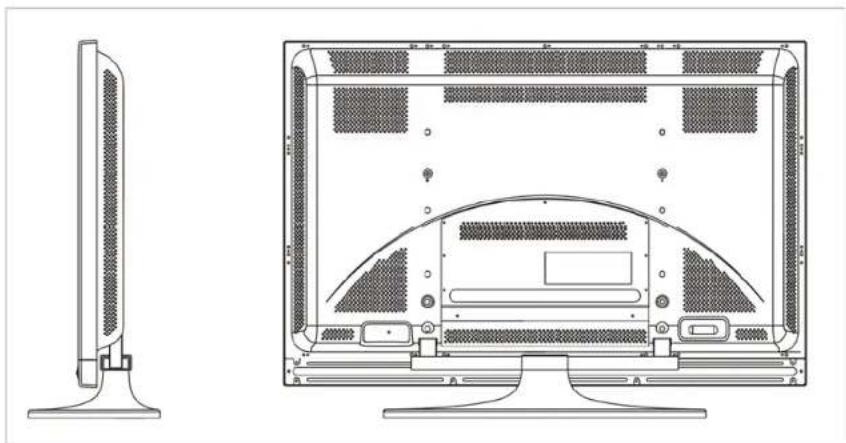
natural_image
Technical line drawing of a flat-screen monitor with side panel and rear panel (no text or symbols)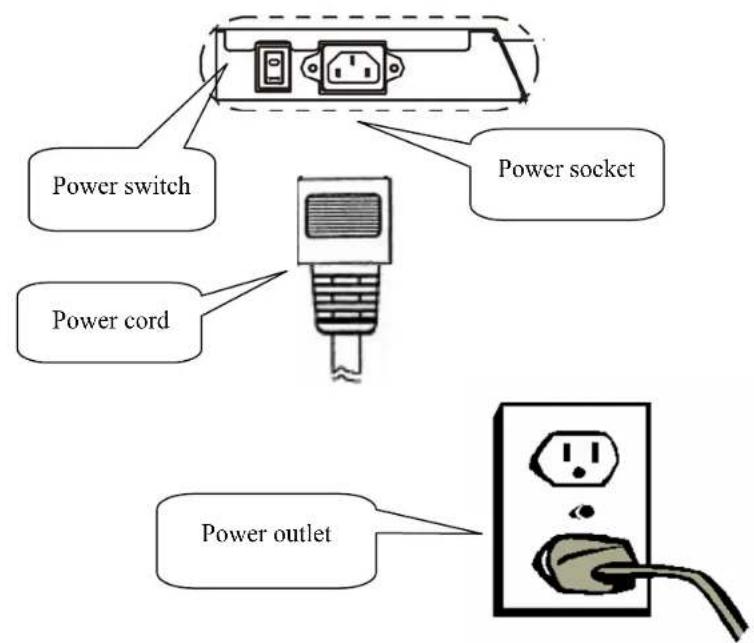
text_image
Power switch Power socket Power cord Power outlet- Connect the included power cord to the power socket on the right hand side of the plasma display. Then, connect the plug of the power cord to a power source.
- Press the power switch (0: Off, 1: On) to turn the plasma display on. When the red indicator light is on, your plasma display is in the standby mode.
5.2 Front:
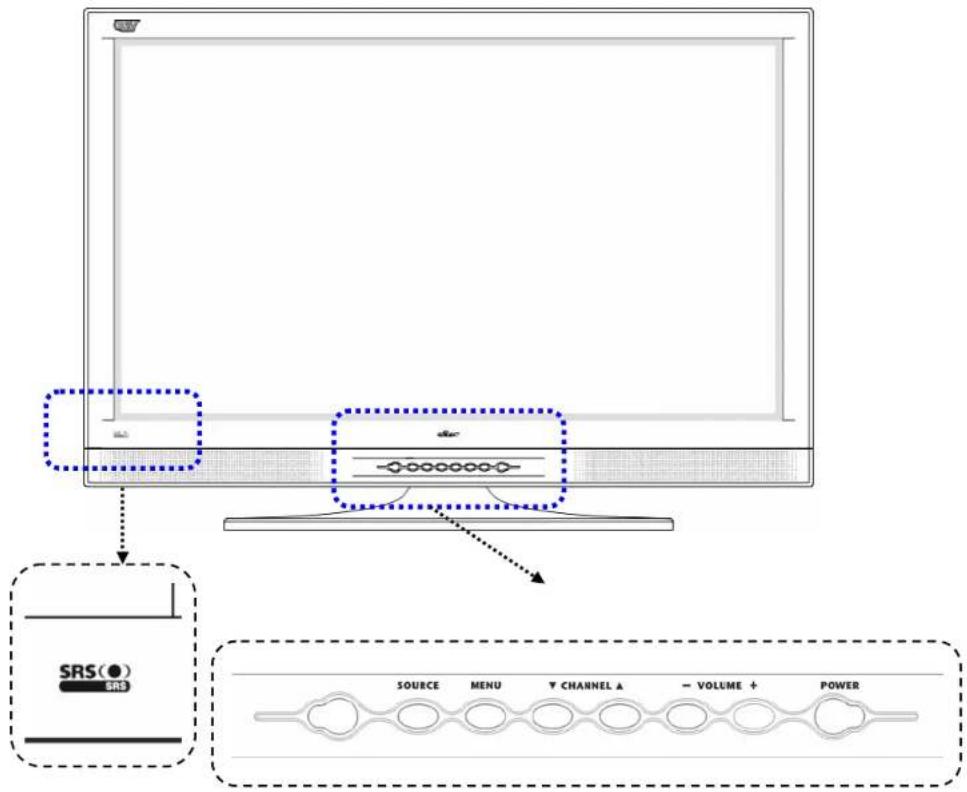
text_image
SRS(●) SRS SOURCE MENU ▼ CHANNEL A - VOLUME + POWER- Remote control receiver: Receives signals from the remote control. The power indicator inside indicates the status of your plasma display.
| Indicator | Status |
| Red | Standby |
| Green | Power |
| Blinking | Sleep |
- Control buttons:
| SOURCE | MENU | ▼ CHANNEL ▲ | - VOLUME + | POWER |
| Button | Function |
| POWER ⏻ | Press this button to turn your plasma display on and off. |
| SOURCE Press this | this button to select an input source (sequence of inputs varies when input modules are different)A. PC: VGA→DVI (cyclical)B. PC + VideoVideo 1→Video 2→Component→VGA→DVI (cyclical) |
| MENU Press this | button to bring up the OSD menu and select OSD menus according to the following sequence:Picture→Display→TVSetting→Audio→Miscellaneous→Information |
| VOLUME+/- | A. Press these buttons to select an item to the left or right in OSD mode.B. Press these buttons to adjust volume in display mode: - reduce volume; + increase volume. |
| CHANNEL▲/▼ | A. Press these buttons to select an item above or below in OSD mode.B. Press these buttons to change the channel in TV mode: ▲ channel up;▼ channel down. |

Is the trademark of SRS Labs, Inc.
This product has been licensed to use the SRS technology product by the SRS Labs, Inc.
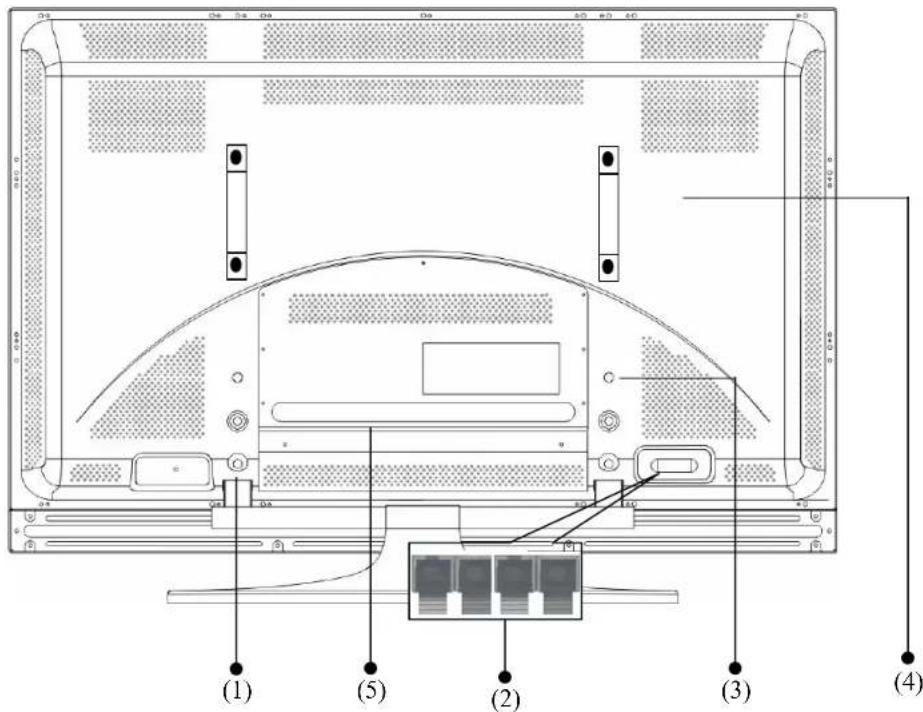
5.3 Rear View:
text_image
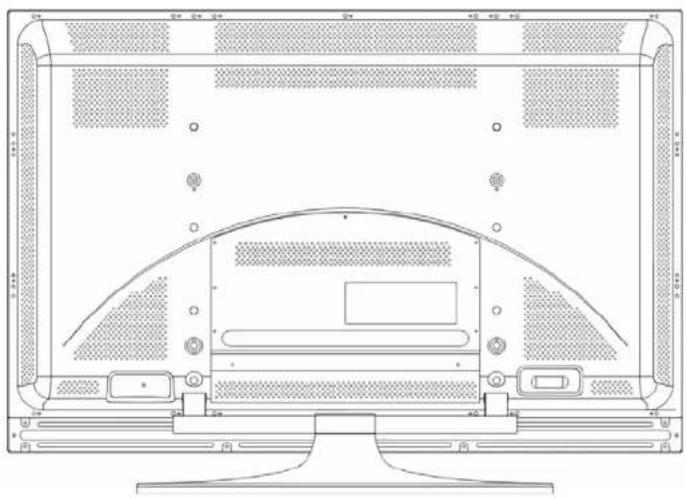
(1) (2) (3) (4)(1) Leg attachment holes (4): Affix the legs with the screws included.
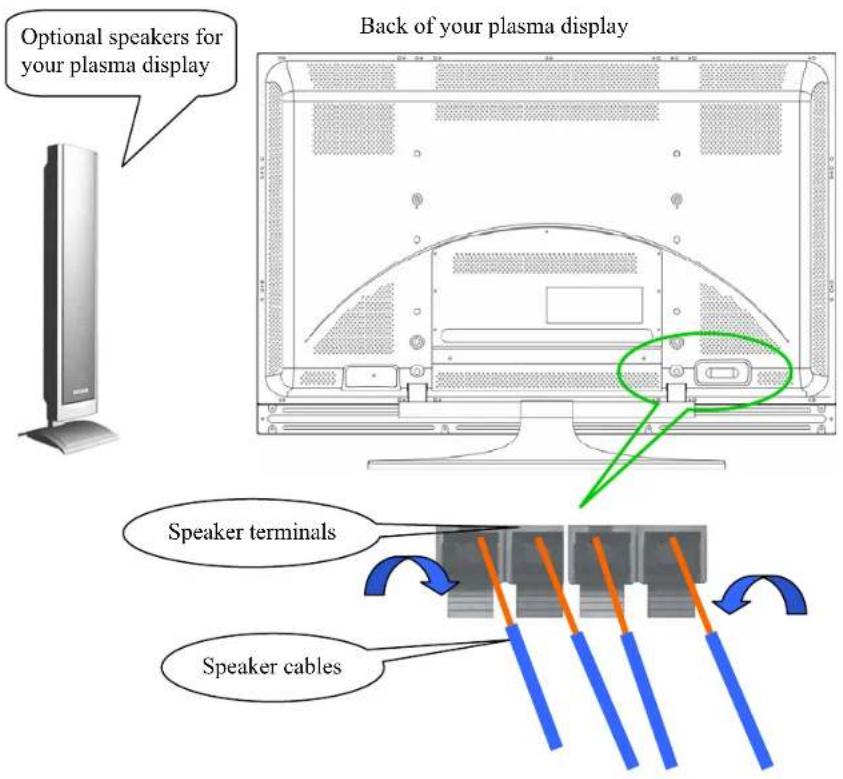
(2) Speaker terminals: You can connect a pair of external speakers to the terminals (red for positive and black for negative). Speaker specifications: 10W (8Ω) - 15W (4Ω) (L+R channels). Impedance: 4-8Ω.
(3) Wall mount rack attachment holes (4): Install the wall mount rack with the screws included. (NB: The wall mount rack is an optional accessory.)
(4) Handles: Carry your plasma display by the handles. Remove handles from your plasma display for wall mount installation.
(5) Signal I/O terminals: Allow users to connect input and output devices to the plasma display. Terminals may be different according to the input modules on your plasma display.
PC module
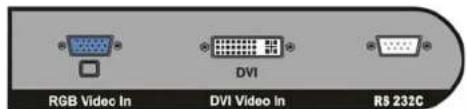
text_image
RGB Video In DVI Video In RS 232CA. D-SUB: Allows users to connect the plasma display to the D-sub 15-pin port (analog output) on the VGA card and use the plasma display as a PC monitor.
B. DVI: Allows user to connect to the DVI-I port (digital output) on the VGA card and use the plasma display as a PC monitor.
C. RS-232C: D-sub 9-pin male port for firmware update.
Video Module

text_image
(A) (B) (C) (D) (E) (F) 1 R L 2 R L Audio In Video In S-Video Audio Out Video Out Audio In PC Audio In(G)
A. Audio In: Audio input terminals for connecting the audio output of a video system. They are shared with audio input of Video In and S-Video.
B. Video In: Composite input terminals (RCA) for connecting video systems with composite outputs.
C. S-Video: Y/C separated video input terminal (DIN 4-pin) for connecting video systems with an S-video output.
D. Y/CbPb/CrPr: Component input terminals (RCA) for connecting video systems with component outputs.
E. Audio In: Audio input terminals for connecting the audio output of the component outputs of a video system.
F. Phone Jack: Stereo input terminal for connecting output signals of a sound card of the PC (VGA/DVI).
G. Audio In: Audio input terminals for connecting the audio output of a video system. They are shared with audio input of Video In and S-Video.
H. Video In: Composite input terminals (RCA) for connecting video systems with composite outputs.
I. S-Video In: Y/C separated video input terminal (DIN 4 -pin) for connecting video systems with an S-video output.
J. Audio Out: Audio output terminals for connecting the audio input of any audio or audiovisual device.
K. Video Out: Composite output terminals of signals form Video In and TV for connecting other monitors.
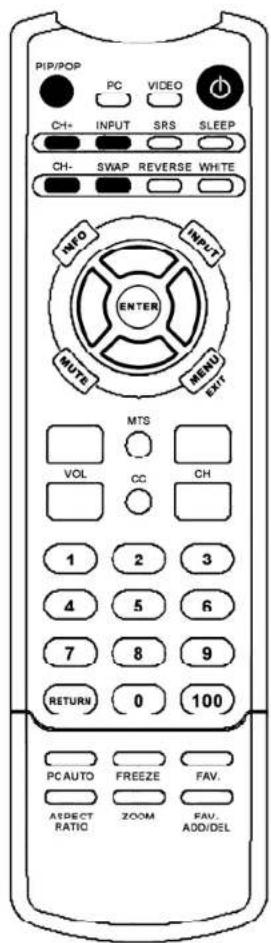
5.4 Remote control
text_image
PIP/POP PC VIDEO CH+ INPUT SRS SLEEP CH- SWAP REVERSE WHITE MFO INPUT ENTER MUTE MENU EXIT MTS VOL CC CH 1 2 3 4 5 6 7 8 9 RETURN 0 100 PC AUTO FREEZE FAV. ASPECT ZOOM FAV. RATIO ADD/DELButtons and their functions:
| No. | Button | Function |
| 1 | POWER | Press this button to turn your plasma display on and off (in standby mode) |
| 2 | PIP/POP | Press this button to turn PIP or POP function on and off. |
| 3 | CH+ | Press this button to view the next TV channel in the sub-frame. |
| 4 | CH- | Press this button to view the previous TV channel in the sub-frame. |
| 5 | INPUT | Press this button to select an input source for the sub-frame. |
| 6 | SWAP | Press this button to swap between the sources of the main frame and the sub-frame. |
| 7 | VIDEO | Press this button to select Video input source. Video 1→Video 2→Component (cyclical) (sequence of inputs varies when input modules are different) |
| 8 | PC | Press this button to select PC input source. VGA→DVI (cyclical) |
| 9 | SRS | Press this button to toggle Surround Sound |
| 10 | SLEEP | Press this button to set timer off. |
| 11 | REVERSE | When a static image is being displayed on the screen for a long period of time, use the “REVERSE” feature to prevent screen burn-in and protect your screen. |
| 12 | WHITE | Press this button to set the color of your plasma display to white (for removing residue image on the screen after displaying a still picture for a long time). |
| 13 | INPUT | Press this button to select an input source. |
| 14 | INFO | Press this button to display the current input source and display mode. |
| 15 | MUTE | Press this button to mute the speakers. Press this button again to resume. |
| 16 | ENTER | Press ▲, ▼, ◀ or ► button to move the highlight bar to the desired menu and adjust settings. Press ENTER to save settings. |
| 17 | MENU/EXIT | Press MENU button to bring up the OSD menu. Press ▲, ▼, ◀ or ► button to move the highlight bar to the desired menu and adjust settings. Press EXIT to quit the OSD menu. |
| 18 | ▲/▼ | Press these buttons to select OSD items above and below the current selection point. |
| 19 | ◀/▶ | Press these buttons to select an OSD item to the left and right of the current selection point. |
| 20 | CH▲/▼ | Press these buttons to view the next or previous TV channel. Note: Tuner module must be installed. |
| 21 | VOL▲/▼ | Press these buttons to adjust volume. |
| 22 | Numeric keys | Press these buttons to select a channel. |
| 23 | M/T/S | Press these buttons to select the audio channel of SAP programs. Note: Tuner module must be installed. |
| 24 | CC | Press this button to close caption. Note: Unavailable for Taiwan area. |
| 25 | PC AUTO | Press this button to activate auto adjustment (phase, V-sync and H-sync) if there is a display problem in PC mode after timing change. |
| 26 | FREEZE | Press button to freeze display on the screen (not the input source). Press button again to resume display. You may need to wait for 1 minute before the display resumes. |
| 27 | FAV. | Press button to bring up your favorite channels. |
| 28 | FAV.ADD/DEL | Press button to add or delete a channel from the favorite channel list. |
| 29 | ZOOM | Press button to zoom in on an image. |
| 30 | ASPECT RATIO | Press button to select screen size: Pixel to Pixel, 4:3 Output, Panoramic, Letter Box or Full Screen. |
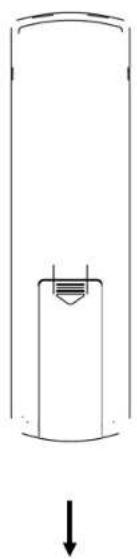
Battery installation:
natural_image
Simple line drawing of a cylindrical container with a small internal component and a downward arrow below (no text or symbols)- Slide out the battery cover as shown above.
- Insert the two batteries (UM4) making sure their polarities are as indicated by (+) and (-) marks inside the battery compartment.
- Replace the cover back on the remote control.
Effective range of remote control:
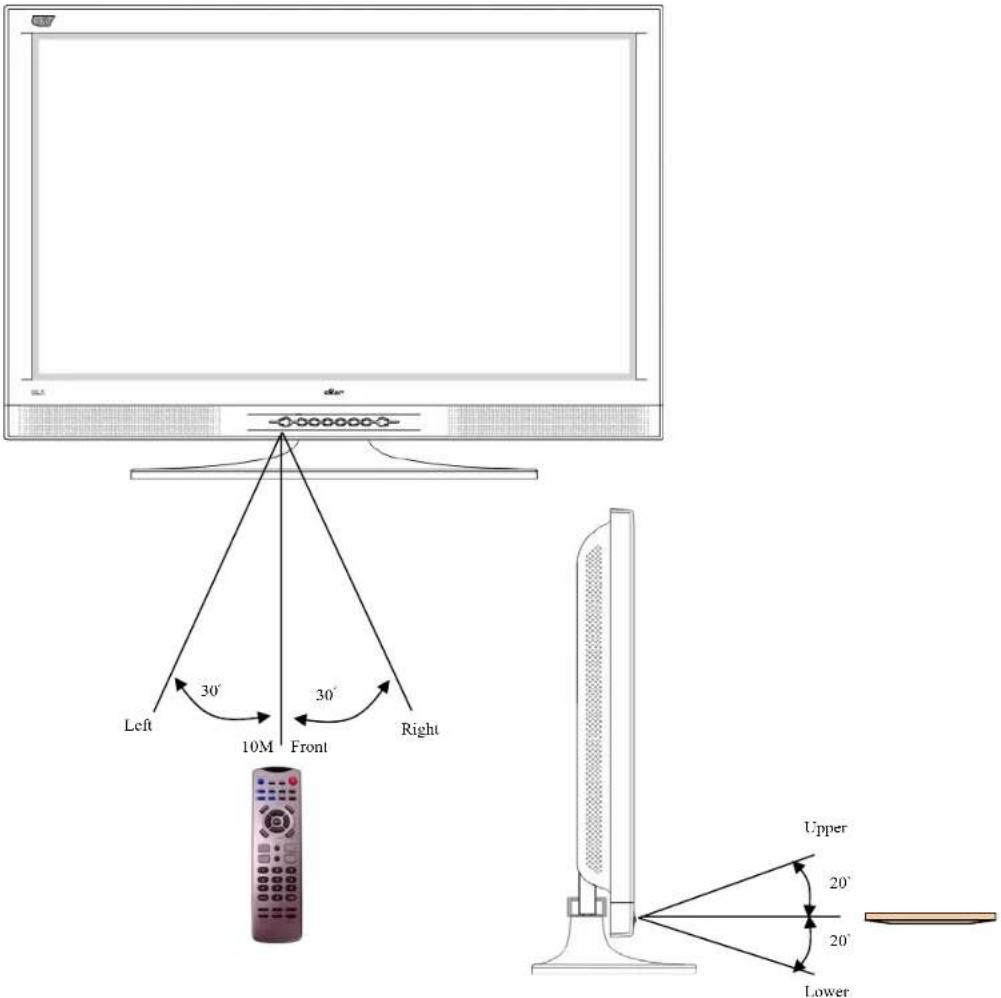
text_image
Left 30° 10M Front 30° Right Upper 20° 20° Lower- Point the remote control at the signal receiver (power indicator) on the front panel of your plasma display.
- Do not block the signal receiver (power indicator) on the front panel of your plasma display.
- The effective range of remote control is 10M, 30^ left and right and 20^ up and down, as shown above.
Notes for remote control maintenance:
- Avoid impact, falling or dropping of remote controller. Keep remote controller dry and away from heat source.
- Do not clean remote controller with volatile solvents (e.g. benzene or thinner).
- Check battery level when remote controller does not work properly.
Connecting an external device to your plasma display:
natural_image
Technical line drawing of a computer monitor front panel with ventilation grilles and buttons (no text or labels)6.1 PC module:
text_image
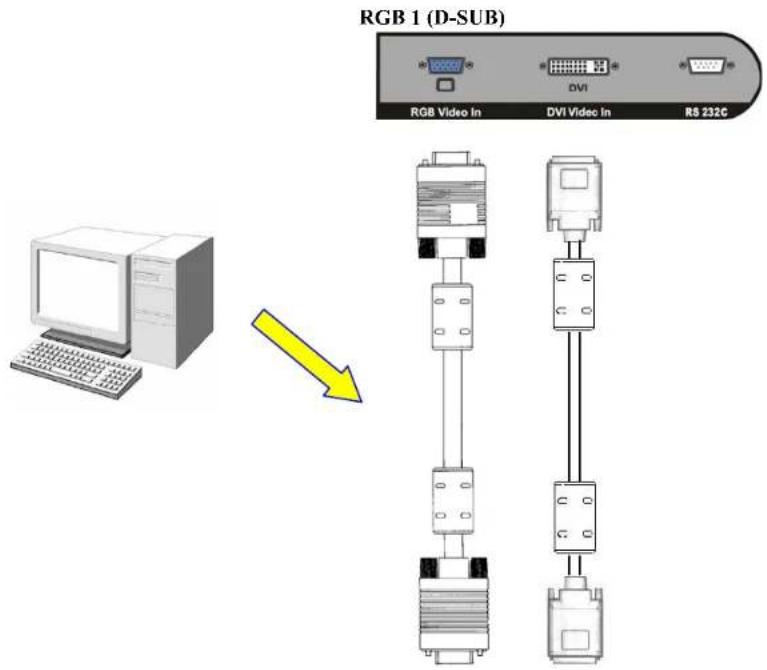
RGB 1 (D-SUB) RGB Video In DVI DVI Video In RS 232G- The PC module is designed for connecting the plasma display to a VGA card in a PC to make it a PC monitor.
D-SUB (15-pin): Connect to the analog RGB output interface on the VGA card. (Select VGA from INPUT)
DVI: Connect to the DVI-I digital RGB output interface on the VGA card. (Select DVI from INPUT)
Notes:
-
The DVI port on your plasma display is for connecting to the DVI-I port on the VGA card. No analog signal is available from this port.
-
The RS-232 port on your plasma display is for firmware update by professionals. It should not be used for communication purposes.
6.2 VIDEO module:
text_image
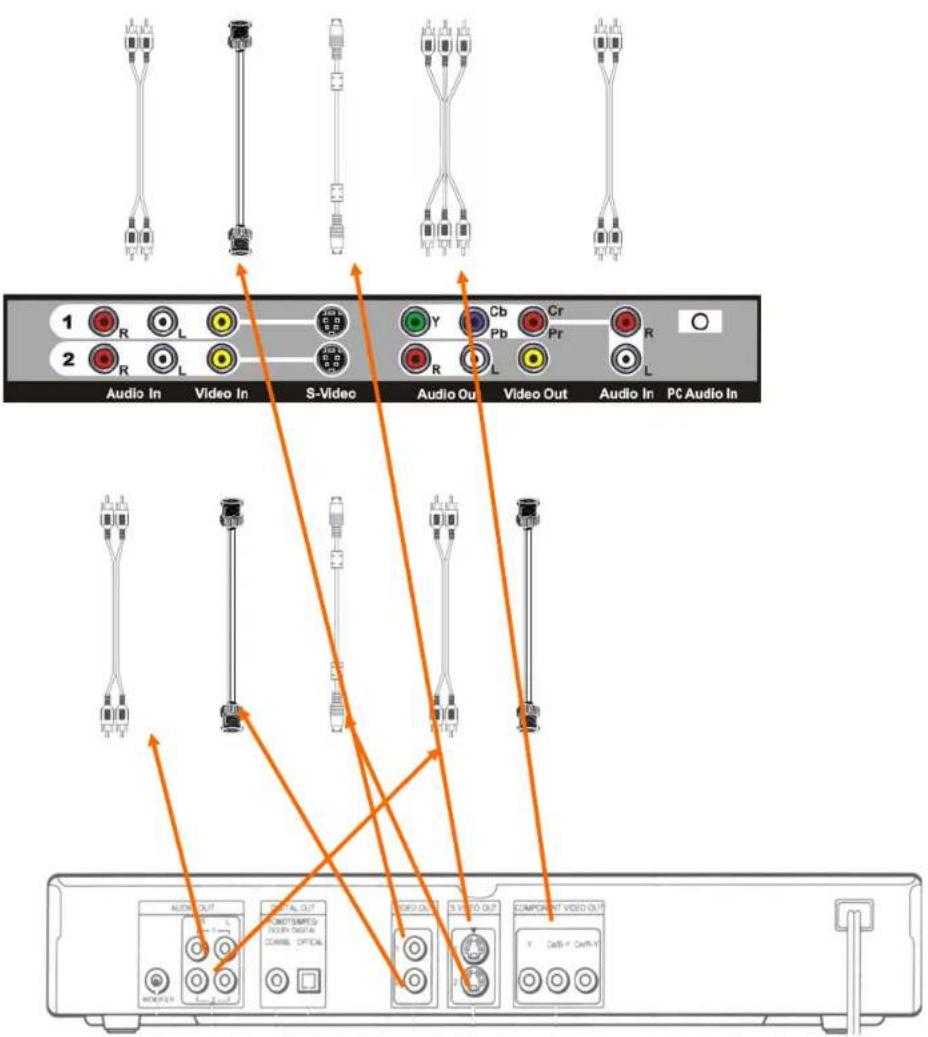
1 2 Audio In Video In S-Video Audio Out Video Out Audio In PC Audio In AUDIO OUT CONTROL OUT COMPUTER'S DATA DIGITAL SCHEME OPTICAL VIDEO OUT S VIDEO OUT COMPONENT VIDEO OUT- Functions of the D-SUB, DVI and RS-232 ports are the same as that of the PC module.
- Component (Y/PbCb/PrCr) terminals: For connecting video systems with component outputs (e.g. DVD players and HDTV tuners).
Connect the audio output port of device to Audio In. (Select Component from INPUT)
- S-Video: For connecting video systems with S-video output (e.g. VCRs, V8 cameras and DVD players). Connect the audio output port of device to Audio In. (Select Video1/Video 2 from INPUT)
- Video In: For connecting video systems with Video (CVBS) outputs (e.g. VCRs, VCD players and DVD players). Connect the audio output port of device to Audio In. (Select Video1/Video 2 from INPUT)
- Video Out: For connecting to other TV or monitor. Connect it to the Video Input of these devices.
6.3 Connecting external speakers:
text_image
Optional speakers for your plasma display Back of your plasma display Speaker terminals Speaker cables- Press and hold the clip on the terminal and plug the speaker cable into the terminal (remove the jacket). Release the clip.
• Pull the cable gently to make sure that it will not come out.
Notes:
- The connection of both channels (L+R) is the same.
- Set Speaker to External Speaker in the OSD menu when a pair of external speakers is connected. (See 7.7.2 for details)
- Use the standard speaker cable that comes with your plasma display. We will not guarantee the EMI safety if other speaker cables are used.
7. Basic operation:
7.1 Turning your plasma display on and off (when your plasma display is in standby mode):
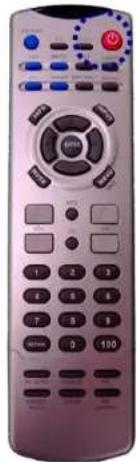
- Press the POWER button to turn your plasma display on. The power indicator will turn from red into green.
- Press the POWER button again to turn your plasma display off.
Note:
Power indicator will blink for a few seconds before turning from green into red (standby mode).
natural_image
Front view of a retro-style remote control with buttons and keypad (no readable text or symbols)7.2 Selecting input mode:
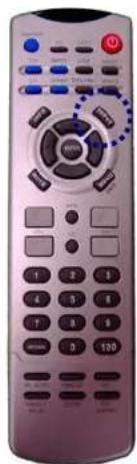
- Press the INPUT button and the INPUT OSD menu will appear on the screen.
- Press INPUT several times to select the desired input source. Sequence of input sources (may be different with different input modules):
VGA: D-SUB analog input from the PC module. DVI: DVI digital input from the PC module.
- PC module:
VGA→DVI
- PC + Video modules:
Video 1→Video2→Component→VGA→DVI
natural_image
Front view of a silver remote control with black buttons and a dotted circular overlay (no readable text or symbols)7.3 Adjusting OSD item settings:
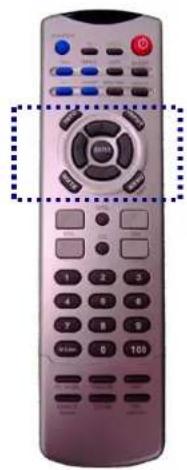
- You can adjust an OSD item with the following seven buttons: MENU, EXIT, ▲, ▼, ◀, ▶ and ENTER.
- Press the MENU button to bring up the OSD menu. Press ◀/▶ to select the following submenus: Picture→Display→TV Setting→Audio→Miscellaneous →Information
- Press ▲/▼ to move the selection point up and down.
- Press ◀/▶ to move the selection point left and right and to adjust the setting of an item.
- Press EXIT button to exit OSD menu.
Note:
You can adjust the OSD time out from the Miscellaneous menu. The OSD menu will turn off automatically if there is no button action before timeout.
natural_image
Front view of a silver remote control with black buttons and a keypad (no visible text or symbols)7.4 Adjusting volume:
- You can adjust the volume of the speakers with the following three buttons: VOL+, VOL-, and MUTE.
- Press and hold VOL+ button to increase volume. Press and hold VOL- button to reduce volume.
- Press MUTE button to mute the speakers (turn speakers off). Press MUTE button again to resume speaker output.
- Miscellaneous audio settings (e.g. treble, bass and balance) must be done from the OSD menu or front panel controls.
text_image
Close-up of a remote control with labeled buttons and a dotted-line annotation pointing to the left button.7.5 Zooming in to/out of pictures:
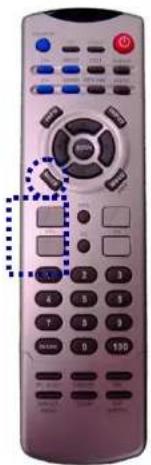
- You can adjust the screen size with the following two buttons: ASPECT RATIO and ZOOM.
- Press ASPECT RATIO to change the screen size.
Note:
- You can select "Fit to Screen" or "Original Size" (1:1) in PC mode.
- You can select Pixel to Pixel, 4:3 Output, Panoramic, Letter Box or Full Screen in Video mode.
- Press and hold ZOOM to zoom in and return to normal.
natural_image
Front view of a remote control with buttons and dials (no readable text or symbols)7.6 Miscellaneous functions:
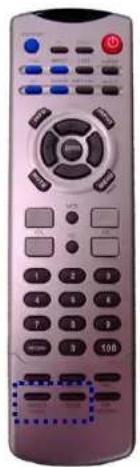
- Press AUTO to activate auto adjustment (phase, V-sync and H-sync) if there is a display problem in PC mode after timing change.
- Press FREEZE to freeze display on the screen (not the input source). Press button again to resume display.
Note:
FREEZE will only freeze the display on the screen, and the playback system will continue playing.
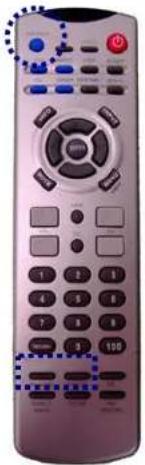
- Press and hold PIP/POP to switch from and to: Sub-frame (small)→Frame (medium) (Frame (big) (Double Screen (full screen) (Double screen (16:9) (Multiple screen))
text_image
Close-up of a remote control with labeled buttons and dials, showing function keys and numeric keypad7.7 OSD functions:
1. Summary of OSD menu:
[PC]
| Picture Display | TV Settings | Audio Miscellaneous Information | ||
| Brightness Aspect Ratio Treble OSD Time Out | ||||
| Contrast PIP Size Bass OSD Position | ||||
| Saturation | PIP Position | SRS | OSD Language | |
| Tint | Reset | Balance | OSD Transparency | |
| Sharpness | Clock | Speaker | DPMS | |
| Reset | Phase | Audio Line Out | Image Reverse | |
| Picture Mode | Position | Color Space | ||
| Color Temperature | Audio Source | |||
| User R | Factory Default | |||
| User G | ||||
| User B | ||||
[AV]
| Picture Display | TV Settings | Audio | Miscellaneous Information | |
| Brightness | Video System | Channel System | Treble | OSD Time Out |
| Contrast | Aspect Ratio | Channel Edit | Bass | OSD Position |
| Saturation | PIP Size | Auto Scan | SRS | OSD Language |
| Tint | PIP Position | Parental Protection | Balance | OSD Transparency |
| Sharpness | Speaker | DPMS | ||
| Reset | Audio Line Out | Image Reverse | ||
| Picture Mode | Color Space | |||
| Color Temperature | Audio Source | |||
| User R | Factory Default | |||
| User G | ||||
| User B | ||||
Note:
There are six submenus in total in each of the PC and Video modules. Settings in each module are slightly different.
2. OSD submenus:
(1) Picture menu:
[PC-2]
text_image
Picture Picture Mode Natural Color Temperature User Red 90 Green 90 Blue 90 Press Enter to select Press▲▼►to move or adjust Press Menu: to exit[VIDEO-2]

text_image
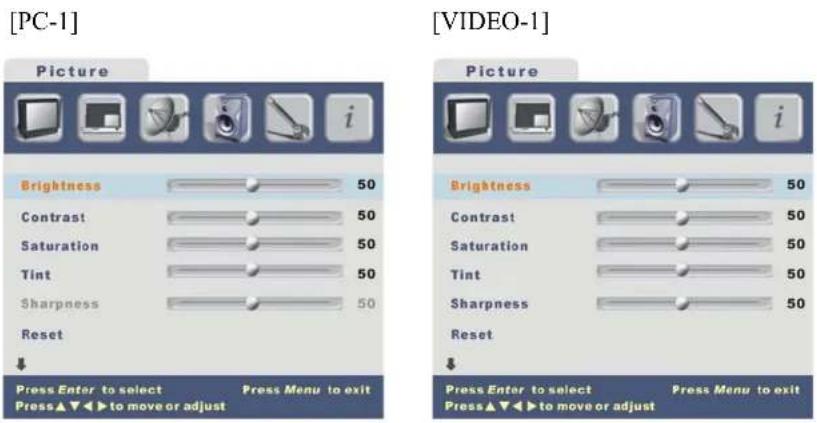
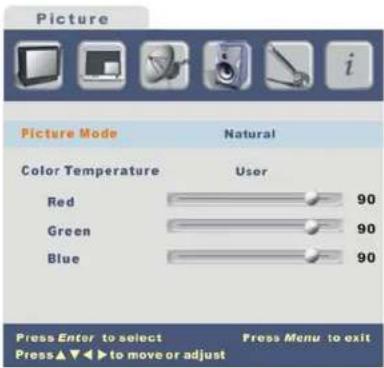
Picture Picture Mode Natural Color Temperature User Red 90 Green 90 Blue 90 Press Enter to select Press Menu to exit Press▲▼►to move or adjust- When connecting your plasma display using the D-sub 15-pin (VGA analog) port, you can only adjust the following items: Brightness, Contrast, Saturation, Tint, Reset, Picture Mode and Color Temperature.
- You can reset the Brightness, Contrast, Saturation and Tint settings to the factory default. If you have selected "User" in the Color Temperature setting, you can adjust the brightness of Red, Green and Blue separately.
- When connecting your plasma display to a video system via the VIDEO module, you can adjust the following items: Brightness, Contrast, Saturation, Tint, Sharpness, Reset, Picture Mode and Color Temperature.
(2) Display menu:
[PC-1]
text_image
Display Aspect Ratio Full Screen PIP Size Small PIP Position Press Enter to select Press Menu to exit Press▲▼◀▶to move or adjust[VIDEO-1]
text_image
Display Video System Auto Aspect Ratio Panoramic PIP Size Small PIP Position Press Enter to select Press Menu to exit Press▲▼►to move or adjust[PC-2]
text_image
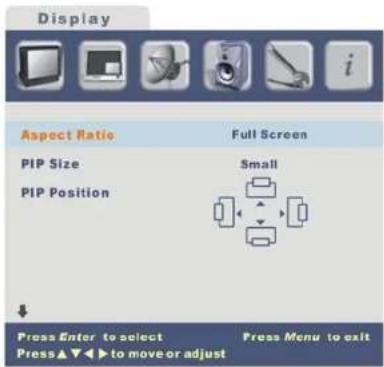
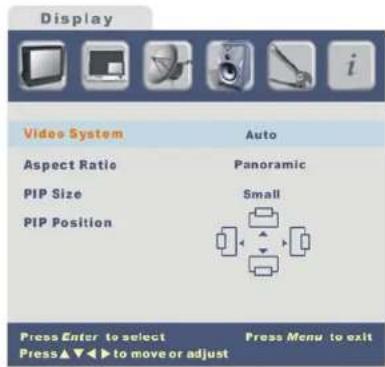
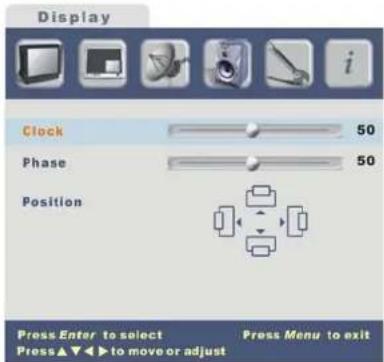
Display Clock 50 Phase 50 Position Press Enter to select Press Menu to exit Press ▲▼▶ to move or adjust- When connecting your plasma display via the PC module, you can adjust the following items: Aspect Ratio, PIP Size, PIP Position, Clock, Phase and Position.
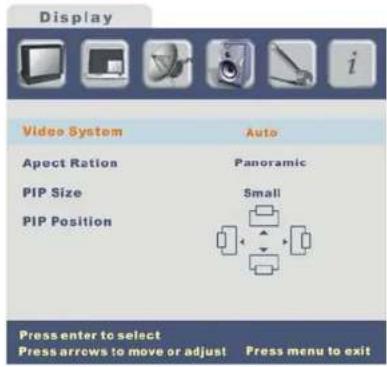
- When connecting your plasma display via the video module, you can adjust the following items: Video System, Aspect Ratio, PIP Size and PIP Position.
- There are five display mode options. You can select the one that best suits the format of the source signal by pressing the Aspect Ratio button. These five options are: Pixel to Pixel, 4:3 Output, Panoramic, Letter Box and Full Screen.
(3) TV Settings menu:

text_image
TV Settings Channel System Cable Air Channel Edit Add Remove Auto Scan Parental Protection Press Enter to Proceed PressEnter to select Press Menu to exit Press▲▼►to move or adjust- You must install a TV module before you can adjust the TV items, including Channel System, Channel Edit, Auto Scan and Parental Protection (available only in the USA).
(4) Audio menu:
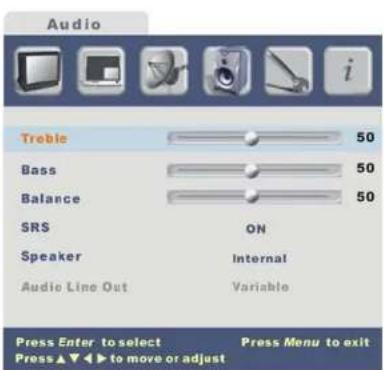
text_image
Audio Treble 50 Bass 50 Balance 50 SRS ON Speaker Internal Audio Line Out Variable Press Enter to select Press ▲▼▶ to move or adjust Press Menu to exit- Items in the Audio Menu are the same for both PC and video module. These settings are: Treble, Bass, Balance, SRS, Speaker and Audio Line Out.
(5) Language and screen saver menu:
[PC & Video - page1] [PC & Video - page2]
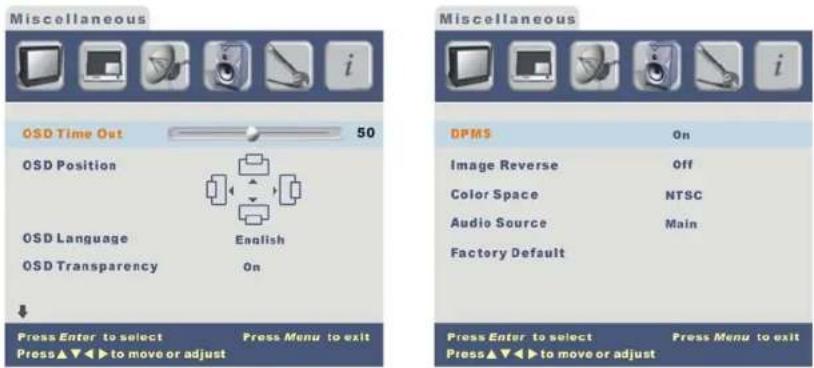
text_image
Miscellaneous OSD Time Out 50 OSD Position OSD Language English OSD Transparency On Press Enter to select Press Menu to exit Press ▲▼◀▶ to move or adjust Miscellaneous DPMS On Image Reverse Off Color Space NTSC Audio Source Main Factory Default Press Enter to select Press Menu to exit Press ▲▼◀▶ to move or adjust- Items in this menu include OSD Time Out, OSD Position, OSD Language, OSD Transparency, DPMS (PC Only), Image Reverse, Color Space, Audio Source and Factory Default.
- You can select the OSD language using the Language setting.
- Image Reverse is a screen saver to protect screen from damage after displaying a still picture for a long time.
(6) Information:
[PC] [Vidco - pagel]
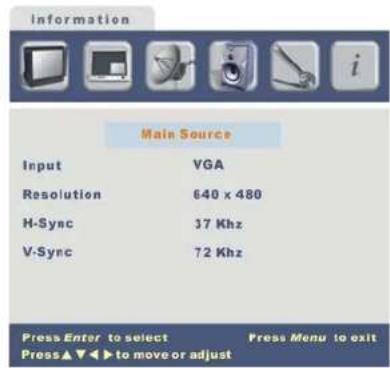
text_image
Main Source Input VGA Resolution 640 x 480 H-Sync 37 KHz V-Sync 72 KHz Press Enter to select Press Menu to exit Press ▼▼◀▶ to move or adjust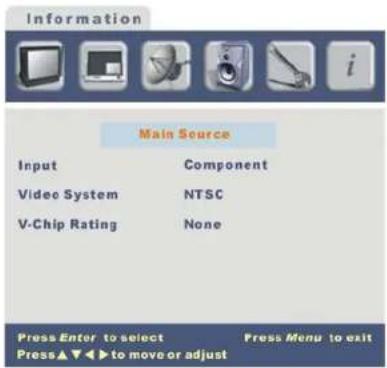
text_image
Information Main Source Input Component Video System NTSC V-Chip Rating None Press Enter to select Press Menu to exit Press▲▼◀▶to move or adjust[PIP/POP - page2]
text_image
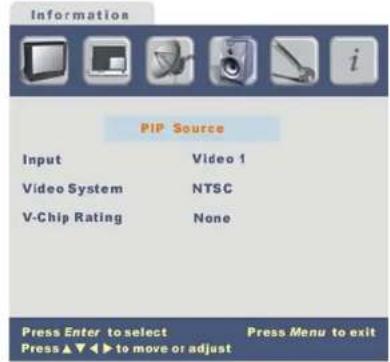
Information PIP Source Input Video 1 Video System NTSC V-Chip Rating None Press Enter to select Press Menu to exit Press ▲▼◀▶ to move or adjust- When connecting your plasma display via the PC module, you can adjust the resolution, H-sync. and V-sync. from this page. If the PIP function is on, the input and system of sub-frame will be displayed.
- When connecting your plasma display via the Video module, the input and system will be displayed. If the PIP function is on, the input and system of sub-frame will be displayed.
8. TV Instructions:
8.1 Connect to antenna:
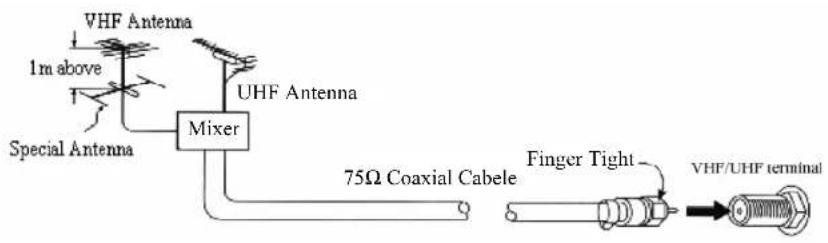
When using 75Ω coaxial cable: Connect directly to the VHF/UHF terminal of the tuner.
text_image
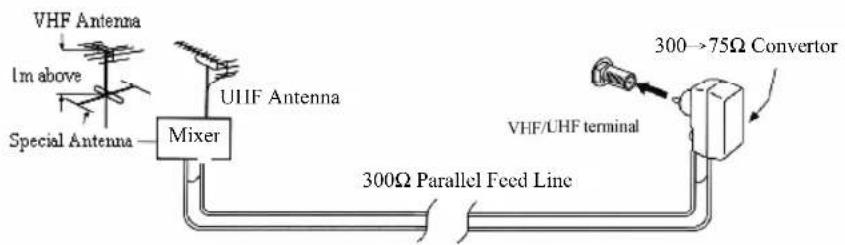
VHF Antenna 1m above Special Antenna UHF Antenna Mixer 75Ω Coaxial Cable Finger Tight VHF/UHF terminalWhen using 300Ω parallel feed line: First connect to a 300Ω to 75Ω converter, then connect to the VHF/UHF terminal of the tuner.
flowchart
graph LR
    A["VHF Antenna"] --> B["Special Antenna"]
    B --> C["Mixer"]
    C --> D["UIIF Antenna"]
    D --> E["300Ω Parallel Feed Line"]
    E --> F["300→75Ω Converter"]
    F --> G["VHF/UHF terminal"]
8.2 Input and Output Connection:
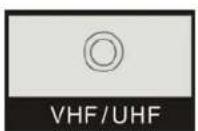
➢ VHF/UHF: Connect antenna or CATV 75Ω coaxial cable to receive TV/CATV signal.
8.3 Operating Instructions:
1. Setting channel and memory:
➢ After installing antenna, please use remote control in accordance with the following steps to scan all TV channels available for watching.
(1) Select TV output:
- Continuously press remote control INPUT button, and select in sequence. Video 1→Video2→Component→VGA→DVI→TV
(2) System Select:
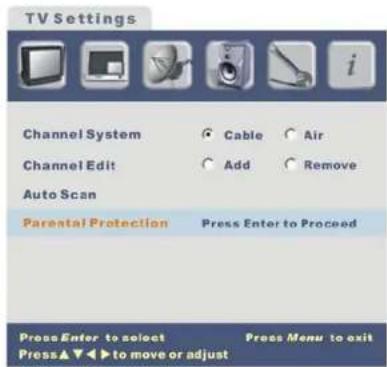
- Press MENU, select TV Setting and execute (Press ▲/▼ to select, Press ◀/▶ to execute).
- Based on source of signal, set Channel System Selection as Cable (TV) or Air; this Selection should be set up before channel scanning.
text_image
TV Settings Channel System Cable Air Channel Edit Add Remove Auto Scan Parental Protection Press Enter to Proceed PressEnter to select Press Menu to exit Press▲▼◀▶to move or adjust(3) Channel Scan Memory:
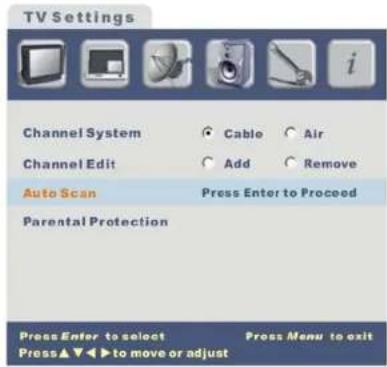
- Select Auto Scan Selection and press ▶ and Enter to execute. The Menu enters channel search status; upon completion of channel scan, it will stay on the channel of scan start.
- Upon completion of channel search, the channel list is stored in memory. Press CH ▲ or CH ▼ to view channels in sequence.
text_image
TV Settings Channel System Cable Air Channel Edit Add Remove Auto Scan Press Enter to Proceed Parental Protection Press Enter to select Press Menu to exit Press▲▼►to move or adjust(4) Channel Edit:
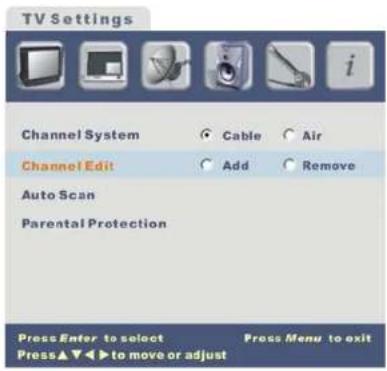
- Add or remove currently selected channels from the Channel List.
text_image
TV Settings Channel System Cable Air Channel Edit Add Remove Auto Scan Parental Protection Press Enter to select Press ▲▼▶ to move or adjust Press Menu to exit(5) Bilingual Select:
- Switch using remote control MTS Key; select Stereo, Sap, or Mono output.
2. PIP/POP Setting:
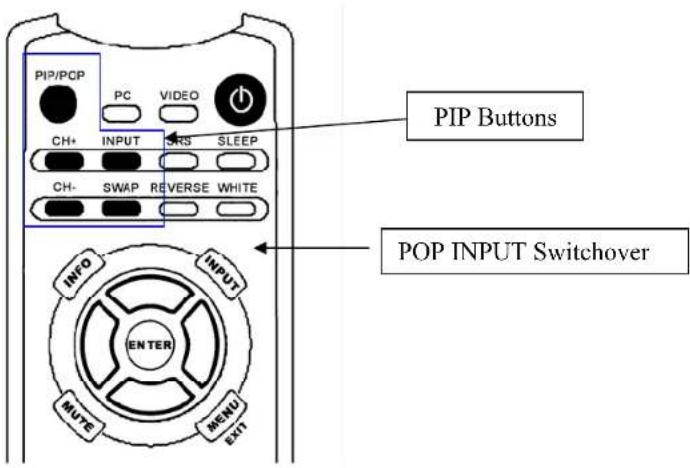
➢ Press PIP/POP on remote control to enter PIP/POP Mode.
This mode provides a variety of PIP/POP screens, press PIP/POP to cycle through according to the following sequence.
PIP(Small)→PIP(Medium)→PIP(Large)→POP→POP(16:9)→Multi POP →Off
text_image
PIP/PCP PC VIDEO CH+ INPUT SRS SLEEP CH- SWAP REVERSE WHITE PIP Buttons INFO INPUT ENTER MENU EXIT POP INPUT Switchover➢ Change source of input signal for PIP screen (Input): Press the INPUT button in the PIP section to change the input source, repeat to cycle through input sources. To change the input source in POP mode, use the POP INPUT button as shown above.
➢ PIP TV Channel Select (CH+ / CH-): When in PIP mode, you may press CH+/- in the PIP section to adjust the channel.
➢ PIP/POP Exchange (SWAP): When in PIP/POP mode, you may press SWAP to exchange the PIP/POP screens.
➢ Change PIP size under PIP Mode: When in PIP mode, you may press the Menu button to enter PIP Size Selection on Display page, and set PIP size to Large, Medium or Small. Also without entering the OSD, directly press PIP/POP button on remote control to change PIP size.
➢ Change PIP position under PIP Mode: When in PIP Mode, you may press the Menu button to enter PIP Position Selection on Display page, then press Up, Down, Right, Left to change PIP position. Also without entering the OSD, directly press Up, Down, Right, Left Key on remote control to change PIP position.
text_image
Display Video System Auto Apect Ration Panoramic PIP Size Small PIP Position Press enter to select Press arrows to move or adjust Press menu to exit➢ Other: To switch to a TV channel previously entered into the “FAV” group, add “F” before the channel number; for example, for Channel 8 enter F 8. When using CH+ / CH- to change the channel, the “F” notation will appear on the screen. The maximum number of channels in the favorite channel group is 125.
8.4 Advanced Functions:
1. Setting Close Caption:
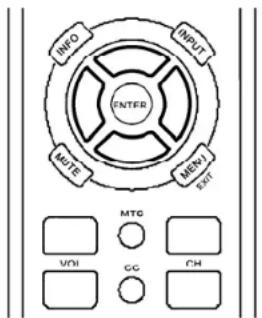
➢ Press “CC” on the remote control.
text_image
INFO INPUT ENTER MTE MENI SIT MTG VDI CC CH➢ Close Caption item description:
| Item | Content | Item | Content |
| CC1 | Show the first subtitle T1 Show the 1st subtitle message | ||
| CC2 | Show the second subtitle T2 Show the 2nd subtitle message | ||
| T3 | Show the 3rd subtitle message | ||
| T4 | Show the 4th subtitle message | ||
| OFF | Hide the subtitle | ||
2. Setting TV Rating:
➢ Activate the V-CHIP function.
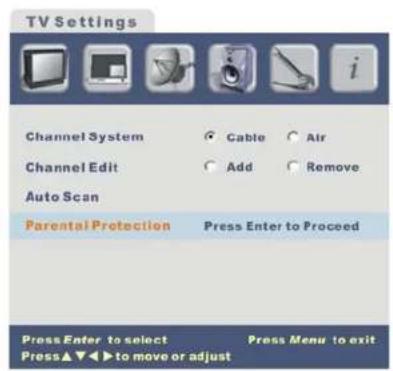
- Highlight the Parental Protection icon and press “▶” key & “Enter” key to access.
- First, the password must be entered. Please input the password that was previously set; the default initial password is "1234". See the figure below.
text_image
TV Settings Channel System Cable Air Channel Edit Add Remove Auto Scan Parental Protection Press Enter to Proceed Press Enter to select Press Menu to exit Press▲▼►to move or adjust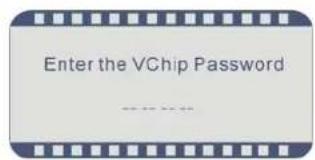
text_image
Enter the VChip Password- If the password is correct, the V-Chip setting OSD page will be displayed.
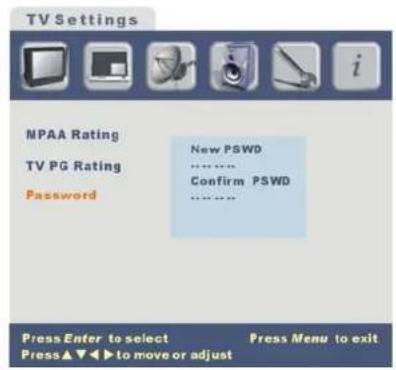
- Change password: highlight "Password" item then press the "Enter" button. You may change the password and save it. See the figure below.
text_image
TV Settings MPAA Rating New PSWD TV PG Rating Confirm PSWD Password Press Enter to select Press ▲▼▶ to move or adjust Press Menu to exit- V-Chip Control: Press “▲/▼” to choose between two kinds of rating.
3. MPAA Rating:
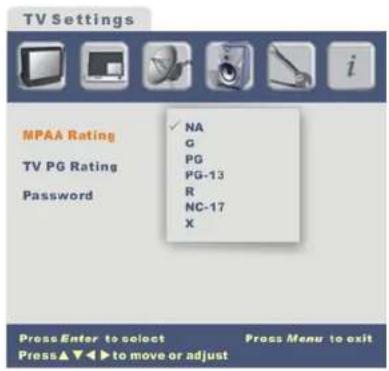
➢ Highlight the MPAA Rating rating icon, and press the “Enter” button. The MPAA Rating page is as shown below.
text_image
TV Settings MPAA Rating ✓ NA G PG PG-13 R NC-17 X TV PG Rating Password Press Enter to select Press▲▼►to move or adjust Press Menu to exitUsing up / down key (▲/▼), select the desired rating items and press "Enter" to store the setting.
Note:
- If the user chooses the "PG-13" setting, then the ratings "R", "NC-17", "X" beyond "PG-13" will be set to "Block" automatically.
• MPAA Rating system description:
| RATING | DESCRIPTION |
| G General Audience (Appropriate for all ages) | |
| PG | Parental Guidance Suggested (Some material may not be suitable for children) |
| PG-13 | Parental Strongly Cautioned (Some material may be inappropriate for children under 13) |
| R Restricted (Under 17 requires accompanying parent or adult guardian) | |
| NC-17 Not intended for anyone 17 and under | |
| X X rated (For adult only) | |
4. US TV Rating:
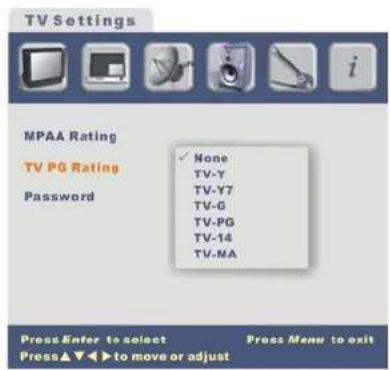
➢ Highlight the TV PG Rating icon, and press “Enter” to enter. The US TV Rating page is as shown below.
text_image
TV Settings MPAA Rating TV PG Rating Password ✓ None TV-Y TV-Y7 TV-G TV-PG TV-14 TV-MA Press Enter to select Press Menu to exit Press ▲▼▶to move or adjustUsing up / down key (▲/▼), select the desired rating items and press "Enter" to store the setting.
Note:
• US TV Rating system description:
| RATING | FV(FantasyViolence) | V(Violence) | S(SexualSituation) | L(AdultLanguage) | D(SexuallySuggestiveDialog) |
| TV-Y(All children) | |||||
| TV-Y7 (Direct toOlder Children) | X | ||||
| TV-G (GeneralAudience) | |||||
| TV-PG(Parental GuidanceSuggested) | X | X | X | ||
| TV-14(Parents StronglyCautioned) | X | X | X | ||
| TV-MA (MatureAudience Only) | X | X | X |
Note: "X" indicates Content Rating can be set.
X
X
9. Optional accessories:
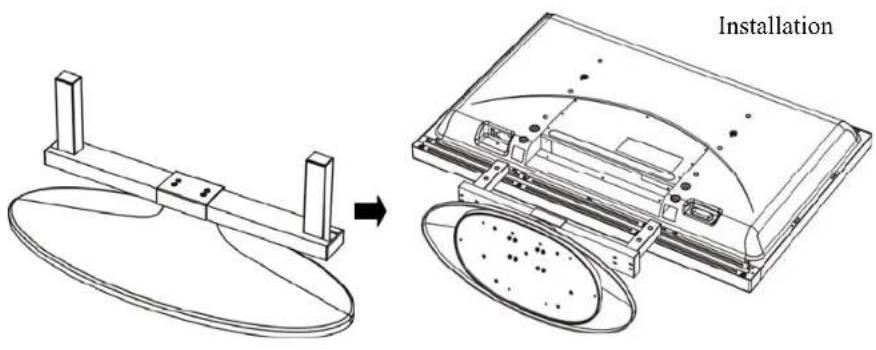
text_image
Installation
text_image
External Speakers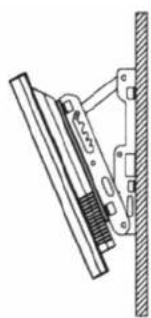
natural_image
Technical line drawing of a mechanical assembly with a vertical rod and bracket (no text or symbols)Wall-mount rack 0^-20^ , adjustable
- Technical Specification:
| Display area | 1007mm (width) x 567.4mm (height) |
| Aspect ratio | 16 : 9 |
| Dimensions 1138mm (width) x 748mm (height) x 98mm (depth) (excl. stand and handles) | |
| Weight | 37kg (excl. stand) |
| Resolution | 852 (Horizontal) x 480 (Vertical) pixels (Each pixel includes R/G/B dots) |
| Pixel pitch | 1.182mm (horizontal) x 1.182mm (vertical) |
| Colors | 16.7 Mega (256 grade for each of R/G/B) |
| Gray tone | 256 (R/G/B @ 8bit) |
| Viewable angle | Over 160°, both horizontal and vertical |
| Sound effect | SRS |
| Power supply | 100-120VAC/220-240VAC, 50Hz/60Hz |
| Power consumption | 330W (general) |
| Input terminals PC module | D-Sub 15-pin (analog RGB input)DVI Connector (digital-TMDS input)D-Sub 9-pin (RS-232 terminal)Video moduleS-Video IN: Mini DIN 4-pin x 2CVBS IN: RCA x 2CVBS OUT: RCA x 1Component Y/Pb(Cb)/Pr(Cr): RCA x 3Audio IN: RCA x 2 (L/R channels)Phone Jack: ∅ 3.5mm x 1 |
| Safety Standards | CE, FCC, UL, C-UL, TUV and CCC |
| Standard accessories | Remote controller x 1; UM4 batteries x 2; AV cable x 1; D-sub cable x 1; S-video cable x 1; power cord x 1; and user's manual x 1 |
11. Factory default:
Your plasma display is ready to receive 17 kinds of input signals as shown in the table below: Factory default signals (RGB mode)
| NO | Resolution Horizontal | Horizontal Frequency (KHz) | Vertical Frequency (Hz) | Dot Clock Frequency (MHz) | Remark |
| 1 | 720×400 | 31.47 | 70.08 | 28.32 | DOS |
| 2 | 640×400 | 37.90 | 85.00 | 31.50 | VESA |
| 3 | 640×480 | 31.50 | 60.00 | 25.18 | DOS |
| 4 | 640×480 | 35.00 | 67.00 | 30.24 | Mac.(SOG) |
| 5 | 640×480 | 37.50 | 75.00 | 31.50 | VESA |
| 6 | 640×480 | 37.86 | 72.81 | 31.50 | VESA |
| 7 | 640×480 | 43.30 | 85.00 | 36.00 | VESA |
| 8 | 800×600 | 35.16 | 56.25 | 36.00 | VESA |
| 9 | 800×600 | 37.90 | 60.32 | 40.00 | VESA |
| 10 | 800×600 | 46.90 | 75.00 | 49.50 | VESA |
| 11 | 800×600 | 48.08 | 72.19 | 50.00 | VESA |
| 12 | 800×600 | 53.70 | 85.00 | 56.25 | VESA |
| 13 | 832×624 | 49.00 | 74.00 | 57.27 | Mac.(H+V) |
| 14 | 1024×768 | 48.40 | 60.00 | 65.00 | VESA |
| 15 | 1024×768 | 56.50 | 70.00 | 75.00 | VESA |
| 16 | 1024×768 | 60.00 | 75.00 | 78.75 | VESA |
| 17 | 1024×768 | 68.70 | 85.00 | 94.50 | VESA |
| 18 | 1280×1024 | 64.00 | 60.00 | 108.00 | VESA |
* If the signal source is out of the range of your plasma display, the message "Signal Out of Range" will be displayed on the screen.
* You can confirm the format of signals from the Information Menu under the OSD menu.
12. Cleaning and trouble shooting:
12.1 Cautions:
- Disconnect your plasma display from the power source before cleaning it.
- Do not use chemicals, such as benzene, thinner or alcohol, to clean the case, screen filter or remote controller of your plasma display, as this could damage the coating on these articles.
12.2 Cleaning the case and remote controller:
- Clean them with a soft cloth.
- If the case or remote controller is very dirty, clean it with diluted neutral detergent. Dampen a cloth with diluted detergent, wipe the dirt off and dry the shell or remote controller with a soft cloth. Make sure liquid does not enter inside your plasma display.
12.3 Cleaning the screen:
- Wipe the screen gently with a soft cloth.
- There is a fragile protective glass in front of the screen. Do not allow sharp objects to scratch it. Do not press or hit the glass. If the glass is very dirty, dampen a cloth with diluted neutral detergent, wipe the dirt off gently and dry the glass with a soft cloth.
12.4 Troubleshooting:
Before sending your plasma display to be serviced, please check your plasma display and the devices connected to it according to the instructions below. Send your plasma display to be serviced only if you cannot eliminate the trouble.
| Problem | Troubleshooting |
| Unable to turn it on. (indicator is dead) | Check the power plugs on the outlet and your plasma display to see if they are securely connected. |
| Message “No Input Signal” appears on the screen. | Check if the audio cables are securely connected.Check if you have turned the video system or PC on.Check if you have selected the correct input source in the OSD menu. |
| Remote controller does not work properly. | Check if you have installed the batteries according to the polarity marks as shown in the battery compartment.Check if the batteries are dead (replace with new batteries).Check if the remote controller is out of range.Check if you have pointed the remote controller toward the receiver when operating it.Check if the receiver is blocked.* See Chapter 7 for details about remote controller operation. |
| Blinking dots or lines on the screen. | Check if the audio/video components are affected by radio or electromagnetic interference, such as a running car, a running train, a high voltage cable, a neon light or other possible sources of interference. |
| The color or picture quality is poor. | Check picture settings, such as Brightness, Contrast and Color.* See OSD Functions in 7.7 for details about picture quality adjustments. |
| Incorrect frame position and size. | Check frame position and size settings. |
| Improper display or color errors. | Check video cable connections for loose or incorrect connections.If you are using the PC module, adjust the resolution from your PC. Incorrect resolution settings will affect picture quality in PC mode. |
| No sound from the external speakers. | Check speaker cable connection.Check if your plasma display is in MUTE mode.Check the audio cable connection of your input device. |
| Power indicator blinks. | Check cable connections.Check if your plasma display is in sleep mode. |
| Unable to receive signals from the input device, and the message “Signal Out of Range” appears on the screen. | Select the correct format of input signals.* See Chapter 10 Factory Default for details. |
PROVIEW Experience the Difference
Your Proview Plasma/LCD Display will be repaired or replaced in accordance with the terms of this warranty, at Proview's option, if it proves to be defective in material or workmanship under normal use, during the warranty period ("Warranty Period") listed below, effective from the date ("Date of Purchase") of original consumer purchase of the product. This warranty is good only to the original purchaser of the product and effective only when used in the United States, including Alaska, Hawaii, and U.S. Territories. WARRANTY PERIOD:
- LABOR and PARTS: 1 YEAR from the Date of Purchase. Your unit will be repaired or replaced with a new, substitute model or factory reconditioned unit, at Proview's option. If repaired, parts used in the repair may be new or remanufactured. Replacement Units and Repair Parts are warranted for the remaining portion of the original unit's warranty period.
- EFFECTIVE DATE OF WARRANTY: Your warranty period begins on the date of sale to the original consumer/end user. KEEP THE DATED BILL OF SALE OR PROOF OF DELIVERY as evidence of the purchase date. You will be required to submit a legible copy of your bill of sale or proof of delivery when requesting warranty service.
THIS WARRANTY IS IN LIEU OF ANY OTHER WARRANTY, EXPRESS OR IMPLIED, INCLUDING WITHOUT LIMITATION, ANY WARRANTY OF MERCHANTABILITY OR FITNESS FOR A PARTICULAR PURPOSE. TO THE EXTENT ANY IMPLIED WARRANTY IS REQUIRED BY LAW, IT IS LIMITED IN DURATION TO THE EXPRESSED WARRANTY PERIOD ABOVE. NEITHER THE MANUFACTURER NOR ITS U.S. DISTRIBUTOR SHALL BE LIABLE FOR ANY INCIDENTAL, CONSEQUENTIAL, INDIRECT, SPECIAL, OR PUNITIVE DAMAGES OF ANY NATURE, INCLUDING WITHOUT LIMITATION, LOST PROFITS, LOST OR CORRUPTED PROGRAMMING OR DATA, OR ANY OTHER DAMAGE WHETHER BASED IN CONTRACT, TORT, OR OTHERWISE. Some states do not allow the exclusion or limitation of incidental or consequential damages or limitations on how long an implied warranty lasts, so the above exclusion or limitation may not apply to you. This warranty gives you specific legal rights and you may also have other rights that vary from state to state.
CONCERNING PIXEL FUNCTIONALITY: Your Plasma/LCD Television contains about one million individual pixels. These Televisions typically contain a small number of pixels that do not function normally. Your display has been inspected and is in compliance with manufacturer's specifications, indicating that any pixel defects do not effect the operation or use of your display.
THIS LIMITED WARRANTY DOES NOT APPLY TO:
• Damage caused in shipping or transit
• Image burn-in (Plasma Only)
- Service required as a result of improper installation, including incorrect or insufficient AC supply (please consult the owner's manual for power supply requirements)
• Installation or repair of antenna systems, cable converters, cable company supplied equipment, or other components in a video system
• Setup or adjustment on consumer controls, or damage caused by improper adjustments
• Damage caused by other system components
• Any panel that has been modified or incorporated into any other product
- Replacement of batteries on the remote control.
- Damage (including cosmetic damage), failure, loss or personal injury due to misuse, abuse, negligence, improper maintenance or storage, or to acts of nature or other causes beyond our control. (Causes beyond our control include but are not limited to lightning strike, power surges, power outages and water damage.)
• Repair or replacement of warranted parts by other than Proview authorized service centers.
• Units purchased or serviced outside of the coverage area
- Product where the original factory serial numbers have been removed defaced or changed in any way.
• Product sold and labeled as "as is, where is" or similar disclaimer.
The cost of repair or replacement under these excluded circumstances shall be borne by the consumer.
FOR SERVICE:
Before you call for warranty service, check your operating guide under the "troubleshooting" section, this may help you avoid a service call.
For warranty service information, please contact the Proview Customer Service Center telephone number (see below). When calling for service, please have your product model number, serial number and the date of purchase or the date of original installation available. If a replacement unit is required, under some circumstances you may be asked to provide a reserve deposit to the Proview Service Center against a credit card number as assurance for advanced shipment. Your credit card will not be charged if you return the defective unit within 30 working days. If a replacement unit is received, please use the carton and packaging from that unit in returning the defective unit to the Proview® Brand Service Center. Parts and service in accordance with the Proview warranty are Proview's responsibility and will be provided without charge. Other service requirements will be at the owner's expense. If you have problems in obtaining satisfactory warranty service, write or call the Proview Customer Service Center. Service may be provided by independently owned and operated service organizations. To assure proper credit and avoid unnecessary charges, you must obtain a Proview Return Authorization before returning any product to the Proview Service Center. Contact the Customer Interactive Center for details.
In-Home Service (for screen sizes over 20" only): Please retain dated bill of sale or delivery ticket as evidence of the Date of Purchase for proof of warranty, and submit a copy of the bill of sale to the service person at the time warranty service is provided.
Please call (877 532-8176) to locate you're nearest
Proview Authorized Service Center, or
Visit our website at:
Http://www.proview.net/service/index.htm
CONTACT THE PROVIEW CUSTOMER SERVICE CENTER BY TELEPHONE OR MAIL:
To obtain customer assistance, product information or Service locations by phone:
(877 532-8176), Mon–Fri 7am–8 pm CT and Sat 8am–5 pm CT
To obtain customer assistance, product information or Service locations by Mail:
Proview Customer Service Center
P.O. Box 192
Lincolnshire, IL. 60069-9998
IMPORTANT PRODUCT REGISTRATION INFORMATION:
It is important to register this or any Proview product. Registering will allow us to reach you promptly should we discover a safety or reliability issue that can affect your product. To register please visit www.proview.net/service/ce/reg.htm and fill in your information. Registration is completely optional. Failure to register this product will not affect your warranty. Your Proview product will be repaired or replaced in accordance with the terms of this warranty, at the option of Proview, if it proves to be defective in material or workmanship under normal use and conditions during the warranty period ("warranty period") listed below effective from the date of original consumer purchase of the product ("date of purchase"). This warranty is good only to the original purchaser of the product and effective only when used in the United States, including Alaska, Hawaii and U.S. territories.
P/NO : (NEED P#)