
LW1815ER - Air-conditioner LG - Free user manual and instructions
Find the device manual for free LW1815ER LG in PDF.


User questions about LW1815ER LG
0 question about this device. Answer the ones you know or ask your own.
Ask a new question about this device
Download the instructions for your Air-conditioner in PDF format for free! Find your manual LW1815ER - LG and take your electronic device back in hand. On this page are published all the documents necessary for the use of your device. LW1815ER by LG.
USER MANUAL LW1815ER LG
Please read this manual carefully before operating your air conditioner and retain it for future reference.
TYPE WINDOW
MODEL LW1815ER
TABLE OF CONTENTS
Safety Precautions....3
Before Operation 7
Introduction 8
Electrical Safety 9
Installation 11
Operating Instructions 16
Maintenance and Service .....20

FOR YOUR RECORDS
Write the model and serial numbers here:
Model #
Serial #
You can find them on a label on the side of each unit.
Dealer's Name
Date Purchased
■ Staple your receipt to this page in the event you need it to prove date of purchase or for warranty issues.

READ THIS MANUAL
Inside you will find many helpful hints on how to use and maintain your air conditioner properly. Just a little preventive care on your part can save you a great deal of time and money over the life of your air conditioner.
You'll find many answers to common problems in the chart of troubleshooting tips. If you review our chart of
Troubleshooting Tips first, you may not need to call for service at all.

PRECAUTION
- Contact the authorized service technician for repair or maintenance of this unit.
• The air conditioner is not intended for use by young children or invalids without supervision. - Young children should be supervised to ensure that they do not play with the air conditioner.
- When the power cord is to be replaced, replacement work shall be performed by authorized personnel only using only genuine replacement parts.
• Installation work must be performed in accordance with the National Electric Code by qualified and authorized personnel only.
natural_image
Simple line drawing of people enjoying a meal at a table with sun and palm trees in the background (no text or symbols)Safety Precautions
To prevent injury to the user or other people and property damage, the following instructions must be followed.
■ Incorrect operation due to ignoring instruction will cause harm or damage. The seriousness is classified by the following indications.

WARNING
This symbol indicates the possibility of death or serious injury.

CAUTION
This symbol indicates the possibility of injury or damage to properties only.
■ Meanings of symbols used in this manual are as shown below.
 | Be sure not to do. |
 | Be sure to follow the instruction. |

WARNING
■ Installation
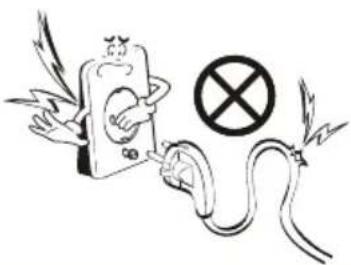
Don't use a power cord, a plug, or a loose socket which is damaged.
- Otherwise, it may cause a fire or electrical shock.
natural_image
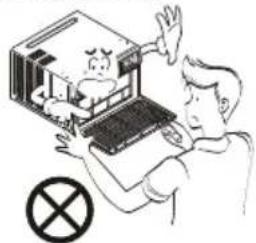
Illustration of a charging plug connected to a prohibition symbol with lightning, no text presentDo not disassemble or modify products.
- It may cause failure and electric shock.
text_image
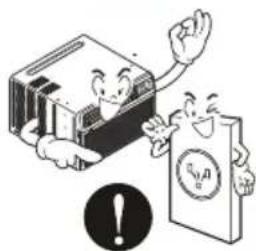
Illustration showing a person using a laptop with a warning symbol and a distressed expression, indicating a workplace or safety concern.Always plug into a grounded outlet.
- Otherwise, it may cause a fire or electrical shock.
natural_image
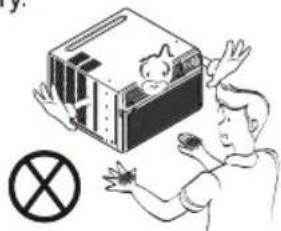
Illustration of a smiling book character holding a stack of books, next to a smiling document with a warning symbol (no text or labels)Be caution when unpacking and installing.
- Sharp edges may cause injury.
natural_image
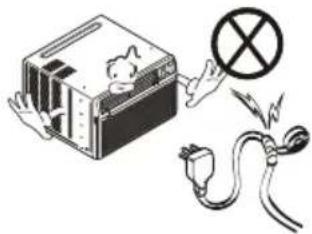
Illustration of a person interacting with a baby in a storage box, with a prohibition symbol below (no text or labels)Do not modify or extend the power cord length.
- It will cause electric shock or fire due to heat generation.
natural_image
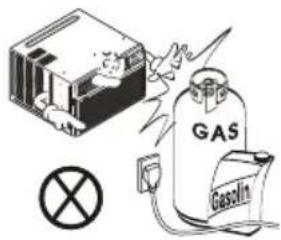
Illustration of an electrical circuit with a switch, fuse, and power plug (no text or symbols)Do not store flammables like gasoline, benzene, thinner, etc. near the air conditioner
- It may cause explosion or fire.
text_image
Diagram illustrating gas and gasoline consumption with a bomb icon and a gas cylinder labeled 'GAS' and 'Gasolin'Operation
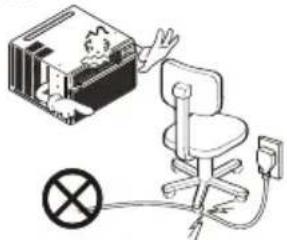
Do not place heavy object on the power cord and take care so that the cord should not be pressed.
• There is danger of fire or electric shock.
text_image
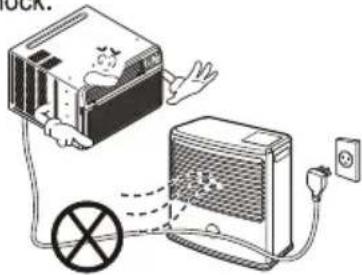
Diagram illustrating a mechanical or electrical system with a box, switch, and power outlet connected to a circular symbol indicating failure or failure.Do not place the power cord near a heater.
- It may cause fire and electric shock.
text_image
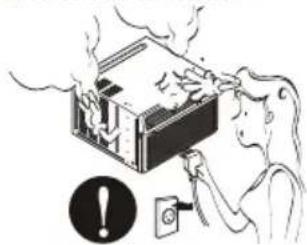
Diagram illustrating a device connection with a cartoon character inside a projector and connected to an air conditioner, showing electrical outlet.Unplug the unit if strange sounds, odors, or smoke come from it.
- Otherwise it may cause fire and electric shock accident.
natural_image
Illustration of a person using a power switch to burn the smoke from a fire extinguisher (no text or symbols present)No correlation between fan usage and oxygen depletion.
• An oxygen shortage may occur.
natural_image
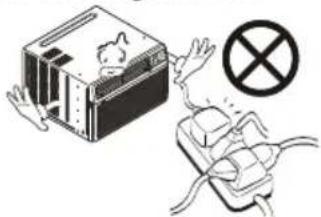
Illustration of a person interacting with a laptop and monitor, with a warning symbol (no text or labels present)Do not share the outlet with other appliances.
- It will cause electric shock or fire due to heat generation.
natural_image
Illustration of a device with a box and a robot, no text or symbols presentDo not allow water to run into electric parts.
- It will cause failure of machine or electric shock.
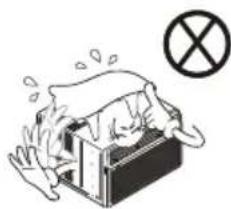
natural_image
Illustration of a person inside a box with steam rising, symbolizing heat or urgency (no text present)Do not open the suction inlet grill of the product during operation.
- Otherwise, it may electrical shock and failure.
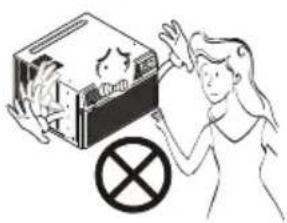
text_image
Illustration showing a person reacting to a device with a crossed-out prohibition symbol, suggesting a toxicity or suppression hazard.Turn off the power and breaker first when cleansing the unit.
- Since the fan rotates at high speed during operation, it may cause injury.
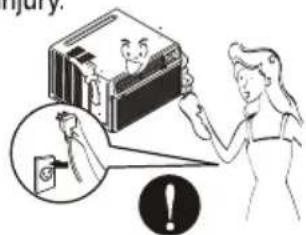
text_image
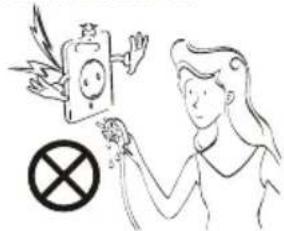
Injury?Take the power plug out if necessary, holding the head of the plug and do not touch it with wet hands.
- Otherwise, it may cause a fire or electrical shock.
natural_image
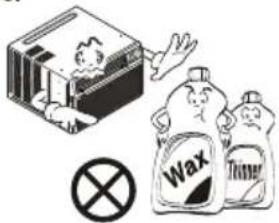
Illustration of a person using a device with a prohibition symbol (no text or labels)Use a soft cloth to clean. Do not use wax, thinner, or a strong detergent.
• The appearance of the air conditioner may deteriorate, change color, or develop surface flaws.
text_image
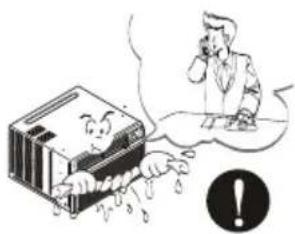
Illustration showing a book with a person, a crossed-out prohibition symbol, and two labeled bottles labeled 'Wax' and 'Thinner'.If water enters the product, turn off the the power switch of the main body of appliance. Contact service center after taking the power-plug out from the socket.
text_image
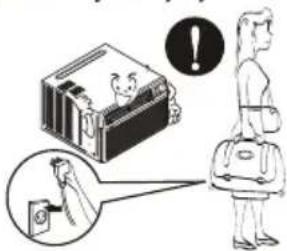
Cartoon illustration showing a person reacting to a phone call, with a warning symbol and falling documents nearby.Unplug the unit when not using It for a long time.
• Prevent accidental startup and the possibility of injury.
text_image
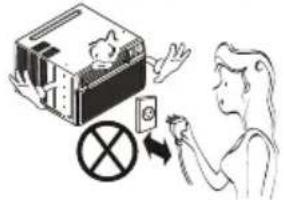
Illustration showing a person standing next to a stack of books with an exclamation mark and a magnified inset highlighting the right side.Do not operate or stop the unit by inserting or pulling out the power plug.
- It will cause electric shock or fire due to heat generation.
natural_image
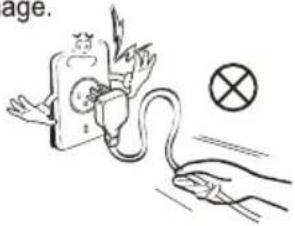
Illustration of a person interacting with a device and a box, no text or symbols presentHold the plug by the head (not the cable) when taking it out.
- It may cause electric shock and damage.
text_image
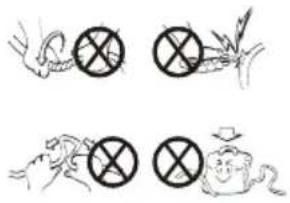
age.Do not damage or use an unspecified power cord.
• It will cause electric shock or fire.
text_image
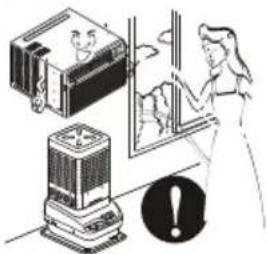
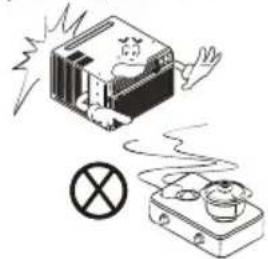
Illustration showing four symbols: a crossed-out circle, crossed-out cross, crossed-out triangle, and a cartoon teapot with a hat.When gas leaks, open the window for ventilation before operating the unit.
• Otherwise, it may cause explosion, and a fire.
natural_image
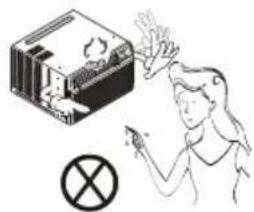
Illustration of a cartoon character reacting with a ringing phone to smoke, no text or symbols presentDo not operate with wet hands or in damp environment.
- It will cause electric shock.
text_image
Illustration showing a person reacting to a device with a warning symbol, alongside a stack of books and a cross symbol.Never touch the metal parts of the unit when removing the filter.
• They are sharp and may cause injury.
natural_image
Illustration of a person interacting with a laptop displaying a device (no text or symbols visible)For inner cleaning, contact an Authorized Service Center or a dealer. Do not use harsh detergent that causes corrosion or damage on the unit. Harsh detergent may also cause failure of product, fire, or electric shock.
CAUTION
■ Installation
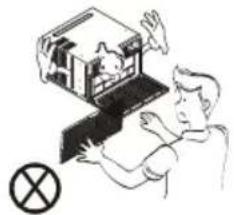
Install the product so the exhaust and noise are not aimed directly at the neighbors.
- Be considerate.
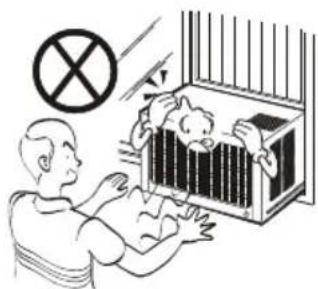
natural_image
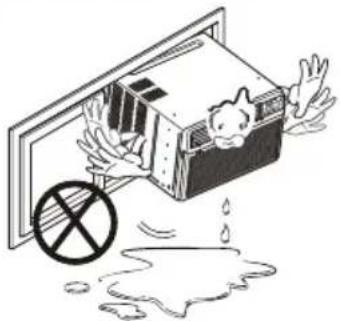
Illustration of a person opening a cage with a prohibition symbol above (no text or symbols present)Follow installation instructions exactly.
- Otherwise, it may cause vibration or water leakage.
natural_image
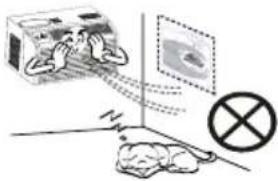
Illustration of a person falling into a damaged box with a prohibition symbol (no text or labels)Operation
Do not use this appliance for special purposes such as cooling pets, foods, precision machinery, or objects of art.
- It is an air conditioner, not a precision refrigeration system.
text_image
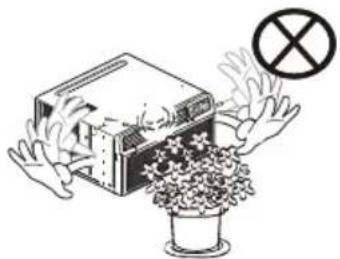
Diagram illustrating a medical procedure with labeled components including a box, a cross symbol, and a patient lying on the floor.Do not block the inlet or outlet of air flow.
• It may cause product failure.
natural_image
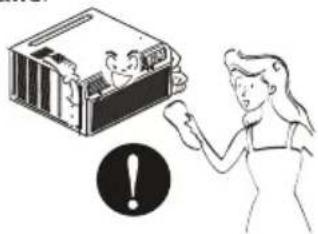
Illustration of a potted plant with leaves and a box, emitting exhaust smoke (no text or symbols)Use a soft cloth to clean. Do not use wax, thinner, or a strong detergent.
• The appearance of the air conditioner may deteriorate, change color, or develop surface flaws.
natural_image
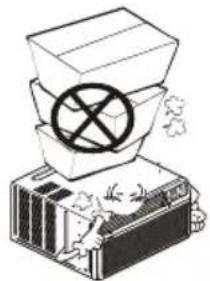
Illustration of a person interacting with a device labeled '1' and a magnifying glass (no text or symbols on the device itself)Do not step on the indoor/outdoor unit and do not put anything on it.
- It may cause an injury through dropping of the unit or falling down.
natural_image
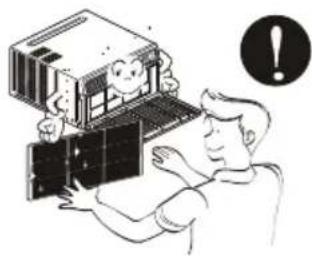
Illustration of a mechanical device with a cross symbol above it, no text or labels present.Always insert the filter securely. Clean it every two weeks.
• Operation without filters will cause failure.
natural_image
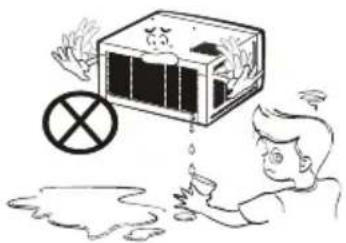
Illustration of a person assembling a computer with an exclamation mark (no text or symbols on the main image)Do not drink water drained from air conditioner.
- It contains containments and will make you sick.
text_image
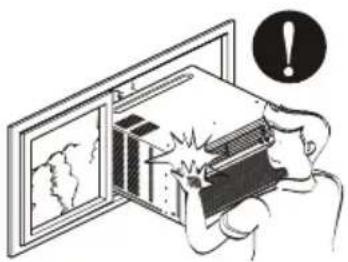
Illustration showing a person reacting to a chemical reaction with a benzene ring, indicating environmental toxicity or toxicity.Be cautious not to touch the sharp edges when installing.
- It may cause injury.
natural_image
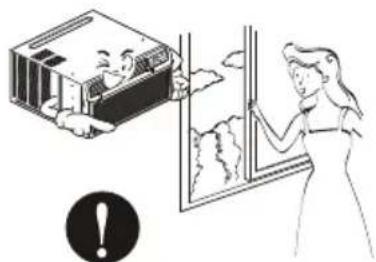
Illustration of a person using a computer to interact with a screen, with an exclamation mark above (no text or symbols on the screen)Instead of running air conditioning constantly, open a window for fresh air occasionally.
- You will feel better.
natural_image
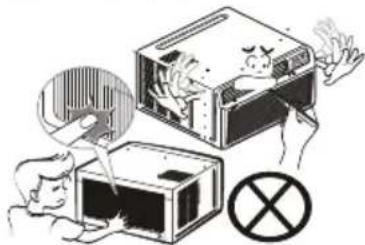
Illustration of a person opening a window with a magnified inset showing a child's face (no text or symbols)Do not insert the hands or bars through the air inlet or outlet during operation.
• Otherwise, it may cause personal injury.
natural_image
Illustration of a device with open box, showing a person reacting to a test tube and another person holding a test tube, with no visible text or symbols.If the liquid from the battery gets onto your skin or clothers, wash it well with clean water. Do not use the remote if the battery has leaked.
• The chemicals in battery could cause burns or other health hazards.

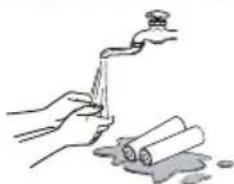
natural_image
Illustration of hands washing a faucet with liquid and a rolled document (no text or symbols)If you eat the liquid from the battery, brush your teeth and see doctor. Do not use the remote if the battery has leaked.
• The chemicals in battery could cause burns or other health hazards.

Before Operation
Preparing for Operation
- Contact an installation specialist for installation.
- Plug in the power plug properly.
- Use a dedicated circuit.
- Do not use an extension cord.
- Do not start/stop operation by plugging/unplugging the power cord.
- If the cord/plug is damaged, replace it with only an authorized replacement part.
Usage
- Being exposed to direct airflow for an extended period of time could be hazardous to your health.
- No correlation between fan usage and oxygen depletion.
- Do not use this air conditioner for non-specified special purposes (e.g. preserving precision devices, food, pets, plants, and art objects). Such usage could damage the items.
Cleaning and Maintenance
- Do not touch the metal parts of the unit when removing the filter. Injuries can occur when handling sharp metal edges.
- Do not use water to clean inside the air conditioner. Exposure to water can destroy the insulation, leading to possible electric shock.
- When cleaning the unit, first make sure that the power and breaker are turned off. The fan rotates at a very high speed during operation. There is a possibility of injury if the unit's power is accidentally triggered on while cleaning inner parts of the unit.
Service
For repair and maintenance, contact an Authorized Service Center. See the warranty page for details or call (800) 243-0000. Have your model number and serial number available. They should be written on page 2 of this manual.
Introduction
Symbols Used in this Manual

This symbol alerts you to the risk of electric shock.

This symbol alerts you to hazards that could cause harm to the air conditioner.
NOTICE
This symbol indicates special notes.
Features
▲ WARNING
This appliance should be installed in accordance with the National Electric Code.
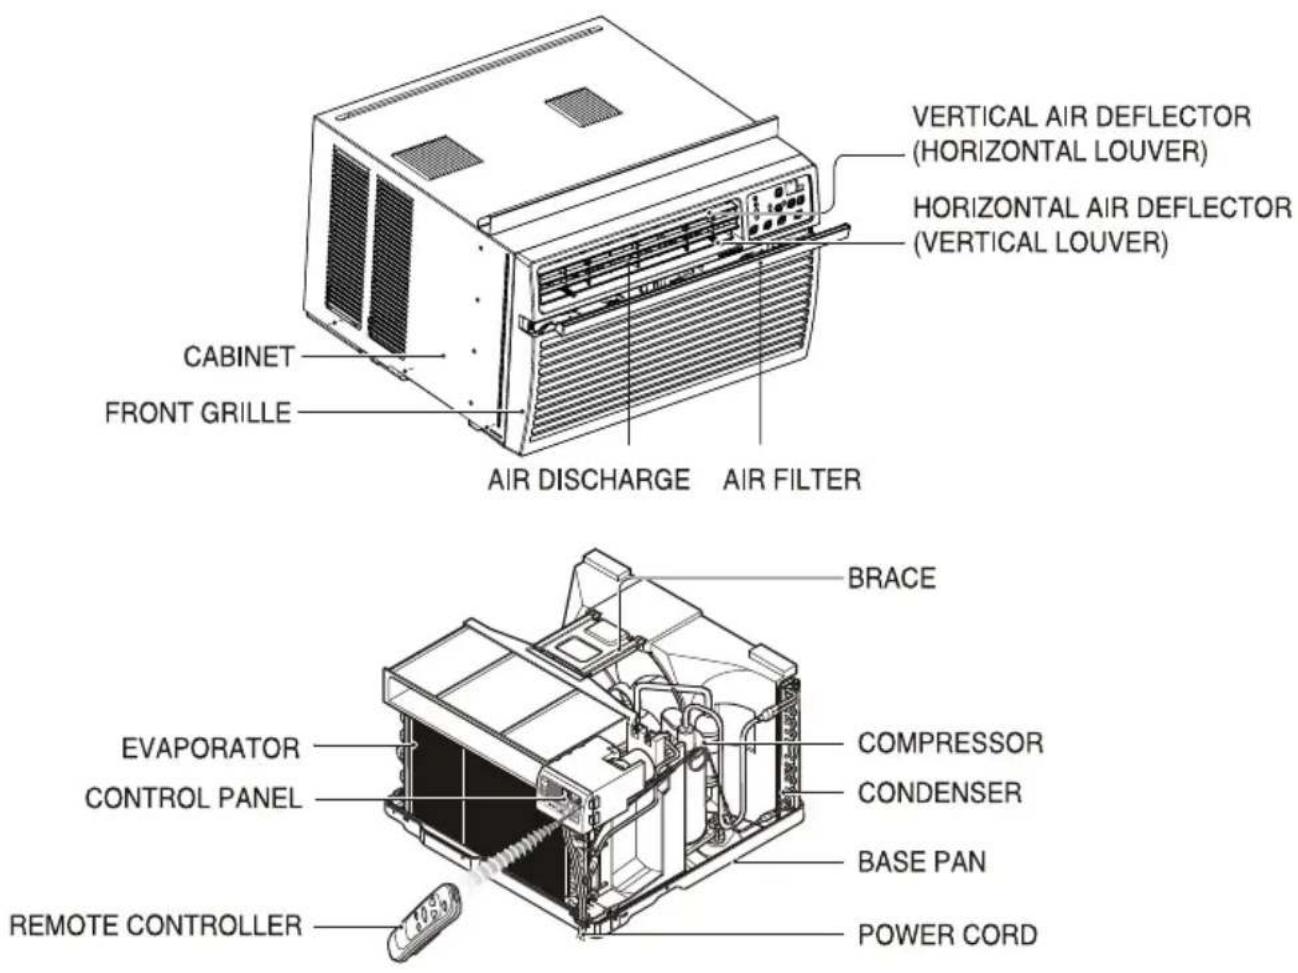
text_image
CABINET FRONT GRILLE AIR DISCHARGE AIR FILTER VERTICAL AIR DEFLECTOR (HORIZONTAL LOUVER) HORIZONTAL AIR DEFLECTOR (VERTICAL LOUVER) BRACE EVAPORATOR CONTROL PANEL REMOTE CONTROLLER COMPRESSOR CONDENSER BASE PAN POWER CORDElectrical Safety
Electrical Data
| 230V~ | Power cord may include a current interrupter device. A test and reset button is provided on the plug case. The device should be tested on a periodic basis by first pressing the TEST button and then the RESET button. If the TEST button does not trip or if the RESET button will not stay engaged, discontinue use of the air conditioner and contact a qualified service technician. |
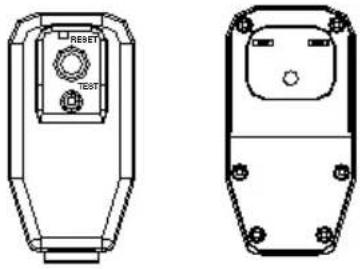 |
NOTICE
| Use Wall Receptacle | Power Supply |
 Standard 250V, 3-wire grounding receptacle rated 15A, 250V AC Standard 250V, 3-wire grounding receptacle rated 15A, 250V AC | Use 15 AMP. time delay fuse or 15 AMP. circuit breaker. |
NOTICE
DO NOT USE AN EXTENSION CORD.
All wiring should be made in accordance with local electrical codes and regulations.
Aluminum house wiring may pose special problems. Consult a qualified electrician.
▲ WARNING
Never push the test button during operation
Otherwise this plug can damaged.
This device contains chemicals, including lead, known to the State of California to cause cancer, and birth defects or other reproductive harm.
Wash hands after handling.
Do not remove, modify, or immerse this plug. If this device trips, the cause should be corrected before further use.
CAUTION
The conductors inside this cord are surrounded by shields, which monitor leakage current.
These shields are not grounded.
Periodically examine the cord for any damage. Do not use this product in the event the shields become exposed.
Avoid shock hazard. This unit cannot be user-serviced. Do NOT open the tamper-resistant sealed portion.
All warranties and performance will be voided. This unit is not intended to be used as an ON/OFF switch.
Electrical Safety
IMPORTANT (PLEASE READ CAREFULLY)
FOR THE USER'S PERSONAL SAFETY, THIS APPLIANCE MUST BE PROPERLY GROUNDED
The power cord of this appliance is equipped with a three-prong (grounding) plug. Use this with a standard three-slot (grounding) wall power outlet to minimize the hazard of electric shock. The customer should have the wall receptacle and circuit checked by a qualified electrician to make sure the receptacle is properly grounded.
DO NOT CUT OR REMOVE THE THIRD (GROUND) PRONG FROM THE POWER PLUG.
A. SITUATIONS WHEN THE APPLIANCE WILL BE DISCONNECTED OCCASIONALLY
Because of potential safety hazards, we strongly discourage the use of an adapter plug. However, if you wish to use an adapter, a TEMPORARY CONNECTION may be made. Use UL-listed adapter, available from most local hardware stores.
The large slot in the adapter must be aligned with the large slot in the receptacle to assure a proper polarity connection.
CAUTION
Attaching the adapter ground terminal to the wall receptacle cover screw does not ground the appliance unless the cover screw is metal, and not insulated, and the wall receptacle is grounded through the house wiring. The customer should have the circuit checked by a qualified electrician to make sure the receptacle is properly grounded.
Disconnect the power cord from the adapter, using one hand on each. Otherwise, the adapter ground terminal might break. DO NOT USE the appliance with a broken adapter plug.
B. SITUATIONS WHEN THE APPLIANCE WILL BE DISCONNECTED OFTEN.
Do not use an adapter plug in these situations. Unplugging the power cord frequently can lead to an eventual breakage of the ground terminal. The wall power outlet should be replaced by a three-slot (grounding) outlet instead.
USE OF EXTENSION CORDS
Because of potential safety hazards, we strongly discourage the use of an extension cord. However, if you wish to use an extension cord, use a CSA certified/UL-listed 3-wire (grounding) extension cord.
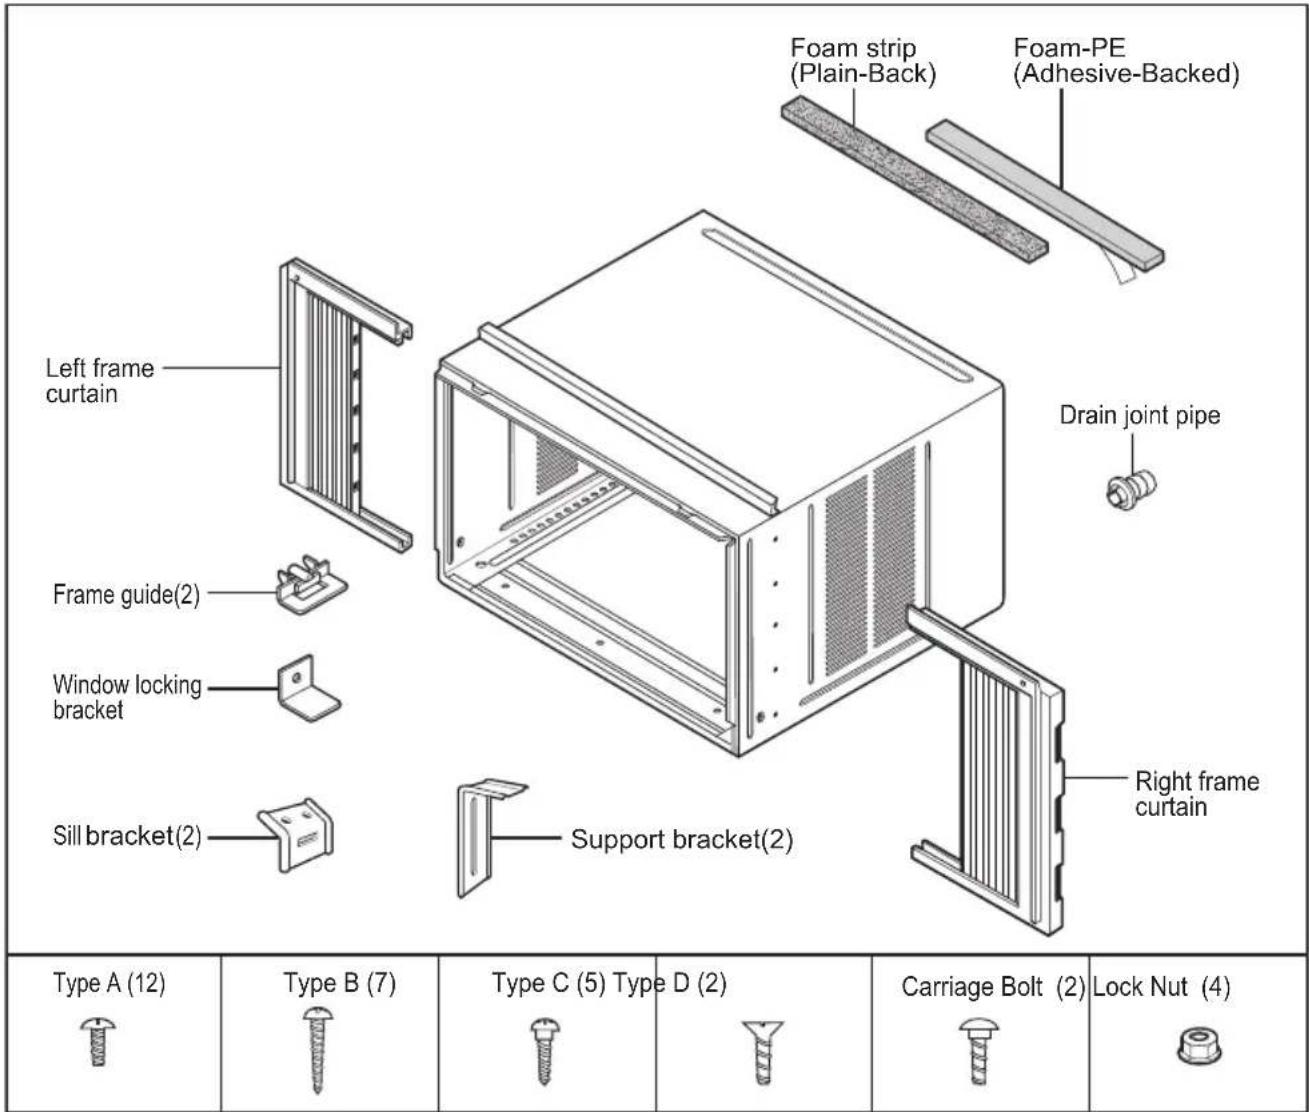
Installation
text_image
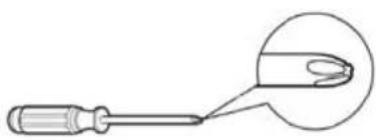
Foam strip (Plain-Back) Foam-PE (Adhesive-Backed) Drain joint pipe Left frame curtain Frame guide(2) Window locking bracket Sill bracket(2) Support bracket(2) Right frame curtain Type A (12) Type B (7) Type C (5) Type D (2) Carriage Bolt (2) Lock Nut (4)Have the following tools available for installation:
* Phillips head screwdriver
natural_image
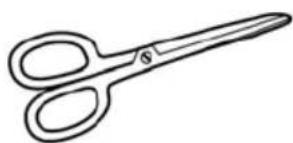
Line drawing of a screwdriver with a magnified view of the tip (no text or symbols)* Ruler

* Scissors or knife
natural_image
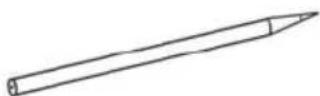
Line drawing of a pair of scissors (no text or symbols)* Level

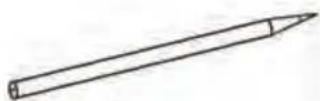
* Pencil
* Flat - blade screwdriver

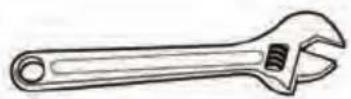
*Adjustable Wrench
Window Requirements
NOTICE
All supporting parts should be secured to firm wood, masonry, or metal.
-
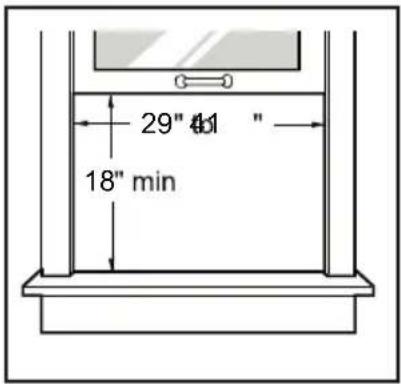
This unit is designed for installation in standard double hung windows with actual opening widths from 29" to 41". The top and bottom window sashes must open sufficiently to allow a clear vertical opening of 18" from the bottom of the upper sash to the window stool.
-
The stool offset (height between the stool and sill) must be less than 1 1/4".
text_image
29" 41 " 18" minPreparation Of Chassis
-
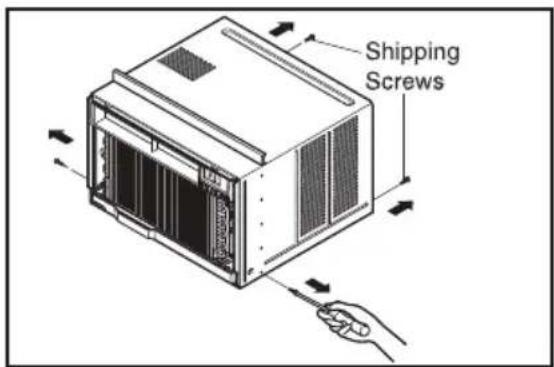
Remove 4 screws which fasten the cabinet at both sides and at the back. (Keep the screws for later use.)
-
Slide the unit from the cabinet by gripping the base pan handle and pulling forward while bracing the cabinet.
-
Cut the window sash seal to the proper length. Peel off the backing and attach the Foam-PE (adhesive backed) to the underside of the window sash.
-
Insert the frame guides into the bottom of the cabinet.
text_image
Shipping Screws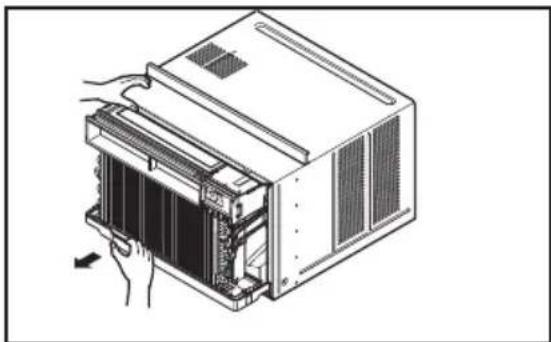
natural_image
Illustration of a computer tower with a hand inserting a fan into the base panel (no text or symbols visible)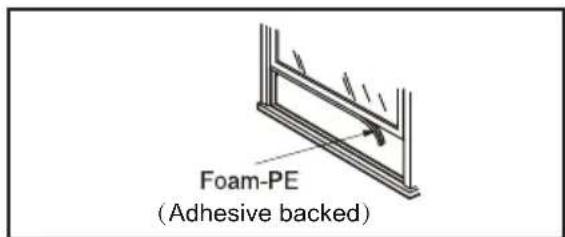
text_image
Foam-PE (Adhesive backed)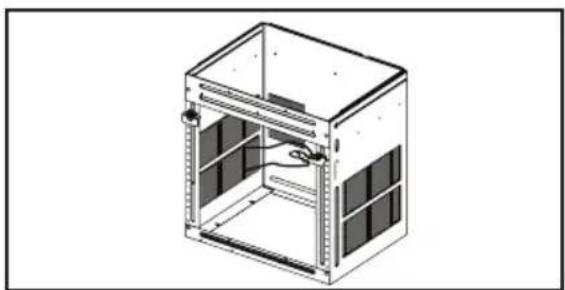
natural_image
Isometric line drawing of a modular server rack unit with internal compartments and ventilation grilles (no text or symbols)- Insert the frame curtain into the upper guide and frame guides.
- Fasten the curtains to the unit with 10 Type A screws.
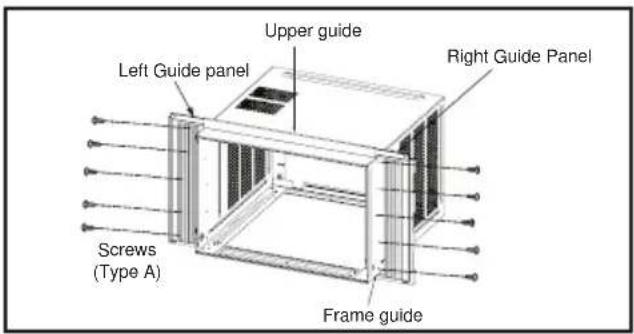
text_image
Upper guide Left Guide panel Right Guide Panel Screws (Type A) Frame guideCabinet Installation
- Open the window. Mark a line on the center of the window stool.
Loosely attach the sill bracket to the support bracket using the carriage bolt and the lock nut. - Attach the sill bracket to the window sill using the screws (Type B).
Carefully place the cabinet on the window stool and align the center mark on the bottom front with the center hole marked window stool. - Using the screw (Type D) and the lock nut, attach the support bracket to the cabinet track hole. Use the first track hole after the sill bracket on the outer edge of the window sill. Tighten the carriage bolt and the lock nut. Be sure the cabinet slants outward.
- Pull the bottom window sash down behind the t op retainer bar until they meet.
▲ CAUTION
Do not drill a hole in the bottom pan. The unit is designed to operate with approximately 1/2" of water in bottom pan.
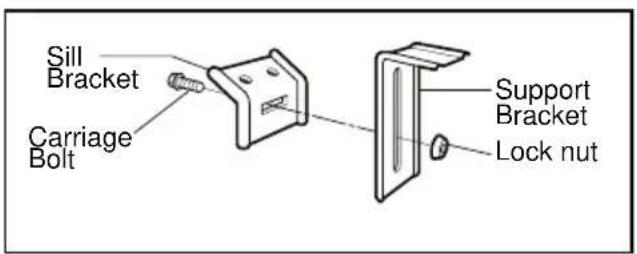
text_image
Sill Bracket Carriage Bolt Support Bracket Lock nut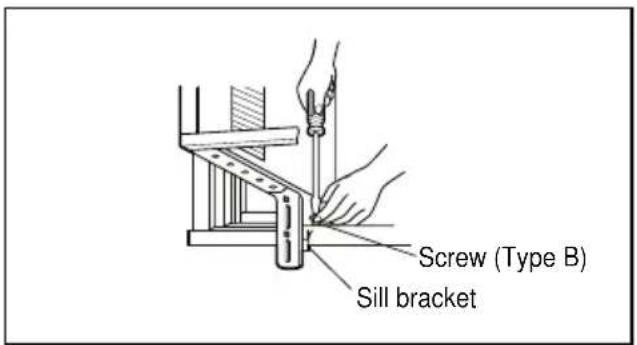
text_image
Screw (Type B) Sill bracket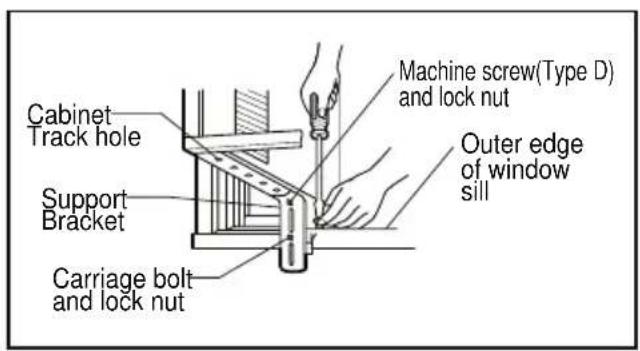
text_image
Cabinet Track hole Support Bracket Carriage bolt and lock nut Machine screw(Type D) and lock nut Outer edge of window sill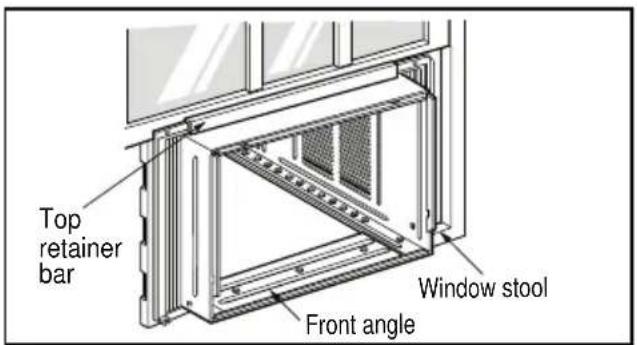
text_image
Top retainer bar Window stool Front angleNOTICE
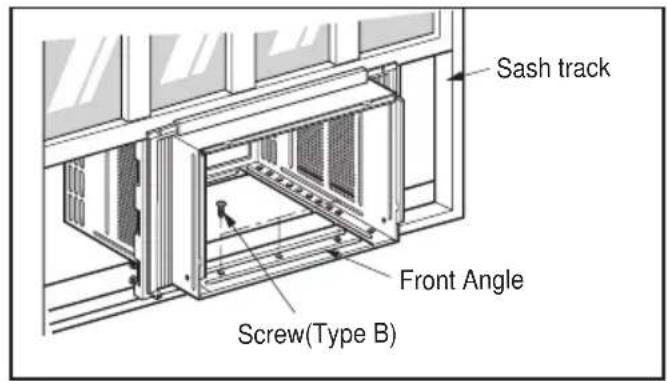
- Do not pull the window sash down so tightly that the movement of frame curtain is restricted. Attach the cabinet to the window stool by driving the screws (Type B) through the cabinet into window stool.
- The cabinet should be installed with a very slight tilt downward toward the outside.
text_image
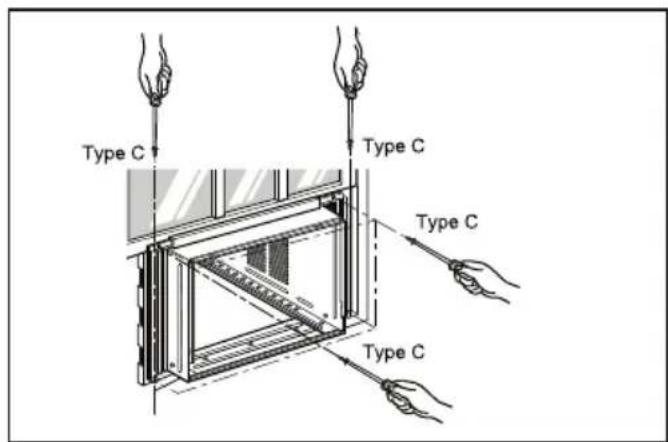
Sash track Front Angle Screw(Type B)- Pull each frame curtain fully to each window sash track, and pull the bottom window sash down behind the top retainer bar until it meets.
- Attach each frame curtain the window sash by using screws (Type C).
text_image
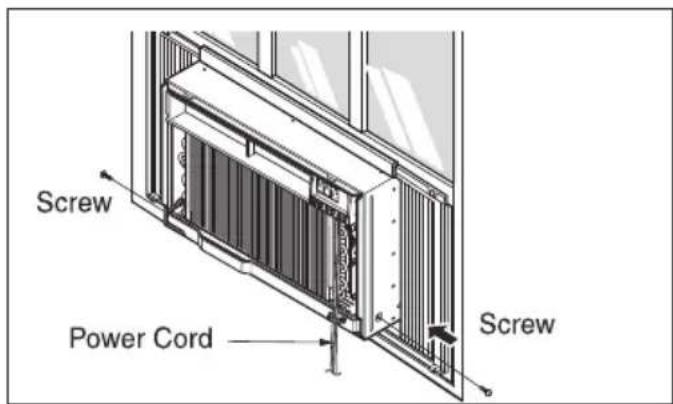
Type C Type C Type C Type C- Slide the unit into the cabinet.
CAUTION
For security purpose, reinstall screws (removed from cabinet) at cabinet's sides. See page 12.
-
Cut the foam-strip (Not adhesive backed) to the proper length and insert between the upper window sash and the lower window sash.
-
Attach the window locking bracket with a screw (Type C).
text_image
Screw Power Cord Screw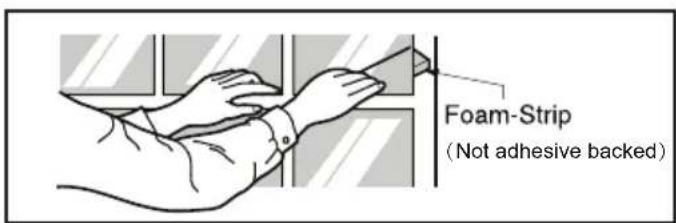
text_image
Foam-Strip (Not adhesive backed)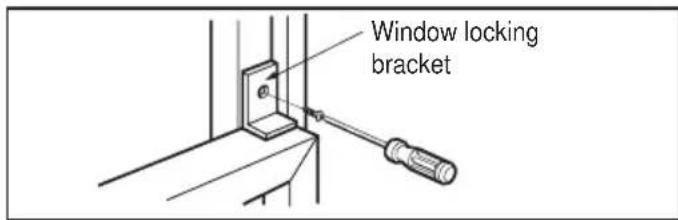
text_image
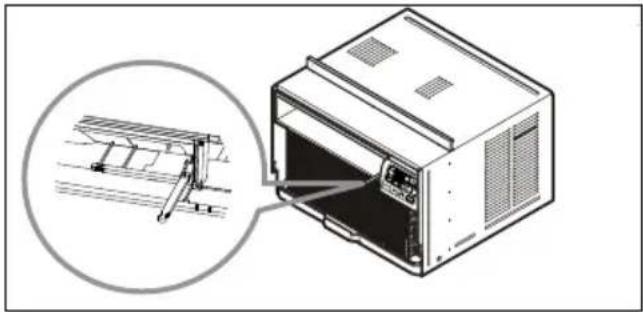
Window locking bracket- Before installing the front grille, pull out the vent control lever located above the unit control knobs, as shown.
natural_image
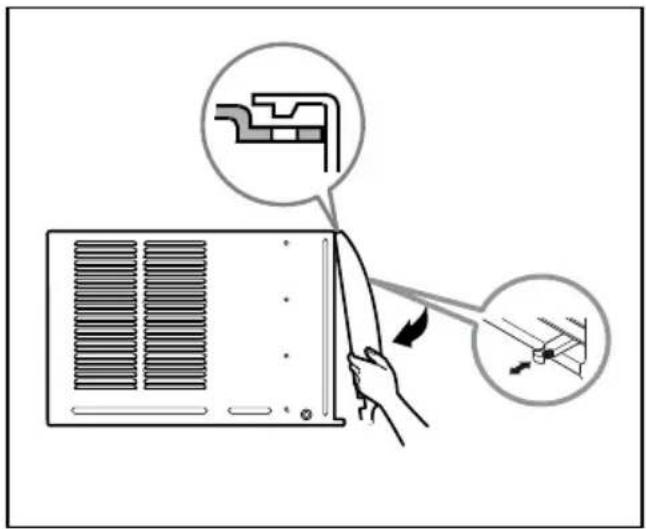
Technical illustration of a microwave oven with an inset showing internal structure (no text or symbols)- Attach the front grille to the cabinet by inserting the tabs the grille into the slots on the front the cabinet. Push the grille in until it snaps into place.
NOTICE
Guide the lever carefully through the grille as you push it in.
text_image
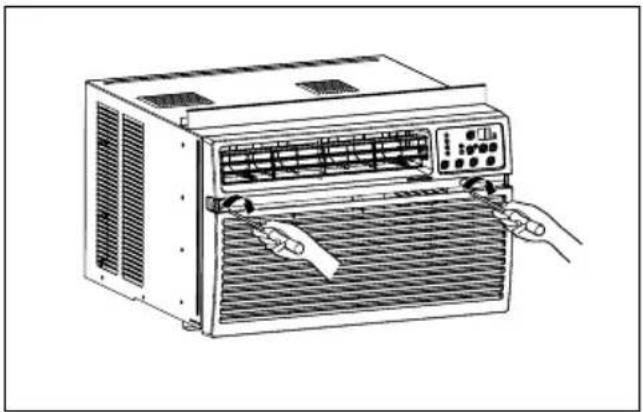
Diagram showing installation of a heat exchanger with labeled components and directional arrows indicating assembly or inspection.- Take out the air filter and secure it with 2 Type A screws through the front grille.
NOTICE
These 2 Type A screws are packaged by bag.
natural_image
Line drawing of an air conditioner unit with a hand operating it (no text or symbols)Window installation of room air conditioner is now completed. See ELECTRICAL DATA for attaching power cord to electrical outlet.
Operating Instructions
Remote Control Operations
text_image
7 Cool Clean Filter Energy Saver Fan Dry Timer F1 LOW F2 MED F3 HIGH Filter Reset TEMP 5 MODE TIMER FAN SPEED POWER 4 3 2 1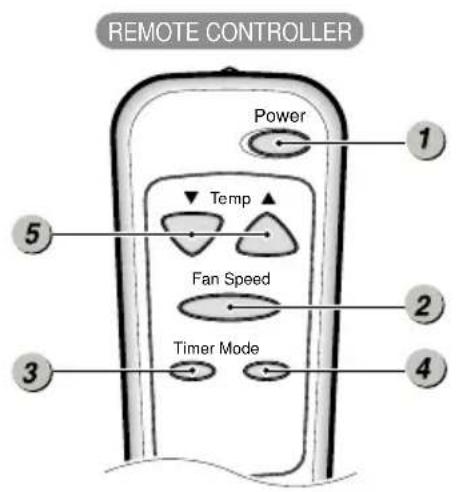
text_image
REMOTE CONTROLLER Power Temp Fan Speed Timer Mode1 POWER
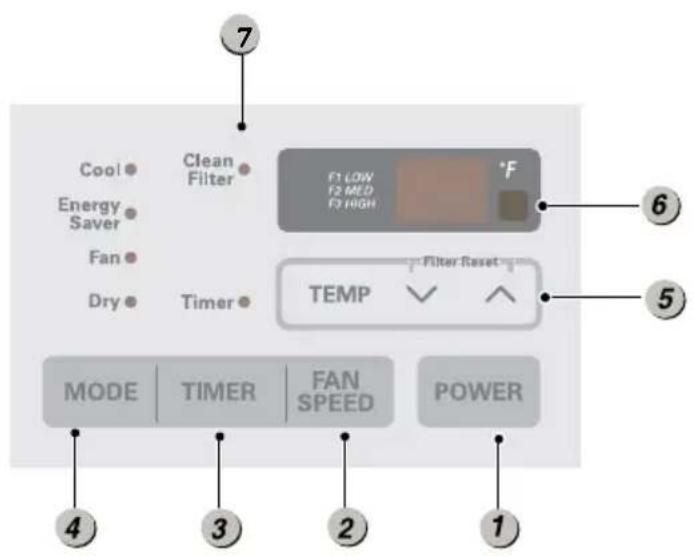
Operation starts when this button is pressed and stops when you press the button again.
2 FAN SPEED SELECTOR
Use to set the fan speed to Low (F1), MED (F2), High (F3).
3 ON/OFF TIMER
Delay ON - when the air conditioner is off, it can be set to automatically turn on from 1 to 24 hours at its previous mode and fan settings.
Delay OFF - when the air conditioner is on, it can be set to automatically turn off from 1 to 24 hours.
- Push the MODE button to rotate between Energy Saver / Cool / Fan / Dry.
Energy Saver - The fan stops when the compressor stops cooling.
Approximately every 3 minutes the fan will turn on and check the room air temperature if cooling is needed.
Cool - Compressor runs and cools the room. Use the ∧/∨ and FAN buttons to set the desired temperature and circulation fan speed.
Fan - Fan circulates air but compressor does not run. Use the FAN button to set the desired fan speed.
Dry - Dry mode is used to remove humidity from the room without additional cooling.
Once the set temperature is reached, the compressor and circulation fan turns off.
Fan speed is pre-set and cannot be adjusted.
5 TEMPERATURE CONTROL
The thermostat monitors room temperature to maintain the desired temperature.
The thermostat can be set between 60^ F\~ 86^ F ( 16^ C\~ 30^ C).
6 REMOTE CONTROL SENSOR
7 CLEAN FILTER
'Clean Filter' LED will light up to notify you that your filter needs to be cleaned.
After cleaning the filter, press "Temp ∧V" together to turn off 'Clean Filter' light.
(Filter reset must be done from unit control panel not remote control).
NOTICE
This feature is reminder to clean the Air Filter (See Maintenance) for more efficient operation.
The LED (light) will illuminate after 250 hours of operation.
AUTO RESTART
During operation in failure of electric power, the unit runs as previous setting operation.
ENERGY SAVER
The unit defaults to Energy Saver mode each time the unit is switched on except restoration after an electrical power outage and fan mode.
CAUTION
The remote controller will not function properly if strong light strikes the sensor of the air conditioner or if there are obstacles between the remote controller and the air conditioner.
Inserting the Remote Control Batteries
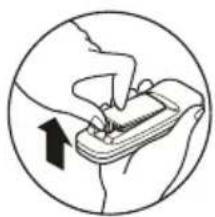
- Push out the cover on the back of the remote control with your thumb.
- Pay attention to polarity and insert one new AAA 1.5V battery.
- Reattach the cover.
NOTICE
Do not use rechargeable battery. Make sure that the battery is new.
Do not mix alkaline, standard (Carbon-zinc) or rechargeable (Nickel-cadmium) battery.
- In order to prevent discharge, remove the battery from the remote control if the air conditioner is not going to be used for an extended period of time.
Keep the remote control away from extremely hot or humid places.
To maintain optimal operation of the remote control, the remote sensor should not be exposed to direct sunlight.
natural_image
Illustration of a hand holding a device with an arrow indicating motion (no text or symbols)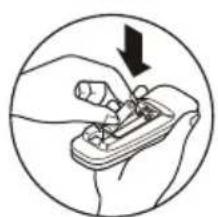
natural_image
Illustration of a hand holding a small object with a downward arrow indicating force or movement (no text or symbols)Ventilation
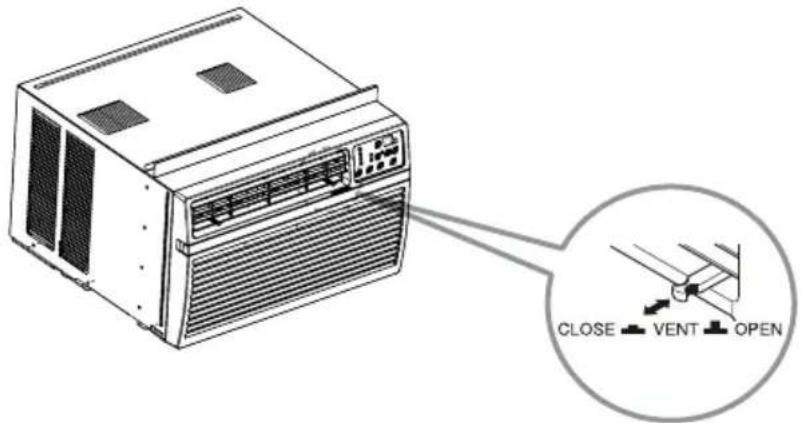
The ventilation lever must be in the CLOSE position in order to maintain the best cooling conditions. When fresh air is necessary in the room, set the ventilation lever to the OPEN position. The damper is opened and room air is drawn out.
text_image
CLOSE VENT OPENAir Direction
Airflow can be adjusted by changing the direction of the air conditioner's louvers.
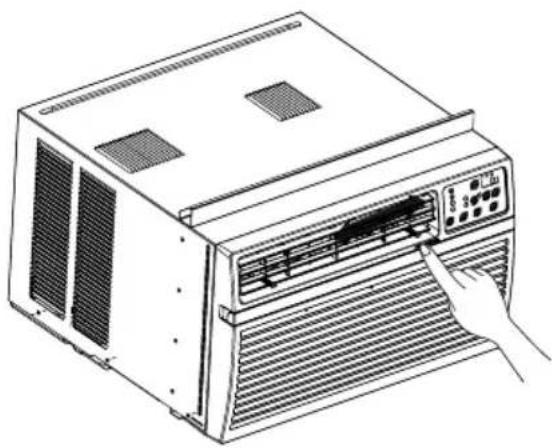
Adjusting Horizontal Air Flow Direction
The horizontal direction is adjusted by moving the lever to the left or right.
Adjusting Vertical Air Flow Direction
Touch the horizontal louvers to adjust the air airflow up or down.
natural_image
Line drawing of a front-loading air conditioner unit with a hand pointing to the control panel (no text or symbols)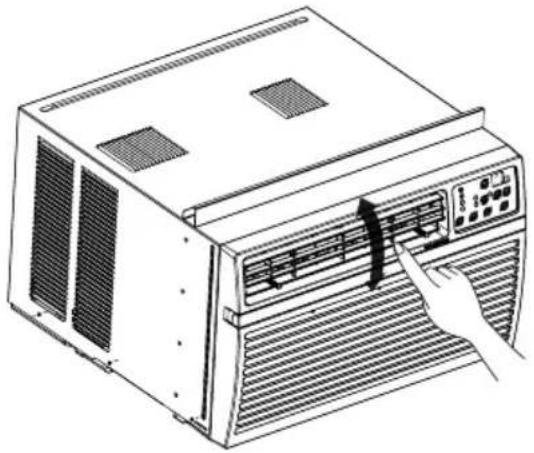
natural_image
Line drawing of a computer air conditioner unit with a hand pointing to the front panel (no text or symbols present)Adjusting horizontal air flow direction Adjusting vertical air flow direction
NOTICE
When the unit operates in extremely hot weather, it turns off automatically to protect compressor.
Additional Features
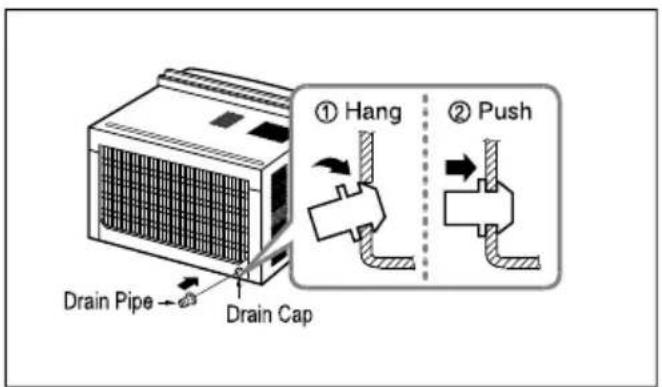
Drain Pipe
In humid weather, excess water may cause the base pan to overflow. To drain the water, remove the drain cap and secure the drain pipe to the rear hole of the base pan.
Press the drain pipe into the hole by pushing down and away from the fins to avoid injury.
text_image
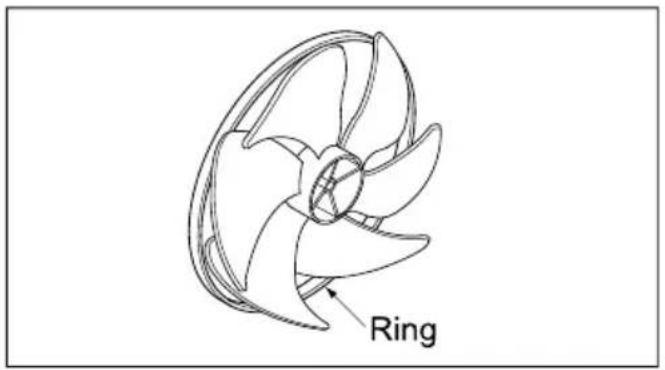
Drain Pipe Drain Cap ① Hang ② PushSlinger Fan
This air conditioner is equipped with a slinger fan. (See drawing, below.) The fan has an outer ring that runs in the water that collects in the base pan if it gets deep. That condensate is then picked up by the fan and expelled through the condenser, making the air conditioner more efficient.
text_image
Ring
CAUTION: Be careful when inserting the drain pipe. Push away from the sharp fin area to avoid slipping injuring yourself.
Maintenance and Service
Air Filter
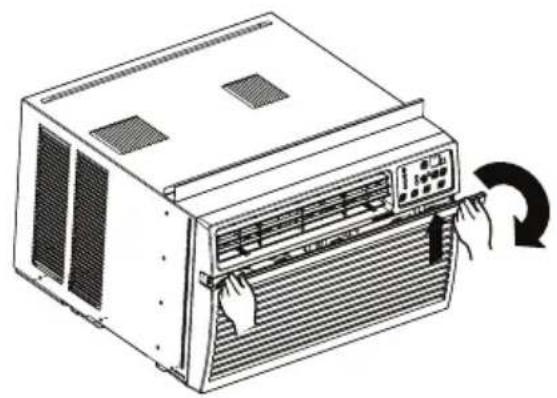
Check the air filter at least twice a month to see if cleaning is necessary. Trapped particles in the filter can build up and block the airflow, reducing cooling capacity and causing an accumulation of frost on the evaporator. To clean the air filter:
natural_image
Line drawing of a server rack with hand pressing down and cooling fan (no text or symbols)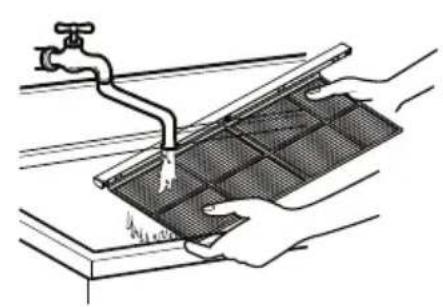
natural_image
Illustration of hands cleaning a grid-patterned surface using a faucet (no text or symbols)- Remove the air filter from the front grille by pulling forward the air filter and then up slightly.
- Wash the filter using lukewarm water below 40^ C (104 °F).
- Gently shake the excess water from the filter and replace.
Cleaning The Air Conditioner
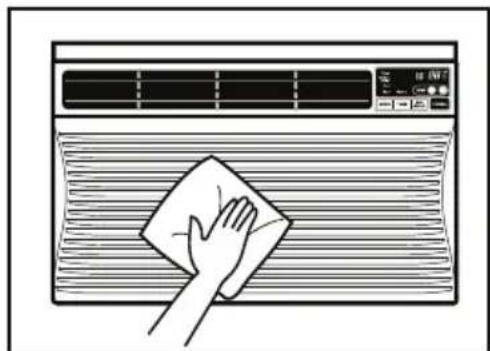
The front grille and inlet grille may be wiped with a cloth dampened in a mild detergent solution.
The cabinet may be washed with mild soap or detergent and lukewarm water, then polished with liquid wax for Appliances.
natural_image
Line drawing of a hand cleaning a window with a cloth (no text or symbols)To ensure continued peak efficiency, the condenser coils (outside of unit) should be checked periodically and cleaned if clogged with soot or dirt from the atmosphere.
Common Problems and Solutions
Before Calling for Service
If you have problems with your air conditioner, read the following information and try to solve the problem. If you cannot find a solution, turn off the air conditioner and call 1-800-243-0000.
Air conditioner does not operate
- Ensure that the air conditioner is plugged into an outlet of the proper voltage and amperage.
- Check the fuse or circuit breaker.
- Check whether the voltage is unusually high or low.
Air does not feel cold enough on the cooling setting
- Ensure that the temperature settings are correct.
- Check to see if the air filter is clogged with dust. If so, clean the filter.
- Ensure that the air flow from the outside is not obstructed and that there is a clearance of over 20" between the back of the air conditioner and the wall or fence behind it.
- Close all doors and windows and check for any source of heat in the room.
Water drip from the rear of the unit
You see water dripping from the rear of the unit. Water may be collected in the base pan in highly humid conditions or on rainy days. This water overflows and drips from the rear of the unit.
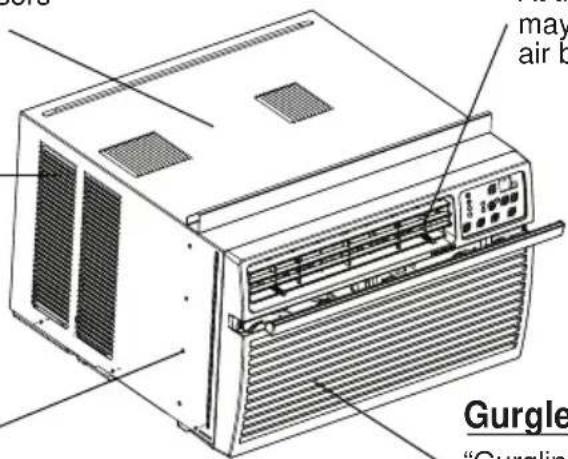
Normal Sound
High pitched Chatter
Today's high efficiency compressors may have a high pitched chatter during the cooling cycle.
Pinging or Swishing
Droplets of water hitting condenser during normal operation may cause "pinging or swishing" sounds. (See the section on Slinger Fan, page 1)
Vibration
Unit may vibrate and make noise because of poor wall or window construction or incorrect installation.
text_image
may air b Gurgle "Gurglin"Sound of Rushing Air
At the front of the unit, you may hear the sound of rushing air being moved by the fan.
Gurgle/Hiss
"Gurgling or hissing" noise may be heard due to refrigerant passing through evaporator during normal operation.
Troubleshooting
The air conditioner may be operating abnormally when:
| Problem | Possible Causes | What To Do |
| Air conditioner does not start | The air conditioner is unplugged. | Make sure the air conditioner plug is pushed completely into the outlet. |
| The fuse is blown/circuit breaker is tripped. | Check the house fuse/circuit breaker box and replace the fuse or reset the breaker. | |
| Power failure. | If power failure occurs, turn the mode control to Off. When power is restored, wait 3 minutes to restart the air conditioner to prevent tripping of the compressor overload. | |
| The current interrupter device is tripped. | Press the RESET button located on the power cord plug. If the RESET button will not stay engaged, discontinue use of the air conditioner and contact a qualified service technician. | |
| Air conditioner does not cool as it should | Airflow is restricted. | Make sure there are no curtains, blinds, or furniture blocking the front of the air conditioner. |
| The temp control may not be set correctly. | In COOL model, press the DECREASE▼pad. | |
| The air filter is dirty. | Clean the filter at least every 2 weeks.See the care and Maintenance section. | |
| The room may have been hot. | When the air conditioner is first turned on, you need to allow time for the room to cool down. | |
| Cold air is escaping. | Check for open furnace floor registers and cold air returns. | |
| Cooling coil have iced up. | See Air Conditioner Freezing Up below. | |
| Air conditioner freezing up | The cooling coils are iced over. | Ice may block the air flow and obstruct the air conditioner from properly cooling the room.Set the mode control at High Fan or High Cool |
| Water drips outside | Hot, humid weather. | This is normal. |
| Water drips indoors | The air conditioner is not tilted to the outside. | For proper water disposal, make sure the air conditioner slants slightly from the case front to the rear. |
| Water collects in base pan | Moisture removed from air and drains into base pan. | This is normal for a short period in areas with little humidity; normal for a longer period in very humid areas. |
| Air conditioner turns on and off rapidly. | Dirty air filter - air restricted. | Clean air filter. |
| Outside temperature extremely hot. | Set FAN speed to a faster setting to bring air through cooling coils more frequently. | |
| Noise when unit is cooling. | Air movement sound. | This is normal. If too loud, set to lower FAN setting. |
| Window vibration - poor installation. | Refer to installation instructions or check with installer. | |
| Remote Sensing Deactivating Prematurely. | Remote control not located within range. | Place remote control within 20 feet & 120° radius of the front of the unit. |
| Remote control signal obstructed. | Remove obstruction. | |
| Room too cold. | Set temperature too low. | Increase set temperature. |
* You can refer to the Energy Star program in detail at www.energystar.gov.
* If you see "CH" in the display, please call 1-800-243-0000.
TABLA DE CONTENIDOS
natural_image
Simple line drawing of people enjoying a picnic with sun, palm trees, and plates (no text or symbols)natural_image
Illustration of a cartoon character with wings and a phone connected to an electric plug, with a prohibition symbol nearby (no text or labels)text_image
Illustration showing a person using a laptop to interact with a computer screen displaying a cartoon character, with a crossed-out symbol nearby.natural_image
Illustration of a smiling book and a smiling document with a speech bubble, accompanied by an exclamation mark (no text or symbols on the figures themselves)natural_image
Illustration of a person interacting with a device labeled 'X' (no text or symbols on the device itself)natural_image
Illustration of a device with a warning symbol and electrical plug, no text or symbols presenttext_image
Diagram showing a person hanging from a book next to an office chair with a lamp, and a cross symbol indicating a prohibition or prohibition.natural_image
Illustration of a device connected to a power outlet with a bulb and switch (no text or symbols)text_image
Illustration showing a person using a power switch to smoke from a device, with an exclamation mark indicating warning.natural_image
Illustration of a person cleaning a window with a refrigerator and electric heater (no text or symbols)natural_image
Illustration of a book with a surprised expression and a crossed-out prohibition symbol (no text or labels)natural_image
Illustration of a person reacting to a box with a cross symbol (no text or labels)text_image
Illustration showing a person interacting with a device and a box, with an exclamation mark indicating warning or error.natural_image
Illustration of a person holding a device with a prohibition symbol nearby (no text or labels)text_image
Illustration showing a book with a child, a crossed-out 'Wax' symbol, and two labeled bottles with 'Water' and 'Infer', suggesting waste management or disposal.text_image
Illustration showing a person reacting to a broken banknote with a warning symboltext_image
Illustration showing a person standing next to a stack of books with an exclamation mark, and a magnified inset highlighting the concept of using a device.natural_image
Illustration of a person using a handheld device to interact with a box and switch (no text or symbols present)text_image
Hand-drawn illustrations showing a snake, a cross symbol, a mouse, and a bird with a hat, likely representing a biological or educational concept.natural_image
Illustration of a hand holding a battery connected to a plug and a bulb, with no text or symbols present.natural_image
Illustration of a firecracker with smoke and a burning stove, no text or symbols presentnatural_image
Illustration of a person interacting with a device, no text or symbols presentnatural_image
Illustration of a person incubating a baby in a cage with a prohibition symbol (no text or labels)natural_image
Illustration of a person inside a box with a prohibition symbol falling, no text or symbols presentOperación
natural_image
Illustration of a medical device with a patient inside, showing a crosshair symbol and a sleeping brain (no text or labels)natural_image
Illustration of a potted plant with a box and a prohibition symbol (no text or labels)natural_image
Illustration of a person reacting to a device with an exclamation mark (no text or symbols present)No se suba a la unidad interior/exterior ni coloque objetos sobre la misma.
natural_image
Illustration of a box with a cross symbol above it, placed on top of a computer case (no text or symbols present)natural_image
Illustration of a person assembling a laptop with an exclamation mark (no text or symbols present)text_image
Illustration showing a person reacting to a chemical reaction with a labeled box and smoke, symbolizing environmental toxicity or pollution.natural_image
Illustration of a person opening a window with a warning symbol above (no text or symbols present)natural_image
Illustration of a person opening a window with a magnified inset showing people inside (no text or symbols)natural_image
Illustration of a person inside a device with a magnified inset showing a barcode and a prohibition symbol (no text or labels)natural_image
Illustration of hands pouring liquid from a pipe with a warning symbol (no text or labels)natural_image
Illustration of a screwdriver with a magnified inset showing the tip (no text or symbols)natural_image
Line drawing of a pair of scissors (no text or symbols)*Nivel

* Lápiz
text_image
29" 40" 18" minnatural_image
Illustration of a computer tower with a hand inserting a rack into the base (no text or symbols visible)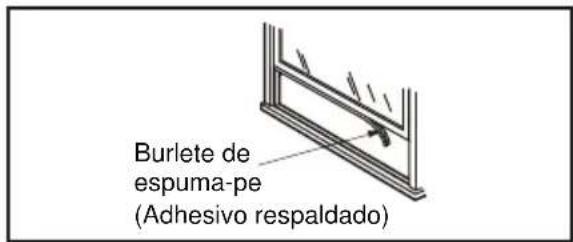
natural_image
Isometric line drawing of a server rack unit with internal compartments and ventilation grilles (no text or symbols)natural_image
Technical illustration of a microwave oven with an inset showing internal structure (no text or symbols)text_image
Diagram showing a hand holding a device with a close-up of its internal structure and a magnified view of the component being inserted.natural_image
Line drawing of an air conditioner unit with a hand operating it (no text or symbols)natural_image
Illustration of hands using a handheld device to interact with a device, enclosed in a circle (no text or symbols)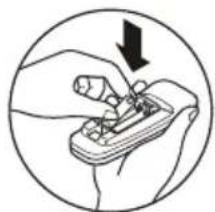
natural_image
Illustration of a hand using a tool to adjust or install a component, with a downward arrow indicating action (no text or symbols present)natural_image
Line drawing of a server rack with ventilation grilles and a hand pointing to the front panel (no text or symbols)natural_image
Line drawing of a portable air conditioner unit with ventilation grilles and a hand pointing to the front panel (no text or symbols)text_image
Drain Pipe → Drain Cap ① Hang ② Push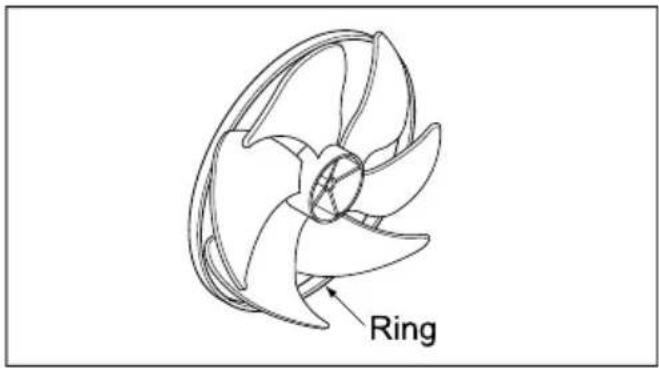
text_image
Ring
natural_image
Line drawing of a computer air conditioner unit with hands operating it, showing airflow direction (no text or symbols)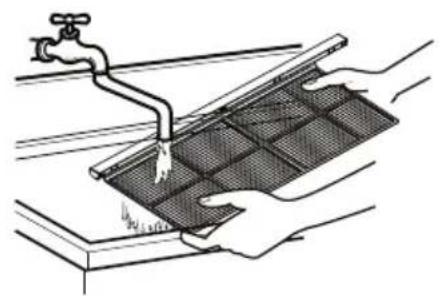
natural_image
Illustration of hands cleaning a tiled surface with a faucet (no text or symbols)natural_image
Line drawing of a hand cleaning a window with a cloth (no text or symbols)WHAT THIS WARRANTY COVERS:
LG Electronics U.S.A., Inc. ("LG") warrants your LG Room Air Conditioner ("product") against defect in materials or workmanship under normal household use, during the warranty period set forth below, LG will, at its option, repair or replace the product. This limited warranty is valid only to the original retail purchaser of the product, is not assignable or transferrable to any subsequent purchaser or user, and applies only when the product is purchased through an LG authorized dealer or distributor and used within the United States ("U.S.") including U.S. Territories.
Note: Replacement products and repair parts may be new or factory-remanufactured and are warranted for the remaining portion of the original unit's warranty period or ninety (90) days, whichever is longer. Please retain dated receipt or delivery ticket as evidence of the Date of Purchase for proof of warranty (you may be required to submit a copy to LG or authorized representative).
WARRANTY PERIOD:
1 year from the Date of Purchase: Any internal/ functional Parts and Labor.
HOW SERVICE IS HANDLED: In-Home Service
In-home service will be provided during the warranty period subject to availability within the United States. In-home service may not be available in all areas. To receive in-home service, the product must be unobstructed and accessible to service personnel. If during in-home service repair cannot be completed, it may be necessary to remove, repair and return the product. If in-home service is unavailable, LG may elect, at our option, to provide for transportation of our choice to and from a LG authorized service center.
THIS LIMITED WARRANTY DOES NOT COVER:
- Service trips to deliver, pick up, or install the product or for instruction on product use.
- Replacing house fuses or resetting of circuit breakers, correction of house wiring or plumbing, or correction of product installation.
- Damage or failure caused by leaky/ broken/ frozen water pipes, restricted drain lines, inadequate or interrupted water supply or inadequate supply of air.
- Damage or failure caused by accidents, pests and vermin, lightning, wind, fire, floods or acts of God.
- Damage or failure resulting from misuse, abuse, improper installation, repair or maintenance. Improper repair includes use of parts not approved or specified by LG.
- Damage or failure caused by unauthorized modification or alteration to the product.
-
Damage or failure caused by incorrect electrical current, voltage, or plumbing codes.
-
Cosmetic damage, including scratches, dents, chips or other damage to the finish of the product, unless such damage results from defects in materials or workmanship and is reported to LG within seven (7) calendar days from the date of delivery.
- Damage or missing items to any display, open box, discounted, or refurbished product.
- Product where the original factory serial numbers have been removed, defaced or changed in any way.
- Repairs when product is used in other than normal and usual household use (e.g. rental, commercial use, offices, or recreational facilities) or contrary to the instructions outlined in the owner's manual.
- The removal and reinstallation of the Product if it is installed in an inaccessible location.
THIS WARRANTY IS IN LIEU OF ANY OTHER WARRANTY, EXPRESS OR IMPLIED, INCLUDING AND WITHOUT LIMITATION TO, ANY WARRANTY OF MERCHANTABILITY OR FITNESS FOR A PARTICULAR PURPOSE. TO THE EXTENT ANY IMPLIED WARRANTY IS REQUIRED BY LAW, THIS WARRANTY IS LIMITED IN DURATION TO THE TERM PERIOD EXPRESSED ABOVE. REPAIR OR REPLACEMENT AS PROVIDED UNDER THIS WARRANTY IS THE EXCLUSIVE REMEDY FOR THE CUSTOMER. NEITHER THE MANUFACTURER NOR ITS U.S. DISTRIBUTOR SHALL BE LIABLE FOR ANY INCIDENTAL, CONSEQUENTIAL, INDIRECT, SPECIAL, OR PUNITIVE DAMAGES OF ANY NATURE, INCLUDING AND WITHOUT LIMITATION TO, LOST REVENUES OR PROFITS, OR ANY OTHER DAMAGE, WHETHER BASED IN CONTRACT, TORT, OR OTHERWISE.
SOME STATES DO NOT ALLOW THE EXCLUSION OR LIMITATION OF INCIDENTAL OR CONSEQUENTIAL DAMAGES OR LIMITATIONS ON HOW LONG AN IMPLIED WARRANTY LASTS, SO THE ABOVE EXCLUSION OR LIMITATION MAY NOT APPLY TO YOU. THIS WARRANTY GIVES YOU SPECIFIC LEGAL RIGHTS AND YOU MAY ALSO HAVE OTHER RIGHTS THAT VARY FROM STATE TO STATE.
HOW TO OBTAIN WARRANTY SERVICE & ADDITIONAL INFORMATION:
Call 1-800-243-0000 or visit our website at www.lg.com.
Mail to: LG Customer Information Center (ATTN: CIC)
201 James Record Road, Huntsville, AL 35824
text_image
LG Life's Good
LG ELECTRONICS, INC. 1000 Sylvan Ave., Englewood Cliffs, NJ 07632
LG Customer Information Center
1-800-243-0000
Register your product Online!
www.lgappliances.com