
Expression Premium ET-7750 - Printer EPSON - Free user manual and instructions
Find the device manual for free Expression Premium ET-7750 EPSON in PDF.


User questions about Expression Premium ET-7750 EPSON
0 question about this device. Answer the ones you know or ask your own.
Ask a new question about this device
Download the instructions for your Printer in PDF format for free! Find your manual Expression Premium ET-7750 - EPSON and take your electronic device back in hand. On this page are published all the documents necessary for the use of your device. Expression Premium ET-7750 by EPSON.
USER MANUAL Expression Premium ET-7750 EPSON
ET-7750 User's Guide.... 13
Your Ink Tank System 14
Product Basics 15
Using the Control Panel 15
Control Panel Buttons and Lights 16
Using the LCD Screen 17
Adjusting Control Panel Position 17
Changing LCD Screen Language 18
Turning On Quiet Mode 18
Product Parts Locations 18
Product Parts - Top.... 19
Product Parts - Front 20
Product Parts - Inside 22
Product Parts - Back 23
The Power Off and Sleep Timers 23
ChangingthePowerOffTimerSettingfromtheControlPanel....24
ChangingtheSleepTimerSettingfromtheControlPanel....24
EpsonConnectSolutionsforSmartphones,Tablets,andMore....25
Setting Up Epson Connect Services 26
Using Epson Email Print 27
Using the Epson iPrint Mobile App 27
Using the Epson Creative Print Mobile App 28
Using Epson Remote Print 28
Using Epson Scan to Cloud 29
Using AirPrint 30
Using Google Cloud Print 30
Setting Up Google Cloud Print on a Chromebook 31
Using the Mopria Print Service 32
Android Printing Using the Epson Print Enabler 33
Using Fire OS Printing 33
Using Windows 10 Mobile Printing 34
Using Epson Print and Scan App with Windows Tablets 35
Wi-Fi or Wired Networking.... 36
Network Security Recommendations 36
Wi-Fi Infrastructure Mode Setup.... 37
SelectingWirelessNetworkSettingsfromtheControlPanel....38
Wi-Fi Direct Mode Setup 40
Enabling Wi-Fi Direct Mode 40
Changing the Wi-Fi Direct Mode Password 42
Wi-Fi Protected Setup (WPS).... 43
Using WPS to Connect to a Network 44
Printing a Network Status Sheet.... 44
Changing or Updating Network Connections 45
Accessing the Web Config Utility 46
ChangingaUSBConnectiontoaWi-FiConnection....46
ChangingaWi-FiConnectiontoaWiredNetworkConnection....46
Connecting to a New Wi-Fi Router 47
Disabling Wi-Fi Features 47
Loading Paper 49
Loading Paper in Cassette 1 (Upper Cassette) 49
Loading Paper in Cassette 2 (Lower Cassette) 54
Loading Paper and Envelopes in the Rear Paper Feed Slot 59
Selecting the Paper Settings for Each Source - Control Panel 64
Paper or Media Type Settings - Control Panel 66
Turning Off the Paper Setting Alert....66
Paper Loading Capacity 67
Available Epson Papers 69
Borderless Paper Type Compatibility 71
Paper or Media Type Settings - Printer Software 72
Placing Originals on the Product 74
Placing Originals on the Scanner Glass 74
Copying 76
Copying Documents or Photos.... 76
Paper Type Settings - Copying 77
Paper Size Settings - Copying.... 78
Copying Options....78
Copying and Restoring Photos....81
Printing from a Computer 83
Printing with Windows 83
Selecting Basic Print Settings - Windows 83
Paper Source Options - Windows 86
Print Quality Options - Windows 86
Multi-Page Printing Options - Windows 87
Selecting Double-sided Printing Settings - Windows 87
Double-sided Printing Options - Windows 89
Print Density Adjustments - Windows 90
SelectingAdditionalLayoutandPrintOptions-Windows....91
CustomColorCorrectionOptions-Windows....93
ImageOptionsandAdditionalSettings-Windows....94
Header/Footer Settings - Windows 95
Selecting a Printing Preset - Windows.... 96
Selecting Extended Settings - Windows 97
Extended Settings - Windows 98
Printing Your Document or Photo - Windows.... 99
Checking Print Status - Windows 101
Selecting Default Print Settings - Windows.... 101
ChangingtheLanguageofthePrinterSoftwareScreens....102
Changing Automatic Update Options 104
Printing with the Built-in Epson Driver - Windows 10 S.... 105
Selecting Print Settings - Windows 10 S.... 105
Printing on a Mac 109
Selecting Basic Print Settings - Mac.... 110
Paper Source Options - Mac.... 114
Print Quality Settings - Mac.... 114
Print Options - Mac 115
Selecting Page Setup Settings - Mac 115
Selecting Print Layout Options - Mac.... 116
Selecting Double-sided Printing Settings - Mac.... 117
Double-sidedPrintingOptionsandAdjustments-Mac....118
Managing Color - Mac 119
Color Matching and Color Options - Mac 120
Selecting Printing Preferences - Mac 121
Printing Preferences - Mac.... 122
Printing Your Document or Photo - Mac 123
Checking Print Status - Mac.... 123
Cancelling Printing Using a Product Button 124
Scanning 125
Starting a Scan.... 125
Starting a Scan Using the Product Control Panel 125
Scan to Memory Card Options.... 127
Changing Default Scan Job Settings 128
Starting a Scan Using the Epson Scan 2 Icon 128
Starting a Scan from a Scanning Program.... 131
Scanning from Smart Devices 133
Scanning in Epson Scan 2 133
Additional Scanning Settings - Main Settings Tab 136
AdditionalScanningSettings-AdvancedSettingsTab....136
SavingScannedDocumentsasaSearchablePDF....137
Using Memory Cards with Your Product.... 140
Inserting a Memory Card 140
Memory Card Types 141
Memory Card File Specifications.... 141
Removing a Memory Card.... 142
Printing from a Memory Card 142
Viewing and Printing Photos.... 143
ViewingandPrintingPhotosFromtheLCDScreen....143
Print Setting Options - Memory Card 145
PhotoAdjustmentOptions-MemoryCard....146
Printing Photo Layouts from a Memory Card 148
Photo Layout Options 150
Printing Photo Greeting Cards.... 151
CreatingandPrintingaGreetingCardTemplate....151
Printing a Greeting Card from a Template.... 152
Transferring Photos on a Memory Card 153
SettingUpFileSharingforPhotoTransfersfromYourComputer....153
TransferringPhotosfromaMemoryCardtoYourComputer....154
Using an External Device with Your Product 156
Printing from a Camera 156
Selecting Print and Photo Adjustment Settings 156
Print Settings - Camera 159
Photo Adjustments - Camera 161
Connecting and Printing from a Camera.... 162
Printing from a Camera Wirelessly 163
Viewing or Printing from a USB Flash Drive or External Device 164
USB Device File Specifications 164
ConnectingandUsingaUSBFlashDriveorExternalDevice....164
Printing Personalized Projects.... 166
Printing Coloring Book Pages 166
Printing Personalized Note Paper 167
Printing Lined Paper, Graph Paper, and Music Sheets 169
Printing Calendar Pages 170
Printing on CDs/DVDs.... 172
CD/DVD Printing Features 172
Loading a CD/DVD 172
Removing a Printed CD/DVD 175
Placing a CD/DVD on the Scanner Glass.... 176
Copying onto a CD/DVD 176
Printing Photos from a Memory Card Onto a CD/DVD 177
Printing a Jewel Case Insert from a Memory Card 179
Printing on CDs/DVDs from a Computer 180
Starting Epson Print CD - Windows 181
Printing Your CD/DVD Design - Windows 182
Starting Epson Print CD - Mac 183
Printing Your CD/DVD Design - Mac 184
Refilling Ink 186
Ink Safety Precautions 186
Check Ink Levels 187
Checking Ink Levels on Your Product 188
Checking Ink Levels with Windows.... 188
Checking Ink Levels - Mac.... 190
Disabling Special Offers with Windows 192
Purchase Epson Ink and Maintenance Box.... 193
Ink Bottle and Maintenance Box Part Numbers 193
Refilling the Ink Tanks 193
Replacing the Maintenance Box.... 199
Adjusting Print Quality 203
Print Head Maintenance....203
Print Head Nozzle Check 203
CheckingtheNozzlesUsingtheProductControlPanel....204
CheckingtheNozzlesUsingaComputerUtility....206
Print Head Cleaning 208
CleaningthePrintHeadUsingtheProductControlPanel....209
CleaningthePrintHeadUsingaComputerUtility....211
Power Cleaning 213
PowerCleaningUsingtheProductControlPanel....213
Power Cleaning Using a Computer Utility 214
Print Head Alignment 216
AligningthePrintHeadUsingtheProductControlPanel....216
Cleaning the Paper Path 218
CleaningtheRearPaperFeedPathUsingtheCleaningSheet....219
Cleaning the Printer Head Path 220
Checking the Number of Sheets.... 222
Checking the Sheet Counter - Windows 222
Checking the Sheet Counter - Mac 223
Cleaning and Transporting Your Product 225
Cleaning Your Product 225
Transporting Your Product 225
Solving Problems 230
Checking for Software Updates.... 230
Product Status Messages 231
Message Appears Prompting You to Reset Ink Levels 233
Running a Product Check 233
Resetting Control Panel Defaults 235
Solving Setup Problems 236
Noise After Filling the Ink 236
Software Installation Problems 236
Control Panel Setup Problems 237
Solving Network Problems 237
ProductCannotConnecttoaWirelessRouterAccessPoint....237
NetworkSoftwareCannotFindProductonaNetwork....238
Product Does Not Appear in Mac Printer Window 239
Cannot Print Over a Network 240
Cannot Scan Over a Network 241
Solving Copying Problems 242
Product Makes Noise, But Nothing Copies 242
Product Makes Noise When It Sits for a While.... 242
Solving Paper Problems.... 243
Paper Feeding Problems 243
Paper Jam Problems Inside the Product 244
Paper Jam Problems in the Paper Cassette 246
Paper Jam Problems in the Rear Cover 247
Paper Ejection Problems 249
Solving Problems Printing from a Computer 249
Nothing Prints 250
ProductIconDoesNotAppearinWindowsTaskbar....250
Printing is Slow 251
Solving Page Layout and Content Problems 252
Inverted Image.... 253
Too Many Copies Print 253
Blank Pages Print 253
Incorrect Margins on Printout.... 254
Border Appears on Borderless Prints 254
Incorrect Characters Print.... 255
Incorrect Image Size or Position 255
Slanted Printout 256
Solving Print Quality Problems 256
White or Dark Lines in Printout 257
Blurry or Smeared Printout 258
Faint Printout or Printout Has Gaps 259
Grainy Printout 260
Incorrect Colors 261
Solving Scanning Problems 262
Scanning Software Does Not Operate Correctly 262
Cannot Start Epson Scan 2 263
Solving Scanned Image Quality Problems 264
Image Consists of a Few Dots Only 264
Line of Dots Appears in All Scanned Images 265
Straight Lines in an Image Appear Crooked 265
Image is Distorted or Blurry 265
Image Colors are Patchy at the Edges 266
Image is Too Dark 266
BackofOriginalImageAppearsinScannedImage....266
Ripple Patterns Appear in an Image 266
Image is Scanned Upside-Down 267
ScannedImageColorsDoNotMatchOriginalColors....267
Scan Area is Not Adjustable in Thumbnail Preview 267
Scanned Image Edges are Cropped 268
Solving Memory Card Problems.... 268
Memory Card Does Not Fit Into a Slot 268
CannotVieworPrintPhotosfromaMemoryCardorDevice....268
CannotTransferPhotostoorfromaMemoryCardorDevice....269
Solving CD/DVD Problems.... 269
CD/DVD Jam Problems 269
Image Not Centered on CD/DVD 270
Ink Smears on CD/DVD 270
Faint Image on CD/DVD 270
Uninstall Your Product Software.... 271
Uninstalling Product Software - Windows 271
Uninstalling Product Software - Mac 272
Where to Get Help 273
Technical Specifications 274
Windows System Requirements 274
Mac System Requirements 275
Paper Specifications 275
Printable Area Specifications 276
Scanning Specifications 279
Ink Specifications 279
Memory Card Specifications 280
External USB Device Specifications.... 281
Dimension Specifications 281
Electrical Specifications 282
Environmental Specifications 282
Interface Specifications 282
Network Interface Specifications 283
Safety and Approvals Specifications 284
Notices 285
Important Safety Instructions.... 285
General Product Safety Instructions 285
Wireless Connection Safety Instructions 287
LCD Screen Safety Instructions.... 287
FCC Compliance Statement.... 287
Binding Arbitration and Class Waiver 288
Trademarks 291
Copyright Notice.... 292
ANoteConcerningResponsibleUseofCopyrightedMaterials....293
DefaultDelayTimesforPowerManagementforEpsonProducts....293
Copyright Attribution 293
ET-7750User'sGuide
Welcome to the ET-7750 User's Guide.
For a printable PDF copy of this guide, click here.
YourInkTankSystem
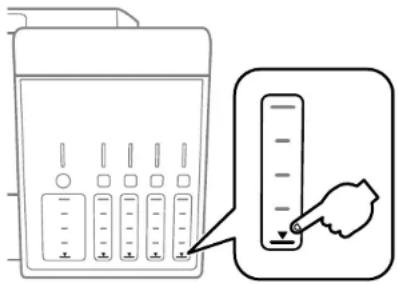
Youshouldvisuallychecktheinklevelsintheproduct'sinktanksregularly.Foroptimumprintingresults, refilltheinktankstotheupperlineatleastonceayear.
text_image
Diagram showing a device with labeled buttons and a hand pointing to a vertical scale, likely illustrating a measurement or control interface.Note: The product has a low ink alert system. The accuracy of this system depends on the user refilling theinktankscorrectly. Theproductcannotdirectlymeasuretheinklevelsinthetanks;instead estimatestheamountofinkremainingbyinternallymonitoringinkusage. Thelowinkalertsystemmay generateinaccuratemessagesiftheinktanksarenotrefilledaccordingtotheseinstructions.
Visuallychecktheinklevelsintheproduct'sinktankstoconfirmmtheactualinklevels.Continueduseof theproductwhentheinkisexpendedcoulddamagetheproduct.
Torefilltheinktanksandresettheinklevels, clickthelinkbelow.
Relatedtopics
RefillingInk
ProductBasics
Seethesectionstolearnaboutthebasicfeaturesofyourproduct.
UsingtheControlPanel
ProductPartsLocations
ThePowerOffandSleepTimers
EpsonConnectSolutionsforSmartphones,Tablets,andMore
UsingAirPrint
UsingGoogleCloudPrint
UsingtheMopriaPrintService
AndroidPrintingUsingtheEpsonPrintEnabler
UsingFireOSPrinting
UsingWindows10MobilePrinting
UsingEpsonPrintandScanAppwithWindowsTablets
UsingtheControlPanel
Seethesectionstolearnaboutthecontrolpanelandselectcontrolpanelsettings.
ControlPanelButtonsandLights
UsingtheLCDScreen
AdjustingControlPanelPosition
ChangingLCDScreenLanguage
TurningOnQuietMode
Parenttopic:ProductBasics
ControlPanelButtonsandLights
flowchart
graph TD
    A["Power"] --> B["Home"]
    B --> C["Display"]
    C --> D["Function 1"]
    C --> E["Function 2"]
    C --> F["Function 3"]
    C --> G["Function 4"]
    C --> H["Function 5"]
    C --> I["Function 6"]
    C --> J["Function 7"]
    C --> K["Function 8"]
    C --> L["Function 9"]
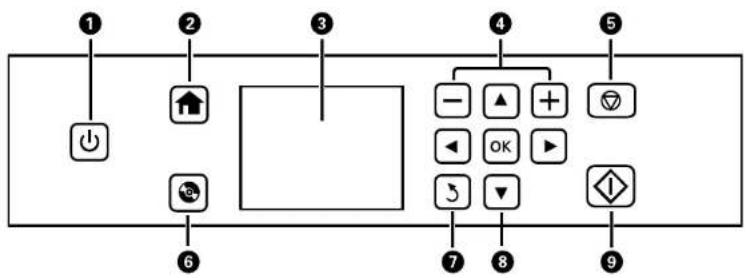
1 ⏻ powerbuttonandlight
2 homebutton
3LCDscreen
4+and-buttons
5 ▽ cancelbutton
6 CDbutton
7 backbutton
8ArrowbuttonsandOKbutton
9startButton
Parenttopic: UsingtheControlPanel
UsingtheLCDScreen
text_image
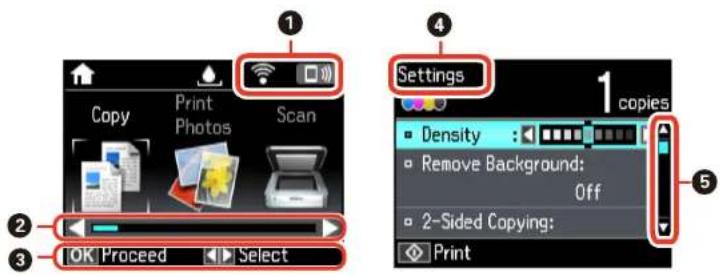
1 Copy Print Photos Scan 2 OK Proceed Select Settings 1 copies Density : Remove Background: Off 2-Sided Copying: Print1Displaysthenetworkstatus
2Youcanscrollleftandrightwhenthesearrowsaredisplayed
3Displaysavailablebuttonoptions
4Screenname
5Youcanscrollupanddownwhenthesearrowsaredisplayed
To view a list of the icons and a description of their use, select Help > Icon List on the LCD screen.
Parenttopic: UsingtheControlPanel
AdjustingControlPanelPosition
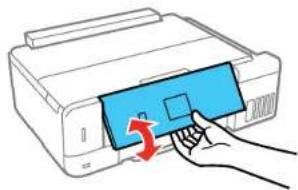
You can adjust the position of the control panel to make it as aerto access. Raise or lower it to the desired angle as shown.
natural_image
Illustration of a hand inserting a blue rectangle into a printer (no text or symbols)Parenttopic: UsingtheControlPanel
ChangingLCDScreenLanguage
YoucanchangethelanguageusedontheLCDscreen.
- Pressthehombutton, if necessary.
- PressthearowbuttonstoselectSettingsandpresstheOKbutton.
- SelectPrinterSetupandpresstheOKbutton.
- SelectLanguageandpresstheOKbutton.
- SelectalanguageandpresstheOKbutton.
6.Pressthehonn-buttontoexit.
Parenttopic: UsingtheControlPanel
TurningOnQuietMode
You can reduce the noisethe product makes by turning on the Quiet Modesetting.
Note: Turning on this setting may reduce printspeed.
- Pressthehonn button, if necessary.
- PressthearowbuttonstoselectSettingsandpresstheOKbutton.
- SelectPrinterSetupandpresstheOKbutton.
- SelectQuietMode and press the OK button.
- SelectOnandpresstheOKbutton.
6.Pressthehombuttontoexit.
Parenttopic: UsingtheControlPanel
ProductPartsLocations
Seethesesectionstoidentifythepartsonyourproduct.
ProductParts-Top
ProductParts-Front
ProductParts-Inside
ProductParts-Back
Parenttopic:ProductBasics
ProductParts-Top
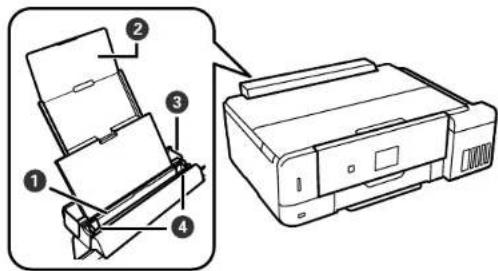
text_image
Diagram showing printer assembly steps with numbered parts for identification1Rearpaperfeedslot
2Rearpaperfeedsupport
3Rearpaperfeedslotcover
4Rearpaperfeededgeguides
Parenttopic:ProductPartsLocations
ProductParts-Front
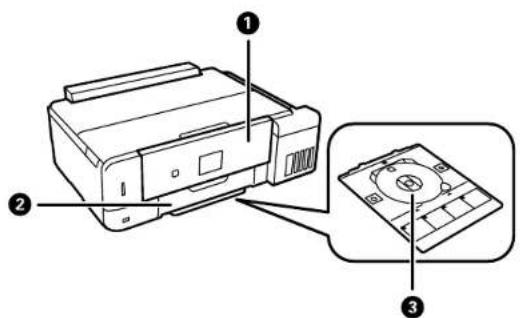
text_image
Diagram showing a printer with labeled parts: print, printer, and cover with three numbered annotations.1Controlpanel
2Frontcover
3CD/DVDtray
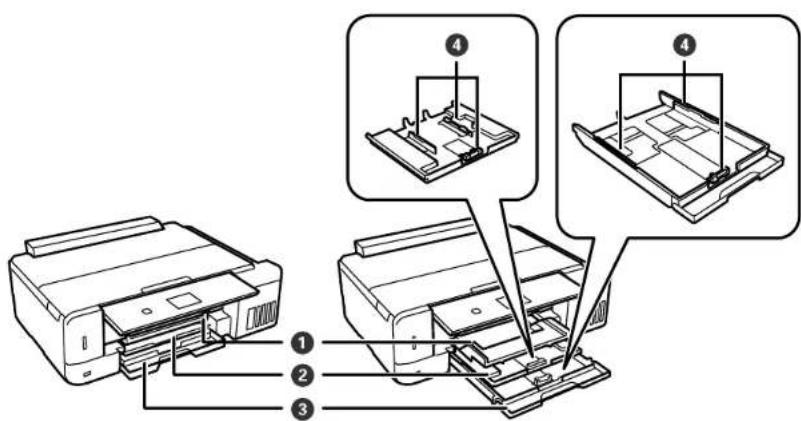
text_image
Technical diagram of a printer with numbered parts and exploded view, showing internal structure and assembly steps.1 Outputtray
2Cassette1(uppercassette)
3Cassette2(lowercassette)
4Cassetteedgeguides
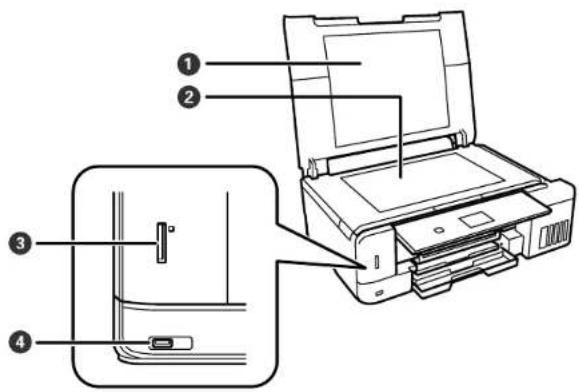
text_image
Diagram of a printer with labeled parts including paper, printer body, and door panel1Documentcover
2Scannerglass
3Memorycardslot
4 USBTypeAportforexternaldevices
Parenttopic:ProductPartsLocations
ProductParts-Inside
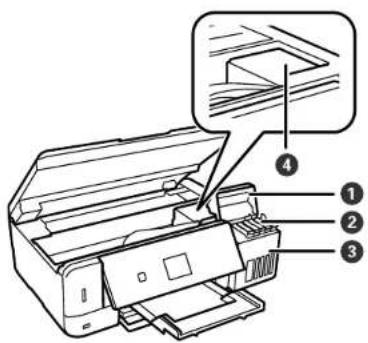
text_image
Technical diagram of a printer with numbered parts labeled 1 to 4, showing internal structure and assembly.1Inktankcover
2Inktanks
3Inktankunit
4Printhead
Parenttopic:ProductPartsLocations
ProductParts-Back
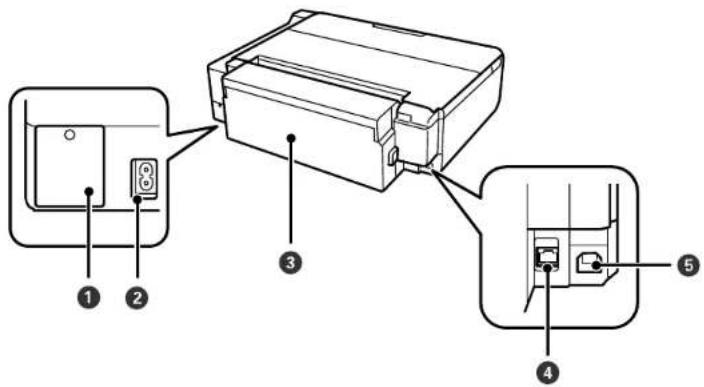
text_image
Diagram of a printer with labeled parts including an electrical outlet, printer, and internal components1 Maintenanceboxcover
2ACinlet
3Rearcover
4USBport
5LANport
Parenttopic:ProductPartsLocations
ThePowerOffandSleepTimers
Theproductenterssleepmodeorturnsoffautomaticallyifitisnotusedforaperiodoftime. Youcan adjustthetimeperiodbeforepowermanagementbegins, butincreasingthetimereducestheproduct's energyefficiency.
ChangingthePowerOffTimerSettingfromtheControlPanel ChangingtheSleepTimerSettingfromtheControlPanel
Parenttopic:ProductBasics
ChangingthePowerOffTimerSettingfromtheControlPanel
Youcanusetheproduct'scontrolpaneltochangethetimeperiodbeforetheprinterturnsoff automatically.
- Pressthehonrebutton, if necessary.
2.PressthearowbuttonstoselectSettingsandpresstheOKbutton. - SelectPrinterSetupandpresstheOKbutton.
- SelectPowerOffTimerandpresstheOKbutton.
Youseethisscreen:
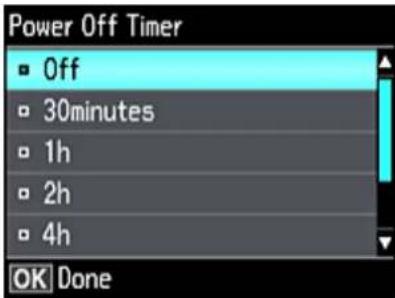
text_image
Power Off Timer Off 30minutes 1h 2h 4h OK Done- Selectthelengthoftimeafterwhichyouwanttheproducttoautomaticallyturnoffwhenitisnotin useandpresstheOKbutton.
6.Pressthehombuttontoexit.
Parenttopic:ThePowerOffandSleepTimers
ChangingtheSleepTimerSettingfromtheControlPanel
Youcanusetheproduct'scontrolpaneltochangethetimeperiodbeforetheproductenterssleepmode.
- Pressthehombutton, if necessary.
- PressthearrowbuttonstoselectSettingsandpresstheOKbutton.
-
SelectPrinterSetupandpresstheOKbutton.
-
SelectSleepTimerandpresstheOKbutton.
Youseethisscreen:
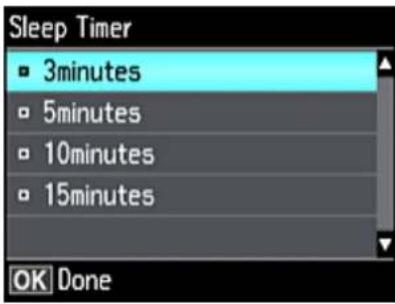
text_image
Sleep Timer ■ 3minutes □ 5minutes □ 10minutes □ 15minutes OK Done- Select the time period you want before the product goestosleep and press the OK button.
6.Pressthehomibuttontoexit.
Parenttopic:ThePowerOffandSleepTimers
EpsonConnectSolutionsforSmartphones,Tablets,andMore
Useyoursmartphone, tablet, orcomputertoprintandscandocuments, photos, emails, andwebpages from your home, office, orevenacrossthe globe.
Note: If you are using your Epson product with the Windows 10 S operating system, you cannot use the softwaresdescribedinthissection.YoualsocannotdownloadandinstallanyEpsonproductsoftware fromtheEpsonwebsiteforusewithWindows10S;youmustobtainsoftwareonlyfromtheWindows Store.
PrintfromanywherewiththeseEpsonConnectsolutions:
•EpsonEmailPrint
•EpsoniPrintMobileApp
•EpsonRemotePrint
ScanandsendafileasanemailoruploadittoanonlineservicedirectlyfromyourEpsonproductwithEpsonScantoCloudortheEpsoniPrintMobileApp.
SettingUpEpsonConnectServices
UsingEpsonEmailPrint
UsingtheEpsoniPrintMobileApp
UsingtheEpsonCreativePrintMobileApp
UsingEpsonRemotePrint
UsingEpsonScantoCloud
Parenttopic:ProductBasics
SettingUpEpsonConnectServices
If you did not activate your product's email address for use with EpsonConnect when you setup your product, you can activate using the product control panel.
- Pressthehomobutton, if necessary.
- PressthearowbuttonstoselectSettingsandpresstheOKbutton.
- SelectEpsonConnectServicesandpresstheOKbutton.
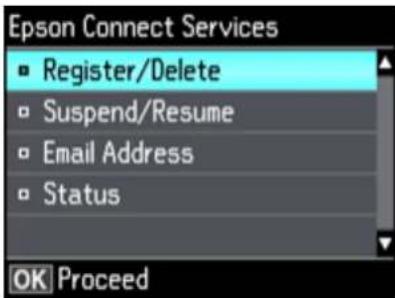
Youseethisscreen:
text_image
Epson Connect Services Register/Delete Suspend/Resume Email Address Status OK Proceed- SelectRegister/DeleteandpresstheOKbutton.
- SelectYesandpresstheOKbutton.
- Follow the instructions on the screento activate your product's email address.
Parenttopic: EpsonConnectSolutionsforSmartphones, Tablets, and More
UsingEpsonEmailPrint
WithEpsonEmailPrint,youcanprintfromanydevicethatcansendemail,suchasyoursmartphone, tablet,orlaptop.Justactivateyourproduct'suniqueemailaddress.Whenyouwanttoprint,attacha PDF,MicrosoftOfficedocument,orphototoanemailandsendittoyourproduct.Boththeemailandthe attachmentswillprintautomatically.
- Connect your product to your network. Seethelink below.
- If you did not overall ready setup Email Print when you installed your product software, seethelink below to use your product control panel to activate your unique email address. Or visit epson.com/connect (U.S), epson.ca/connect (Canada), or epsonconnect.com (Caribbean) to learn more about Email Print, create your Epson Connect account, and registry your product to the Epson Connect service.
3.Nowyouarereadytosendandprintemailstoyourproduct'sEmailPrintaddress.
Note: Go to epsonconnect.com and log into your Epson Connect account to personalize your product's email, adjustprintsettings, and setupotherEpsonConnectservices.
Parenttopic: EpsonConnectSolutionsforSmartphones, Tablets, and More
Relatedtasks
SettingUpEpsonConnectServices
Relatedtopics
Wi-FiorWiredNetworking
UsingtheEpsoniPrintMobileApp
UsethisfreeAppleandAndroidapptoprintandscanwithnetworkedEpsonproducts.EpsoniPrintlets youprintPDFs,MicrosoftOfficedocuments,photos,andwebpagesoverawirelessnetwork.Youcan scanandsaveafileonyourdevice,senditasanemail,oruploadittoanonline services such as Box, Dropbox, Evernote, or Google Drive.
- Connect your product to your wireless network. Seethelink below.
- Visit epson.com/connect (U.S), epson.ca/connect (Canada), or epson.com.jm/connect (Caribbean) tolearnmoreaboutEpsoniPrintandcheckthecompatibilityofyourmobiledevice.
- Download Epsoni Print from the Apple App Store or Google Play.
- Connect your mobile device to the same wireless network as your product.
5.OpenEpsoniPrintandselectyourEpsonproduct.
NowyouarereadytoprintorscanwithyourmobiledeviceandyourEpsonproduct.
Parenttopic: EpsonConnectSolutionsforSmartphones, Tablets, and More
Relatedtopics
Wi-FiorWiredNetworking
UsingtheEpsonCreativePrintMobileApp
UsethisfreeAppleandAndroidapptodothefollowing:
- Accessandprintyourmobiledevicephotos,includingInstagramandFacebookphotos
- Createcustomgreetingcardsandstationery
- PrintontoCD/DVDs
• Turnphotosintocoloringbooktemplates
Note: Notallfeaturesmaybesupportedbyyourproduct.
-
Connect your product to your wireless network. Seethelink below.
-
Visit epson.com/connect (U.S), epson.ca/connect (Canada), or epson.com.jm/connect (Caribbean) tolearnmoreaboutEpsonCreativePrintandcheckthecompatibilityofyourmobiledeviceandyour Epsonproduct.
-
Download Epson Creative Print from the Apple App Store or Google Play.
-
Connect your mobile device to the same wireless network that your product is using.
5.OpenEpsonCreativePrint.
NowyouarereadytogetcreativewithyourmobiledeviceandyourEpsonproduct.
Parenttopic: EpsonConnectSolutionsforSmartphones, Tablets, and More
Relatedtopics
Wi-FiorWiredNetworking
UsingEpsonRemotePrint
WithEpsonRemotePrintsoftware,youcanprintfromyourlaptopordesktopcomputertoanEpson Email-enabledproductanywhereintheworld.
-
ConnectyourEpsonproducttoyourwirelessnetwork.Seethelinkbelow.
-
If you did not ready setup an Epson Connect account when you installed your product software, visitepsonconnect.com to create your account and registry your product to the Epson Connect service.
Note: Make anote of your product's email address.
- Visitepsonconnect.com to learn more about Remote Print and how to download the Remote Print Driversoftware.
- Download and install the Remote Print software.
5.EntertheemailaddressandoptionalaccesskeyofyourEpsonproductduringRemotePrintsetup.
6.Nowyouarereadytoprintremotely.Selecttheprintcommandinyourlaptopordesktopcomputer applicationandchoosetheRemotePrintoptionforyourEpsonproduct.
Parenttopic: EpsonConnectSolutionsforSmartphones, Tablets, and More
Relatedtopics
Wi-FiorWiredNetworking
UsingEpsonScantoCloud
TheEpsonScantoCloudserviceallowsyoutoscanandsendafileasanemailoruploadittoanonline servicedirectlyfromyourEpsonproduct.RegisteranemailaddressoronlineservicessuchasBox, DropBox, Evernote, orGoogleDrivewithyourEpsonConnectaccount.
- Connect your Epson product to your network. Seethelink below.
- If you did not ready setup an Epson Connect account when you installed your product software, visitepsonconnect.com to create your account and registry your product to the Epson Connect service.
Note: Make anote of your product's email address and password.
- Visitepsonconnect.comtosignintoyouraccountwiththeemailaddressandpasswordyou selected.
- Select your product, select Scan to Cloud, and select Destination List.
5.ClickAdd, then follow the instructions on the screent to create your destination list.
6.NowyouarereadytouseScantoCloud.SelectthesettingforscanningtoScantoCloudonyourEpsonproductcontrolpanel.
Parenttopic: EpsonConnectSolutionsforSmartphones, Tablets, and More
Relatedtopics
Wi-FiorWiredNetworking
UsingAirPrint
AirPrintenablesinstantwirelessprintingfromiPhone,iPad,andiPodtouchwiththelatestversionofiOS,andMacwiththelatestversionofOSXormacOS.

Note: If you disabled paper configuration messages on your product control panel, you cannot use AirPrint.Seethelinkbelowtoenablethemessages,ifnecessary.
- Loadpaperinyourproduct.
- Setup your product for wireless printing. Seethelink below.
- Connect your Apple device to the same wireless network that your product is using.
4.Printfromyourdevicetoyourproduct.
Note: Fordetails, seetheAirPrintpageontheApplewebsite.
Parenttopic:ProductBasics
Relatedtopics
Wi-FiorWiredNetworking
UsingGoogleCloudPrint
WithaGoogleAccount,youcanprintfromyourAppleorAndroiddevicetoyourEpsonproduct.Youcan alsoprintfromChromebooksandtheGoogleChromebrowserwithoutdriversorcables.
- Connect your Epson product to your wireless network. Seethelink below.
- Note your product's IP address by checking your network status. Seethelink below.
- Connect your computer or your Apple or Android device to the same wireless network as your Epson product.
-
Enteryourproduct'sIPaddressintotheaddressbarofawebbrowser.
-
SelecttheGoogleCloudPrintServicesoption.
Note: If you don't see the Google Cloud Print Services option, turn your product off and back on. If the option still doesn't appear, select the Firmware Update option and follow the on-screen instructionstoupdateyourproduct.
6.ClickRegister.
7. Select the checkbox to agree to the Usage Advisory and click Next.
8.ClickOKtolaunchthesign-inpage.
Aseparatebrowserwindowopens.
- Enter your Google Account username and password and click Sign in, or, if you don't have an account, click SignupforanewGoogleAccountandfollowtheon-screeninstructions.
- ClickFinishprinterregistrationtocompletesetupandprintatestpage.
YourproductisnowlinkedtoyourGoogleAccountandcanbeaccessedfromanyChromebook, computer, Apple or Android device with Internet access. Visit Epson Support for Google Cloud Print (U.S) or Epson Support for Google Cloud Print (Canada) for more information on using Google Cloud Print,ortheGoogleCloudPrintwebsiteforalistofsupportedapps.
SettingUpGoogleCloudPrintonaChromebook
Parenttopic:ProductBasics
Relatedtasks
PrintingaNetworkStatusSheet
Relatedtopics
Wi-FiorWiredNetworking
SettingUpGoogleCloudPrintonaChromebook
WithaGoogleAccount, you can print from a Chromebook without drivers or cables.
- Connect your Epson product to your wireless network. Seethelink below.
- TurnonyourChromebook and connectittothesamewirelessnetworkasyourproduct.
Note: SeeyourChromebook's documentation for detailson connecting to anNetwork.
3.Dooneofthefollowing:
- ClickAddtoCloudPrintinthenotificationthatappearsinthecornerofyourChromebook screen.
Note: If you do not see a notification, check to see if a number appears in the status area at the lower-right corner of the screen. Click this number to open the notifications menu, then click Add toCloudPrint.
- Openawebbrowserandenterchrome://devicesintheaddressbar.Skiptostep4.
- Ifyouseearegistrationconfirmationscreeninstead,clickRegister.
4.ClickAddDevice.
-
ClicktheRegisterbuttonthatappearsnexttoyourproduct.
-
Click Register on the confirmation screen. Your product's LCD screen displays a confirmation message.
- Select OK or press the OK button on your product to confirm the Google Cloud Print connection and printatestpage.
YourproductisnowlinkedtoyourGoogleAccountandcanbeaccessedfromanyChromebook,iPhone, or Android phone with Internet access. Visit Epson Support for Google Cloud Print (U.S) or Epson Support for Google Cloud Print (Canada) for more information on using Google Cloud Print, or the GoogleCloudPrintwebsiteforalistofsupportedapps.
Parenttopic: UsingGoogleCloudPrint
Relatedtopics
Wi-FiorWiredNetworking
UsingtheMopriaPrintService
YoucanusetheMopriaPrintServicetoprintfromyourAndroidphoneortablet(Androidv4.4orlater)to yourEpsonproductoranyMopria-certifiedproductfromothermanufacturers.Youcandownloadthe MopriaPrintServicefromGooglePlay.
Note: For details on the Mopria Print Service, click here (U.S) or click here (Canada).
-
Connect your Epson product to your wireless network. Seethelink below.
-
On your Android device, download the Mopria Print Service from Google Play.
Note: OnsomeSamsungGalaxydevices, Mopriamaycomepreinstalled.
- Go to Settings on your Android device, select Printing, and enable the Mopria Print Service.
- Connect your Android device to the same wireless network as your product.
5.Nowyouarereadytoprint.FromanAndroidapplicationsuchasChromeorGmail,tapthemenu icon and select Print. Then select All printers, select your Epson product, adjust your print settings, andprint.
Parenttopic:ProductBasics
Relatedtopics
Wi-FiorWiredNetworking
AndroidPrintingUsingtheEpsonPrintEnabler
Youcanwirelesslyprintyourdocuments, emails, photos, and webpages right from your Android phone ortablet(Androidv4.4orlater). With a few taps, your Android device will discovery your nearby Epson product and print.
- Connect your Epson product to your wireless network. Seethelink below.
- On your Android device, download the Epson Print Enabler plug-in from Google Play.
- Go to Settings on your Android device, select Printing, and enable the Epson plug-in.
- ConnectyourAndroiddevicetothesamewirelessnetworkasyourproduct.
5.Nowyouarereadytoprint.FromanAndroidapplicationsuchasChromeorGmail,tapthemenu iconandprintwhateverisonthescreen.
Note: If you do not see your product, tap All Printers and select your product.
Parenttopic:ProductBasics
Relatedtopics
Wi-FiorWiredNetworking
UsingFireOSPrinting
YoucanwirelesslyprintfromAmazonFiretabletsandphonestoyournearbynetworkedEpsonproduct. Thereisnosoftwaredownload,nodriverstoinstall,andnocablestoconnect.Withjustafewtapsin
Email, Calendar, Contacts, and WPSOffice, you cansendwhateverisonthescreentoanEpson product.
- ConnectyourEpsonproducttoyourwirelessnetwork.Seethelinkbelow.
- ConnectyourAmazondevicetothesamewirelessnetworkasyourproduct.
3.Nowyouarereadytoprint.FromyourAmazonapplication,taptheprintoptionandselectyourproducttoprintwhateverisonthescreen.
Note: If you see a message telling you that a plug-in is required, tap OK and tap Download. If your AmazonFireproductusesFireOS5andabove,yourdeviceautomaticallyusesthebuilt-inMopria PrintServiceapptoprint.
Visit epson.com/connect (U.S), epson.ca/connect (Canada), or epson.com.jm/connect (Caribbean) to learn more about FireOSPrinting(oneofmanyEpsonConnectPartnerSolutions) and check the compatibility of your mobile device.
Parenttopic:ProductBasics
Relatedtopics
Wi-FiorWiredNetworking
UsingWindows10MobilePrinting
YoucanwirelesslyprintfromWindows10MobiletablesandphonestoyournearbynetworkedEpson product.Thereisnosoftwaredownload,nodriverstoinstall,andnocablestoconnect.Lookforthe printoptioninyourWindows 10applicationtosendwhateverisonthescreentoanEpsonproduct.
- ConnectyourEpsonproducttoyourwirelessnetwork.Seethelinkbelow.
- Connect your Windows 10 Mobile device to the same wireless network as your product.
3.Nowyouarereadytoprint.FromyourWindows10application,taptheprintoptionandselectyourproducttoprintwhateverisonthescreen.
Visit epson.com/connect (U.S), epson.ca/connect (Canada), or epson.com.jm/connect (Caribbean) to learn more about Windows 10 Mobile Printing (one of many Epson Connect Partner Solutions) and check the compatibility of your mobile device.
Parenttopic:ProductBasics
Relatedtopics
Wi-FiorWiredNetworking
UsingEpsonPrintandScanAppwithWindowsTablets
YoucanusethisfreeapptoprintphotosandscanfromyourWindows(Windows8orhigher)Surface RTorProtabletwithnetworkedEpsonproducts.EpsonPrintandScanAppallowsyoutoscanand captureimagesrighttoyourtabletortoMicrosoftOneDrive.
Note: The Epson Print and Scan App does not support Windows 10 Mobile printing.
- Connect your Epson product to your wireless network. Seethelink below.
- Download Epson Print and Scan App from the Microsoft Windows Store.
- Connect your Windowstablettothesamewirelessnetworkasyourproduct.
4.OpenEpsonPrintandScanAppandselectyourEpsonproduct.
Nowyouarereadytoprintphotosorscan.
Visit epson.com/connect (U.S), epson.ca/connect (Canada), or epson.com.jm/connect (Caribbean) to learn more about Epson Print and Scan App.
Parenttopic:ProductBasics
Relatedtopics
Wi-FiorWiredNetworking
Wi-FiorWiredNetworking
SeethesectionstouseyourproductonaWi-Fiorwirednetwork.
NetworkSecurityRecommendations
Wi-FilnfrastructureModeSetup
Wi-FiDirectModeSetup
Wi-FiProtectedSetup(WPS)
PrintingaNetworkStatusSheet
ChangingorUpdatingNetworkConnections
NetworkSecurityRecommendations
To help deter unauthorized access to your product over an network, you should protect your network environment using appropriates security measures.
Securitymeasuresuchasthesecanhelpdeterthreatssuchaslossofuserdata,useoftelephoneandfaxlines,andotherintrusions:
- EnablesecurityonyourwirelessLAN
EnabletheappropriatesecurityonthewirelessLANyouplantousewithyourproduct.Network securitysuchasanetworkpasswordcandeterinterceptionoftrafficoverthewirelessLAN.Your routermayalreadyhaveadefaultpasswordenabledbyyourInternetserviceprovider(ISP).Seeyour ISPandrouterdocumentationforinstructionsonhowtochangethedefaultpasswordandbetter secureyournetwork.
- Connectyourproductonlytoanetworkprotectedbyafirewall
ConnectingyourproductdirectlytotheInternetmayleaveitvulnerabletosecuritythreats. Instead, connectittoarouterorothernetworkconnectionprotectedbyafirewall.Yourroutermayalready haveafirewallsetupbyyourInternetserviceprovider;checkwithyourISPforconfirmation.Forbest results, setupanduseaprivateIPaddressforyournetworkconnection.
- Changethedefaultadministratorpasswordonyourproduct
If your product has an option to set an administrator password, can get the default administrator password to deter access by unauthorized user stop personal data stored on your product, such as IDs, passwords, and contact lists.
Parenttopic: Wi-FiorWiredNetworking
Wi-FiInfrastructureModeSetup
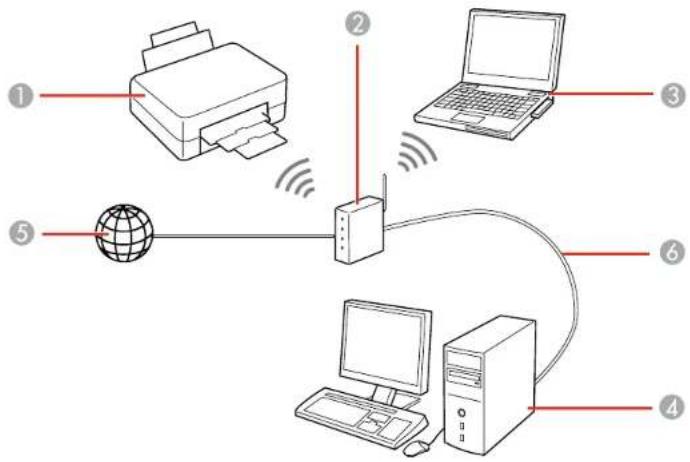
Youcan setup your product to communicate with your computer using wireless router or access point. The wireless router or access point can be connected to your computer over wireless or wired network.
flowchart
graph TD
    ①[Printer] -->|Signal| ②[Laptop]
    ② -->|Signal| ③[Laptop]
    ② -->|Signal| ④[Tower]
    ② -->|Signal| ⑤[Global]
    ⑤ -->|Signal| ②
    ⑥[Computer] -->|Signal| ④
    ⑥ -->|Signal| ②
1Epsonproduct
2Wirelessrouteroraccesspoint
3Computerwithawirelessinterface
4Computer
5Internet
6Ethernetcable(usedonlyforwiredconnectiontothewirelessrouteroraccesspoint)
SelectingWirelessNetworkSettingsfromtheControlPanel
Parenttopic:Wi-FiorWiredNetworking
SelectingWirelessNetworkSettingsfromtheControlPanel
Youcanselectorchangewirelessnetworksettingsusingyourproductcontrolpanel.
To install your product on a wireless network, follow the instructions on the Start Here sheet and install thenecessarysoftware. Theinstallerprogramguidesyouthroughnetworksetup.
- Pressthehombutton, if necessary.
- Press the arrow buttons to select Wi-Fi Setup and press the OK button.
3.PresstheOKbuttontoselectWi-Fi(Recommended).
4.PresstheOKbutton.
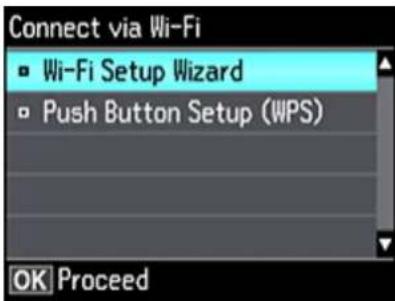
Youseethisscreen:
text_image
Connect via Wi-Fi ■ Wi-Fi Setup Wizard □ Push Button Setup (WPS) OK Proceed- SelectWi-FiSetupWizardandpresstheOKbutton.
- Press the up or down arrow buttons to select the name of your wireless network and press the OK button. If you donot see your wireless network's name, you can enter it manually.
Note: To enter the wireless network name manually, select Other Networks and press the OK button. Enteryournetworknameasdescribedinthenextstep.
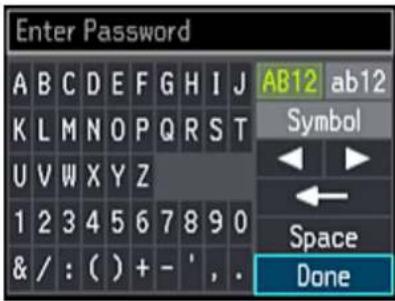
- Enteryourwirelesspassword(ornetworknameandthenpassword).
text_image
Enter Password A B C D E F G H I J AB12 ab12 K L M N O P Q R S T Symbol U V W X Y Z Space 1 2 3 4 5 6 7 8 9 0 & / : ( ) + - ', . Space Done- Press the arrow button to highlight a character or function button displayed on the keypad. Then press the OK button to select it.
- To change the case of letters or select symbols, select AB12 (uppercase), ab12 (lowercase), or Symbol and press the OK button. Then highlight a number or symbol and press the OK button to select it.
• Toenteraspace, selectSpaceandpresstheOKbutton. - Todeletecharacters, selectthebackarrowandpresstheOKbutton.
- When you finish entering characters, select Done and press the OK button.
8.PresstheOKbuttontoconfirmWi-Fisettings.
- If you want to print a network status report, select Yes and press the OK button. (Otherwise, select No.)
Yourproductshouldnowbeconnectedtothenetwork.
Note: If the Wi-Fi connections symbol does not appear on the LCD screen, you may have selected the wrong network name or entered the password incorrectly. Repeat these step to try again.
Parenttopic:Wi-FilInfrastructureModeSetup
Relatedtopics
ChangingorUpdatingNetworkConnections
Wi-FiDirectModeSetup
Youcan setup your product to communicate directly with your computer or another device without requiring wireless router or access point.
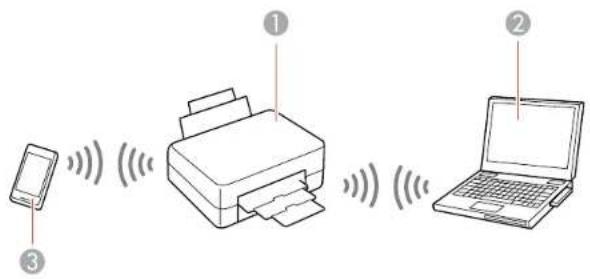
text_image
Diagram showing three labeled devices: a smartphone, a printer, and a laptop, each with wireless signal waves.1Epsonproduct
2Computerwithawirelessinterface
3Otherwirelessdevice
Yourproductentersaccesspointmodeandtheproductitselfactsasthenetworkaccesspointforupto 4devices.Whenoperatinginthismode,yourproductdisplaytheWi-FiDirectconnectionsymbolonthe LCDscreen.
Note: Connected devices cannot communicate with each other via the connection to your product.
EnablingWi-FiDirectMode
Parenttopic:Wi-FiorWiredNetworking
EnablingWi-FiDirectMode
YoucanenableWi-FiDirectmodetoallowdirectcommunicationbetweenyourproductandcomputerorotherdeviceswithoutawirelessrouteroraccesspoint.
-
Presstehonn button, if necessary.
-
Press the arrow buttons to select Wi-Fi Setup and press the OK button.
-
Press the arrow buttons to select Wi-Fi Direct and press the OK button.
4.PresstheOKbutton.
5.PresstheOKbuttonagain.
6.PresstheOKbuttontoconfirmtheWi-Fisettings.
Youseeascreenlikethis:
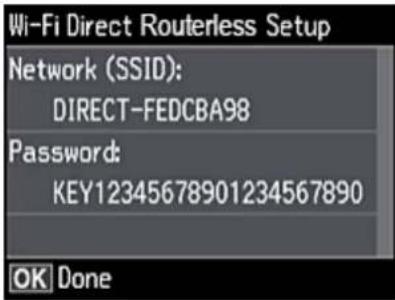
text_image
Wi-Fi Direct Routerless Setup Network (SSID): DIRECT-FEDCBA98 Password: KEY12345678901234567890 OK Done7.PresstheOKbutton.
8.PresstheOKbuttontoexit.

YouseetheconnectionsymbolontheLCDscreenandshouldbeabletoconnecttoyour productdirectlyfromyourcomputerordevice,andthenprint.Ifyouareprintingfromacomputer, makesureyouinstalledthenetworksoftwaresdescribedontheStartHeresheet.
Note: Make an note of the SSID and password that appear.
If the connections symbol is not displayed on the LCD screen, Wi-Fi Direct mode is not enabled. Repeat these stepstotry again.
ChangingtheWi-FiDirectModePassword
Parenttopic:Wi-FiDirectModeSetup
ChangingtheWi-FiDirectModePassword
YoucanchangetheWi-FiDirectModepasswordfromtheproduct'scontrolpanel.
- Presstehonn button, if necessary.
- Press the arrow buttons to select Wi-Fi Setup and press the OK button.
- Press the arrow buttons to select Wi-Fi Direct and press the OK button.
4.PresstheOKbutton.
5.PresstheOKbuttonagain.
6.PresstherightarrowbuttontoselectModify.
Note: If you have already connected devices or computers to your product via Wi-Fi Direct, they will be disconnected when you change the password.
- SelectYes.
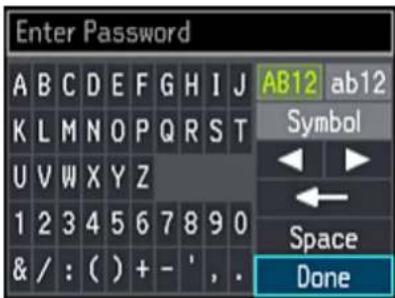
8.Enteranewpassword.
Note: The password must beat least 8 and nom more than 22 characters long.
text_image
Enter Password A B C D E F G H I J AB12 ab12 K L M N O P Q R S T Symbol U V W X Y Z 1 2 3 4 5 6 7 8 9 0 & / : ( ) + - ', . Space Done- Pressthearrowbuttonstohighlhtacharacterorafunctionbuttondisplayonthekeypad. ThenpresstheOKbuttontoselectit.
- To change the case of letters or select symbols, select AB12 (uppercase), ab12 (lowercase), or Symbol and press the OK button. Then highlight a number or symbol and press the OK button to select it.
• Toenteraspace, selectSpaceandpresstheOKbutton. - Todeletecharacters, selectthebackarrowandpresstheOKbutton.
- When you finish entering characters, select Done and press the OK button.
9.PresstheOKbuttontoconfirmtheWi-Fisettings.
Youseeascreenlikethis:
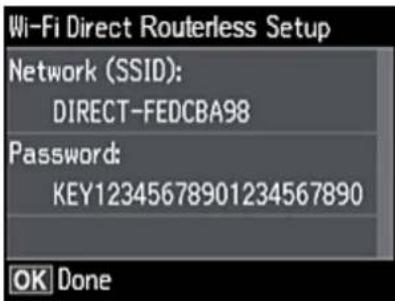
text_image
Wi-Fi Direct Routerless Setup Network (SSID): DIRECT-FEDCBA98 Password: KEY12345678901234567890 OK Done10.PresstheOKbutton.
11.PresstheOKbuttontoexit.
Parenttopic:EnablingWi-FiDirectMode
Wi-FiProtectedSetup(WPS)
If your network uses a WPS-enabled wireless router or access point, you can quickly connect your product to thenetwork using Wi-Fi Protected Setup (WPS).
Note: To check if your router is WPS-enabled, look for a button labeled WPS on your router or access point. If there is no hardware button, theremaybe virtual WPS button in the software forth the device. Check your network product documentation for details.
UsingWPStoConnecttoaNetwork
Parenttopic:Wi-FiorWiredNetworking
UsingWPStoConnecttoaNetwork
If you have a WPS-enabled wireless router or access point, you can use Wi-Fi Protected Setup (WPS) to connect your product to the network.
- On the product, pressthehome button, if necessary.
- PressthearowbuttonstoselectSettingsandpresstheOKbutton.
- SelectNetworkSettingsandpresstheOKbutton.
- SelectWi-FiSetupandpresstheOKbutton.
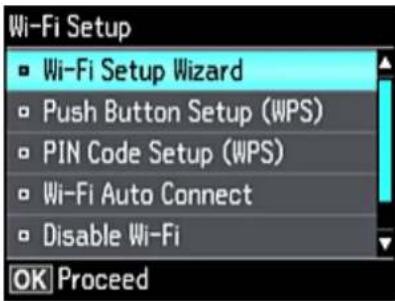
text_image
Wi-Fi Setup ■ Wi-Fi Setup Wizard □ Push Button Setup (WPS) □ PIN Code Setup (WPS) □ Wi-Fi Auto Connect □ Disable Wi-Fi OK Proceed- SelectPushButtonSetup(WPS) and press the OK button.
6.FollowtheinstructionsontheLCDscreentocompleteWPSsetup.
YourproductshouldnowdisplayaWiFisymbolontheLCDscreen.Ifitdoesnot,repeatthesesteps totryagain.
Parenttopic:Wi-FiProtectedSetup(WPS)
PrintingaNetworkStatusSheet
Youcanprintanetworkstatussheettohelpyoudeterminethecausesofanyproblemsyoumayhave usingyourproductonanetwork.Makesurepaperisloadedinthecassette.
-
Pressthehonrebutton, if necessary.
-
PressthearowbuttonstoselectSettingsandpresstheOKbutton.
- SelectNetworkSettingsandpresstheOKbutton.
- SelectNetworkStatusandpresstheOKbutton.
Youseeascreenlikethis:
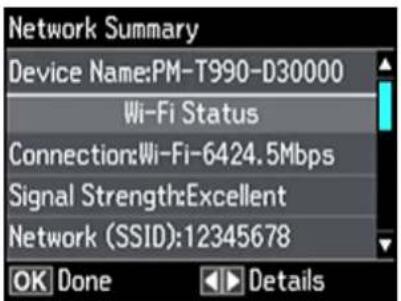
text_image
Network Summary Device Name:PM-T990-D30000 Wi-Fi Status Connection:Wi-Fi-6424.5Mbps Signal Strength:Excellent Network (SSID):12345678 OK Done DetailsNote: If you are connected to an network, the signal strength is also displayed.
5.Presstheleftorrightarrowbuttontoviewadditionaloptions.
6. Press the up or down arrow buttons to select Print Status Sheet and press the OK button.
7. Pressthestartbuttontoprintthenetworkstatussheet.
(Pressthecancelbuttonifyouwanttocanceltheoperation.)
Examinethesettingsshownonthenetworkstatussheettodiagnoseanyproblemsyouhave.
Parenttopic:Wi-FiorWiredNetworking
ChangingorUpdatingNetworkConnections
Seethesectionstochangeorupdatehowyourproductconnectstoanetwork.
AccessingtheWebConfigUtility
ChangingaUSBConnectiontoaWi-FiConnection
ChangingaWi-FiConnectiontoaWiredNetworkConnection
ConnectingtoaNewWi-FiRouter
DisablingWi-FiFeatures
Parenttopic: Wi-FiorWiredNetworking
AccessingtheWebConfigUtility
Youcanselectyourproduct'snetworksettingsandconfirmitsoperatingstatususingawebbrowser. Youdothisbyaccessingyourproduct'sbuilt-inWebConfigutilityfromacomputerorotherdevicethatis connectedtothesamenetworkasyourproduct.
-
Printanetworkstatussheet.
-
Locatethel Paddressforyourproductthatislistedonthenetworkstatussheet.
-
Onacomputerorotherdeviceconnectedtothesamenetworkasyourproduct, openaweb browser.
-
Enteryourproduct'sIPaddressintotheaddressbar.
YouseetheavailableWebConfigutilityoptions.
Parenttopic: ChangingorUpdatingNetworkConnections
Relatedtasks
PrintingaNetworkStatusSheet
ChangingaUSBConnectiontoaWi-FiConnection
If you have already connected your product to your computer using a USB connection, you can change to a Wi-Fi connection.
-
Disconnect the USB cable from your product.
-
Uninstall your product software.
-
Download and install your product software from the Epson website using the instructions on the StartHeresheet.
Parenttopic: ChangingorUpdatingNetworkConnections
Relatedconcepts
UninstallYourProductSoftware
ChangingaWi-FiConnectiontoaWiredNetworkConnection
If you have already connected your product to your computer wirelessly, you can change to a wired network connection if necessary.
-
Disable your product's Wi-Fi features.
-
ConnectoneendofanEthernetnetworkcabletotheproduct'sLANport.
-
Connect the other end to any available LAN portonyour router or access point.
-
Uninstall your product software.
-
Download and install your product software from the Epson website.
6.Followtheon-screeninstructionstoinstallthesoftware.
-
When you see the Select Your Connections screen, select Wired network connection.
-
If you see a Select Setup Options screen, select Setup printer for the first time.
-
Continue following the rest of the screen instructions.
Parenttopic: ChangingorUpdatingNetworkConnections
Relatedtasks
DisablingWi-FiFeatures
ConnectingtoaNewWi-FiRouter
If you chan gethewireless routery you have been using on your network, you need to update your product's Wi-Ficon connection to thenew router.
Note: If you switch to a 5 GHz wireless router, set the router to operate in dual band (2.4 GHz and 5GHz)mode.Seeyourrouterdocumentationforinstructions.
- Dooneofthefollowing:
•Windows:Uninstallyourproductsoftware.
- Download and install your product software from the Epson website using the instructions on the StartHeresheet.
Parenttopic: ChangingorUpdatingNetworkConnections
Relatedconcepts
UninstallYourProductSoftware
DisablingWi-FiFeatures
Youmayneedtodisableyourproduct'sWi-Fifeaturesifyouchangeyournetworkconnectiontypeor needtosolveaproblemwithyournetworkconnection.
Note: Before disabling Wi-Fi features, make a note of your product's SSID (network name) and password, and any network settings selected for the Epson Connect services you may use.
- Pressthehombutton, if necessary.
- PressthearowbuttonstoselectSettingsandpresstheOKbutton.
- SelectNetworkSettingsandpresstheOKbutton.
- SelectWi-FiSetupandpresstheOKbutton.
Youseethisscreen:
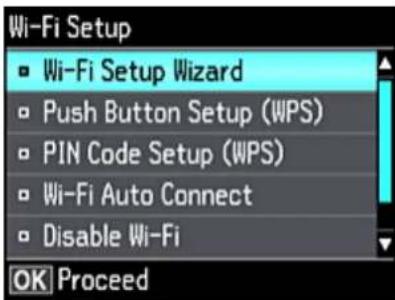
text_image
Wi-Fi Setup ■ Wi-Fi Setup Wizard ■ Push Button Setup (WPS) ■ PIN Code Setup (WPS) ■ Wi-Fi Auto Connect ■ Disable Wi-Fi OK Proceed- SelectDisableWi-FlandpresstheOKbutton.
- SelectYesandpresstheOKbuttontodisableWi-Fi.
Parenttopic: ChangingorUpdatingNetworkConnections
LoadingPaper
Beforeyouprint,loadpaperforthetypeofprintingyouwilldo. LoadingPaperinCassette1(UpperCassette) LoadingPaperinCassette2(LowerCassette) LoadingPaperandEnvelopesintheRearPaperFeedSlot SelectingthePaperSettingsforEachSource-ControlPane TurningOffthePaperSettingAlert PaperLoadingCapacity AvailableEpsonPapers BorderlessPaperTypeCompatibility PaperorMediaTypeSettings-PrinterSoftware
LoadingPaperinCassette1(UpperCassette)
Youcanloadphotopaperinthesesizesintheupperpapercassette: •3.5×5inches(89×127mm) •4×6inches(102×152mm) •5×7inches(127×178mm) •16:9wide(4×7.1inches[102×181mm]) •A6(4.1×5.8inches[105×148mm])
Note: Donotremoveorinsertthepapercassetteduringprinting.
- Closetheoutputtray, if necessary.
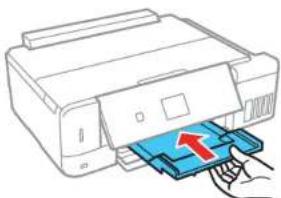
natural_image
Illustration of a printer with a blue cover and red arrow indicating print direction (no text or symbols)Note: As you slide in the output tray, there may be slight resistance and noise. This is normal.
- Raisethecontrol panel.
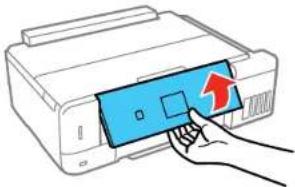
natural_image
Illustration of a hand pressing a blue rectangle on a printer (no text or symbols visible)- Openthefrontcover.
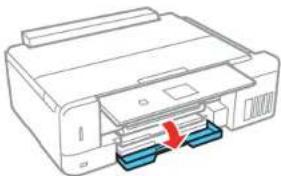
natural_image
Line drawing of a printer with blue paper clips and a red arrow indicating compression (no text or symbols)- Pullouttheupperpapercassette. Theuppercassetteislabeledasshown.
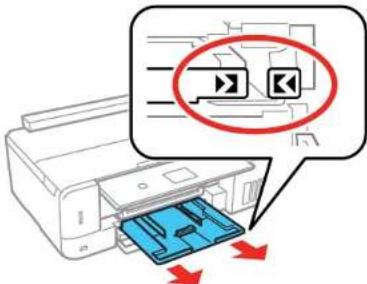
text_image
Diagram showing printer printing process with red annotation highlighting a file icon and blue plastic trayNote: If the cassette is too far inside the product to reach, turn off your product and turn it back on againtoresetthecassette'sposition.
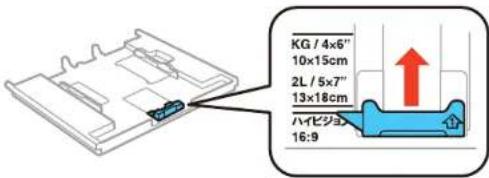
5.Slidetheedgeguidesoutward.
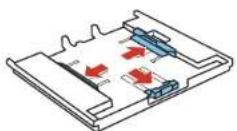
- Setthefrontedgeguidetothepositionforthepapersizeyouareusing.
text_image
Safety warning symbol with no sign and blue medical device illustration8.Slidethesideedgeguidesagainstthepaper,butnottootightly.
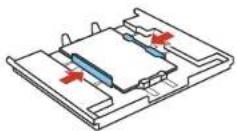
Note: Makesurethepaperfitsunderthetabsontheedgeguides.

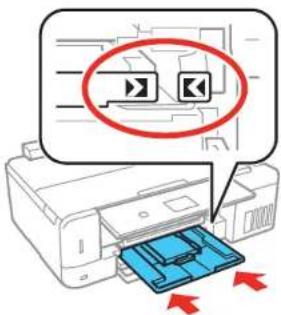
- Keeping the cassette flat, insert it into your product until the arrow marks on the tray and product line up.
text_image
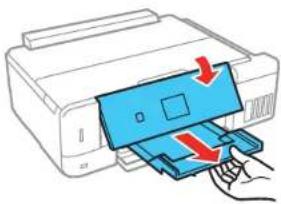
Diagram showing printer printing process with highlighted paperclip and blue plastic sheet, annotated with red arrows indicating motion direction.- Lowerthecontrolpanelandpullouttheoutputtray.
natural_image
Illustration of a printer being inserted into a blue plastic sheet with arrows indicating the process (no text or symbols present)- SelectthesizeandtypeofpaperyoujustloadedontheproductLCDscreen.
Alwaysfollowthesepaperloadingguidelines:
- Loadonlytherecommendednumberofsheets.
- Loadpapershortedgefirststandprintablesidefacedown.
- Makesurethepaperisunderthetabsontheedgeguidesandnotstickingoutfromtheendofthe cassette.
- Checkthepaperpackageforanyadditionalalloadinginstructions.
Parenttopic: LoadingPaper
Relatedreferences
PaperLoadingCapacity
PaperorMediaTypeSettings-ControlPanel
Relatedtasks
LoadingPaperinCassette2(LowerCassette)
LoadingPaperandEnvelopesintheRearPaperFeedSlot
LoadingPaperinCassette2(LowerCassette)
Youcanloadpaperuptothissizeinthelowerpapercassette:Legal(8.5×14inches[216×356mm]).
Note: Donotremoveorinsertthepapercassetteduringprinting.
- Closetheoutputtray, if necessary.
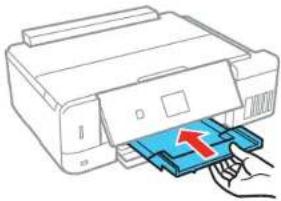
natural_image
Illustration of a printer with a blue cover and red arrow indicating compression (no text or symbols)Note: As you slide in the output tray, there may be slight resistance and noise. This is normal.
- Raisethecontrol panel.
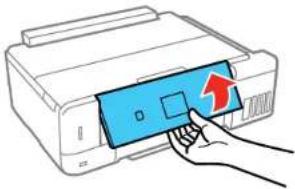
natural_image
Illustration of a hand inserting a blue rectangle into a printer (no text or symbols)- Openthefrontcover.
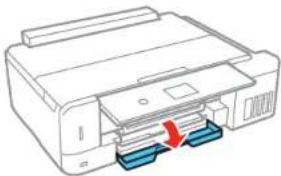
natural_image
Diagram of a printer with two blue plastic clips inserted, showing internal structure and no text or symbols.- Pullonthefrontcovertopulloutthelowerpapercassette.
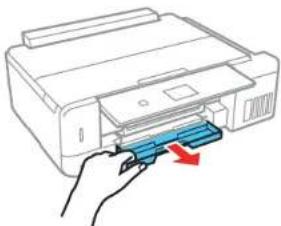
natural_image
Hand inserting a blue plastic into a printer (no text or symbols visible)5.Slidetheedgeguidesoutward.
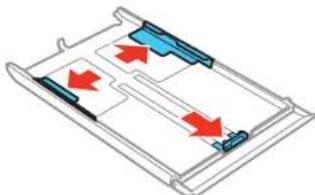
natural_image
Diagram of a mechanical device with red arrows indicating directional flow or movement (no text or symbols)- Setthefrontedgeguidetothepapersizeyouareusing.
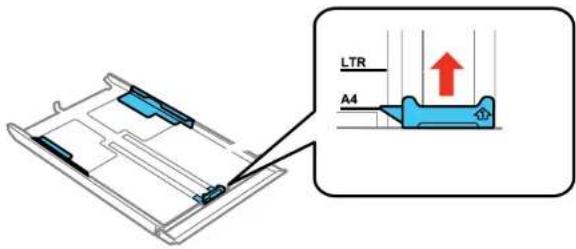
text_image
LTR A47.Dooneofthefollowing:
- Insertpaperwiththeglossyorprintablesidefacedown.
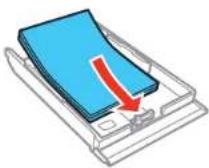
- Insertupto10envelopes,printablesidedownandflapedgeleft,asshown.

- Forlegal-sizepaper, removetheCD/DVDtrayfromtheproduct.Pressthebuttononthecassette andextenditasshown.Loadpaperwiththeglossyorprintablesidefacedown.
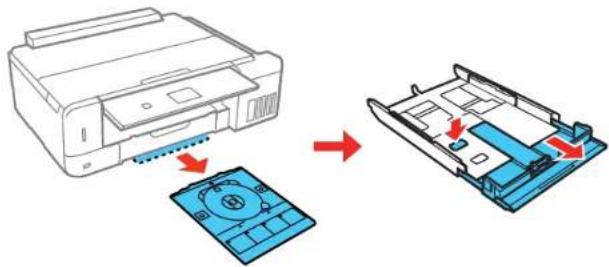
text_image
Diagram illustrating printer operation with blue circuit board and red directional arrows indicating process flowNote: Makesurethepaperisloadedagainstthefrontedgeguideanddoesnotextendbeyondthe trianglesymbolattherearofthecassette.
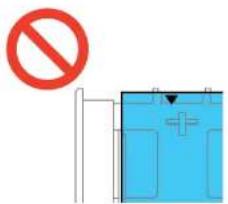
text_image
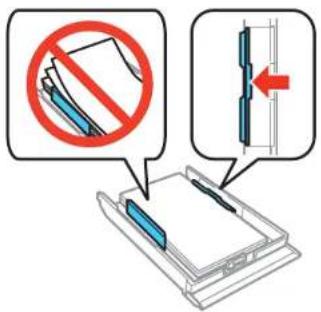
Safety warning sign with red prohibition symbol and blue medical device diagram8.Slidethesideedgeguidesagainstthepaper,butnottootightly.
text_image
Diagram illustrating a document processing step with prohibition and error message, showing no document and error indicated.Note: Makesurethepaperfitsunderthetabsontheedgeguides.
- Keep the cassette flatasy you insert it into your product.
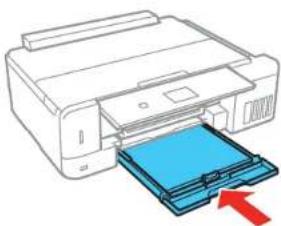
natural_image
Illustration of a printer with a blue cover being inserted, showing paper feeding into a stack (no text or symbols)Note:Leaveenoughspaceinfrontoftheproductforthepapertobefullyejected.
- Lowerthecontrolpanelpullouttheoutputtray.
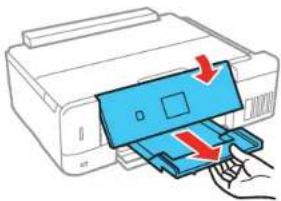
natural_image
Illustration of a printer being inserted into a blue paper filter with red arrows indicating the process (no text or symbols present)- SelectthesizeandtypeofpaperyoujustloadedontheproductLCDscreen.
Alwaysfollowthesepaperloadingguidelines:
- Loadonlytherecommendednumberofsheets.
- Loadpapershortedgefirststandprintablesidedown.
- Makesurethepaperisunderthetabsontheedgeguidesandnotstickingoutfromtheendofthe cassette.
- If you have trouble loading a stack of envelopes, press each envelope flat before loading its load one envelope at time.
• If print quality declines when printing multiple envelopes, try loading one envelope at time. - Checkthepaperpackageforanyadditionalalloadinginstructions.
Parenttopic:LoadingPaper
Relatedreferences
PaperLoadingCapacity
PaperorMediaTypeSettings-ControlPanel
Relatedtasks
LoadingPaperinCassette1(UpperCassette)
LoadingPaperandEnvelopesintheRearPaperFeedSlot
LoadingPaperandEnvelopesintheRearPaperFeedSlot
Youcanload10sheetsofpaperorenvelopesintherearpaperfeedslot.
- Raisethecontrol panel.
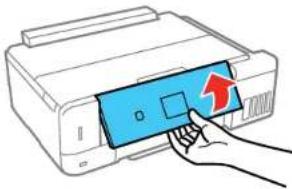
text_image
Diagram showing a hand pressing a blue button labeled with a red arrow, indicating a process or action.- Openthefrontcover.
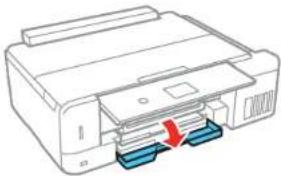
natural_image
Line drawing of a printer with two blue paper clips and a red arrow indicating compression (no text or symbols)- Pullout the output tray and lower the control panel.
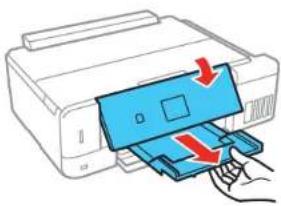
natural_image
Illustration of a printer being inserted into a blue paper with arrows indicating the process (no text or symbols present)- Opentherearpaperfeedslotcover.
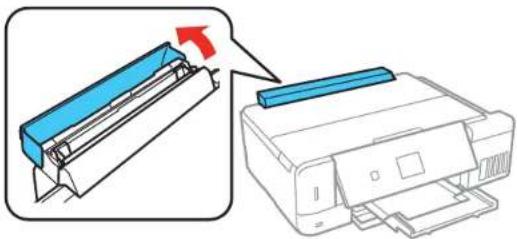
natural_image
Diagram showing a printer being inserted into a blue plastic sheet, with no text or symbols present.- Extend therear paper feed support and thentiltit backwards.
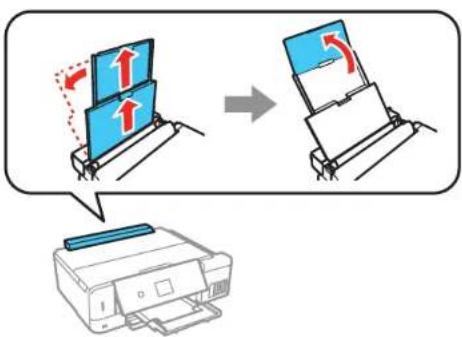
text_image
Diagram illustrating printer operation with two screens and directional arrows, showing process flow from printer to printer.6.Slideouttheedgeguides.
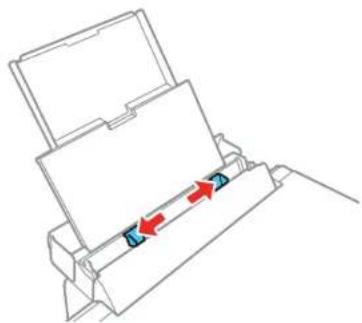
natural_image
Technical line drawing of a mechanical assembly with arrows indicating motion or force direction (no text or symbols)7.Dooneofthefollowing:
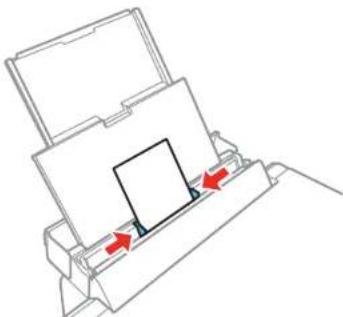
- Loadpaperwiththeprintablesidefaceupatthecenteroftherearpaperfeedslot.
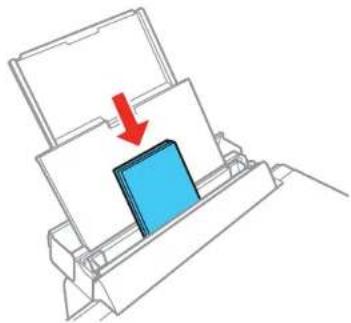
natural_image
Diagram of a printer or printer with a blue cover and red arrow indicating compression or disassembly (no text or symbols present)- Loadenvelopesshortedgefirstwiththeflapfacingdownandtheflapedgetotheleftatthecenter oftherearpaperfeedslot.
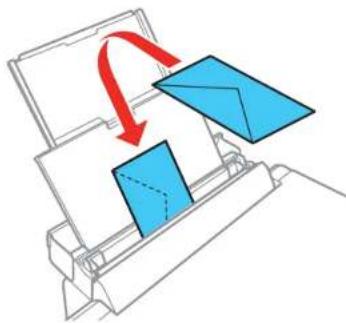
natural_image
Diagram showing a printer with blue envelope and red arrow indicating rotation (no text or symbols)8.Slidetheedgeguidesagainstthepaperorenvelopes,butnottootightly.
natural_image
Diagram of a printer or printer with two red arrows indicating compression or disassembly (no text or symbols present)- Confirm the papersize and typed displayed on the LCD screen and make any changes, if necessary.
Alwaysfollowthesepaperloadingguidelines:
- Donotloadmorethanthemaximumnumberofsheetsorenvelopesspecifiedforthepapertype.
- Loadpapershortedgefirst,nomatterwhichwayyourdocumentfaces.
- Loadtheprintablesidefaceup.
- Loadletterheaderpre-printedpapertopedgefirst.
- Checkthepaperpackageforanyadditionalalloadinginstructions.
Note: You can load a sheet of binder paper with holes on one of the long edges, but not for automatic 2-sidedprinting.
Parenttopic: LoadingPaper
Relatedreferences
PaperLoadingCapacity
PaperorMediaTypeSettings-ControlPanel
Relatedtasks
LoadingPaperinCassette1(UpperCassette)
LoadingPaperinCassette2(LowerCassette)
SelectingthePaperSettingsforEachSource-ControlPanel
You can change the default paper size and paper type to foreach source using the control panel on the product.
- Pressthehom button, if necessary.
- PressthearowbuttonstoselectSettingsandpresstheOKbutton.
- SelectPrinterSetupandpresstheOKbutton.
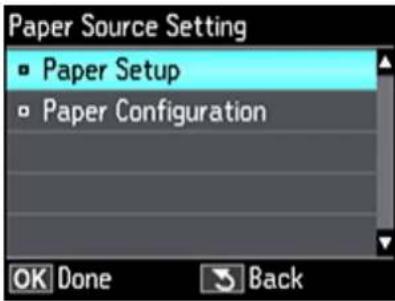
- SelectPaperSourceSettingandpresstheOKbutton.
Youseethisscreen:
text_image
Paper Source Setting □ Paper Setup □ Paper Configuration OK Done BackNote: To turn off the automatic display of the paper settings selection screen after paper is loaded in the cassettes, setthePaperConfigurationsettingtoOff.
- SelectPaperSetupandpresstheOKbutton.
- Select the papers source you want to change.
- SelectPaperSize.
- Select the papers size you loaded.
9.SelectPaperType. - Select the papertype you loaded.
11.Pressthebackbuttontoselectanotherpapersourcetochange,orpressthehomebuttonto exit.
PaperorMediaTypeSettings-ControlPanel
Parenttopic:LoadingPaper
PaperorMediaTypeSettings-ControlPanel
| ForthispaperSelectthisPaperTypesetting | |
| PlainpaperEpsonBrightWhitePaperEpsonIron-onCoolPeelTransferpaperEpsonPhotoQualitySelf-adhesiveSheets | PlainPaper |
| EpsonUltraPremiumPhotoPaperGlossyUltraGlossy | |
| EpsonPremiumPhotoPaperGlossyPrem.Glossy | |
| EpsonPhotoPaperGlossyGlossy | |
| EpsonPresentationPaperMattePresentationMatte | |
| EpsonPremiumPhotoPaperSemi-glossPrem.Semi-Gloss | Gloss |
| EpsonUltraPremiumPhotoPaperLusterUltraLuster | |
| EpsonPremiumPresentationPaperMatteEpsonPremiumPresentationPaperMatteDouble-sidedEpsonUltraPremiumPresentationPaperMatteEpsonBrochure&FlyerPaperMatteDouble-sided | Prem.Matte |
| EpsonVelvetFineArtPaperVelvetFineArtPaper | |
| EnvelopesEnvelope |
Parenttopic: SelectingthePaperSettingsforEachSource-ControlPanel
TurningOffthePaperSettingAlert
ThePaperSettingAlertwarnsyouwhenthepapersettingsdonotmatchthepaperyouloaded. Youcan turnoffthisfeaturefromtheproduct'scontrolpanel.
- Pressthehonn button, if necessary.
- PressthearowbuttonstoselectSettingsandpresstheOKbutton.
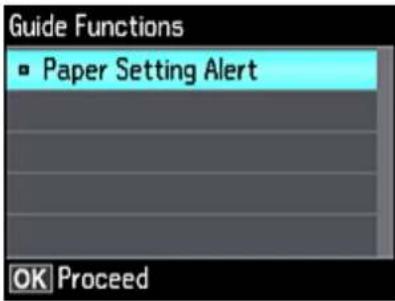
- SelectGuideFunctionsandpresstheOKbutton.
Youseethisscreen:
text_image
Guide Functions ■ Paper Setting Alert OK Proceed- SelectPaperSettingAlertandpresstheOKbutton.
- SelectOffandpresstheOKbutton.
6.Pressthehomobuttontoexit.
Parenttopic:LoadingPaper
PaperLoadingCapacity
Seethetableherefortheloadingcapacityofthepapercassettesandrearpaperfeedslot.
| PapertypeLoaduptothismany | sheets | ||
| Cassette1(upper cassette) | Cassette2(lowercassette)RearPaper | perFeedSlot | |
| Plainpaper20sheetsHalfLetter(5.5×8.5inches | [140×216mm]),Letter(8.5×11 inches[216×279mm]),A4 (8.3×11.7inches [210×297mm]),orLegal (8.5×14inches[216×356mm]) size:Uptothelineindicatedby thetrianglesymbolontheedge guide A6(4.1×5.8inches [105×148mm]):20sheets | 10sheets | |
| EpsonBrightWhitePaper—80sheets10sheets | |||
| EpsonPresentationPaper MatteEpsonPremiumPresentation PaperMatteEpsonUltraPremium PresentationPaperMatte | —20sheets5sheets | ||
| EpsonPhotoPaperGlossyEpsonPremiumPhotoPaper GlossyEpsonUltraPremiumPhoto PaperGlossyEpsonPremiumPhotoPaper Semi-glossEpsonUltraPremiumPhoto PaperLuster | 20sheets20sheets5sheets | ||
| PapertypeLoaduptothismany sheets | |||
| Cassette1 (upper cassette) | Cassette2(lowercassette)RearPaper | FeedSlot | |
| EpsonPremiumPresentation PaperMatteDouble-sided | —1sheet1sheet | ||
| EpsonPhotoQualitySelf-adhesiveSheets | |||
| EpsonIron-onCoolPeel Transferpaper | |||
| EpsonBrochure&FlyerPaper MatteDouble-sided | |||
| EpsonVelvetFineArtPaper——1 sheet | |||
| Envelopes—10envelopes5envelopes | |||
Parenttopic: LoadingPaper
AvailableEpsonPapers
You can purchase genuine Epson ink and paper at epson.com (U.S. sales) or epson.ca (Canadian sales). You can also purchase supplies from an Epson authorized reseller. To find the nearest stone, call 800-GO-EPSON(800-463-7766) in the U.S. or 800-807-7766 in Canada.
| PaperTypeSizePartnumberSheetcount | |||
| EpsonBrightWhitePaperLetter(8.5×11inches[216×279mm]) | S041586500 | ||
| EpsonPhotoPaperGlossy4×6inches(102×152mm)S041809 | S042038 | 50100 | |
| Letter(8.5×11inches[216×279mm]) | S041141S041649S041271 | ||
| 11×17inches(279×432mm) | S04115620 | ||
| EpsonPremiumPhotoPaper Glossy | 4×6inches(102×152mm)S0418 | 08 | 40 |
| S041727 | 100 | ||
| 5×7inches(127×178mm)S0414 | 6420 | ||
| 8×10inches(203×254mm)S041 | 46520 | ||
| Letter(8.5×11inches[216×279mm]) | S042183 | 25 | |
| S041667 | 50 | ||
| 11×17inches(279×432mm) | S04129020 | ||
| A3(11.7×16.5inches[297×420mm]) | S04128820 | ||
| EpsonUltraPremiumPhotoPaper Glossy | 4×6inches(102×152mm)S0421 | 31 | 60 |
| S042174 | 100 | ||
| 5×7inches(127×178mm)S0419 | 4520 | ||
| 8×10inches(203×254mm)S041 | 94620 | ||
| Letter(8.5×11inches[216×279mm]) | S042182 | 25 | |
| S042175 | 50 | ||
| EpsonUltraPremiumPhotoPaper Luster | Letter(8.5×11inches[216×279mm]) | S04140550 | |
| A3(11.7×16.5inches[297×420mm]) | S04140650 | ||
| EpsonVelvetFineArtPaperLetter(8.5×11inches[216×279mm]) | S04163620 | ||
| EpsonPremiumPhotoPaper Semi-gloss | 4×6inches(102×152mm)S0419 | 8240 | |
| Letter(8.5×11inches[216×279mm]) | S04133120 | ||
| EpsonPresentationPaperMatteLetter | (8.5×11inches[216×279mm]) | S041062100 | |
| Legal(8.5×14inches[216×356mm]) | S041067100 | ||
| 11×17inches(279×432mm) | S041070100 | ||
| EpsonPremiumPresentationPaperMatte | 8×10inches(203×254mm)S04146750 | ||
| Letter(8.5×11inches[216×279mm]) | S041257S042180 | 50100 | |
| A3(11.7×16.5inches[297×420mm]) | S04126050 | ||
| EpsonPremiumPresentationPaperMatteDouble-sided | Letter(8.5×11inches[216×279mm]) | S04156850 | |
| EpsonUltraPremiumPresentationPaperMatte | Letter(8.5×11inches[216×279mm]) | S04134150 | |
| A3(11.7×16.5inches[297×420mm]) | S04134350 | ||
| EpsonBrochure&FlyerPaperMatteDouble-sided | Letter(8.5×11inches[216×279mm]) | S042384150 | |
| EpsonPhotoQualitySelf-adhesive Sheets | A4(8.3×11.7inches[210×297mm]) | S04110610 | |
| EpsonIron-onCoolPeelTransfer paper | Letter(8.5×11inches[216×279mm]) | S04115310 | |
Parenttopic: LoadingPaper
BorderlessPaperTypeCompatibility
Youcanprintborderlessphotosoncompatiblepapertypesincompatiblesizes:
BorderlessPaperTypes
•EpsonPhotoPaperGlossy
•EpsonPremiumPhotoPaperGlossy
•EpsonUltraPremiumPhotoPaperGlossy
•EpsonPremiumPhotoPaperSemi-gloss
•EpsonPremiumPresentationPaperMatte
•EpsonPremiumPresentationPaperMatteDouble-sided
BorderlessPaperSizes
- 4×6inches(102×152mm)
- 5×7inches(127×178mm)
- 8×10inches(203×254mm)
•Letter(8.5×11inches[216×279mm])
•A4(8.3×11.7inches[210×297mm])
Parenttopic:LoadingPaper
PaperorMediaTypeSettings-PrinterSoftware
| ForthispaperSelectthispaperTypeorMediaTypesetting | |
| Plainpaper | PlainPaper/BrightWhitePaper |
| EpsonBrightWhitePaper | |
| EpsonIron-onCoolPeelTransferpaper | |
| EpsonPhotoQualitySelf-adhesiveSheets | |
| EpsonUltraPremiumPhotoPaperGlossyUltraPremium | mPhotoPaperGlossy |
| EpsonPremiumPhotoPaperGlossyPremiumPhotoPaperGlossy | |
| EpsonPhotoPaperGlossyPhotoPaperGlossy | |
| EpsonPresentationPaperMattePresentationPaperMatte | |
| EpsonPremiumPhotoPaperSemi-glossPremiumPhotoPaperSemi-Gloss | |
| EpsonUltraPremiumPhotoPaperLusterUltraPremium | mPhotoPaperLuster |
| EpsonPremiumPresentationPaperMatte | PremiumPresentationPaperMatte |
| EpsonPremiumPresentationPaperMatteDouble-sided | |
| EpsonUltraPremiumPresentationPaperMatte | |
| EpsonBrochure&FlyerPaperMatteDouble-sided | |
| EpsonVelvetFineArtPaperVelvetFineArtPaper | |
| EnvelopesEnvelope | |
Note: The settings listed here are available only when printing from your computer; they do not apply to your product's control panel settings.
Parenttopic: LoadingPaper
PlacingOriginalsontheProduct
Followtheinstructionsheretoplaceyouroriginaldocumentsorphotosontheproduct.
Caution: Do not place anything on top of your product or use its cover as a writing surface to avoid damagingit.
PlacingOriginalsontheScannerGlass
Relatedtopics
Copying
Scanning
PlacingOriginalsontheScannerGlass
Youcanplaceoriginalsuptothissizeonthescannerglass:Letter(8.5×11inches[216×279mm])or A4(8.3×11.7inches[210×297mm]).
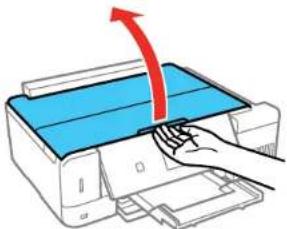
- Openthedocumentcover.
natural_image
Illustration of a hand pressing down on a printer with a red arrow indicating compression (no text or symbols)- Place your original faced down on the scanner glass with the top of the original facing into the corner shown. Slidethe original to the edges of the indicated corner.

text_image
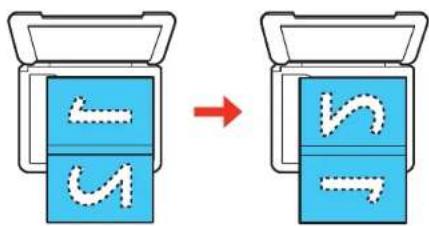
Diagram illustrating a floral image editing process, showing an open image with a red arrow pointing to a document preview.Note: You can place multiple originals on the scanner glass. Just make sure they are at least 0.20 inch(5mm)awayfromeachotherandfromtheedgeofthescannerglass.
- If you are copying two book pages onto onesheet, place the book as show to copy the first page, then turn the book as show to copy these second page.
text_image
Diagram showing a device transitioning from a blue box with dashed lines to a blue box with dotted lines, indicating a change in shape.- Closethedocumentcovergentlytokeepyouroriginalinplace.
Parenttopic: PlacingOriginalsontheProduct
Copying
Seetheinformationheretocopydocumentsorphotosusingyourproduct.
Note: Copies may not be exactly the same size as your originals.
CopyingDocumentorPhotos
CopyingandRestoringPhotos
CopyingDocumentorPhotos
Youcancopydocumentsorphotosontovarioussizesandtypesofpaper,includingEpsonspecial papers.
-
Place your original document or photo on the scanner glass.
-
Loadthepaperyouwanttoprinton.
Note: Loadonlytherecommendednumberofsheets.
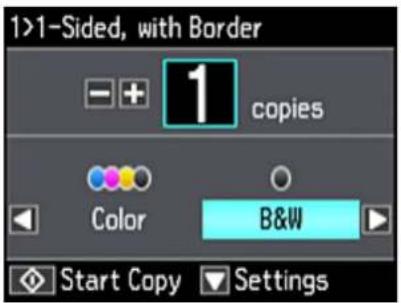
- PressthearowbuttonstoselectCopyandpresstheOKbutton.
text_image
1>1-Sided, with Border - + 1 copies Color B&W Start Copy Settings- To print more than one copy, press the + or - button to select the number (up to 99).
5.PresstherightorleftarrowbuttontoselectColororB&W.
-
To view and change additional copy settings, press the down arrow button to select Settings > PaperandCopySettingsandpresstheOKbutton.
-
When you are ready to copy, press the start button.
Note: Tocancelcopying, pressthecanvelbutton.
PaperTypeSettings-Copying
PaperSizeSettings-Copying
CopyingOptions
Parenttopic: Copying
Relatedreferences
AvailableEpsonPapers
Relatedtasks
PlacingOriginalsontheScannerGlass
Relatedtopics
LoadingPaper
PaperTypeSettings-Copying
SelectaPaperTypesettingthatmatchsthepaperyouloaded.
| PapertypeloadedPaperTypesetting | |
| PlainpaperEpsonBrightWhitePaperEpsonIron-onCoolPeelTransferpaperEpsonPhotoQualitySelf-adhesiveSheets | PlainPaper |
| EpsonPresentationPaperMattePresentationMatte | |
| EpsonPremiumPresentationPaperMatteEpsonPremiumPresentationPaperMatteDouble-sidedEpsonUltraPremiumPresentationPaperMatte | Prem.Matte |
| EpsonPremiumPhotoPaperGlossyEpsonUltraPremiumPhotoPaperLuster | Prem.Glossy |
| EpsonUltraPremiumPhotoPaperGlossyUltraGlossy | |
| EpsonPhotoPaperGlossyGlossy | |
| EpsonPremiumPhotoPaperSemi-glossPrem.Semi-Gloss | |
| EpsonVelvetFineArtPaperVelvetFineArtPaper |
Parenttopic: Copying DocumentsorPhotos
PaperSizeSettings-Copying
SelectthePaperSizesettingthatmatchesthepaperyouloaded.
Note: You can copy only on these papers.
- 4×6inches(102×152mm)
-5×7inches(127×178mm)
•8×10inches(203×254mm)
•A4(8.3×11.7inches[210×297mm])
•Letter(8.5×11inches[216×279mm])
•11×17inches(279×432mm)
•A3(11.7×16.5inches[297×420mm])
Parenttopic: CopyingDocumentsorPhotos
CopyingOptions
Selectthecopyingoptionsyouwanttouseforyourcopies.
Note: Notalloptionsorsettingsmaybeavailable,dependingonothercopyingsettings.
| CopyingoptionAvailable | settingsDescription | |
| DensityVaryinglevelsAdjuststhelightnessordarknessof | copies | |
| RemoveBackgroundOff | Removesorlightensthebackground | color(maynotremoveverydarkorivid colors) |
| On | ||
| 2-SidedCopying1>1-Sided | edUsestheduplexertomake2-sided | copies |
| 1>2-Sided | ||
| LayoutWithBorderLeaves | sasmallmarginaroundthe | image |
| BorderlessExpandstheimagetothe | edgeofthepaper(slightcroppingmayoccur) | |
| A4,2-upCopyCopies2originalsonto | asingleA4-sizesheet | |
| Letter,2-upCopyCopies2originalson | ontoasingleletter-sizesheet | |
| A4,Book/2-upCopies2pagesofaboo | kormagazineontoasingleA4-sizesheet | |
| Letter,Book/2-upCopies2pagesofa | bookormagazineontoasingleletter-sizesheet | |
| Reduce/EnlargeCustom | SizeAutomaticallysizestheimagebythe | percentageyouselect |
| ActualSize | Copiesat100%size | |
| AutoFitPage | Automaticallysizestheimagetofittheselectedpapersizesetting | |
| Letter->4x6inandotherconversions | Automaticallyconvertsfromonesizetoanother | |
| Paper Size | Various sizes | Selects the paper size for the copy printout |
| Paper Type | Various types | Adjusts printer settings for the selected papertype |
| PaperSourceCassette1 | CopiesontopaperloadedinCassette1 | (uppercasecassette) |
| Cassette2Copiesontopaperloadedin | Cassette2(lowercassette) | |
| RearPaperFeedSlotCopiesontopaper | erloadedintherearpaperfeedslot(onlyonesheetatatime) | |
| DocumentTypeTextCopies | esatextdocument | |
| Text&ImageCopiesadocumentthat | cludestextandimages | |
| PhotoCopiesaphotograph | ||
| QualityDraftProvideslower | erqualityfordraftcopies | (plainpaperonly) |
| StandardProvidesgoodqualityform | stcopies | |
| BestProvidesthehighestqualityforspecialcopies | ||
| DocumentOrientationPortraitSpecifiestheorientationofyour | originals(availableonlywhen1>2-Sidedisselected) | |
| Binding Margin | Left Edge | Specifies the binding edge of yourdouble-sidedcopies(availableonlywhen1>2-Sidedisselected) |
| TopEdge | ||
| Expansion | StandardAdjuststheamountofexpansionfor | |
| Medium | printingborderlessphotos(availableonlywhenBorderlessisselected) | |
| Minimum | ||
| DryTime | StandardProvideslongerdryingtimefor2-sided | |
| Long | copies,ifsmudgesormarksappearonthefrontofthepaperwhenyouprintonthesecondside | |
| Longer | ||
Parenttopic: Copying DocumentsorPhotos
Relatedreferences
PaperTypeSettings-Copying
PaperSizeSettings-Copying
CopyingandRestoringPhotos
Youcanrestorethecolorsinfadedphotosasyoucopythem.
- Load photopaperin the product.
2.Pressthehombutton,ifnecessary.
-
Press the arrow buttons to select More Functions and press the OK button.
-
SelectCopy/RestorePhotosandpresstheOKbutton.
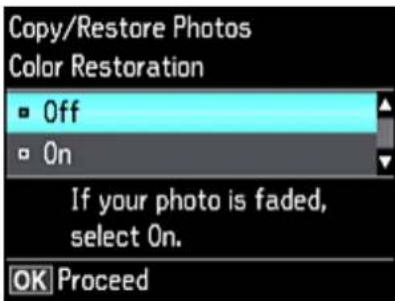
Youseethisscreen:
text_image
Copy/Restore Photos Color Restoration ■ Off ■ On If your photo is faded, select On. OK Proceed-
SelectOnandpresstheOKbutton.
-
Placeuptotwooriginalphotosontheproduct.
Note: Press the up or down arrow buttons for instructions on placing your photos on the product.
7.Pressthestanbutton.
-
Press the + or - button to select one or more copies of the photo (up to 99).
-
If you placed two original son the scanner, press the left right arrow button to view these second original, then press + or - button to select one or more copies of the photo (up to 99).
-
Toselectsettingsforthephotos, pressthedownarrowbutton.
11.Dooneormoreofthefollowing: -
To change the display setting for the LCD screen, select Display Mode, press the OK button, and select the setting you want.
- To change the print settings, select Paper and Copy Settings, press the OK button, and select the necessarysettings.
- To adjust the copy image, select Photo Adjustments, press the OK button, and select the necessarysettings.
• To add a black-and-white filter, select Filter, press the OK button, and select B&W. -
To crop or zoom into your photo, select Crop/Zoom, press the OK button, and press the + or - and arrowbuttonstoadjusttheimagearea.
-
When you are ready to print, press the start button.
Note: Tocancelcopying, pressthecan@elbutton.
Parenttopic: Copying
Relatedreferences
PaperTypeSettings-Copying
PaperSizeSettings-Copying
CopyingOptions
Relatedtasks
PlacingOriginalsontheScannerGlass
Relatedtopics
LoadingPaper
PrintingfromaComputer
Beforeprintingfromyourcomputer, makesureyouhavesetupyourproductandinstalleditssoftware asdescribedontheStartHeresheet.
Note: If you have an Internet connection, it is a good idea to check for updates to your product software on Epson's support website. If you see a Software Update screen, select Enable automatic checking and click OK. The update scans your system to see if you have the latest product software. Follow the on-screen instructions.
PrintingwithWindows
PrintingwiththeBuilt-inEpsonDriver-Windows10S
PrintingonaMac
CancellingPrintingUsingaProductButton
PrintingwithWindows
You can print with your product using any Windows application, as described in these sections.
Note: If you are using your Epson product with the Windows 10 S operating system, you cannot use the softwaresdescribedinthissection.YoualsocannotdownloadandinstallanyEpsonproductsoftware fromtheEpsonwebsiteforusewithWindows10S;youmustobtainsoftwareonlyfromtheWindows Store.
SelectingBasicPrintSettings-Windows
SelectingDouble-sidedPrintingSettings-Windows
SelectingAdditionalLayoutandPrintOptions-Windows
SelectingaPrintingPreset-Windows
SelectingExtendedSettings-Windows
PrintingYourDocumentorPhoto-Windows
SelectingDefaultPrintSettings-Windows
ChangingAutomaticUpdateOptions
Parenttopic: PrintingfromaComputer
SelectingBasicPrintSettings-Windows
Selectthebasicsettingsforthedocumentorphotoyouwanttoprint.
- Openaphotoordocumentforprinting.
- Selecttheprintcommandinyourapplication.
Note: You may need to select a print icon on your screen, the Print option in the File menu, or another command. See your application's help utility for details.
- If necessary, select your product name as the printery you want to use.
Note: You may also need to select Properties or Preferences to view your print settings.
YouseetheMaintabofyourprintersettingswindow:
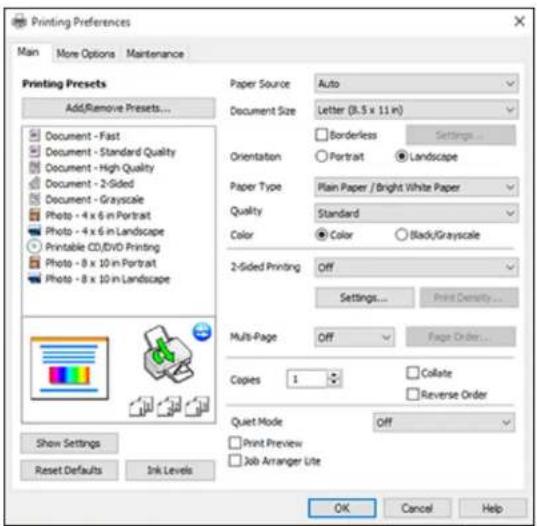
text_image
Printing Preferences Man More Options Maintenance Printing Presets Add/Remove Presets... Document - Fast Document - Standard Quality Document - High Quality Document - 2-Gided Document - Grayscale Photo - 4 x 6 in Portrait Photo - 4 x 6 in Landscape Printable CD/DVD Printing Photo - 8 x 10 in Portrait Photo - 8 x 10 in Landscape Show Settings Reset Defaults Ink Levels Paper Source Auto Document Size Letter (3.5 x 11 in) Orientation Borderless Settings Portrait Landscape Paper Type Plain Paper / Bright White Paper Quality Standard Color Color Black/Grayscale 2-Gided Printing Off Settings... Print Density... Multi-Page Off Page Order... Copies 1 Collate Reverse Order Quiet Mode Off Print Preview Job Arranger Lite OK Cancel Help-
For the Paper Sourcesetting, select where you loaded the paperyouwanttoprinton.
-
SelectthesizeofthepaperyouloadedastheDocumentSizesetting.
Note: You can also select the User-Defined setting to create a custom paper size, but you cannot usetheBorderlesssetting.
- If you are printing a borderless photo, select Borderless. You can click Settings to access additional options for borderless printing.
Note: You must select a compatible borderless paper type and size to print without borders. Check theborderlesspapercompatibilitylistfordetails.
- Select the orientation of your document.
Note: If you are printing an envelope, select Landscape.
- Select the type of papery you loaded as the Paper Types setting.
Note: The setting may not exactly match the name of your paper. Check the paper type settings list for details.
- Select the Quality setting that match the print quality you want to use.
10.SelectaColoroption:
- Toprintacolordocumentorphoto,selecttheColorsetting.
- Toprinttextandgraphicsinblackorshadesofgray,selecttheBlack/Grayscalesetting.
-
Toprintonbothsidesofthepaper, selecta2-SidedPrintingoption.
-
Toprintmultiplepagesononesheetofpaper, orprintoneimageonmultiplesheetsofpaper, select oneofthesettingsintheMulti-Pagemenuandselecttheprintingoptionsyouwant.
-
Toprintmultiplecopiesandarrangetheirprintorder,selecttheCopiesoptions.
-
To reduce noise during printing when you select Plain Paper/Bright White Paper, turn on Quiet Mode(printingwillbeslower).
-
Topreviewyourjobbeforeprinting, selectPrintPreview.
-
Tosaveyourprintjobasaprojectthatcanbemodifiedandcombinedwithotherprintjobs,select JobArrangerLite.
PaperSourceOptions-Windows
PrintQualityOptions-Windows
Multi-PagePrintingOptions-Windows
Parenttopic: PrintingwithWindows
Relatedreferences
PaperorMediaTypeSettings-PrinterSoftware
BorderlessPaperTypeCompatibility
Relatedtasks
SelectingDouble-sidedPrintingSettings-Windows
PrintingYourDocumentorPhoto-Windows
PaperSourceOptions-Windows
YoucanselectanyoftheavailableoptionsinthePaperSourcemenutoprintonthepaperloadedinthat source.
Auto
Automaticallyselectsthepapersourcebasedontheselectedpapersize.
Cassette1
Selectsthepaperincassette1asthepapersource.
Cassette2
Selectsthepaperincassette2asthepapersource.
Cassette1>Cassette2
Selectsthepaperincassette1asthepapersourceandautomaticallyswitchestocassette2when cassette1isempty.
RearPaperFeedSlot
Selectsthepaperintherearfeedslotasthepapersource.
CD/DVDTray
SelectstheCDorDVDloadedintheCD/DVDtray.
Parenttopic: SelectingBasicPrintSettings-Windows
PrintQualityOptions-Windows
YoucanselectanyoftheavailableQualityoptionstofine-tunethequalityofyourprint.Somesettings maybeunavailable,dependingonthepapertypeandbordersettingyouhavechosen.
Draft
Fordraftprintingonplainpaper.
Standard
Foreverydaytextandimageprinting.
High
Forphotosandgraphicswithhighprintquality.
MoreSettings
Opensawindowthatletsyouchooseamonglevelsofspeedandquality.
Parenttopic: SelectingBasicPrintSettings-Windows
Multi-PagePrintingOptions-Windows
YoucanselectanyoftheavailableoptionsintheMulti-Pagemenutosetupyourmulti-pageprintjob.
2-Upand4-Up
Prints 2 or 4 pages on one sheet of paper. Click the Page Order button to select page layout and borderoptions.
2×1Poster, 2×2Poster, 3×3Poster, 4×4Poster
Prints one image on multiple sheets of paper to create a larger poster. Click the Settings button to selectimagelayoutandguidelineoptions.
Parenttopic: SelectingBasicPrintSettings-Windows
SelectingDouble-sidedPrintingSettings-Windows
You can print on both sides of the paper by selecting one of the 2-Sided Printing options on the Main tab.
Note: Some options may be pre-selected or unavailable, depending on other settings you have chosen orifyouareaccessingtheproductoveranetwork.
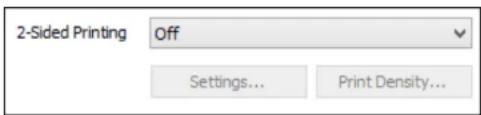
text_image
2-Sided Printing Off Settings... Print Density...1. Selectoneofthefollowingoptionsfor2-SidedPrinting:
- Auto (Long-edge binding) to print your double-sided print job by automatically flipping the paper onthelongedge.
- Auto (Short-edge binding) to print your double-sided print job by automatically flipping the paper ontheshortedge.
2. ClicktheSettingsbutton.
Youseethiswindow:
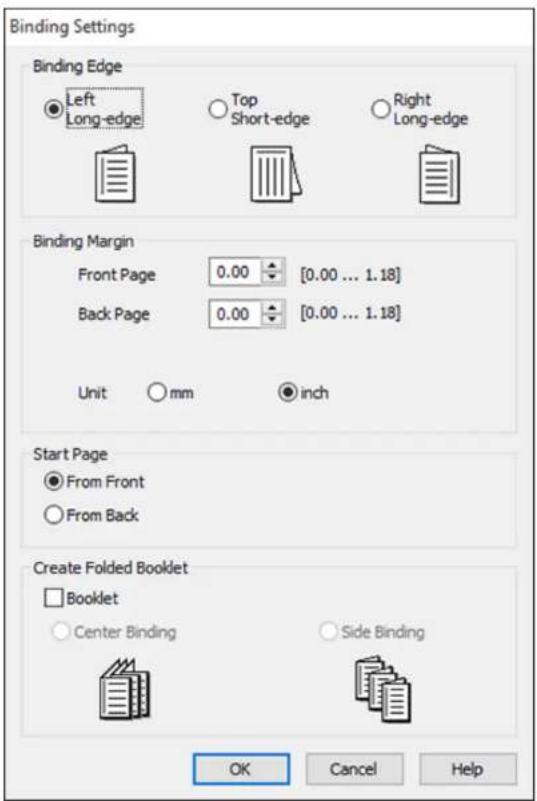
text_image
Binding Settings Binding Edge Left Long-edge Top Short-edge Right Long-edge Binding Margin Front Page 0.00 [0.00 ... 1.18] Back Page 0.00 [0.00 ... 1.18] Unit mm inch Start Page From Front From Back Create Folded Booklet Booklet Center Binding Side Binding OK Cancel Help- Select the double-sided printing options you want to use.
4.ClickOKtoreturntotheMaintab.
5. ClickthePrintDensitybutton.
Youseethiswindow:
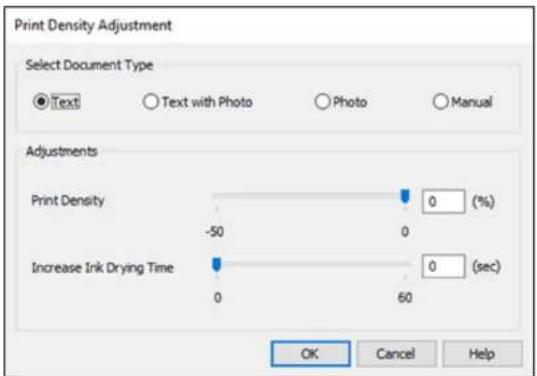
text_image
Print Density Adjustment Select Document Type ● Text ○ Text with Photo ○ Photo ○ Manual Adjustments Print Density 0 (%) -50 0 Increase Ink Drying Time 0 60 0 (sec) OK Cancel Help- Select the typeofdocumentyouareprintingastheDocumentTypesetting.Thesoftware automatically setstheAdjustmentsoptionsforthatdocumenttype.
- If necessary, select the Adjustment options you want to use.
8.ClickOKtoreturntotheMaintab. - Printatestcopyofyourdouble-sideddocumenttotesttheselectedsettings.
- Followanyinstructionsdisplayonthescreenduringprinting.
Double-sidedPrintingOptions-Windows
PrintDensityAdjustments-Windows
Parenttopic: PrintingwithWindows
Relatedtasks
SelectingBasicPrintSettings-Windows
Double-sidedPrintingOptions-Windows
YoucanselectanyoftheavailableoptionsontheBindingSettingswindowtosetupyourdouble-sided printjob.
BindingEdgeOptions
Selectasettingthatorientsdouble-sidedprintbindinginthedesireddirection.
BindingMarginOptions
Selections that define awidermarg into allow for binding.
StartPage
Selectswhetherprintingstartsonthefrontorbackpage.
CreateFoldedBookletOptions
SelecttheBookletcheckboxandabindingoptiontoprintdouble-sidedpagesasabooklet.
Parenttopic: SelectingDouble-sidedPrintingSettings-Windows
PrintDensityAdjustments-Windows
YoucanselectanyoftheavailableoptionsonthePrintDensityAdjustmentwindowtoadjusttheprintqualityofyourdouble-sidedprintjob.
PrintDensity
Setsthelevelofinkcoveragefordouble-sidedprinting.
IncreaseInkDryingTime
Setstheamountoftimerequiredfordryinginkafterprintingononesideofthepaperbeforeprinting theothersideindouble-sidedprintingtopreventinksmearing.
Parenttopic: SelectingDouble-sidedPrintingSettings-Windows
SelectingAdditionalLayoutandPrintOptions-Windows
YoucanselectvarietyofadditionallayoutandprintingoptionsforyourdocumentorphotoontheMore Optionstab.
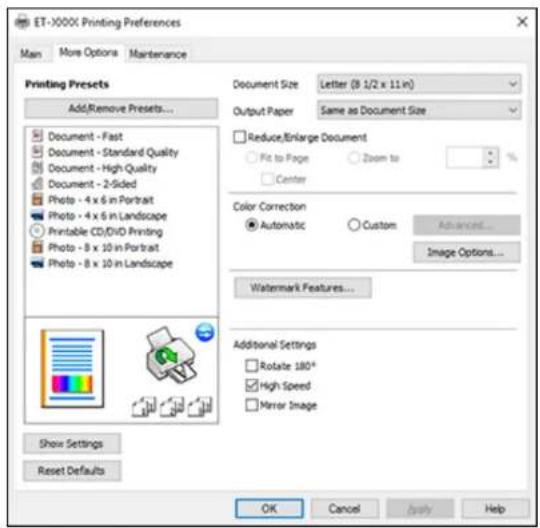
text_image
ET-X000X Printing Preferences Main More Options Maintenance Printing Presets Add/Remove Presets... Document - Fast Document - Standard Quality Document - High Quality Document - 2-Sided Photo - 4 x 6 in Portrait Photo - 4 x 6 in Landscape Printable CD/DVD Printing Photo - 8 x 10 in Portrait Photo - 8 x 10 in Landscape Document Size Letter (3 1/2 x 11 in) Output Paper Same as Document Size Reduce/Enlarge Document Fit to Page Zoom to % Center Color Correction Automatic Custom Advanced... Image Options... Watermark Features... Additional Settings Rotate 180° High Speed Mirror Image Show Settings Reset Defaults OK Cancel Apply Help-
Tochangethesizeofyourprinteddocumentorphoto,selecttheReduce/EnlargeDocument checkboxandselectoneofthesesizingoptions:
-
Select the Fit to Page option to size your image to fit the paper you loaded. Select the size of your document or photo as the Document Size setting, and the size of your paper as the Output Paper setting. If you want to center your image on the paper, select the Center option.
-
Select the Zoom to option to reduce or enlarge your document or photo by a specific percentage. Selectthepercentageinthe%menu.
-
SelectoneofthefollowingColorCorrectionoptions:
- Select Automatic to automatically adjust the sharpness, brightness, contrast, and color saturation for your image.
- Select Custom and click the Advanced button to manually adjust the color correction settings or turnoffcolormanagementinyourprintersoftware.
- SelectImageOptionstoaccessadditionalsettingsforimprovingprintedimages.
Note: YoucanalsoselectColorUniversalPrintsettings.
- To add the following features, click the Watermark Features button:
•Watermark:addsvisiblewatermarktoyourprintout
- Header/Footer: adds information such as the date and time to the top or bottom of your printout
Note: Click the Settings button to customize the text and location of the header or footer.
- SelectanyoftheAdditionalSettingsoptionstocustomizeyourprint.
CustomColorCorrectionOptions-Windows
ImageOptionsandAdditionalSettings-Windows
Header/FooterSettings-Windows
Parenttopic: PrintingwithWindows
CustomColorCorrectionOptions-Windows
YoucanselectanyoftheavailableoptionsintheColorCorrectionwindowtocustomizetheimagecolors foryourprintjob.
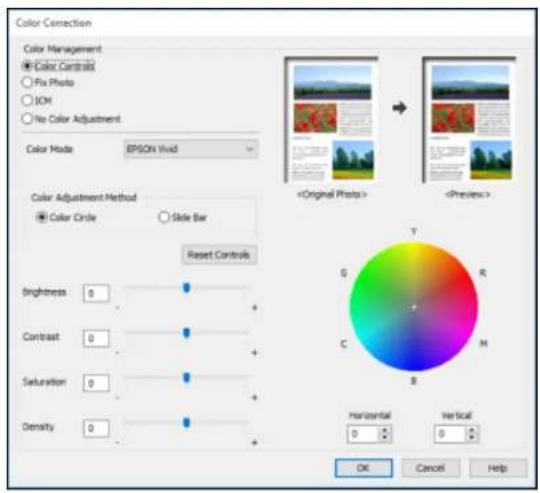
text_image
Color Correction Color Management ● Color Controls ○ Fix Photo ○ IOM ○ No Color Adjustment Color Mode EPSON Vivid Color Adjustment Method ● Color Circle ○ Slide Bar Reset Controls Brightness 0 + Contrast 0 + Saturation 0 + Density 0 +ColorControls
Lets you select a Color Mode setting, individual settings for Brightness, Contrast, Saturation, and Density, and individual color tones. Depending on the selected color mode, you can also adjust the midtonedensityusingtheGammasetting.
FixPhoto
Improvesthecolor, contrast, and sharpness offlawed photos.
Note: Fix Photo uses a sophisticated face recognition technology to optimize photos that include faces. Forthistowork, botheyesandthenosemustbevisibleinthesubject'sface. If your photo includes a face with an intentional color cast, such as a statue, you may want to turn off Fix Photo to retain the special colore effects.
ICM
Letsyoumanagecolorusinginstalledcolorprintingprofiles.
NoColorAdjustment
Turnsoffcolormanagementinyourprintersoftwaresoyoucanmanagecolorusingonlyyour applicationsoftware.
Parenttopic: SelectingAdditionalLayoutandPrintOptions-Windows
ImageOptionsandAdditionalSettings-Windows
YoucanselectanyofthelmageOptionsandAdditionalSettingstocustomizeyourprint.Someoptions maybepre-selectedorunavailable,dependingonothersettingsyouhavechosen.
ImageOptions
EmphasizeText
Adjuststheweightofprintedtexttoincreasereadability.
EmphasizeThinLines
Adjuststheweightofprintedlinestoincreasevisibility.
EdgeSmoothing
Smoothsjaggededgesinlow-resolutionimagessuchasscreencapturesorimagesfromtheWeb.
FixRed-Eye
Reducesorremovesred-eyeinphotos.
PrintTextinBlack
Printscoloredtextinblack.
ForColorText
Printscoloredtextonabackgroundpatternorunderlined.
ForColorGraphsandImages
Printscoloredgraphicsandimageswithoverlaypatterns.
ForColorText, Graphs, and Images
Printscoloredtext,graphics,andimageswithoverlaypatterns.
EnhancementOptions
SpecifiesColorUniversalPrintenhancementsettingsfortext,graphics,andimages.
AdditionalSettingsOptions
Rotate180°
Printstheimagerotated180°fromitsoriginalorientation.
HighSpeed
Speedsupprintingbutmayreduceprintquality.
MirrorImage
Flipstheprintedimagelefttoright.
Parenttopic: SelectingAdditionalLayoutandPrintOptions-Windows
Header/FooterSettings-Windows
YoucanselectanyoftheHeader/FooterSettingsoptionstoaddheadersorfooterswhenyouprint. The itemsareavailabletoprintatthetoporbottomofyourpages,ineithertheleft,right,orcenterofthe page.
Note: Thesesettingsarenotsavedwithyourdocument.
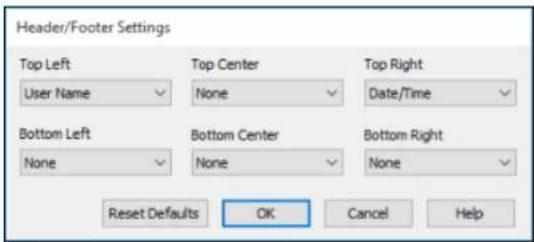
text_image
Header/Footer Settings Top Left User Name Top Center None Top Right Date/Time Bottom Left None Bottom Center None Bottom Right None Reset Defaults OK Cancel HelpYoucanselecttoprintthefollowinginformation:
-UserName
-ComputerName
- Date
- Date/Time
•CollateNumber(copynumber)
Note: The username, computername, date, and time come from the Windows Control Panel on your computer.
Parenttopic: SelectingAdditionalLayoutandPrintOptions-Windows
SelectingaPrintingPreset-Windows
For quick access to common group of print settings, you can select a printing preset on the Main or More Option stab.
Note: You can create your own preset by clicking the Add/Remove Presets button.
1. ClicktheMainorMoreOptionstab.
YouseetheavailablePrintingPresetsontheleft:
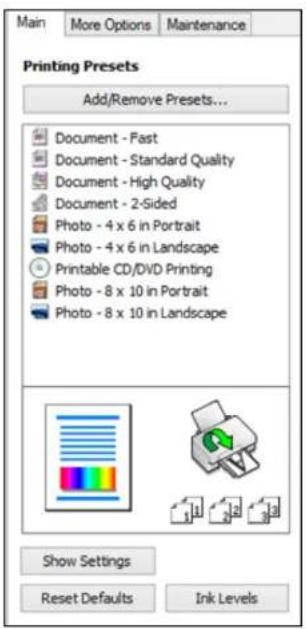
text_image
Main More Options Maintenance Printing Presets Add/Remove Presets... Document - Fast Document - Standard Quality Document - High Quality Document - 2-Sided Photo - 4 x 6 in Portrait Photo - 4 x 6 in Landscape Printable CD/DVD Printing Photo - 8 x 10 in Portrait Photo - 8 x 10 in Landscape Show Settings Reset Defaults Ink Levels-
PlaceyourcursoroveroneofthePrintingPresetstoviewitslistofsettings.
-
Clickonapresettochangeitssettings, or use any of the available options on the screento control your printing presets.
- To choose apreset for printing, select it.
5.ClickOK.
Parenttopic: PrintingwithWindows
SelectingExtendedSettings-Windows
Youcanselectadditionalsettingsthatapplytoalltheprintjobsyousendtoyourproduct.
- AccesstheWindowsDesktopandright-clicktheiconforyourproductintherightsideoftheWindowstaskbar,orclicktheuparrowandright-click.
- SelectPrinterSettings.
- ClicktheMaintenancetab.
Youseethemaintenanceoptions:
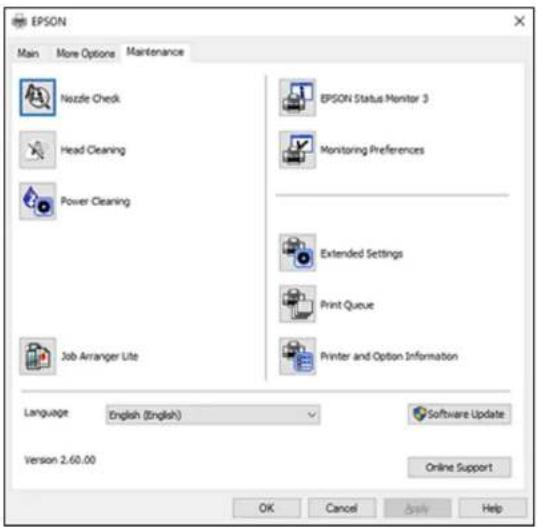
text_image
EPSON Main More Options Maintenance Nozzle Check Head Cleaning Power Cleaning Job Arranger Lite EPSON Status Monitor 3 Monitoring Preferences Extended Settings Print Queue Printer and Option Information Language English (English) Software Update Version 2.60.00 Online Support OK Cancel Apply Help- ClicktheExtendedSettingsbutton.
Youseethiswindow:
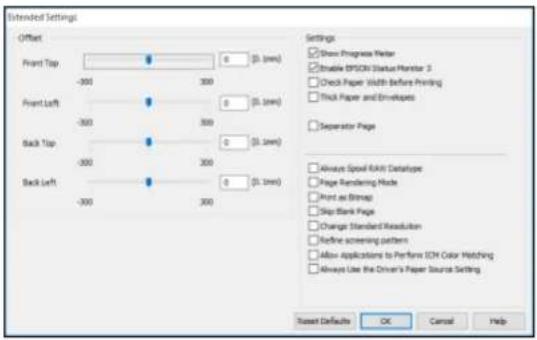
text_image
Extended Settings Offset Front Top -300 Front Left -300 Back Top -300 Back Left -300 Settings Show Progress Meter Enable EPSON Status Monitor 3 Check Paper Width Before Printing Thick Paper and Envelopes Separator Page Always Speed-Risk DataPage Page Rendering Mode Front as Bitmap Skip Blank Page Change Standard Resolution Refine screening pattern Allow applications to Perform SCN Color Matching Always Use the Driver's Paper Source Setting Reset Defaults OK Cancel Help- Selectanyoftheextendedsettingstocustomizeyourprint.
6.ClickOKtoclosetheExtendedSettingswindow.
7.ClickOKtoclosetheprintersoftwarewindow.
ExtendedSettings-Windows
Parenttopic: PrintingwithWindows
ExtendedSettings-Windows
You can select from these settings on the Extended Settings window.
ShowProgressMeter
Displaystheprogressofprintjobsastheyarebeingprinted.
EnableEPSONStatusMonitor3
Enablesproductmonitoringforinkandpapersuppliesandotherissues.
CheckPaperWidthBeforePrinting
Preventsprintingbeyondtheedgesofthepaperifthepapersizesettingisincorrect;mayreduceprint speed.
ThickPaperandEnvelopes
Preventsinkfromsmearingwhenyouprintonenvelopesorotherthickpaper.
SeparatorPage
Beforeeachdocument, printsaseparatorpagecontainingthetitle, user, date, and time.
AlwaysSpoolRAWDatatype
Increasesprintspeedandmaysolveotherprintingproblems.
PageRenderingMode
Increasesprintspeedwhenprintingisextremelyslowortheprintheadstopsduringprinting.
PrintasBitmap
Increasesprintspeedwhenprintingisextremelyslowortheprintheadstopsduringprinting,and othersettingsdonothelp.
SkipBlankPage
Ensure that your product does not print page that contain not text or images.
ChangeStandardResolution
Reducestheresolutionofprintdatatocorrectprintingproblems.
Refinescreeningpattern
Printsgraphicswithafinerscreeningpattern.
AllowApplicationstoPerformICMColorMatching
AllowsapplicationstoperformICMcolormatching.
AlwaysUsetheDriver'sPaperSourceSetting
Printsusingthepapersourcesettingintheprinterdriver, rather than the setting in your application.
Parenttopic: SelectingExtendedSettings-Windows
PrintingYourDocumentorPhoto-Windows
Onceyouhaveselectedyourprintsettings,youarereadytosaveyoursettingsandprint.
- ClickOKtosaveyoursettings.
Youseeyourapplication'sPrintwindow,suchasthisone:
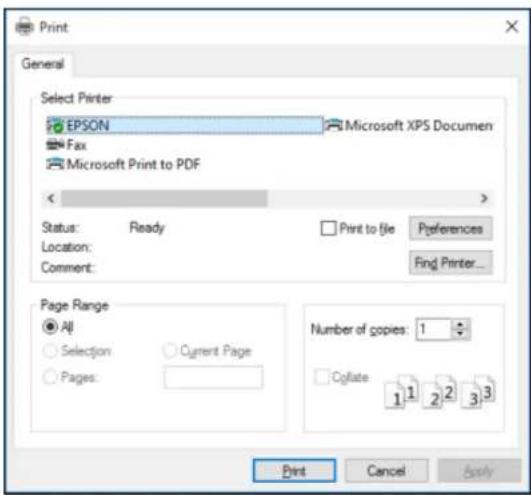
text_image
Print General Select Printer EPSON Microsoft XPS Documen Fax Microsoft Print to PDF Status: Ready Location: Comment: Print to file Preferences Find Printer... Page Range All Selection: Current Page Pages: Number of copies: 1 Coflate 1 1 2 2 3 3 Print Cancel Apply- ClickOKorPrinttostartprinting.
CheckingPrintStatus-Windows
Parenttopic: PrintingwithWindows
CheckingPrintStatus-Windows
Duringprinting,youseethiswindowshowingtheprogressofyourprintjob.Itallowsyoutocontrol printingandcheckinkstatus.
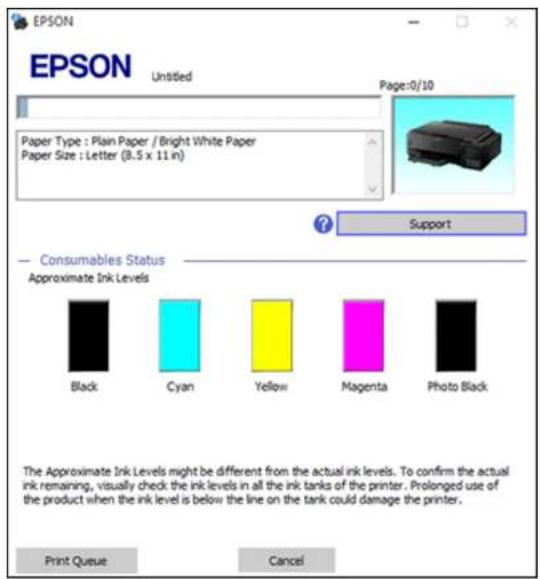
text_image
EPSON Untitled Page:0/10 Paper Type : Plain Paper / Bright White Paper Paper Size : Letter (8.5 x 11 in) Support Consumables Status Approximate Ink Levels Black Cyan Yellow Magenta Photo Black The Approximate Ink Levels might be different from the actual ink levels. To confirm the actual ink remaining, visually check the ink levels in all the ink tanks of the printer. Prolonged use of the product when the ink level is below the line on the tank could damage the printer. Print Queue Cancel•Tocancelprinting,clickCancel.
- Toseeprintjobslinedupforprinting,clickPrintQueue.
Parenttopic: Printing Your Documentor Photo-Windows
SelectingDefaultPrintSettings-Windows
When you change your print settings in a program, the changes apply only while you are printing in that program session. If you want to change the print settings you use in all your Windows programs, you can select new default print settings.
- AccesstheWindowsDesktopandright-clicktheiconforyourproductintherightsideofthe Windowstaskbar,orclicktheuparrowandright-click.
2. SelectPrinterSettings.
Youseetheprintersettingswindow:
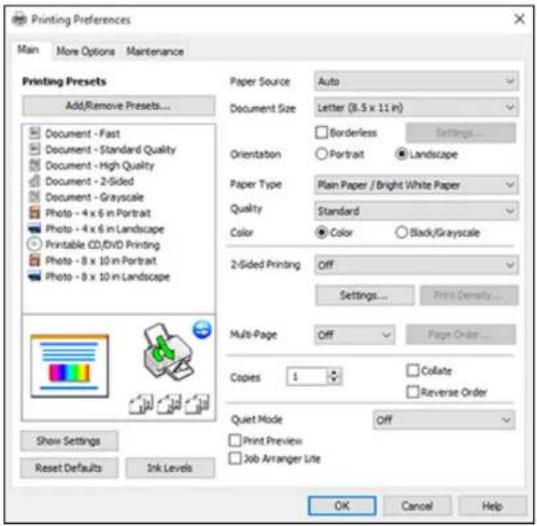
text_image
Printing Preferences Main More Options Maintenance Printing Presets Add/Remove Presets... Document - Fast Document - Standard Quality Document - High Quality Document - 2-Sided Document - Grayscale Photo - 4 x 6 in Portrait Photo - 4 x 6 in Landscape Printable CD/DVD Printing Photo - 8 x 10 in Portrait Photo - 8 x 10 in Landscape Show Settings Reset Defaults Ink Levels Paper Source Auto Document Size Letter (3.5 x 11 in) Orientation Borderless Settings... Orientation Portrait Landscape Paper Type Plain Paper / Bright White Paper Quality Standard Color Color Black/Grayscale 2-Sided Printing Off Settings Print Density... Multi-Page Off Page Order... Copies 1 Collate Reverse Order Quiet Mode Off Print Preview Job Arranger Lite OK Cancel Help- SelecttheprintsettingsyouwanttouseasdefaultsinallyourWindowsprograms.
4.ClickOK.
Thesesettingsarenowthedefaultsselectedforprinting.Youcanstillchangethemasneededfor printinginanyprogramsession.
ChangingtheLanguageofthePrinterSoftwareScreens
Parenttopic: PrintingwithWindows
ChangingtheLanguageofthePrinterSoftwareScreens
YoucanchangethelanguageusedontheWindowsprintersoftwarescreens.
-
AccesstheWindowsDesktopandright-clicktheiconforyourproductintherightsideofthe Windowstaskbar,orclicktheuparrowandright-click.
-
SelectPrinterSettings.
Youseetheprintertsettingswindow.
- ClicktheMaintenancetab.
Youseethemaintenanceoptions:
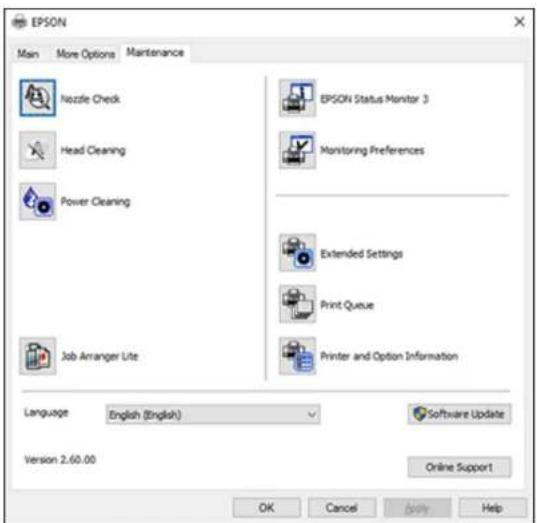
text_image
EPSON Main More Options Maintenance Nozzle Check Head Cleaning Power Cleaning Job Arranger Lite EPSON Status Monitor 3 Monitoring Preferences Extended Settings Print Queue Printer and Option Information Language English (English) Software Update Version 2.60.00 Online Support OK Cancel Help- Select the language you want to use the Languages setting.
5.ClickOKtoclosetheprintersoftwarewindow.
Theprintersoftwarescreensappearinthelanguageyouselectedthenexttimeyouaccessthem.
Parenttopic:SelectingDefaultPrintSettings-Windows
ChangingAutomaticUpdateOptions
YourprintersoftwareforWindowsautomaticallychecksforupdatestotheproductsoftware.Youcan changehowoftenthesoftwarechecksforupdatesordisablethisfeature.
-
AccesstheWindowsDesktopandright-clicktheiconforyourproductintherightsideofthe Windowstaskbar,orclicktheuparrowandright-click.
-
SelectSoftwareUpdateSettings.
Youseethiswindow:
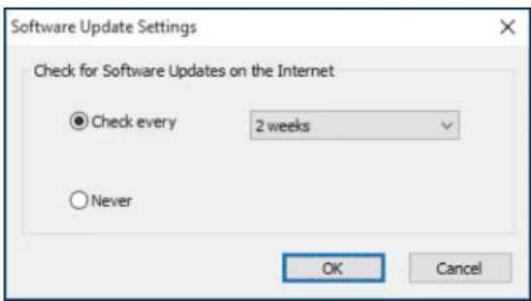
text_image
Software Update Settings Check for Software Updates on the Internet ● Check every 2 weeks ○ Never OK Cancel3.Dooneofthefollowing:
- To change how often the software checks for updates, select a setting in the Check every menu. - Todisabletheautomaticupdatefeature,selecttheNeveroption.
4.ClickOKtoexit.
Note: If you choose to disable the automatic update feature, you can check for updates manually.
Parenttopic: PrintingwithWindows
Relatedtasks
CheckingforSoftwareUpdates
PrintingwiththeBuilt-inEpsonDriver-Windows10S
Youcanprintwiththebuilt-inEpsonprinterdriverusinganyprintingprogramonWindows10S,as describedinthesesections.
Note: The built-in Epson driver in Windows 10 S does not include all the available print settings for your product. Toprintwithadditionalsettings, downloadandinstalltheEpsonPrintandScanutilityfromtheWindowsStore. YoucannotdownloadandinstallanyEpsonproductsoftwarefromtheEpsonwebsite forusewithWindows10S;youmustobtainsoftwareonlyfromtheWindowsStore.
SelectingPrintSettings-Windows10S
Parenttopic: PrintingfromaComputer
SelectingPrintSettings-Windows10S
Select these settings for your print job in your Windows 10 Application.
- Openaphotoordocumentforprinting.
- Selecttheprintcommandinyourapplication.
Note: You may need to select a print icon on your screen, the Print option in the File menu, or another command. See your application's help utility for details.
- If necessary, select your product name as the printery you want to use.
Note: You may also need to select Properties or Preferences to view your print settings.
Youseeawindowlikethis:
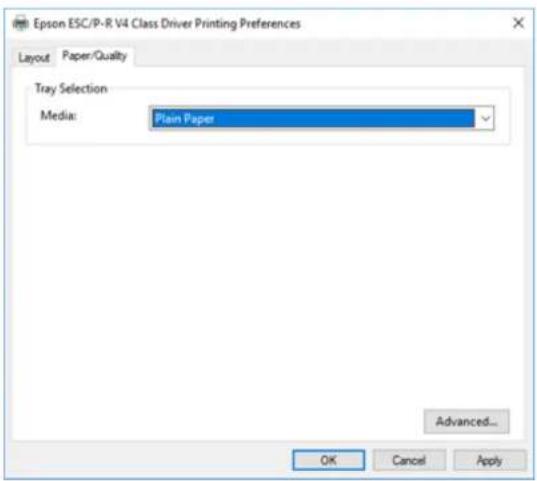
text_image
Epson ESC/P-R V4 Class Driver Printing Preferences Layout Paper/Quality Tray Selection Media: Plain Paper Advanced... OK Cancel Apply- SelectthetypeofpaperyouloadedastheMediasetting.
Note: The setting may not exactly match the name of your paper. Check the paper type settings list for details.
- ClicktheAdvancedbutton.
Youseeawindowlikethis:
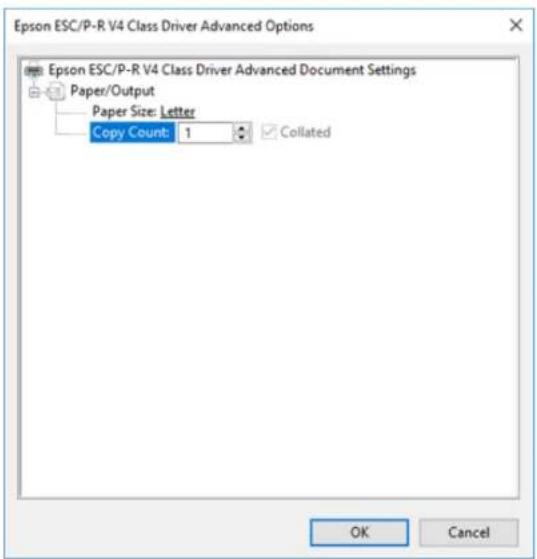
text_image
Epson ESC/P-R V4 Class Driver Advanced Options Epson ESC/P-R V4 Class Driver Advanced Document Settings Paper/Output Paper Size: Letter Copy Count: 1 Collated OK Cancel- SelectthesizeofthepaperyouloadedasthePaperSizesetting.
- Toprintmoleculecopies, selectorenterthenumberastheCopyCountsetting.
- Toprintmultiplecopiesofmulti-pagedocumentsinsets, selecttheCollatedcheckbox.
9.ClickOK.
Youreturntotheprintingpreferenceswindow.
10. SelecttheLayouttab.
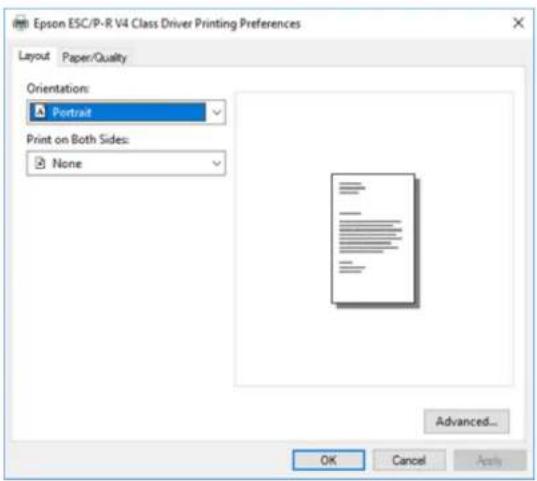
text_image
Epson ESC/P-R V4 Class Driver Printing Preferences Layout Paper/Quality Orientation: Portrait Print on Both Sides: None Advanced... OK Cancel Apply11. Select the orientation of your document as the Orientation setting.
- To printing double-sided, select one of the Print on Both Sides options, depending on how you wanttoorientthepagelayout. Theiconnexttoeachoptionshowsthelayout.
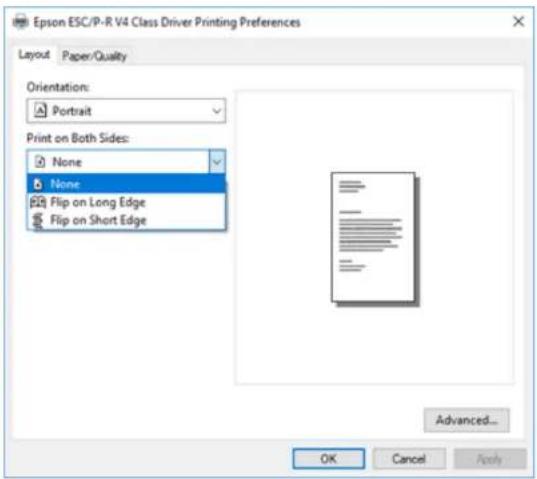
text_image
Epson ESC/P-R V4 Class Driver Printing Preferences Layout Paper/Quality Orientation: Portrait Print on Both Sides: None None Flip on Long Edge Flip on Short Edge Advanced... OK Cancel Apply13.ClickOKtosaveyoursettings.
Youseeyourapplication'sPrintwindow.
- ClickOKorPrinttostartprinting.
Parenttopic: PrintingwiththeBuilt-inEpsonDriver-Windows10S
PrintingonaMac
YoucanprintwithyourproductusinganyMacprintingprogram,asdescribedinthesesections.
Note: If you have an Internet connection, it is a good idea to check for updates to your product software on Epson's support website.
SelectingBasicPrintSettings-Mac
SelectingPageSetupSettings-Mac
SelectingPrintLayoutOptions-Mac
SelectingDouble-sidedPrintingSettings-Mac
ManagingColor-Mac
SelectingPrintingPreferences-Mac
PrintingYourDocumentorPhoto-Mac
Parenttopic: PrintingfromaComputer
SelectingBasicPrintSettings-Mac
Selectthebasicsettingsforthedocumentorphotoyouwanttoprint.
-
Openaphotoordocumentforprinting.
-
Selecttheprintcommandinyourapplication.
Note: You may need to select a print icon on your screen, the Print option in the File menu, or another command. See your application's help utility for details.
- Select your product as the Printersetting.

text_image
Printer: EPSON Presets: Default Settings- If necessary, click the arrow next to the Printer setting or the Show Details button to expand the printwindow.
Youseetheexpandedprintersettingswindowforyourproduct:
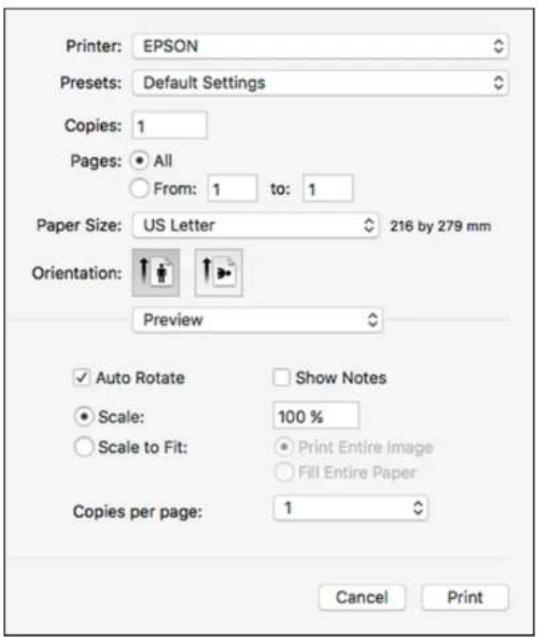
text_image
Printer: EPSON Presets: Default Settings Copies: 1 Pages: All From: 1 to: 1 Paper Size: US Letter 216 by 279 mm Orientation: Preview ✓ Auto Rotate Show Notes Scale: 100 % Scale to Fit: Print Entire Image Fill Entire Paper Copies per page: 1 Cancel PrintNote: The print window may look different, depending on your version of the Mac operating system and the application you are using.
- SelecttheCopiesandPagessettingsasnecessary.
Note: If you do not see these settings in the print window, check for them in your application before printing.
- Select the pages setup options: PaperSize and Orientation.
Note: If you do not see these settings in the print window, check for them in your application before printing. They maybe accessible by selecting PageSetup from the Filemenu.
-
Selectanyapplication-specificsettingsthatappearonthescreen, suchasthoseshownintheimage aboveforthePreviewapplication.
-
SelectPrintSettingsfromthepop-upmenu.
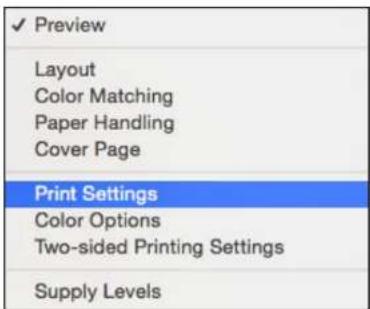
text_image
Preview Layout Color Matching Paper Handling Cover Page Print Settings Color Options Two-sided Printing Settings Supply LevelsYouseethesesettings:
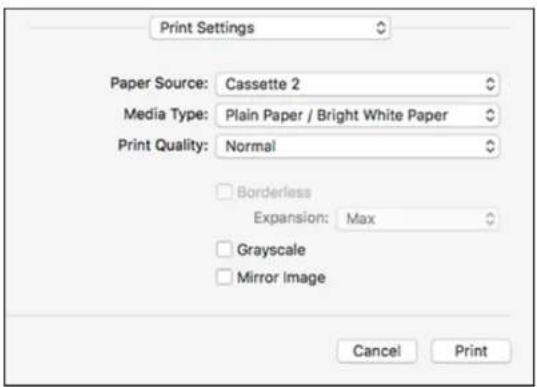
text_image
Print Settings Paper Source: Cassette 2 Media Type: Plain Paper / Bright White Paper Print Quality: Normal Borderless Expansion: Max Grayscale Mirror Image Cancel Print- SelectthePaperSourceyouwishtoprintfrom.
- SelectthetypeofpaperyouloadedastheMediaTypesetting.
Note: The setting may not exactly match the name of your paper. Check the paper type settings list for details.
- SelectthePrintQualitysettingyouwanttouse.
- Selectanyoftheavailableprintoptions.
PaperSourceOptions-Mac
PrintQualitySettings-Mac
PrintOptions-Mac
Parenttopic: PrintingonaMac
Relatedreferences
PaperorMediaTypeSettings-PrinterSoftware
Relatedtasks
SelectingPageSetupSettings-Mac
PrintingYourDocumentorPhoto-Mac
PaperSourceOptions-Mac
YoucanselectanyoftheavailableoptionsinthePaperSourcemenutoprintfrompaperloadedinthat source.
AutoSelect
Automaticallyselectsthepapersourcebasedontheselectedpapersize.
Cassette1
Selectsthepaperincassette1asthepapersource.
Cassette2
Selectsthepaperincassette2asthepapersource.
RearPaperFeedSlot
Selectsthepaperintherearfeedslotasthepapersource.
Parenttopic: SelectingBasicPrintSettings-Mac
PrintQualitySettings-Mac
You can select any of the Print Quality settings to fine-tune the quality of your print. Some settings may be unavailable, depending on the papertype and border setting you have chosen.
Draft
Fordraftprintingonphotopaper.
FastEconomy
Forthefastestprintingwithdraftquality.
Economy
Forfastprintingwithreducedquality.
Normal
Foreverydaytextandimageprinting.
Fine
Fortextandgraphicswithgoodqualityandprintspeed.
Quality
Forphotosandgraphicswithgoodqualityandprintspeed.
BestQuality
Forthebestprintquality, but the slowest printspeed.
Parenttopic: SelectingBasicPrintSettings-Mac
PrintOptions-Mac
Youcanselectanyoftheprintoptionstocustomizeyourprint.Someoptionsmaybeunavailable, dependingonothersettingsyouhavechosen.
Expansion
If you selected a border less papers sizes setting, this option adjusts the image expansion setting to control printing at the edges of border less prints.
Grayscale
Printstextandgraphicsinblackorshadesofgray.
MirrorImage
Letsyoufliptheprintedimagehorizontally.
Note: If you select the Min option for the Expansion setting, you may see white borders on your printed photo.
Parenttopic: SelectingBasicPrintSettings-Mac
SelectingPageSetupSettings-Mac
Depending on your application, you maybe able to select the paper size and orientation settings from the print window.
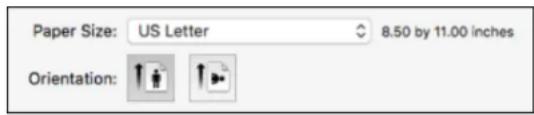
text_image
Paper Size: US Letter 8.50 by 11.00 inches Orientation:Note: If you do not see these settings in the print window, check for them in your application before printing. They maybe accessible by selecting PageSetup from the Filemenu.
- Select the size of the paper you loaded as the Paper Size setting. If you are printing a borderless photo, select the Borderless checkbox or a paper size with a Borderless option. You can also selectacustomsettingtocreateacustompapersize,buttheQualitysettingwillbelimitedto Normal.
Note: You must select a compatible borderless paper type and size to print without borders. Check theborderlesspapercompatibilitylistfordetails.
- Select the orientation of your document or photo as shown in the print window.
Note: If you are printing an envelope, select the icon.
Note: You can reduce or enlarge the size of the printed image by selecting Paper Handling from the pop-upmenuandselectingascalingoption.
Parenttopic: PrintingonaMac
Relatedreferences
BorderlessPaperTypeCompatibility
SelectingPrintLayoutOptions-Mac
You can select a variety of layout options for your document or photo by selecting Layout from the pop-upmenuontheprintwindow.
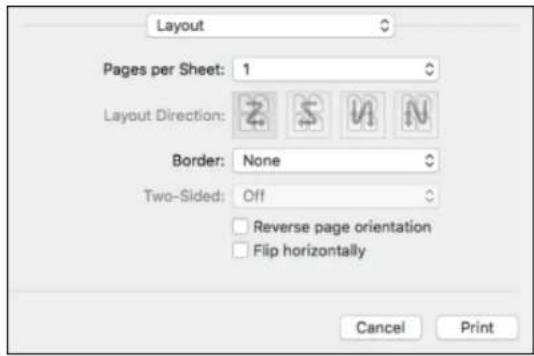
text_image
Layout Pages per Sheet: 1 Layout Direction: Border: None Two-Sided: Off Reverse page orientation Flip horizontally Cancel Print- To print multiple pages on one sheet of paper, select the number of pages in the Pages per Sheet pop-upmenu.Toarrangetheprintorderofthepages,selectaLayoutDirectionsetting.
- To print borders around each page on the sheet, select a line setting from the Border pop-up menu.
- To invert or flip the printed image, select the Reverse page orientation or Flip horizontally settings.
Parenttopic: PrintingonaMac
SelectingDouble-sidedPrintingSettings-Mac
You can print on both sides of the paper by selecting Two-sided Printing Settings from the pop-up menuontheprintwindow.
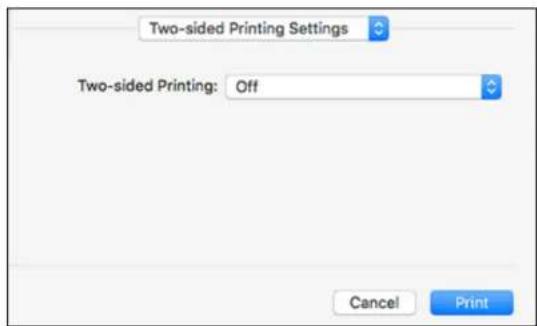
text_image
Two-sided Printing Settings Two-sided Printing: Off Cancel PrintNote: Some options may be pre-selected or unavailable, depending on other settings you have chosen orifyouareaccessingtheproductoveranetwork.Thisscreenmaybedifferent,dependingontheMac OSversionyouareusing.
-
SelectoneoftheTwo-sidedPrintingoptions.
-
Select the type of document you are printing as the Document Types setting. Thesoftware automatically sets the Adjustment options for that document type.
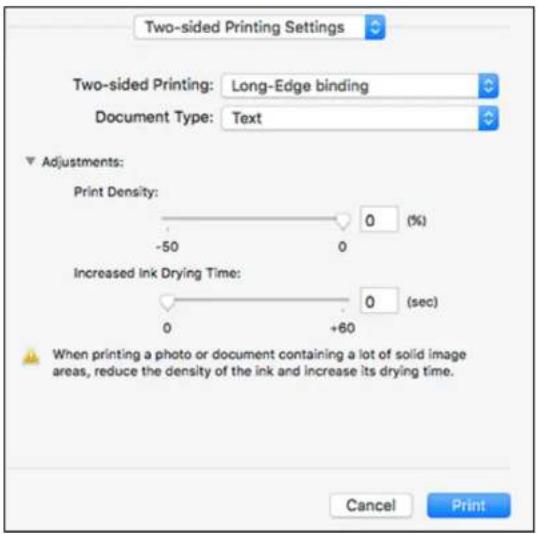
text_image
Two-sided Printing Settings Two-sided Printing: Long-Edge binding Document Type: Text Adjustments: Print Density: -50 0 (%) 0 Increased Ink Drying Time: 0 +60 0 (sec) When printing a photo or document containing a lot of solid image areas, reduce the density of the ink and increase its drying time. Cancel Print- If necessary, customizetheAdjustmentssettingsasinstructedonthescreen.
- Printatestcopyofyourdouble-sideddocumenttotesttheselectedsettings.
- Followanyinstructionsdisplayonthescreenduringprinting.
Double-sidedPrintingOptionsandAdjustments-Mac
Parenttopic: PrintingonaMac
Double-sidedPrintingOptionsandAdjustments-Mac
You can select any of the available options in the Two-sided Printing Settings or Output Settings pop-upmenutosetupyourdouble-sidedprintjob.
Two-sidedPrintingOptions
Long-Edgebinding
Orientsdouble-sidedprintedpagestobeboundonthelongedgeofthepaper.
Short-Edgebinding
Orientsdouble-sidedprintedpagestobeboundontheshortedgeofthepaper.
Adjustments
PrintDensity
Setsthelevelofinkcoveragefordouble-sidedprinting.
IncreasedInkDryingTime
Setstheamountoftimerequiredfordryinginkafterprintingononesideofthepaperbeforeprinting theothersideindouble-sidedprinting.
Parenttopic: SelectingDouble-sidedPrintingSettings-Mac
ManagingColor-Mac
You can adjust the Color Matching and Color Options setting to fine-tunethe colors in your print out, or turn off color management in your printers software.
- SelectColorMatchingfromthepop-upmenuintheprintwindow.

text_image
Color Matching ColorSync EPSON Color Controls-
Selectoneoftheavailableoptions.
-
SelectColorOptions from the pop-up menu in the print window.
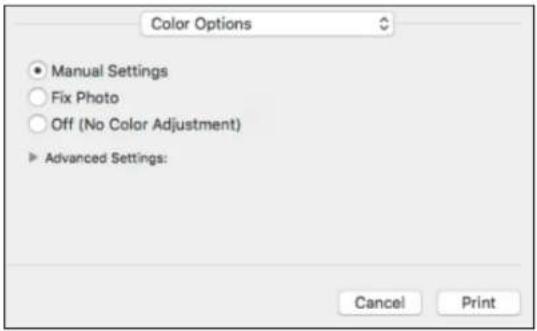
text_image
Color Options ● Manual Settings ○ Fix Photo ○ Off (No Color Adjustment) ▶ Advanced Settings: Cancel PrintNote: The available settings on the Color Options menu depend on the option you selected on the Color Matching menu.
- Selectoneoftheavailableoptions.
ColorMatchingandColorOptions-Mac
Parenttopic: PrintingonaMac
ColorMatchingandColorOptions-Mac
You can select from these settings on the Color Matching and Color Options menus.
ColorMatchingSettings
EPSONColorControls
Letsyoumanagecolorusingcontrolsinyourprintersoftwareorturnoffcolormanagement.
ColorSync
Printsusingstandardcolorprofilesforyourproductandpapertohelpmatchimagecolors.Youcan customizetheconversionmethodandfiltersettingsontheColorSyncpop-upmenuintheprint window.
ColorOptionsSettings
ManualSettings
Letsyouselectmanualcoloradjustments.ClickthearrownexttoAdvancedSettingsandselect settings for Brightness, Contrast, Saturation, and individual color tones. You can also select a color Mode setting for printing photos and graphics and the Fix Red-Eye setting to reduce or remove red-eyeinphotos.Dependingontheselectedcolormode,youcanalsoadjustthemidtonedensityusing theGammasetting.
FixPhoto
Improvesthecolor, contrast, and sharpness offlawed photos. Click the arrown next to Advanced Settings and select the Fix Red-Eye setting to reduce or remove red-eye in photos.
Note: Fix Photo uses a sophisticated face recognition technology to optimize photos that include faces. Forthistowork, botheyesandthenosemustbevisibleinthesubject'sface. If your photo includes a face with an intentional color cast, such as a statue, you may want to turn off Fix Photo to retain the special colore effects.
Off(NoColorAdjustment)
Turnsoffcolormanagementinyourprintersoftwaresoyoucanmanagecolorusingonlyyour applicationsoftware.
Note: An ICC profile is required if colormanagement is turned off.
Parenttopic: ManagingColor-Mac
SelectingPrintingPreferences-Mac
Youcanselectprintingpreference that apply to all the print jobs you send to your product.
-
In the ApplemenuortheDock, select System Preferences.
-
Select Print & Fax, Print & Scan, or Printers & Scanners, select your product, and select Options & Supplies.
-
SelectDriverorOptions.
Youseeascreenlikethis:
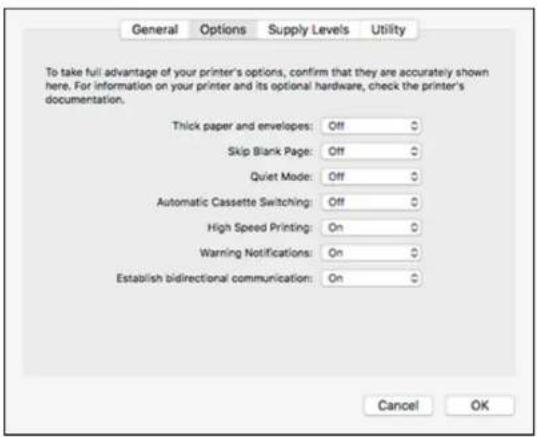
text_image
To take full advantage of your printer's options, confirm that they are accurately shown here. For information on your printer and its optional hardware, check the printer's documentation. Thick paper and envelopes: Off Skip Blank Page: Off Quiet Mode: Off Automatic Cassette Switching: Off High Speed Printing: On Warning Notifications: On Establish bidirectional communication: On Cancel OK- Selectanyoftheavailableprintingpreferences.
5.ClickOK.
PrintingPreferences-Mac
Parenttopic: PrintingonaMac
PrintingPreferences-Mac
YoucanselectfromthesesettingsontheOptionsorDrivertab.
ThickPaperandEnvelopes
Preventsinkfromsmearingwhenyouprintonenvelopesorotherthickpaper.
SkipBlankPage
Ensure that your product does not print pages that contain not text or images.
QuietMode
Lessensnoiseduringprintingbutmaydecreaseprintspeed.
AutomaticCassetteSwitching
Automatically switch the other cassette when none of the cassettes run out of paper.
HighSpeedPrinting
Speedsupprintingbutmayreduceprintquality.
WarningNotifications
Letsyouchoosewhetherornottoreceivewarningnotificationsfromtheprintersoftwareforvarious operatingconditions.
Establishbidirectionalcommunication
Allowstheproductocommunicatewiththecomputer.Donotchangethedefaultsettingunlessyou experienceissueswhenusingasharedprintingpool.
Parenttopic: SelectingPrintingPreferences-Mac
PrintingYourDocumentorPhoto-Mac
Once you have selected your print settings, you are ready to print.
ClickPrintatthebottomoftheprintwindow.
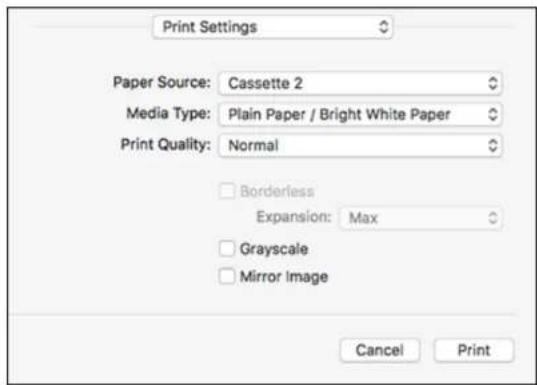
text_image
Print Settings Paper Source: Cassette 2 Media Type: Plain Paper / Bright White Paper Print Quality: Normal Borderless Expansion: Max Grayscale Mirror Image Cancel PrintCheckingPrintStatus-Mac
Parenttopic: PrintingonaMac
CheckingPrintStatus-Mac
Duringprinting, you can view the progress of your print job, control printing, and check in status.
- ClicktheprintericonwhenitappearsintheDock.
Youseetheprintstatuswindow:
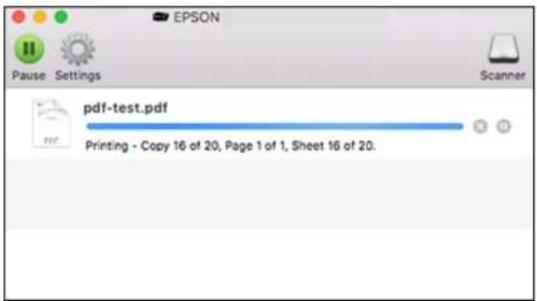
text_image
EPSON Pause Settings Scanner pdf-test.pdf Printing - Copy 16 of 20, Page 1 of 1, Sheet 16 of 20.- Select the following options as necessary for your MacOS version:
• Tocancelprinting, clicktheprintjobandclickorDelete
- Topauseaprintjob, clicktheprintjobandclickorHold. To resumeaprintjob, clickthe pausedprintjobandclickorResume.
• To pause printing for all queued print jobs, click Pause or Pause Printer.
• To display other printer information, click Settings or Supply Levels.
Parenttopic: Printing Your Documentor Photo-Mac
CancellingPrintingUsingaProductButton
If you need to cancel printing, press the can button on your product.
Parenttopic: PrintingfromaComputer
Scanning
Youcanscanyouroriginalsandsavethemasdigitalfiles.
StartingaScan
ScanninginEpsonScan2
StartingaScan
Afterplacingyouroriginalsonyourproductforscanning,startscanningusingoneofthesemethods.
StartingaScanUsingtheProductControlPanel
StartingaScanUsingtheEpsonScan2Icon
StartingaScanfromaScanningProgram
ScanningfromSmartDevices
Parenttopic: Scanning
StartingaScanUsingtheProductControlPanel
Youcanscananimagetoyourcomputerusingyourproduct'scontrolpanelbuttons.
Yourproductautomaticallyselectssuitabledefaultscansettings, butyoucanvieworchangethemas necessary.
- Makesureyouinstalledtheproductsoftwareandconnectedtheproducttoyourcomputeror network.
Note: Restart your computer after installing the product software to enable scanning from the control panel. AlsomakesuretheEventManagerprogramisnotbeingblockedbyyourfirewallorsecurity software.
- Pressthehombutton, if necessary.
3.PressthearrowbuttonstoselectScanandpresstheOKbutton.
Youseeascreenlikethis:

text_image
Scan WSD Scan to Memory Card OK Proceed-
SelectascanoptionandpresstheOKbutton.
-
Scan to Memory Card saves your scan file on a memory card and lets you select the file format, quality,andothersettings.
- ScantoCloud sends your scanned file to a destination that you have registered with Epson Connect.
Note: Tousethisfeature,youmusthaveregisteredacloudaccountwithEpsonConnect.
-ScantoComputer(JPEG)savesyourscanasaJPEGfiletoyourcomputerorasanimage
captureonaMac.
-ScantoComputer(PDF)savesyourscanasaPDFfiletoyourcomputerorasanimagecapture onaMac.
- ScantoComputer(Email)scansyouroriginalandattachesittoamessageinyoure-mail program.Youcanselectthee-mailprogramyouwanttouseandresizeyourimage,ifnecessary,fromanoptionscreenonyourcomputer.
Note: This workswith MAPI-type emails such as Microsoft Outlook, Windows LiveMail, MacMail, and Entourage, but not web-based emails such as Gmail.
- ScantoComputer(WSD)letsyoumanagewirelessscanninginWindows.
Note: Tousethisfeature, you must first setup WSD(WebServicesforDevices) on the computer you want to scanto.
-
ToscantoyourPC, select how you connected your product to your computer:
-
If your product is connected directly to your computer with a USB cable, select USB Connection.
- If your product is connected to your computer over an network, select the computer name from the list.
6.Pressthestarbuttontostartscanning.
ScantoMemoryCardOptions
ChangingDefaultScanJobSettings
Parenttopic: StartingaScan
ScantoMemoryCardOptions
SelecttheScantoMemoryCardoptionsyouwanttouse.
| ScantoMemoryCard setting | AvailableoptionsDescription | |
| FormatJPG | JPG:forphotosPDF:fordocuments | |
| ColorColor | B&W | Selectcolororblack-and-white scans |
| ScanAreaLetter | A4AutoCroppingMaxArea | Selectsthepagesizefordocuments orspecialsettingsforphotos.AutoCropping:forphotoswith darkedgesMaxArea:formostphotos |
| DocumentText | Photograph | Selectsthetypeoforiginalyouare scanning |
| Resolution200dpi | 300dpi600dpi | 200dpi:fore-mailingorpostingon theweb300dpi:forprintingorOCR600dpi:forhighestqualityprinting |
| Contrast Various levels Decrease | or increase image | contrast |
| Document Orientation Portrait | Landscape | Specifies the orientation of your originals |
Parent topic: Starting a Scan Using the Product Control Panel
Changing Default Scan Job Settings
You can view or change the default scan job settings your product uses when you scan to your computer. You do this using the Event Manager program.
-
Do one of the following to open Event Manager:
-
Windows 10: Click 📋 and select EPSON Software > Event Manager.
- Windows 8.x: Navigate to the Apps screen and select Event Manager.
-
Windows (other versions): Click or Start > All Programs or Programs > EPSON Software > Event Manager.
• Mac: Open the Applications folder, click Epson Software, and select Event Manager. -
Open the Scanner (Windows) or Select Scanner (Mac) drop-down list and select your product, if necessary.
- Click Make Job Settings.
- Open the Edit Job Settings drop-down list and select the scan job settings you want to view or change.
- Change the settings as necessary.
- Click OK.
- Click Close to close the Event Manager window.
Parent topic: Starting a Scan Using the Product Control Panel
Starting a Scan Using the Epson Scan 2 Icon
You can start the Epson Scan 2 program to select scan settings, scan, and save the scanned image to a file.
Note: If you are using your Epson product with the Windows 10 S operating system, you cannot use the softwaresdescribedinthissection.YoualsocannotdownloadandinstallanyEpsonproductsoftware fromtheEpsonwebsiteforusewithWindows10S;youmustobtainsoftwareonlyfromtheWindows Store.
- Windows 10: Click and select EPSON > Epson Scan 2.
- Windows 8.x: Navigate to the Apps screen and select Epson Scan 2.
- Windows (other versions): Click 📋 or Start, and select All Programs or Programs. Select EPSON >EpsonScan2>EpsonScan2.
• Mac: Open the Applications folder, open the Epson Software folder, and select Epson Scan 2.
YouseeanEpsonScan2windowlikethis:
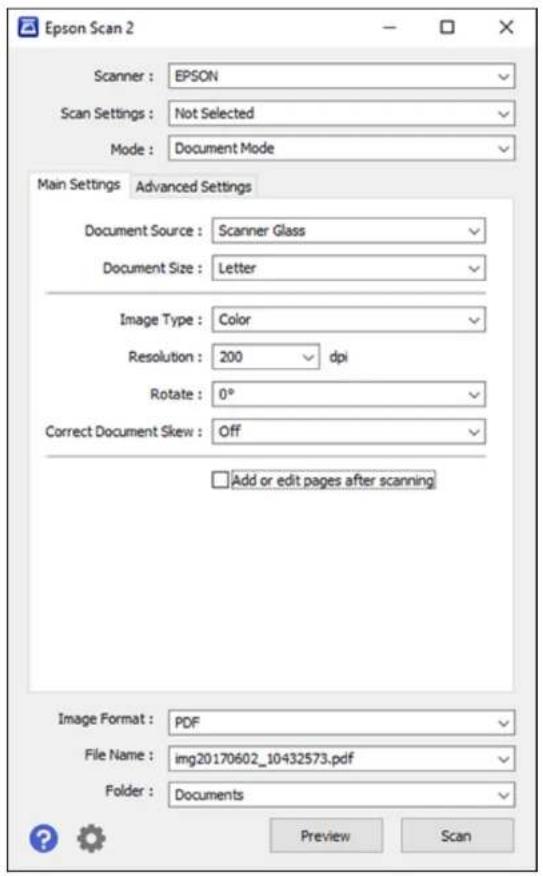
text_image
Epson Scan 2 Scanner : EPSON Scan Settings : Not Selected Mode : Document Mode Main Settings Advanced Settings Document Source : Scanner Glass Document Size : Letter Image Type : Color Resolution : 200 dpi Rotate : 0° Correct Document Skew : Off Add or edit pages after scanning Image Format : PDF File Name : img20170602_10432573.pdf Folder : Documents Preview ScanParenttopic: StartingaScan
StartingaScanfromaScanningProgram
YoucanstartEpsonScan2fromaTWAIN-compliantscanningprogramtoselectscansettings,scan,andopenthescannedimageintheprogram.
Note: If you are using your Epson product with the Windows 10 S operating system, you cannot use the softwaresdescribedinthissection.YoualsocannotdownloadandinstallanyEpsonproductsoftware fromtheEpsonwebsiteforusewithWindows10S;youmustobtainsoftwareonlyfromtheWindows Store.
- Openyourscanningprogramandselectitsscanningoption.(Seeyourscanningprogramhelpfor instructions.)
- Select your product.
Note: In certain programs, you may need to select your product as the "source" first. If you see a Select Source option, choose it and select your product. With Windows, do not select a WIA option for your product; it will not work correctly.
YouseeanEpsonScan2windowlikethis:
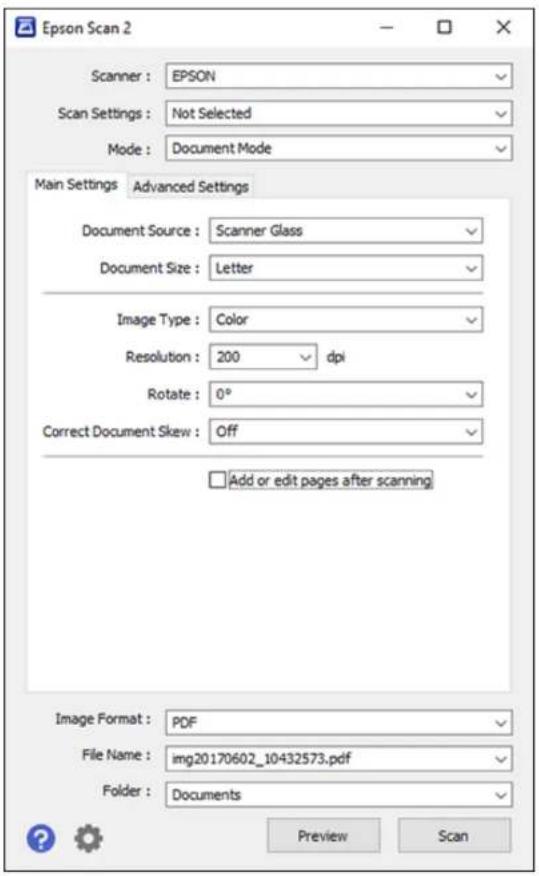
text_image
Epson Scan 2 Scanner : EPSON Scan Settings : Not Selected Mode : Document Mode Main Settings Advanced Settings Document Source : Scanner Glass Document Size : Letter Image Type : Color Resolution : 200 dpi Rotate : 0° Correct Document Skew : Off Add or edit pages after scanning Image Format : PDF File Name : img20170602_10432573.pdf Folder : Documents Preview ScanParenttopic: StartingaScan
ScanningfromSmartDevices
UsingtheEpsoniPrintapplication,youcanuseyouriOSorAndroidsmarthoneortablettoscan originaldocumentsorphotosonyournetworkedproductandsavethemasdigitalfilesonyourdevice.
FollowthelinkhereformoreinformationonEpsoniPrint.
Parenttopic: StartingaScan
Relatedtasks
UsingtheEpsoniPrintMobileApp
ScanninginEpsonScan2
EpsonScan2automaticallyscansyourdocumentandsavesthescannedfileinPDFformatinyour operatingsystem'sDocumentsorMyDocumentsfolder,oropensitinyourscanningprogram.Youcan selectsettings,preview,andchangethescannedfilesettingsasnecessary.
Note: If you are using your Epson product with the Windows 10 S operating system, you cannot use the softwaresdescribedinthissection.YoualsocannotdownloadandinstallanyEpsonproductsoftware fromtheEpsonwebsiteforusewithWindows10S;youmustobtainsoftwareonlyfromtheWindows Store.
1.StartEpsonScan2.
Youseethiswindow:
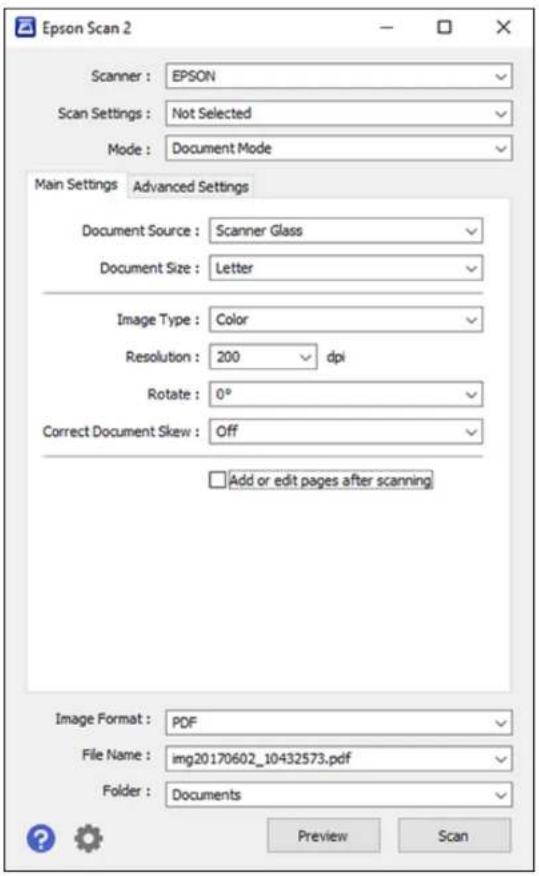
text_image
Epson Scan 2 Scanner : EPSON Scan Settings : Not Selected Mode : Document Mode Main Settings Advanced Settings Document Source : Scanner Glass Document Size : Letter Image Type : Color Resolution : 200 dpi Rotate : 0° Correct Document Skew : Off Add or edit pages after scanning Image Format : PDF File Name : img20170602_10432573.pdf Folder : Documents Preview Scan- SelecttheModesettingthatmatchesthetypeoforiginalyouarescanning.
- Select the Document Sources setting that matches where you placed your original.
- Select the Document Size setting that matches the size of your original. You can select Customize to enteracustomsize, if necessary.
- Select the image type of your original and how you want it scanned as the Image Type setting.
- Select the Resolution setting you want to use for your scan.
- SelecttheRotatesettingtorotatethescannedimage.
- Select the Correct Document Skew setting to correct skewed originals, image contents, or both.
9.ClickthePreviewbutton.
EpsonScan2 previews your original and display the results in the EpsonScan2 window.
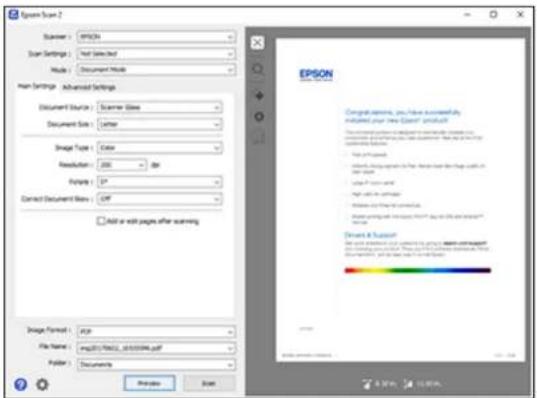
text_image
Sigma Scan Scanner : EPSON Scan Settings : Not Selected Mode : Document Mode Main Settings - Advanced Settings Document Style : Scanner Size Document Size : Letter Image Type : Color Resolution : 200 px Page : 1" Connect Document Size : OFF Add or add pages after scanning EPSON Congratulations, you have successfully modified your new Epson's product? From the image: - Here is important to the image and find the image in the image file. - Use the image as an example. - Use the image in the image file. You can use this image. Direct Scan Use your own image to create your image and find the image in the image file. - Please click your image on the image file. Preview Cancel OK Cancel10.Dooneofthefollowing:
- If you'rescanninginDocumentMode, select any of the additional settings that you want to use on the MainSettingstab.
-
If you're scanning in Photo Mode, select the Color Management and Thumbnail Options settingsasnecessary.
-
ClicktheAdvancedSettingstabandselectanysettingsthatyouwanttouse.
-
Select the format in which you want to save your scanned file as the Image Format setting. If necessary, selectOptions and selectanydesiredformatoptions.
- Enter the file name for your scanned file in the File Name field. If necessary, select Settings to modify the filenamesettings.
- Select the location in which you want to save your scanned file as the Folder setting. If necessary, selectSelecttocreateanewfolder.
15.ClickScan.
Theproductscansyouroriginalandsavesthescannedfileinthelocationyouspecified.
AdditionalScanningSettings-MainSettingsTab AdditionalScanningSettings-AdvancedSettingsTab SavingScannedDocumentsasaSearchablePDF
Parenttopic: Scanning
AdditionalScanningSettings-MainSettingsTab
You can select these additional scanningsettings on the Epson Scan2 Main Setting stab. Not all adjustment settings may be available, depending on other settings you have chosen.
CorrectDocumentSkew
Correctsskewedoriginals,imagecontents,orboth.
Addoreditpagesafterscanning
Letsyouadd, remove, oreditthepagesinajob, includingrotatingpagesandchangingthepage order.
Note: To save multiple pages in a single file, you must select a file format that supports multiple pages such as PDF or Multi-TIFF. If you select another file format, each scanned image or page is saved as separatefile.
Parenttopic: ScanninginEpsonScan2
AdditionalScanningSettings-AdvancedSettingsTab
You can select these additional scanning settings on the Epson Scan2 Advanced Setting stab. Not all adjustment settings may be available, depending on other settings you have chosen.
RemoveBackground
Removesthebackgroundoftheoriginals.
TextEnhancement
Sharpenstheappearanceoflettersintextdocuments.
AutoAreaSegmentation
Makesblackandwhiteimagesclearerandtextrecognitionmoreaccuratebyseparatingthetextfrom thegraphics.
Threshold
Adjuststhelevelatwhichblackareasintextandlineartaredelineated,improvingtextrecognitionin OCR(OpticalCharacterRecognition)programs.
ColorEnhance
Enhancestheshadesofthecoloryouselectinthescannedimage. Thissettingisavailableonlyifyou selectGrayscaleorBlack&WhiteasthelImageTypesetting.
Brightness
Adjuststheoveralllightnessanddarknessofthescannedimage.
Contrast
Adjuststhedifferencebetweenthelightanddarkareasoftheoverallscannedimage.
Gamma
Adjuststhemidtonedensityofthescannedimage.
UnsharpMask
Makestheedgesofcertainimageareasclearer.Turnoffthisoptiontoleavesofteredges.
Descreening
Removestheripplepatternthatmightappearinsubtlyshadedimageareas,suchasskintones.This optionimprovesresultswhenscanningmagazinesorenewspapers.(Theresultsofdescreeningdonot appearinthepreviewimage,onlyinyourscannedimage.)
EdgeFill
Correctsshadowingaroundtheedgesoftheimagebyfillingtheshadowswithblackorwhite.
DualImageOutput
Scanstheoriginalimagetwiceusingdifferentoutputsettings(Windowsonly).
Parenttopic: ScanninginEpsonScan2
SavingScannedDocumentsasaSearchablePDF
YoucanscanadocumentandsavethetextinasearchablePDF.InasearchablePDF,textis recognizedusingOpticalCharacterRecognition(OCR)andthenembeddedinthescannedoriginal.
Note: TherequiredEpsonScan2OCRComponentisinstalledautomaticallywhenyouinstallyour product software as instructed on the Start Here sheet. If you install your scanner software programs individually, besuretoalsoinstallthiscomponentifyouwanttoperformOCR.
- Load your original in the product for transcanning.
2.StartEpsonScan2. - Select your scansettings.
- ClickPreviewandadjusttheareayouwanttoscan, if necessary.
- SelectSearchablePDFasthelmageFormatsetting.
6.SelectOptionsfromtheImageFormatlist.
Youseethiswindow:
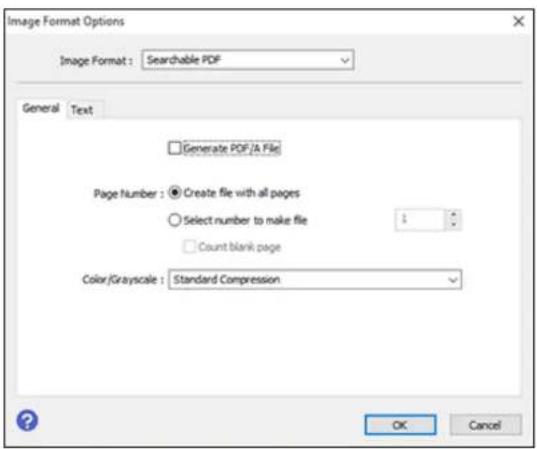
text_image
Image Format Options Image Format : Searchable PDF General Text □ Generate PDF [A File] Page Number : ● Create file with all pages ○ Select number to make file □ Count blank page Color/Grayscale : Standard Compression OK Cancel- SelectanyoftheoptionsontheGeneraltab.
8.SelecttheTexttab. -
MakesurethelanguageusedinthedocumenttextisselectedastheTextLanguagesetting.
10.ClickOK. -
ConfirmtheFileNamesettingandselectaFoldersettingforyourdocument.
12.ClickScan.
ThescannedimageissavedasasearchablePDF.
Parenttopic: ScanninginEpsonScan2
UsingMemoryCardswithYourProduct
Followtheinstructionsheretoworkwithamemorycardinsertedintoyourproduct.
InsertingaMemoryCard
PrintingfromaMemoryCard
TransferringPhotosonaMemoryCard
InsertingaMemoryCard
Insertonlyonememorycardatatimeintothememorycardslotonyourproduct.
-
Makesurethememorycardandthefilesonitarecompatiblewithyourproductbeforeinsertingthe card.
-
Insert your memory card into the slot, making sure the card is oriented correctly.
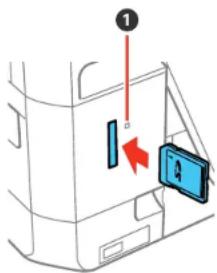
text_image
Diagram showing a door with labeled components and directional arrow, likely illustrating a door or interior mechanism.1 Memorycardaccesslight
Note: Do not force the card all the way into the slot. Insert it only until it meets resistance.
Thememorycardaccesslightflashesandthenstayslit.
Caution: Do not remove the memory card or turn off your product while the memory card access light is flashing, or you may lose data from the memory card.
MemoryCardTypes
MemoryCardFileSpecifications
RemovingaMemoryCard
Parenttopic: UsingMemoryCardswithYourProduct
MemoryCardTypes
Youcaninsertthesetypesofmemorycardsinyourproduct.
Note: Cards marked with an asterisk (*) require an adapter; consult your adapter documentation for detailsonusingit.
Youcaninsertthefollowingcardsinthememorycardslot:
•SD:2GB
•SDHC:32GB
- SDXC:64GB
•miniSD*:2GB
•miniSDHC*:32GB
- microSD*:2GB
- microSDHC*:32GB
- microSDXC*:64GB
Parenttopic: InsertingaMemoryCard
MemoryCardFileSpecifications
Youcaninsertmemorycardsinyourproductcontainingfilesthatmeetthesespecifications.
FileformatJPEGwiththeExifversion2.3standard(takenwithdigitalcamera
usingDCF(DesignruleforCameraFilesystem)version1.0or2.0 compliant)
Imagesize80×80pixelsto10200×10200pixels
FilesizeUpto2GB
NumberoffilesUpto9990
Note: DCF2.0 filesstoredinacamera's built-in memory are not supported.
Parenttopic: InsertingaMemoryCard
RemovingaMemoryCard
Afteryoufinishworkingwithamemorycard,checktomakesureitissafetoremoveitfromyourproduct.
Caution: Do not remove a memory card or turn off your product while the memory card access light is flashingoryoumaylosedatafromthememorycard.
- Makesurethememorycardaccesslightisnotflashing.
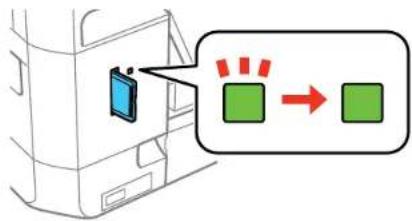
text_image
Diagram showing a device with a blue screen and a green square, with red arrows pointing to it, indicating a process or transformation.-
If your product is connected to your computer using a USB cable, do one of the following:
-
Windows: Open the My Computer, Computer, Windows Explorer, or File Explorer utility. Then right-click then name of your memory card (listed as aremovable disk) and select Eject.
•Mac: Dragtheremovablediskiconforyourmemorycardfromthedesktoporcomputerwindow intothetrash.
3.Pushinthememorycard, thenpullitstraightoutofitsslot.
Parenttopic: InsertingaMemoryCard
PrintingfromaMemoryCard
Seethesectionstoprintphotosfromamemorycardinsertedintoyourproduct:
ViewingandPrintingPhotos
PrintingPhotoLayoutsfromaMemoryCard
PrintingPhotoGreetingCards
Parenttopic: UsingMemoryCardswithYourProduct
ViewingandPrintingPhotos
Seethesesectionstoviewandprintphotosdisplayedonyourproduct'sLCDscreen.
ViewingandPrintingPhotosFromtheLCDScreen
PrintSettingOptions-MemoryCard
PhotoAdjustmentOptions-MemoryCard
Parenttopic: PrintingfromaMemoryCard
ViewingandPrintingPhotosFromtheLCDScreen
YoucanselectphotosforprintingasyouviewthemontheLCDscreen.
-
Pressthehon button, if necessary.
-
Press the arrow buttons to select Print Photos and press the OK button. Aphotoonyourmemorycardisdisplayed:
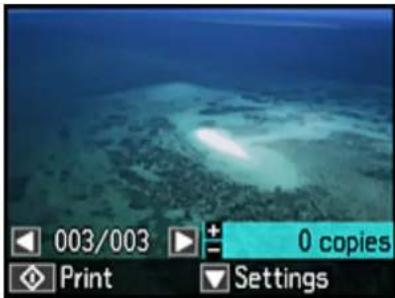
natural_image
Underwater scene with a bright light source and dark water, no visible text or symbols3.Presstherightorleftarrowbuttontoscrollthroughyourphotosanddisplayonethatyouwantto vieworprint.
-
Press the + or - button to select one or more copies of the photo (up to 99).
-
Toviewandselectadditionalphotosforprinting, repeatthestepsabove.
-
Toviewadditionalsettings, pressthedownarrowbutton.
Youseethisscreen:
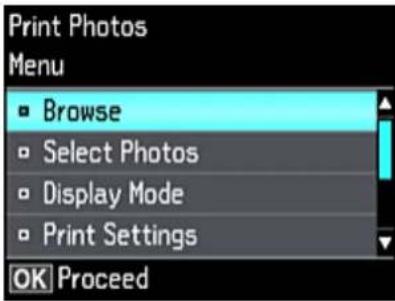
text_image
Print Photos Menu Browse Select Photos Display Mode Print Settings OK Proceed7.Dooneofthefollowing:
- To locate photos by date, select Browse, press the OK button twice, and select the photos you want.
- To change the selected photos and number of copies to print, select Select Photos, press the OK button, and select then necessary settings.
- To change the display setting for the LCD screen, select Display Mode, press the OK button, and select theseetting you want.
- To change the print settings, select Print Settings, press the OK button, and select the necessary settings.
•Tochangetheappearance(e.g., brightness and contrast) of your printed photos, select Photo Adjustments, pressthe OK button, and select the necessary settings. - To apply a sepia tone or black-and-white filter to the viewed or printed photo, select Filter, press theOKbutton, and selectthenecessarysettings.
-
To crop or zoom into your photo, select Crop/Zoom, press the OK button, and press the + or - buttontoadjusttheimageareaorthethomebuttontorotatethecroparea.Whenyouare finished,presstheOKbuttontwice.
-
When you are ready to print, press the start button.
Note: Tocancelprinting, pressthecancelbutton.
Parenttopic: Viewing and Printing Photos
Relatedreferences
PhotoAdjustmentOptions-MemoryCard
PrintSettingOptions-MemoryCard
PrintSettingOptions-MemoryCard
Select the Print Settings options you want to use when printing photos displayed on the LCD screen.
Note: To return to the default print settings, press the Ⓤ cancel button, select No, and press the OK button.
| PrintsettingsAvailable | e options | Description |
| PaperSizeVariouspapersizes | s | Indicatesthesizeofpaperyouhaveloaded |
| PaperTypeVariouspapertypes | p | Indicatesthetypeofpaperyouhaveloaded;seethelistofpapertypesforcopying(availableoptionsdependonthe selectedPaperSizesetting) |
| PaperSourceCassette | 1Printsontopaper | oadedinCassette1(uppercassette) |
| Cassette2Printso | ntopaperloadedinCassette2(lowercassette) | |
| Cassette1>Cassette2 | PrintsontopaperloadedinCassette1andthenontopaperloadedinCassette2whenthefirstcassetteisempty(loadthesamesizeandtypeofpaperinbothcassetteswhenselectingthisoption) | |
| RearPaperFeedSlot | Printsontopaperloadedintherearpaperfeedslot | |
| BorderlessBorderles | sExpandstheimag | etotheedgeofthepaper(slightcroppingmayoccur) |
| WithBorderLeaves | asmallmarginaroundtheimage | |
| QualityDraftProvides | owerqualityfordraft | printing |
| StandardProvides | goodqualityformostprints | |
| BestProvidestheighighestqualityforimportantprints | ||
| ExpansionStandard | Expandsimagescor | rectlyformostborderlessprints |
| MediumExpands | magesslightlylessforborderlessprints | |
| MinimumExpands | smagestheleastforborderlessprints(youmaysee somewhatborder) | |
| DateVariousdate | formats | Printsthedatethephotowastakenonthephotointhe formatyouselect |
| PrintInfo.On Photos | OffTurnsoffthissetting | |
| CameraTextPrints | textthatyouaddedinyourcamera | |
| LandmarkPrintslo | cationinformationembeddedinaphotobycameras thathaveabuilt-inGPSfeature | |
| FitFrameOnAutomatic | callycropsthephoto | ofitintotheselectedphoto layout |
| OffTurnsoffautomaticcropping | ||
| BidirectionalOnPrints | atnormalspeed | |
| OffSlowsdownprintingtoimproveprintquality | ||
Parenttopic: Viewing and Printing Photos
Relatedreferences
PhotoAdjustmentOptions-MemoryCard
PaperTypeSettings-Copying
PaperSizeSettings-Copying
Relatedtasks
ViewingandPrintingPhotosFromtheLCDScreen
PhotoAdjustmentOptions-MemoryCard
Select the Photo Adjustment options you want to use when viewing and printing photos displayed on the LCD screen. Themodifications affect only the printed copy of the photo, not the original file.
| PhotoAdjustment settings | AvailableoptionsDescription | tion |
| FixPhotoFixPhotoOn | Automaticallyadjuststhebrightness,contrast,and saturationofthephotobasedontheScene Detectionsettingthatisselected. | |
| FixPhotoOffTurnsoffautomaticadjustments;seeNotebelow | ||
| P.I.M.Usesyourcamera'sPRINTImageMatchingorExif Printadjustments | ||
| Scene Detection | Automatic | Optimizes the Fix Photo adjustments for specific typesofphotos;selecttheoptionthatbestmatches yourphotocontent |
| People | ||
| Landscape | ||
| NightScene | ||
| FixRed-EyeOff-Current | ntAutomaticallyfixesthered | -eyeeffectinphotos |
| On-Current | ||
| BrightnessVariousSetings | Adjustindividualqualiti | esinyourphoto |
| Contrast | ||
| Sharpness | ||
| Saturation | ||
Note: Fix Photo uses a sophisticated face recognition technology to optimize photos that include faces. Forthistowork,botheyesandthenosemustbevisibleinthesubject'sface.Ifyourphotoincludesa face with an intentional color cast, such as a statue, you may want to turn off Fix Photo to retain the specialcoloreffects.
Parenttopic: Viewing and Printing Photos
Relatedreferences
PrintSettingOptions-MemoryCard
Relatedtasks
ViewingandPrintingPhotosFromtheLCDScreen
PrintingPhotoLayoutsfromaMemoryCard
Youcanprintoneormorephotosfromamemorycardinspeciallayoutsonvarioussizesofphotopaper.
- Load photopaperinyourproduct.
- Pressthehon button, if necessary.
- Press the arrow buttons to select More Functions and press the OK button.
- SelectPhotoLayoutSheetandpresstheOKbutton.
Youseethisscreen:
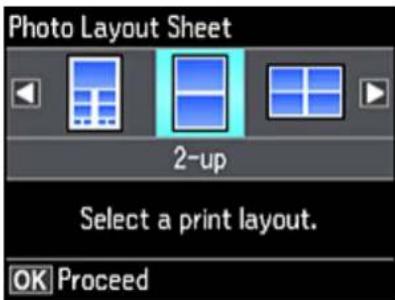
text_image
Photo Layout Sheet 2-up Select a print layout. OK Proceed- SelectoneofthelayoutoptionsandpresstheOKbutton.
Youseethisscreen:
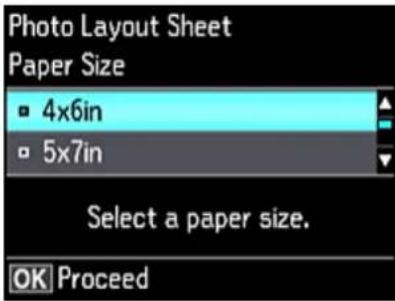
text_image
Photo Layout Sheet Paper Size 4x6in 5x7in Select a paper size. OK Proceed- Select the Paper Size setting that matches the paper you loaded and press the OK button.
- Select the Paper Type setting that matches the paper you loaded and press the OK button. Dependingonthelayoutyouselected,youmayseethisscreen:
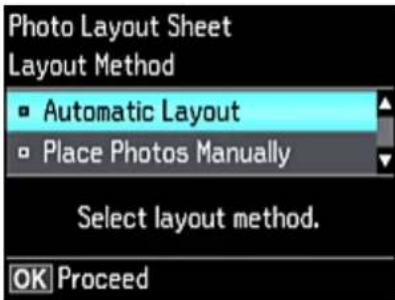
text_image
Photo Layout Sheet Layout Method Automatic Layout Place Photos Manually Select layout method. OK Proceed- If you seethescreen above, doone of the following:
- To allow your product to place photos in the layout automatically, select Automatic Layout and press the OK button. Press the + button to select a photo to print. If you need to deselect a photo, pressthe-button.PresstheOKbuttonwhenyou'refinished.
- To place photos in the layout manually, select Place Photos Manually and press the OK button. Pressthearrowbuttonstochangelayoutoptions,pressingtheOKbuttontoconfirmeachphoto placement.
Note: If the product does not automatically advance to then next screen when you finish placing your photos, press the arrow buttons to select Finished and press the OK button.
-
If you want to chan the print settings for the photolayout sheet, press the upordown arrow button to select Menu and press the OK button.
-
Press the + or - button to select one or more copies of each photo layout sheet (up to 99).
11.PresstheOKbutton.
-
To print more than one copy of the photo layout sheet, press the + or - button to select the number (upto99).
-
When you are ready to print, press the start button.
Note: Tocancelprinting, pressthecanvelbutton.
PhotoLayoutOptions
Parenttopic: PrintingfromaMemoryCard
Relatedreferences
PaperTypeSettings-Copying
PaperSizeSettings-Copying
Relatedtopics
LoadingPaper
PhotoLayoutOptions
Selectthelayoutyouwanttousewhenprintingyourphotosinalayout.
PicturePackage
Printsonephotoinmultiplesizesononesheet.
2-up,4-up,8-up,or20-up
Print2,4,8,or20photosononesheet.
Upper ^1/2 or Lower ^1/2
Printonephotointheupperorlowerhalfofthesheet.
PhotoID
Prints4ID-sizedphotosononesheet.
JewelUpper
Printsonephotoontheupperhalfofafoldedjewelcaseinsert.
JewellIndex
Prints24to48thumbnailimagesonafoldedjewelcaseinsert.
Parenttopic: PrintingPhotoLayoutsfromaMemoryCard
PrintingPhotoGreetingCards
You can create custom greeting cards using photos on your memory card or other device, and add your own handwritten or printed text.
Firstyouselectyourphotoandprintatemplateonplainpaper. Thenyoufilloutthetemplate, addyour message, and printyourcards.
CreatingandPrintingaGreetingCardTemplate
PrintingaGreetingCardfromaTemplate
Parenttopic: PrintingfromaMemoryCard
CreatingandPrintingaGreetingCardTemplate
Beforeyoustart, makesureplainpaperisloadedandyourmemorycardisinserted.
-
Pressthehon button, if necessary.
-
Press the arrow buttons to select More Functions and press the OK button.
-
SelectPrintPhotoGreetingCardandpresstheOKbutton.
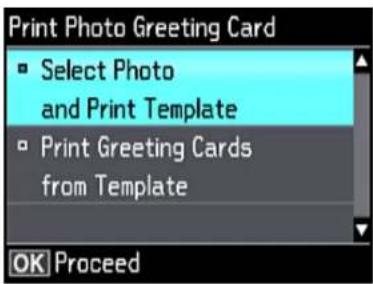
text_image
Print Photo Greeting Card Select Photo and Print Template Print Greeting Cards from Template OK Proceed- SelectSelectPhotoandPrintTemplateandpresstheOKbutton.
5.PresstheleftorrightarrowbuttontoselectthephotoyouwantandpresstheOKbutton.
-
Select Letter to print three cards on one letter-size sheet or 4x6in to print one card. Then press the OKbutton.
-
SelectthetypeofpaperyouplantouseandpresstheOKbutton.
-
Select the other print settings as necessary, pressing the OK button after each selection.
-
When you are ready to print your greeting card template on plain paper, press the start button
Parenttopic: Printing Photo Greeting Cards
Relatedtasks
PrintingaGreetingCardfromaTemplate
PrintingaGreetingCardfromaTemplate
Afteryourgreetingcardtemplateisprinted,youfillitouttocreateyourcardandaddyourmessage.
- UseadarkpenorpenciltofillinthecirclesandselecttheTextStyleandTextEffects.
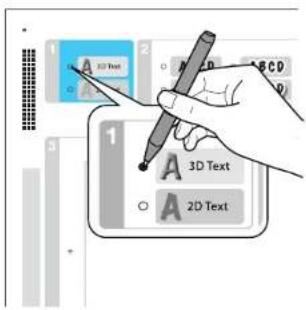
text_image
1 A 3D Text 2 A 3D A 2D Text 3 1 A 3D Text A 2D Text2.Addyourgreetingcardmessagewithinthebox.Youcanwriteitinbyhand,printamessageand pasteitintothebox,ordrawapicture.
Note: When adding text, place it in the direction that your photofaces.
-
Load photopapereitherin Cassette2(lower) forthissize: Letter(8.5×11 inches[216×279mm]), orin Cassette1(upper) forthissize: 4×6 inches(102×152mm).
-
Select Print Greeting Cards from Template and press the OK button. (If you do not see the option, press the home button and select More Functions > Print Photo Greeting Card > Print GreetingCardsfromTemplate.)
-
Follow the instructions on the LCD screentoplacethetemplate faced down on the scanner glass with the blue triangle facing into the front right corner.
6.ClosethedocumentcoverandpresstheOKbutton.
-
To print more than one copy, press the + or - button to select the number (up to 99).
-
When you are ready to print, press the start button.
Note: Tocancelprinting, pressthecanwelbutton.
When you finish printing, cut your greeting cards apart, if necessary.
Parenttopic: Printing Photo Greeting Cards
Relatedtasks
CreatingandPrintingaGreetingCardTemplate
TransferringPhotosonaMemoryCard
Youcantransferphotostoandfromamemorycardinsertedintoamemorycardslotonyourproduct.
SettingUpFileSharingforPhotoTransfersfromYourComputer
TransferringPhotosfromaMemoryCardtoYourComputer
Parenttopic: UsingMemoryCardswithYourProduct
SettingUpFileSharingforPhotoTransfersfromYourComputer
Before you transfer photos from a computer to an记忆 card inserted into an记忆 card slot on your product, you may need to set up your product's file sharing settings.
Caution: Removethememorycardbeforeyouchangethissettigoryoumaylosedatafromthememorycard.Donotremoveamemorycardorturnoffyourproductwhilethememorycardaccesslightisflashingoryoumaylosedatafromthememorycard.
-
Remove anonymemory cards from the product.
-
Pressthehombutton, if necessary.
- PressthearowbuttonstoselectSettingsandpresstheOKbutton.
- SelectFileSharingSetupandpresstheOKbutton.
- Select your connection type and press the OK button.
Parenttopic: TransferringPhotosonaMemoryCard
Relatedtasks
RemovingaMemoryCard
TransferringPhotosfromaMemoryCardtoYourComputer
Youcantransferphotostoandfromamemorycardinsertedintoamemorycardslotonyourproduct andacomputerconnectedtoyourproduct.
Note: Do not transfer photos to and from a memory card while you are printing from the memory card.
- Makesureyourproductisconnectedtoacomputer.
- Insertamemorycardintoamemorycardslotonyourproduct.
-
Dooneofthefollowingtoaccessyourmemorycardfilesfromyourcomputer:
-
Windows: Open the Computer, My Computer, Windows Explorer, or File Explorer utility, then selecttheremovablediskicon.
•MacwithaUSBconnection: Lookfortheremovablediskicononyourdesktopporcomputer window, thenselectit.
•Macwithanetworkconnection: Selecttheharddriveicononyourdesktopporcomputerwindow, selectyourproductintheSHAREDsectionofthesidebar(youmayneedtowidenthesidebarto seethename), thenselecttheMEMORYCARDicon. -
Select the folder that contains your photos.
5.Dragthephotosyouwanttotransfertothedesiredfolderonyourcomputeroronyourmemorycard.
Note: Your product's LCD screen does not update to display new photos transferred to the memory card. Wait until thememorycardaccesslightstopsflashing, then remove and insert thememorycardto updatethephotosdisplayed.
Parenttopic: TransferringPhotosonaMemoryCard
Relatedtasks
InsertingaMemoryCard
UsinganExternalDevicewithYourProduct
Followtheinstructionsinthesesectionstouseyourproductwithanexternaldevice,suchasacamera, smartphone,orotherdevice.
PrintingfromaCamera
ViewingorPrintingfromaUSBFlashDriveorExternalDevice
PrintingfromaCamera
If you have a digital camerathatsupports PictBridgeprinting, you can print your photos directly from the camera. Check your cameramanual to see if it is compatible.
Note: Your photos must be in JPG format and sized from 80×80 to 10200×10200 pixels. Epson cannot guarantee the compatibility of your camera. Some combinations of papertype, size, and layout may not be supported, depending on your camera and the product settings.
SelectingPrintandPhotoAdjustmentSettings
ConnectingandPrintingfromaCamera
PrintingfromaCameraWirelessly
Parenttopic: Using an External Device with Your Product
SelectingPrintandPhotoAdjustmentSettings
Beforeprintingfromyourcamera,youcanmakeimageadjustmentsandselecttheprintsettingsforyour photos.Imageadjustmentsaffectonlytheprintedcopyofthephoto,nottheoriginalfile.
- Presstehonn button, if necessary.
2.PressthearowbuttonstoselectSettingsandpresstheOKbutton.
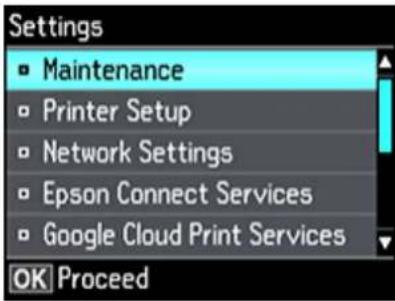
text_image
Settings ■ Maintenance □ Printer Setup □ Network Settings □ Epson Connect Services □ Google Cloud Print Services OK Proceed- Select ExternalDevice Setup and press the OK button.
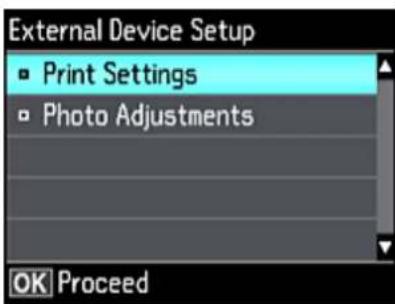
text_image
External Device Setup Print Settings Photo Adjustments OK Proceed- SelectPrintSettingsandpresstheOKbutton.
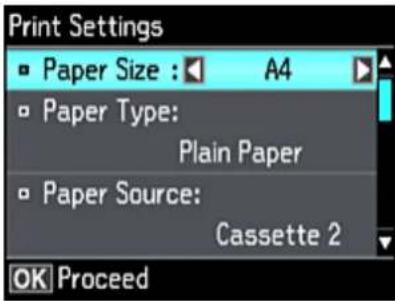
text_image
Print Settings Paper Size : A4 Paper Type: Plain Paper Paper Source: Cassette 2 OK Proceed- Selecttheprintsettingsyouwanttouse.
- When you are done, presstheback button.
- SelectPhotoAdjustmentsandpresstheOKbutton.
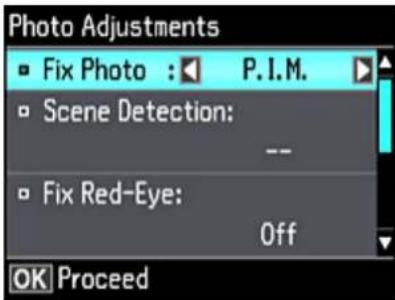
text_image
Photo Adjustments Fix Photo : P.I.M. Scene Detection: -- Fix Red-Eye: Off OK Proceed- Select the photo adjustments you want to use, then press the home but into exit.
Afteryouselectsettings,youarereadytoconnectyourcameraandprintyourphotos.
PrintSettings-Camera
PhotoAdjustments-Camera
Parenttopic: PrintingfromaCamera
Relatedtasks
ConnectingandPrintingfromaCamera
PrintSettings-Camera
Select these print settings options when printing photos from your camera.
| PrintsettingsAvailable | optionsDescription | |
| PaperSizeVariouspapers | izesIndicatesthesizeofpap | eryouhaveloaded |
| PaperTypeVariouspapertypes | typesIndicatesthetypeofpa | peryouhaveloaded;seethelistofpapertypesforcopying(availableoptionsdependontheselectedPaperSize setting) |
| PaperSourceCassette1 | PrintsontopaperloadedinC | cassette1(upper cassette) |
| Cassette2Printsontopaper | loadedinCassette2(lower cassette) | |
| Cassette1>Cassette2Pr | ntsontopaperloadedinCassette1andthenontopaperloadedinCassette2whenthefirstcassetteisempty(loadthesamesizeandtypeofpaperinbothcassetteswhenselectingthisoption) | |
| RearPaperFeedPrintson | topaperloadedintherearpaperfeedslot | |
| PrintsettingsAvailableOptionsDescription | ||
| LayoutBorderlessExpand | dstheimagetothedgeofthepaper(slight croppingmayoccur) | |
| WithBorderLeavesasmallmarginaroundtheimage | ||
| PicturePackagePrintsonephotoinmultiplesizesononesheet | ||
| 1-up,2-up,4-up,8-up, 20-up,and80-up, Variety | Printstheselectednumberofphotosononesheet orCD/DVD | |
| Upper ^1/2 orLower ^1/2 Printsonephotointheupperorlowerhalfofthe sheet | ||
| PhotoIDPrints4ID-sizedphotosononesheet | ||
| JewelUpperPrintsonephotoontheupperhalfofafoldedjewel caseinsert | ||
| JewellIndexPrints24to48thumbnaillimagesonafoldedjewel caseinsert | ||
| QualityDraftProvideslowerqualityfordraftprinting | ||
| StandardProvidesgoodqualityformostprints | ||
| BestProvidesthehighestqualityforimportantprints | ||
| ExpansionStandardExpandsimagescorrectlyformostborderless prints | ||
| Medium Expandsimagesslightlylessforborderlessprints | ||
| Minimum Expandsimagestheleastforborderlessprints (youmayseesomewhiteborder) | ||
| DateOff | Doesnotprintthedateonwhichthephotowas taken | |
| On | Printsthedateonwhichthephotowastaken | |
| Print Info. on Photos | Camera Text | Prints text that you added in your camera |
| Landmark | Printslocationinformationembeddedinaphotoby camerasthathaveabuilt-inGPSfeature | |
| Off | Printsnoinformationonphotos | |
| PrintsettingsAvailable | optionsDescription | |
| FitFrameOnAutomatically | ycropsthephototofitintothe | selectedphotolayout |
| OffTurnsoffautomaticcropping | ||
| BidirectionalOnPrintsat | normalspeed | |
| OffSlowsdownprintingtoimproveprintquality | ||
| CDInner/OuterRangeof | measurementsSelectsinner | andouterdiameterforprintingon CDs/DVDsfromyourcamera |
| CDDensityStandardAdjust | juststheprintdensitywhenprintingon | |
| Darker | CDs/DVDsfromyourcamera | |
| Darkest | ||
Parenttopic: SelectingPrintandPhotoAdjustmentSettings
Relatedreferences
PaperTypeSettings-Copying
PaperSizeSettings-Copying
PhotoAdjustments-Camera
Select these photo adjustment options when printing photos from your camera. Themodifications affect only the printed copy of the photo, not the original file.
| Photo Adjustments settings | AvailableoptionsDescription | |
| FixPhotoFixPhoto | OnAutomaticallyadjust | sthebrightness,contrast,and saturationofthephotobasedontheSceneDetection settingthatisselected |
| FixPhotoOffTurnsoff | automaticadjustments;seeNotebelow | |
| P.I.MUsesyourcamera | 'sPRINTImageMatchingorExifPrint adjustments | |
| Scene Detection | Automatic | Optimizes the Fix Photo adjustments for specific types of photos;selecttheoptionthatbestmatchesyourphoto content |
| People | ||
| Landscape | ||
| NightScene | ||
| FixRed-EyeOffDoesnotautomaticallyfixthered-eyeeffectinphotos | ||
| FilterOffTurnsoffthe | onAutomaticallyfixesthered-eyeeffectinphotos | |
| efiltersetting | ||
| SepiaAppliesasepiatonefiltertotheviewedorprintedphoto | ||
| B&WAppliesablack-and-whitefiltertotheviewedorprinted photo | ||
| BrightnessVarious | settingsAdjustindividual | alqualitiesinyourphoto |
| Contrast | ||
| Sharpness | ||
| Saturation | ||
Note: Fix Photo uses a sophisticated face recognition technology to optimize photos that include faces. Forthistowork,botheyesandthenosemustbevisibleinthesubject'sface.Ifyourphotoincludesa face with an intentional color cast, such as a statue, you may want to turn off Fix Photo to retain the specialcoloreffects.
Parenttopic: SelectingPrintandPhotoAdjustmentSettings
ConnectingandPrintingfromaCamera
Beforeyouconnectyourcamera, makesuretheproductisturnedonbutnotprinting.
- Remove anonymemory cards from the product.
-
Load the paperyouwanttouseforprinting.
-
Connect the USB cable that camewith your camerato the USB portion the front of your product.
Note: You cannot us the USB port to transfer images from your camerato your computer.
- Turnonyourcamera.
- Follow the instruction that camewith your cameratoselectandprintyourphotos.
When you finish printing, turn off your camera and disconnect from the product.
Parenttopic: PrintingfromaCamera
Relatedtasks
RemovingaMemoryCard
Relatedtopics
LoadingPaper
PrintingfromaCameraWirelessly
Youcanprintphotosfromadigitalcamerausingawirelessconnection.Makesureyourdigitalcamera canconnecttoanetworkandisPictBridgecompatible(DPSoverIP).
- Remove anonymemory cards from the product.
- Load the paperyouwanttouseforprinting.
- Turnonyourcamera.
- Setup the camera's wireless network connection. Seethedocumentation that camewith your camerafordetails.
Note: Connect the cameratothesamenetwork that your product uses. You can print a Network Status sheet to view your product's network settings.
- Follow the instruction that camewith your cameratoselectandprintyourphotos.
When you finish printing, turn off your camera and disconnect it from then network.
Parenttopic: PrintingfromaCamera
Relatedtasks
PrintingaNetworkStatusSheet
RemovingaMemoryCard
ViewingorPrintingfromaUSBFlashDriveorExternalDevice
YoucanviewandprintphotosfromaUSBflashdriveorotherexternalUSBdevice,suchasanexternalharddriveorCD/DVDburner.
Note: Makesurethefilesonyourdevicearecompatiblewiththeproduct.
USBDeviceFileSpecifications
ConnectingandUsingaUSBFlashDriveorExternalDevice
Parenttopic: Using an External Device with Your Product
Relatedtasks
ViewingandPrintingPhotosFromtheLCDScreen
USBDeviceFileSpecifications
Youcanprintexternaldevicefilesthatmeetthesespecifications.
FileformatJPEGwiththeExifversion2.3standard(takenwithdigitalcamera
usingDCF(DesignruleforCameraFilesystem)version1.0or2.0 compliant)
Imagesize80×80pixelsto10200×10200pixels
FilesizeUpto2GB
NumberoffilesUpto9990
Note: DCF2.0 filesstoredinacamera's built-in memory are not supported.
Parenttopic:ViewingorPrintingfromaUSBFlashDriveorExternalDevice
ConnectingandUsingaUSBFlashDriveorExternalDevice
Before you connect your flash drive external device, makes sure the product is turned on but not printing.
Note: Epson cannot guarantee the compatibility of your drive.
-
Remove anonymemorycards from the product.
-
Load the paperyouwanttouseforprinting.
-
Insert your USB flash drive or the USB cable that came with your device into the USB port on the front of your product.
- Insertstoragemedia(suchasaCD) into your drive, if necessary.
- Select the photostoprint from the LCD screen.
When you finish printing, makes sure the access light on the device is not flashing, then remove or disconnect from the product.
Caution: Do not remove the USB device or turn off the product when the access light is flashing, or you may lose photosonthed device.
Parenttopic:ViewingorPrintingfromaUSBFlashDriveorExternalDevice
Relatedtasks
RemovingaMemoryCard
ViewingandPrintingPhotosFromtheLCDScreen
Relatedtopics
LoadingPaper
PrintingPersonalizedProjects
Youcanprintcalendars,linedpaper,graphpaper,orstationerywithaphotobackground.
PrintingColoringBookPages
PrintingPersonalizedNotePaper
PrintingLinedPaper, GraphPaper, and MusicSheets
PrintingCalendarPages
PrintingColoringBookPages
You can create a coloring book page from a photo on your memory card, or from a photo or drawing placed on the canner glass.
- LoadoneofthesetypesofpaperineitherLetter(8.5×11inches[216×279mm])orA4(8.3×11.7 inches[210×297mm])size:
-Plainpaper
•EpsonBrightWhitePaper
•EpsonPresentationPaperMatte
•EpsonPremiumPresentationPaperMatte
- Insertamemorycardorplaceaphotoordrawingonthescannerglass.
3.Pressthehomobutton,ifnecessary.
- Press the arrow buttons to select More Functions and press the OK button.
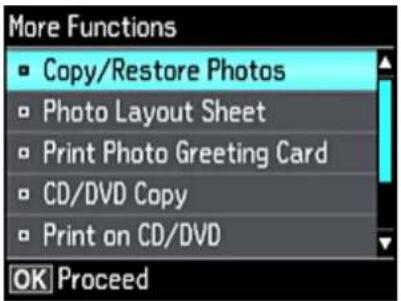
text_image
More Functions Copy/Restore Photos Photo Layout Sheet Print Photo Greeting Card CD/DVD Copy Print on CD/DVD OK Proceed- SelectColoringBookandpresstheOKbutton.
-
Selectoneofthefollowingsettings:
-
PhotoorDrawingonScannerGlassstoprintadesignfromanoriginalplacedfacedownonthe scannerglass,inthefrontrightcorner
- PhotoonMemoryCardtoprintadesignfromamemorycardinsertedinyourproduct,then selectaphoto
7.PresstheOKbuttontwice.
8.Presstheleftorrightarrowbuttontoselectthesizeandtypeofpaperthatyouloaded.
9.PressthedownarrowbuttontoselectPaperSourceandselectwhereyouloadedyourpaper.
10. If necessary, adjust the following settings:
•Densitytomaketheprintlighterordarker
•LineDetectiontochangetheamountofdetailintheprint
- When you are ready to print, press the start button.
Note: Tocancelprinting, pressthecanvelbutton.
Parenttopic: Printing Personalized Projects
Relatedtasks
PlacingOriginalsontheScannerGlass
InsertingaMemoryCard
Relatedtopics
LoadingPaper
PrintingPersonalizedNotePaper
Youcanprintlinedorunlinednotepaperwithoneofyourownphotosinthebackground.
- LoadplainpaperineitherLetter(8.5×11inches[216×279mm])orA4(8.3×11.7inches[210×297mm])size.
- Insertamemorycardintoyourproduct'smemorycardslot.
-
Pressthehon button, if necessary.
-
Press the arrow buttons to select More Functions and press the OK button.
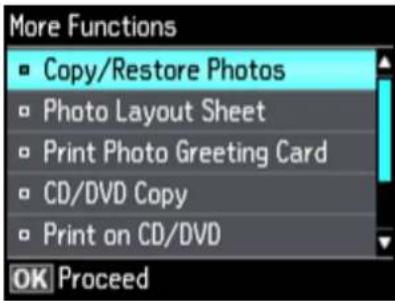
text_image
More Functions Copy/Restore Photos Photo Layout Sheet Print Photo Greeting Card CD/DVD Copy Print on CD/DVD OK Proceed- SelectPersonalStationeryandpresstheOKbutton.
- SelectWritingPapersandpresstheOKbutton.
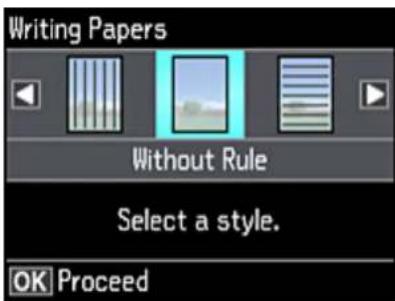
text_image
Writing Papers Without Rule Select a style. OK Proceed- SelectoneofthelayoutoptionsandpresstheOKbutton.
Note: Viewtheimagesforeachoptiontopreviewthedesignlayout.
-
SelectthesizeofpaperyouloadedandpresstheOKbutton.
-
Select the photo you want to use a story your notepaper and press the OK button.
Note: Torotatethelayoutforyournotepaper, pressthedownarrowbutton.
-
When you see a message asking out to load paper, press the OK button.
-
To print more than one sheet, press the + or - button to select the number (up to 99).
-
When you are ready to print, press the start button.
Note: Tocancelprinting, pressthecanvelbutton.
Parenttopic: Printing Personalized Projects
Relatedtasks
InsertingaMemoryCard
Relatedtopics
LoadingPaper
PrintingLinedPaper, GraphPaper, and MusicSheets
Youcanprintmusicsheetsandwide-ruleornarrow-rulenotebookpaperandgraphpaper.
-
LoadplainpaperineitherLetter(8.5×11inches[216×279mm])orA4(8.3×11.7inches[210×297mm])size.
-
Pressthehon button, if necessary.
-
Press the arrow buttons to select More Functions and press the OK button.
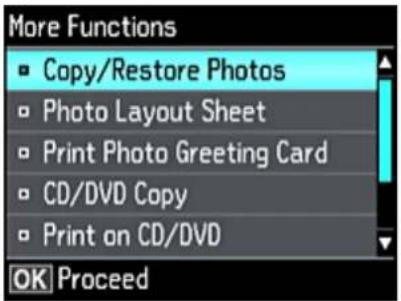
text_image
More Functions Copy/Restore Photos Photo Layout Sheet Print Photo Greeting Card CD/DVD Copy Print on CD/DVD OK Proceed- SelectPersonalStationeryandpresstheOKbutton.
- SelectLinedPapersandpresstheOKbutton.
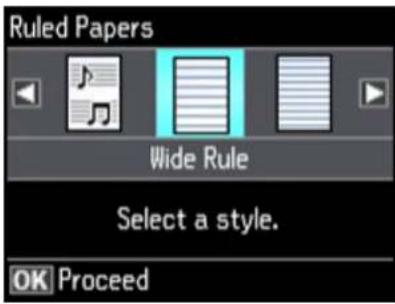
text_image
Ruled Papers Wide Rule Select a style. OK Proceed- SelectoneofthelayoutoptionsandpresstheOKbutton.
Note: Viewtheimagesforeachoptiontopreviewthedesignlayout.
- Selectthesize of paperyouloaded and pressthe OK button.
- When you see a message asking out to load paper, press the OK button.
- To print more than one sheet, press the + or - button to select the number (up to 99).
- When you are ready to print, press the start button.
Note: Tocancelprinting, pressthecanvelbutton.
Parenttopic: Printing Personalized Projects
Relatedtopics
LoadingPaper
PrintingCalendarPages
Youcancreateandprintaweeklyormonthlycalendarpagefromyourproduct.
-
LoadplainpaperineitherLetter(8.5×11inches[216×279mm])orA4(8.3×11.7inches[210×297mm])size.
-
Pressthehombutton, if necessary.
- SelectMoreFunctionsandpresstheOKbutton.
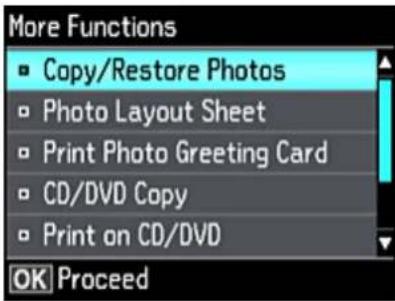
text_image
More Functions Copy/Restore Photos Photo Layout Sheet Print Photo Greeting Card CD/DVD Copy Print on CD/DVD OK Proceed- SelectPersonalStationeryandpresstheOKbutton.
- Select Calendar and press the OK button.
- SelectoneoftheformatoptionsandpresstheOKbutton.
Note: Viewtheimagesforeachoptiontopreviewthedesignlayout.
- If you chose Monthly, select the year and month, and press the OK button.
- SelectthetypeofpapertoprintonandpresstheOKbutton.
- When you see a message asking out load paper, press the OK button.
- To print more than one sheet, press the + or - button to select the number (up to 99).
- When you are ready to print, press the start button.
Note: Tocancelprinting, pressthecanelbutton.
Parenttopic: Printing Personalized Projects
Relatedtopics
LoadingPaper
PrintingonCDs/DVDs
Followtheinstructionsinthissectiontoprintadesignontoinkjet-printableCDsorDVDstocreatea customlabel.
CD/DVDPrintingFeatures
LoadingaCD/DVD
RemovingaPrintedCD/DVD
PlacingaCD/DVDontheScannerGlass
CopyingontoaCD/DVD
PrintingPhotosfromaMemoryCardOntoaCD/DVD
PrintingaJewelCaseInsertfromaMemoryCard
PrintingonCDs/DVDsfromaComputer
CD/DVDPrintingFeatures
You can use any of the following features to print custom CD/DVD/Blu-ray Disclabels and accessories:
• CopyanexistinglabelontoanewCD/DVD/Blu-rayDisc
- Useyourproduct'scontrolpaneltoprintphotosfromamemorycardontoaCD/DVD/Blu-rayDisc
- PrinttextandimagesfromyourcomputerusingtheEpsonPrintCDsoftware
Parenttopic: PrintingonCDs/DVDs
Relatedtasks
CopyingontoaCD/DVD
PrintingPhotosfromaMemoryCardOntoaCD/DVD
PrintingaJewelCaseInsertfromaMemoryCard
Relatedtopics
PrintingonCDs/DVDsfromaComputer
LoadingaCD/DVD
Youcanprintonanycompatible,inkjet-printableCDsorDVDs,includingBlu-rayDiscs.
Caution: Do not insert the CD/DVD tray while the product is printing, copying, or performing other operations. Otherwise, your product may be damaged or the surface of the CD/DVD may become dirty or scratched.
Note: If you are using discs where the printable area extends to within 0.16 inch (4 mm) of the center hole, you may need to adjust the inner diameter setting using the control panel or Epson PrintCD software.
-
Burnyourfiles, music, or video onto your disc before reprinting on it.
-
Pressthehombutton, if necessary.
3.PresstheCDButton,selectLoadCD/DVD,andpresstheOKbutton.
-
When you see a message asking if you want to prepare for CD loading, select Yes and press the OK button.
-
Raisethecontrol panel all the way up.
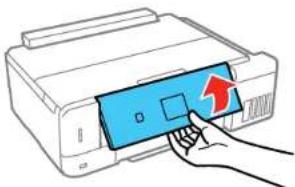
natural_image
Illustration of a hand pressing a blue button on a printer (no text or symbols visible)- Makesurenothingisontheoutputtray, thencloseit.
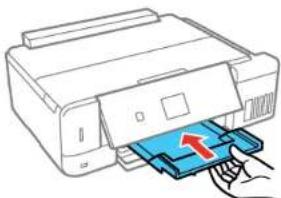
natural_image
Illustration of a printer with a blue cover and red arrow indicating print direction (no text or symbols)-
Closethefrontcover.
-
RemovetheCD/DVDtrayfromthebottomoftheproduct.
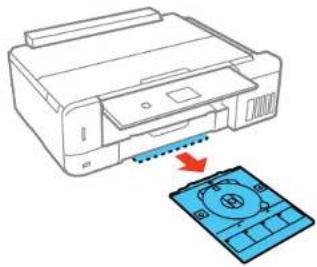
natural_image
Diagram of a printer with a blue cover and arrow indicating process (no text or symbols)- PlaceaCDorDVDontheCD/DVDtraywiththeprintablesidefaceup, and insertthetray into the slotabovetheoutputtray.
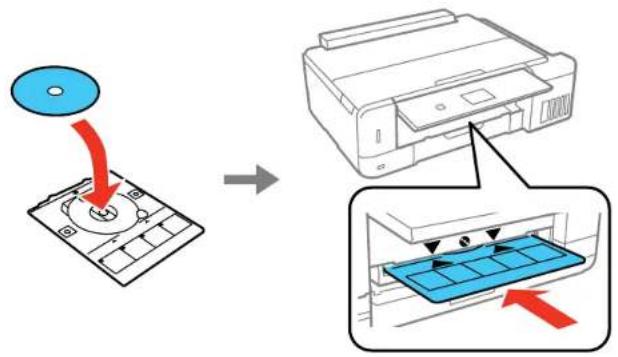
text_image
Diagram illustrating the process of printer printing and disc removal, showing steps from disc to printer output.Note: Makesurethemarksonthetrayandthemarksonneproductineup.
10.PresstheOKbutton.
Caution: Do not turn off the product with a CD or DVD loaded in it. Always remove the disc first.
Parenttopic: PrintingonCDs/DVDs
RemovingaPrintedCD/DVD
AfteryourCDorDVDisprinted, therayextendsautomatically.
- PulltheCD/DVDtrayoutoftheproductandremoveyourCDorDVDfromthetray.
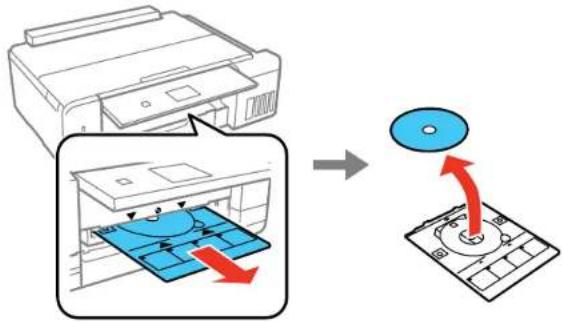
text_image
Diagram illustrating printer printing process with CD output and blue fabric placement, showing steps from printer to CD.- Insert the CD/DVD tray into the storages slot on the bottom of the product.
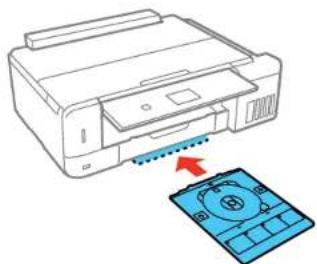
natural_image
Line drawing of a printer with a blue circuit board and a red arrow pointing to it (no text or symbols)Caution: After printing, handle the CD or DVD carefully. You may need to wait up to 24 hours for the ink todryfullybeforeinsertingitinadrive,dependingonthetypeofdiscyouused.Keepprinteddiscsaway frommoistureanddirectsunlight.
Parenttopic: PrintingonCDs/DVDs
PlacingaCD/DVDontheScannerGlass
YoucanplaceaCDorDVDonthescannerglassandcopythelabeldesignontoanotherCDorDVD.
-
Openthedocumentcover.
-
PlaceyourCDorDVDfacedowninthecenterofthescannerglass.
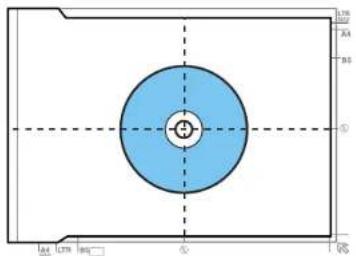
text_image
1.0 2.0 3.0 4.0 5.0 6.0 7.0 8.0 9.0 10.0 11.0 12.0 13.0 14.0 15.0 16.0 17.0 18.0 19.0 20.0 21.0 22.0 23.0 24.0 25.0 26.0 27.0 28.0 29.0 30.0 31.0 32.0 33.0 34.0 35.0 36.0 37.0 38.0 39.0 40.0 41.0 42.0 43.0 44.0 45.0 46.0 47.0 48.0 49.0 50.0 51.0 52.0 53.0 54.0 55.0 56.0 57.0 58.0 59.0 60.0 61.0 62.0 63.0 64.0 65.0 66.0 67.0 68.0 69.0 70.0 71.0 72.0 73.0 74.0 75.0 76.0 77.0 78.0 79.0 80.0 81.0 82.0 83.0 84.0 85.0 86.0 87.0 88.0 89.0 90.0 91.0 92.0 93.0 94.0 95.0 96.0 97.0 98.0 99.0 100.0- Closethedocumentcovergentlytokeepyourdiscinplace.
Parenttopic: PrintingonCDs/DVDs
CopyingontoaCD/DVD
YoucancopyaprintedphotoorCD/DVDlabeldirectlyontoaninkjet-printableCDorDVD.Ifyouwant, youcanfirstprintatestdesignonplainpaper.
-
LoadtheCD, DVD, or plain paperyouwanttoprinton.
-
Presstehonn button, if necessary.
3.PresstheCDsutton.
-
SelectCD/DVDCopyandpresstheOKbutton.
-
Follow the instructions on the LCD screen to place your original CD, DVD, or photoonthescanner glass and press the OK button.
-
If necessary, adjust the inner and outer diameter of your CDashownonthescreen, and press the OK button.
Youseethisscreen:
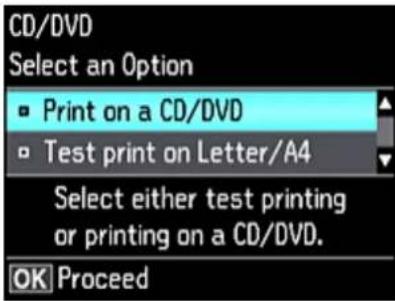
text_image
CD/DVD Select an Option Print on a CD/DVD Test print on Letter/A4 Select either test printing or printing on a CD/DVD. OK Proceed- Select one of the options shown on the screen and press the OK button. If printing a test print on plainpaper, press the OK button again.
- Selectanycopysettingsasneeded.
- When you are ready to print, press the start button.
Note: Tocancelprinting, pressthecanvelbutton.
Parenttopic: PrintingonCDs/DVDs
Relatedtasks
LoadingaCD/DVD
PlacingaCD/DVDontheScannerGlass
PlacingOriginalsontheScannerGlass
PrintingPhotosfromaMemoryCardOntoaCD/DVD
YoucanprintoneormorephotosfromamemorycarddirectlyontoaCD/DVD. If you want, you can first printatestdesignonplainpaper.
- Insertamemorycardintoamemorycardslotonyourproduct.
2.LoadtheCD,DVD,orplainpaperyouwanttoprinton.
3.Pressthehom button,ifnecessary.
4.PresstheCDButton.
5. SelectPrintonCD/DVDandpresstheOKbutton.
Youseethisscreen:
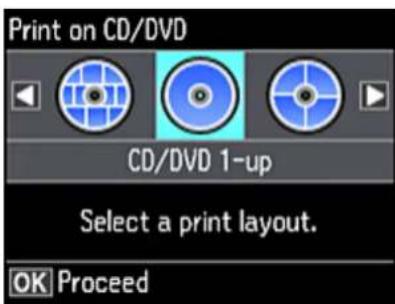
text_image
Print on CD/DVD CD/DVD 1-up Select a print layout. OK Proceed- SelectoneofthelayoutoptionsandpresstheOKbutton.
- Follow the instructions on the screentoselect your photoorphotos.
- When you se the screentoadjust the inner and outer diameter of your CD or DVD, adjust the settings if necessary, and press the OK button.
Youseethisscreen:
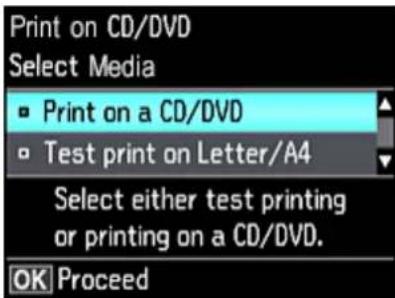
text_image
Print on CD/DVD Select Media ■ Print on a CD/DVD □ Test print on Letter/A4 Select either test printing or printing on a CD/DVD. OK Proceed-
Select one of the options shown on the screen and press the OK button. If printing a test print on plainpaper, presstheOKbuttonagain.
-
When you are ready to print, press the start button.
Note: Tocancelprinting, pressthecanvelbutton.
Parenttopic: PrintingonCDs/DVDs
Relatedtasks
InsertingaMemoryCard
LoadingaCD/DVD
PrintingaJewelCaseInsertfromaMemoryCard
YoucanprintaphotofromamemorycardonaCD/DVDjewelcaseinsert. Yourproductautomatically resizesthephototofit, butyoucanalsoprintmulitlethumbnailimagesformattedtofitonajewelcase insert. Aftertheinsertisprinted, youcancutandfoldittofit.
- Insertamemorycardintoamemorycardslotonyourproduct.
2.Loadthepaperyouwanttoprinton.
3.Pressthehon button,ifnecessary.
- Press the arrow buttons to select More Functions and press the OK button.
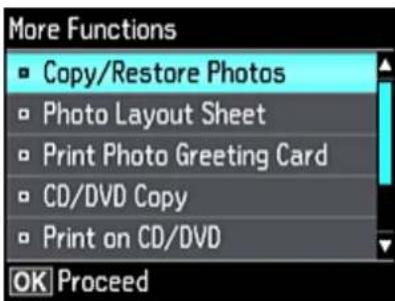
text_image
More Functions Copy/Restore Photos Photo Layout Sheet Print Photo Greeting Card CD/DVD Copy Print on CD/DVD OK Proceed- SelectPhotoLayoutSheetandpresstheOKbutton.
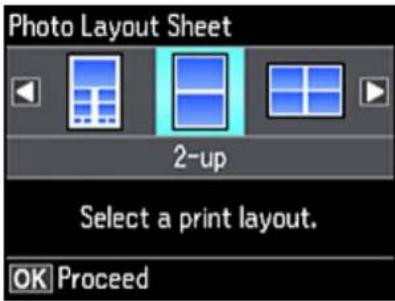
text_image
Photo Layout Sheet 2-up Select a print layout. OK Proceed- SelectoneofthefollowingoptionsandpresstheOKbutton:
•JewelUppertoprintonephotoontheupperhalfoftheinsert.
•JewellIndextoprint24or48thumbnailimagesontheinsert.
-
Select your papersize and type, and press the OK button.
-
Follow the instructions on the LCD display to select your photos and set the number of copies.
- When you are ready to print, press the start button.
Note: Tocancelprinting, pressthecanvelbutton.
- After your insertisprinted, cut and fold it following the croplines.
Parenttopic: PrintingonCDs/DVDs
Relatedtasks
InsertingaMemoryCard
Relatedtopics
LoadingPaper
PrintingonCDs/DVDsfromaComputer
BeforeprintingdirectlyonCDsorDVDsfromyourcomputer,makesureyouhavesetupyourproductas describedontheStartHeresheetandinstalledtheEpsonPrintCDsoftware.
Note: If you are using your Epson product with the Windows 10 S operating system, you cannot use the softwaresdescribedinthissection.YoualsocannotdownloadandinstallanyEpsonproductsoftware fromtheEpsonwebsiteforusewithWindows10S;youmustobtainsoftwareonlyfromtheWindows Store.
StartingEpsonPrintCD-Windows
PrintingYourCD/DVDDesign-Windows
StartingEpsonPrintCD-Mac
PrintingYourCD/DVDDesign-Mac
Parenttopic: PrintingonCDs/DVDs
StartingEpsonPrintCD-Windows
YoucanuseEpsonPrintCDtodesignyourdiscbyimportingphotos,addingtext,andcreatingspecial effects.
- SelecttheEpsonPrintCDicononyourWindowsDesktop.
Youseeascreenlikethis:
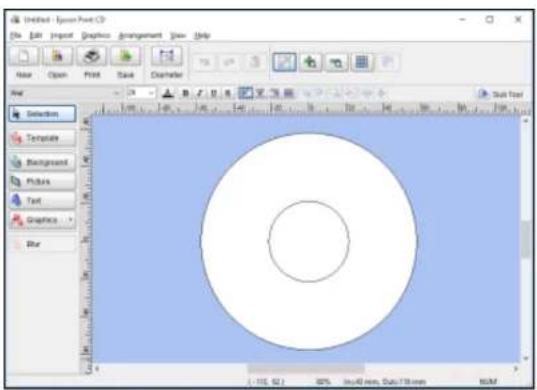
text_image
Epsilon Post CD File Edit View Graphics Arrangement View Help New Open Print Save CMR Select Template Background Pictures Text Graphics Blue -115, 62.0 80% In40 mm, Data: 79 mm 80%-
Use the button on the left side of the screen to select a pre-designed template or add a background image, picture, text, or graphic elements. Form more information, select the Help menu.
-
When you are finished creating your design, click Save and save your design file.
Parenttopic: PrintingonCDs/DVDsfromaComputer
Relatedtasks
PrintingYourCD/DVDDesign-Windows
PrintingYourCD/DVDDesign-Windows
Afteryoucreateyourdesign,youcanprintitonpapertotestit,thenprintitontheCDorDVDthat containsyourdata.photos,video,ormusic.Makesurethediscisloadedforprintingbeforeyoustart.
1.OpenyourfileinEpsonPrintCDandclickPrint.
Youseeascreenlikethis:
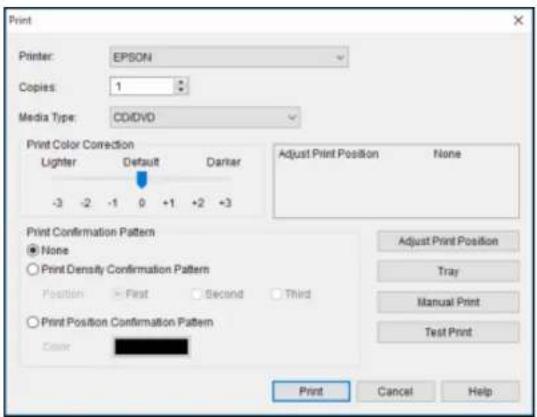
text_image
Print Printer: EPSON Copies: 1 Media Type: CD/DVD Print Color Correction Lighter Default Darner -3 -2 -1 0 +1 +2 +3 Adjust Print Position None Print Confirmation Pattern None Print Density Confirmation Pattern Position First Second Third Print Position Confirmation Pattern Color Adjust Print Position Tray Manual Print Test Print Print Cancel Help-
MakesureyourproductisselectedasthePrintersetting.
-
To see how your design will look without printing on the disc, click Test Print and follow the instructionsonthescreen.
-
When you are ready to print on the disc, click the Print button on the screen.
5.ClickPrint.
Note: If you need to adjust the print position or print quality, see the Epson Print CD Help utility for instructions.
Parenttopic: Printingon CDs/DVDs from a Computer
Relatedtasks
StartingEpsonPrintCD-Windows
StartingEpsonPrintCD-Mac
YoucanuseEpsonPrintCDtodesignyourdiscbyimportingphotos,addingtext,andcreatingspecial effects.
- Open the Epson Print CD program in the Applications > Epson Software > Print CD folder on your Mac.
Youseeascreenlikethis:
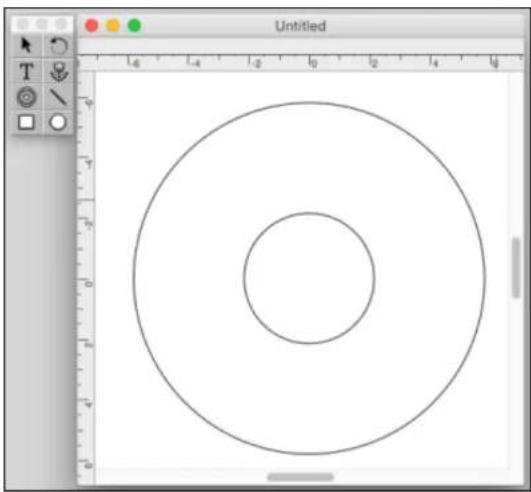
natural_image
Simple diagram with two concentric circles on a white background, no text or symbols present.-
Use the icon on the left side of the screen to add a background image, picture, text, or graphic elements.
-
When you are finished creating your design, makes sure you save it.
Parenttopic: Printingon CDs/DVDs from a Computer
Relatedtasks
PrintingYourCD/DVDDesign-Mac
PrintingYourCD/DVDDesign-Mac
Afteryoucreateyourdesign,youcanprintitonpapertotestit,thenprintitontheCDorDVDthat containsyourdata.photos,video,ormusic.Makesurethediscisloadedforprintingbeforeyoustart.
1.OpenyourfileinEpsonPrintCDandselectPrintfromtheFilemenu.
Youseeascreenlikethis:
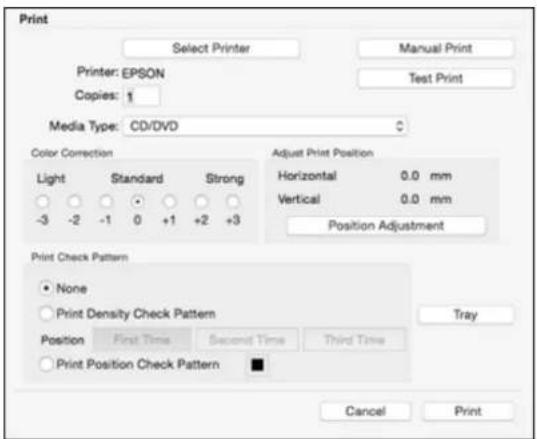
text_image
Print Select Printer Manual Print Printer: EPSON Test Print Copies: 1 Media Type: CD/DVD Color Correction Light Standard Strong -3 -2 -1 0 +1 +2 +3 Adjust Print Position Horizontal 0.0 mm Vertical 0.0 mm Position Adjustment Print Check Pattern None Print Density Check Pattern Tray Position First Time Second Time Third Time Print Position Check Pattern Cancel Print- MakesureyourproductisselectedasthePrintersetting.
- To see how your design will look without printing on the disc, select Test Print and follow the instructionsonthescreen.
- When you are ready to print on the disc, click the Print button on the screen.
Note: If you need to adjust the print position or print quality, see the Epson Print CD Help utility for instructions.
Parenttopic: Printingon CDs/DVDs from a Computer
Relatedtasks
StartingEpsonPrintCD-Mac
RefillingInk
Whentheinklevelisbelowthelowerlineonaninktank,youneedtorefillit.
Beforecheckingtheinklevelorrefillinganinktankasdescribedhere,besuretoreadtheinksafety precautions.
Caution: If the ink level is below the lower line on the ink tank, fill it to the upper line on the ink tank. Continued use of the product when the ink level is below the lower line on the tank could damage the product.
InkSafetyPrecautions
CheckInkLevels
PurchaseEpsonInkandMaintenanceBox
RefillingtheInkTanks
ReplacingtheMaintenanceBox
InkSafetyPrecautions
Note: The product has a low ink alert system. The accuracy of this system depends on the user refilling theinktankscorrectly. Theproductcannotdirectlymeasuretheinklevelsinthetanks;instead estimatestheamountofinkremainingbyinternallymonitoringinkusage. Thelowinkalertsystemmay generateinaccuratemessagesiftheinktanksarenotrefilledaccordingtotheseinstructions.
Asaprecaution, performregularvisualinspectionsoftheinktankstoensureinklevelsdonotfallbelow thelowerline.Continueduseoftheproductwhentheinklevelisbelowthelowerlineonthetankcould damagetheproduct.
InkHandlingPrecautions
- Keepinkbottlesandtheinktankunitoutofthereachofchildren.Donotallowchildrentodrinkfromor handletheinkbottlesandbottlecaps.
- Donottiltorshakeaninkbottleafteropeningit; otherwise, inkmayleak.
•Ifinkgetsonyourskin,washitthoroughlywithsoapandwater.Ifinkgetsintoyoureyes,flushthem immediatelywithwater.Ifinkgetsintoyourmouth,spititoutimmediately.Seekmedicaladviceif problemspersist.
• Donotsqueezetheinkbottles.
InkRefillingPrecautions
- Useinkbottleswiththecorrectpartnumberforthisproduct.
- DonotmixwithotherEpsoninktypes.
•Theuseofnon-EpsoninkmaycausedamagethatisnotcoveredbyEpson'swarranty,andunder certaincircumstances,maycauseerraticproductbehavior. - Thisproductrequirescarefulhandlingofink.Inkmaysplatterwhentheinktanksarefilledorrefilledwithink.Ifinkgetsonyourclothesorbelongings,itmaynotcomeoff.
- Donotopentheinkbottlepackageuntilyouarereadytofillaninktank.Inkbottlesarevacuum packedtomaintainreliability.Ifyouleaveaninkbottleunpackedforalongtimebeforeusingit,print qualitymaybeaffected.
• If the ink level is below the lower line on the ink tank, refill the ink. Continued use of the product when the ink level is below the lower line on the ink tank could damage the product. - Epsonrecommendsfillinganinktanktotheupperlinebeforeresettingtheinklevel.
• After bringing an ink bottle inside from acold storagesite, allow it to warm up at room temperature for at least three hours before using it. - Storeinkbottlesinacool,darkplace.
- Storetheinkbottlesinthesameenvironmentastheproduct.Whenstoringortransportinganopened inkbottle,donottilthebottleanddonotsubjectittoimpactsortemperaturechanges. Otherwise,ink mayleakevenifthecapontheinkbottleistightenedsecurely.Besuretokeeptheinkbottleupright whentighteningthecap,andtakemeasurestopreventinkfromleakingwhenyoutransportthebottle.
InkBottleandInkTankInformation
- Tomaintainoptimumprintheadperformance, someinkisconsumedfromallinktanksduringprinting andwhenperformingmaintenanceoperations, suchascleaningtheprinthead.
•Theinkbottlesmaycontainrecycledmaterials,butthisdoesnotaffectproductfunctionor performance. - Whenprintinginmonochromeorgrayscale,colorinkmaybeusedinsteadofblackink,dependingon thepapertypeorprintqualitysettings. Thisisbecauseamixtureofcolorinksisusedtocreateblack.
Parenttopic: RefillingInk
CheckInkLevels
Yourproductanditsprintingsoftwarewillletyouknowwhenaninktankisloworexpended.
CheckingInkLevelsonYourProduct
CheckingInkLevelswithWindows
CheckingInkLevels-Mac
DisablingSpecialOfferswithWindows
Parenttopic: RefillingInk
CheckingInkLevelsonYourProduct
To confirm the actual in k levels, visually check the in k levels in the product'sink tanks. Makes sure the in k levels are above the lower lines on the in k tanks.
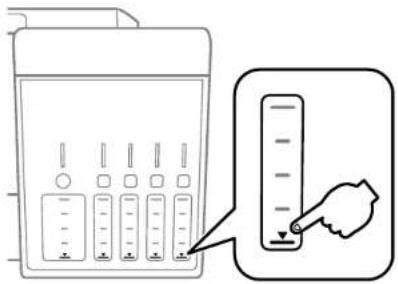
text_image
Diagram showing a device with labeled buttons and a hand pointing to a vertical scale, likely illustrating a measurement or control interface.Note: The product has a low ink alert system. The accuracy of this system depends on the user refilling theinktankscorrectly. Theproductcannotdirectlymeasuretheinklevelsinthetanks;instead estimatestheamountofinkremainingbyinternallymonitoringinkusage. Thelowinkalertsystemmay generateinaccuratemessagesiftheinktanksarenotrefilledaccordingtotheseinstructions.
Asaprecaution, performregularvisualinspectionsoftheinktankstoensureinklevelsdonotfallbelow thelowerline.Continueduseoftheproductwhentheinklevelisbelowthelowerlineonthetankcould damagetheproduct.
Parenttopic:CheckInkLevels
CheckingInkLevelswithWindows
Alowinkreminderappearsifyoutrytoprintwheninkislow, andyoucancheckyourinklevelsatany timeusingautilityonyourWindowscomputer.
- To check your ink levels, access the Windows Desktop and double-click the icon for your product in the right side of the Window task bar, or click the up arrow and double-click.
Youseeawindowlikethis:
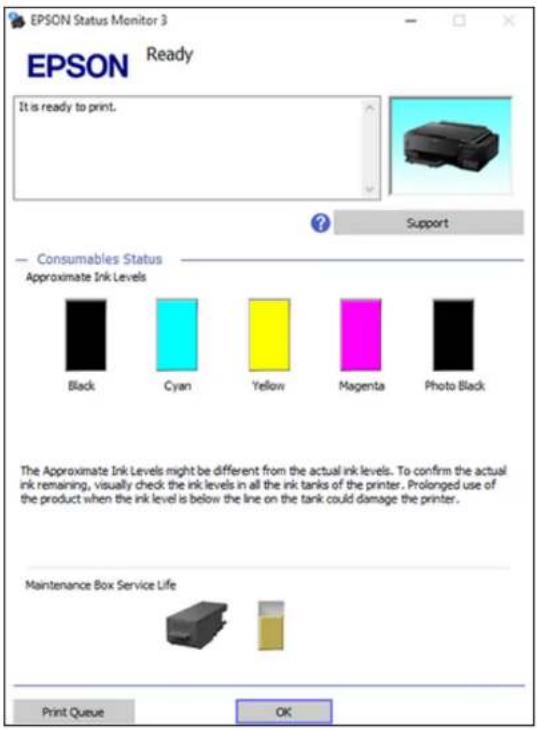
text_image
EPSON Status Monitor 3 Ready EPSON It is ready to print. Support Consumables Status Approximate Ink Levels Black Cyan Yellow Magenta Photo Black The Approximate Ink Levels might be different from the actual ink levels. To confirm the actual ink remaining, visually check the ink levels in all the ink tanks of the printer. Prolonged use of the product when the ink level is below the line on the tank could damage the printer. Maintenance Box Service Life Print Queue OK

Support
Consumables Status
Approximate Ink Levels


The Approximate Ink Levels might be different from the actual ink levels. To confirm the actual ink remaining, visually check the ink levels in all the ink tanks of the printer. Prolonged use of the product when the ink level is below the line on the tank could damage the printer.
Maintenance Box Service Life


Print Queue
OK
- Refillanyinktankasneeded.
Note: The ink levels displayed are an estimate and may differ from the actual ink remaining in the ink tanks. To confirm the actual remaining ink, visually check the ink levels in the ink tanks. Continued use of the product when the ink level is below the lower line on the tank could damage the product.
Parenttopic: CheckInkLevels
Relatedreferences
InkSafetyPrecautions
Relatedtopics
RefillingInk
CheckingInkLevels-Mac
YoucancheckyourinklevelsusingautilityonyourMac.
-
In the Apple menu or the Dock, select System Preferences. Select Print & Fax, Print & Scan, or Printers & Scanners, select your product, and select Options & Supplies. Select Utility and select OpenPrinterUtility.
-
SelectEPSONStatusMonitor.
Youseeawindowlikethis:
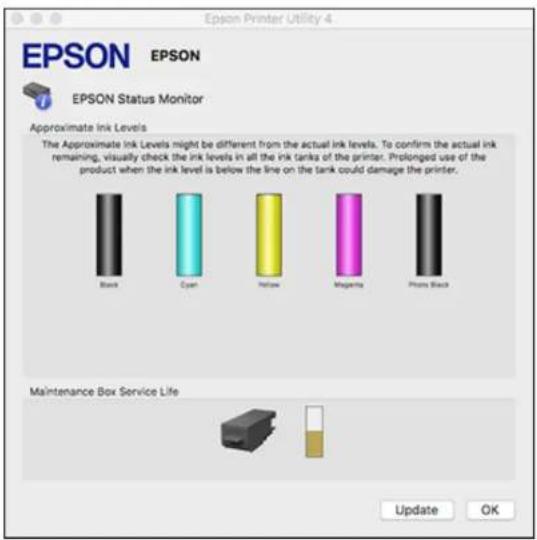
text_image
EPSON Printer Utility 4 EPSON EPSON EPSON Status Monitor Approximate Ink Levels The Approximate Ink Levels might be different from the actual ink levels. To confirm the actual ink remaining, visually check the ink levels in all the ink tanks of the printer. Prolonged use of the product when the ink level is below the line on the tank could damage the printer. Black Cyan Hellow Magenta Phoa Black Maintenance Box Service Life Update OK- Refillanyinktankasneeded.
Note: Toupdateorrefreshthedisplayedinklevels, clickUpdate.
Note: The ink levels displayed are an estimate and may differ from the actual ink remaining in the ink tanks. To confirm the actual remaining ink, visually check the ink levels in the ink tanks. Continued use of the product when the ink level is below the lower line on the tank could damage the product.
Parenttopic:CheckInkLevels
Relatedreferences
InkSafetyPrecautions
Relatedtopics
RefillingInk
DisablingSpecialOfferswithWindows
YoucandisablespecialoffersmessagesfromEpsonusingautilityonyourWindowscomputer.
- Access the Windows Desktop and right-click the icon for your product in the rights side of the Window task bar, or click the up arrow and right-click. Select Monitoring Preferences. You see this window:
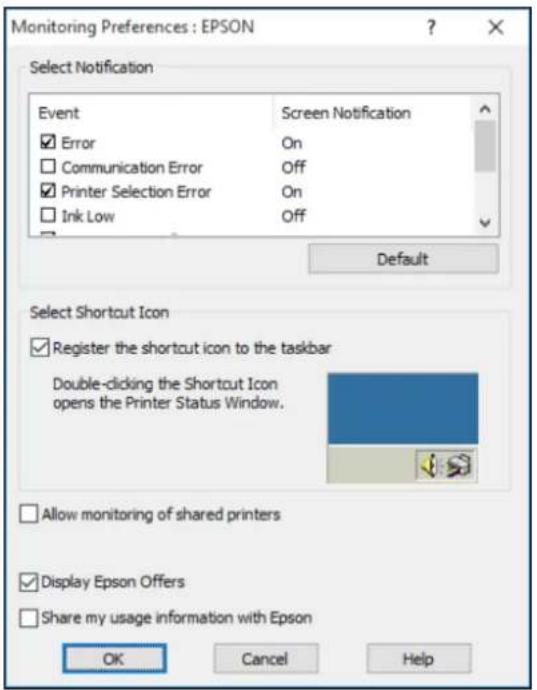
text_image
Monitoring Preferences : EPSON Select Notification Event Screen Notification ✓ Error On □ Communication Error Off ✓ Printer Selection Error On □ Ink Low Off Default Select Shortcut Icon ✓ Register the shortcut icon to the taskbar Double-clicking the Shortcut Icon opens the Printer Status Window. Allow monitoring of shared printers ✓ Display Epson Offers Share my usage information with Epson OK Cancel Help- Todisablepromotionaloffers, deselecttheDisplayEpsonOfferscheckbox.
Parenttopic: CheckInkLevels
PurchaseEpsonInkandMaintenanceBox
YoucanpurchasegenuineEpsonink,maintenanceboxes,andpaperatepson.com(U.S.sales)orepson.ca (Canadian sales). You can also purchase supplies from an Epson authorized reseller. To find thenearestone,call800-GO-EPSON(800-463-7766)intheU.S.or800-807-7766inCanada.
Note: This product is designed to work with genuine Epson inks. Non-Epson ink or any other ink not specified for this printer could cause damage not covered by Epson's warranties.
The included initial link bottles must be used for printers setup and are not for resale. The printerships with full link bottles and part of the link from the first bottles is used to charge the printhead. Yields vary considerably based on images printed, print settings, papertype, frequency of use and temperature.
InkBottleandMaintenanceBoxPartNumbers
Parenttopic: RefillingInk
InkBottleandMaintenanceBoxPartNumbers
Usethesepartnumberswhenyouorderorpurchasenewinkbottlesoranewmaintenancebox. Usethe inkbythedateprintedonthepackage.
| InkcolorPartnumber | |
| Black512 | |
| Cyan512 | |
| Magenta512 | |
| Yellow512 | |
| PhotoBlack512 |
Maintenanceboxpartnumber:T04D000
Parenttopic: Purchase Epson Ink and Maintenance Box
RefillingthelnkTanks
Makesureyouhavenewinkbottleshandyandhavereadtheinksafetyprecautionsbeforeyoubegin.
Youcancontinuetousetheproductevenifoneormoreinktanksarenotfilledalltheway.However,for themostaccurateinklevelmonitoring,fillalltheinktanksuptothetopline.
Note: The product has a low ink alert system. The accuracy of this system depends on the user refilling theinktankscorrectly. Theproductcannotdirectlymeasuretheinklevelsinthetanks;insteadit estimatestheamountofinkremainingbyinternallymonitoringinkusage. Thelowinkalertsystemmay generateinaccuratemessagesiftheinktanksarenotrefilledaccordingtotheseinstructions.
Asaprecaution, performregularvisualinspectionsoftheinktankstoensureinklevelsdonotfallbelow thelowerline.Continueduseoftheproductwhentheinklevelisbelowthelowerlineonthetankcould damagetheproduct.
Caution: Wear disposable gloves while refilling the ink tanks to avoid staining your hands. If ink spills, wipeitoffimmediatelywithadamptoweltoavoidpermanentstains.Ifinkgetsonyourclothesor belongings,itmaynotcomeoff.
- Turnonyourproduct.
2.Liftupthescannerunit.
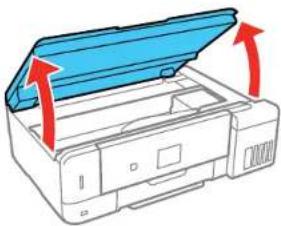
natural_image
Diagram of a printer with blue cover and red arrows indicating orientation (no text or symbols)- Opentheinktankcover, thenopenthecapfortheinktankyouaregoingtofill.
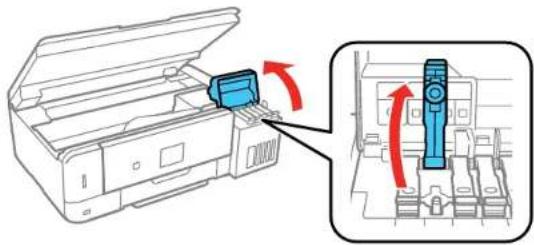
natural_image
Diagram showing a printer with a blue component being inserted, and a close-up of the device's internal structure with red arrows indicating rotation (no text or symbols present)4.Holdtheinkbottleuprightandslowlyturnthebottlecaptoremoveit.
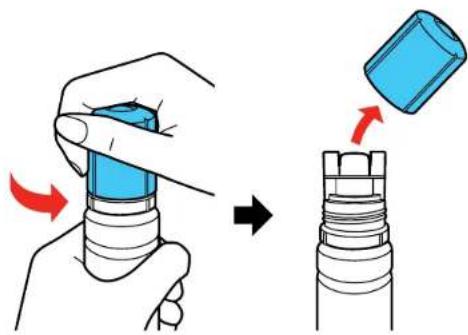
text_image
Diagram illustrating the step-by-step installation of a blue cylindrical device into a multi-layered cylindrical component, with red arrows indicating direction.Caution: Do not shake or squeeze the bottle. Do not touch the top of the bottle after its cap is removed.
Warning: If ink gets on your skin, wash it thoroughly with soap and water. If ink gets into your eyes, flush them immediately with water. Ifink gets into your mouth, spit out immediately. Seek medical advice if problem persist. Keep the ink bottles out of there each of children and donot drink the ink.
- Position the top of the ink bottle along the slot in front of the filling port, then slowly stand the bottle upto insert it.
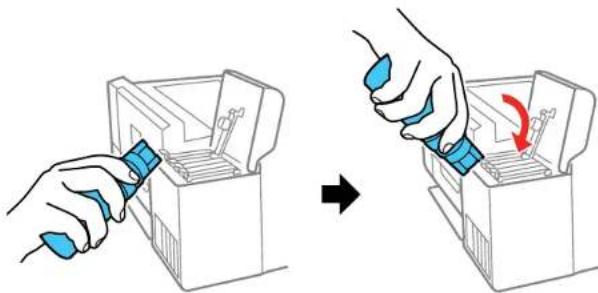
natural_image
Illustration of two hands using blue tools to adjust a device in a container, showing a change from left to right (no text or symbols present)Note: Refer to the color-coded sticker on the ink tank unit to identify the color of each tank. Do not forcethebottlesintoposition;theyarekeyedforeachcolor.
- Waitfortheinktofillthetank. Donotsqueezethebottle. Inkflowsintothetankandstops automaticallywhentheinkisfilledtotheupperline.
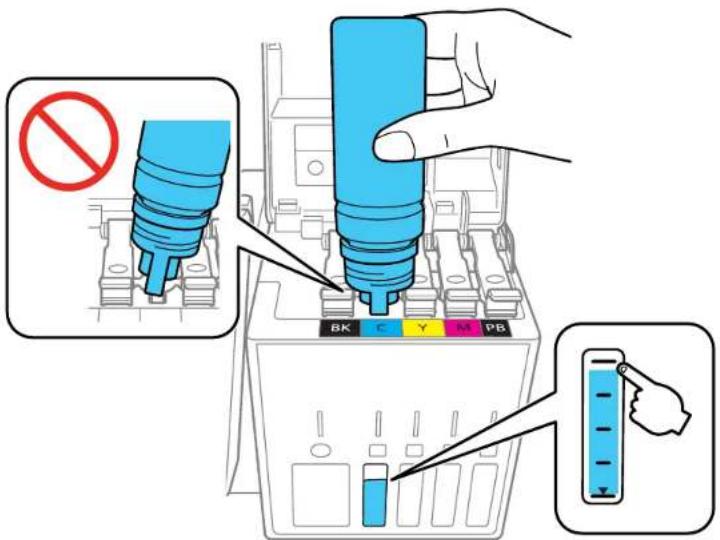
text_image
Diagram showing a hand inserting a color-coded component into a battery, with Chinese annotations indicating prohibition and color coding.Note: Ifinkdoesnotflowfromthebottle, liftandreinsertthebottle.
- Whentheinktankisfull, removetheinkbottleandsecurelyclosetheinktankcap.
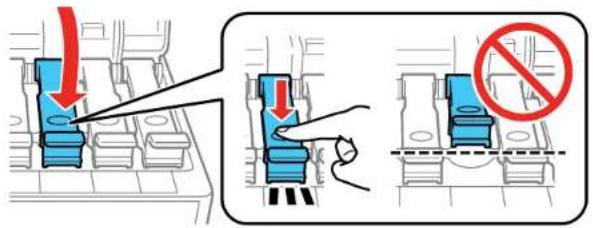
text_image
Diagram illustrating a mechanical or electrical switch mechanism with red arrows indicating downward motion and a no-smoking symbol.Note: If any ink remains in the bottle, replace the bottle cap and tighten it. Store the bottle upright for lateruse.
-
Repeat the previous steps as necessary for each ink tank you need to refill.
-
Closetheinktankcover, thenclosethescannerunit.
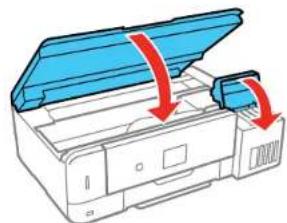
natural_image
Illustration of a printer with blue cover and red arrows indicating process (no text or symbols)- Press the OK button on the product control panel to proceed. Follow the on-screen instructions to resettheinklevelforthecoloryourefilled.
Parenttopic: RefillingInk
Relatedconcepts
PurchaseEpsonInkandMaintenanceBox
ReplacingtheMaintenanceBox
Makesureyouhaveanewmaintenanceboxbeforeyoubegin.
Caution: Do not reuse a maintenance box that has been removed and left uninstalled for more than a week. Keep them maintenance box away from direct sunlight.
- Removethenewmaintenanceboxfromitspackage.
Caution: Donottouch the greenchip on them maintenance box. Doings may prevent normal operation and printing.
- Using a flat-tipped screw driver, removethescrew on them maintenance box cover and remove the cover.
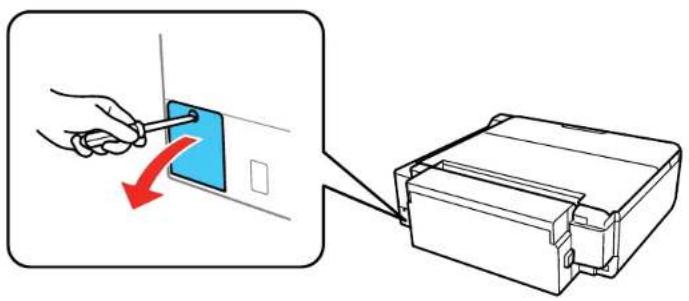
text_image
Diagram showing a hand using a tool to press a blue component with a red arrow, next to a printer outline.- Removetheusedmaintenancebox.
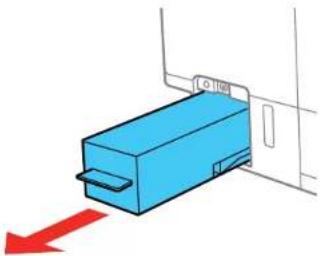
natural_image
Illustration of a blue rectangular device with a red arrow pointing downward, next to a vertical line (no text or symbols)Note: Donottiltheusedmaintenanceboxortakeitapart.
Caution: Donottouch the area shown below on them maintenance box; otherwise, ink may leak.
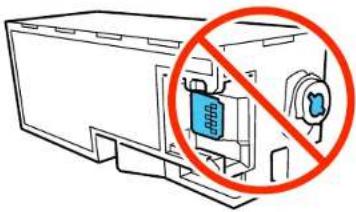
natural_image
Diagram of a printer with a blue device and a red prohibition symbol (no text or labels)Warning: If ink gets on your skin, wash it thoroughly with soap and water. If ink gets into your eyes, flush them immediately with water. Ifink gets into your mouth, spitout immediately. Keep the maintenance box out of thereach of children and donot drink the ink.
- Placetheusedmaintenanceboxintheplasticbagthatcamewiththenewmaintenancebox.Seal thebaganddisposeofitcarefully.

- Insertthenewmaintenanceboxandpushitallthewayin.
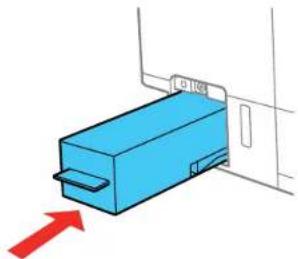
natural_image
Illustration of a blue rectangular device with a red arrow pointing to its side, next to a white panel (no text or symbols)- Reattachthemaintenanceboxcoverandtightenthescrew.
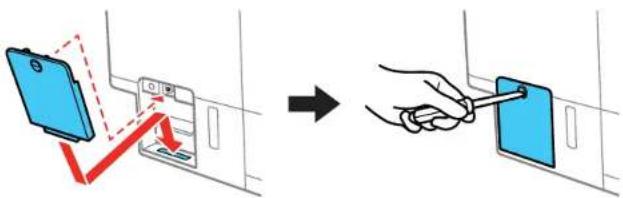
text_image
Diagram illustrating a device operation with a hand holding a clip and connecting to a device panel, showing red arrows indicating movement.- PresstheOKbuttonontheproductcontrolpaneltoresumeoperation.
Parenttopic: RefillingInk
Relatedreferences
InkBottleandMaintenanceBoxPartNumbers
AdjustingPrintQuality
If your print quality declines, you may need to run a utility to clean an align the printhead.
Ifrunningtheseutilitiesdoesnotsolvetheproblem,youmayneedtorunaPowerCleaningorcleanthe paperorprinterheadpath.
PrintHeadMaintenance
PrintHeadAlignment
CleaningthePaperPath
CleaningtheRearPaperFeedPathUsingtheCleaningSheet
CleaningthePrinterHeadPath
CheckingtheNumberofSheets
PrintHeadMaintenance
If your printoutsbecometoolight, or you seed darkor light bands across them, you may need to clean the printhead nozzles. Cleaning uses ink, so clean then ozzles only if print quality declines.
Youcancheckforcloggednozzlesbeforeyoucleanthemsoyoudon'tcleanthemunnecessarily.
Note: You cannot clean the print head if the ink level has reached the lower line on the ink tank, and may notbeabletocleanitwhentheinklevelinanyofthetanksislow.Youmustrefilltheinktankfirst.
If you still see white ordark lines or missing nozzles in your printouts, even after cleaning the printhead severaltimes, you can run a Power Cleaning.
PrintHeadNozzleCheck
PrintHeadCleaning
PowerCleaning
Parenttopic:AdjustingPrintQuality
Relatedtopics
RefillingInk
PrintHeadNozzleCheck
Youcanprintanozzlecheckpatterntocheckforcloggednozzles.
CheckingtheNozzlesUsingtheProductControlPanel
CheckingtheNozzlesUsingaComputerUtility
Parenttopic: PrintHeadMaintenance
CheckingtheNozzlesUsingtheProductControlPanel
Youcanchecktheprintheadnozzlesusingthecontrolpanelonyourproduct.
- MakesuretherearenoerrorsontheLCDscreen, theCD/DVDtrayisnotinsertedforprinting, and theoutputtrayisextended.
- Loadafewsheetsofplainpaperintheproduct.
- Pressthehom button, if necessary.
4.PressthearowbuttonstoselectSettingsandpresstheOKbutton. - SelectMaintenanceandpresstheOKbutton.
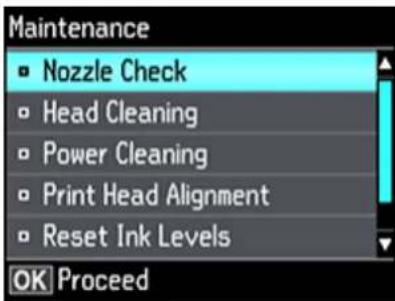
text_image
Maintenance Nozzle Check Head Cleaning Power Cleaning Print Head Alignment Reset Ink Levels OK Proceed6.PresstheOKbuttontoselectNozzleCheck.
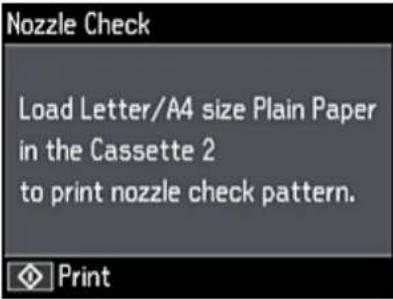
text_image
Nozzle Check Load Letter/A4 size Plain Paper in the Cassette 2 to print nozzle check pattern. ◇ Print- Pressthestanbutton.
Thenozzlecheckpatternisprinted.
- Check the printed pattern to see if there are gaps in the lines.
Printheadisclean
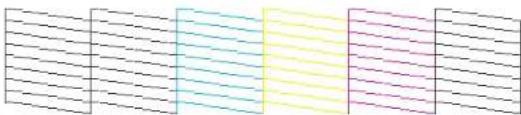
natural_image
Abstract pattern of horizontal lines with gradient colors (no text or symbols)Printheadneedscleaning

natural_image
Abstract pattern of horizontal lines and vertical color bands (no text or symbols)9.Dooneofthefollowing:
- Iftherearenogaps, theprintheadisclean. PresstheuparrowbuttontoselectOK.
- If there are gaps or the pattern is faint, press the down arrow button to select NG. Follow the instructionsonthescreentocleantheprinthead.
If you don't see any improvement after cleaning the printhead up to 3 times, turn the product off and wait at least 12 hours. Thentry cleaning the printhead again. If quality still does not improve, runa Power Cleaning. If there is still no improvement, contact Epson support.
Parenttopic: PrintHeadNozzleCheck
Relatedtasks
CleaningthePrintHeadUsingtheProductControlPanel
PowerCleaningUsingtheProductControlPanel
CheckingtheNozzlesUsingaComputerUtility
Relatedtopics
LoadingPaper
CheckingtheNozzlesUsingaComputerUtility
YoucanchecktheprintheadnozzlesusingautilityonyourWindowsorMaccomputer.
- MakesuretherearenoerrorsontheLCDscreen,theCD/DVDtrayisnotinsertedforprinting,and theoutputtrayisextended.
-
Loadafewsheetsofplainpaperintheproduct.
3.Dooneofthefollowing: -
Windows:AccesstheWindowsDesktopandright-clicktheiconforyourproductintheright sideoftheWindowstaskbar,orclicktheuparrowandright-click.
-
Mac: In the Apple menu or the Dock, select System Preferences. Select Print & Fax, Print & Scan, or Printers & Scanners, select your product, and select Options & Supplies. Select UtilityandselectOpenPrinterUtility.
-
SelectNozzleCheck.
Youseeawindowlikethis:
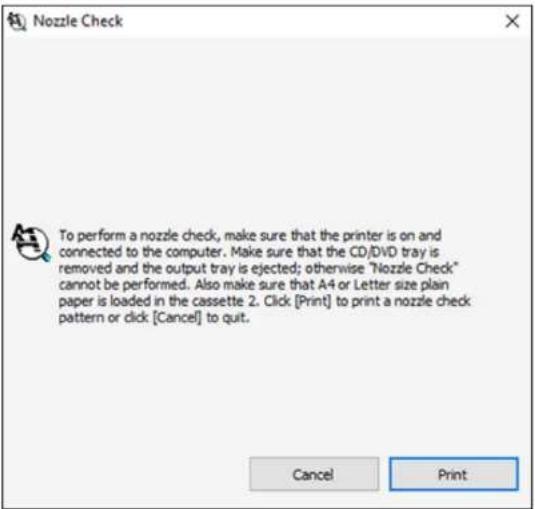
text_image
Nozzle Check To perform a nozzle check, make sure that the printer is on and connected to the computer. Make sure that the CD/DVD tray is removed and the output tray is ejected; otherwise "Nozzle Check" cannot be performed. Also make sure that A4 or Letter size plain paper is loaded in the cassette 2. Click [Print] to print a nozzle check pattern or click [Cancel] to quit. Cancel Print5.ClickPrint.
- Check the printed pattern to see if there are gaps in the lines.
Printheadisclean
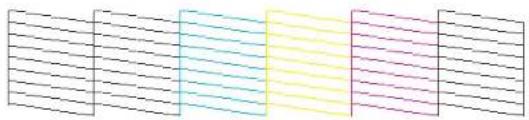
natural_image
Abstract pattern of horizontal lines with gradient colors (no text or symbols)Printheadneedscleaning
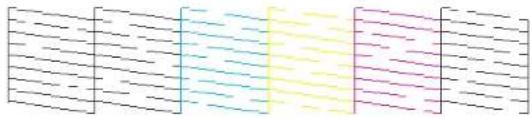
natural_image
Three vertical panels with horizontal lines, one in blue and one in pink, showing no text or symbols.- If there are nogaps, clickFinish.
If therearegapsorthepatternisfaint,cleantheprinthead.
If you don't see any improvement after cleaning the printhead up to 3 times, turn the product off and wait at least 12 hours. Thentry cleaning the printhead again. If quality still does not improve, run a Power Cleaning. If there is still no improvement, contact Epson support.
Parenttopic: PrintHeadNozzleCheck
Relatedtasks
CleaningthePrintHeadUsingaComputerUtility
PowerCleaningUsingaComputerUtility
CheckingtheNozzlesUsingtheProductControlPanel
Relatedtopics
LoadingPaper
PrintHeadCleaning
If print quality has declined and thenozzlecheck pattern indicates clogged nozzles, you can clean the printhead.
Note: You cannot clean the print head if the ink level has reached the lower line on the ink tank, and may notbeabletocleanitwhentheinklevelinanyofthetanksislow.Youmustrefilltheinktankfirst.
CleaningthePrintHeadUsingtheProductControlPanel
CleaningthePrintHeadUsingaComputerUtility
Parenttopic: PrintHeadMaintenance
CleaningthePrintHeadUsingtheProductControlPanel
Youcancleantheprintheadnozzlesusingthecontrolpanelonyourproduct.
- MakesuretherearenoerrorsontheLCDscreen,theCD/DVDtrayisnotinsertedforprinting,and theoutputtrayisextended.
- Loadafewsheetsofplainpaperintheproduct.
3.Pressthehombutton,ifnecessary.
4.PressthearowbuttonstoselectSettingsandpresstheOKbutton. - SelectMaintenanceandpresstheOKbutton.
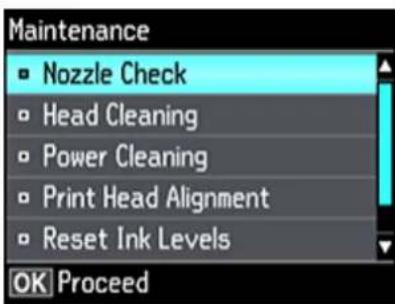
text_image
Maintenance Nozzle Check Head Cleaning Power Cleaning Print Head Alignment Reset Ink Levels OK Proceed6.SelectHeadCleaningandpresstheOKbutton.
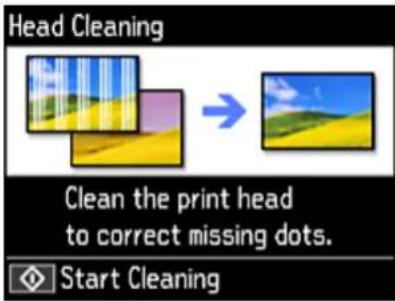
text_image
Head Cleaning Clean the print head to correct missing dots. Start Cleaning7.Pressthestartbuttontocleantheprinthead.YouseeamessageontheLCDscreenduringthe cleaningcycle.
Caution: Neverturnoff the product during acleaning cycle or you may damage it.
Whenthecleaningcycleisfinished,youseeacompletionmessageontheLCDscreen.
- SelectCheckandpresstheOKbutton.
9.Pressthestanbuttontoprintanozzlecheckpatternandconfirmthattheprintheadisclean.
If you don't see any improvement after cleaning the printhead up to 3 times, turn off the product and wait at least 12 hours. Thentry cleaning the printhead again. If quality still does not improve, run a Power Cleaning. If there is still no improvement, contact Epson support.
Parenttopic: PrintHeadCleaning
Relatedtasks
CheckingtheNozzlesUsingtheProductControlPanel
PowerCleaningUsingtheProductControlPanel
CleaningthePrintHeadUsingaComputerUtility
Relatedtopics
LoadingPaper
CleaningthePrintHeadUsingaComputerUtility
YoucancleantheprintheadusingautilityonyourWindowsorMaccomputer.
- MakesuretherearenoerrorsontheLCDscreen, theCD/DVDtrayisnotinsertedforprinting, and theoutputtrayisextended.
- Loadafewsheetsofplainpaperintheproduct.
3.Dooneofthefollowing:
- Windows:AccesstheWindowsDesktopandright-clicktheiconforyourproductintherightsideoftheWindowstaskbar,orclicktheuparrowandright-click.
- Mac: In the Apple menu or the Dock, select System Preferences. Select Print & Fax, Print & Scan, or Printers & Scanners, select your product, and select Options & Supplies. Select UtilityandselectOpenPrinterUtility.
- SelectHeadCleaning.
Youseeawindowlikethis:
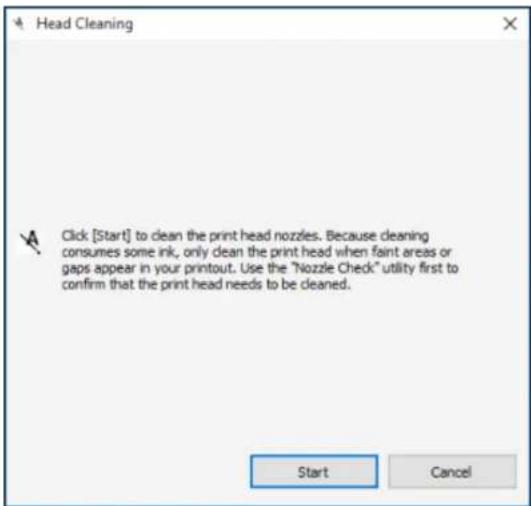
text_image
Head Cleaning Click [Start] to clean the print head nozzles. Because cleaning consumes some ink, only clean the print head when faint areas or gaps appear in your printout. Use the "Nozzle Check" utility first to confirm that the print head needs to be cleaned. Start Cancel5.ClickStarttobeginthecleaningcycle.
Caution: Neverturnoff the product during acleaning cycle or you may damage it.
-
When the cleaning cycle is finished, you can check to see if the nozzles are clean; click Print Nozzle CheckPatternandclickPrint.
-
Check the printed pattern to see if there are gaps in the lines.
Printheadisclean
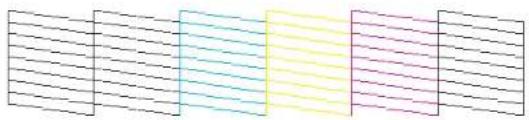
natural_image
Abstract pattern of horizontal lines with gradient colors (no text or symbols)Printheadneedscleaning
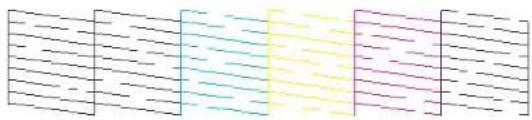
natural_image
Abstract pattern of horizontal lines and vertical color bands (no text or symbols)- Iftherearenogaps,clickFinish.
- Iftherearegapsorthepatternisfaint,clickCleantocleantheprintheadagain.
If you don't see any improvement after cleaning the printhead up to 3 times, turn off the product and wait at least 12 hours. Thentry cleaning the printhead again. If quality still does not improve, run a Power Cleaning. If there is still no improvement, contact Epson support.
Parenttopic: PrintHeadCleaning
Relatedtasks
CheckingtheNozzlesUsingaComputerUtility
PowerCleaningUsingaComputerUtility
CleaningthePrintHeadUsingtheProductControlPanel
Relatedtopics
LoadingPaper
PowerCleaning
If you still see white ordark lines or missing nozzles in your printouts, even after cleaning the printhead severaltimes, you can run a Power Cleaning.
If you donot see improvement after running a Power Cleaning, turn off the product and wait at least 12 hours before running another Power Cleaning.
Caution: Running a Power Cleaning consumes a lot of ink, so you should run it only if necessary. Make sureeachinktankisatleastone-thirdfullbeforerunningaPowerCleaning,oritmaydamagethe product.
Caution: PowerCleaning may cause the ink pad store each their capacity sooner. When an ink pad reaches the end of its service life, the product stops printing and you must contact Epson for support.
PowerCleaningUsingtheProductControlPanel
PowerCleaningUsingaComputerUtility
Parenttopic: PrintHeadMaintenance
PowerCleaningUsingtheProductControlPanel
YoucanrunaPowerCleaningusingthecontrolpanelonyourproduct.
Note: After a Power Cleaning, you must turn off the product and wait at least 12 hours before running anotherPowerCleaning.
-
Turnoff the product.
-
Visually check the ink levels and makes sure each ink tank is at least one-third full.
Caution: If youruna Power Cleaning when the ink levels are low, you may damage the product.
-
Hold down the ⏻ power button, the OK button, and the down arrow button at the same time until the PowerCleaningscreenappears.
-
Followtheon-screen instructionstorunthePowerCleaning.
-
When Power Cleaning is finished, runanozzle check.
Parenttopic: PowerCleaning
Relatedtasks
CheckingtheNozzlesUsingtheProductControlPanel
PowerCleaningUsingaComputerUtility
PowerCleaningUsingaComputerUtility
YoucanrunaPowerCleaningusingautilityonyourWindowsorMaccomputer.
Note: After running a Power Cleaning, you must turn off the product and wait at least 12 hours before running another Power Cleaning.
- MakesuretherearenoerrorsontheLCDscreenandtheoutputtrayisextended.
- Loadafewsheetsofplainpaperintheproduct.
3.Dooneofthefollowing:
- Windows:AccesstheWindowsDesktopandright-clicktheiconforyourproductintheright
side of the Windows taskbar, or click the up arrow and right-click. Select Printer Settings and clicktheMaintenancetab.
- Mac: In the Apple menu or the Dock, select System Preferences. Select Print & Fax, Print & Scan, or Printers & Scanners, select your product, and select Options & Supplies. Select UtilityandselectOpenPrinterUtility.
- SelectPowerCleaning.
Youseeawindowlikethis:
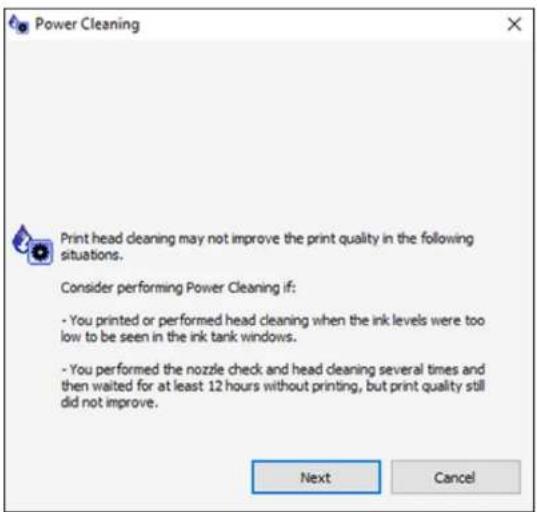
text_image
Power Cleaning Print head cleaning may not improve the print quality in the following situations. Consider performing Power Cleaning if: - You printed or performed head cleaning when the ink levels were too low to be seen in the ink tank windows. - You performed the nozzle check and head cleaning several times and then waited for at least 12 hours without printing, but print quality still did not improve. Next Cancel-
Followtheon-screen instruction storuna Power Cleaning.
-
When PowerCleaning is finished, runanozzle check.
Iftheprintqualitydidnotimprove,turnofftheprinterandwaitatleast12hoursbeforerunninganother PowerCleaning.
If the print quality does not improve after running the Power Cleaning utility multiple times, contact Epson for support.
Parenttopic:PowerCleaning
Relatedtasks
CheckingtheNozzlesUsingaComputerUtility
PowerCleaningUsingtheProductControlPanel
PrintHeadAlignment
If your printouts become grainy or blurry, you notice misalignment of vertical lines, or you seed a long horizontal bands, you may need to align the printhead.
Note: Banding may also occur your printhead nozzles need cleaning.
AligningthePrintHeadUsingtheProductControlPanel
Parenttopic:AdjustingPrintQuality
AligningthePrintHeadUsingtheProductControlPanel
Youcanaligntheprintheadusingthecontrolpanelonyourproduct.
- MakesuretherearenoerrorsontheLCDscreen, theCD/DVDtrayisnotinsertedforprinting, and theoutputtrayisextended.
- Loadafewsheetsofplainpaperintheproduct.
3.Pressthehombutton,ifnecessary.
4.PressthearowbuttonstoselectSettingsandpresstheOKbutton. - SelectMaintenanceandpresstheOKbutton.
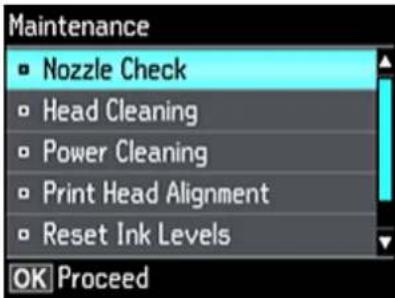
text_image
Maintenance Nozzle Check Head Cleaning Power Cleaning Print Head Alignment Reset Ink Levels OK Proceed- SelectPrintHeadAlignmentandpresstheOKbutton.
7.Dooneofthefollowing:
- SelectVerticalAlignmentandpresstheOKbutton.
- Select Horizontal Alignment, select Color or B&W, and press the OK button.
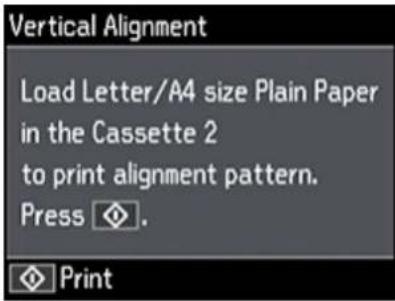
text_image
Vertical Alignment Load Letter/A4 size Plain Paper in the Cassette 2 to print alignment pattern. Press ◆. Print8.Pressthestarbuttontoprintanalignmentsheet.
Note: Donotcancelprintingwhileyouareprintingaheadalignmentpattern.
- Check the printed pattern and select the number representing them most solid printed pattern foreach set on the LCD screen.
Verticalalignment
1


Horizontalalignment
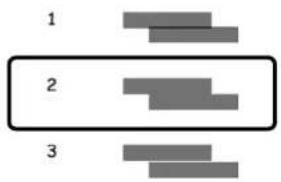
text_image
1 2 310.PresstheOKbuttonwhenyouarefinished.
Parenttopic: PrintHeadAlignment
Relatedtopics
LoadingPaper
CleaningthePaperPath
Ifyouseeinkonthebackofaprintout,youcancleanthepaperpathtoremoveanyexcessink.
- MakesuretheCD/DVDtrayisnotinsertedforprintingandtheoutputtrayisextended.
2.Loadafewsheetsofplainpaperintheproduct.
- Usetheproductcontrolpaneltomakeacopy, but without placing a document on the scannery glass.
Note: Makesurethereisnodustorstainsonthescannerglassordocumentcover.
- Checkthebackoftheejectedpapertoseeifitisclean.
5.Repeatasnecessaryuntilthepapercomesoutclean.
Parenttopic:AdjustingPrintQuality
Relatedtopics
Copying
LoadingPaper
CleaningtheRearPaperFeedPathUsingtheCleaningSheet
If your paper does not feed correctly, clean the paper paths inside the printer using the clean sheets that came with your product. The clean sheets should only be used to clean there are paper feed.
Caution: Do not use tissues to clean inside the product; lint from tissues may clog the print head nozzles.
- Makesurethereisnopaperintherearpaperfeedslotandtheoutputtrayisextended.
- Pressthehombutton, if necessary.
- Press the arrow buttons to select Maintenance and press the OK button.
- Press the down arrow button to select Paper Guide Cleaning (Rear) and press the OK button.
5.Followtheon-screeninstructionstocleanthepaperpath. - Removetheprotectivesheetfromthecleaningsheet.
- Load the cleanings sheet into therear paper feed slot and slide the edge guides against the sheet. Makes sure you insert the cleanings sheet with the cut corner at the lower right as shown.
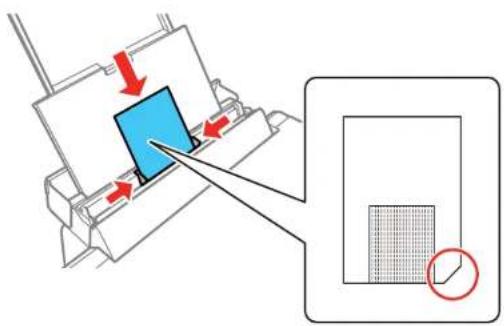
text_image
Diagram illustrating a mechanical or electrical process with labeled components and directional arrows, including a magnified inset showing a grid structure.- Pressthestartbuttontofeedthecleaningsheetthroughtheproduct.
- Check the cleaningsheet when it comes out of the product. You can repeat the previous steps up to three times as necessary (the cleaningsheet loses it effectively when used three times more).
Parenttopic:AdjustingPrintQuality
CleaningthePrinterHeadPath
If the print quality has not improved after cleaning and aligning the print head and cleaning the paper path, the printer head paths inside the print may be measured with ink.
Tocleantheprinterheadpath, usethefollowing:
•Severalcottonswabs
- ¼cup(59ml)watercontaining2to3dropsofmilddishdetergent
- Asmallflashlight
Caution: Do not use any other liquid to clean the printer head path or you may damage your product.
- Turnoff the product.
- Unplugthepowercable.
- Disconnectanyconnectedcables.
- Liftupthescannerunit.
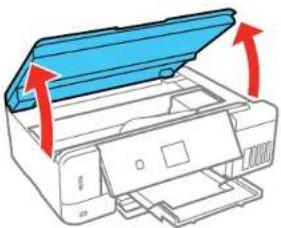
natural_image
Diagram of a printer with a blue cover and red arrows indicating paper direction (no text or symbols)- Using the flashlight, check the translucent film shown here for inksmears.
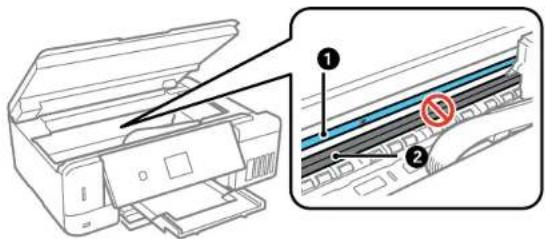
text_image
Diagram showing printer assembly with labeled parts, including a zoomed-in section and numbered annotations.1Translucentfilm
2Printheadrail
Caution: Do not touch the print head rail or wipe the grease off of it. You may not be able to print.
- Moistenacottonswabwiththewateranddetergentmixtureandsqueezeoutanyexcessmoisture, thenlightlywipetheinkoffthetranslucentfilm.
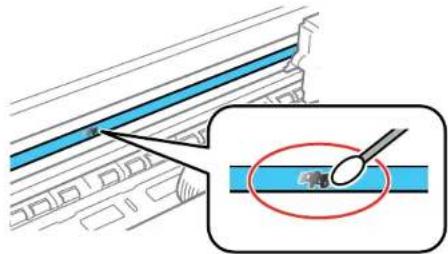
text_image
Technical diagram showing a blue mechanical component with an inset close-up of a tool interacting with a blue strip, likely illustrating a machining or assembly process.Caution: Donotpresstoothardonthefilmoryoumaydislocatetheanchorspringsanddamage yourproduct.
-
Useanew, drycottonswabtodrythetranslucentfilm.
-
Repeatsteps6 and 7 as necessary to clean all links meters.
- Whenthetranslucentfilmisdry, closetescannerunit.
- Reconnectany disconnected cables, plugin the power cord, and turn on the product.
Parenttopic: AdjustingPrintQuality
CheckingtheNumberofSheets
Youcanviewanoptionthatdisplaysthenumberofsheetsofpaperthathavefedthroughtheproduct.
CheckingtheSheetCounter-Windows
CheckingtheSheetCounter-Mac
Parenttopic:AdjustingPrintQuality
CheckingtheSheetCounter-Windows
Youcancheckthenumberofsheetsofpaperthathavefedthroughtheproductbycheckingthesheet counter.
- Access the Windows Desktop and right-click the icon for your product in the rights side of the Window task bar, or click the up arrow and right-click.
- SelectPrinterSettings.
- ClicktheMaintenancetab.
- SelectPrinterandOptionInformation.
Youseethiswindow:
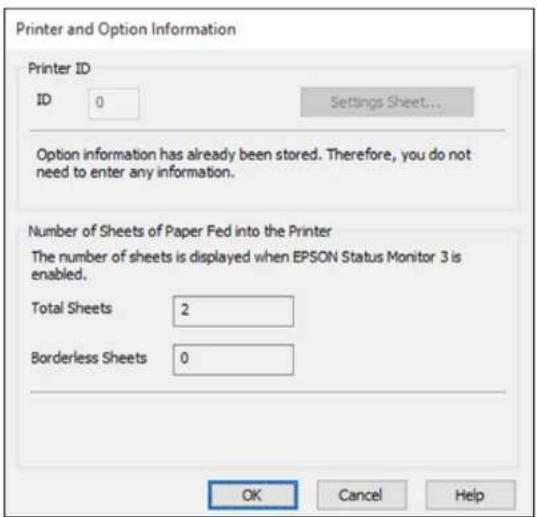
text_image
Printer and Option Information Printer ID ID 0 Settings Sheet... Option information has already been stored. Therefore, you do not need to enter any information. Number of Sheets of Paper Fed into the Printer The number of sheets is displayed when EPSON Status Monitor 3 is enabled. Total Sheets 2 Borderless Sheets 0 OK Cancel Help- Aftercheckingthenumberofsheetsfedintotheprinter, clickOKtocosethewindow.
Note: ThenumberofsheetsisdisplayedonlywhenEpsonStatusMonitor3isenabled.
Parenttopic: CheckingtheNumberofSheets
CheckingtheSheetCounter-Mac
Youcancheckthenumberofsheetsofpaperthathavefedthroughtheproductbycheckingthesheet counter.
- In the Apple menu or the Dock, select System Preferences. Select Print & Fax, Print & Scan, or Printers & Scanners, select your product, and select Options & Supplies. Select Utility and select OpenPrinterUtility.
- SelectPrinterandOptionInformation.
Youseethiswindow:
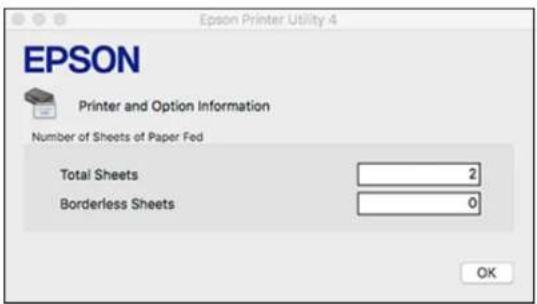
text_image
EPSON Printer and Option Information Number of Sheets of Paper Fed Total Sheets 2 Borderless Sheets 0 OK- Aftercheckingthenumberofsheetsfedintotheprinter, click OK to closetethewindow.
Parenttopic: CheckingtheNumberofSheets
CleaningandTransportingYourProduct
Seethesesectionsifyouneedtocleanortransportyourproduct.
CleaningYourProduct
TransportingYourProduct
CleaningYourProduct
Tokeep your product working at its best, you should clean it several times a year.
Closetheoutputtray, frontcover, and rearpaperfeedcover when you are not using the product to protect it from dust.
Caution: Do not use a hard brush, alcohol, or paint thinner to clean the product or you may damage it. Donotuseoilorotherlubricantsinsidetheproductorletwatergetinsideit.
- Turnoff the product.
- Unplugthepowercable.
- Disconnectanyconnectedcables.
- Remove all the paper.
- Cleanthescannerglasswithasoft, lint-freecloth(microfiberisrecommended), moistenedwitha littleglasscleaner.
Caution: Do not spray glass cleaner directly on the glass and do not press the glass surface with any force.
- Cleantheoutercase and control panel with asoft, drycloth. Donotuseliquidorchemical cleansers.
Parenttopic: Cleaning and Transporting Your Product
TransportingYourProduct
If you need to store your product or transport itsomed distance, prepare it for transportation as described here.
Caution: During transportation and storage, follow these guidelines:
- Avoidtiltingtheproduct, placingitvertically, orturningitupsidedown; otherwiseinkmayleak.

- Whenstoringortransportinganopenedinkbottle, donottilthebottle and donotsubjectittoimpacts ortemperaturechanges. Otherwise, inkmayleakevenifthecapontheinkbottleistightened securely. Besuretokeeptheinkbottleuprightwhentighteningthecap, andtakemeasurestoprevent inkfromleakingwhentransportingtheinkbottles.
- Donotputopenedinkbottlesintheboxwiththeproduct.
-
Donotcarrytheproductbyitscontrolpanel;thismaydamagetheproduct.
-
Turnoff the product.
- Remove all the paper from the product.
- Unplugthepowercable.
- Disconnectanyconnectedcables.
- Liftupthescannerunitandchecktoseeiftheprintheadisinthefarrightposition(thehome position).Ifnot,turnontheproduct,waitfortheprintheadtomovetothefarright,thenturnthe productoffagain.
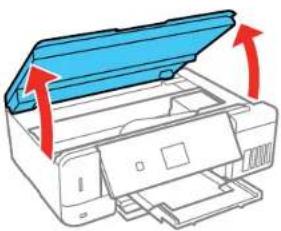
natural_image
Diagram of a printer with blue cover and red arrows indicating paper movement (no text or symbols)- Securetheprintheadtothecasewithtape.
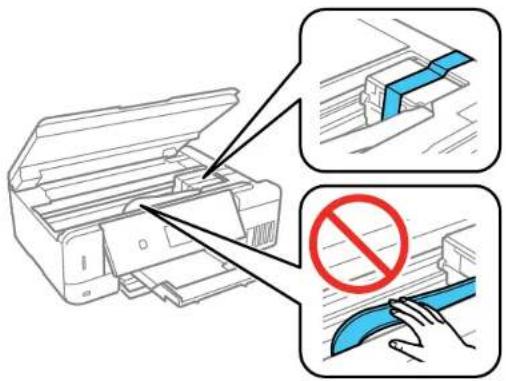
text_image
Diagram illustrating printer operation with labeled steps and a prohibition symbolCaution: Do not place tape on the white flat cable inside the product; otherwise, you may damage yourproduct.
- Opentheinktankcover. Makesuretheinktapcapsaresecurelyclosedandclosetheinktank cover.
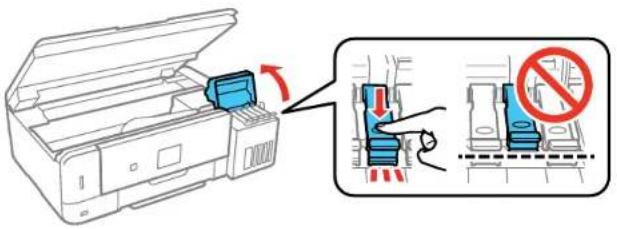
text_image
Diagram showing printer operation with a blue printer and a warning symbol indicating no usage.- Lowerthescannerunit.
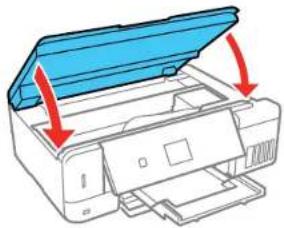
natural_image
Diagram of a printer with a blue cover and red arrows indicating operation (no text or symbols)- Closetherearpaperfeedsupportandrearpaperfeedcover.Closetheoutputtrayandthefront cover,thenlowerthecontrolpanel.
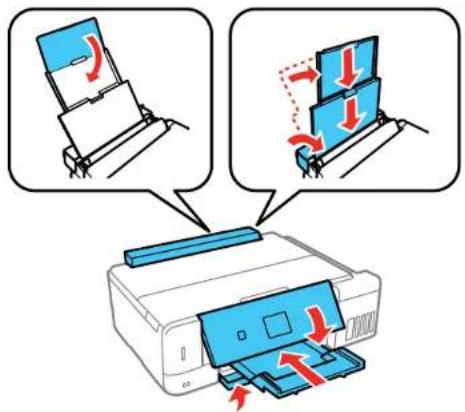
text_image
Diagram illustrating printer operation with blue and red arrows indicating rotation and movement steps- Placetheproductinitsoriginalpackagingmaterials, if possible, or use equivalent cushioning around the product.
Besuretoremovethetapefromtheprintheadbeforeturningonyourproduct.Ifprintqualityhas declinedwhenyouprintagain,cleanandaligntheprinthead.
Parenttopic: Cleaning and Transporting Your Product
Relatedconcepts
PrintHeadCleaning
PrintHeadAlignment
SolvingProblems
Checkthesesectionsforsolutionstoproblemsyoumayhaveusingyourproduct.
CheckingforSoftwareUpdates
ProductStatusMessages
MessageAppearsPromptingYoutoResetInkLevels
RunningaProductCheck
ResettingControlPanelDefaults
SolvingSetupProblems
SolvingNetworkProblems
SolvingCopyingProblems
SolvingPaperProblems
SolvingProblemsPrintingfromaComputer
SolvingPageLayoutandContentProblems
SolvingPrintQualityProblems
SolvingScanningProblems
SolvingScannedImageQualityProblems
SolvingMemoryCardProblems
SolvingCD/DVDProblems
UninstallYourProductSoftware
WheretoGetHelp
CheckingforSoftwareUpdates
Periodically, it'sagoodideatocheckEpson'ssupportwebsiteforfreeupdatestoyourproductsoftware.
Visit epson.com/support (U.S.), epson.ca/support (Canada), or epson.com.jm/support (Caribbean) and select your product.
- Windows: Your printer software automatically checks for updates. You can also manually update the softwarebyselectingSoftwareUpdatehere:
- AccessingtheWindowsDesktopandright-clickingtheiconforyourproductintherightsideof theWindowstaskbar,orclickingtheuparrowandright-clicking.
•OntheMaintenancetabintheprintersettingswindow
You can also update the software by selecting EPSON Software Updater in the EPSON or EPSON Software program group, accessible by the Start button, or on the Start or Apps screens, depending on your version of Windows.
- OS X: You can manually update the software by opening the Applications > Epson Software folder and selecting EPSONSoftwareUpdater.
- macOS 10.12.x: You can manually update the software by opening the App Store, selecting Updates, searching for a software update option for Epson Software, and selecting Update.
Parenttopic: Solving Problems
Relatedtasks
Changing Automatic Update Options
ProductStatusMessages
You can often diagnose problems with your product by checking the messages on its LCD screen. You can also see help information and how-to instructions on the screen. Press the home button, if necessary, select Help and press the OK button.
| LCDscreenmessageCondition/solution | |
| Operation canceled. An error occurred while saving. | A memory card or external storage device may be damaged. Make sure the memory card or external device is inserted correctly and meets the specifications for the product. |
| Printer error. Turn the power off and on again. For details, see documentation. | A fatal error has occurred. Turn the product off and then back on again. If the error continues, check for a paper jam. If there is no paper jam, contact Epson for support. |
| Communication error. Check if a computer is connected. | Make sure the computer is connected to your product and your software is installed correctly. |
| Paper Configuration is disabled. Some features may not be available. For details, see your documentation. | The Paper Configuration setting must be turned on to use AirPrint. |
| Theprinter'sinkpadis nearingtheendofits servicelife.Please contactEpsonsupport. | Theinkpadisneartheendofitsservicelifeandthemessagewillbe displayeduntiltheinkpadisreplaced.ContactEpsonforsupport.(To resumeprinting,pressthestattnbutton.) |
| Theprinter'sinkpadis attheendofitsservicelife.Pleasecontact Epsonsupport. | Theinkpadisattheendofitsservicelife.Turnofftheproductandcontact Epsonforsupport. |
| Updatetheroot certificatetousecloud services. | Accessyourproduct'sbuilt-inWebConfigutilityandupdatetheroot certificateforyourproduct. |
| CombinationofIP addressandsubnet maskisinvalid.See yourdocumentation. | Thereisaproblemwiththenetworkconnectiontoyourproduct.Checkthe solutionsinthisguide. |
| RecoverymodeAerrorha | soccurredduringfirmwareupdating.Connectyourproductusing aUSBcableandtryupdatingthefirmwareagain.Ifyoustillreceivethiserror message,contactEpsonforsupport. |
Note: The ink pads in the printer collect, distribute, and contain the ink that is not used on printed pages. Duringthelifeofyourproductitmayreachaconditionwhereeithersatisfactoryprintqualitycannotbe maintainedortheinkpadshaverachedtheendoftheirusablelife.TheEpsonStatusMonitor,your LCDscreen,orlightsonthecontrolpanelwilladviseyouwhentesepartsneedreplacing.Ifthis happensduringthestandardwarrantyoftheproduct,theexchangeoftheproductorreplacementofthe padsiscoveredunderthestandardwarranty.Iftheproductisoutofwarranty,thepadscanbereplaced byanyEpsonauthorizedserviceprovider.Thewasteinkpadsarenotauser-replaceablepart.
Parenttopic: Solving Problems
Relatedreferences
MemoryCardFileSpecifications PaperJamProblemsInsidetheProduct PaperJamProblemsinthePaperCassette PaperJamProblemsintheRearCover WhereToGetHelp
Relatedtasks
InsertingaMemoryCard
UsingAirPrint
SelectingthePaperSettingsforEachSource-ControlPanel
Relatedtopics
Wi-FiorWiredNetworking
MessageAppearsPromptingYoutoResetInkLevels
IfyouseeamessageontheLCDscreenpromptingyoutoresettheinklevels,dothefollowing:
- RefillalloftheinktanksortheinktanksindicatedontheLCDscreenallthewaytothetop.
Note: Depending on the operating conditions, you may see the ink reset message even when there is stillinkinthetanks.
-
SelectthecolorsthatyourefilledontheLCDscreen.
-
Follow the instructions on the LCD screentoresettheink levels.
Note: The product has a low ink alert system. The accuracy of this system depends on the user refilling theinktankscorrectly. Theproductcannotdirectlymeasuretheinklevelsinthetanks;instead estimatestheamountofinkremainingbyinternallymonitoringinkusage. Thelowinkalertsystemmay generateinaccuratemessagesiftheinktanksarenotrefilledaccordingtotheseinstructions.
Asaprecaution, performregularvisualinspectionsoftheinktankstoensureinklevelsdonotfallbelow thelowerline.Continueduseoftheproductwhentheinklevelisbelowthelowerlineonthetankcould damagetheproduct.
Parenttopic: Solving Problems
Relatedtopics
RefillingInk
RunningaProductCheck
Runningaproductcheckhelpsyoudetermineifyourproductisoperatingproperly.
-
Disconnectanyinterfacecablesconnectedtoyourproduct.
-
Loadplainpaperintheproduct.
3.Pressthehonnbutton,ifnecessary.
4.PressthearowbuttonstoselectSettingsandpresstheOKbutton.
5. SelectMaintenanceandpresstheOKbutton.
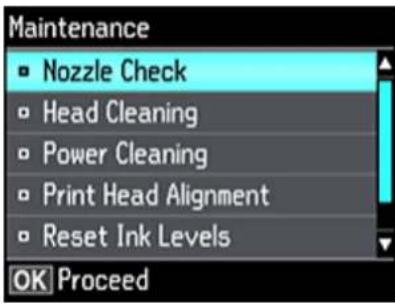
text_image
Maintenance Nozzle Check Head Cleaning Power Cleaning Print Head Alignment Reset Ink Levels OK Proceed6.SelectNozzleCheckandpresstheOKbutton.
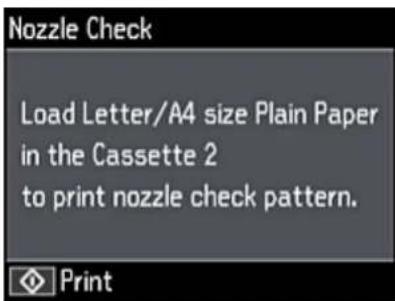
text_image
Nozzle Check Load Letter/A4 size Plain Paper in the Cassette 2 to print nozzle check pattern. Print7.Pressthestanbutton.
Thenozzlecheckpatternisprinted.
8.Dooneofthefollowing,dependingontheresultsoftheproductcheck:
- If the page prints and then ozzle check pattern is complete, the product is operating properly. Any operation problem you may have could be caused by your computer, cable, software, or selected
settings.Checktheothersolutionsinthisbookortryuninstallingandreinstallingyourprinter software.
- Ifthepageprintsbutthenozzlecheckpatternhasgaps,cleanoraligntheprinthead.
- Ifthepagedoesnotprint, theproductmayhaveaproblem. Checktheothersolutionsinthis manual. Iftheydonotwork, contactEpson.
Parenttopic: SolvingProblems
ResettingControlPanelDefaults
If you have a problem with settings on the product control panel, you can reset them to their factory defaults. You can choose which setting stores to reset them all.
- Pressthehonrebutton, if necessary.
2.PressthearowbuttonstoselectSettingsandpresstheOKbutton. - SelectRestoreDefaultSettingsandpresstheOKbutton.
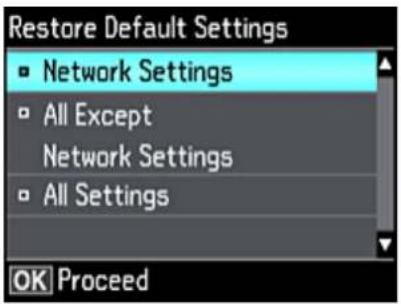
text_image
Restore Default Settings ■ Network Settings □ All Except Network Settings □ All Settings OK Proceed- Selectoneoftheseoptions:
•NetworkSettings:Resetsallnetworksettings.
- AllExceptNetworkSettings: Resetsallcontrolpanelsettings, exceptfornetworksettings.
- AllSettings: Resetsallcontrolpanelsettings.
- Select Yes to reset the selected settings. (Select No if you want to cancel the operation.)
Parenttopic: Solving Problems
SolvingSetupProblems
Checkthesesectionsifyuhaveproblemswhilesettingupyourproduct.
NoiseAfterFillingtheInk
SoftwareInstallationProblems
ControlPanelSetupProblems
Parenttopic: Solving Problems
NoiseAfterFillingthelnk
If you hear noises from your product after filling the ink tank with ink, check these explanations:
- The first time you fill the tank with ink, the product must charge its print head. Wait until charging finishes before you turn off the product, or it may charge improperly and use excess ink then next time you turn it on. Your product is finished charging the print head when the power light stops flashing.
- If the product's printhead stopsmovingormaking noise, and the charging process has not finished after approximately 20 minutes, turn off your product. Turn it back on and check to see if charging is still in progress. If it is still in progress, contact Epson for help.
Parenttopic: SolvingSetupProblems
SoftwareInstallationProblems
If you have problems while installing your product software, try thesesolutions:
- Makesureyourproductisturnedonandanynecessarycablesaresecurelyconnectedatbothends.If youstillhaveproblemsinstallingsoftware,disconnectthecableandcarefullyfollowtheinstructionson the Start Here sheet. Also make sure your system meets the requirements for your operating system.
- Closeanyotherprograms, including screensavers and virus protection software, and install your product software again.
•InWindows, makesureyourproductisselectedasthedefaultprinterandthecorrectportisshownintheprinterproperties.
- If you see any error message your software does not install correctly in Windows, you may not have software installation privileges. Contact your system administrator.
Parenttopic: Solving Setup Problems
ControlPanelSetupProblems
If you have problems setting up the control panel, try these solutions:
- ToviewLCDscreentextinadifferentlanguage,selectadifferentlanguagesettingforthepanel.
- Toadjustthepositionofthecontrolpanel, carefullyraiseorlowerit.
Parenttopic: Solving Setup Problems
Relatedtopics
UsingtheControlPanel
SolvingNetworkProblems
Checkthesesolutionsify you have problems setting up or using your product on an network.
Note: Breakdown or repair of this product may cause loss of network data and settings. Epson is not responsible for backing up or recovering data and settings during or after the warranty period. We recommend that you make your own backup or print out your network data and settings.
ProductCannotConnecttoaWirelessRouterorAccessPoint
NetworkSoftwareCannotFindProductonaNetwork
ProductDoesNotAppearinMacPrinterWindow
CannotPrintOveraNetwork
CannotScanOveraNetwork
Parenttopic: Solving Problems
ProductCannotConnecttoaWirelessRouterorAccessPoint
If your product that a trouble finding or connecting to a wireless router or access point, try thesesolutions:
- If you are connecting the product via Wi-Fi Protected Setup (WPS) and the Wi-Fi icon your product's LCD screen is not lit or does not appear, makes sure you select one of the WPS options from the product control panel within 2 minutes of pressing the WPS button on your router.
- Makesuretoplaceyourproductwithincontactrangeofyour2.4GHzrouteroraccesspoint.Avoid placingyourproductnearamicrowaveoven,2.4GHzcordlessphone,orlargemetalobject,suchasa filingcabinet.
Note: If you are using a 5 GHz wireless router, set the router to operate in dual band (2.4 GHz and 5GHz) mode. If your router uses asinglenetworkname(SSID) for both the 2.4 GHz and 5 GHz band, give each band its own network name(SSID) instead, such as Home Network 2.4 GHz and Home
Network5GHz.Seeyourrouterdocumentationorcontactyourinternetserviceproviderfor instructions.
- Verify that your router or access point is operating correctly by connecting to it from your computer or another device.
- Youmayneedtodisablethefirewallandanyanti-virussoftwareonyourwirelessrouteroraccess point.
- Checktoseeifaccessrestrictions,suchasMACaddressfiltering,aresetontherouteroraccess point.Ifaccessrestrictionsareset,addyourproduct'sMACaddressstoyourrouter'saddresslist.To obtainyourproduct'sMACaddress,printanetworkstatussheet.Thenfollowtheinstructionsinyour routeroraccesspointdocumentationtoaddtheaddressstothelist.
- If your router or access point does not broadcast its network name (SSID), follow the instruction that camewith your product to enter your wireless network namemannually.
- If your router or access point as security enabled, determin the kind of security is using and any required password or passphrase for connection. Then makes sure to enter the exact WEP key or WPA passphrase correctly.
- Checkify our computer is restricting the available wireless channels. If so, verify that your wireless access point is using one of the usable channels and change to a usable channel, if necessary.
• If you are using a Wi-Fi Direct connection that suddenly disconnects, the Wi-Fi direct password on your device may have been changed. If necessary, delete the existing DIRECT-xxxxxxxx connection settings from your device and enter anew password. See your device documentation for instructions.
Parenttopic: Solving Network Problems
Relatedtopics
Wi-FiorWiredNetworking
NetworkSoftwareCannotFindProductonaNetwork
IfEpsonNetSetupcannotfindyourproductionanetwork,trythesesolutions:
- Makesureyourproductisturnedonandconnectedtoyournetwork.Verifyconnectionusingyour productcontrolpanel.
- Checkifyournetworkname(SSID)containsnon-ASCIIcharacters.Yourproductcannotdisplaynon-ASCIIcharacters.
- Makesureyourproductisnotconnectedtoaguestnetwork.
-
Ifnecessary,reinstallyourproductsoftwareandtryrunningEpsonNetSetupagain:
-
Resetyourproduct'snetworksettingstotheirfactorydefaults.
-
Windowsonly: uninstall your product software.
- Initialize your router following the instructions in your router documentation.
Note: If you are reading these instructions online, you will lose your Internet connection when you initialize your router, sonotethenextstep before initializing it.
- Download your product software from the Epson website using the instructions on the Start Here sheet.
- If you have replaced your router, reinstall your product software to connect to the new router.
Note: If you are using a 5 GHz wireless router, set the router to operate in dual band (2.4 GHz and 5GHz)mode. If yourrouter uses asinglenetworkname(SSID)for both the 2.4GHz and 5GHzband, give each band its own network name(SSID) instead, such as Home Network 2.4GHz and Home Network 5GHz. See your router documentation or contact your internet service provider for instructions.
- ChecktoseeifyourwirelessrouteroraccesspointhasanenabledPrivacySeparatorfunctionthatis preventingdetectionofyourdeviceoverthenetwork.Seeyourrouteroraccesspointdocumentation forinstructionsondisablingthePrivacySeparatorfunction.
Parenttopic: SolvingNetworkProblems
Relatedconcepts
UninstallYourProductSoftware
Relatedtopics
Wi-FiorWiredNetworking
ProductDoesNotAppearinMacPrinterWindow
If your product does not appear in the Macprinter window, try these solutions:
- Turnyourproductoff, wait30seconds, thenturnitbackonagain.
- If you are connecting the product via Wi-Fi Protected Setup (WPS) and the Wi-Fi economy your product's LCD screen is not lit, makes sure you select one of the WPS options from the product control panel within 2 minutes of pressing the WPS button on your router.
- If you are connecting the product wirelessly via Epson Net Setup and the Wi-Fi condition not appear, it is your LCD screen, makes your product software was installed correctly. If necessary, reinstall your software.
Note: If you are using a 5 GHz wireless router, set the router to operate in dual band (2.4 GHz and 5GHz)mode.Ifyourrouterusesasinglenetworkname(SSID)forboththe2.4GHzand5GHzband, giveeachbanditsownnetworkname(SSID)instead,suchasHomeNetwork2.4GHzandHome Network5GHz.Seeyourrouterdocumentationorcontactyourinternetserviceproviderforinstructions.
Parenttopic: SolvingNetworkProblems
Relatedconcepts
UninstallYourProductSoftware
Relatedtopics
Wi-FiorWiredNetworking
CannotPrintOveraNetwork
If you cannot print over an network, try thesesolutions:
• Makesurethatyourproductisturnedon.
- Makesureyouinstallyourproduct'snetworksoftwareasdescribedinyourproductdocumentation.
- Printanetworkstatussheetandverifythatthenetworksettingsarecorrect.Ifthenetworkstatusis Disconnected,checkanycableconnectionsandturnyourproductoffandthenonagain.
• If you are using TCP/IP, makes sure the product's IP address is set correctly for your network. If your network does not assign IP addresses using DHCP, set the IP address manually.
- Makesureyourcomputerandproductarebothusingthesamewirelessnetwork.
- Ifnetworkprintingisslow,printanetworkstatussheetandcheckthesignalstrength.Ifitispoor,place yourproductclosertoyourrouteroraccesspoint.Avoidplacingyourproductnearamicrowaveoven, 2.4GHzcordlessphone,orlargemetalobject,suchasafilingcabinet.
Note: If you are using a 5 GHz wireless router, set the router to operate in dual band (2.4 GHz and 5GHz)mode. If your router uses asinglenetworkname(SSID)for both the 2.4GHz and 5GHzband, give each band its own network name(SSID) instead, such as Home Network 2.4GHz and Home Network 5GHz. See your router documentation or contact your internetservice provider for instructions.
- ChecktoseeifyourwirelessrouteroraccesspointhasanenabledPrivacySeparatorfunctionthatis preventingprintingfromadeviceoverthenetwork. Seeyourrouteroraccesspointdocumentationfor instructionsondisablingthePrivacySeparatorfunction.
- If you are connecting the product wirelessly via Epson Net Setup and the Wi-Fi connection icon is not to do not appear on the product's LCD screen, makes sure your product software was installed correctly. If necessary, reinstally your software.
Parenttopic: SolvingNetworkProblems
Relatedconcepts
UninstallYourProductSoftware
Relatedtasks
PrintingaNetworkStatusSheet
Relatedtopics
Wi-FiorWiredNetworking
CannotScanOveraNetwork
If you cannot start Epson Scan 2 for scanning over an network, try thesesolutions:
- If you cannot scan from your product control panel, makes sure you rest started your computer after installing the product software. Makes sure the Event Manager program is not being blocked by your firewall or security software.
Note: If you are using a 5 GHz wireless router, set the router to operate in dual band (2.4 GHz and 5GHz)mode. If your router uses asinglenetworkname(SSID)for both the 2.4GHz and 5GHzband, give each band its own network name(SSID) instead, such as Home Network 2.4GHz and Home Network 5GHz. See your router documentation or contact your internet service provider for instructions.
- If you are scanning a large original at high resolution, an network communication error may occur. Try scanning again at lower resolution.
- IfnetworkcommunicationwasinterruptedwhilestartingEpsonScan2,exitEpsonScan2,waitafew seconds,andrestartit.IfEpsonScan2cannotrestart,turnoffyourproduct,turnitbackon,andtry restartingEpsonScan2again.
- CheckthescannersettingandresettheconnectionifnecessaryusingEpsonScan2Utility:
Windows 10: Click ☐ and select EPSON > Epson Scan 2 Utility. Make sure your product is selected. If necessary, select the OthertabandclickReset.
Windows 8.x: Navigate to the Apps screen, select EPSON, and select Epson Scan 2 Utility. Make sure your product is selected. If necessary, select the Other tab and click Reset.
Windows (other versions): Click 📋 or Start > All Programs or Programs > EPSON > Epson Scan 2 > Epson Scan 2 Utility. Make sure your product is selected. If necessary, select the Other tabandclickReset.
Mac: Open the Applications folder, click Epson Software, and click Epson Scan 2 Utility. Make sure your product is selected. If necessary, select the Other tab and click Reset.
- Youmayneedtodisablethefirewallandanyanti-virussoftwareonyourwirelessrouteroraccess point.
Parenttopic: SolvingNetworkProblems
Relatedtopics
Wi-FiorWiredNetworking
Scanning
SolvingCopyingProblems
Checkthesesolutionsify you have problemscopying with your product.
ProductMakesNoise, ButNothingCopies
ProductMakesNoiseWhenItSitsforaWhile
Parenttopic: Solving Problems
ProductMakesNoise, ButNothingCopies
If your product makesanoise, but nothing copies, try thesesolutions:
- Runanozzlechecktoseeifanyoftheprintheadnozzlesareclogged. Thencleantheprinthead, if necessary.
- If thenozzlecheckpagedoesnotprint, but the product's power is on, makes sure your product software is installed correctly.
• Makesureyourproductislevel(nottilted).
Parenttopic: Solving Copying Problems
Relatedconcepts
PrintHeadNozzleCheck
PrintHeadCleaning
ProductMakesNoiseWhenItSitsforaWhile
Yourproductisperformingroutinemaintenance. Thisisnormal.
Parenttopic: Solving Copying Problems
SolvingPaperProblems
Checkthesesectionsifyuhaveproblemsusingpaperwithyourproduct.
PaperFeedingProblems
PaperJamProblemsInsidetheProduct
PaperJamProblemsinthePaperCassette
PaperJamProblemsintheRearCover
PaperEjectionProblems
Parenttopic: Solving Problems
PaperFeedingProblems
If you have problems feeding paper, try thesesolutions:
- Makesurethepapercassetteisinsertedallthewayintheprinter.
- Ifpaperdoesnotfeedcorrectly, remove and reloaditinthecassette and adjust the edge guides. Makesurethepaperstackis not abovethetabontheedgeguides insidethecassette.
- If multiple pages feed at once, remove the paper, fan the edge gestose separate the sheets, and reload it.
- Donotloadmorethantherecommendednumberofsheets.
- Makesureyourpapermeetsthespecificationsforyourproduct.
- Ifpaperjamswhenyouprintonbothsidesofthepaper,tryloadingfewersheets.
•Forbestresults, follow these guidelines:
- Usenew, smooth, high-quality paper that is not curled, creased, old, toothin, ortoothick.
- Loadpaperinthecassetteprintablesidedown.
- Followanyspecialloadinginstructionsthatcamewiththepaper.
Parenttopic: SolvingPaperProblems
Relatedreferences
PaperLoadingCapacity
PaperSpecifications
PaperJamProblemsInsidetheProduct
PaperJamProblemsinthePaperCassette
PaperJamProblemsintheRearCover
PaperJamProblemsInsidetheProduct
Ifyouseeamessagethatpaperhasjammedinsidetheproduct,followthestepshereorontheLCD screentoclearthejam.
- Canceltheprintjob, if necessary.
- Liftupthescannerunit.
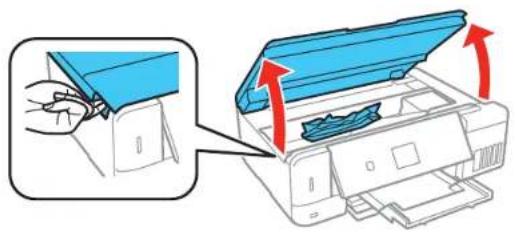
text_image
Diagram showing printer press operation with blue cover and red directional arrows indicating press direction- Removeanyjammedpaperinside.
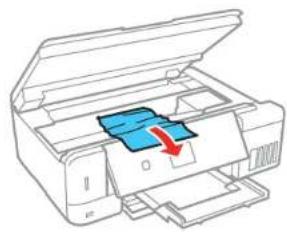
natural_image
Line drawing of a printer with a blue cover and red arrow indicating a loading or compression process (no text or symbols)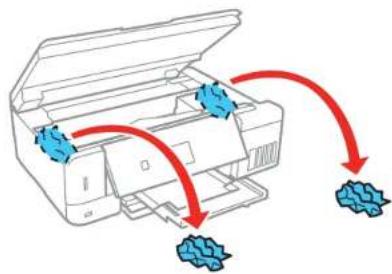
text_image
Diagram illustrating printer printing process with blue plastic particles and red arrows indicating flow directionCaution: Donottouchtheflatwhitecable, translucentfilm, orinktubesinsidetheprinter.
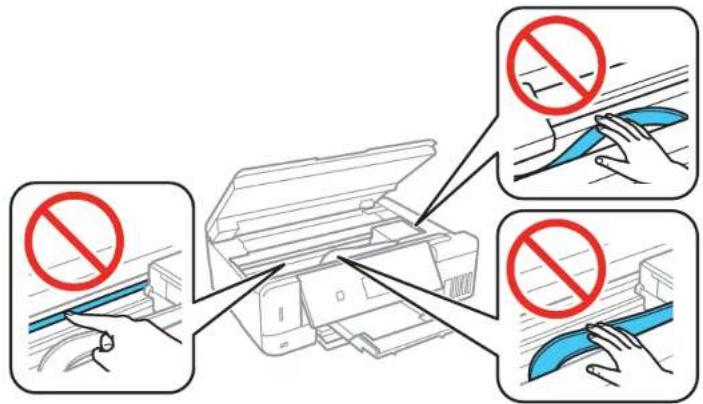
text_image
Diagram illustrating three methods of removing a printer into a printer, with Chinese annotations indicating prohibition.4.Closethescannerunit.
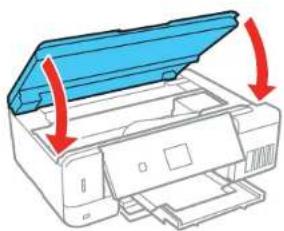
natural_image
Diagram of a printer with a blue cover and red arrows indicating process direction (no text or symbols)- FollowthepromptsontheLCDscreentoclearanyerrormessages.Ifyoustillseeapaperjam message,checktheotherpaperjamsolutions.
Parenttopic: SolvingPaperProblems
Relatedreferences
PaperJamProblemsinthePaperCassette
PaperJamProblemsintheRearCover
Relatedtasks
CancellingPrintingUsingaProductButton
PaperJamProblemsinthePaperCassette
Ifyouseeamessagethatpaperhasjammedinthepapercassette, followthestepshereorontheLCD screentoclearthejam.
- Canceltheprintjob, if necessary.
- Closetheoutputray.
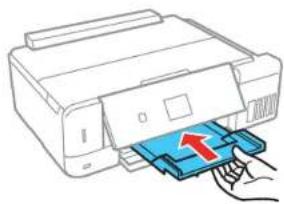
natural_image
Illustration of a printer with a blue cover and red arrow indicating print direction (no text or symbols)- Pullout and remove both papercassettes.
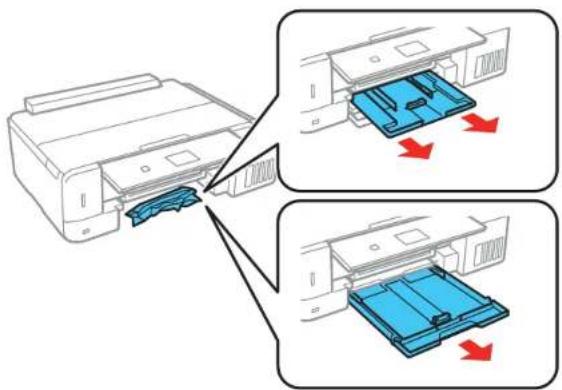
text_image
Diagram illustrating printer folding process with blue plastic sheet being removed, showing two states of disassembly.- Removethejammedpaper.
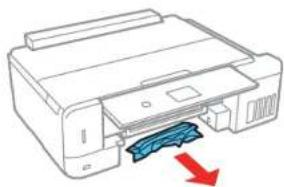
natural_image
Diagram of a printer with a blue cover and red arrow indicating compression or disassembly (no text or symbols present)- Makesurethepaperyouloadisundertheedgeguides.
- Keep the cassette flatasy you insert it. Insert Cassette 1 (upper cassette) it until the arrows on the right sideline up.
- FollowthepromptsontheLCDscreentoclearanyerrormessages.Ifyoustillseeapaperjam message,checktheotherpaperjamsolutions.
Parenttopic: SolvingPaperProblems
Relatedreferences
PaperJamProblemsInsidetheProduct
PaperJamProblemsintheRearCover
Relatedtasks
CancellingPrintingUsingaProductButton
PaperJamProblemsintheRearCover
Ifyouseeamessagethatpaperhasjammedintherearcover,followthestepshereorontheLCD screentoclearthejam.
-
Canceltheprintjob, if necessary.
-
Pressthebuttonstoreleasetherearcoverandremoveitfromyourproduct.
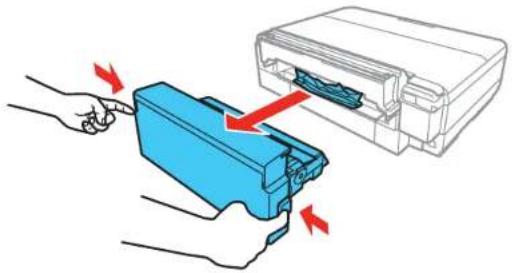
natural_image
Illustration of hands inserting a blue plastic device into a white case with red arrows indicating force (no text or symbols)- Remove any jammed paper from insidethe product.
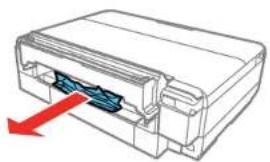
natural_image
Diagram of a mechanical device with a blue internal component and red directional arrow indicating flow or movement (no text or symbols)- Reattachtherearcover.
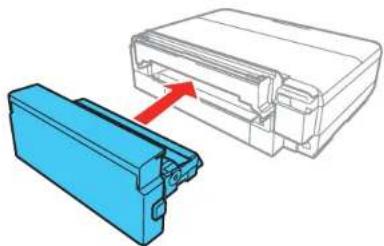
natural_image
Diagram showing a blue plastic housing with a red arrow pointing to a white rectangular component (no text or symbols present)- FollowthepromptsontheLCDscreentoclearanyerrormessages.Ifyoustillseeapaperjam message,checktheotherpaperjamsolutions.
Parenttopic: SolvingPaperProblems
Relatedreferences
PaperJamProblemsInsidetheProduct
PaperJamProblemsinthePaperCassette
Relatedtasks
CancellingPrintingUsingaProductButton
PaperEjectionProblems
If you have problems with paperejecting properly, try thesesolutions:
- Ifpaperdoesnotejectfully,youmayhavesetthewrongpapersize.Cancelprintingtoejectthepaper.Selecttthecorrectpapersizewhenyoureprint.
- Ifpaperiswrinkledwhenitejects, itmaybedamportoothin. Loadnewpaperandbesuretoselect thecorrectpapertypesettingwhenyoureprint.
Parenttopic: SolvingPaperProblems
Relatedreferences
PaperSpecifications
PaperorMediaTypeSettings-PrinterSoftware
Relatedtasks
CancellingPrintingUsingaProductButton
Relatedtopics
LoadingPaper
SolvingProblemsPrintingfromaComputer
Checkthesesectionsifyuhaveproblemswhileprintingfromyourcomputer.
Note: When printing using AirPrint, the available print settings are different from those covered in this manual.SeetheApplewebsitefordetails.
NothingPrints
ProductIconDoesNotAppearinWindowsTaskbar
PrintingisSlow
Parenttopic: Solving Problems
NothingPrints
If you have sent a print job and nothing prints, try thesesolutions:
• Makesureyourproductisturnedon.
- Makesureanyinterfacecablesareconnectedsecurelyatbothends.
- If you connected your product to a USB hub, makes sure it is first-tier hub. If it still does not print, connect your product directly to your computer instead of the hub.
- Runaproductchecktoseeifatestpageprints.Ifthetestpageprints,checktoeeifyourproduct softwareisinstalledcorrectly.
• InWindows, makesureyourproductisselectedasthedefaultprinter.
- In Windows, delete all jobs from the Windows Spooler. Click Print Queue on the Maintenance tab in the printersettingswindow, and cancelanystalledprintjobs.
Parenttopic: SolvingProblemsPrintingfromaComputer
ProductIconDoesNotAppearinWindowsTaskbar
If you donot see your product icon in the Window task bar, first try restarting your computer. If that does not work, try this solution:
- Dooneofthefollowing:
- Windows 10: Click and select (Settings) > Devices > Printers & scanners. Select your productname and select Manage>Printingpreferences.
- Windows 8.x: Navigate to the Apps screen and select Control Panel > Hardware and Sound > Devices and Printers. Right-click your product name, select Printing Preferences, and select yourproductnameagainifnecessary.
- Windows 7: Click and select Devices and Printers. Right-click your product name, select PrintingPreferences, and select your product name again if necessary.
- Windows Vista: Click 📋, select Control Panel, and click Printer under Hardware and Sound. Right-click your product name, select Printing Preferences, and select your product name again if necessary.
-
ClicktheMaintenancetab.
-
ClicktheExtendedSettingsbutton.
-
SelectEnableEPSONStatusMonitor3andclickOK.
- ClicktheMonitoringPreferencesbutton.
- Click the checkbox for the option that add st heshort cut to the task bar.
- Click OK to closet the open program windows.
Parenttopic: Solving Problems Printing from a Computer
PrintingisSlow
Ifprintingbecomesslow, trythesesolutions:
- Makesureyoursystemmeetstherequirementsforyouroperatingsystem.Ifyouareprintingahigh-resolutionimage,youmayneedmorethantheminimumrequirements.Ifnecessary,increaseyour system'smemory.
- If you are using Windows 7, closet the Devices and Printers window before you print.
- OnaMac, makesure you download and install the Epson printer driver.
•MakesureQuietModeisturnedoff.
-Clearspaceonyourharddriveorrunadefragmentationutilitytofreeupexistingspace. - Closeanyprogramsyouarenotusingwhenyouprint.
- If your product is connected to a USB hub, connect it directly to your computer instead.
- Ifprintingbecomesslowerafterprintingcontinuouslyforalongtime, theproductmayhave automaticallysloweddowntoprotecttheprintmechanismfromoverheatingorbecomingdamaged. Lettheproductrestwiththepoweronfor30minutes, thentryprintingagain.
Forthefastestprinting, select the following settings in your product software:
- Makesurethepapertypesettingmatchesthetypeofpaperyouloaded.
- Turnonanyhighspeedsettingsinyourproductsoftware.
- Selectalowerprintqualitysetting.
- Makesuretheinkdryingtimehasnotbeenincreasedfordouble-sidedprinting.
- Windows: Click the Maintenance or Utility tab, select Extended Settings or Speed and Progress, and select the following settings:
•AlwaysSpoolRAWDatatype
•PageRenderingMode
-PrintasBitmap
- Windows: Select Printer Properties, click the More Options tab and make sure the High Speed settingisenabled.
• Mac: Select System Preferences, select Printers & Scanners, then select your product. Select Options & Supplies, then select Options (or Driver) and enable the High Speed Printing setting.
IfprintingisstillslowandyouareusingWindows7orWindowsVista,trythefollowing:
- Click and select Computer or My Computer. Double-click the C: drive and open these folders: ProgramData>EPSON>PRINTER.
Note: If you do not see the ProgramData folder, open the Organize menu and select Folder and search options. In the window that appears, click the View tab, select Show hidden files, folders, and drives in the Advanced settings list, and click OK.
2.Right-clicktheEPAUDF01.AUDfileandselectDelete.
3.Restartyourcomputerandtryprintingagain.
Parenttopic: Solving Problems Printing from a Computer
Relatedreferences
WindowsSystemRequirements
MacSystemRequirements
PaperorMediaTypeSettings-PrinterSoftware
Relatedtasks
SelectingBasicPrintSettings-Windows
SelectingExtendedSettings-Windows
SelectingBasicPrintSettings-Mac
SelectingPrintingPreferences-Mac
SolvingPageLayoutandContentProblems
Checkthesesectionsifyouhaveproblemswiththelayoutorcontentofyourprintedpages.
Note: When printing using AirPrint, the available print settings are different from those covered in this manual.SeetheApplewebsitefordetails.
InvertedImage
TooManyCopiesPrint
BlankPagesPrint
IncorrectMarginsonPrintout
BorderAppearsonBorderlessPrints
IncorrectCharactersPrint
IncorrectImageSizeorPosition
SlantedPrintout
Parenttopic: Solving Problems
InvertedImage
If your printed image is inverted unexpectedly, try thesesolutions:
- Turnoffanymirrororinversionsettingsinyourprintingapplication.
- Turn off the Mirror Image, Flip horizontally, or Reverse page orientation settings in your printer software. (Thisoptionhasdifferentnames,dependingonyouroperatingsystemversion.)
Note: Leave these options turned on when you print on Epson Iron-on Cool Peel Transfer paper, if available for your product.
Parenttopic: Solving PageLayoutandContentProblems
Relatedtasks
SelectingBasicPrintSettings-Mac
SelectingAdditionalLayoutandPrintOptions-Windows
TooManyCopiesPrint
Make sure that the Copies setting in your printing program or printer software is not set for multiple copies.
Parenttopic: Solving PageLayoutandContentProblems
BlankPagesPrint
Ifblankpagesprintunexpectedly,trythesesolutions:
- Makesureyouselectedthecorrectpapersizesettingsinyourprintingprogramandprintersoftware.
- If a blank page exists in a document you are printing and you want to skip printing it, select the Skip BlankPagesettinginyourprintersoftware,ifavailable.
- Runaprintheadnozzlechecktoseefanyofthenozzlesareclogged. Thencleantheprinthead, if necessary.
- Makesureyourproductisselectedastheprinterinyourprintingprogram.
- Youmayneedtorefilltheink. Visuallychecktheinklevels.
Parenttopic: Solving PageLayoutandContentProblems
Relatedconcepts
PrintHeadCleaning
PrintHeadNozzleCheck
Relatedtasks
SelectingBasicPrintSettings-Windows
SelectingExtendedSettings-Windows
SelectingBasicPrintSettings-Mac
IncorrectMarginsonPrintout
If your printed page has incorrect margins, try thesesolutions:
- Makesureyouselectedthecorrectpapersizesettingsinyourprintingprogramandprintersoftware.
- Makesureyouselectedthecorrectmarginsforyourpapersizeinyourprintingprogram.
- Makesureyourpaperispositionedcorrectlyforfeedingintotheprinter.
Youcanusethepreviewoptioninyourprintersoftwaretocheckyourmarginsbeforeyouprint.
Parenttopic: Solving PageLayoutandContentProblems
Relatedtasks
SelectingBasicPrintSettings-Windows
SelectingBasicPrintSettings-Mac
SelectingPageSetupSettings-Mac
BorderAppearsonBorderlessPrints
If you see aborderon borderless prints, try thesesolutions:
- Makesureyouareprintingonacompatibleborderlesspapertypeandsize.
Note: For custom papersizes, makes sure you select as supported border less width.
- Windows: Make sure you selected the Borderless setting in your printer software.
- Mac: Make sure you selected the Borderless checkbox or a paper size with a Borderless option in yourprintersoftware.
- Adjust the Expansion setting to adjust the amount of image expansion on the edges of borderless prints.
- Makesuretheimagesizeandthepapersizearesetcorrectly;iftheimageissmall,theenlargement maynotbeenoughtocoverthepaper.
Parenttopic: Solving PageLayout and Content Problems
Relatedreferences
BorderlessPaperTypeCompatibility
Relatedtasks
SelectingBasicPrintSettings-Windows
SelectingBasicPrintSettings-Mac
SelectingPageSetupSettings-Mac
IncorrectCharactersPrint
If incorrect characters appear in your prints, try thesesolutions before reprinting:
- Makesureanycablesaresecurelyconnectedatbothends.
- In Windows, delete all jobs from the Windows Spooler. Click Print Queue on the Maintenance tab in theprintersettingswindow,andcancelanystalledprintjobs.
- If your product is connected to a USB hub, connect it directly to your computer instead.
- If incorrect characters still appear in your prints, try connecting your product using a different cable.
Parenttopic: Solving PageLayoutandContentProblems
IncorrectImageSizeorPosition
If your printed image is the wrong size or in the wrong position, try these solutions:
- Makesureyouselectedthecorrectpapersizeandlayoutsettingsinyourprintingprogramandprinter software.
- Makesureyouselectedthecorrectpapersizeonthecontrolpanel.
- Makesureyourpaperispositionedcorrectlyforfeedingintotheprinter.
- Cleanthescannerglassanddocumentcover.
- If the edges of a copy are cropped, slightly mov the original away from the edges of the scanner glass.
- Makesureyouselectedthecorrectmarginsforyourpapersizeinyourprintingprogram.
Youcanusethepreviewoptioninyourprintersoftwaretocheckyourmarginsbeforeyouprint.
Parenttopic: SolvingPageLayoutandContentProblems
Relatedtasks
SelectingBasicPrintSettings-Windows
SelectingBasicPrintSettings-Mac
SelectingPageSetupSettings-Mac
Relatedtopics
LoadingPaper
SlantedPrintout
If your printoutsareslanted, try thesesolutions:
- Slidetheedgeguidesagainsttheedgesofthepaper.
- Selectahigherprintqualitysettinginyourprintersoftware.
- Turnoffanyhighspeedsettingsinyourproductsoftware.
•Aligntheprinthead.
- Makesuretheproductisnotprintingwhiletiltedoratanangle.
Parenttopic: SolvingPageLayoutandContentProblems
Relatedconcepts
PrintHeadAlignment
Relatedtasks
SelectingBasicPrintSettings-Mac
SelectingBasicPrintSettings-Windows
Relatedtopics
LoadingPaper
SolvingPrintQualityProblems
Checkthesesectionsifyourprintoutshaveproblemswithprintquality,butyourimagelooksfineonyour computerscreen.
Note: When printing using AirPrint, the available print settings are different from those covered in this manual.SeetheApplewebsitefordetails.
WhiteorDarkLinesinPrintout
BlurryorSmearedPrintout
FaintPrintoutorPrintoutHasGaps
GrainyPrintout
IncorrectColors
Parenttopic: Solving Problems
WhiteorDarkLinesinPrintout
If you notice white ordarklines in your prints (alsocalled banding), try thesesolutions before you reprint:
- Runanozzlechecktoseeifanyoftheprintheadnozzlesareclogged. Thencleantheprinthead, if necessary.
- Makesurethepapertypesettingmatchesthetypeofpaperyouloaded.
- Makesureyouloadedtheprintablesideofthepapercorrectlyforyourproduct.
- Turnoffanyhighspeedsettingsinyourproductsoftware.
•Aligntheprinthead.
- Youmayneedtorefilltheink. Visuallychecktheinklevels.
- If you havenot used the product for a long time, run the Power Cleaning utility.
Note: Power Cleaning consumes a lot of ink, so run this utility only if you cannot improve print quality bycleaningtheprinthead.
Parenttopic: SolvingPrintQualityProblems
Relatedconcepts
PrintHeadNozzleCheck
PrintHeadCleaning
PrintHeadAlignment
PowerCleaning
Relatedreferences
PaperorMediaTypeSettings-PrinterSoftware
Relatedtasks
SelectingAdditionalLayoutandPrintOptions-Windows
SelectingPrintingPreferences-Mac
Relatedtopics
RefillingInk
LoadingPaper
BlurryorSmearedPrintout
If your printouts are blurryorsmeared, try thesesolutions:
- Makesureyourpaperisnotdamp,curled,old,orloadedincorrectlyinyourproduct.
- Useasupportsheetwithspecialpaper,orloadspecialpaperonesheetatatime.
- Makesureyourpapermeetsthespecificationsforyourproduct.
- UseEpsonpaperstoensurepropersaturationandabsorptionofgenuineEpsoninks.
- Makesurethepapertypesettinginyourproductsoftwarematchesthetypeofpaperyouloaded.
-
Makesureyouloadedtheprintablesideofthepapercorrectlyforyourproduct.
-
If you are printing on thick paper or envelopes, turn on the Thick Paper setting from the control panel or select Thick Paper and Envelopes in the Extended Settings of the printer software. (Turning this settingonwilldecreaseprintspeed.)
- Remove each sheet from the output tray as it is printed.
- Avoidhandlingprintoutsonglossypaperrightafterprintingtoallowtheinktoset.
- Turnoffanyhighspeedsettingsinyourproductsoftware.
- If you print on both sides of a sheet of paper, smudges may appear on the reverses of heavily saturated dark images. If one side of a sheet will contain a lighter image or text, print that side first. Adjust the Print Density and/or Increase Ink Drying Times settings.
•Theinklevelsmaybelowandyoumayneedtorefilltheink. Visuallychecktheinklevels. - Runanozzlechecktoseefanyoftheprintheadnozzlesareclogged. Thencleantheprinthead, if necessary.
- Aligntheprinthead.
- Cleanthepaperpath.
• If you printed when the ink level was too low to be seen in the ink tank windows, refill the ink tank to the upper lines and run the Power Cleaning utility. Then run a nozzle check to see if print quality has improved. - If you havenot used the product for a long time, run the Power Cleaning utility.
Note: Power Cleaning consumes a lot of ink, so run this utility only if you cannot improve print quality bycleaningtheprinthead.
Note: Your product will not operate properly while tilted at an angle. Place it on a flat, stable surface that extendsbeyondthebaseoftheproductinalldirections.
Parenttopic: SolvingPrintQualityProblems
Relatedconcepts
PrintHeadNozzleCheck
PrintHeadCleaning
PrintHeadAlignment
PowerCleaning
Relatedreferences
PaperSpecifications
Relatedtasks
SelectingBasicPrintSettings-Windows
SelectingAdditionalLayoutandPrintOptions-Windows
SelectingDouble-sidedPrintingSettings-Windows
SelectingBasicPrintSettings-Mac
SelectingPrintingPreferences-Mac
SelectingDouble-sidedPrintingSettings-Mac
CleaningthePaperPath
Relatedtopics
LoadingPaper
FaintPrintoutorPrintoutHasGaps
If your printouts are faint or have gaps, try thesesolutions:
- Runanozzlechecktoseeifanyoftheprintheadnozzlesareclogged. Thencleantheprinthead, if necessary.
•Theinklevelsmaybelow. Visuallychecktheinklevels.
- Makesurethepapertypesettingmatchesthetypeofpaperyouloaded.
- Makesureyourpaperisnotdamp,curled,old,orloadedincorrectlyinyourproduct.
•Aligntheprinthead.
- Cleanthepaperpath.
- If you havenot used the product for a long time, run the Power Cleaning utility.
Note: Power Cleaning consumes a lot of ink, so run this utility only if you cannot improve print quality bycleaningtheprinthead.
Parenttopic: SolvingPrintQualityProblems
Relatedconcepts
PrintHeadNozzleCheck
PrintHeadCleaning
PrintHeadAlignment
PowerCleaning
Relatedreferences
PaperorMediaTypeSettings-PrinterSoftware
Relatedtasks
CleaningthePaperPath
Relatedtopics
RefillingInk
LoadingPaper
GrainyPrintout
If your printouts are grainy, try thesesolutions:
- Makesureyouloadedtheprintablesideofthepapercorrectlyforyourproduct.
- Selectahigherprintqualitysettingandturnoffanyhighspeedsettingsinyourproductsoftware.
- Runanozzlechecktoseeifanyoftheprintheadnozzlesareclogged. Thencleantheprinthead, if necessary.
- Aligntheprinthead.
- Youmayneedtoincreasetheimageresolutionorprintasmallersize;seeyoursoftware documentation.
Note: ImagesfromtheInternetmaybelowresolutionandnotresultinahighqualityprintout.
- If youenlarged the imagesize in an image-editing program, you need to increase the imageresolution setting to retain a high image equality. Increase the imageresolution by the same amount you increase the imagesize. For example, if the imageresolution is 300 dpi (dots per inch) and you will double the imagesize for printing, change the resolution setting to 600 dpi.
Note: Higher resolution settings result in larger file sizes, which take longer to process and print. Consider the limitations of your computers system when selecting a resolution, and select the lowest possibleresolution that produces acceptable equality to keep filesizes manageable.
Parenttopic: SolvingPrintQualityProblems
Relatedconcepts
PrintHeadNozzleCheck
PrintHeadCleaning
PrintHeadAlignment
Relatedtasks
SelectingBasicPrintSettings-Windows
SelectingAdditionalLayoutandPrintOptions-Windows
SelectingBasicPrintSettings-Mac
SelectingPrintingPreferences-Mac
IncorrectColors
If your printout have incorrect colors, try thesesolutions:
- Makesurethepapertypesettingmatchsthepaperyouloaded.
- Make sure the Black/Grayscale or Grayscale setting is not selected in your printer software.
- Runanozzlechecktoseeifanyoftheprintheadnozzlesareclogged. Thencleantheprinthead, if necessary.
•Theinklevelsmaybelowandyoumayneedtorefilltheink. Visuallychecktheinklevels.
- If you printed when the ink level were too low to be seen in the ink tank windows, refill the ink tank to the upper lines and run the Power Cleaning utility. Then run a nozzle check to see if print quality has improved.
- Afteryouprint, thecolorsinyourprintoutneedtimetosetastheinkdries. Duringthistime, thecolors maylookdifferentthanyouexpect. Tospeedupdryingtime, donotstackyourprintoutsontopofeach other.
- Yourprintedcolorscanneverexactlymatchyouron-screencolors. However, you can use acolor managementsystemtogetascloseaspossible. Try using the color management options in your printersoftware.
•Forbestresults,usegenuineEpsoninkandpaper. - If you havenot used the product for a long time, run the Power Cleaning utility.
Note: Power Cleaning consumes a lot of ink, so run this utility only if you cannot improve print quality bycleaningtheprinthead.
Parenttopic: SolvingPrintQualityProblems
Relatedconcepts
PrintHeadNozzleCheck
PrintHeadCleaning
PowerCleaning
Relatedtasks
SelectingBasicPrintSettings-Windows
SelectingAdditionalLayoutandPrintOptions-Windows
SelectingBasicPrintSettings-Mac
ManagingColor-Mac
Relatedtopics
RefillingInk
SolvingScanningProblems
Checkthesesolutionsify you have problemscanning with your product.
ScanningSoftwareDoesNotOperateCorrectly
CannotStartEpsonScan2
Parenttopic: Solving Problems
ScanningSoftwareDoesNotOperateCorrectly
If your scanning software does not operate correctly, try thesesolutions:
- Makesureyourcomputerhasadequatememoryandmeetsthesystemrequirementsforyouroperatingsystem.
- Makesureyourcomputerisnotrunninginapower-savingmode,suchassleeporstandby.Ifso, wakeyoursystemandrestartyourscanningsoftware.
- If you upgraded your operating system but did not treinstall your scanning software, try reinstalling it.
- In Windows, make sure your product is listed as a valid device in the Scanners and Cameras control panel.
Parenttopic: Solving Scanning Problems
Relatedconcepts
UninstallYourProductSoftware
Relatedreferences
WindowsSystemRequirements
MacSystemRequirements
CannotStartEpsonScan2
If you cannot start EpsonScan2, try thesesolutions:
- Makesureyourproductisturnedonandanyinterfacecablesaresecurelyconnectedatbothends.
- MakesureEpsonScan2isselectedasyourscanningprogram.
- Makesureyourcomputerisnotrunninginapower-savingmode,suchassleeporstandby.Ifso, wakeyoursystemandrestartEpsonScan2.
- ChecktheconnectionsettingandtesttheconnectionusingEpsonScan2Utility:
Windows 10: Click ▼ and select EPSON > Epson Scan 2 Utility. Make sure the correct product is selected. If necessary, select the OthertabandclickReset.
Windows 8.x: Navigate to the Apps screen and select Epson Scan 2 Utility. Make sure the correct product is selected. If necessary, select the Other tab and click Reset.
Windows (other versions): Click 📋 or Start > All Programs or Programs > EPSON > Epson Scan 2 > Epson Scan 2 Utility. Make sure the correct product is selected. If necessary, select the Other tabandclickReset.
Mac: Open the Applications folder, click Epson Software, and click Epson Scan 2 Utility. Make sure the correct product is selected. If necessary, select the Other tab and click Reset.
- MakesureyoudonothavemultipleversionsofEpsonScan2installed.Ifyoudo, uninstallboth versionsandinstalloneversion.
- If you upgraded your operating system but did not treinstall EpsonScan2, try reinstalling it.
Parenttopic: Solving Scanning Problems
Relatedtasks
PlacingOriginalsontheScannerGlass
StartingaScanfromaScanningProgram
SolvingScannedImageQualityProblems
Checkthesesectionsifascannedimageonyourcomputerscreenhasaqualityproblem.
ImageConsistsofaFewDotsOnly
LineofDotsAppearsinAllScannedImages
StraightLinesinanImageAppearCrooked
ImageisDistortedorBlurry
ImageColorsarePatchyattheEdges
ImageisTooDark
BackofOriginalImageAppearsinScannedImage
RipplePatternsAppearinanImage
ImageisScannedUpside-Down
ScannedImageColorsDoNotMatchOriginalColors
ScanAreaisNotAdjustableinThumbnailPreview
ScannedImageEdgesareCropped
Parenttopic: SolvingProblems
ImageConsistsofaFewDotsOnly
If your scanned image consists only of a few dots, try these solutions:
- Makesureyouplacedyouroriginalforscanningfacingthecorrectway.
- If you are scanning using the Epson Scan 2 Black & White setting, adjust the Threshold setting and scanagain.
Parenttopic: SolvingScannedImageQualityProblems
Relatedtasks
CleaningYourProduct
LineofDotsAppearsinAllScannedImages
Ifalineofdotsappearsinallyourscannedimages,cleanthescannerglasswithasoft,dry,lint-free clothoruseasmallamountofglasscleaneronthecloth,ifnecessary.Papertowelsarenot recommended.
Caution: Donotsprayglasscleanerdirectlyonthescannerglass.
Parenttopic: SolvingScannedImageQualityProblems
StraightLinesinanImageAppearCrooked
Ifstraightlinesinanoriginalappearcrookedinascannedimage,makesuretoplaceyouroriginal straightwhenyouscanit.
Parenttopic: SolvingScannedImageQualityProblems
Relatedtasks
PlacingOriginalsontheScannerGlass
ImageisDistortedorBlurry
Ifascannedimageappearsdistortedorblurry, trythesesolutions:
- Makesureyouroriginalisnotwrinkledorwarped. This may prevent the original from laying flat on the scannerglass.
- Donotmoveyouroriginaloryourproductduringscanning.
- Yourproductwillnotoperateproperlywhiletiltedatanangle.Placeyourproductonaflat,stable surfacethatextendsbeyonditsbaseinalldirections.
- AdjusttheseEpsonScan2settings(ifavailable)andtryscanningagain:
- Increase the Resolution setting.
- If the Image Type setting is Black & White, adjust the Threshold setting.
- SelecttheUnsharpMasksetting.
- If the Image Type setting is Black & White, select Text Enhancement. If the Image Type setting is Color or Grayscale, change the Text Enhancement setting to High.
Parenttopic: Solving Scanned Image Quality Problems
Relatedreferences
AdditionalScanningSettings-AdvancedSettingsTab
ImageColorsarePatchyattheEdges
If you are scanning athick or warped original, cover its edges with papertoblock external light as you scan it.
Parenttopic: SolvingScannedImageQualityProblems
ImageisTooDark
Ifyourscannedimageistoodark, trythesesolutions:
- Select the Advanced Settings tab in Epson Scan 2 and adjust the Brightness setting.
- Checkthebrightnessandcontrastsettingsofyourcomputermonitor.
Parenttopic: Solving Scanned Image Quality Problems
Relatedreferences
AdditionalScanningSettings-AdvancedSettingsTab
BackofOriginalImageAppearsinScannedImage
If an image from the back of a fourth original appears in your scanned image, try these solutions:
- Placeapieceofblackpaperonthebackoftheoriginalandscanitagain.
- AdjusttheseEpsonScan2settings(ifavailable)andtryscanningagain:
- SelecttheAdvancedSettingstabandadjusttheBrightnesssetting.
- If the Image Type is set to Black & White, select Text Enhancement. If the Image Type is set to Color or Grayscale, change the Text Enhancement setting to High.
Parenttopic: Solving Scanned Image Quality Problems
Relatedreferences
AdditionalScanningSettings-AdvancedSettingsTab
RipplePatternsAppearinanImage
Youmayseearipplepattern(calledamoiré)inscannedimagesofprinteddocuments. This is caused by interference from differing pitches in the browser and your original shelf tonescreen. To reduce this effect, adjust these EpsonScan2 settings (if available) and try scanning again:
- SelecttheDescreeningsetting.
- SelectalowerResolutionsetting.
Parenttopic: SolvingScannedImageQualityProblems
Relatedreferences
AdditionalScanningSettings-AdvancedSettingsTab
ImageisScannedUpside-Down
Your product scans using the Auto Photo Orientation setting. This setting checks the preview image forfaces,thesky,andotherfeatures,andthencorrectlyrotatesthephotowhenitisscanned,if necessary.
If your photo is not oriented correctly using this option, you can turn Auto Photo Orientation off and scanagain.WhenPhotoModeisselected,selectThumbnailOptionsfromtheMainSettingstab.SelectOnorOffandscanyourdocumentagain.
Note: AutoPhotoOrientation will not work when you can newspapers, magazines, documents, illustrations, or line art, or image smaller than 2 inches (5.1 cm) on anyside.
Parenttopic: SolvingScannedImageQualityProblems
ScannedImageColorsDoNotMatchOriginalColors
Printedcolorscanneverexactlymatchthecolorsonyourcomputermonitorbecauseprintersand monitorsusedifferentcolorsystems:monitorsuseRGB(red,green,andblue)andprinterstypicallyuse CMYK(cyan,magenta,yellow,andblack).
Checkthecolormatchingandcolormanagementcapabilitiesofyourcomputer,displayadapter,andthe softwareyouareusingtoseeiftheyareaffectingthepaletteofcolorsyouseeonyourscreen.
Toadjustthecolorsinyourscannedimage,adjusttheseEpsonScan2settings(ifavailable)andtry scanningagain:
- If the Image Type setting is Color or Grayscale, adjust the Contrast setting.
- If the Image Type setting is Black & White or Grayscale, adjust the Color Enhance setting.
Parenttopic: SolvingScannedImageQualityProblems
ScanAreaisNotAdjustableinThumbnailPreview
If you cannot adjust the scan area awhile viewing a Thumbnail preview in Epson Scan, try these solutions:
- Createascanareabydrawingamarqueeonyourpreviewimageandadjustingitasnecessary.
- SwitchtoNormalpreviewmode,ifavailable,andpreviewyourimageagain.
Parenttopic: SolvingScannedImageQualityProblems
ScannedImageEdgesareCropped
If the edges of a scanned image are cropped, makes sure your original is placed correctly for scanning. If necessary, move your original away from the edges of the scanner glass slightly.
Parenttopic: SolvingScannedImageQualityProblems
Relatedtasks
PlacingOriginalsontheScannerGlass
SolvingMemoryCardProblems
Checkthesesolutionsify you have problems using memory cards with your product.
MemoryCardDoesNotFitIntoaSlot
CannotVieworPrintPhotosfromaMemoryCardorDevice
CannotTransferPhotostoorfromaMemoryCardorDevice
Parenttopic: Solving Problems
MemoryCardDoesNotFitIntoaSlot
Ifamemorycarddoesnotfitproperlyinaslot, donotforceitin. Youmayneedtouseanadapterwith yourmemorycard.
Parenttopic: SolvingMemoryCardProblems
Relatedreferences
MemoryCardTypes
Relatedtasks
InsertingaMemoryCard
CannotVieworPrintPhotosfromaMemoryCardorDevice
If you cannot view or print photos from memory card or USB device inserted in your product, try these solutions:
- Makesureyourmemorycardordeviceiscompatiblewiththeproduct.
- Makesurethefilesonyourmemorycardordeviceareinthecorrectformat.
- If you havetoomanyphotosonyourmemorycardordevice, you may not see all the photos you expectorm may be prompted to select a group of photos by date. Reducethenumberofphotosonyour cardorselectonegroupofphotosatatime. Check the specifications forth the maximum number of photos.
Parenttopic: SolvingMemoryCardProblems
CannotTransferPhotostoorfromaMemoryCardorDevice
If you have problem transferring photostoor from memory card or USB device inserted in your product, try thesesolutions:
- Makesureyourmemorycardordeviceiscompatiblewiththeproduct.
- Makesureyourproductissecurelyconnectedtoyourcomputer.
- If you are transferring photostoamemorycard, check thememorycard's write-protecttabtomake sure it set to allow writing to the card.
- Makesurethatthefilesharingsettingforyourproductissetcorrectly.
Parenttopic: Solving Memory Card Problems
Relatedreferences
MemoryCardTypes
MemoryCardSpecifications
ExternalUSBDeviceSpecifications
Relatedtasks
InsertingaMemoryCard
ConnectingandPrintingfromaCamera
ConnectingandUsingaUSBFlashDriveorExternalDevice
SolvingCD/DVDProblems
CheckthesesectionsifyouhaveproblemsprintingonaCD/DVDwithyourproduct.
CD/DVDJamProblems
ImageNotCenteredonCD/DVD
InkSmearsonCD/DVD
FaintImageonCD/DVD
Parenttopic: Solving Problems
CD/DVDJamProblems
IfaCD/DVDhasjammedintheproductandyouseeanerrormessage,youneedtoremovethe CD/DVDtray:
- Cancel the print job from your computer, if necessary.
2.SlowlypulltheCD/DVDtrayoutoftheproduct.
3.Cleartheerrormessage.
4. Ifanerrorisstilldisplayed, turnofftheproduct, waitamoment, and thenturnitbackon.
5. If you are unable to remove the CD/DVD tray, contact Epson for support.
Parenttopic: SolvingCD/DVDProblems
ImageNotCenteredonCD/DVD
If your printed image is not centered on the disc, do one of the following:
- If you are printing from a computer, adjust the print position using the Epson Print CD software. See the Epson Print CD help utility for details.
- If you are printing from the control panel, adjust the printing position using the product menus.
Parenttopic: SolvingCD/DVDProblems
Relatedtasks
PrintingYourCD/DVDDesign-Windows
PrintingYourCD/DVDDesign-Mac
PrintingPhotosfromaMemoryCardOntoaCD/DVD
InkSmearsonCD/DVD
Ifyounoticsmearedinkonyourdisc, trythesesolutions:
- Makesureyouareprintingoninkjet-printableCDsorDVDsandthatthesurfaceofthediscisdry.
- Handleprinteddiscscarefullyandletthemdryfor24hoursbeforeinsertingtheminadrive.
- AdjusttheprintqualityusingtheEpsonPrintCDsoftware.SeetheEpsonPrintCDhelputilityfor details.
Parenttopic: SolvingCD/DVDProblems
Relatedtasks
PrintingYourCD/DVDDesign-Windows
PrintingYourCD/DVDDesign-Mac
FaintImageonCD/DVD
If your printed image is faint, adjust the print quality using the Epson PrintCD software. See the Epson PrintCD help utility for details.
Parenttopic: SolvingCD/DVDProblems
Relatedtasks
PrintingYourCD/DVDDesign-Windows
PrintingYourCD/DVDDesign-Mac
UninstallYourProductSoftware
If you have a problem that requires you to install and install your software, follow the instructions for your operating system.
UninstallingProductSoftware-Windows
UninstallingProductSoftware-Mac
Parenttopic: Solving Problems
UninstallingProductSoftware-Windows
Youcanuninstallandthenre-installyourproductsoftwaretosolvecertainproblems.
- Turnoff the product.
-
Disconnectanyinterfacecables.
3.Dooneofthefollowing: -
Windows 10: Click and select (Settings) > Apps > Apps & features. Then select the programyouwanttouninstallandselectUninstall.
- Windows 8.x: Navigate to the Apps screen and select Control Panel > Programs > Programs and Features. Select the uninstall option for your Epson product, then select Uninstall/Change.
Note: If you see a User Account Control window, click Yes or Continue.
Select your product again, if necessary, then select OK, and click Yes to confirm the uninstallation.
- Windows (other versions): Click 📋 or Start, and select All Programs or Programs. Select EPSON, select your product, then click EPSON Printer Software Uninstall.
Note: If you see a User Account Control window, click Yes or Continue.
Inthenextwindow, select your product and click OK. Then follow any on-screen instructions.
-
DooneofthefollowingtouninstallEpsonEventManager, thenfollowanyon-screeninstructions:
-
Windows 10/8.x: Select Epson Event Manager and click Uninstall.
-
Windows 7/Windows Vista: Open the Windows Control Panel utility. Select Programs and Features. (In Classic view, select Programs and click Uninstall a program.) Select Epson EventManagerandclickUninstall/Change.
-
DooneofthefollowingtouninstallEpsonScan2, thenfollowanyon-screeninstructions:
-
Windows 10: Select Epson Scan 2 and click Uninstall.
- Windows 8.x/Windows 7/Windows Vista: Select Epson Scan 2 and click Uninstall/Change.
6.Restartyourcomputer,thenseetheStartHeresheettore-installyoursoftware.
Note: If you find that re-installing your product software does not solve a problem, contact Epson.
Parenttopic: UninstallYourProductSoftware
UninstallingProductSoftware-Mac
Inmostcases,youdonotneedtouninstallyourproductsoftwarebeforere-installingit.However,you candownloadtheUninstallerutilityfromtheEpsonsupportwebsitetouninstallyourproductsoftwareas describedhere.
Note: If you find that re-installing your product software does not solve a problem, contact Epson.
- To download the Uninstaller utility, visit epson.com/support (U.S.), epson.ca/support (Canada), or epson.com.jm/support(Caribbean)andselectyourproduct.
2.ClickDownloads. - Select your operating system, click Utilities, locate the Uninstaller utility, and click Download.
- Runthefileyoudownloaded.
- Double-click the Uninstallericon.
- In the Epson Uninstallerscreen, select the checkbox for each software program you want to uninstall.
7.ClickUninstall. - Followtheon-screen instructionstouninstallthesoftware.
- Reinstall your product software.
Note: If you uninstall the printer driver and your product name remains in the Print & Fax, Print & Scan, or Printers & Scanners window, select your product name and click the – (remove) icon to remove it.
Parenttopic: UninstallYourProductSoftware
WheretoGetHelp
If you need to contact Epson for technical supports, use the following support options.
InternetSupport
Visit Epson's support website at epson.com/support (U.S.), epson.ca/support (Canada), or epson.com.jm/support (Caribbean) and select your product for solutions to common problems. You can download drivers and documentation, get FAQs and troubleshooting advice, ore-mail Epson with your questions.
SpeaktoaSupportRepresentative
BeforeyoucallEpsonforsupport,please havethe following information ready:
•Productname
•Productserialnumber(locatedonalabelontheproduct)
•Proofofpurchase(suchasastorereceipt)anddateofpurchase
•Computerconfiguration
•Descriptionoftheproblem
Thencall:
• U.S.: (562) 276-4382, 6AM to 8PM, Pacific Time, Monday through Friday, and 7AM to 4PM, Pacific Time, Saturday
•Canada:(905)709-3839,6AMto8PM,PacificTime,MondaythroughFriday,and7AMto4PM,PacificTime,Saturday
Daysandhoursofsupportaresubjecttochangewithoutnotice. Tollerlongdistancechargesmay apply.
PurchaseSuppliesandAccessories
You can purchase genuine Epson ink and paper at epson.com (U.S. sales) or epson.ca (Canadian sales). You can also purchase supplies from an Epson authorized reseller. To find the nearest stone, call 800-GO-EPSON(800-463-7766) in the U.S. or 800-807-7766 in Canada.
Parenttopic: Solving Problems
TechnicalSpecifications
Thesesectionslistthetechnicalspecificationsforyourproduct.
Note: Epson offers a recycling program for end of life Epson products. Please go to this site (U.S) or this site(Canada)forinformationonhowtoreturnyourEpsonproductsforproperdisposal.
WindowsSystemRequirements MacSystemRequirements PaperSpecifications PrintableAreaSpecifications ScanningSpecifications InkSpecifications MemoryCardSpecifications ExternalUSBDeviceSpecifications DimensionSpecifications ElectricalSpecifications EnvironmentalSpecifications InterfaceSpecifications NetworkInterfaceSpecifications SafetyandApprovalsSpecifications
WindowsSystemRequirements
Touseyourproductanditssoftware,yourcomputershoulduseoneoftheseMicrosoftoperating systems:
- Windows10
- Windows8.x
- Windows7
- WindowsVista
Note: For the latest product software available for your operating system, visit the Epson support site at epson.com/support (U.S.), epson.ca/support (Canada), or epson.com.jm/support (Caribbean), select yourproduct,andselectDownloads.
Parenttopic: Technical Specifications
MacSystemRequirements
Touseyourproductanditssoftware,yourMacshoulduseoneoftheseoperatingsystems:
•macOS10.12.x
-OSX10.11.x
•OSX10.10.x
-OSX10.9.x
-OSX10.8.x
-OSX10.7.x
-OSX10.6.8
Note: For the latest product software available for your operating system, visit the Epson support site at epson.com/support (U.S.), epson.ca/support (Canada), or epson.com.jm/support (Caribbean), select yourproduct,andselectDownloads.
Parenttopic: Technical Specifications
PaperSpecifications
Note: Since the quality of any particular brand or type of paper may be changed by the manufacturer at anytime, Epson cannot guarantee the quality of any non-Epson brand or type of paper. Always stesta sample of paper stock before purchasing large quantities or printing large jobs.
Single-sheets
SizeA3(11.7×16.5inches[297×420mm])
A4(8.3×11.7inches[210×297mm])
A6(4.1×5.8inches[105×148mm])
Letter(8.5×11inches[216×279mm])
Legal(8.5×14inches[216×356mm])
4×6inches(102×152mm)
5×7inches(127×178mm)
8×10inches(203×254mm)
11×17inches(279×432mm)
16:9wide(4×7.1inches[102×181mm])
PapertypesPlainpaperandpaperdistributedbyEpson
WeightPlainpaper:17lb(64g/m
^2) to24lb(90g/m ^2) )
Envelopes
SizeNo.10(4.1×9.5inches[105×241mm])
PapertypesPlainbondpaper
Weight20lb(75g/m
^2) to24lb(90g/m ^2) )
Parenttopic: Technical Specifications
PrintableAreaSpecifications
Note: When printing borderless, quality may decline in the expanded printable area.
Singlesheets-normalprinting
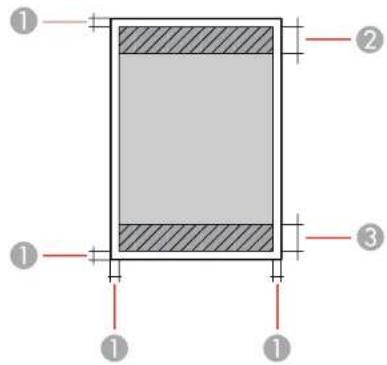
text_image
Diagram showing a rectangular structure with three labeled components and hatched areas indicating material sections.1Margin:0.12inch(3mm)minimum
2Reducedprintqualityarea/top:1.61inch(41mm)minimum
3Reducedprintqualityarea/bottom:1.46inch(37mm)minimum
Singlesheets-borderlessprinting
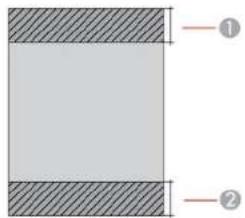
text_image
① ②1Reducedprintqualityarea/top:1.73inch(44mm)minimum
2Reducedprintqualityarea/bottom:1.57inch(40mm)minimum
Envelopes
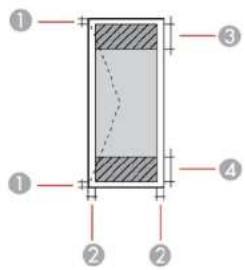
text_image
Technical diagram showing a cross-section with labeled components and dimension lines1Left/rightmargins:0.12inch(3mm)minimum
2Top/bottom:0.20inch(5mm)minimum
3Reducedprintqualityarea/right:0.71inch(18mm)minimum
4Reducedprintqualityarea/left:1.61inch(41mm)minimum
CD/DVD
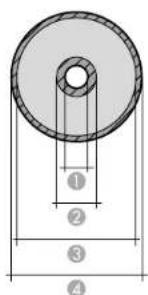
text_image
① ② ③ ④1Innermargin:0.71inch(18mm)minimum
2Innerreducedprintqualityarea:1.69inch(43mm)minimum
3Outerreducedprintqualityarea:4.57inches(116mm)minimum
4Maximumoutermargin:4.72inches(120mm)
Parenttopic: Technical Specifications
ScanningSpecifications
ScannertypeFlatbed
PhotoelectricdeviceCIS
DocumentsizeMaximum:8.5×11.7inches(216×297mm)
Scannerglass:USletterorA4
Scanningresolution1200dpi(mainscan)
2400dpi(subscan)
ColorDepthColor:
48bitsperpixelinternal(16bitsperpixelpercolorinternal)
24bitsperpixelexternal(8bitsperpixelpercolorexternal)
Grayscale:
16bitsperpixelinternal
8bitsperpixelinternal
Black-and-white:
16bitsperpixelinternal
1bitperpixelexternal
LightsourceLED
Parenttopic: Technical Specifications
InkSpecifications
Note: This product is designed to work with genuine Epson inks. Non-Epson ink or any other ink not specified for this printer could cause damage not covered by Epson's warranties.
The included initial link bottles must be used for printersetup and a renot for resale. The printerships with full link bottles and part of the ink from the first bottles is used to charge the printhead. Yields vary considerably based on images printed, print settings, papertype, frequency of use and temperature.
ColorBlack, PhotoBlack, Cyan, Magenta, Yellow
InklifeForbestresults, useupinkwithin6monthsofopeninganinkbottle
TemperatureStorage: -4to104°F(-20to40°C)
1monthat104°F(40°C)
Inkfreezesat5°F(-15°C)
Inkthawsandisusableafter2hoursat77°F(25°C)
Parenttopic: Technical Specifications
Relatedconcepts
PurchaseEpsonInkandMaintenanceBox
MemoryCardSpecifications
Note: Cards marked with an asterisk (*) require an adapter; consult your adapter documentation for detailsonusingit.
Compatibletypesand miniSD*:2GB
maximumcapacities
miniSDHC*:32GB
microSD*:2GB
microSDHC*:32GB
microSDXC*:64GB
SD:2GB
SDHC:32GB
SDXC:64GB
Voltagerequirements3.3Vtype,dualvoltagetype(3.3Vand5V);supplyvoltage3.3V
Maximumcurrent:200mA
Parenttopic: Technical Specifications
ExternalUSBDeviceSpecifications
Donotusedeviceswiththefollowingrequirements:
•Dedicateddriver
- Securitysettings, such as password encryption, etc.
•Built-inUSBHub
Note: Use only external storage devices with independent AC power sources. External storage devices that are powered via USB are not recommended. Epson cannot guarantee the operation of externally connected devices.
CD-ROM/CD-Rdrive700MBmaximumcapacity
CD-RWisnotsupported
DVD-ROM/DVD-Rdrive4.7GBmaximumcapacity
DVD-RW, DVD+R, DVD+RW, DVD-RAM, and Blu-ray Discarenot supported
Magneto-opticaldrive1.3GB
HarddiskandUSBflash 2TB
drives
FormattedinFAT, FAT32, orexFAT.
Parenttopic: Technical Specifications
DimensionSpecifications
HeightStored:6.6inches(168mm)
Printing:17.8inches(453mm)
WidthStored:20.7inches(526mm)
Printing:20.7inches(526mm)
DepthStored:16.3inches(415mm)
Printing:29.3inches(743mm)
Weight
23.1lb(10.5kg)
(withoutink, powercord, and
CD/DVDtray)
Parenttopic: Technical Specifications
ElectricalSpecifications
Powersupplyrating100to120V
Ratedfrequencyrange50/60Hz
Ratedcurrent0.5A
PowerconsumptionStandalonecopying: Approximately 13W(ISO/IEC24712)
Readymode: Approximately6.4W
Sleepmode: Approximately 0.9W
Poweroffmode: Approximately0.1W
Parenttopic: Technical Specifications
EnvironmentalSpecifications
TemperatureOperating:50to95°F(10to35°C)
Storage: -4to104°F(-20to40°C)
1monthat104°F(40°C)
Humidity
Operating:20to80%RH
(withoutcondensation)
Storage:5to85%RH
Parenttopic: Technical Specifications
InterfaceSpecifications
InterfacetypeHi-SpeedUSB(DeviceClassforcomputers)
Hi-SpeedUSB(forMassstorageclassforexternalstorageand
PictBridgedevices)
Note: Epson cannot guarantee the operation of externally connected devices.
Parenttopic: Technical Specifications
NetworkInterfaceSpecifications
Wi-Fi
WirelessLANstandardIEEE802.11b/g/n
WirelesssecurityWPA2-PSK(AES);WPA2compliant WEP(64/128bit)
Frequencyband2.4GHz
CommunicationmodelInfrastructuremode
Wi-FiDirect(notsupportedforIEEE802.11b)
Note: Wireless LAN standard complies with either IEEE 802.11 b/g or IEEE 802.11 b/g/n, depending on purchaselocation.
Ethernet
StandardIEEE802.3i(10BASE-T);topreventriskofradiointerference,usea
Category-5eorhighershieldedtwistedpaircable
IEEE802.3u(100BASE-TX)
IEEE802.3az(EnergyEfficientEthernet);connecteddeviceshould beIEEE802.3azcompliant
CommunicationmodeAuto, 10MbpsFullduplex, 10MbpsHalfduplex, 100MbpsFullduplex, 100MbpsHalfduplex
ConnectorRJ-45
SecurityProtocol
SSL/TLS:HTTPSServer/ClientorIPPS
Parenttopic: Technical Specifications
SafetyandApprovalsSpecifications
UnitedStatesSafety:UL60950-1
EMC:FCCpart15SubpartBclassB
CanadaSafety:CAN/CSAC22.2No.60950-1
EMC:CAN/CSA-CEI/IECCISPR22ClassB
Thisequipmentcontainsthefollowingwirelessmodule:
•Manufacturer:AskeyComputerCorporation.
•Type:WLU6320-D69(RoHS)
ThisproductconformstoPart15ofFCCRulesandRSS-210oftheICRules.Epsoncannotaccept responsibilityforanyfailuretosatisfytheprotectionrequirementsresultingfromanon-recommended modificationoftheproductOperationissubjecttothefollowingtwoconditions:(1)thisdevicemaynot causeharmfulinterference,and(2)thisdevicemustacceptanyinterferencereceived,including interferencethatmaycauseundesiredoperationofthedevice.
Topreventradiointerferencetothelicensedservice, this device is intended to be operated indoors and away from window stop providemaximum shielding. Equipment (oritstransmitantenna) that is installed outdoors is subject to licensing.
This equipment complies with FCC/IC radiation exposure limits set forth for an uncontrolled environment and meets the FCC radio frequency (RF) Exposure Guidelines in Supplement CtoOET65 and RSS-102 of the IC radio frequency (RF) Exposurerules. This equipment should be installed and operated so that theradiator is kept at least 7.9 inches (20 cm) or more away from a person's body (excluding extremities: hands, wrists, feet andankles).
Parenttopic: Technical Specifications
Notices
Checkthesesectionsforimportantnoticesaboutyourproduct.
Note: Epson offers a recycling program for end of life Epson products. Please go to this site (U.S) or this site(Canada)forinformationonhowtoreturnyourEpsonproductsforproperdisposal.
ImportantSafetyInstructions
FCCComplianceStatement
BindingArbitrationandClassWaiver
Trademarks
CopyrightNotice
ImportantSafetyInstructions
Before using your Epson product, read and follow the safety instructions.
GeneralProductSafetyInstructions
WirelessConnectionSafetyInstructions
LCDScreenSafetyInstructions
Parenttopic:Notices
GeneralProductSafetyInstructions
- Besuretofollowwallwarningsandinstructionsmarkedontheproduct.
- Useonlythetypeofpowersourceindicatedontheproduct'slabel.
- Useonlythepowercordthatcomeswiththeproduct.Useofanothercordmaycausefiresorshock. Donotusethecordwithanyotherequipment.
- Placetheproductnearawalloutletwheretheplugcanbeeasilyunplugged.
- Avoidpluggingtheproductintoanoutletonthesamecircuitasaphotocopieroraircontrolsystem thatregularlyswitchesonandoff,oronanoutletcontrolledbyawallswitchortimer.
- Donotletthepowercordbecomedamagedorfrayed. Placeittoavoidabrasions, cuts, fraying, crimping, and kinking. Donotplaceobjectsontopofitandonotallowittobesteppedonorrunover. Becarefultokeepthecordstraightateachend.
• If you use an extension cord with the product, makes sure the total ampererating of the devices plugged into the extension cord does not exceed the cord's ampererating. Also, makes sure the total
ampereratingofalldevicespluggedintothewalloutletdoesnotexceedthewalloutlet'sampere rating.
- Alwaysturnofftheproductusingthepowerbutton, and wait until the powerlight stops flashing before unplugging the product or cutting off power to the electrical outlet.
- If you will not be using the product for a long period, unplug the power cord from the electrical outlet.
- Placetheproductionaflat,stablesurfacethatextendsbeyonditsbaseinalldirections.Itwillnot operateproperlyifitistiltedoratanangle.
- Allowspacebehindtheproductforthecables, andspaceabovetheproductsothatyoucanfullyraise thedocumentcover.
- Leaveenoughspaceinfrontoftheproductforthepapertobefullyejected.
- Avoidlocationsthataresubjecttorapidchangesinheatorhumidity,shocksorvibrations,ordust.
- Donotplaceorstoretheproductoutdoors.
- Donotplacetheproductnearexcessiveheatsourcesorindirectsunlight.
- Leaveenoughroomaroundtheproductforsufficientventilation.Donotblockorcoveropeningsinthe caseorinsertobjectsthroughtheslots.
- Keep the product away from potential sources of electromagnetic interference, such as loudspeakers or the base unit so of cordless telephones.
- Whenconnectingtheproducttoacomputerorotherdevicewithacable,ensurethecorrect orientationoftheconnectors.Eachconnectorhasonlyonecorrectorientation.Insertingaconnector inthewrongorientationmaydamagebothdevicesconnectedbythecable.
- Donottouchtheflatwhitecableinsidetheproduct.
- Donotmovetheprintheadbyhand; this may damage the product.
- Donotspillliquidontheproductorusetheproductwithwethands.
- Donotuseaerosolproductsthatcontainflammablegasesinsideoraroundtheproduct.Doingsomay causefire.
- Donotpresstoothardonthedocumenttablewhenplacingoriginals.
- Donotopenthescannersectionwhiletheproductiscopying,printing,scanning,orperformingany otherfunctions.
- Becarefulnottotrapyourfingerswhenclosingthedocumentcoverorscanner.
- Exceptasspecificallyexplainedinyourdocumentation,donotattempttoserviceordisassemblethe productyourself.
- Unplugtheproductandreferservicingtoqualifiedservicepersonnelunderthefollowingconditions:if thepowercordorplugisdamaged;ifliquidhasenteredtheproduct;iftheproducthasbeendropped orthecasedamaged;iftheproductdoesnotoperatenormallyorexhibitsadistinctchangein performance.Adjustonlythosecontrolsthatarecoveredbytheoperatinginstructions.
•Beforetransportingtheproduct, makesurethattheprintheadisinthehome(farright)position. - Whenstoringortransportingtheproduct, donottiltit, standitonitsside, orturnitupsidedown; otherwiseinkmayleak.
Parenttopic: Important Safety Instructions
WirelessConnectionSafetyInstructions
Radiowavesfromthisproductmayadverselyaffecttheoperationofmedicalequipmentorautomatically controlleddevices,suchaspacemakers,automaticdoorsorfirearms.Whenusingthisproductnear suchdevicesorinsideamedicalfacility,followthedirectionsfromauthorizedstaffmembersatthe facility,andfollowallpostedwarningsanddirectionsonthedevicetoavoidcausinganaccident.
Parenttopic: Important Safety Instructions
LCDScreenSafetyInstructions
- Useonlyadry,softclothtocleantheLCDscreen.Donotuseliquidorchemicalcleansers.
- IftheLCDscreenisdamaged,contactEpson.Iftheliquidcrystalsolutiongetsonyourhands,wash themthoroughlywithsoapandwater.Iftheliquidcrystalsolutiongetsintoyoureyes,flushthem immediatelywithwater.Ifdiscomfortovisionproblemsremainafterathoroughflushing,seeadoctor immediately.
- DonotpresstoothardontheLCDscreenorsubjectittoheavyimpacts.
- Donotuseapointyorsharpobject,suchasapenoryourfingernail,tooperatetheLCDscreen.
- If the LCD screens or cracks, don't touch or attempt to remove the broken pieces; contact Epson for support.
Parenttopic: Important Safety Instructions
FCCComplianceStatement
ForUnitedStatesUsers
ThisequipmenthasbeentestedandfoundtocomplywiththelimitsforaClassBdigitaldevice,pursuant toPart15oftheFCCRules. Theselimitsaredesignedtoprovidereasonableprotectionagainsttharmful interferenceinaresidentialinstallation. Thisequipmentgenerates,uses,andcanradiateradio frequencyenergyand,ifnotinstalledandusedinaccordancewiththeinstructions,maycauseharmful
interferencetoradioortelevisionreception. However, thereisnoguaranteethatinterferencewillnot occurinaparticularinstallation. If this equipment does cause interferencetoradioandtelevision reception, which can be determined by turning the equipment of fandon, the user is encouraged to try to correct the interference by one or more of the following measures:
•Reorientorrelocatethereceivingantenna.
- Increase these separation between the equipment and receiver.
- Connecttheequipmentintoanoutletonacircuitdifferentfromthattowhichthereceiverisconnected.
- Consultthedealeroranexperiencedradio/TVtechnicianforhelp.
WARNING
The connection of an on-shielded equipment interface cable to this equipment will invalidate the FCC Certification or Declaration of this device and may cause interference levels which exceed the limits established by the FCC forthisequipment. It is the responsibility of the userto obtain and use a shielded equipment interface cable with this device. If this equipment has more than one interface connector, do not leave cables connected to unused interfaces. Changes or modifications not expressly approved by the manufacturer could void the user's authority to operate the equipment.
ForCanadianUsers
CANICES-3(B)/NMB-3(B)
Parenttopic:Notices
BindingArbitrationandClassWaiver
1. DISPUTES, BINDING INDIVIDUAL ARBITRATION, AND WAIVER OF CLASSACTIONS AND CLASSAR BITRATIONS
1.1 Disputes. The terms of this Section 1 shall apply to all Disputes between you and Epson. The term "Dispute" is meant to have the broadest meaning permissible underlaw and includes any dispute, claim, controversy or action between you and Epson arising out for relating to this Agreement, Epson branded products (hardware and including any related software), or other transaction involving you and Epson, whether in contract, warranty, misrepresentation, fraud, tort, intentionaltort, statute, regulation, ordinance, or any other legal or equitable basis. "DISPUTE" DOES NOT INCLUDE IP CLAIMS, or more specifically, a claimor cause of action for (a) trademark infringement or dilution, (b) patent infringement, (c) copyright infringement or disuse, or (d) trades secret misappropriation (an "IPClaim"). You and Epson also agree, notwithstanding Section 1.6, that a court, not an arbitrator, may decide if a claimor cause of action is for an IP claim.
1.2 Binding Arbitration. You and Epson agree that all Disputes shall be resolved by binding arbitration according to this Agreement. ARBITRATION MEANSTHAT YOUWAIVE YOUR RIGHT TO AJUDGE
ORJURYINACOURTPROCEEDINGANDYOURGROUNDSFORAPPEALARELIMITED
PursuanttothisAgreement, bindingarbitrationshallbeadministered by JAMS, anationally recognized arbitration authority, pursuant to its code of procedure then effective for consumer related disputes, but excluding any rule that permit joinder or class actions in arbitration (formoredetail on procedure, see Section 1.6 below). You and Epson understand and agree that (a) the Federal Arbitration Act (9U.S.C. §1, et seq.) govern the interpretation and enforcement of this Section 1, (b) this Agreement memorializes at transaction in interstate commerce, and (c) this Section 1 shall survivvetermination of this Agreement.
1.3 Pre-Arbitration Steps and Notice. Before submitting a claim for arbitration, you and Epson agree to try, for sixty (60) days, to resolve any Dispute informally. If Epson and you donot reach an agreement to resolv the Disputewithin the sixty (60) days), you or Epson may commence an arbitration. Noticeto Epson must be addressed to: Epson America, Inc., ATTN: Legal Department, 3840 Kilroy Airport Way, Long Beach, CA90806 (the "Epson Address"). The Dispute Noticetoyou will besent to themost recent address Epson has in its records for you. For this reason, it is important to notify us your address changes by emailing us at EAILegal@ea.epson.com or writing us at the Epson Address above. Notice of the Disputeshall includethesender's name, address and contact information, the fact giving riseto the Dispute, and therelief requested (the "Dispute Notice"). Following receipt of the Dispute Notice, Epson and you agree to acting good faith to resolv the Dispute before commencing arbitration.
1.4 Small Claims Court. Notwithstanding the foregoing, you may bring an individual action in the small claimscourtofyourstateormunicipalityiftheactioniswithinthatcourt'sjurisdictionandspendingonlyinthatcourt.
1.5WAIVEROFCLASSACTIONSANDCLASSARBITRATIONS.YOUANDEPSONAGREETHAT EACHPARTYMAYBRINGDISPUTESAGAINSTTHEOTHERPARTYONLYINANINDIVIDUAL CAPACITY,ANDNOTASAPLAINTIFFORCLASSMEMBERINANYCLASSOR REPRESENTATIVEPROCEEDING,INCLUDINGWITHOUTLIMITATIONFEDERALORSTATE CLASSACTIONS,ORCLASSARBITRATIONS.CLASSACTIONLAWSUITS,CLASS-WIDE ARBITRATIONS,PRIVATEATTORNEY-GENERALACTIONS,ANDANYOTHERPROCEEDING WHEREOMEONEACTSINAREPRESENTATIVECAPACITYARENOTALLOWED. ACCORDINGLY,UNDERTHEARBITRATIONPROCEDUREOUTLINEDINTHISSECTION,AN ARBITRATORSHALLNOTCOMBINEORCONSOLIDATEMORETHANONEPARTY'SCLAIMS WITHOUTTHEWRITTENCONSENTOFALLAFFECTEDPARTIESTOANARBITRATION PROCEEDING.
1.6 Arbitration Procedure. If you or Epson commences arbitration, the arbitration shall be governed by therulesofJAMSthatareineffectwhenthearbitrationisfiled,excludinganyrulesthatpermitarbitration on a class or representative basis (the "JAMS Rules"), available at http://www.jamsadr.com or by calling 1-800-352-5267,andundertherulessetforthinthisAgreement.AllDisputesshallberesolvedbya singleneutralarbitrator,andbothpartiesshallhaveareasonableopportunitytoparticipateinthe selectionofthearbitrator.ThearbitratorisboundbythetermsofthisAgreement.Thearbitrator,andnot anyfederal,stateorlocalcourtoragency,shallhaveexclusiveauthoritytoresolvealldisputesarising
outoforrelatingtotheinterpretation,applicability,enforceabilityorformationofthisAgreement, includinganyclaimthatalloranypartofthisAgreementisvoidorvoidable. Notwithstandingthisbroad delegationofauthoritytothearbitrator,acourtmaydeterminethelimitedquestionofwhetheraclaimor causeofactionisforanIPClaim,whichisexcludedfromthedefinitionof"Disputes"inSection1.1 above.Thearbitratorshallbeempoweredtograntwhateverreliefwouldbeavailableinacourtunder laworinequity.Thearbitratormayawardyouthesamedamagesasacourtcould,andmayaward declaratoryorinjunctivereliefonlyinfavoroftheindividualpartyseekingreliefandonlytotheextent necessarytoprovidereliefwarrantedbythatparty'sindividualclaim.Insomeinstances,thecostsof arbitrationcanexceedthecostsoflitigationandtherighttodiscoverymaybemorelimitedinarbitration thanincourt.Thearbitrator'sawardisbindingandmaybeenteredasajudgmentinanycourtof competentjurisdiction.
You may choose to engage in arbitration hearings by telephone. Arbitration hearings not conducted by telephones shall take place in allocation reasonably accessible from your primary residence, or in Orange County, California, at your option.
a) Initiation of Arbitration Proceeding. If either you or Epson decidest to arbitrate a dispute, both parties agree to the following procedure:
(i) WriteaDemandforArbitration. The demand must include a description of the dispute and the amount of damage sought to be recovered. You can find a copy of a Demand for Arbitration at http://www.jamsadr.com ("DemandforArbitration").
(ii) Send three copies of the Demand for Arbitration, plus the appropriate filing fee, to: JAMS, 500 North State College Blvd., Suite 600 Orange, CA 92868, U.S.A.
(iii) Sendonecopy of the Demand for Arbitration to the other party (same address as the Dispute Notice), or otherwise agreed by the parties.
b) HearingFormat. During the arbitration, the amount of any settlement to offer mades shall not be disclosed to the arbitrator until after the arbitrator determines the amount, if any, to which you or Epson is entitled. The discovery of exchange of non-privileged information relevant to the Disputation may be allowed during the arbitration.
c) Arbitration Fees. Epson shall pay, or (if applicable) reimburse you for all JAMS filings and arbitrator fees for any arbitration commenced (by you or Epson) pursuant to provision of this Agreement.
d) Awardin Your Favor. For Disputes in which you or Epson seeks \75,000 or less indamages exclusive of attorney's fees and costs, if the arbitrator's decision results in an award to you in an amount greater than Epson's last written offer, if any, to settle the Dispute, Epson will: (i) pay you \1,000 or the amount of the award, whichever is greater; (ii) pay outwicethe amount of your reasonable attorney's fees, if any; and (iii) reimburse you for any expenses (including expert witness fees and costs) that your attorney reasonably accrues for investigating, preparing, and pursuing the Dispute in arbitration. Except as agreed upon by you and Epson in writing, the arbitrator shall determin the amount of fees, costs, and expensestobepaid by Epson pursuant to this Section 1.6d).
e) Attorney's Fees. Epson will not seek its attorney's fees and expenses for any arbitration commenced involving a Dispute under this Agreement. Your right to attorney's fees and expenses under Section
1.6d) abovedoesnotlimityourrightstoattorney'sfeesandexpensesunderapplicablelaw;
notwithstanding the foregoing, the arbitrator may not award duplicative awards of attorney's fees and expenses.
1.7Opt-out.Youmayelecttoopt-out(excludeyourself)fromthefinal,binding,individual arbitrationprocedureandwaiverofclassandrepresentativeproceedingsspecifiedinthis AgreementbysendingawrittenlettertotheEpsonAddresswithinthirty(30)daysofyourassent tothisAgreement(includingwithoutlimitationthepurchase,download,installationofthe SoftwareorotherapplicableuseofEpsonHardware,productsandservices)thatspecifies(i)yourname,(ii)yourmailingaddress,and(iii)yourrequesttobeexcludedfromthefinal,binding individualarbitrationprocedureandwaiverofclassandrepresentativeproceedingsspecifiedin thisSection1.Intheeventthatyouopt-outconsistentwiththeproceduresetforthabove,all othertermsshallcontinuetoapply,includingtherequirementtoprovidenoticepriortolitigation.
1.8 Amendments to Section 1. Notwithstanding any provision in this Agreement to the contrary, you and EpsonagreethatifEpsonmakesanyfutureamendmentstothedisputeresolutionprocedureand classactionwaiverprovisions(otherthanachangetoEpson'saddress)inthisAgreement,Epsonwill obtainyouraffirmativeassenttotheapplicableamendment.Ifyoudonotaffirmativelyassenttothe applicableamendment,youareagreeingthatyouwillarbitrateanyDisputebetweenthepartiesin accordancewiththelanguageofthisSection1(orresolvedisputesasprovidedforinSection1.7,ifyou timelyelectedtoopt-outwhenyoufirstassentedtothisAgreement).
1.9 Severability. If any provision in this Section 1 is found to be unenforceable, that provision shall be severed with the remainder of this Agreement remaining in full force and effect. The foregoing shall not applytothep prohibitionagainstclassorrepresentativeactionsasprovidedinSection1.5.This meansthatifSection1.5isfoundtobeunenforceable,theentireSection1(butonlySection1) shallbenullandvoid.
Parenttopic:Notices
Trademarks
EPSON ^® isaregisteredtrademark, EPSONExceedYourVisionisaregisteredlogomark, and Epson Connect ^™ isattrademarkofSeikoEpsonCorporation.
EpsonStore ^SM isaservicemarkofEpsonAmerica,Inc.
EpsoniPrint ^TM and RemotePrint ^TM aretrademarksofSeikoEpsonCorporation.
Apple, AppStore, AirPrint, AirPrintlogo, iPad, iPhone, iPodtouch, Mac, and OSXaretrademarksof AppleInc., registeredintheU.S. and other countries.
Google® isaregisteredtrademarkandAndroid ^TM ,Chromebook ^TM ,Gmail ^TM ,GoogleChrome ^TM ,Google CloudPrint ^TM ,GoogleDrive ^TM ,andGooglePlay ^TM aretrademarksofGoogleInc.
Wi-FiDirect ^® isaregisteredtrademarkofWi-FiAlliance ^® .
GeneralNotice: Otherproductnamesusedhereinareforidentificationpurposesonlyandmaybe trademarksoftheirrespectiveowners.Epsondisclaimsanyandallrightsinthosemarks.
EPSON®
EXCEED YOUR VISION
Parenttopic:Notices
CopyrightNotice
Allrightsreserved. Nopartofthispublicationmaybereproduced, storedinaretrievalsystem, or transmittedinanyformorbyanymeans, electronic, mechanical, photocopying, recording, or otherwise, without the prior written permission of SeikoEpsonCorporation. The information contained herein is designed only for use with this Epsonproduct. Epsonis not responsible for any use of this information as applied to other products.
Neither Seiko Epson Corporation nor its affiliates shall be liable to the purchaser of this product or third parties for damages, losses, costs, or expenses incurred by purchaser third parties as a result of: accident, misuse, or abuse of this product or unauthorized modifications, repairs, or alteration to this product, or (excluding the U.S.) failure to strictly comply with Seiko Epson Corporation's operating and maintenance instructions.
SeikoEpsonCorporationshallnotbeliableforanydamagesorproblemsarisingfromtheuseofany optionsoranyconsumableproductsotherthanthosedesignatedasOriginalEpsonProductsorEpson ApprovedProductsbySeikoEpsonCorporation.
SeikoEpsonCorporationshallnotbeheldliableforanydamageresultingfromelectromagneticinterferencethatoccursfromtheuseofanyinterfacecablesotherthanthosedesignatedasEpsonapprovedProductsbySeikoEpsonCorporation.
Thisinformationissubjecttochangewithoutnotice.
ANoteConcerningResponsibleUseofCopyrightedMaterials
DefaultDelayTimesforPowerManagementforEpsonProducts
CopyrightAttribution
Parenttopic:Notices
ANoteConcerningResponsibleUseofCopyrightedMaterials
Epsonencourageseachusertoberesponsibleandrespectfulofthecopyrightlawswhenusingany Epsonproduct.Whilesomecountries'lawspermitlimitedcopyingorreuseofcopyrightedmaterialin certaincircumstances,thosecircumstancesmaynotbeasbroadassomepeopleassume.Contactyour legaladvisorforanyquestionsregardingcopyrightlaw.
Parenttopic: CopyrightNotice
DefaultDelayTimesforPowerManagementforEpsonProducts
Thisproductwillentersleepmodeafteraperiodofnonuse. Thisistoensurethattheproductmeets EnergyStarstandardsofenergyefficiency.Moreenergysavingscanbeachievedbysettingthetimeto sleeptoashorterinterval.
Parenttopic: CopyrightNotice
CopyrightAttribution
©2017EpsonAmerica,Inc.
8/17
CPD-54003
Parenttopic: CopyrightNotice