
WorkForce ET-4750 - Printer EPSON - Free user manual and instructions
Find the device manual for free WorkForce ET-4750 EPSON in PDF.


User questions about WorkForce ET-4750 EPSON
0 question about this device. Answer the ones you know or ask your own.
Ask a new question about this device
Download the instructions for your Printer in PDF format for free! Find your manual WorkForce ET-4750 - EPSON and take your electronic device back in hand. On this page are published all the documents necessary for the use of your device. WorkForce ET-4750 by EPSON.
USER MANUAL WorkForce ET-4750 EPSON
ET-4750 User's Guide.... 13
Product Basics 14
Using the Control Panel 14
Control Panel Buttons and Lights 15
Status Icon Information 15
Entering Characters on the LCD Screen 17
Selecting the Date and Time 17
Changing LCD Screen Language.... 19
Adjusting Control Panel Sounds 20
Adjusting the Screen Brightness.... 21
Turning Off the Operation Time Out Setting 22
Product Parts Locations 23
Product Parts - Front 24
Product Parts - Inside 26
Product Parts - Back 28
Checking for Software Updates.... 28
Using Power Saving Settings 29
Changing the Sleep Timer Settings 29
Changing the Power Off Timer Settings 31
EpsonConnectSolutionsforSmartphones,Tablets,andMore 31
Setting Up Epson Connect Services 32
Using Epson Email Print 34
Using the Epson iPrint Mobile App 34
Using Epson Remote Print 35
Using Epson Scan to Cloud 35
Using AirPrint 36
Using Google Cloud Print.... 37
Android Printing Using the Epson Print Enabler 38
Using Fire OS Printing 38
Using Windows 10 Mobile Printing 39
Using Epson Print and Scan App with Windows Tablets 39
Wi-Fi or Wired Networking.... 41
Network Security Recommendations 41
Wi-Fi Infrastructure Mode Setup.... 42
SelectingWirelessNetworkSettingsfromtheControlPanel....43
Wi-Fi Direct Mode Setup 45
Enabling Wi-Fi Direct Mode 45
Wi-Fi Protected Setup (WPS).... 47
Using WPS to Connect to a Network 47
Printing a Network Status Sheet.... 48
Changing or Updating Network Connections 49
Accessing the Web Config Utility 50
ChangingaUSBConnectiontoaWi-FiConnection....50
ChangingaWi-FiConnectiontoaWiredNetworkConnection....50
Connecting to a New Wi-Fi Router 51
Disabling Wi-Fi Features 51
Loading Paper 53
Loading Paper in the Cassette 53
Paper Loading Capacity 58
Double-sided Printing Capacity 59
Available Epson Papers 60
Borderless Paper Type Compatibility 61
Paper or Media Type Settings - Printing Software 62
Selecting the Paper Settings - Control Panel 63
Paper Type Settings - Control Panel 63
Selecting the Default Paper Source Settings.... 64
Paper Source Settings Options 65
Selecting the Universal Print Settings 65
Universal Print Settings Options 66
Placing Originals on the Product 68
Placing Originals on the Scanner Glass 68
Placing Originals in the Automatic Document Feeder 69
ADF Original Document Specifications 71
Copying 73
Copying Documents or Photos....73
Copying Options....74
Printing from a Computer 76
Printing with Windows 76
Selecting Basic Print Settings - Windows 77
Print Quality Options - Windows 79
Multi-Page Printing Options - Windows 79
Selecting Double-sided Printing Settings - Windows 80
Double-sided Printing Options - Windows 82
Print Density Adjustments - Windows 83
SelectingAdditionalLayoutandPrintOptions-Windows....84
CustomColorCorrectionOptions-Windows....86
ImageOptionsandAdditionalSettings-Windows....87
Header/Footer Settings - Windows 88
Selecting a Printing Preset - Windows 89
Selecting Extended Settings - Windows 90
Extended Settings - Windows 91
Printing Your Document or Photo - Windows.... 92
Locking Printer Settings - Windows 93
Locked Setting Options 95
Selecting Default Print Settings - Windows.... 96
ChangingtheLanguageofthePrinterSoftwareScreens....97
Changing Automatic Update Options 98
Printing with the Built-in Epson Driver - Windows 10 S....99
Selecting Print Settings - Windows 10 S....99
Printing on a Mac 102
Selecting Basic Print Settings - Mac 103
Print Quality Options - Mac 106
Print Options - Mac 106
Selecting Page Setup Settings - Mac 107
Selecting Print Layout Options - Mac.... 108
Selecting Double-sided Printing Settings - Mac 109
Double-sided Printing Options and Adjustments - Mac.... 110
Managing Color - Mac 111
Color Matching and Color Options - Mac 112
Selecting Printing Preferences - Mac 113
Printing Preferences - Mac.... 114
Printing Your Document or Photo - Mac 114
Checking Print Status - Mac.... 116
Printing From a Chromebook 116
Cancelling Printing Using the Product 117
Scanning 118
Starting a Scan.... 118
Starting a Scan Using the Product Control Panel 118
Scanning to a Connected Computer 119
Control Panel Scanning Options 121
Changing Default Scan Job Settings 122
Starting a Scan Using the Epson Scan 2 Icon 123
Starting a Scan from a Scanning Program.... 125
Starting a Scan from a Smart Device.... 126
Scanning in Epson Scan 2 127
Additional Scanning Settings - Main Settings Tab 130
Additional Scanning Settings - Advanced Settings Tab.... 130
Saving Scanned Documents as a Searchable PDF.... 131
Image Format Options 132
Scan Resolution Guidelines 133
Faxing.... 135
Connecting a Telephone or Answering Machine.... 135
Setting Up Fax Features 138
Setting Up Basic Fax Features 138
Using the Fax Setup Wizard 138
Selecting the Line Type.... 140
Setting the Number of Rings to Answer 142
Selecting Advanced Fax Settings.... 143
Print Settings - Fax.... 145
Basic Settings - Fax 146
Security Settings - Fax 147
Setting Up the Fax Utility - Windows.... 148
Setting Up Fax Features Using the Fax Utility - Mac 150
Setting Up Contacts and Contact Groups.... 151
Setting Up Contacts Using the Product Control Panel.... 152
Creating a Contact.... 152
Editing or Deleting a Contact 154
Creating a Contact Group 155
Editing or Deleting a Contact Group.... 157
Importing Contacts Using the Fax Utility - Windows 158
Setting Up Speed/Group Dial Lists Using the Fax Utility - Mac.... 161
Sending Faxes 163
Sending Faxes from the Product Control Panel.... 163
Sending a Fax Using the Keypad, Contact List, or History.... 164
Fax Sending Options 165
Sending a Fax at a Specified Time 167
Sending Faxes Using the Fax Utility - Windows 168
Sending Faxes Using the Fax Utility - Mac 171
Dialing Fax Numbers from a Connected Telephone.... 174
Receiving Faxes.... 175
Fax Reception 175
Receiving Faxes Automatically 176
Receiving Faxes Manually.... 176
Receiving a Fax by Polling 177
Viewing a Fax on the LCD Screen (Using the Inbox).... 177
Selecting Received Fax Options Using the Fax Utility - Windows 179
Checking Fax Status 182
Printing Fax Reports.... 183
Fax Report Options 183
Refilling Ink 185
Ink Safety Precautions 185
Check Ink Levels.... 187
Checking Ink Levels on Your Product 187
Checking Ink Levels with Windows.... 188
Checking Ink Levels - Mac.... 189
Disabling Special Offers with Windows 191
Purchase Epson Ink and Maintenance Box.... 192
Ink Bottle and Maintenance Box Part Numbers 192
Refilling the Ink Tanks 192
Maintenance Box Replacement 197
Adjusting Print Quality.... 199
Print Head Maintenance.... 199
Print Head Nozzle Check.... 199
CheckingtheNozzlesUsingtheProductControlPanel....200
CheckingtheNozzlesUsingaComputerUtility....202
Print Head Cleaning 205
CleaningthePrintHeadUsingtheProductControlPanel....205
CleaningthePrintHeadUsingaComputerUtility....207
Power Cleaning 209
PowerCleaningUsingtheProductControlPanel....209
Power Cleaning Using a Computer Utility 210
Print Head Alignment 212
AligningthePrintHeadUsingtheProductControlPanel....212
Cleaning the Paper Guide 214
Cleaning the Print Head Path 215
Checking the Number of Sheets.... 217
Checking the Sheet Counter - Windows 217
Checking the Sheet Counter - Mac 218
Cleaning and Transporting Your Product 220
Cleaning Your Product 220
Cleaning the Paper Rollers 222
Transporting Your Product 225
Solving Problems 229
Checking for Software Updates.... 229
Product Status Messages 230
Message Appears Prompting You to Reset Ink Levels.... 232
Running a Product Check 232
Resetting Control Panel Defaults 234
Solving Setup Problems 235
Noise After Filling the Ink 235
Software Installation Problems 235
Control Panel Setup Problems 236
Solving Network Problems 236
ProductCannotConnecttoaWirelessRouterAccessPoint....237
NetworkSoftwareCannotFindProductonaNetwork 238
Product Does Not Appear in Mac Printer Window 239
Cannot Print Over a Network 239
Cannot Scan Over a Network 240
Solving Copying Problems 241
Product Makes Noise, But Nothing Copies 242
Product Makes Noise When It Sits for a While.... 242
Solving Paper Problems.... 242
Paper Feeding Problems 242
Paper Jams Inside the Printer 243
Paper Ejection Problems 243
Solving Problems Printing from a Computer.... 244
Nothing Prints.... 244
ProductIconDoesNotAppearinWindowsTaskbar....245
Printing is Slow 245
Solving Page Layout and Content Problems 247
Inverted Image.... 247
Too Many Copies Print 248
Blank Pages Print 248
Incorrect Margins on Printout.... 248
Border Appears on Borderless Prints 249
Incorrect Characters Print 249
Incorrect Image Size or Position 250
Slanted Printout 251
Solving Print Quality Problems.... 251
White or Dark Lines in Printout 252
Blurry or Smeared Printout 253
Faint Printout or Printout Has Gaps 254
Grainy Printout.... 255
Incorrect Colors 256
Solving Scanning Problems 257
Scanning Software Does Not Operate Correctly 257
Cannot Start Epson Scan 2 258
Solving Scanned Image Quality Problems 258
Image Consists of a Few Dots Only 259
Line of Dots Appears in All Scanned Images 259
Straight Lines in an Image Appear Crooked 259
Image is Distorted or Blurry 260
Image Colors are Patchy at the Edges 260
Image is Too Dark 260
BackofOriginalImageAppearsinScannedImage....261
Ripple Patterns Appear in an Image 261
ScannedImageColorsDoNotMatchOriginalColors....261
Scanned Image Edges are Cropped 262
Solving Faxing Problems.... 262
Cannot Send or Receive Faxes 262
CannotReceiveFaxeswithaTelephoneConnectedtoYourProduct....264
Fax Memory Full Error Appears 264
Sent Fax Quality is Poor 265
Sent Fax is Received in an Incorrect Size 265
Received Fax Quality is Poor 266
Received Fax is Not Printed 266
Uninstall Your Product Software.... 266
Uninstalling Product Software - Windows 266
Uninstalling Product Software - Mac.... 268
Where to Get Help.... 268
Technical Specifications 270
Windows System Requirements 270
Mac System Requirements 271
Paper Specifications 271
Printable Area Specifications 272
Scanning Specifications 274
Automatic Document Feeder (ADF) Specifications 275
Fax Specifications 275
Ink Specifications 276
Dimension Specifications 277
Electrical Specifications 277
Environmental Specifications 278
Interface Specifications 278
Network Interface Specifications 278
Safety and Approvals Specifications 279
Notices 281
Important Safety Instructions.... 281
General Product Safety Instructions 281
Wireless Connection Safety Instructions 283
LCD Screen Safety Instructions.... 283
Telephone Equipment Safety Instructions 284
FCC Compliance Statement.... 284
Binding Arbitration and Class Waiver 287
Trademarks 290
Copyright Notice....290
libTIFF Software Acknowledgment 291
ANoteConcerningResponsibleUseofCopyrightedMaterials....292
DefaultDelayTimesforPowerManagementforEpsonProducts....292
Copyright Attribution 292
ET-4750User'sGuide
Welcome to the ET-4750 User's Guide.
For a printable PDF copy of this guide, click here.
ProductBasics
Seethesectionstolearnaboutthebasicfeaturesofyourproduct.
UsingtheControlPanel
ProductPartsLocations
CheckingforSoftwareUpdates
UsingPowerSavingSettings
EpsonConnectSolutionsforSmartphones,Tablets,andMore
UsingAirPrint
UsingGoogleCloudPrint
AndroidPrintingUsingtheEpsonPrintEnabler
UsingFireOSPrinting
UsingWindows10MobilePrinting
UsingEpsonPrintandScanAppwithWindowsTablets
UsingtheControlPanel
Seethesectionstolearnaboutthecontrolpanelandselectcontrolpanelsettings.
ControlPanelButtonsandLights
EnteringCharactersontheLCDScreen
SelectingtheDateandTime
ChangingLCDScreenLanguage
AdjustingControlPanelSounds
AdjustingtheScreenBrightness
TurningOfftheOperationTimeOutSetting
Parenttopic:ProductBasics
ControlPanelButtonsandLights

flowchart
graph TD
    1["①"] --> A["②"]
    2["②"] --> B["③"]
    3["③"] --> C["④"]
    4["④"] --> D["⑤"]
    5["⑤"] --> E["⑦"]
1 The powerbuttonandlight
2 Thehomebutton
3 Thereceivedfaxlight
4TheLCDscreen
5 The helpbutton
StatusIconInformation
Parenttopic: UsingtheControlPanel
StatusIconInformation
YourproductdisplaysstatusiconsontheLCDscreenforcertainproductstatusconditions.Pressthe

icontovieworchangethecurrentnetworksettings.
| IconsDescription | |
| Displaysadditionalinformationorinstructions,suchasloadingpaperorplacingadocument. | |
| ◆ | DisplaystheSupplyStatusscreen. |
| QuietModeisenabled.Noiseisreducedduringprinting,buttheprintspeedmaybe reduced.Pressthisicontochangethesettings. | |
| QuietModeisdisabled.Pressthisicontochangethesettings. | |
| DisplaystheFaxDataInformationscreen. | |
| Thereisaproblemwiththeindicatedsetting.Presstheicontoresolvetheproblem. | |
| NoEthernetconnection. | |
| AnEthernetconnectionisestablished. | |
| NoWi-Ficonnection. | |
| AWi-Finetworkerrorhasoccurredortheproductissearchingforaconnection. | |
| AWi-Ficonnectionisestablished.Thenumberofbarsindicatestheconnection'ssignal strength. | |
| NoWi-FiDirectconnection. | |
| AWi-FiDirectconnectionisestablished. | |
Parenttopic: ControlPanelButtonsandLights
EnteringCharactersontheLCDScreen
Followtheseguidelinstoentercharactersforpasswordsandothersettings.
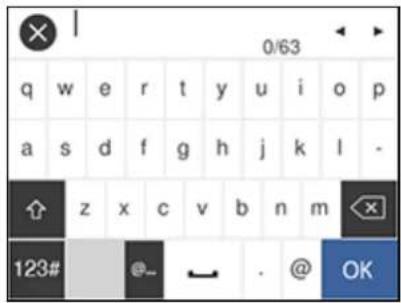
text_image
0/63 q w e r t y u i o p a s d f g h j k l - 123# @- . @ OK• Tomovethecursor, selecttheleftorrightarrows.
• Tochangethecaseofletters, select.
• Todeletethepreviouscharacter, select.
• Toenternumbersorsymbols, select123#.
• Toenteracommonlyuseddomainname,select@....
• Toenteraspace, select.
Parenttopic: UsingtheControlPanel


SelectingtheDateandTime
Beforefaxing, select the current date, time, and daylight saving phase in your area, and choose your preferred date and timeframe.
-
Pressthehomebutton, if necessary.
-
SelectSettings.
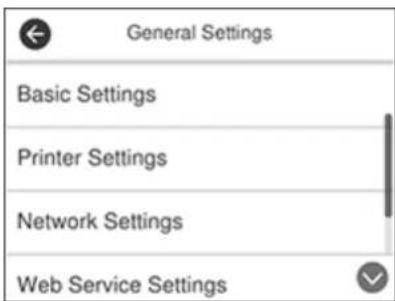
3. SelectGeneralSettings.

text_image
General Settings Basic Settings Printer Settings Network Settings Web Service Settings4. SelectBasicSettings.
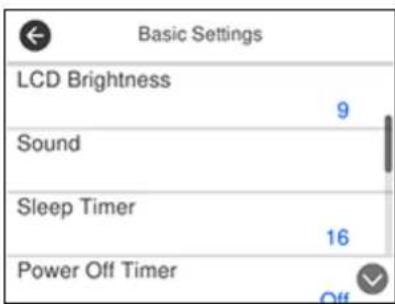
text_image
Basic Settings LCD Brightness 9 Sound Sleep Timer 16 Power Off Timer5. SelectDate/TimeSettings.
Youseeascreenlikethis:
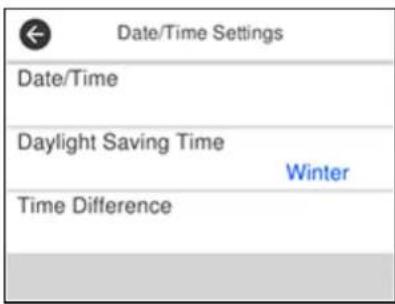
text_image
Date/Time Settings Date/Time Daylight Saving Time Winter Time Difference6. SelectDaylightSavingTime.
-
Select the setting that appliest your area:
-
Winter: it is winter or your region does not use daylight Saving Time (DST)
- Summer: itisspringorsummerandyourregionusesDaylightSavingTime(DST)
Note: If your region uses daylight Saving Time (DST), you must change this setting to match the season. When you change from Winter to Summer, your product automatically sets its clock ahead one hour. When you change from Summer to Winter, it sets its clock back one hour.
8. SelectDate/Time.
- Select the date format you want to use.
- Usethenumerickeypadtoenterthecurrentdate.
- Selectthetimeformatyouwanttouse.
- Usethenumerickeypadtoenterthecurrenttime.
Parenttopic: UsingtheControlPanel
ChangingLCDScreenLanguage
YoucanchangethelanguageusedontheLCDscreen.
1.Pressthehomebutton,ifnecessary.
- SelectSettings.
- SelectGeneralSettings.
Youseeascreenlikethis:
text_image
General Settings Basic Settings Printer Settings Network Settings Web Service Settings- SelectBasicSettings.
- ScrolldownandselectLanguage.
6.Selectalanguage.
Parenttopic: UsingtheControlPanel
AdjustingControlPanelSounds
You can adjust the sound level heard when you press button on the control panel.
- Pressthehomebutton, if necessary.
- SelectSettings.
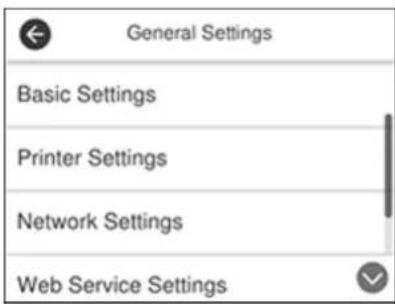
- SelectGeneralSettings.
Youseeascreenlikethis:
text_image
General Settings Basic Settings Printer Settings Network Settings Web Service Settings- SelectBasicSettings.
5.SelectSound.
6.SelectNormalModeorQuietMode.
Note: Press the 📁 icon on the home screen to switch between Normal Mode and Quiet Mode.
- SelectButtonPress.
- Pressthe+or-buttonstoadjustthevolume.
9.SelectOKtoexit.
Note: You can also adjust the Sound Type and the volume for various product functions.
Parenttopic: UsingtheControlPanel
AdjustingtheScreenBrightness
YoucanadjustthebrightnessoftheLCDscreen.
- Pressthehomebutton, if necessary.
- SelectSettings.
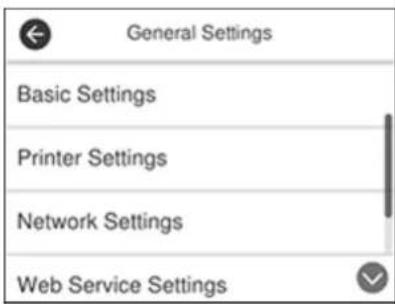
- SelectGeneralSettings.
Youseeascreenlikethis:
text_image
General Settings Basic Settings Printer Settings Network Settings Web Service Settings- SelectBasicSettings.
- SelectLCDBrightness.
6.Pressthe-or+iconstodecreaseorincreasethebrightness.
7.SelectOKtoexit.
Parenttopic: UsingtheControlPanel
TurningOfftheOperationTimeOutSetting
TheOperationTimeOutsettingcauses theLCDscreentoreturntotheHomescreenafterafewminutes ofinactivity. Thisfeatureisenabledbydefault, butyoucanturnitoff.
- Pressthehomebutton, if necessary.
- SelectSettings.
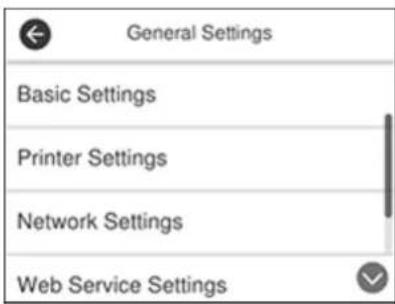
- SelectGeneralSettings.
Youseeascreenlikethis:
text_image
General Settings Basic Settings Printer Settings Network Settings Web Service Settings- SelectBasicSettings.
- ScrolldownandsetOperationTimeOuttoOff.
Parenttopic: UsingtheControlPanel
ProductPartsLocations
Seethesesectionstoidentifythepartsonyourproduct.
ProductParts-Front
ProductParts-Inside
ProductParts-Back
Parenttopic:ProductBasics
ProductParts-Front
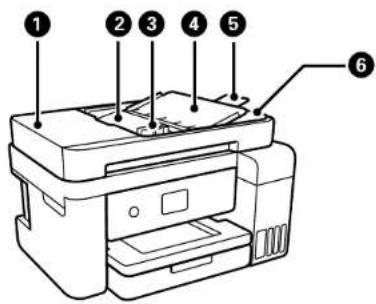
text_image
Diagram of a printer with numbered parts labeled 1 to 6 for identification1AutomaticDocumentFeeder(ADF)cover
2ADFinputtray
3ADFedgeguides
4ADFdocumentsupport
5ADFoutputtrayextension
6ADFoutputtray
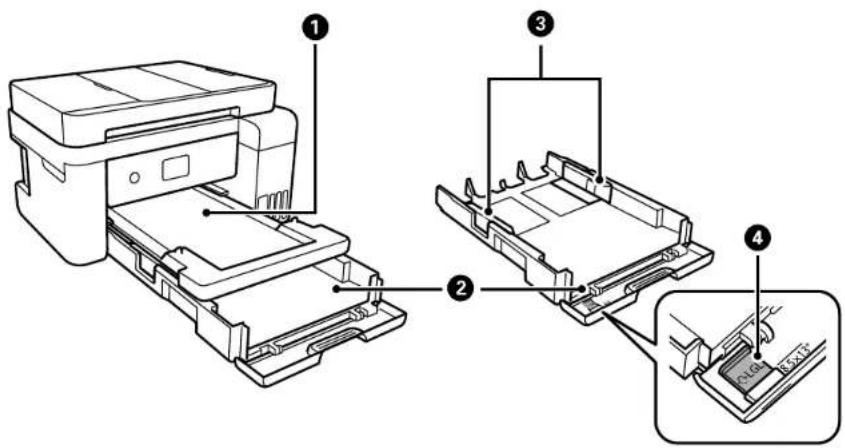
text_image
Technical diagram of a printer assembly with numbered parts and labeled components1 Outputtray
2Papercassette
3Papercassetteedgeguides
4Legal-sizepaperguide
Parenttopic:ProductPartsLocations
ProductParts-Inside
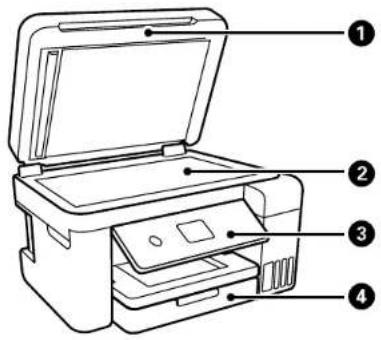
text_image
Diagram of a printer with numbered parts labeled 1 to 4 for identification1Documentcover
2Scannerglass
3Controlpanel
4Frontcover
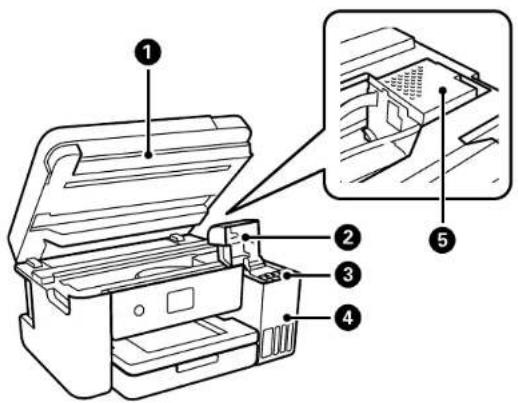
text_image
Diagram of a printer with numbered parts and an inset view showing internal components1Scannerunit
2Inktankcover
3Inktanks
4Inktankunit
5Printhead
Parenttopic:ProductPartsLocations
ProductParts-Back
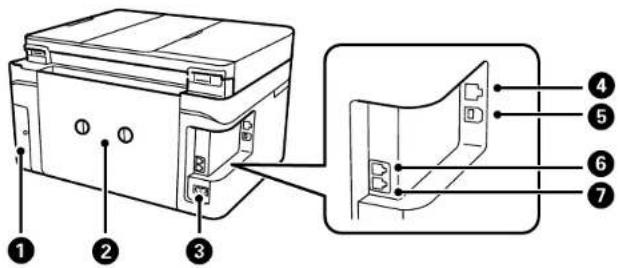
text_image
Technical diagram of a printer with numbered parts and labeled parts in Chinese1 Maintenanceboxcover
2Rearcover(duplexer)
3ACinlet
4LANport
5USBport
6EXTport
7LINEport
Parenttopic:ProductPartsLocations
CheckingforSoftwareUpdates
Periodically, it'sagoodideatocheckEpson'ssupportwebsiteforfreeupdatestoyourproductsoftware.
Visit epson.com/support (U.S.), epson.ca/support (Canada), or epson.com.jm/support (Caribbean) and select your product.
- Windows: Your printer software automatically checks for updates. You can also manually update the softwarebyselectingSoftwareUpdatehere:
- AccessingtheWindowsDesktopandright-clickingtheiconforyourproductintherightsideof theWindowstaskbar,orclickingtheuparrowandright-clicking.
• OntheMaintenancetabintheprintersettingswindow
You can also update the software by selecting EPSON Software Updater in the EPSON or EPSON Software program group, accessible by the Start button, or on the Start or Apps screens, depending on your version of Windows.
- OS X: You can manually update the software by opening the Applications > Epson Software folder andselectingEPSONSoftwareUpdater.
- macOS 10.12.x: You can manually update the software by opening the App Store, selecting Updates, searching for a software update option for Epson Software, and selecting Update.
Parenttopic:ProductBasics
UsingPowerSavingSettings
YourproductentersleepmodeautomaticallyandturnsofftheLCDscreenifitisnotusedforaperiod oftime. Youcanmakethetimeperiodshorterandselectotheroptionstosaveenergyandresources.
ChangingtheSleepTimerSettings
ChangingthePowerOffTimerSettings
Parenttopic:ProductBasics
ChangingtheSleepTimerSettings
You can adjust the time period before your product enters sleep mode and turn off the LCD screen.
- Pressthehomebutton, if necessary.
- SelectSettings.
- SelectGeneralSettings.
Youseeascreenlikethis:
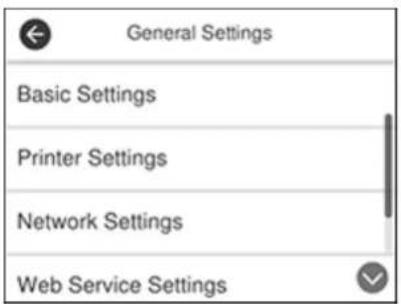
text_image
General Settings Basic Settings Printer Settings Network Settings Web Service Settings- SelectBasicSettings.
- SelectSleepTimer.
Youseeascreenlikethis:
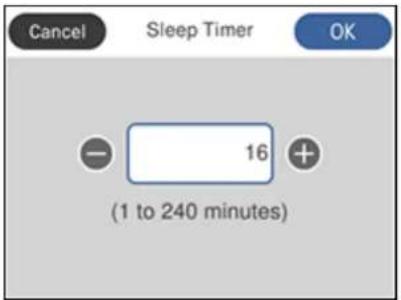
text_image
Cancel Sleep Timer OK - 16 + (1 to 240 minutes)6.Dooneofthefollowing:
- Pressthe-or+icontodecreaseorincreasethenumberofminutes.
- PressthenumberofminutesontheLCDscreen,selectthenumberofminutesfromtheon-screen keypad,andselectOK.
7.SelectOK.
Parenttopic: UsingPowerSavingSettings
ChangingthePowerOffTimerSettings
Youcan have the product turnoff automatically if it is not used for a specified period of time.
- Pressthehomebutton, if necessary.
- SelectSettings.
- SelectGeneralSettings.
Youseeascreenlikethis:
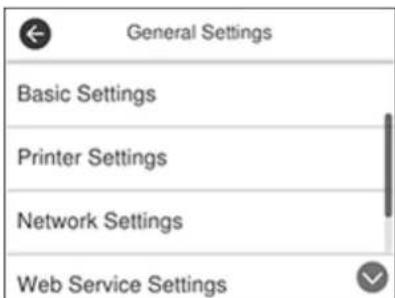
text_image
General Settings Basic Settings Printer Settings Network Settings Web Service Settings- SelectBasicSettings.
- Select Power Off Timer, and select a time period between 30 minutes and 12h (12 hours).
Parenttopic: UsingPowerSavingSettings
EpsonConnectSolutionsforSmartphones,Tablets,andMore
Useyoursmartphone, tablet, orcomputertoprintandscandocuments, photos, emails, andwebpages from your home, office, orevenacrossthe globe.
Note: If you are using your Epson product with the Windows 10 S operating system, you cannot use the softwaresdescribedinthissection.YoualsocannotdownloadandinstallanyEpsonproductsoftware
fromtheEpsonwebsiteforusewithWindows10S;youmustobtainsoftwareonlyfromtheWindows Store.
PrintfromanywherewiththeseEpsonConnectsolutions:
•EpsonEmailPrint
•EpsoniPrintMobileApp
•EpsonRemotePrint
ScanandsendafileasanemailoruploadittoanonlineservicedirectlyfromyourEpsonproductwithEpsonScantoCloudortheEpsoniPrintMobileApp.
SettingUpEpsonConnectServices
UsingEpsonEmailPrint
UsingtheEpsoniPrintMobileApp
UsingEpsonRemotePrint
UsingEpsonScantoCloud
Parenttopic:ProductBasics
Relatedtasks
UsingAirPrint
UsingGoogleCloudPrint
AndroidPrintingUsingtheEpsonPrintEnabler
UsingFireOSPrinting
UsingWindows10MobilePrinting
UsingEpsonPrintandScanAppwithWindowsTablets
SettingUpEpsonConnectServices
If you did not activate your product's email address for use with Epson Connect when you setup your product, you can activate it using the product control panel.
-
Pressthehomebutton, if necessary.
-
SelectSettings.
-
SelectGeneralSettings.
Youseeascreenlikethis:
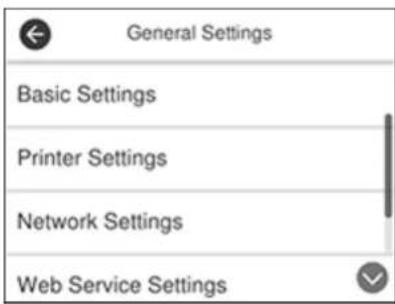
text_image
General Settings Basic Settings Printer Settings Network Settings Web Service Settings- SelectWebServiceSettings.
- SelectEpsonConnectServices.
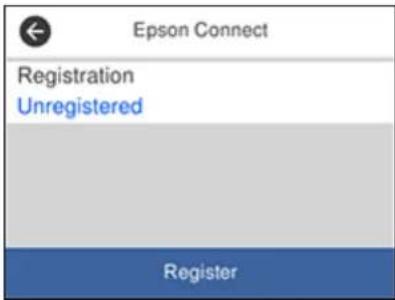
Youseeascreenlikethis:
text_image
Epson Connect Registration Unregistered Register6.SelectRegister.
7. Follow the instructions on the screento activate your product's email address.
Parenttopic: EpsonConnectSolutionsforSmartphones, Tablets, and More
Relatedtopics
Wi-FiorWiredNetworking
UsingEpsonEmailPrint
WithEpsonEmailPrint,youcanprintfromanydevicethatcansendemail,suchasyoursmartphone, tablet,orlaptop.Justactivateyourproduct'suniqueemailaddress.Whenyouwanttoprint,attacha PDF,MicrosoftOfficedocument,orphototoanemailandsendittoyourproduct.Boththeemailandthe attachmentswillprintautomatically.
- Connect your product to your network. Seethelink below.
- If you did not already setup Email Print when you installed your product software, seethelink below to use your product control panel to activate your unique email address. Or visit epson.com/connect (U.S), epson.ca/connect (Canada), or epsonconnect.com (Caribbean) to learn more about Email Print, create your Epson Connect account, and registry your product to the Epson Connect service.
3.Nowyouarereadytosendandprintemailstoyourproduct'sEmailPrintaddress.
Note: Go to epsonconnect.com and log into your Epson Connect account to personalize your product's email, adjustprintsettings, and setupotherEpsonConnectservices.
Parenttopic: EpsonConnectSolutionsforSmartphones, Tablets, and More
Relatedtopics
Wi-FiorWiredNetworking
UsingtheEpsoniPrintMobileApp
UsethisfreeAppleandAndroidapptoprintandscanwithnetworkedEpsonproducts.EpsoniPrintlets youprintPDFs,MicrosoftOfficedocuments,photos,andwebpagesoverawirelessnetwork.Youcan scanandsaveafileonyourdevice,senditasanemail,oruploadittoanonline services suchasBox, Dropbox,Evernote,orGoogleDrive.
-
Connect your product to your wireless network. Seethelink below.
-
Visit epson.com/connect (U.S), epson.ca/connect (Canada), or epson.com.jm/connect (Caribbean) tolearnmoreaboutEpsoniPrintandcheckthecompatibilityofyourmobiledevice.
-
Download Epsoni Print from the Apple App Store or Google Play.
-
Connect your mobile device to the same wireless network as your product.
5.OpenEpsoniPrintandselectyourEpsonproduct.
NowyouarereadytoprintorscanwithyourmobiledeviceandyourEpsonproduct.
Parenttopic: EpsonConnectSolutionsforSmartphones, Tablets, and More
Relatedtopics
Wi-FiorWiredNetworking
UsingEpsonRemotePrint
WithEpsonRemotePrintsoftware,youcanprintfromyourlaptopordesktopcomputertoanEpson Email-enabledproductanywhereintheworld.
-
Connect your Epson product to your wireless network. Seethelink below.
-
If you did not already setup an Epson Connect account when you installed your product software, visit epsilon connect.com to create your account and registry your product to the Epson Connect service.
Note: Make an note of your product's email address.
-
Visitepsonconnect.com to learn more about Remote Print and how to download the Remote Print Driversoftware.
-
Download and install the Remote Print software.
5.EntertheemailaddressandoptionalaccesskeyofyourEpsonproductduringRemotePrintsetup.
6.Nowyouarareadytoprintremotely.Selecttheprintcommandinyourlaptopordesktopcomputer applicationandchoosetheRemotePrintoptionforyourEpsonproduct.
Parenttopic: EpsonConnectSolutionsforSmartphones, Tablets, and More
Relatedtopics
Wi-FiorWiredNetworking
UsingEpsonScantoCloud
TheEpsonScantoCloudserviceallowsyoutoscanandsendafileasanemailoruploadittoanonline servicedirectlyfromyourEpsonproduct.RegisteranemailaddressoronlineservicessuchasBox, DropBox, Evernote, orGoogleDrivewithyourEpsonConnectaccount.
-
Connect your Epson product to your network. Seethelink below.
-
If you did not ready setup an Epson Connect account when you installed your product software, visitepsonconnect.com to create your account and registry your product to the Epson Connect service.
Note: Make an note of your product's email address and password.
- Visitepsonconnect.comtosignintoyouraccountwiththeemailaddressandpasswordyou selected.
- Select your product, select Scan to Cloud, and select Destination List.
5.ClickAdd, then follow the instructions on the screent to create your destination list.
6.NowyouarereadytouseScantoCloud.SelectthesettingforscanningtoScantoCloudonyourEpsonproductcontrolpanel.
Parenttopic: EpsonConnectSolutionsforSmartphones, Tablets, and More
Relatedtopics
Wi-FiorWiredNetworking
UsingAirPrint
AirPrintenablesinstantwirelessprintingfromiPhone,iPad,andiPodtouchwiththelatestversionofiOS,andMacwiththelatestversionofOSXormacOS.

Note: If you disabled paper configuration messages on your product control panel, you cannot use AirPrint.Seethelinkbelowtoenablethemessages,ifnecessary.
- Loadpaperinyourproduct.
- Setup your product for wireless printing. Seethelink below.
- Connect your Apple device to the same wireless network that your product is using.
- Printfromyourdevicetoyourproduct.
Note: Fordetails, seetheAirPrintpageontheApplewebsite.
Parenttopic:ProductBasics
Relatedreferences
PaperSourceSettingsOptions
Relatedtopics
Wi-FiorWiredNetworking
UsingGoogleCloudPrint
WithaGoogleAccount,youcanprintfromyourAppleorAndroiddevicetoyourEpsonproduct.Youcan alsoprintfromChromebooksandtheGoogleChromebrowserwithoutdriversorcables.
- Connect your Epson product to your wireless network. Seethelink below.
- Noteyourproduct'sIPaddressbycheckingyournetworkstatus.Seethelinkbelow.
- Connect your computer or your Apple or Android device to the same wireless network as your Epson product.
- Enteryourproduct'sIPaddressintotheaddressbarofawebbrowser.
- SelecttheGoogleCloudPrintServicesoption.
Note: If you don't see the Google Cloud Print Services option, turn your product off and back on. If the option still doesn't appear, select the Firmware Update option and follow the on-screen instructionstoupdateyourproduct.
6.ClickRegister.
- Select the checkbox to agree to the Usage Advisory and click Next.
8.ClickOKtolaunchthesign-inpage.
Aseparatebrowserwindowopens.
- Enter your Google Account username and password and click Sign in, or, if you don't have an account, click SignupforanewGoogleAccountandfollowtheon-screeninstructions.
- ClickFinishprinterregistrationtocompletesetupandprintatestpage.
YourproductisnowlinkedtoyourGoogleAccountandcanbeaccessedfromanyChromebook, computer, Apple or Android device with Internet access. Visit Epson Support for Google Cloud Print (U.S) or Epson Support for Google Cloud Print (Canada) for more information on using Google Cloud Print,ortheGoogleCloudPrintwebsiteforalistofsupportedapps.
Parenttopic:ProductBasics
Relatedtasks
PrintingaNetworkStatusSheet
Relatedtopics
Wi-FiorWiredNetworking
AndroidPrintingUsingtheEpsonPrintEnabler
Youcanwirelesslyprintyourdocuments,emails,photos,andwebpagesrightfromyourAndroidphoneortablet(Androidv4.4orlater).Withafewtaps,yourAndroiddevicewilldiscoveryournearbyEpsonproductandprint.
- Connect your Epson product to your wireless network. Seethelink below.
- On your Android device, download the Epson Print Enabler plug-in from Google Play.
- Go to Settings on your Android device, select Printing, and enable the Epson plug-in.
- Connect your Android device to the same wireless network as your product.
5.Nowyouarereadytoprint.FromanAndroidapplicationsuchasChromeorGmail,tapthemenu iconandprintwhateverisonthescreen.
Note: If you do not see your product, tap All Printers and select your product.
Parenttopic:ProductBasics
Relatedtopics
Wi-FiorWiredNetworking
UsingFireOSPrinting
YoucanwirelesslyprintfromAmazonFiretabletsandphonestoyournearbynetworkedEpsonproduct. Thereisnosoftwaretodownload,nodriverstoinstall,andnocablestoconnect.Withjustafewtapsin Email,Calendar,Contacts,andWPSOffice,youcansendwhateverisonthescreentoanEpson product.
- Connect your Epson product to your wireless network. Seethelink below.
- Connect your Amazon device to the same wireless network as your product.
3.Nowyouarereadytoprint.FromyourAmazonapplication,taptheprintoptionandselectyourproducttoprintwhateverisonthescreen.
Note: If you see a message telling you that a plug-in is required, tap OK and tap Download. If your AmazonFireproductusesFireOS5andabove,yourdeviceautomaticallyusesthebuilt-inMopria PrintServiceapptoprint.
Visit epson.com/connect (U.S), epson.ca/connect (Canada), or epson.com.jm/connect (Caribbean) to learn more about FireOSPrinting(oneofmanyEpsonConnectPartnerSolutions) and check the compatibility of your mobile device.
Parenttopic:ProductBasics
Relatedtopics
Wi-FiorWiredNetworking
UsingWindows10MobilePrinting
YoucanwirelesslyprintfromWindows10MobiletabletsandphonestoyournearbynetworkedEpson product.Thereisnosoftwaredownload,nodriverstoinstall,andnocablestoconnect.Lookforthe printoptioninyourWindows10applicationtosendwhateverisonthescreentoanEpsonproduct.
- Connect your Epson product to your wireless network. Seethelink below.
- Connect your Windows 10 Mobile device to the same wireless network as your product.
3.Nowyouarereadytoprint.FromyourWindows10application,taptheprintoptionandselectyourproducttoprintwhateverisonthescreen.
Visit epson.com/connect (U.S), epson.ca/connect (Canada), or epson.com.jm/connect (Caribbean) to learn more about Windows 10 Mobile Printing (one of many Epson Connect Partner Solutions) and check the compatibility of your mobile device.
Parenttopic:ProductBasics
Relatedtopics
Wi-FiorWiredNetworking
UsingEpsonPrintandScanAppwithWindowsTablets
YoucanusethisfreeapptoprintphotosandscanfromyourWindows(Windows8orhigher)Surface RTorProtabletwithnetworkedEpsonproducts.EpsonPrintandScanAppallowsyoutoscanand captureimagesrighttoyourtabletortoMicrosoftOneDrive.
Note: The Epson Print and Scan App does not support Windows 10 Mobile printing.
- ConnectyourEpsonproducttoyourwirelessnetwork.Seethelinkbelow.
- Download Epson Print and Scan App from the Microsoft Windows Store.
- Connect your Windowstablettothesamewirelessnetworkasyourproduct.
4.OpenEpsonPrintandScanAppandselectyourEpsonproduct.
Nowyouarereadytoprintphotosorscan.
Visit epson.com/connect (U.S), epson.ca/connect (Canada), or epson.com.jm/connect (Caribbean) to learn more about Epson Print and Scan App.
Parenttopic:ProductBasics
Relatedtopics
Wi-FiorWiredNetworking
Wi-FiorWiredNetworking
SeethesectionstouseyourproductonaWi-Fiorwirednetwork.
NetworkSecurityRecommendations
Wi-FilnfrastructureModeSetup
Wi-FiDirectModeSetup
Wi-FiProtectedSetup(WPS)
PrintingaNetworkStatusSheet
ChangingorUpdatingNetworkConnections
NetworkSecurityRecommendations
To help deter unauthorized access to your product over an network, you should protect your network environment using appropriates security measures.
Securitymeasuresuchasthesecanhelpdeterthreatssuchaslossofuserdata,useoftelephoneandfaxlines,andotherintrusions:
- EnablesecurityonyourwirelessLAN
EnabletheappropriatesecurityonthewirelessLANyouplantousewithyourproduct.Network securitysuchasanetworkpasswordcandeterinterceptionoftrafficoverthewirelessLAN.Your routermayalreadyhaveadefaultpasswordenabledbyyourInternetserviceprovider(ISP).Seeyour ISPandrouterdocumentationforinstructionsonhowtochangethedefaultpasswordandbetter secureyournetwork.
- Connectyourproductonlytoanetworkprotectedbyafirewall
ConnectingyourproductdirectlytotheInternetmayleaveitvulnerabletosecuritythreats. Instead, connectittoarouterorothernetworkconnectionprotectedbyafirewall.Yourroutermayalready haveafirewallsetupbyyourInternetserviceprovider;checkwithyourISPforconfirmation.Forbest results, setupanduseaprivateIPaddressforyournetworkconnection.
- Changethedefaultadministratorpasswordonyourproduct
If your product has an option to set an administrator password, can get the default administrator password to deter access by unauthorized user stop personal data stored on your product, such as IDs, passwords, and contact lists.
Parenttopic: Wi-FiorWiredNetworking
Wi-FiInfrastructureModeSetup
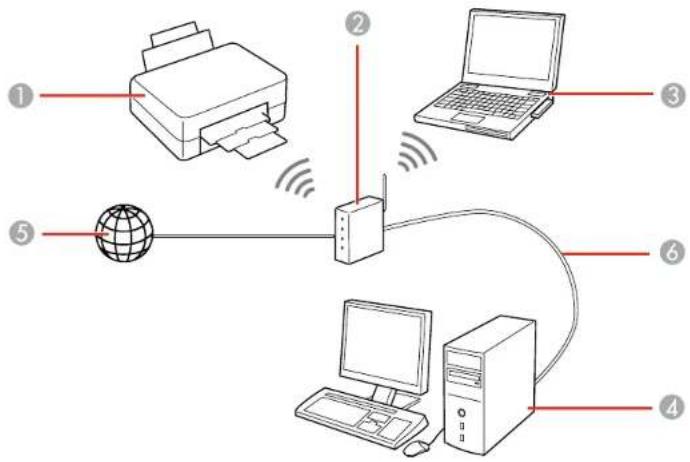
Youcan setup your product to communicate with your computer using wireless router or access point. The wireless router or access point can be connected to your computer over wireless or wired network.
flowchart
graph TD
    A["Printer"] -->|Wireless Signal| B["Central Tower"]
    C["Laptop"] -->|Wireless Signal| B
    D["Tower"] -->|Wireless Signal| B
    E["Computer"] -->|Wireless Signal| B
    F["Global Sphere"] -->|Wireless Signal| B
1Epsonproduct
2Wirelessrouteroraccesspoint
3Computerwithawirelessinterface
4Computer
5Internet
6Ethernetcable(usedonlyforwiredconnectiontothewirelessrouteroraccesspoint)
SelectingWirelessNetworkSettingsfromtheControlPanel
Parenttopic:Wi-FiorWiredNetworking
SelectingWirelessNetworkSettingsfromtheControlPanel
Youcanselectorchangewirelessnetworksettingsusingyourproductcontrolpanel.
To install your product on a wireless network, follow the instructions on the Start Here sheet and install thenecessarysoftwarebydownloadingitfromtheEpsonwebsite.Theinstallerprogramguidesyou throughnetworksetup.
Note: Breakdown or repair of this product may cause loss of fax and network data and settings. Epson is not responsible for backing up or recovering data and settings during a after the warranty period. We recommend that you make your own backup or print out your fax and network data and settings.
- Pressthehomebutton, if necessary.
2.Presstheicon

Youseeascreenlikethis:
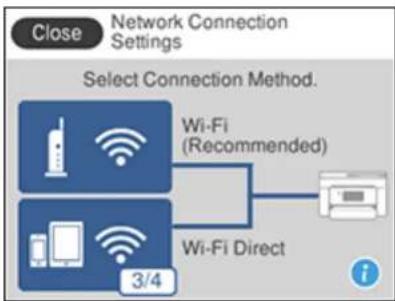
flowchart
graph LR
    A["Device 1"] -->|Wi-Fi (Recommended)| B["Printer"]
    C["Device 2"] -->|Wi-Fi Direct| B
    D["3/4"] --> B
-
SelectWi-Fi(Recommended).
-
SelectStartSetuporChangeSettings.
-
SelectWi-FiSetupWizard.
-
Select the name of your wireless network or select Enter Manually to enter the name manually. Use the displayedkeypadtoenteryournetworkname.
-
SelecttheEnterPasswordfieldandenteryourwirelesspasswordusingthedisplayedkeypad.
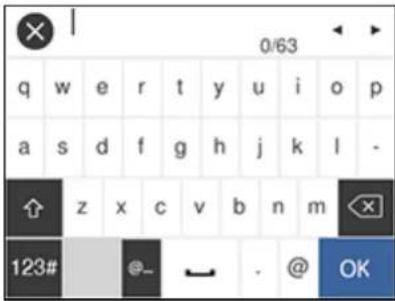
text_image
0/63 q w e r t y u i o p a s d f g h j k l - 123# @- - @ OKNote: The network name and password are case sensitive. Be sure to correctly enter uppercase and lowercase letters, and numeric special characters.
- Tomovethecursor,selecttheleftorrightarrows.
• Tochangethecaseofletters, select.

•Todeletethepreviouscharacter,select.

• Toenternumbersandsymbols, select123#.
• Toenteraspace, select.

-
SelectOK when you finish entering your password.
-
ConfirmthedisplayednetworksettingsandselectStartSetuptosavethem.
-
If you want to print a network setup report, select Print Check Report. (Otherwise, select OK.)
11.Pressthehomebuttontoexit.
YouseetheiconontheLCDscreenandshouldbeabletoconnecttoyourproductdirectlyfrom yourcomputerordevice, and thenprint. If you are printing from a computer, makes sure you installed thenetworksoftwareasdescribed on the StartHeresheet.
Note: If you don't see the icon, you may have selected the wrong network name or entered the password incorrectly. Repeat these stepstotry again.
Parenttopic:Wi-FiInfrastructureModeSetup
Relatedtasks
PrintingaNetworkStatusSheet
Wi-FiDirectModeSetup
Youcan setup your product to communicate directly with your computer or another device without requiring wireless router or access point. In Wi-Fi Direct Mode, the product itself facts as an network access point for up to 4 devices.
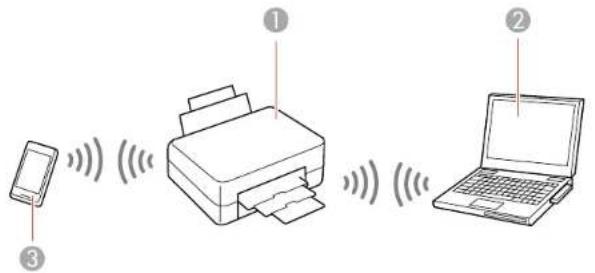
text_image
Diagram showing three labeled devices: a smartphone, a printer, and a laptop, each with signal waves indicating data transmission.1Epsonproduct
2Computerwithawirelessinterface
3Otherwirelessdevice
EnablingWi-FiDirectMode
Parenttopic:Wi-FiorWiredNetworking
EnablingWi-FiDirectMode
YoucanenableWi-FiDirectmodetoallowdirectcommunicationbetweenyourproductandcomputerorotherdeviceswithoutawirelessrouteroraccesspoint.
- Pressthehomebutton, if necessary.
2.Presstheicon.

Youseeascreenlikethis:
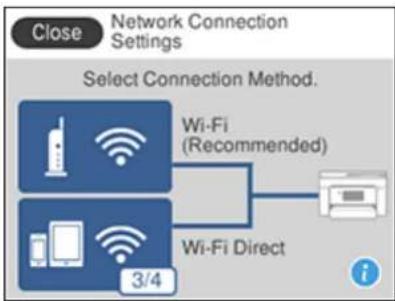
flowchart
graph LR
    A["Device 1"] -->|Wi-Fi (Recommended)| C["Printer"]
    B["Device 2"] -->|Wi-Fi Direct| C["Printer"]
    D["Device 3/4"] -->|Wi-Fi Direct| C["Printer"]
- SelectWi-FiDirect.
- ScrolldownandselectStartSetup.
- SelectStartSetupagain.
Youseeascreenlikethis:
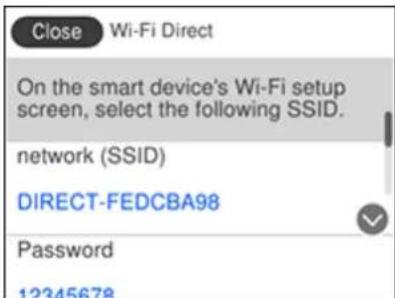
text_image
Close Wi-Fi Direct On the smart device's Wi-Fi setup screen, select the following SSID. network (SSID) DIRECT-FEDCBA98 Password 12345678- Use your computer or wireless device to select the Wi-Fi network name (SSID) displayed on the LCD screen, then enter the password shown.
7.Pressthehomebuttontoexit.
YouseetheiconontheLCDscreenandshouldbeabletoconnecttoyourproductdirectly fromyourcomputerordevice,andthenprint.Ifyouareprintingfromacomputer,makesureyou installedthenetworksoftwareasdescribedontheStartHeresheet.
Note: If you don't se the icon on the LCD screen, you may have selected the wrong network name or entered the password incorrectly. Repeat these stepstotry again.
Parenttopic:Wi-FiDirectModeSetup
Wi-FiProtectedSetup(WPS)
If your network uses a WPS-enabled wireless router or access point, you can quickly connect your product to thenetwork using Wi-Fi Protected Setup (WPS).
Note: To check if your router is WPS-enabled, look for a button labeled WPS on your router or access point. If there is no hardware button, therem maybe virtual WPS button in the software for the device. Check your network product documentation for details.
UsingWPStoConnecttoaNetwork
Parenttopic: Wi-FiorWiredNetworking
UsingWPStoConnecttoaNetwork
If you have a WPS-enabled wireless router or access point, you can use Wi-Fi Protected Setup (WPS) to connect your product to the network.
- Pressthehomebutton, if necessary.
2.Presstheicon.
Youseeascreenlikethis:
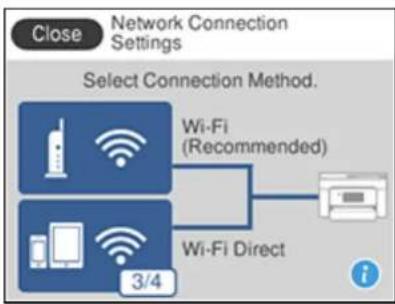
flowchart
graph LR
    A["Device 1"] -->|Wi-Fi (Recommended)| C["Printer"]
    B["Device 2"] -->|Wi-Fi Direct| C["Printer"]
    D["Device 3/4"] -->|Wi-Fi Direct| C["Printer"]
- SelectWi-Fi(Recommended).
- SelectPushButtonSetup(WPS).
5.FollowtheinstructionsontheLCDscreentocompleteWPSsetup.
6.Pressthehomebuttontoexit.
YouseetheiconontheLCDscreenandshouldbeabletoconnecttoyourproductdirectlyfrom yourcomputerordevice,andthenprint.Ifyouareprintingfromacomputer,makesureyouinstalled thenetworksoftwareasdescribedontheStartHeresheet.
Note: If you don't seethe icon, repeat these stepstotry again.
Parenttopic:Wi-FiProtectedSetup(WPS)
PrintingaNetworkStatusSheet
Youcanprintanetworkstatussheettohelpyoudeterminethecausesofanyproblemsyoumayhave usingyourproductonanetwork.
- Pressthehomebutton, if necessary.
- SelectSettings.
- SelectGeneralSettings.
Youseeascreenlikethis:
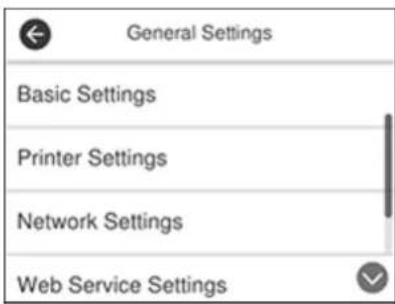
text_image
General Settings Basic Settings Printer Settings Network Settings Web Service Settings-
SelectNetworkSettings.
-
SelectNetworkStatus.
6.SelectPrintStatusSheet.
7.SelectPrint.
Examinethesettingsshownonthenetworkstatussheettodiagnoseanyproblemsyouhave.
Parenttopic:Wi-FiorWiredNetworking
Relatedtasks
AccessingtheWebConfigUtility
ChangingorUpdatingNetworkConnections
Seethesectionstochangeorupdatehowyourproductconnectstoanetwork.
AccessingtheWebConfigUtility
ChangingaUSBConnectiontoaWi-FiConnection
ChangingaWi-FiConnectiontoaWiredNetworkConnection
ConnectingtoaNewWi-FiRouter
DisablingWi-FiFeatures
Parenttopic:Wi-FiorWiredNetworking
Relatedtasks
SelectingWirelessNetworkSettingsfromtheControlPanel
AccessingtheWebConfigUtility
Youcanselectyourproduct'snetworksettingsandconfirmitsoperatingstatususingawebbrowser. Youdothisbyaccessingyourproduct'sbuilt-inWebConfigutilityfromacomputerorotherdevicethatis connectedtothesamenetworkasyourproduct.
- Checkyournetworkstatus.
- Noteyourproduct'sIPaddress.
- Onacomputerorotherdeviceconnectedtothesamenetworkasyourproduct, openaweb browser.
- Enteryourproduct'sIPaddressintotheaddressbar.
YouseetheavailableWebConfigutilityoptions.
Parenttopic: ChangingorUpdatingNetworkConnections
Relatedtasks
PrintingaNetworkStatusSheet
ChangingaUSBConnectiontoaWi-FiConnection
If you have already connected your product to your computer using a USB connection, you can change to a Wi-Fi connection.
- Disconnect the USB cable from your product.
- Uninstall your product software.
- Download and install your product software from the Epson website using the instructions on the StartHeresheet.
Parenttopic: ChangingorUpdatingNetworkConnections
ChangingaWi-FiConnectiontoaWiredNetworkConnection
If you have already connected your product to your computer wirelessly, you can change to a wired network connection if necessary.
- Disable your product's Wi-Fi features.
- ConnectoneendofanEthernetnetworkcabletotheproduct'sLANport.
-
ConnecttheotherendtoanyavailableLANportonyourrouteroraccesspoint.
-
Uninstall your product software.
- Download and install your product software from the Epson website.
6.Followtheon-screeninstructionstoinstallthesoftware. - When you see the Select Your Connections screen, select Wired network connection.
- If you see a Select Setup Options screen, select Setup printer for the first time.
- Continue following the rest of the screen instructions.
Parenttopic: ChangingorUpdatingNetworkConnections
Relatedtasks
DisablingWi-FiFeatures
ConnectingtoaNewWi-FiRouter
If you chan gethewireless routery you have been using on your network, you need to update your product's Wi-Ficonction to thenew router.
Note: If you switch to a 5 GHz wireless router, set the router to operate in dual band (2.4 GHz and 5GHz) mode. See your router documentation for instructions.
- Dooneofthefollowing:
- Windows: Uninstall your product software.
•Mac:Gotothenextstep. - Download and install your product software from the Epson website using the instructions on the StartHeresheet.
Parenttopic: ChangingorUpdatingNetworkConnections
DisablingWi-FiFeatures
Youmayneedtodisableyourproduct'sWi-Fifeaturesifyouchangeyournetworkconnectiontypeor needtosolveaproblemwithyournetworkconnection.
Note: Before disabling Wi-Fi features, make a note of your product's SSID (network name) and password, and any network settings selected for the Epson Connect services you may use.
- Pressthehomebutton, if necessary.
2.Presstheicon.

Youseeascreenlikethis:
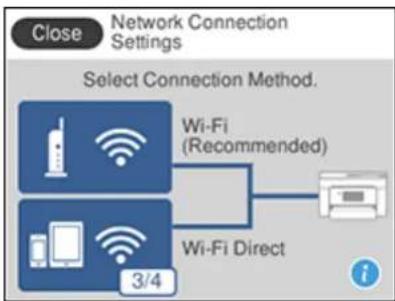
flowchart
graph LR
    A["Wi-Fi (Recommended)"] --> B["Printer"]
    C["Wi-Fi Direct"] --> B
    D["3/4"] --> B
- SelectWi-Fi(Recommended).
- SelectChangeSettings.
- SelectOthers.
- SelectDisableWi-Fi
- SelectYestodisableWi-Fi.
Parenttopic: ChangingorUpdatingNetworkConnections
LoadingPaper
Beforeyouprint,loadpaperforthetypeofprintingyouwilldo.
LoadingPaperintheCassette
PaperLoadingCapacity
Double-sidedPrintingCapacity
AvailableEpsonPapers
BorderlessPaperTypeCompatibility
PaperorMediaTypeSettings-PrintingSoftware
SelectingthePaperSettings-ControlPanel
SelectingtheDefaultPaperSourceSettings
SelectingtheUniversalPrintSettings
LoadingPaperintheCassette
Youcanloadpaperuptothissizeinthepapercassette:Legal(8.5×14inches[216×356mm]).
Note: Before loading paper, make sure your product is not currently printing, scanning, or copying.
- Openthefrontcover.
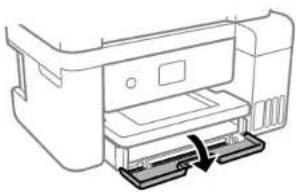
natural_image
Line drawing of a printer with a paperclip inserted (no text or symbols)- Pulloutthepapercassetteuntilitstops.
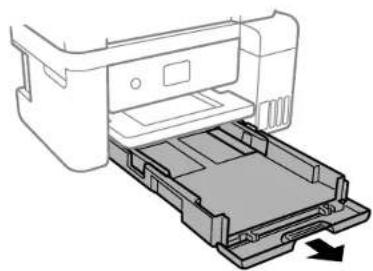
natural_image
Diagram of a printer with an open tray and arrow indicating compression or disassembly (no text or symbols present)3.Slidetheedgeguidesoutward.
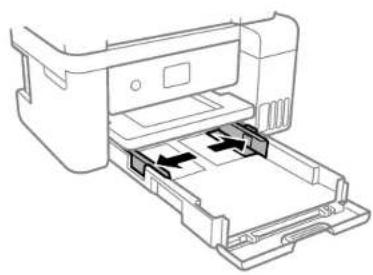
natural_image
Line drawing of a printer with internal components and arrows indicating flow or movement (no text or symbols)4.Dooneofthefollowing:
- Insertpaperintothecassettewiththeglossyorprintablesidefacedownandslideitinuntil stops.
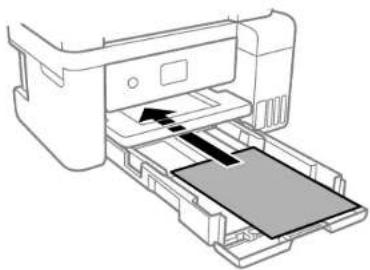
natural_image
Diagram of a printer printer with an arrow indicating the printing process (no text or symbols present)Note: Makesurethepaperisloadedagainsttherearofthecassette.
- Forlegal-sizepaper, extend the legal paper guide and load paper using the guideline as shown.

text_image
Diagram illustrating printer operation steps: adding a card to a device, then adding a cable to a device.- Insertupto10envelopeswiththeprintablesidefacedownandflapedgeleft,asshown.
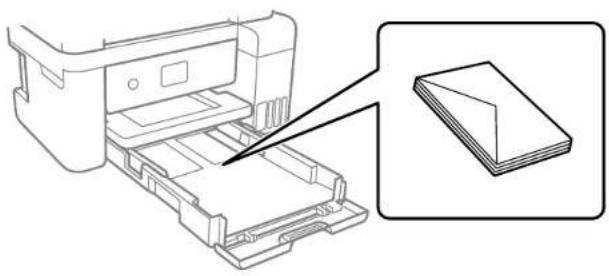
natural_image
Line drawing of a printer with a stack of papers inserted into the cover (no text or symbols)- Loadasheetofloose-leaforotherpaperwithholesasshown.
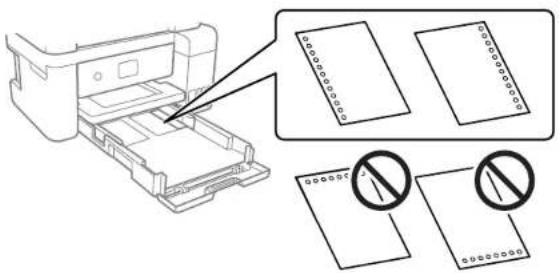
text_image
Diagram showing printer setup with paper sheets and warning symbols, including a magnified view of the paper's edge.Note: Donotselectautomatic2-sidedprintingforthistypeofpaperanddonotprintoverthe holes.
5.Slidetheedgeguidesagainstthepaper,butnottootightly.
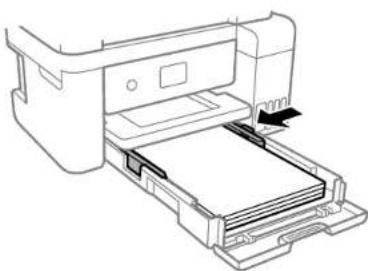
natural_image
Line drawing of a printer with paper feed and printer slot (no text or symbols)Note: Makesurethepaperfitsunderthetabsontheedgeguides.
6.Slidethecassettebackintotheproductuntilitsopsandclosethefrontcover.
7. Selectthesize and type of the papery you loaded on the product LCD screen and select OK.
8. Extend the output tray.
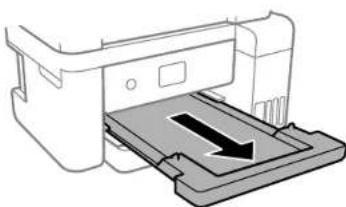
natural_image
Diagram of a printer with a paper feed into the cover, showing internal structure and an arrow indicating direction (no text or symbols present)Note: Donotremoveorinsertthepapercassetteduringprinting.
Alwaysfollowthesepaperloadingguidelines:
- Loadonlytherecommendednumberofsheets.
- Loadpapersshortedgefirststandprintablesidefacedown.
- Makesurethepaperisunderthetabsontheedgeguidesandnotstickingoutfromtherearendof thecassette.
- If you have trouble loading a stack of envelopes, press each envelope flat before loading its load one envelope at time.
- Ifprintqualitydeclineswhenprintingmultipleenvelopes,tryloadingoneenvelopeatatime.
- Loadletterheaderpre-printedpapertopedgefirst.
- Checkthepaperpackageforanyadditionalalloadinginstructions.
Parenttopic: LoadingPaper
Relatedreferences
PaperLoadingCapacity
PaperLoadingCapacity
Seethetableherefortheloadingcapacityofthepapercassettes.
| PapertypeLoadingcapacity | |
| PlainpaperCopypaper | Letter(8.5×11inches[216×279mm])orA4(8.3×11.7inches[210×297mm])sizeorsmaller: 250sheets |
| Legal(8.5×14inches[216×356mm])orFolio(8.5×13inches[216×330mm])size:1sheet | |
| EpsonBrightWhitePaper200sheets | |
| EpsonPresentationPaperMatte100sheets | |
| EpsonPremiumPresentationPaperMatteEpsonPhotoPaperGlossyEpsonPremiumPhotoPaperGlossyEpsonUltraPremiumPhotoPaperGlossyEpsonPremiumPhotoPaperSemi-gloss | 20sheetsIfpaperfeedsincorrectly,orprintingisunevenorsmeared,load1sheetatatime. |
| EpsonPremiumPresentationPaperMatte Double-sided | 1sheet |
| Envelopes10envelopes |
Parenttopic: LoadingPaper
Double-sidedPrintingCapacity
Youcanprintdouble-sidedusingAutoorManualmodeonthepapertypesandsizeslistedhere.
| PapertypeSizeDouble-sidedprintingcapacity | ||
| AutoManual | ||
| PlainpaperCopierpaper | Letter(8.5×11inches[216×279mm])orA4(8.3×11.7inches[210×297mm])orsmaller | 200sheets30sheets |
| Legal(8.5×14inches[216×356mm]) | —1sheet | |
| EpsonBrightWhite Paper | Letter(8.5×11inches[216×279mm]) | 200sheets30sheets |
| EpsonPremium PresentationPaper MatteDouble-sided | Letter(8.5×11inches[216×279mm]) | —1sheet |
You cannot print double-sided on the following papertypes:
•EpsonPresentationPaperMatte
•EpsonPhotoPaperGlossy
•EpsonPremiumPhotoPaperGlossy
•EpsonPremiumPhotoPaperSemi-gloss
•EpsonUltraPremiumPhotoPaperGlossy
•EpsonPremiumPresentationPaperMatte
•Envelopes
Parenttopic: LoadingPaper
AvailableEpsonPapers
YoucanpurchasegenuineEpsonink,maintenanceboxes,andpaperatepson.com(U.S.sales)orepson.ca (Canadian sales). You can also purchase supplies from an Epson authorized reseller. To find thenearestone,call800-GO-EPSON(800-463-7766)intheU.S.or800-807-7766inCanada.
| PaperTypeSizePartnumberSheetcount | |||
| EpsonBrightWhitePaperLetter(8.5×11inches[216×279mm]) | S041586500 | ||
| EpsonPresentationPaperMatteLetter(8.5×11inches[216×279mm]) | S041062100 | ||
| Legal(8.5×14inches[216×356mm]) | S041067100 | ||
| EpsonPremiumPresentationPaperMatte | 8×10inches(203×254mm)S04146750 | ||
| Letter(8.5×11inches[216×279mm]) | S041257S042180 | 50100 | |
| EpsonPremiumPresentationPaperMatteDouble-sided | Letter(8.5×11inches[216×279mm]) | S04158650 | |
| EpsonPhotoPaperGlossy4×6inches(102×152mm)S041809 | S042038 | 50100 | |
| EpsonPremiumPhotoPaper Glossy | 4×6inches(102×152mm)S041808 | S041727 | 40100 |
| 16:9wide(4×7.1inches[102×181mm]) | S04210920 | ||
| 5×7inches(127×178mm)S04146420 | |||
| 8×10inches(203×254mm)S04146520 | |||
| Letter(8.5×11inches[216×279mm]) | S042183S041667 | 2550 | |
| EpsonUltraPremiumPhotoPaper Glossy | 4×6inches(102×152mm)S042181 | S042174 | 60100 |
| 5×7inches(127×178mm)S04194520 | |||
| 8×10inches(203×254mm)S04194620 | |||
| Letter(8.5×11inches[216×279mm]) | S042182S042175 | 2550 | |
| EpsonPremiumPhotoPaper Semi-gloss | 4×6inches(102×152mm)S04198240 | ||
| Letter(8.5×11inches[216×279mm]) | S04133120 | ||
Parenttopic: LoadingPaper
BorderlessPaperTypeCompatibility
Youcanprintborderlessphotosoncompatiblepapertypesincompatiblesizes:
BorderlessPaperTypes
•EpsonBrightWhitePaper
•EpsonPhotoPaperGlossy
•EpsonPremiumPhotoPaperGlossy
•EpsonUltraPremiumPhotoPaperGlossy
•EpsonPremiumPhotoPaperSemi-gloss
•EpsonPremiumPresentationPaperMatte
- EpsonPremiumPresentationPaperMatteDouble-sided
BorderlessPaperSizes
•4×6inches(102×152mm)
- 5×7inches(127×178mm)
•16:9wide(4×7.1inches[102×181mm])
•A4(8.3×11.7inches[210×297mm])
•Letter(8.5×11inches[216×279mm])
Parenttopic: LoadingPaper
PaperorMediaTypeSettings-PrintingSoftware
| ForthispaperSelectthispaperTypeorMediaTypesetting | |
| PlainpaperEpsonBrightWhitePaper | PlainPaper/BrightWhitePaper |
| EnvelopesEnvelope | |
| EpsonUltraPremiumPhotoPaperGlossyUltraPremium | mPhotoPaperGlossy |
| EpsonPremiumPhotoPaperGlossyPremiumPhotoPaperGlossy | |
| EpsonPhotoPaperGlossyPhotoPaperGlossy | |
| EpsonPremiumPhotoPaperSemi-glossPremiumPhotoPaperSemi-Gloss | |
| EpsonPresentationPaperMatteEpsonPremiumPresentationPaperMatteEpsonPremiumPresentationPaperMatteDouble-sided | PremiumPresentationPaperMatte |
Note: The settings listed here are available only when printing from your computer; they do not apply to your product's control panel settings.
Parenttopic: LoadingPaper
SelectingthePaperSettings-ControlPanel
You can change the default paper size and paper type to foreach source using the control panel on the product.
-
Pressthehomebutton, if necessary.
-
Select Settings > General Settings > Printer Settings > Paper Source Settings > Paper Setting. Youseeascreenlikethis:
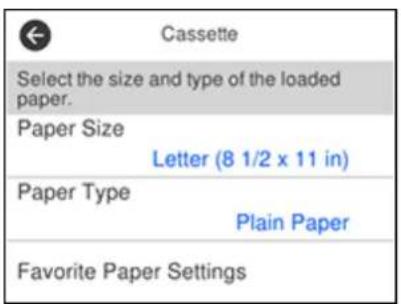
text_image
Cassette Select the size and type of the loaded paper. Paper Size Letter (8 1/2 x 11 in) Paper Type Plain Paper Favorite Paper Settings- SelectPaperSize.
- Select the papers size you loaded.
- SelectPaperType.
- Select the papertype you loaded.
- SelectFavoritePaperSettingstochoosefromalistofcommonlyusedpapersettings.
8.Selecttoexit.
PaperTypeSettings-ControlPanel
Parenttopic:LoadingPaper
PaperTypeSettings-ControlPanel
SelectaPaperTypesettingthatmatchsthepaperyouloaded.
| PapertypeloadedPaperTypesetting | |
| PlainpaperEpsonBrightWhitePaper | PlainPaper |
| EnvelopesEnvelope | |
| EpsonUltraPremiumPhotoPaperGlossyUltraGlossy | |
| EpsonPremiumPhotoPaperGlossyPrem.Glossy | |
| EpsonPhotoPaperGlossyGlossy | |
| EpsonPremiumPhotoPaperSemi-glossPrem.Semi-Gloss | |
| EpsonPresentationPaperMatteEpsonPremiumPresentationPaperMatteEpsonPremiumPresentationPaperMatteDouble-sided | Prem.Matte |
Parenttopic: SelectingthePaperSettings-ControlPanel
SelectingtheDefaultPaperSourceSettings
You can change default papers or source settings using the control panel on the product.
-
Pressthehomebutton, if necessary.
-
Select Settings > General Settings > Printer Settings.
Youseeascreenlikethis:
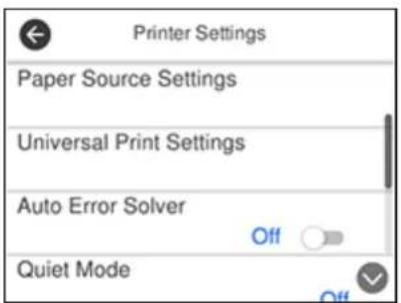
text_image
Printer Settings Paper Source Settings Universal Print Settings Auto Error Solver Off Quiet Mode-
SelectoneoftheseAutoErrorResolveroptions:
-
Turnonthissettingtodisplayawarningandprintsingle-sidedwhena2-sidedprintingerror occurs, ortoprintonlywhattheprintercouldprocesswhenamemoryfullerroroccurs.
-
Turnoffthissettingtodisplayanerrormessageandstopprintingifanerroroccurs.
-
SelectthePaperSourceSettingsoptionsyouwanttouse.
-
When you are finished, pressthehomebuttontoexit.
PaperSourceSettingsOptions
Parenttopic:LoadingPaper
PaperSourceSettingsOptions
Select the papersourceoptions you want to use for your print jobs.
| PaperSource Settingsoption | AvailablesettingsDescription | |
| PaperSettingVarious | Selectthepapersizeandtypeforeachpapersource | |
| A4/LetterAuto Switching | OnSelectOntoswitchtheselectedpapersizetomatchtheloadpaper(LetterorA4)ifthewrongsizeisselected | |
| Off | ||
| Error Notice | Paper Size Notice | Select On for either of these settings to display an error messagewhentheselectedpapertypeorsizedoesnot matchtheloadedpaper |
| PaperTypeNotice | ||
| PaperSetup AutoDisplay | OnSelectOntoautomaticallydisplayamenuthatletsyouselectthepapersizeandtypewhenyouloadpaperinthe product | |
| Off | ||
Parenttopic: SelectingtheDefaultPaperSourceSettings
SelectingtheUniversalPrintSettings
Youcanchangethedefaultuniversalprintsettingsusingthecontrolpanelontheproduct.
- Pressthehomebutton, if necessary.
- Select Settings > General Settings > Printer Settings > Universal Print Settings.
Youseethisscreen:
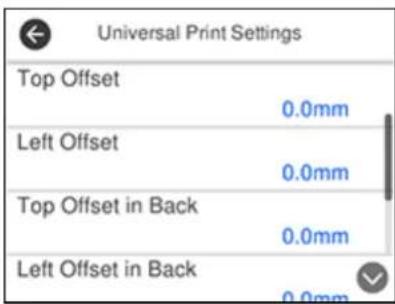
text_image
Universal Print Settings Top Offset 0.0mm Left Offset 0.0mm Top Offset in Back 0.0mm Left Offset in Back 0.0mm- Adjust the settings as necessary.
- When you are finished, pressthehomebuttontoexit.
UniversalPrintSettingsOptions
Parenttopic:LoadingPaper
UniversalPrintSettingsOptions
Selecttheuniversalprintsettingoptionsyouwanttouseforyourprintjobs.
| UniversalPrint Settingsoption | AvailablesettingsDescription | |
| TopOffset—Adjust | thetoporleftmargin | |
| LeftOffset | ||
| TopOffsetIn Back | —Adjustthetoporleftm | arginofthebackpagewhenprinting double-sided. |
| LeftOffsetin Back | ||
| CheckPaper Width | OnSelectOntocheckthe paperwidthbeforeprinting. This preventsprintingbeyondtheedgesofthepaperwhenthe papersizesettingsareincorrect,butmayreducethe printingspeed. | |
| Off | ||
| Skip Blank Page | On | Select On to skip printing of blank pages automatically |
| Off | ||
Parenttopic: SelectingtheUniversalPrintSettings
PlacingOriginalsontheProduct
Followtheinstructionsheretoplaceyouroriginaldocumentsorphotosontheproduct.
Caution: Do not place anything on top of your product or use its cover as a writing surface to avoid damagingit.
PlacingOriginalsontheScannerGlass
PlacingOriginalsintheAutomaticDocumentFeeder
ADFOriginalDocumentSpecifications
PlacingOriginalsontheScannerGlass
Youcanplaceoriginalsuptothissizeonthescannerglass:Letter(8.5×11inches[216×279mm])or A4(8.3×11.7inches[210×297mm]).
Note: When originals are placed in the ADF and on the scanner glass, priority is given to the originals in theADF.
- Openthedocumentcover.
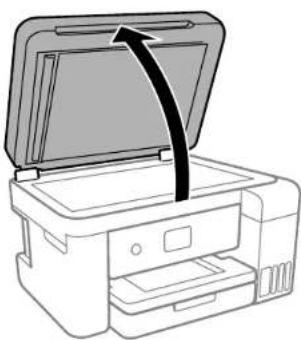
natural_image
Line drawing of a printer with an open lid and arrow indicating compression or shift (no text or symbols)- Place your original facedownonthescannerglass with the top facing into the corner. Slide the original to the edges of the indicated corner.
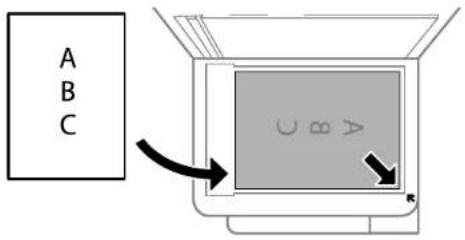
text_image
A B C C B ANote: The edges of your original may be cropped by 0.06 inch (1.5 mm) from the edge of the scanner glass. Manually position your original away from the edge to prevent cropping.
- Closethedocumentcovergentlytokeepyouroriginalinplace.
Caution: Donotpushdownonthedocumentcoverorscannerglassoryoumaydamagethe product.
Parenttopic: PlacingOriginalsontheProduct
Relatedtopics
Copying
Scanning
Faxing
PlacingOriginalsintheAutomaticDocumentFeeder
Youcanplacesingle-ormulti-pageoriginaldocumentsintheAutomaticDocumentFeeder(ADF).Make suretheoriginalsmeettheAutomaticDocumentFeederspecificationsbeforeloadingthem.
Caution: Make sure your originals are not creased or folded, and do not contain holes, staples, tape, or other material that could obstruct the feeder.
Caution: Do not place photographs or valuable artwork in the ADF. Place fragile or valuable originals on thescannerglasstoavoidwrinklingordamagingthem.
- OpentheADFpapersupportandslideouttheADFoutputtrayextension.
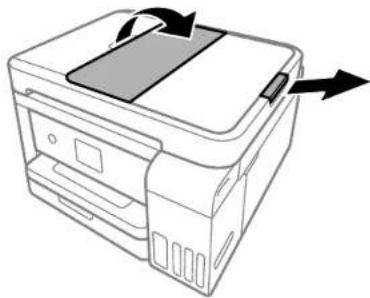
natural_image
Line drawing of a printer with arrows indicating print direction (no text or symbols)2.SlidetheADFedgeguideoutward.
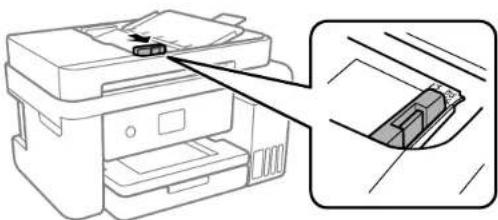
natural_image
Line drawing of a printer with a close-up view showing the internal structure (no text or symbols)- Fanyourstackoforiginalsandtapthemgentlyonaflatsurfacetoeventheedges.
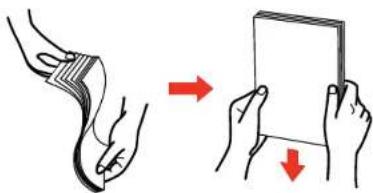
text_image
Diagram illustrating hand positioning and movement of a device, showing left-hand rule and right-hand rule with red arrows indicating direction.- InserttheoriginalsintotheADFfaceupandtop-edgefirst.
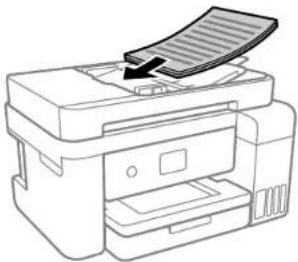
natural_image
Line drawing of a printer with a paper sheet being inserted (no text or symbols)TheADFiconontheCopying, Scanning, and Faxingscreenslightsup.
5.SlidetheADFedgeguideagainsttheoriginals,butnottootightly.
Note: If you are copying two originals onto one sheet, make sure the originals are loaded as shown:
Parenttopic: PlacingOriginalsontheProduct
Relatedtopics
Copying
Scanning
Faxing
ADFOriginalDocumentSpecifications
YoucanloadoriginaldocumentsthatmeetthesespecificationsintheADF.
| PapertypePapersizeP | paperweightLoadingcapacity | ||
| PlainpaperLetter(8.5×1 | 1inches[216×279mm]) | 17to24lb(64to95g/m2) | Approximately30sheets |
| A4(8.3×11.7inches[210×297mm]) | |||
| Legal(8.5×14inches[216×356mm]) | 10sheets | ||
| 8.5×13inches(216×330mm)size |
Caution: Donotload the following types of originals in the ADF, or they may be damaged by damage to the damage of the damage of the damage. Use the scannenglass for these types of originals:
•Photos
•Thermalpaper
•Fabricothernon-paperoriginals
•Originalswithunevensurfaces,suchasembosseddocuments
•Originalscontainingstaplesorpaperclips
•Originalswithcarbonpaperbacking
•Originalswithwetink
•Originalsthatarebound
•Originalswithlabels,stickers,orstickynotes
•Ripped,curled,folded,deteriorated,orwrinkledoriginals
•Originalswithholes
•Transparencies
•Carbon-lesspaper
•Originalsthatarecutinanirregularshapeorwithcornersthatarenotrightangles
Parenttopic: PlacingOriginalsontheProduct
Copying
Seetheinformationheretocopydocumentsorphotosusingyourproduct.
Note: Copies may not be exactly the same size as your originals.
CopyingDocumentorPhotos
CopyingOptions
CopyingDocumentorPhotos
Youcancopydocumentsorphotosontovarioussizesandtypesofpaper,includingEpsonspecial papers.
- Placeyouroriginaldocumentorphotoonthescannerglass, orplacemulti-pagedocumentsinthe ADF.
- Loadthepaperyouwanttoprinton.
3.Pressthehomebutton,ifnecessary. - SelectCopy.
Youseeascreenlikethis:
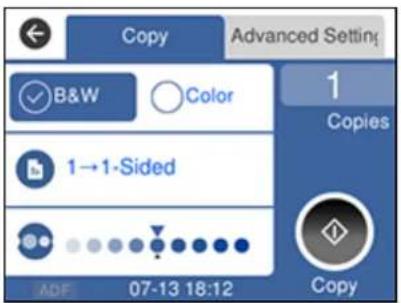
text_image
Copy Advanced Setting B&W Color 1 Copies 1→1-Sided ADF 07-13 18:12 Copy-
To print more than one copy, select Copies and use the displayed keypad to enter the number of copies.
-
Changeanyofthedisplayedsettingsasnecessary.
- SelectAdvancedSettingstoviewandchangeadditionalcopysettings, if necessary.
- SelectPreviewtopreviewyourcopyontheLCDscreen.
- When you are ready to copy, select the Copy icon.
Note: Tocancelprinting, selectCancel.
Parenttopic: Copying
Relatedreferences
PaperLoadingCapacity
Double-sidedPrintingCapacity
AvailableEpsonPapers
Relatedtasks
LoadingPaperintheCassette
Relatedtopics
PlacingOriginalsontheProduct
CopyingOptions
Selectthecopyingoptionsyouwanttouseforyourcopies.
Note: Notalloptionsorsettingsmaybeavailable,dependingonothercopyingsettings.
Copy
| CopyingoptionAv | allablesettingsDescription | |
| B&W—Copiesthed | documentinblackandwhite | |
| Color—Copiesthed | documentincolor | |
| 2-Sided | 1>1-Sided | Select to make 2-sided copies. When you select 1>2-Sided,alsoselecttheAdvancedSettingstabtoselecttheorientationandbindingedgeforyouroriginalsorcopies. |
| 1>2-Sided | ||
| DensityselectorVaryinglevelsAdjuststhelightnessordarknessofcopies | ||
AdvancedSettings
| CopyingoptionAv | availablesettingsDescription | option |
| PaperSettingVari | ussettingsSelectsthep | apersizeandpapertype |
| Reduce/Enlarge10 | 0%/ActualSizeCopies | theoriginalatitsfullsize |
| AutoFitPageAutomatic | callysizestheimagetofitthepapersizeyou selected | |
| 45%->195%and otherconversions | Automaticallyconvertsfromonesizetoanother | |
| OriginalSizeVariou | ssizesSelectthedocum | entsizeofyouroriginal |
| Multi-PageSingle | PageCopieseachpageof | theoriginalontoanindividualsheet |
| 2-upCopiesmoleculepag | gedocumentsontoonesheet.Scrolldownandselectthedocumentorientationandlayoutorder settingsasnecessary. | |
| 4-up | ||
| QualityStandardA | adjuststhequalityofyour | copies |
| Best | ||
| Original Orientation | UpDirectionSpecifies | theorientationofyouroriginals |
| LeftDirection | ||
| Remove Shadow | Off | Select On to erase the shadows that appear in the center of adocumentwhencopyingabookorthatappeararounda documentwhencopyingthickpaper |
| On | ||
| RemovePunch Holes | Off | Select On to erase the binding holes on a document |
| On | ||
| ID Card Copy | Off | Select On to copy both sides of an ID card onto one side of asheetofpaper |
| On | ||
| Borderless Copy | Off | Adjusts the amount to expand the original photo when printingborderlessphotos |
| On | ||
| Standard | ||
| Medium | ||
| Minimum |
Parenttopic: Copying
PrintingfromaComputer
Beforeprintingfromyourcomputer, makesureyouhavesetupyourproductandinstalleditssoftware asdescribedontheStartHeresheet.
Note: If you have an Internet connection, it is a good idea to check for updates to your product software on Epson's support website. If you see a Software Update screen, select Enable automatic checking and click OK. The update scans your system to see if you have the latest product software. Follow the on-screen instructions.
PrintingwithWindows
PrintingwiththeBuilt-inEpsonDriver-Windows10S
PrintingonaMac
PrintingFromaChromebook
CancellingPrintingUsingtheProduct
PrintingwithWindows
YoucanprintwithyourproductusinganyWindowsapplication,asdescribedinthesesections.
Note: If you are using your Epson product with the Windows 10 S operating system, you cannot use the softwares described in this section. You also cannot download and install any Epson product software from the Epson website for use with Windows 10S; you must obtain software only from the Windows Store.
SelectingBasicPrintSettings-Windows
SelectingDouble-sidedPrintingSettings-Windows
SelectingAdditionalLayoutandPrintOptions-Windows
SelectingaPrintingPreset-Windows
SelectingExtendedSettings-Windows
PrintingYourDocumentorPhoto-Windows
LockingPrinterSettings-Windows
SelectingDefaultPrintSettings-Windows
ChangingAutomaticUpdateOptions
Parenttopic: PrintingfromaComputer
SelectingBasicPrintSettings-Windows
Selectthebasicsettingsforthedocumentorphotoyouwanttoprint.
- Openaphotoordocumentforprinting.
- Selecttheprintcommandinyourapplication.
Note: You may need to select a print icon on your screen, the Print option in the File menu, or another command. See your application's help utility for details.
- If necessary, select your product name as the printery you want to use.
Note: You may also need to select Properties or Preferences to view your print settings.
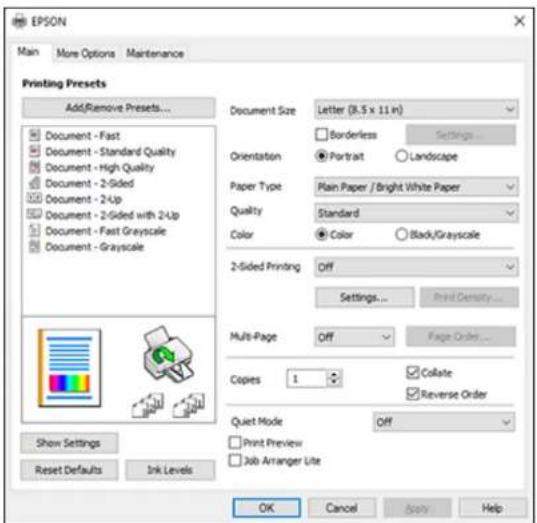
YouseetheMaintabofyourprintertsettingswindow:
text_image
EPSON Main More Options Maintenance Printing Presets Add/Remove Presets... Document - Fast Document - Standard Quality Document - High Quality Document - 2-Sided Document - 2-Up Document - 2-Sided with 2-Up Document - Fast Grayscale Document - Grayscale Document Size Letter (8.5 x 11 in) Borderless Settings... Orientation Portrait Landscape Paper Type Plain Paper / Bright White Paper Quality Standard Color Color Black/Grayscale 2-Sided Printing Off Settings... Print Density... Multi-Page Off Page Order... Copies 1 Collate Reverse Order Quiet Mode Off Print Preview Job Arranger Lite Show Settings Reset Defaults Ink Levels OK Cancel Apply Help- SelectthesizeofthepaperyouloadedastheDocumentSizesetting.
Note: You can also select the User-Defined setting to create a custom paper size, but you cannot use the Borderless setting and the Quality setting will be set to Standard.
- If you are printing a borderless photo, select Borderless. You can click Settings to access additional options for borderless printing.
Note: You must select a compatible borderless paper type and size to print without borders. Check theborderlesspapercompatibilitylistfordetails.
- Select the orientation of your document.
Note: If you are printing an envelope, select Landscape.
- SelectthetypeofpaperyouloadedasthePaperTypesetting.
Note: The setting may not exactly match the name of your paper. Check the paper type settings list for details.
-
Select the Quality setting that match the print quality you want to use.
-
SelectaColoroption:
-
Toprintacolordocumentorphoto,selecttheColorsetting.
-
Toprinttextandgraphicsinblackorshadesofgray,selecttheBlack/Grayscalesetting.
-
To print on both sides of the paper, select the 2-Sided Printing setting and select the options you want.
- Toprintmultiplepagesononesheetofpaper, or printoneimageonmultiplesheetsofpaper, select oneofthesettingsintheMulti-Pagemenuandselecttheprintingoptionsyouwant.
- Toprintmultiplecopiesandarrangetheirprintorder,selecttheCopiesoptions.
- Topreview your job before printing, select PrintPreview.
-
Tosaveyourprintjobasaprojectthatcanbemodifiedandcombinedwithotherprintjobs,select JobArrangerLite.
-
To reduce noise during printing when you select Plain Paper/Bright White Paper, select On in the QuietModemenu.
Note: Enabling Quiet Modemay reduce printingspeed.
PrintQualityOptions-Windows
Multi-PagePrintingOptions-Windows
Parenttopic: PrintingwithWindows
Relatedreferences
PaperorMediaTypeSettings-PrintingSoftware
Relatedtasks
SelectingDouble-sidedPrintingSettings-Windows
PrintQualityOptions-Windows
YoucanselectanyoftheavailableQualityoptionstofine-tunethequalityofyourprint.Somesettings maybeunavailable,dependingonthepapertypeandbordersettingyouhavechosen.
Draft
Fordraftprintingonplainpaper.
Standard
Foreverydaytextandimageprinting.
Standard-Vivid
Fortextandgraphicswithgoodqualityandprintspeed.
High
Forphotosandgraphicswithhighprintquality.
MoreSettings
Opensawindowthatletsyouchooseamonglevelsofspeedandquality.
Parenttopic: SelectingBasicPrintSettings-Windows
Multi-PagePrintingOptions-Windows
YoucanselectanyoftheavailableoptionsintheMulti-Pagemenutosetupyourmulti-pageprintjob.
2-Upand4-Up
Prints 2 or 4 pages on one sheet of paper. Click the Page Order button to select page layout and borderoptions.
2×1Poster,2×2Poster,3×3Poster,4×4Poster
Prints one image on multiple sheets of paper to create a larger poster. Click the Settings button to selectimagelayoutandguidelineoptions.
Parenttopic: SelectingBasicPrintSettings-Windows
SelectingDouble-sidedPrintingSettings-Windows
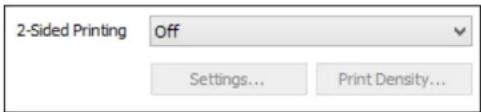
You can print on both sides of the paper by selecting one of the 2-Sided Printing options on the Main tab.
Note: Some options may be pre-selected or unavailable, depending on other settings you have chosen orifyouareaccessingtheproductoveranetwork.
text_image
2-Sided Printing Off Settings... Print Density...1. Selectoneofthefollowingoptionsfor2-SidedPrinting:
- Auto (Long-edge binding) to print your double-sided print job by automatically flipping the paper onthelongedge.
- Auto (Short-edge binding) to print your double-sided print job by automatically flipping the paper ontheshortedge.
- Manual(Long-edgebinding)toprintyourdouble-sidedprintjobbyprintingonesideand promptingyoutoflipthepaperoveronthelongedgetoprinttheotherside(recommendedfor papertypesthatdonotsupportautomaticduplexing).
- Manual(Short-edgebinding)toprintyourdouble-sidedprintjobbyprintingonesideand promptingyoutoflipthepaperoverontheshortedgetoprinttheotherside(recommendedfor papertypesthatdonotsupportautomaticduplexing).
2. ClicktheSettingsbutton.
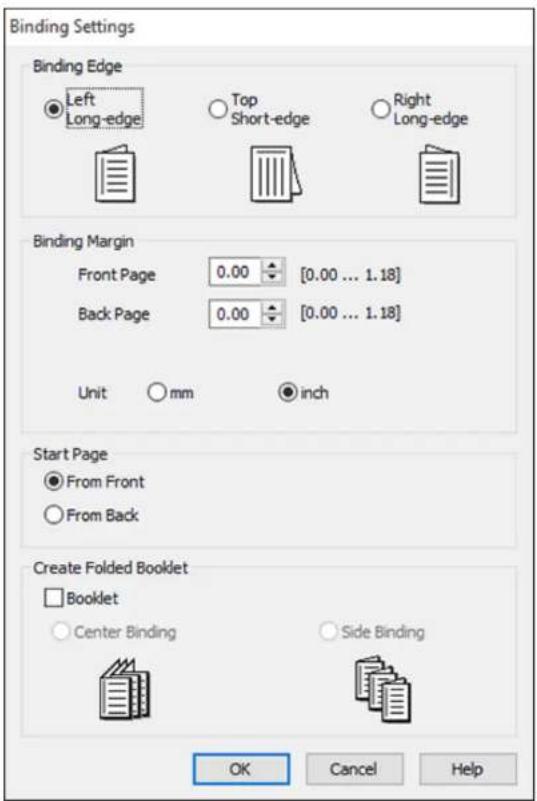
Youseethiswindow:
text_image
Binding Settings Binding Edge Left Long-edge Top Short-edge Right Long-edge Binding Margin Front Page 0.00 [0.00 ... 1.18] Back Page 0.00 [0.00 ... 1.18] Unit mm inch Start Page From Front From Back Create Folded Booklet Booklet Center Binding Side Binding OK Cancel Help-
Select the double-sided printing options you want to use.
4.ClickOKtoreturntotheMaintab. -
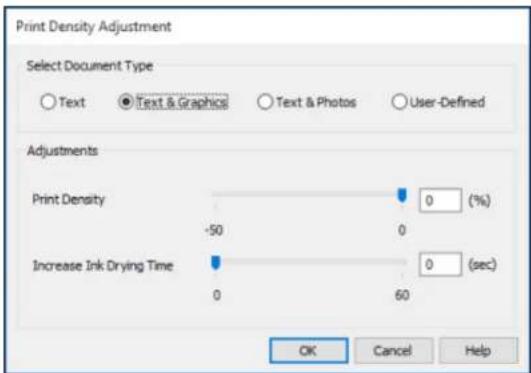
ClickthePrintDensitybutton.
Youseethiswindow:
text_image
Print Density Adjustment Select Document Type ○ Text ○ Text & Graphics ○ Text & Photos ○ User-Defined Adjustments Print Density 0 (%) -50 0 Increase Ink Drying Time 0 60 0 (sec) OK Cancel Help-
Select the type of document you are printing as the Document Types setting. Thesoftware automatically sets the Adjustment options for that document type.
-
If necessary, select the Adjustment options you want to use.
8.ClickOKtoreturntotheMaintab.
9.Printatestcopyofyourdouble-sideddocumenttotesttheselectedsettings.
- Followanyinstructionsdisplayonthescreenduringprinting.
Double-sidedPrintingOptions-Windows
PrintDensityAdjustments-Windows
Parenttopic: PrintingwithWindows
Relatedtasks
SelectingBasicPrintSettings-Windows
Double-sidedPrintingOptions-Windows
Youcanselectanyoftheavailableoptionsonthe2-SidedPrintingSettingswindowtosetupyour double-sidedprintjob.
BindingEdgeOptions
Selectasettingthatorientsdouble-sidedprintbindinginthedesireddirection.
BindingMarginOptions
Selections that define awidermarg into allow for binding.
StartPage
Selectswhetherprintingstartsonthefrontorbackpage.
CreateFoldedBookletOptions
SelecttheBookletcheckboxandabindingoptiontoprintdouble-sidedpagesasabooklet.
Parenttopic: SelectingDouble-sidedPrintingSettings-Windows
PrintDensityAdjustments-Windows
YoucanselectanyoftheavailableoptionsonthePrintDensityAdjustmentwindowtoadjusttheprintqualityofyourdouble-sidedprintjob.
PrintDensity
Setsthelevelofinkcoveragefordouble-sidedprinting.
IncreaseInkDryingTime
Setstheamountoftimerequiredfordryinginkafterprintingononesideofthepaperbeforeprinting theothersideindouble-sidedprintingtopreventinksmearing.
Parenttopic: SelectingDouble-sidedPrintingSettings-Windows
SelectingAdditionalLayoutandPrintOptions-Windows
YoucanselectvarietyofadditionallayoutandprintingoptionsforyourdocumentorphotoontheMore Optionstab.
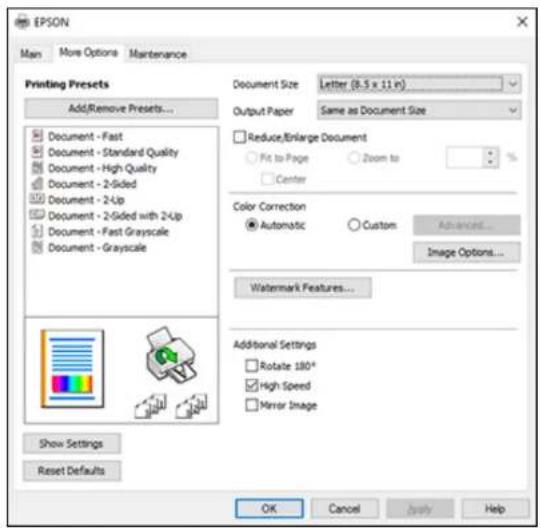
text_image
EPSON Main More Options Maintenance Printing Presets Add/Remove Presets... Document - Fast Document - Standard Quality Document - High Quality Document - 2-Sided Document - 2-Up Document - 2-Sided with 2-Up Document - Fast Grayscale Document - Grayscale Show Settings Reset Defaults Document Size Letter (8.5 x 11 in) Output Paper Same as Document Size Reduce/Enlarge Document Fit to Page Zoom to Center Color Correction Automatic Custom Advanced... Image Options... Watermark Features... Additional Settings Rotate 180° High Speed Mirror Image OK Cancel Apply Help-
Tochangethesizeofyourprinteddocumentorphoto,selecttheReduce/EnlargeDocument checkboxandselectoneofthesesizingoptions:
-
Select the Fit to Page option to size your image to fit the paper you loaded. Select the size of your document or photo as the Document Size setting, and the size of your paper as the Output Paper setting. If you want to center your image on the paper, select the Center option.
-
Select the Zoom to option to reduce or enlarge your document or photo by a specific percentage. Selectthepercentageinthe%menu.
-
SelectoneofthefollowingColorCorrectionoptions:
- Select Automatic to automatically adjust the sharpness, brightness, contrast, and color saturation for your image.
- Select Custom and click the Advanced button to manually adjust the color correction settings or turnoffcolormanagementinyourprintersoftware.
-
SelectImageOptionstoaccessadditionalsettingsforimprovingprintedimages.
Note: You can also select Color Universal Print settings. -
To add the following features, click the Watermark Features button:
-
Anti-CopyPattern:addsawatermarkthatonlyappearswhenyourprintoutiscopied
•Watermark:addsvisiblewatermarktoyourprintout - Header/Footer: adds information such as the date and time to the top or bottom of your printout
Note: Click the Settings button to customize the text and location of the header or footer.
- SelectanyoftheAdditionalSettingsoptionstocustomizeyourprint.
CustomColorCorrectionOptions-Windows
ImageOptionsandAdditionalSettings-Windows
Header/FooterSettings-Windows
Parenttopic: PrintingwithWindows
CustomColorCorrectionOptions-Windows
YoucanselectanyoftheavailableoptionsintheColorCorrectionwindowtocustomizetheimagecolors foryourprintjob.

text_image
Color Correction Color Management ● Color Controls ○ Fix Photo ○ IOM ○ No Color Adjustment Color Mode EPSON Vivid Color Adjustment Method ● Color Circle ○ Slide Bar Reset Controls Brightness 0 + Contrast 0 + Saturation 0 + Density 0 +ColorControls
Lets you select a Color Mode setting, individual settings for Brightness, Contrast, Saturation, and Density, and individual color tones. Depending on the selected color mode, you can also adjust the midtonedensityusingtheGammasetting.
FixPhoto
Improvesthecolor, contrast, and sharpnessofflawedphotos.
Note: Fix Photo uses a sophisticated face recognition technology to optimize photos that include faces. Forthistowork, botheyesandthenosemustbevisibleinthesubject'sface. If your photo includes a face with an intentional color cast, such as a statue, you may want to turn off Fix Photo to retain the special colore effects.
ICM
Letsyoumanagecolorusinginstalledcolorprintingprofiles.
NoColorAdjustment
Turnsoffcolormanagementinyourprintersoftwaresoyoucanmanagecolorusingonlyyour applicationsoftware.
Parenttopic: SelectingAdditionalLayoutandPrintOptions-Windows
ImageOptionsandAdditionalSettings-Windows
YoucanselectanyoftheImageOptionsandAdditionalSettingstocustomizeyourprint.Someoptions maybepre-selectedorunavailable,dependingonothersettingsyouhavechosen.
ImageOptions
EmphasizeText
Adjuststheweightofprintedtexttoincreasereadability.
EmphasizeThinLines
Adjuststheweightofprintedlinestoincreasevisibility.
EdgeSmoothing
Smoothsjaggededgesinlow-resolutionimagessuchasscreencapturesorimagesfromtheWeb.
FixRed-Eye
Reducesorremovesred-eyeinphotos.
PrintTextinBlack
Printscoloredtextinblack.
ForColorText
Printscoloredtextonabackgroundpatternorunderlined.
ForColorGraphsandImages
Printscoloredgraphicsandimageswithoverlaypatterns.
ForColorText, Graphs, and Images
Printscoloredtext,graphics,andimageswithoverlaypatterns.
EnhancementOptions
SpecifiesColorUniversalPrintenhancementsettingsfortext,graphics,andimages.
AdditionalSettingsOptions
Rotate180°
Printstheimagerotated180°fromitsoriginalorientation.
HighSpeed
Speedsupprintingbutmayreduceprintquality.
MirrorImage
Flipstheprintedimagelefttoright.
Parenttopic: SelectingAdditionalLayoutandPrintOptions-Windows
Header/FooterSettings-Windows
YoucanselectanyoftheHeader/FooterSettingsoptionstoaddheadersorfooterswhenyouprint. The itemsareavailabletoprintatthetoporbottomofyourpages,ineithertheleft,right,orcenterofthe page.
Note: Thesesettingsarenotsavedwithyourdocument.
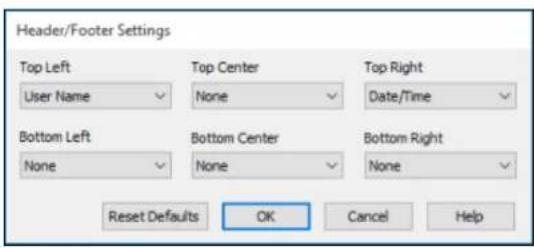
text_image
Header/Footer Settings Top Left User Name Top Center None Top Right Date/Time Bottom Left None Bottom Center None Bottom Right None Reset Defaults OK Cancel HelpYoucanselecttoprintthefollowinginformation:
-UserName
-ComputerName
- Date
- Date/Time
- DocumentName
•CollateNumber(copynumber)
Note: The username, computername, date, and time come from the Windows Control Panel on your computer.
Parenttopic: SelectingAdditionalLayoutandPrintOptions-Windows
SelectingaPrintingPreset-Windows
For quick access to common group of print settings, you can select a printing preset on the Main or More Option stab.
Note: You can create your own preset by clicking the Add/Remove Presets button.
1. ClicktheMainorMoreOptionstab.
YouseetheavailablePrintingPresetsontheleft:
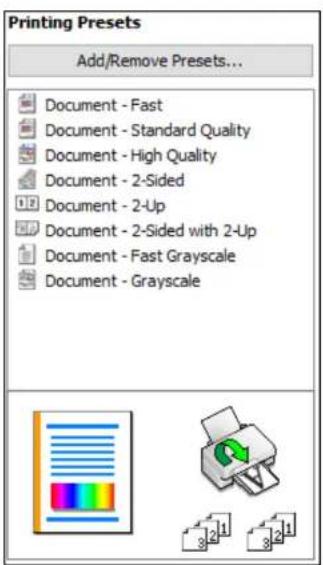
text_image
Printing Presets Add/Remove Presets... Document - Fast Document - Standard Quality Document - High Quality Document - 2-Sided Document - 2-Up Document - 2-Sided with 2-Up Document - Fast Grayscale Document - Grayscale-
Place your cursor over one of the Printing Preset to view its list of settings.
-
Clickonapresettochangeitssettings, or use any of the available options on the screento control your printing presets.
- To choose apreset for printing, select it.
5.ClickOK.
Parenttopic: PrintingwithWindows
SelectingExtendedSettings-Windows
Youcanselectadditionalsettingsthatapplytoalltheprintjobsyousendtoyourproduct.
- AccesstheWindowsDesktopandright-clicktheiconforyourproductintherightsideoftheWindowstaskbar,orclicktheuparrowandright-click.
- SelectPrinterSettings.
- ClicktheMaintenancetab.
Youseethemaintenanceoptions:
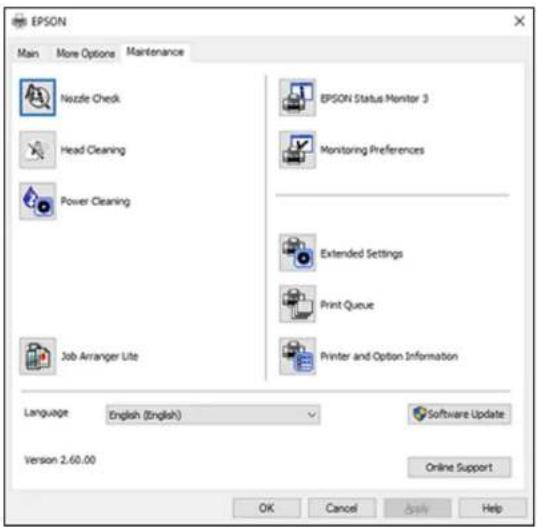
text_image
EPSON Main More Options Maintenance Nozzle Check Head Cleaning Power Cleaning Job Arranger Lite EPSON Status Monitor 3 Monitoring Preferences Extended Settings Print Queue Printer and Option Information Language English (English) Software Update Version 2.60.00 Online Support OK Cancel Apply Help4. ClicktheExtendedSettingsbutton.
Youseethiswindow:
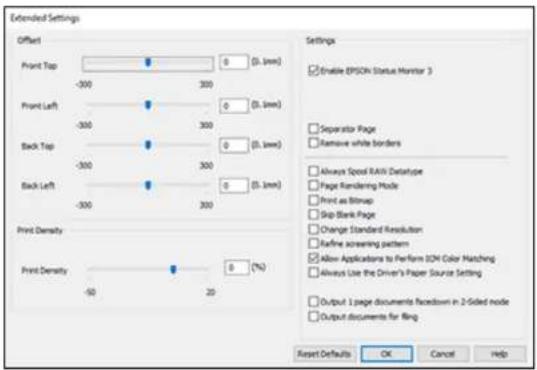
text_image
Extended Settings Offset Front Top 0 (5.0 mm) -300 300 Front Left 0 (5.0 mm) -300 300 Back Top 0 (5.0 mm) -300 300 Back Left 0 (5.0 mm) -300 300 Print Density 0 (%) Print Density -50 20 Settings Enable EP/SON Status Monitor 3 Separator Page Remove white borders Always Speed RAW Datatype Page Rendering Mode Print as Bitmap Skip Blank Page Change Standard Resolution Refine screening pattern Allow Applications to Perform ISO Color Matching Always Use the Driver's Paper Source Setting Output 1 page documents redoown in 2-Sided node Output documents for ring Reset Defaults OK Cancel Help- Selectanyoftheextendedsettingstocustomizeyourprint.
6.ClickOKtoclosetheExtendedSettingswindow. - Click OK to closet the printers software window.
ExtendedSettings-Windows
Parenttopic: PrintingwithWindows
ExtendedSettings-Windows
YoucanselectfromthesesettingsontheExtendedSettingswindow.
EnableEPSONStatusMonitor3
Enablesproductmonitoringforinkandpapersuppliesandotherissues.
SeparatorPage
Beforeeachdocument, printsaseparatorpagecontainingthetitle, user, date, and time.
Removewhiteborders
Removeswhitemarginsthatmayappearwhenyouprintborderlessphotos.
AlwaysSpoolRAWDatatype
Increasesprintspeedandmaysolveotherprintingproblems.
PageRenderingMode
Increasesprintspeedwhenprintingisextremelyslowortheprintheadstopsduringprinting.
PrintasBitmap
Increasesprintspeedwhenprintingisextremelyslowortheprintheadstopsduringprinting,and othersettingsdonothelp.
SkipBlankPage
Ensure that your product does not print pages that contain not text or images.
ChangeStandardResolution
Reducestheresolutionofprintdatatocorrectprintingproblems.
Refinescreeningpattern
Printsgraphicswithafinerscreeningpattern.
AllowApplicationstoPerformICMColorMatching
AllowsapplicationstoperformICMcolormatching.
AlwaysUsetheDriver'sPaperSourceSetting
Printsusingthepapersourcesettingintheprinterdriver, rather than the setting in your application.
Output1pagedocumentsfacedownin2-Sidedmode
Outputssingle-sidedpagesina2-sidedprintjobfacedowninsteadoffaceup.
Outputdocumentsforfiling
Outputsalllandscape,portrait,1-sided,and2-sideddocumentsinthesameorientationforeasier filing.
Parenttopic: SelectingExtendedSettings-Windows
PrintingYourDocumentorPhoto-Windows
Onceyouhaveselectedyourprintsettings,youarereadytosaveyoursettingsandprint.
- ClickOKtosaveyoursettings.
Youseeyourapplication'sPrintwindow,suchasthisone:
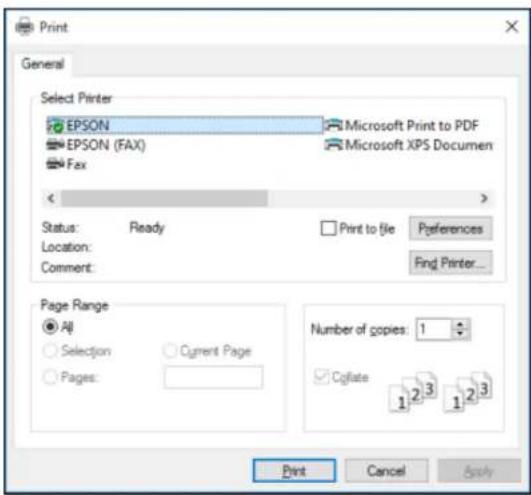
text_image
Print General Select Printer EPSON Microsoft Print to PDF EPSON (FAX) Microsoft XPS Documen Fax < Status: Ready Location: Comment: Print to file Preferences Find Printer... Page Range All Selection Current Page Pages: Number of copies: 1 Collate 1 2 3 1 2 3 Print Cancel Apply- ClickOKorPrinttostartprinting.
Parenttopic: PrintingwithWindows
LockingPrinterSettings-Windows
Windows administratorscanlockaccesstosomeprintersettingstopreventunauthorizedchanges.
-
Dooneofthefollowing:
-
Windows 10: Click and select (Settings) > Devices > Printers & scanners. Select your productnameandselectManage>Printerproperties.
- Windows 8.x: Navigate to the Apps screen and select Control Panel > Hardware and Sound > Devices and Printers. Right-click your product and select Printer properties.
- Windows 7: Click 📋 and select Devices and Printers. Right-click your product and select Printerproperties.
- Windows Vista: Click and select Control Panel. Click Printer under Hardware and Sound, thenright-clickyourproductandselectProperties.
- ClicktheOptionalSettingstab.
Note: You can prevent access to the Optional Settings tab by changing the user or group permissionsintheSecuritytab.
3.ClickDriverSettings.
Youseethiswindow:
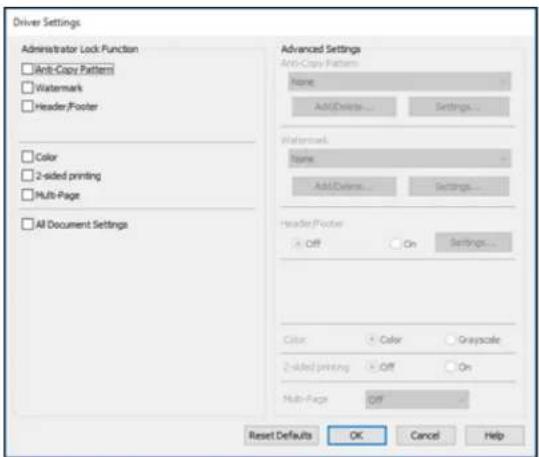
text_image
Driver Settings Administrator Lock Function Anti-Copy Pattern Watermark Header Footer Color 2-sided printing Multi-Page All Document Settings Advanced Settings Anti-Copy Pattern Name: Add/Delete... Settings... Watermark Name: Add/Delete... Settings... Header Footer Off On Settings... Color Color Gray-scale 2-sided printing Off On Multi-Page Off Reset Defaults OK Cancel Help- Select the checkbox for each setting you want to lock. To lock all print settings, select All Document Settings.
5.UnderAdvancedSettings,selectthesettingoptionyouwanttouseforeachlockedsetting.
6.ClickOK.
LockedSettingOptions
Parenttopic: PrintingwithWindows
LockedSettingOptions
Selecttheoptionsyouwanttouseforanylockedprintsettings.
| SettingOptionsDescription | ||
| Anti-Copy Pattern | VariousdataitemsLetsyouaddordeleteacustomizedanti-copypattern | |
| Add/DeleteLetsyouaddordeleteacustomizedanti-copypattern | ||
| SettingsLetsyouselectthearrangement,size,andothersettingsfor thecustomanti-copypattern | ||
| WatermarkVarioustext watermarks | Letsyouselectthetextforthewatermarkorprohibit watermarks | |
| Header/FooterOff | Prohibitsheadersorfooters | |
| OnAllowsheadersandfooters | ||
| SettingsLetsyouselectthetextandpositionforprintingheadersandfooters | ||
| ColorColorAllowscolorprinting | ||
| 2-sidedprintingOff | Allowsprintingononesideofthepaperonly | |
| OnAllowsprintingonbothsidesofthepaper | ||
| Multi-PageOffProhibitsmulti-pagesettings | ||
| 2-UpAllowsprintingof2pagesononesheetofpaper | ||
| 4-UpAllowsprintingof4pagesononesheetofpaper | ||
Parenttopic:LockingPrinterSettings-Windows
SelectingDefaultPrintSettings-Windows
When you change your print settings in a program, the changes apply only while you are printing in that program session. If you want to change the print settings you use in all your Windows programs, you can select new default print settings.
- AccesstheWindowsDesktopandright-clicktheiconforyourproductintherightsideofthe
Windowstaskbar,orclicktheuparrowandright-click.

- SelectPrinterSettings.
Youseetheprintersettingswindow:
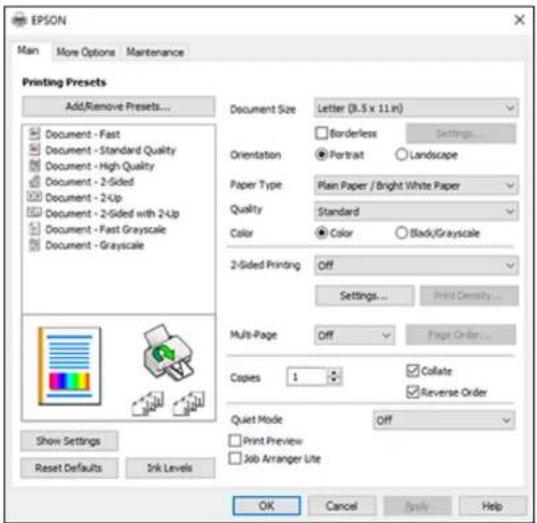
text_image
EPSON Man More Options Maintenance Printing Presets Add/Remove Presets... Document - Fast Document - Standard Quality Document - High Quality Document - 2-Sided Document - 2-Up Document - 2-Sided with 2-Up Document - Fast Grayscale Document - Grayscale Document Size Letter (3.5 x 11 in) Borderless Settings... Orientation Portrait Landscape Paper Type Plain Paper / Bright White Paper Quality Standard Color Color Black/Grayscale 2-Sided Printing Off Settings Print Density... Multi-Page Off Page Order... Copies 1 Collate Reverse Order Quiet Mode Off Print Preview Job Arranger Lite Show Settings Reset Defaults Ink Levels OK Cancel Apply Help- SelecttheprintsettingsyouwanttouseasdefaultsinallyourWindowsprograms.
4.ClickOK.
Thesesettingsarenowthedefaultsselectedforprinting.Youcanstillchangethemasneededfor printinginanyprogramsession.
ChangingtheLanguageofthePrinterSoftwareScreens
Parenttopic: PrintingwithWindows
ChangingtheLanguageofthePrinterSoftwareScreens
YoucanchangethelanguageusedontheWindowsprintersoftwarescreens.
-
AccesstheWindowsDesktopandright-clicktheiconforyourproductintherightsideofthe Windowstaskbar,orclicktheuparrowandright-click.
-
SelectPrinterSettings.
Youseetheprintersettingswindow.
- ClicktheMaintenancetab.
Youseethemaintenanceoptions:
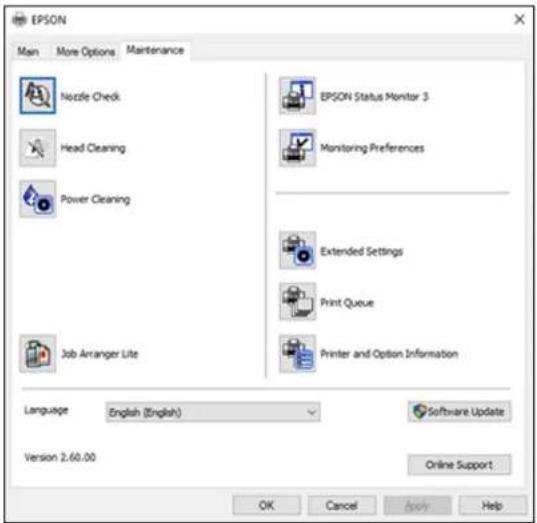
text_image
EPSON Main More Options Maintenance Nozzle Check Head Cleaning Power Cleaning Job Arranger Lite EPSON Status Monitor 3 Monitoring Preferences Extended Settings Print Queue Printer and Option Information Language English (English) Software Update Version 2.60.00 Online Support OK Cancel how Help- Select the language you want to use the Languages setting.
5.ClickOKtoclosetheprintersoftwarewindow.
Theprintersoftwarescreensappearinthelanguageyouselectedthenexttimeyouaccessthem.
Parenttopic:SelectingDefaultPrintSettings-Windows
ChangingAutomaticUpdateOptions
YourprintersoftwareforWindowsautomaticallychecksforupdatestotheproductsoftware.Youcan changehowoftenthesoftwarechecksforupdatesordisablethisfeature.
-
AccesstheWindowsDesktopandright-clicktheiconforyourproductintherightsideofthe Windowstaskbar,orclicktheuparrowandright-click.
-
SelectSoftwareUpdateSettings.
Youseethiswindow:
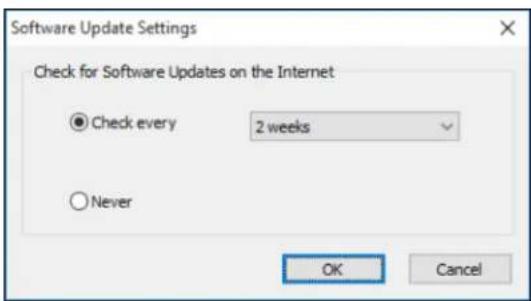
text_image
Software Update Settings Check for Software Updates on the Internet ● Check every 2 weeks ○ Never OK Cancel3.Dooneofthefollowing:
• To change how often the software checks for updates, select a setting in the Check every menu.
- Todisabletheautomaticupdatefeature,selecttheNeveroption.
4.ClickOKtoexit.
Note: If you choose to disable the automatic update feature, you can check for updates manually.
Parenttopic: PrintingwithWindows
PrintingwiththeBuilt-inEpsonDriver-Windows10S
Youcanprintwiththebuilt-inEpsonprinterdriverusinganyprintingprogramonWindows10S,as describedinthesesections.
Note: The built-in Epson driver in Windows 10 S does not include all the available print settings for your product. Toprintwithadditionalsettings, downloadandinstalltheEpsonPrintandScanutilityfromtheWindowsStore. YoucannotdownloadandinstallanyEpsonproductsoftwarefromtheEpsonwebsite forusewithWindows10S;youmustobtainsoftwareonlyfromtheWindowsStore.
SelectingPrintSettings-Windows10S
Parenttopic: PrintingfromaComputer
SelectingPrintSettings-Windows10S
Select these settings for your print job in your Windows 10 Application.
- Openaphotoordocumentforprinting.
- Selecttheprintcommandinyourapplication.
Note: You may need to select a print icon on your screen, the Print option in the File menu, or another command. See your application's help utility for details.
- If necessary, select your product name as the printery you want to use.
Note: You may also need to select Properties or Preferences to view your print settings.
Youseeawindowlikethis:
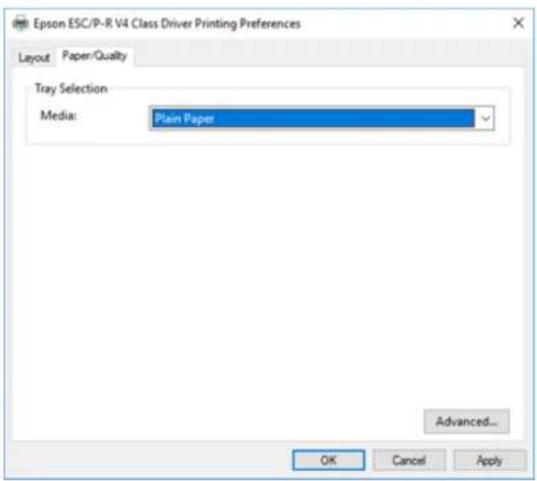
text_image
Epson ESC/P-R V4 Class Driver Printing Preferences Layout Paper/Quality Tray Selection Media: Plain Paper Advanced... OK Cancel Apply- SelectthetypeofpaperyouloadedastheMediasetting.
Note: The setting may not exactly match the name of your paper. Check the paper type settings list for details.
5.ClicktheAdvancedbutton.
Youseeawindowlikethis:
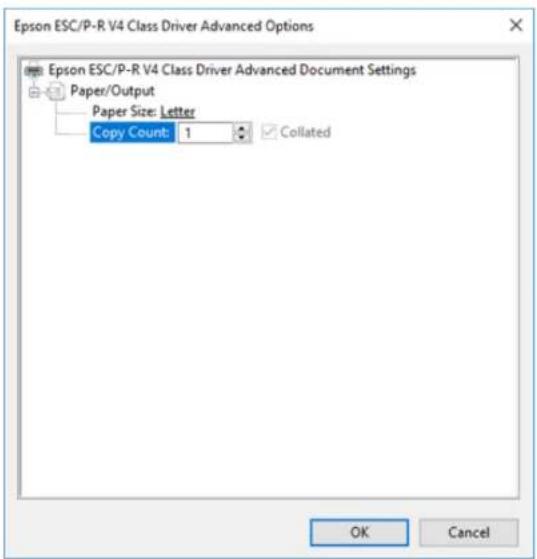
text_image
Epson ESC/P-R V4 Class Driver Advanced Options Epson ESC/P-R V4 Class Driver Advanced Document Settings Paper/Output Paper Size: Letter Copy Count: 1 Collated OK Cancel- SelectthesizeofthepaperyouloadedasthePaperSizesetting.
- Toprintmultiplecopies, selectorenterthenumberastheCopyCountsetting.
- Toprintmultiplecopiesofmulti-pagedocumentsinsets, selecttheCollatedcheckbox.
9.ClickOK.
Youreturntotheprintingpreferenceswindow.
10. SelecttheLayouttab.
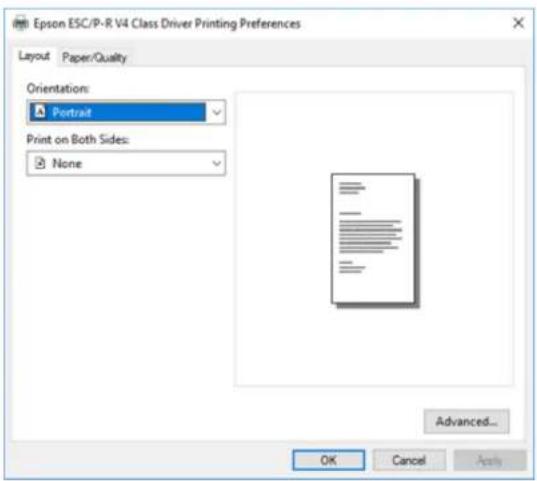
text_image
Epson ESC/P-R V4 Class Driver Printing Preferences Layout Paper/Quality Orientation: Portrait Print on Both Sides: None Advanced... OK Cancel Apply- Select the orientation of your document as the Orientation setting.
12.ClickOKtosaveyoursettings.
Youseeyourapplication'sPrintwindow.
13.ClickOKorPrinttostartprinting.
Parenttopic: PrintingwiththeBuilt-inEpsonDriver-Windows10S
PrintingonaMac
YoucanprintwithyourproductusinganyMacprintingprogram,asdescribedinthesesections.
Note: If you have an Internet connection, it is a good idea to check for updates to your product software on Epson's support website.
SelectingBasicPrintSettings-Mac
SelectingPageSetupSettings-Mac
SelectingPrintLayoutOptions-Mac
SelectingDouble-sidedPrintingSettings-Mac
ManagingColor-Mac
SelectingPrintingPreferences-Mac
PrintingYourDocumentorPhoto-Mac
Parenttopic: PrintingfromaComputer
SelectingBasicPrintSettings-Mac
Selectthebasicsettingsforthedocumentorphotoyouwanttoprint.
-
Openaphotoordocumentforprinting.
-
Selecttheprintcommandinyourapplication.
Note: You may need to select a print icon on your screen, the Print option in the File menu, or another command. See your application's help utility for details.
- Select your product as the Printersetting.

text_image
Printer: EPSON Presets: Default Settings- If necessary, click the arrow next to the Printer setting or the Show Details button to expand the printwindow.
Youseetheexpandedprintersettingswindowforyourproduct:
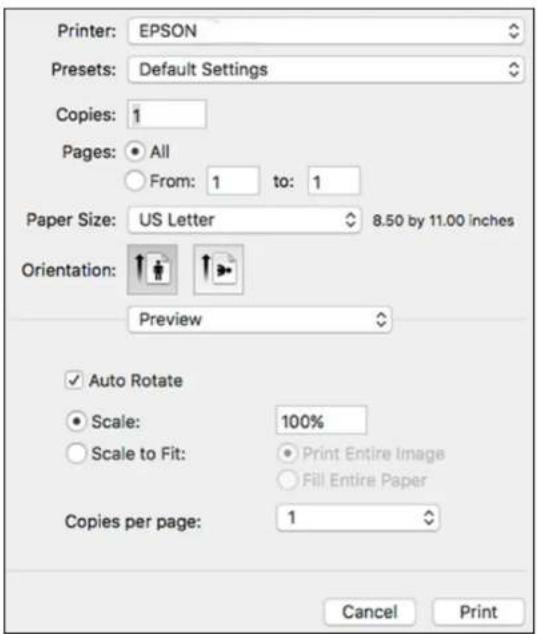
text_image
Printer: EPSON Presets: Default Settings Copies: 1 Pages: All From: 1 to: 1 Paper Size: US Letter 8.50 by 11.00 inches Orientation: Preview ✓ Auto Rotate Scale: 100% Scale to Fit: Print Entire Image Fill Entire Paper Copies per page: 1 Cancel PrintNote: The print window may look different, depending on the MacOS version and the application you are using.
- SelecttheCopiesandPagessettingsasnecessary.
Note: If you do not see these settings in the print window, check for them in your application before printing.
- Select the pages setup options: PaperSize and Orientation.
Note: If you do not see these settings in the print window, check for them in your application before printing. They maybe accessible by selecting PageSetup from the Filemenu.
-
Selectanyapplication-specificsettingsthatappearonthescreen, suchasthoseshownintheimage aboveforthePreviewapplication.
-
SelectPrintSettingsfromthepop-upmenu.
text_image
Preview Layout Color Matching Paper Handling Cover Page Print Settings Color Options Two-sided Printing Settings Supply LevelsYouseethesesettings:
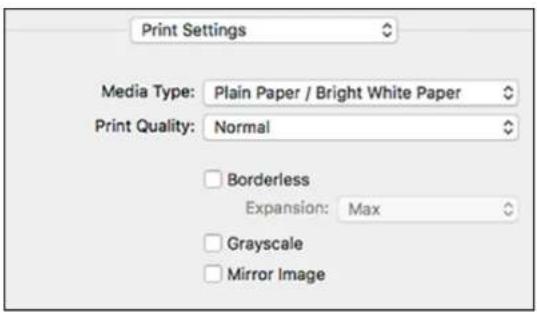
text_image
Print Settings Media Type: Plain Paper / Bright White Paper Print Quality: Normal Borderless Expansion: Max Grayscale Mirror Image- Select the type of papery you loaded as the Media Typesetting.
Note: The setting may not exactly match the name of your paper. Check the paper type settings list for details.
- SelectthePrintQualitysettingyouwanttouse.
- Select the Borderless checkbox if you want to print a borderless photo. If the option is grayed out, changetheMediaTypesettingtoapapertypethatsupportsborderlessprinting.
- Selectanyoftheavailableprintoptions.
PrintQualityOptions-Mac
PrintOptions-Mac
Parenttopic: PrintingonaMac
Relatedtasks
SelectingPageSetupSettings-Mac
PrintingYourDocumentorPhoto-Mac
PrintQualityOptions-Mac
YoucanselectanyoftheavailablePrintQualityoptionstofine-tunethequalityofyourprint.Some settingsmaybeunavailable,dependingonthepapertypesettingyouhavechosen.
Draft
Fordraftprintingonplainpaper.
Normal
Foreverydaytextandimageprinting.
Normal-Vivid
Foreverydaytextandimageprintingwithgoodqualityandprintspeed.
Quality
Fortextandgraphicswithincreasedqualityandprintspeed.
BestQuality
Forthebestprintquality, but the slowest printspeed.
Parenttopic: SelectingBasicPrintSettings-Mac
PrintOptions-Mac
Youcanselectanyoftheprintoptionstocustomizeyourprint.Someoptionsmaybeunavailable, dependingonothersettingsyouhavechosen.
Expansion
If you selected a border less papers sizes setting, this option adjusts the image expansion setting to control printing at the edges of border less prints.
Grayscale
Printstextandgraphicsinblackorshadesofgray.
MirrorImage
Letsyoufliptheprintedimagehorizontally.
Note: If you select the Min option for the Expansion setting, you may see white borders on your printed photo.
Parenttopic: SelectingBasicPrintSettings-Mac
SelectingPageSetupSettings-Mac
Depending on your application, you maybe able to select the paper size and orientation settings from the print window.
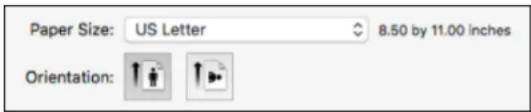
text_image
Paper Size: US Letter 8.50 by 11.00 inches Orientation:Note: If you do not see these settings in the print window, check for them in your application before printing. They maybe accessible by selecting PageSetup from the Filemenu.
- Select the size of the paper you loaded as the Paper Size setting. If you are printing a borderless photo, select the Borderless checkbox or a paper size with a Borderless option. You can also selectacustomsettingtocreateacustompapersize,buttheQualitysettingwillbelimitedto Normal.
Note: You must select a compatible borderless paper type and size to print without borders. Check theborderlesspapercompatibilitylistfordetails.
- Select the orientation of your document or photo as shown in the print window.
Note: If you are printing an envelope, select the icon.
Note: You can reduce or enlarge the size of the printed image by selecting Paper Handling from the pop-upmenuandselectingascalingoption.
Parenttopic: PrintingonaMac
SelectingPrintLayoutOptions-Mac
You can select a variety of layout options for your document or photo by selecting Layout from the pop-upmenuontheprintwindow.
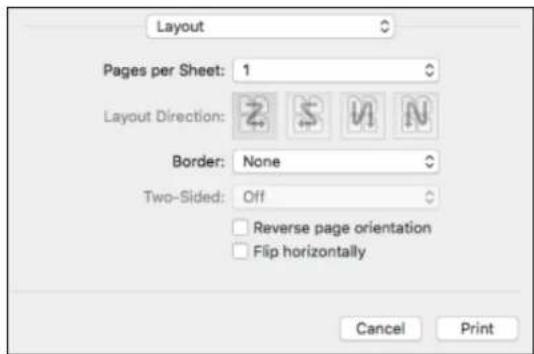
text_image
Layout Pages per Sheet: 1 Layout Direction: Border: None Two-Sided: Off Reverse page orientation Flip horizontally Cancel Print- To print multiple pages on one sheet of paper, select the number of pages in the Pages per Sheet pop-upmenu.Toarrangetheprintorderofthepages,selectaLayoutDirectionsetting.
• To print borders around each page on the sheet, select a line setting from the Border pop-up menu. - To invert or flip the printed image, select the Reverse page orientation or Flip horizontally settings.
Parenttopic: PrintingonaMac
SelectingDouble-sidedPrintingSettings-Mac
You can print on both sides of the paper by selecting Two-sided Printing Settings from the pop-up menuontheprintwindow.
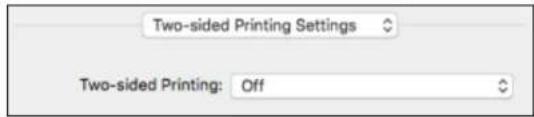
text_image
Two-sided Printing Settings Two-sided Printing: OffNote: Some options may be pre-selected or unavailable, depending on other settings you have chosen orifyouareaccessingtheproductoveranetwork. Thisscreenmaybedifferent,dependingontheMac OSversionyouareusing.
-
SelectoneoftheTwo-sidedPrintingoptions.
-
Select the type of document you are printing as the Document Types setting. Thesoftware automatically sets the Adjustments options for that document type.
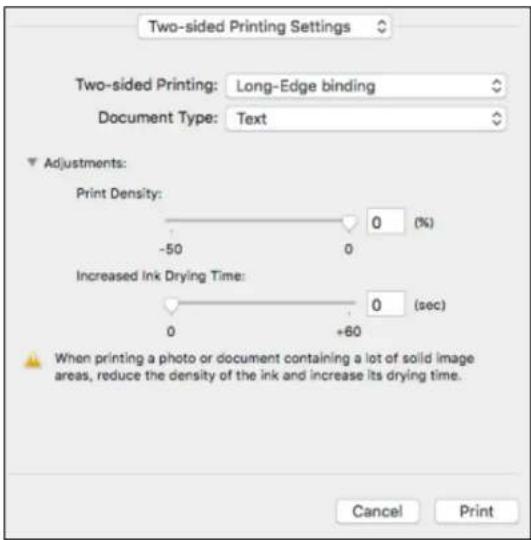
text_image
Two-sided Printing Settings Two-sided Printing: Long-Edge binding Document Type: Text Adjustments: Print Density: 0 (%) -50 0 Increased Ink Drying Time: 0 +60 0 (sec) When printing a photo or document containing a lot of solid image areas, reduce the density of the ink and increase its drying time. Cancel Print- If necessary, customizetheAdjustmentssettingsasinstructedonthescreen.
- Printatestcopyofyourdouble-sideddocumenttotesttheselectedsettings.
- Followanyinstructionsdisplayonthescreenduringprinting.
Double-sidedPrintingOptionsandAdjustments-Mac
Parenttopic: PrintingonaMac
Double-sidedPrintingOptionsandAdjustments-Mac
You can select any of the available options in the Two-sided Printing Settings or Output Settings pop-upmenutosetupyourdouble-sidedprintjob.
Long-Edgebinding
Orientsdouble-sidedprintedpagestobeboundonthelongedgeofthepaper.
Short-Edgebinding
Orientsdouble-sidedprintedpagestobeboundontheshortedgeofthepaper.
PrintDensity
Setsthelevelofinkcoveragefordouble-sidedprinting.
IncreasedInkDryingTime
Setstheamountoftimerequiredfordryinginkafterprintingononesideofthepaperbeforeprinting theothersideindouble-sidedprinting.
Parenttopic: SelectingDouble-sidedPrintingSettings-Mac
ManagingColor-Mac
You can adjust the Color Matching and Color Options setting to fine-tunethe colors in your print out, or turn off color management in your printers software.
- SelectColorMatchingfromthepop-upmenuintheprintwindow.

text_image
Color Matching ColorSync EPSON Color Controls-
Selectoneoftheavailableoptions.
-
SelectColorOptions from the pop-up menu in the print window.
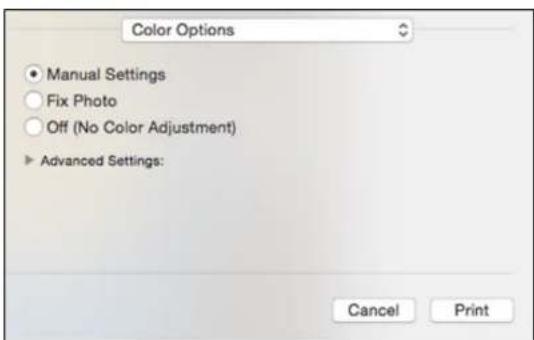
text_image
Color Options ● Manual Settings ○ Fix Photo ○ Off (No Color Adjustment) ▶ Advanced Settings: Cancel PrintNote: The available settings on the Color Options menu depend on the option you selected on the Color Matching menu.
- Selectoneoftheavailableoptions.
ColorMatchingandColorOptions-Mac
Parenttopic: PrintingonaMac
ColorMatchingandColorOptions-Mac
You can select from these settings on the Color Matching and Color Options menus.
ColorMatchingSettings
EPSONColorControls
Letsyoumanagecolorusingcontrolsinyourprintersoftwareorturnoffcolormanagement.
ColorSync
Printsusingstandardcolorprofilesforyourproductandpapertohelpmatchimagecolors.Youcan customizetheconversionmethodandfiltersettingsontheColorSyncpop-upmenuintheprint window.
ColorOptionsSettings
ManualSettings
Letsyouselectmanualcoloradjustments.ClickthearrownexttoAdvancedSettingsandselect settings for Brightness, Contrast, Saturation, and individual color tones. You can also select a color Mode setting for printing photos and graphics and the Fix Red-Eye setting to reduce or remove red-eyeinphotos.Dependingontheselectedcolormode,youcanalsoadjustthemidtonedensityusing theGammasetting.
FixPhoto
Improvesthecolor, contrast, and sharpnessofflawed photos. ClickthearrownexttoAdvanced Settings and select the Fix Red-Eye setting to reduce or remove red-eye in photos.
Note: Fix Photo uses a sophisticated face recognition technology to optimize photos that include faces. Forthistowork, botheyesandthenosemustbevisibleinthesubject'sface. If your photo includes a face with an intentional color cast, such as a statue, you may want to turn off Fix Photo to retain the special coloreffects.
Off(NoColorAdjustment)
Turnsoffcolormanagementinyourprintersoftwaresoyoucanmanagecolorusingonlyyour applicationsoftware.
Note: An ICC profile is required if color management is turned off.
Parenttopic: ManagingColor-Mac
SelectingPrintingPreferences-Mac
Youcanselectprintingpreference that apply to all the print jobs you send to your product.
-
In the ApplemenuortheDock, select System Preferences.
-
Select Print & Fax, Print & Scan, or Printers & Scanners, select your product, and select Options & Supplies.
-
SelectDriverorOptions.
Youseeascreenlikethis:
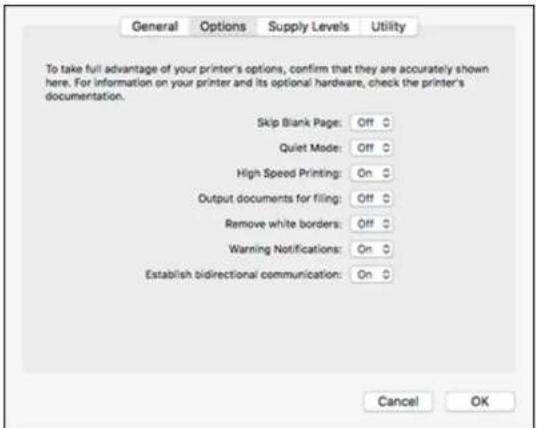
text_image
General Options Supply Levels Utility To take full advantage of your printer's options, confirm that they are accurately shown here. For information on your printer and its optional hardware, check the printer's documentation. Skip Blank Page: Off Quiet Mode: Off High Speed Printing: On Output documents for filing: Off Remove white borders: Off Warning Notifications: On Establish bidirectional communication: On Cancel OK- Selectanyoftheavailableprintingpreferences.
5.ClickOK.
PrintingPreferences-Mac
Parenttopic: PrintingonaMac
PrintingPreferences-Mac
YoucanselectfromthesesettingsontheOptionsorDrivertab.
SkipBlankPage
Ensure that your product does not print page that contain not text or images.
QuietMode
Lessensnoiseduringprintingbutmaydecreaseprintspeed.
HighSpeedPrinting
Speedsupprintingbutmayreduceprintquality.
Outputdocumentsforfiling
Outputsalllandscape,portrait,1-sided,and2-sideddocumentsinthesameorientationforeasier filing.
Removewhiteborders
Removeswhitemarginsthatmayappearwhenyouprintborderlessphotos.
WarningNotifications
Letsyouchoosewhetherornottoreceivewarningnotificationsfromtheprintersoftwareforvarious operatingconditions.
Establishbidirectionalcommunication
Allowstheproducttocommunicatewiththecomputer.Donotchangethedefaultsettingunlessyou experienceissueswhenusingasharedprintingpool.
Parenttopic: Selecting Printing Preferences-Mac
PrintingYourDocumentorPhoto-Mac
Onceyouhaveselectedyourprintsettings,youarereadytoprint.
ClickPrintatthebottomoftheprintwindow.
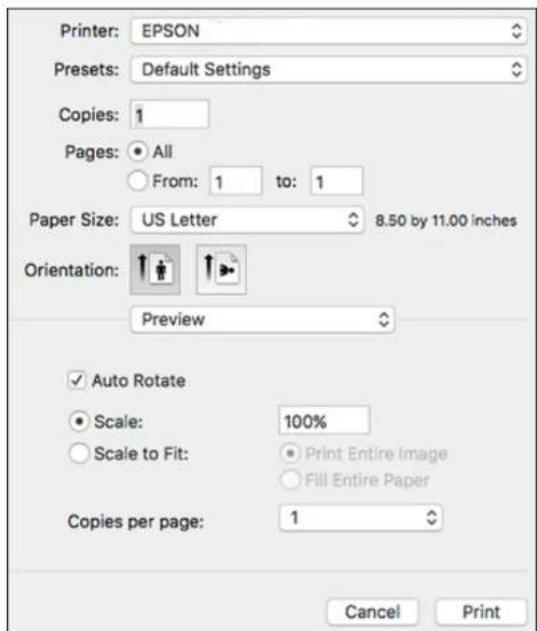
text_image
Printer: EPSON Presets: Default Settings Copies: 1 Pages: All From: 1 to: 1 Paper Size: US Letter 8.50 by 11.00 inches Orientation: Preview ✓ Auto Rotate Scale: 100% Scale to Fit: Print Entire Image Fill Entire Paper Copies per page: 1 Cancel PrintCheckingPrintStatus-Mac
Parenttopic: PrintingonaMac
Relatedtasks
SelectingBasicPrintSettings-Mac
SelectingPageSetupSettings-Mac
SelectingPrintLayoutOptions-Mac
SelectingDouble-sidedPrintingSettings-Mac
ManagingColor-Mac
SelectingPrintingPreferences-Mac
CheckingPrintStatus-Mac
Duringprinting, you can view the progress of your print job, control printing, and check in k status.
- ClicktheprintericonwhenitappearsintheDock.
Youseetheprintstatuswindow:
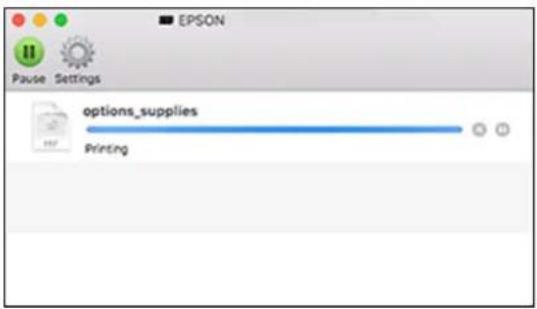
text_image
EPSON Pause Settings options_supplies Printing- Select the following options as necessary for your MacOS version:
• Tocancelprinting, clicktheprintjobandclickorDelete
- Topauseaprintjob, clicktheprintjobandclickorHold. To resumeaprintjob, clickthe pausedprintjobandclickorResume.
• To pause printing for all queued print jobs, click Pause or Pause Printer.
• To display other printer information, click Settings or Supply Levels.
Parenttopic: Printing Your Documentor Photo-Mac
PrintingFromaChromebook
WithaGoogleAccount, you can print from a Chromebook without drivers or cables.
-
ConnectyourEpsonproducttoyourwirelessnetwork.Seethelinkbelow.
-
TurnonyourChromebook and connectittothesamewirelessnetworkasyourproduct.
Note: SeeyourChromebook's documentation for detail on connecting to anNetwork.
3.Dooneofthefollowing:
- ClickAddtoCloudPrintinthenotificationthatappearsinthecornerofyourChromebook screen.
Note: If you do not see a notification, check to see if a number appears in the status area at the lower-right corner of the screen. Click this number to open the notifications menu, then click Add toCloudPrint.
- Openawebbrowserandenterchrome://devicesintheaddressbar.Skiptostep4.
- Ifyouseearegistrationconfirmationscreeninstead,clickRegister.
4.ClickAddDevice.
-
ClicktheRegisterbuttonthatappearsnexttoyourproduct.
-
Click Register on the confirmation screen. Your product's LCD screen displays a confirmation message.
- Select OK or press the OK button on your product to confirm the Google Cloud Print connection and printatestpage.
- Toprinttotheconnectedproduct, selecttheprintcommandinyourChromeapp.
YourproductisnowlinkedtoyourGoogleAccountandcanbeaccessedfromanyChromebookwhere you are logged in, as long as you have Internet access. Visit Epson Support for Google Cloud Print (U.S) or Epson Support for Google Cloud Print (Canada) for more information on using Google Cloud Print, or theGoogleCloudPrintwebsiteforalistofsupportedapps.
Parenttopic: PrintingfromaComputer
CancellingPrintingUsingtheProduct
If you need to cancel printing, select Cancel, then select Cancel again to confirm.
Parenttopic: PrintingfromaComputer
Scanning
Youcanscanyouroriginalsandsavethemasdigitalfiles.
StartingaScan
ScanninginEpsonScan2
StartingaScan
Afterplacingyouroriginalsonyourproductforscanning,startscanningusingoneofthesemethods.
StartingaScanUsingtheProductControlPanel
StartingaScanUsingtheEpsonScan2Icon
StartingaScanfromaScanningProgram
StartingaScanfromaSmartDevice
Parenttopic: Scanning
Relatedtopics
PlacingOriginalsontheProduct
StartingaScanUsingtheProductControlPanel
Youcanscananimagetoavarietyofdestinationsuingyourproduct'scontrolpanel.
- Makesureyouinstalledtheproductsoftwareandconnectedtheproducttoyourcomputeror network.
Note: Restart your computer after installing the product software to enable scanning from the control panel.
-
Place your original on the product for transcanning.
-
Pressthehomebutton, if necessary.
-
SelectScan.
Youseeascreenlikethis:
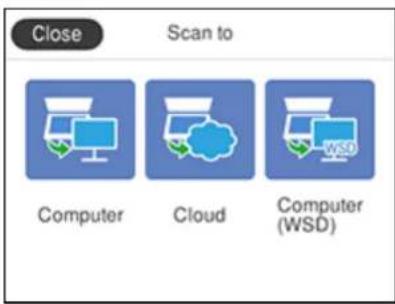
text_image
Close Scan to Computer Cloud Computer (WSD)-
SelectoneofthefollowingScantooptions:
-
Computerletysyouscantoaconnectedcomputerusingyoursavedscansettings.
-
CloudsendsyourscannedfilestoadestinationthatyouhaveregisteredwithEpsonConnect.
-Computer(WSD)letsyoumanagenetworkscanninginWindows10,Windows8.x,Windows7,orWindowsVista(Englishonly).TousethisfeaturewithWindows7orWindowsVista,youmustfirstsetupWSD(WebServicesforDevices)onthecomputer. -
Follow the instructions in then next section to complete your scan.
ScanningtoaConnectedComputer
ControlPanelScanningOptions
ChangingDefaultScanJobSettings
Parenttopic: StartingaScan
Relatedtasks
UsingEpsonScantoCloud
ScanningtoaConnectedComputer
Youcanscananoriginallandsaveittoaconnectedcomputerusingyourproduct'scontrolpanel. The computermustbeconnectedusingaUSBcableorconnectedtothesamenetworkasyourproduct.
YoucansavethescannedfileasaJPEGorPDFfile,orattachittoanemail. Youcanalsosetup customscansettingsusingEventManagerandautomaticallyscanusingthosesettingsyourproduct controlpanel.
Note: Be sure you have installed Epson Scan 2 and Event Manager on your computer before scanning to your computer.
- Place your original on the product for transcanning.
- Pressthehomebutton, if necessary.
- SelectScan.
Youseeascreenlikethis:

text_image
Close Scan to Computer Cloud Computer (WSD)- SelectComputer.
Youseeascreenlikethis:
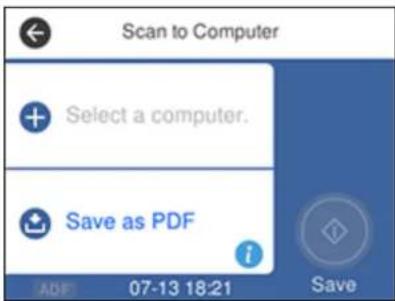
text_image
Scan to Computer + Select a computer. Save as PDF i 07-13 18:21 Save- SelectOKtoclosetheinformationscreen, if necessary.
-
SelectSelectacomputerandchooseoneofthefollowingoptions:
-
If your computer is connected to your product over an network, select a connected computer from the displayed list. (If the computer is not listed, select SearchAgain.)
-
If you computer is connected to your product using a USB cable, select USB Connection.
-
SelectSaveasPDF and choose one of the following options:
-
SaveasJPEGtosavethescannedscannedimageasaJPEGfile.
- SaveasPDFtosavethescanneddocumentorimageasaPDFfile.
- Attachtoemailtoopenthedefaultemailsoftwareonyourcomputerandsavethescanned documentorimagesasaJPEGemailattachment.
- Followcustomsettingtosavethescanneddocumentorimageusingcustomsettingsyouhave selectedusingtheEventManagercustomscansettingsoption.
Note: You can customize the settings for each of these options using EventManager.
- SelectSavetostartscanning.
Parenttopic: StartingaScanUsingtheProductControlPanel
Relatedtasks
ChangingDefaultScanJobSettings
ControlPanelScanningOptions
Selecttheoptionsyouwanttouseforscanning.
Note: Not all options or settings may be available, depending on the Scan to option selected.
| ScantosettingAvailableoptionsDescription | ||
| ColormodeColorSelectwhethertoscanimagesincolororblackandwhite | ||
| B&W | ||
| FileformatJPEGSelectforphotost.YoucanalsoselecttheCompressionRatio. | ||
| PDFSelectfordocuments.YoucanalsoselecttheCompressionRatioandPDFSettings. | ||
| ScanAreaLetterSelectthepagesizefordocuments,then | selecttheorientationoftheoriginal | |
| AutoCroppingSelectforphotoswithdarkedges | ||
| OriginalTypeTextSpecifiesth | etypeoforiginalyouarescanning | |
| Text&Image | ||
| Photo | ||
| Density-4to+4Adjuststhelighnessordarknessofscannedimages. | ||
| RemoveShadowOnErasesth | eshadowsthatappearinthecenterofadocumentwhencopyingabookortheshadowsthatappearoundadocumentwhencopyingthickpaper | |
| Off | ||
| RemovePunchHolesOnEras | esthebindingholesonadocument | |
| Off | ||
Parenttopic: StartingaScanUsingtheProductControlPanel
ChangingDefaultScanJobSettings
Youcanvieworchangethedefaultscanjobsettingsyourproductuseswhenyouscantoyour computer.YoudothisusingtheEventManagerprogram.
-
DooneofthefollowingtoopenEventManager:
-
Windows 10: Click and select EPSON Software > Event Manager.
- Windows 8.x: Navigate to the Apps screen and select Event Manager.
-
Windows (other versions): Click 📋 or Start > All Programs or Programs > EPSON Software > EventManager.
• Mac: Open the Applications folder, click Epson Software, and select Event Manager. -
Open the Scanner (Windows) or Select Scanner (Mac) drop-down list and select your product, if necessary.
-
ClickMakeJobSettings.
- Open the Edit Job Settings drop-down list and select the scan job settings you want to view or change.
- Changethesettingsasnecessary.
Note: If you create a new job, you can only assign it to the Custom Action setting. You can change the setting of the other assigned jobs, but you cannot rename them or select different job.
6.ClickOK.
- ClickClosetoclosetheEventManagerwindow.
Parenttopic: StartingaScanUsingtheProductControlPanel
StartingaScanUsingtheEpsonScan2Icon
YoucanstarttheEpsonScan2programtoselectscansettings,scan,andsavethescannedimagetoa file.
Note: If you are using your Epson product with the Windows 10 S operating system, you cannot use the softwaresdescribedinthissection.YoualsocannotdownloadandinstallanyEpsonproductsoftware fromtheEpsonwebsiteforusewithWindows10S;youmustobtainsoftwareonlyfromtheWindows Store.
- Windows 10: Click and select EPSON > Epson Scan 2.
- Windows 8.x: Navigate to the Apps screen and select Epson Scan 2.
- Windows (other versions): Click 📋 or Start, and select All Programs or Programs. Select EPSON >EpsonScan2>EpsonScan2.
- Mac: Open the Applications folder, open the Epson Software folder, and select Epson Scan 2. YouseeanEpsonScan2windowlikethis:
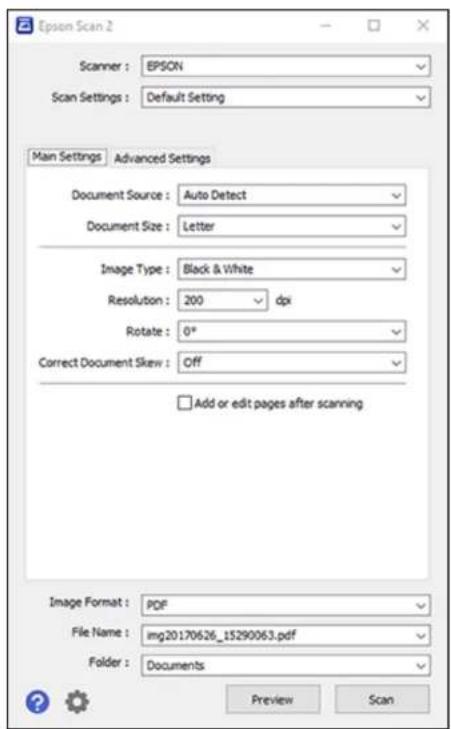
text_image
Epson Scan 2 Scanner : EPSON Scan Settings : Default Setting Main Settings Advanced Settings Document Source : Auto Detect Document Size : Letter Image Type : Black & White Resolution : 200 dpi Rotate : 0° Correct Document Skew : Off Add or edit pages after scanning Image Format : PDF File Name : img20170626_15290063.pdf Folder : Documents Preview ScanParenttopic: StartingaScan
StartingaScanfromaScanningProgram
YoucanstartEpsonScan2fromaTWAIN-compliantscanningprogramtoselectscansettings,scan,andopenthescannedimageintheprogram.
Note: If you are using your Epson product with the Windows 10 S operating system, you cannot use the softwaresdescribedinthissection.YoualsocannotdownloadandinstallanyEpsonproductsoftware fromtheEpsonwebsiteforusewithWindows10S;youmustobtainsoftwareonlyfromtheWindows Store.
- Openyourscanningprogramandselectitsscanningoption.(Seeyourscanningprogramhelpfor instructions.)
- Select your product.
Note: In certain programs, you may need to select your product as the "source" first. If you see a Select Source option, choose it and select your product. With Windows, do not select a WIA option for your product; it will not work correctly.
YouseeanEpsonScan2windowlikethis:
text_image
Epson Scan 2 Scanner : EPSON Scan Settings : Default Setting Main Settings Advanced Settings Document Source : Auto Detect Document Size : Letter Image Type : Black & White Resolution : 200 dpi Rotate : 0° Correct Document Skew : Off Add or edit pages after scanning Image Format : PDF File Name : img20170626_15290063.pdf Folder : Documents Preview ScanParenttopic: StartingaScan
StartingaScanfromaSmartDevice
YoucanstartascanfromasmartdeviceusingtheEpsoniPrintapp.Youcansavethescanned documenttoyourdeviceoracloudservice,e-mailit,orprintit.
Note: If you are using your Epson product with the Windows 10 S operating system, you cannot use the softwaresdescribedinthissection.YoualsocannotdownloadandinstallanyEpsonproductsoftware fromtheEpsonwebsiteforusewithWindows10S;youmustobtainsoftwareonlyfromtheWindows Store.
Note: Your device must be connected to the same wireless network as your Epson product.
- Download the Epsoni Print app from your device's sapp store or from Epson's website.
- Place your original on the product for scanning.
- OpentheEpsoniPrintappandselectyourproduct.
- Selectthescansettingsandscanyouroriginal.
- Save your scanned image to a file or cloud location.
Parenttopic: StartingaScan
ScanninginEpsonScan2
EpsonScan2automaticallyscansyourdocumentandsavesthescannedfileinPDFformatinyouroperatingsystem'sDocumentsorMyDocumentsfolder,ropensitinyourscanningprogram.Youcanselectsettings,preview,andchangethescannedfilesettingsasnecessary.
Note: If you are using your Epson product with the Windows 10 S operating system, you cannot use the softwaresdescribedinthissection.YoualsocannotdownloadandinstallanyEpsonproductsoftware fromtheEpsonwebsiteforusewithWindows10S;youmustobtainsoftwareonlyfromtheWindows Store.
1.StartEpsonScan2.
Youseethiswindow:
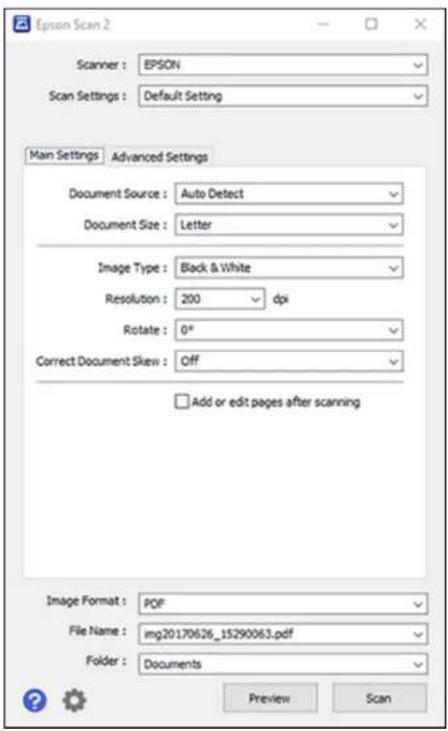
text_image
Epson Scan 2 Scanner : EPSON Scan Settings : Default Setting Main Settings Advanced Settings Document Source : Auto Detect Document Size : Letter Image Type : Black & White Resolution : 200 dpi Rotate : 0° Correct Document Skew : Off Add or edit pages after scanning Image Format : PDF File Name : img20170626_15290063.pdf Folder : Documents Preview Scan- Select the Document Source setting that matches where you placed your original, or select Auto DetecttohaveEpsonScan2automaticallydetectthesize.
- Select the Document Size setting that matches the size of your original. You can select Customize to enteracustomsize, if necessary.
-
Select the image type of your original and how you want it scanned as the Image Type setting.
-
Select the Resolution setting you want to use for your scan.
-
Select the Rotatesetting to rotatethescanned image.
-
Select the Correct Document Skew setting to correct skewed originals, image contents, or both.
8.ClickthePreviewbutton.
EpsonScan2preiewsyouroriginalanddisplaystheresultsintheEpsonScan2window.
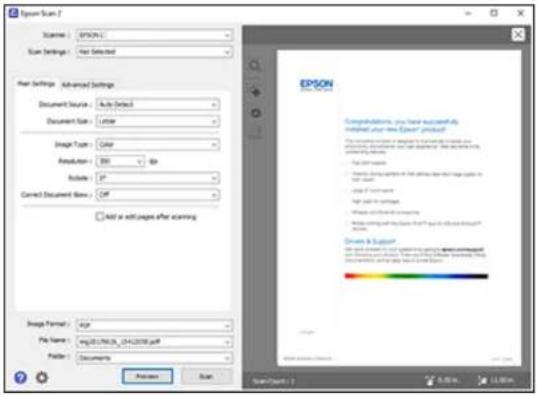
text_image
Epson Scan Scenes: Epson1 Scan Settings: Net Selected Main Settings: Advanced Settings Document Status: Auto Detect Document Size: Linear Image Type: Color Resolution: 500 x 60 Rotate: 2° Correct Document Size: Off Add to exit pages after scanning EPSON Epson Scan Completions, you have successfully installed your new Epson® product. File format: a design tool with the following tools: • Image files are available in the image file named Epson1. • File name: Epson1@Epson.com • File type: Epson1@Epson.com • Export: Epson1@Epson.com • Export scope: Epson1@Epson.com • Export description: Epson1@Epson.com • Export description: Epson1@Epson.com • Export description: Epson1@Epson.com • Export description: Epson1@Epson.com • Export description: Epson1@Epson.com • Export description: Epson1@Epson.com • Export description: Epson1@Epson.com • Export description: Epson1@Epson.com • Export description: Epson 1@Epson.com • Export description: Epson 2@Epson.com • Export description: Epson 3@Epson.com • Export description: Epson 4@Epson.com • Export description: Epson 5@Epson.com • Export description: Epson 6@Epson.com • Export description: Epson 7@Epson.com • Export description: Epson 8@Epson.com • Export description: Epson 9@Epson.com • Export description: Epson 10@Epson.com • Export description: Epson 11@Epson.com • Export description: Epson 12@Epson.com • Export description: Epson 13@Epson.com • Export description: Epson 14@Epson.com • Export description: Epson 15@Epson.com • Export description: Epson 16@Epson.com • Export description: Epson 17@Epson.com • Export description: Epson 18@Epson.com • Export description: Epson 19@Epson.com • Export description: Epson 20@Epson.com • Export description: Epson 21@Epson.com • Export description: Epson 22@Epson.com • Export description: Epson 23@Epson.com • Export description: Epson 24@Epson.com • Export description: Epson 25@Epson.com • Export description: Epson 26@Epson.com • Export description: Epson 27@Epson.com • Export description: Epson 28@Epson.com • Export description: Epson 29@Epson.com • Export description: Epson 30@Epson.com • Export description: Epson 31@Epson.com • Export description: Epson 32@Epson.com • Export description: Epson 33@Epson.com • Export description: Epson 34@Epson.com • Export description: Epson 35@Epson.com • Export description: Epson 36@Epson.com • Export description: Epson 37@Epson.com • Export description: Epson 38@Epson.com • Export description: Epson 39@Epson.com • Export description: Epson 40@Epson.com • Export description: Epson 41@Epson.com • Export description: Epson 42@Epson.com • Export description: Epson 43@Epson.com • Export description: Epson 44@Epson.com • Export description: Epson 45@Epson.com • Export description: Epson 46@Epson.com • Export description: Epson 47@Epson.com • Export description: Epson 48@Epson.com • Export description: Epson 49@Epson.com • Export description: Epson 50@Epson.com • Export description: Epson 51@Epson.com • Export description: Epson 52@Epson.com • Export description: Epson 53@Epson.com • Export description: Epson 54@Epson.com • Export description: Epson 55@Epson.com • Export description: Epson 56@Epson.com • Export description: Epson 57@Epson.com • Export description: Epson 58@Epson.com • Export description: Epson 59@Epson.com • Export description: Epson 60@Epson.com • Export description: Epson 61@Epson.com • Export description: Epson 62@Epson.com • Export description: Epson 63@Epson.com • Export description: Epson 64@Epson.com • Export description: Epson 65@Epson.com • Export description: Epson 66@Epson.com • Export description: Epson 67@Epson.com • Export description: Epson 68@Epson.com • Export description: Epson 69@Epson.com • Export description: Epson 70@Epson.com • Export description: Epson 71@Epson.com • Export description: Epson 72@Epson.com • Export description: Epson 73@Epson.com • Export description: Epson 74@Epson.com • Export description: Epson 75@Epson.com • Export description: Epson 76@Epson.com • Export description: Epson 77@Epson.com • Export description: Epson 78@Epson.com • Export description: Epson 79@Epson.com • Export description: Epson 80@Epson.com • Export description: Epson 81@Epson.com • Export description: Epson 82@Epson.com • Export description: Epson 83@Epson.com • Export description: Epson 84@Epson.com • Export description: Epson 85@Epson.com • Export description: Epson 86@Epson.com • Export description: Epson 87@Epson.com • Export description: Epson 88@Epson.com • Export description: Epson 89@Epson.com • Export description: Epson 90@Epson.com • Export description: Epson 91@Epson.com • Export description: Epson 92@Epson.com • Export description: Epson 93@Epson.com • Export description: Epson 94@Epson.com • Export description: Epson 95@Epson.com • Export description: Epson 96@Epson.com • Export description: Epson 97@Epson.com • Export description: Epson 98@Epson.com • Export description: Epson 99@Epson.com • Export description: Epson 100@Epsons) Save at www.psdnt.org-
Reinsert your original into the ADF, if necessary.
-
SelectanyoftheadditionalsettingsthatyouwanttouseontheMainSettingstab.
-
ClicktheAdvancedSettingstabandselectanysettingsthatyouwanttouse.
-
Select the format in which you want to save your scanned file as the Image Format setting. If necessary, selectOptions and selectany desired format options.
-
Enter the file name for your scanned file in the File Name field. If necessary, select Settings to modify the filenamesettings.
-
Select the location in which you want to save your scanned file as the Folder setting. If necessary, selectSelecttocreateanewfolder.
15.ClickScan.
Theproductscansyouroriginalandsavesthescannedfileinthelocationyouspecified.
AdditionalScanningSettings-MainSettingsTab
AdditionalScanningSettings-AdvancedSettingsTab
SavingScannedDocumentsasaSearchablePDF
ImageFormatOptions
ScanResolutionGuidelines
Parenttopic: Scanning
AdditionalScanningSettings-MainSettingsTab
You can select these additional scanningsettings on the EpsonScan2MainSettingstab. Not all adjustment settings may be available, depending on other settings you have chosen.
CorrectDocumentSkew
Correctsskewedoriginals,imagecontents,orboth.
Addoreditpagesafterscanning
Letsyouadd, remove, oreditthepagesinajob, includingrotatingpagesandchangingthepage order.
Note: To save multiple pages in a single file, you must select a file format that supports multiple pages such as PDF or Multi-TIFF. If you select another file format, each scanned image or page is savedasaseparatefile.
Parenttopic: ScanninginEpsonScan2
AdditionalScanningSettings-AdvancedSettingsTab
You can select these additional scanningsettings on the EpsonScan2 Advanced Setting stab. Not all adjustment settings may be available, depending on other settings you have chosen.
RemoveBackground
Removesthebackgroundoftheoriginals.
TextEnhancement
Sharpenstheappearanceoflettersintextdocuments.
AutoAreaSegmentation
Makesblackandwhiteimagesclearerandtextrecognitionmoreaccuratebyseparatingthetextfrom thegraphics.
Threshold
Adjuststhelevelatwhichblackareasintextandlineartaredelineated,improvingtextrecognitionin OCR(OpticalCharacterRecognition)programs.
ColorEnhance
Enhancestheshadesofthecoloryouselectinthescannedimage.Thissettingisavailableonlyifyou selectGrayscaleorBlack&WhiteasthelImageTypesetting.
Brightness
Adjuststheoveralllightnessanddarknessofthescannedimage.
Contrast
Adjuststhedifferencebetweenthelightanddarkareasoftheoverallscannedimage.
Gamma
Adjuststhemidtonedensityofthescannedimage.
UnsharpMask
Makestheedgesofcertainimageareasclearer.Turnoffthisoptiontoleavesofteredges.
Descreening
Removestheripplepatternthatmightappearinsubtlyshadedimageareas,suchasskintones.This optionimprovesresultswhenscanningmagazinesornewspapers.(Theresultsofdescreeningdonot appearinthepreviewimage,onlyinyourscannedimage.)
EdgeFill
Correctsshadowingaroundtheedgesoftheimagebyfillingtheshadowswithblackorwhite.
DualImageOutput
Scanstheoriginalimagetwiceusingdifferentoutputsettings(Windowsonly).
Parenttopic: ScanninginEpsonScan2
SavingScannedDocumentsasaSearchablePDF
YoucanscanadocumentandsavethetextinasearchablePDF.InasearchablePDF,textis recognizedusingOpticalCharacterRecognition(OCR)andthenembeddedinthescannedoriginal.
- Load your original in the product for scanning.
2.StartEpsonScan2.
- Select your scansettings.
4.ClickPreviewandadjusttheareayouwanttoscan,ifnecessary.
-
If you are using the ADF, reload the ejected original.
-
SelectSearchablePDFasthelmageFormatsetting.
-
SelectOptionsfromtheImageFormatlist.
Youseethiswindow:
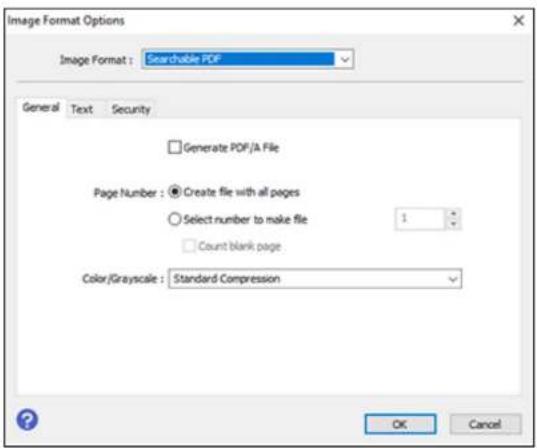
text_image
Image Format Options Image Format : Searchable PDF General Text Security Generate PDF/A File Page Number : Create file with all pages Select number to make file 1 Count blank page Color/Grayscale : Standard Compression OK Cancel- SelectanyoftheoptionsontheGeneraltab.
9.SelecttheTexttab.
-
MakesurethelanguageusedinthedocumenttextisselectedastheTextLanguagesetting.
-
Select the Security tab if you want to add a password to the PDF or protect printing or editing properties.
12.ClickOK.
- ConfirmtheFileNamesettingandselectaFoldersettingforyourdocument.
14.ClickScan.
ThescannedimageissavedasasearchablePDF.
Parenttopic: ScanninginEpsonScan2
ImageFormatOptions
You can select different image formats and related options. For details on available options, click the ?iconontheEpsonScan2ImageFormatOptionswindow.Notallimageformatshaveoptions.
Bitmap(\*.bmp)
AstandardimagefileformatformostWindowsprograms.
JPEG(\*.jpg)
Animageformatthatletysouhighlycompressimagedata.However,thehigherthecompression,the lowertheimagequality.(TheTIFFformatisrecommendedwhenyouneedtomodifyorretouchyour scannedimage.)
PNG(\*.png)
Animageformatthatdoesnotlosequalityduringediting.
TIFF(\*.tif)
Afileformatcreatedforechangingdatabetweenmanyprograms,suchasgraphicandDTP software.
Multi-TIFF(\*.tif)
ATIFFfileformatwhenmultiplepagesaresavedtothesamefile,allowingyoutoedittheimages usingacompatibleprogram.
PDF(\*.pdf)
AdocumentformatthatisreadablebyWindowsandMacsystemsusingAdobeReader,Acrobat,or otherprograms.Youcansavemulti-pagedocumentsinonePDFfile.
SearchablePDF(\*.pdf)
AdocumentformatthatisreadablebyWindowsandMacsystemsusingAdobeReader,Acrobat,or otherprograms.Youcansavemulti-pagedocumentsinonePDFfile.Recognizedtextinthescanned documentcanbesearched.
Parenttopic: ScanninginEpsonScan2
ScanResolutionGuidelines
The Resolution setting, measured in dpi (dots per inch), controls the amount of detail captured in your scans. Increasing the resolution raise the amount of detail captured but comes with the following disadvantages:
• Largerfilesizes
- Ittakeslongertoscanyouroriginals, send/receiveyourscansbyemailorfax, andtoprintyourscans
•Theimagemaybecometoolargetofitonyourdisplayorprintonpaper
If you plant to en large as canned images you can print it at a largersize, you may need to increase the resolution from the default resolution set by Epson Scan2. Follow these guidelines to determine the resolution setting you need:
- Youwillscantheimageatitsoriginalsizebutenlargeitlaterinanimage-editingprogram.
IncreasetheEpsonScan2Resolutionsettinginyourscan.Increasetheresolutionbythesame amountyouwillincreasetheimagesizetoretainahighimagequality.Forexample,iftheresolutionis 300dpi(bitsperinch)andyouwilldoubletheimagesizelater,changetheResolutionsettingto600 dpi.
- Youwillscantheimageat100%orsmallersize.
SelecttheEpsonScan2Resolutionsettingbasedonhowyouwillusethescannedimage:
- Email/viewonacomputerscreen/postontheweb:96to200dpi
- Print/fax/converttoeditabletext(OCR)/createsearchablePDF:200to300dpi
Parenttopic: ScanninginEpsonScan2
Faxing
Seethesesectionstofaxusingyourproduct.
Note: This product allows you to store names, telephone numbers, and fax data in its memory even when the power is turned off. Makes sure your store all of the default settings if you give away or dispose of the product. This will erase all of your network settings and fax data.
ConnectingaTelephoneorAnsweringMachine
SettingUpFaxFeatures
SettingUpContactsandContactGroups
SendingFaxes
ReceivingFaxes
CheckingFaxStatus
PrintingFaxReports
ConnectingaTelephoneorAnsweringMachine
Youmustconnectyourproducttoatelephonewalljacktosendorreceivefaxes.Ifyouwanttousethe sametelephonelinetoreceivecalls,youcanconnectatelephoneoransweringmachinetoyourproduct usinganadditionalphonecable.
Note: If you do not connect a telephone to your product, make sure Receive Mode is set to Auto. Otherwise, you cannot receive faxes.
- ConnectaphonecabletoyourtelephonewalljackandtotheLINEportonyourproduct.
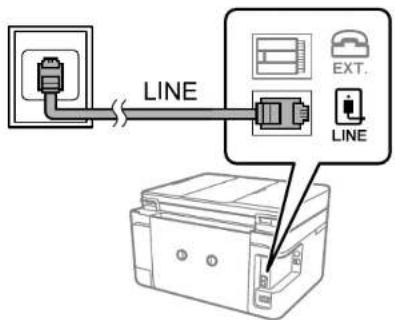
text_image
LINE EXT. LINENote: If you have a DSL or ISDN connection, you must connect the appropriate DSL filter, or ISDN terminaladapterorroutertothewalljacktobeabletousethelineforfaxingorvoicecallsusingyour product.ContactyourDSLorISDNproviderfortheneccessaryequipment.
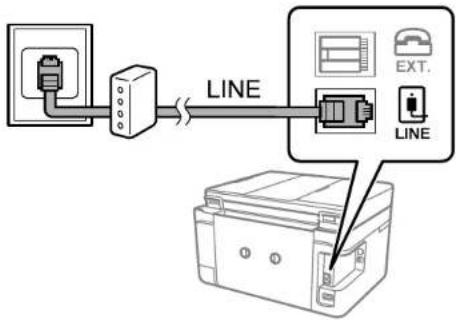
flowchart
graph TD
    A["Device"] -->|LINE| B["Printer"]
    B --> C["Line"]
    style A fill:#f9f,stroke:#333
    style B fill:#ccf,stroke:#333
    style C fill:#cfc,stroke:#333
- If you are connecting telephone or answering machine your product using a second phone cable, remove the cap from the EXT portony our product.
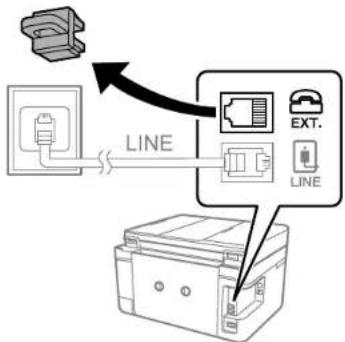
text_image
LINE EXT. LINE- Connect a second phone cable to your telephone or answering machine and to the EXT port on your product.
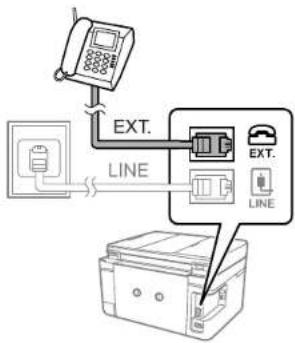
text_image
EXT. LINE EXT. LINENote: If you connect an answering machine and Receive Mode is set to Auto, set the number of ringsbeforeyourproductanswersacalltoanumberthatishigherthanyouransweringmachine's settingforthenumberofrings.
AnyphoneoransweringmachinemustbeconnectedtotheEXTportforyourproducttodetectan incomingfaxcallwhenthephoneispickedup.EpsoncannotguaranteecompatibilitywithVoIP, cablephonesystems,orfiberopticdigitalservicessuchasFIOS.
Parenttopic: Faxing
SettingUpFaxFeatures
Beforefaxingwithyourproduct, setupyourfaxheaderandselectthefaxfeaturesyouwanttouse.
Note: If you leave your product unplugged for a long period of time, you may need to reset the date and timesettingsforfaxes.
SettingUpBasicFaxFeatures
SelectingAdvancedFaxSettings
SettingUptheFaxUtility-Windows
SettingUpFaxFeaturesUsingtheFaxUtility-Mac
Parenttopic: Faxing
Relatedtasks
ReceivingFaxesAutomatically
SettingUpBasicFaxFeatures
Seethesectionstoselectthebasicsettingsyouneedtousetheproduct'sfaxfeatures.
UsingtheFaxSetupWizard
SelectingtheLineType
SettingtheNumberofRingstoAnswer
Parenttopic: SettingUpFaxFeatures
UsingtheFaxSetupWizard
Youcan setup the product's basic fax settings using the Fax Setting Wizard. This wizard is automatically displayed when the product is turned on for the first time. You can also change these settings individually from the Fax Settings menu.
-
Pressthehomebutton, if necessary.
-
SelectSettings.
- SelectGeneralSettings.
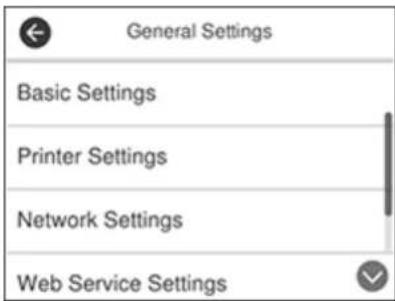
text_image
General Settings Basic Settings Printer Settings Network Settings Web Service Settings- ScrolldownandselectFaxSettings.
- ScrolldownandselectFaxSettingWizard.
TheFaxSettingWizardscreenappears.
6.SelectProceed.
- OntheFaxHeaderscreen, usethedisplayedkeypadtoenterthesendernameforyourfaxsource, suchasyournameorabusinessname. Youcanenterupto40characters.
- On the Your Phone Numberscreen, used displayed keypad to enter your fax number, up to 20 characters.
Note: Thenameandphonenumberinthefaxheaderidentifiesthesourceofthefaxesyousend.
-
On the Distinctive Ring Settings screen, do one of the following:
-
If you have subscribed to a distinctive ring service from your telephone company, select Settings. SelecttheringpatterntobeusedforincomingfaxesorselectAll.Gotostep12.
- If you donothave adistinctiveringservice, select Sklp and goto then next step.
Note: Distinctive ring services allows you to have several phone numbers on one phone line. Each numberisassignedadifferentrringpattern.Youcanuseonenumberforvoicecallsandanotherfor
faxcalls.SelecttheringpatternassignedtofaxcallsintheDistinctiveRingSetting.Ifyouselecta ring pattern other than All,Receive Mode is automatically set to Auto.
-
OntheReceiveModeSettingscreen, dooneofthefollowing:
-
If you have connected an external telephone or answering machine to the product, select Yes and gotothenextstep.
-
If you did not connect an external telephone or answering machine, select No and go to step 12. (ReceiveModeisautomaticallysettoAuto; otherwiseyoucannotreceivefaxes.)
-
On the next Receive Mode Setting screen, select Yes to receive faxes automatically or select No to receivefaxesmanually.
Note: If you connect an external answering machine and select to receive faxes automatically, make sure the Rings to Answer setting is correct. If you select to receive faxes manually, you need to answer every call and operate the product's control panel or your phonet or receive faxes.
- On the Proceed screen, confirm the displayed settings and select Proceed, or press the back arrow tochangethesettings.
- On the Run Check Fax Connections screen, select Start Checking and follow the on-screen instruction to check the fax connection and print a report of the check result. If there are any errors reported, try the solutions on thereport and run the check again.
If the SelectLine Typescreenappears, select the correct linetype.
If the Select Dial Tone Detection screen appears, select Disable. However, disabling the dial tone detectionfunctionmaydropthefirstdigitofafaxnumberandsendthefaxtothewrongnumber.
Parenttopic: SettingUpBasicFaxFeatures
SelectingtheLineType
If you connect the product to a PBX phones system to terminal adapter, you must change the product's line type. PBX (Private Branch Exchange) is used in office environments where an external accesscode such as "9" must be directed to call out on outside. The default Line Types setting is PSTN (Public Switched Telephone Network), which is a standard home phone line.
- Pressthehomebutton, if necessary.
- SelectSettings.
3. SelectGeneralSettings.
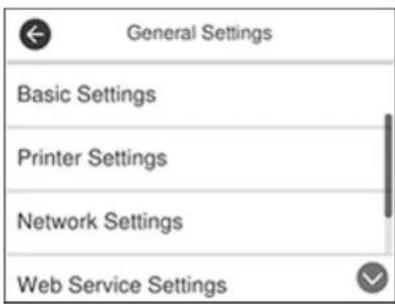
text_image
General Settings Basic Settings Printer Settings Network Settings Web Service Settings- ScrolldownandselectFaxSettings.
- SelectBasicSettings.
6.SelectLineType.
7.SelectPBX.
Youseeascreenlikethis:
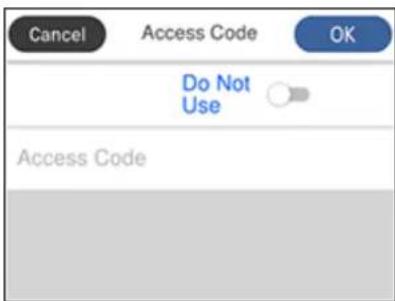
text_image
Cancel Access Code OK Do Not Use Access Code- SettheswitchtoUsetoactivatethesetting.
9.SelectAccessCode.
10.Usethedisplayedkeypadtoentertheaccesscode,suchas9,andselectOK.
Parenttopic: SettingUpBasicFaxFeatures
SettingtheNumberofRingstoAnswer
If you connect an external answering machine and select to receive faxes automatically, makes sure the Ringsto Answers setting is correct. Then number of frings should be higher than the number of frings your answering machine is set to for answering acall.
- Pressthehomebutton, if necessary.
- SelectSettings.
- SelectGeneralSettings.
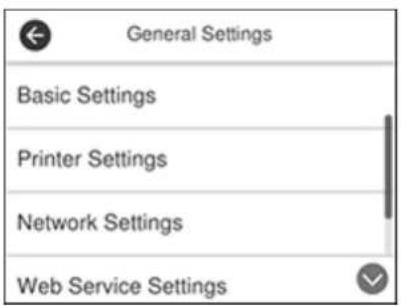
text_image
General Settings Basic Settings Printer Settings Network Settings Web Service Settings- ScrolldownandselectFaxSettings.
- SelectBasicSettings.
6.SelectRingstoAnswer.
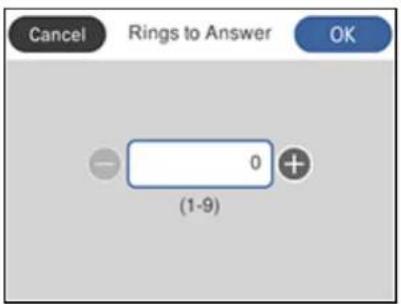
text_image
Cancel Rings to Answer OK - 0 + (1-9)- Select the number of rings and select OK. Make sure to select a number higher than the number of ringsyouransweringmachineissettoforansweringacall.
Note: An answering machine picks up every call faster than the product, but the product can detect fax tonesandstartreceivingfaxes. If youanswerthephoneandhearafaxtone, checkthattheproducthas startedreceivingthefax, thenhangupthephone.
Parenttopic:SettingUpBasicFaxFeatures
SelectingAdvancedFaxSettings
Youcanselectavarietyofadvancedfaxsettings.
- Pressthehomebutton, if necessary.
- SelectSettings.
3. SelectGeneralSettings
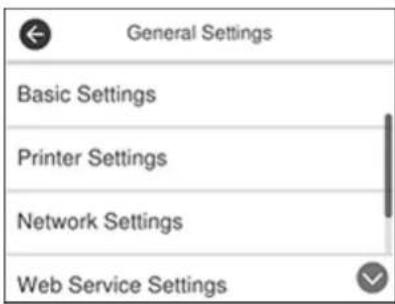
text_image
General Settings Basic Settings Printer Settings Network Settings Web Service Settings4. ScrolldownandselectFaxSettings.
Youseeascreenlikethis:
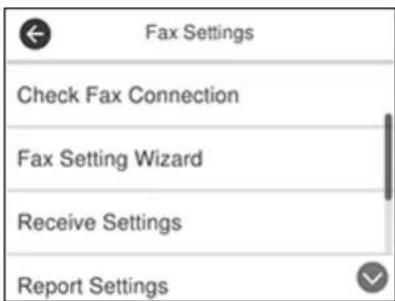
text_image
Fax Settings Check Fax Connection Fax Setting Wizard Receive Settings Report Settings5. Select the group of settings you want to change.
PrintSettings-Fax
BasicSettings-Fax
SecuritySettings-Fax
Parenttopic:SettingUpFaxFeatures
PrintSettings-Fax
Set the print options you want to use for incoming faxes in the Receive Settings > Print Settings menu.
| SettingOptionsDescription | ||
| AutoReductionOnSelect | oreducethesizeoflarge | receivedfaxestofitonthepapersizeintheselectedpapersource. |
| OffSelecttoprintlarge | ncomingfaxesattheiroriginalsizeonmultiplesheets,ifnecessary. | |
| SplitPageSettingsDelete | PrintDataAfterSplit | Selecthowtosplitlargeincomingfaxesacrossmultiplesheets. |
| OverlapWhenSplit | ||
| AutoRotationOnIfyouhav | loadedA5-sizepaper, | selectOntorotatelandscape-orientedincomingfaxessothattheyprintcorrectlyonthepaper. |
| Off | ||
| AddReceptionInformation | OnSelectOntoinclude | thedate,time,thesender'sinformation,andapagenumberintheheaderofyourincomingfaxes. |
| Off | ||
| 2-SidedOnSelectOntoprint | tincomingfaxesdouble | sided.YoucanalsoselecttheBindingMargin. |
| Off | ||
| PrintStartTimingAllPages | Received | Selecttoprintincomingfaxesaftertheproductreceivesallofthepagesofthedocument. |
| FirstPageReceived | Selecttoprintincomingfaxesassoonastheproductreceivesthefirstpageofthedocument. | |
| CollationStackOnSelectO | ontoprintincomingfaxes | ssothathepagesarestackedinthecorrectpageorder.(Whentheproductislowonmemory,thisoptionmaynotbeavailable.) |
| Off | ||
| Print Suspend Time | Off | Select On to set a time period to stop automaticprintingoffaxesorreportsandsavereceivedfaxesintheproduct'smemory.(Makesurethereisenoughfreememorybeforeusingthisfunction.) |
| On | ||
| TimetoStop | ||
| TimetoRestart | ||
| QuietModeOnSelectOnto | reducenoiseduringprinting. (Printing speedmaybereduced.) | |
| Off | ||
Parenttopic: SelectingAdvancedFaxSettings
BasicSettings-Fax
Setthebasicoptionsyouwanttouseforincomingandoutgoingfaxes.
| SettingOptionsDescription | ||
| FaxSpeedFast(33,600bps) | Setsthespeedatwhich | yousendandreceivefaxes. |
| Medium(14,400bps) | ||
| Slow(9,600bps) | ||
| ECMOnTurnsonErrorCorrection | ectionMode(ECM)to | automaticallycorrecterrorsinsentorreceivedfax data. |
| OffTurnsoffErrorCorrection | actionMode(ECM);colorfaxes cannotbesentorreceived. | |
| DialToneDetectionOnAutomaticallydialsthenumberyouenterforfaxingwhentheproductdetectsadialtone. | ||
| LineTypePSTNSelectsastandardphoneline(PublicSwitchedTelephoneNetwork). | ||
| HeaderFaxHeaderSelectbentertheheaderinformationandyourphonenumberforinclusiononoutgoingfaxes. | ||
| ReceiveModeManualLets | youconfirmwhetheranin | comingfaxshouldbeprinted;atelephonemustbeconnectedtotheproduct |
| AutoAutomaticallyreceivesandprintsfaxes. | ||
| DistinctiveRingAllIfyouareusingaDistinctiveRing | Serviceonyourphoneline,yourtelephonecompanycanassigntwoormorephonenumberstothesamelineandassigndiferentringpatternstoeach.Ifyouusethisservice,selectthenumberofringsforyourfaxnumberosyourproductcanreceivefaxesonthecorrectnumberofrings.SelectAllforphoneslinesthatdonotusethisservice. | |
| RingstoAnswer1to9Setsthnenumberofringsbefore | yourproductreceivesafax.IfReceiveModeissettoAutoandanansweringmachineisconnectedtotheproduct,makesurethissettingissethigherthanthenumberofringsyouransweringmachineissettoansweracall. | |
| RemoteReceiveOffLetsyoustartreceivingfaxesusingyourphone | ||
| RejectionFaxVariousLetsyouautomaticallyrejectfaxesreceivedfromblockednumbers,unrecognizedcontacts,orwithblankheaders. | ||
Parenttopic: SelectingAdvancedFaxSettings
SecuritySettings-Fax
Setthesecurityoptionsyouwanttouseforfaxdata.
| SettingOptionsDescription | ||
| DirectDialing Restrictions | OffDoesnotrestrictdialedfaxnumbers. | |
| OnAllowsfaxingonlytonumbersstoredinthecontactslistorhistory. | ||
| EnterTwiceRequiresyoutoenterfaxnumberstwicetopreventerrors. | ||
| ConfirmAddressListOffS | Selectswhetherornottodisplayarecipient | |
| On | confirmationscreenbeforeafaxissent. | |
| BackupDataAutoClearOff | IfAutomaticallyerasessentorreceivedfaxdatafrom | |
| On | yourproduct'smemory. | |
| ClearBackupData—Delet | esallsentorreceivedfaxdataremaininginyourproduct'smemory;runthisfunctionifyouaregivingawayordisposingofyourproduct. | |
Parenttopic: SelectingAdvancedFaxSettings
SettingUptheFaxUtility-Windows
YoucansetuptheFAXUtilityforWindowsforusewithyourproduct.
Note: Before using the FAX Utility for Windows, make sure you have set up the fax features on your productusingtheproductcontrolpanel.Alsofirstconfirmthatyoucansendandreceivefaxesusingthe controlpanel.
- Dooneofthefollowing:
•Windows10: ClickandElectEPSONSoftware.
•Windows8.x: NavigatetotheAppsscreen.
- Windows (other versions): Click 📋 or Start > Programs or All Programs > EPSON Software.
- SelectFAXUtility.
The first time you use the FAX Utility, you see this introduction window:
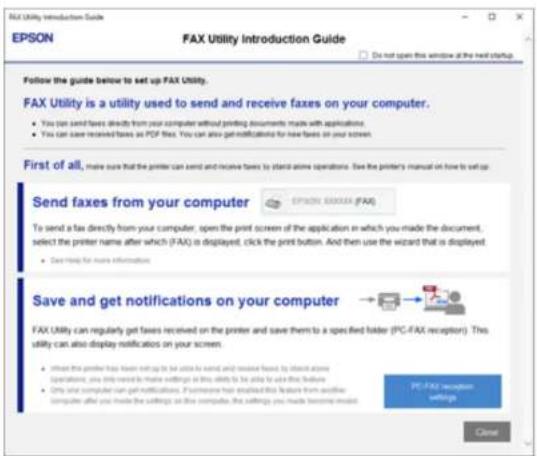
text_image
FAX Utility Introduction Guide EPSON FAX Utility Introduction Guide Do not open this window at the next startup. Follow the guide below to set up FAX Utility. FAX Utility is a utility used to send and receive faxes on your computer. • You can send faxes directly from your computer without printing documents made with applications. • You can save received faxes as PDF file. You can also get notifications for new faxes on your screen. First of all, make sure that the printer can send and receive faxes to stand alone operations. Save the printer's manual on how to set up. Send faxes from your computer OPTIONAL SERVICE (FAX) To send a fax directly from your computer, open the print screen of the application in which you made the document, select the printer name after which (FAX) is displayed, click the print button. And then use the wizard that is displayed. • Get help for more information. Save and get notifications on your computer FAX Utility can regularly get faxes received on the printer and save them to a specified folder (PC-FAX receptor). This utility can also display notifications on your screen • If not the printer has been sent up to be extra to send and receive fees, by interest alone operations, you only need to make settings on this utility to be able to use this feature. • Only what computer can get notifications. If someone has displayed this feature from another computer after you made the settings on this computer, the settings you made being sent. PE/FAX receipt settings Close- ReadabouttheFAXUtilityandclickCloseatthebottomofthewindow.
Youseethiswindow:
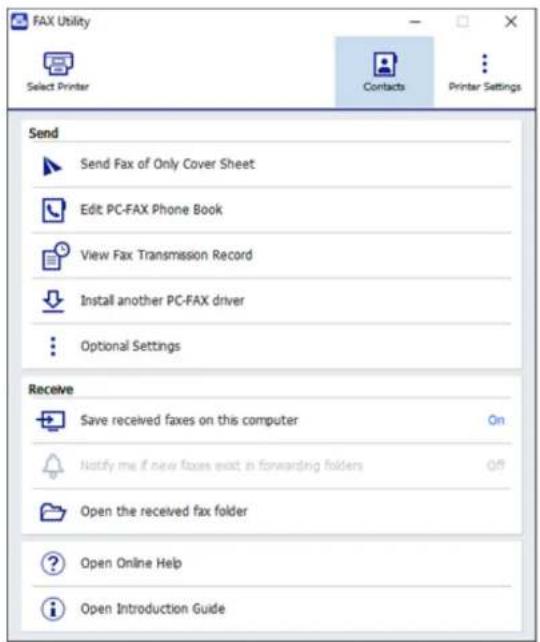
text_image
FAX Utility Select Printer Contacts Printer Settings Send Send Fax of Only Cover Sheet Edit PC-FAX Phone Book View Fax Transmission Record Install another PC-FAX driver Optional Settings Receive Save received faxes on this computer Notify me if new faxes exist in forwarding folders Open the received fax folder Open Online Help Open Introduction Guide- Click Select Printer and follow the on-screen instructions to transfer your product's fax settings to theFAXUtility.
Note: For detailed information, click Help or Open Online Help.
Parenttopic: SettingUpFaxFeatures
SettingUpFaxFeaturesUsingtheFaxUtility-Mac
Youcan setup your fax header and select your fax settings using the FAX Utility for Mac.
-
In the Apple menu or the Dock, select System Preferences. Select Print & Fax, Print & Scan, or Printers & Scanners, select the FAX option for your product, and select Options & Supplies. SelectUtilityandselectOpenPrinterUtility.
-
Double-clickFAXUtility, if necessary.
Youseethiswindow:
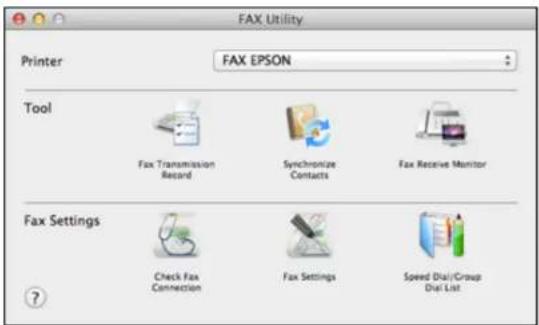
text_image
FAX Utility Printer FAX EPSON Tool Fax Transmission Record Synchronize Contacts Fax Receive Monitor Fax Settings Check Fax Connection Fax Settings Speed Dial/Group Dial List ?-
Select your FAX product in the Printer list.
-
SelectFaxSettings.
-
Follow the prompt that appear on the screento entry your fax header information and select your fax settings.
Note: Fordetailedinformation, selecttheFAXUtility?icon.
Parenttopic: SettingUpFaxFeatures
SettingUpContactsandContactGroups
Youcansetupalistofcontactsandtheirfaxnumberssoyoucanquicklyselectthemforfaxing.You canalsosetupcontactgroupstosendafaxmessagetomultiplecontacts.
SettingUpContactsUsingtheProductControlPanel
ImportingContactsUsingtheFaxUtility-Windows
SettingUpSpeed/GroupDialListsUsingtheFaxUtility-Mac
Parenttopic: Faxing
SettingUpContactsUsingtheProductControlPanel
You can setup your contacts and contact groups using the control panel on your product.
CreatingaContact
EditingorDeletingaContact
CreatingaContactGroup
EditingorDeletingaContactGroup
Parenttopic: SettingUpContactsandContactGroups
CreatingaContact
Youcancreatealistofcontactstosavefrequentlyusedfaxnumbers.
Note: You can create up to 99 contacts and contact groups combined.
- Pressthehomebutton, if necessary.
2.SelectFax.
Youseeascreenlikethis:
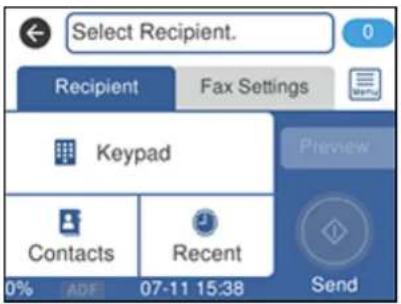
text_image
Select Recipient. Recipient Fax Settings Keypad Contacts Recent 0% ADF 07-11 15:38 Send Preview3.SelectContacts.
Youseeascreenlikethis:
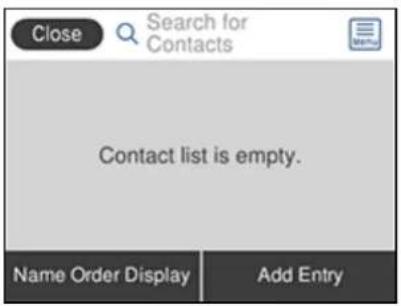
text_image
Close Search for Contacts Contact list is empty. Name Order Display Add Entry- SelectAddEntry.
- SelectAddContact.
Youseeascreenlikethis:
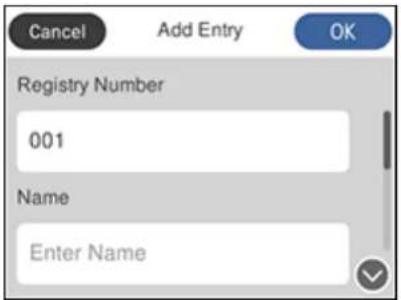
text_image
Cancel Add Entry OK Registry Number 001 Name Enter Name- SelecttheRegistryNumberfieldandusetheon-screenkeyboardifyouwanttochangethe registrationnumberassignedtothenewcontact.(Changingthisfieldisoptional.)
-
Select the Name field, use the displayed keyboard to enter the contact name (up to 30 characters), and press OK.
-
Select the Index Word field, use the displayed keyboard to enter a word to use when searching for anentry(upto30characters), and press OK. (Thisfieldisoptional.)
- Select the Fax Number field, and use the numeric keypad on the LCD screen or the buttons on the producttoenterthefaxnumber.Youcanenterupto64characters.
Note: If necessary, enter an outside line access code (such as 9) at the beginning of the fax number. If the access code has been set up in the Line Type setting, enter the # pound sign instead of the code.
- SelectOK>Close.
Parenttopic: SettingUpContactsUsingtheProductControlPanel
EditingorDeletingaContact
Youcaneditordeleteanyofthecontactsonyourlist.
- Pressthehomebutton, if necessary.
2.SelectFax.
Youseeascreenlikethis:
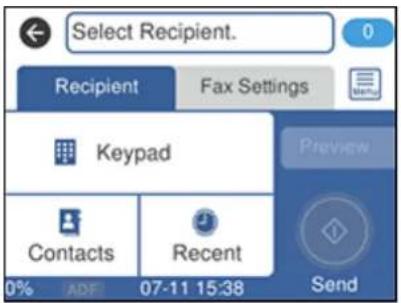
text_image
Select Recipient. Recipient Fax Settings Keypad Contacts Recent 0% ADF 07-11 15:38 Send Preview3.SelectContacts.
- Selecttheiconnexttothecontactyouwanttoeditordelete.
Youseeascreenlikethis:
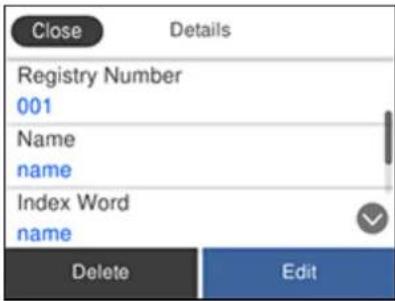
text_image
Close Details Registry Number 001 Name name Index Word name Delete Edit5.Dooneofthefollowing:
• To delete the contact, select Delete and select Yes on the confirmation screen.
- To edit the contact, select Edit, select the item you want to change, enter the correct information, and select OK. When you are finished editing, select OK, and select Close.
Parenttopic: SettingUpContactsUsingtheProductControlPanel
CreatingaContactGroup
Youcancreateagroupofcontactssothatyoucaneasilysendfaxestomultiplerecipients.
Note: You can create up to 100 contacts and contact groups combined. You must create a contact before creating a contact group.
- Pressthehomebutton, if necessary.
2.SelectFax.
Youseeascreenlikethis:
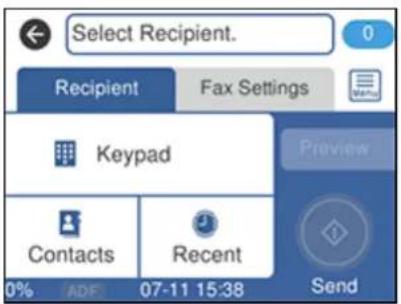
text_image
Select Recipient. Recipient Fax Settings Keypad Contacts Recent 0% ADF 07-11 15:38 Send3.SelectContacts
4. SelectAddEntry.
5. SelectAddGroup.
Youseeascreenlikethis:

text_image
Cancel Add Group OK Registry Number 002 Group Name (Required) Enter Group Name-
SelecttheRegistryNumberfieldandusetheon-screenkeyboardifyouwanttochangethe registrationnumberassignedtothenewgroup.(Changingthisfieldisoptional.)
-
SelecttheGroupNamefield, usethedisplayedkeyboardtoenterthegroupname(upto30 characters), andpressOK.
- Select the Index Word field, use the displayed keyboard to enter a word to use when searching for a group(upto30characters), and press OK. (Thisfieldisoptional.)
- SelectContact(s) Added to the Group.
Youseeyourcontactslist.
- Select the contacts you want to include in your group.
Note: To display the contacts in alphabetical order, select Name Order Display.
Acheckmarkappearsnexttoeachselectedcontact.
11.SelectOK.
Parenttopic: SettingUpContactsUsingtheProductControlPanel
EditingorDeletingaContactGroup
Youcaneditanexistingcontactgrouptoaddordeleteentries.Youcanalsodeletetheentirecontact group.
- Pressthehomebutton, if necessary.
2.SelectFax.
Youseeascreenlikethis:

text_image
Select Recipient. Recipient Fax Settings Keypad Contacts Recent 0% ADF 07-11 15:38 Send Preview3.SelectContacts.

- Select the icon next to the group you want to editor delete.
Youseeascreenlikethis:
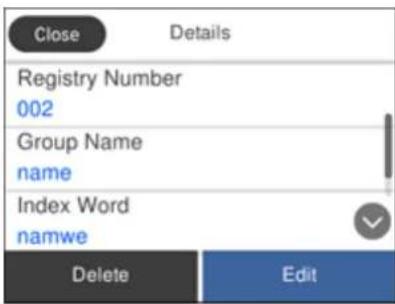
text_image
Close Details Registry Number 002 Group Name name Index Word namwe Delete EditNote: If you want to delete the entire group, select Delete.
- Toeditthegroup, selectEdit.
6.SelectContact(s)AddedtotheGroup.
Youseealistofthecontactsinyourgroup.
- To addor delete a contact, select the contact.
- When you are finished, select Close, select OK, and select Close again.
Parenttopic: SettingUpContactsUsingtheProductControlPanel
ImportingContactsUsingtheFaxUtility-Windows
You can edit contacts stored in your product and import contacts from your Windows Address Book to the PC-FAX Phone Book in the FAX Utility for Windows.
1.Dooneofthefollowing:
•Windows10: ClickandSelectEPSONSoftware.
- Windows8.x: NavigatetotheAppsscreen.
- Windows (other versions): Click 📋 or Start > Programs or All Programs > EPSON Software.
2. SelectFAXUtility.
The first time you use the FAX Utility, you see this introduction window:
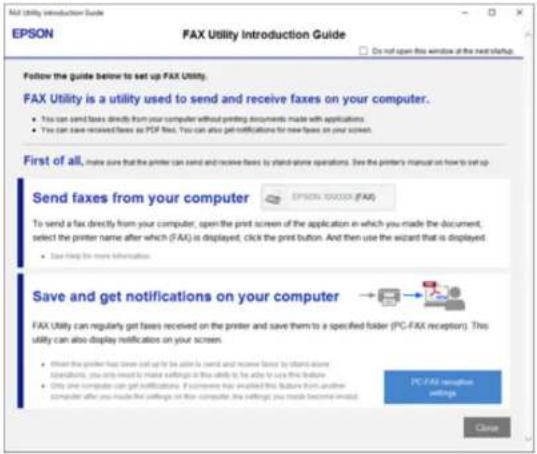
text_image
Add Utility Introduction Guide EPSON FAX Utility Introduction Guide Do not open this window at the next startup Follow the guide below to set up FAX Utility. FAX Utility is a utility used to send and receive faxes on your computer. • You can send taxes directly from your computer without printing documents made with applications. • You can save received taxes as PDF files. You can also get notifications for new fees on your screen. First of all, make sure that the printer can send and receive faxes by stand-alone operations. See the printer's manual on how to set up Send faxes from your computer EPSON 100000 (FAX) To send a fax directly from your computer, open the print screen of the application in which you made the document, select the printer name after which (FAX) is displayed, click the print button. And then use the wizard that is displayed. • Use help for more information. Save and get notifications on your computer FAX Utility can regularly get faxes received on the printer and save them to a specified folder (PC-FAX receptor). This utility can also display notifications on your screen. • Offer the printer has done out to be able to send and receive faxes by stand-alone Description, you only need to make settings in this utility to be able to use this feature • Only one computer can get notifications. If someone has enabled this feature from another computer after you made few settings on this computer, the settings you made become invalid. PC/FAX notification settings Close- ReadabouttheFAXUtilityandclickCloseatthebottomofthewindow.
Youseethiswindow:
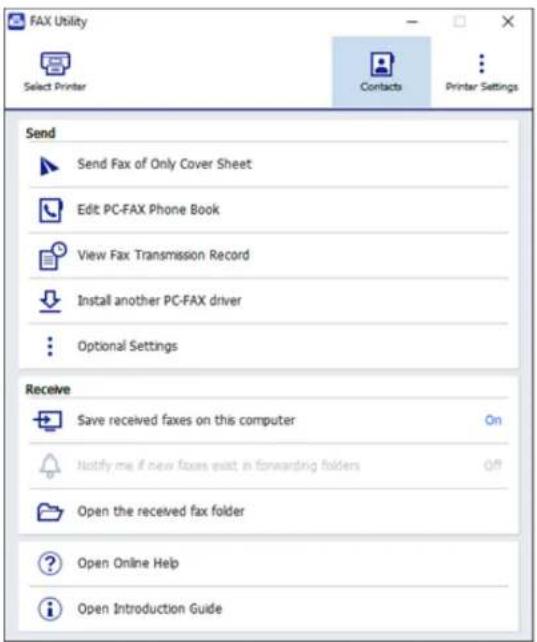
text_image
FAX Utility Select Printer Contacts Printer Settings Send Send Fax of Only Cover Sheet Edit PC-FAX Phone Book View Fax Transmission Record Install another PC-FAX driver Optional Settings Receive Save received faxes on this computer Notify me if new faxes exist in forwarding folders Open the received fax folder Open Online Help Open Introduction Guide- Toeditthecontactslistonyourproduct, clickContacts.
5.Dooneofthefollowing:
•Toeditacontact,selectitinthelistandclicktheicon.

• Todeleteacontact, selectitinthelistandclicktheicon.

- To import fax numbers from your Windows Address Book into the FAX Utility PC-FAX Phone Book, select Edit PC-FAX Phone Book.
Youseethiswindow:
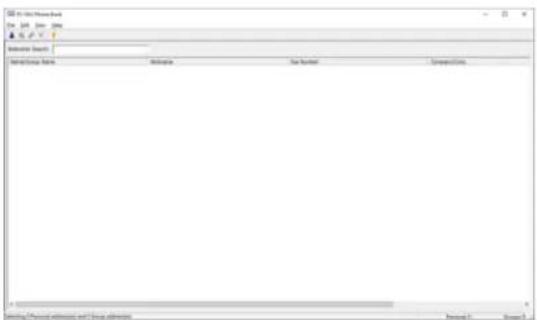
text_image
No. 100 No. 100 No. 100 No. 100 No. 100 No. 100 No. 100 No. 100 No. 100 No. 100 No. 100 No. 100 No. 100 No. 100 No. 100 No. No. No. No. No. No. No. No. No. No. No. No. No. No. No. No. No. No. No. No. No. No. No. No. No. No. No. No. No. No. No. No. No. No. No. No. No. No. No. No. No. No. No. No. No. No. No. No. No. No. No.- SelectFile>ImportFromWindowsAddressBook.
- SelectthecontactsyouwanttoimportandclickOK.
Note: For detailed information, select Help or Open Online Help.
Parenttopic: SettingUpContactsandContactGroups
Relatedtopics
SettingUpContactsUsingtheProductControlPanel
SettingUpSpeed/GroupDialListsUsingtheFaxUtility-Mac
YoucansetupyourspeeddialandgroupdiallistsusingtheFAXUtility. Theutilityalsoletsyouimport faxnumbersfromtheMacAddressBookandbackupfaxnumberstoyourproduct'smemory.
Note: You can create up to 60 speed dial and group dial entries combined.
- In the Apple menu or the Dock, select System Preferences. Select Print & Fax, Print & Scan, or Printers & Scanners, select the FAX option for your product, and select Options & Supplies. SelectUtilityandselectOpenPrinterUtility.
- Double-click FAX Utility, if necessary.
Youseethiswindow:
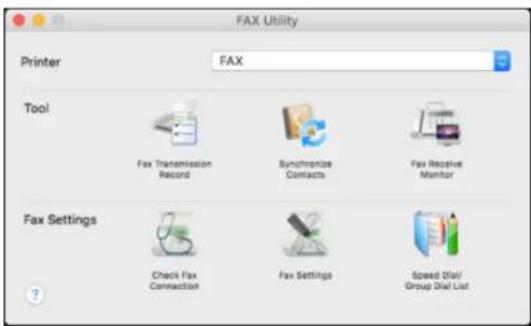
text_image
FAX Utility Printer FAX Tool Fax Transmission Record Synchronize Contacts Fax Receive Monitor Fax Settings Check Fax Connection Fax Settings Speed Dial/ Group Dial List- Select your FAX product in the Printer list.
- SelectSpeedDial/GroupDialList.
Youseethiswindow:
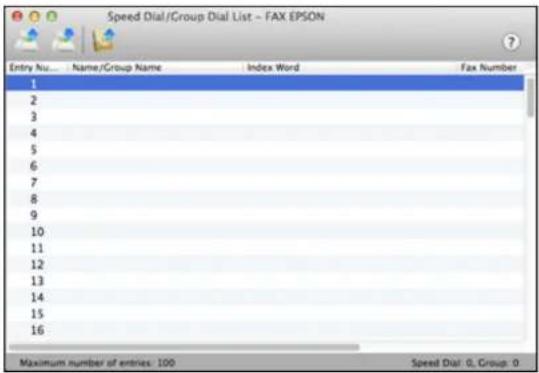
text_image
Speed Dial/Group Dial List -- FAX EPSON Entry No... Name/Group Name Index Word Fax Number 1 2 3 4 5 6 7 8 9 10 11 12 13 14 15 16 Maximum number of entries: 100 Speed Dial: 0, Group: 0- To addanentry, double-click an empty entry.
Note: To edit an entry, select it and change the information. To delete an entry, select it and press theDeletekeyonyourkeyboard.
6.Dooneofthefollowing:
• To create a speed dial entry, select Speed Dial, enter a name and fax number, and click OK.
- To create a group dial entry, select Group Dial, enter a name, select your desired fax numbers, and click OK.
-
Repeat the previous steps as necessary to add all your speed dial or group dial entries.
-
To import entries from your MacAddressbook, click the icon.

- When you are finished, click theicontosavetheentriestoyourproduct'smemory.
Parenttopic: SettingUpContactsandContactGroups
Relatedtopics
SettingUpContactsUsingtheProductControlPanel
SendingFaxes
Seethesectionstosendfaxesusingyourproduct.
SendingFaxesfromtheProductControlPanel
SendingFaxesUsingtheFaxUtility-Windows
SendingFaxesUsingtheFaxUtility-Mac
DialingFaxNumbersfromaConnectedTelephone
Parenttopic: Faxing
SendingFaxesfromtheProductControlPanel
Seethesectionstosendfaxesusingtheproduct'scontrolpanel.
SendingaFaxUsingtheKeypad,ContactList,orHistory
FaxSendingOptions
SendingaFaxataSpecifiedTime
Parenttopic: Sending Faxes
Relatedtasks
SelectingtheLineType
Relatedtopics
SettingUpContactsUsingtheProductControlPanel
PlacingOriginalsontheProduct
SendingaFaxUsingtheKeypad,ContactList,orHistory
Youcansendafaxfromyourproductcontrolpanelbyenteringthefaxnumber,orselectingthenumber fromeitherthecontactlistorfaxhistory.
Note: You can send a black-and-white fax to up to 100 contacts or 99 groups at a time, or send a color faxtoonerecipientatatime. Ifyourrecipient'sfaxmachinedoesnotprintincolor,yourfaxis automaticallysentinblack-and-white.
- Place your original on the product for faxing.
2.Pressthehomebutton,ifnecessary.
3.SelectFax.
Youseeascreenlikethis:
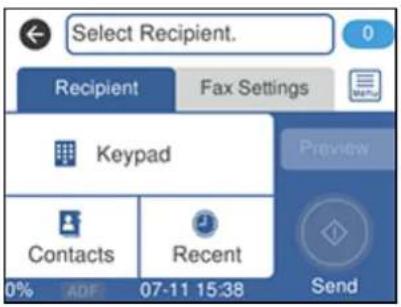
text_image
Select Recipient. Recipient Fax Settings Keypad Contacts Recent 0% ADF 07-11 15:38 Send- Dooneofthefollowingtoselectfaxrecipients:
- Manually enter a fax number: Select Keypad, enter a fax number using the displayed keypad, and press OK when done. To add another fax number, repeat this step. You can also set the numeric keypad on the control panel to enter a fax number.
Note: If direct dialing has been restricted, you can only select the number from the contact list or faxhistory.lfnecessary,enteranoutsidelineaccesscode(suchas9)atthebeginningofthefax number. If the access code has been set up in the Line Type setting, enter the # pound sign instead of the code. If your fax number requires a brief pause, select – to insert a pause symbol (–).
- Select from the contact list: Select Contacts to display the contact list. Select one or more contacts(selectthecontactagaintodeselectit),andselectClose.
- Select from the sent fax history: Select Recent to display the sent fax history. Select a recipient fromthelist.
Note: To delete entered recipients, select the Enter Recipient field, select the recipient you want to delete, and select Remove.
-
If you need to change any fax settings, select Fax Settings and select your settings.
-
If you want to preview your fax in black-and-white on the LCD screen, select Preview. (If the preview looks incorrect, select Cancel, reposition the document or change the fax settings, and repeat this step.) You cannot send the fax in color after previewing it.
Note: If you don't touch the preview screen for 20 seconds, your product sends the fax automatically. You cannot preview images when the Direct Send setting is turned on.
7.SelectSend.
Note: Tocancelfaxing, selecttheicon
Yourproductscansyouroriginalandpromptsyoutoplaceadditionalpages,ifnecessary.
Afterscanningyouroriginals,yourproductdialsthenumberandsendsthefax.
Parenttopic: Sending Faxes from the Product Control Panel
FaxSendingOptions
While sending a fax, you can select Fax Settings and select these options.
| SettingOptionsDescription | on | |
| OriginalSize(Glass)HalfL | letterSetsthesizeforad | documentplacedonthescanner glass |
| A5 | ||
| Letter | ||
| A4 | ||
| ColorModeB&WSelectwh | ethertoscanimagesinc | colororblackand white |
| Color | ||
| ResolutionStandardAdjust | ststhescanresolutionand | dprintqualityof outgoingfaxes |
| Fine | ||
| Photo | ||
| DensityVaryinglevels | available | Letsyouselectfromvariousdensitylevels |
| RemoveBackgroundAuto | Automaticallyremove | sanybackgroundcoloron scannedimages |
| Varyinglevels available | Letsyouselectfromvariouslevelsofbackground coloradjustment | |
| ADF Continuous Scan | Off | Select On to have the product to ask if you want to scananotherpageafteradocumentintheADFhas finishedscanning |
| On | ||
| DirectSendOffSelectOnto | sendblack-and-white | axestoasingle recipientassoonastheconnectionismade,without savingthescannedimagetomemory.Youcannot usethissettingwhensendingacolorfaxorsendinga faxtomultiplerecipients. |
| On | ||
| Send Fax Later | Off | Select On to send the current fax at a selected time |
| On | ||
| Add Sender Information | Off | Lets you include a header, your phone number, or a destinationlistintheselectedlocationonyour outgoingfaxes |
| OutsideOfImage | ||
| InsideOfImage | ||
| SettingOptionsDescription | ||
| TransmissionReportPrintonErrorLetsyouselectwhenoprinttransmissionreports | ||
Parenttopic: Sending Faxes from the Product Control Panel
SendingaFaxataSpecifiedTime
Youcansendafaxatatimeofyourchoice.Youcanonlyscheduleonefaxatatime.
Note: Make sure the product's date and time settings are correct. You can only send faxes in black-and-whitewhenyouusethisoption.
- Place your original on the product for faxing.
- Pressthehomebutton, if necessary.
3.SelectFax.
Youseeascreenlikethis:
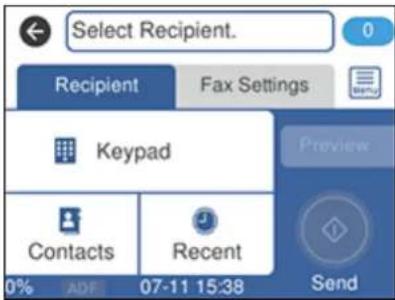
text_image
Select Recipient. Recipient Fax Settings Keypad Contacts Recent 0% ADF 07-11 15:38 Send- EnterafaxnumberorselectanumberfromtheContactsorRecentlist.
-
SelectFaxSettings.
6.SelectSendFaxLater. -
SelectOn.
- Select Time, use the displayed keypad on the LCD screen to enter your desired time, and select OK twice.
- Select the Recipient tab and select Send.
Note: Tocancelfaxing, selecttheicon
Afterscanningyouroriginals, yourproductdialsthenumberandsendsthefaxatthespecifiedtime.
Note: If the product is turned off at the specified time, the fax is sent when it is powered on.
Parenttopic: Sending Faxes from the Product Control Panel
Relatedtopics
SettingUpContactsandContactGroups
PlacingOriginalsontheProduct
SendingFaxesUsingtheFaxUtility-Windows
YoucansendafaxfromaprintingprograminWindows. Youcanfaxupto100pagesatatime, includingacoversheet.
- Openthefileyouwanttofaxandselecttheprintcommand.
Youseeawindowlikethis:
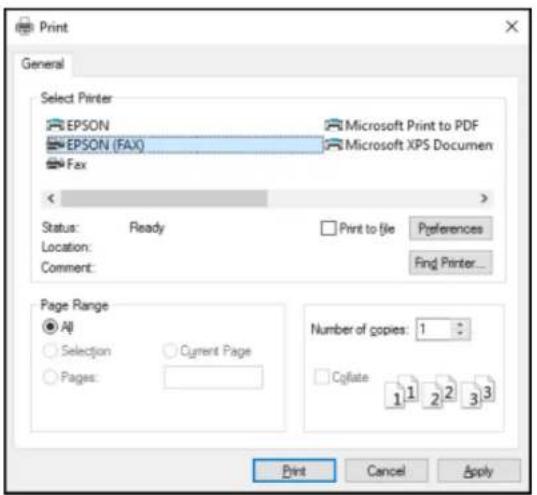
text_image
Print General Select Printer EPSON Microsoft Print to PDF EPSON (FAX) Microsoft XPS Documen Fax < Status: Ready Location: Comment: Print to file Preferences Find Printer... Page Range All Selection Current Page Pages: Number of copies: 1 Coflate 1 1 2 2 3 3 Print Cancel Apply- Select your product with the FAX option as the printer.
- TochangethePaperSize, Orientation, Color, ImageQuality, or CharacterDensitysettings, click the Preferences or Properties button.
Note: If you see a Setup, Printer, or Options button, click it. Then click Preferences or Properties onthenextscreen.Formoreinformationaboutselectingfaxprintsettings,clickHelp.
- SelectthePageRangeasnecessary.(LeavetheNumberofcopiessetto1.)
5.ClickPrintorOK.
If you're faxing for the first time, you see a window likethisone:
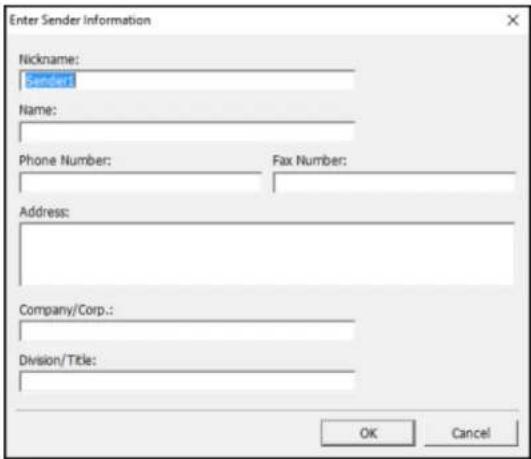
text_image
Enter Sender Information Nickname: Name: Phone Number: Fax Number: Address: Company/Corp.: Division/Title: OK Cancel- Enter your sender information so that recipients can identify the origin of the fax. Then click OK to savethesenderinformation.
Youseeawindowlikethis:
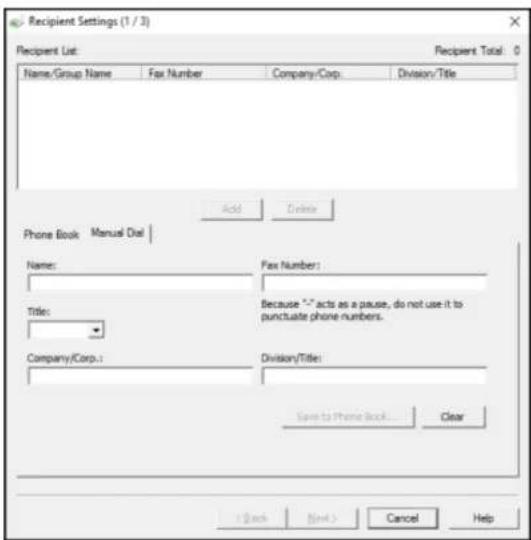
text_image
Recipient Settings (1 / 3) Recipient List: Name/Group Name Fax Number Company/Corp Division/Title Add Delete Phone Book Manual Dial Name: Fax Number: Title: Because "-" acts as a pause, do not use it to punctuation phone numbers. Company/Corp.: Division/Title: Save to Phone Book... Clear (Clock Next > Cancel Help- Enter the recipient's name and fax number or select a recipient from the phonebook, then click Next.
Note: For detailed instructions on using the Epson FAX Utility, click Help.
-
Selectacoversheetandenterasubjectandmessage,thenclickNext.
-
ClickSendtotransmityourfax.
Parenttopic: Sending Faxes
SendingFaxesUsingtheFaxUtility-Mac
YoucansendafaxfromaMacprintingprogramusingtheFAXUtility.Youcanfaxupto100pagesata time,includingacoversheet.
-
Openthefileyouwanttofax.
-
Selecttheprintcommandinyourapplication.
Note: You may need to select a print icon on your screen, the Print option in the File menu, or another command. Seeyourapplication's helputilityfordetails.
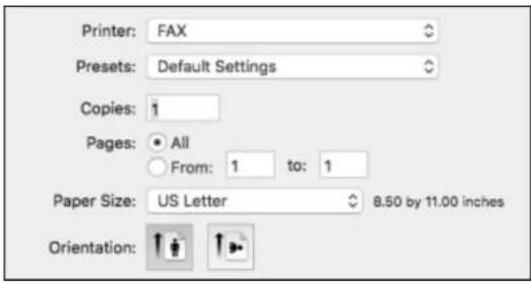
text_image
Printer: FAX Presets: Default Settings Copies: 1 Pages: All From: 1 to: 1 Paper Size: US Letter 8.50 by 11.00 inches Orientation:- Select your product FAX option as the Printersetting.
- If necessary, click the arrow next to the Printer setting or the Show Details button to expand the printwindow.
- SelectthenumberofpagesyouarefaxingasthePagesetting.
Note:LeavetheCopiessettingsetto1.
- SelectRecipientSettingsfromthepop-upmenu.
Youseethiswindow:
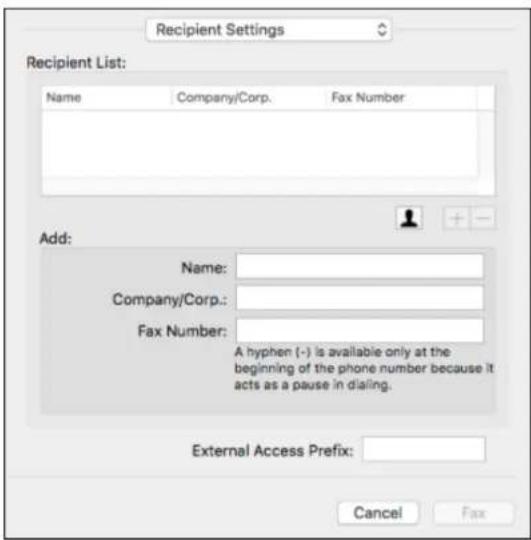
text_image
Recipient Settings Recipient List: Name Company/Corp. Fax Number Add: Name: Company/Corp.: Fax Number: A hyphen (-) is available only at the beginning of the phone number because it acts as a pause in dialing. External Access Prefix: Cancel Fax7.Dooneofthefollowingtochooseyourrecipient:
- SelectanameorgroupfromtheRecipientList.
- Enteraname, company, and fax number and click the + button.
-
Clicktheiconandselectarecipientfromyouraddressbook.
-
SelectFaxSettingsfromthepop-upmenu.
Youseethiswindow:
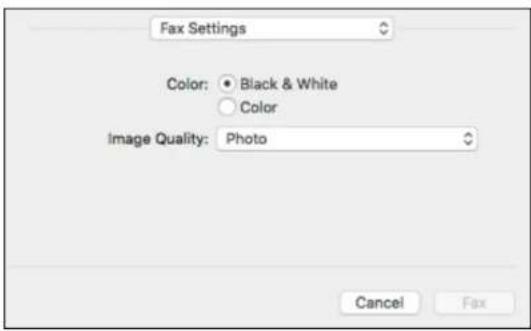
text_image
Fax Settings Color: Black & White Color Image Quality: Photo Cancel Fax- Select the Color and Image Quality settings you want to use for your fax.
10.ClickFax.
Parenttopic: Sending Faxes
DialingFaxNumbersfromaConnectedTelephone
If you connected a telephone to the EXT port on your product, you can send a fax by dialing the fax numberfromtheconnectedtelephone.Iftherecipient'sphonenumberandfaxnumberarethesame, youcanspeaktotherecipientbeforesendingthefax.
- Place your original on the product for faxing.
- Pressthehomebutton, if necessary.
- Dialthefaxnumberfromtheconnectedtelephone.Speaktotherecipientifnecessary.
Note: If you are using a pre-paid calling card, enter the number and password required to use the cardbeforeenteringthedestinationfaxnumber.
-
SelectFaxontheLCDscreen.
-
SelectFaxSettingsandselectanysettingsasnecessary.
Note: Yourproductnowcommunicateswiththerecipient'sfaxmachine.Donothangupthe telephone.
- When you hear a fax tone, select Send to start sending the fax.
Note: If your recipient's fax machine does not print in color, your fax is automatically sent in black-and-white.
- Hangupthetelephone.
Parenttopic: Sending Faxes
ReceivingFaxes
Seethesectionstoreceivefaxeswithyourproduct.
FaxReception
ReceivingFaxesAutomatically
ReceivingFaxesManually
ReceivingaFaxbyPolling
ViewingaFaxontheLCDScreen(UsingtheInbox)
SelectingReceivedFaxOptionsUsingtheFaxUtility-Windows
Parenttopic: Faxing
FaxReception
YourproductwillautomaticallyreceiveandprintfaxeswhenyousettheReceiveModetoAuto.
If you connected at elephoneto your product so you can us the same phoneline for faxes and voice calls, you can also set your product to receive faxes manually. This allows you to check for a fax tone using the telephone and press a button on your product to receive the fax.
Makesuretoloadpaperinyourproductandselectyourfaxsettingsbeforereceivingafax.
Note: If you run out of paper during fax printing, load more paper and press the button indicated on your product's LCD screentocontinue.
Parenttopic:ReceivingFaxes
ReceivingFaxesAutomatically
To receive faxes automatically, make sure Receive Mode is set to Auto (the default setting for the product).
To change the Receive Mode if necessary, select Settings > General Settings > Fax Settings > Basic Settings>ReceiveMode.
If an answering machine is connected, make sure the product's Rings to Answer setting is set higher than then number of rings your answering machine is set to answer a call. Forexample, if the answering machine is set top pick up on the fourth ring, set the product top pick up on the fifth ring or later.
Parenttopic:ReceivingFaxes
Relatedtasks
ReceivingFaxesManually
ReceivingFaxesManually
You can set up your product to receive faxes manually by setting the Receive Mode to Manual. This lets youcheckforafaxtoneontheconnectedtelephonebeforeereceivingafax.
-
To change the Receive Mode, select Settings > General Settings > Fax Settings > Basic Settings>ReceiveModeandselectManual.
-
Whentheconnectedtelephonerings, answerthecall.
-
If you hear a fax tone, select Fax on the LCD display.
Note: To receive a fax using the attached telephone instead of the product control panel, enable the Fax Settings > Basic Settings > Remote Receive setting.
- SelectSend/Receive.
5.SelectRecv..
-
Selecttheicontostartreceivingthefax.
-
Hangupthetelephone.
Parenttopic:ReceivingFaxes
Relatedtasks
ReceivingFaxesAutomatically
ReceivingaFaxbyPolling
Youcanusepollingtoreceiveafaxfromanotherfaxmachine(suchasafaxinformationservice).
Note: You cannot use polling to receive a fax from a fax information service that uses audio guidance.
- Pressthehomebutton, if necessary.
2.SelectFax.
Youseeascreenlikethis:
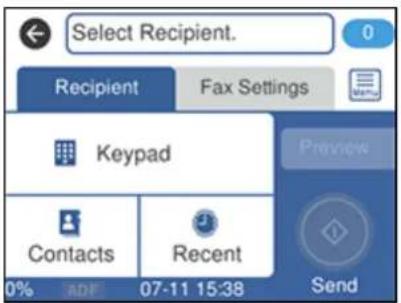
text_image
Select Recipient. Recipient Fax Settings Keypad Contacts Recent 0% ADF 07-11 15:38 Send Preview3.Presstheicon
4. SetPollingReceivetoOn.
5. SelectClose.
6.Enterthefaxnumberyouexpecttoreceivethefaxfrom.
7. SelectPollingtostartreceivingthefax.
Parenttopic:ReceivingFaxes
ViewingaFaxontheLCDScreen(UsingtheInbox)
Youcansavereceivedfaxesinyourproduct'smemoryandviewthemontheLCDscreen.
- Pressthehomebutton, if necessary.
- SelectSettings.
3. SelectGeneralSettings.
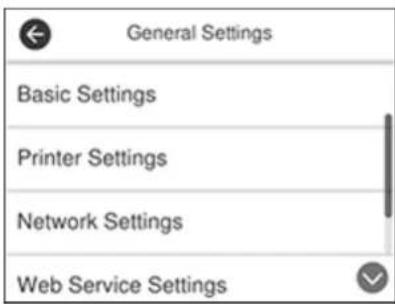
text_image
General Settings Basic Settings Printer Settings Network Settings Web Service Settings- ScrolldownandselectFaxSettings.
- SelectReceiveSettings.
- SelectFaxOutputSettings.
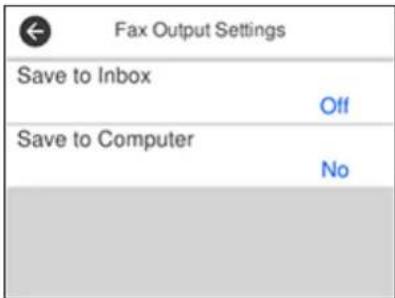
text_image
← Fax Output Settings Save to Inbox Off Save to Computer No7.SelectSavetolnbox.
8. Set SavetoInboxtoOn.
9. SelectOptionWhenMemoryisFullandchooseanoption.
- SelectInboxPasswordSettingstoset, change, orresetthepasswordfortheinbox.
Note: You cannot set an Inbox password if you set Option When Memory is Full to Receive and printfaxes.
- Pressthehomebutton.
- Select.Entertheinboxpassword,ifnecessary.
- Select the fax you want to view.
Youseethefaxdisplayonthescreen.
14.Presstheicon
15. Selectoneoftheprintingordeletingoptions, and followtheon-screeninstructions.
Note: Delete faxes after you print or view them to prevent the product's memory from filling up. When the memoryisfull,youcanonlyprintorrejectincomingfaxes.
Parenttopic:ReceivingFaxes
SelectingReceivedFaxOptionsUsingtheFaxUtility-Windows
YoucanselectoptionsforusewithreceivedfaxesusingtheFAXUtilityforWindows.
- Dooneofthefollowing:
•Windows10: ClickandElectEPSONSoftware.
- Windows8.x: NavigatetotheAppsscreen.
- Windows (other versions): Click 📋 or Start > Programs or All Programs > EPSON Software.
- SelectFAXUtility.
The first time you use the FAX Utility, you see this introduction window:
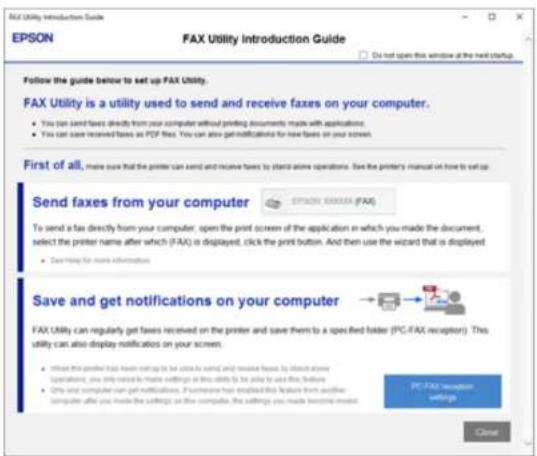
text_image
FAX Utility Introduction Guide EPSON FAX Utility Introduction Guide Do not open this window at the next startup. Follow the guide below to set up FAX Utility. FAX Utility is a utility used to send and receive faxes on your computer. • You can send faxes directly from your computer without printing documents made with applications. • You can save received faxes as PDF file. You can also get notifications for new faxes on your screen. First of all, make sure that the printer can send and receive faxes to stand alone operations. Save the printer's manual on how to set up. Send faxes from your computer OPTIONAL SERVICE (FAX) To send a fax directly from your computer, open the print screen of the application in which you made the document, select the printer name after which (FAX) is displayed, click the print button. And then use the wizard that is displayed. • Get help for more information. Save and get notifications on your computer FAX Utility can regularly get faxes received on the printer and save them to a specified folder (PC-FAX receptor). This utility can also display notifications on your screen • If not the printer has been sent up to be extra to send and receive fees, by interest alone operations, you only need to make settings on this utility to be able to use this feature. • Only what computer can get notifications. If someone has displayed this feature from another computer after you made the settings on this computer, the settings you made being sent. PE/FAX receipt settings Close- ReadabouttheFAXUtilityandclickCloseatthebottomofthewindow.
Youseethiswindow:
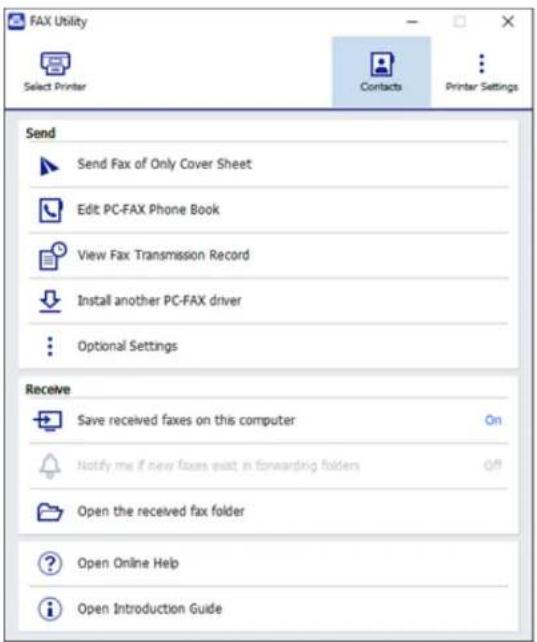
text_image
FAX Utility Select Printer Contacts Printer Settings Send Send Fax of Only Cover Sheet Edit PC-FAX Phone Book View Fax Transmission Record Install another PC-FAX driver Optional Settings Receive Save received faxes on this computer Notify me if new faxes exist in forwarding folders Open the received fax folder Open Online Help Open Introduction Guide- Tosavefaxesreceivedbyyourproductonyourcomputer,selectSavereceivedfaxesonthis computer.
- Select the destination folder and other options, and click OK.
YoureturntotheFAXUtilitywindow.
-
Toreceivenotificationswhenreceivedfaxesarriveintheselecteddestinationfolderonyour computer,selectNotifymeifnewfaxesexistinforwardingfolders.
-
SelecthowoftenyouwanttobenotifiedofreceivedfaxesandclickOK.
Note: For detailed information, click Help or Open Online Help.
Parenttopic:ReceivingFaxes
CheckingFaxStatus
You can check the status of current fax jobs, or fax esthath have been received or sent on the product control panel.
- Pressthehomebutton, if necessary.
2.SelectFax.
Youseeascreenlikethis:
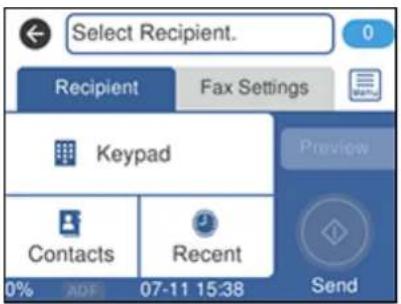
text_image
Select Recipient. Recipient Fax Settings Keypad Contacts Recent 0% ADF 07-11 15:38 Send Preview3.Selecttheico

- SelectTransmissionHistory and select the fax job by you want to check.
Note: If you see an numbered icon above the icon your product's LCD screen or the received fax light is flashing, received faxes have been temporarily saved to the product's memory.
Parenttopic: Faxing
PrintingFaxReports
Youcanprintseveraltypesoffaxreportswhenevernecessary.
- Pressthehomebutton, if necessary.
2.SelectFax.
Youseeascreenlikethis:
text_image
Select Recipient. Recipient Fax Settings Keypad Contacts Recent 0% ADF 07-11 15:38 Send Preview3.Presstheico

- SelectFaxReport.
- Select the fax report you want to print.
FaxReportOptions
Parenttopic: Faxing
FaxReportOptions
Selectthefaxreportorlistyouwanttoprint.
LastTransmission
Print a report on the previous fax that was sent or received through polling. You can use the Fax Settings > Transmission Report setting to print the report automatically.
FaxLog
View or print a report on recent fax transmissions. You can use the Settings > General Settings > Fax Settings > Fax Log Auto Print setting to print the report automatically.
FaxSettingsList
Printalistofthecurrentfaxcommunicationsettings.
ProtocolTrace
Printadetailedreportforthepreviousssentorreceivedfax.
Parenttopic: PrintingFaxReports
RefillingInk
Whentheinklevelisbelowthelowerlineonaninktank,youneedtorefillit.
Beforecheckingtheinklevelorrefillinganinktankasdescribedhere,besuretoreadtheinksafety precautions.
Caution: If the ink level is below the lower line on the ink tank, fill it to the upper line on the ink tank. Continued use of the product when the ink level is below the lower line on the tank could damage the product.
InkSafetyPrecautions
CheckInkLevels
PurchaseEpsonInkandMaintenanceBox
RefillingtheInkTanks
MaintenanceBoxReplacement
InkSafetyPrecautions
Note: The product has a low ink alert system. The accuracy of this system depends on the user refilling theinktankscorrectly. Theproductcannotdirectlymeasuretheinklevelsinthetanks;instead estimatestheamountofinkremainingbyinternallymonitoringinkusage. Thelowinkalertsystemmay generateinaccuratemessagesiftheinktanksarenotrefilledaccordingtotheseinstructions.
Asaprecaution, performregularvisualinspectionsoftheinktankstoensureinklevelsdonotfallbelow thelowerline.Continueduseoftheproductwhentheinklevelisbelowthelowerlineonthetankcould damagetheproduct.
InkHandlingPrecautions
- Keepinkbottlesandtheinktankunitoutofthereachofchildren.Donotallowchildrentodrinkfromor handletheinkbottlesandbottlecaps.
- Donottiltorshakeaninkbottleafteropeningit; otherwise, inkmayleak.
•Ifinkgetsonyourskin,washitthoroughlywithsoapandwater.Ifinkgetsintoyoureyes,flushthem immediatelywithwater.Ifinkgetsintoyourmouth,spititoutimmediately.Seekmedicaladviceif problemspersist.
• Donotsqueezetheinkbottles.
InkRefillingPrecautions
- Useinkbottleswiththecorrectpartnumberforthisproduct.
•Theuseofnon-EpsoninkmaycausedamagethatisnotcoveredbyEpson'swarranty,andunder certaincircumstances,maycauseerraticproductbehavior. - Thisproductrequirescarefulhandlingofink.Inkmaysplatterwhentheinktanksarefilledorrefilledwithink.Ifinkgetsonyourclothesorbelongings,itmaynotcomeoff.
- Donotopentheinkbottlepackageuntilyouarereadytofillaninktank.Inkbottlesarevacuum packedtomaintainreliability.Ifyouleaveaninkbottleunpackedforalongtimebeforeusingit,print qualitymaybeaffected.
• If the ink level is below the lower line on the ink tank, refill the ink. Continued use of the product when the ink level is below the lower line on the ink tank could damage the product. - Epsonrecommendsfillingallinktankstotheupperlinewhentheproductisnotoperatingtoresettheinklevels.
• After bringing an ink bottle inside from acold storagesite, allow it to warm up at room temperature for at least three hours before using it. - Storeinkbottlesinacool,darkplace.
- Storetheinkbottlesinthesameenvironmentastheproduct.Whenstoringortransportinganopened inkbottle,donottilthebottleanddonotsubjectittoimpactsortemperaturechanges.Otherwise,ink mayleakevenifthecapontheinkbottleistightenedsecurely.Besuretokeeptheinkbottleupright whentighteningthecap,andtakemeasurestopreventinkfromleakingwhenyoutransportthebottle.
InkBottleandInkTankInformation
- Tomaintainoptimumprintheadperformance, someinkisconsumedfromallinktanksduringprinting andwhenperformingmaintenanceoperations,suchascleaningtheprinthead.
•Theinkbottlesmaycontainrecycledmaterials,butthisdoesnotaffectproductfunctionor performance. - Thespecificationandappearanceoftheinkbottlesaresubjecttochangewithoutpriornoticefor improvement.
- Ifaninkbottleisdented, youcanstillusetheink. Thequalityandquantityofinkwillnotbeaffected.
- Whenprintinginmonochromeorgrayscale, colorinkmaybeusedinsteadofblackink, depending on thepapertypeorprintqualitysettings. This is because a mixture of colorinks is used to create black.
- Areserveamountofinkremainsinthetankwhenyourproductindicatesthatarefillisnecessary.
Parenttopic:RefillingInk
CheckInkLevels
Yourproductanditsprintingsoftwarewillletyouknowwhenaninktankisloworexpended.
CheckingInkLevelsonYourProduct
CheckingInkLevelswithWindows
CheckingInkLevels-Mac
DisablingSpecialOfferswithWindows
Parenttopic: RefillingInk
CheckingInkLevelsonYourProduct
To confirm the actual in k levels, visually check the in k levels in the product's sink tanks. Makes sure the in k levels are above the lower lines on the in k tanks.
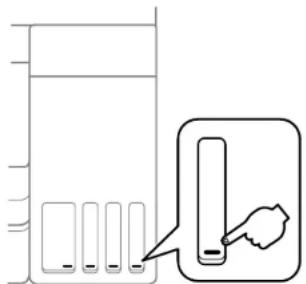
text_image
Diagram showing a device with multiple screens connected to a screen, with an icon of a hand pointing to the screen.Note: The product has a low ink alert system. The accuracy of this system depends on the user refilling theinktankscorrectly. Theproductcannotdirectlymeasuretheinklevelsinthetanks;instead estimatestheamountofinkremainingbyinternallymonitoringinkusage. Thelowinkalertsystemmay generateinaccuratemessagesiftheinktanksarenotrefilledaccordingtotheseinstructions.
Asaprecaution, performregularvisualinspectionsoftheinktankstoensureinklevelsdonotfallbelow thelowerline.Continueduseoftheproductwhentheinklevelisbelowthelowerlineonthetankcould damagetheproduct.
Parenttopic: CheckInkLevels
Relatedtasks
RefillingtheInkTanks
CheckingInkLevelswithWindows
Alowinkreminderappearsifyoutrytoprintwheninkislow, andyoucancheckyourinklelsatany timeusingautilityonyourWindowscomputer.
- To check your ink levels, access the Windows Desktop and double-click the icon for your product in therights side of the Window task bar, or click the up arrow and double-click.
Youseeawindowlikethis:
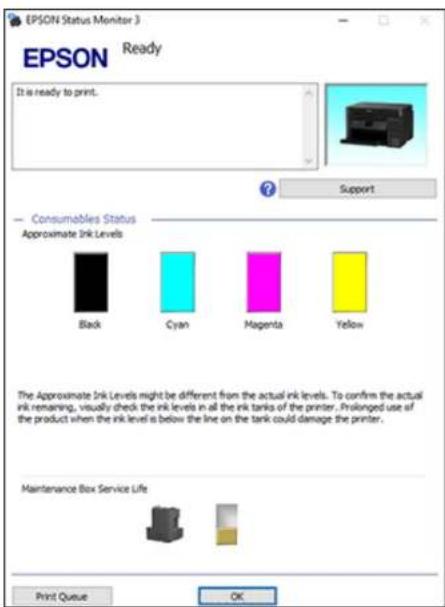
text_image
EPSON Status Monitor 3 EPSON Ready It is ready to print. Support Consumables Status Approximate Ink Levels Black Cyan Magenta Yellow The Approximate Ink Levels might be different from the actual ink levels. To confirm the actual ink remaining, visually check the ink levels in all the ink tanks of the printer. Prolonged use of the product when the ink level is below the line on the tank could damage the printer. Maintenance Box Service Life Print Queue OK- Refillanyinktankasneeded.
Note: The ink levels displayed are an estimate and may differ from the actual ink remaining in the ink tanks. To confirm the actual remaining ink, visually check the ink levels in the ink tanks. Continued use of the product when the ink level is below the lower line on the tank could damage the product.
Parenttopic: CheckInkLevels
Relatedtasks
RefillingtheInkTanks
CheckingInkLevels-Mac
YoucancheckyourinklevelsusingautilityonyourMac.
-
In the Apple menu or the Dock, select System Preferences. Select Print & Fax, Print & Scan, or Printers & Scanners, select your product, and select Options & Supplies. Select Utility and select OpenPrinterUtility.
-
SelectEPSONStatusMonitor.
Youseeawindowlikethis:
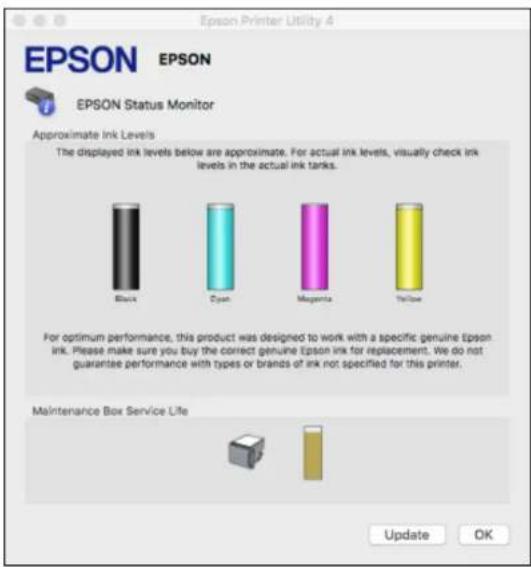
text_image
EPSON Printer Utility 4 EPSON EPSON EPSON Status Monitor Approximate Ink Levels The displayed ink levels below are approximate. For actual ink levels, visually check ink levels in the actual ink tanks. Black Cyan Magenta Tellow For optimum performance, this product was designed to work with a specific genuine Epson ink. Please make sure you buy the correct genuine Epson ink for replacement. We do not guarantee performance with types or brands of ink not specified for this printer. Maintenance Box Service Life Update OK- Refillanyinktankasneeded.
Note: Touppdateorrefreshthedisplayedinklevels, clickUpdate.
Note: The ink levels displayed are an estimate and may differ from the actual ink remaining in the ink tanks. To confirm the actual remaining ink, visually check the ink levels in the ink tanks. Continued use of the product when the ink level is below the lower line on the tank could damage the product.
Parenttopic: CheckInkLevels
Relatedtasks
RefillingtheInkTanks
DisablingSpecialOfferswithWindows
YoucandisablespecialoffersmessagesfromEpsonusingautilityonyourWindowscomputer.
- AccesstheWindowsDesktopandright-clicktheiconforyourproductintherightsideofthe Windowstaskbar,orclicktheuparrowandright-click.SelectMonitoringPreferences. Youseethiswindow:
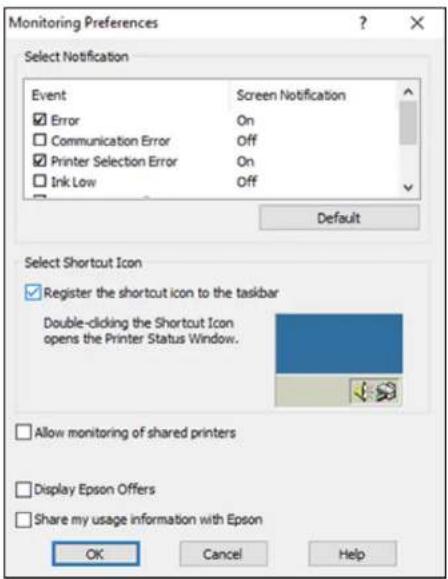
text_image
Monitoring Preferences Select Notification Event Screen Notification ✓ Error On ☐ Communication Error Off ✓ Printer Selection Error On ☐ Ink Low Off Default Select Shortcut Icon ✓ Register the shortcut icon to the taskbar Double-clicking the Shortcut Icon opens the Printer Status Window. Allow monitoring of shared printers Display Epson Offers Share my usage information with Epson OK Cancel Help- Todisablepromotionaloffers, deselecttheDisplayEpsonOfferscheckbox.
Parenttopic:CheckInkLevels
PurchaseEpsonInkandMaintenanceBox
You can purchase genuine Epsonink, maintenanceboxes, and paperatepson.com (U.S. sales) or epson.ca (Canadian sales). You can also purchase supplies from an Epson authorized reseller. To find the neareststone, call 800-GO-EPSON(800-463-7766) in the U.S. or 800-807-7766 in Canada.
Note: This product is designed to work with genuine Epson inks. Non-Epson ink or any other ink not specified for this printer could cause damage not covered by Epson's warranties.
The included initial link bottles must be used for printers setup and are not for resale. The printerships with full link bottles and part of the ink from the first bottles is used to charge the printhead. Yields vary considerably based on images printed, print settings, papertype, frequency of use and temperature.
InkBottleandMaintenanceBoxPartNumbers
Parenttopic: RefillingInk
InkBottleandMaintenanceBoxPartNumbers
Usethesepartnumberswhenyouorderorpurchasenewinkbottlesoranewmaintenancebox. Usethe inkbythedateprintedonthepackage.
| InkcolorPartnumber | |
| Black502 | |
| Cyan502 | |
| Magenta502 | |
| Yellow502 |
Maintenanceboxpartnumber:T04D100
Parenttopic: Purchase Epson Ink and Maintenance Box
RefillingthelnkTanks
Makesureyouhavenewinkbottleshandyandhavereadtheinksafetyprecautionsbeforeyoubegin.
Youcancontinuetousetheproductevenifoneormoreinktanksarenotfilledalltheway.However,for themostaccurateinklevelmonitoring,fillalltheinktanksuptothetopline.
Note: The product has a low ink alert system. The accuracy of this system depends on the user refilling theinktankscorrectly. Theproductcannotdirectlymeasuretheinklevelsinthetanks;instead
estimatestheamountofinkremainingbyinternallymonitoringinkusage. Thelowinkalertsystemmay generateinaccuratemessagesiftheinktanksarenotrefilledaccordingtotheseinstructions.
Asaprecaution, performregularvisualinspectionsoftheinktankstoensureinklevelsdonotfallbelow thelowerline.Continueduseoftheproductwhentheinklevelisbelowthelowerlineonthetankcould damagetheproduct.
Caution: Wear disposable gloves while refilling the ink tanks to avoid staining your hands. If ink spills, wipeitoffimmediatelywithadamptoweltoavoidpermanentstains.Ifinkgetsonyourclothesor belongings,itmaynotcomeoff.
- Turnonyourproduct.
2.Liftupthescannerunit.
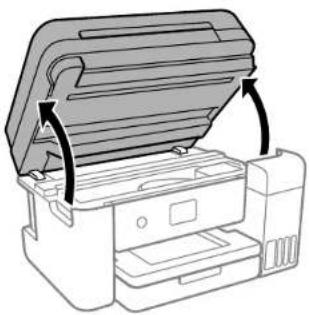
natural_image
Line drawing of a printer with an open lid and arrows indicating assembly or operation (no text or symbols)- Opentheinktankcover, thenopenthecapfortheinktankyouaregoingtofill.
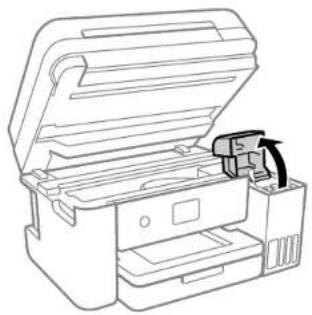
natural_image
Line drawing of an open industrial machine with a mechanical component inserted (no text or symbols)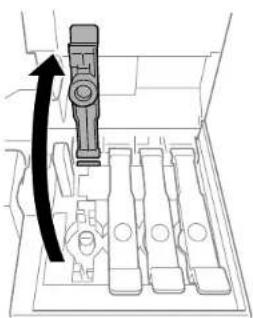
natural_image
Diagram of a mechanical device with an arrow indicating rotation or movement, no text or symbols present- Hold the ink bottle upright and slowly turn the bottle capture remove it.
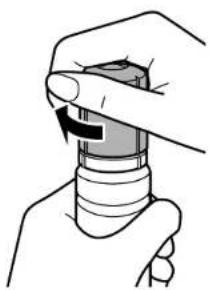
natural_image
Illustration of a hand holding a cylindrical object with an arrow indicating rotation (no text or symbols)Caution: Do not shake or squeeze the bottle. Do not touch the top of the bottle after its cap is removed.
Warning: If ink gets on your skin, wash it thoroughly with soap and water. If ink gets into your eyes, flush them immediately with water. If ink gets into your mouth, spit out immediately. Seek medical advice if problems persist. Keep the ink bottles out of there each of children and donot drink the ink.
- Position the top of the ink bottle along the slot in front of the filling port, then slowly stand the bottle upto insert it.
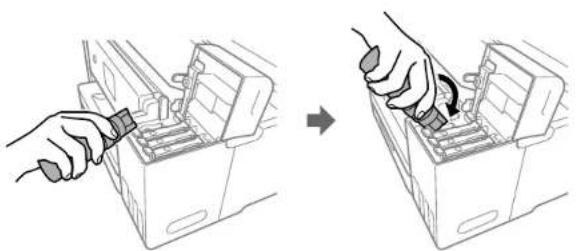
natural_image
Illustration of hands using a tool to adjust or install an electronic device into a battery case (no text or symbols present)Note: Refer to the color-coded sticker on the ink tank unit to identify the color of each tank. Do not forcethebottlesintoposition;theyarekeyedforeachcolor.
- Waitfortheinktofillthetank. Donotsqueezethebottle. Inkflowsintothetankandstops automaticallywhentheinkisfilledtotheupperline.
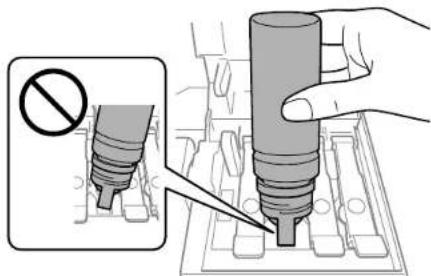
text_image
Diagram showing a hand using a screwdriver to adjust a screw with a no-smoking symbol, alongside a close-up of the screw being inserted.Note: Ifinkdoesnotflowfromthebottle, liftandreinsertthebottle.
- Whentheinktankisfull, removetheinkbottleandsecurelyclosetheinktankcap.

text_image
Diagram showing a hand pressing down a component with a prohibition symbol indicating no movement or disassembly.Note: If any ink remains in the bottle, replace the bottle cap and tighten it. Store the bottle upright for lateruse.
-
Repeat the previous steps as necessary for each ink tank you need to refill.
-
Closetheinktankcover, thenclosethescannerunit.
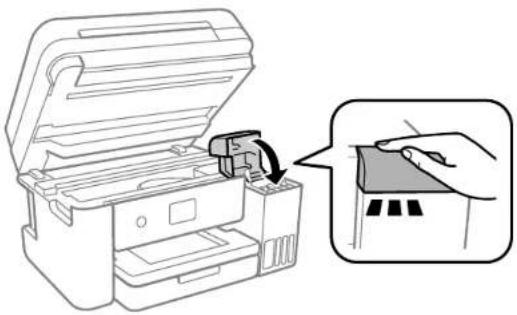
natural_image
Illustration of a printer with an open lid and a hand inserting a clip into a base, showing a magnified view of the clip (no text or symbols present)- Press the OK button on the product control panel to proceed. Follow the on-screen instructions to resettheinklevelforthecolorsyourefilled.
Parenttopic: RefillingInk
Relatedconcepts
PurchaseEpsonInkandMaintenanceBox
MaintenanceBoxReplacement
Themaintenanceboxstoressurplusinkthatgetsflushedfromthesystemduringprintheadcleaning. WhenyouseeamessageontheLCDscreen,followtheon-screeninstructionstoreplacethe maintenancebox.
Notethefollowingprecautionswhenreplacingthemaintenancebox:
- Donotremovethemaintenanceboxoritscoverexceptwhenreplacingthemaintenancebox.
- Donottouchthegreenchiponthesideofthemaintenancebox.
- Donottiltthemaintenanceboxafterremovingitorinkmayleak.
- Donottouchtheopeningsinthemaintenanceboxoryoumaygetinkonyou.
- Donotdropthemaintenanceboxorsubjectittostrongshocks.
- If you cannot replace the cover, the maintenance box may not be installed correctly. Remove and reinstall them maintenance box.
- Donotstorethemaintenanceboxinhighorfreezingtemperatures.
Caution: Do not reuse a maintenance box that has been removed and left uninstalled for a long period. Keepthemaintenanceboxawayfromdirectsunlight.
Note: The maintenance box is a user-replaceable part and is not covered by the product warranty.
Parenttopic: RefillingInk
AdjustingPrintQuality
If your print quality declines, you may need to run a utility to clean an align the printhead.
Ifrunningtheseutilitiesdoesnotsolvetheproblem,youmayneedtorunaPowerCleaningorcleanthe paperorprintheadpath.
PrintHeadMaintenance
PrintHeadAlignment
CleaningthePaperGuide
CleaningthePrintHeadPath
CheckingtheNumberofSheets
PrintHeadMaintenance
If your printoutsbecometoolight, or youseedarkorlightbandsacrossthem, you may need to clean the printhead nozzles. Cleaning usesink, socleanthenozzles only if print quality declines.
Youcancheckforcloggednozzlesbeforeyoucleanthemsoyoudon'tcleanthemunnecessarily.
Note: You cannot clean the print head if the ink level has reached the lower line on the ink tank, and may notbeabletocleanitwhentheinklevelinanyofthetanksislow. Youmustrefilltheinktankfirst.
If you still see white ordark lines orgaps in your printouts, even after cleaning the printhead several times, you can run a Power Cleaning.
PrintHeadNozzleCheck
PrintHeadCleaning
PowerCleaning
Parenttopic: AdjustingPrintQuality
Relatedtasks
RefillingtheInkTanks
PrintHeadNozzleCheck
Youcanprintanozzlecheckpatterntocheckforcloggednozzles.
CheckingtheNozzlesUsingtheProductControlPanel
CheckingtheNozzlesUsingaComputerUtility
Parenttopic: PrintHeadMaintenance
CheckingtheNozzlesUsingtheProductControlPanel
Youcanchecktheprintheadnozzlesusingthecontrolpanelonyourproduct.
- MakesuretherearenoerrorsontheLCDscreenandtheoutputtrayisextended.
- Loadafewsheetsofplainpaperintheproduct.
3.Pressthehomebutton,ifnecessary. - SelectMaintenance.
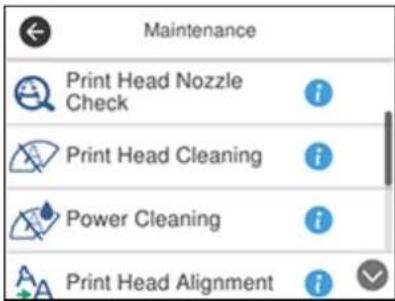
text_image
Maintenance Print Head Nozzle Check Print Head Cleaning Power Cleaning Print Head Alignment- SelectPrintHeadNozzleCheck.
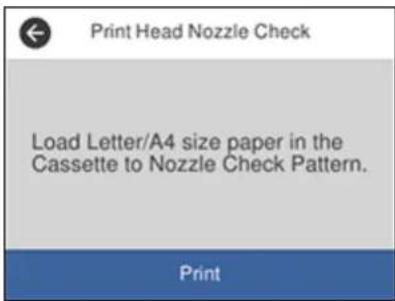
text_image
Print Head Nozzle Check Load Letter/A4 size paper in the Cassette to Nozzle Check Pattern. Print6.SelectPrint.
Thenozzlecheckpatternisprinted.
- Check the printed pattern to see if there are gaps in the lines.
Printheadisclean

natural_image
Abstract pattern of horizontal black and yellow lines on white background, no text or symbols presentPrintheadneedscleaning

natural_image
Abstract pattern of horizontal black and yellow lines on white background, no text or symbols present8.Dooneofthefollowing:
- Iftherearenogaps, theprintheadisclean. SelectO
- If there are gaps or the pattern is faint, select X. Follow the instructions on the screen to clean the printhead.
If you don't see any improvement after cleaning the printhead up to 3 times, turn the product off and wait at least 12 hours. Thentry cleaning the printhead again. If quality still does not improve, run a Power Cleaning. If there is still no improvement, contact Epson support.
Parenttopic: PrintHeadNozzleCheck
Relatedtasks
RefillingtheInkTanks
CleaningthePrintHeadUsingtheProductControlPanel
LoadingPaperintheCassette
CheckingtheNozzlesUsingaComputerUtility
YoucanchecktheprintheadnozzlesusingautilityonyourWindowsorMaccomputer.
- MakesuretherearenoerrorsontheLCDscreenandtheoutputtrayisextended.
- Loadafewsheetsofplainpaperintheproduct.
3.Dooneofthefollowing:
- Windows:AccesstheWindowsDesktopandright-clicktheiconforyourproductintheright sideoftheWindowstaskbar,orclicktheuparrowandright-click.
- Mac: In the Apple menu or the Dock, select System Preferences. Select Print & Fax, Print & Scan, or Printers & Scanners, select your product, and select Options & Supplies. Select UtilityandselectOpenPrinterUtility.
- SelectNozzleCheck.
Youseeawindowlikethis:
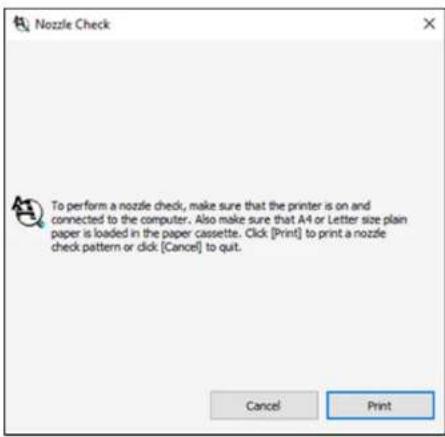
text_image
Nozzle Check To perform a nozzle check, make sure that the printer is on and connected to the computer. Also make sure that A4 or Letter size plain paper is loaded in the paper cassette. Click [Print] to print a nozzle check pattern or click [Cancel] to quit. Cancel Print5.ClickPrint.
- Check the printed pattern to see if there are gaps in the lines.
Printheadisclean

natural_image
Abstract pattern of horizontal lines in black, yellow, pink, and cyan (no text or symbols)Printheadneedscleaning

natural_image
Two abstract geometric patterns with horizontal lines and color gradients (no text or symbols)- If there are no gaps, click Finish.
If therearegapsorthepatternisfaint,cleantheprinthead.
If you don't see any improvement after cleaning the printhead up to 3 times, turn the product off and wait at least 12 hours. Thentry cleaning the printhead again. If quality still does not improve, run a Power Cleaning. If there is still no improvement, contact Epson support.
Parenttopic: PrintHeadNozzleCheck
Relatedtasks
RefillingtheInkTanks
CleaningthePrintHeadUsingaComputerUtility
CleaningthePrintHeadUsingaComputerUtility
LoadingPaperintheCassette
PrintHeadCleaning
If print quality has declined and thenozzlecheck pattern indicates clogged nozzles, you can clean the printhead.
Note: You cannot clean the print head if the ink level has reached the lower line on the ink tank, and may notbeabletocleanitwhentheinklevelinanyofthetanksislow.Youmustrefilltheinktankfirst.
CleaningthePrintHeadUsingtheProductControlPanel
CleaningthePrintHeadUsingaComputerUtility
Parenttopic: PrintHeadMaintenance
Relatedtasks
RefillingtheInkTanks
CleaningthePrintHeadUsingtheProductControlPanel
Youcancleantheprintheadnozzlesusingthecontrolpanelonyourproduct.
- MakesuretherearenoerrorsontheLCDscreenandtheoutputtrayisextended.
- Loadafewsheetsofplainpaperintheproduct.
- Pressthehomebutton, if necessary.
- SelectMaintenance.
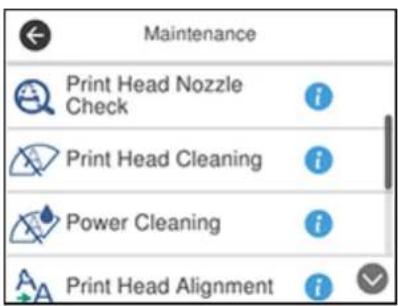
text_image
Maintenance Print Head Nozzle Check Print Head Cleaning Power Cleaning Print Head Alignment5. SelectHeadCleaning.
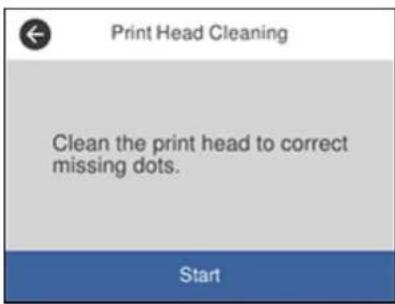
text_image
Print Head Cleaning Clean the print head to correct missing dots. Start- Select Start to clean the print head. You see a message on the LCD screen during the cleaning cycle.
Caution: Never turn off the product or open the printer cover during a cleaning cycle or you may not beabletoprint.
Whenthecleaningcycleisfinished,youseeamessageontheLCDscreen.
-
SelectCheck.
-
SelectPrinttorunanozzlecheckandconfirmthattheprintheadisclean.
If you don't see any improvement after cleaning the printhead up to 3 times, turn off the product and wait at least 12 hours. Thentry cleaning the printhead again. If quality still does not improve, run a Power Cleaning. If there is still no improvement, contact Epson support.
Parenttopic: PrintHeadCleaning
Relatedreferences
WheretoGetHelp
Relatedtasks
RefillingtheInkTanks
CheckingtheNozzlesUsingtheProductControlPanel
LoadingPaperintheCassette
CleaningthePrintHeadUsingaComputerUtility
YoucancleantheprintheadusingautilityonyourWindowsorMaccomputer.
- MakesuretherearenoerrorsontheLCDscreenandtheoutputtrayisextended.
- Loadafewsheetsofplainpaperintheproduct.
3.Dooneofthefollowing:
- Windows:AccesstheWindowsDesktopandright-clicktheiconforyourproductintheright sideoftheWindowstaskbar,orclicktheuparrowandright-click.
- Mac: In the Apple menu or the Dock, select System Preferences. Select Print & Fax, Print & Scan, or Printers & Scanners, select your product, and select Options & Supplies. Select UtilityandselectOpenPrinterUtility.
4. SelectHeadCleaning.
Youseeawindowlikethis:
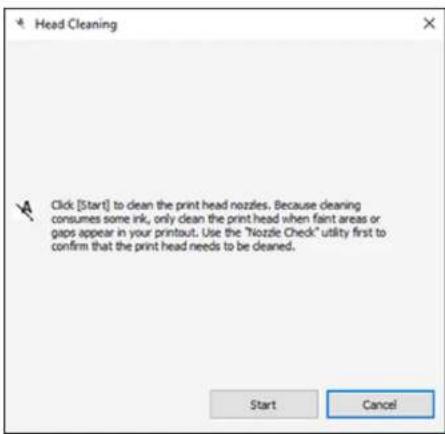
text_image
Head Cleaning Click [Start] to clean the print head nozzles. Because cleaning consumes some ink, only clean the print head when faint areas or gaps appear in your printout. Use the "Nozzle Check" utility first to confirm that the print head needs to be cleaned. Start Cancel5. ClickStarttobeginthecleaningcycle.
The powerlightflashestroughoutthecleaningcycleandstaysonwhenthecleaningcycleis finished.
Caution: Never turn off the product or open the printer cover during a cleaning cycle or you may not beabletoprint.
-
When the cleaning cycle is finished, you can check to see if the nozzles are clean; click Print Nozzle CheckPatternandclickPrint.
-
Check the printed pattern to see if there are gaps in the lines.
Printheadisclean

natural_image
Abstract pattern of horizontal black and yellow stripes on white background (no text or symbols)Printheadneedscleaning

natural_image
Abstract pattern of horizontal black and yellow lines on white background, no text or symbols present- Iftherearenogaps,clickFinish.
- Iftherearegapsorthepatternisfaint,clickCleantocleantheprintheadagain.
If you don't see any improvement after cleaning the printhead up to 3 times, turn off the product and wait at least 12 hours. Thentry cleaning the printhead again. If quality still does not improve, run a Power Cleaning. If there is still no improvement, contact Epson support.
Parenttopic: PrintHeadCleaning
Relatedreferences
WheretoGetHelp
Relatedtasks
RefillingtheInkTanks
LoadingPaperintheCassette
PowerCleaning
If you still see white or dark lines or missing nozzles in your printouts, even after cleaning the printhead severaltimes, you can run a Power Cleaning.
If you donot see improvement after running a Power Cleaning, turn off the product and wait at least 12 hours before running another Power Cleaning.
Caution: Running a Power Cleaning consumes a lot of ink, so you should run it only if necessary. Make sureeachinktankisatleastone-thirdfullbeforerunningaPowerCleaning,oritmaydamagethe product.
Caution: PowerCleaningmaycausetheinkpadstoreachtheircapacitysooner. Whenaninkpad reachestheendofitssservicelife, theproductstopsprintingandyoumustcontactEpsonforsupport.
PowerCleaningUsingtheProductControlPanel
PowerCleaningUsingaComputerUtility
Parenttopic: PrintHeadMaintenance
Relatedtasks
RefillingtheInkTanks
PowerCleaningUsingtheProductControlPanel
YoucanrunaPowerCleaningusingthecontrolpanelonyourproduct.
AfteraPowerCleaning, you must turn off the product and wait at least 12 hours before running another PowerCleaning.
-
Turnoff the product.
-
Visually check the ink levels and makes sure each ink tank is at least one-third full.
Caution: If youruna Power Cleaning when the ink levels are low, you may damage the product.
-
PressandholdthepowerbuttonandthehelpbuttonatthesametimeuntilthePowerCleaning screenappearsontheLCDscreen.
-
Followtheon-screen instructionstorunthePowerCleaning.
-
WhenthePowerCleaningisfinished, runanozzlecheck.
If the print quality did not improve, turn off the printer and wait at least 12 hours before running another Power Cleaning.
If the print quality does not improve after running the Power Cleaning utility multipletimes, contact Epsonforsupport.
Parenttopic: PowerCleaning
Relatedtasks
RefillingtheInkTanks
PowerCleaningUsingaComputerUtility
YoucanrunaPowerCleaningusingautilityonyourWindowsorMaccomputer.
Note: After running a Power Cleaning, you must turn off the product and wait at least 12 hours before running another Power Cleaning.
- MakesuretherearenoerrorsontheLCDscreenandtheoutputtrayisextended.
-
Loadafewsheetsofplainpaperintheproduct.
3.Dooneofthefollowing: -
Windows:AccesstheWindowsDesktopandright-clicktheiconforyourproductintheright
side of the Windows taskbar, or click the up arrow and right-click. Select Printer Settings and clicktheMaintenancetab. -
Mac: In the Apple menu or the Dock, select System Preferences. Select Print & Fax, Print & Scan, or Printers & Scanners, select your product, and select Options & Supplies. Select UtilityandselectOpenPrinterUtility.
-
SelectPowerCleaning.
Youseeawindowlikethis:
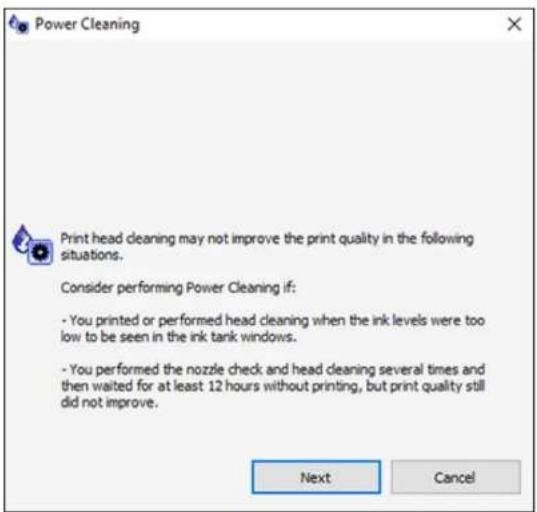
text_image
Power Cleaning Print head cleaning may not improve the print quality in the following situations. Consider performing Power Cleaning if: - You printed or performed head cleaning when the ink levels were too low to be seen in the ink tank windows. - You performed the nozzle check and head cleaning several times and then waited for at least 12 hours without printing, but print quality still did not improve. Next Cancel-
Followtheon-screen instruction storuna PowerCleaning.
-
When PowerCleaning is finished, runanozzlecheck.
If the print quality did not improve, turn off the product and wait at least 12 hours before running another Power Cleaning.
If the print quality does not improve after running the Power Cleaning utility multiple times, contact Epson for support.
Parenttopic:PowerCleaning
Relatedtasks
RefillingtheInkTanks
PrintHeadAlignment
If your printouts become grainy or blurry, you notice misalignment of vertical lines, or you seed a long horizontal bands, you may need to align the printhead.
Note: Banding may also occur your printhead nozzles need cleaning.
AligningthePrintHeadUsingtheProductControlPanel
Parenttopic:AdjustingPrintQuality
AligningthePrintHeadUsingtheProductControlPanel
Youcanaligntheprintheadusingthecontrolpanelonyourproduct.
- MakesuretherearenoerrorsontheLCDscreenandtheoutputtrayisextended.
- Loadafewsheetsofplainpaperintheproduct.
- Pressthehomebutton, if necessary.
- SelectMaintenance.
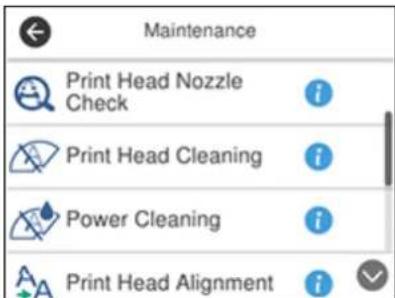
text_image
Maintenance Print Head Nozzle Check Print Head Cleaning Power Cleaning Print Head Alignment- SelectPrintHeadAlignment.
- Selectoneofthefollowingoptions:
- RuledLineAlignmentifstraightlinesareslantedormisaligned.
•VerticalAlignmentifthereareverticalgapsorlinesinpatternedareas.
- Horizontal Alignment, then select either Color or B&W if adjacent horizontal regions are overlappedorseparated.
- SelectPrinttoprintanalignmentsheet.
Note: Donotcancelprintingwhileyouareprintingaheadalignmentpattern.
- Check the printed pattern and select the number representing them most solid printed pattern foreach set on the LCD screen.
RuledLineAlignment
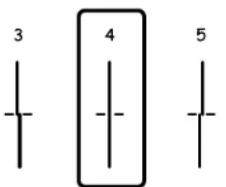
text_image
3 4 5VerticalAlignment
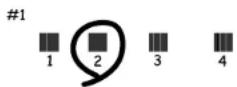
HorizontalAlignment
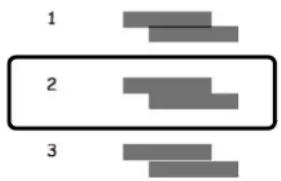
text_image
1 2 3- SelectOK when you are finished.
Parenttopic: PrintHeadAlignment
Relatedtasks
LoadingPaperintheCassette
CleaningthePaperGuide
If you see ink the back of a print out, you can clean the paper guider roller store move any excess sink.
-
If print outs a res me are dors cuffed, load plain paper in the cassette in this size: Letter (8.5×11 inches [216×279mm]) or A4 (8.3×11.7 inches [210×297mm]).
-
SelectMaintenance.
Youseeascreenlikethis:
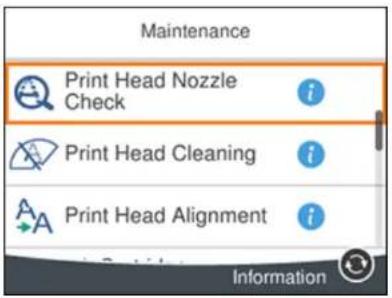
text_image
Maintenance Print Head Nozzle Check i Print Head Cleaning i Print Head Alignment i Information-
ScrolldownandselectPaperGuideCleaning.
-
Followtheon-screen instruction stoclean the paperguide.
5.Repeatthesestepsasnecessaryuntilthepapercomesoutclean.
Parenttopic:AdjustingPrintQuality
Relatedconcepts
PrintHeadCleaning
PrintHeadAlignment
Relatedtasks
CleaningthePrintHeadUsingaComputerUtility
LoadingPaperintheCassette
CleaningthePrintHeadPath
If the print quality has not improved after cleaning and aligning the print head and cleaning the paper path, the print head paths inside the print term may be measured with think.
Tocleantheprintheadpath, usethefollowing:
•Severalcottonswabs
•1/4cup(59ml)watercontaining2to3dropsofmilddishdetergent
- Asmallflashlight
Caution: Do not use any other liquid to clean the print head path or you may damage your product.
- Turnoff the product.
- Unplugthepowercable.
- Disconnectanyconnectedcables.
- Liftupthescannerunit.
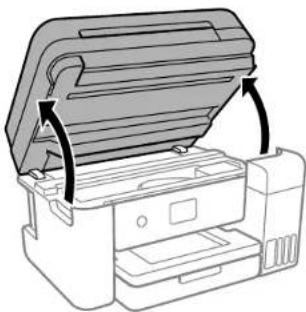
natural_image
Diagram of a printer with an open lid and arrows indicating assembly or operation (no text or symbols present)- Using the flashlight, check the translucent film shown here for inksmears.
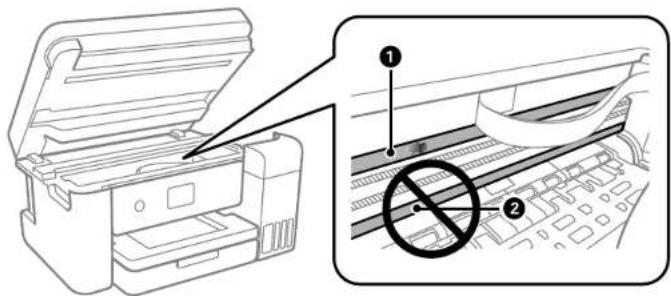
text_image
Diagram showing printer open with a stopper and a warning symbol indicating no stopper1Translucentfilm
2Printheadrail
Caution: Do not touch the print head rail or wipe the grease off of it. You may not be able to print.
- Moistenacottonswabwiththewateranddetergentmixture, andsqueezeoutanyexcessmoisture. Lightlywipetheinkoffthetranslucentfilm.
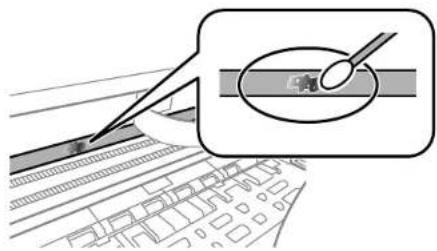
text_image
Diagram illustrating a precision inspection process with tool tip and magnified view of sample being heldCaution: Donotpressstoothardonthefilmoryoumaydislocatetheanchorspringsanddamage yourproduct.
- Useanew, drycottonswabtodrythetranslucentfilm.
8.Repeatsteps6and7asnecessarytocleanallinksmears. - Whentetranslucentfilmisdry, closetescannerunit.
- Reconnectany disconnected cables, plugin the power cord, and turn on the product.
Parenttopic: AdjustingPrintQuality
Relatedconcepts
PrintHeadCleaning
PrintHeadAlignment
Relatedtasks
CleaningthePrintHeadUsingaComputerUtility
CheckingtheNumberofSheets
Youcanviewanoptionthatdisplaysthenumberofsheetsofpaperthathavefedthroughtheproduct.
Note: You can also view the number of sheets of paper fed through the product by printing a nozzle check.
CheckingtheSheetCounter-Windows
CheckingtheSheetCounter-Mac
Parenttopic: AdjustingPrintQuality
CheckingtheSheetCounter-Windows
You can check the number of sheet sof paper that have fed through the product by checking the sheet counter.
- Access the Windows Desktop and right-click the icon for your product in therights side of the Window stask bar, or click the up arrow and right-click.
- SelectPrinterSettings.
- ClicktheMaintenancetab.
- SelectPrinterandOptionInformation.
Youseethiswindow:
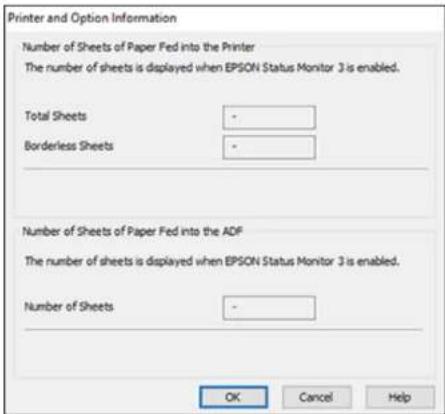
text_image
Printer and Option Information Number of Sheets of Paper Fed into the Printer The number of sheets is displayed when EPSON Status Monitor 3 is enabled. Total Sheets Borderless Sheets Number of Sheets of Paper Fed into the ADF The number of sheets is displayed when EPSON Status Monitor 3 is enabled. Number of Sheets OK Cancel Help- Aftercheckingthenumberofsheetsfedintotheprinter, click OK to closetehewindow.
Note: ThenumberofsheetsisdisplayedonlywhenEpsonStatusMonitor3isenabled.
Parenttopic: CheckingtheNumberofSheets
CheckingtheSheetCounter-Mac
Youcancheckthenumberofsheetsofpaperthathavefedthroughtheproductbycheckingthesheet counter.
-
In the Apple menu or the Dock, select System Preferences. Select Print & Fax, Print & Scan, or Printers & Scanners, select your product, and select Options & Supplies. Select Utility and select OpenPrinterUtility.
-
SelectPrinterandOptionInformation.
Youseethiswindow:
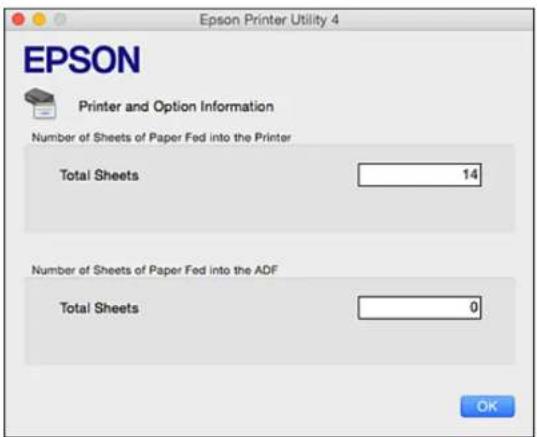
text_image
EPSON Printer and Option Information Number of Sheets of Paper Fed into the Printer Total Sheets 14 Number of Sheets of Paper Fed into the ADF Total Sheets 0 OK- Aftercheckingthenumberofsheetsfedintotheprinter, clickOKtocosethewindow.
Parenttopic: Checking the Number of Sheets
CleaningandTransportingYourProduct
Seethesesectionsifyouneedtocleanortransportyourproduct.
CleaningYourProduct
CleaningthePaperRollers
TransportingYourProduct
CleaningYourProduct
Tokeep your product working at its best, you should clean it several times a year.
Caution: Do not use a hard brush, alcohol, or paint thinner to clean the product or you may damage it. Donotuseoilorotherlubricantsinsidetheproductorletwatergetinsideit.
- Turnoff the product.
- Unplugthepowercord.
- Disconnectanyconnectedcables.
- Pulloutthepapercassetteandremovethepaper.
- Openthedocumentcover.
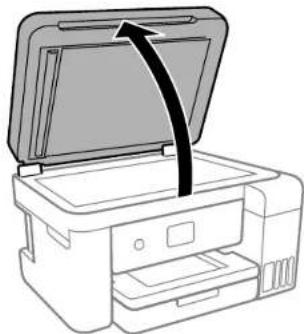
natural_image
Line drawing of a printer with an open lid and arrow indicating compression or disassembly (no text or symbols)- Cleanthescannerglassandtheglassareaontheleftwithasoft,lint-freecloth(microfiberis recommended)moistenedwithalittleglasscleaner.
Caution: Do not spray glass cleaner directly on the glass and do not press the glass surface with any force.
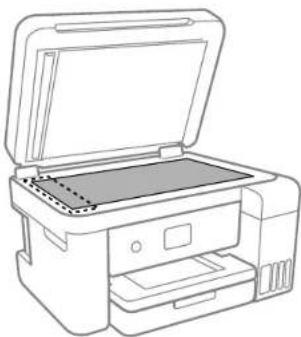
natural_image
Line drawing of a printer with open lid and paper tray (no text or symbols)Note: If lines appear on the printout or in scanned images, carefully clean the scanner glass on the left.
-
Closethedocumentcover.
-
OpentheADFcover.
-
Useasoft, dry, lint-freecloth (microfiber is recommended) to clean the rollers and the interior of the ADF.
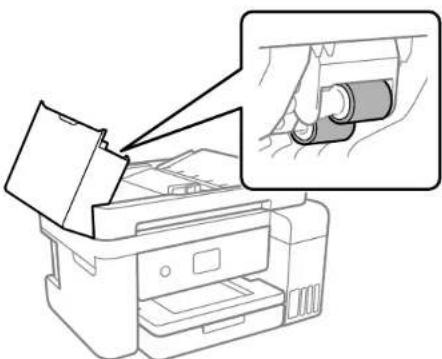
natural_image
Line drawing of a printer with an open lid and a magnified inset showing the printer's tip (no text or symbols)- Cleantheoutercase and control panel with asoft, drycloth. Donotuseliquidorchemicalcleansers.
Parenttopic: Cleaning and Transporting Your Product
CleaningthePaperRollers
If you encounter repeated paper feed issues from the cassette, clean the paper rollers inside the product.
-
Turnoff the product.
-
Unplugthepowercable.
-
Disconnectanyconnectedcables.
-
Slideoutthepapercassetteandremovethepaper.
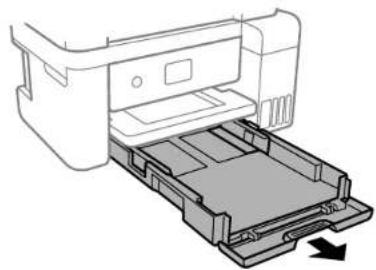
natural_image
Diagram of a printer with an open tray and arrow indicating compression or disassembly (no text or symbols present)- Makesuretheinktankcapsaresecurelyclosed.

text_image
Diagram showing a hand pressing a button on a vehicle chassis, with a prohibition symbol indicating no movement.- Placetheproductonitssidewiththeinktankonthebottom.
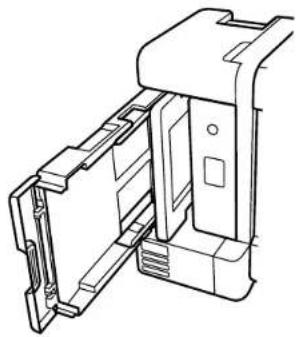
natural_image
Technical line drawing of a mechanical device with internal components (no text or symbols)Warning: Becarefulnottotrapyourfingersundertheproduct.
- Useasoft, moist cloth to clean the cassette rollers, as shown. Rotatether roller to clean them thoroughly.
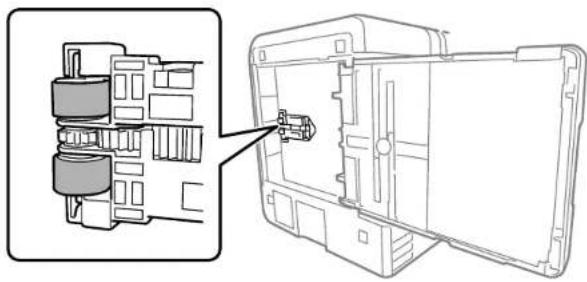
natural_image
Technical line drawing of a mechanical assembly with internal components and a close-up view (no text or symbols)- Return the product to its normal position.
Caution: Donotleavetheprinteronitssideforanextendedperiodoftime.
- Replacethepaper, slideinthepapercassette, and connect the power cord.
Parenttopic: Cleaning and Transporting Your Product
TransportingYourProduct
If you need to store your product or transport itsomed distance, prepare it for transportation as described here.
Caution: During transportation and storage, follow these guidelines:
- Avoidtiltingtheproduct,placingitvertically,orturningitupsidedown;otherwiseinkmayleak.

text_image
Prohibition sign with crossed-out rectangular blocks and 'k' symbols, commonly used in educational materials- Whenstoringortransportinganopenedinkbottle, donottilthebottle and donotsubjectittoimpacts ortemperaturechanges. Otherwise, inkmayleakevenifthecapontheinkbottleistightened securely. Keeptheinkbottleuprightwhentighteningthecapandkeepthebottleslevelduring transportation.
- Donotputopenedinkbottlesintheboxwiththeproduct.
-
Donotcarrytheproductbyitscontrolpanel;thismaydamagetheproduct.
-
Turnoff the product.
- Remove all the paper from the product.
- Unplugthepowercable.
-
Disconnectanyconnectedcables.
-
Liftupthescannerunitandchecktoseeftheprintheadisinthefarrightposition(thehome position). Ifnot,turnontheproduct,waitfortheprintheadtomovetothefarright,thenturnthe productoffagain.
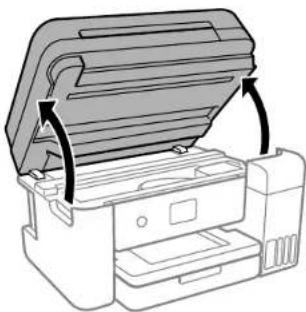
natural_image
Diagram of a printer with an open lid and arrows indicating process flow (no text or symbols)- Securetheprintheadtothecasewithtape.
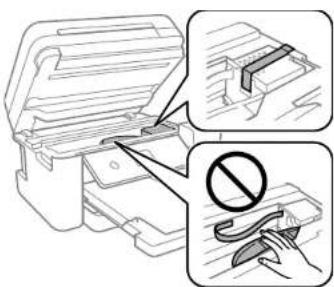
text_image
Diagram illustrating a printer's internal structure and prohibition symbol, with magnified views showing the mechanism.Caution: Do not place tape on the white flat cable inside the product; otherwise, you may damage yourproduct.
- Makesuretheinktankcapsaresecurelyclosedandclosetheinktankcover.
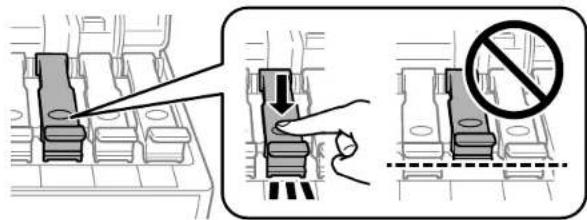
text_image
Diagram illustrating a switch mechanism with a no-smoking symbol, showing step-by-step instructions for battery or switch assembly.- Lowerthescannerunit.
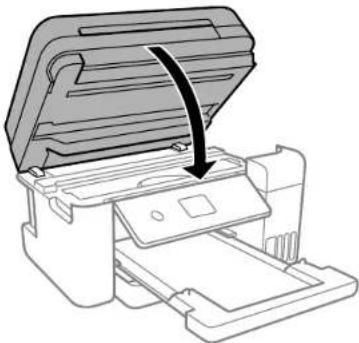
natural_image
Line drawing of a printer with an open lid and arrow indicating compression (no text or symbols)- ClosetheADFdocumentsupportandtheADFoutputtrayextension.Slideintheoutputtray, close thefrontcover, and lowerthecontrolpanel.
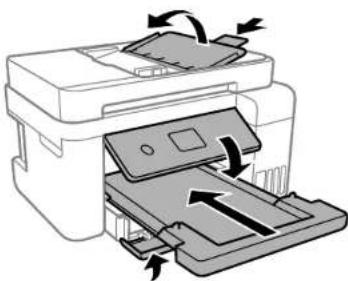
natural_image
Diagram of a printer with paper being inserted into a slot, showing paper movement arrows (no text or symbols)- Placetheproductinitsoriginalpackagingmaterials, if possible, or use equivalent cushioning around the product.
Besuretoremovethetapefromtheprintheadbeforeturningonyourproduct.Ifprintqualityhas declinedwhenyouprintagain,cleanandaligntheprinthead.
Parenttopic: Cleaning and Transporting Your Product
Relatedconcepts
PrintHeadCleaning
PrintHeadAlignment
SolvingProblems
Checkthesesectionsforsolutionstoproblemsyoumayhaveusingyourproduct.
CheckingforSoftwareUpdates
ProductStatusMessages
MessageAppearsPromptingYoutoResetInkLevels
RunningaProductCheck
ResettingControlPanelDefaults
SolvingSetupProblems
SolvingNetworkProblems
SolvingCopyingProblems
SolvingPaperProblems
SolvingProblemsPrintingfromaComputer
SolvingPageLayoutandContentProblems
SolvingPrintQualityProblems
SolvingScanningProblems
SolvingScannedImageQualityProblems
Visit epson.com/support (U.S.), epson.ca/support (Canada), or epson.com.jm/support (Caribbean) and select your product.
- Windows: Your printer software automatically checks for updates. You can also manually update the softwarebyselectingSoftwareUpdatehere:
- AccessingtheWindowsDesktopandright-clickingtheiconforyourproductintherightsideof theWindowstaskbar,orclickingtheuparrowandright-clicking.
• OntheMaintenancetabintheprintersettingswindow
You can also update the software by selecting EPSON Software Updater in the EPSON or EPSON Software program group, accessible by the Start button, or on the Start or Apps screens, depending on your version of Windows.
- OS X: You can manually update the software by opening the Applications > Epson Software folder andselectingEPSONSoftwareUpdater.
- macOS 10.12.x: You can manually update the software by opening the App Store, selecting Updates, searching for a software update option for Epson Software, and selecting Update.
Parenttopic: Solving Problems
ProductStatusMessages
YoucanoftendiagnoseproblemswithyourproductbycheckingthemessagesonitsLCDscreen.You canalsoseehelpinformationandhow-toinstructionsonthescreen.Pressthehomebutton,if necessary,selectthehelpbutton.
| LCDscreenmessageCondition/solution | |
| Printererror.Turnonthe printeragain.Seeyour documentationfor details. | Afatalerrorhasoccurred.Turntheproductoffandthenbackonagain.Ifthe errorcontinues,checkforapaperjam.Ifthereisnopaperjam,contact Epsonforsupport. |
| PaperConfigurationis disabled.Somefeatures maynotbeavailable.Fordetails,seeyour documentation. | ThePaperSetupAutoDisplaysettingmustbeturnedontouseAirPrint. |
| Nodialtoneisdetected Makesurethephonecableisconnectedcorrectlyandthephonelineworks.IfyouconnectedtheproducttoaPBX(PrivateBranchExchange)phoneline or Terminal Adapter, change the Line Type setting to PBX. If you still cannot sendafax,turnofftheDialToneDetectionsetting.(TurningofftheDial ToneDetectionsettingmaycausetheproducttodropthefirstdigitofafax number.) | |
| Theprinter'sinkpadis nearingtheendofits servicelife.Please contactEpsonsupport. | Theinkpadisneartheendofitsservicelifeandthemessagewillbe displayeduntiltheinkpadisreplaced.ContactEpsonforsupport.(To resumeprinting,pressthestartbutton.) |
| Theprinter'sinkpadis attheendofitsservice life.Pleasecontact Epsonsupport. | Theinkpadisattheendofitsservicelife.Turnofftheproductandcontact Epsonforsupport. |
| Tousecloudservices, updatetheroot certificatefromWeb Services. | Accessyourproduct'sbuilt-inWebConfigutilityandupdatetheroot certificateforyourproduct. |
| CombinationofIP addressandsubnet maskisinvalid.See yourdocumentation. | Thereisaproblemwiththenetworkconnectiontoyourproduct.Checkthe solutionsinthisguide. |
| Checkthattheprinter driverisinstalledonthe computerandthatthe portsettingsforthe printerarecorrect. | MakesuretheprinterportisselectedcorrectlyonthePorttabofthePrinter Properties screen (Windows) or theSystem Properties > USBlist (Mac).SelectUSBXXXforaUSBconnectionorEpsonNetPrintPortforanetwork connection. |
| Checkthattheprinter driverisinstalledonthe computerandthatthe USBportsettingsforthe printerarecorrect. | |
| RecoverymodeAerrorha | soccurredduringfirmwareupdating.Connectyourproductusing aUSBcableandtryupdatingthefirmwareagain.Ifyoustillreceivethiserror message,contactEpsonforsupport. |
Note: The ink pads in the printer collect, distribute, and contain the ink that is not used on printed pages. Duringthelifeofyourproductitmayreachaconditionwhereeithersatisfactoryprintqualitycannotbe maintainedortheinkpadshavereachedtheendoftheirusablelife.TheEpsonStatusMonitor,your LCDscreen,orlightsonthecontrolpanelwilladviseyouwhentesepartsneedreplacing.Ifthis happensduringthestandardwarrantyoftheproduct,theexchangeoftheproductorreplacementofthepadsiscoveredunderthestandardwarranty.Iftheproductisoutofwarranty,thepadscanbereplaced byanyEpsonauthorizedserviceprovider.Thewasteinkpadsarenotauser-replaceablepart.
Parenttopic: Solving Problems
Relatedreferences
WheretoGetHelp
Relatedtasks
CheckingforSoftwareUpdates
ConnectingaTelephoneorAnsweringMachine
Relatedtopics
Wi-FiorWiredNetworking
SolvingPaperProblems
LoadingPaper
MessageAppearsPromptingYoutoResetInkLevels
If you see a message on the LCD screen prompting out to reset the in k levels, do the following:
- RefillalloftheinktanksortheinktanksindicatedontheLCDscreenallthewaytothetop.
Note: Depending on the operating conditions, you may see the ink reset message even when there is stillinkinthetanks.
- SelectthecolorsthatyourefilledontheLCDscreen.
3.FollowtheinstructionsontheLCDscreentoresettheinklevels.
Note: The product has a low ink alert system. The accuracy of this system depends on the user refilling theinktankscorrectly. Theproductcannotdirectlymeasuretheinklevelsinthetanks;instead estimatestheamountofinkremainingbyinternallymonitoringinkusage. Thelowinkalertsystemmay generateinaccuratemessagesiftheinktanksarenotrefilledaccordingtotheseinstructions.
Asaprecaution, performregularvisualinspectionsoftheinktankstoensureinklevelsdonotfallbelow thelowerline.Continueduseoftheproductwhentheinklevelisbelowthelowerlineonthetankcould damagetheproduct.
Parenttopic: Solving Problems
RunningaProductCheck
Runningaproductcheckhelpsyoudetermineifyourproductisoperatingproperly.
-
Disconnectanyinterfacecablesconnectedtoyourproduct.
-
Loadplainpaperintheproduct.
3.Pressthehomebutton,ifnecessary.
4. SelectMaintenance.
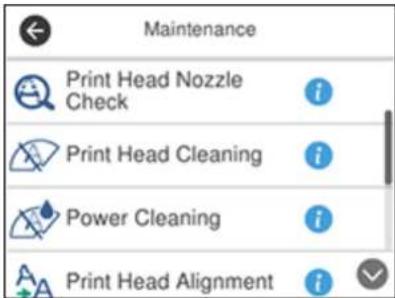
text_image
Maintenance Print Head Nozzle Check Print Head Cleaning Power Cleaning Print Head Alignment- SelectPrintHeadNozzleCheck.
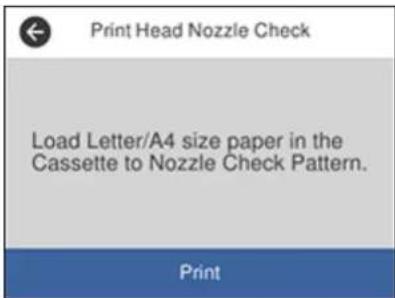
text_image
Print Head Nozzle Check Load Letter/A4 size paper in the Cassette to Nozzle Check Pattern. Print6.SelectPrint.
Thenozzlecheckpatternisprinted.
- Dooneofthefollowing, dependingontheresultsoftheproductcheck:
- If the page prints and then ozzle check pattern is complete, the product is operating properly. Any operation problem you may have could be caused by your computer, cable, software, or selected
settings.Checktheothersolutionsinthisbookortryuninstallingandreinstallingyourprinter software.
- Ifthepageprintsbutthenozzlecheckpatternhasgaps,cleanoraligntheprinthead.
- Ifthepagedoesnotprint, theproductmayhaveaproblem. Checktheothersolutionsinthis manual. Iftheydonotwork, contactEpson.
Parenttopic: Solving Problems
Relatedconcepts
PrintHeadCleaning
PrintHeadAlignment
UninstallYourProductSoftware
Relatedreferences
WheretoGetHelp
ResettingControlPanelDefaults
If you have a problem with settings on the product control panel, you can reset them to their factory defaults. You can choose which setting stores or reset them all.
- Pressthehomebutton, if necessary.
- SelectSettings.
- SelectRestoreDefaultSettings.
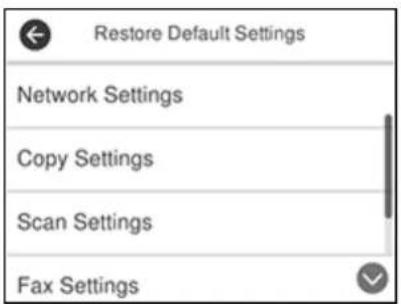
text_image
Restore Default Settings Network Settings Copy Settings Scan Settings Fax Settings- Selectoneoftheseoptions:
•NetworkSettings:Resetsallnetworksettings.
- CopySettings: Resetsallcopysettings.
- ScanSettings: Resetsallscansettings.
•FaxSettings: Resetsallfaxsettings.
- Clear All Data and Settings: Resets all control panel settings and deletes any stored information. Youseeaconfirmationscreen.
- Select Yes to reset the selected settings. (Select No if you want to cancel the operation.)
Parenttopic: Solving Problems
SolvingSetupProblems
Checkthesesectionsifyouhaveproblemswhilesettingupyourproduct.
NoiseAfterFillingtheInk
SoftwareInstallationProblems
ControlPanelSetupProblems
Parenttopic: Solving Problems
NoiseAfterFillingthelnk
If you hear noises from your product after filling the ink tank with ink, check these explanations:
• The first time you fill the tank with ink, the product must charge its printhead. Wait until charging finishes before you turn off the product, or it may charge improperly and use excess sink then next time you turn it on. Your product is finished charging the printhead when the power light stops flashing.
- If the product's printhead stopsmovingormaking noise, and the charging process has not finished after approximately 20 minutes, turn off your product. Turn it back on and check to see if charging is still in progress. If it is still in progress, contact Epson for help.
Parenttopic: SolvingSetupProblems
SoftwareInstallationProblems
If you have problems while installing your product software, try thesesolutions:
- Makesureyourproductisturnedonandanynecessarycablesaresecurelyconnectedatbothends.If youstillhaveproblemsinstallingsoftware,disconnectthecableandcarefullyfollowtheinstructionson the Start Here sheet. Also make sure your system meets the requirements for your operating system.
- Closeanyotherprograms, includingscreensaversandvirusprotectionsoftware, andinstallyour productsoftwareagain.
• In Windows, makes sure your product is selected as the default printer and the correct port is shown in the printer properties. - If you see any error message your software does not install correctly in Windows, you may not have software installation privileges. Contact your system administrator.
Parenttopic: Solving Setup Problems
Relatedconcepts
UninstallYourProductSoftware
Relatedreferences
WindowsSystemRequirements
MacSystemRequirements
ControlPanelSetupProblems
If you have problems setting up the control panel, try these solutions:
- ToviewLCDscreentextinadifferentlanguage,selectadifferentlanguagesettingforthepanel.
- Toadjustthepositionofthecontrolpanel, carefullyraiseorlowerit.
Parenttopic: SolvingSetupProblems
Relatedtasks
ChangingLCDScreenLanguage
AdjustingControlPanelSounds
SolvingNetworkProblems
Checkthesesolutionsify you have problems setting up or using your product on an network.
Note: Breakdown or repair of this product may cause loss of fax and network data and settings. Epson is not responsible for backing up or recovering data and settings during or after the warranty period. We recommend that you make your own backup or print out your fax and network data and settings.
ProductCannotConnecttoaWirelessRouterorAccessPoint
NetworkSoftwareCannotFindProductonaNetwork
ProductDoesNotAppearinMacPrinterWindow
CannotPrintOveraNetwork
CannotScanOveraNetwork
Parenttopic: Solving Problems
ProductCannotConnecttoaWirelessRouterorAccessPoint
If your product a strouble finding or connecting to a wireless router or access point, try thesesolutions:
- If you are connecting the product via Wi-Fi Protected Setup (WPS) and the Wi-Fi icon your product's LCD screen is not lit or does not appear, makes sure you select one of the WPS options from the product control panel within 2 minutes of pressing the WPS button on your router.
- Makesuretoplaceyourproductwithincontactrangeofyour2.4GHzrouteroraccesspoint.Avoid placingyourproductnearamicrowaveoven,2.4GHzcordlessphone,orlargemetalobject,suchasa filingcabinet.
Note: If you are using a 5 GHz wireless router, set the router to operate in dual band (2.4 GHz and 5GHz)mode. If your router uses asinglenetworkname(SSID)for both the 2.4GHz and 5GHzband, give each band its own network name(SSID) instead, such as Home Network 2.4GHz and Home Network 5GHz. See your router documentation or contact your internet service provider for instructions.
- Verify that your router or access point is operating correctly by connecting to it from your computer or another device.
- Youmayneedtodisablethefirewallandanyanti-virussoftwareonyourwirelessrouteroraccess point.
- Checktoseeifaccessrestrictions,suchasMACaddressfiltering,aresetontherouteroraccess point.Ifaccessrestrictionsareset,addyourproduct'sMACaddresstoyourrouter'saddresslist.To obtainyourproduct'sMACaddress,printanetworkstatussheet.Thenfollowtheinstructionsinyour routeroraccesspointdocumentationtoaddtheaddressstothelist.
- If your router or access point does not broadcast its network name (SSID), follow the instruction that camewith your product to enter your wireless network namemannually.
- If your router or access point as security enabled, determin the kind of security is using and any required password or passphrase for connection. Then makes sure to enter the exact WEP key or WPA passphrase correctly.
- Checkifyourcomputerisrestrictingtheavailablewirelesschannels.Ifso,verifythatyourwireless accesspointisusingoneoftheusablechannelsandchangetoausablechannel,ifnecessary.
- If you are using a Wi-Fi Direct connection that suddenly disconnects, the Wi-Fidirect password on your device may have been changed. If necessary, delete the existing DIRECT-xxxxxxxx connection settings from your device and enter anew password. See your device documentation for instructions.
- If you connected your product to a Windows computer using Wi-Fi Direct and it automatically selected AccessPointMode, you may have trouble accessing all-priority Internet connection. Check the network connection or adapters settings in the Windows Control Panel and the Internet metric setting to 100 for your version of the Internet Protocol.
Parenttopic: Solving Network Problems
Relatedconcepts
Wi-FiDirectModeSetup
Relatedtasks
DisablingWi-FiFeatures
Relatedtopics
Wi-FiorWiredNetworking
NetworkSoftwareCannotFindProductonaNetwork
IfEpsonNetSetupcannotfindyourproductionanetwork,trythesesolutions:
- Makesureyourproductisturnedonandconnectedtoyournetwork.Verifyconnectionusingyour productcontrolpanel.
- Checkifyournetworkname(SSID)containsnon-ASCIIcharacters.Yourproductcannotdisplaynon-ASCIIcharacters.
- Makesureyourproductisnotconnectedtoaguestnetwork.
-
Ifnecessary,reinstallyourproductsoftwareandtryrunningEpsonNetSetupagain:
-
Reset your product's network setting to their factory defaults.
- Windowsonly: uninstall your product software.
- Initialize your router following the instructions in your router documentation.
Note: If you are reading these instructions online, you will lose your Internet connection when you initialize your router, sonotethenextstep before initializing it.
- Download your product software from the Epson website using the instructions on the Start Here sheet.
- If you have replaced your router, reinstall your product software to connect to the new router.
Note: If you are using a 5 GHz wireless router, set the router to operate in dual band (2.4 GHz and 5GHz)mode.Ifyourrouterusesasinglenetworkname(SSID)forboththe2.4GHzand5GHzband,
giveeachbanditsownnetworkname(SSID)instead,suchasHomeNetwork2.4GHzandHome Network5GHz.Seeyourrouterdocumentationorcontactyourinternetserviceproviderfor instructions.
- ChecktoseeifyourwirelessrouteroraccesspointhasanenabledPrivacySeparatorfunctionthatis preventingdetectionofyourdeviceoverthenetwork.Seeyourrouteroraccesspointdocumentation forinstructionsondisablingthePrivacySeparatorfunction.
Parenttopic: SolvingNetworkProblems
Relatedconcepts
UninstallYourProductSoftware
Relatedtopics
Wi-FiorWiredNetworking
ProductDoesNotAppearinMacPrinterWindow
If your product does not appear in the Macprinter window, try these solutions:
- Turnyourproductoff, wait30seconds, thenturnitbackonagain.
- If you are connecting the product via Wi-Fi Protected Setup (WPS) and the Wi-Fi economy your product's LCD screen is not lit, makes sure you select one of the WPS options from the product control panel within 2 minutes of pressing the WPS button on your router.
- If you are connecting the product wirelessly via Epson Net Setup and the Wi-Fi condition does not appear, it is on your LCD screen, makes sure your product software was installed correctly. If necessary, reinstall your software.
Note: If you are using a 5 GHz wireless router, set the router to operate in dual band (2.4 GHz and 5GHz) mode. If your router uses asinglenetworkname(SSID) for both the 2.4 GHz and 5 GHz band, give each band its own network name(SSID) instead, such as Home Network 2.4 GHz and Home Network 5 GHz. See your router documentation or contact your internet service provider for instructions.
Parenttopic: SolvingNetworkProblems
Relatedconcepts
UninstallYourProductSoftware
CannotPrintOveraNetwork
If you cannot print over an network, try thesesolutions:
• Makesurethatyourproductisturnedon.
- Makesureyouinstallyourproduct'snetworksoftwareasdescribedinyourproductdocumentation.
- Printanetworkstatussheetandverifythatthenetworksettingsarecorrect.Ifthenetworkstatusis Disconnected,checkanycableconnectionsandturnyourproductoffandthenonagain.
- If you are using TCP/IP, makes sure the product's IP address is correct by your own network. If your network does not assign IP addresses using DHCP, set the IP address manually.
- Makesureyourcomputerandproductarebothusingthesamewirelessnetwork.
• Ifnetworkprintingisslow, printanetworkstatussheetandcheckthesignalstrength. Ifitispoor, place yourproductclosertoyourrouteroraccesspoint. Avoidplacingyourproductnearamicrowaveoven, 2.4GHz cordlessphone, or largemetalobject, such as a filling cabinet.
Note: If you are using a 5 GHz wireless router, set the router to operate in dual band (2.4 GHz and 5GHz)mode. If yourrouter uses asinglenetworkname(SSID)for both the 2.4GHz and 5GHzband, give each band its own network name(SSID) instead, such as Home Network 2.4GHz and Home Network 5GHz. See your router documentation or contact your internetservice provider for instructions.
- ChecktoseeifyourwirelessrouteroraccesspointhasanenabledPrivacySeparatorfunctionthatis preventingprintingfromadeviceoverthenetwork. Seeyourrouteroraccesspointdocumentationfor instructionsondisablingthePrivacySeparatorfunction.
- If you are connecting the product wirelessly via Epson Net Setup and the Wi-Fi connection icon is not lit or does not appear on the product's LCD screen, makes sure your product software was installed correctly. If necessary, reinstall your software.
Parenttopic: SolvingNetworkProblems
Relatedreferences
CannotScanOveraNetwork
Relatedtasks
PrintingaNetworkStatusSheet
CannotScanOveraNetwork
If you cannot start Epson Scan2 for scanning over an network, try thesesolutions:
- If you cannot scan from your product control panel, makes sure you rest started your computer after installing the product software. Makes sure the Event Manager program is not being blocked by your firewall or security software.
Note: If you are using a 5 GHz wireless router, set the router to operate in dual band (2.4 GHz and 5GHz)mode. If your router uses asinglenetworkname(SSID)for both the 2.4GHz and 5GHzband, give each band its own network name(SSID) instead, such as Home Network 2.4GHz and Home Network 5GHz. See your router documentation or contact your internet service provider for instructions.
- If you are scanning a large original at high resolution, an network communication error may occur. Try scanning again at lower resolution.
- IfnetworkcommunicationwasinterruptedwhilestartingEpsonScan2,exitEpsonScan2,waitafew seconds,andrestartit.IfEpsonScan2cannotrestart,turnoffyourproduct,turnitbackon,andtry restartingEpsonScan2again.
- CheckthescannersettingandresettheconnectionifnecessaryusingEpsonScan2Utility:
Windows 10: Click ▼ and select EPSON > Epson Scan 2 Utility. Make sure your product is selected. If necessary, select the OthertabandclickReset.
Windows 8.x: Navigate to the Apps screen, select EPSON, and select Epson Scan 2 Utility. Make sure your product is selected. If necessary, select the Other tab and click Reset.
Windows (other versions): Click 📄 or Start > All Programs or Programs > EPSON > Epson Scan 2 > Epson Scan 2 Utility. Make sure your product is selected. If necessary, select the Other tabandclickReset.
Mac: Open the Applications folder, click Epson Software, and click Epson Scan 2 Utility. Make sure your product is selected. If necessary, select the Other tab and click Reset.
- Youmayneedtodisablethefirewallandanyanti-virussoftwareonyourwirelessrouteroraccess point.
Parenttopic: Solving Network Problems
Relatedtasks
StartingaScanUsingtheProductControlPanel
StartingaScanUsingtheEpsonScan2Icon
SolvingCopyingProblems
Checkthesesolutionsify you have problemscopying with your product.
ProductMakesNoise, ButNothingCopies
ProductMakesNoiseWhenItSitsforaWhile
Parenttopic: Solving Problems
ProductMakesNoise, ButNothingCopies
If your product makesanoise, but nothing copies, try thesesolutions:
- Runanozzlechecktoseeifanyoftheprintheadnozzlesareclogged. Thencleantheprinthead, if necessary.
- If thenozzlecheckpagedoesnotprint, but the product's power is on, makes sure your product software is installed correctly.
• Makesureyourproductislevel(nottilted).
Parenttopic: Solving Copying Problems
Relatedconcepts
PrintHeadNozzleCheck
PrintHeadCleaning
ProductMakesNoiseWhenItSitsforaWhile
Yourproductisperformingroutinemaintenance. Thisisnormal.
Parenttopic: Solving Copying Problems
SolvingPaperProblems
Checkthesesectionsifyouhaveproblemsusingpaperwithyourproduct.
PaperFeedingProblems
PaperJamsInsidethePrinter
PaperEjectionProblems
Parenttopic: Solving Problems
PaperFeedingProblems
If you have problems feeding paper, try thesesolutions:
- Makesurethepapercassetteisinsertedallthewayintheprinter.
- Ifpaperdoesnotfeedcorrectly, removeandreloaditinthecassette and adjusttheedgeguides. Makesurethepaperstackisnotabovethetabontheedgeguidesinsidethecassette.
- If multiple pages feed at once, remove the paper, fan the edge gestose separate the sheets, and reload it.
- Donotloadmorethantherecommendednumberofsheets.
- Makesureyourpapermeetsthespecificationsforyourproduct.
- Ifpaperjamswhenyouprintonbothsidesofthepaper,tryloadingfewersheets.
•Forbestresults, follow these guidelines: - Usenew, smooth, high-quality paper that is not curled, creased, old, toothin, ortoothick.
- Loadpaperinthecassetteprintablesidedown.
- Followanyspecialloadinginstructionsthatcamewiththepaper.
Parenttopic: SolvingPaperProblems
Relatedreferences
PaperJamsInsidethePrinter
PaperJamsInsidethePrinter
If you see a message that paper has jammed in the product, follow the on-screen instruction to locate and remove the jammed paper.
Takethefollowingprecautionswhenremovingjammedpaperfromtheprinter:
- Removethejammedpapercarefully. Usingtoomuchforcemaydamagetheprinter.
- Avoidtiltingtheprinter,placingitonitsside,orturningitupsidedown,asinkmayspill.
Caution: Never touch the buttons on the control panel while your hand is inside the printer. If the printer startsoperating, it may cause an injury. Don't touch any protruding parts inside the printer.
Parenttopic: SolvingPaperProblems
PaperEjectionProblems
If you have problems with paperejecting properly, try thesesolutions:
- Ifpaperdoesnotejectfully,youmayhavesetthewrongpapersize.Cancelprintingtoejectthepaper.Selectthecorrectpapersizewhenyoureprint.
- Ifpaperiswrinkledwhenitejects,itmaybedamportoothin.Loadnewpaperandbesuretoselect thecorrectpapertypesettingwhenyoureprint.
Parenttopic: SolvingPaperProblems
Relatedreferences
PaperJamsInsidethePrinter
PaperorMediaTypeSettings-PrintingSoftware
PaperTypeSettings-ControlPanel
Relatedtopics
LoadingPaper
SolvingProblemsPrintingfromaComputer
Checkthesesectionsifyuhaveproblemswhileprintingfromyourcomputer.
Note: When printing using AirPrint, the available print settings are different from those covered in this manual.SeetheApplewebsitefordetails.
NothingPrints
ProductIconDoesNotAppearinWindowsTaskbar
PrintingisSlow
Parenttopic: Solving Problems
NothingPrints
If you have sent a print job and nothing prints, try thesesolutions:
• Makesureyourproductisturnedon.
- Makesureanyinterfacecablesareconnectedsecurelyatbothends.
• If you connected your product to a USB hub, makes sure it is first-tier hub. If it still does not print, connect your product directly to your computer instead of the hub.
- Makesuretheprinterstatusisnotofflineorpending.
- Runaproductchecktoseeifatestpageprints.Ifthetestpageprints,checktoseeifyourproduct softwareisinstalledcorrectly.
- InWindows, makesureyourproductisselectedasthedefaultprinter.
- In Windows, delete all jobs from the Windows Spooler. Click Print Queue on the Maintenance tab in the printersettingswindow, and cancelanystalledprintjobs.
•OnaMac, makesuretheprinterisnotpaused.
Parenttopic: SolvingProblemsPrintingfromaComputer
Relatedtasks
RunningaProductCheck
ProductIconDoesNotAppearinWindowsTaskbar
If you donot see your product icon in the Window task bar, first try restarting your computer. If that does not work, try this solution:
-
Dooneofthefollowing:
-
Windows 10: Click and select (Settings) > Devices > Printers & scanners. Select your productnameandselectManage>Printingpreferences.
- Windows 8.x: Navigate to the Apps screen and select Control Panel > Hardware and Sound > Devices and Printers. Right-click your product name, select Printing Preferences, and select yourproductnameagainifnecessary.
- Windows 7: Click and select Devices and Printers. Right-click your product name, select PrintingPreferences, and select your product name again if necessary.
-
Windows Vista: Click 📋, select Control Panel, and click Printer under Hardware and Sound. Right-click your product name, select Printing Preferences, and select your product name again if necessary.
-
ClicktheMaintenancetab.
- ClicktheExtendedSettingsbutton.
- SelectEnableEPSONStatusMonitor3andclickOK.
- ClicktheMonitoringPreferencesbutton.
- Click the checkbox for the option that add st heshort cuticontothetaskbar.
7.ClickOKtoclosetheopenprogramwindows.
Parenttopic: Solving Problems Printing from a Computer
PrintingisSlow
Ifprintingbecomesslow, trythesesolutions:
- Makesureyoursystemmeetstherequirementsforyouroperatingsystem.Ifyouareprintingahigh-resolutionimage,youmayneedmorethantheminimumrequirements.Ifnecessary,increaseyour system'smemory.
- If you are using Windows7, closet the Devices and Printers window before you print.
-
OnaMac, makesureyoudownloadandinstalltheEpsonprinterdriver.
•MakesureQuietModeisturnedoff. -
Clearspaceonyourharddriveorrunadefragmentationutilitytofreeupexistingspace.
- Closeanyprogramsyouarenotusingwhenyouprint.
- If your product is connected to a USB hub, connect it directly to your computer instead.
• Ifprintingbecomesslowerafterprintingcontinuouslyforalongtime, theproductmayhave automaticallysloweddowntoprotecttheprintmechanismfromoverheatingorbecomingdamaged. Lettheproductrestwiththepoweronfor30minutes, thentryprintingagain.
Forthefastestprinting, select the following settings in your product software:
- Turnonanyhighspeedsettingsinyourproductsoftware.
- Selectalowerprintqualitysetting.
- Windows: Click the Maintenance or Utility tab, select Extended Settings or Speed and Progress, and select the following settings:
•AlwaysSpoolRAWDatatype
•PageRenderingMode
-PrintasBitmap
- Windows: Select Printer Properties, click the More Options tab and make sure the High Speed settingisenabled.
-
Mac: Select System Preferences, select Printers & Scanners, then select your product. Select Options & Supplies, then select Options (or Driver) and enable the High Speed Printing setting. IfprintingisstillslowandyouareusingWindows7orWindowsVista,trythefollowing:
-
Click and select Computer or My Computer. Double-click the C: drive and open these folders: ProgramData>EPSON>PRINTER.
Note: If you do not see the ProgramData folder, open the Organize menu and select Folder and search options. In the window that appears, click the View tab, select Show hidden files, folders, and drives in the Advanced settings list, and click OK.
- Right-click the EPAUDF01.AUDfile and select Delete.
3.Restartyourcomputerandtryprintingagain.
Parenttopic: Solving Problems Printing from a Computer
Relatedreferences
PaperorMediaTypeSettings-PrintingSoftware
WindowsSystemRequirements
MacSystemRequirements
Relatedtasks
SelectingBasicPrintSettings-Windows
SelectingExtendedSettings-Windows
SelectingBasicPrintSettings-Mac
SelectingPrintingPreferences-Mac
SolvingPageLayoutandContentProblems
Checkthesesectionsifyuhaveproblemswiththelayoutorcontentofyourprintedpages.
Note: When printing using AirPrint, the available print settings are different from those covered in this manual.SeetheApplewebsitefordetails.
InvertedImage
TooManyCopiesPrint
BlankPagesPrint
IncorrectMarginsonPrintout
BorderAppearsonBorderlessPrints
IncorrectCharactersPrint
IncorrectImageSizeorPosition
SlantedPrintout
Parenttopic: Solving Problems
InvertedImage
If your printed image is inverted unexpectedly, try thesesolutions:
- Turnoffanymirrororinversionsettingsinyourprintingapplication.
- Turn off the Mirror Image, Flip horizontally, or Reverse page orientation settings in your printer software.(Thisoptionhasdifferentnames,dependingonyouroperatingsystemversion.)
Parenttopic: Solving PageLayoutandContentProblems
Relatedtasks
SelectingBasicPrintSettings-Mac
SelectingAdditionalLayoutandPrintOptions-Windows
TooManyCopiesPrint
Make sure that the Copies setting in your printing program or printer software is not set for multiple copies.
Parenttopic: Solving PageLayoutandContentProblems
BlankPagesPrint
Ifblankpagesprintunexpectedly,trythesesolutions:
- Makesureyouselectedthecorrectpapersizesettingsinyourprintingprogramandprintersoftware.
- If a blank page exists in a document you are printing and you want to skip printing it, select the Skip BlankPagesettinginyourprintersoftware,ifavailable.
- Runaprintheadnozzlechecktoseefanyofthenozzlesareclogged. Thencleantheprinthead, if necessary.
- Makesureyourproductisselectedastheprinterinyourprintingprogram.
- Youmayneedtorefilltheink. Visuallychecktheinklevels.
Parenttopic: Solving PageLayout and Content Problems
Relatedconcepts
PrintHeadNozzleCheck
PrintHeadCleaning
Relatedreferences
PaperorMediaTypeSettings-PrintingSoftware
PaperTypeSettings-ControlPanel
Relatedtopics
LoadingPaper
IncorrectMarginsonPrintout
If your printed page has incorrect margins, try thesesolutions:
- Makesureyouselectedthecorrectpapersizesettingsinyourprintingprogramandprintersoftware.
- Makesureyouselectedthecorrectmarginsforyourpapersizeinyourprintingprogram.
- Makesureyourpaperispositionedcorrectlyforfeedingintotheprinter.
Youcanusethepreviewoptioninyourprintersoftwaretocheckyourmarginsbeforeyouprint.
Parenttopic: Solving PageLayoutandContentProblems
Relatedtasks
SelectingBasicPrintSettings-Windows
SelectingBasicPrintSettings-Mac
SelectingPageSetupSettings-Mac
Relatedtopics
LoadingPaper
BorderAppearsonBorderlessPrints
If you see aborder on border less prints, try thesesolutions:
- Makesureyouareprintingonacompatibleborderlesspapertypeandsize.
Note: For custompapersizes, makes sure you select as supported border less width.
- Windows: Make sure you selected the Borderless setting in your printer software.
- Mac: Make sure you selected the Borderless checkbox or a paper size with a Borderless option in yourprintersoftware.
- Adjust the Expansion setting to adjust the amount of image expansion on the edges of borderless prints.
- Makesuretheimagesizeandthepapersizearesetcorrectly;iftheimageissmall,theenlargement maynotbeenoughtocoverthepaper.
- AccesstheExtendedSettings(Windows)orPrintingPreferences(Mac)andselectRemoveWhite Borders.
Parenttopic: SolvingPageLayoutandContentProblems
Relatedtasks
SelectingBasicPrintSettings-Windows
SelectingBasicPrintSettings-Mac
IncorrectCharactersPrint
If incorrect characters appear in your prints, try thesesolutions before eprinting:
- Makesureanycablesaresecurelyconnectedatbothends.
- In Windows, delete all jobs from the Windows Spooler. Click Print Queue on the Maintenance tab in the printersettingswindow, and cancelanystalledprintjobs.
-
IfyourproductisconnectedtoaUSBhub,connectitdirectlytoyourcomputerinstead.
-
If your computer entered sleep mode the last time you printed, then next print job after your computer exit sleep mode may contain arbled characters. Print your document again.
- If incorrect characters still appear in your prints, try connecting your product using a different cable.
Parenttopic: Solving PageLayout and Content Problems
Relatedtasks
SelectingBasicPrintSettings-Windows
SelectingBasicPrintSettings-Mac
SelectingPageSetupSettings-Mac
IncorrectImageSizeorPosition
If your printed image is the wrong size or in the wrong position, try these solutions:
- Makesureyouselectedthecorrectpapersizeandlayoutsettingsinyourprintingprogramandprinter software.
- Makesureyouselectedthecorrectpapersizeonthecontrolpanel.
- Makesureyourpaperispositionedcorrectlyforfeedingintotheprinter.
- Cleanthescannerglassanddocumentcover.
- If the edges of a copy are cropped, slightly movethe original away from the edges of the scanner glass.
- Makesureyouselectedthecorrectmarginsforyourpapersizeinyourprintingprogram.
- BesuretoselectthecorrectOriginalSizesettingforyouroriginalintheCopysettings.
Youcanusethepreviewoptioninyourprintersoftwaretocheckyourmarginsbeforeyouprint.
Parenttopic: Solving PageLayoutandContentProblems
Relatedtasks
SelectingBasicPrintSettings-Windows
SelectingBasicPrintSettings-Mac
SelectingPageSetupSettings-Mac
Relatedtopics
LoadingPaper
SlantedPrintout
If your printouts a reslanted, try thesesolutions:
- Slidetheedgeguideagainsttheedgeofthepaper.
- Selectahigherprintqualitysettinginyourprintersoftware.
- Turnoffanyhighspeedsettingsinyourproductsoftware.
•Aligntheprinthead.
- Makesuretheproductisnotprintingwhiletiltedoratanangle.
Parenttopic: Solving PageLayoutandContentProblems
Relatedtasks
SelectingBasicPrintSettings-Windows
SelectingBasicPrintSettings-Mac
Relatedtopics
LoadingPaper
SolvingPrintQualityProblems
Checkthesesectionsifyourprintoutshaveproblemswithprintquality,butyourimagelooksfineonyour computerscreen.
Note: When printing using AirPrint, the available print settings are different from those covered in this manual.SeetheApplewebsitefordetails.
WhiteorDarkLinesinPrintout
BlurryorSmearedPrintout
FaintPrintoutorPrintoutHasGaps
GrainyPrintout
IncorrectColors
Parenttopic: Solving Problems
Relatedtopics
SolvingScannedImageQualityProblems
WhiteorDarkLinesinPrintout
If you notice whiteordarklines in your prints (also called banding), try thesesolutions before you print:
- Runanozzlechecktoseeifanyoftheprintheadnozzlesareclogged. Thencleantheprinthead, if necessary.
- Makesurethepapertypesettingmatchesthetypeofpaperyouloaded.
- Makesureyouloadedtheprintablesideofthepapercorrectlyforyourproduct.
- Turnoffanyhighspeedsettingsinyourproductsoftware.
- Adjusttheprintqualityintheproductsoftware.
- Youmayneedtorefilltheink. Visuallychecktheinklevels.
- If you havenot used the product for a long time, run the Power Cleaning utility.
Note: Power Cleaning consumes a lot of ink, so run this utility only if you cannot improve print quality bycleaningtheprinthead.
Parenttopic: SolvingPrintQualityProblems
Relatedconcepts
PrintHeadCleaning
PrintHeadAlignment
PowerCleaning
PrintHeadNozzleCheck
Relatedreferences
PaperorMediaTypeSettings-PrintingSoftware
Relatedtasks
SelectingAdditionalLayoutandPrintOptions-Windows
SelectingPrintingPreferences-Mac
RefillingtheInkTanks
Relatedtopics
LoadingPaper
BlurryorSmearedPrintout
If your printouts are blurryorsmeared, try thesesolutions:
- Makesureyourpaperisnotdamp,curled,old,orloadedincorrectlyinyourproduct.
- Useasupportsheetwithspecialpaper,orloadspecialpaperonesheetatatime.
- Makesureyourpapermeetsthespecificationsforyourproduct.
- UseEpsonpaperstoensurepropersaturationandabsorptionofgenuineEpsoninks.
- Makesurethepapertypesettinginyourproductsoftwarematchesthetypeofpaperyouloaded.
- Makesureyouloadedtheprintablesideofthepapercorrectlyforyourproduct.
- Remove each sheet from the output tray as it is printed.
- Avoidhandlingprintoutsonglossypaperrightafterprintingtoallowtheinktoset.
•Turnoffanyhighspeedsettingsinyourproductsoftware.
• If you print on both sides of a sheet of paper, smudges may appear on there reverses of heavily saturated dark images. If one side of a sheet will contain a lighter image or text, print that side first. Adjust the Print Density and/or Increase Ink Drying Times settings.
- Ifprintedcopiesaresmeared, lowerthecopydensitysettingontheproductcontrolpanel.
•Theinklevelsmaybelowandyoumayneedtorefilltheink. Visuallychecktheinklevels.
- Runanozzlechecktoseeifanyoftheprintheadnozzlesareclogged. Thencleantheprinthead, if necessary.
•Aligntheprinthead.
- Adjusttheprintqualityintheproductsoftware.
- Cleanthepaperpath.
- If you printed when the ink level were too low to be seen in the ink tank windows, refill the ink tank to the upper lines and run the Power Cleaning utility. Then run a nozzle check to see if print quality has improved.
- If you havenot used the product for a long time, run the Power Cleaning utility.
Note: Power Cleaning consumes a lot of ink, so run this utility only if you cannot improve print quality bycleaningtheprinthead.
Note: Your product will not operate properly while tilted at an angle. Place it on a flat, stable surface that extendsbeyondthebaseoftheproductinalldirections.
Parenttopic: SolvingPrintQualityProblems
Relatedconcepts
PrintHeadNozzleCheck
PrintHeadCleaning
PrintHeadAlignment
Relatedreferences
PaperSpecifications
AvailableEpsonPapers
Relatedtasks
AligningthePrintHeadUsingtheProductControlPanel
SelectingAdditionalLayoutandPrintOptions-Windows
SelectingPrintingPreferences-Mac
CleaningthePaperGuide
SelectingBasicPrintSettings-Windows
SelectingBasicPrintSettings-Mac
SelectingExtendedSettings-Windows
FaintPrintoutorPrintoutHasGaps
If your printouts are faint or have gaps, try thesesolutions:
- Runanozzlechecktoseeifanyoftheprintheadnozzlesareclogged. Thencleantheprinthead, if necessary.
•Theinklevelsmaybelow. Visuallychecktheinklevels.
- Makesurethepapertypesettingmatchesthetypeofpaperyouloaded.
- Makesureyourpaperisnotdamp,curled,old,orloadedincorrectlyinyourproduct.
•Aligntheprinthead.
- Adjusttheprintqualityintheproductsoftware.
- Cleanthepaperpath.
- If you havenot used the product for a long time, run the Power Cleaning utility.
Note: Power Cleaning consumes a lot of ink, so run this utility only if you cannot improve print quality bycleaningtheprinthead.
Parenttopic: SolvingPrintQualityProblems
Relatedconcepts
PrintHeadNozzleCheck
PrintHeadAlignment
PrintHeadCleaning
Relatedreferences
PaperorMediaTypeSettings-PrintingSoftware
PaperTypeSettings-ControlPanel
Relatedtasks
CleaningthePaperGuide
RefillingtheInkTanks
Relatedtopics
LoadingPaper
GrainyPrintout
If your printouts are grainy, try thesesolutions:
- Makesureyouloadedtheprintablesideofthepapercorrectlyforyourproduct.
- Selectahigherprintqualitysettingandturnoffanyhighspeedsettingsinyourproductsoftware.
- Runanozzlechecktoseeifanyoftheprintheadnozzlesareclogged. Thencleantheprinthead, if necessary.
•Aligntheprinthead.
- Adjusttheprintquality.
- Youmayneedtoincreasetheimageresolutionorprintasmallersize;seeyoursoftware documentation.
Note: ImagesfromtheInternetmaybelowresolutionandnotresultinahighqualityprintout.
- If you enlarged the imagesize in an image-editing program, you need to increase the imageresolution setting to retain a high image equality. Increase the imageresolution by the same amount you increase the imagesize. For example, if the imageresolution is 300 dpi (dots per inch) and you will double the imagesize for printing, change the resolution setting to 600 dpi.
Note: Higher resolution settings result in larger file sizes, which take longer to process and print. Considerthelimitationsofyourcomputersystemwhenselectingaresolution,andselectthelowest possibleresolutionthatproducesacceptablequalitytokeepfilesizesmanageable.
Parenttopic: SolvingPrintQualityProblems
Relatedconcepts
PrintHeadNozzleCheck
PrintHeadAlignment
PrintHeadCleaning
Relatedtasks
SelectingBasicPrintSettings-Windows
SelectingBasicPrintSettings-Mac
SelectingPrintingPreferences-Mac
SelectingAdditionalLayoutandPrintOptions-Windows
IncorrectColors
If your printout have incorrect colors, try thesesolutions:
- Makesurethepapertypesettingmatchsthepaperyouloaded.
- MakesuretheGrayscalesettingisnotselectedinyourprintersoftware.
- If you selected Standard-Vivid (Windows) or Normal-Vivid (Mac) as the quality setting in the printer software, tryselecting Standard (Windows) or Normal (Mac) instead.
- Runanozzlechecktoseeifanyoftheprintheadnozzlesareclogged. Thencleantheprinthead, if necessary.
•Theinklevelsmaybelowandyoumayneedtorefilltheink. Visuallychecktheinklevels.
• If you printed when the ink level was too low to be seen in the ink tank windows, refill the ink tank to the upper lines and run the Power Cleaning utility. Then run a nozzle check to see if print quality has improved.
- Afteryouprint, thecolorsinyourprintoutneedtimetosetastheinkdries. Duringthistime, thecolors maylookdifferentthanyouexpect. Tospeedupdryingtime, donotstackyourprintoutsontopofeach other.
- Yourprintedcolorscanneverexactlymatchyouron-screencolors. However, you can use acolor managementsystemtogetascloseaspossible. Try using the color management options in your printersoftware.
- Forbestresults, usegenuineEpsoninkandpaper.
- If you havenot used the product for a long time, run the Power Cleaning utility.
Note: Power Cleaning consumes a lot of ink, so run this utility only if you cannot improve print quality bycleaningtheprinthead.
Parenttopic: SolvingPrintQualityProblems
Relatedconcepts
PrintHeadNozzleCheck
PrintHeadCleaning
PowerCleaning
Relatedreferences
AvailableEpsonPapers
Relatedtasks
SelectingAdditionalLayoutandPrintOptions-Windows
SelectingBasicPrintSettings-Windows
SelectingBasicPrintSettings-Mac
RefillingtheInkTanks
ManagingColor-Mac
SolvingScanningProblems
Checkthesesolutionsify you have problemscanning with your product.
ScanningSoftwareDoesNotOperateCorrectly
CannotStartEpsonScan2
Parenttopic: Solving Problems
ScanningSoftwareDoesNotOperateCorrectly
If your scanning software does not operate correctly, try thesesolutions:
- Makesureyourcomputerhasadequatememoryandmeetsthesystemrequirementsforyouroperatingsystem.
- Makesureyourcomputerisnotrunninginapower-savingmode,suchassleeporstandby.Ifso, wakeyoursystemandrestartyourscanningsoftware.
- If you upgraded your operating system but did not treinstall your scanning software, try reinstalling it.
- In Windows, make sure your product is listed as a valid device in the Scanners and Cameras control panel.
Parenttopic: Solving Scanning Problems
CannotStartEpsonScan2
If you cannot start EpsonScan2, try thesesolutions:
- Makesureyourproductisturnedonandanyinterfacecablesaresecurelyconnectedatbothends.
- MakesureEpsonScan2isselectedasyourscanningprogram.
- Makesureyourcomputerisnotrunninginapower-savingmode,suchassleeporstandby.Ifso, wakeyoursystemandrestartEpsonScan2.
- ChecktheconnectionsettingandtesttheconnectionusingEpsonScan2Utility:
Windows 10: Click □ and select EPSON > Epson Scan 2 Utility. Make sure the correct product is selected. If necessary, select the OthertabandclickReset.
Windows 8.x: Navigate to the Apps screen and select Epson Scan 2 Utility. Make sure the correct product is selected. If necessary, select the Other tab and click Reset.
Windows (other versions): Click 📋 or Start > All Programs or Programs > EPSON > Epson Scan 2 > Epson Scan 2 Utility. Make sure the correct product is selected. If necessary, select the Other tabandclickReset.
Mac: Open the Applications folder, click Epson Software, and click Epson Scan 2 Utility. Make sure the correct product is selected. If necessary, select the Other tab and click Reset.
- MakesureyoudonothavemultipleversionsofEpsonScan2installed.Ifyoudo,uninstallboth versionsandinstalloneversion.
- If you upgraded your operating system but did not reinstall EpsonScan2, try reinstalling it.
Parenttopic: Solving Scanning Problems
Relatedtopics
StartingaScan
SolvingScannedImageQualityProblems
Checkthesesectionsifascannedimageonyourcomputerscreenhasaqualityproblem.
ImageConsistsofaFewDotsOnly
LineofDotsAppearsinAllScannedImages
StraightLinesinanImageAppearCrooked
ImageisDistortedorBlurry
ImageColorsarePatchyattheEdges
ImageisTooDark
BackofOriginalImageAppearsinScannedImage
RipplePatternsAppearinanImage
ScannedImageColorsDoNotMatchOriginalColors
ScannedImageEdgesareCropped
Parenttopic: Solving Problems
ImageConsistsofaFewDotsOnly
If your scanned image consists only of a few dots, try these solutions:
- Makesureyouplacedyouroriginalforscanningfacingthecorrectway.
- If you are scanning using the Epson Scan 2 Black & White setting, adjust the Threshold setting and scanagain.
Parenttopic: SolvingScannedImageQualityProblems
LineofDotsAppearsinAllScannedImages
Ifalineofdotsappearsinallyourscannedimages,cleanthescannerglasswithasoft,dry,lint-free clothoruseasmallamountofglasscleaneronthecloth,ifnecessary.Papertowelsarenot recommended.
Caution: Donotsprayglasscleanerdirectlyonthescannerglass.
If you are scanning from the ADF, try cleaning the ADF and scan again.
Parenttopic: SolvingScannedImageQualityProblems
StraightLinesinanImageAppearCrooked
Ifstraightlinesinanoriginalappearcrookedinascannedimage,makesuretoplaceyouroriginal straightwhenyouscanit.
If you are scanning from the ADF, try cleaning the ADF and scan again.
Parenttopic: SolvingScannedImageQualityProblems
Relatedtasks
PlacingOriginalsontheScannerGlass
ImageisDistortedorBlurry
Ifascannedimageappearsdistortedorblurry,trythesesolutions:
- Makesureyouroriginalisnotwrinkledorwarped. This may prevent the original from laying flat on the scannerglass.
- Donotmoveyouroriginaloryourproductduringscanning.
- Yourproductwillnotoperateproperlywhiletiltedatanangle.Placeyourproductonaflat,stable surfacethatextendsbeyonditsbaseinalldirections.
- AdjusttheseEpsonScan2settings(ifavailable)andtryscanningagain:
•Increase the Resolution setting
- If the Image Type setting is Black & White, adjust the Threshold setting.
- SelecttheUnsharpMasksetting.
- If the Image Type setting is Black & White, select Text Enhancement. If the Image Type setting is Color or Grayscale, change the Text Enhancement setting to High.
Parenttopic: SolvingScannedImageQualityProblems
Relatedreferences
AdditionalScanningSettings-MainSettingsTab
AdditionalScanningSettings-AdvancedSettingsTab
ImageColorsarePatchyattheEdges
Ifyouarescanningathickorwarpedoriginal,coveritsedgeswithpapertoblockexternallightasyouscanit.
Parenttopic: SolvingScannedImageQualityProblems
ImageisTooDark
Ifyourscannedimageistoodark, trythesesolutions:
- Select the Advanced Settings tab in Epson Scan 2 and adjust the Brightness setting.
- Checkthebrightnessandcontrastsettingsofyourcomputermonitor.
Parenttopic: SolvingScannedImageQualityProblems
Relatedreferences
AdditionalScanningSettings-MainSettingsTab
AdditionalScanningSettings-AdvancedSettingsTab
BackofOriginalImageAppearsinScannedImage
Ifanimagefromthebackofathinoriginalappearsinyourscannedimage,trythesesolutions:
- Placeapieceofblackpaperonthebackoftheoriginalandscanitagain.
- AdjusttheseEpsonScan2settings(ifavailable)andtryscanningagain:
- SelecttheAdvancedSettingstabandadjusttheBrightnesssetting.
- If the Image Type is set to Black & White, select Text Enhancement. If the Image Type is set to Color or Grayscale, change the Text Enhancement setting to High.
Parenttopic: SolvingScannedImageQualityProblems
RipplePatternsAppearinanImage
Youmayseearipplepattern(calledamoiré)inscannedimagesofprinteddocuments. This is caused by interference from differing pitches in the scanner's screen and your original shelf tonescreen. To reduce this effect, adjust these EpsonScan2 settings (if available) and try scanning again:
- SelecttheDescreeningsetting.
- SelectalowerResolutionsetting.
Parenttopic: Solving Scanned Image Quality Problems
Relatedreferences
AdditionalScanningSettings-MainSettingsTab
AdditionalScanningSettings-AdvancedSettingsTab
ScannedImageColorsDoNotMatchOriginalColors
Printedcolorscanneverexactlymatchthecolorsonyourcomputermonitorbecauseprintersand monitorsusedifferentcolorsystems:monitorsuseRGB(red,green,andblue)andprinterstypicallyuse CMYK(cyan,magenta,yellow,andblack).
Checkthecolormatchingandcolormanagementcapabilitiesofyourcomputer,displayadapter,andthe softwareyouareusingtoseeiftheyareaffectingthepaletteofcolorsyouseeonyourscreen.
Toadjustthecolorsinyourscannedimage,adjusttheseEpsonScan2settings(ifavailable)andtry scanningagain:
- If the Image Type setting is Color or Grayscale, adjust the Contrast setting.
- If the Image Type setting is Black & White or Grayscale, adjust the Color Enhance setting.
Parenttopic: SolvingScannedImageQualityProblems
Relatedreferences
AdditionalScanningSettings-MainSettingsTab
AdditionalScanningSettings-AdvancedSettingsTab
ScannedImageEdgesareCropped
If the edges of a scanned image are cropped, makes sure your original is placed correctly for scanning. If necessary, move your original away from the edges of the scanner glass slightly.
Parenttopic: SolvingScannedImageQualityProblems
Relatedtasks
PlacingOriginalsontheScannerGlass
Checkthesesolutionsifyouhaveproblemsfaxingwithyourproduct.
CannotSendorReceiveFaxes
CannotReceiveFaxeswithaTelephoneConnectedtoYourProduct
FaxMemoryFullErrorAppears
SentFaxQualityisPoor
SentFaxisReceivedinanIncorrectSize
ReceivedFaxQualityisPoor
Received Faxis Not Printed
Parenttopic: Solving Problems
CannotSendorReceiveFaxes
If you cannot send or receive faxes, try thesesolutions:
- If you are faxing from a computer, use the Epson FAX Utility to send your fax.
- Makesuretherecipient'sfaxmachineisturnedonandworking.
• Makesurepaperisloadedcorrectlyinyourproduct.
• MakesureyouhavesetupyourheaderinformationandhavenotblockedyourcallerID. Otherwise, yourfaxesmightberejectedbytherecipient'sfaxmachine.
- If you did not connect a telephone to your product, set the Receive Mode setting to Auto so you can receivefaxesautomatically.
- Check that the cable connecting your telephone wall jack to your product's LINE port is secure.
- Printafaxconnectionreportusingyourproductcontrolpanelorfaxsoftwaretohelpdiagnosethe problem.
-
Verify that the telephone wall jack works by connecting a phoneto it and testing it.
-
Check the Line Type setting and set it to PBX. If your phone system requires an external access code to each an outsideline, registerthecodetotheprinterandadda#(hash)tothebeginningofthe phonenumberwhendialing.
- If you connected your product to a DSL phoneline, you must connect a DSL filter to the phone jack to enable faxing over the line. Contact your DSL provider forth the necessary filter.
• Trylowering your product's faxspeed setting. - If your telephone uses call waiting and you have trouble receiving faxes, turn off call waiting to prevent disruption of incoming faxes.
- If you have subscribed to a call forwarding service, the product may not be able to receive taxes. Contact your service provider for assistance.
- Checkyourinboxanddeletefaxesafterreadingorprintingthem.Iftheinboxisfull,theproductcannot receivefaxes.
- If you cannot send faxes at as specified time, makes sure the date and time a reset correctly on the product.
Note: If your product is connected to a VoIP (Voice over Internet Protocol) phone line, keep in mind that faxmachinesaredesignedtoworkoveranalogphonelines.Epsoncannotguaranteethatfax transmissionwillworkwhenusingVoIP.
If your phone includes voicemail answerings services, calls or faxes maybe in advertently received by your voicemail service.
Parenttopic: SolvingFaxingProblems
Relatedtasks
SettingUptheFaxUtility-Windows
SettingUpFaxFeaturesUsingtheFaxUtility-Mac
PrintingFaxReports
CheckingFaxStatus
ViewingaFaxontheLCDScreen(UsingtheInbox)
SelectingtheDateandTime
Relatedtopics
SettingUpFaxFeatures
CannotReceiveFaxeswithaTelephoneConnectedtoYourProduct
If you cannot receive faxes when telephone is connected to your product, try thesesolutions:
- Makesureyourtelephoneisconnectedtoyourproduct'sEXTport.
•MakesuretheReceiveModeissettoManual.
Note: When answering a call that is a fax, wait until the product's LCD screen displays a message that a connection has been made before you hang up.
Parenttopic: SolvingFaxingProblems
Relatedtasks
ConnectingaTelephoneorAnsweringMachine
UsingtheFaxSetupWizard
FaxMemoryFullErrorAppears
If you see an error message getting youth that the product's fax memory is full, try these solutions:
• If you set the product to save received faxes in the product's memory or in box, delete any faxes you have already read.
Note: Yourproductcanstoreupto100faxesbeforeitsinboxisfull.
• If you set the product to save received faxes on a computer, turn on these selected computers. Once the faxes are saved on the computer, they are deleted from the product's memory.
- If the memory is full, try sending a monochrome fax using the Direct Send feature or sending your faxesinsmallerbatches.
- If the product cannot print are received fax dueto a product error, such as a paper jam, the memory full error may appear. Clear any product errors, then ask the sender to send the fax.
Parenttopic: SolvingFaxingProblems
Relatedtasks
ViewingaFaxontheLCDScreen(UsingtheInbox)
SettingUptheFaxUtility-Windows
SentFaxQualityisPoor
Ifthesentfaxqualityispoor,trythesesolutions:
- Cleanthescannerglass.
•CleantheADF.
- Trychangingtheresolutionsettingonthecontrolpanel.
- Tryadjustingthedensitysettingonthecontrolpanel.
- If you are sending a monochrome fax to a single recipient, try sending the fax using the Direct Send feature.
Note: If you send a high-resolution monochrome fax without using the Direct Send feature, the product may automatically lower the resolution.
- Tryenablingtheerrorcorrectionmode(ECM)setting.
Parenttopic: SolvingFaxingProblems
Relatedreferences
FaxSendingOptions
BasicSettings-Fax
Relatedtasks
CleaningYourProduct
SentFaxisReceivedinanIncorrectSize
If your recipient receives a faxinan incorrect size, try thesesolutions:
• If you are sending a fax using the scanner glass, makes sure your original is placed correctly and that the correct papers size is selected on the control panel.
- Cleanthescannerglassanddocumentcover.
Parenttopic: SolvingFaxingProblems
Relatedtasks
CleaningYourProduct
Relatedtopics
PlacingOriginalsontheProduct
ReceivedFaxQualityisPoor
If you receive apoor quality fax, try thesesolutions:
- Tryenablingtheerrorcorrectionmode(ECM)setting.
- Contactthefaxsenderandaskthemtosendthefaxinahigherresolution.
• Tryreprintingthereceivedfax.
Parenttopic: SolvingFaxingProblems
Relatedreferences
BasicSettings-Fax
Received Faxis Not Printed
Ifareceivedfaxisnotprinted, trythesesolutions:
- Makesuretheproductisfreeoferrors. Theproductcannotprintreceivedfaxesifanerrorhas occurredwiththeproduct,suchasapaperjam.
- If the product has been set to save received faxes in the product's memory or in box, received faxes are not automatically printed. Check the Receive Settings options on the product control panel and changethem, if necessary.
Parenttopic: SolvingFaxingProblems
Relatedtasks
ViewingaFaxontheLCDScreen(UsingtheInbox)
SelectingReceivedFaxOptionsUsingtheFaxUtility-Windows
UninstallYourProductSoftware
If you have a problem that requires you to install and install your software, follow the instructions for your operating system.
UninstallingProductSoftware-Windows
UninstallingProductSoftware-Mac
Parenttopic: Solving Problems
UninstallingProductSoftware-Windows
Youcanuninstallandthenre-installyourproductsoftwaretosolvecertainproblems.
-
Turnoff the product.
-
Disconnectanyinterfacecables.
3.Dooneofthefollowing:
- Windows 10: Click and select (Settings) > Apps > Apps & features. Then select the programyouwanttouninstallandselectUninstall.
- Windows 8.x: Navigate to the Apps screen and select Control Panel > Programs > Programs and Features. Select the uninstall option for your Epson product, then select Uninstall/Change.
Note: If you see a User Account Control window, click Yes or Continue.
Select your product again, if necessary, then select OK, and click Yes to confirm the uninstallation.
- Windows (other versions): Click 📋 or Start, and select All Programs or Programs. Select EPSON, select your product, then click EPSON Printer Software Uninstall.
Note: If you see a User Account Control window, click Yes or Continue.
Inthenextwindow, select your product and click OK. Then follow any on-screen instructions.
-
DooneofthefollowingtouninstallEpsonEventManager, thenfollowanyon-screeninstructions:
-
Windows 10/8.x: Select Epson Event Manager and click Uninstall.
-
Windows 7/Windows Vista: Open the Windows Control Panel utility. Select Programs and Features. (In Classic view, select Programs and click Uninstall a program.) Select Epson EventManagerandclickUninstall/Change.
-
DooneofthefollowingtouninstallEpsonScan2, thenfollowanyon-screeninstructions:
-
Windows 10: Select Epson Scan 2 and click Uninstall.
- Windows 8.x/Windows 7/Windows Vista: Select Epson Scan 2 and click Uninstall/Change.
- Windows XP: Select Epson Scan and click Change/Remove.
6.Restartyourcomputer,thenseetheStartHeresheettore-installyoursoftware.
Note: If you find that re-installing your product software does not solve a problem, contact Epson.
Parenttopic: UninstallYourProductSoftware
UninstallingProductSoftware-Mac
Inmostcases,youdonotneedtouninstallyourproductsoftwarebeforere-installingit.However,you candownloadtheUninstallerutilityfromtheEpsonsupportwebsitetouninstallyourproductsoftwareas describedhere.
Note: If you find that re-installing your product software does not solve a problem, contact Epson.
- To download the Uninstaller utility, visit epson.com/support (U.S.), epson.ca/support (Canada), or epson.com.jm/support(Caribbean)andselectyourproduct.
2.ClickDownloads. - Select your operating system, click Utilities, locate the Uninstaller utility, and click Download.
- Runthefileyoudownloaded.
- Double-click the Uninstallericon.
- In the Epson Uninstallerscreen, select the checkbox for each software program you want to uninstall.
7.ClickUninstall.
8.Followtheon-screeninstructionstouninstallthesoftware. - Reinstall your product software.
Note: If you uninstall the printer driver and your product name remains in the Print & Fax, Print & Scan, or Printers & Scanners window, select your product name and click the – (remove) icon to remove it.
Parenttopic: UninstallYourProductSoftware
WheretoGetHelp
If you need to contact Epson for technical supports, use the following support options.
InternetSupport
Visit Epson's support website at epson.com/support (U.S.), epson.ca/support (Canada), or epson.com.jm/support (Caribbean) and select your product for solutions to common problems. You can download drivers and documentation, get FAQs and troubleshooting advice, ore-mail Epson with your questions.
SpeaktoaSupportRepresentative
BeforeyoucallEpsonforsupport,please havethe following information ready:
•Productname
•Productserialnumber(locatedonalabelontheproduct)
•Proofofpurchase(suchasastorereceipt)anddateofpurchase
- Computerconfiguration
•Descriptionoftheproblem
Thencall:
• U.S.:(562)276-4382,6AMto8PM,PacificTime,MondaythroughFriday,and7AMto4PM,PacificTime,Saturday
•Canada:(905)709-3839,6AMto8PM,PacificTime,MondaythroughFriday,and7AMto4PM,PacificTime,Saturday
Daysandhoursofsupportaresubjecttochangewithoutnotice. Tollerlongdistancechargesmay apply.
PurchaseSuppliesandAccessories
You can purchase genuine Epson ink and paper at epson.com (U.S. sales) or epson.ca (Canadian sales). You can also purchase supplies from an Epson authorized reseller. To find the nearest stone, call 800-GO-EPSON(800-463-7766) in the U.S. or 800-807-7766 in Canada.
Parenttopic: Solving Problems
TechnicalSpecifications
Thesesectionslistthetechnicalspecificationsforyourproduct.
Note: Epson offers a recycling program for end of life Epson products. Please go to this site (U.S) or this site(Canada)forinformationonhowtoreturnyourEpsonproductsforproperdisposal.
WindowsSystemRequirements
MacSystemRequirements
PaperSpecifications
PrintableAreaSpecifications
ScanningSpecifications
AutomaticDocumentFeeder(ADF)Specifications
FaxSpecifications
InkSpecifications
DimensionSpecifications
ElectricalSpecifications
EnvironmentalSpecifications
InterfaceSpecifications
NetworkInterfaceSpecifications
SafetyandApprovalsSpecifications
WindowsSystemRequirements
Touseyourproductanditssoftware,yourcomputershoulduseoneoftheseMicrosoftoperating systems:
- Windows10
- Windows8.x
- Windows7
- WindowsVista
•WindowsServer2008R2
•WindowsServer2008
•WindowsServer2003R2
•WindowsServer2003SP2orlater
Note: For the latest product software available for your operating system, visit the Epson support site at epson.com/support (U.S.), epson.ca/support (Canada), or epson.com.jm/support (Caribbean), select yourproduct,andselectDownloads.
Parenttopic: Technical Specifications
MacSystemRequirements
Touseyourproductanditssoftware,yourMacshoulduseoneoftheseoperatingsystems:
•macOS10.12.x
-OSX10.11.x
-OSX10.10.x
-OSX10.9.x
-OSX10.8.x
-OSX10.7.x
•OSX10.6.8
Note: For the latest product software available for your operating system, visit the Epson support site at epson.com/support (U.S.), epson.ca/support (Canada), or epson.com.jm/support (Caribbean), select yourproduct,andselectDownloads.
Parenttopic: Technical Specifications
PaperSpecifications
Note: Since the quality of any particular brand or type of paper may be changed by the manufacturer at anytime, Epson cannot guarantee the equality of any non-Epson brand or type of paper. Always stesta sample of paper stock before purchasing large quantities or printing large jobs.
Single-sheets
| SizeA4(8.3×11.7inches[210×297mm]) |
| A6(4.1×5.8inches[105×148mm]) |
| Letter(8.5×11inches[216×279mm]) |
| Legal(8.5×14inches[216×356mm]) |
| Folio(8.5×13inches[216×330mm]) |
| 4×6inches(102×152mm) |
| 5×7inches(127×178mm) |
| 8×10inches(203×254mm) |
| 3.5×5inches(89×127mm) |
| Executive(7.25×10.5inches[184×267mm]) |
| 16:9wide(4×7.1inches[102×181mm]) |
| HalfLetter(5.5×8.5inches[140×216mm]) |
PapertypesPlainpaperandpaperdistributedbyEpson
Weight17lb(64g/m ^2 )to24lb(90g/m ^2 )
Envelopes
SizeNo.10(4.1×9.5inches[105×241mm])
PapertypesPlainbondpaper
Weight20lb(75g/m ^2 )to24lb(90g/m ^2 )
Parenttopic: Technical Specifications
PrintableAreaSpecifications
Note: When printing borderless, quality may decline in the expanded printable area.
Singlesheets
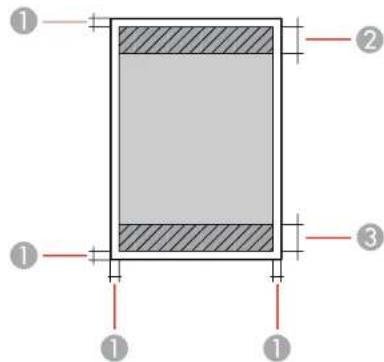
text_image
Technical diagram showing a rectangular component with three labeled parts and dimension lines1Top/bottommargins:0.12inch(3mm)
2Reducedprintqualityarea/top:1.61inches(41mm)
3Reducedprintqualityarea/bottom:1.46inches(37mm)
Borderless
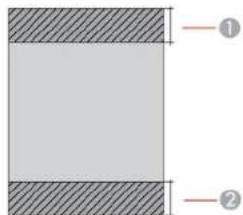
text_image
① ②1Reducedprintqualityarea/top:1.73inches(44mm)
2Reducedprintqualityarea/bottom:1.57inches(40mm)
Envelopes
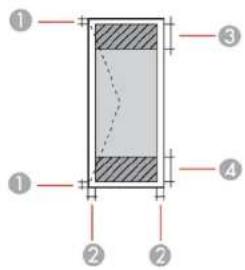
text_image
Technical diagram showing a cross-section with labeled components and dimension lines1Left/rightmargins:0.12inch(3mm)
2Top/bottom:0.20inch(5mm)
3Reducedprintqualityarea/left:0.70inch(18mm)
4Reducedprintqualityarea/right:1.61inches(41mm)
Parenttopic: Technical Specifications
ScanningSpecifications
ScannertypeFlatbed,color
PhotoelectricdeviceCIS
Effectivepixels10200×14040pixels(1200dpi)
DocumentsizeMaximum:8.5×11.7inches(216×297mm)
Scannerglass:USletterorA4
Scanningresolution1200dpi(mainscan)
2400dpi(subscan)
Outputresolution50to9600in1dpiincrements)
ImagedataColor:
48bitsperpixel(16bitsperpixelpercolor)internal
24bitsperpixel(8bitsperpixelpercolor)external
Grayscale:
16bitsperpixelinternal
8bitsperpixelexternal
Blackandwhite:
16bitsperpixelinternal
1bitperpixelexternal
LightsourceLED
Parenttopic: Technical Specifications
AutomaticDocumentFeeder(ADF)Specifications
PapersizeUSletter,A4,legal,or8.5×13inches(216×330mm)size
PapertypePlainpaper
Paperweight17lb(64g/m ^2 )to24lb(90g/m ^2 )
LoadingcapacityApproximately30sheets;USletterorA4size
10sheets;legalor8.5×13inches(216×330mm)size
Parenttopic: Technical Specifications
FaxSpecifications
FaxtypeBlack-and-whiteandcolorfaxcapability(ITU-TSuperGroup3)
SupportedlinesStandardanalog(household)phoneline
PBX(PrivateBranchExchange)telephonesystems
SpeedUpto33.6kbps
ResolutionMonochrome
Standard:203pixelsperinch×98linesperinch(8pixelsperm×3.85linesperm)
Fine:203pixelsperinch×196linesperinch(8pixelspermm×7.7linespermm)
Photo:203pixelsperinch×196linesperinch(8pixelspermm×7.7linespermm)
Color
200×200dpi
PagememoryUpto100pages(receivedITU-TNo.1chartinmonochromedraft mode)
Redial2times(with 1 minute interval); specification may differ by country or region
InterfaceRJ-11PhoneLine
RJ-11 Telephonesetconnection
Parenttopic: Technical Specifications
InkSpecifications
Note: This product is designed to work with genuine Epson inks. Non-Epson ink or any other ink not specified for this printer could cause damage not covered by Epson's warranties.
The included initial link bottles must be used for printersetup and a renot for resale. The printerships with full link bottles and part of the in from the first bottles is used to charge the printhead. Yields vary considerably based on images printed, print settings, papertype, frequency of use and temperature.
ColorBlack, Cyan, Magenta, Yellow
InklifeDonotuseifthedateonthepackagehasexpired
TemperatureStorage: -4to104°F(-20to40°C)
1monthat104°F(40°C)
Inkfreezesat5°F(-15°C)
Inkthawsandisusableafterapproximately2hoursat77°F(25°C)
Parenttopic: Technical Specifications
Relatedreferences
InkBottleandMaintenanceBoxPartNumbers
InkBottleandMaintenanceBoxPartNumbers
DimensionSpecifications
HeightStored:9.1inches(231mm)
Printing:10inches(255mm)
WidthStored:14.8inches(375mm)
Printing:16.4inches(417mm)
DepthStored:13.7inches(347mm)
Printing:19.8inches(503mm)
Weight
15lb(6.8kg)
(withoutinkorpowercord)
Parenttopic: Technical Specifications
ElectricalSpecifications
Powersupplyrating100to240V
Ratedfrequencyrange50/60Hz
Ratedcurrent0.4to0.2A
Powerconsumption
Standalonecopying: Approximately12W(ISO/IEC24712)
(withUSBconnection)
Readymode: Approximately5.4W
Sleepmode:Approximately1W
Poweroffmode: Approximately0.2W
Parenttopic: Technical Specifications
EnvironmentalSpecifications
TemperatureOperating:50to95°F(10to35°C)
Storage: -4to104°F(-20to40°C)
1monthat104°F(40°C)
Humidity
Operating:20to80%RH
(withoutcondensation)
Storage:5to85%RH
Parenttopic: Technical Specifications
InterfaceSpecifications
InterfacetypeHi-SpeedUSB(DeviceClassforcomputers)
Parenttopic: Technical Specifications
NetworkInterfaceSpecifications
Wi-Fi
StandardIEEE802.11b/g/n; complies with either IEEE802.11b/gorIEEE
802.11b/g/n,dependingonpurchaselocation
SecurityWEP(64/128bit)
WPA2-PSK(AES); complies with WPA2 with support for
WPA/WPA2Personal
Frequencyband2.4GHz
CommunicationmodeInfrastructuremode
Wi-FiDirect(SimpleAP);notsupportedforIEEE802.11b
Maximumradiofrequency
19.8dBm(EIRP)
powertransmitted
Ethernet
StandardIEEE802.3i/u(10BASE-T);useacategory5eorhigherSTP
(shieldedtwistedpaircabletopreventriskofradiointerference
IEEE802.3u(100BASE-TX)
IEEE802.3az(EnergyEfficientEthernet);connecteddeviceshould
beIEEE802.3azcompliant
CommunicationmodesAuto, 10MbpsFullduplex, 10MbpsHalfduplex, 100MbpsFull
duplex,100MbpsHalfduplex
ConnectorRJ-45
SecurityProtocol
SSL/TLS
HTTPSServer/Client,IPPS
Parenttopic: Technical Specifications
SafetyandApprovalsSpecifications
UnitedStatesSafety:UL60950-1
EMC:FCCpart15SubpartBclassB
CanadaSafety:CAN/CSAC22.2No.60950-1
EMC:CAN/CSA-CEI/IECCISPR22ClassB
Thisequipmentcontainsthefollowingwirelessmodule:
•Manufacturer:AskeyComputerCorporation.
•Type:WLU6320-D69(RoHS)
ThisproductconformstoPart15ofFCCRulesandRSS-210oftheICRules.Epsoncannotaccept responsibilityforanyfailuretosatisfytheprotectionrequirementsresultingfromanon-recommended modificationoftheproduct.Operationissubjecttothefollowingtwoconditions:(1)thisdevicemaynot causeharmfulinterference,and(2)thisdevicemustacceptanyinterferencereceived,including interferencethatmaycauseundesiredoperationofthedevice.
Topreventradiointerferencetothelicensedservice,thisdeviceisintendedtobeoperatedindoorsand awayfromwindowstoprovidemaximumshielding.Equipment(oritstransmitantenna)thatisinstalled outdoorsissubjecttolicensing.
This equipment complies with FCC/ICradiation exposure limits set forth for an uncontrolled environment and meets the FCC radio frequency (RF) Exposure Guidelines in Supplement C to OET65 and RSS-102 of the IC radio frequency (RF) Exposurerules. This equipment should be installed and operated so that theradiator is kept at least 7.9 inches (20 cm) or more away from a person's body (excluding extremities: hands, wrists, feet andankles).
Parenttopic: Technical Specifications
Notices
Checkthesesectionsforimportantnoticesaboutyourproduct.
Note: Epson offers a recycling program for end of life Epson products. Please go to this site (U.S) or this site(Canada)forinformationonhowtoreturnyourEpsonproductsforproperdisposal.
ImportantSafetyInstructions
FCCComplianceStatement
BindingArbitrationandClassWaiver
Trademarks
CopyrightNotice
ImportantSafetyInstructions
Before using your Epson product, read and follow the safety instructions.
GeneralProductSafetyInstructions
WirelessConnectionSafetyInstructions
LCDScreenSafetyInstructions
TelephoneEquipmentSafetyInstructions
Parenttopic:Notices
GeneralProductSafetyInstructions
- Besuretofollowwallwarningsandinstructionsmarkedontheproduct.
- Useonlythetypeofpowersourceindicatedontheproduct'slabel.
- Useonlythepowercordthatcomeswiththeproduct.Useofanothercordmaycausefiresorshock. Donotusethecordwithanyotherequipment.
- Placetheproductnearawalloutletwheretheplugcanbeeasilyunplugged.
- Avoidpluggingtheproductintoanoutletonthesamecircuitasaphotocopieroraircontrolsystem thatregularlyswitchesonandoff,oronanoutletcontrolledbyawallswitchortimer.
- Donotletthepowercordbecomedamagedorfrayed. Placeittoavoidabrasions, cuts, fraying, crimping, and kinking. Donotplaceobjectsontopofitandonotallowittobesteppedonorrunover. Becarefulltokeepthecordstraightateachend.
- If you use an extension cord with the product, makes sure the total ampererating of the devices plugged into the extension cord does not exceed the cord's ampererating. Also, makes sure the total ampererating of all devices plugged into the wall outlet does not exceed the wall outlet's ampererating rating.
- Alwaysturnofftheproductusingthepowerbutton,andwaituntilthepowerlightstopsflashingbefore unpluggingtheproductorcuttingoffpowertotheelectricaloutlet.
- If you will not be using the product for a long period, unplug the power cord from the electrical outlet.
- Placetheproductionaflat,stablesurfacethatextendsbeyonditsbaseinalldirections.Itwillnot operateproperlyifitistiltedoratanangle.
- Allowspacebehindtheproductforthecables, andspaceabovetheproductsothatyoucanfullyraise thedocumentcover.
- Leaveenoughspaceinfrontoftheproductforthepapertobefullyejected.
- Avoid location that a subject to rapid changes in heat or humidity, shocks or vibrations, ordust.
- Donotplaceorstoretheproductoutdoors.
- Donotplacetheproductnearexcessiveheatsourcesorindirectsunlight.
- Leaveenoughroomaroundtheproductforsufficientventilation.Donotblockorcoveropeningsinthe caseorinsertobjectsthroughtheslots.
- Keep the product away from potential sources of electromagnetic interference, such as loudspeakers or the base unit of cordless telephones.
- Keep your product at least 8.7 inches (22cm) away from cardiac pacemaker to prevent your product's radiowaves from affecting the operation of the pacemaker.
- Whenconnectingtheproducttoacomputerorotherdevicewithacable,ensurethecorrect orientationoftheconnectors.Eachconnectorhasonlyonecorrectorientation.Insertingaconnector inthewrongorientationmaydamagebothdevicesconnectedbythecable.
- Donottouchtheflatwhitecableorinktubesinsidetheproduct.
- Donotmovetheprintheadbyhand; this may damage the product.
- Donotputyourhandinsidetheprinterwhileitisprinting.
- Donotspillliquidontheproductorusetheproductwithwethands.
- Donotuseaerosolproductsthatcontainflammablegasesinsideoraroundtheproduct.Doingsomay causefire.
-
Donotpresstoohardonthedocumenttablewhenplacingoriginals.
-
Donotopenthescannersectionwhiletheproductiscopying,printing,scanning,orperformingany otherfunctions.
- Becarefulnottotrapyourfingerswhenclosingthedocumentcoverorscanner.
- Exceptasspecificallyexplainedinyourdocumentation,donotattempttoserviceordisassemblethe productyourself.
- Unplugtheproductandreferservicingtoqualifiedservicepersonnelunderthefollowingconditions:if thepowercordorplugisdamaged;ifliquidhasenteredtheproduct;iftheproducthasbeendropped orthecasedamaged;iftheproductdoesnotoperatenormallyorexhibitsadistinctchangein performance.Adjustonlythosecontrolsthatarecoveredbytheoperatinginstructions.
- Beforetransportingtheproduct, makesurethattheprintheadisinthehome(farright)position.
- Whenstoringortransportingtheproduct,donottiltit,standitonitsside,orturnitupsidedown; otherwiseinkmayleak.
Parenttopic: Important Safety Instructions
WirelessConnectionSafetyInstructions
Radiowavesfromthisproductmayadverselyaffecttheoperationofmedicalequipmentorautomatically controlleddevices,suchaspacemakers,automaticdoorsorfirealarms.Whenusingthisproductnear suchdevicesorinsideamedicalfacility,followthedirectionsfromauthorizedstaffmembersatthe facility,andfollowallpostedwarningsanddirectionsonthedevicetoavoidcausinganaccident.
Parenttopic: Important Safety Instructions
LCDScreenSafetyInstructions
• Useonlyadry, softclothocleantheLCDscreen. Donotuseliquidorchemicalcleansers.
- IftheLCDscreenisdamaged,contactEpson.Iftheliquidcrystalsolutiongetsonyourhands,wash themthoroughlywithsoapandwater.Iftheliquidcrystalsolutiongetsintoyoureyes,flushthem immediatelywithwater.Ifdiscomfortovisionproblemsremainafterathoroughflushing,seeadoctor immediately.
- DonotpresstoothardontheLCDscreenorsubjectittoheavyimpacts.
- Donotuseapointyorsharpobject,suchasapenoryourfingernail,tooperatetheLCDscreen.
- If the LCD screens or cracks, don't touch or attempt to remove the broken pieces; contact Epson for support.
Parenttopic: Important Safety Instructions
TelephoneEquipmentSafetyInstructions
When using telephone equipment, you should always follow basics safety precaution store due to the risk of fire, electric shock, and personal injury, including the following:
•DonotusetheEpsonproductnearwater.
- Avoidusingatelephoneduringanelectricalstorm. Theremaybearemoteriskofelectricshockfrom lightning.
- Donotuseatelephonetoreportagasleakinthevicinityoftheleak.
Caution: To reduce the risk of fire, use only a No. 26 AWG or larger telecommunication line cord.
Parenttopic: Important Safety Instructions
FCCComplianceStatement
ForUnitedStatesUsers
This equipment complies with Part 68 of the FCC rules and there requirements adopted by the Administrative Council for Terminal Attachments ("ACTA"). On the surface of this equipment is a label that contains, among other information, a product identifier in the format US: AAAEQ##TXXXX. If requested, this number must be provided to the telephone company.
ApplicablecertificationjackUniversalServiceOrderCodes("USOC")fortheequipment:RJ11C.
Aplugandjackusedtoconnectthisequipmenttothepremiseswiringandtelephonenetworkmust complywiththeapplicableFCCPart68rulesandrequirementsadoptedbytheACTA.Acompliant telephonecordandmodularplugisprovidedwiththisproduct.Itisdesignedtobeconnectedtoa compatiblemodularjackthatisalsocompliant.Seeinstallationinstructionsfordetails.
TheRENisusedtodeterminethenumberofdevicesthatmaybeconnectedtoatelephoneline. ExcessiveRENsonatelephonelinemayresultinthedevicesnotringinginresponsetoanincoming call.Inmostbutnotallareas,thesumofRENsshouldnotexceedfive(5.0).Tobecertainofthenumber ofdevicesthatmaybeconnectedtoaline,asdeterminedbythetotalRENs,contactthelocaltelephone company.ForproductsapprovedafterJuly23,2001,theRENforthisproductispartoftheproduct identifierthatastheformatUS:AAAEQ##TXXXX.Thedigitsrepresentedby##aretheRENwithouta decimalpoint(e.g.,03isaRENof0.3).Forearlierproducts,theRENisseparatelyshownonthelabel.
If this equipment causes harm to the telephone network, the telephone company will notify you in advance that temporary discontinuance of servicemay berequired. But if advances notice isn't practical, the telephone company will notify the customer as soon as possible. Also, you will be advised of your right to file a complaint with the FCC if you believe it is necessary.
Thetelephonecompanymaymakechangesinitsfacilities, equipment, operationsorprocedurethat could affect the operation of the equipment. If this happen the telephone company will provide advance notice in order for out of a necessary modification, to maintain uninterrupted service.
If you have problems with this product and require technical or customer support, please visit www.epson.com from more information.
Thisproductisnotintendedtoberepairedbythecustomer.Ifyouexperiencetroubleconnectingthis equipmenttoatelephoneline,pleasecontact:
Name: EpsonAmerica, Inc.
Address:3840KilroyAirportWay,LongBeach,CA90806U.S.A.
Telephone:(562)981-3840
If the equipment is causing harm to the telephone network, the telephone company may request that you disconnect the equipment until the problem is resolved.
This equipment may not be used on coinservice provided by the telephone company. Connection to party lines service is subject to that atetariffs. Contact the state public utility commission, public service commission or corporation commission for information.
If your home has specially wired alarm equipment connected to the telephone line, ensure the installation of this equipment does not disable your alarm equipment. If you have questions about what will disable alarm equipment, consult your telephone company or a qualified installer.
The Telephone Consumer Protection Act of 1991 makes it unlawful for any person to use a computer or the electronic device, including fax machines, to send any message unless such message clearly contains in a margin at the top or bottom of each transmitted page or the first page of the transmission, the date and time is sent and an identification of the business or other entity, or other individuals sending them message and the telephone number of the sending machine or such business, other entity, or individual. (The telephone number provided may not be a 900 number or any other number for which charges exceed local or long - distance transmission charges.)
Inordertoprogramthisinformationintoyourfaxmachine, clickthelinkbelowforinstructionsonentering faxheaderinformation.
According to the FCC's electrical safety advisory, were recommend that you may install an AC surge arrester in the AC outlet to which this equipment is connected. Telephone companies report that electrical surges, typically lightning transients, are very destructive to customer terminale equipment connected to AC powers sources and that this is a major nationwide problem.
ThisequipmenthasbeentestedandfoundtocomplywiththelimitsforaClassBdigitaldevice,pursuant toPart15oftheFCCRules. Theselimitsaredesignedtoprovidereasonableprotectionagainsttharmful interferenceinaresidentialinstallation. Thisequipmentgenerates,uses,andcanradiateradio frequencyenergyand,ifnotinstalledandusedinaccordancewiththeinstructions,maycauseharmful
interferencetoradioortelevisionreception. However, thereisnoguaranteethatinterferencewillnot occurinaparticularinstallation. If this equipment does cause interferencetoradioandtelevision reception, which can be determined by turning the equipment of fandon, the user is encouraged to try to correct the interference by one or more of the following measures:
•Reorientorrelocatethereceivingantenna.
- Increase these separation between the equipment and receiver.
- Connecttheequipmentintoanoutletonacircuitdifferentfromthattowhichthereceiverisconnected.
- Consultthedealeroranexperiencedradio/TVtechnicianforhelp.
WARNING
The connection of an on-shielded equipment interface cable to this equipment will invalidate the FCC Certification or Declaration of this device and may cause interference levels which exceed the limits established by the FCC forthisequipment. It is the responsibility of the userto obtain and use a shielded equipment interface cable with this device. If this equipment has more than one interface connector, do not leave cables connected to unused interfaces. Changes or modifications not expressly approved by the manufacturer could void the user's authority to operate the equipment.
ForCanadianUsers
- This product meets the applicable Innovation, Science and Economic Development Canadatechnical specifications.
- The Ringer Equivalence Number indicates the maximum number of devices allowed to be connected to telephone interface. The termination of an interfacem may consist of any combination of devices subject only to the requirement that the sum of the REN so full the devices does not exceed five.
CANICES-3(B)/NMB-3(B)
1. DISPUTES, BINDING INDIVIDUAL ARBITRATION, AND WAIVEROF CLASSACTIONS AND CLASSARBITRATIONS
1.1 Disputes. The terms of this Section 1 shall apply to all Disputes between you and Epson. The term "Dispute" is meant to have the broadest meaning permissible under law and includes any dispute, claim, controversy or action between you and Epson arising out for relating to this Agreement, Epson branded products (hardware and including any related software), or other transaction involving you and Epson, whether in contract, warranty, misrepresentation, fraud, tort, intentionaltort, statute, regulation, ordinance, or any other legal or equitable basis. "DISPUTE" DOES NOT INCLUDE IP CLAIMS, or more specifically, a claimor cause of action for (a) trademark infringement or dilution, (b) patent infringement, (c) copyright infringement or misuse, or (d) trades secret misappropriation (an "IPClaim"). You and Epson also agree, notwithstanding Section 1.6, that court, not an arbitrator, may decide if a claimor cause of action is for an IP claim.
1.2 Binding Arbitration. You and Epson agree that all Disputes shall be resolved by binding arbitration according to this Agreement. ARBITRATION MEANSTHAT YOU WAIVE YOUR RIGHT TO AJUDGE OR JURYINACOURTPROCEEDING AND YOUR GROUNDS FOR APPEAL ARE LIMITED.
PursuanttothisAgreement, bindingarbitrationshallbeadministered by JAMS, anationally recognized arbitration authority, pursuant to its code of procedure then ineffect for consumer related disputes, but excluding any rule that permit joinder or class actions in arbitration (formoredetail on procedure, see Section 1.6 below). You and Epson understand and agree that (a) the Federal Arbitration Act (9U.S.C. §1, et seq.) govern the interpretation and enforcement of this Section 1, (b) this Agreement memorializes at transaction in interstate commerce, and (c) this Section 1 shall survive termination of this Agreement.
1.3 Pre-Arbitration Steps and Notice. Before submitting a claim for arbitration, you and Epson agree to try, for sixty (60) days, to resolve any Dispute informally. If Epson and you donot reach an agreement to resolv the Disputewithin the sixty (60) days), you or Epson may commence an arbitration. Noticeto Epson must be addressed to: Epson America, Inc., ATTN: Legal Department, 3840 Kilroy Airport Way, Long Beach, CA90806 (the "Epson Address"). The Dispute Noticetoyou will besent to themost recent address Epson has in its records for you. For this reason, it is important to notify us if your address changes by emailing us at EAILegal@ea.epson.com or writing us at the Epson Address above. Notice of the Disputeshall includethesender's name, address and contact information, the fact giving riseto the Dispute, and therelief requested (the "Dispute Notice"). Following receipt of the Dispute Notice, Epson and you agree to acting good faith to resolv the Dispute before commencing arbitration.
1.4 Small Claims Court. Notwithstanding the foregoing, you may bring an individual action in the small claimscourtofyourstateormunicipalityiftheactioniswithinthatcourt'sjurisdictionandspendingonlyinthatcourt.
1.5WAIVEROFCLASSACTIONSANDCLASSARBITRATIONS.YOUANDEPSONAGREETHAT EACHPARTYMAYBRINGDISPUTESAGAINSTTHEOTHERPARTYONLYINANINDIVIDUAL CAPACITY,ANDNOTASAPLANTIFFORCLASSMEMBERINANYCLASSOR REPRESENTATIVEPROCEEDING,INCLUDINGWITHOUTLIMITATIONFEDERALORSTATE CLASSACTIONS,ORCLASSARBITRATIONS.CLASSACTIONLAWSUITS,CLASS-WIDE ARBITRATIONS,PRIVATEATTORNEY-GENERALACTIONS,ANDANYOTHERPROCEEDING WHEREOMEONEACTSINAREPRESENTATIVECAPACITYARENOTALLOWED. ACCORDINGLY,UNDERTHEARBITRATIONPROCEDUREOUTLINEDINTHISSECTION,AN ARBITRATORSHALLNOTCOMBINEORCONSOLIDATEMORETHANONEPARTY'SCLAIMS WITHOUTTHEWRITTENCONSENTOFALLAFFECTEDPARTIESTOANARBITRATION PROCEEDING.
1.6 Arbitration Procedure. If you or Epson commences arbitration, the arbitration shall be governed by the rules of JAM that are ineffect when the arbitration is filed, excluding any rule that permit arbitration on a class or representative basis (the "JAMS Rules"), available at http://www.jamsadr.com or by calling 1-800-352-5267, and under the rules set forth in this Agreement. All Disputesshall beresolved by a single neutral arbitrator, and both parties shall have a reasonable opportunity to participate in the selection of the arbitrator. The arbitrator is bound by the term so this Agreement. The arbitrator, and not any federal, state or local courtor agency, shall have exclusive authority to resolve all disputes arising out for relating to the interpretation, applicability, enforceability or formation of this Agreement, including any claim that all or any part of this Agreement is void or voidable. Not with standing this broad delegation of authority to the arbitrator, acourt may determinethelimited question of whether a claimor cause of action is for an P Claim, which is excluded from the definition of "Disputes" in Section 1.1 above. The arbitrator shall be empowered to grant whatever relief would be available in a court under law or inequity. The arbitrator may award you the same damages as a court could, and may award declaratory or injunctiverelief only in favor of the individual party seeking relief and only to the extent necessary to provide relief warranted by that party's individual claim. In some instances, the cost of arbitration can exceed the cost of litigation and theright to discovery may be limited in arbitration than in court. The arbitrator's awardisbinding and maybe entered as a judgment in any court of competent jurisdiction.
You may choose to engage in arbitration hearings by telephone. Arbitration hearings not conducted by telephones shall take place in allocation reasonably accessible from your primary residence, or in Orange County, California, at your option.
a) Initiation of Arbitration Proceeding. If either you or Epson decidest to arbitrate a Dispute, both parties agree to the following procedure:
(i) WriteaDemandforArbitration. The demand must include a description of the Dispute and the amount of damage sought to be recovered. You can find a copy of a Demand for Arbitration at http://www.jamsadr.com ("DemandforArbitration").
(ii) Send three copies of the Demand for Arbitration, plus the appropriate filing fee, to: JAMS, 500 North State College Blvd., Suite 600 Orange, CA92868, U.S.A.
(iii) Sendonecopy of the Demand for Arbitration to the other party (same address as the Dispute Notice), or otherwise agreed by the parties.
b) HearingFormat. During the arbitration, the amount of any settlement to offer mades shall not be disclosed to the arbitrator until after the arbitrator determines the amount, if any, to which you or Epson is entitled. The discoveryorexchange of non-privileged information relevant to the Disputation may be allowed during the arbitration.
c) Arbitration Fees. Epson shall pay, or (if applicable) reimburse you for all JAMS filings and arbitration fees for any arbitration commenced (by you or Epson) pursuant to provision of this Agreement.
d) Awardin Your Favor. For Disputes in which you or Epson seeks \75,000 or less indamages exclusive of attorney's fees and costs, if the arbitrator's decision results in an award to you in an amount greater than Epson's last written offer, if any, to settle the Dispute, Epson will: (i) pay you \1,000 or the amount of the award, whichever is greater; (ii) pay outwic the amount of your reasonable attorney's fees, if any; and (iii) reimburse you for any expenses (including expert witness fees and costs) that your attorney reasonably accrues for investigating, preparing, and pursuing the Dispute in arbitration. Except as agreed upon by you and Epson in writing, the arbitrator shall determin the amount of fees, costs, and expensestobepaid by Epson pursuant to this Section 1.6d).
e) Attorney's Fees. Epson will not seek its attorney's fees and expenses for any arbitration commenced involving a Dispute under this Agreement. Your right to attorney's fees and expenses under Section 1.6d) aboved does not limit your right to attorney's fees and expenses under applicable law; notwithstanding the foregoing, the arbitrator may not award duplicative award sof attorney's fees and expenses.
1.7Opt-out.Youmayelecttoopt-out(excludeyourself)fromthefinal,binding,individual arbitrationprocedureandwaiverofclassandrepresentativeproceedingsspecifiedInthis AgreementbysendingawrittenlettertotheEpsonAddresswithinthirty(30)daysofyourassent tothisAgreement(includingwithoutlimitationthepurchase,download,installationofthe SoftwareorotherapplicableuseofEpsonHardware,productsandservices)thatspecifies(i)yourname,(ii)yourmailingaddress,and(iii)yourrequesttobeexcludedfromthefinal,binding individualarbitrationprocedureandwaiverofclassandrepresentativeproceedingsspecifiedin thisSection1.Intheeventthatyouopt-outconsistentwiththeproceduresetforthabove,all othertermsshallcontinuetoapply,includingtherequirementtoprovidenoticepriortolitigation.
1.8 Amendments to Section 1. Notwithstanding any provision in this Agreement to the contrary, you and EpsonagreethatifEpsonmakesanyfutureamendmentstothedisputeresolutionprocedureand classactionwaiverprovisions(otherthanachangetoEpson'saddress)inthisAgreement,Epsonwill obtainyouraffirmativeassenttotheapplicableamendment.Ifyoudonotaffirmativelyassenttothe applicableamendment,youareagreeingthatyouwillarbitrateanyDisputebetweenthepartiesin accordancewiththelanguageofthisSection1(orresolvedisputesasprovidedforinSection1.7,ifyou timelyelectedtoopt-outwhenyoufirstassentedtothisAgreement).
1.9 Severability. If any provision in this Section 1 is found to be unenforceable, that provision shall be severed with the remainder of this Agreement remaining in full force and effect. The foregoing shall not applytothep prohibitionagainstclassorrepresentativeactionsasprovidedinSection1.5.This meansthatifSection1.5isfoundtobeunenforceable,theentireSection1(butonlySection1) shallbenullandvoid.
Parenttopic:Notices
Trademarks
EPSON ^® isaregisteredtrademark, EPSONExceedYourVisionisaregisteredlogomark, and Epson Connect ^™ isattrademarkofSeikoEpsonCorporation.
EpsonStore ^SM isaservicemarkofEpsonAmerica,Inc.
EpsoniPrint ^TM and RemotePrint ^TM aretrademarksofSeikoEpsonCorporation.
Apple, AppStore, AirPrint, AirPrintlogo, iPad, iPhone, iPodtouch, Mac, and OSXaretrademarksof AppleInc., registeredintheU.S. and other countries.
Google® isaregisteredtrademarkandAndroid ^TM ,Chromebook ^TM ,Gmail ^TM ,GoogleChrome ^TM ,Google CloudPrint ^TM ,GoogleDrive ^TM ,andGooglePlay ^TM ,aretrademarksofGoogleInc.
Wi-FiDirect ^® isaregisteredtrademarkofWi-FiAlliance ^® .
GeneralNotice: Other product names used herein are for identification purposes only and maybe trademark of their respective owners. Epson disclaims any and all rights in those marks.

EXCEED YOUR VISION
Parenttopic:Notices
CopyrightNotice
Allrightsreserved. Nopartofthispublicationmaybereproduced, storedinaretrievalsystem, or transmittedinanyformorbyanymeans, electronic, mechanical, photocopying, recording, or otherwise, without the prior written permission of SeikoEpsonCorporation. The information contained herein is designed only for use with this Epsonproduct. Epsonis not responsible for any use of this information as applied to other products.
NeitherSeikoEpsonCorporationnoritsaffiliatesshallbeliabletothepurchaserofthisproductorthird partiesfordamages,losses,costs,orexpensesincurredbypurchaserorthirdpartiesasaresultof:
accident, misuse, or abuse of this product or unauthorized modifications, repairs, or alteration to this product, or (excluding the U.S.) failure to strictly comply with Seiko Epson Corporation's operating and maintenance instructions.
SeikoEpsonCorporationshallnotbeliableforanydamagesorproblemsarisingfromtheuseofany optionsoranyconsumableproductsotherthanthosedesignatedasOriginalEpsonProductsorEpson ApprovedProductsbySeikoEpsonCorporation.
SeikoEpsonCorporationshallnotbeheldliableforanydamageresultingfromelectromagneticinterferencethatoccursfromtheuseofanyinterfacecablesotherthanthosedesignatedasEpsonapprovedProductsbySeikoEpsonCorporation.
Thisinformationissubjecttochangewithoutnotice.
libTIFFSoftwareAcknowledgment
ANoteConcerningResponsibleUseofCopyrightedMaterials
DefaultDelayTimesforPowerManagementforEpsonProducts
CopyrightAttribution
Parenttopic:Notices
libTIFFSoftwareAcknowledgment
Copyright©1988-1997SamLeffler
Copyright©1991-1997SiliconGraphics,Inc.
Permissionouse, copy, modify, distribute, and sell this software and its documentation for any purpose is hereby granted without fee, provided that (I) the above copyright notices and this permission notice appear in all copies of the software and related documentation, and (ii) then names of Sam Leffler and Silicon Graphics may not be used in any advertising or publicity relating to the software without the specific, prior written permission of Sam Leffler and Silicon Graphics.
THESOFTWAREISPROVIDED"AS-IS"ANDWITHOUTWARRANTYOFANYKIND,EXPRESS,IMPLIEDOROTHERWISE,INCLUDINGWITHOUTLIMITATION,ANYWARRANTYOF MERCHANTABILITYORFITNESSFORAPARTICULARPURPOSE.
INNOEVENTSHALLSAMLEFFLERORSILICONGRAPHICSBELIABLEFORANYSPECIAL, INCIDENTAL, INDIRECTORCONSEQUENTIALDAMAGESOFANYKIND, ORANYDAMAGES WHATSOEVERRESULTINGFROMLOSSOFUSE, DATAORPROFITS, WHETHERORNOT ADVISEDOFTHEPOSSIBILITYOFDAMAGE, ANDONANYTHEORYOFLIABILITY, ARISINGOUT OFORINCONNECTIONWITHTHEUSEORPERFORMANCEOFTHISSOFTWARE.
Parenttopic: CopyrightNotice
ANoteConcerningResponsibleUseofCopyrightedMaterials
Epsonencourageseachusertoberesponsibleandrespectfulofthecopyrightlawswhenusingany Epsonproduct.Whilesomecountries'lawspermitlimitedcopyingorreuseofcopyrightedmaterialin certaincircumstances,thosecircumstancesmaynotbeasbroadassomepeopleassume.Contactyour legaladvisorforanyquestionsregardingcopyrightlaw.
Parenttopic: CopyrightNotice
DefaultDelayTimesforPowerManagementforEpsonProducts
Thisproductwillentersleepmodeafteraperiodofnonuse. Thisistoensurethattheproductmeets EnergyStarstandardsofenergyefficiency.Moreenergysavingscanbeachievedbysettingthetimeto sleeptoashorterinterval.
Parenttopic: CopyrightNotice
CopyrightAttribution
©2017EpsonAmerica,Inc.
9/17
CPD-53997
Parenttopic: CopyrightNotice