
ReadyClean Pet 3 - Vacuum Cleaner BISSELL - Free user manual and instructions
Find the device manual for free ReadyClean Pet 3 BISSELL in PDF.


User questions about ReadyClean Pet 3 BISSELL
0 question about this device. Answer the ones you know or ask your own.
Ask a new question about this device
Download the instructions for your Vacuum Cleaner in PDF format for free! Find your manual ReadyClean Pet 3 - BISSELL and take your electronic device back in hand. On this page are published all the documents necessary for the use of your device. ReadyClean Pet 3 by BISSELL.
USER MANUAL ReadyClean Pet 3 BISSELL
natural_image
Black Bissell pet3 vacuum cleaner with attached hose and filter (no visible text or symbols on body)
text_image
HOME TO A DEEPER CLEAN™ Bissel® SINCE 1876 HOME TO A DEEPER CLEAN™IMPORTANT SAFETY INSTRUCTIONS
READ ALL INSTRUCTIONS BEFORE USING YOUR APPLIANCE.
Unplug from outlet when not in use and before conducting maintenance. When using an electrical appliance, basic precautions should be observed, including the following:
WARNING
TO REDUCE THE RISK OF FIRE, ELECTRIC SHOCK, OR INJURY:
» This appliance can be used by children aged from 8 years and above and persons with reduced physical, sensory or mental capabilities or lack of experience and knowledge if they have been given supervision or instruction concerning use of the appliance in a safe way and understand the hazards involved. Cleaning and user maintenance shall not be made by children without supervision.
» Children should be supervised to ensure that they do not play with the appliance.
» Keep hair, loose clothing, fingers, and all parts of body away from openings and moving parts of the appliance and its accessories.
» Unplug from electrical socket when not in use, before cleaning, maintaining or servicing the appliance, and if your appliance has an accessory tool with a moving brush, before connecting or disconnecting the tool.
» If the supply cable is damaged, it must be replaced by the manufacturer, its service agent, or similarly qualified person in order to avoid a hazard.
» Do not run appliance over cable.
» Use only the type and amount of liquids specified under the operations section of this guide.
» Do not leave appliance when plugged in.
» Do not use with damaged cable or plug.
» Do not pull or carry by cable, use cable as a handle, close door on cable, or pull cable around sharp edges or corners.
» Keep cable away from heated surfaces.
» To unplug, grasp the plug, not the cable.
» Do not handle plug or appliance with wet hands.
» Turn off all controls before unplugging.
» Hold plug when rewinding onto cord reel. Do not allow plug to whip when rewinding.
» Plastic film can be dangerous. To avoid danger of suffocation, keep away from children.
» Use only as described in this user guide.
» Use only manufacturer's recommended attachments.
» Do not immerse in water or liquid.
» If appliance is not working as it should, has been dropped, damaged, left outdoors, or dropped into water; do not attempt to operate it and have it repaired at an authorized service center.
» Do not put any object into openings.
» Do not use with any opening blocked; keep free of dust, lint, hair, and anything that may reduce air flow.
» Use extra care when cleaning on stairs.
» Do not use to pick up flammable or combustible liquids, such as petroleum, or use in areas where they may be present.
» Do not pick up toxic material (chlorine bleach, ammonia, drain cleaner, etc.)
» Do not use appliance in an enclosed space filled with vapours given off by oil base paint, paint thinner, some mothproofing substances, flammable dust, or other explosive or toxic vapours.
» Do not pick up hard or sharp objects such as glass, nails, screws, coins, etc.
» Keep appliance on a level surface.
» Do not pick up anything that is burning or smoking, such as cigarettes, matches, or hot ashes.
» If your appliance has a motorized brushroll, do not leave machine running in the same spot without the handle fully upright.
» Do not use outdoors.
» Always connect to a properly earthed electrical socket. Do not modify earthed plug.
» Liquid must not be directed towards equipment containing electrical components.
» Do not immerse. Use only on surfaces moistened by the cleaning process. Use only BISSELL cleaning products intended for use with this machine.
» Always install float before any wet pick-up operation.
» If your appliance is fitted with a nonrewireable BS 1363 plug it must not be used unless a 13 amp (ASTA approved to BS 1362) fuse is fitted in the carrier contained in the plug. Spares may be obtained from your BISSELL supplier. If for any reason the plug is cut off, it must be disposed of, as it is an electric shock hazard should it be inserted into a 13 amp socket.
SAVE THESE INSTRUCTIONS
FOR OPERATION ON A 220-240 VOLT A.C. 50-60 HZ POWER SUPPLY ONLY.
This model is for household use only.
Thanks for buying a BISSELL deep Cleaner
We're glad you purchased a BISSELL carpet cleaner. Everything we know about floor care went into the design and construction of this complete, high-tech home cleaning system.
Your BISSELL carpet cleaner is well made, and we back it with a limited two-year guarantee. We also stand behind it with a knowledgeable, dedicated Consumer Care department, so, should you ever have a problem, you'll receive fast, considerate assistance.
My great-grandfather invented the floor sweeper in 1876. Today, BISSELL is a global leader in the design, manufacture, and service of high quality homecare products like your BISSELL carpet cleaner.
Thanks again, from all of us at BISSELL.
max 1.7 mmol
Mark J. Bissell
Chairman & CEO
Safety Instructions.....2
Product View.....4
Assembly 5
Operations 6-9
Maintenance & Care ..... 10
Troubleshooting ..... 11
Guarantee 12
Consumer Care .... 12
Tips
» Deep cleaning stairs and high-traffic areas on a regular basis helps prolong carpet life.
» Deep cleaning carpeting regularly can reduce dust and allergens in your home.
| WARNING | AN ACTION OR ATTENTION IS NEEDED TO THIS AREA IN ORDER TO REDUCE THE RISK OF ELECTRIC SHOCK, FIRE, OR INJURY | |
| GUIDE | READ USER GUIDE FOR COMPLETE SAFETY AND USER INSTRUCTIONS | |
| WEEE | DO NOT THROW THE APPLIANCE AWAY WITH THE NORMAL HOUSHOLD WASTE AT THE END OF ITS LIFE, BUT HAND IT IN AT AN OFFICIAL COLLECTION POINT FOR RECYCLING. BY DOING THIS YOU WILL HELP TO PRESERVE THE ENVIRONMENT. |
Product View

text_image
Bissell pet3 1 2 3 4 5 6 7 8 9 10 11 12 13 disin powerbrush drapping rows1SprayTrigger
2 Quick Release Cord Wrap
3 Tough Stain Tool
4 Hose Wrap
5 Handle Assembly
6 Power Cord
7 Hose
8 Upper Body
9 ReadyTools™ Dial
10 Collection Tank
11 Vent Cover (Foam Filter)
12 Collection Tank Latch
13 Removable Nozzle
Assembly
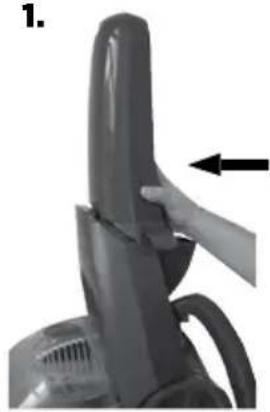
Your deep cleaner assembles quickly and easily. The only tool you will need for assembly is a Phillips head screwdriver.
- Slide upper body onto lower body.
- Secure with screws.
NOTE: The screws can be found taped to the handle.
- Attach hose wrap to upper handle by sliding it up the bottom of the handle until it snaps firmly in place.
- Slide upper handle into upper body, until it will not go any further and secure with screw.
- Place solution tank on back of unit.
- Wrap power cord and flex hose.
- Keep flex hose snugly in place by using the hose secure latch.
- Attach tool to end of hose.
Assembly is now complete.
⚠ WARNING
Do not plug in your deep cleaner until you have completely assembled it per the instructions and are familiar with all instructions and operating procedures.
natural_image
Close-up of a hand adjusting a black mechanical component with an arrow indicating the process (no text or symbols visible)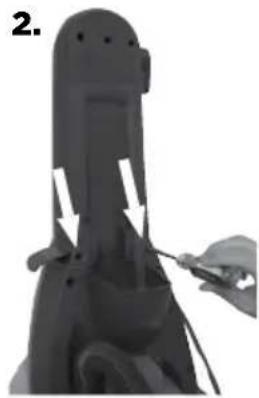
natural_image
3D rendered mechanical component with arrows indicating motion direction (no text or symbols)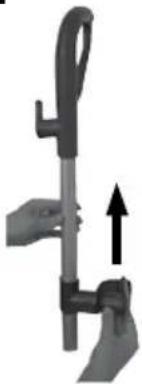
natural_image
Close-up of hands holding a mechanical tool with an upward arrow indicating motion (no text or symbols visible)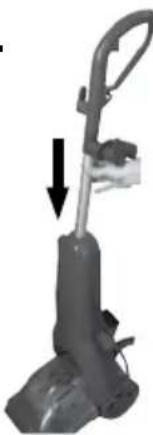
natural_image
Mechanical device with a handle and arrow indicating force or movement (no visible text or symbols)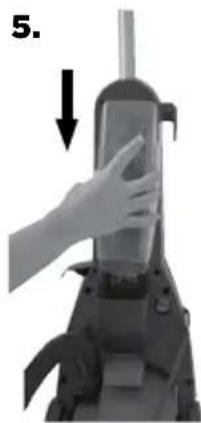
natural_image
Hand operating a vacuum cleaner with a downward arrow indicating motion (no text or symbols visible)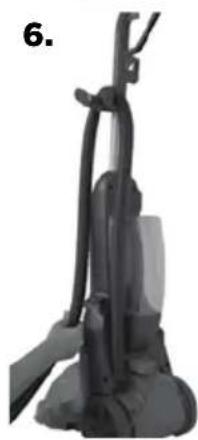
natural_image
Close-up of a black vacuum cleaner with attached cable (no visible text or symbols)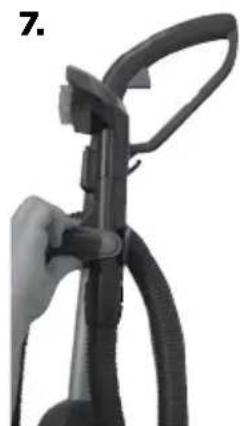
natural_image
Close-up of a black handheld device with a handle and cable, no visible text or symbols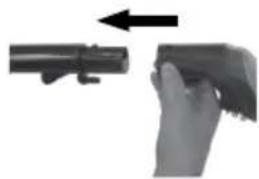
natural_image
Close-up of a hand holding a handgun with an arrow indicating left motion (no text or symbols)Operations
Special features
Your BISSELL deep cleaner is a home cleaning system that uses a combination of hand hot tap water, BISSELL cleaning formula, brush agitation and suction to safely clean carpets.
DirtLifter™ Powerbrush
The DirtLifter PowerBrush is designed to enhance cleaning performance. The bristle pattern safely lifts out dirt while gently grooming carpet fibers. The floating suspension self-adjusts to all carpet heights. When the power is ON and the machine is in the upright position, your carpet is protected because the brush is lifted up off the carpet.
ReadyTools™ Dial
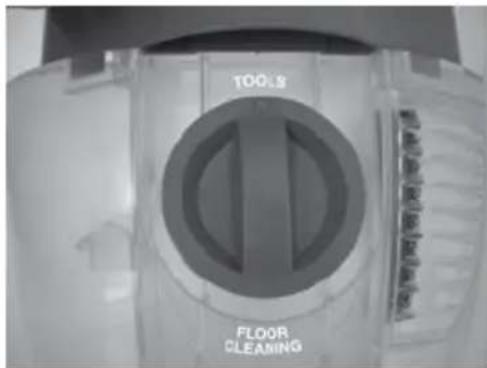
The ReadyTools feature allows you to choose between FLOOR CLEANING or cleaning with TOOLS simply by turning the dial. The TOOLS setting allows for above floor cleaning of upholstery, stairs, creases along baseboards, and other hard to reach areas. Simply choose the tool that is appropriate for the job, attach to flex hose, and you are ready to go.
WARNING
To reduce the risk of fire, use only BISSELL deep cleaning formula for full size machines in your deep cleaner. Use of cleaning formulas that contain lemon or pine oil may damage this appliance and void the guarantee. Chemical spot cleaners or solvent-based soil removers should not be used. These products may react with the plastic materials used in your deep cleaner causing cracking or pitting.
Before you clean
- Move furniture to another area if cleaning an entire room. (Optional)
- Remove loose dirt and impediments before cleaning.
- Plan your cleaning route to leave an exit path. It is best to begin cleaning in the corner farthest from your exit.
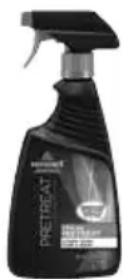
- Pretreat stubborn stains and highly soiled carpet in hallways and other high traffic areas (Optional). Pretreat formula not included.
4a. Generously spray BISSELL Stain Pretreat evenly over soiled area. Caution: DO NOT OVER WET CARPET
4b. Wait 3-5 minutes before deep cleaning.
4a.
Fill the tank
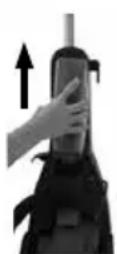
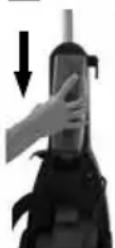
- Remove the solution tank by lifting it straight up, then away from the lower body.
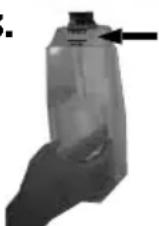
- Unscrew the black cap at the bottom of the solution tank.
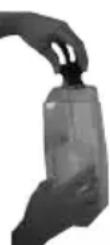
- Fill with hand hot (60°C/140°F MAX) tap water to the WATER line. Fill the rest of the tank with BISSELL 2X Formula to the FORMULA line. Replace and tighten the black cap. NOTE: Do not boil or microwave water as it can damage the solution tank.
- Place solution tank on lower body.


Operations
Carpet cleaning
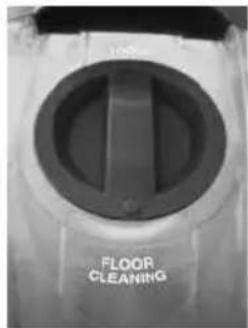
- Set ReadyTools dial to "FLOOR CLEANING".
- Plug into proper outlet.
- Turn the power switch to the ON (I) position (located on the back of unit)
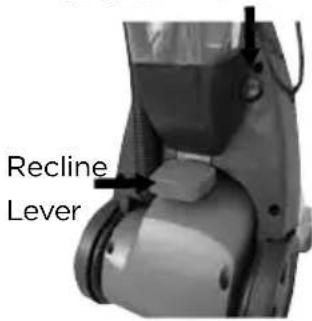
- With foot, press the red recline lever (located on the back of unit).
- Cleaning Strokes. While pressing the spray trigger, make one slow forward wet pass and another one back. Caution: Do not overwet.
- Release the spray trigger and make one slow forward and backward pass over the same area.
- Repeat steps 5 and 6 until solution being pulled up appears clean.
-
Empty the collection tank when dirty water reaches the full line, or when the solution tank is empty.
-
text_image
FLOOR CLEANING- & 4. Power
text_image
Recline LeverEmpty the collection tank
- Turn power switch OFF (O) and unplug power cord from outlet.
- Remove the collection tank from base of unit.
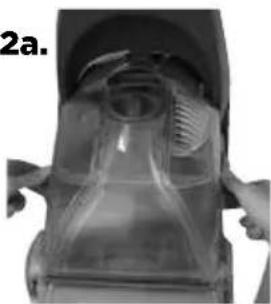
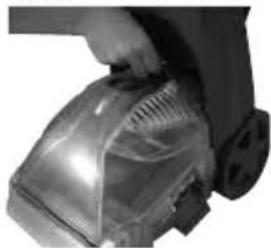
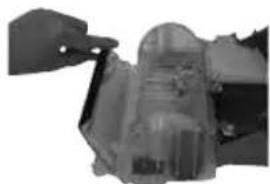
2a. Release collection tank latches (on each side) by pulling up from the bottom of latch and then out.
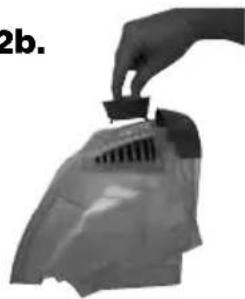
2b. Carefully remove the top of the tank by lifting up on the tank handle.
- Carry collection tank to a toilet or sink. To empty, pour out contents using opening at back of tank.
- Rinse collection tank thoroughly and replace on unit.
- Refill solution tank and continue cleaning.
2a.
natural_image
Close-up of a transparent plastic object with a textured surface and side handles (no visible text or symbols)2b.
natural_image
Close-up of a hand holding a transparent plastic device with a mesh grille (no visible text or symbols)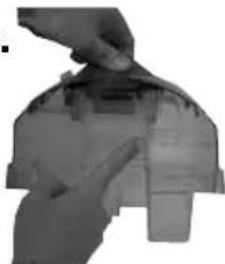
natural_image
Close-up of a hand holding a small mechanical component (no visible text or symbols)Cleaning with attachments
Your deep cleaner is equipped with a hose and at least one attachment for cleaning stairs, upholstery, and more.
- Important! If using to clean upholstery, check upholstery tags.
a. Check manufacturer's tag before cleaning. "W" or "WS" on the tag means you can use your deep cleaner. If the tag is coded with an "X" or an "S" (with a diagonal stripe through it), or says "Dry Clean Only", do not proceed with any deep cleaning machine. Do not use on velvet or silk. If manufacturer's tag is missing or not coded, check with your furniture dealer.
b. Check for colourfastness in an inconspicuous place.
Operations
Cleaning with attachments continued
c. If possible, check upholstery stuffing.
Coloured stuffing may bleed through fabric when wet.
d. Plan activities to allow upholstery time to dry.
e. Remove loose dirt and impediments.
- Follow the instructions on page 6 for filling the tank.
- Set the ReadyTools dial to the "TOOLS" setting.
- Attach the cleaning tool to the end of the hose.
- Plug in and turn the power switch to the ON position.
- Clean by pressing the spray trigger to spray solution onto the area to be cleaned. Slowly move the tool back and forth over the soiled surface. Release the spray trigger to suction dirty water. Continue to clean in the area, working in small sections, until dirt is removed.
Caution: Do Not Overwet.
- When finished cleaning, remove and rinse tool(s) in clean, running water.
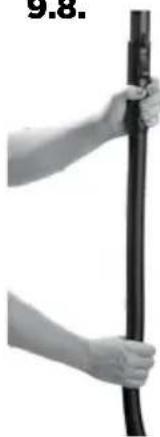
- It is recommended that you suction clean water from a bowl or from the tap to rinse out the hose.
- Lift end of hose and stretch out to ensure all water is cleared from hose.
- Wrap flex hose around hose wrap.
- Empty collection tank and rinse out, following instructions on page 9 under "Cleaning after use."
-
Return ReadyTools dial to "FLOOR CLEANING" setting.
-
text_image
TOOLS FLOOR CLEANING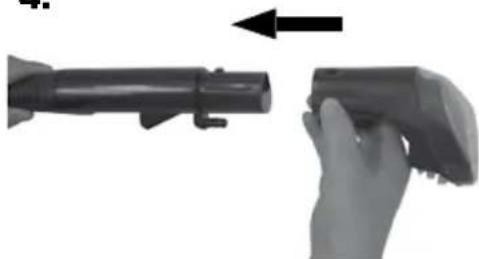
natural_image
Close-up of a hand holding a firearm with an arrow indicating motion (no text or symbols visible)
natural_image
Hand holding a black pipe with a faucet, against a plain background (no text or symbols visible)9.8.
natural_image
Close-up of hands holding a black cable or wire (no text or symbols visible)Operation
Cleaning after use
- Unplug the unit.
- Rinse collection tank thoroughly.
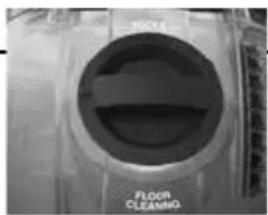
2a. Remove ReadyTools Dial by rotating it halfway between "TOOLS" & "FLOOR CLEANING."
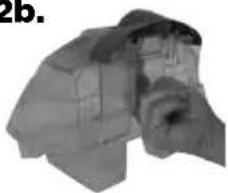
2b. Pop out knob by using the opening on the back of the tank. Rinse and replace knob and collection tank.
- Remove tank vent & foam filter (located on top of the collection tank) and rinse.
- Clean nozzle window by lifting latch and removing from machine. Rinse under running water.
- When finished, replace nozzle and secure with latch.
NOTE: For best results, it is recommended that the nozzle is cleaned after each use.
- Remove lint and hair from red gasket in base of unit. (Do not remove gasket)
- Replace the collection tank to the base of the machine and secure with latches.
2a.
natural_image
Close-up of a cleaning device with a circular dial and label 'FLOOR CLEAMNO' (no additional text or symbols visible)2b.
natural_image
3D rendered mechanical part with no visible text or symbols
natural_image
Close-up of a person's face with a small object above, possibly a tool or device (no visible text or symbols)5.6.
natural_image
Close-up of a mechanical component with no visible text or symbols2b.
natural_image
Hand placing a small object into a plastic bag (no text or symbols visible)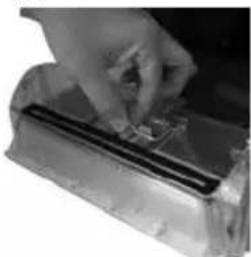
natural_image
Close-up of a hand using a tool to press or install a metal component (no visible text or symbols)
natural_image
Interior view of a vehicle showing a person interacting with a vehicle (no visible text or symbols)Maintenance & Care
Machine storage
For best results, a few simple steps can assure your machine is well maintained after your cleaning is complete.
- Wrap power cord around Quick Release Cord Wrap ^™ on side of the machine.
- Wipe all surfaces with a soft cloth. Store cleaner upright in a protected, dry area.
NOTE: You may have cleaning solution remaining in the solution tank. You may store your machine this way for the next cleaning task, but never keep dirty water in the collection tank.
⚠ WARNING
To reduce the risk of electric shock, push power button ① off and disconnect plug from electrical outlet before performing maintenance or troubleshooting checks.
⚠️CAUTION
Do not store unit where freezing may occur. Damage to internal components may result.
⚠ WARNING
To reduce the risk of electric shock, push power button ① off and disconnect plug from electrical outlet before performing maintenance or troubleshooting checks.
| Problem Possible causes Remedies | ||
| Reduced spray OR no spray in upright mode | Solution tank empty Refill tank with water and formula | |
| Lint screen on solution tank cap clogged | Soak solution tank cap in warm water and then rinse under running water | |
| Upper body not properly attached properly. | Repeat steps 1-4 on page 5. | |
| Reduce spray or no spray attachment | Solution tank empty Refill tank with water and formula | |
| Spray nozzle clogged Clean spray nozzle by rinsing tool under water | ||
| Pump needs priming Place tool on floor and press spray trigger | ||
| Machine is reclined Return machine to full upright position until it locks into place | ||
| ReadyTools dial is set to “FLOOR CLEANING” | Choose “TOOLS” setting on ReadyTools dial. | |
| Deep cleaner not picking up cleaning solution | Collection tank not aligned/ secured | Check tank alignment and secure with side latches |
| Collection tank full Empty tank | ||
| Removable nozzle installed improperly | Unplug unit. Align four "hooks" into bottom first, then snap into place on top | |
| Removable nozzle full of debris Unplug unit. Remove nozzle and rinse under running water | ||
| Red lint screen under collection tank clogged | Remove debris from lint screen | |
| ReadyTools dial not set properly Choose either “FLOOR CLEANING” or “TOOLS” for desired cleaning method | ||
| Brush not turning | Handle not reclined. Press the red recline lever on the back of the unit to activate the brush. Follow step 4 under "Carpet cleaning" on page 7. | |
Consumer Guarantee
This Guarantee only applies outside of the USA and Canada. It is provided by BISSELL International Trading Company BV (“BISSELL”). This Guarantee is provided by BISSELL. It gives you specific rights. It is offered as an additional benefit to your rights under law. You also have other rights under law which may vary from country to country. You can find out about your legal rights and remedies by contacting your local consumer advice service. Nothing in this Guarantee will replace or lessen any of your legal rights or remedies. If you need additional instruction regarding this Guarantee or have questions regarding what it may cover, please contact BISSELL Consumer Care or contact your local distributor.
This Guarantee is given to the original purchaser of the product from new and is not transferable. You must be able to evidence the date of purchase in order to claim under this Guarantee.
Limited 2 Year Guarantee (from the date of purchase by original purchaser)
Subject to the *EXCEPTIONS AND EXCLUSIONS identified below, BISSELL will repair or replace (with new or remanufactured components or products), at BISSELL's option, free of charge, any defective or malfunctioning part or product.
BISSELL recommends that the original packaging and evidence of the date of purchase be kept for the duration of the Guarantee period in case the need arises within the period to claim on the Guarantee. Keeping the original packaging will assist with any necessary re-packaging and transportation but is not a condition of the Guarantee.
If your product is replaced by BISSELL under this Guarantee, the new item will benefit from the remainder of the term of this Guarantee (calculated from the date of the original purchase). The period of this Guarantee shall not be extended whether or not your product is repaired or replaced.
\*EXCEPTIONS AND EXCLUSIONS FROM THE TERMS OF THE GUARANTEE
This Guarantee applies to products used for personal domestic use and not commercial or hire purposes. Consumable components such as filters, belts and mop pads, which must be replaced or serviced by the user from time to time, are not covered by this Guarantee.
This Guarantee does not apply to any defect arising from fair wear and tear. Damage or malfunction caused by the user or any third party whether as a result of accident, negligence, abuse, neglect, or any other use not in accordance with the User Guide is not covered by this Guarantee.
An unauthorised repair (or attempted repair) may void this Guarantee whether or not damage has been caused by that repair/attempt.
Removing or tampering with the Product Rating Label on the product or rendering it illegible will void this Guarantee. SAVE AS SET OUT BELOW BISSELL AND ITS DISTRIBUTORS ARE NOT LIABLE FOR ANY LOSS OR DAMAGE THAT IS NOT FORESEEABLE OR FOR INCIDENTAL OR CONSEQUENTIAL DAMAGES OF ANY NATURE ASSOCIATED WITH THE USE OF THIS PRODUCT INCLUDING WITHOUT LIMITATION LOSS OF PROFIT, LOSS OF BUSINESS, BUSINESS INTERRUPTION, LOSS OF OPPORTUNITY, DISTRESS, INCONVENIENCE OR DISAPPOINTMENT. SAVE AS SET OUT BELOW BISSELL'S LIABILITY WILL NOT EXCEED THE PURCHASE PRICE OF THE PRODUCT.
BISSELL DOES NOT EXCLUDE OR LIMIT IN ANY WAY ITS LIABILITY FOR (A) DEATH OR PERSONAL INJURY CAUSED BY OUR NEGLIGENCE OR THE NEGLIGENCE OF OUR EMPLOYEES, AGENTS OR SUBCONTRACTORS; (B) FRAUD OR FRAUDULENT MISREPRESENTATION; (C) OR FOR ANY OTHER MATTER WHICH CANNOT BE EXCLUDED OR LIMITED UNDER LAW.
Consumer Care
If your BISSELL product should require service or to claim under our limited guarantee, please contact us as follows:
Email:
info@bisselldirect.co.uk
Phone:
0344-888-6644
Write:
BISSELL Homecare (Overseas) Inc.
Ground Floor
226 Berwick Avenue
Slough, Berkshire, SL1 4QT
United Kingdom
Visit the BISSELL website: www.BISSELL.com
When contacting BISSELL, have model number of cleaner available.
Please record your Model Number: ____ Please record your Purchase Date: ____
NOTE: Please keep your original sales receipt. It provides proof of the date of purchase in the event of a Guarantee claim. See Guarantee for details.