
RECO Smart Cam - Dash cam ASUS - Free user manual and instructions
Find the device manual for free RECO Smart Cam ASUS in PDF.

| Product Type | Dash Cam (Car and Portable) |
| Brand | ASUS |
| Model | RECO Smart Cam |
| Image Sensor | SONY CMOS Sensor |
| Video Resolution | 1920x1080P @ 30fps / 1280x720P @ 30fps |
| Lens Angle | Wide angle lens, FOV 150° (Diagonal) |
| Aperture | F/1.8 |
| Battery | Built-in 720mAh Li-Polymer battery |
| App Control | Android / iOS apps (ASUS RECO) for live streaming and control |
| Interface | Micro USB 2.0 (Power) / Mini USB (GPS) |
| Wireless Connectivity | Wi-Fi 802.11b/g/n |
| NFC | Yes |
| GPS | External (optional) |
| G-Sensor | 3 Axis |
| File Format | MP4 (AVC/H.264) |
| Memory Card Support | 8 GB ~ 32 GB Class 10 microSD card |
| Operating Temperature | 0°C ~ 60°C |
| Storage Temperature | -20°C ~ 70°C |
| Cloud Storage | ASUS WebStorage 500 GB free for one year |
| Default Wi-Fi SSID | ASUS RECO |
| Default Wi-Fi Password | 1234567890 |
| Power Supply | Dual USB car charger (1A and 2.1A output) |
| Modes | Car mode (loop recording, emergency, monitor) / Portable mode (time lapse, photo burst) |
Frequently Asked Questions - RECO Smart Cam ASUS
User questions about RECO Smart Cam ASUS
0 question about this device. Answer the ones you know or ask your own.
Ask a new question about this device
Download the instructions for your Dash cam in PDF format for free! Find your manual RECO Smart Cam - ASUS and take your electronic device back in hand. On this page are published all the documents necessary for the use of your device. RECO Smart Cam by ASUS.
USER MANUAL RECO Smart Cam ASUS
natural_image
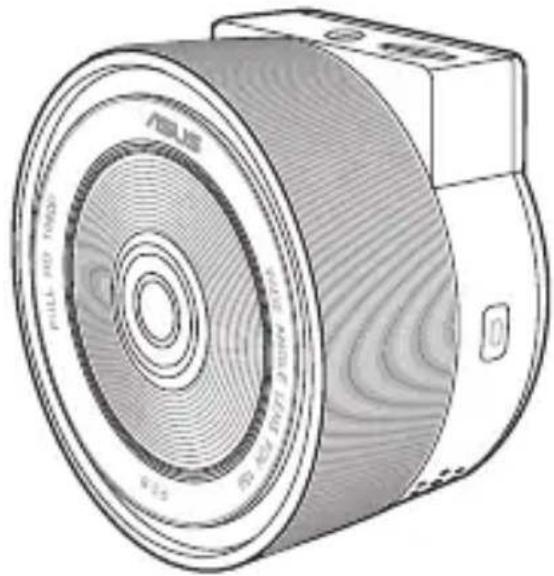
Technical line drawing of a camera lens with visible internal components and mounting bracket (no text or symbols)Quick Start Guide
E11074 / Revised Edition V2 / November 2015
NOTE:
- The screenshots in this Quick Start Guide are for reference only.
Hardware
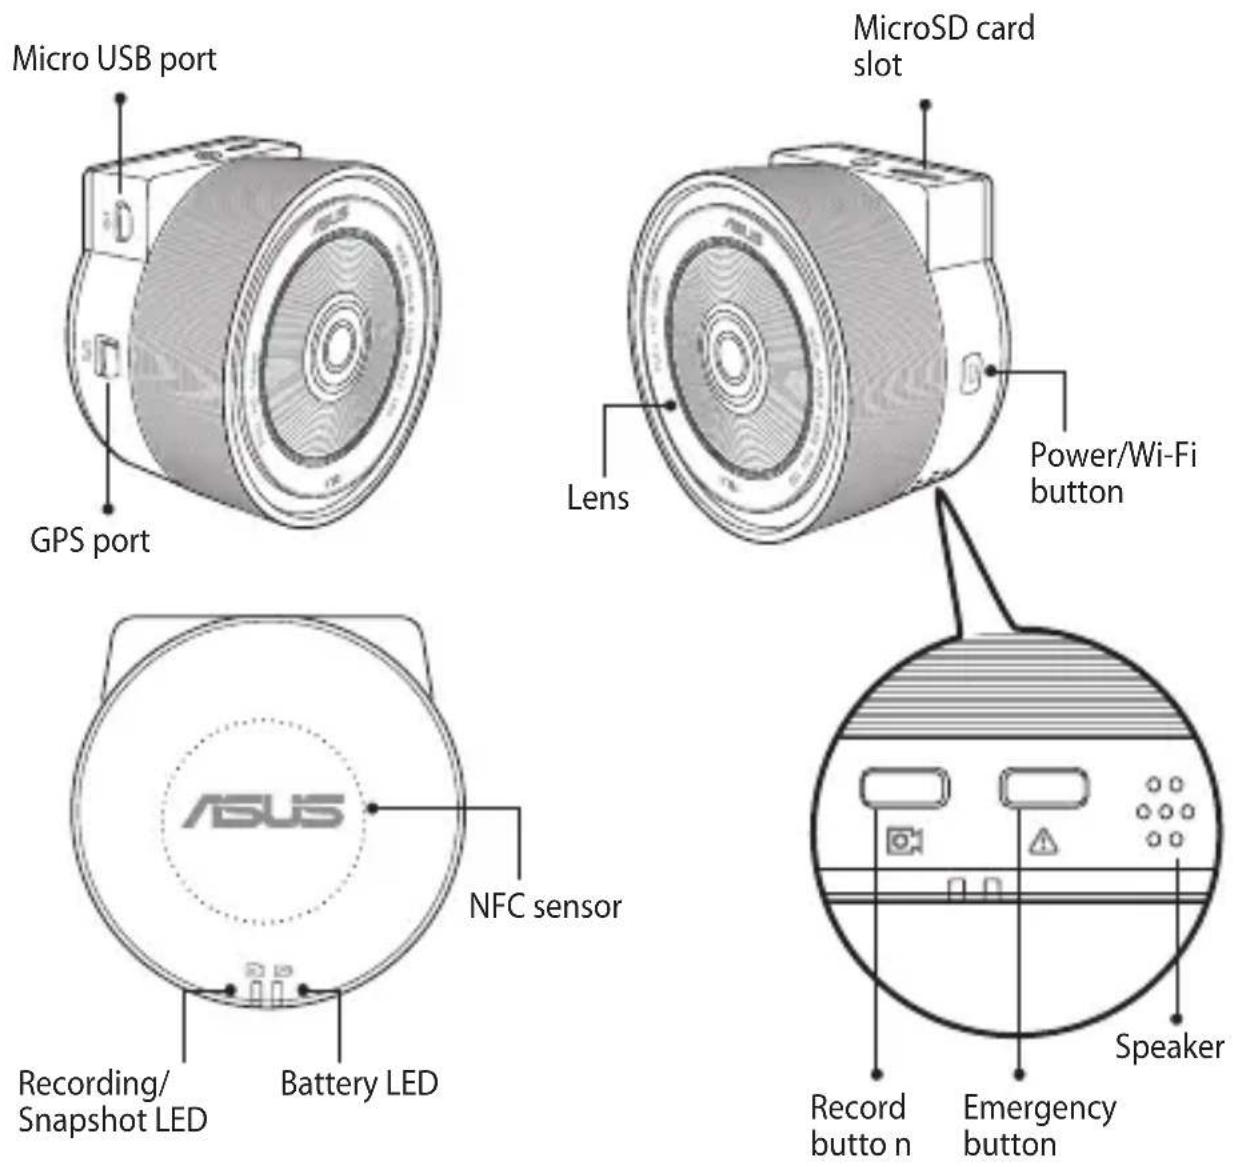
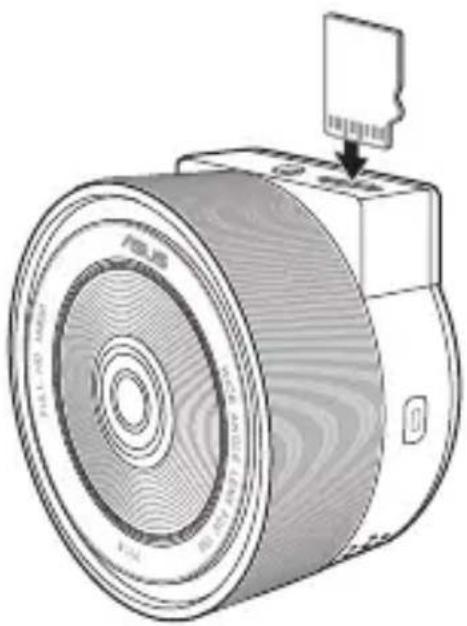
Installing / removing the microSD card
To install the microSD card:
- Insert the microSD card into the card slot with its gold-plated contacts facing towards the front of your RECO Smart Cam.
- Push the microSD card into the slot until it clicks in place.
To remove the microSD card:
Press the microSD card to eject, then pull it out.
natural_image
Technical line drawing of a camera lens assembly with a small component inserted (no text or symbols)IMPORTANT!
- For first time use of your RECO Smart Cam and to ensure the best video saving quality, format a Class 10 microSD card to FAT32.

- Do not remove the microSD card during recording. Doing so may damage your RECO Smart Cam.
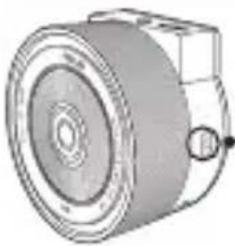
Turning your RECO Smart Cam on/off
- To manually turn your RECO Smart Cam on, press the Power/Wi-Fi button and the Wi-Fi function gets activated automatically when your RECO Smart Cam turns on.
- To manually turn your RECO Smart Cam off, press the Power/Wi-Fi button for about three (3) seconds, then release it when you hear a beeping sound.

natural_image
Technical line drawing of a mechanical component with concentric rings and a circular button (no text or symbols)IMPORTANT!
- The Wi-Fi function gets activated in about 40 seconds after turning your RECO Smart Cam on.
- Before connecting your RECO Smart Cam and mobile device, ensure that the Wi-Fi LED is solid blue indicating that Wi-Fi is on.
NOTES:
- When the Auto Record function is enabled, your RECO Smart Cam starts recording automatically in about five (5) seconds after turning it on.
- For details on Auto Record and other functions, refer to the section Settings.
- To save power, press the Power/Wi-Fi button to disable the Wi-Fi function.
- In car mode, your RECO Smart Cam overwrites the oldest recorded files when your microSD card is full.
- In portable mode, your RECO Smart Cam stops recording when your microSD card is full.
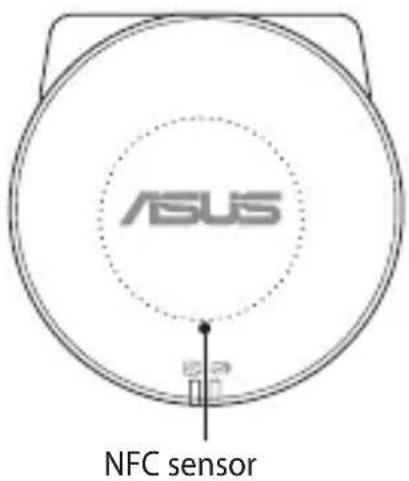
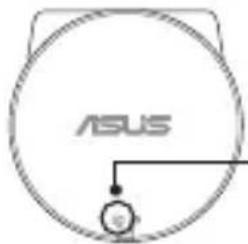
Installing ASUS RECO app on your mobile device
Do any of these three methods to download and install ASUS RECO app:
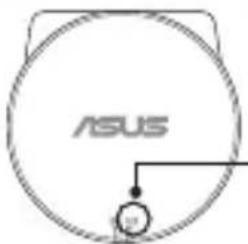
- Place your NFC-enabled Android mobile device on the NFC sensor of your RECO Smart Cam to download ASUS RECO and install it on your mobile device.
- Scan the QR code for your Android or iOS mobile device to download and install ASUS RECO.

iOS

Android
- Download ASUS RECO from App Store or Google Play Store and install it on your mobile device.
Connecting your mobile device
- Turn on your RECO Smart Cam. The Wi-Fi function starts in 40 seconds after turning it on.
- Turn on the Wi-Fi function of your mobile device.
- From the list of networks, tap ASUS RECO (default SSID).
- Enter the default password (1234567890) and tap Join (for iOS device) or Connect (Android device).
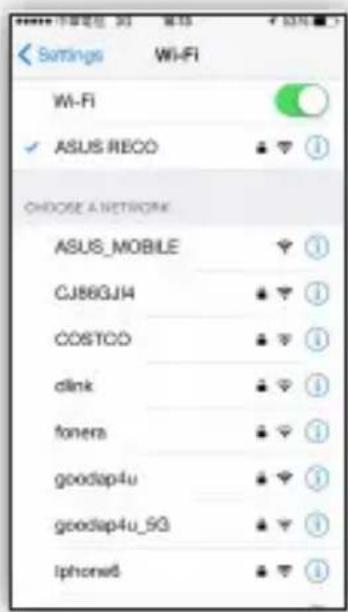
NOTE: You can change the network name (SSID) and password from the Settings screen of your mobile device.
Connecting your RECO Smart Cam
-
Connect your USB cable to the micro USB port of your RECO Smart Cam.
-
Plug the other end of your USB cable to the dual USB car charger 1A port.
-
Place the power cord along the windshield ceiling and front pillar of your vehicle, then secure it in place with the self-adhesive clips.
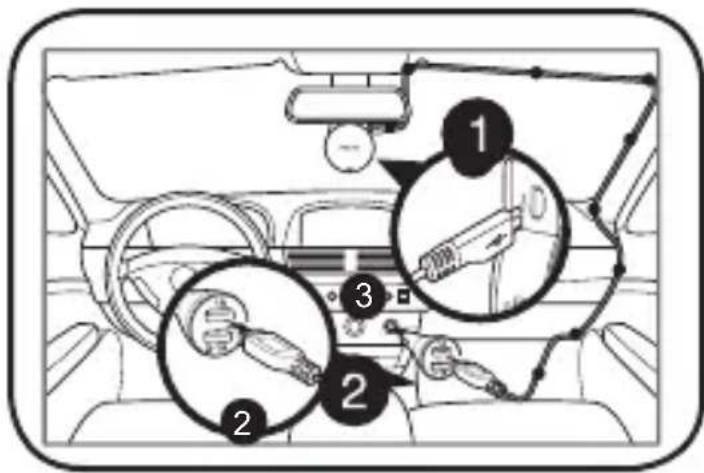
NOTES:
- Your RECO Smart Cam comes with a dual car charger with 1A and 2.1A output, which makes it easier to power on and charge other electronic devices at the same time.
- Disconnect your car charger when the engine is off.
- Use only the power adapter that came with your RECO Smart Cam. Using a different car charger may damage your RECO Smart Cam.
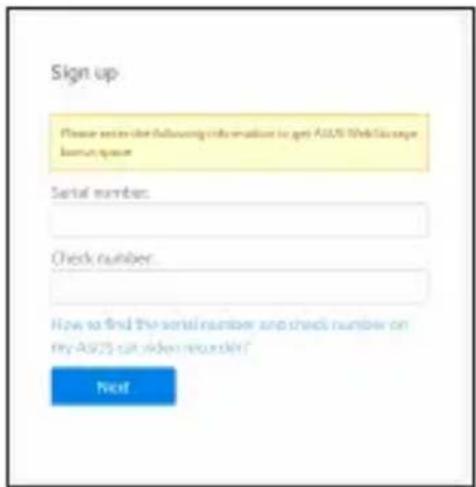
Registering for your free 500GB ASUS WebStorage
Register your RECO Smart Cam on ASUS WebStorage to get a free 500GB cloud storage for a year.
- Locate the Serial number and Check number on the packaging box of your RECO Smart Cam.
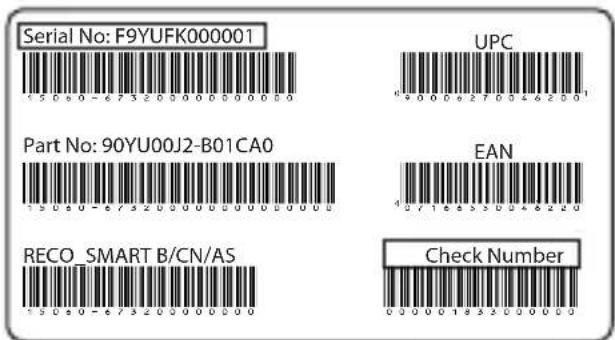
- Go to http://asuswebstorage.com/navigate/car.
- Enter the Serial number and Check number, then click Next.
- Follow the succeeding instructions to complete the registration.
Using ASUS RECO
ASUS RECO is an app that lets you to enjoy live streaming, play videos, or download media files for sharing to your mobile device.
Live streaming
- From your mobile device, launch ASUS RECO.
- Tap the Preview tab for live streaming.
Using One Shot
- From your mobile device, launch ASUS RECO.
- Tap the Preview tab, then tap One Shot.
- Tap to capture the photo.
- Tap the Playback tab check the photos.
Capturing continuous photos
- From your mobile device, launch ASUS RECO.
- Tap the Preview tab, then tap Photo Burst.
- Tap to continuously capture photos.
- Tap the Playback tab check the photos.
NOTE: You can change the photo burst frequency in the Settings tab.
Capturing time-lapse photos
- From your mobile device, launch ASUS RECO.
- Tap the Preview tab, then tap Time Lapse.
- Tap to capture photos. Tap to stop time-lapse.
- Tap the Playback tab check the photos.
NOTE: You can change the time lapse frequency in the Settings tab.
Recording videos
- From your mobile device, launch ASUS RECO.
- Tap the Preview tab, then tap Record Video. Tap 🔒 to start recording. Tap 🔒 to stop recording.
Playing videos or viewing photos
- From your mobile device, launch ASUS RECO.
- Tap the Playback tab, then tap Video or Photo. You can get the file list from the RECO Smart Cam microSD card.
- Select the video or photo that you want to play or view.
- Tap the screen to pause the video playback. Tap the screen again to resume the video playback.
Sharing files to social media
- From your mobile device, launch ASUS RECO.
- Tap the Playback tab, then tap Video or Photo.
3 Select the video or photo that you want to share. - Tap to download the file to your mobile device.
- Tap Low Resolution (Quick) or High Resolution. Tap Cancel to go back to your playlist.
- Tap the Mobile tab, then tap 📋 to share your files to social media.
Deleting files
- From your mobile device, launch ASUS RECO.
- Tap the Playback tab, then tap Video or Photo.
- Tap on the file you want to delete.
- Tap Delete on the confirmation message.
Installing the Media Player
- For first-time use of your car camcorder, format a micro SD card on it from Settings > Format > Confirm.
- Remove the formatted micro SD card from your car camcorder.
- Insert the formatted micro SD card into a card reader, then connect the card reader to your computer.
- Click the Removable Disk icon on your computer, then double-click the Media Player's installation file (installation.exe).
- Follow the onscreen instructions to complete the installation.
NOTE: For normal video playback, ensure that K-Lite Codec (.mov codec) is installed on your computer.
- Follow the onscreen instructions to complete the installation.
NOTE: For normal video playback, ensure that K-Lite Codec (.mov codec) is installed on your computer.
Reviewing the GPS log
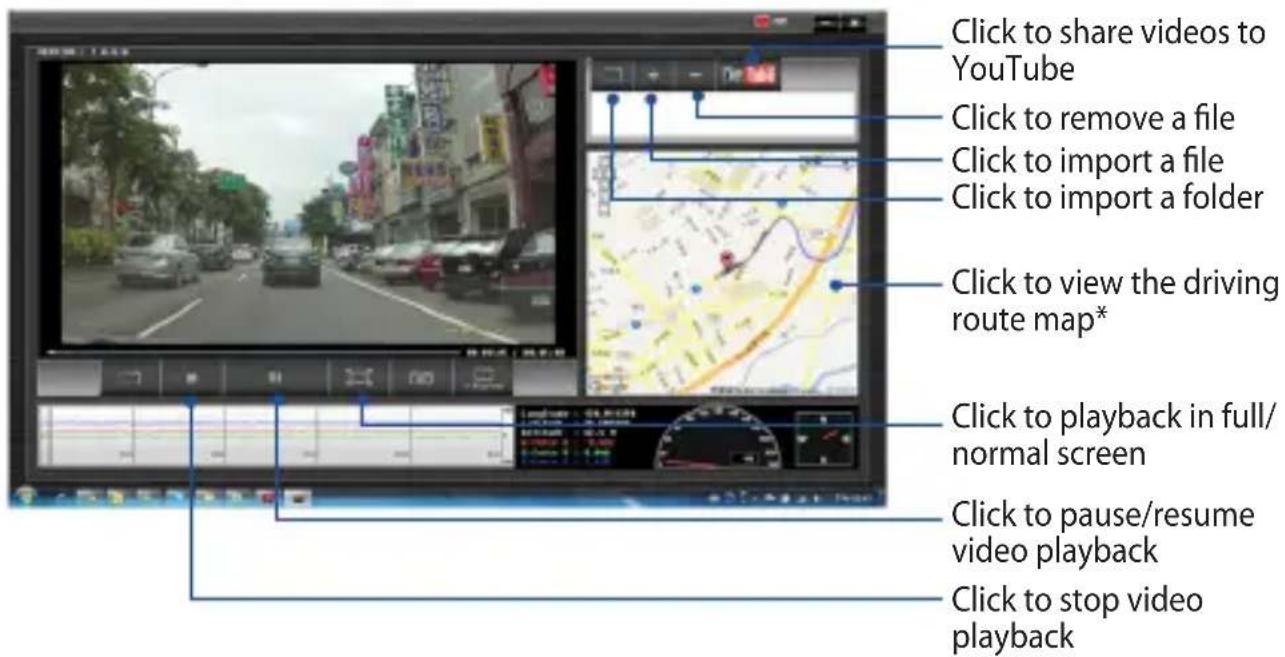
NOTE: * Ensure that your computer is connected to the Internet to be able to review the driving route on the map.
- Using a USB cable, connect your car camcorder to your computer.
- On your computer, launch the Media Player.
- Click the removable disk icon to access your files from your car camcorder.
- On the Media Player, click the corresponding icon to import a folder/file, and remove a file from your playlist.
Settings
| FUNCTION DESCRIPTION | |
| Video Resolution Sets the video resolution. Available options: 1920x1080@30f; 1280x720@30fNOTE: Default resolution for One Photo, Time Lapse, and Photo Burst is 1920x1080. | |
| Ultra Wide Angle Mode | When enabled, this function can record videos at 150 degrees.When disabled, this function can record videos without distortion. |
| Photo Burst Frequency | Specifies the number of continuous shots per second. Available options: 5p/1s; 10p/1s; 30p/1s |
| Time Lapse Frequency | Selects the interval options when capturing photos using Lapse mode.Available options: 1p/5s; 1p/30s; 1p/m |
| Emergency Contacts Sends an emergency message* to your emergency contact listed.NOTE:* Your mobile device will be charged for this message. | |
(continued on the next page)
| FUNCTION DESCRIPTION | |
| Text Message Lets you edit the emergency message. | |
Auto Backup Activates the Auto Backup function. The recorded emergency file is downloaded to your mobile device and uploaded to the cloud automatically.NOTES:Ensure that your mobile phone is connected to 3G, 4G, or Wi-Fi network.On an Android mobile device, the recorded emergency file is downloaded to the device first, then uploaded to the cloud once connected to the Internet.You must be signed in to ASUS WebStorage. The Serial number and Check number are on the packaging box of your RECO Smart Cam. For details, refer to the section Registering for your free 500GB ASUS WebStorage.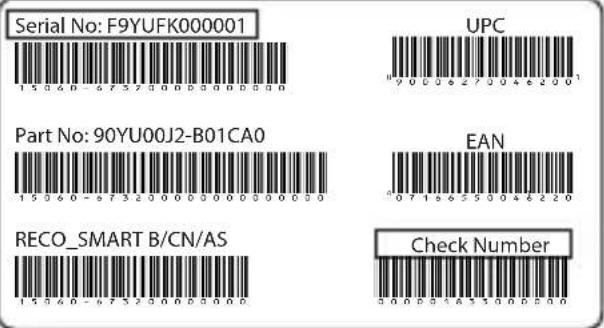 |
(continued on the next page)
| FUNCTION DESCRIPTION | |
| Wi-Fi Setting Allows you to configure the network name (SSID) and password settings.Default SSID: ASUS RECODefault Password: 1234567890 | |
Mode Car mode: Loop re  | ding, emergency recording, and monitor mode functions are available. |
| Portable mode: Time lapse, One photo, Photo burst functions are available. In this mode, your RECO Smart Cam stops recording when your microSD card is full. | |
| Image Rotate Auto: The image direction will be adjusted automatically by G-sensor. | |
(continued on the next page)
| FUNCTION DESCRIPTION | |
| Auto Record Automatically starts recording when you start your vehicle. NOTE: Only works in Car mode | |
| Voice Record Turns the microphone on/off. | |
| G-Sensor Sensitivity Sensitivity High/Mid/Low/Off: This function allows you to set the collision intensity level that triggers an emergency recording. Once the specified intensity level is reached, your RECO Smart Cam automatically records the emergency event. You can save up to ten (10) emergency recording files that normal recording cannot overwrite. | |
| Date Stamp Select ON to include a date and time on a video stream. Available options: ON / OFF | |
| Volume Adjusts the volume level | |
| Monitor Mode When this function is enabled and the scene does not change in 60 seconds, your RECO Smart Cam stops recording and enters the standby mode. Once any movement is detected, your RECO Smart Cam automatically starts recording. |
(continued on the next page)
| FUNCTION DESCRIPTION | |
| EV Adjusts the exposure level | |
| Format SD card Select OK to format the memory card installed on the device.CAUTION! Before formatting the SD card, ensure that you have backed up your files from your SD card. | |
| Battery Status Shows battery status | |
| Factory Default Select OK to reset all settings to factory default settings. | |
| Version Information | Shows the firmware version. |
Button functions
| STATUS ACTION | |
| Power on Press the Power/Wi-Fi button and the Wi-Fi function is activated automatically. | |
| Power off Press and hold the Power/Wi-Fi button for three (3) seconds until you hear a beeping sound. | |
| Turn Wi-Fi on/off When power is on, press the Power/Wi-Fi button to turn Wi-Fi on/off. | |
| Start/stop recording Press the Record button. | |
| Start emergency recording When the G-Sensor is activated or the Emergency button is pressed during an emergency, the event is recorded immediately and the system automatically saves the event data. You can save up to ten (10) emergency recording files that normal recording cannot overwrite. | |
| Reset to default Simultaneously press the Power/Wi-Fi and Emergency buttons for five (5) seconds. | |
| Force shutdown If the Power off function fails, press and hold the Power/Wi-Fi button for ten (10) seconds. | |
LED indicators
| STATUS ACTION | |||
 | —Power/Wi-Fi button | Solid white Power on. Wi-Fi is still off. | |
| Solid blue Power on and Wi-Fi is available. NOTE: The Wi-Fi function starts in about 40 seconds after turning it on. | |||
| LED Off Power off | |||
 | Recording/ Snapshot LED | Solid red Recording videos | |
| Flashing red Red LED flashes every time a photo is taken | |||
| LED Off Standby mode. No video or photo is being recorded or taken. | |||
 | —Battery LED | Solid green Battery is charging | |
| Flashing green Flashing green three (3) times for five (5) seconds. Battery is less than 10%. | |||
| Flashing green with a beeping sound | Out of battery power | ||
| LED Off Plugged to a power source: Battery is fully charged. Not plugged to a power source: Battery is more than 10%. | |||
 | Flashing green and red | Firmware UpdateNOTE: An alert sound notifies you when the firmware update is completed. | |
 |  | Flashing green, red, white, and blue | MicroSD card is not installed.In portable mode.MicroSD card is full. Please save your files, or format the SD card. |
(continued on the next page)
Specifications summary
| Image sensor SONY COMS Sensor | |
| Video resolution 1920x1080P (30fps) / 1280x720P (30fps) | |
| Lens angle Wide angle lens, FOV 150 degree (Diagonal) | |
| Aperture F/1.8 | |
| Battery Built-in 720mAh Li-Polymer battery | |
| App control Android / iOS apps for streaming video and control device | |
| Interface Micro USB 2.0 (Power) / Mini USB (GPS) | |
| Wireless connectivity Wi-Fi 802.11b/g/n | |
| NFC Yes | |
| GPS External (optional) | |
| G-Sensor 3 Axis | |
| File format MP4 (AVC/H.264) | |
| Memory card support 8 GB ~ 32 GB Class 10 microSD card | |
| Operating temperature 0 | °C ~ 60°C |
| Storage temperature -20 | °C ~ 70°C |
| Cloud ASUS WebStorage 500 GB space for one (1) year | |
Troubleshooting
Where can I download ASUS RECO app?
- For Android mobile devices, you can download the app from Google Play Store
- For iOS mobile devices, you can download the app from App Store
- In China, you can download the app from Baidu 📁, 360 and Wandoujia
How do I connect my RECO Smart Cam to my mobile device?
- Turn on your RECO Smart Cam. The Wi-Fi function starts in 40 seconds after turning it on.
- Turn on the Wi-Fi function of your mobile device.
- From the list of networks, tap ASUS RECO (default SSID).
- Enter the default password (1234567890) and tap Join (for iOS device) or Connect (Android device).
How will I know that RECO Smart Cam is recording even without seeing the screen?
The recording LED is solid red during recording.
How do I update the firmware on my RECO Smart Cam?
- Download the firmware file from the ASUS support site at https://www.asus.com/Car-Electronics/RECO-Smart-Car-and-Portable-Cam/HelpDesk_Download and save the file in a microSD Card.
- Install the microSD card with the latest firmware file into the microSD card slot of your RECO Smart Cam.
- Turn on your RECO Smart Cam and the update process runs automatically.
- Wait until you hear a sound alert, indicating that the firmware update process is completed.
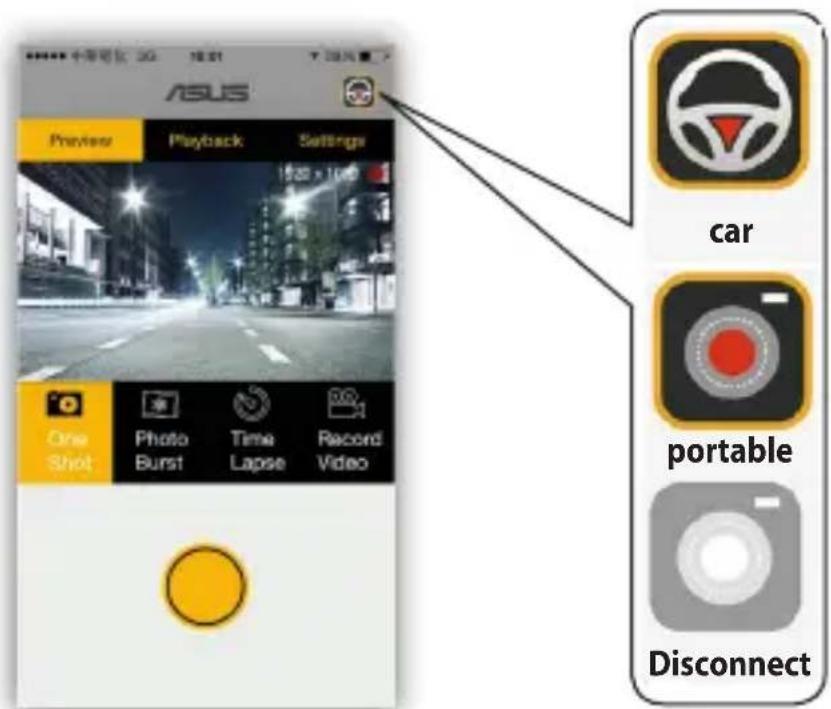
What are the RECO Smart Cam modes?
Upon launching the ASUS RECO app, you will see either of these two icons at the top of the screen:

Car mode: Loop recording, emergency recording, and monitor mode functions are available.

Portable mode: Time lapse, One photo, Photo burst functions are available. In this mode, your RECO Smart Cam stops recording when your microSD card is full.
My RECO Smart Cam did not automatically start recording after I started my vehicle.
- Ensure that your RECO Smart Cam is set to Car mode and Auto Record function is enabled.
- Ensure that you are using the bundled charging cable.
- Check that the Power and Battery LEDs are lighting up. If the LEDs are lighting up but the auto-recording function is still not working, there might be some issues with your RECO Smart Cam. Please contact your local ASUS Support Center.
I cannot find a previously-recorded emergency video file.
Your RECO Smart Cam can save up to ten (10) emergency recording. When the maximum emergency recording limit is reached, the newly-saved recording overwrites the oldest recording.
What is the default mode of my RECO Smart Cam?
The default mode is Car Mode.
What is the range of Monitor Mode?
The range is about ten (10) meters, and the focal length is fixed.
What is the Wi-Fi range?
The range is about ten (10) meters.
RECO Smart Cam 錄可攜
natural_image
Line drawing of a cylindrical object with textured surface and circular patterns, no visible text or symbols快速使用指南
natural_image
Technical line drawing of a mechanical component with a small inset showing a pin or connector (no text or symbols present)重要!
natural_image
Technical line drawing of a mechanical component with concentric rings and a circular button (no text or symbols)重要!
iOS

Android
注意:
natural_image
Line drawing of a luxury camera lens with visible internal structure and no text or symbols快速使用指南
natural_image
Technical line drawing of a camera lens assembly with a small component inserted (no text or symbols)重要!
natural_image
Technical line drawing of a camera lens assembly (no text or symbols)重要!
natural_image
Diagram of a circular device with a dotted circle labeled 'ASUS' and a small connector at the bottom (no readable text or symbols beyond branding)NFC 感应器
iOS

Android
注意:
RISK OF EXPLOSION IF BATTERY IS REPLACED BY AN INCORRECT TYPE. DISPOSE OF USED BATTERIES ACCORDING TO THE INSTRUCTIONS.