
WG2 - Tripod FeiyuTech - Free user manual and instructions
Find the device manual for free WG2 FeiyuTech in PDF.


| Product Type | 3-Axis Wearable Gimbal for Action Camera |
| Model | WG2 (also known as WG2X) |
| Brand | FeiyuTech |
| Weight | 238 g (not including action camera) |
| Payload | 130 g (in balanced status) |
| Battery Life | 2.5 hours |
| Charging Input | 5V / 2A via Micro USB |
| Compatible Cameras | GoPro HERO6, HERO5, HERO4, Session, and similar sized cameras |
| Working Modes | Panning Mode, Follow Mode, Lock Mode, Auto-rotation Mode |
| Connectivity | Bluetooth (for Feiyu ON App), WiFi (for camera control) |
| Axis Movement Range | Tilt: 360°, Roll: 310° (structure), 70° (after camera mounted), Pan: 360° |
| Mounting Options | Fixing bar or session mount, 1/4-20 thread mount for accessories |
| Firmware Upgrade | Via Feiyu ON App or Micro USB connection to computer |
| Indicator Lights | Charging/WiFi indicator (red/green/blue), Mode indicator (blue) |
| Buttons | Function Button, Mode Button, Shutter Button |
| Included Accessories | Micro USB cable, Session mount, Screws, 1/2 inch T-head connector |
| Material | High-strength plastic and metal components |
| Usage | Wearable gimbal for action cameras, ideal for sports and outdoor activities |
Frequently Asked Questions - WG2 FeiyuTech
User questions about WG2 FeiyuTech
0 question about this device. Answer the ones you know or ask your own.
Ask a new question about this device
Download the instructions for your Tripod in PDF format for free! Find your manual WG2 - FeiyuTech and take your electronic device back in hand. On this page are published all the documents necessary for the use of your device. WG2 by FeiyuTech.
USER MANUAL WG2 FeiyuTech
3-Axis Wearable Gimbal for Action Camera
Instructions
Guilin Feiyu Technology Incorporated Company
V1.0ENUser Manual
Catalogue
www.feiyu-tech.com
WG2X
- WG2X Overview 1
- Quick Start Guide 3
- Function operation 4
Working Mode 4
Function Button - operation 4
Mode Button - operation 5
Shutter Button - operation 5
- Advanced Operation 5
Manual Lock 5
Auto-rotation Mode 6
App - Download and Connecting 7
Connect the camera 8
Firmware Upgrade 8
Gimbal Initialization 9
- Parameters 10
1. WG2X Overview
Accessories
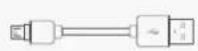
Micro USB cable
X1
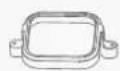
Session Mount
X1
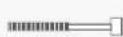
Screw
X2

1/2 Inch T-head Connector
X1
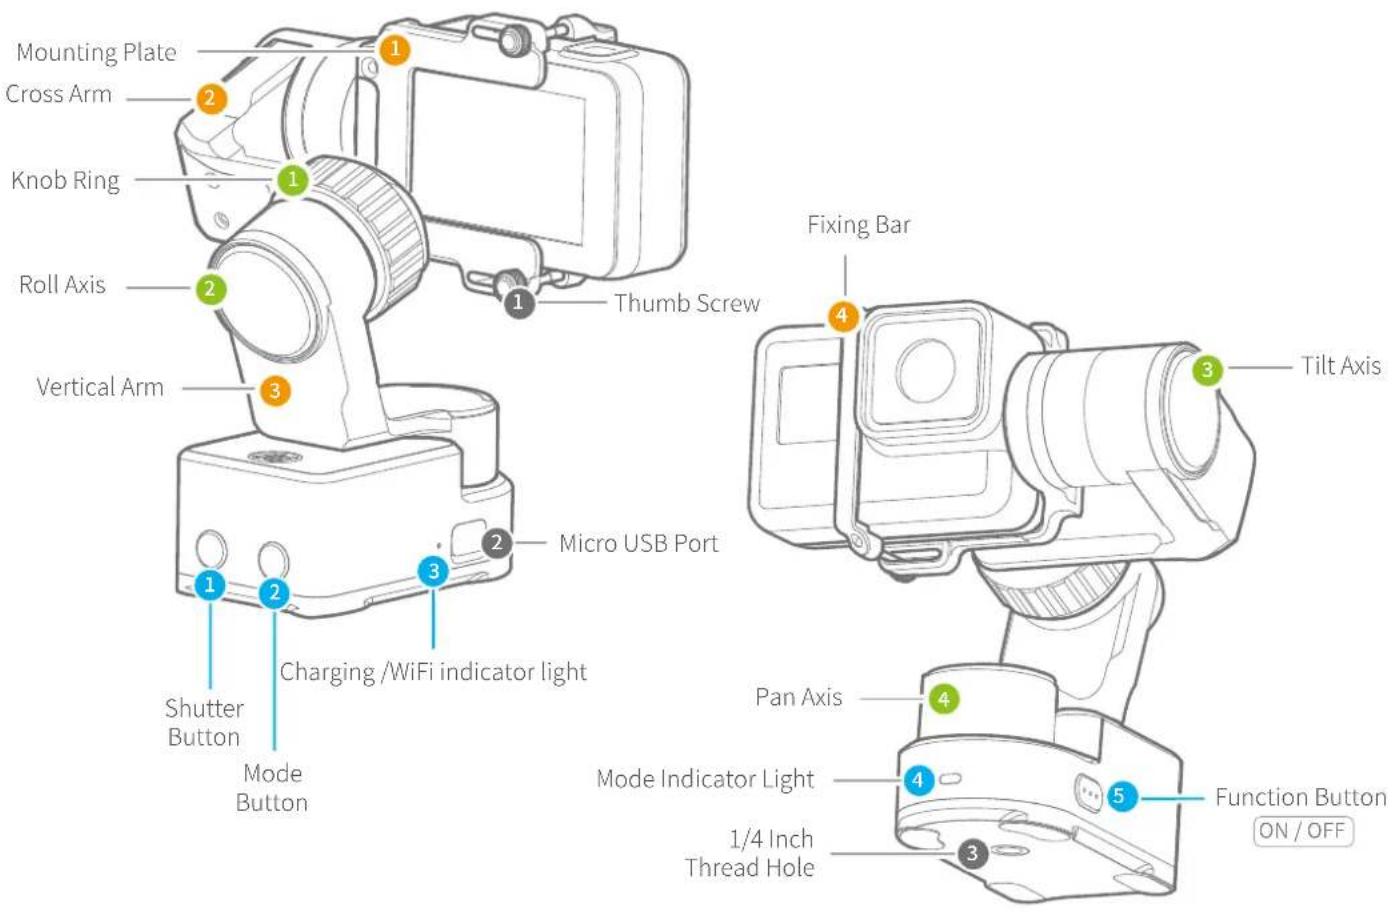
Introduction of interface and screws

To fix the camera It is used for other accessories expansion.
3 1/4-20 Thread MountThumb Screw
such as 1/4 inch screw tripod, extension bar and so on.
2 Micro USB Port
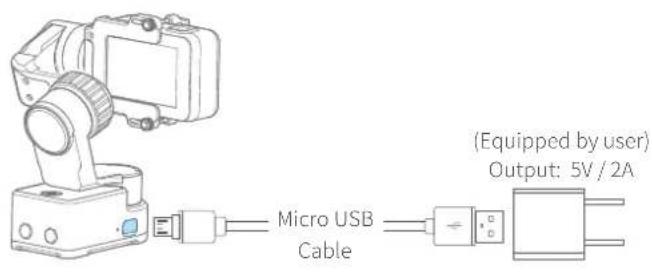
(1) It is used for charging the gimbal (input 5V / 2A), the gimbal can be used while being charged, but it is not available for external power supply.
(2) It used for firmware upgrade (computer), please refer to the firmware upgrade operation steps for details.
Please stuff up this port by the dustproof plug when it is not in use.
Introduction of Display and Buttons
1 Shutter Button
Single click Photo Capturing / Video Recording
2 Mode Button
Turn on / Turn off the WiFiLong time pr Photo Mode / Recording ModeSingle cli
ResetTriple click
3 Charging /WiFi indicator light
It has the highest priority during charging, the red light is always on when it is not fully charged, and the green light is always on when it is fully charged.
When it is not being charged, turn on the WiFi and the blue light blinks, turn off the WiFi and there is no display.
for recording
4 Mode Indicator Light
| Power of indicator light is constantly on | |
| Power off | Red Indicator light is constantly on from flashing |
| Panning Mode | Blue light flashes once |
| Follow Mode | Blue light flashes twice |
| Lock Mode / Initialization | Blue light constant on |
| Initialization failure / Error | Blue light keeps flashing |
| Low battery | Blue light flashes for three times every 5 seconds |
5 Function Button
Power on / Power off Long time press
Panning Mode / Lock Mode Single click
Double click Follow Mode
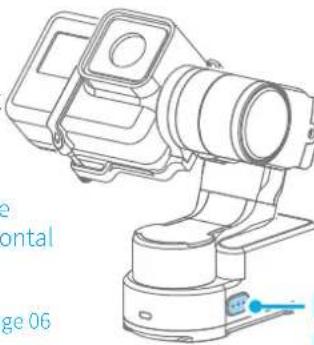
Triple click Rotate 180° in horizontal
*When the gimbal is in lock mode, triple click the function button can not be rotated 180° in horizontal
Four click Auto-rotation Mode
Five click Initialization
Introduction of Axis and Knob
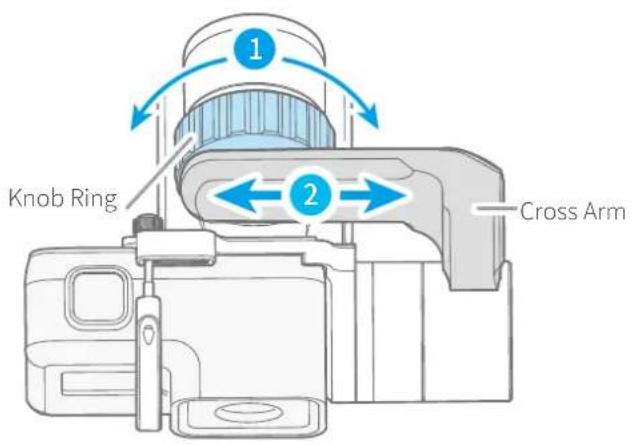
1 Knob Ring
It is used for fixing the cross arm.
2 Roll axis
Take the camera lens as the base point, and control the lens to tilt to the left or tilt to the right by roll axis.
3 Tilt Axis
Take the camera lens as the base point, and control the lens to move up or down by tilt axis.
4 Pan Axis
Take the camera lens as the base point, and control the lens to turn left or turn right by pan axis.
Introduction of Other Components
1 Mounting Plate
It is used for fixing the camera.
2 Cross arm
It is used for adjusting the gravity center position of roll axis.
3 Vertical arm
It is used for adjusting gravity center position of pan axis.
2. Quick Start Guide
1 Charging
TIPS Please fully charge the battery before power on the gimbal for the first time.
Charging with Micro USB cable as shown below.
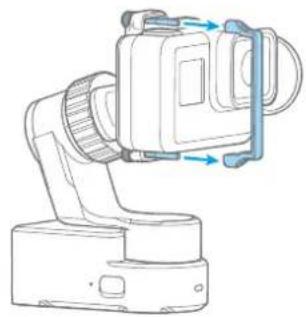
2 Mount the Camera
Put the camera on mounting plate, then tighten the camera with retainer bar (or session mount) and screw.
natural_image
Technical line drawing of a mechanical device with blue directional arrows indicating motion or force (no text or symbols)Use fixing bar to install
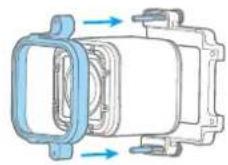
Use session holder to install
3 Balance the Gimbal (Before power on)
Loosen the knob ring, move and adjust the position of cross arm, tight the knob ring after the gimbal is in balanced status. Then turn on the gimbal.
4 Power on / off
Power on: long time press function button until the green light is on.
Power off: long time press function button until the red light changes from quick flashing to always on.
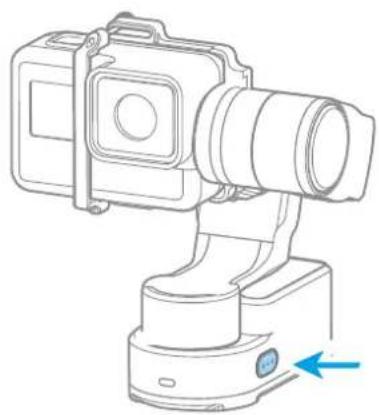
natural_image
Line drawing of a camera with a blue arrow indicating left motion (no text or symbols)3. Operation
Working Mode
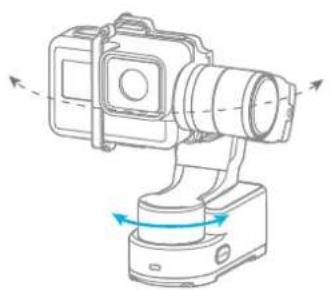
Panning Mode (Default mode)
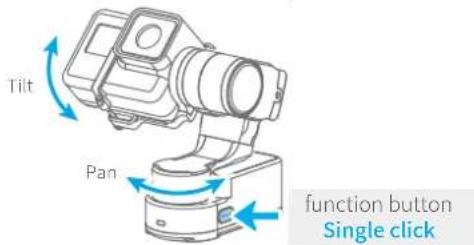
The roll and tilt direction are fixed, and the camera moves according to the left-right movements of the user's hand.
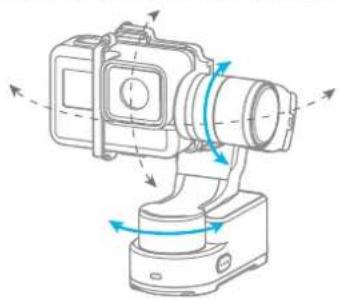
Follow Mode
The roll direction is fixed, and the camera moves according to the left-right movements, up-down movements of the user's hand.
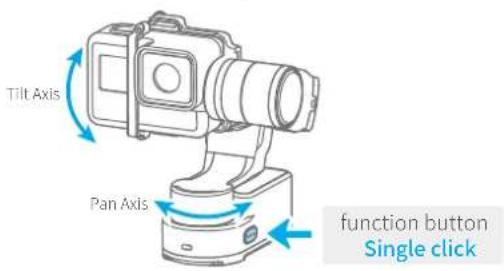
Lock Mode
The orientation of the camera is fixed.
Reset
Return to panning mode, three axises return to default position.
natural_image
Technical line drawing of a mechanical device with directional arrows indicating motion (no text or symbols)Panning Mode Default
natural_image
Technical line drawing of a mechanical device with directional arrows indicating motion or force (no text or symbols)Follow Mode Lock Mode
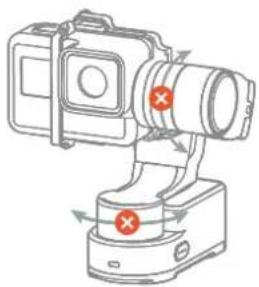
natural_image
Diagram of a camera with red X marks indicating sensor positions (no text or symbols present)Function Button - operation
Note: The firmware upgrade may occur manual operation function and the actual product features do not match. Please find the latest manual on the official website.
Single click
Panning Mode / Lock Mode
Double click Follow mode
Triple click
Rotate 180° in horizontal
Four click Auto-rotation Mode
Five click Initialization
Single click to switch between panning mode and lock mode
Under all follow, single click to switch to locking mode
Make the lens rotate 180°
*When the gimbal is in lock mode, triple click the function button can not be rotated 180° in horizontal
Enter auto-rotation mode
Please refer to the chapter "Auto-rotation Mode" in page 06
Enter initialization
Please refer to the chapter "Gimbal Initialization" in page 09
natural_image
Technical line drawing of a mechanical device with no visible text or symbolsFunction Button
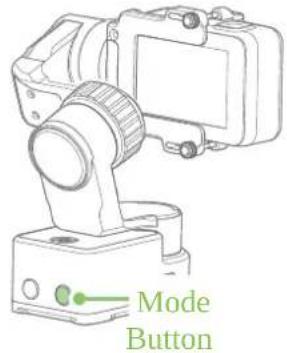
Mode Button - operation
Long time press Turn on / Turn off the WiFi
Single click Photo Mode / Recording Mode
Triple click Reset
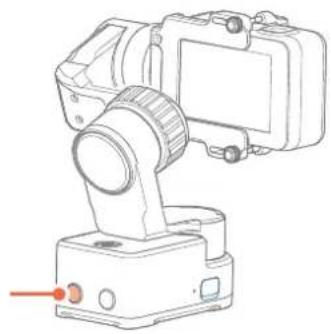
Shutter Button - operation
After connecting the gimbal to camera via Feiyu On App, single click it to control the recording of the camera.
Single click Capturing / Start recording / Stop recording
Please refer to the chapter "Connecting to camera" in page 08
Shutter Button
natural_image
Technical line drawing of a mechanical device with a cylindrical component mounted on a base (no text or symbols visible)4. Advanced Operation
Manual Lock
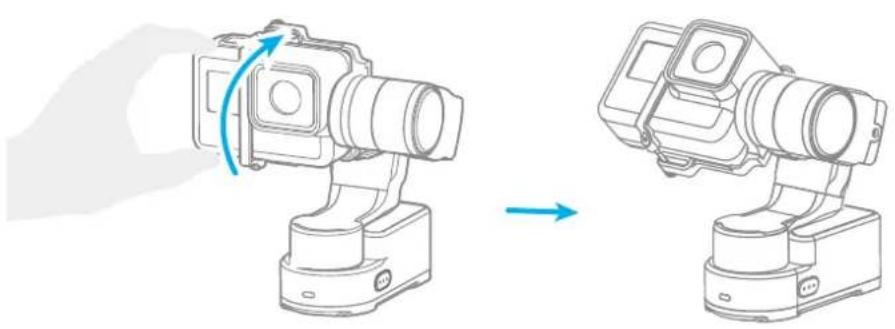
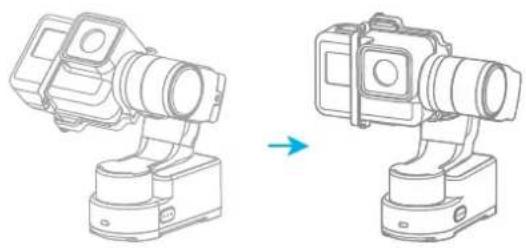
Camera can be manually positioned while in panning mode, follow mode or lock mode. Both the pan axis and tilt axis can be manually set up.
Manually move camera to desired position, and hold for half a second. New tilt and/or pan positions are automatically saved.
Take the tilt axis setting for example:
natural_image
Diagram showing a camera assembly before and after motion, with no visible text or symbolsAuto-rotation Mode
*When the gimbal is placed in front, it cannot enter the auto-rotation mode.
The WG2X gimbal can easily create constant speed movements in the auto-rotation mode. This mode can be used for recording both regular video and motion time-lapse photography. For better performance, please equip with FeiyuTech tripod or other tripod.
Set rotation speed in Feiyu ON App
Both the pan and tilt directions can be rotated.
Connect to the Feiyu ON App and select speed from the auto-rotation mode rate option in the settings menu.
WG2X Rotation Speed
| 12s/ round | 18s/ round | 24s/ round | 30s/ round | 1min/ round | 2 min/ round | 4min/ round | 8min/ round | 15min/ round | 30min/ round | 1h/ round(Default) | 4h/ round | 8h/ round |
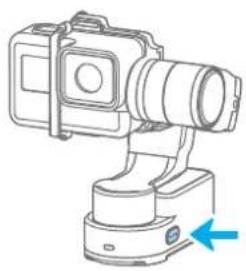
(1) Enter auto-rotation mode
natural_image
Line drawing of a camera with lens and base mount (no text or symbols)function button Four click
(2) Set rotation start position
Record the first position (rotation start position) by manually moving camera to desired position. Hold in position for half a second. Single tap the function button to record rotation start position.
(3) Set rotation end position (4) Start auto rotation movements
Record the second position (rotation end position) by manually moving camera to desired position. Hold in position for half a second. Single tap the function button to record rotation end position.
The gimbal automatically restores to the start position, while the tilt axis and pan axis start rotating at a constant speed according to pre-set speed to end position, repeat step (2) (3) to start again.
natural_image
Line drawing of a camera module being adjusted to form a larger device (no text or symbols present)Exit →
Triple click Mode Button
→
Exit the auto-rotation mode and reset
App - Download and Connecting
* Requires iOS 9.0 or later, Android 5.0 or later
Download and Install Feiyu ON App.
(1) iOS Version (2) Android Version


Or search and download the "Feiyu ON" App on the following application platform:

App Store

Google play
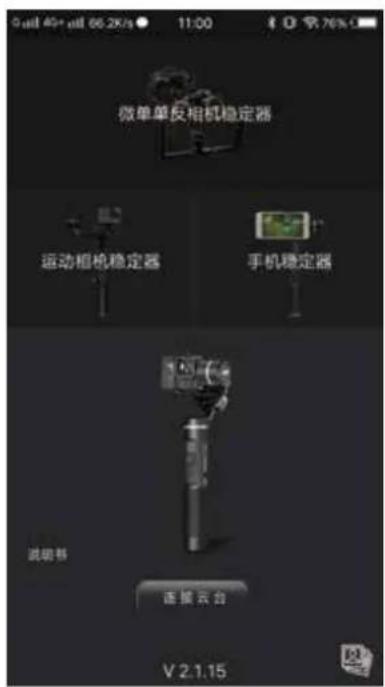
Connecting App
Turn on the Bluetooth and run the App on smartphone, follow on the instructions to connect smartphone to gimbal via bluetooth.
Connecting to Camera
WG2X gimbal can connect to the camera by Feiyu ON App.
Operations available after connecting to the camera:
按键 操作 实现功能
Mode Button Single click Single click to switch between the photo mode and video mode
Shutter Button
Single click
Capturing / Start recording / Stop recording
Steps of connecting to camera:
(1) Turn on your recording camera's WiFi (2.4GHz)
(2) Successively select "Settings" -- "Parameters Settings" -- "WiFi Settings" on Feiyu ON App
(3) Select camera model
(4) Select your camera connection name and enter the correct connection password of your camera
(5) Waiting for connecting
(6) Connect successfully
If icon 📋 appears on the display screen, it means the gimbal failed to connect to the camera, try to restart gimbal or camera, or reconnect according to above steps.
If the WiFi is not connected for a long time, please restart the camera's WiFi.
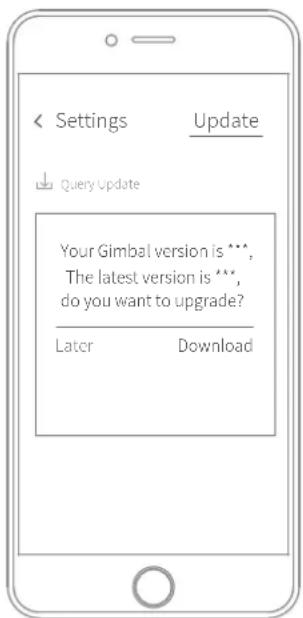
Firmware Upgrade
Upgrade firmware via App

Feiyu ON

Gimbal Initialization
You can initialize your gimbal when:
(1) camera is not balance
(2) If not use for a long period of time
(3) In case of extreme temperature variations
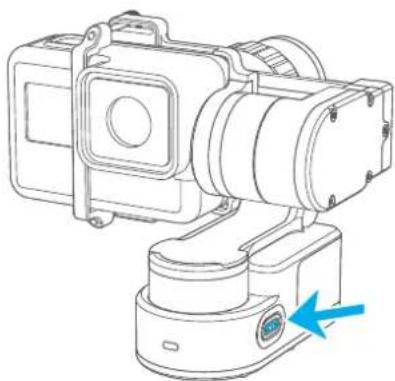
Adjusting Steps
natural_image
Technical line drawing of a camera module with a blue arrow indicating motion direction (no text or symbols)1 Click the function button for 5 consecutive times, and the motor will stop working.
natural_image
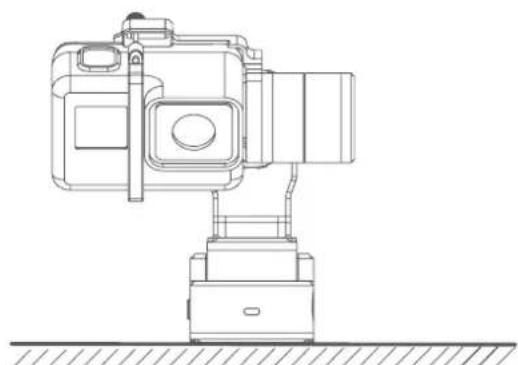
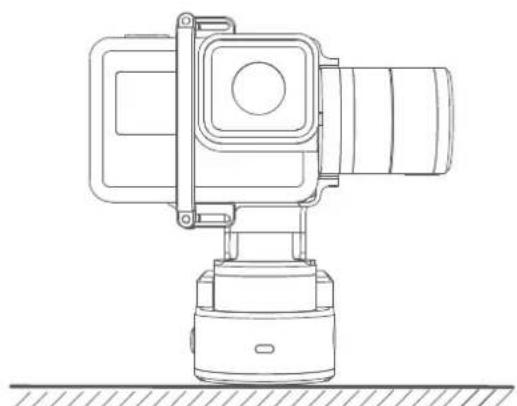
Line drawing of a camera mounted on a base, showing no text or symbols2 Place the gimbal on the table unmoved, and the gimbal automatically detect whether or not it is placed on a static flat surface, and then its initializing will start automatically.
natural_image
Technical line drawing of a camera mounted on a base, showing no text or symbols3 After the initialization is successful, the motor will automatically start working.
Note: if the initialization is not successful, long time press the function button to turn off the gimbal, restart initialization process.
5. Specifications
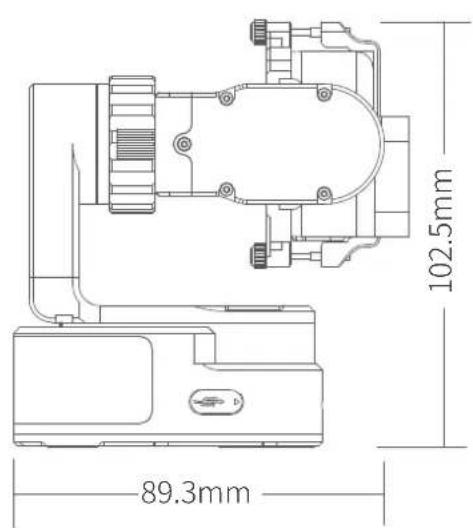
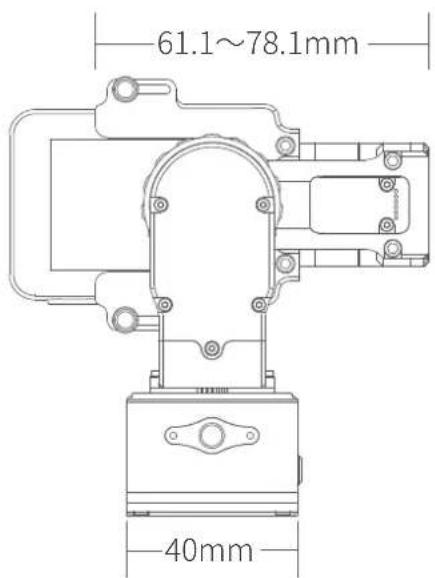
Parameters
Product Name
Tilt Axis Mechanical Movement Range
Roll Axis Mechanical Movement Range
Pan Axis Mechanical Movement Range
Operation Time
Weight
Payload
WG2X 3-Axis Wearable Gimbal for Action Camera
360^
310° (Structure range)
70° (Limit angle after camera mounted)
360^
2.5Hours
238 g (Not including the action camera)
130g ( In balanced status )
Compatible Camera Compatible with GoPro HERO6 / GoPro HERO5 /
GoPro HERO4 / Session and cameras with similar dimensions
Guilin Feiyu Technology Incorporated Company
Website: www.feiyu-tech.com
E-mail: service@feiyu-tech.com
Tel: +86(0)773 2320865
Due to software and hardware improvements, your actual product might differ from the descriptions and pictures in this user manual. You can get the latest user manual from the official website.
For more information, please visit our official website





DISCLAIMER
Prohibit any user for any illegal purpose. Users will be responsible for all behaviors of purchase and use products.
The Company assumes no liability for any risks related to or resulting from the debug and use of this product (including the direct, indirect or third-party losses).
For any unknown sources of using, we will not be at any services.
The updating and changes of product firmware and program may cause changes in function descriptions in this user manual, please read the instructions carefully before upgrading the firmware and use the corresponding user manual.
You can get the latest user manual from the official website: www.feiyu-tech.com
FeiyuTech reserves the right to amend this manual and the terms and conditions of use the gimbal at any time.


- Catalogue
- www.feiyu-tech.com
- WG2X
- WG2X Overview
- Introduction of interface and screws
- 1/4-20 Thread MountThumb Screw
- Micro USB Port
- Introduction of Display and Buttons
- Shutter Button
- Mode Button
- Charging /WiFi indicator light
- Mode Indicator Light
- Function Button
- Introduction of Axis and Knob
- Knob Ring
- Roll axis
- Tilt Axis
- Pan Axis
- Introduction of Other Components
- Mounting Plate
- Cross arm
- Vertical arm
- Quick Start Guide
- Charging
- Mount the Camera
- Balance the Gimbal (Before power on)
- Power on / off
- Operation
- Working Mode
- Panning Mode (Default mode)
- Follow Mode
- Lock Mode
- Reset
- Function Button - operation
- Mode Button - operation
- Shutter Button - operation
- Advanced Operation
- Manual Lock
- Auto-rotation Mode
- Enter auto-rotation mode
- Set rotation start position
- Set rotation end position (4) Start auto rotation movements
- App - Download and Connecting
- Connecting App
- Connecting to Camera
- 按键 操作 实现功能
- Steps of connecting to camera:
- Firmware Upgrade
- Gimbal Initialization
- You can initialize your gimbal when:
- Adjusting Steps
- Specifications
- Parameters
- Guilin Feiyu Technology Incorporated Company
- DISCLAIMER
Brand : FeiyuTech
Model : WG2
Category : Tripod