
G5 - Tripod FeiyuTech - Free user manual and instructions
Find the device manual for free G5 FeiyuTech in PDF.


| Product Type | 3-Axis Stabilized Handheld Gimbal |
| Brand | FeiyuTech |
| Model | G5 |
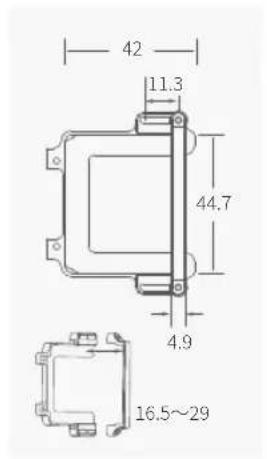
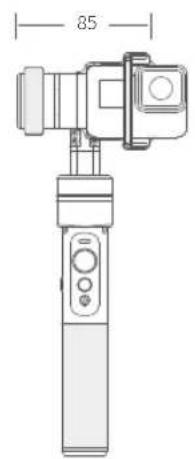
| Dimensions | Approx. 246 x 143 x 44.7 mm |
| Weight (without battery, camera, counter weight) | 271 g |
| Battery Type | 22650 Li-ion (included) |
| Operating Time | Up to 8 hours |
| Charging Input | 5V/1A via Micro USB |
| Compatible Cameras | GoPro HERO5/4/3+/3, Yi Cam 4K, AEE and similar size |
| Axis Control | Pan, Tilt, Roll (3-axis stabilization) |
| Working Modes | Panning Follow, All Follow, Locking Mode, Autorotation, Vertical Shooting |
| Connection | Bluetooth (App: Feiyu ON) |
| Angle Ranges | Pan: 360°, Tilt: 360°, Roll: 245° |
| Speed Settings | Pan: 3°/s - 150°/s, Tilt: 2°/s - 75°/s |
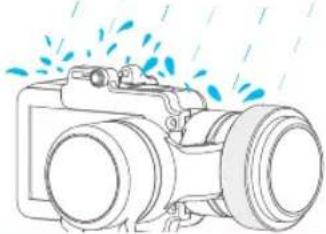
| Water Resistance | Splash proof (do not submerge) |
| Spare Parts and Repairability | Battery, thumb screws, retainer plate; contact official website for service |
| Maintenance | Keep dry, clean with soft cloth; store in carrying bag |
| Safety Warnings | Do not submerge, balance camera before use, charge with proper adapter |
Frequently Asked Questions - G5 FeiyuTech
User questions about G5 FeiyuTech
0 question about this device. Answer the ones you know or ask your own.
Ask a new question about this device
Download the instructions for your Tripod in PDF format for free! Find your manual G5 - FeiyuTech and take your electronic device back in hand. On this page are published all the documents necessary for the use of your device. G5 by FeiyuTech.
USER MANUAL G5 FeiyuTech
GS
3-Axis Stabilized Handheld Gimbal
Compatible with GoPro HERO5 / HERO4 / HERO3+ / HERO3 / Yi Cam 4K / AEE etc.
Guilin Feiyu Technology Incorporated Company
V2.0ENUser Manual
1. Product Overview
* The showing sports camera is only for reference
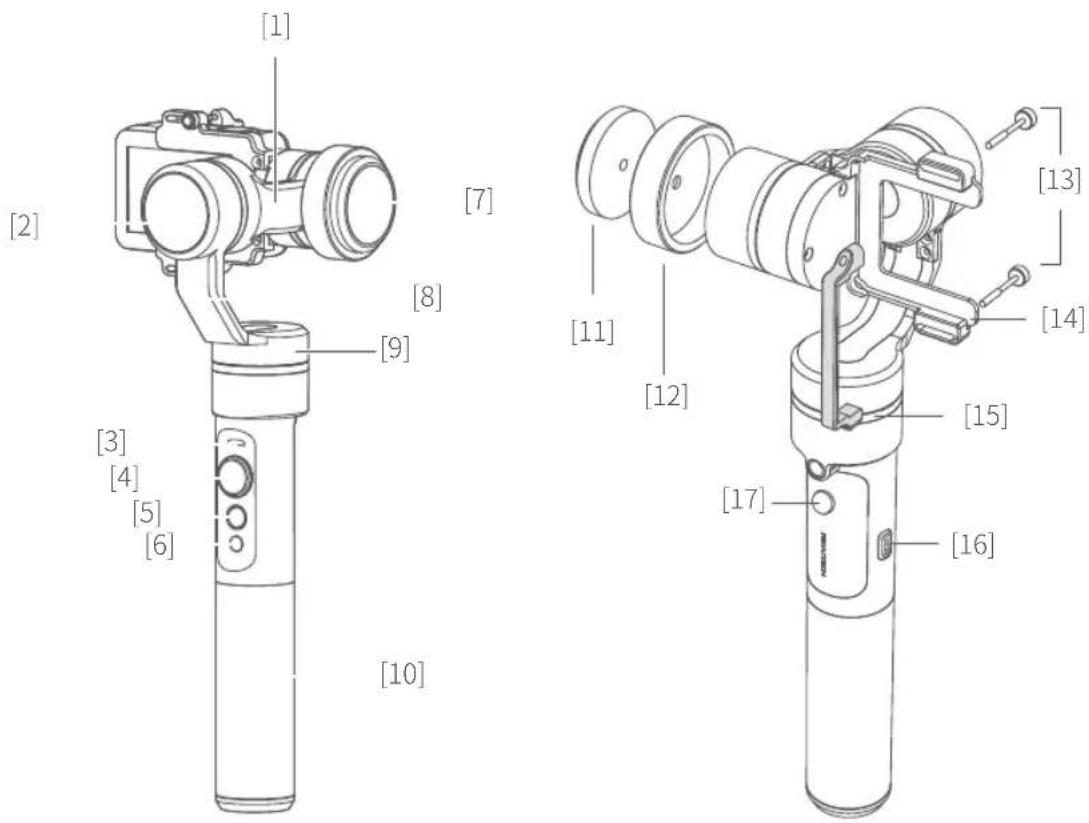
[1] Cross arm
[2] Rolling axis
[3] Status indicator
[4] Joystick
[5] Function button
[6] Self-timer button
[7] Titling axis
[8] Vertical arm
[9] Panning axis
[10] Handle
[11] Counter weight
[12] Weight ring
[13] Thumb screw
[14] Retainer plate
[15] Retainer bar
[16] USB interface
[17] Trigger button
Package List
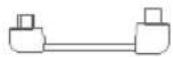
HERO 5 camera charging cable X1
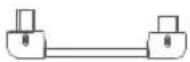
Mini camera charging cable X1
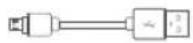
USB cable X1
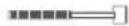
Thumb screw X2
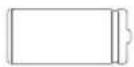
Battery
(Type:22650) X1
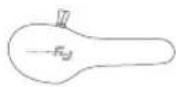
Portable bag X1
Water Splash Proof
natural_image
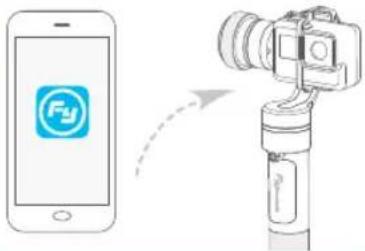
Illustration of a camera with water spray effect (no text or symbols)App Control
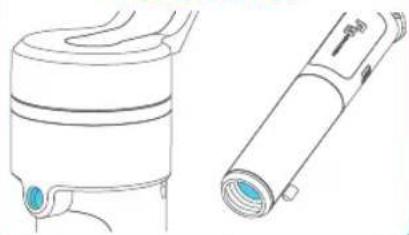
Compatible with Accessories
natural_image
Line drawing of a mechanical component with two views: top shows internal structure, bottom shows cylindrical device (no text or symbols)*Never submerge the gimbal in water
2. User Guide
Attention: Please complete the following instructions before powering on the gimbal.
1 Install the battery
Remove the handle and insert one 22650 battery into it.
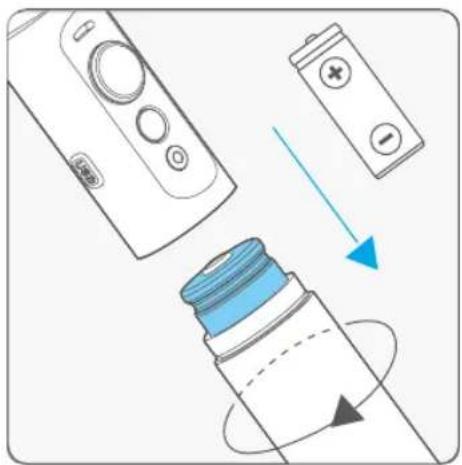
natural_image
Illustration of a hand holding a device with a blue cap and a battery, showing a blue arrow indicating direction (no text or symbols present)2 Install the Camera
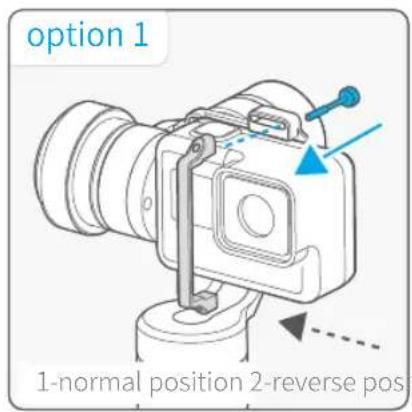
Take the Gopro HERO 5 camera for example Install the camera on retainer plate, then fix the camera with retainer bar and screw.
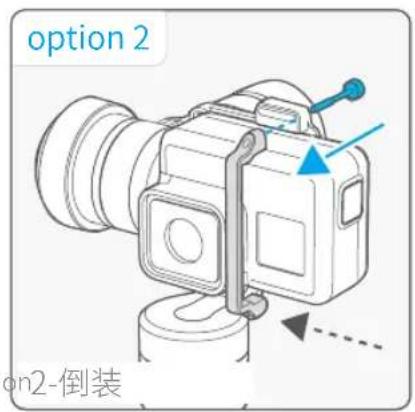
3 Camera balance adjustment
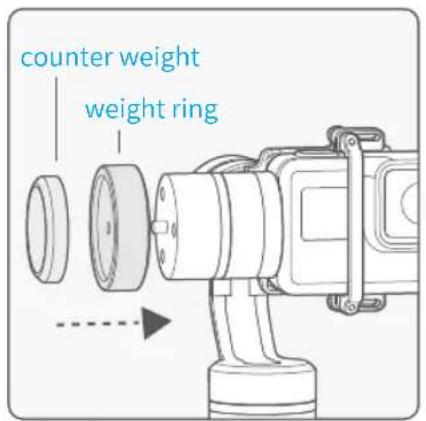
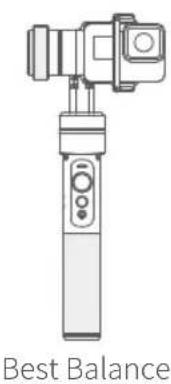
In order to achieve in a better performance of the gimbal, please try to balance the camera before powering on G5.
Balance adjustment reference :
GoPro HERO 5 — counter weight & weight ring
GoPro HERO 4 — counter weight
natural_image
Line drawing of a handheld device with a camera module and a button, labeled 'Best Balance' below (no other text or symbols)4 Power on / off
Attention: Make sure the camera is secure before powering on the Gimbal.
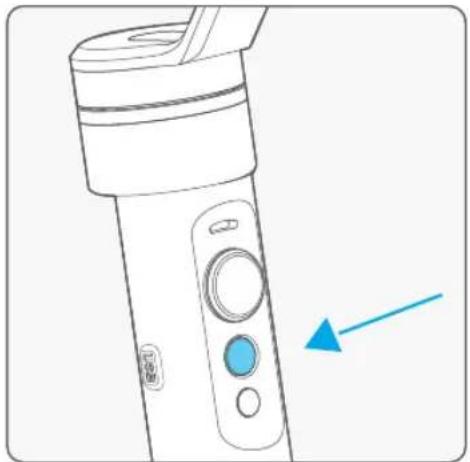
Power On: Press and hold the function button until the green light comes on and you hear the tone.
Power Off: Press and hold the function button until the red light changes from quick flashing to constant and you hear the tone.
natural_image
Illustration of a handheld electric shaver with control buttons and a blue arrow pointing to the left side (no text or symbols)
In case of low battery the indicator light will flash red three times every 5 seconds. Please charge gimbal or replace the battery.
3. Modes / Functions
Mode / Function Operation Instructions
| Function Button | Function Explanation | |
| One tap | Panning follow / Locking Mode Single tap to switch between panning follow and locking mode | |
| Two taps | All follow | Under all follow, single tap to switch to locking mode |
| Three taps Rotate horizontal 180° Make the lens rotate 180° | ||
| Four taps | Autorotation Mode | Quadruple taps to enter autototation mode |
| Five taps | Initialization | Five taps to automatically enter initialization |
| Trigger Button | Function Explanation | |
| Long press Locking Mode | In the panning follow or all follow, press and hold the button to enter the locking mode, release it to return previous mode | |
| Two taps Panning Reset | Restore the initial follow state of the panning follow | |
Explanation of LED indicator status
The current mode of the gimbal can be identified by the indicator status.
Indicator status Mode / Status
| Blue light flashes once | Panning follow |
| Blue light flashes twice | All follow |
| Blue light constant on | Locking mode / Initialize the gimbal |
| Blue light keeps flashing | Initialization failure / Malfunction |
| Red light flashes three times | Low battery |
| Red light keeps flashing | Entering power off |
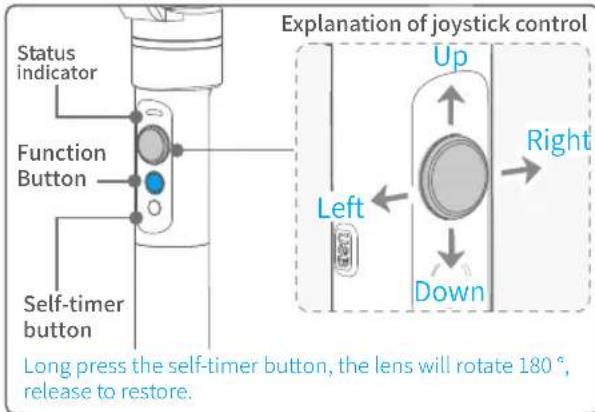
Working Modes
Panning follow
All direction are fixed, and the camera lens moves according to the hand movement direction of the user.
*The gimbal will work in panning follow after powering on.
All follow
The rolling direction is fixed, and the camera lens moves according to the hand movement direction of the user.
Locking Mode
The orientation of the camera is fixed.
Reset
Return to panning follow, all to return to default.
Vertical Shooting Mode
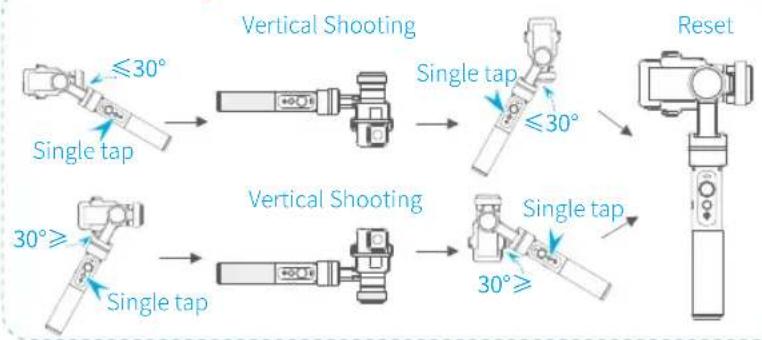
flowchart
graph TD
    A["Single tap ≤30°"] --> B["Vertical Shooting"]
    C["Single tap ≥30°"] --> D["Vertical Shooting"]
    E["Single tap ≥30°"] --> F["Vertical Shooting"]
    G["Single tap ≥30°"] --> H["Vertical Shooting"]
    I["Single tap ≥30°"] --> J["Vertical Shooting"]
    K["Single tap ≥30°"] --> L["Vertical Shooting"]
    M["Single tap ≥30°"] --> N["Vertical Shooting"]
    O["Single tap ≥30°"] --> P["Vertical Shooting"]
    Q["Single tap ≥30°"] --> R["Vertical Shooting"]
    S["Single tap ≥30°"] --> T["Vertical Shooting"]
    U["Reset"] --> V["Vertical Shooting"]
    W["Reset"] --> X["Vertical Shooting"]
    Y["Reset"] --> Z["Vertical Shooting"]
Audio effect optimization
When installing GoPro HERO5 on G5, the following configuration of HERO5 will help you to get better audio effect:
[RAW AUDIO TRACK] HIGH
RAW AUDIO TRACK
Applies full audio processing including wind and/or stereo and automatic gain.
MID
HIGH

[MANUAL AUDIO CONTROL] Wind Only


Wind Only

Stereo Only

Autorotation Mode
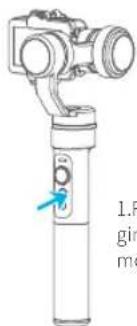
- Four taps on function button, gimbal will access the autorotation mode.
- Set the gimbal rotation start position: Pull the tilting axis or panning axis to the start position by hand, clicking the function button to record.
- Set the gimbal rotation end position: Pull the gimbal (which can be rotated more than one turn) to the rotation path you want to set, and then click the function button to record the end position.
- The gimbal will go to the start position and start the automatic rotation.
Using the gimbal autorotation function with a camera, timelapse photography functioning can be used to achieve special movement timelapse photography. use the Feiyu ON App for control the speed setting.
Note: Both the panning and tilting directions can be rotated.
Exit operations:
- Click the function button to exit the autorotation mode during automatic rotation and reset the gimbal.
2.Enter the autorotation mode or autorotation setting, four times click the function button to exit the autorotation mode and reset the gimbal.
Annexed parameter table:
gimbal speed setting reference table
| G5 speed setting |
| 8 hours / turn |
| 4 hours / turn |
| 2 hours / turn |
| 1 hour / turn (default) |
| 30 minutes / turn |
| 15 minutes / turn |
| 8 minutes / turn |
| 4 minutes / turn |
| 2 minutes / turn |
| 1 minute / turn |
| 30 seconds / turn |
| 15 seconds / turn |
natural_image
Technical line drawing of a handheld device with a blue arrow pointing to the handle (no text or symbols)- Four taps on function button, gimbal will access the autorotation mode setting.
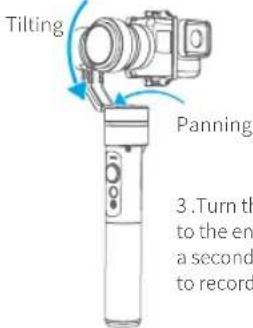
- Turn the panning axis or tilting axis to the end position and hold for half a second. Click on the function button to record the end position.
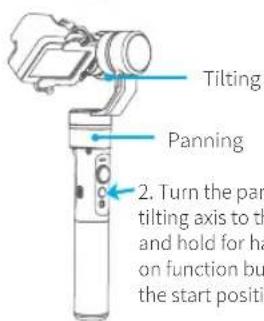
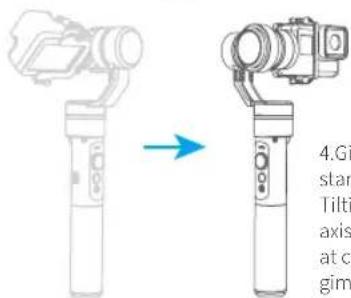
- Gimbal will recover to start position automatically. Tilting axis and panning axis turn to end position at constant speed. The gimbal is automatically reset after the end.
Manual Lock
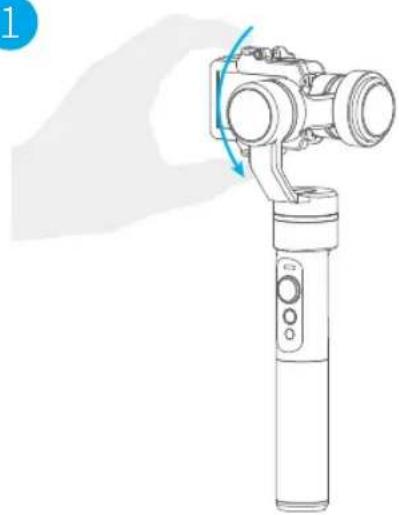
Pull to the required angle and hold for half a second to lock in that position. (The tilting axis and panning axis in the locking mode can be manual locking. The tilting axis can be manually locked in the panning follow.) Take the tilting axis as an example:
1
natural_image
Illustration of a hand holding a 3D-printed model of a handheld device with a blue curved arrow indicating rotation (no text or symbols)Hold the camera and change its angle in tilting axis direction.
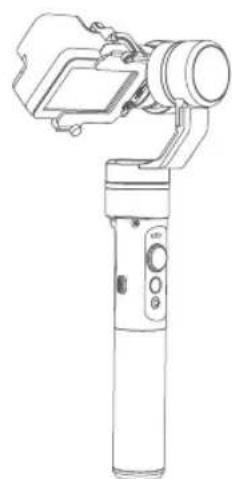
2
natural_image
Line drawing of a handheld 3D scanner device (no text or symbols visible)Keep this position for half second, the current angle will be locked manually.
4. Download and connect App
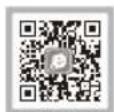
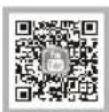
1 Download "Feiyu ON" and install it.
(1) iOS version: (2) Android version:

flowchart
graph LR
    A["App Store"] --> B["Feliyu ON"]
    B --> C["QR scanning"]
    C --> D["360 手机助手"]
    D --> E["豌豆荚"]
    E --> F["Google play"]
    F --> G["Feliyu ON"]
    G --> H["QR scanning"]
    H --> I["* Use the browser to scan two-dimensional code can be downloaded the App directly"]
2 Connecting App
Start the App on your smartphone, follow the instructions to connect the smartphone with gimbal via bluetooth.
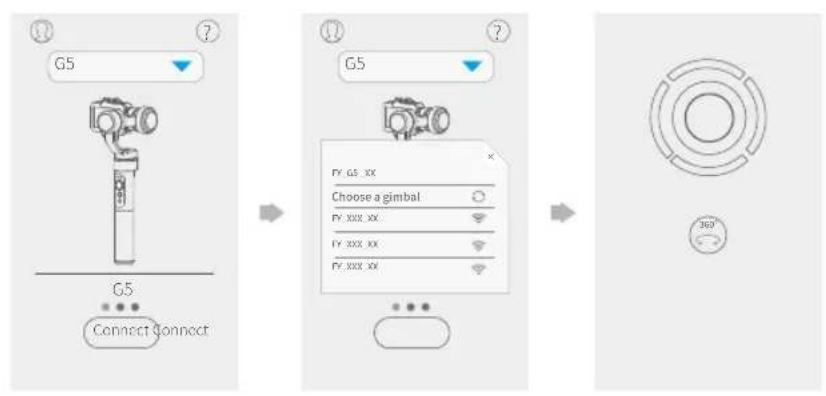
flowchart
graph LR
    A["G5"] --> B["Connect Connect"]
    C["FY: G5 XX Choose a gimbal"] --> D["FY: XXX XX"]
    E["FY: XXX XX"] --> F["FY: XXX XX"]
    G["360"] --> H["End"]
5. Charging
1 Gimbal charging
* Please make sure the battery was fully charged before you power on the gimbal first time. Option 1: charging with micro USB cable.
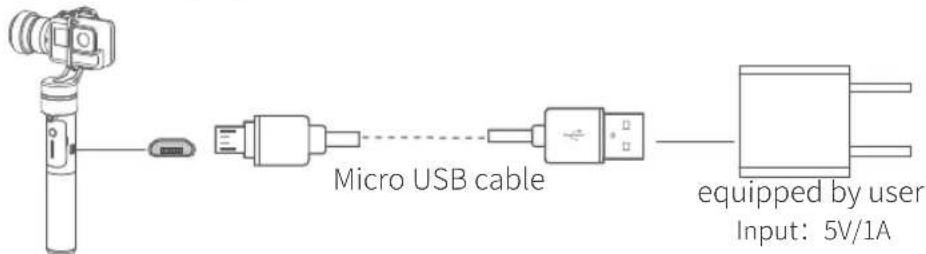
Option 2: remove the battery and charge the battery with charger(equipped by user).
2 Charging for Camera
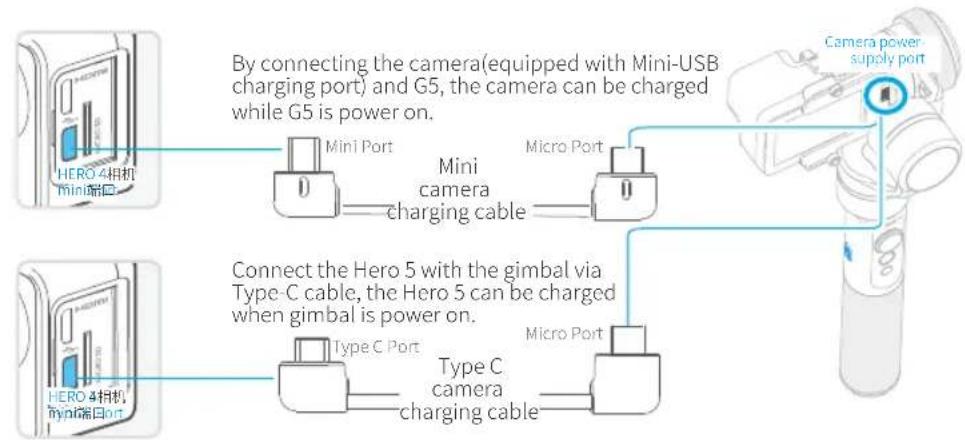
flowchart
graph TD
    A["HERO 4相机\nMini端口"] --> B["Mini Port"]
    B --> C["Mini camera charging cable"]
    C --> D["Micro Port"]
    D --> E["Camera power supply port"]
    F["HERO 4相机\nMini端口"] --> G["Type C Port"]
    G --> H["Type C camera charging cable"]
    H --> I["Micro Port"]
    I --> J["Connect the Hero 5 with the gimbal via Type-C cable, the Hero 5 can be charged when gimbal is power on."]
    style A fill:#f9f,stroke:#333
    style F fill:#f9f,stroke:#333
    style E fill:#ccf,stroke:#333
    style J fill:#ccf,stroke:#333
6. Firmware Upgrade
(1) Option 1: connect the gimbal with PC via micro USB cable to upgrade the firmware.
Please visit the official website www.feiyu-tech.com to download the relevant programs for upgrading, including USB driver, firmware upgrade software and product firmware. Install the relevant software, decompress the firmware files and upgrade according to the firmeare upgrade instructions.
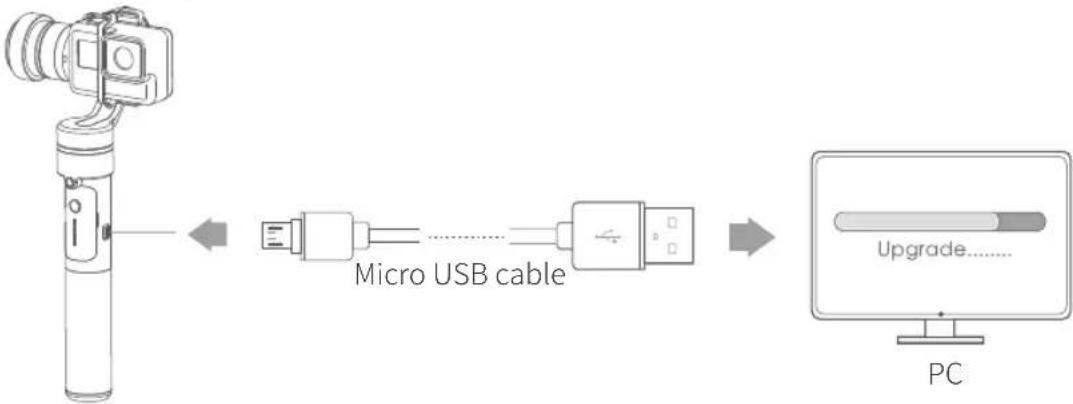
flowchart
graph LR
    A["Device with sensor"] --> B["Micro USB cable"]
    B --> C["PC Upgrade"]
(2) Option 2: connect the gimbal with smartphone via bluetooth, and then upgrade the firmware.
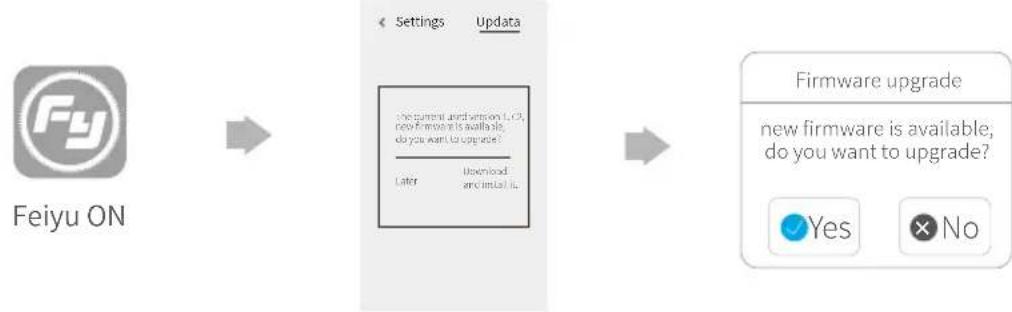
flowchart
graph LR
    A["Feiyu ON"] --> B["Settings Update"]
    B --> C["Firmware upgrade"]
    C --> D["new firmware is available, do you want to upgrade?"]
    D --> E["Yes No"]
7. Gimbal initialization
You can initialize your gimbal when:
(1) camera is not level.
(2) if not used for a long period of time.
(3) in case of extreme temperature variations.
Adjusting steps:
1
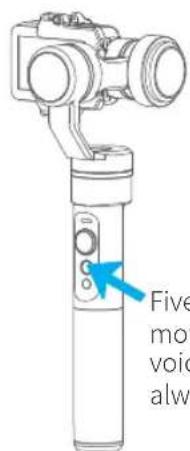
Five tap function button, the motors stop working after the voice "drop", the blue light is always on.
2
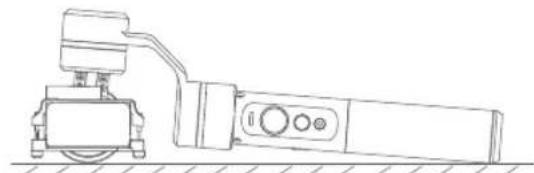
natural_image
Technical line drawing of a mechanical device with no visible text or symbolsPlace the gimbal still on a desktop. The gimbal will automatically initialize when it detects being static. The blue light cycles three flashes and then initialization ends, otherwise the initialization fails.
3
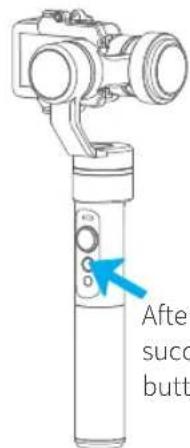
After the initialization is successful, click the function button to wake up.
Note: If the initialization is not successful for a long time, long press the function button to turn off the gimbal, restart it and then initialize.
8. Parameters
| Titling Angle | 360° | Titling Increments | min 2°/s max 75°/s |
| Rolling Angle | 245° | Panning Increments | min 3°/s max 150°/s |
| Panning Angle | 360° | Usage Time | 8 Hours |
| Adaption | GoPro HERO5 / HERO4 / HERO3+ / HERO3 / Yi cam 4K / AEE | and other cameras with the same size | |
| Weight | 271g (Not including battery, camera or counter weight) | ||
Unit: mm
natural_image
Technical line drawing of a handheld device with a 85-unit height dimension标注 (no text or symbols on the device itself)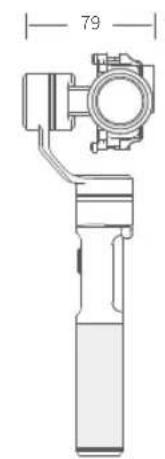
natural_image
Technical line drawing of a mechanical device with no visible text or symbols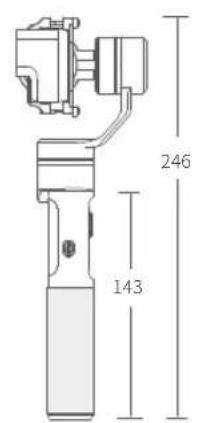
DISCLAIMER
Prohibit any user for any illegal purpose. Users will be responsible for all behaviors of purchase and use products.
The Company assumes no liability for any risks related to or resulting from the debug and use of this product (including the direct, indirect or third-party losses).
For any unknown sources of using, we will not be at any services.
The updating and changes of product firmware and program may cause changes in function descriptions in this user manual, please read the instructions carefully before upgrading the firmware and use the corresponding user manual.
You can get the latest user manual from the official website: www.feiyu-tech.com
Feiyu Tech reserves the right to amend this manual and the terms and conditions of use the gimbal at any time.
Attention
• Please correctly assemble the gimbal in accordance with the diagram
• Please install the phone before powering on the gimbal
- When the gimbal is not in use or placed on the table, please ensure it is powered off
Guilin Feiyu Technology Incorporated Company
Website: www.feiyu-tech.com
E-mail: service@feiyu-tech.com
Tel: +86 (0)773 2320865
Due to software and hardware improvements, your actual product might differ from the descriptions and pictures in this user manual. You can get the latest user manual from the official website.
For more information, please visit our official website



- GS
- Product Overview
- Package List
- User Guide
- Install the battery
- Install the Camera
- Camera balance adjustment
- Power on / off
- Modes / Functions
- Explanation of LED indicator status
- Working Modes
- Panning follow
- All follow
- Locking Mode
- Reset
- Audio effect optimization
- RAW AUDIO TRACK
- Autorotation Mode
- Note: Both the panning and tilting directions can be rotated.
- Exit operations:
- Annexed parameter table:
- Manual Lock
- Download and connect App
- Download "Feiyu ON" and install it.
- Connecting App
- Charging
- Gimbal charging
- Charging for Camera
- Firmware Upgrade
- Gimbal initialization
- You can initialize your gimbal when:
- Adjusting steps:
- 1
- 2
- 3
- Parameters
- DISCLAIMER
- Attention
- Guilin Feiyu Technology Incorporated Company
Brand : FeiyuTech
Model : G5
Category : Tripod