
XP5560 Bolt 2 IS - Smartphone SONIM - Free user manual and instructions
Find the device manual for free XP5560 Bolt 2 IS SONIM in PDF.


| Product Type | Smartphone |
| Brand | Sonim |
| Model | XP5560 Bolt 2 IS |
| Network | GSM/GPRS/EDGE/UMTS (2G: 850/900/1800/1900 MHz, 3G: UMTS 850/1900/2100 MHz) |
| Display | TFT, 240 x 320 pixels, 262K colors (approx. 2.0 inch) |
| Internal Memory | Approx. 99 MB |
| Expandable Storage | microSD up to 16 GB |
| Connectivity | Bluetooth 3.0, USB 2.0 (Mass Storage / COM port), 3.5 mm audio jack |
| GPS | Yes, with A-GPS support |
| Push-to-Talk (PTT) | Yes, dedicated PTT button |
| Water Resistance | Submersible to 2 meters for up to 30 minutes (IP68 equivalent) |
| Dust Resistance | Dust resistant |
| Shock Resistance | Withstands drops from up to 2 meters |
| Battery | Rechargeable Li-ion, model Ex-BPH 08 (replaceable) |
| Operating System | Proprietary (feature phone OS) |
| Camera | None |
| Lone Worker Feature | Yes, with red alarm button and automatic alarms (requires service subscription) |
| Intrinsic Safety | IS Class I Division 1 Groups A-D T4 (for hazardous environments) |
| SAR (Head) | 1.12 W/kg (1g) |
| SAR (Body) | 1.10 W/kg (1g) |
| Warranty | 3 years comprehensive |
Frequently Asked Questions - XP5560 Bolt 2 IS SONIM
User questions about XP5560 Bolt 2 IS SONIM
0 question about this device. Answer the ones you know or ask your own.
Ask a new question about this device
Download the instructions for your Smartphone in PDF format for free! Find your manual XP5560 Bolt 2 IS - SONIM and take your electronic device back in hand. On this page are published all the documents necessary for the use of your device. XP5560 Bolt 2 IS by SONIM.
USER MANUAL XP5560 Bolt 2 IS SONIM
Copyright © 2013 Sonim Technologies, Inc.
SONIM and the Sonim logo are trademarks of Sonim Technologies, Inc. Other company and product names may be trademarks or registered trademarks of the respective owners with whom they are associated.
Disposal of Old Electrical and Electronic Equipment

The symbol of the crossed-out wheeled bin indicates that within the countries in the European Union, this product, and any enhancements marked with this symbol, cannot be disposed as unsorted waste but must be taken to separate collection at their end-of-life.
Disposal of Battery

Please check local regulations for disposal of batteries. The battery should never be placed in municipal waste. Use a battery disposal facility if available.
Guideline for Headphone and Earphone

To prevent possible hearing damage, please do not listen at high volume levels for long periods.
General Information----7
Phone Models Covered
Network Services
Sonim Support Information
Use the Guide Effectively
Your Safety Guidelines----9
Battery Performance
Battery Replacement
Avoid Short Circuit
Avoid High Temperatures
Battery Disposal
Personal Medical Devices
Child Safety
Emergency Calls
SAR Information
Getting Started with Sonim XP5560 BOLT 2 IS—14
Battery Usage
Inserting the Battery
Charging the Battery
Set Battery Alert
Your SIM Card
Inserting the SIM Card
Removing the SIM Card
Switching On
Home Screen
Key Shortcuts in Home Screen
Keypad Functions
Your SONIM XP5560 BOLT 2 IS - - - - - - - - 25
Main Menu
Main Menu Icons
Home Screen Indicators
Key Operations without Your SIM Card
Understanding Lone Worker
Application----29
Display Indicators for Lone Worker Application
Raising Alarms
Understanding Lone Worker
Application----30
Lone Worker Usage Recommendations
Managing Calls----31
Dial a Number
Dial an International Number
Dial a Number via Contacts
Making a PTT Call from Contacts
Dial a Number via the Call History
Managing Call History
Call Timers
Call Settings
Auto Answer
Any key Answer
Call Waiting
Caller ID
Call Forwarding
Call Barring
Advanced Settings
Receive a Call
Record a Call
Call Restrictions
Managing Phone Settings----36
Time and Date Settings
Schedule Power On/Off Settings
Language Settings
Display Settings
Customizing Dedicated Keys
Managing Speed Dial Numbers
Power Saving Settings
Auto Keypad Lock
Firmware Details
Managing Network Settings----38
Network Selection
Service Selection
Data Connection
Data Account
A-GPS Settings
Managing Security Settings----40
PIN Protection
Change PIN
Change PIN2
Phonelock Mode
Safeguard
Certificate Manager
Managing Connectivity----42
Sending Data via Bluetooth
Receiving Data via Bluetooth
Java Settings
USB Function
Managing Your Files----46
Managing Contacts----48
Add a New Contact
View the Contact Details
Sending a Message from Contacts
Dialing a Number from Contacts
Delete Contact
Copy Numbers between Phone and SIM
Move Numbers between Phone and SIM
Sending Contact
Selecting Multiple Contacts
Caller Groups
Phonebook Settings
Searching Contacts
Managing Messages----53
Write Message
Manage Your Messages
Drafts
Outbox
Sent Messages
Archive
Configuring Email Accounts
Write Email
Email Inbox
Email Outbox
Email Sent
Email Draft
Broadcast Messages
Templates
Message Settings
MMS Settings
Managing Profiles----62
Sound Settings
Tools----64
Calendar
Alarm
Calculator
Unit Converter
World Clock
Sound Recorder
Notes
Stopwatch
Text Reader
SIM Services
Applications----67
Data Account and Java Settings
Installing Java Application from WAP
Installing Java Application from Memory Card
WAP Browser----68
Managing Push-to-talk Services----69
Activating Push-to-talk (PTT) Service
Login and Logout of the PTT Service
PTT Home Screen
PTT Related Key Functions
PTT Display Icons
Manage PTT Settings
Managing PTT Calls
Direct PTT Calls
Calls from PTT History Tab
Calls from PTT Contacts Tab
Calls from PTT Group Tab
Sending Alerts
Block Incoming PTT Calls
Manage PTT Contact List
Manage PTT Groups
Manage PTT Favourite Contacts
Manage PTT Favourite Groups
Supervisory Override
Accessing Other Phone Features during Active PTT
Call
Vibration of Incoming voice calls
Managing Multimedia Files----81
Media Player
Hardcoded Shortcuts----82
Using Memory Card----83
Inserting Memory card into the Phone
End User License Agreement----84
Our Warranty
Comprehensive 3 Year Warranty
Our Warranty
What We Will Do
Phone Care
Conditions
FCC Statement----87
FCC Statement
Index----89
3 COMPREHENSIVE 3-YEAR WARRANTY
- Please register your phone within 30 days at www.sonimtech.com/register, to receive product information and updates. For more information related to the warranty, please refer to "Our Warranty" on page 84.
Congratulations on the purchase of a SONIM XP5560 BOLT 2 IS mobile phone. This phone is a GSM/GPRS/EDGE/UMTS enabled handset with quad-band capabilities and has an intuitive, feature-rich user interface, which allows you to make the best use of the offered functions.
Phone Models Covered
This user guide only covers SONIM XP5560 BOLT 2 IS phone models.
The model name can be read on the phone label under the battery.
This phone utilizes the following 2G RF bands: GSM 850, GSM 900, DCS 1800, PCS 1900 bands and supports the UMTS 850, 1900 and 2100 bands.
Network Services
These are additional services that you can avail through your network service provider. To make the best of these services, you must subscribe to them through your service provider and obtain instructions for their use from your service provider.
Sonim Support Information
For additional product and support information, visit www.sonimtech.com.
Use the Guide Effectively
Familiarize yourself with the terminology and symbols used in the guide to help you use your phone effectively.
| HOME SCREEN | This is the screen displayed when the phone is in idle condition. |
| PRESS Means to press and release a key immediately. For example, Press 2 means that you press the key on the keypad that is labelled with the numeral 2 and the alphabets “ABC”. | |
| SELECT Means to either press the Left or Right Selection Key to apply the command indicated at the bottom of the screen. The Center navigation key can also be used to select options. For example, if this guide says Select Menu >Messages >Write message, you must press the Left Selection Key to select Menu, scroll to Messages and press the Left Selection Key, scroll to Write message and press the Left Selection Key. To return to the previous screen, press the Right Selection Key. | |
| PRESS & HOLD | Means to press and hold a key for 2 seconds before releasing the key. This action is typically used when trying to switch on/off the phone or when using shortcut keys to access specific functions. For example: press and hold 1 to access voicemail. |
| MENU OPTIONS | Press Options to display menu options on the screen. The selection keys are used to accomplish the indicated option. |
| SELECT MENU | Means to press the Left Selection Key to select the Menu option or press the Menu key (centre) for the same result. |
| A MENUITEMSUFFIXEDWITH THREEDOTS (...) | Means more options are available but only one has been mentioned in the guide. |

Signifies a Note.
Options Commonly Used across Menu Items
The following are common actions used across various menu items:
| BACK Displays the previous screen. Use the Right Selection Key to perform this function. |
| CLEAR Deletes data character by character. Use the Right Selection Key to perform this function. |
| OK Confirms an action. Use the Left Selection Key or the Menu key to perform this function. |
| CLEAR KEY Use this key to delete while editing a message or delete a selected item in a list. |
BACK KEY Use this key to display the previous screen.
Please read and understand the following safety guidelines before you use the phone. These guidelines provide details to enable you to operate your phone safely and conform to any legal requirements regarding the use of cellular phones.
 | Do not to use the phone at a refuelling point. Observe restrictions when using radio equipment at fuel depots, chemical plants or where blasting operations are in progress. |
 | Electrical interference may obstruct the use of your phone. Observe restrictions in hospitals and near medical equipment. |
 | Switch off your cellular phone when in an aircraft. Wireless phones can cause interference or danger to an aircraft. In an aircraft, the phone can be used in flight mode. |
 | Do not expose the battery to high temperatures (in excess of 60°C). |
 | Adhere to road safety laws. Do not hold/use a phone while you are driving; find a safe place to stop first. Use hands-free microphone while you are driving. |
 | Avoid using the phone in close proximity to personal medical devices, such as pacemakers and hearing aids. |
 | Use only SONIM XP5560 BOLT 2 IS approved charging equipment to charge your phone and avoid damage to your phone. |
 | The symbol of the crossed-out wheeled bin indicates that this product, and any enhancements marked with this symbol, can not be disposed as unsorted waste but must be taken to separate collection at their end-of-life. |


Ensure that only qualified personnel install or repair your phone.
The Sonim XP5560 BOLT 2 IS is water-proof and can be submerged to 2 metres for 30 minutes.
- Ensure to properly close the rubber cover of the charging connector and audio connector, to avoid deposits of water drops on these connectors, when the phone is immersed in water.
- Water droplets may condense under the display cover if the phone is immersed in water with significant drop in temperature. This does not indicate water leakage. The droplets will disappear at room temperature.
The Sonim XP5560 BOLT 2 IS is dust-resistant, rugged and shock-resistant. However, it is not dust-proof or unbreakable if subjected to overwhelming impact. For best results and long product life, one should protect the Sonim XP5560 from salt water, dust and strong impacts.
Battery Performance
A rechargeable battery powers your device. Use the battery only for its intended purpose. Never use any charger or battery that is damaged. If the battery is completely discharged, it may take a few minutes before the charging indicator appears on the display or before any calls can be made. The full performance of a new battery is achieved only after three to four complete charge and discharge cycles. The battery can be charged and discharged hundreds of times but it will eventually wear out. Unplug the charger from the electrical plug and the device when not in use. Ensure that you do not leave the fully charged battery connected to the charger for longer time. If left unused, a fully charged battery will lose its charge over time.

There is a risk of explosion while charging if the battery has been replaced by an incorrect type.
Battery Replacement
When the talk and standby times are noticeably shorter than normal, replace the battery with an original Sonim battery. If a replacement battery is being used for the first time or if the battery has not been used for a prolonged period, it may be necessary to connect the charger and then disconnect and reconnect it to begin charging the battery.
Avoid Short Circuit
Do not short-circuit the battery. An accidental short-circuit can occur when a metallic object such as a coin, clip, or pen causes direct connection of the positive (+) and negative (-) terminals of the battery. (These look like metal strips on the battery.) This might happen, for
For example, when you carry a spare battery in your pocket or purse. A short-circuit at the terminals may damage the battery or the connecting object.
Avoid High Temperatures
Leaving the battery in hot or cold places, such as in a closed car in summer or winter conditions, will reduce the capacity and lifetime of the battery. For the best results, try to keep the battery between -20°C and +55°C (-4°F and 131°F). A device with a hot or cold battery may not work temporarily, even when the battery is fully charged. Battery performance is particularly limited in temperatures well below freezing.
Battery Disposal
Do not dispose of batteries in a fire as they may explode. Batteries may also explode if damaged. Dispose of batteries according to local regulations and recycle when possible. Do not dispose as household waste. Do not dismantle, open or shred cells or batteries. In the event of a battery leak, do not allow the liquid to come in contact with the skin or eyes. In the event of a leak or a hazard, seek medical help immediately.
Personal Medical Devices
Mobile phones may affect the operation of cardiac pacemakers and other implanted equipment. Please avoid placing the mobile phone over the pacemaker, for example in your breast pocket. When using the mobile phone, place it at the ear opposite the pacemaker. If a minimum distance of 15 cm (6 inches) is kept between the mobile phone and the pacemaker, the risk of interference is limited. If you suspect that interference is taking place, immediately turn off your mobile phone.
Contact your cardiologist for more information. For other medical devices, consult your physician and the manufacturer of the device. Comply with instructions to switch off the device or deactivate the RF transmitter when required, especially when posted in hospitals and aeroplanes. Equipment used in these places may be sensitive to radio waves emitted from the device and adversely affect their operation. Also, observe restrictions at gas stations or other areas with flammable atmosphere or when close to electro-explosive devices.
Child Safety
Do not allow children to play with your mobile phone or its accessories. Keep it out of their reach. They could hurt themselves or others, or could accidentally damage the mobile phone or accessories. Your mobile phone and its accessories may contain small parts, which could be detached and create a choking hazard.
Emergency Calls
Mobile phones operate using radio signals, which cannot guarantee connection under all conditions. Therefore you should never rely solely upon any mobile phone for essential communications (e.g. medical emergencies). Emergency calls may not be possible in all areas, on all cellular networks, or when certain network services and/or mobile phone features are in use. Check with your local service provider.
SAR Information
The Sonim XP5560 BOLT 2 IS has been certified in compliance with the Government's requirements for exposure to Radio Waves.
When communicating over the wireless network, the
mobile phone emits via the radio frequency waves low levels of radio energy. The Specific Absorption Rate, or SAR, is the amount of RF energy absorbed by the body while using the phone and is expressed in watts/kilogram (W/kg).
Governments around the world have adopted comprehensive international safety guidelines, developed by scientific organizations, for example, ICNIRP (International Commission on Non-Ionizing Radiation Protection) and IEEE (The Institute of Electrical and Electronics Engineers Inc.). These guidelines establish permitted levels of radio wave exposure for the general population.
Tests for SAR are conducted using standardized methods with the phone transmitting at its highest certified power level in all used frequency bands.
SAR Data Information for residents in the United States and Canada
In the United States and Canada, the SAR limit for mobile phones used by the public is 1.6 watts/kilogram averaged over one gram of tissue. The standard incorporates a margin of safety to give additional protection for the public and to account for any variations in measurements.
Before a phone model is available for sale to the public in the US, it must be tested and certified by the Federal Communications Commission (FCC) that it does not exceed the limit established by the government-adopted requirement for safe exposure. The tests are performed in positions and locations (that is, by the ear and worn on the body) as required by the FCC for each model.
The highest SAR value for the Sonim XP5560 Ex-Handy 08 Bell phones when tested by Sonim for use:
- By the ear is 1.12 W/kg (1 g).
- Worn on the body is 1.10 W/kg (1 g).
For body-worn operation, this phone meets FCC RF exposure guidelines provided that it is used with a non-metallic accessory with the handset at least 1.5 cm from the body, or with the original Sonim accessory intended for this phone and worn on the body. Use of other accessories may not ensure compliance with FCC RF exposure guidelines.
The product complies with the Canada portable RF exposure limit set forth for an uncontrolled environment and are safe for intended operation as described in this manual. The further RF exposure reduction can be achieved if the product can be kept as far as possible from the user body or set the device to lower output power if such function is available.
This section provides information on using your Sonim XP5560 BOLT 2 IS phone.
The list of items in the Sonim XP5560 phone box are:
- Sonim XP5560 BOLT 2 IS phone
- Quick Start Guide
- Welcome Letter
- Rechargeable battery
- Screwdriver • Wall charger with safety box cable
- Belt clip
Battery Usage
- Use only a Sonim XP5560 BOLT 2 IS certified battery that is designed for this phone model.
- The use of other batteries may void the warranty terms of your phone and cause damage.
- It is recommended to protect the battery from extreme temperature environments and moisture.
- Please keep the battery out of the reach of children.
WARNING
ONLY use the battery model Ex-BPH 08** and the Safety Box (USB Cable) model SBH 07 with your Sonim XP5560 BOLT 2 IS.
** is replaced by letters for the differentiation of permissible versions of the battery module.
Inserting the Battery
To insert the IS battery, rotate both the IS battery screws in a clockwise direction. You can use the screwdriver provided to tighten the screws. Ensure not to overtighten the screws.
Removing the Battery
To open the IS battery, rotate both the IS battery screws in a counterclockwise direction. Sometimes, the battery cover may be tight and some extra effort is required to open it. You can use the screwdriver provided to open the screws.
WARNING
DO NOT remove or install your battery in your Sonim XP5560 BOLT 2 IS in a hazardous environment.
Charging the Battery
The battery delivered with your mobile phone is not fully charged. We recommend that you charge your mobile for 5 hours before you use your mobile phone for the first time.
WARNING
DO NOT charge your Sonim XP5560 BOLT 2 IS inside hazardous areas and/or with anything other than the provided Safety Box "SBH 07" (USB Cable)
Charging your Sonim XP5560 BOLT 2 IS with a different cable/charger and/or in a hazardous environment will compromise the Intrinsically Safe nature of the device.

There is a risk of explosion while charging if the battery has been replaced by an incorrect type.

If the battery is completely out of charge, it can take several minutes for the charging icon to appear when the charger is connected.
1 Insert Charger
Insert the charger plug into a power outlet
2 Connect to Phone
The charger port is located on the left side of the phone. To access the charger port, lift the cover with the USB sign. Insert the 3.5 mm jack/connector of the charger to the port. You can also use the standard USB cable and adaptor to charge the phone battery. Insert the adaptor to the charger port of the phone. Connect one end of the standard USB cable to the adaptor and the other end of the USB cable to the PC.
3 Charging Animation/Icon
If the battery is being charged when the phone is switched off, only the battery icon is displayed. If the battery is being charged while the phone is switched on, the bars in the battery charge icon on the home screen show animation indicating that the battery is being charged. After the phone is fully charged, the battery bars on the display stop scrolling. You can disconnect the charger from the phone.


Set Battery Alert
When you set the battery alert, every time the battery charge is low you hear an alarm. To set the battery alert, select Menu > Settings > Profiles > any profile (currently active in the phone) > Options > Customize > Extra tone > Warning. Select to activate the alert.
Your SIM Card
Purchase a SIM card from a mobile operator. The SIM card associates your network services (for example, phone number, data services, and so on) with your phone.
Inserting the SIM Card
1
Switch Off Phone
Ensure that the phone is switched off.
2
Remove Battery
To open the battery, rotate both the battery screws in a counter-clockwise direction. Sometimes, the battery cover may be tight and some extra effort is required to open it. You can use the screwdriver provided to open the screws.
3
Place SIM Card
Place the SIM card by pushing it upward in the designated slot located under the battery.
4
Insert Battery
To insert the battery, rotate both battery screws in a clockwise direction. You can use the provided screwdriver to tighten the screws. Ensure not to overtighten them.
Removing the SIM Card
1
Switch Off Phone
Ensure the phone is switched off.
2
Remove Battery
To open the battery, rotate both battery screws in a counterclockwise direction. Sometimes, the battery cover may be tight and some extra effort is required to open it. You can use the provided screwdriver to open the screws.
3
Remove SIM Card
Remove the SIM card by pushing it downward from the slot.
4
Insert Battery
To insert the IS battery, rotate both IS battery screws in a clockwise direction. You can use the provided screwdriver to tighten the screws. Ensure not to overtighten them.
Parts of the SONIM XP5560 BOLT 2 IS Phone
The Sonim XP5560 BOLT 2 IS keypad has 11 function keys and 12 alphanumeric keys. The left side of the phone has one key, and the right side has three keys.

Parts of the SONIM XP5560 BOLT 2 IS Phone

SONIM XP5560 BOLT 2 IS Keypad
The following figure represents the different keys on the phone keypad.
* Lone Worker is available in XP5560 BOLT 2 IS. It requires separate provisioning. If this feature is not active, the Red button will not have any other function.

Switching On
Press and hold the Power ON/OFF key for 2 seconds to power on the phone.
When the phone is switched on, it attempts to register with the network. After successful registration, the name of the service provider is displayed.
Home Screen
Details such as the name of the service provider, date and time, battery charge status, and data service connectivity are displayed when the phone is in standby mode. Other optional indicators like alarm and call forward will be displayed if the feature is activated.

- Display Icons
- Battery Charge Indicator
- Service provider
- RSK command
- LSK command
- Date and day
- Time
- Network type and Signal strength indicator
- Push-to-talk (PTT)
Key Shortcuts in Home Screen
The following shortcuts can be accessed from the home screen.
| Press To Access | |
| Menu Key Main menu | |
| Left Selection Key Main menu | |
| Right Selection Key Contacts | |
| Call/Accept/Send Key All calls list | |
| Up Arrow Calendar | |
| Down Arrow Profiles | |
| Left Arrow Messages | |
| Right Arrow Browser |

The four functions that are performed using the arrow keys are set as factory defaults. To change these functions, select Menu > Settings > Phone settings > Dedicated key. Select the required arrow key and select OK.

You cannot use the arrow keys when a notification, for example: 1 missed call, is displayed on the home screen.
Keypad Functions
The following table displays the various keys and the corresponding functions they perform:
| Keypad key Operations | |
 POWER ON/OFF/END CALL POWER ON/OFF/END CALL | Press to end a call.Press and hold to switch on or switch off the mobile phone.Press when in Menu or Edit modes to return to Standby mode.Press to reject an incoming call. |
 CALL/ACCEPT/SEND CALL/ACCEPT/SEND | Press to answer an incoming call.After entering a phone number, press to make a call.Press while in Standby mode to access All calls list. |
 LSK/RSK LSK/RSK | These keys are present immediately below the display screen.Press the Left Selection Key (LSK) or Right Selection Key (RSK) to select the function indicated at the bottom of the screen. The indicated functions can vary according to different program definitions.Press LSK to access the Menu in standby mode.Press RSK to access the Contacts in standby mode. |
 CLEAR (C) CLEAR (C) | This key is present below the LSK key.Press this key to delete the text, while editing a messageLong press this key to delete the complete message.Press this key to delete a selected item in a list. |
 BACK BACK | This key is present below the RSK key. Press this key to display the previous screen. |
| Keypad key Operations | |
 MENU KEY (CENTRE) MENU KEY (CENTRE) | Present at the centre of the navigation keys.Press while in standby mode to enter the main menu.Press when required to be used as a toggle key to select or clear a checkbox.Press to perform similar tasks as the Left Selection Key.Press to select the OK command.Press to view missed call and new message notifications. |
 NAVIGATION KEYS NAVIGATION KEYS | The Left and Right Selection Keys and Power On/Off keys surround this key group. There are arrows on the key that denote the direction to scroll for information displayed on the screen.UP/DOWNPress to move the cursor up or down in the text editor.Press to view the pages in the text editor.Press to browse menus/lists at the same level.Press to browse the main menu.Press to access features assigned as shortcuts.LEFT/RIGHTPress to navigate between tabs.Press to move the cursor left or right in the text editor.Press to browse the main menu.Press to view the previous or next picture when previewing pictures.Press to access features assigned as shortcuts. |
| ALPHA-NUMERIC KEYS | Press the required keys to enter the desired phone number and press 1  like a call.Alternatively, enter the number and select Options > Call to dial the number.Press and hold any numeric key to access the shortcut /speed dial number assigned, while in standby mode.Enter text while in the text editor. like a call.Alternatively, enter the number and select Options > Call to dial the number.Press and hold any numeric key to access the shortcut /speed dial number assigned, while in standby mode.Enter text while in the text editor. |
| 1 | Press and hold in standby mode to access your Voice mail.When entering text, press to enter space. |
| 2ABC | Press and hold to set access Tone settings. |
| 3DEF | Press and hold to access the Profiles. |
| 4GHI | Press and hold to set the alarm. |
| 5JKL | Press and hold to access the calendar. |
| 6MNO | Press and hold to access the Bluetooth. |
| 7PQRS | Press and hold to access the Browser. |
| 8TUV | Press and hold to access shortcuts. |
| 9WXYZ | Press and hold to access language list. |
 | The above preset functions of number keys (from 2 to 9) can also be changed to the speed dial functionality. For more information refer, “Managing Speed Dial Numbers” on page 37 . | |
 | Press and hold to display ‘+’ used for dialing an international number, while in standby mode.On editor screen, press 0 to get “.” in T9 or normal mode. | |
 | Press and hold to lock the keypad.With backlight on, press LSK followed by this key to unlock the keypad.When entering text, press to display special characters, for example, period, comma, and so on. Press and hold to display the text input languages. | |
 | Press and hold in standby mode to switch between Meeting on/off modes.When entering text, press to switch between lower case, upper case or numeric.Press and hold to enable/disable T9 mode. |
This model is a bar type phone with a single LCD screen. The graphic field of the screen is 240 (w) and 320 (h) pixels. The TFT technology used displays 262K colours.
Main Menu
To access the phone menu, press the Menu key. The main menu, which comprises the following 12 items, appears.
Main Menu Icons
Home Screen Indicators
The home screen indicators are visible when the phone is in standby mode. Some icons indicate the status of certain functions of the phone, for example, the battery charge indicator, the network status indicator, the date and time, etc. Some icons are displayed only if the specific service is activated.

The following table describes the display indicators on the top bar of the home screen in the Sonim XP5560 BOLT 2 IS phone. These icons depend on the selected theme.
For information related to PTT icons, refer to "PTT Display icons" on page 7.
| Display Indicators | Name Description | |
| Battery | Full green indicator represents maximum battery charge.Green indicator with empty space indicates decline in battery charge. | |
| Roaming | This icon is only displayed when your phone is registered with a non home network. | |
| GPRS | G icon indicates that the phone is attached to 2G network and GPRS feature is available in the phone. Boxed G icon indicates that the phone is in active data connection and GPRS feature is available in the phone. | |
 | EDGE | E icon indicates that the phone is attached to 2G network and EDGE feature is available in the phone. Boxed E icon indicates that the phone is in active data connection and EDGE feature is available in the phone. |
 | ||
 | 3G | 3G icon indicates that the phone is attached to 3G packet networkBoxed 3G icon indicates that the phone is in active data connection in 3G packet network. |
 | ||
 | HSPA | H icon indicates that the phone is attached to HSPA packet networkBoxed H icon indicates that the phone is in active data connection in HSPA packet network. |
 | ||
 | Alarm Clock | Indicates that the alarm clock has been set. |
| [3Y70] | Stop watch | Indicates that the Stopwatch is running. |
 | Meeting | Indicates that the phone is on meeting mode. |
| Call Forward | Indicates that the call forward function is enabled. |
| Display Indicators | Name Description | |
| Unread Message | Indicates that there are unread messages in the inbox. | |
| Voice Message | Indicates a new voice message. | |
| Unread e-mail Message | Indicates a new e-mail message. | |
| Keypad Lock | Indicates that the keypad is locked. | |
| Bluetooth Connec-tivity | Indicates that bluetooth is active. | |
| Bluetooth CarKit/Headset Connec-tivity | Indicates that your device is paired and connected to a carkit or headset with bluetooth connectivity. | |
| Wired Headset | Indicates that a wired headset is connected. | |
| Both Vibration and Ringing | Indicates that the phone performs both vibration and ringing. | |
| SD Card | Indicates that SD card is mounted on the phone. |
| Display Indicators | Name Description | |
| 2G | Indicates the signal strength when registered to 2G network. | |
| HSPA | Indicates the signal strength when registered to HSPA network. | |
| 3G | Indicates the signal strength when registered to 3G network. | |
| Java | JAVA | Indicates that the Java application is active and is available in the background. |
The following table describes the display indicators on the call screen in the Sonim XP5560 BOLT 2 IS phone:
| Display Indicators | Name Description | |
| Active Call | Indicates an active call. | |
| Call on Hold | Indicates a call on hold. | |
| Call on Mute | Indicates a call on mute. | |
| Handsfree Call | Indicates a handsfree call. | |
| Display Indicators | Name Description | |
| Active Call | Indicates an active call. | |
| Call on Hold | Indicates a call on hold. | |
| Call on Mute | Indicates a call on mute. | |
| Handsfree Call | Indicates a handsfree call. | |
The following table describes the display indicators on the home screen in the Sonim XP5560 BOLT 2 IS phone:
| Display Indicators | Name Description | |
| Incoming Call | Indicates an incoming call. | |
| Outgoing Call | Indicates an outgoing call. | |
| Missed Call Indicates a missed call. |
Key Operations without Your SIM Card
Menus Accessible
The following menus can be accessed on the phone without the SIM card:
- Settings
- Phone settings
- A-GPS settings
- Security settings
- Connectivity - Bluetooth
- Restore factory settings
- Phonebook
- My files
- Tools
- Applications
- Multimedia
- Profiles
- Calendar
Display Indicators for Lone Worker Application
If Lone Worker application is enabled on your phone, an icon indicating the mode of the Lone Worker application will be displayed.
| Display Indicators | Name Description | |
 | Simple | Indicates simple mode. |
 | Tracking | Indicates tracking mode. |
 | Man down | Indicates man down mode. |
 | Alarm Indicates | alarm mode. |
 | GPS-Red | GPS is ON but the location information is still not available.This icon will be displayed only if Lone Worker is active. |
 | GPS-Amber | GPS is ON with limited satellite signal and the location information might be inaccurate.This icon will be displayed only if Lone Worker is active. |
 | GPS-Green | GPS is ON and the location information is accurate.This icon will be displayed only if Lone Worker is active. |
Raising Alarms
You can use the red button located on the right side of Sonim XP5560 BOLT 2 IS to raise alarms and initiate emergency calls to the emergency call center, when a critical situation arises.
The red button will be active on all screens and even when the keypad is locked or Java applications are running.
The phone raises automatic alarms and initiates emergency calls to the emergency call center based on the device settings when the phone detects conditions such as
- Freefall
- Impact (like hitting a wall forcefully)
- Entry into or exit out of a defined geographical region
Lone Worker Usage Recommendations
Here are some tips to get the best performance of the Lone Worker features.

Lone Worker features need service subscription to work. For more details contact your service provider.
- Please watch out for the GPS icon. If it is amber, the accuracy is poor. If it is green, the accuracy is OK. If it is red, it has not connected to the satellites. It may take more time to connect to the satellites if you are in non-ideal conditions like moving in a car or inside buildings. Always make sure that phone has maximum satellite view where ever possible, for example,
- Make sure the GPS icon is green before starting to drive.
- While in moving a car, always keep the phone on the dash board.
- Carry the phone always on the belt holster instead of keeping it in the pocket.
- Phone being in the vertical position gives better GPS performance.
It is advisable to make sure that the GPS icon is green before you get into a car and start moving.
- Java applications that use the audio recorder are incompatible with reliable Lone Worker operation. Please do not use such applications.
- When the phone is powered on, it will take about 10 to 15 seconds for the Lone Worker application to startup and be fully operational. Please wait for 30
seconds before doing any operations on the phone.

If in an alarm confirmation screen OK and Cancel are provided, selecting OK confirms the alarm and informs the service provider; selecting Cancel is used to indicate a false alarm and no information is sent to the service provider.
This section provides information on managing calls.
Dial a Number
- Use the numeric keys to enter the number and press
- Alternatively you can enter the desired phone number and select Options > Call.

Dial an International Number
Press and hold the numeric key 0 till the + symbol is displayed. Enter the Country code, Area code (without preceding 0) and the phone number and press select Options>Call.

Dial a Number via Contacts
- On the home screen, select Contacts. Scroll to the phone number.
- Press total the number OR select Options > Call. Press disconnect.
Making a PTT Call from Contacts
On the home screen, select Menu > Phonebook. Select the contact. Select Options > Make PTT Call.

You can also view PTT contacts and groups in Phonebook.
Dial a Number via the Call History
The Call History comprises separate lists for All calls, Missed calls, Dialled calls and Received calls.
- To access the Call history, press Select Menu > Calls > Call history. All the available call history is displayed.
- Select a list, scroll to the number and press dial the number.

Managing Call History
Call history provides the call log of dialed, received and missed call information for voice and PTT calls. PTT IPA and missed call notifications will also be displayed. Contacts within the call history have the following options:
- View: You can view the details of the call such as the type of call, name, number, call time, call duration and times of call.
- Call: You can call the selected contact.
- Send message: You can send an SMS/MMS to the number. Enter the SMS/MMS and select Options to view the send options and send it accordingly.
- Save to Phonebook: You can save the number in Contacts. This option is displayed only if the number is not saved.
- Edit before call: You can edit the number before dialing.
- Delete: You can delete the number from the Call history.
- Delete all: You can delete all the numbers from the Call history.
Call Timers
- To view the total time spent on the last call, select Menu > Calls > Call history > Options > Advanced > Call timers > Last call.
- To view the total time spent on outgoing calls, select Menu > Calls > Call history > Options > Advanced > Call timers > Dialled calls.
- To view the total time spent on incoming calls, select Menu > Calls > Call history > Options > Advanced > Call timers > Received calls.
- To reset the time of all calls, select Menu > Calls > Call history > Options > Advanced > Call timers > Reset all.
Call Settings
Auto Answer
Auto answer is enabled only if wired headset or Bluetooth headset/carkit is connected to the phone. When auto answer is activated, your incoming calls will automatically be answered. Select Menu > Calls > Call settings > Earphone auto answer > On.
Any key Answer
When enabled, you can press any key except answer a call.

To activate this feature, select Menu > Calls > Call settings > Any key answer > On.
During an incoming call, Reject (RSK) would reject the call.

Long pressing (press and hold) the Power on/off key [0W] ring a call will only end the call and not switch off the phone.
Call Waiting
When call waiting is enabled and the phone is in conversation, the incoming number is displayed when you receive a call.
- To enable this feature, select Menu > Calls > Call settings > Call waiting > Activate.
- To cancel this feature, select Menu > Calls > Call settings > Call waiting > Deactivate. You will not be prompted when you receive an incoming call while your phone is busy. The caller will receive a busy signal.
- To verify the call waiting status, select Menu > Calls > Call settings > Call waiting > Query Status.
Caller ID
When you make a call, you can select whether or not to display your ID to the receiver.
- Select Menu > Calls > Call settings > Caller ID > Set by network, to allow the network operator to define the Caller ID settings.
- Select Menu > Calls > Call settings > Caller ID > Hide ID, to hide your ID from the receiver.
- Select Menu > Calls > Call settings > Caller ID > Send ID, to display the ID to the receiver.
Call Forwarding
You can forward your incoming calls to a number in the Contacts or a new number, provided your network operator supports this service. To access call forward settings, select Menu > Calls > Call settings > Call Forward. The Call forward options are mentioned below:
| Options Function | |
| Forward all voice calls | Forward all incoming calls to a pre-designated number. When All calls forward is enabled, the icon 📊 is displayed at the top of the screen when the phone is in standby mode. |
| Forward if unreachable | Forward calls when your phone is switched off or is out of coverage area. |
| Forward if no answer | Forward calls when you do not answer incoming calls. |
| Forward if busy | Forward calls when your phone is busy. |
| Forward all data calls | Forward all data calls when your phone is in roaming. |
| Cancel all forwards | Deactivates the call forward option. |
Call Barring
You can set the Call barring feature for all incoming and outgoing calls, international calls, local and home only calls.
- To set call barring settings, select Menu > Calls > Call settings > Call barring > select the required
call barring option.
- Enter the call barring password. Contact your network provider for call barring password. This password will be sent to the network for verification.
The Call barring options are:
| Options Function | |
| Outgoing calls All voice calls or International voice calls or International voice calls except home. | |
| Incoming calls All voice calls or voice calls when roaming. | |
| Cancel all Deactivates call barring. | |
| Change barring password | You can change the barring password by entering a new password. |
Advanced Settings
Auto Redial
When auto redial is enabled, your phone will automatically redial within a set interval, if a call does not connect.
- To enable this feature select Menu > Calls > Call settings > Advanced settings > Auto redial > On.
- If the attempt to call is not successful, you will be prompted with the message to redial after a specific time. Select Abort to return to home screen.
Call Time Display
You can select Menu > Calls > Call settings > Advanced settings > Call time display > On to activate the call time display.
Call Time Reminder
When enabled, you receive a beep/tone as prompt at the set time period during a conversation. Select Menu > Calls > Call settings > Advance settings > Call time reminder > On. Select OK and set the reminder time. You can set the reminder time between 30 to 60 seconds.
Receive a Call
- To receive a call, press the Accept key press Left Selection key. Select Accept.
- To reject a call press the Power on/off key press Right Selection key. Select Reject.
- To receive another call while you are already speaking, enable the call waiting feature for calls. Select Menu > Calls > Call settings > Call waiting > Activate.


Record a Call
- While on call, select Options > Sound recorder.
- Select Stop to stop the recording. Save the record.
- The recorded file is saved in the location My files > Phone (or Memory card) > Audio.
Depending on the settings, the storage location can be phone or memory card.
Call Restrictions
You can restrict incoming and outgoing calls using Call restrictions options.
Select Menu > Calls > Calling restrictions. You can choose from the following options.
| Options Function | |
| Restrict incoming | Allow all - allows all incoming callsAllow contacts - allows calls from numbers in the phonebook contact list.Block reject - list - blocks incoming calls from numbers in the call reject listBlock all - blocks all incoming calls. |
| Restrict outgoing | Allow all - allows all outgoing callsAllow contacts - allows outgoing calls restricted only to numbers in the phonebook contact list.Block all - blocks all outgoing calls. |
| Manage reject list | To add a new number to the reject - list, select Enter number > enter the number and select Done.Click Options to perform the following commands:Edit number - modify the selected phone number.Delete number - delete the selected phone numberDelete all numbers - delete all the phone numbers present in the reject list. |
| To enable password protection for call restrictions setting, you must activate Safeguard feature and choose Restrict calls under settings. For more information refer “Safeguard” on page 40. |
This section provides information on the various settings for the phone. To access, select Menu > Settings > Phone settings.
Time and Date Settings
You can set and display the date and time on the phone. You can also select the display format.
- Set home city: To set the home city, select Phone settings > Time and date > Set home city.
- Set time/date: To set the date and time, select Phone settings > Time and date > Set time/date.
- Set format: To set date and time format, select Phone settings > Time and date > Set format.
- The date formats supported are DD MM YYYY, MM DD YYYY, YYYY MM DD with the different date separators.
- The time formats supported are 24 hr. and 12 hr.
- Update with time zone: To update the time automatically, when the time zone (home city) is changed, select Phone settings > Time and date > Update with time zone > select On.
- Auto Update time: To synchronize the time and date with the network details, select Phone settings > Time and date > Auto update time > On. This feature requires network support.
Schedule Power On/Off Settings
To enable this feature, select Phone settings > Schedule Power on/off > Select the time > Status > Enable and Power on/off. Select the time after which the phone should be automatically switched on. Select OK. Select
Disable to disable this feature.
Language Settings
You can change the phone's interaction language by selecting your preferred language.
- To set the language based on the SIM card, select Phone settings > Language > Automatic.
- To set the language to English, select Phone settings > Language > English.
- To set the language to French, select Phone settings > Language > Français.
All the menu items, user feedback messages and text entry language are displayed in the language set based on the SIM card.
Display Settings
You can activate and modify the display settings. Select Phone settings > Display.
- Wallpaper: Allows you to set the background screen display using the embedded pictures available in your phone or from your own pictures that you have downloaded onto your phone or memory card. The selected wallpaper is displayed on the home screen.
- Screensaver: Select this to make the screen saver appear on the home screen. User can select the screensaver image.
- Show date and time: Select this to display date and time on the home screen.
- Themes: Allows you to set the color theme and icons for the main menu and other screens. There
are two themes available. Select Theme 1 or Theme 2. Select Options to activate the selected theme, update the theme automatically after set time period, and set the theme display order.
Customizing Dedicated Keys
Dedicated keys are the navigation keys set to access specific functions. To assign specific function to the keys, select Menu > Settings > Phone settings > Dedicated key > Select a key > press center key > select the new function > select OK. You can also change the specific function previously assigned to the key.

When pre-defined functions are activated, speed dial numbers will be disabled.
Managing Speed Dial Numbers
This option enables you to dial a number quickly via a shortcut.
- Select Menu > Settings > Phone settings > Dedicated key > Speed dial. Select Status > On. The shortcut is set.
- To add a new contact, select Set numbers. Select the number key (from 2 to 9) to which you want to assign the speed dial. Select the contact from the phonebook and save. The Speed dial is set.
- To make a call, press and hold the shortcut designated number key for Speed dial while on home screen.

When speed dial is activated, pre-defined functions set using Dedicated keys will be disabled.
Power Saving Settings
You can set the backlight level and duration. Select Menu > Settings > Phone settings > Power saving > LCD backlight. Select the brightness level for the backlight of the screen. The screen display is active for the period chosen by you. The screen display active time can be selected between 25 seconds to 3 minutes in increments of 5 seconds.
Auto Keypad Lock
To lock the keypad automatically, when the phone is in idle state, select Menu > Settings > Phone settings > Auto keypad lock. Select the time after which the keypad will be automatically locked. Select None to disable this feature.
Firmware Details
To view the firmware version and IMEI number, select Menu > Settings > Phone settings > Firmware details.
Network Selection
To modify the network access settings, select Menu > Settings > Network settings. The following network settings are displayed: You can select your network, specify the network account, and indicate whether GPRS is required at all times.
- New search: Search the network for the phone
to connect when you are selecting the network manually.
- Select Network: Select the network automatically or you can do it manually.
- Selection Mode: Select Automatic to set the phone to automatically select a cellular network available in your area, or select Manual to set the network manually. If manual mode is set, the user has to invoke Select Network to do network selection.

Manual under Selection mode is displayed only in the Roaming network.
Service Selection
You can view and set the required type of network.
• GSM: Register to GSM network only. - WCDMA: Register to 3G network only. If 3G network is not available, the phone proceeds to no signal condition, even if GSM coverage is present. - Automatic: Register to 3G network, only if available. If the 3G network is not available, the phone registers to the GSM network. This is the recommended option.
Data Connection
To set registration preferences for accessing data connection, select one of the following options:
- Always - Register with the data connection, continuously.
- When needed - Register only when data transfer is required.
Data Account
You can set the network account and view the data connection information.
You can add, view, edit and delete the accounts. You can edit the following information in the accounts: Account Name, APN, Username, Password, Authentication type, Advanced settings, MMSC/Homepage, Connection type, Use proxy, Proxy address, Proxy port, Proxy user name, Proxy password, Primary DNS, Secondary DNS, IP Address, and Subnet mask. Make the changes and select OK. Then 'Add new packet data account' will pop up, select Yes. Refer "WAP Browser" on page 68 for further information.
A-GPS Settings
Your handset is equipped with a GPS receiver, that supports A-GPS (Assisted GPS) functionality. This helps to calculate your current location. When an user accesses an application that requires GPS, then the receiver is turned on automatically. After the application is closed, it is turned off automatically.
A GPS receiver calculates its current location by monitoring broadcast signals from GPS satellites. Hence it is important that the handset is exposed to the sky.
A-GPS feature helps the GPS receiver to acquire certain information through data connection and/or network messages. This information is used during the position calculation process. This significantly increases the ability to calculate position at low signals. It also speeds up the time required to calculate the position. Please note
that some A-GPS features could be network dependent. In some cases, A-GPS uses external data connectivity, which may result in network charges.
To configure the A-GPS on your phone, do the following:
- Select Menu > Settings > AGPS settings.
- Select AGPS profiles and then press Select. In A-GPS profiles, select the required profile and click Options > Activate. You can also select Edit. Enter the name, address, data account, port, and TLS as provided by the service provider or operator.
- Select Done to save the settings.
To prevent unauthorized use of your phone, you can set the PIN protection.
PIN Protection
You can activate PIN protection to prevent unauthorized use of your phone. The PIN is operator dependent.
To enable PIN protection,
- Select Menu > Settings > Security settings > PIN protection > On. Input PIN message pops up. Enter the PIN. Select OK. After this is set, every time you power on the phone, you will be requested to enter the PIN. If the PIN code is wrong you cannot access the phone.
Select Menu > Settings > Security settings > PIN protection > On. Enter the password.
Change PIN
To change the PIN code select Menu > Settings > Security settings > Change PIN. You can change codes for PIN.
Change PIN2
To change the PIN code select Menu > Settings > Security settings > Change PIN2. You can change codes for PIN2.
Phonelock Mode
In the phonelock mode, the phone can be unlocked only by entering a password. To enter the phonelock password, select Menu > Settings > Security settings > Phone lock. Enter the default phone lock password, to
Lock the phone. Enter the password again to unlock the phone.

The default password for phone lock is 1234.
If the phone lock is enabled, you will be requested to enter the password whenever you power on the phone. To change the phone lock password, select Menu > Settings > Security settings > Change phone lock password. Enter the old password and the new password and select OK.
Safeguard
You can set a password and prevent unauthorized usage of keypad, messages, phonebook, call history, browser, modify autostart, modify phonebook, restore factory settings, restrict calls options, and my files of your phone. To use this application, do the following:
- Select Menu > Settings > Security settings > Safeguard > On. Input password message pops up. Enter the password. Select OK. After this is set, every time the particular option for which safeguard is set is accessed, you will be requested to enter the password. If the password is wrong, you cannot access the phone.
- To activate the safeguard protection for accessing the messages, phonebook, call history, my files, keypad, modify autostart, modify phonebook, restore factory settings, and restrict calls options in your phone, select Menu > Settings > Security settings > Safeguard > On. Select Activation and select the required option to be protected.
- To change the safeguard password, select Menu > Settings > Security settings > Safeguard
Change safeguard password. Enter the old password and the new password. Re-enter the new password for confirmation and select OK.

The default password for safeguard is 1234.
Certificate Manager
You can view, edit key usages, and delete authorized certificates and user certificates.
Select to reset the settings to the original factory settings. Please note that this can remove changes you have made to your settings.
To restore the factory settings, select Menu > Settings > Restore factory settings > Master setting.

The default password for restoring factory settings is 1234 or your phone lock password if it is changed.
You can access Bluetooth and data accounts.
Bluetooth
Bluetooth is a wireless connection that enables devices within short range to exchange information.
The Sonim XP5560 BOLT 2 IS is compliant with Bluetooth specification BT 3.0 supporting the following profiles: SPP, SAP, HFP, HSP, A2DP, AVRCP, DUN, PBAP, OPP, and FTP. This device can send images and audio files using Bluetooth connection.

There may be restrictions on using Bluetooth technology in some locations. Check with your local authorities or service providers.
Activate Bluetooth
Select Menu > Settings > Connectivity > Bluetooth > Power > On. Use the Menu key to toggle between on and off. When Bluetooth is activated, the Bluetooth icon is displayed on the home screen.
Deactivate Bluetooth
Select Menu > Settings > Connectivity > Bluetooth > Power > Off. Use the Menu key to toggle between on and off.
Pairing Devices
Pairing with Bluetooth Devices of Version V2.0 and below
- Select Menu > Settings > Connectivity > Bluetooth > Search new device.
- Select the device of your choice. Select Pair.
- Enter a passcode (for example, 0000). The same passcode must be entered for the other device also.
- Select OK.
- When the other device accepts your request, the message "Allow this device to connect automatically?" is displayed with options Yes and No.
If you select Yes, the other device can send any file via Bluetooth without your confirmation.
If you select No, the other device cannot send a file without your confirmation.
- Select Yes/No to enable/disable automatic connect in future.
- When the other device rejects your request, the message "Pairing Failed" is displayed on the screen.
Pairing with Bluetooth Devices of Version V2.1 and above
- Select Menu > Settings > Connectivity > Bluetooth > Search new device.
- Select the device of your choice. Select Pair. The message "Passcode matched?" pops up while pairing.
- Select OK.
- When the other device accepts your request, the message "Allow this device to connect automatically?" is displayed with options Yes and No.
- Select Yes/No to enable/disable automatic connect in future.
- When the other device rejects your request, the message "Pairing Failed" is displayed on the screen.

Prior to pairing the devices, ensure that the visibility settings for the pairing devices are activated. To activate the visibility settings, select Menu > Settings > Connectivity > Bluetooth > Settings > Visibility > On.

Do not pair with an unknown device for security reasons.
Connecting a Bluetooth Headset
You can connect a Bluetooth headset after pairing it with your phone.
- Select Menu > Settings > Connectivity > Bluetooth > My device.
- Select the paired Bluetooth headset.
- Select Options > Connect.
When the connection to the paired device is successful, the message "Handsfree Connected" is displayed on the screen.
When the connection to the paired device is unsuccessful, the message "Connection failed" is displayed on the screen.

For more details, refer to the user manual of the Bluetooth headset.
Rename Paired Device
- Select Menu > Settings > Connectivity > Bluetooth > My device.
- Select the paired device.
- Select Options > Rename.
- Enter the new name.
- Select OK.
Delete Paired Device
- Select Menu > Settings > Connectivity > Bluetooth > My device.
- Select the paired device.
- Select Options > Delete.

If you cancel the pairing with a device that is connected, pairing is removed and the connection is switched off immediately.
Bluetooth Settings
- Select Menu > Settings > Connectivity > Bluetooth > Settings.
- Edit the following details.
| Options | Description |
| Visibility Select On | to show your presence to other devices. Select Off to hide your presence from other devices. |
| My name Select this option to change the name of your device. | |
| Storage Select the storage location. | |
| Remote SIM Mode | Select this option to access the SIM card inserted in your phone using Bluetooth car kit. |
| Sharing Permissions | Select this option to provide full control or read-only permission to the other device connected to your device. |
About
You can view the device name, address and other support services.
Sending Data via Bluetooth
You can transfer files to another compatible device.
- Select Menu > My files.
- To send an image file, select Images > select the file OR To send an audio file, select Audio > select the file OR To send any other file, select Others > select the file.
- Select Options > Send > via Bluetooth.
- Select the paired device to which you want to send the file.

The My devices screen displays the paired devices. To send data to an unpaired device, select Search new device. Select the unpaired device of your choice. Enter the passcode when you are asked to enter it.
- When the other device accepts your file, the message Done is displayed on the screen.
- When the other device rejects the file, the message Unfinished is displayed on the screen.
Receiving Data via Bluetooth
To receive data using Bluetooth, your device should have Bluetooth activated and must be visible to other devices.
- When you receive data, you are asked if you want to accept it.
- Select Accept to receive data OR select Reject to refuse the data.
- If you accept, the data will be stored in My files > Images or Audio or Others.

Confirmation is required only if the Authorize option is set to Always Ask (Menu > Settings > Connectivity > Bluetooth > My device > Select the device > Options > Authorize). If Authorize is set to Always connect, user confirmation is not asked when receiving data from other Bluetooth devices.
Data Account
You can set the Network account and view the data connection information.
To set the data account, select Menu > Settings > Connectivity > Data account and create a new data account.
You can add, view, edit, and delete the accounts. You can edit the following information in the accounts: Account Name, APN, Username, Password, Authentication type, Advanced settings, MMSC/Homepage, Connection type, Use proxy, Proxy address, Proxy port, Proxy user name, Proxy password, Primary DNS, Secondary DNS, IP Address, and Subnet mask. Make the changes and select OK. Then Add new packet data account will pop up, select Yes.

Default data account Browser APN, MMS APN, and PTT cannot be edited or deleted.
Java Settings
To use the applications requiring internet service, the Java must be set.
Select Menu > Settings > Connectivity > Java Settings. Select the required data account and save.
USB Function
Phone can be connected to PC as a Mass storage using USB cable. When the phone is connected to the computer via a USB cable, the following two options are displayed:
- Mass storage: Select this to use the USB cable as mass storage device to transfer and synchronize data between the Sonim XP5560 BOLT 2 IS phone and your computer. • COM port: Select this to use the phone with
PC-Sync software.
 | When the phone is connected to the computer via USB cable, you can select only to charge the phone by pressing the Back button. You need not select the Mass storage or COM port option. |
 | When the phone is connected to the computer via USB cable in Mass Storage mode and the memory card is also present in the phone, the memory card and the phone memory are displayed as two separate drives in the computer. |
 | When the phone is connected to the computer as mass storage, you cannot access the My files menu in the phone. To access the My files menu, disconnect the phone from the computer and reconnect in COM port mode. |
 | When you are logged in to PTT, you cannot access Mass storage as it will not be recognized and the message “Currently not available” will pop up. |
Using the My files, you can store and manage audio, video files, image files, .jar files, .jad files, and .txt files. You can preview the files, view their details, and delete files. The internal storage capacity is approximately 99 MB.
- To view your files select Menu > My files > select Phone/Memory card > Options > Open.
- Scroll to a category and select one of the categories: Audio, Images, Java, Others, or Videos and select OK.
- For pictures, select the images stored in the Phone memory/memory card.
- For sounds, select the audio files stored in the Phone memory/memory card.
- Scroll to file from the displayed list and select Options to display further options.
For an image file, the following options are present.
| Options Function | |
| View View | the image in full screen mode. |
| Edit Resize | the image or edit the image to add photo effects, adjust contrast and brightness, flip and rotate the images. |
| Send Send | the image to any phone as a multimedia message, E-mail or via Bluetooth. |
| Use as Use | the image as wallpaper, screen saver, power On/Off display and caller picture. |
| New folder | Create a new folder. |
| Rename Rename the image. | |
| Delete Delete the image. | |
| Sort by Sort the images by name, type, time, and size. | |
| Mark several | Select all the images or select one by one. |
| Copy Copy a file to different folder. | |
| Move Move a file to different folder. | |
| Delete all files | Delete all the images. |
| Details View the creation date, size, and copyright details of the file. | |
| Edit option will not be present for some images. |
For an audio file, the following options are present.
| Options Function | |
| Play Play the audio file. | |
| Send | Send the audio file to any phone as multimedia message, as an E-mail, or via Bluetooth. |
| Use as Use | the audio as ring tone for incoming call. |
| New folder | Create a new folder. |
| Rename | Rename a file. |
| Delete | Delete the audio file. |
| Sort by Sort | the audio files by name, type, time, or size. |
| Mark several | Select all the audio files or select one by one. |
| Copy You can copy a file to different folder. | |
| Move You can move a file to different folder. | |
| Delete all files | You can delete all the audio files. |
| Details You can view the creation date, size, and copyright details of the file. | |
You can use the phonebook to maintain phone numbers of your contacts. This feature enables you to add, delete, dial phone numbers, send SMS and MMS messages. To access the contacts, select Menu > Phonebook. The contacts are displayed.
You can also view PTT contacts and PTT groups from your phonebook.
You can use the volume keys to scroll through the contacts.

You cannot add, delete or edit PTT contacts and PTT groups from native phonebook.
Add a New Contact
- To add a new contact, select Menu > Phonebook > Options > Add new contact. Select SIM or phone and enter the name and phone number. Press Menu key to save and select Save.
- Alternatively, you can directly enter a number and select Options > Save to Phonebook > Add new contact. Select SIM or phone and enter the name and phone number. Press Menu key to save and select Save.
- You can also add a contact from Call history (refer "Managing Call History" on page 31) and Write message menu (refer "Write Message" on page 53).
The new number is updated in the Contacts list.

If Phone is selected as the storage location, then the user can add many details apart from the name and phone number. The user can add a maximum of 1000 contacts.
View the Contact Details
On the home screen, select Menu > Phonebook. Select the contact. Select Options > View or press the Menu key.
Sending a Message from Contacts
You can send SMS and MMS messages to the contacts.
Sending SMS
- On the home screen, select Menu > Phonebook. Select the contact.
- Select Options > Send message.
- Enter the message and select Options > Send to. Select additional recipients, if any.
- Select Options > Send, to send the message.
Sending MMS
- On the home screen, select Menu > Phonebook. Select the contact.
- Select Options > Send message > Options > Switch to MMS.
- Enter the message and select Options. You can add the required picture, sound, video, subject, and slides to the message. Select the required file.
- Select Options > Send to. Select additional
recipients, if any.
- Select Options > Send, to send the message.
Dialing a Number from Contacts
On the home screen, select Menu > Phonebook. Select the contact. Select Options > Call or press the call key.
Edit the Contact Details
You can enter or edit the contact details. On the home screen, select Menu > Phonebook. Select the contact. Select Options > Edit.
Delete Contact
To delete a contact, select Menu > Phonebook. Select the contact and select Options > Delete > A message appears Delete? Select Yes to delete.
Copy Numbers between Phone and SIM
- To copy a selected number from SIM card to Phone memory, select Menu > Phonebook > Options> Copy > To phone. Select OK.
- To copy a selected number from Phone memory to SIM card, select Menu > Phonebook > Options > Copy > To SIM. Select OK.
- To copy a selected number from SIM card or Phone memory to a file, select Menu > Phonebook > Options > Copy > To file. Select OK.
Move Numbers between Phone and SIM
To move a selected number from SIM card to Phone memory or Phone memory to SIM card, select Menu
Phonebook > Options > Move. Select OK. Moved records are deleted from the source location.

When the contact details are moved from Phone to SIM, only the contact name and mobile number is saved in the SIM card.
Sending Contact
You can send contact information by SMS, MMS, e-mail or Bluetooth.
Send Contact by SMS
- Select Menu > Phonebook. Select the contact.
- Select Options > Send business card > As text message. Select additional recipients, if any.
- Select Options > Send to send the contact information.
Send Contact by MMS
- Select Menu > Phonebook. Select the contact.
- Select Options > Send business card > As MMS.
- Enter the message and select Options. You can add the required picture, sound, video, subject, and slides to the message. Select the required file.
- Select Options > Send to. Select additional recipients, if any.
- Select Options > Send, to send the contact information.
Send Contact by e-mail
- Select Menu > Phonebook. Select the contact.
- Select Options > Send business card > As Email. Enter the following details:
- To: You can enter the recipient's e-mail address.
- CC: You can enter the e-mail address of the recipient, to whom a copy of the e-mail has to be sent.
- BCC: You can enter the e-mail address of the recipient, to whom a blind copy of the e-mail has to be sent.
- Subject: You can enter the subject of the e-mail.
- Attachments: By default the selected contact details are attached. You can also include other attachments, if any.
- Priority: You can set the priority for the message.
- Select Done > A message appears displaying the size of the message > Select Yes to send the message.

You will not be able to send the contact by e-mail, if e-mail account is not configured. To configure the e-mail account, refer to "Configuring Email Accounts" on page 58.
Send Contact by Bluetooth
- Select Menu > Phonebook. Select the contact.
- Select Options > Send business card > Via Bluetooth.
- If Bluetooth is not on, the user will get a prompt to turn it on.
- Select the paired device to which you want to send the name card.
- If the device is not paired, select Search new device and then select the device.
- When the other device accepts the contact, a Done message will be displayed.
Selecting Multiple Contacts
To select multiple contacts, select Menu > Phonebook > Options > Mark several. To select the contacts, scroll to the required contacts and do one of the following:
- Select Options > Mark.
- Press the Menu key.
- Select Options > Mark all to select all the contacts in the phonebook. This option is displayed only if all the contacts are not selected. Once the contacts are marked, the following options are displayed:
| Options Function | |
| Unmark Unmark the | selected contact. |
| Make a PTT call Makes a Quick group Call to selected contacts. | |
| Send message Send | an SMS/MMS message to all the marked contacts. |
| Send business card | Send a business card to the marked contacts |
| Backup contacts Export | port the contact details of the marked contacts as UDX file. |
| Delete marked Delete | all the selected contacts. |
| Mark all Select all the | contacts in the phonebook. This option is displayed only if all the contacts are not selected. |
| Unmark all Unmark all | all the selected contacts. This option is displayed only if all the contacts are marked. |

You cannot add, edit, delete, send, copy, or move PTT contacts from the Phonebook menu.
Caller Groups
You can create a new group, add a new contact to the group, and manage the groups.
- To create a new group, select Menu > Phonebook > Options > Caller groups > Add new group. You can assign a name, ringtone, and picture for the group.
- To add a new contact to a group, select Menu > Phonebook. Select the contact. Select Options > Caller groups. Select a group. Select Options > View members > Options > Add members. The phonebook is displayed. Select the phone numbers to be added to the group.

Only the contacts stored in phone memory can be added to the group.
To manage a group, select Menu > Phonebook > Options > Caller groups. Select a group and then select Options. The following options are displayed.
| Options Function | |
| View members You | can view the contacts in the group. |
| Delete You can delete | the group. |
| Delete all You can delete | all the groups. |
| Send message You | can send an SMS/ MMS message to the contacts in the group. |
| Group settings You | can rename the group, assign a ring tone to the group, and add a picture to the group. |
Phonebook Settings
To view or define settings for your phonebook, select Menu > Phonebook > Options > Phonebook settings.
- Preferred storage: You can select either SIM or Phone or both as the default memory location to store the contacts.
- My number: You can manage your own information. The following sub-menus are present.
- Edit my number: Enter your name and other personal details such as Mobile number, Home number, Company name, Email address, Office number, and Fax number. Select OK and Save.
- Send my number: You can send your information to any number via SMS, MMS, e-mail and bluetooth.
- Delete: Delete the contact information.
- Extra Numbers: You can view some special purpose phone numbers. The following sub-menus are present.
- Owner numbers: Contains the number and name of the owner. You can edit or delete the information. • Service numbers: Contains the service numbers provided by the operator.
- Memory status: You can view the number of contacts stored in the SIM and mobile phone.
- Copy contacts: You can copy all the selected records from SIM card to phone memory and from phone memory to SIM card.
- Move contacts: You can move all the selected records from SIM card to phone memory and from phone memory to SIM card.
- Delete all contacts: You can delete all the contact records stored in the SIM card and phone memory.
Searching Contacts
- Select Menu > Phonebook.
- Type the contact name.
- The contact will be displayed.
Highlight the PTT contact and select Options, the following additional options are displayed:
- Send IPA: Send a IPA alert to the highlighted contact.
- Make a PTT call: Make a PTT call to the highlighted contact.
- Navigate to PTT (to group / contacts screen): Go back to the group/contacts screen.
- Navigate to PTT (to group / contacts screen): Go back to the group/contacts screen.
- The contact will be displayed.
SMS and MMS are convenient and inexpensive means of communication. You can send a text message to other people via SMS service. MMS allows you to send messages by including multimedia content such as pictures, audio files, video files, and so on.
You can use the Messages in your phone to send an SMS and MMS message to other mobile phones or any other equipment that can receive SMS and MMS.

The MMS feature is available only if you subscribe it from your network operator.
To access the messages function select Menu > Messages. The list of options are displayed.
Write Message
You can send SMS and MMS messages to contacts in your phonebook and to new numbers that are not present in the phonebook.
You can also send SMS and MMS messages to PTT contacts present in the PTT tab in your phonebook.
SMS Messages
- To create a SMS message select Menu > Messages > Write message.
- Enter the message in the text pane. The text input mode is displayed at the top left of the screen. Press and release # to select the appropriate text input mode.
- Enter the message and select Options. The following options are present:

When you add a multimedia attachment, the message is automatically converted to a multimedia message. MMS charges will apply, based on the operator.
| Options Function | |
| Send to You | can select recipients for the message. You can enter a new number or select from the Phonebook. |
| Insert symbol | You can select the required symbol to include in the message. |
| Input Method Options | You can set the input options to T9, add a new T9 word or enable auto completion and alphabetic prediction under Advanced Settings. |
| Edit options | You can mark the required text of a message, select Copy all to copy the complete text or Cut all to cut the complete message and paste at a desired location. |
| Add picture | You can add a picture to the message. |
| Add sound | You can add a sound to the message. You can also record a new sound using record sound option. |
| Add video | You can add a video to the message. |
| Add subject | You can add a subject to the message. |
| Slide options | You can set to display a slide either behind or before the message and set the slide display timings. |
| Switch to MMS | You can switch to MMS and send the message as a MMS. |
| Advanced You | You can use a message template stored in Templates folder.You can attach a file, contact details, and insert bookmarks. |
| Save to drafts | You can save the message as a draft in Draft folder. |
| Details You | can view the details of the message such as message type, subject, size, number of recipients, and attachment list. |
- Select Send to and select the recipients of the message.
- Select Options > Send, to send the message.

Instead of selecting Options, press the Menu key to quickly send the message to a number in Phonebook.
MMS Messages
- To write a MMS message select Menu > Messages > Write message.
- Enter the message in the text pane. The text input mode is displayed at the top left of the screen. Press and release # to select the appropriate text input
mode.
- Enter the message and select Options. The following options are present:

For sending multimedia messages, different charges will apply, based on the operator.
| Options Function | |
| Send to You | can select recipients for the message. You can enter a new number or select from the Phonebook. |
| Insert symbol | You can select the required symbol to include in the message. |
| Input Method Options | You can set the input options to T9, add a new T9 word or enable auto completion and alphabetic prediction under Advanced Settings. |
| Edit options | You can mark the required text of a message, select Copy all to copy the complete text or Cut all to cut the complete message and paste at a desired location. |
| Add picture | You can add a picture to the message. |
| Add sound | You can add a sound to the message. You can also record a new sound using record sound option. |
| Add video | You can add a video to the message. |
| Add subject | You can add a subject to the message. |
| Preview MMS | You can preview the message before sending. |
| Slide options | You can set to display a slide either behind or before the message and set the slide display timings. |
| Switch to SMS | You can switch to SMS and send the message as a SMS. |
| Advanced You can use a message template stored in Templates folder.You can attach a file, contact details, and insert bookmarks. | |
| Save to drafts | You can save the message as a draft in Draft folder. |
| Details You can view the details of the message such as from, message type, received date and storage for SMS messages and from, to, cc, number of recipients, subject, priority, type ,received date, size and storage for MMS messages. | |
- Select Options > Send to and select the recipients of the message.
- Select Options > Send, to send the message.

Instead of selecting Options, press the Menu key to quickly send the message to a number in Phonebook.
Manage Your Messages
The inbox, draft, outbox and sent folders display the number of stored messages in parenthesis.
Inbox
The Inbox stores and displays all the incoming SMS and MMS messages.
To access the Inbox, select Menu > Messages > Inbox. The Inbox displays a list of messages.
- Scroll to a message and select Options to view the following list of options.
• View: You can view the message. - Reply: You can send a text or multimedia message to the sender of that message.
- Call sender: You can call the sender of the message.
- Forward: You can send the message to another recipient.
- Delete: You can delete the message.
- Delete all: You can delete all the messages.
- Save to Phonebook: You can save the numbers to the phonebook.
- Sort by: You can sort the messages based on Sender, Subject, unread/read, Message size and Message type.
- Move to Archive: You can move the selected message to archive.
- Mark several: You can select multiple messages, one by one.
- Mark as unread: You can mark a message as unread.
- Advanced: You can copy and move messages from the phone memory to SIM card or from SIM card to phone memory.
- Details: You can view the details of the message such as from, message type, received date and storage for SMS messages and from, to, cc, Number of recipients, subject, priority, type received date, size and storage for MMS messages.
- To open a message, scroll to a message and press the Menu key.
- After a message is opened, other functions can be performed. Select Options to list the following options: Reply, Call sender, Forward, Delete, Edit options, Save as Template, Save to Phonebook, and also other Advanced options to use the number, URL, e-mail, USSD, copy or move the messages from phone memory to SIM card or from SIM card to phone memory.
Drafts
Messages that have been saved to be sent later are stored in Draft.
- To access unsent messages, select Menu > Messages > Drafts.
- Select Options to view the following list of options.
• View: You can view the message. - Send: You can send the message. - Edit: You can edit the message.
- Delete: You can delete the message.
- Delete all: You can delete all the messages.
- Sort by: You can sort the messages based on Recipient, Subject, Message size, and Message type.
- Mark several: You can select multiple messages, one by one.
- Advanced: You can copy and move messages from phone memory to SIM card or from SIM card to phone memory.
- Details: You can view the details of the multimedia or text message.
- Press the Menu key to view the message.
- Select Options > Send to send the message.
Outbox
Messages that were undelivered to the recipient due to some reason are stored in Outbox.
- To access undelivered messages, select Menu > Messages > Outbox.
- Select Options to view the following list of options.
• View: You can view the message. - Resend: You can resend the message. - Edit: You can edit the message. - Delete: You can delete the message. - Delete all: You can delete all the messages. - Sort by: You can sort the messages based on Recipient, Subject, Message size and Message
type.
- Mark several: You can select multiple messages, one by one.
- Advanced: You can copy and move messages from phone memory to SIM card or from SIM card to phone memory.
- Details: You can view the details of the multimedia or text message.
- Press the Menu key to view the message.
- Press Options > Resend to send the message.
Sent Messages
Messages that have been sent and delivered are stored in Sent.
- To access sent messages, select Menu > Messages > Sent.
- Select Options to view the following list of options.
• View: You can view the message. • Forward: You can send the message to another recipient. • Delete: You can delete the message. • Delete all: You can delete all the messages. • Sort by: You can sort the messages based on Recipient, Subject, Message size and Message type. • Move to Archive: You can move the selected message to archive. • Mark several: You can select multiple
messages, one by one.
- Advanced: You can copy and move messages to the phone memory.
- Details: You can view the details of the message such as message type, subject, size, number of recipients, and storage.
3. Press the Menu key to view the message.

The SMS messages are saved in Sent messages, only if it is activated in Messages > Message settings > Text message > Common settings > Save sent message.
The MMS messages are saved in Sent messages, only if it is activated in Messages > Message settings > Multimedia message > Common settings > Sending > Enable Send and save option.
Archive
You can save the received or sent messages in the archive folder. To archive a message, select Menu > Messages > Inbox/Sent Messages > select the message > select Move to Archive.
Email Messages
You can send, receive, and manage e-mail messages. To access, select Menu > Messages > Email.

The e-mail account has to be configured, created, and activated to access e-mail messages.
Configuring Email Accounts
You have to configure and create an e-mail account to access the e-mail functionality.
- To create an e-mail account: Menu > Messages > Email > A message appears: "Start to create account?" > Select Yes.
- Select the specific pre-defined e-mail service provider. For Gmail, Yahoo, and Hotmail, pre-configured settings are available. This can be accessed with just a user name and password.
- Enter the e-mail address and password, and select OK. If you get a certificate error while retrieving or sending e-mail, complete the procedure provided below and install the new certificate.
Installing a New Certificate
When the certificate for an account is not installed in the phone, you will get an error. You can install the required certificate using the following steps.
- In the certificate error screen, select Options or press the center Menu key.
The certificate installation screen to install the new certificate is displayed.
- Select Install > OK.
- Enter a certificate label name in the editor.
The certificate label is a unique user-defined name for the new certificate. You can enter any name to identify the certificate easily.
Example: yahooocert1
- Select Options > Done.
Certificate imported message is displayed, once the certificate is installed successfully.
If you want to create other Email accounts,
- Select Other Email accounts.
- Enter the e-mail address and select Options > Next.
- Select a protocol and select Options > Next.
- Select a data account and select Options > Next.
- Enter the incoming server address and select Options > Next.
- Enter the outgoing server address and select Options > Next.
- Enter the user name and select Options > Next.
- Enter the password and select Options > Next.
- Enter the account name (if it is not displayed) and select Options > Done. The e-mail account is saved.

Instead of selecting Options > Next, press the Menu key to quickly go to the next step.
Write Email
- To write an e-mail, select Menu > Messages > Email > Select the Email Account > Options > Write Email.
- Enter the following details:
- To: You can enter the recipient's e-mail address.
- Subject: You can enter the subject of the e-mail.
- Select Options to enter the following details:
- Edit: You can edit the subject or content.
- Address: You can enter the e-mail address of the recipient, to whom a copy or blind copy of the e-mail has to be sent.
- Add Attachments: You can also include attachments.
- Priority: You can set the priority for the message.
- Save to Drafts: You can save the e-mail to draft and send later. • Size: View the size of the mail.
- Exit: Exit without sending.
- Select Options > Send.
Email Inbox
The Inbox stores and displays all incoming messages.
- To access the inbox, select Menu > Messages > Email > Select the Email Account > Options > View > Inbox. The inbox displays a list of messages.
If you get a certificate error while retrieving or sending email, refer to "Installing New Certificate" on page 53, and install the new certificate.
- Scroll to a message and select Options to view the
list of inbox options.
- To open a message, scroll to a message and press the Menu key.
- To reply, select Options > Reply or press the Menu key. The reply screen with default sender, recipient, and subject details is displayed.
- Press the Menu key to edit the content section.
- Navigate to the beginning of the message to enter new content.
- Type the content and select Options > Done or press the Menu key.
- Select Options > Send to reply to the message.
Email Outbox
Messages that were undelivered to the recipient due to some reason are stored in Outbox.
- To access undelivered messages, select Menu > Messages > Email > Select the Email Account > Options > View > Outbox.
- Select Options to display the outbox options.
- Press the Menu key to view the message.
- Press Options > Send to send the message.
Email Sent
Messages that have been sent and delivered are stored in Sent.
- To access sent messages, select Menu > Messages > Email > Select the Email Account >
Options > View > Sent.
- Select Options to display the sent options.
- Press the Menu key to view the message.
Email Draft
Messages that have been saved to be sent later are stored in Drafts.
- To access unsent messages, select Menu > Messages > Email > Select the Email Account > Options > View > Draft.
- Select Options to view the draft options.
- Press the Menu key to view the message.
- Press Options > Edit to edit and send the message.
Broadcast Messages
Broadcast messages are sent by the network operator to all users connected to the mobile network. You can choose to receive broadcast messages. On the home screen, select Menu > Messages > Broadcast message.
- Receive mode: Select On to get information about the reception tower.
- Read message: Select this to read the message. • Languages: Select the required language.
- Channel settings: Select, add, edit, and delete channels.
Templates
When you send messages to contacts, you can use the predefined messages stored in the Templates folder. You can use a text message template for an SMS message and a multimedia message template for an MMS message. On the home screen, select Menu > Messages > Templates.
Message Settings
To view or define settings for your messages, select Menu > Messages > Message settings.
SMS Settings
Select Message settings > Text message to edit the following SMS settings:
- Profile settings: View and edit the profile name, SMSC address, and type of message.
- Voicemail Server: Configure the voicemail server.
- Common settings: Set the following options:
| Settings Function | |
| Save sent message | Save the sent messages. |
| Delivery report | Receive delivery report for sent messages. |
| Reply path | View the reply path for sent messages. |
- Memory status: View the number of messages stored in the SIM and mobile phone.
- Preferred Storage: You can select mobile phone or memory card as the storage location of messages.
When you send messages to contacts, you can use the
MMS Settings
Select Message settings > Multimedia message to edit the following MMS settings:
• Data Account: Select the MMS data account. - Common settings: Set the following options:
| Settings Function | |
| Compose You can set the slide time, creation mode, picture size and select to insert signature automatically. You can enter the text, picture, video, or sound for the signature. | |
| Sending You can set the validity period, activate to receive the delivery and read reports, priority, delivery time and save the sent message. | |
| Retrieval You can select to retrieve the message in home network or while roaming.You can also allow or reject anonymous mails and advertisements, You can send the read report and delivery report. | |
| Preferred storage | You can select phone or memory card as the storage location for messages. |
| Memory status | You can view the number of messages stored in phone and memory card. |

Pre-defined MMS Settings: You may find some pre-defined operator settings on the phone.
You can activate and modify various settings on your Sonim XP5560 BOLT 2 IS phone using Profiles.
On the home screen, select Menu > Settings > Phone settings > Profiles to display the options.
You can also access Profiles from Menu > Profiles.
You can customise the profiles to use features such as tone settings, ring volume, alert type, ring type and extra tone. There are six environment profiles present in this phone. General is the default profile, while the other profiles are Meeting, Outdoor, Silent, Flight mode and Headset.

You cannot change the parameters for the Silent mode.
- General: The default profile where all sounds are enabled. Parameters in this mode can be changed. Select Menu > Settings > Phone settings > Profiles > General > Options > Customize to open the Customize screen. You can use this screen to choose tone settings, ring volume, alert type, ring type or extra tone. Select Menu > Settings > Phone settings > Profiles > General > Options > Activate to activate this profile.
- Meeting: Here only the vibrate mode is enabled. Parameters in this mode can be changed. Select Menu > Settings > Phone settings > Profiles > Meeting > Customize to open the Customize screen. You can use this screen to choose tone settings, ring volume, alert type, ring type or extra tone. Select Menu > Settings > Phone settings > Profiles > Meeting > Activate to activate this profile. You can also press and hold the # key to activate the meeting mode from the home screen.
- Outdoor: Here both the vibrate and ring modes are enabled. Parameters in this mode can be changed. Select Menu > Settings > Phone settings > Profiles > Outdoors > Options > Customize to open the Customize screen. You can use this screen to choose tone settings, ring volume, alert type, ring type, or extra tone.
- Silent: Here all the alerts are on mute. Select Menu > Settings > Phone settings > Profiles > Silent > Activate to activate this profile.

Alarm tone will be played even in Silent profile.
- Flight mode: Select Menu > Settings > Phone settings > Profiles > Flight mode to open the Flight mode screen. Select Flight mode to activate this profile. In this mode, you cannot make or receive calls but can play Media player. You can deactivate the flight mode only by selecting Menu > Settings > Phone settings > Profiles > Flight mode > Normal mode.
- Headset: Headset mode is activated automatically when wired headset is inserted. User cannot change to other profiles except Flight mode when wired headset is inserted. Parameters in this mode can be changed. Select Menu > Settings > Phone settings > Profiles > Headset > Customize to open the Customize screen. You can use this screen to choose Tone settings, Volume, Alert type, Ring type or Extra tone.
Sound Settings
Select Menu > Settings > Phone settings > Profiles > General > Customize. Changing it affects the current set
profile. The following sound settings are displayed:
- Tone settings: You can set the tone for incoming calls, messages, and keypad.
- Volume: You can set the volume for ringtone and keytone.
- Alert Type: You can set the alert type for incoming calls and messages. You can select Ring only, Vibrate only, Vibrate and Ring, Vibrate then ring.
- Ring type: You can set the ringtype for your calls. You can select Repeat, Ascending or Beep once.

You can download and store ring tones over Bluetooth or WAP. The supported ringtone formats are MIDI, MP3, WAV, AAC and AMR.
- Extra tone: You can set tones for warning, error, and connect tone for calls.
This section contains miscellaneous features supported by the handset.
Calendar
The calendar enables you to set appointments, schedule reminders when required, set alerts and repeat specific settings. Tasks can be viewed on daily and weekly basis.
- To access the calendar and its associated functions, select Menu > Tools > Calendar. The calendar for the current month is displayed. Use the navigation keys to navigate across months.
- Select Options to view the list of options available.
• View: You can view the list of events for the day.
• View all: You can view all the events.
- Add event: You can enter a new event.
- Delete event: You can delete an event.
- Jump to date: You can go to a particular date and view the events for that date.
- Go to today: You can access the current date.
- Go to weekly view: You can view the list of events for the week.

When you are in weekly view, the option changes to Go to monthly view to view the calendar of the month.
Edit Events
Select Menu > Tools > Calendar > Options > View. Select the event. Select Options > Edit. Make the
changes. Select Done and Save.
Alarm
You can set alarm for a particular time. Select Menu > Tools > Alarm.
- To set a simple alarm, select Menu > Tools > Alarm > Edit > On. Enter the time and select Repeat > Once. Select Done.
- To set a recurrent alarm, select Menu > Tools > Alarm > Edit > On. Enter the time and select Repeat > Everyday or Custom. Using the Menu key, select the day and select Done.
- To set the alarm tone, select Menu > Tools > Alarm > Edit > Alarm tone > Tone. Select the alarm tone.
- To enable snooze, select Menu > Tools > Alarm > Edit > Snooze. Use the left and right arrow keys to set the time for snooze.

The alarm will work even if the phone is switched off or is in Silent mode.
Calculator
The calculator in this phone is designed to perform simple mathematical calculations.
- Select Menu > Tools > Calculator.
- To enter the numbers, press the numeric keys.
- To use mathematical operators, use the navigation keys.
| Navigation Key Operation | |
| Up + (Addition) | |
| Down - (Subtraction) | |
| Left * (Multiplication) | |
| Right / (Division) | |
- After performing the calculations, press the Menu key for the final result.
The following calculator options are also displayed.
| Options Function | |
| MC Clears | number from memory |
| MR Reads | the number from memory |
| M+ Adds a | number to the number in memory and stores the result in memory |
| M- Subtracts | a number to the number in memory and stores the result in memory |

This phone accepts numbers up to a maximum of 12 digits per entry.
Unit Converter
You can convert one type of physical unit to another type. Select Menu > Tools > Unit converter.
- Select the type of physical unit. Use the Right or Left navigation keys to scroll. For example, Weight from
Kg to Pound.
- Scroll down and enter the value in the Kg slot or Pound slot, for example, 10 Kg, and select OK.
- The Weight 10 Kg is converted to pounds and is displayed in the Pound slot.
You can select Unit converter > Currency converter to convert the currency based on rate. Enter the rate and then enter the local value of the currency. The equivalent foreign value of the currency is displayed.
World Clock
You can view the time of major cities in different time zones using this function. You also have the option to use Daylight Saving Time (DST).
The local time is displayed in the lower half of the screen.
- To view the international clock, select Menu > Tools > World clock.
- To view the time of different cities, select the required city using the navigation keys and the time is displayed.
- To set Daylight Saving Time (DST), select Menu > Tools > World clock > Options > Daylight saving time for foreign city > On.
- To set the home city, select Menu > Tools > World clock > select the home city and select Options > Set Home city.
Sound Recorder
Select Menu > Tools > Sound recorder.
- To record an audio file, select Options > New record.
- To temporarily stop the recording, select Pause.
- To continue with the recording, select Continue.
- To end the recording, select Stop. A message appears Save audio? > Select Yes. The recorded audio file is stored under My files. For more information refer "Managing Your Files" on page 46.
Audio Playback
The user can do instant playback of the recorded audio within the sound recorder. To listen to a recorded audio file, select Menu > Tools > Sound recorder > Options > List. You can also select Menu > My files > Open > Audio > Open to access the audio files.
Notes
Select Menu > Tools > Notes to store the required information.
Stopwatch
Select Menu > Tools > Stopwatch to start and stop the timer, as required.
Text Reader
Select Menu > Tools > Text reader to view and read the .txt files.
SIM Services
You can access certain services provided by the operator using this menu. This feature can be accessed via Menu > Tools > SIM services.
You can download more Java applications via WAP, Bluetooth, SD Card or Java Application Manager.
Data Account and Java Settings
To use the applications requiring internet service, the Java settings must be set.
Select Menu > Settings > Connectivity > Java Settings. Select the required data account and save.
Installing Java Application from WAP
Configure WAP as described in "WAP Browser" on page 68. Launch WAP. Browse to the http/WAP link where the file (.jar or .jad) is present. Select the file. The installation process begins. Once the application is installed successfully, it will be displayed in the Applications (Java box).
Installing Java Application from Memory Card
Select Menu > My files > Memory card. Select the file (.jar or .jad). The installation process begins. Once the application is installed successfully, it will be displayed in the Java box.

Some Java applications running in the foreground can be pushed to the background by pressing the key.
This phone is equipped with a browser that provides wireless connectivity and access to the Internet. This feature is available only if you subscribe to a data service from your network operator for Internet access. You need to consult your local operator for more details.

If you are unable to view WAP web pages because of change in WAP parameters or change in WAP web address or contents, please consult your network operator and Internet Content Provider (ICP) for updates.
Select Menu > Browser. The following submenus are displayed:
- Homepage: This is the page that is displayed first when you open the WAP browser.
- Bookmarks: Use this menu to add and manage your bookmarks and go directly to the corresponding web address. You can also edit or delete bookmarks via this menu.
- Input address: Enter a web address directly and browse.
- Last Web Address: View the last visited Web page.
- Recent Pages: View web pages which you have viewed previously. Click on them to open the pages.
- Stored pages: You can view the pages that are saved.
- Service messages: This is the inbox for WAP push messages.
- Settings: The following configurations can be set via this menu:
• Homepage: Set the homepage.
- Data Accounts: In this menu, existing accounts are listed on the display. Scroll to the required account and select OK.
- Browser options: You can clear cache, cookies and authentication information.
- Preferences: You can set the time out, select to display or not display images in the web pages and you can enable or disable the cookies and cache.
- Security settings: You can view the trusted certificates.
- Service message settings: You can decide whether or not to receive the push messages from operators and web portals. You can enable service loading.
- Restore browser settings: You can restore the browser to its original settings.

Pre-defined Browser Settings: You may find some pre-defined operator settings on the phone.
Activating Push-to-talk (PTT) Service

You can access PTT services only if you subscribe to PTT from your service provider.
When you switch ON the phone for the first time, you can activate your PTT service by:
- Simply pressing the PTT button (on the left side of the phone) OR selecting Menu > Push to talk > Select Yes to activate PTT service.
- Once registered, a "Login successful" message is displayed. A green icon is displayed at the top left corner of the home screen. The PTT service will retrieve PTT contacts and groups if they exist for your company or corporation.

Press and release the PTT button located on the left side of the phone to use PTT service.
PTT button is enabled by default. To disable PTT launch from the left side button, select Menu > Settings > Dedicated key > PTT Button > select Off. PTT button can be disabled only when PTT is logged out.
Login and Logout of the PTT Service
- To logout of the PTT service, select Menu > Push to talk > Options > Settings > Logout > Select Yes. Once you logout of the PTT service, [icon] is displayed.
- To login, select Menu > Push to talk > Select Yes. Once you login to the PTT service, [icon] is displayed at the top left corner of the home screen indicating your available status.
PTT Home Screen

- PTT history tab/Home tab
- Presence status
- Contacts tab
- Groups tab
- Favourite tab
PTT Overview
A PTT subscriber can have both public and corporate contacts. Public contacts are created on the phone. You can add up to 300 public contacts and 30 public groups, each containing 30 members.
The corporate administrator for the company stores the corporate contacts on the phone. You can add up to 1000 contacts and 100 corporate groups, each containing up to 100 members per group.

The maximum number of supported contacts depends on the software configuration.
You cannot edit or delete corporate contacts and groups. These are managed by the corporate administrator.
A PTT subscriber will be able to:
- Create groups with other public contacts.
- Create groups with a mix of public and corporate contacts.
- Rename public contacts, groups, or any group members.
- Delete public contacts.
- Delete any groups created by the PTT subscriber.
- Make PTT calls to public and corporate contacts.
- Initiate a PTT quick group call to public contacts.
- Initiate a PTT quick group call to a mix of corporate and public contacts.
- Initiate a PTT fixed group call to a mix of corporate and public contacts.
- Send alerts to public and corporate contacts.
- Add contacts and groups as favourites.
- Change availability status.
If a company has a corporate administrator, they can further restrict the PTT capability on the handset by making the profile as corporate only.
A corporate only subscriber will be able to:
• Make corporate PTT calls. - Initiate a corporate fixed PTT group call. - Initiate a PTT quick group call to other corporate contacts. - Change availability status. - Send alerts to other corporate contacts.
- Add contacts and groups as favourites.
- Log off. A corporate only subscriber will not be able to:
- Create any contacts or groups.
- Add group members to a group.
- Edit contacts or groups. The user can only add contacts and groups as favourites.
- Delete any contacts or groups and its members.
Disallowed Corporate Only Subscriber Rights
PTT Related Key Functions
PTT related keys present in your XP5560 phone are:
| Key Function | |
| PTT key • Displays the PTT home tab.• Initiate a PTT call.• Used for call control | |
| Volume keys | • Adjusts the volume during a PTT conversation.• Navigates up and down the PTT Contacts list. |
| LSK Activates | the menu options displayed at the bottom of the screen. |
| RSK • Sends | alert to a selected contact.• Toggles between favourite groups and contacts in Favourites tab. |
| Navigation keys | Scrolls horizontally or vertically to access a desired menu option. |
| Power on/Power off/End call key | Switch on/off the phone.Return to the home screen when the phone is in any other screen.Ends a PTT call. |
PTT Display Icons
The common PTT display icons are:
| Icon Description | |
 | Indicates that PTT is activated in your phone, but you are not logged in. |
 | Indicates you are logged-on to PTT service and is available to answer PTT calls. |
 | Indicates you are in Do not disturb mode. |
 | Indicates a new notification. |
Manage PTT Settings
To access the PTT Settings, press and release the PTT button or select Menu > Push to talk. The Home tab with call history is displayed. Select Options. The following options are displayed.
- My Status: Set one of the following options to indicate your online presence.
• Available - Indicates your online presence to
other contacts.
- Do not Disturb - Indicates that you are not available for calls.
- View History: View call/alert history specific to the selected contact.
- Search: Search for an entry in the home tab.
- Call: Make a PTT call to the selected contact.
- Send Alert: Send an alert to the selected contact.
- Delete: Delete the selected contact from the call history.
- Delete All: Delete all the calls and alerts from the call history.
- Settings: You can set the alerts, name, sort and so on.
- Help: View the help for specific functionality.
| Options Details | |
| Vibrate Alert Enable or disable vibrate mode for incoming PTT alerts. | |
| Audible Alert Enable or disable audible alerts for incoming PTT alerts. | |
| Alert Repeat Set | the incoming alert notification toOnce- The audible alert occurs once when the notification is displayed.Repeat- The audible alert occurs immediately, and every 20 seconds for up to 10 minutes, until user clears the notification.Continuous- The audible alert occurs immediately, and every 20 seconds until the user clears the notification. |
| Notification Control | Notifications for alerts and missed PTT calls. |
| Set Default PTT Tab | Set the default tab when the PTT button is pressed or PTT application is accessed.By default it is set to PTT Home or history tab.To set the default tab,From thePTT settings > Set Default PTT Tab, select one of the following tabs.HomeContactsGroupsFavourites |
| Sort Contact List | Sort the contacts based in alphabetical order or online presence. |
| PTT Tones Controls | PTS tone volume. By default the tones will be set at a volume level-03.To set this option, select PTT settings > PTT tones > PTT Alert tones or PTT In call tones, select the desired tone and set the volume level.Incoming call alert toneMissed call alert toneInstant personal alert toneFloor acquired toneFloor free toneFloor error tone |
| Headset setting for PTT tones | Reduces the loudness of the PTT tones and normalizes volume for a headset. By default the option is disabled. To edit this option, select PTT settings > Headset Settings for PTT TonesEnable - normalizes headset volumeDisable - switches to headset volume |
| Volume Increase | or decrease the call volume |
| Display Name Edit the existing login name . | |
| Show tutorial View the tutorial for specific functionality | |
| Capacity View the contacts, groups and favourites storage capacity. | |
| Mute incoming call | Mute the incoming call volume,When Phone silent - If native profile is set to silent or vibrate only, then the PTT audio and in call tones will be muted. (set by default on activating silent or vibrate only profile)Use App volume - On selecting this, PTT audio and in call tones are heard through the loudspeaker. |
| Auto start • Enable | - PTT will automatically login after the phone restarts.Disable – PTT login will not happen automatically. Once the phone restarts user has to press the PTT button (left side button) or select the PTT icon on the main menu for PTT application to login. If phone lock is enabled, then PTT login will not happen automatically until the user enters the correct phone password. |
| Use Bluetooth for Audio | Enable - On enabling this, the PTT media, in call tones and notification tones would be played through the BT accessory connected.Disable - On disabling this, the PTT media, in call tones and notification tones would be played through the phone loudspeaker even though BT accessory is connected. |
| Speaker phone default setting | Activates or deactivates the loudspeaker. By default loudspeaker is enabled. You can select one of the following options:Speakerphone off with incoming call vibrate alert - with an incoming PTT call, device will vibrate and audio will come over the earpiece.Speakerphone off with incoming call Vibrate/ audible alert - with an incoming PTT call, device will vibrate and provide an incoming call alert tone. Audio will come over the earpiece.Speakerphone on - loudspeaker is enabled. |
| Receive call in background | Always starts incoming PTT calls in the background. By default this option is disabled.To set this option, select PTT settings >Receive PTT call in Background and select one of the following optionsEnable- starts incoming PTT call in background.Disable- starts incoming PTT call in the main screen. |
| Restore Defaults | Restore PTT settings to factory default settings. |
| Reject Voice Call when PTT call in progress | Directs voice calls to voicemail or sends busy signal when the user is in a PTT call. By default this option is disabled.To set this option, select PTT settings >Reject voice call when PTT call in progressEnable- rejects voice call when the user is in an active PTT call.Disable- incoming voice call will barge in while on a PTT call. |
| About View the d | etails of the PTT application |
| Logout Logout of | PTT session. |
Managing PTT Calls
A user can make or receive a one-to-one call or one-to-many call (group call). Calls can be dialled directly, from the call history/home tab, from the PTT contact or group tab or from the favourite tab.
The PTT contacts/groups will also be displayed in the native phonebook and calls will appear in the call history.

You cannot call any recipient who is in Do not disturb or Offline status.

If a call has no response from both initiator and receiver, it is automatically disconnected after a short time interval.

For one-to-one calls, the terminated call will be considered by the client as a ‘Missed call’ if the receiver never speaks during the entire call.
Direct PTT Calls
To dial a PTT call directly:
- Enter the phone number of a contact using the dial pad on the home screen.
- Press and hold the PTT button.
- Continue to hold the PTT button to speak.
- Release the PTT button when you finish speaking.
- To end the call, press the End Call (RSK) key or the End key.
Calls from PTT History Tab
The PTT history tab is the home screen for PTT. It maintains logs of all outgoing PTT calls, received PTT calls, missed PTT calls, and alerts.
To access the PTT history screen, press and release the PTT button or select Menu > Push to talk.
You can also access PTT history from Menu > Calls > Call history.
You can make PTT calls from conversation history by scrolling to an entry in the list and pressing the PTT button.
You can also get more details by highlighting an entry and selecting Options > View history to see the call and alert records for the specific entry.
The Search screen is activated by touching a key on the dial pad.
Calls from PTT Contacts Tab
You can make a one-to-one call and quick group call from the PTT Contacts tab.
One-to-One Call
This is a simple PTT session where just one caller and one recipient are involved in the conversation.
- Press and release the PTT button or select Menu > Push to talk. Go to the Contacts tab to display the list of PTT Contacts.
- Scroll to the contact you want to call. Press and hold the PTT button. The screen displays PTT Private Call in progress.
- Continue to hold the PTT button to speak.
- Release the PTT button when you finish speaking.
- To end the call, press the End Call (RSK) key or the End key.
Quick Group Call
You can quickly make a single call to many contacts in the PTT Contacts list.
- Press and release the PTT button or select Menu > Push to talk. Go to the Contacts tab to display the list of PTT Contacts.
- Mark the required contacts you want to call. You can add up to 10 contacts to initiate a quick group call.
- Press and release the PTT button. You can also select Options > Call to initiate a quick group call.
- Continue to hold the PTT button while you are speaking. Release the PTT button when you finish speaking.
- To end the call, press the End Call (RSK) key or the End key.
Calls from PTT Group Tab
You can make a call to a group by going to the Groups tab and selecting a group.
- Press and release the PTT button or select Menu > Push to talk. Select the Groups tab to display the existing list of PTT groups.
- Scroll to the PTT group you want to call. Press and hold the PTT button to call the selected group. The
screen displays PTT Group Call.
- Continue to hold the PTT button while you are speaking.
- Release the PTT button when you finish speaking.
- To end the call, press End Call (RSK) key or End key.
Sending Alerts
You can send an alert to an individual to let them know that you want to speak to them. It is a great way of getting someone's attention in a more discreet way.
- Press and release the PTT button or select Menu > Push to talk. Select Contacts tab.
- Select a contact and press RSK Alert.
- The alert is sent to the contact.

A popup alert is displayed until you act on it, and an alert sound will be played every 20 seconds if the alert is set to repeat or continuous. Alert popup and alert sound depend on the respective settings.

You can send an alert only to individuals who are online. If your status is set to DND, you cannot send an alert.
Block Incoming PTT Calls
Press and release the PTT button or select Menu > Push to talk. Select Options > My Status > Do not disturb to block incoming calls from other PTT members.
A Do not disturb icon is displayed at the top of the screen indicating that the option is enabled. A presence icon is displayed next to the contact name in the PTT Contacts list of other contacts.
Manage PTT Contact List
To access the PTT Contacts, press and release the PTT button or select Menu > Push to talk. Select Contacts tab. The contacts tab contains the list of members whom you want to call or send alerts. Your contact list can be created or copied from your existing list of contacts in your phonebook.
Select a contact and select Options. By default the first contact is selected. The following options are displayed.

Some of the options may not be available depending on corporate account setup.
• View Details: View contact details for the selected contact. • View History: View call/alert history specific to the selected contact. - Search: Search for a contact or group entry. - Delete: Delete the selected contact from the Contacts. - Call: Dial a PTT call to the selected contact. - Personal Alert: Send an alert to the selected contact. - New Group: You can add a new group and also include a new member to the group. - Settings: You can edit PTT settings such as the
alerts, volume, and display name, and also logout of the PTT session. For more information refer, "Manage PTT Settings" on page 71.
- Help: View the help for specific functionality.
Add Contact
To add a new contact to the PTT Contacts list, do the following:
- Press and release the PTT button or select Menu > Push to talk. Select Contacts tab > New Contact.
- Select Manual to add the contact details manually or select Phone to select a contact from phonebook.
- Enter the Contact name and Contact number or select the specific contact from the phonebook.
- Select ON to add the contact to the Favourite Contacts list.
- Select Save. The contact is added to the PTT Contacts.
Contact Options
- Select a Contact in the Contacts tab and then select Options > View Details > Options to view the following Contact Options:

Some of the options will not be displayed for corporate contacts.
- Add/remove as Favourite: Add/remove the selected contact to/from Favourite Contacts.
- Call: Make a PTT call to the selected contact.
- Personal Alert: Send an alert to the selected contact.
For more information, refer to "Sending Alerts" on page 76.
- Edit: Edit the contact details.
- Delete: You can delete a selected contact from the Contacts list.
Manage PTT Groups
To access the PTT groups, press and release the PTT button or select Menu > Push to talk. Select the Groups tab. The Groups tab contains the list of groups with contacts whom you want to call.
Select a group and select Options. By default, the first group is selected. The following options are displayed:
• View Details: View details for the selected group. • View History: View call history specific to the selected group. • Search: Search for a group in the groups list. • Delete: Delete the selected group from the groups list. • Call: Dial a PTT call to the selected group. • Settings: You can edit PTT settings such as the alerts, volume, and display name, and also logout of the PTT session. For more information, refer to "Manage PTT Settings" on page 7.
• Help: View the help for specific functionality.
Add Group
To add a new group to the PTT groups list, do the following:
- Press and release the PTT button or select Menu > Push to talk. Select the Groups tab > New Group.
- Enter the Group name.
- Select ON to add the group to the Favourite Groups list.
- Select Add Members. Select members from PTT Contacts and select Add.
- Select Save. The new group is created.
Groups Options
- Select a Group in the Groups tab and then select Options > View Details > Options to view the following group Options:
- Call Group: Make a PTT call to the selected contact.
- Edit Group: Edit the group details.
- Delete Group: Delete a selected group from the Groups list.
- Rename Contact: Edit the selected contact name.
- Add/Remove as Favourite: Add or remove the selected group to/from Favourite Groups.
Manage PTT Favourite Contacts
To access the PTT Favourite contacts, press and release the PTT button or select Menu > Push to talk. Select the Favourites tab. The Favourite Contacts tab contains the list of PTT contacts added as favourites for easy access.

If Favourite Groups is displayed, press RSK to toggle to Favourite Contacts.
Select a Contact and select Options. By default the first contact is selected. The following options are displayed.
• View Details: View details for the selected contact. • View History: View call/alert history specific to the selected contact. - Search: Search for a contact in the favourite contacts list.
- New Favourite/group: Add a contact/group from PTT contacts to the Favourite contacts list.
- Remove Favourite: Delete a contact from the Favourite contacts list.
- Call: Dial a PTT call to the selected contact.
- Settings: You can edit PTT settings such as the alerts, volume, and display name, and also logout of the PTT session.
- Help: View the help for specific functionality.
Add Favourite Contact
To add a contact to the PTT favourite contacts list, do the following:
- Press and release the PTT button or select Menu > Push to talk. Select Favourite Contact tab > Add Contact.
- Select the contact from PTT contacts list.
- Select Save. The contact is added to the PTT Favourite Contacts.
Favourite Contact Options
- Select a Contact in the Favourite Contacts tab and then select Options > View Details > Options to view following Contact Options:
- Remove as Favourite: Remove the selected contact from Favourites Contacts.
- Call: Make a PTT call to the selected contact.
- Send Alert: Send an alert to the selected contact.
- Edit: Edit the contact details.
Manage PTT Favourite Groups
To access the PTT Favourite groups, press and release the PTT button or select Menu > Push to talk. Select Favourites tab. The Favourite Groups tab contains the list of PTT groups added as favourites for easy access.

If Favourite Contacts is displayed, press RSK to toggle to Favourite Groups.
Select a group and select Options. By default the first group is selected. The following options are displayed.
• View Details: View details for the selected group. • View History: View call history specific to the selected group. • Search: Search for a group in the groups list. • New Favourite: Add a group from PTT groups to the Favourite groups list. • Remove Favourite: Delete a group from the Favourite groups list.
- Call: Dial a PTT call to the selected group.
- Settings: You can edit PTT settings such as the alerts, volume, and display name, and also logout of the PTT session.
- Help: View the help for specific functionality.
Add Favourite Group
To add a group to the PTT Groups favourite list, do the following:
- Press and release the PTT button or select Menu > Push to talk. Select Favourite Group tab > Add Group.
- Select the group from the group list.
- Select Save. The group is added to the PTT Favourite Groups.
Favourite Group Options
- Select a Group in the Favourite Groups tab and then select Options > View Details > Options to view the following Contact Options:
- Call Group: Make a PTT call to the selected group.
- Edit Group: Edit the group details.
- Rename: Edit the selected contact name.
- Remove as Favourite: Remove the selected group from Favourite Groups.
Supervisory Override
If this feature is enabled by your corporate administrator, the user will be able to take floor even if the floor is
occupied. Supervisor icon (☐) will be displayed next to the user name when the supervisor takes floor.
Accessing Other Phone Features during Active PTT Call
You can make regular voice calls, access the browser, and send messages while in an active PTT session by pushing the PTT call to the background from the Options > Go back from the PTT call session screen.
When the PTT call is in the background, you can continue to use the PTT key for floor control. PTT call screens will not be displayed, and audio control will work as usual.
Vibration of Incoming Voice Calls
When a PTT call is in the receiving state and a GSM call is received, the phone will vibrate and PTT audio will continue to play.
Media Player
You can use the built-in media player to play audio and video files. To access the media player, select Menu > Multimedia > Media player. The following sub-menus are listed: Now Playing
You can view the audio/video files that are currently being played. You can pause, stop, play the previous song, or play the next song by using the navigation arrow keys. Select Options > Settings to display and set the following settings:
| Settings Function | |
| Player settings | Define the background display settings, shuffle the playlist, and song repeat sequence of the playlist. You can play the audio in background. A strip in the home screen indicates that audio is playing in background. You can also define the sound effects and Bass enhancement. |
| Audio settings | You can define the play speed of the audio. |
| Network settings | You can select and edit the network profile required for streaming audio files. |
My Playlists
You can view all the stored playlists. Select Options to display the following options:
- Open: You can open a playlist and select Options. The following options are displayed:
| Options Function | |
| Play Play a set | selected file. |
| Details View | the details of the file. |
| Move up Select | ect a file that is at the top of the list by moving up. This option is available only if there are more than one file. |
| Move down | Select a file that is at the bottom of the list by moving down. This option is available only if there are more than one file. |
| Add Include | a new file to the playlist. |
| Remove Remove | move a file from the playlist. |
| Send Send a | file as a multimedia message, E-mail, or via bluetooth to another user. |
| Use Use the | file as a ringtone. |
- New: You can add a new playlist.
- Delete all: You can delete all the playlists.
- Delete: You can delete a playlist.
- Rename: You can rename a playlist.
- Storage: You can store the playlist in phone/memory card (if present on the phone).

You can play .mp3, .wav, .amr, and .aac audio files. You can play MPEG and 3GP video files.
The following are a set of special shortcuts related to voice calls. Some of these features may require network support.
- Enter 0 followed by SEND - releases all held calls or sets User Determined User Busy (UDUB) for a waiting call.
- Enter 1 followed by SEND - Releases all active calls (if any exist) and accepts the other (held or waiting) call.
- Enter 1X followed by SEND - Releases a specific active call X.
- Enter 2 followed by SEND - Places all active calls (if any exists) on hold and accepts the other (held or waiting) call.
- Enter 2X followed by SEND - Places all active calls on hold except call X with which communication shall be supported.
- Enter 3 followed by SEND - Adds a held call to the conversation.
- Enter 4 followed by SEND - Connects two calls and disconnects the subscriber from both calls (ECT).
- Enter 4 * "Directory Number" followed by SEND - Redirects an incoming or a waiting call to the specified directory number.
- Enter 5 followed by SEND - Activates the completion of calls to busy subscriber request.
- Enter "Directory Number" followed by SEND - Places all active calls (if any exists) on hold and sets up a new call to the specified directory number.
- Enter END - Releases the subscriber from all calls (except a possible waiting call).
 | “X” is the numbering (starting with 1) of the call given by the sequence of setting up or receiving the calls (active, held or waiting) as seen by the served subscriber. Calls hold their number until they are released. New calls take the lowest available number. |
 | Where both a held and a waiting call exist, the above procedures shall apply to the waiting call (that is, not to the held call) in conflicting situation. |
You can increase the storage capacity by inserting an optional memory card into the slot inside the phone. You can perform the following functions on the memory card.
- Formatting of the memory card.
- Viewing memory details such as free space and total space.
- Storing user data.

The maximum capacity supported is up to 16 GB.
- Place the battery and turn the battery cover screws clockwise to lock the battery cover.

When the Sonim XP5560 BOLT 2 IS phone is connected to a computer in mass storage mode, the memory card is displayed as a separate drive in the computer.

When you are logged in to PTT, you cannot access Mass storage as it will not be recognized and the message “Currently not available” will pop up.
Inserting Memory card into the Phone
- Ensure the phone is switched off.
- Remove the battery by unscrewing it. For instructions refer "Inserting the Battery" on page 14.
- Slide and lift the silver clip over the designated slot located below the SIM card slot.

- Place the memory card in the designated slot and close the silver clip

Our Warranty
This wireless device, (the “Device”) contains software owned by Sonim Technologies, Inc. (“Sonim”) and its third party suppliers and licensors (collectively, the “Software”). As user of this Device, Sonim grants you a non- exclusive, non-transferable, non-assignable license to use the software solely in conjunction with the Device on which it is installed and/or delivered with. Nothing herein shall be construed as a sale of the Software to a user of this Device.
You shall not reproduce, modify, distribute, reverse engineer, decompile, otherwise alter or use any other means to discover the source code of the Software or any component of the Software. For avoidance of doubt, you are at all times entitled to transfer all rights and obligations to the Software to a third party, solely together with the Device with which you received the Software, provided always that such third party agrees in writing to be bound by these rules.
You are granted this license for a term of the life of this Device. If you fail to comply with any of the terms and conditions set out in this license, it will terminate with immediate effect. Sonim and its third party suppliers and licensors are the sole and exclusive owner of and retain all rights, title and interest in and to the Software. Sonim, and, to the extent that the Software contains material or code of a third party, such third party shall be entitled third party beneficiaries of these terms. The validity, construction and performance of this license shall be governed by the laws of Delaware, United States.
Comprehensive 3 Year Warranty
Sonim provides this Comprehensive three-year warranty for your mobile phone (hereinafter referred to as
"Product").
You may register your phone at www.sonimtech.com/register to receive further information about your product. Should your Product need service, please contact your service provider.
Our Warranty
Subject to the conditions of this Comprehensive 3-year Warranty, Sonim warrants this product to be free from major defects in design, material and workmanship at the time of its original purchase by a consumer, and for a subsequent period of three (3) years.
What We Will Do
If during the warranty period, this product fails to operate in accordance with its specifications under normal use and service, due to defects in design, material or workmanship, Sonim's authorized distributors or service partners, in the country/region where you purchased the product, will repair or replace at the sole discretion of Sonim, with the same or better model in the same or better condition as detailed below:
- If a device is out-of-warranty, then additional repair charges may apply;
- You will be advised of the charges in advance of any work being performed;
- You will have the option to approve the charges and have the repair performed, or you may choose to have your device returned to you unrepaired;
- Any repair charges will be billed to you through Sonim's Authorized Distributor.
Please note that some of your personal settings,
downloads or other information may be lost when your Sonim Product is repaired or replaced. Sonim does not take any responsibility for any lost information of any kind and will not reimburse you for any such loss.
You should always make backup copies of all the information stored on your Sonim Product such as downloads, calendar and contacts before handing in your Sonim Product for repair or replacement.
Phone Care
Each Sonim phone has a designated IP class for dust and water protection, according to the IEC Ingress Protection (IP) Standard 60529. This means that the phone is dust protected and can be submerged into 2 m deep water for up to 60 minutes. Immersion in deeper water can damage it and must be avoided.
Sonim phones are solid and built for heavy duty use. Its design protects against disassembly or mechanical damage when subjected to forces equal to free fall from the height of 2 meters. Subjecting the phone to stronger impact and forces can damage it and must be avoided.
Conditions
- The warranty is valid whether or not the product has been registered.
- The warranty is valid only if the original proof of purchase issued to the original purchaser by an authorized service provider, specifying the date of purchase and serial number for this Product, is presented with the Product to be repaired or replaced. Sonim reserves the right to refuse warranty service if the device is found to be out of warranty under the conditions as set forth herein.
- If Sonim repairs or replaces the Product, the repaired or replaced Product shall be warranted for the remaining time of the original warranty period or for ninety (90) days from the date of repair, whichever is longer. Repair or replacement may involve the use of functionally equivalent reconditioned units. Replaced parts or components will become the property of Sonim.
- This warranty does not cover any failure of the Product due to normal wear and tear, or due to misuse or abuse, including but not limited to use in other than the normal and customary manner, in accordance with the Sonim device specifications and instructions for use and maintenance of the Product. Nor does this warranty cover any failure of the Product due to software or hardware modification or adjustment, acts of God, or damage resulting from liquid interacting with the product beyond what is described as acceptable in the user guide for the product. A rechargeable battery can be charged and discharged hundreds of times. However, it will eventually wear out - this is not a defect. When the talk-time or standby time is noticeably shorter, it is time to replace your battery. Sonim recommends that you use only batteries and chargers approved by Sonim. Minor variations in display brightness and color may occur between phones. There may be tiny bright or dark dots on the display. These are called defective pixels and occur when individual dots have malfunctioned and cannot be adjusted. Up to three defective pixels are deemed acceptable.
- This warranty does not cover Product failures caused by installations, modifications, or repair or opening of the Product performed by any person other than a Sonim-authorized person. Tampering
with any of the seals on the Product will void the warranty.
- The warranty does not cover Product failures which have been caused by use of accessories or other peripheral devices which are not Sonim-branded original accessories intended for use with the Product.
- The 3-year warranty does not cover 3rd party accessories or any 3rd party software applications, which are instead covered to the extent provided by the original vendor guarantee for these products.
- THERE ARE NO EXPRESS WARRANTIES, WHETHER WRITTEN OR ORAL, OTHER THAN THIS PRINTED LIMITED WARRANTY. ALL IMPLIED WARRANTIES, INCLUDING WITHOUT LIMITATION THE IMPLIED WARRANTIES OF MERCHANTABILITY OR FITNESS FOR A PARTICULAR PURPOSE, ARE LIMITED TO THE DURATION OF THIS LIMITED WARRANTY. IN NO EVENT SHALL SONIM OR ITS LICENSORS BE LIABLE FOR INCIDENTAL OR CONSEQUENTIAL DAMAGES OF ANY NATURE WHATSOEVER, INCLUDING BUT NOT LIMITED TO LOST PROFITS OR COMMERCIAL LOSS; TO THE FULL EXTENT THOSE DAMAGES CAN BE DISCLAIMED BY LAW.
WARNING: Changes or modifications made to this equipment not expressly approved by Sonim Technologies, Inc. for compliance could void the user's authority to operate the equipment.
FCC Statement
Sonim Ex-Handy 08 Bell devices comply with part 15 of the FCC rules. Operation is subject to the following two conditions:
- This device may not cause harmful interference.
- This device must accept any interference received, including interference that may cause undesired operation.
This equipment has been tested and found to comply with the limits for a Class B digital device, pursuant to part 15 of the FCC Rules. These limits are designed to provide reasonable protection against harmful interference in a residential installation. This equipment generates, uses, and can radiate radio frequency energy and, if not installed and used in accordance with the instructions, may cause harmful interference to radio communications. However, there is no guarantee that interference will not occur in a particular installation. If this equipment does cause harmful interference to radio or television reception, which can be determined by turning the equipment off and on, the user is encouraged to try to correct the interference by one or more of the following measures:
- Reorient or relocate the receiving antenna.
- Increase the separation between the equipment and receiver.
- Connect the equipment into an outlet on a circuit different from that to which the receiver is connected.
- Consult the dealer or an experienced radio/TV technician for help.
IC Statement
The following is valid for the Sonim Ex-Handy 08 Bell devices:
- This Class B digital apparatus complies with Canadian ICES-003.
- This device complies with RSS-310 of Industry Canada. Operation is subject to the condition that this device does not cause harmful interference.
- This device must accept any interference, including interference that may cause undesired operation of the device.
A
Activating PTT service 69
Add a Favorite PTT Group 80
Add a new PTT contact 77, 79
Add a new PTT Group 78
Add new contact 48
Alarm clock 64
Audio
Playback 66
B
Battery
Charging indicator 15
Usage Information 14
Block Incoming PTT Calls 76
Bluetooth connectivity 42
Activation 42
Connecting headset 43
Deactivation 42
Deleting paired device 43
Device pairing 42
Renaming paired device 43
Sending data to paired device 44
Settings 43
Specifications 42
Supported Profiles 42
Bookmarks 68
C
Calendar 64
Editing events 64
Call accept/Send key 19
Call history/list 31
Call Restriction 34
Calls on hold/waiting 32
Clear key 19
Contact Options 77, 79, 80
Contacts
Add 48
Caller groups 51
Multiple contacts 50
My number 51
Phonebook settings 51
Search 52
Send message 48
View details 48
D
Direct PTT call 75
Display settings 36
E
E-mail 57
Configuring Email account 58
Draft 60
Inbox 59
Outbox 59
Sent 60
Write 58
F
Flight mode 62
H
Hardcoded Shortcuts 82
Homepage 68
|
International number dialling 31
J
Java
Installing Java Application From
Memory Card 67
Installing Java Application From
WAP 67
K
Keypad
Accept/Send 21
Back 21
Clear 21,65
End call 21
Function keys 17
LSK/RSK 21
Navigation keys 22
Power On/Off 21
L
Language Settings 36
Left Selection Key 19
Login and Logout of PTT Service 69
Lone Worker application 29
M
Memory card 83
Insert 83
Messages
Broadcast 60
Drafts 56
e-mail 55
Inbox 55
MMS 54
Outbox 56
Sent 57
Settings 60
SMS 53
Template 60
N
Network Connectivity 42
O
One-to-One PTT Call 75
P
Profiles 62, 63
Flight 62
General 62
Headset 62
Meeting 62
Outdoor 62
Silent 62
PTT call me alerts 76
PTT Calls 75
PTT conversation history 75
PTT Corporate only subscriber 70
PTT Group Call 76
PTT related key functions 70
PTT Settings 71
Q
Quick Group PTT Call 76
R
Recording a call 34
Restricting incoming calls 34
S
Security Settings 40
Send a PTT call me alert 76
Silent mode 62
Sound Recorder 66
Speed dial 37
T
Themes 36
Tools
Alarm clock 64
Calculator 64
Calendar 64
Notes 66
SIM card menu 66
Sound recorder 66
Stopwatch 66
Text reader 66
Unit converter 65
World clock 65
U
Unit converter 65
USB function 45
V
Voicemail
Server settings 60
W
WAP
Address 68
Service inbox 68
Settings 68
World clock 65
Write Messages 53
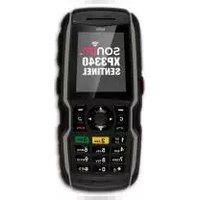
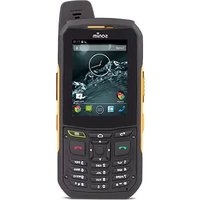
- DISPOSAL OF OLD ELECTRICAL AND ELECTRONIC EQUIPMENT
- DISPOSAL OF BATTERY
- GUIDELINE FOR HEADPHONE AND EARPHONE
- GENERAL INFORMATION
- YOUR SAFETY GUIDELINES
- GETTING STARTED WITH SONIM XP5560 BOLT 2 IS
- YOUR SONIM XP5560 BOLT 2 IS
- UNDERSTANDING LONE WORKER
- APPLICATION
- MANAGING CALLS
- MANAGING PHONE SETTINGS
- MANAGING NETWORK SETTINGS
- MANAGING SECURITY SETTINGS
- MANAGING CONNECTIVITY
- MANAGING YOUR FILES
- MANAGING CONTACTS
- MANAGING MESSAGES
- MANAGING PROFILES
- TOOLS
- APPLICATIONS
- WAP BROWSER
- MANAGING PUSH-TO-TALK SERVICES
- COMPREHENSIVE 3-YEAR WARRANTY
- PHONE MODELS COVERED
- NETWORK SERVICES
- SONIM SUPPORT INFORMATION
- USE THE GUIDE EFFECTIVELY
- OPTIONS COMMONLY USED ACROSS MENU ITEMS
- BATTERY PERFORMANCE
- BATTERY REPLACEMENT
- AVOID SHORT CIRCUIT
- AVOID HIGH TEMPERATURES
- BATTERY DISPOSAL
- PERSONAL MEDICAL DEVICES
- CHILD SAFETY
- EMERGENCY CALLS
- SAR INFORMATION
- SAR DATA INFORMATION FOR RESIDENTS IN THE UNITED STATES AND CANADA
- BATTERY USAGE
- WARNING
- INSERTING THE BATTERY
- REMOVING THE BATTERY
- CHARGING THE BATTERY
- INSERT CHARGER
- CONNECT TO PHONE
- CHARGING ANIMATION/ICON
- SET BATTERY ALERT
- YOUR SIM CARD
- INSERTING THE SIM CARD
- SWITCH OFF PHONE
- REMOVE BATTERY
- PLACE SIM CARD
- INSERT BATTERY
- REMOVING THE SIM CARD
- REMOVE SIM CARD
- PARTS OF THE SONIM XP5560 BOLT 2 IS PHONE
- SONIM XP5560 BOLT 2 IS KEYPAD
- SWITCHING ON
- HOME SCREEN
- KEY SHORTCUTS IN HOME SCREEN
- KEYPAD FUNCTIONS
- MAIN MENU
- HOME SCREEN INDICATORS
- KEY OPERATIONS WITHOUT YOUR SIM CARD
- MENUS ACCESSIBLE
- DISPLAY INDICATORS FOR LONE WORKER APPLICATION
- RAISING ALARMS
- LONE WORKER USAGE RECOMMENDATIONS
- DIAL A NUMBER
- DIAL AN INTERNATIONAL NUMBER
- DIAL A NUMBER VIA CONTACTS
- MAKING A PTT CALL FROM CONTACTS
- DIAL A NUMBER VIA THE CALL HISTORY
- MANAGING CALL HISTORY
- CALL TIMERS
- CALL SETTINGS
- AUTO ANSWER
- ANY KEY ANSWER
- CALL WAITING
- CALLER ID
- CALL FORWARDING
- CALL BARRING
- ADVANCED SETTINGS
- AUTO REDIAL
- CALL TIME REMINDER
- RECEIVE A CALL
- RECORD A CALL
- CALL RESTRICTIONS
- TIME AND DATE SETTINGS
- SCHEDULE POWER ON/OFF SETTINGS
- LANGUAGE SETTINGS
- DISPLAY SETTINGS
- CUSTOMIZING DEDICATED KEYS
- MANAGING SPEED DIAL NUMBERS
- POWER SAVING SETTINGS
- AUTO KEYPAD LOCK
- FIRMWARE DETAILS
- NETWORK SELECTION
- SERVICE SELECTION
- DATA CONNECTION
- DATA ACCOUNT
- A-GPS SETTINGS
- PIN PROTECTION
- CHANGE PIN
- PHONELOCK MODE
- SAFEGUARD
- CERTIFICATE MANAGER
- BLUETOOTH
- ACTIVATE BLUETOOTH
- DEACTIVATE BLUETOOTH
- PAIRING DEVICES
- PAIRING WITH BLUETOOTH DEVICES OF VERSION V2.1 AND ABOVE
- CONNECTING A BLUETOOTH HEADSET
- RENAME PAIRED DEVICE
- DELETE PAIRED DEVICE
- BLUETOOTH SETTINGS
- ABOUT
- SENDING DATA VIA BLUETOOTH
- RECEIVING DATA VIA BLUETOOTH
- JAVA SETTINGS
- USB FUNCTION
- ADD A NEW CONTACT
- VIEW THE CONTACT DETAILS
- SENDING A MESSAGE FROM CONTACTS
- SENDING SMS
- SENDING MMS
- DIALING A NUMBER FROM CONTACTS
- EDIT THE CONTACT DETAILS
- DELETE CONTACT
- COPY NUMBERS BETWEEN PHONE AND SIM
- MOVE NUMBERS BETWEEN PHONE AND SIM
- SENDING CONTACT
- SEND CONTACT BY SMS
- SEND CONTACT BY MMS
- SEND CONTACT BY E-MAIL
- SEND CONTACT BY BLUETOOTH
- SELECTING MULTIPLE CONTACTS
- CALLER GROUPS
- PHONEBOOK SETTINGS
- SEARCHING CONTACTS
- WRITE MESSAGE
- SMS MESSAGES
- MMS MESSAGES
- MANAGE YOUR MESSAGES
- INBOX
- DRAFTS
- OUTBOX
- TYPE
- SENT MESSAGES
- PRESS THE MENU KEY TO VIEW THE MESSAGE
- ARCHIVE
- EMAIL MESSAGES
- CONFIGURING EMAIL ACCOUNTS
- INSTALLING A NEW CERTIFICATE
- WRITE EMAIL
- EMAIL INBOX
- EMAIL OUTBOX
- EMAIL SENT
- EMAIL DRAFT
- BROADCAST MESSAGES
- TEMPLATES
- MESSAGE SETTINGS
- SMS SETTINGS
- MMS SETTINGS
- SOUND SETTINGS
- CALENDAR
- EDIT EVENTS
- ALARM
- CALCULATOR
- UNIT CONVERTER
- WORLD CLOCK
- SOUND RECORDER
- AUDIO PLAYBACK
- NOTES
- STOPWATCH
- TEXT READER
- SIM SERVICES
- DATA ACCOUNT AND JAVA SETTINGS
- INSTALLING JAVA APPLICATION FROM WAP
- INSTALLING JAVA APPLICATION FROM MEMORY CARD
- ACTIVATING PUSH-TO-TALK (PTT) SERVICE
- LOGIN AND LOGOUT OF THE PTT SERVICE
- PTT HOME SCREEN
- PTT OVERVIEW
- DISALLOWED CORPORATE ONLY SUBSCRIBER RIGHTS
- PTT RELATED KEY FUNCTIONS
- PTT DISPLAY ICONS
- MANAGE PTT SETTINGS
- MANAGING PTT CALLS
- DIRECT PTT CALLS
- CALLS FROM PTT HISTORY TAB
- CALLS FROM PTT CONTACTS TAB
- ONE-TO-ONE CALL
- QUICK GROUP CALL
- CALLS FROM PTT GROUP TAB
- SENDING ALERTS
- BLOCK INCOMING PTT CALLS
- MANAGE PTT CONTACT LIST
- ADD CONTACT
- CONTACT OPTIONS
- MANAGE PTT GROUPS
- ADD GROUP
- GROUPS OPTIONS
- MANAGE PTT FAVOURITE CONTACTS
- ADD FAVOURITE CONTACT
- FAVOURITE CONTACT OPTIONS
- MANAGE PTT FAVOURITE GROUPS
- ADD FAVOURITE GROUP
- FAVOURITE GROUP OPTIONS
- SUPERVISORY OVERRIDE
- ACCESSING OTHER PHONE FEATURES DURING ACTIVE PTT CALL
- VIBRATION OF INCOMING VOICE CALLS
- MEDIA PLAYER
- MY PLAYLISTS
- INSERTING MEMORY CARD INTO THE PHONE
- OUR WARRANTY
- COMPREHENSIVE 3 YEAR WARRANTY
- WHAT WE WILL DO
- PHONE CARE
- CONDITIONS
- FCC STATEMENT
- IC STATEMENT
- A
- B
- C
- D
- E
- F
- H
- J
- K
- L
- M
- N
- O
- P
- Q
- R
- S
- T
- U
- V
- W
Brand : SONIM
Model : XP5560 Bolt 2 IS
Category : Smartphone