
XP6 - Smartphone SONIM - Free user manual and instructions
Find the device manual for free XP6 SONIM in PDF.
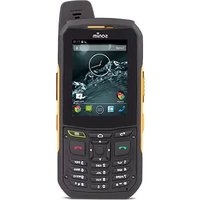


| Product Type | Smartphone |
| Brand | Sonim |
| Model | XP6 |
| Dimensions | Approximately 136 x 72 x 22 mm |
| Weight | Approximately 280 g |
| Display | 4.3-inch TFT LCD with Corning Gorilla Glass |
| Operating System | Android 5.1 Lollipop |
| Processor | Quad-core 1.3 GHz |
| RAM | 1 GB |
| Storage | 8 GB internal, expandable via microSD up to 128 GB |
| Camera (Rear) | 13 MP with autofocus and LED flash |
| Camera (Front) | 5 MP |
| Battery | Li-Ion 3400 mAh, non-removable |
| Charging | USB-C, supports fast charging |
| Connectivity | 4G LTE, Wi-Fi 802.11 a/b/g/n, Bluetooth 4.0, GPS, NFC |
| Water and Dust Resistance | IP68 (submersible up to 1.5 m for 30 min) |
| Drop Protection | MIL-STD-810G certified, withstands drops from 2 m |
| Audio | Speakerphone, 3.5 mm headphone jack, noise cancellation |
| Sensors | Accelerometer, proximity, light, compass |
| Cleaning | Wipe with a damp cloth; avoid abrasive cleaners |
| Safety | Do not expose to extreme heat; use only approved chargers |
| Spare Parts and Repairability | Battery replacement by authorized service only; screen available from Sonim |
Frequently Asked Questions - XP6 SONIM
User questions about XP6 SONIM
0 question about this device. Answer the ones you know or ask your own.
Ask a new question about this device
Download the instructions for your Smartphone in PDF format for free! Find your manual XP6 - SONIM and take your electronic device back in hand. On this page are published all the documents necessary for the use of your device. XP6 by SONIM.
USER MANUAL XP6 SONIM
Copyright © 2014 Sonim Technologies, Inc.
SONIM and the Sonim logo are trademarks of Sonim Technologies, Inc. Other company and product names may be trademarks or registered trademarks of the respective owners with whom they are associated.
Third Party Trademarks
Google, Android, Google Calendar, Google Now, Google Play and other marks are trademarks of Google Inc.
Disposal of Old Electrical and Electronic Equipment

This symbol indicates that within the countries in the European Union, this product, and any enhancements marked with this symbol, cannot be disposed as unsorted waste but must be taken to separate collection at their end-of-life.
Disposal of Battery

Please check local regulations for disposal of batteries. The battery should never be placed in municipal waste. Use a battery disposal facility if available.
Guideline for Headphone and Earphone

To prevent possible hearing damage, please do not listen at high volume levels for long periods.
General Information ---- 7
Phone Models Covered
Sonim Support Information
Use the Guide Effectively
Safety Guidelines ---- 9
SAR Information
Avoid High Temperatures
Battery Disposal
Personal Medical Devices
Child Safety
Emergency Calls
Battery Usage Guidelines
Battery Usage
Charging the Battery
Verifying and Optimizing Battery Usage
Tips to Extend the Battery Life
Getting Started
What Is In the Box?
Phone Specifications
Your SIM Card
Replacing the SIM Card
Your Sonim XP6
Switching On
Setting Up Your Phone
Enhanced Push-To-Talk (EPTT) Application Update
Setting up Google Touch Keyboard
Need for a Google+ Account
Touch and Type Operations
Managing Home Screen
Home Screen Indicators
Phone Operations Without SIM Card
Setting up and Using Lock Screen
Changing the Wallpaper
Taking a Screenshot
Voice Input for Text Entry
Text Entry Options
T9 Text Input Method
Keypad Functions
Managing Phone Settings---- 29
Time and Date Settings
Language and Input Settings
Mouse/Pointer Settings
Display Settings
Power Saving Settings
Connecting a Wireless Display Device
Connecting a PC Using USB Connection
Viewing Device Details
Managing Memory Utilized by Applications
Optimizing Memory Usage
Managing Wireless and Network
Connecting to Wi-Fi Network
Enhanced PTT Users Advanced Setting
Connecting to Bluetooth Devices
Optimizing Data Usage
Activating Airplane Mode
Setting Up Tethering & Portable Hotspot
Setting Up Wi-Fi Hotspot
Activating Bluetooth Tethering
Managing Mobile Network
Managing Emergency Alerts
Managing Phone Security Settings
About Android Security
Managing Security Settings
Locking your Screen
Encrypting Phone Data
Locking Your SIM Card
Managing Credential Certificates
Protecting your Phone from Harmful Applications
Managing Personal, Account and System
Settings----39
Location Access
Apps Accessing Your Location
Backup and Restore Data
Managing Accounts
Syncing Your Account
ManagingContacts----42
Add a New Contact
View the Contact Details
Sending a Message from Contacts
Dialing a Number from Contacts
Editing the Contact Details
Importing SIM Card Contacts to Phone
Exporting Phone Contacts to SIM Card
Exporting Phone Contacts to Storage
Managing Contact Settings
Managing Phonebook Settings
Searching Contacts
Deleting a Contact
Managing Calls ---- 45
Making a Call
Dialing a Number via People
Answering an Incoming Call
Adding a Contact from Phone Screen
Viewing All Contacts from Phone Screen
Viewing Call History
Deleting Call History
Deleting Frequently Called Contacts List
Managing Call Settings
Changing Ringtones and Master Volume
Editing Quick Responses
Activating Vibrate Mode
Activating Touch Tones
Changing to Loudspeaker Mode
Managing Fixed Dial Numbers
Monitoring Incoming and Outgoing Calls
Turn on proximity sensor
Setting TTY Mode
Call Forwarding
SIP Accounts
Use Internet Calling
Optimizing Power During a Call
Sending Messages ---- 50
Sending SMS/MMS Message
Managing Message Settings
Deleting Messages
Emergency Alerts
Setting Up E-mail Accounts
Sending an E-mail
Reading an E-mail
Using the Virtual Keyboard ---- 53
Enter and Edit Text
Gesture Typing
Use Gesture Typing without the space bar
Keyboard Dictionaries
Installing and Accessing Enhanced Push-To-Talk
Services----55
Launching EPTT Application
Activating EPTT Using Wi-Fi
Enhanced PTT Users Advanced Setting
Creating EPTT Contacts---- 59
Adding Contacts from Native Phonebook
Adding Contacts by Manual Input
Creating New EPTT Groups---- 62
Making EPTT Calls to Individuals and
Groups----63
Making a EPTT Call to an Individual
Making a EPTT Call to a Group
Making a Quick Group Call
Editing EPTT Contact
Deleting EPTT Contact
Editing EPTT Group
Deleting EPTT Group
Adding a Favorite Contact or Favorite Group
Group - - - - - - - - - 71
Adding a Favorite Contact
Adding a Favorite Group
EPTT Presence Status Change - - - - - - - - - 73
EPTT Presence Status Change
Managing Alerts - - - - - - - - - 75
Sending Personal Alert
Receiving Personal Alert
Missed Call Alert
EPTT History Screen - - - - - - - - - 77
Managing EPTT Settings - - - - - - - - - 79
Logout of EPTT Service----82
Installing and Using Android™
Applications----83
Google Play™ Store
Downloading Android Applications and Media Files
Managing Downloaded Application
Managing Downloaded Media Files
Accessing Gmail
Camera
Google Calendar™
Alarm
Clock
Calculator
Sound Recorder
Music Player
Google Search™ and Google Now™ — — — — — —
87
About Google Search™ and Google Now™
Activate Google Now
Use Google Now
Voice Search and Action
Voice Actions
End User License Agreement---- 88
License
Comprehensive 3 Year Warranty
Warranty Registration Application (Only available on
Smart phones)
Our Warranty
What We Will Do
Phone Care
Conditions
Accessories
Federal Communication Commission Interference
(FCC) Statement----92
FCC Statement
FOR PORTABLE DEVICE USAGE (<20cm from
body/SAR)
Index----94
3 COMPREHENSIVE 3-YEAR WARRANTY
- Please register your phone at www.sonimtech.com/register, to receive product information and updates. Sonim devices are covered by a 3-Year comprehensive warranty. The embedded battery is covered by a 1-Year limited warranty. For more information related to the warranty, please refer to the warranty section "Comprehensive 3 Year Warranty" on page 88.
Congratulations on the purchase of a Sonim XP6 mobile phone. This phone is an LTE smartphone enabled handset with quad-band capabilities and has an intuitive, feature-rich user interface, which allows you to make the best use of the offered functions.
Phone Models Covered
This user guide covers Sonim XP6 phone with the model number XP6700. The model name can be read on the phone label under the battery.
Sonim Support Information
For additional product and support information, visit www.sonimtech.com.
Use the Guide Effectively
Familiarize yourself with the terminology and symbols used in the guide to help you use your phone effectively.
| HOME SCREEN | This is the screen displayed when the phone is in idle condition or when you tap the Home icon ( ) on the keypad. |
| TOUCH & HOLD | Touch and hold an item on the screen by touching it and not lifting your finger until an action occurs. |
| DRAG Touch and hold an item for a moment and then, without lifting your finger, move your finger on the screen until you reach the target position. | |
| SWIPE OR SLIDE | Quickly move your finger across the surface of the screen, without pausing when you first touch. For example, you can slide a home screen left or right to view the other home screens. |
| DOUBLE TAP | Tap quickly twice on a map or other screen to zoom. For example, double-tap a location in the map to zoom in, and double-tap again to zoom out. |
 | Signifies a Note. |
Options Commonly Used across Menu Items
The following are common actions used across various menu items:
OK Confirms an action. Use the Center key to perform this function.
BACK Use this key to display the previous screen.
HOME Moves the current working application to the recent applications list/background and displays home screen.
RECENT Displays the thumbnails of the applications that you have worked on recently. To remove any application from this list, swipe the application to left or right.
Please read and understand the following safety guidelines before you use the phone. These guidelines provide details to enable you to operate your phone safely and conform to any legal requirements regarding the use of cellular phones.

Do not use the phone at a refueling point. Observe restrictions when using radio equipment at fuel depots, chemical plants or where blasting operations are in progress.
Electrical interference may obstruct the use of your phone. Observe restrictions in hospitals and near medical equipment.
Switch off your cellular phone when in an aircraft. Wireless phones can cause interference or danger to an aircraft. In an aircraft, the phone can be used in flight mode.
Do not expose the battery to high temperatures (in excess of 55°C).
Adhere to road safety laws. Do not hold/use a phone while you are driving; find a safe place to stop first. Use hands-free microphone while you are driving.
Avoid using the phone in close proximity to personal medical devices, such as pacemakers and hearing aids.
Use only Sonim XP6 approved charging equipment to charge your phone and avoid damage to your phone.
The symbol of the crossed-out wheeled bin indicates that this product, and any enhancements marked with this symbol, cannot be disposed as unsorted waste but must be taken to separate collection at their end-of-life.

Ensure that only qualified person install or repair your phone.
The Sonim XP6 is water-proof and can be submerged to 2 meters for 1 hour.
- Ensure to properly close the rubber cover of the charging connector and audio connector, to avoid deposits of water drops on these connectors, when the phone is immersed in water.
- Water droplets may condense under the display cover if the phone is immersed in water with significant drop in temperature. This does not indicate water leakage. The droplets disappear at room temperature.
The Sonim XP6 is dust-resistant, rugged and shock-resistant. However, it is not dust-proof or unbreakable if subjected to overwhelming impact. For best results and long product life, one should protect the Sonim XP6 from salt water, dust and strong impacts.
SAR Information
The Sonim XP6 has been certified in compliance with the Government's requirements for exposure to Radio Waves.
When communicating over the wireless network, the mobile phone emits via the radio frequency waves low levels of radio energy. The Specific Absorption Rate, or SAR, is the amount of RF energy absorbed by the body while using the phone and is expressed in watts/kilogram (W/kg).
Governments around the world have adopted comprehensive international safety guidelines, developed by scientific organizations, for example, ICNIRP (International Commission on Non-Ionizing Radiation Protection) and IEEE (The Institute of Electrical and Electronics Engineers Inc.). These guidelines establish permitted levels of radio wave exposure for the general population.
Tests for SAR are conducted using standardized methods with the phone transmitting at its highest certified power level in all used frequency bands.
SAR Data Information for residents in the United States and Canada
The limit recommended by ICNIRP is 1.6 W/kg averaged over one (1) gram of tissue.
The highest SAR value for the Sonim XP6700 phones when tested by Sonim for use:
- By the ear is 0.93 W/1g.
- Worn on the body is 1.29 W/1g provided that the phone is used with a non-metallic accessory with the handset at least 1 cm from the body, or with the original Sonim accessory intended for this phone
and worn on the body.
HAC Rating
The FCC has created a rating system for cellular phones regarding their HAC-related performance. This rating helps consumers with hearing disabilities to find phones that work well with their hearing aid devices. The HAC rating and measurement procedure are described in the American National Standards Institute (ANSI) C63.19:2011.
ANSI C63.19 contains two rating standards: an "M" rating from 1 to 4 for hearing aids operating in microphone mode, and a "T" rating from 1 to 4 for hearing aids operating in telecoil mode.
M-Rating stands for Microphone rating and indicates the amount of reduction of RF interference between the telephone and the hearing aid in acoustic coupling mode (also called microphone mode).
Phones rated M3 or M4 meet FCC requirements and generate less interference to hearing devices set in microphone mode. T-Rating stands for Telecoil rating and represents inductive coupling with hearing aids that are operating in telecoil mode. A telecoil is a small piece of tightly wrapped wire, built into some hearing aids. While the microphone of a hearing aid picks up all sounds, the telecoil only picks up an electromagnetic signal from the telephone. Thus, users of telecoil-equipped hearing aids are able to communicate over the telephone without the amplification of unwanted background noise.
Phones rated T3 or T4 meet FCC requirements and generate less interference to hearing devices set in telecoil mode.
A combination of M-rating and T-rating defines the final HAC rating and is a deciding factor in selecting
cellular phones for people with hearing problems. A HAC compliant phone could be rated:
These ratings assist hearing device users to find phones that are compatible with their hearing devices. Ratings are shown on the phone's box or label. The ratings are not guaranteed for suitability. The results vary depending on the individual's hearing loss and the immunity characteristics of the used hearing device, i.e. its resistance to interference. The best way to evaluate the suitability of the phone is to try it with the intended hearing aid device.
Sonim XP6 has been tested for hearing aid device compatibility and complies with the Federal Communications Commission (FCC) requirements. Sonim XP6 is rated M3/T4.
Avoid High Temperatures
Leaving the device in hot or cold places, such as in a closed car in summer or winter conditions, reduces the capacity and lifetime of the battery. For the best results, try to keep the device between -20°C and +55°C (-4°F and 131°F). A device with a hot or cold battery may not work temporarily, even when the battery is fully charged. Battery performance is particularly limited in temperatures well below freezing.
Battery Disposal
Do not dispose of batteries in a fire as they may explode. Batteries may also explode if damaged. Dispose of batteries according to local regulations and recycle when possible. Do not dispose as household waste. Do not dismantle, open or shred cells or batteries. In the event of a battery leak, do not allow the liquid to come in contact with the skin or eyes. In the event of leak or a hazard seek medical help immediately.
Personal Medical Devices
Mobile phones may affect the operation of cardiac pacemakers and other implanted equipment. Please avoid placing the mobile phone over the pacemaker, for example in your breast pocket. When using the mobile phone, place it at the ear opposite the pacemaker. If a minimum distance of 15 cm (6 inches) is kept between the mobile phone and the pacemaker, the risk of interference is limited. If you suspect that interference is taking place, immediately turn off your mobile phone. Contact your cardiologist for more information. For other medical devices, consult your physician and the manufacturer of the device. Comply with instructions to switch off the device or deactivate the RF transmitter when required, especially when posted in hospitals and aeroplanes. Equipment used in these places may be sensitive to radio waves emitted from the device and adversely affect their operation. Also, observe restrictions at gas stations or other areas with flammable atmosphere or when close to electro-explosive devices.
Child Safety
Do not allow children to play with your mobile phone or its accessories. Keep it out of their reach. They could hurt themselves or others, or could accidentally damage the mobile phone or accessories. Your mobile phone and its accessories may contain small parts, which could be
detached and create a choking hazard.
Emergency Calls
Mobile phones operate using radio signals, which cannot guarantee connection under all conditions. Therefore you should never rely solely upon any mobile phone for essential communications (e.g. medical emergencies). Emergency calls may not be possible in all areas, on all cellular networks, or when certain network services and/or mobile phone features are in use. Check with your local service provider.
To dial emergency calls, when the phone is not connected to any network, tap Emergency calls on the home screen. Dial the emergency call number provided by your service provider.
Battery Usage
Sonim XP6 phone comes with a built-in battery. For any battery related queries contact Sonim customer support.
Charging the Battery
We recommend that you charge your mobile phone for 4 hours before using for the first time.

There is a risk of explosion while charging if the battery has been replaced by an incorrect type.
1 Insert Charger
Insert the charger plug into a power outlet.
2 Connect to Phone
The charging port is located on the lower side of the phone, below the back cover. Insert the charger connector into the charging port.
3 Charging Animation/Icon
If the battery is being charged when the phone is switched off, a battery charging animation with the charged percentage is displayed. If the battery is being charged while the phone is switched on, the battery charge icon on the home screen shows an animation indicating that the battery is being charged. After the phone is fully charged, the charging animation stops and you can disconnect the charger from the phone.

Verifying and Optimizing Battery Usage
You can check the battery usage status and also close some applications to save battery power. On the home screen, select Settings ( ) > Device > Battery ( ).
The current battery charge status (charging or discharging) and the charge level details are displayed at the top of the screen.
The discharge graph at the top of the screen shows the battery level over time since you last charged the device, and how long you have been running on battery power.
The list at the bottom of the screen shows the breakdown of battery usage for individual apps and services. Touch a graph for more details. The details screen for some apps includes buttons that allow you to adjust settings affecting power usage, or stop the app completely.

If you stop some system apps or services such as Google service, your device may not work correctly.
Tips to Extend Battery Life
Follow these tips to extend your phone's battery life.
- If you are not using Wi-Fi, Bluetooth, or GPS, use the Settings to turn them off. The GPS setting is located in Settings > Personal > Location.
- Terminate or close Google Maps or Navigation apps to background when you are not using them. They use GPS (and thus more power) only when they're running.
- Set screen brightness to Auto and set a shorter Sleep timeout (1 minute). The display settings are located in Settings > Device > Display.
- If you are travelling and do not have access to mobile or Wi-Fi network, switch to Airplane mode: Press and hold the power switch until the Phone options dialog appears. Then touch Airplane Mode.
What Is In the Box?
The list of items in the Sonim XP6 phone box are:
- Sonim XP6 phone with rechargeable built-in battery
- Quick Start Guide • Factory Installed SIM Card
- USB Data Cable
- Multi-tool (for SIM removal)
- Wall charger
Phone Specifications
Feature Description
| Camera Rear camera - 5 MP (Auto focus) | |
| Memory 8 GB | |
| Wireless Wi-Fi | - 802.11 a/b/g/n/r with hotspot function(Max. 5 connections)Bluetooth 4 + LE |
| Connectivity Charger port name: 5pins water-proof magnetic USB2.03.5 mm headphone jack | |
| Battery 4800m | Ah (4 pins) embeddedStandby: up to 250 hoursTalk time: up to 10 hoursMusic playback: up to 40 hoursVideo playback: up to 8 hoursWeb browsing: up to 7 hours |
Feature Description
| Operating system | Android Kitkat (4.4.2) |
Your SIM Card
The SIM card associates your network services (for example, phone number, data services, and so on) with your phone.
Your Sonim XP6 comes with a SIM card installed at the factory. Please contact your operator to activate your SIM prior to use.
Replacing the SIM Card
- Remove screw A using the screwdriver in the multi-tool and remove the headset port cover.

- Remove screw B using the screwdriver in the multi-tool and remove SIM cover.

- Insert the pin into the pinhole and press inside. The SIM card tray will pop-up. Use the pin to hook into the loop on top of the SIM card tray and remove the tray completely.
- Insert the SIM card in the tray and return the tray into the slot by pushing it in, make sure the pinhole is aligned next to the headset port.
- Refix both the covers and screws in place using the screwdriver in the multi-tool.
* Multi-Tool


Sonim XP6 Phone

Switching On
Press and hold the Power ON/OFF key located in the top corner in the left hand side for 2 seconds to Power ON the phone.
When the phone is switched on, it tries to register with the network. After successful registration, the name of the service provider is displayed.

Ensure that a valid SIM card is inserted in your phone.
Setting Up Your Phone
For instructions on using your phone's buttons, charger, battery, and other hardware features, check the printed Quick Start Guide provided along with your phone.
When you power ON the phone for the first time, the Welcome screen is displayed.
• To choose the language, touch the Menu. - To set up your phone, touch Start and follow the instructions. - Make sure not to skip setting up your Google account or certain applications will not update properly.
Enhanced Push-To-Talk (EPTT) Application Update
Once set up is complete,
- Push the EPTT button ("EPTT" on page 18) to update the application from the Google Play Store.
- Select Update > Accept permissions > Press OK.
Once downloading is completed, press the EPTT button again to load the application. For further instructions, see "Launching EPTT Application" on page 55.
Setting up Google Touch Keyboard
A series of screens takes you through the setup process. Your XP6 default input method is set to T9. Refer to "T9 Text Input Method" on page 25.
Once you have completed the set up process and have already updated your EPTT application, if you wish to turn OFF T9 and use the Google touch keyboard, go to Settings > Language & Input > scroll down and tap Default > slide Hardware Physical Keyboard to the OFF position > check the Google Keyboard option > tap Default again > check English (US) Google Keyboard > uncheck T9 Text Input > tap Back or Home Key (to return to main settings or home screen).
The Settings menu will display a light gray check next to Google Keyboard. Please note that if you use the numeric keyboard to input while having the Google keyboard enabled, special characters, such as *, # and space bar can only be found by pressing the 1 key multiple times until you find the special character. Or use the touch screen for input of special characters.
If you already have a Gmail account, use your Gmail address and password or else, create a Gmail account.
If you want to, you can skip some of the setup steps such as mobile network configuration and Wi-Fi configuration during this setup process. Refer to the user guide to configure later.
Need for a Google+™ Account
Your Google Account lets you organize and access your personal information from any computer or mobile device:
- When you sign in to your phone with your Google account, all the contacts you associate with that account in the People app are automatically backed up. As a result, they are always accessible through your Gmail account from any computer. The contacts are also not lost.
- Synchronize and back up your e-mails, multimedia files, contact details and events created in your phone to your Google account. You can use the download backed up information to any other computer or mobile device when you login to the same Google account from that device.
- Protect your personal information as Google accounts are secure, accessible and password protected.
- You can use all the Google services such as Google Maps, Google Play™, Google Now™, Google+ and Chrome bookmarks with a single sign-on user name and password.
Touch and Type Operations
Sonim XP6 is a touch phone. You can use your fingers to manipulate icons, buttons, menus, and other items on the touchscreen. To select or activate a feature or application, touch it.
Other common touch gestures are:
- Touch & hold: Touch & hold an item on the screen by touching it and not lifting your finger until an action occurs.
Drag: Touch and hold an icon for a moment and then, without lifting your finger, move your finger on the screen until you reach the target position. For example, you can drag to reposition shortcuts on the Home screen.
- Drag: Touch and hold an icon for a moment and then, without lifting your finger, move your finger on the screen until you reach the target position. For example, you can drag to reposition shortcuts on the Home screen.
- Swipe or slide: Quickly move your finger across the surface of the screen, without pausing when you first touch (so you don't drag something instead). For example, you can slide a Home screen left or right to view the other Home screens.
Managing Home Screen
After you complete the phone setup, the home screen is displayed. The home screen is the starting point for accessing all the device's features. The home screen can have multiple panels. To move between the home panels, press the navigation keys.

The navigation keys are located below the display screen.
| Keys Description | |
 | Back - Opens the previous screens in the working sequence till the home screen is displayed. Once the home screen is displayed, it remains there even when you press the back key. |
 | Home - moves the current working application to the recent applications list/ background and displays home screen. |
 | Recent - displays the thumbnails of the applications that you have worked on recently. To remove any application from this list, swipe the application to left or right.Tap the Home key twice to view the recent applications list. |
The Application menu or grid is located above the navigation buttons on the home screen. The app icons you keep in the tray remain visible on every Home screen panel.
The Applications Tray (C) is always positioned in the center of the favorites tray. Touch it to view all the installed applications and widgets.
The Display icons at the top of the display screen provide details about various notifications such as missed calls, new messages, and E-mail messages.
- To view the notifications, swipe your finger down from the top of the screen to view the notification panel settings.
The System icons on the right display the current device status such as wireless and network connection strength, battery level, and time.
The Google Search bar, just below the status and system icons, lets you search your phone or the Internet. Touch the Google search bar to type your search terms, or to speak and give a voice input.
You can save folders, application, and widget icons in the middle of your home screen panel.
Adding an Application Icon to Home Screen

- On the home screen, tap App Tray (
- Swipe left or right to locate the application for which you require a shortcut on the home screen.
- Touch and hold the application icon and drag it to the home screen.
- To open an app, folder, or widget, touch its icon.
- To view other Home screens, swipe your finger quickly left or right.
Creating a Folder on the Home Screen
Folders help you to keep the icons in an organized fashion. To create folders,
- Touch and hold an icon on the home screen or Applications.
- Drag and position it on another icon that should be included in the same folder.
- Hold for about 2 seconds. Both the icons are grouped together in an unnamed folder.
- Tap the folder. Tap on the name area and give a suitable name.
Moving an Icon/Folder from the Home Screen
- Tap and hold the application icon and drag it to the new location.
- To move it to another panel, drag it to the side of the screen.
Removing an Icon/Folder from the Home Screen
- Tap and hold the application icon. A Remove icon is displayed on the top of the home screen.
- Drag the icon and position it on the Remove icon till it turns red.
- Drop the icon and it is deleted from the home screen.

Deleting an application icon from the home screen does not delete the application. You must go to the Applications panel and select the application to uninstall it.
Home Screen Indicators
The icons displayed at the top of the screen provide information about the status of the device. Details such as date and time, battery charge status, and data service and Wi-Fi connectivity are displayed when the phone is in standby mode. Other indicators such as Bluetooth
connectivity status, airplane mode, alarm, and call forwarding (only if Always forward is enabled) are displayed if the feature is activated.
| Icons Description | |
 | Battery level indicator |
 | Battery charging in progress |
 | No signal |
 | Signal strength |
 | No SIM card |
 | Roaming |
 | 4G LTE network connected |
 | HSPA or UMTS network connected |
 | GPRS network connected |
 | EDGE network connected |
 | Wi-Fi connected |
 | Bluetooth activated |
 | Call in progress |
 | Missed call |
 | New SMS or MMS |
 | Alarm activated |
 | Silent mode activated |
| Icons Description | |
 | Vibration mode activated |
 | Airplane mode activated |
 | Error/information notification - attention required |
 | Synced with the associated account such as Google |
 | Screenshot captured |
 | Music is played |
 | Device storage space is running out |
Phone Operations Without SIM Card
You can perform the following operations without inserting a SIM card in your phone.
• Make emergency calls. • View and modify all settings except Data usage and mobile network related settings. • Activate and share files through Bluetooth.
- Activate and access the Internet, and all your synced accounts using Wi-Fi connectivity.
- Access your phonebook, my files, multimedia files, all tools and applications. • View and modify your profile settings.
Setting up and Using Lock Screen
You must lock your phone to protect it from unauthorized access.
- From the Home screen or Notification Panel, tap Settings ( ).
- Scroll down and tap Security, located under Personal settings.
- Tap Screen lock and select one of the following options to configure the phone:
• None: Disables the phone lock. • Slide: When the phone is locked, press and hold the * key or swipe to unlock. • PIN: When enabled, enter your own PIN value. When the phone is locked, unlock it using the PIN. • Password: When enabled, enter your own password. When the phone is locked, unlock it using the password.
When the phone is locked, you can answer an incoming call without unlocking the phone. Touch the white phone icon and slide over one of these icons:
| Icons Description | |
 | To answer the call, either press green key on the keypad or swipe towards right on the touch screen. |
 | To reject the call, either press red key on the keypad or swipe towards left on the touch screen. |
 | Disconnect the call and respond with a default text message from a list of response text messages. |
Changing the Wallpaper
You can set an image or a photo stored in your phone as your home screen wallpaper. To change the wallpaper:
- Tap and hold on the Home screen. Home screen actions is displayed.
- Tap change wallpaper. Choose wallpaper from popup is displayed.
- Select from one of the following Wallpaper collections:
- Gallery: includes photos and screenshots taken using the phone's camera. • Live Wallpapers: includes animated wallpapers.
- Photos: includes photos taken from the phone camera and the photos from the Google account.
Wallpapers: includes images that are pre-bundled with the phone.
Taking a Screenshot
You can take the screenshot of the current screen and it is stored in your phone's gallery. To take a screenshot:
- Ensure that the image to be captured is displayed in the current screen.
- Press the Power and Volume down button simultaneously. The screenshot is captured and stored in the gallery. A screen Capture icon (☐) is also displayed on the home screen top bar.
Voice Input for Text Entry
You can use voice input to enter text by speaking. This feature uses Google's speech-recognition service. It is necessary to have a data connection on a mobile or Wi-Fi network to use it.
Text Entry Options
When you enter a text message, you can change the text entry options by pressing the # key. The current text entry options are displayed in the top bar.
The various text entry options are:
• ABC: Enter all the text in upper case. • Abc: Enter the first letter of the paragraph in upper case. • abc: Enter all the text in lower case. • 123: Enter the numbers. • T9ENG: Enter the text based on the T9 dictionary.
All the letters are in upper case (capitalized).
• T9eng: Enter the text based on the T9 dictionary. All the letters are in lower case.
T9 Text Input Method
Your device is defaulted to T9. However, if you changed to the Google Keyboard, to change back to T9, please follow these steps:
To turn T9 ON, go to Settings > Language & Input > scroll down and tap Default > slide Hardware Physical Keyboard to the ON position > Check T9 Text Input > Tap Default again > select T9 Text Input > tap the Back key to finish set up > tap Back or Home key (to return to main settings or home screen).


To Enter a Word:
- Start by pressing the numeric keys from 2 through 9 only once for the required letter.
Ex 1: To enter the word Good, press 4-6-6-3. The word displays on the screen as you type.
Ex 2: To enter the word Hello, press 4-3-5-5-6. The word displays on the screen as you type.
- If the word does not display correctly, press the right navigation key to scroll through alternative word choices. Press either the center navigation key or the 0 key to accept the word.
To Insert a Number:
- Press the key labeled with the number you want and use the navigation key to scroll to that number as above.
- Use the navigation key to scroll to that number as above.
- To insert a symbol, press and hold the numeric key 1 and use the navigation key to scroll and select a symbol.
You can switch between T9 and multi-tap text entry options by pressing the # key until your chosen entry method appears in the notification bar at the top of your phone display.
T9EN: Enter text based on the T9 dictionary. All letters are in uppercase (capitalized).
- T9En: Enter text based on the T9 dictionary. Only the first letter of the paragraph is in uppercase (capitalized).
- T9en: Enter text based on the T9 dictionary. All letters are in lowercase.
- T9en: Enter the text based on the T9 dictionary. All the letters are in lower case.

To quickly change the input method while typing in an application (like SMS or e-mail), slide down the notification panel, and tap Choose Input Method to select Google Keyboard.
The following table displays the various keys and the corresponding functions they perform:
The following table displays the various keys and the corresponding functions they perform:
| Keypad key Operations | |
 RED PHONE HANDLE/END CALL RED PHONE HANDLE/END CALL | Press to end a call.Press to return to home screen.Press to wake up display.Press to reject an incoming call. |
 CALL/ACCEPT/SEND CALL/ACCEPT/SEND | Press to answer an incoming call.After entering a phone number, press to make a call.Press while in Standby mode to access last received or dialed call list. |
 BACK BACK | Present above the Call accept key. Press this key to go back to the previous screen. You can press till you reach the Home screen. |
 MENU KEY (CENTER) MENU KEY (CENTER) | Press to perform a specific operation on a selected application. |
 NAVIGATION KEYS NAVIGATION KEYS | Press to navigate in up, down, left and right directions. |
| ALPHA-NUMERIC KEYS | Press the required keys (0-9) to enter the desired phone number and press t  make a call.Enter text while in the text editor. make a call.Enter text while in the text editor. |
| Press and hold in standby mode to access your Voicemail. | |
| Press and hold to display ‘+’ used for dialing an international number, while in standby mode.On editor screen, press 0 to get a blank space in T9 or normal mode. | |
| Press and hold to lock/unlock the keypad. | |
| Press and hold in standby mode to switch between Meeting on/off modes. To set from keypad, press # key to set the option Silent > Vibrate > General mode.When entering text, press to switch between lower case, upper case or numeric.Press and hold to enable/disable T9 mode.Press and hold to change the language, when entering text. | |
| Press and hold to turn on the Torch.Press again to turn it off. | |
| ALPHA-NUMERIC KEYS | Press the required keys (0-9) to enter the desired phone number and press to make a call.Enter text while in the text editor. |
| Press and hold in standby mode to access your Voicemail. | |
| Press and hold to display ‘+’ used for dialing an international number, while in standby mode.On editor screen, press 0 to get a blank space in T9 or normal mode. | |
| Press and hold to lock/unlock the keypad. | |
| Press and hold in standby mode to switch between Meeting on/off modes. To set from keypad, press # key to set the option Silent > Vibrate > General mode.When entering text, press to switch between lower case, upper case or numeric.Press and hold to enable/disable T9 mode.Press and hold to change the language, when entering text. | |
| Press and hold to turn on the Torch.Press again to turn it off. |
| ALPHA-NUMERIC KEYS | Press the required keys (0-9) to enter the desired phone number and press to make a call.Enter text while in the text editor. |
| Press and hold in standby mode to access your Voicemail. | |
| Press and hold to display ‘+’ used for dialing an international number, while in standby mode.On editor screen, press 0 to get a blank space in T9 or normal mode. | |
| Press and hold to lock/unlock the keypad. | |
| Press and hold in standby mode to switch between Meeting on/off modes. To set from keypad, press # key to set the option Silent > Vibrate > General mode.When entering text, press to switch between lower case, upper case or numeric.Press and hold to enable/disable T9 mode.Press and hold to change the language, when entering text. | |
| Press and hold to turn on the Torch.Press again to turn it off. |
| ALPHA-NUMERIC KEYS | Press the required keys (0-9) to enter the desired phone number and press to make a call.Enter text while in the text editor. |
| Press and hold in standby mode to access your Voicemail. | |
| Press and hold to display ‘+’ used for dialing an international number, while in standby mode.On editor screen, press 0 to get a blank space in T9 or normal mode. | |
| Press and hold to lock/unlock the keypad. | |
| Press and hold in standby mode to switch between Meeting on/off modes. To set from keypad, press # key to set the option Silent > Vibrate > General mode.When entering text, press to switch between lower case, upper case or numeric.Press and hold to enable/disable T9 mode.Press and hold to change the language, when entering text. | |
| Press and hold to turn on the Torch.Press again to turn it off. |
| ALPHA-NUMERIC KEYS | Press the required keys (0-9) to enter the desired phone number and press to make a call.Enter text while in the text editor. |
| Press and hold in standby mode to access your Voicemail. | |
| Press and hold to display ‘+’ used for dialing an international number, while in standby mode.On editor screen, press 0 to get a blank space in T9 or normal mode. | |
| Press and hold to lock/unlock the keypad. | |
| Press and hold in standby mode to switch between Meeting on/off modes. To set from keypad, press # key to set the option Silent > Vibrate > General mode.When entering text, press to switch between lower case, upper case or numeric.Press and hold to enable/disable T9 mode.Press and hold to change the language, when entering text. | |
| Press and hold to turn on the Torch.Press again to turn it off. |
| ALPHA-NUMERIC KEYS | Press the required keys (0-9) to enter the desired phone number and press to make a call.Enter text while in the text editor. |
| Press and hold in standby mode to access your Voicemail. | |
| Press and hold to display ‘+’ used for dialing an international number, while in standby mode.On editor screen, press 0 to get a blank space in T9 or normal mode. | |
| Press and hold to lock/unlock the keypad. | |
| Press and hold in standby mode to switch between Meeting on/off modes. To set from keypad, press # key to set the option Silent > Vibrate > General mode.When entering text, press to switch between lower case, upper case or numeric.Press and hold to enable/disable T9 mode.Press and hold to change the language, when entering text. | |
| Press and hold to turn on the Torch.Press again to turn it off. |
You can set and display the date and time on the phone. You can also select the display format.
You can set and display the date and time on the phone. You can also select the display format.
- From the Home screen or Apps Tray, tap Settings.

- Scroll down and tap Date & Time ( ) located under Personal settings.
- Select one of the following options to configure the phone:
- To synchronize the date and time with the network-provided time, enable Automatic date and time.
- To synchronize the time zone with the network-provided time, enable Automatic time zone.
- To set the date manually, tap Set date. Scroll and select the date, month, and year. Tap Done.
- To set the time manually, tap Select time. Scroll and select the hour and minute. Tap Done.
- To set the time zone, tap Select time zone. Scroll and select your time zone.
- To set the clock to 24-hour format, enable Use 24-hour format. By default, the phone is set to 24-hour format.
- To set your preferred date format, tap Choose date format. The date formats supported are Regional (the standard format supported by that country or region), MM/DD/YYYY, DD/MM/YYYY, YYYY/MM/DD with / as the date separator.
Language and Input Settings
You can set the phone's language to either US Spanish or English.
- From the Home screen or Apps Tray, tap Settings ( )
- Scroll down and tap Language & input ( ), located under Personal settings.
- Select English or Spanish as your preferred language.
All menu items, user feedback messages, and text entry language are displayed in the set language.
Spell Checker Settings
Enable Spell checker to verify and change spellings when you type your text message or mail.
Personal Dictionary Settings
The default keyboard input language is set to English (US)/Spanish (United States) - T9 format. This cannot be modified.
Speech Settings
- Tap Speech rate to set the speech input rate to a comfortable speed.
- Tap Text-to-speech output to access speech rate.
- Tap Listen to an example to verify the set speech rate.
- Tap Default language status to view the default language for speech input.
- Tap Text-to-speech output to access speech rate.
Mouse/Pointer Settings
Tap Pointer speed to set your phone's touch pointer sensitivity to a comfortable level.
Display Settings
- From the Home screen or Apps Tray, tap Settings

- Scroll down and tap Display, located under Device settings.
- Set one of the following options to configure your phone's display:
- Brightness: Set the brightness of the phone display. It is recommended to set to Auto so that the display brightness is adjusted automatically based on the brightness of the surroundings. This also optimizes the battery power consumed.
- Wallpaper: Set the wallpaper for your home screen. You can select from one of the following wallpaper collections:
- Gallery: includes photos and screenshots taken using the phone's camera. • Live Wallpapers: includes animated wallpapers.
- Photos: includes photos stored in your Google photos.
- Wallpapers: includes images that are pre-bundled with the phone.
- Sleep: Set the sleep time so that the screen brightness is turned down after specified time
of phone inactivity. This setting also optimizes the battery power.
- Daydream: Enable this to activate the screen saver after specified time of phone inactivity. You can set the screen saver to one of the following options. Tap the Settings icon (next to each option) to customize the screen saver.
- Clock: Displays the current system clock.
- Colors: Displays the seven colors of spectrum with various transition effects.
- Photo Frame: Displays the photos present in the gallery and screenshots as full screen images.
- Photo Table: Displays the photos present in the gallery and screenshots as assorted images.
- Google Photos: Displays a photo collage of Google + account.
- Font size: Set the font size of the text displayed on the screen.
Power Saving Settings
Viewing Battery Life
To view the battery life when all the apps are running,
- From the Home screen or Apps Tray, tap Settings ( ).
- Scroll down and tap Battery, located under Device settings.
The battery life and list of running applications is displayed.
Force Stopping an Application
- From the Home screen or Apps Tray, tap Settings.
- Scroll down and tap Apps, located under Device settings.
- Tap All to view all the applications.
- Tap the application to be force stopped.
- Tap Force stop to stop an application.


If you force stop an app, it may misbehave.
Reporting an Issue with Application
- From the Home screen or Apps Tray, tap Settings.
- Scroll down and tap Apps, located under Device settings.
- Tap Running to view all the running applications.
- Tap the application to be force stopped.
- Tap Report to report an issue.

Connecting a Wireless Display Device
You can utilize the wireless display feature and stream videos and audio to other displays that support cast screen feature. You can perform screen cast from your
phone either using a standard wireless router or even without it.
- From the Home screen or Apps Tray, tap Settings.
- Scroll down and tap Display, located under Device settings.

Connecting a PC Using USB Connection
You can connect your phone to a PC as a Media device (MTP) using a USB cable. When the phone is connected to the computer via a USB cable, the following two options are displayed:
• Media device (MTP): Select this to use the phone as a Media device (MTP) to transfer data such as music, pictures, and videos between your Sonim phone and your computer. • Camera (PTP): Select this to transfer photos and files that do not support MTP. This transfer method is commonly used for MAC.
USB Tethering
To perform USB Tethering:
Select Settings > More > Tethering and Portable Hotspot > Enable USB Tethering.
The user should activate mobile data or get connected to a Wi-Fi network.

When the phone is connected to the computer via USB cable, you can select only to charge the phone by pressing the Back button. You need not select the Media device (MTP) or Camera (PTP) option.

When the phone is connected to the computer via USB cable in Media device (MTP) mode, the phone memory is displayed on the computer.
Viewing Device Details
To view the device details such as system update status, model number, Android version, Kernel and baseband versions:
- From the Home screen or Apps Tray, tap Settings.

- Scroll down and tap About Phone, located under System settings.
Managing Memory Utilized by Applications
The Apps screen allows you to optimize memory usage for all the applications. To view these settings,
- From the Home or Apps Tray, tap Settings ( ).
- Scroll down and tap Apps, located under Device settings. The following tabs are displayed:
- Downloaded: Displays all applications downloaded on Google Play™ or other sources.
- Running: Displays all applications, processes, and services that are currently running or that
have cached processes, and the details about the RAM utilized by each application.
- The graph at the bottom of the Running tab shows the total RAM in use and the amount free. Touch SHOW CACHED PROCESSES or SHOW RUNNING SERVICES to switch back and forth.
- All: Displays all applications that are pre-bundled with Android and downloaded on Google Play™ or other sources.
Optimizing Memory Usage
You can optimize your phone's memory by performing the following tasks:
- Uninstall apps that are not required.
- Delete unwanted files that are downloaded or created.
- Transfer files that would be required later to your computer.
- Delete offline content from Google Play™ and stream it via a Wi-Fi or mobile network.
Connecting to Wi-Fi Network
Wi-Fi is a wireless network technology that can provide Internet access at distance up to 100 feet, depending on the Wi-Fi router and surroundings, when you connect your mobile device to the wireless router.
You can access the Internet when you connect your XP6 to a Wi-Fi network. To connect your phone to a Wi-Fi network:
- From the Home screen or Apps Tray, tap Settings.

- Enable Wi-Fi, located under Wireless & Networks settings.
- Tap Wi-Fi. A list of Wi-Fi routers present within your phone's accessible range are displayed.
- Tap your preferred network. Enter the WEP/WPS/WPA key (if it is a secured network) and tap Connect. To verify the password before connecting, enable Show password.

It is always recommended to make your Wi-Fi router secure and also to connect your phone to a secure network.
Adding a New Network
To add a new Wi-Fi network:
- In the Wi-Fi settings screen, tap Add Network button.
- Enter the following details:
• Network SSID: The wireless network ID. • Security: Set the security type to None, WEP, WPA/WPA2 PSK, 802.1x EAP.
- Enable Advanced Settings to set the Proxy details and IP settings.
Editing a Network
- Tap and hold your preferred network.
- Select Modify Network. The network setting details such as connection status, signal strength, connection speed, security type, IP address and password are displayed.
- Tap Save to save the settings or Cancel to exit to the previous screen.
Forgetting a Network
- Press and hold your preferred network.
- Select Forget Network. The selected network is removed from the list.
Enabling WPS For your Router
To setup a secure Wi-Fi network, press WPS Push button ( ) in the Wi-Fi network Settings and press the WPS button in your router, when prompted.
Enhanced PTT Users Advanced Setting
For EPTT users who do not have a data plan, an additional option allows you to not check for Internet access when connected to Wi-Fi.
Go to Settings > Wi-Fi > Tap Menu key > Advanced > uncheck the box marked Check internet access.
For more information on EPTT, see "FOR PORTABLE DEVICE USAGE (<20cm from body/SAR)" on page 93.
Connecting to Bluetooth Devices
Bluetooth is a short-range wireless communication technology used to communicate between devices over a distance of about 8 meters (26.25 ft).
You can perform the following tasks using Bluetooth paired devices:
- Transfer media files and contacts between mobile devices connected using Bluetooth.
- Access the Internet through a Bluetooth device that is connected to a Wi-Fi router.
- Use Bluetooth connected headphones for playing media files.
Pairing a Bluetooth Device
To activate Bluetooth and pair your XP6 phone with other Bluetooth devices:
- From the Home screen or Apps Tray, tap Settings (
- Enable Bluetooth located under Wireless & Networks settings.
A list of accessible Bluetooth devices is displayed.
Ensure that Bluetooth is activated in the other device too.
- Select and tap your preferred device.
- Confirm the pass key in the other device and tap Pair in your phone.
The device is displayed in the Paired device list.
Editing Bluetooth Device Settings
- Tap Settings icon ( ) located next to the preferred paired Bluetooth device.
- Tap Rename to rename the display name of the device.
- Tap Unpair to remove the device from your paired list.
- Enable Media Audio to connect the Bluetooth device for listening to media files.
- Enable Internet access to use the paired Bluetooth device to access the Internet.
Optimizing Data Usage
Data usage refers to the amount of data utilized by your phone during data transfers through the Internet. The data usage charges depend on the wireless plan provided by your service provider.
To monitor your data usage, adjust your data usage settings.
- From the Home screen or Apps Tray, tap Settings ( ).
- Enable Data Usage located under Data usage settings.
- Enable Mobile Data to access the Internet using your mobile network.
- Enable Set mobile data limit to preset your data usage limit and to set an alert before reaching the preset limit.
- Drag the red bar to set the Data usage limit.
Mobile data access is disconnected automatically as soon as you reach this limit. You cannot access the Internet and related phone features do not work. You receive a notification once you reach the set data usage limit.
- Drag the yellow bar to set data usage warning so that you receive an alert before reaching your set data usage limit.
Activating Airplane Mode
When your phone is set in airplane mode, network connectivity or mobile data connectivity is disabled. But you can access your camera, medial files and other features that do not require mobile connectivity. To activate airplane mode
- From the Home screen or Apps Tray, tap Settings
- Tap More located under Wireless & Networks settings.
- Enable Airplane mode.

Setting Up Tethering & Portable Hotspot
Using tethering and portable hotspot you can share your device's network connection with a computer or with up to other devices, via USB, Wi-Fi, or Bluetooth. To activate USB Tethering,
- Tap More located under Wireless & Networks settings.
- Tap Tethering & Portable hotspot.
- Enable USB tethering.
Setting Up Wi-Fi Hotspot
When you set up your phone as a Wi-Fi hotspot, you can connect other devices to this phone through Wi-Fi and access the Internet.
- Tap More located under Wireless & Networks settings.
- Tap Tethering & Portable hotspot.
- Tap Set up Wi-Fi Hotspot.
- Enter Network SSID, Security details and password and tap Save.
Activating Wi-Fi Hotspot
- From the Home screen or Apps Tray, tap Settings
- Tap More located under Wireless & Networks settings.
- Tap Tethering & Portable hotspot.

Activating Bluetooth Tethering
When you activate Bluetooth tethering, you can share your phone's Internet connection with other Bluetooth paired devices.
- Tap More located under Wireless & Networks settings.
- Tap Tethering & Portable hotspot.
- Enable Bluetooth tethering.
Managing Mobile Network
You can view and modify your mobile service provider settings.
To view and modify your mobile network settings,
- From the Home screen or Apps Tray, tap Settings ( ).
- Tap More located under Wireless & Networks settings.
- Tap Mobile network settings.
- Enable Data enabled to access the Internet using your mobile network.
- Enable Data roaming to have network connectivity when you are in a roaming network.
- Select the preferred Network type.
- Tap Access Point Names to view and edit the network access points. Tap Add network icon (+) to add a new access point.
- Tap Network operator to view and modify your network operator from the list of available networks.
Managing Emergency Alerts
You can activate emergency alerts to get emergency and important broadcast messages from your service provider.
- From the Home screen or Apps Tray, tap Settings ( ).
- Tap More located under Wireless & Networks settings.
- Tap Emergency Alert. Enable the emergency alert message types such as extreme threats, severe threats and amber alerts, that you would wish to receive.
- Enable Turn on notification to receive notifications when alerts are sent to your phone.
- Set the Alert reminder.
- Enable Turn on notification to receive notifications when alerts are sent to your phone.
- Set the Alert reminder.
About Android Security
Android provides a multi-layered approach to the security.
- Prevent: Apps on Google Play™ are scanned continuously to block harmful apps and policy violators. You can also choose to have apps installed from other sources verified.
- Control: App sandboxes prevent apps from accessing other parts of your device's operating system, or each other, unless you give permission during installation. Screen lock and encryption prevent unauthorized access to the entire device.
- Defend: Once identified, dangerous apps can be removed remotely.
For more information about protecting your phone, refer to the topics below.
Managing Security Settings
You can activate and protect your phone from unauthorized by configuring the security settings.
- From the Home screen or Apps Tray, tap Settings

- Tap Security located under Personal settings.
Enable and modify required security settings.
Locking your Screen
- Tap Screen lock and select one of the following options to configure phone:
• None: Disables the phone lock. - Slide: When the phone is locked slide to your
right or long press * key to unlock the phone.
- PIN: When enabled, enter your own PIN value. When the phone is locked, unlock it using the PIN.
- Password: When enabled, enter your own password. When the phone is locked, unlock it using the password.
When the phone is locked, you can answer an incoming call, without unlocking the phone. Touch the white phone icon and slide over one of these icons:
Icons Description
 | To answer the call, either press green key on the keypad or swipe towards right on the touch screen |
 | To reject the call, either press red key on the keypad or swipe towards left on the touch screen. |
 | Disconnect the call and respond with a quick response from a list of response text messages. |
- Check Enable Widgets to view the selected widget shortcuts in the lock screen.
- Enable Owner Info to display your specific owner info in the lock screen. You can modify this detail whenever required.
Encrypting Phone Data
You can encrypt your accounts, phone settings, downloaded applications, contacts, messages data and media files.
Tap Encrypt phone to encrypt your phone data. You require a numeric PIN or password to decrypt the data whenever you power ON the phone.
Encryption takes at least an hour depending on the amount of data to be encrypted. Hence, ensure that your phone is fully charged before you encrypt it.
If data encryption is interrupted, you might lose your phone data.
Locking Your SIM Card
You can activate and set a SIM lock to unlock your SIM, whenever you power ON the phone.
- Tap Settings > Security > Setup SIM/RUIM card lock.
- Enable Lock SIM card. To disable this option you must enter your SIM lock PIN.
- Tap Change SIM PIN. Enter the old pin and tap OK.
- Enter the new PIN and re-enter the same value when asked. Tap OK.
Managing Credential Certificates
You can view, install, verify and manage the certificates installed in your phone.
- Tap Trusted Credentials to view and verify the system and user certificates.
- Tap Install from Storage to view and install new user certificates.
Protecting your Phone from Harmful Applications
Some applications can harm your device. It is recommended to verify apps in order to help prevent harmful software from being installed on your device.
To prevent installation of applications from unknown sources, disable the option Unknown sources.
If you want to install applications from unknown sources, enable Verify apps under Settings > Security, to verify if the application is safe for installation.
Location Access
If you enable Location services, your location is displayed in all your accounts.
- From the Home screen or App Tray, tap on Settings ( ).
- Tap Location located under Personal settings. Enable and modify required security settings.
- Enable Location.
- Set the Location mode to one of the following options:
- High accuracy: uses AGPS, Wi-Fi, mobile networks, and other sensors to get the highest-accuracy location for your device. It uses Google location services to help estimate your location faster and more accurately.
- Battery saving: allows your device to estimate your location using low battery-intensive location sources, such as Wi-Fi and mobile networks. It uses Google location services to help estimate your location faster and more accurately.
- Device only: allows your device to estimate your location using GPS only. It uses the satellite information to provide location information. This mode may use more battery power and take longer to determine your location.
Apps Accessing Your Location
You can view and force stop the apps that are accessing or have recently accessed your location.
- In the Location screen, view the list of applications
that are accessing or recently accessed the Location data of your phone, under Recent location request.
- Tap an application to view the application page. You can stop the application or uninstall it. The following applications are system applications that access the location services by default.
- High battery use: This app receives location information from sources that may use more battery power.
- Low battery use: This app receives location information from only low battery-intensive sources.
Selecting an app brings you to its App info page, where you can view app permissions and uninstall an app.
Backup and Restore Data
You can backup your phone data to one or more of your Google accounts using Android backup services. If you need to replace your device or erase its data, you can restore your data for any accounts that were previously backed up.
To backup your data,
- From the Home screen or App Tray, tap on Settings ( ).
- Tap Backup & reset located under Personal settings.
- Enable the option Back up my data.
Managing Accounts
You can link an existing Google account to your phone to organize and access your personal information from any
computer or mobile device.
Configure Auto-Sync for all Apps
To control auto-sync for all apps that use it, open Settings > Wireless & Networks > Data usage > Menu and check or uncheck Auto-sync data.
If this option is not checked, you may be able to use an app's tools to sync data manually. You can also sync manually to collect messages, e-mail, and other recent information. Leaving auto-sync off can help extend your battery life, but will prevent you from receiving notifications when updates occur.
Adding an Account
- From the Home screen or App Tray, tap on Settings ( ).
- Tap Accounts located under Account settings.
- Select the type of account. You can create a Corporate account or an IMAP account.
- Complete the on-screen instructions. The account is displayed under one of the following list:
- Google accounts shown under Settings > Accounts > Google.
- Other accounts shown under Settings > Accounts.
Deleting an Account
You can remove any account and all the information associated with it from your device, including e-mail, contacts, settings, and other data backed up in that account.
- To remove a Google account, tap the name in Settings > Accounts or Settings > Accounts > Google.
- Tap Menu > Remove account.
To remove any other type of account, tap Settings > Accounts > Tap on the account you have to remove > Options > Remove account.

If you do not have a backup account on your device, you can touch Backup account to add an account.
Syncing Your Account
To view and modify the sync settings for Google accounts,
- From the Home screen or App Tray, tap on Settings ( ).
- Tap Accounts located under Account settings.
- Tap Google account.
Adding an Account
To enable auto-sync for all apps that are linked with your account,
- From the Home screen or App Tray, tap on Settings ( ).
- Tap Wireless & Networks located under Account settings.
- Tap Data usage > Menu > enable Auto-sync data.
If this option is not checked, you can only sync the sync data manually. You can also sync manually to collect messages, e-mail, and other recent information.
If auto-sync is disabled, it extends your phone's battery life. But it prevents you from receiving notifications when updates occur.
Configure Google Account Sync Settings
To modify a single Google account's sync settings:
- From the Home screen or App Tray, tap on Settings ( ).
- Tap Accounts located under Account settings.
- Tap Google account.
- Indicates that some or all of an account's information is configured to sync automatically.
- Indicates that none of an account's information is configured to sync automatically
- Tap the specific account, to change the sync settings.
- If auto-sync is enabled, you can check or uncheck items to be synced automatically for that account. If auto-sync is off, touch an item to manually sync its data.
Sync a Google Account Manually
- In the Google settings screen, touch the account whose data has to be synced.
- Tap Menu > Sync now.
You can use the phonebook to maintain phone numbers of your contacts. This feature enables you to add, delete, dial phone numbers, send SMS and MMS messages.
To access the contacts,
From Home or All apps screen, tap People (☐). The contacts saved in the phonebook are displayed.

You can touch and drag the scroll bar on the screen to scroll through the contacts.
Add a New Contact
- To add a new contact, tap People > Add new contact (2). Enter the contact details and tap Done to save the contact.
- You can also enter a number using the dial pad and tap Add to contacts to add a new contact.
View the Contact Details
- From Home screen or Apps Tray, tap People ( ).
- Scroll to the required contact and tap the contact, to view the contact details.
Sending a Message from Contacts
You can send SMS and MMS messages to the contacts.
Sending SMS/MMS
- From the Home screen or Apps Tray, tap People (☐).
- Scroll to the required contact and tap the Message icon (☐) to open the message screen.
- (Optional) Tap Attachment ( ) to attach a multimedia file.
- Type the message and tap Send ( ).

If you attach a media file or a contact to your SMS message, it is converted to an MMS message automatically.
Dialing a Number from Contacts
- From the Home screen or Apps Tray, tap People (☐).
- Scroll to the required contact and tap the contact to view the contact details.
- Tap the required phone number to dial the contact, or press the OK key to dial the default number.
Editing the Contact Details
- From the Home screen or Apps Tray, tap People (☐).
- Scroll to the required contact and tap the contact to view the contact details.
- Press Menu > Edit.
- Edit the required details and tap Done.
Importing SIM Card Contacts to Phone
- From Home screen or Apps Tray, tap People ( ).
- Press Menu > Import/export.
- Tap Manage SIM card contacts. The list of contacts stored in your SIM card is displayed.
- Tap the contact to be moved to the phone. The contact is imported to the phone address book.
Exporting Phone Contacts to SIM Card
- From Home screen or Apps Tray, tap People ( ).
- Scroll to the required contact and tap the contact, tap the contact to view the contact details.
- Press Menu > Import/export.
- Tap Export to SIM card.
The list of contacts stored in your phone address book is displayed.
- Check the contacts to be moved to the phone.
The contacts are exported to the SIM card.
Exporting Phone Contacts to Storage
- From Home screen or Apps Tray, tap People ( ).
- Scroll to the required contact and tap the contact, tap the contact to view the contact details.
- Press Menu > Import/export.
- Tap Export to storage.
All the contacts are exported to your computer as .VCF file.
Sharing Contacts via MMS, Bluetooth, Drive and E-mail
You can send contact information by MMS, e-mail or Bluetooth.
- From Home screen or Apps Tray, tap People ( ).
- Scroll to the required contact and tap the contact, tap the contact to view the contact details.
- Press Menu > Import/export.
- Tap Export to storage.
- Tap Share visible contacts.
- Select one of the following options to share the required contact and tap Just Once to select the transfer mode every time or Always to send the contact using the same method:
- Bluetooth: Send the contact details to a Bluetooth device paired with your phone. Select the Bluetooth device to share the contact.
- E-mail: Send the contact details as an e-mail message. Ensure to setup your e-mail account before sending e-mail messages. Else you are requested to setup the e-mail account.
- Messaging: Send the contact details as a multimedia message to any mobile phone.
- Gmail: Send the contact details as an e-mail using your configured Gmail account.
- Drive: Save and share the contact details through Google Drive.
You can also share a single contact.
- Scroll to the required contact and tap the contact, tap the contact to view the contact details.
- Press Menu > Share.
- Select the sharing option from Menu and select
Bluetooth, E-mail or Messaging and share the contact.
Managing Contact Settings
You can edit and modify ringtone and call receiving settings for individual contacts.
- From Home screen or Apps Tray, tap People ( ).
- Scroll to the required contact and tap the contact to view the contact details.
- Press Menu and select one of the following options:
- Set ringtone to set a specific ringtone for that contact.
- Enable All calls to voicemail to forward all incoming calls from that contact to your voice-mail box.
- Select Place on Home screen to copy the contact widget to the Home screen for easy access.
Managing Phonebook Settings
You can set the sort list to view the contacts and also the first or last name of the contact to be displayed first.
- From Home screen or Apps Tray, tap People (☐).
- Press Menu and tap Settings. Set the following options:
- Sort list by: Sort the contact names by first name or last name.
- View Contact names: Set the contact display name to first name or last name.
- Activate address book: Activate the address book if it is not active.
Searching Contacts
- From Home screen or Apps Tray, tap People ( ).
- Tap Search ( ) and enter the first few letters/numbers of the contact name/phone number to be searched.
All the contacts containing the search text are displayed.
Deleting a Contact
- From Home screen or Apps Tray, tap People (☐).
- Scroll to the required contact and tap the contact, tap the contact to view the contact details.
- Press Menu and select Delete. The contact is deleted after confirmation.
Making a Call
- From Home screen or Apps Tray, tap Phone (☐).
The Phone screen with last dialed number, frequently called contacts, Call history ( ), dial pad ( ) and call options ( ) is displayed.
To dial a number use one of the following options:
- Call history: Tap the call history icon ( ). Tap the contact/number and tap the phone icon ( ) located next to the specific phone number/contact.
- Dial pad: Tap the dial pad. The numeric touch keypad is displayed. Dial the phone number and tap the phone icon to make a call.
To dial an international number, prefix the phone number with the respective country code.
- Frequently called contacts/numbers: Tap the specific contact/number from the frequently called numbers to make a call.
Dialing a Number via People
- From Home screen or Apps Tray, tap People (☐).
- Scroll to the contact and tap the contact. The contact details are displayed.
- Tap the required phone number to call the contact.
Answering an Incoming Call
To answer/reject an incoming call, tap the green phone icon and slide to the right over one of these icons:
| Icons Description | |
 | To answer the call, either press green key on the keypad or swipe towards right on the touch screen. |
 | To reject the call, either press red key on the keypad or swipe towards left on the touch screen. |
 | Disconnect the call and respond with a quick response from a list of response text messages. |
Adding a Contact from Phone Screen
- From Home screen or Apps Tray, tap Phone ( ).
- Tap Add contact ( ). You can also press Menu key.
- Tap New Contact.
- Enter the contact details and tap Done.
Viewing All Contacts from Phone Screen
- From Home screen or Apps Tray, tap Phone ( ).
- Tap RSK.
- Tap All Contacts.
Viewing Call History
- From Home screen or Apps Tray, tap Phone (☐).
- Tap the Call history icon ( ).
- Tap All to view all the incoming, outgoing and missed calls.
- Tap Missed to view only the missed calls.
Deleting Call History
- From Home screen or Apps Tray, tap Phone ( ).
- Tap the Call history icon ( ).
- Press the Menu key.
- Tap Clear call log to delete the call history.
Deleting Frequently Called Contacts List
- From Home screen or Apps Tray, tap Phone ( ).
- Tap RSK or the Menu key.
- Tap Clear Frequents.
Managing Call Settings
You can change the incoming call ring tone, enable vibrate during call and also activate voice-mail and dial pad touch tones using call settings.
To view and modify call settings,
- From Home screen or App Tray, tap Phone ( ).
- Tap RSK or the Menu key.
- Tap Settings.
Changing Ringtones and Master Volume
- From Home screen or App Tray, tap Settings (☐).
- Tap Sound located under Device settings.
- Tap Volumes to set the master volume separately for music, ringtones & notifications, and alarms. You can also use the physical volume control on the phone to raise or lower volume of whatever sound is currently playing.
- In the Call settings screen, tap Phone ringtone.
- Select the ringtone from the ringtones list and tap Ok.
Editing Quick Responses
When you are not able to answer an incoming call, you can send quick response to the caller.
To view and edit quick responses, in the Call settings screen, tap Quick responses, tap the specific response message to edit. Edit the message and tap OK.
Activating Vibrate Mode
In the Call settings screen, enable Vibrate when ringing to receive both ring and vibrate alert for an incoming call.
To turn off the vibration mode, disable the Vibrate when ringing option.
Activating Touch Tones
In the Call settings screen, enable Audible touch tones to activate touch tones when you press a number on the dial pad.
Changing to Loudspeaker Mode
You can change an incoming and outgoing active call from ear piece to loudspeaker.
- Touch the Speaker icon ( ) on the screen during an active call to enable the loudspeaker.

- A confirmation message is displayed to Enable Loud Speaker.

- Select Yes to enable the call on loudspeaker and No to continue the call on ear piece.
When the loud speaker is enabled, the speaker icon is highlighted on the screen.

Managing Fixed Dial Numbers
FDN (fixed dialing numbers) is a SIM card-enabled feature. When activated, this feature restricts outgoing calls only to phone numbers listed in the FDN list. This feature can be activated only if PIN2 is entered. Contact your network operator if you do not have a PIN2.
Monitoring Incoming and Outgoing Calls
The Call screening options helps you to monitor and regulate your incoming and outgoing calls.
Screening Outgoing Calls
In the call settings screen, enable Screening outgoing calls to call only numbers stored in the FDN list.
Turn on proximity sensor
You can save battery power by switching off the display when you are in a call. Enable Turn on proximity sensor to switch off the display, when you answer a call.
- In the call settings screen, enable Proximity sensor.
- To wake up the display, while in call or idle state, a quick press of the Power key, PTT key or End key (on the physical keypad) will light the display.
Setting TTY Mode
If you enable TTY mode, hearing-impaired individuals can send and receive phone calls as text over the phone.
- In the call settings screen, tap TTY mode to view and modify TTY mode settings.
- Set one of the following options:
- TTY Off: disables TTY mode.
- TTY Full: enables TTY mode for both incoming and outgoing calls. Set this for both hearing and voice assistance.
- TTY HCO: enables TTY mode only for incoming calls. Set this for only hearing assistance.
- TTY VCO: enables TTY mode only for outgoing calls. Set this for only voice assistance.
Call Forwarding
You can forward your incoming calls to a number in the contacts or a new number, provided your network operator supports this service.
To access call forward settings in the call settings screen, tap Call forwarding. Select one of the following call forward options:
| Options Function | |
| Always forward | Forward all incoming calls to a pre-designated number. |
| Forward when busy | Forward calls when your phone is busy. |
| Forward when unanswered | Forward calls when you do not answer incoming calls. |
| Forward when unreachable | Forward calls when your phone is switched off or is out of coverage area. |
Call Waiting
When call waiting is enabled and the phone is in conversation, the incoming number is displayed when you receive a call.
To activate call waiting in the call settings screen, tap Additional settings. Enable Call waiting.
Internet Call Settings
You can make and receive calls over the Internet when connected to a Wi-Fi network, rather than over your mobile network.
To place a call over the Internet, the phone must be configured to use an Internet calling account.
After you set up the account, placing an Internet call is no different from placing any other call. However, you must be connected to a Wi-Fi network. When you are making an Internet call, the phone displays "Internet Call" near the top of the screen.
SIP Accounts
Internet calling is based on the Session Initiation Protocol (SIP) for voice calls over an Internet Protocol (IP) network.
To add a SIP account and configure your incoming and outgoing preferences:
- In the call settings screen, tap SIP Accounts.
- Enable "Receive incoming calls" to answer incoming Internet calls.
This might reduce your phone's battery life.
- Tap "Add account" to configure a new SIP account.
- Enter the following details and tap Save.
- Username: Username to log in to the SIP account.
- Password: Password to login to SIP account. • Server: SIP server details.
- Set as primary account: Enable to set this SIP account as the primary account.
- Optional Settings: Tap to view/modify or hide optional details such as authentication username, display name, outbound proxy address, port number, transport type and Send keep alive options.
Use Internet Calling
- In the call settings screen, tap Use Internet Calling located under Internet call Settings.
- Select one of the following options:
- For all calls when data network is available:
If this option is selected and when the phone is connected to Wi-Fi network or mobile Internet, each dialed call becomes an Internet call.
- Only for Internet calls: If this option is selected, only Internet call can be dialed.
- Ask for each call: If this option is selected, when a number is selected to dial, a dialog is displayed to select either Cell phone call or Internet call.
Optimizing Power During a Call
- You can save battery power by switching off the display when you are in a call. Enable Turn on proximity sensor to switch off the display, when you answer a call.
- To wake up the display, while in a call or idle state, a quick press of the power key, PTT Key or End Key (on the physical keypad) will light the display
SMS and MMS are convenient and inexpensive means of communication. You can send a text message to other people via SMS service. MMS allows you to send messages by including multimedia content such as pictures, audio files, video files, and so on.
You can use the Messages app on your phone to send SMS and MMS messages to other mobile phones or any other device that can receive SMS and MMS.

The MMS feature is available only if you subscribe to it from your network operator.
To access the Messages function, from the Home screen or App Tray, tap Messages ( ).
Sending SMS/MMS Messages
- To create an SMS message, from the Home screen or App Tray, tap Messages ( ).
- Tap New message ( ).

- Enter the contact name or the phone number in the To field.
If you enter an alphabet, all the contact names starting with that alphabet are displayed as a list. Scroll down to select the contact.
- Enter the message and tap Send ( ).
When you add a multimedia attachment, the message is automatically converted to a multimedia message. MMS charges are applied based on the operator.
- You can add any multimedia attachment up to the
size of <=1 Mb. To add an attachment, tap Attach ( ) and select the attachment type from the following options:
- Browse My files or a specific folder and select the multimedia file to be attached.
| Attachment Type | Description |
| Pictures Attach | a photo from the phone memory. |
| Capture picture | Take a new photo using the mobile camera and attach. |
| Videos Attach | video from the phone memory. |
| Capture Video | Take a new photo using the mobile camera and attach. |
| Audio Attach | audio file from the phone memory. |
| Record audio | Record a new audio file using the voice recorder and attach. |
| Slideshow Create | new slideshow or edit the existing slides and attach. |
| Vcalendar Attach | a calendar event. |
Managing Message Settings
You can customize the way you want to view and filter the messages. You can also set the default messaging application.
To view and modify the message settings,
- To edit message settings, from the Home screen or App Tray, tap Messages (☐)
- Tap RSK or the Menu key.
- View and edit the following settings:
| Settings Description | |
| SMS enabled Set the default messaging application. | |
| Delete old messages | Delete the old messages automatically when the storage limit is reached. |
| Text message limit | Set the maximum number of SMS messages to be stored. |
| Multimedia message limit | Set the maximum number of MMS messages to be stored. |
| Notification Enable notification alert for incoming messages | |
| Sound Set the default alert tone for incoming messages | |
| Vibrate Enable vibrate alert for incoming messages | |
| Manage SIM card messages | Enable to view the messages stored in the SIM card. |
| Group messaging | Send a single message as MMS message when multiple recipients are selected |
| Creation mode | Sets the MMS message creation mode to one of the following:Restricted- the phone will only create and send messages with content belonging to the Core MM Content DomainWarning- the phone guides you to create and submit only messages with content belonging to the Core MM Content Domain. This guidance is implemented through warning dialogFree- you can add any content to the message. - |
Deleting Messages
To delete all the message threads,
- From the Home screen or Apps Tray screen, tap Messages ( ).
- Tap RSK or the Menu key.
- Tap Delete all threads. All the message thread are deleted after confirmation.
Emergency Alerts
You receive active alerts and emergency alerts from the service provider.
Setting Up E-mail Accounts
You have to configure and create an e-mail account to
Access the e-mail functionalities.
- To create an e-mail account, from the Home screen or App Tray, tap Settings ( ).
- Tap Add account ( ) which is located under Accounts.
- Select the type of account: Corporate, Google, or POP3/IMAP.
- Enter the e-mail address and password. Tap Next for a private e-mail account, such as Google Mail, or tap Manual setup for a company e-mail account. After that, follow on-screen instructions to complete the setup.
- To set up another e-mail account, follow the same procedure.
Sending an E-mail
- From Home or App Tray screen, tap E-mail ( ).
- Enter the mail recipient in the To field or select the contact from People, subject, and message in the Compose screen.
- Enter the message in Compose and tap on Send ( ).
- To add an attachment, tap Menu. The following are the options:
| Option Description | |
| Attach file Attach | a photo or any other file from the phone memory. |
| Attach video Attach a video from the phone memory. | |
| Add Cc/Bcc Add other recipients. | |
| Save draft Save the composed mail as a draft. | |
| Discard Delete the mail. | |
| Settings Set the general settings. | |
| Insert quick response | Send the required quick responses from the list. |
| Add reply to Include a reply to e-mail ID if you want to receive the reply in a different e-mail ID. | |
| Set priority Set the e-mail priority based on its importance. | |
Reading an E-mail
- Select an e-mail account to use, and new e-mails are retrieved.
- To manually retrieve a new e-mail, tap on Menu > to get the Sync option.
- Tap a message to read. The following options are available when a message is opened:
- Reply to the message
- Forward the message
- Open attachment
This section refers to the virtual keyboard using the touch screen. You can view and modify the keyboard, language, and dictionary settings using the Phone Settings.
To change from the default T9 keyboard, please follow the instructions on "Setting up Google Touch Keyboard" on page 19.
For EPTT Users:

Update your EPTT application before changing to the Google virtual keyboard.
For more information, refer to "Setting up Google Touch Keyboard" on page 19 or "Launching EPTT Application" on page 55.
If T9 is enabled, for more information, refer to "T9 Text Input Method" on page 25.
Enter and Edit Text
You can use the virtual keyboard to enter text quickly and easily. Type faster and more accurately on your device with keyboard's word recognition and next-word predictions.
The key features are:
- Personalized suggestions, corrections, and completions
- Keypress popup animations
- Emoji entry point and layouts (Android 4.4+)
- Gesture Typing with dynamic floating preview • Space-aware Gesture Typing
- Voice typing
- Advanced keyboard layouts
Gesture Typing
Touch the location where you want to type to open the keyboard.
Slide your finger slowly across the letters of the word you want to input.
Release your finger when the word you want is displayed in the floating preview or in the middle of the suggestion strip. To select one of the words in the suggestion strip, tap on it.
Use Gesture Typing without the space bar
When you use Gesture Typing, there is no need to use the space bar—just continue to slide your finger across the letters you want to input, then lift your finger to start the next word.
Keyboard Dictionaries
To manage keyboard dictionaries,
- From the Home screen or App Tray, tap on Settings ( ).
- Tap Language & Input located under Personal settings.
Personal Dictionary
You can add your own words to your personal dictionary so that your device remembers them.
- To add a word or phrase, including an optional shortcut,
- Tap Language & Input located under Personal settings.
- Tap on Personal dictionary and then Add (

- Add a required word and respective shortcut which is optional.
Add-on Dictionary
- From the Home screen or App Tray, tap on Settings ( ).
- Tap Language & Input located under Personal settings.
- Tap Settings ( ) icon next to Android Keyboard.
- Tap Add-on dictionaries.
The dictionaries for other languages that you can download to your device are displayed on your XP6 phone.
Sonim supports Virtual Pre-Load (VPL) mechanism, also known as Stub, to install the EPTT application.
Enhanced Push-To-Talk (EPTT) requires a subscription to work. Additional charges may apply. Contact your representative for more information.
The application must be updated immediately after device setup, and the keyboard must be set to the default T9 keyboard to be updated.
For further information on device setup, see "Enhanced Push-To-Talk (EPTT) Application Update" on page 19.
For further information on T9, see "T9 Text Input Method" on page 25.
- The device displays the EPTT application icon (stub) on panel 2 of the home screen.
- Tap the EPTT button on the side of the XP6 phone or tap the EPTT icon on panel 2 of the home screen to update the application.
- The Enhanced EPTT application starts downloading from Google Play and downloads the latest version of the EPTT client.
Launching EPTT Application
To launch the Enhanced PTT application, click on the EPTT icon from the Home/Application screen.
- Accept the License agreement.

- Click Yes to activate the Enhanced Push to Talk service. The activation can also be processed using Wi-Fi connection or mobile data.

Once the service is activated, the contacts and groups are retrieved from the server.

- Familiarize yourself with the in-application tutorial to use the EPTT service.

Activating EPTT Using Wi-Fi
- A screen is displayed prompting to activate EPTT service using the Wi-Fi network as a cellular data network.

- The screen prompts to enter the activation code provided by the corporate administrator in the specified text box. Enter the activation code and click Yes to activate the EPTT over Wi-Fi network.

Enhanced PTT Users Advanced Setting
For EPTT users who do not have a data plan, an additional option allows you to not check for internet access when connected to Wi-Fi.
Go to Settings > Wi-Fi > Tap Menu key > Advanced > uncheck the box marked Check internet access.
From the handset's Home screen/Application screen, select the EPTT icon and launch the application. The following EPTT menu icons are displayed:

Home: Displays your EPTT calls and conversation history. You can also change your presence status here.
Contacts: Displays your contacts and allows you to start a EPTT call, and send an alert.
Groups: Displays your groups and allows you to create/edit a group or initiate a group call.


Favorites: Displays your favorite contacts and groups. You can easily start a EPTT call to your favorite.

The EPTT contacts directory is different from the phone's native contacts directory. There are two ways to add EPTT contacts:
- Add from Native Phonebook: Select Native Phone Book from + New Contact. It opens phone's native contact list, and the user can select the contact from contact list and can modify the selected contact or save the same contact as it is.
- Add by Manual Input: Select Manual Input from + New Contact, It opens screen to add the contacts. User can create contact manually by typing phone number, name, set favorite and save.
Adding Contacts from Native Phonebook
- Go to Contacts and tap on + New Contact. The following screen is displayed.

- Tap on the Native Phonebook. The following screen is displayed.

- To modify the contact imported from the native book manually, edit the contact's name and phone number, then select Save.

- If you want a contact to be added as a favorite, then check Set as Favorite before pressing Save.

- Once the contact is saved, it is added to the EPTT contact list.


Adding Contacts by Manual Input
If you have enabled the Google Keyboard, but also use the numeric keyboard to input text and numbers, special characters, such as *, # and space bar can only be found by pressing the numeric key 1 multiple times until you find the special character or use the touch screen to input special characters.
- Go to the contacts and tap on + New Contact.
- Select Manual Input.

- To enter a contact manually, type the contact's name and phone number, and then select Save.

- If you want a contact to be added as a favorite, then check Set as Favorite before pressing Save.

- Once you save a contact's information, it is added to the EPTT contact list. The contact is added successfully.

Groups can be added by creating manually or can be pushed to the phone by the corporate administrator. The groups pushed by the corporate administrator (Corporate groups) cannot be changed or deleted from the handset.
- Go to the Groups screen and select + New Group to add a new group.
- The New Group Details screen is displayed.
Enter the group name, scroll down and press +Add members. The Group Members list is displayed. Select the desired contacts as group members. Go back to the New Group Details screen by using the Return key. Press Save to add the group.


You can assign a group as a favorite by selecting Set as favorite.
- A new group is added successfully.


Deselecting the member(s) from a Group screen, removes those member(s) from the Group.
Making a EPTT Call to an Individual
- Go to the Contacts screen and select the contact you desire to call. A call to an individual can also be initiated from Call option present in the Menu on the phone.

- Press the EPTT button to initiate a call Or go to the Contacts screen and long press on the contact you desire to call. Choose Call from the Option menu. The screen with Call Ready status is displayed.
- Press and hold the EPTT button or press and hold the on screen EPTT call button to start the call. Start speaking after you hear the chirp.

- When you finish speaking, release the EPTT button.
- When no one has the floor, the EPTT touch button turns grey in color.

- When the other person is speaking, the EPTT touch button turns red. Unless the other person releases the floor (you will hear a release tone), you cannot start speaking.

- Press the Menu option and tap on End Call option to end the call.

Making a EPTT Call to a Group
- Go to the Groups screen and select the group you desire to call. Press the EPTT button to initiate a group call or select a call option from Menu/Context menu to initiate a group call.

- Select Menu to get the options. Select Call from the Options.


You may need to touch the screen to scroll through additional menu options as not all items can be displayed in one screen.
- An on-screen EPTT call button appears.

- Press and hold the EPTT button or press and hold the on-screen button. Start speaking after you hear the chirp. All the available group members receive the call.

- Press the Menu key and tap on End call option to end the call.

Making a Quick Group Call
- Go to the Contacts screen and mark the contacts you would like to include in your quick group EPTT call.

- Press the EPTT button or select Call from Menu option to initiate the call to the selected members.

- An on-screen EPTT call button appears.

- Press and hold the EPTT button or hold the on-screen EPTT call button to start the call. The call is initiated to all the selected contacts. Start speaking after you hear the chirp.

- Press the Menu key and tap on End call option to end the call.

Editing EPTT Contact
- Select a Contact from the list.

- Tap on Menu option or long press on the contact and select Edit Contact.

- Edit the contact name and favorite setting if required and press Save.


The contact modifications are updated.
Deleting EPTT Contact
- Select a Contact from the list.

- Tap on Menu option or long press on the contact and select Delete Contact.

- A confirmation message is displayed. Select Yes to delete the selected contact. The selected contact is deleted from the contact list.


Editing EPTT Group
- Select a group from the list and tap on the Menu option.


- Select Edit Group to edit the Group Name, Favorite. The user can add members and remove members.

The other ways to edit the group are:
- Long press on the Group and select Edit Group from the Menu options.
- Tap on Menu option and select Edit Group.
The selected group details are edited and modified successfully.


Deleting EPTT Group
- Press and hold a selected group name which has to be deleted. Select Menu option to select Delete Group.

- A confirmation message is displayed. Select Yes to delete the group.

- A pop-up message is displayed confirming that the selected group is getting deleted.

- The selected group is deleted and a message is displayed: "Group successfully deleted."

Adding a Favorite Contact
The user can add contacts as favorites. The favorite contacts are listed under the Favorite tab.
- To set a contact as favorite: Go to the Favorites contact tab and select + Add Contact. The contact list is displayed. Select the desired contact/contacts.

- The selected contacts get added as favorites and are displayed under the Favorite contacts tab.

- Selected contact is added to Favorite successfully.

Adding a Favorite Group
The user can add groups as favorites. The favorite groups are listed under the Favorite tab.
- To set a group as favorite: Go to the Favorites Groups tab and select + Add Group. The group list is displayed. Select the desired group/groups.

- The selected groups get added as favorites and are displayed under the Favorite groups tab.

- Selected group is added to Favorite successfully.

EPTT Presence Status Change
The EPTT Presence can be set in two ways:
- Select Menu > My Presence.

- My Presence status can be changed from Available to Do Not Disturb and vice versa.

- Select My Status from the Conversation history screen.
• Available ( ) - Do Not Disturb ( )
Select one of the following options:

• Available: You are available to accept calls and can send or receive alerts.

• Do Not Disturb: You are not available to accept calls, but alerts can be received.

Sending Personal Alert
Select the desired contact from the contact list and select Send Alert from the menu.

The personal alert can also be sent using the * or # keys:
- On the EPTT home screen, select the Menu option.
- Select Settings > Actions > Configure Alert Options to choose either * or # to send the personal alerts.

The personal alert is sent to the selected contact by pressing * or #.

Receiving Personal Alert
When a personal alert is received, the user is notified with the sender's details such as Name, Date, and Time.
Touch the Call button or press the EPTT Hard key to initiate an EPTT call with the sender.

When the user is in Do Not Disturb mode, personal alerts can still be received.
Missed call Alert
If an EPTT call comes in while you are on a regular phone call or another EPTT call, you will receive a Missed call alert. You can press the Call Soft button or press the EPTT Hard key to make a call.

To view the EPTT call history screen, go to the Home screen and see a list of the most recent EPTT calls. You can make a call to a contact and group from the conversation history. Also send and receive alerts from the conversation history.
1. Available Status:
When the EPTT service is available, My Status is in Available status and the icon is displayed green in color.

2. Do Not Disturb Status:
When the EPTT service is set to Do Not Disturb, My Status is in Do Not Disturb status and the icon is displayed red in color.

3. Offline Status:
- When the EPTT service is not connected or in offline status, the EPTT notification icon is displayed in the status bar.

- When there is a network error while connecting to the EPTT service and in offline status, the EPTT icon is displayed grey ( ) in color.

You can customize the application through the Settings tab. The following are the most commonly used settings options.
- The Settings option can be found at the last from the menu options.
- Alerts and Sounds: Notification alert tones can be set to vibrate or audible tones.
To view the following options, go to Options (RSK) > Settings > ALERTS and SOUNDS.

- Use Bluetooth for EPTT calls: Using Bluetooth for EPTT calls after pairing with other devices.
- Vibrate Alert: Vibrate when a new alert is received. • Audible Alert: Play a tone when a new alert is received.
- Alert Repeat: Choose how often you want the alert to repeat, like once, repeat, and continuous.
- Speaker: The speaker can be turned ON by checking the checkbox and unchecking the checkbox to turn OFF the speaker.


By default, the speaker is ON and the user gets a call on the speaker.
- Privacy Mode: Determine whether to mute the incoming call or use the handset earpiece when the handset is in silent mode.
- Notification Control: The notifications can be controlled.
To view the following options, go to Options (RSK) > Settings > NOTIFICATION CONTROL.

- Instant Personal Alert: Alert when an Instant Personal Alert is received.
- Missed Call Alert: Alert for missed calls is received.
- Call Reconnect Tone: Determine whether the handset plays the Call Reconnect Tone. • Volume: To increase or decrease the volume from level 0 to level 20.
- Information: The information such as Display name and EPTT Number are displayed.
To view the following options, go to Options (RSK) > Settings > Information.

- Contact Sorting: Set contact sorting to alphabetical or by availability.
- Display name: Your username is displayed. • My EPTT Number: It displays the activated EPTT number. • Capacity: Show available capacity to store Contacts and Groups.
- About: Displays information about EPTT application.
- Actions: The actions such as Configure Alert Options, Show Tutorial, and Restore Default Settings can be performed from the following screen.
To view the following options, go to Options (RSK) > Settings > Actions.

- Configure Alert Options: Use * or # key to send personal alerts.
- Show Tutorial: User can view the tutorial of EPTT application.
- Restore Default Settings: Restore all application settings to their default values.
- Logout: Logout from EPTT application.
- Auto Start: Start the EPTT application automatically every time, when handset is turned ON.
- Notification Tone: To set the Alert tones like Alert1, Alert2, Alert3 & Alert4.
- Wi-Fi: Allow EPTT to use Wi-Fi connection when available.
- Talkgroup Locking: Enable/Disable Talkgroup Setting.
- To logout of the EPTT application, go to EPTT setting and select Logout option.

- Confirm the logout screen by selecting Yes on the confirmation screen.

The EPTT application is logged out and goes to the homescreen.


Google Play™ Store
Google Play™ store is a one stop application to access all your favorite media content such as games, TV shows, books, music, magazines, and much more.
Downloading Android Applications and Media Files
You can download and install/view your Android applications/media files, when your phone is connected to the Internet through Wi-Fi or mobile data connection. You can also download files from Gmail or other sources.
Managing Downloaded Application
To manage application downloads, select Settings > Apps > Downloaded.
Managing Downloaded Media Files
Downloaded movies and other media files such as documents, videos and applications are not listed in the Downloads screen.
Use the Downloads screen to view, reopen, or delete the downloaded files.
- Tap the file to open it.
- Touch file headings for earlier downloads to view them.
- Long tap on the downloaded file and check the items you want to share. Then touch the Share icon and choose a sharing method from the list.
- Long tap on the downloaded file and check the item you want to delete. Then touch the Trash icon.
- At the top of the screen, touch the 3 horizontal lines
to sort your downloads by name, by date modified, or by size.
Accessing Gmail
Gmail application is used to read and write e-mail from any mobile device.
Gmail account can be used to sign in to all Google applications and services which includes:
- Google Now - Locate the right information at the right time.
- Calendar - View, add and sync the calendar events with the phone • People - View, add and sync contacts stored in the phone
- Google Drive™ - Access documents on the go.
While reading a message,
- Touch the icons and menus along the top of the screen to archive, label or perform other actions on that message.
- Swipe left or right to delete the message and undo the action.
Camera
The Sonim XP6 has a back camera with 5MP fixed focus for taking pictures. The pictures are saved in the Gallery (in your phone memory). You can access the Gallery from the All Apps screen.
- To take a picture, press the Camera button (yellow button located on the left side of your phone) or tap the Camera icon (present in the All Apps screen).
The camera screen with touch controls is displayed.
The camera screen with touch controls is displayed.

- Tap Camera mode ( ), to set one of the following modes:
- Normal - Tap the Capture icon (☐) to take a picture in normal mode. Use two-finger pinch on the camera preview screen to zoom in or out for a clearer shot.
- Video - ( ): To shoot a video, tap the Record icon (☐). Tap the Stop icon (☐) to end the recording. You cannot pause the recording in the middle.
- Panoramic ( ): shoot a picture in panoramic view. Tap the Capture icon ( ) to capture the picture. Start from the leftmost edge of the image and move towards the rightmost edge, or vice versa, to capture the complete panoramic image.
- To view or change camera settings such as flash, exposure, and file size, tap the Settings icon (C) located to the right of the shutter.
The Google Calendar helps you to set appointments, schedule reminders and alerts, and repeat them if required. You can also view your saved tasks on a daily or weekly basis.
When you first set up your phone and configure it to use a Google Account (such as Gmail), you can link your Google Calendar also. All the appointments and tasks stored in the Google Calendar will also be synced to your phone.
When you first set up your phone and configure it to use a Google Account (such as Gmail), you can link your
Google Calendar also. All the appointments and tasks stored in the Google Calendar will also be synced to your phone.
To access calendar,
- Tap the Calendar icon ( ) on the All Apps screen.
- To change the calendar view, choose Day, Week, Month, or Agenda from the drop-down list at the top of the screen.
- Select Menu to view the list of the following available options:
• Today: Access current date events. - Switch view: The calendar view can be switched from different views such as Day, Week, Month, and Agenda. - New event: When Google Calendar is synced with your Google account, a new event can be added using the Google account. - Refresh: Refresh the calendar for updates. - Search: You can search for a particular event. - Calendars to display: Displays the calendar which is synced with your Google account. - Settings: Displays the general settings of the calendar. - Help: Access the website to view the tutorial.
From any of the calendar views,
- Read or edit event details: Tap on the event to view the details.
- Manage events and calendar: Touch icons across the menu to search or create events, return to today,
or adjust settings.
Alarm
You can set an alarm for a particular time.
- Tap the Clock icon ( ) located in the All Apps screen.
- Tap the Alarm activation icon ( ☑ ) at the top of the screen.
- To set a simple alarm, tap the Add Alarm ( ) + icon. Enter the time and tap Done.
- To set a reoccurring alarm, enable Repeat. Select the days for repeating the alarm.
- To set the alarm tone, select the type of alarm from the Ringtone list. Tap the selected ringtone and select OK.

The alarm will work even when the phone is set in silent mode.
Clock
You can view the time of major cities in different time zones using this function. You also have the option to use Daylight Saving Time (DST).
- The local time in the home city is displayed in the upper half of the screen.
- Tap World clock icon ( ) located at the bottom of the screen, to view the list of cities and the current time.
The world cities are listed in the alphabetical order.
- To set the home city, tap the required city from the list. It is added to the Selected Cities list. The selected city is set as the home city.
Calculator
The default calculator in this phone is designed to perform simple mathematical calculations. Press Menu to perform advanced calculations.
To access calculator, tap Calculator (located in All Apps screen).
- To enter the numbers, tap the numeric keys.
- To use mathematical operators, touch the respective operation keys on the keypad.
- Tap = for the final results.
Sound Recorder
You can record voice memos using the sound recorder. To access the sound recorder, tap Sound recorder (a) located in All Apps screen.
- To record an audio file, tap Record ( ).
- To stop the recording, tap Stop ( ).
- To save the voice memo, tap Save ( ). Done
- To exit without saving, select Options and Discard.
- To play the recorded file instantly, tap Play ( ).
Music Player
You can play music files and voice memos stored in your phone using the music application. The music files are by default stored in the music folder in File explorer.
To play music files, tap Music (9) located in All Apps screen.
- Tap Playlist to access the default playlists in the music folder.
- Tap Recently Added playlist to view the music files that are recently added to the music folder.
- Tap My recordings playlist to access all your voice memo files.
- Tap Artist to view the music files sorted based on the artists.
- Tap Album to view the music files sorted based on the albums.
- Tap Songs to view the complete list of songs stored in your phone.
- Tap the required song/memo to play.
About Google Search™ and Google Now™
Google Now gives you the right information at just the right time. Google Now does not require any elaborate setting. The information is at your fingertips.
It gives the information about the weather and traffic update before you start your day.
When Google Now is activated, it also activates the Location reporting and Location history.
- Location Reporting: allows Google to periodically store and use your device's most recent location data in connection with your Google Account. Location Reporting is a per-device setting.
- Location History: allows Google to store a history of your location data from all devices where you are logged into your Google Account and have enabled location reporting.
Activate Google Now
Google Now can be set up on your phone when you switch on the phone for the first time. You can turn it on and off at any time.
- Tap the Google Search bar on a home screen.
- Touch Get it now if you don't have it already. To access the menu for the next step, perform a Google search.
- Select Options > Stop to turn off Google Now.
Use Google Now
To use Google Now, swipe up from the bottom of the screen or press and hold the Home button.
screen or, press and hold the Home button.
Voice Search and Action
You can speak to your phone to search, get directions, send messages and perform other tasks.
To initiate the voice search or voice action, on the Google home screen, say "OK Google" or tap on the microphone icon.
After you touch the microphone icon or say "OK Google", Google listens as you speak and initiates the search or action you describe. If voice search does not understand you, it lists some suggestions. Select the one you want from the list.

Spoken answers are supported for English language only.
Voice Actions
Voice Actions are supported only in English, French, German, Spanish, and Italian languages.
You can use Voice Actions to perform common tasks, such as sending an e-mail or opening an application.
After touching the microphone icon or saying "OK Google", speak the voice action you want to use.
License
This wireless device, (the "Device") contains software owned by Sonim Technologies, Inc. ("Sonim") and its third party suppliers and licensors (collectively, the "Software"). As user of this Device, Sonim grants you a non-exclusive, non-transferable, non-assignable license to use the software solely in conjunction with the Device on which it is installed and/or delivered with. Nothing herein shall be construed as a sale of the Software to a user of this Device.
You shall not reproduce, modify, distribute, reverse engineer, decompile, otherwise alter or use any other means to discover the source code of the Software or any component of the Software. For avoidance of doubt, you are at all times entitled to transfer all rights and obligations to the Software to a third party, solely together with the Device with which you received the Software, provided always that such third party agrees in writing to be bound by these rules.
You are granted this license for a term of the useful life of this Device. You can terminate this license by transferring all your rights to the Device on which you have received the Software to a third party in writing. If you fail to comply with any of the terms and conditions set out in this license, it will terminate with immediate effect. Sonim and its third party suppliers and licensors are the sole and exclusive owner of and retain all rights, title and interest in and to the Software. Sonim, and, to the extent that the Software contains material or code of a third party, such third party, shall be entitled third party beneficiaries of these terms. The laws of Delaware, United States shall govern the validity, construction and performance of this license.
Comprehensive 3 Year Warranty
- Sonim provides this Comprehensive 3-year warranty for your mobile phone (hereinafter referred to as "Product").
- To activate the 3-Year comprehensive warranty, register your phone within 30 days at www.sonimtech.com/register or use the warranty registration application.
- Should your Product need service, please contact your local Sonim Customer Service Center. The online support and country specific contact information can be found at: www.sonimtech.com/support or e-mail to: support@sonimtech.com
Warranty Registration Application (Only available on Smart phones)
- You can register your phone using the Warranty Registration Application on your device.
- This application initiates automatically after first boot up and prompts to register the handset now or later.
- All the mandatory fields have to be filled, some fields such as IMEI and model number are auto populated.
- State and Zip code fields are same as Province and Postal code.
- Once all the mandatory details are submitted, an e-mail confirmation will be sent.
- If not registered, the application will remind the user to register every two days. After ten reminders the user has to register online.
Our Warranty
Subject to the conditions of this Comprehensive 3 year Warranty Sonim warrants this product to be free from major defects in design, material and workmanship at the time of its original purchase by a consumer, and for a subsequent period of Three (3) years.
What We Will Do
If during the guarantee period, this product fails to operate under normal use and service, due to defects in design, material or workmanship, Sonim's authorized distributors or service partners, in the country/region where you purchased the product, will repair or replace at the sole discretion of Sonim, with the same or better model in the same or better condition.
Sonim and its service partners reserve the right to charge a handling fee if a returned product is found not to be under warranty according to the conditions below.
Please note that some of your personal settings, downloads or other information may be lost when your Sonim Product is repaired or replaced. Sonim does not take any responsibility for any lost information of any kind and will not reimburse you for any such loss.
You should always make backup copies of all the information stored on your Sonim Product such as downloads, pictures, videos, music, calendar and contacts before handing in your Sonim Product for repair or replacement.
You should always remove SIM cards and MicroSD cards before handing in your Sonim Product for repair or replacement. Depending on local law and legislations we will, in order to protect your data and privacy, destroy any received SIM cards and MicroSD cards.
Phone Care
Each Sonim Phone has a designated IP class for dust and water protection, according to the IEC Ingress Protection (IP) Standard 60529. This means that the phone is dust protected and can be submerged into 6.5 feet/2 m deep water for up to 30 minutes. Immersion in deeper water can damage it and must be avoided.
Sonim phones are built for heavy duty use. Its design protects against disassembly or mechanical damage when subjected to forces equal to free fall from the height of 6.5 feet/2 meters. Subjecting the phone to stronger impact and forces can damage it and must be avoided.
Conditions
- The warranty is valid whether or not the product has been registered.
- The warranty is valid only if the original proof of purchase issued to the original purchaser by an authorized service provider, specifying the date of purchase and serial number for this Product, is presented with the Product to be repaired or replaced. Sonim reserves the right to refuse warranty service if the device is found to be out of warranty under the conditions as set forth herein.
- If Sonim repairs or replaces the Product, the repaired or replaced Product shall be warranted for the remaining time of the original warranty period or for ninety (90) days from the date of repair, whichever is longer. Repair or replacement may involve the use of functionally equivalent reconditioned units. Replaced parts or components will become the property of Sonim.
- This warranty does not cover any failure of the
Product due to normal wear and tear, or due to misuse or abuse, including but not limited to use in other than the normal and customary manner, in accordance with the Sonim device specifications and instructions for use and maintenance of the Product. Nor does this warranty cover any failure of the Product due to software or hardware modification or adjustment, acts of God, or damage resulting from liquid interacting with the product beyond what is described as acceptable in the user guide for the product. A rechargeable battery can be charged and discharged hundreds of times. However, it will eventually wear out - this is not a defect. When the talk-time or standby time is noticeably shorter, it is time to replace your battery. Sonim recommends that you use only batteries and chargers approved by Sonim. Minor variations in display brightness and color may occur between phones. There may be tiny bright or dark dots on the display. These are called defective pixels and occur when individual dots have malfunctioned and cannot be adjusted. Up to three defective pixels are deemed acceptable.
- This warranty does not cover Product failures caused by installations, modifications, or repair or opening of the Product performed by any person other than a Sonim-authorized person. Tampering with any of the seals on the Product will void the warranty.
- The warranty does not cover Product failures which have been caused by use of accessories or other peripheral devices which are not Sonim-branded original accessories intended for use with the Product.
- The 3-year warranty does not cover 3rd party
accessories or any 3rd party software applications, which are instead covered to the extent provided by the original vendor guarantee for these products.
- THERE ARE NO EXPRESS WARRANTIES, WHETHER WRITTEN OR ORAL, OTHER THAN THIS PRINTED LIMITED WARRANTY. ALL IMPLIED WARRANTIES, INCLUDING WITHOUT LIMITATION THE IMPLIED WARRANTIES OF MERCHANTABILITY OR FITNESS FOR A PARTICULAR PURPOSE, ARE LIMITED TO THE DURATION OF THIS LIMITED WARRANTY. IN NO EVENT SHALL SONIM OR ITS LICENSORS BE LIABLE FOR INCIDENTAL OR CONSEQUENTIAL DAMAGES OF ANY NATURE WHATSOEVER, INCLUDING BUT NOT LIMITED TO LOST PROFITS OR COMMERCIAL LOSS; TO THE FULL EXTENT THOSE DAMAGES CAN BE DISCLAIMED BY LAW.
Accessories
Sonim accessories are warranted as follows:
Sonim Branded
- All Sonim branded accessories, in-box as well as optional, are warranted for a period of one (1) year under Sonim's 1-Year limited warranty.
- For a detailed list of Sonim branded accessories, please go to: www.sonimtech.com/accessories.
Battery
All device batteries both embedded and removable are warranted for a period of one (1) year under Sonim's 1-Year limited warranty.
1-Year limited warranty
Sonim provides a limited 1-year warranty for this accessory (hereinafter referred to as "Product"). Subject to the conditions of this limited 1-year Warranty, Sonim warrants this product to be free from major defects in design, material, and workmanship at the time of its original purchase by a consumer, and for a
subsequent period of one (1) year.
Conditions:
- This warranty does not cover any failure of the Product due to normal wear and tear, or due to misuse or abuse, including but not limited to use in other than the normal and customary manner, in accordance with the Sonim Product specifications and instructions for use and maintenance of the Product. Nor does this warranty cover any failure of the Product due to software or hardware modification or adjustment, acts of God, or damage resulting from liquid interacting with the Product beyond what is described as acceptable in the user guide for the Product.
- This warranty does not cover Product failures caused by installations, modifications, or repair or opening of the Product performed by any person other than a Sonim-authorized person. Tampering with any of the seals on the Product will void the warranty.
- The warranty does not cover Product failures which have been caused by use of other peripheral devices that are not Sonim certified and intended for use with the Product.
- THERE ARE NO EXPRESS WARRANTIES,
WHETHER WRITTEN OR ORAL, OTHER THAN THIS PRINTED LIMITED WARRANTY. ALL IMPLIED WARRANTIES, INCLUDING WITHOUT LIMITATION THE IMPLIED WARRANTIES OF MERCHANTABILITY OR FITNESS FOR A PARTICULAR PURPOSE, ARE LIMITED TO THE DURATION OF THIS LIMITED WARRANTY. IN NO EVENT SHALL SONIM OR ITS LICENSORS BE LIABLE FOR INCIDENTAL OR CONSEQUENTIAL DAMAGES OF ANY NATURE WHATSOEVER, INCLUDING BUT NOT LIMITED TO LOST PROFITS OR COMMERCIAL LOSS; TO THE FULL EXTENT THOSE DAMAGES CAN BE DISCLAIMED BY LAW.
Sonim XPand
- All Sonim branded accessories, in-box as well as optional, are warranted for a period of three (3) years under Sonim's 3-Year comprehensive warranty.
- For a detailed list of Sonim XPand accessories, please go to: www.sonimtech.com/accessories.
WARNING: Changes or modifications made to this equipment not expressly approved by Sonim Technologies, Inc. for compliance could void the user's authority to operate the equipment.
FCC Statement
- This device complies with part 15 of the FCC rules (FCC ID: WYPL11V011AA). Operation is subject to the following two conditions:
- This device may not cause harmful interference.
- This device must accept any interference received, including interference that may cause undesired operation.
- This device has been tested and found to comply with the limits for a Class B digital device, pursuant to Part 15 of the FCC Rules. These limits are designed to provide reasonable protection against harmful interference in a residential installation. This equipment generates, uses, and can radiate radio frequency energy, and, if not installed and used in accordance with the instructions, may cause harmful interference to radio communications. However, there is no guarantee that interference will not occur in a particular installation. If this equipment does cause harmful interference to radio or television reception, which can be determined by turning the equipment off and on, the user is encouraged to try to correct the interference by one or more of the following measures:
- Reorient or relocate the receiving antenna.
- Increase the separation between the equipment and receiver.
- Connect the equipment into an outlet on a
circuit different from that to which the receiver is connected.
- Consult the dealer or an experienced radio/TV technician for help.
FCC Caution
Any changes or modifications not expressly approved by the party responsible for compliance could void the user's authority to operate the equipment.
The antenna(s) used for this transmitter must not be co-located or operating in conjunction with any other antenna or transmitter.
IC Statement
This device complies with RSS-310 of Industry Canada (IC ID: 8090A-L11V012AA). Operation is subject to the following two conditions:
- This device does not cause harmful interference.
- This device must accept any interference, including interference that may cause undesired operation of the device.
FOR PORTABLE DEVICE USAGE (<20cm from body/SAR) Radiation Exposure Statement:
The product complies with the Canada portable RF exposure limit set forth for an uncontrolled environment and is safe for intended operation as described in this manual. Further RF exposure reduction can be achieved if the product is kept as far as possible from the user's body or if the device is set to lower output power if such function is available.
- The device for operation in the band 5150-5250 MHz is only for indoor use to reduce the potential for harmful interference to co-channel mobile satellite systems.
- High-power radars are allocated as primary users (i.e. priority users) of the bands 5250-5350 MHz and 5650-5850 MHz, and these radars could cause interference and/or damage to LE-LAN devices. FOR MOBILE DEVICE USAGE (>20cm/low power).
A
Actions 80
Adding a contact from phone screen 45
Add new contact 42
Alarm 85
Alerts and Sounds 79
All applications icon 21
Answering a call 45
Application/media file download 83
Audible touch tones 46
B
Backup data 39
Battery
Charging indicator 14
Battery usage 14
Charging 14
Improving battery life 15
Optimize power 14
Broadcast messages 51
C
Calculator 85
Calendar 84
Call accept/Send key 18
Calling from People 42
Call monitoring 47
Call settings 46
Call waiting 48
Camera 83
Changing wallpaper 24
Clock 85
Contacts
Add 42
Send message 42
D
Data backup and restore 39
Data syncing 40
Adding an account 40
Configuring an account 41
Manual 41
Deleting a contact 44
Deleting call history 46
Deleting messages 51
Dialing a call 45
From People 45
Display icons 21
Display settings
Wallpaper 24
E
Editing contact details 42
Events 84
Exporting contacts to computer 43
Exporting contacts to SIM card 43
F
Favorites tray 21
Fixed dial numbers (FDN) 47
Frequently called list 46
G
Gmail 83
Google account 20, 39
Adding an account 40
Deleting an account 40
Syncing data 40
Google search bar 21
Google Touch Keyboard 19
H
HAC rating 11
Home screen 20
Indicators 22
Home screen icons/folders
Adding to home screen 21
Creating in home screen 21
Moving an icon/folder 22
Removing from home screen 22
1
Importing contacts to phone 42
Information 80
Internet calls 48, 49
K
Keypad
Accept/Send 27
Back 27
End call 27
Function keys 57
Navigation keys 27
Power On/Off 27
Keypad for Sonim XP6 18
Keypad functions 29
Keypad layout
Xp6 phone 18
L
Language settings 29
Personal dictionary 29
Speech 29
Spell checker 29
Loudspeaker 46
M
MMS 50
Sending MMS message 50
Mouse/pointer settings 30, 31
Music player 85
N
Notification Control 79
O
Optimizing power 30, 49
P
People 42
People/Contact settings 44
Phone lock screen 24
Phone specifications 16
Play store 83
Power Optimization 14
Power saving settings 30 Viewing battery life 30
Proximity sensor 47
Q
Quick Responses 46
R
Restore data 39
Ringtones 46
S
Safety Guidelines for mobile usage 9
SAR information 11
Search bar 21
Searching Contacts/people 44
Security settings
Phone lock screen 24
Sending SMS 50
Sending SMS/MMS
From People 42
Setting up your phone 19
Sharing contact details 43
SIM card 16
SIP accounts 49
SMS 50
SMS settings 50
Sound recorder 85
System icons 21
T
Text entry 53
Time and date settings 29
Touch and type operations 20
TTY mode 48
V
vibrate mode 46
Viewing call history 45
Viewing contact details 42
Viewing contacts from phone screen 45
Voice recorder 85
XP6 phone
Box contents 16
Keypad layout 18
Switching On 19
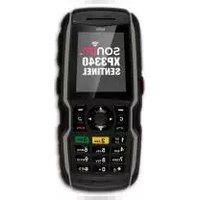
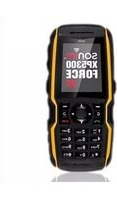
- THIRD PARTY TRADEMARKS
- DISPOSAL OF OLD ELECTRICAL AND ELECTRONIC EQUIPMENT
- DISPOSAL OF BATTERY
- GUIDELINE FOR HEADPHONE AND EARPHONE
- SETTINGS
- MANAGINGCONTACTS
- MANAGING CALLS
- SENDING MESSAGES
- USING THE VIRTUAL KEYBOARD
- INSTALLING AND ACCESSING ENHANCED PUSH-TO-TALK
- SERVICES
- CREATING EPTT CONTACTS
- CREATING NEW EPTT GROUPS
- MAKING EPTT CALLS TO INDIVIDUALS AND
- GROUPS
- COMPREHENSIVE 3-YEAR WARRANTY
- PHONE MODELS COVERED
- SONIM SUPPORT INFORMATION
- USE THE GUIDE EFFECTIVELY
- OPTIONS COMMONLY USED ACROSS MENU ITEMS
- SAR INFORMATION
- THE SONIM XP6 HAS BEEN CERTIFIED IN COMPLIANCE WITH THE GOVERNMENT'S REQUIREMENTS FOR EXPOSURE TO RADIO WAVES
- SAR DATA INFORMATION FOR RESIDENTS IN THE UNITED STATES AND CANADA
- HAC RATING
- AVOID HIGH TEMPERATURES
- BATTERY DISPOSAL
- PERSONAL MEDICAL DEVICES
- CHILD SAFETY
- EMERGENCY CALLS
- BATTERY USAGE
- CHARGING THE BATTERY
- INSERT CHARGER
- CONNECT TO PHONE
- CHARGING ANIMATION/ICON
- VERIFYING AND OPTIMIZING BATTERY USAGE
- TIPS TO EXTEND BATTERY LIFE
- WHAT IS IN THE BOX
- PHONE SPECIFICATIONS
- YOUR SIM CARD
- REPLACING THE SIM CARD
- SONIM XP6 PHONE
- SWITCHING ON
- SETTING UP YOUR PHONE
- ENHANCED PUSH-TO-TALK (EPTT) APPLICATION UPDATE
- SETTING UP GOOGLE TOUCH KEYBOARD
- NEED FOR A GOOGLE+™ ACCOUNT
- TOUCH AND TYPE OPERATIONS
- MANAGING HOME SCREEN
- ADDING AN APPLICATION ICON TO HOME SCREEN
- CREATING A FOLDER ON THE HOME SCREEN
- MOVING AN ICON/FOLDER FROM THE HOME SCREEN
- REMOVING AN ICON/FOLDER FROM THE HOME SCREEN
- HOME SCREEN INDICATORS
- PHONE OPERATIONS WITHOUT SIM CARD
- SETTING UP AND USING LOCK SCREEN
- CHANGING THE WALLPAPER
- TAKING A SCREENSHOT
- VOICE INPUT FOR TEXT ENTRY
- TEXT ENTRY OPTIONS
- T9 TEXT INPUT METHOD
- TO ENTER A WORD
- TO INSERT A NUMBER
- T9EN: ENTER TEXT BASED ON THE T9 DICTIONARY. ALL LETTERS ARE IN UPPERCASE (CAPITALIZED)
- THE FOLLOWING TABLE DISPLAYS THE VARIOUS KEYS AND THE CORRESPONDING FUNCTIONS THEY PERFORM
- YOU CAN SET AND DISPLAY THE DATE AND TIME ON THE PHONE. YOU CAN ALSO SELECT THE DISPLAY FORMAT
- LANGUAGE AND INPUT SETTINGS
- SPELL CHECKER SETTINGS
- PERSONAL DICTIONARY SETTINGS
- SPEECH SETTINGS
- MOUSE/POINTER SETTINGS
- DISPLAY SETTINGS
- POWER SAVING SETTINGS
- VIEWING BATTERY LIFE
- FORCE STOPPING AN APPLICATION
- REPORTING AN ISSUE WITH APPLICATION
- CONNECTING A WIRELESS DISPLAY DEVICE
- CONNECTING A PC USING USB CONNECTION
- USB TETHERING
- VIEWING DEVICE DETAILS
- MANAGING MEMORY UTILIZED BY APPLICATIONS
- OPTIMIZING MEMORY USAGE
- CONNECTING TO WI-FI NETWORK
- ADDING A NEW NETWORK
- EDITING A NETWORK
- FORGETTING A NETWORK
- ENABLING WPS FOR YOUR ROUTER
- ENHANCED PTT USERS ADVANCED SETTING
- CONNECTING TO BLUETOOTH DEVICES
- PAIRING A BLUETOOTH DEVICE
- EDITING BLUETOOTH DEVICE SETTINGS
- OPTIMIZING DATA USAGE
- ACTIVATING AIRPLANE MODE
- SETTING UP TETHERING & PORTABLE HOTSPOT
- SETTING UP WI-FI HOTSPOT
- ACTIVATING WI-FI HOTSPOT
- ACTIVATING BLUETOOTH TETHERING
- MANAGING MOBILE NETWORK
- MANAGING EMERGENCY ALERTS
- ABOUT ANDROID SECURITY
- MANAGING SECURITY SETTINGS
- LOCKING YOUR SCREEN
- ENCRYPTING PHONE DATA
- LOCKING YOUR SIM CARD
- MANAGING CREDENTIAL CERTIFICATES
- PROTECTING YOUR PHONE FROM HARMFUL APPLICATIONS
- LOCATION ACCESS
- APPS ACCESSING YOUR LOCATION
- BACKUP AND RESTORE DATA
- TO BACKUP YOUR DATA
- MANAGING ACCOUNTS
- CONFIGURE AUTO-SYNC FOR ALL APPS
- ADDING AN ACCOUNT
- DELETING AN ACCOUNT
- SYNCING YOUR ACCOUNT
- CONFIGURE GOOGLE ACCOUNT SYNC SETTINGS
- SYNC A GOOGLE ACCOUNT MANUALLY
- ADD A NEW CONTACT
- VIEW THE CONTACT DETAILS
- SENDING A MESSAGE FROM CONTACTS
- SENDING SMS/MMS
- DIALING A NUMBER FROM CONTACTS
- EDITING THE CONTACT DETAILS
- IMPORTING SIM CARD CONTACTS TO PHONE
- EXPORTING PHONE CONTACTS TO SIM CARD
- EXPORTING PHONE CONTACTS TO STORAGE
- SHARING CONTACTS VIA MMS, BLUETOOTH, DRIVE AND E-MAIL
- MANAGING CONTACT SETTINGS
- MANAGING PHONEBOOK SETTINGS
- SEARCHING CONTACTS
- DELETING A CONTACT
- MAKING A CALL
- DIALING A NUMBER VIA PEOPLE
- ANSWERING AN INCOMING CALL
- ADDING A CONTACT FROM PHONE SCREEN
- VIEWING ALL CONTACTS FROM PHONE SCREEN
- VIEWING CALL HISTORY
- DELETING CALL HISTORY
- DELETING FREQUENTLY CALLED CONTACTS LIST
- MANAGING CALL SETTINGS
- CHANGING RINGTONES AND MASTER VOLUME
- EDITING QUICK RESPONSES
- ACTIVATING VIBRATE MODE
- ACTIVATING TOUCH TONES
- CHANGING TO LOUDSPEAKER MODE
- MANAGING FIXED DIAL NUMBERS
- MONITORING INCOMING AND OUTGOING CALLS
- SCREENING OUTGOING CALLS
- TURN ON PROXIMITY SENSOR
- SETTING TTY MODE
- CALL FORWARDING
- CALL WAITING
- INTERNET CALL SETTINGS
- SIP ACCOUNTS
- USE INTERNET CALLING
- OPTIMIZING POWER DURING A CALL
- SENDING SMS/MMS MESSAGES
- MANAGING MESSAGE SETTINGS
- DELETING MESSAGES
- EMERGENCY ALERTS
- SETTING UP E-MAIL ACCOUNTS
- SENDING AN E-MAIL
- READING AN E-MAIL
- FOR EPTT USERS
- ENTER AND EDIT TEXT
- GESTURE TYPING
- USE GESTURE TYPING WITHOUT THE SPACE BAR
- KEYBOARD DICTIONARIES
- PERSONAL DICTIONARY
- ADD-ON DICTIONARY
- LAUNCHING EPTT APPLICATION
- ACTIVATING EPTT USING WI-FI
- ADDING CONTACTS FROM NATIVE PHONEBOOK
- ADDING CONTACTS BY MANUAL INPUT
- MAKING A EPTT CALL TO AN INDIVIDUAL
- MAKING A EPTT CALL TO A GROUP
- MAKING A QUICK GROUP CALL
- EDITING EPTT CONTACT
- DELETING EPTT CONTACT
- EDITING EPTT GROUP
- DELETING EPTT GROUP
- ADDING A FAVORITE CONTACT
- ADDING A FAVORITE GROUP
- EPTT PRESENCE STATUS CHANGE
- SENDING PERSONAL ALERT
- RECEIVING PERSONAL ALERT
- MISSED CALL ALERT
- AVAILABLE STATUS
- DO NOT DISTURB STATUS
- OFFLINE STATUS
- GOOGLE PLAY™ STORE
- DOWNLOADING ANDROID APPLICATIONS AND MEDIA FILES
- MANAGING DOWNLOADED APPLICATION
- MANAGING DOWNLOADED MEDIA FILES
- ACCESSING GMAIL
- CAMERA
- THE GOOGLE CALENDAR HELPS YOU TO SET APPOINTMENTS, SCHEDULE REMINDERS AND ALERTS, AND REPEAT THEM IF REQUIRED. YOU CAN ALSO VIEW YOUR SAVED TASKS ON A DAILY OR WEEKLY BASIS
- ALARM
- CLOCK
- CALCULATOR
- SOUND RECORDER
- MUSIC PLAYER
- ABOUT GOOGLE SEARCH™ AND GOOGLE NOW™
- ACTIVATE GOOGLE NOW
- USE GOOGLE NOW
- VOICE SEARCH AND ACTION
- VOICE ACTIONS
- LICENSE
- COMPREHENSIVE 3 YEAR WARRANTY
- WARRANTY REGISTRATION APPLICATION (ONLY AVAILABLE ON SMART PHONES)
- OUR WARRANTY
- WHAT WE WILL DO
- PHONE CARE
- CONDITIONS
- ACCESSORIES
- SONIM BRANDED
- BATTERY
- YEAR LIMITED WARRANTY
- SONIM XPAND
- FCC STATEMENT
- FCC CAUTION
- IC STATEMENT
- FOR PORTABLE DEVICE USAGE (
- A
- B
- C
- D
- E
- F
- G
- H
- K
- L
- M
- N
- O
- P
- Q
- R
- S
- T
- V
Brand : SONIM
Model : XP6
Category : Smartphone