
Kosmo - Mp3 player MEMUP - Free user manual and instructions
Find the device manual for free Kosmo MEMUP in PDF.


| Product Type | MP3/MP4 Player |
| Brand | MEMUP |
| Model | Kosmo |
| Display | 1.8-inch TFT Color Display |
| Battery | Built-in Lithium-ion Rechargeable |
| Charging Time | 3-4 hours via USB port |
| Recommended Initial Charge | 8 hours |
| Connectivity | USB 2.0 High Speed |
| Audio Playback Formats | MP3, WMA (others via conversion) |
| Video Playback Formats | AMV, AVI (converted from common formats) |
| FM Radio | Yes (FM version only) |
| Voice Recording | Yes (built-in microphone) |
| E-book Reader | Yes (TXT files) |
| Photo Viewer | Yes (supports image browsing) |
| Expandable Storage | microSD card slot |
| Equalizer Presets | Natural, Rock, Pop, Classic, Soft, Jazz, DBB |
| Repeat Modes | Normal, Repeat One, Folder, Repeat Folder, Repeat All, Random, Intro |
| Special Features | A-B Repeat, Lyrics Display, Tempo Control |
| Language Support | Multiple UI languages selectable |
| Dimensions (approx.) | 80 x 40 x 10 mm |
| Weight (approx.) | 30 g |
| Color | Pink |
| Safety Precautions | Avoid water, extreme temperatures, strong magnetic fields |
| Maintenance | Clean with dry cloth; do not use chemical solutions |
| Warranty | Standard manufacturer warranty (refer to included documentation) |
Frequently Asked Questions - Kosmo MEMUP
User questions about Kosmo MEMUP
0 question about this device. Answer the ones you know or ask your own.
Ask a new question about this device
Download the instructions for your Mp3 player in PDF format for free! Find your manual Kosmo - MEMUP and take your electronic device back in hand. On this page are published all the documents necessary for the use of your device. Kosmo by MEMUP.
USER MANUAL Kosmo MEMUP
Kosmo 1.8"
User manual




www.memup.com
Notice
• Download latest user manual from www.memup.com if there is a difference in the instructions given in this manual.
- Do not disconnect the player when it is being formatted or uploading / downloading data.
- Do not subject the device to severe impact or drop it from high position.
- Do not use the player in extreme hot or cold, dusty or damp field. Do not expose it to direct sunshine.
- Back up the data frequently in case of accident data loss.
- Avoid using the player in strong magnetic field.
- Keep the device away from water or other liquids. In the event that water or other liquids enter the device, power off the product immediately, and clean the device.
- Do not use chemical solution to clean the device in order to avoid corrosion. Clean it with a dry cloth.
- Do not attempt to disassemble, repair or modify the product. This will invalidate guarantee.
Introduction
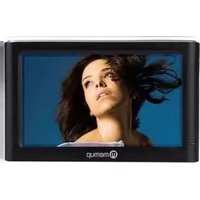
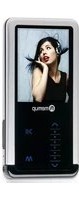
The high integration reduces the device weight and the dimensions and the use is comfortable. The big display with TFT technology offers clear and sharp information and the USB 2.0 High Speed interface make easier the data transfer operation from/to the computer. The KOSMO MP3/MP4 Player has built-in a Lithium battery rechargeable by computer USB port. By the microphone inside it is possible to record voice messages and play them directly with the device or by computer. Before using this product, please read this manual and retain the instruction for future reference.
Description
Here below you will find a product description

- MICRO SD Card slot
- Menu
- Previous [◀] / Backward[◀]
- VOL- (Decrease the Volume)
- USB Connector
- Earphone Connector
- [▶] / Pause [II]
- Next [▶] / Forward [▶]
- VOL + (Increase the Volume)
- Power ON/OFF
- Reset
- Microphone
1. Use
Power ON/OFF
The player has built-in a rechargeable battery. At the first use we suggest to recharge the battery for a long period (around 8 hours). To recharge the battery please connect the Player to USB computer port.
Powering On: Press on On/Off button
Powering Off: Hold the On/Off button until the power-off animation begins.
Recharge the Player
The player can be recharged by the provided USB cable by connecting to the PC. During charging, an icon on the right will show. You should first turn on your PC, and then connect the player to the PC through the USB cable. The player should be fully charged in 3 to 4 hours.
2. Main Menu
After powering on the Player, you can see the main menu with 9 submenus (Radio FM for FM version only*), which allow you to select different functions and options.
By using the [◀] or [▶] buttons, you can select the desire option, and then press [M] button to confirm the selection. To access at the main menu while you are inside any of these submenus, press and hold [M] button for a few seconds. (Short pressing the [M] button usually opens the submenu option of each submenu)
The available options are:
Music: Select this option to play song.
Video: Select this option to play AMV video.
FM Radio*: Select this option to listen radio programs *Only available on KOSMO FM version
Record: Select this option to record voice messages by the microphone inside.
Voice: Select this option to play recorded voice message.
E-Book: Select this option to read text.
Browser: Select this option to explorer folders.
Photos: Select this option to browse and see photos.
System: Select this option to access at system setup.
3. Music Mode
The music player option allows playing songs. To activate this option please follow here below instruction:
- Power ON the Player, the screen will display the main menu
- By using [◀] or [▶] buttons, select MUSIC option then press [M] button.
- Press [▶ II] button to start to play the first song available.
Key Function at Music Mode
During the song play it is possible to activate the following controls.
Press the [▶ II] to start to play a song. Press the play button again to pause the song. [▶ II]: To restart to play the song press play button again. Hold the play button for longer time will eventually turn off the player
Press [◀] or [▶] to select the previous or the next song. REW & FFWD [◀▶]: Press and Hold the [◀] or [▶] buttons to rewind or fast forward the song.
Volume (VOL+ and VOL-): Press [VOL+] button to increase the volume and press [VOL-] button to decrease the volume.
Music Submenu
By short pressing the MENU [M] button, you can find the following music submenus. Press [◀] or [▶] to choose, and then press [M] button to confirm each submenus. Use the same technique to navigate inside each of the submenus.
| Status | Submenu Options |
| In Pause mode | Local Folder: List of the folders in internal memory. Under this directory, you can choose to go up a folder level by pressing [◀] or [▶], then press [M] button to confirm. |
| Card Folder: List of the folders in micro SD card. Under this directory, you can choose to go up a folder level by pressing [◀] or [▶], then press [M] button to confirm. | |
| Delete File: Delete specific file you want | |
| Delete All: Delete all files using this option |
| Status | Submenu Options |
| In Play mode | Repeat: Normal, Repeat One, Folder, Repeat Folder, Repeat All, Random and Intro. |
| Equalizer : Natural, Rock, Pop, Classic, Soft, Jazz and DBB | |
| Tempo Rate: You can alter the playing speed of the Song (not WMA format) | |
| Replay A-B : A-B Repeat Function | |
| Replay Times | |
| Replay Gap |
A-B Repeat Function
The player can loop-playing a specified music interval of a song. While Playing Music, Press M button to set repeat start point A, and then press M again to set repeat end point B. The player will then loop-play the content between point A and B.
Lyric Display
The Player supports Lyrics Display, in which the lyrics would be shown synchronizing with the actually lyrics of the song. The file format should be ".Irc", and the file name should be exactly the same with the song's file name and place within the same folder with the song. To activate this option, please follow here below instruction:
- While playing song, press and hold MENU [M] to activate lyrics display
- Short press MENU [M] button again to de-activate the lyrics display and return to music play menu.
4. Video Mode
Caution: The Movie Player only plays AMV and AVI files, you need conversion from other file format in order to watch the movie you like.
Supported formats to be converted in AMV and AVI format with video converter:
- Windows Media format (.asf, .wmv & .wma)
- Quicktime format (.mov)
- MPEG 1 format (.mpg, mpeg &.dat)
- MPEG 2 format (.vob)
• Real player format (.rm)
NOTE: to convert some formats it is necessary to have installed the related codec (for example Quicktime for ".mov" files or DivX Codec for some ".avi" files)
The Video allows playing movies in AMV Format. To activate this option please follow here below instruction:
-
Power ON the Player, the screen will display the main menu.
-
By using [◀] or [▶] buttons, select Video option then press [M] button.
-
Press [▶ II] button to start to play the first movie available.
Key Function at Video Mode
During the song play it is possible to activate the following controls.
Press the [▶ II] to start to play a movie. Press the play button again to make a pause. To [▶ II]: restart to play the movie press play button again.
Hold the play button for longer time will eventually turn off the player
REW & FFWD [◀▶]
Press [◀◀] or [▶◀] to select the previous or the next movie.
Press and Hold the [◀◀] or [▶◀] buttons to rewind or fast forward the movie.
Volume (VOL+ and VOL-): Press [VOL+] button to increase the volume and press [VOL-] button to decrease the volume.
Video Submenu
By short pressing the MENU [M] button, you can find the following Video submenus. Press [◀] or [▶] to choose, and then press [M] key to confirm each submenus. Use the same technique to navigate inside each of the submenus.
| Status | Submenu Options |
| In Pause mode | Local Folder: List of the folders in internal memory. Under this directory, you can choose to go up a folder level by pressing [◀] or [▶], then press [▶ II ] to confirm. |
| Card Folder: List of the folders in micro SD card. Under this directory, you can choose to go up a folder level by pressing [◀] or [▶], then press [▶ II ] to confirm. | |
| Delete File: Delete specific file you want | |
| Delete All: Delete all files using this option | |
| Repeat: Normal, Repeat One, Folder, Repeat Folder, Repeat All, Random and Intro. |
5. Record: Voice messages recorder
This option allows to record voice messages by using the microphone inside. To record voice message, please follow here below instruction:
- Power ON the Player, the screen will display the main menu.
- By using [◀] or [▶] buttons, select Record option then press [M] button.
- Press [▶ II] button to start and stop recording.
- You can listen to your way file under the Voice submenu.
During recording, press the [▶ II] to make a pause. Hold the [▶ II] button for longer time will eventually stop recording.
By short pressing the MENU [M] button, you can find the Local folder, Card folder and Rec Type (Record format settings). Press [◀] or [▶] to choose, and then press [M] key to confirm each submenus. Use the same technique to navigate inside each of the submenus.
- Under the Local folder or Card folder submenu, you can choose to go up a folder level by pressing [▶ II] to confirm. And then you can choose the folder you want to play
- Under the Rec Type submenu, you can choose the recording quality.
6. Voice : Voice Messages Player
The voice option allows playing the voice messages recorded by the Player. To activate this option, please follow here below instruction:
- Power ON the Player, the screen will display the main menu.
- By using [◀] or [▶] buttons, select Voice option then press [M] button.
- Press [▶ II] button to start to play the first recording available.
Key Function at Voice Mode
During the recording play it is possible to activate the following controls.
Press the [▶ II] to start to play a recording. Press the play button again to pause the recording. To restart to play the recording press play button again. Hold the play button for longer time will eventually turn off the player.
REW & FFWD [◀▶]: Press [◀◀] or [▶▶] to select the previous or the next recording. Press and Hold the [◀◀] or [▶▶] buttons to rewind or fast forward the recording.
Volume (VOL+ and VOL-): Press [VOL+] button to increase the volume and press [VOL-] button to decrease the volume.
Voice Submenu
By short pressing the MENU [M] button, you can find the following music submenus. Press [◀] and [▶] to choose, and then press [M] key to confirm each submenus. Use the same technique to navigate inside each of the submenus.
| Status | Submenu Options |
| While Music is paused | Local Folder: Under this directory, you can choose to go up a folder level by pressing [▶ II ] to confirm. And then you can choose the folder you want to play |
| Delete File: Delete specific voice file you want | |
| Delete All: Delete all voice files using this option |
| Status | Submenu Options |
| While music is on | Repeat: Seven repeat modes are listed including Normal, Repeat One, Folder, Repeat Folder, Repeat All, Random and Intro. |
| Replay: Replay song | |
| Replay A-B : A-B Repeat Function |
7. E-Book
The Ebook option allows reading text file. To activate this option please follow here below instruction:
1: Power ON the Player, the screen will display the main menu.
2: By using the [◀] or [▶] buttons select E-book, and then press [M] button to confirm
3: Use [◀◀] or [▶▶] buttons to choose the file
4: Press [▶ II] button to start reading the file
E-Book Submenu
By short pressing the MENU [M] button, you can find the following music submenus. Press [◀] or [▶] to choose, and then press [M] key to confirm each submenus. Use the same technique to navigate inside each of the submenus.
| Status | Submenu Options |
| In Pause mode | Local Folder: List of the folders in internal memory. Under this directory, you can choose to go up a folder level by pressing [◀] or [▶], then press [▶ II ] to confirm. |
| Card Folder: List of the folders in micro SD card. Under this directory, you can choose to go up a folder level by pressing [◀] or [▶], then press [▶ II ] to confirm. | |
| Play Set: You can choose between manual play and auto play. For auto play, you can set the playing time from 1 to 10 seconds for each file. | |
| Delete File: Delete specific file you want | |
| Delete All: Delete all files using this option |
8. Photo
The Photo option allows browsing image file. To activate this option please follow here below instruction:
- Power ON the Player, the screen will display the main menu.
- By using the [◀] or [▶] buttons select Photo, and then press [M] button to confirm
- Use [◀◀] or [▶▶] buttons to choose the file
- Press [▶ II] button to start browsing the file
Photo Submenu
By short pressing the MENU [M] button, you can find the following music submenus. Press [◀] or [▶] to choose, and then press [M] key to confirm each submenus. Use the same technique to navigate inside each of the submenus.
| Status | Submenu Options |
| In Pause mode | Local Folder: List of the folders in internal memory. Under this directory, you can choose to go up a folder level by pressing [◀] or [▶], then press [▶ II ] to confirm. |
| Card Folder: List of the folders in micro SD card. Under this directory, you can choose to go up a folder level by pressing [◀] or [▶], then press [▶ II ] to confirm. | |
| Play Set: You can choose between manual play and auto play. For auto play, you can set the playing time from 1 to 10 seconds for each file. | |
| Delete File: Delete specific file you want | |
| Delete All: Delete all files using this option |
9. Setting: System Setup
The Setting option allows to access to Player setup system. To access at system setup please follow here below instruction:
- Power ON the Player, button, the screen will display the main menu.
- By using the [◀] or [▶] select Setting option then press [M] button to enter the Setting menu.
- By using the [◀] or [▶] select the system setup parameter and press [▶ II] button.
The parameters available in the setup system are:
System Time: This option allows setting of the system date and time.
LCD set: This option allows setting the brightness, darkly and black screen of the LCD panel.
Language: This option allows setting the Language of the User Interface.
Power Off: This option allows setting the off time and sleep time.
Memory Info: This option allows checking the memory usage.
Firmware Ver: This option allows checking the firmware version.
Firmware Upg: This option allows to upgrade the firmware.
LIMITATION OF LIABILITY AND DAMAGES.
IN NO EVENT WILL MANUFACTURER AND MANUFACTURER'S RESELLERS (COLLECTIVELY REFERRED TO AS "THE SELLERS") BE LIABLE FOR DAMAGES OR LOSS, INCLUDING BUT NOT LIMITED TO DIRECT, INDIRECT, SPECIAL WILLFUL, PUNITIVE, INCIDENTAL, EXEMPLARY, OR CONSEQUENTIAL, DAMAGES, DAMAGES FOR LOSS OF BUSINESS PROFITS, OR DAMAGES FOR LOSS OF BUSINESS OF ANY CUSTOMER OR ANY THIRD PARTY ARISING OUT OF THE USE OR THE INABILITY TO USE THE PRODUCT OR THE SOFTWARES, INCLUDING BUT NOT LIMITED TO THOSE RESULTING FROM DEFECTS IN THE PRODUCT OR SOFTWARE OR DOCUMENTATION, OR LOSS OR INACCURACY OF DATA OF ANY KIND, WHETHER BASED ON CONTRACT, TORT OR ANY OTHER LEGAL THEORY, EVEN IF THE PARTIES HAVE BEEN ADVISED OF THE POSSIBILITY OF SUCH DAMAGES. BECAUSE SOME STATES DO NOT ALLOW THE EXCLUSION OR LIMITATION OF LIABILITY FOR DAMAGES, THE ABOVE LIMITATION MAY NOT APPLY TO THE PARTIES. IN NO EVENT WILL THE SELLERS' TOTAL CUMULATIVE LIABILITY OF EACH AND EVERY KIND IN RELATION TO THE PRODUCT OR ITS SOFTWRE EXCEED THE AMOUNT PAID BY CUSTOMER FOR THE PRODUCT.
- KOSMO 1.8
- USER MANUAL
- NOTICE
- INTRODUCTION
- DESCRIPTION
- USE
- POWER ON/OFF
- RECHARGE THE PLAYER
- MAIN MENU
- MUSIC MODE
- KEY FUNCTION AT MUSIC MODE
- MUSIC SUBMENU
- A-B REPEAT FUNCTION
- LYRIC DISPLAY
- VIDEO MODE
- KEY FUNCTION AT VIDEO MODE
- VIDEO SUBMENU
- RECORD: VOICE MESSAGES RECORDER
- VOICE : VOICE MESSAGES PLAYER
- KEY FUNCTION AT VOICE MODE
- VOICE SUBMENU
- E-BOOK
- E-BOOK SUBMENU
- PHOTO
- PHOTO SUBMENU
- SETTING: SYSTEM SETUP
- LIMITATION OF LIABILITY AND DAMAGES
Brand : MEMUP
Model : Kosmo
Category : Mp3 player