Explorer - Camcorder i-Joy - Free user manual and instructions
Find the device manual for free Explorer i-Joy in PDF.


| Product Type | Sport videocamera / camcorder |
| Brand | i-Joy |
| Model | Explorer |
| Dimensions | 58 x 44 x 23 mm |
| Weight | Approx. 50 g (estimated) |
| Power Supply | Built-in 3.7V rechargeable lithium battery |
| Battery Charging Time | 2-4 hours |
| Storage Medium | TF card (max 32GB, Class 6 or above) |
| Image Sensor | 5.0 megapixel CMOS |
| Lens | F2.5, f=3.53mm |
| Digital Zoom | 8x |
| LCD Screen | 2.0-inch |
| Photo Resolution | 12M (4000x3000), 8M (3264x2448), 5M (2592x1944) |
| Video Resolution | FHD (1920x1080), HD (1280x720) |
| File Format | JPEG (photo), MJPG4 (video) |
| Self-timer | 2 sec / 5 sec / 10 sec |
| USB Port | USB 2.0 |
| Menu Languages | English, French, Spanish |
| Auto Shutdown | 1, 3, 5, 10 min or OFF |
| System Requirements | Windows XP/Vista/7/8, Mac OS X 10.2 or higher |
| Function Modes | Photo, Video recording, Playback, PC camera |
| Waterproof Case | Included (no audio recording while inside) |
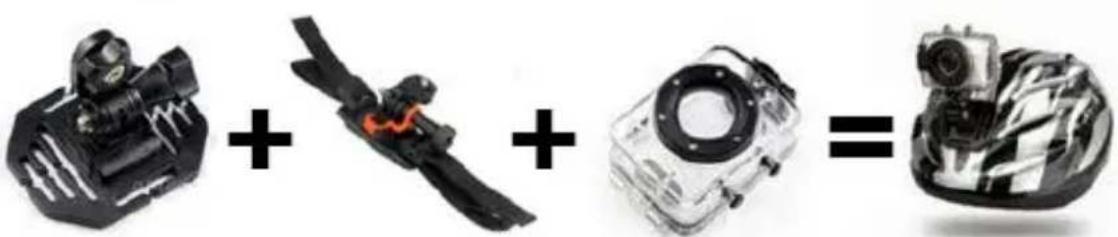
| Accessories Included | Waterproof case, mounting kit (bike, helmet), USB cable, manual |
| Maintenance | Keep dry, clean lens with professional cleaner, avoid organic solvents |
| Safety Precautions | Format memory card in camera first; avoid extreme temperatures; use Class 6 or above TF card |
| Spare Parts / Repairability | Memory card replaceable; battery built-in not user-replaceable; warranty covers manufacturing defects |
| Warranty | Standard warranty from date of purchase; proof of purchase required |
Frequently Asked Questions - Explorer i-Joy
User questions about Explorer i-Joy
0 question about this device. Answer the ones you know or ask your own.
Ask a new question about this device
Download the instructions for your Camcorder in PDF format for free! Find your manual Explorer - i-Joy and take your electronic device back in hand. On this page are published all the documents necessary for the use of your device. Explorer by i-Joy.
USER MANUAL Explorer i-Joy
natural_image
Exterior view of a transparent underwater camera module with orange 'EXPLORER' logo and black bezel (no text or symbols on body)Manual de usuario
Funciones
natural_image
Three black-and-white photos of camera modules: a clip, a camera with lens, and a camera with connectors (no text or symbols)Casco
natural_image
Composite image showing three outdoor scenes: a camera on a bicycle, a road with a digital camera, and a skier on a snowy slope (no text or symbols visible)
natural_image
Diagram showing a laptop connected to a screen with a cable, next to an open screen displaying a photo (no text or symbols present)natural_image
Line drawing of a device with labeled ports and a connector (no text or symbols)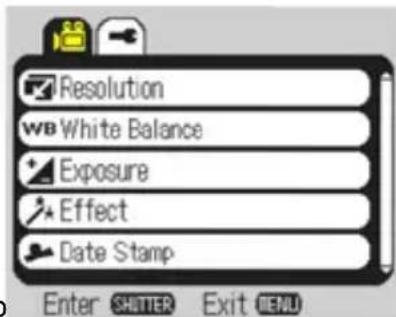
Menú Foto
Grabación de video
▲ Menu Reproducción
natural_image
Exterior view of a transparent digital camera with orange 'EXLOVER' logo and black bezel (no text or symbols on body)User manual
Function
Thank you for choosing this camera. Please carefully read the manual before using, and keep it at a safe place for future reference.
The compilation of the user manual refers to the latest information. The manual quotes captured screen displays and graphics, with the aim to introduce the digital camera through detailed and direct methods. Due to the differences of technical R&D and production batch, those captured screen displays and graphics indicated in the manual may be different from that of actual digital camera.
Precautions
TF high-speed card (multimedia memory card) at Class6 or above is required for this camera.
Instructions for using the memory card
- In case of a newly purchased memory card for the first time use, or data available in the memory card unrecognized for the camera or image captured by other cameras, please ensure to firstly format the memory card;
- Before plugging in or out the memory card, please firstly disconnect power supply of the camera;
- After using for many times, performance of the memory card will be lowered. In case of lowered performance, a new memory card is needed to purchase;
- The memory card is a precise electronic device. Please don't bend it and keep it away from falling or heavy load;
- Don't keep the memory card in the environment with strong electromagnetic or magnetic field, like
the place near speaker or receiver of TV;
- Don't use or keep the memory card in environment with over high or low temperature;
- Keep the memory card clean and away from contacting liquid. In case of contacting liquid, please dry it with soft cloth;
- In case of keeping the memory card idle, place it into the card sleeve;
- Please note that the memory card will get hot after long-term use, and this is normal;
- Don't use the memory card having used on other digital cameras. If to memory card on this camera, please firstly format it with the camera;
- Don't use the memory card having formatted on other camera or card reader;
- In case of one of the followings with the memory card, the recorded data may be damaged:
- Improper use of the memory card;
- Disconnect power supply or take the memory card out during recording, deleting (formatting) or reading;
- You are recommended to backup important data on other media like soft disk, hard disk, CD.
Camera Maintenance
- Keep it in a dry and dark place for keeping idle;
- Use proper protective cover to avoid lens and display scratched;
- In case of cleaning the surface of camera lens, first blow the dust off the surface, use a cloth or paper available to optical equipment to wipe the lens gently. Use the professional camera cleanser to
clean the lens. Do not use any organic solvent;
- Do not touch the lens surface by fingers.
System requirements
When operating or using the digital camera, please take minimum system requirements for the computer of the camera into consideration. You are strongly recommended to use better computer equipment for operating the camera to achieve the optimized effect. The minimum system requirements are as below:
| System requirements | |
| Operating system | Windows XP, Windows Vista, Windows 7, Windows 8, Mac 10.2 |
| CPU Intel PIII667 or above or CPU with equal performance | |
| Memory 512 MB or above | |
| Sound card and graphics card | Support DirectX8 or above |
| CD driver 4X speed or above | |
| Hard disk Minimum 1 GB free space | |
| Others 1 standard USB 2.0 port | |
Function Features
This camera is equipped with various characteristics and functions:
- Digital VDR;
● Digital camera (5 mega-pixel);
● Mass Storage (Removable disk); - PC Camera;
- 8X digital zoom
Appearance
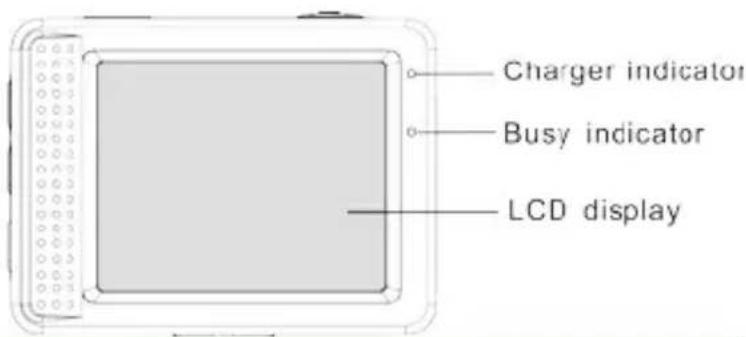
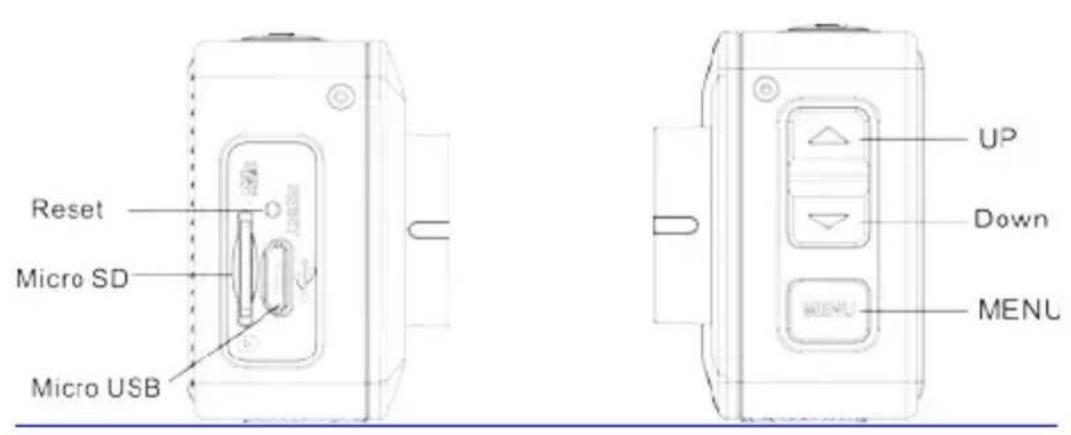
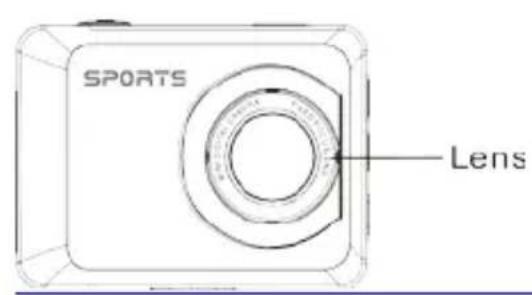
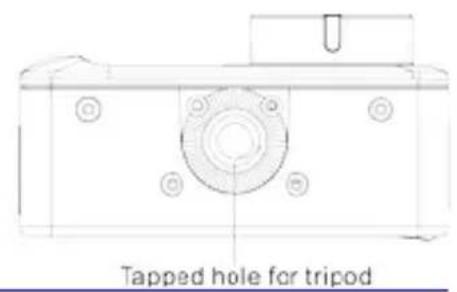
Accessories
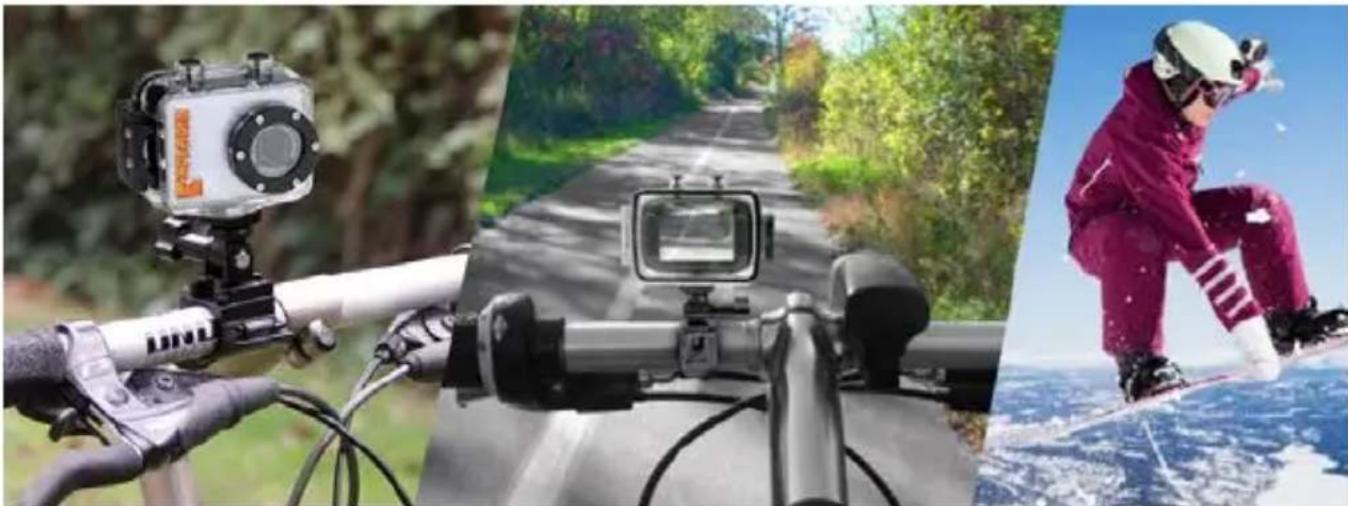
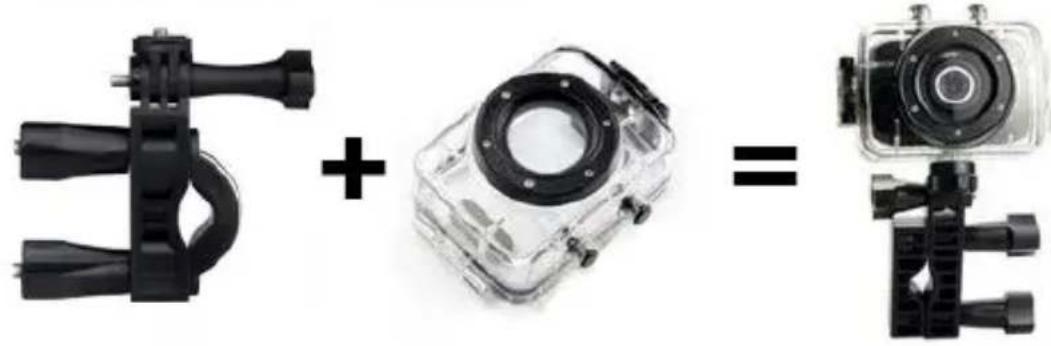
Moto / Bike
natural_image
Three black-and-white photos showing a camera with adjustment knobs, a camera case, and a camera module (no text or symbols)Helmet
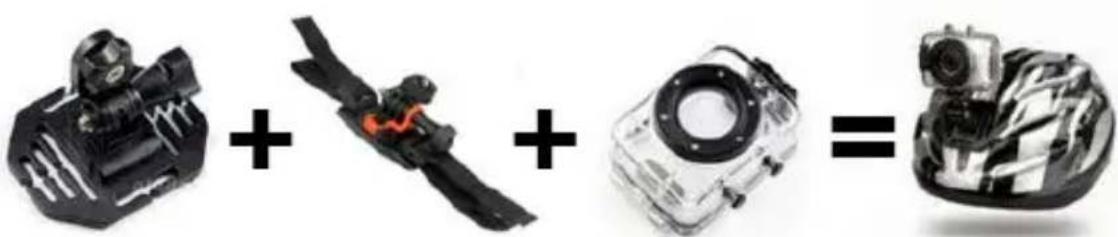
natural_image
Composite image showing three outdoor scenes: a camera on a bicycle, a road with a digital camera, and a skier on a snowy slope (no text or symbols visible)
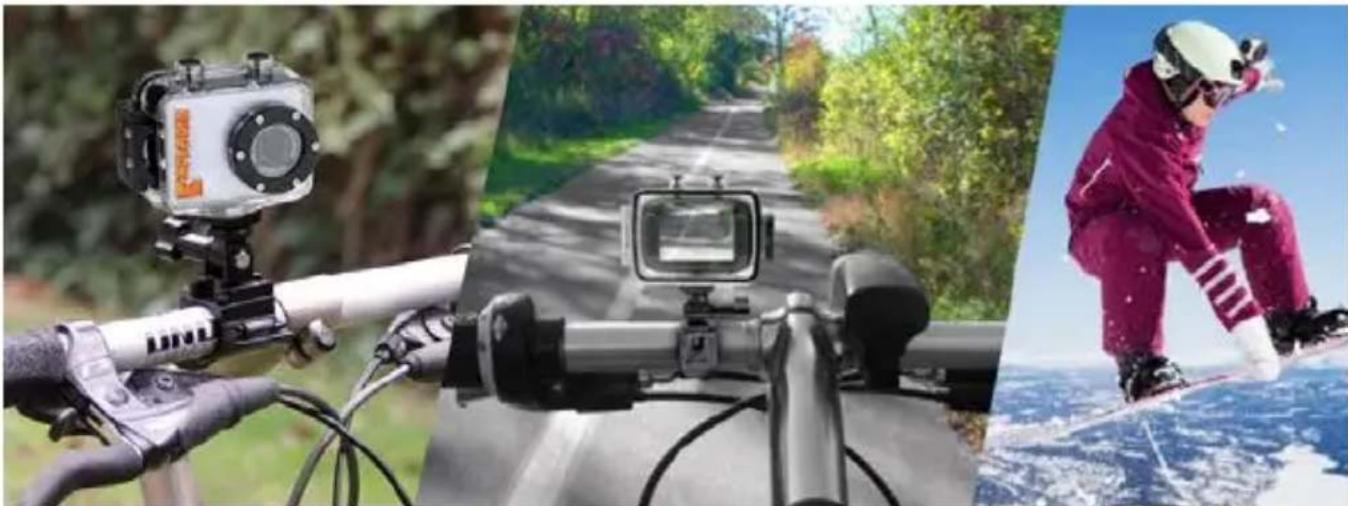
Please, note the camera won't record audio while it is inside the waterproof case.
Key Functions and Indicators
| Key/Indicator | Function |
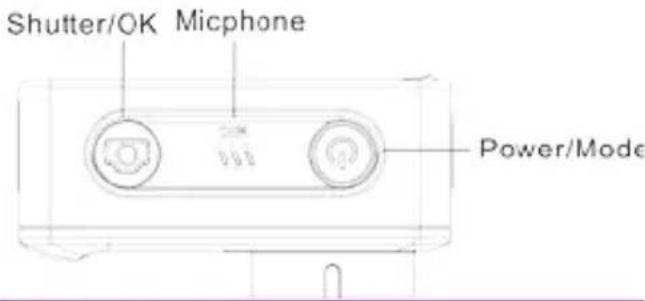
| Power key | Power On/Off; switch_over among video recording, capturing and playback |
| Shutter key | Video recording/capturing; play/stop playing video file (Playback mode); menu confirmation |
| MENU key Open and exit from menu | |
| Up key | Digital zoom-in: select menu (after opening the menu); file page-up; pause playing video ( playback mode); |
| Down key | Digital zoom-out: select menu (after opening the menu); file page-down (after picture zoom-out in playback mode) |
| Charger indicator | Indicator lights in red during charging, and the indicator turns off after charging full. |
| Busy indicator | When the camera is busy (for example: during film recording, capturing, automatic screen-off), the busy indicator will light. |
Start to use
- Charge the built-in lithium battery
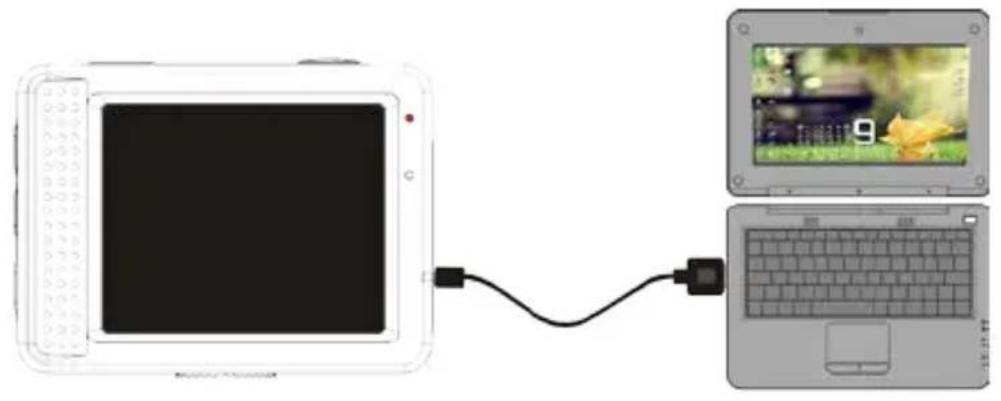
The camera is equipped with built-in 3.7V lithium battery. Please ensure power available for the camera and timely charge it in case of low battery.
natural_image
Diagram showing a laptop connected to a screen with a cable, next to an open screen displaying a small image (no text or symbols present)-Connect the camera to computer for charging under shutdown status. The charging indicator will be on when charging, and will be off when the battery is fully charged. Generally, the battery can be fully charged after 2-4 hours.
- How to use the memory card
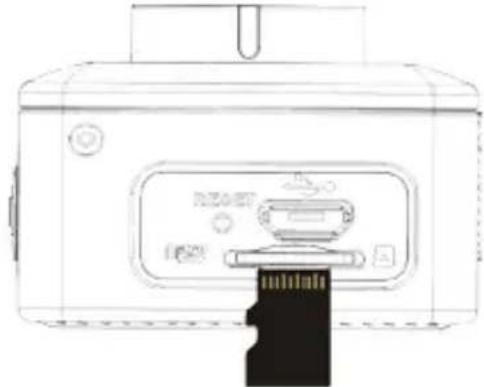
2.1. Properly insert the TF card into the card holder as per the instructions indicated near the card holder.
2.2. To remove the TF card, press the end of memory card gently, the card will be ejected.
natural_image
Line drawing of a portable device with a black clip inserted into the base (no text or symbols)Note: The camera is not equipped with built-in memory. Please insert memory card before using. Before using the camera, it is a must to format the memory card on the camera.
- Startup and shutdown:
3.1 Startup: press the POWER key for 3 second, the camera will show startup screen and enters into POWER ON state;
3.2 Shutdown: press the POWER key when the camera is under idle mode to shut down;
3.3 Auto shutdown: the camera will be shut down automatically when the camera is under idle mode for a certain time to save power. The default time for auto shutdown is 3 min.
3.4 Shutdown under low power: when the battery is under low power, the LCD will ind.e " . Please charge the battery timely. When the icon turns red and flashes, the camera will be shut down automatically.
4. Function modes switching
The camera has 3 modes: photo mode, recording mode, and playback mode. Use the power key to switch the modes after starting up.
Recording mode: for recording videos;
Photo mode: for taking photos;
Playback mode: for playing back the current video.
5. Indicators
5.1 BUSY indicator: When the camera is working (e.g. recording, photographing, auto screen off etc.), the indicator will light;
5.2 Charging indicator: In shutdown state, the lightened indicator means the user is charging the camera.
6. Photo/recording mode
It enters automatically into recording mode.
Press Shutter to start recording, and press Shutter again to stop recording.
Press Shutter to directly take photo.
In rerecording/photo mode, press Up/Down for digital zoom in/out.
6.1 Screen display in photo mode
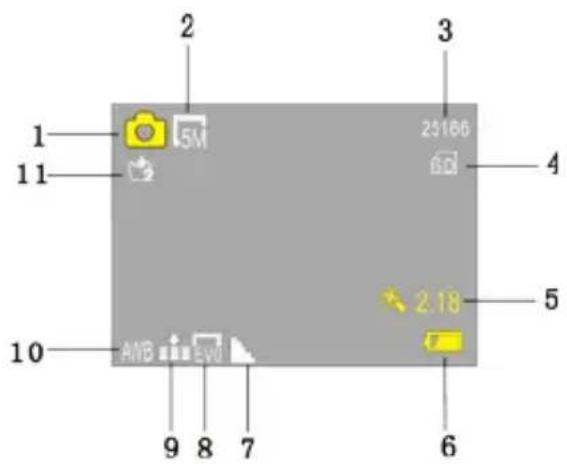
- Photo mode;
- Photo resolution;
- Available shooting count;
- Insert SDcard ;
- Icon of digital zoom;
- Battery state;
- Sharpness mode;
- EV value mode
- Photo quality
- White balance mode;
- Self-timer mode.
6.2 Screen display in recording mode
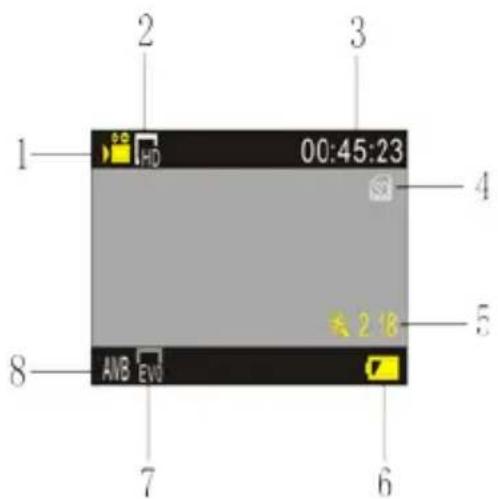
- Video mode;
- Video resolution;
- Available time to record;
- Insert SDcard;
- Icon of digital zoom;
- Battery state;
- EV value mode;
- White balance mode.
Note: Automatic screen-off will be performed during recording for saving power. User may short press Power key to enable the screen for displaying.
7. Menu Setting Mode
7.1 Menu display
In photo, recording and playback mode, press Menu key to open the menu, and then press Up/Down key to select menu, press the Shutter key to enter submenu. When selecting menu, the selected menu will be displayed with yellow background.
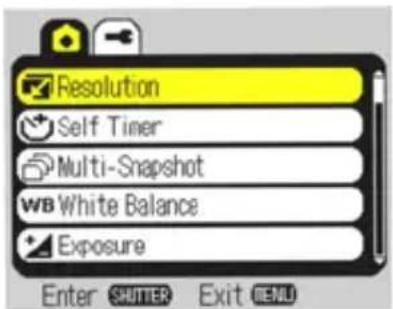
Photo menu mode
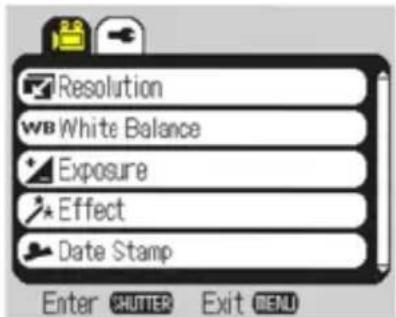
Recording menu mode
7.2 System mode menu setting
After opening the menu by pressing Menu key, press Up/Down key to switch over to setting main menu, press Shutter key for confirmation, and then press Up/Down key to select menu, and after that to press Shutter key for confirming to enter the submenu. In the submenu, press Up or Down key to select menu, and press Shutter to confirm. After returning to the main menu, press Menu key to exit from the menu.
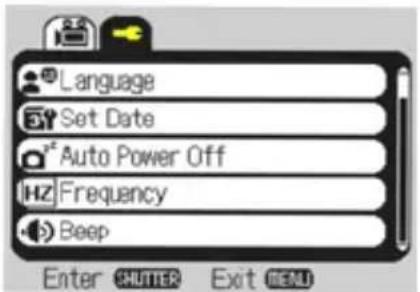
System menu mode
7.3 Setting date and time
Press Menu key to open the menu, press Up/Down key to switch to setting menu, and then press Shutter key to confirm. Press Down key to select "Date and time" in menu item, and then press Shutter key to enter setting window.
In setting window, press MENU key to select items (date, time) to be adjusted, and then press Up key or Down key to make adjustment, press Shutter key for conformation at completion of adjustment, or press Menu key to cancel setting and exit. Finally, press Menu key to exit from setting mode.
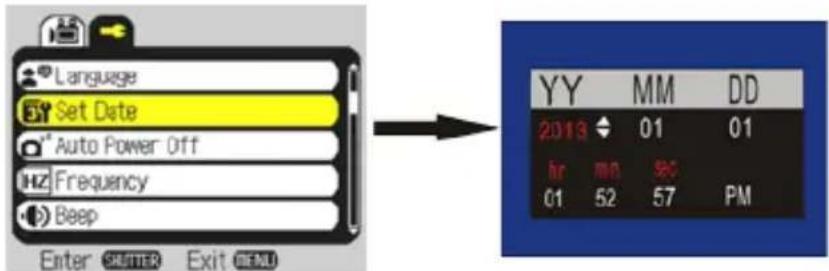
7.4 Playback mode menu setting
Press Menu key to open playback main menu, press Up or Down key to select menu, press Shutter key to enter submenu. In the submenu, press Up or Down key for selection, and press Shutter key
to confirm. After returning to the main menu, press Menu key to exit from the menu.
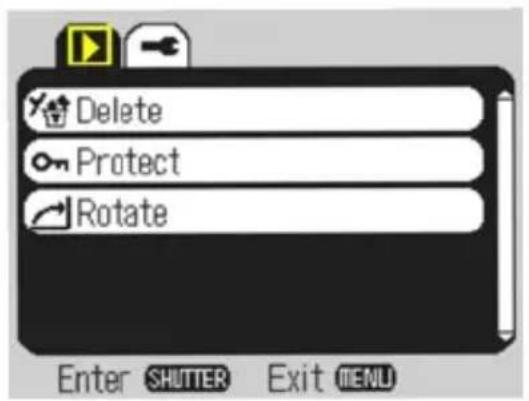
▲ Playback menu
8. Playback mode
Press Power key to enter playback mode to browse photo/video, play the video recorded by this camera.
Press Up/Down key to access to previous or next photo/video.
Play movie: press Shutter key to start/stop playing video, press Up key to pause playing the video.
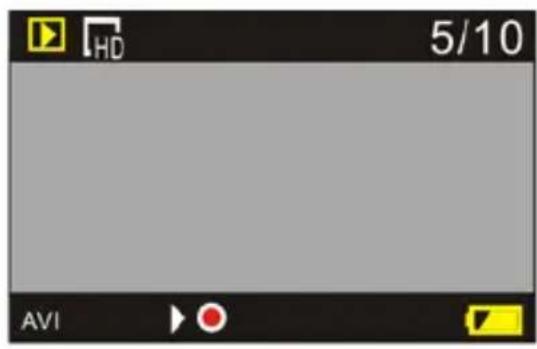
Video file playback
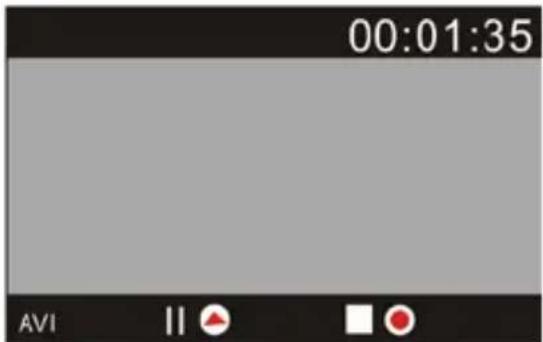
Video pause mode
9. Connect to computer to download photo/video
When the camera is connected with the computer and entering removable disk mode, there will be a removable disk added in the window of "My computer". The photo or video file may be stored in the catalogue of "DCIM\100MEDIA" in the removable disk. You may enter this catalogue to copy files on to hard disk of your computer.

Note: During file downloading, it is prohibited to disconnect USB connection, and plugging out the memory card when USB connected is also prohibited to avoid loss of____data.
Use camera functions
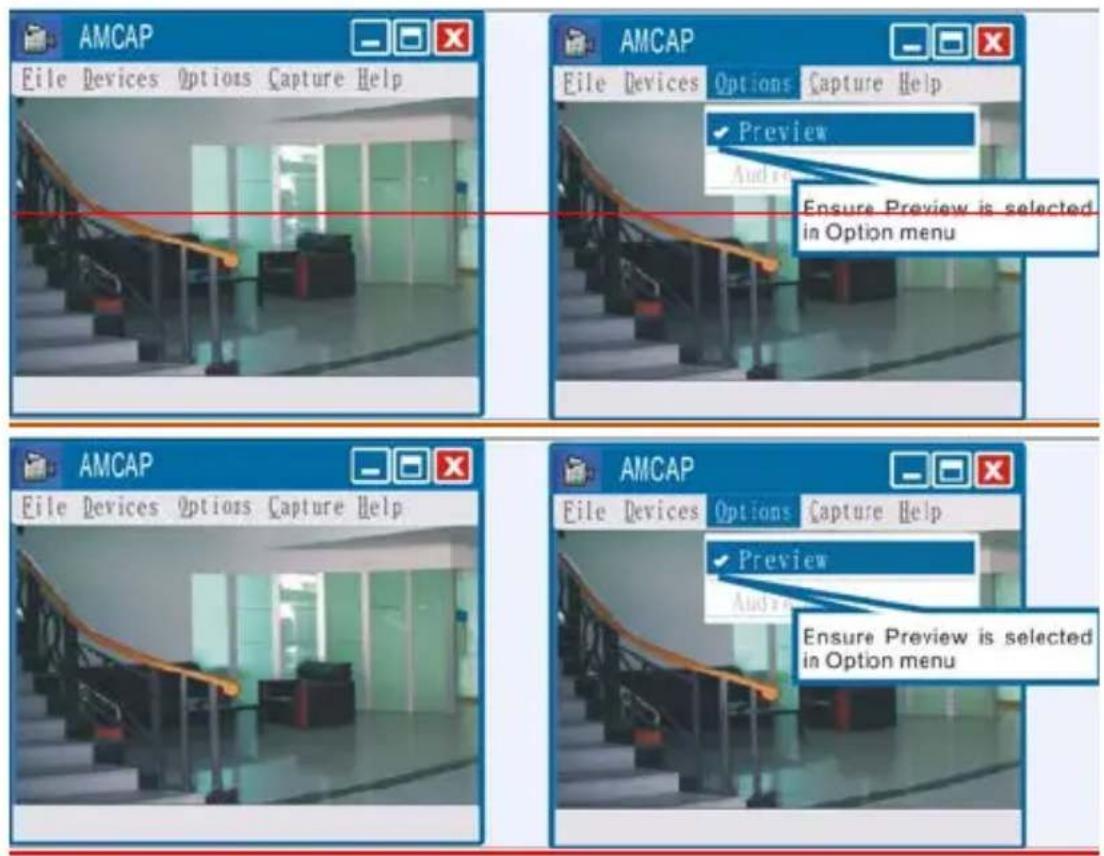
After connecting the camera to the computer, while pressing and holding MENU key, press the Power key to start up the camera to enter mode of camera.
Before using the camera functions, after connecting the camera with the computer to enter the mode of camera, click this shortcut icon (Amcap) to open AMCAP window. The corresponding image of video of the camera shall be displayed in the AMCAP window. When AMCP software is not enabled, with camera function, you may transmit video with the network.
Note: In case of PCCAM, version 1 is XP sp3 or the above.
Technical parameters
| Image sensor | 5.0 mega-pixel CMOS image sensor |
| Function mode | Recording, photo, playback |
| Lens | F2.5 f=3.53mm |
| Digital zoom 8x | - |
| LCD screen 2.0" LCD | screen |
| Picture resolution | 12M (4000 x 3000), 8M (3264 x 2448), 5M (2592 x 1944) |
| Video resolution | FHD (1920x1080), HD (1280X720) |
| Storage medium TF card (Maximum supporting 32GB) | |
| File format JPEG, MJPG4 | - |
| Self-timer delay 2 sec./5 sec./10 sec. | |
| USB port USB 2.0 | |
| Power supply | Built-in 3.7V rechargeable lithium battery |
| Menu language | English/France/Spain |
| Auto shutdown 1 min. / 3 min./5 min./10 min./OFF | |
| Operating system requirements | Windows XP/Vista/7/8, Mac 10.2 |
| Dimensions 58x44x23mm | |
Note: The product design specification is made based on updated information when compiling this product manual. The specification is subject to change without further notice. The product is subject to the actual camera.
Conditions of Guarantee
- To be able to carry out the guarantee it will necessary to have a copy of the proof of purchase, preferably with a copy of the original bill.
- For the guarantee to be carried out, all products must be delivered to iJoy perfectly packed, preferably in its own original packing, with all accessories, user manuals and drivers that the packaging would originally contain. Otherwise, iJoy will not be held responsible for damages that might occur during transportation.
- The repair of the products will be carried out according to the problem reported by the client; therefore it is essential that the client indicates in a clear form and in the most specific way possible where the problem lies, to be able to solve it in the correct manner. In the case that there is not problem with the product a diagnosis and transportation charge can be applied.
- In any case iJoy will not be held responsible for the loss of data contained in hard drives, as well as any other non-original accessory.
- In the case that there is no possibility of repair of the product, it can be replaced by another one of similar or superior characteristics, taking into consideration the state in which the product is received, such as usage marks, scratches, etc. In any case the product returned to the customer will have been tested to be functioning correctly.
- The Guarantee will only cover errors caused by deficiencies in manufacturing, and does not therefore cover damage caused by mis-use, modifications or damages caused by accidents of any nature of caused by the client. The guarantee does not cover: Accessories, pieces exposed to normal
wear and tea. The Guarantee will not be valid when the product is not used for the purpose for which it was originally conceived.
- The guarantee period starts in the moment of first purchase of the product. The reparation or substitution of the product will not imply an extension of the guarantee period.
- In the case that the product is not covered by the guarantee, a budget will be drawn up which has to be approved by the client. In the case that the budget is not approved by the client, the client must pay for the cost incurred in the transportation, manipulation and diagnosis of the product.
- Once the product is repaired after notifying the client, the client will have a period of ten working days to pick up the product. After this period of time, a daily storage charge will be applicable depending on the volume of the product.
i-Joy
28022 - Madrid (Spain)
Tel.:+34 91 551 17 87
www.i-joy.es
We declare, under our own exclusive responsibility that the product to which this manual refers, is in compliance with the essential norms and standards of the Directive 1999/5/CE of the European Parliament and of the Council of March 9th 1999.
Product: Sport videocamera
Model: Explorer
Brand: i-Joy
Manufacturing country: R.P:C.

Madrid, 16th October 2014
i-Joy Europe International, S.L
Pol. Ind. Fin de Semana
28022 - Madrid (Spain)
www.i-joy.es
Tel: +34 91 551 17 87

- Funciones
- Function
- Precautions
- Instructions for using the memory card
- Camera Maintenance
- System requirements
- Function Features
- Appearance
- Accessories
- Start to use
- Function modes switching
- Indicators
- Photo/recording mode
- Screen display in photo mode
- Screen display in recording mode
- Menu Setting Mode
- Menu display
- System mode menu setting
- Setting date and time
- Playback mode menu setting
- Playback mode
- Connect to computer to download photo/video
- Use camera functions
- Conditions of Guarantee
Brand : i-Joy
Model : Explorer
Category : Camcorder