
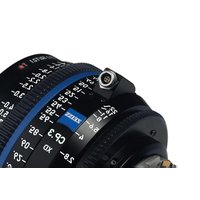
Compact Prime CP.2 - Lens ZEISS - Free user manual and instructions
Find the device manual for free Compact Prime CP.2 ZEISS in PDF.


| Product Type | Cine Lens |
| Brand | ZEISS |
| Model | Compact Prime CP.2 |
| Focal Length Range | 15mm to 135mm (various primes) |
| Aperture | T2.1, T2.9, T1.5 (depending on focal length) |
| Lens Mount | Interchangeable: PL, EF, F, Micro 4/3, E |
| Image Coverage | Full-frame (36 x 24 mm), Super 35, APS-H (18mm) |
| Coating | ZEISS T* anti-reflective coating |
| Focus Type | Manual |
| Aperture Type | Manual, de-clicked (cine-style) |
| Lens Barrel Material | Metal |
| Dimensions (approx) | Diameter 95 mm, Length 80-110 mm |
| Weight (approx) | 800-1000 g |
| Color Options | Black or Silver |
| Compatibility | DSLR and cinema cameras with appropriate mount |
| Mount Change Mechanism | User-interchangeable with T6 Torx screws (0.4 Nm) |
| Flange Focal Adjustment | Via color-coded shims (silver, gold, etc.) |
| Cleaning | Soft brush and dry cotton cloth; ZEISS cleaning kit recommended |
| Accessories Included | Mount set, lens caps, shims set |
| Manufacturer | Carl Zeiss AG, Oberkochen, Germany |
Frequently Asked Questions - Compact Prime CP.2 ZEISS
User questions about Compact Prime CP.2 ZEISS
0 question about this device. Answer the ones you know or ask your own.
Ask a new question about this device
Download the instructions for your Lens in PDF format for free! Find your manual Compact Prime CP.2 - ZEISS and take your electronic device back in hand. On this page are published all the documents necessary for the use of your device. Compact Prime CP.2 by ZEISS.
USER MANUAL Compact Prime CP.2 ZEISS
Compact Prime and Zoom lenses
ZEISS Mount Change Instructions
A. Adjusting the flange focal distance to the lens B. Overview
Congratulations on the purchase of this Compact Prime CP.2 lens set. We are convinced that your new lenses will bring you much pleasure and success.
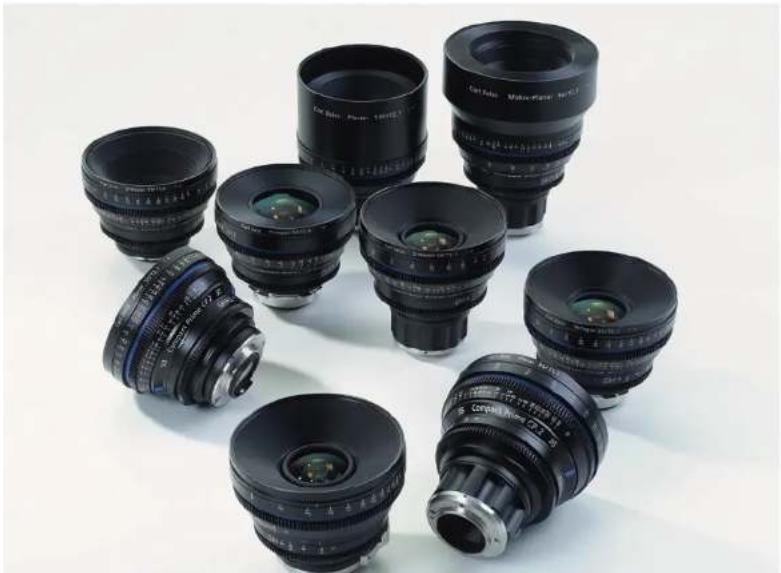
The Compact Prime CP.2 lenses are the latest members of the ZEISS family of lenses for digital and film cameras. They deliver great flexibility by introducing interchangeable mounts that allow the lenses to be used with a wide range of cameras, from traditional cine to HDSLR systems. Available in five different mounts — PL, EF, F, Micro 4/3 and E — this new family of ZEISS lenses enables cinematographers to be completely free in their choice of camera systems. The Compact Prime CP.2 lenses cover the full-frame image format without vignetting.
In this manual we take a Compact Prime CP.2 35mm/ T 2.1 with EF mount, scaled in feet as an example to explain how to change a lens mount and the subsequent matching of your lens to a DSLR camera. Proceed in the same sequences to switch to any other CP.2 mount.
natural_image
Collection of black and silver cameras with no visible text or symbols on the product image.General instructions
■ The use of a T6 torque wrench with a torque of 0.4 Nm is strongly recommended. This wrench can be purchased from Carl Zeiss (see appendix, page 17).
■ Ensure that the environment is clean and free from dust so that no dust particles can enter the lens during the following procedure.
■ Smudges and fingerprints on the lens surface can be gently removed with a soft brush and then with a dry and clean cotton cloth. The ZEISS lens cleaning kit will give superior results and is highly recommended for this purpose.
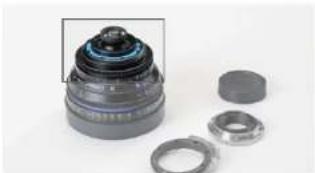
- When matching the lens, ensure that the colored shims lie on top of each other in the groove of the lens barrel and do not cover the screw holes.
■ Please handle the shims carefully as they can easily kink or tear which makes them unusable.
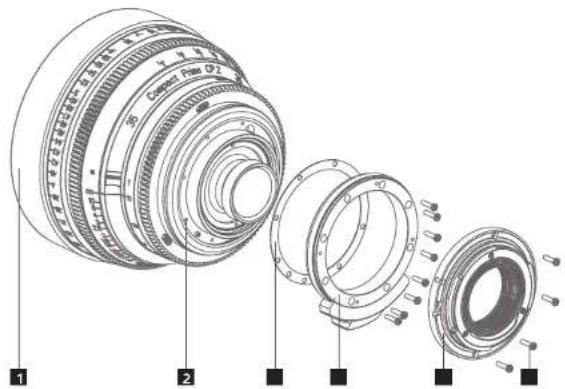
General drawing
1 Lens
2 Groove of the lens barrel
3 Shim
4 Adapter ring with attached silver support bracket
5 Mount including threaded black inner ring (e.g. EF)
6 Torx screws
C. Changing the mount
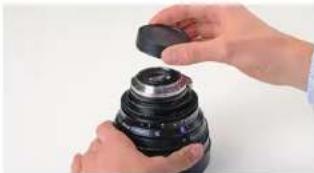
- Remove the rear lens cap.
natural_image
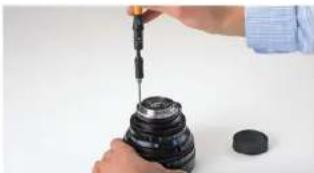
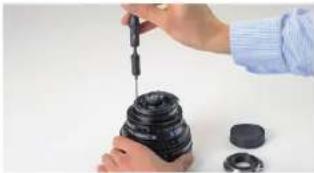
Close-up of hands holding a black camera lens (no text or symbols visible)- Remove the four torx screws of the silver EF mount with a T6 torque wrench and place the mount and the screws on one side.
The size of the black inner ring depends on the focal length of the lens and is securely fastened to the EF mount (or F, MFT or E Mount) at the factory.
natural_image
Close-up of hands using a screwdriver to adjust a camera lens (no text or symbols visible)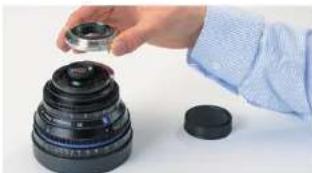
natural_image
Hand holding a small object over a black camera lens on a white surface (no text or symbols visible)- Remove the eight torx screws of the black EF adapter ring and place the ring and the screws on one side.
The silver support bracket is already installed on the EF adapter ring at the factory and does not need to be removed.
natural_image
Close-up of a hand using a screwdriver to draw a black cylindrical object on a white surface (no text or symbols visible)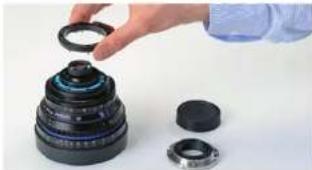
natural_image
Close-up of a hand holding a camera lens assembly with multiple lenses (no text or symbols visible)- Now you see the colored shims in the groove of the black lens barrel.
natural_image
Close-up of a mechanical component with layered parts and a separate ring (no visible text or symbols)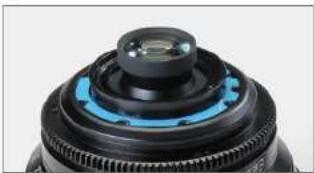
natural_image
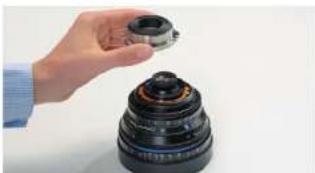
Close-up of a black mechanical component with blue and black layered structure (no visible text or symbols)- Place the PL mount on the lens in such a way that the groove on the rear side of the PL mount fits over the silver screw on the lens barrel.
natural_image
Hand holding a camera lens on a black cylindrical object (no text or symbols visible)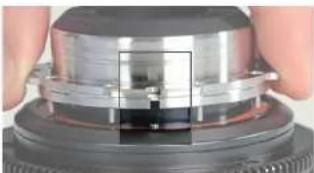
natural_image
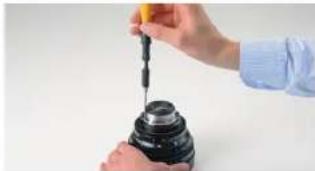
Close-up of a mechanical component with metallic components and a highlighted section (no visible text or symbols)- Tighten the eight torx screws with the T6 torque wrench using a torque of 0.4 Nm.
natural_image
Close-up of hands using a pipette to apply liquid into a mechanical component (no text or symbols visible)-
When the torx screws have been tightened, the lens can be fitted to a camera with a PL mount and used.
-
Check the flange focal distance of the lens (see section D) in combination with your camera, screw of the lens barrel.
Instructions on changing to an EF or to any other CP.2 mount
- Ensure that the groove on the rear side of the black EF adapter ring fits over the small screw of the lens barrel.
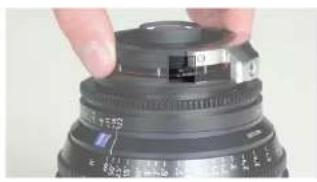
natural_image
Close-up of a hand adjusting a black camera lens with measurement markings (no visible text or symbols)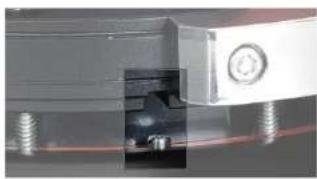
natural_image
Close-up of a mechanical assembly with bolts and a central knob (no visible text or symbols)- Place the silver EF mount on the EF adapter ring in such a way that the blue dot on the mount has the same orientation as the ZEISS logo and the support bracket points to the serial number on the lens barrel.
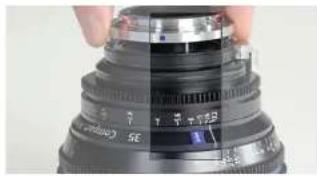
natural_image
Close-up of a camera lens with visible caliper and adjustment knobs (no text or symbols)- Please note the correct orientation of the F mount to the ZEISS logo.
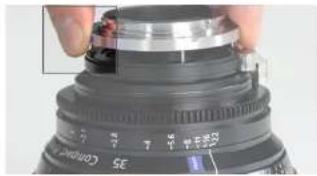
natural_image
Close-up of a camera lens with adjustment knobs and a handle, no visible text or symbols- Please note the correct orientation of the Micro 4/3 and the E mount to the serial number on the lens barrel.
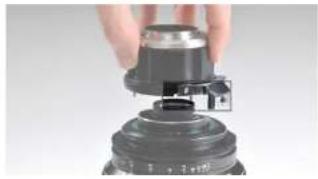
natural_image
Close-up of a hand holding a black mechanical component, possibly a valve or knob, with no visible text or symbols.- Tighten the torx screws using a torque of 0.4 Nm.
D. Adjusting the lens to your camera
As the flange focal distance varies from camera type to camera type, it is necessary to adjust the CP.2 lens to the camera used when changing the mount or camera model (=shimming). In order to perform this adjustment, Carl Zeiss provides shims in different thicknesses that are color coded.
When the mount has been unscrewed, these shims can be placed in a groove in the lens barrel. Any possible combination of shims can be used to achieve the required thickness and therefore the required flange focal distance. The lens already contains shims when delivered.
Carl Zeiss recommends that the camera is set to the usual standard settings (cf. works settings). You can obtain further details from the instruction manual of the camera you use.
Procedure
In the following chapter we explain how to adjust your Compact Prime CP.2 to a DSLR camera.
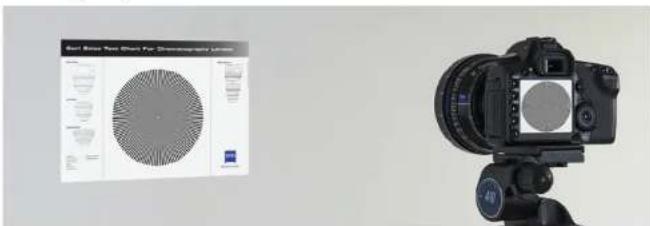
- Fasten the Carl Zeiss test chart on a wall at the appropriate test distance (see tables on page 12 – 16; the test distance is depending on the focal length) and ensure that the illumination is bright and uniform.
- Mount the camera and lens on a tripod and level the camera, making sure that the centre of the image is aligned with the centre of the Siemens star.
-
Activate the live view of your camera, select the maximum magnification.
-
Set the distance ring to the test distance according to the tables in the appendix. This setting must not be changed during the adjustment process.
- Set the aperture of the lens to full speed.
- Obtain maximum image sharpness on the live view by varying the distance between the test chart and the camera.
- Now remeasure the distance between the image plane mark on the camera body and the test chart (= the actual distance).
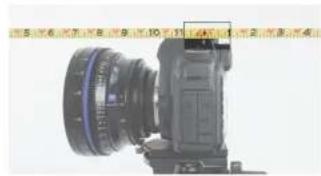
natural_image
Close-up of a camera lens assembly with measurement markings (no visible text or symbols)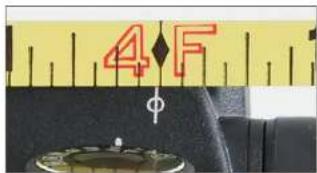
- If the distance has changed, the flange focal distance of the lens must be adjusted by using the colored shims.
You find a list of tables in the appendix for each focal length to calculate the resultant change of the flange focal distance.
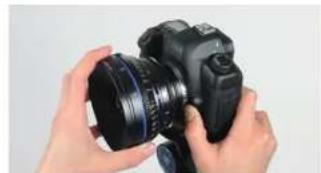
- Now remove the lens from the camera.
natural_image
Close-up of hands holding a DSLR camera with lens (no visible text or symbols)-
Remove the EF mount and EF adapter ring (cf. section C 2-4).
-
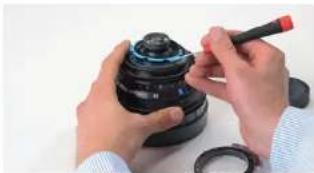
Determine the total thickness of the shims that are already installed in the lens groove. Increase or decrease the total shim thickness according to the tables in the appendix by using a flat-bladed screw-driver or a pair of tweezers.
natural_image
Close-up of hands assembling a mechanical component with a red tool (no visible text or symbols)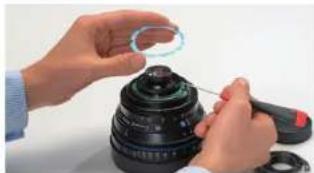
natural_image
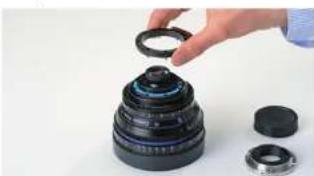
Close-up of hands adjusting a black camera lens with a ring, no visible text or symbols- Place the black EF adapter ring on the lens barrel and tighten the screws using a torque of 0.4 Nm.
natural_image
Hand holding a camera lens assembly on a multi-tiered black-and-white photo album (no text or symbols visible)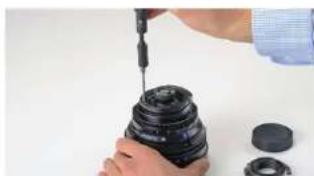
natural_image
Close-up of hands using a screwdriver to adjust a mechanical component (no visible text or symbols)- The next step is to place the silver EF mount on the EF adapter ring and tighten the screws using a torque of 0.4 Nm.
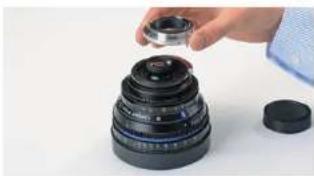
natural_image
Close-up of a hand adjusting a black camera lens on a cylindrical base (no text or symbols visible)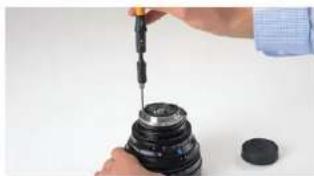
natural_image
Close-up of hands using a screwdriver to adjust or install a mechanical component (no visible text or symbols)- Recheck the flange focal distance of the lens (see section D) in combination with the camera you use.
E. Appendix
Table for shims to adjust Compact Prime CP.2 lenses when used on digital cameras
| Shim color Thickness [mm] | |
| silver 0.013 | |
| gold 0.019 | |
| purple 0.025 | |
| light blue 0.032 | |
| red 0.038 | |
| blue 0.051 | |
| white 0.064 | |
| green 0.076 | |
| orange 0.102 | |
| light purple 0.127 | |
| clear 0.152 | |
Example
Using a Compact Prime CP.2 35mm/T2.1 lens with an EF mount, scaled in feet and a test chart at a test distance of 4 ft, an actual distance of 4 ft 1' is measured. Due to the table on page 14, a silver shim 0.013 mm must therefore be added to the total thickness of the shims.
Note
Any combination of shims is possible to achieve the required thickness and therefore the desired flange focal distance. Always use the closest possible combination of shims.
Tables for adjusting the flange focal distance of Compact Prime CP.2 lenses
All Compact Prime CP.2 lenses cover the full-frame image format (36 x 24 mm), ANSI Super 35 and Normal 35 image format, except the CP.2 18mm/T3.6. This lens covers the APS-H image format.
Key
Minus sign: Shims must be removed
Plus sign: Shims must be added
Compact Prime CP.2 15/T2.9
Meter distance scale Feet distance scale
Distance to test chart [mm] 1000 Distance to test chart [ft] 4
| Object distance at best focus [mm] | Change of total washer thickness [mm] | Object distance at best focus [ft] | Change of total washer thickness [mm] |
| 860 -0,04 3ft 4' -0,04 | |||
| 895 -0,03 3ft 6' -0,03 | |||
| 930 -0,02 3ft 8' -0,02 | |||
| 965 -0,01 3ft 10' -0,01 | |||
| 1000 0,00 4ft 0' 0,00 | |||
| 1035 0,01 4ft 2' 0,01 | |||
| 1070 0,02 4ft 4' 0,02 | |||
| 1105 0,03 4ft 6' 0,03 | |||
| 1140 0,04 4ft 8' 0,04 |
Compact Prime CP.2 18/T3.6
Meter distance scale Feet distance scale
Distance to test chart [mm] 1000 Distance to test chart [ft] 4
| Object distance at best focus [mm] | Change of total washer thickness [mm] | Object distance at best focus [ft] | Change of total washer thickness [mm] |
| 900 -0,04 3ft 8' -0,03 | |||
| 925 -0,03 3ft 9' -0,02 | |||
| 950 -0,02 3ft 10' -0,01 | |||
| 975 -0,01 3ft 11' -0,01 | |||
| 1000 0,00 4ft 0' 0,00 | |||
| 1025 0,01 4ft 1' 0,01 | |||
| 1050 0,02 4ft 2' 0,01 | |||
| 1075 0,03 4ft 3' 0,02 | |||
| 1100 0,04 4ft 4' 0,03 |
Compact Prime CP.2 21/T2.9
Meter distance scale Feet distance scale
Distance to test chart [mm] 1000 Distance to test chart [ft] 4
| Object distance at best focus [mm] | Change of total washer thickness [mm] | Object distance at best focus [ft] | Change of total washer thickness [mm] |
| 940 -0,04 3ft 8' -0,04 | |||
| 955 -0,03 3ft 9' -0,03 | |||
| 970 -0,02 3ft 10' -0,02 | |||
| 985 -0,01 3ft 11' -0,01 | |||
| 1000 0,00 4ft 0' 0,00 | |||
| 1015 0,01 4ft 1' 0,01 | |||
| 1030 0,02 4ft 2' 0,02 | |||
| 1045 0,03 4ft 3' 0,03 | |||
| 1060 0,04 4ft 4' 0,04 |
Compact Prime CP.2 25/T2.9 and CP.2 25/T2.1
Meter distance scale Feet distance scale
| Distance to test chart [mm] 1000 Distance to test chart [ft] 4 | |||
| Object distanceat best focus [mm] | Change of totalwasher thickness [mm] | Object distanceat best focus [ft] | Change of totalwasher thickness [mm] |
| 960 -0,03 3ft 8' -0,05 | |||
| 970 -0,02 3ft 9' -0,04 | |||
| 980 -0,02 3ft 10' -0,03 | |||
| 990 -0,01 3ft 11' -0,01 | |||
| 1000 0,00 4ft 0' 0,00 | |||
| 1010 0,01 4ft 1' 0,01 | |||
| 1020 0,02 4ft 2' 0,03 | |||
| 1030 0,02 4ft 3' 0,04 | |||
| 1040 0,03 4ft 4' 0,05 | |||
Compact Prime CP.2 28/T2.1
Meter distance scale Feet distance scale
Distance to test chart [mm] 1000 Distance to test chart [ft] 4
| Object distance at best focus [mm] | Change of total washer thickness [mm] | Object distance at best focus [ft] | Change of total washer thickness [mm] |
| 960 -0,04 3ft 10' -0,03 | |||
| 970 -0,03 3ft 10 1/2' -0,03 | |||
| 980 -0,02 3ft 11' -0,02 | |||
| 990 -0,01 3ft 11 1/2' -0,01 | |||
| 1000 0,00 4ft 0' 0,00 | |||
| 1010 0,01 4ft 1' 0,01 | |||
| 1020 0,02 4ft 1 1/2' 0,02 | |||
| 1030 0,03 4ft 2' 0,03 | |||
| 1040 0,04 4ft 2 1/2' 0,03 |
Compact Prime CP.2 35/T2.1 and CP.2 35/T1.5 Super Speed
Meter distance scale Feet distance scale
| Distance to test chart [mm] 1000 Distance to test chart [ft] 4 | |||
| Object distanceat best focus [mm] | Change of totalwasher thickness [mm] | Object distanceat best focus [ft] | Change of totalwasher thickness [mm] |
| 980 -0,03 3ft 10' -0,05 | |||
| 985 -0,02 3ft 10 1/2' -0,04 | |||
| 990 -0,02 3ft 11' -0,03 | |||
| 995 -0,01 3ft 11 1/2' -0,01 | |||
| 1000 0,00 4ft 0' 0,00 | |||
| 1005 0,01 4ft 1' 0,01 | |||
| 1010 0,02 4ft 1 1/2' 0,03 | |||
| 1015 0,02 4ft 2' 0,04 | |||
| 1020 0,03 4ft 2 1/2' 0,05 | |||
Compact Prime CP.2 50/T2.1, CP.2 50/T2.1 Macro and CP.2 50/T1.5 Super Speed
Meter distance scale Feet distance scale
| Distance to test chart [mm] 1500 Distance to test chart [ft] 5 | |||
| Object distance at best focus [mm] | Change of total washer thickness [mm] | Object distance at best focus [ft] | Change of total washer thickness [mm] |
| 1480 -0,03 4ft 11' -0,03 | |||
| 1485 -0,02 4ft 11 1/4' -0,03 | |||
| 1490 -0,01 4ft 11 1/2' -0,02 | |||
| 1495 -0,01 4ft 11 3/4' -0,01 | |||
| 1500 0,00 5ft 0' 0,00 | |||
| 1505 0,01 5ft 1/4' 0,01 | |||
| 1510 0,01 5ft 1/2' 0,02 | |||
| 1515 0,02 5ft 3/4' 0,03 | |||
| 1520 0,03 5ft 1' 0,03 | |||
Compact Prime CP.2 85/T2.1 and CP.2 85/T1.5 Super Speed
Meter distance scale Feet distance scale
| Distance to test chart [mm] 1500 Distance to test chart [ft] 5 | |||
| Object distance at best focus [mm] | Change of total washer thickness [mm] | Object distance at best focus [ft] | Change of total washer thickness [mm] |
| 1492 -0,03 4ft 11 4/8' -0,05 | |||
| 1494 -0,02 4ft 11 5/8' -0,04 | |||
| 1496 -0,02 4ft 11 5/8' -0,02 | |||
| 1498 -0,01 4ft 11 7/8' -0,01 | |||
| 1500 0,00 5ft 0' 0,00 | |||
| 1502 0,01 5ft 1/8' 0,01 | |||
| 1504 0,02 5ft 2/8' 0,02 | |||
| 1506 0,02 5ft 3/8' 0,04 | |||
| 1508 0,03 5ft 4/8' 0,05 | |||
Compact Prime CP.2 100/T2.1 CF
Meter distance scale Feet distance scale
Distance to test chart [mm] 2000 Distance to test chart [ft] 7
| Object distance at best focus [mm] | Change of total washer thickness [mm] | Object distance at best focus [ft] | Change of total washer thickness [mm] |
| 1987 -0,04 6ft 11 4/8' -0,03 | |||
| 1990 -0,03 6/L 11 5/8' -0,02 | |||
| 1993 -0,02 6/L 11 6/8' -0,02 | |||
| 1997 -0,01 6/L 11 7/8' -0,01 | |||
| 2000 0,00 7ft 0' 0,00 | |||
| 2003 0,01 7ft 1/8' 0,01 | |||
| 2007 0,02 7ft 2/8' 0,02 | |||
| 2010 0,03 7ft 3/8' 0,03 | |||
| 2013 0,04 7ft 4/8' 0,03 |
Compact Prime CP.2 135/T2.1
Meter distance scale Feet distance scale
| Distance to test chart [mm] 2000 Distance to test chart [ft] / | |||
| Object distance at best focus [mm] | Change of total washer thickness [mm] | Object distance at best focus [ft] | Change of total washer thickness [mm] |
| 1992 -0,05 6'11 4/8' -0,06 | |||
| 1994 -0,03 6'11 5/8' -0,05 | |||
| 1996 -0,02 6'11 6/8' -0,03 | |||
| 1998 -0,01 6'11 7/8' -0,02 | |||
| 2000 0,00 /ft 0' 0,00 | |||
| 2002 0,01 /ft 1/8' 0,02 | |||
| 2004 0,02 /ft 2/8' 0,03 | |||
| 2006 0,03 /ft 3/8' 0,05 | |||
| 2008 0,05 /ft 4/8' 0,06 | |||
Compact Zoom CZ.2 70-200/T2.9
Meter distance scale Feet distance scale
| Distance to test chart [mm] 4500 Distance to test chart [ft] 15 | |||
| Object distance at best focus [mm] | Change of total washer thickness [mm] | Object distance at best focus [ft] | Change of total washer thickness [mm] |
| 4460 -0,09 14ft 10' -0,11 | |||
| 4470 -0,07 14/L 10 1/2' -0,08 | |||
| 4480 -0,04 14/L 11' -0,06 | |||
| 4490 -0,02 14/L 11 1/2' -0,03 | |||
| 4500 0,00 15ft 0' 0,09 | |||
| 4510 0,02 15ft 1/2' 0,03 | |||
| 4520 0,04 15ft 1' 0,06 | |||
| 4530 0,07 15ft 1 1/2' 0,08 | |||
| 4540 0,09 15ft 2' 0,11 | |||
Compact Zoom CZ.2 28-80/T2.9
Meter distance scale Feet distance scale
| Distance to test chart [mm] 2000 Distance to test chart [ft] / | |||
| Object distance at best focus [mm] | Change of total washer thickness [mm] | Object distance at best focus [ft] | Change of total washer thickness [mm] |
| 1960 -0,07 7ft 10^1 -0,10 | |||
| 1970 -0,06 7ft 10^1/2 -0,07 | |||
| 1980 -0,04 7ft 11^1 -0,05 | |||
| 1990 -0,02 7ft 11^1/2 -0,02 | |||
| 2000 0,00 7ft 0^1 -0,00 | |||
| 2010 0,02 7ft 1/2^1 -0,02 | |||
| 2020 0,04 7ft 1^1 -0,05 | |||
| 2030 0,06 7ft 1^1/2 | 0,07 | ||
| 2040 0,07 7ft 2^1 -0,10 | |||
Compact Prime and Zoom lenses - Accessories and spare parts
All interchangeable mount sets include: mount, lens caps, adaption ring with support bracket, screws and a set of shims CP.2.
EF mount Indent No.
| Interchangeable Mount Set EF (for CP.2 18/T3.6) 1846-490 | |
| Interchangeable Mount Set LT (for CP.2 21/T2.9, CP.2 25/T2.1, CP.2 28/T2.1 or CP.2 35/T2.1) | 1846-492 |
| Interchangeable Mount Set LT (for CP.2 15/T2.9, CP.2 35/T1.5 SuSp, CP.2 50/T1.5 SuSp, CP.2 50/T2.1, CP.2 85/T1.5 SuSp or CP.2 85/T1.2.1) | 1846-494 |
| Interchangeable Mount Set LT (for CP.2 50/T2.1 Macro) 1846-496 | |
| Interchangeable Mount Set LT (for CP.2 100/T2.1 CI) 1846-499 | |
| Interchangeable Mount Set LT (CP.2 135/T2.1) 1998-731 | |
| PL mount | |
| Interchangeable Mount Set PL (for CP.2 18/T3.6) 1846 489 | |
| Interchangeable Mount Set PL (for CP.2 21/T2.9, CP.2 25/T2.1, CP.2 28/T2.1 or CP.2 35/T2.1) | 1846-492 |
| Interchangeable Mount Set PL (for CP.2 15/T2.9, CP.2 35/T1.5 SuSp, CP.2 50/T1.5 SuSp, CP.2 50/T2.1, CP.2 85/T1.5 SuSp or CP.2 85/T2.1) | 1846-493 |
| Interchangeable Mount Set PL (for CP.2 50/T2.1 Macro) 1846-495 | |
| Interchangeable Mount Set PL (for CP.2 100/T2.1 CI) 1846-498 | |
| Interchangeable Mount Set PL (CP.2 135/T2.1) 1998-730 | |
F mount
| Interchangeable Mount Set F (for CP.2 15/T2.9) 1998-736 | |
| Interchangeable Mount Set F (for CP.2 18/T3.6) 1871-042 | |
| Interchangeable Mount Set F (for CP.2 21/T2.9, CP.2 25/T2.1, CP.2 28/T2.1 or CP.2 35/T2.1) | 1871-043 |
| Interchangeable Mount Set F (for CP.2 35/T1.5 SuSp, CP.2 50/T1.5 SuSp, CP.2 50/T2.1, CP.2 50/T2.1 Macro, CP.2 85/T1.5 SuSp or CP.2 85/T2.1) | 1871-046 |
| Interchangeable Mount Set F (for CP.2 100/T2.1 CR) | 1871-044 |
| Interchangeable Mount Set F (CP.2 135/T2.1) | 1998-732 |
Micro 4/3 mount
| Interchangeable Mount Set: MFT (for CP 2 18/T3.6) | 1889 230 |
| Interchangeable Mount Set: MFT (for CP 2 21/T2.9, CP 2 25/T2.1, CP 2 28/T2.1 or CP 2 35/T2.1) | 1889-231 |
| Interchangeable Mount Set: MFT (for CP 2 15/T2.9, CP 2 35/T1.5 SuSp, CP 2 50/T1.5 SuSp, CP 2 50/T2.1, CP 2 85/T1.5 SuSp or CP 2 85/T2.1) | 1889 232 |
| Interchangeable Mount Set: MFT (for CP 2 50/T2.1 Macro) | 1889-233 |
| Interchangeable Mount Set: MFT (for CP 2 100/T2.1 CF) | 1889-234 |
| Interchangeable Mount Set: MFT (for CP 2 135/T2.1) | 1998 733 |
| E mount | Indent No. |
| Interchangeable Mount Set E (for CP.2 18/T3.6) | 1907-608 |
| Interchangeable Mount Set E (for CP.2 21/T2.9, CP.2 25/T2.1, CP.2 28/T2.1 or CP.2 35/T2.1) | 1907-609 |
| Interchangeable Mount Set E (for CP.2 15/T2.9, CP.2 35/T1.5 Susp, CP.2 50/T1.5 Susp, CP.2 50/T2.1, CP.2 85/T1.5 Susp or CP.2 85/T2.1) | 1907-610 |
| Interchangeable Mount Set E (for CP.2 50/T2.1 Macro) | 1907-611 |
| Interchangeable Mount Set E (for CP.2 100/T2.1 CF) | 1907-612 |
| Interchangeable Mount Set E (for CP.2 135/T2.1) | 1998-735 |
| ZEISS Diopters | |
| Diopter +0,5 (meter/feet) | 1430-420 |
| Diopter +1,0 (meter/feet) | 1430-399 |
| Diopter +2,0 (meter/feet) | 1430-309 |
| Accessories | |
| Support Brockel EF, F, MFT, E (incl. screws) | 1836-667 |
| Torx torque wrench (16, torque moment 0.4 Nm) | 0570-065 |
| Torx Fan-Head screw (M2 x 8 -5U5 410; 50 pcs.) | 500-022 |
| Front Lens Cap Focal Lengths 18-85mm & 100mm CF | 0097-227 |
| Front Lens Cap Focal Length 50mm Macro | 1775-836 |
| Rear Lens Cap EF | 1793-167 |
| Rear Lens Cap PI | 102160-0052-000 |
| Rear Lens Cap F | 1793-178 |
| Rear Lens Cap MH | 1889-118 |
| Rear Lens Cap E | 1907-145 |
| Siemens Star test chart (DIN A3, laminated) | 1849-755 |
| Set of shims CP.2 | 1853-634 |
Carl Zeiss AG
Camera Lenses
73446 Oberkochen
Germany
Phone +49 7364 20-6175
Fax: +49 7364 20-4045
www.zeiss.com/cine

- Compact Prime and Zoom lenses
- Adjusting the flange focal distance to the lens B. Overview
- General instructions
- General drawing
- Changing the mount
- Instructions on changing to an EF or to any other CP.2 mount
- Adjusting the lens to your camera
- Procedure
- Appendix
- Example
- Note
- Tables for adjusting the flange focal distance of Compact Prime CP.2 lenses
- Key
- Compact Prime CP.2 15/T2.9
- Compact Prime CP.2 18/T3.6
- Compact Prime CP.2 21/T2.9
- Compact Prime CP.2 25/T2.9 and CP.2 25/T2.1
- Compact Prime CP.2 28/T2.1
- Compact Prime CP.2 35/T2.1 and CP.2 35/T1.5 Super Speed
- Compact Prime CP.2 50/T2.1, CP.2 50/T2.1 Macro and CP.2 50/T1.5 Super Speed
- Compact Prime CP.2 85/T2.1 and CP.2 85/T1.5 Super Speed
- Compact Prime CP.2 100/T2.1 CF
- Compact Prime CP.2 135/T2.1
- Compact Zoom CZ.2 70-200/T2.9
- Compact Zoom CZ.2 28-80/T2.9
- Compact Prime and Zoom lenses - Accessories and spare parts
Brand : ZEISS
Model : Compact Prime CP.2
Category : Lens