
SR-200 MKII - Radio Block - Free user manual and instructions
Find the device manual for free SR-200 MKII Block in PDF.


| Product Type | Radio / Hi-Fi System with CD, Internet Radio, Streaming |
| Brand | Block |
| Model | SR-200 MKII |
| Amplifier | Class D, 2 x 20 W RMS (6 Ohm) |
| Frequency Range FM | 87.5 - 108 MHz |
| Frequency Range DAB+ | 174.928 - 239.200 MHz |
| Internet Radio | Over 25,000 stations worldwide |
| Station Presets | 10 per source (FM, DAB+, Internet Radio) |
| CD Player | CD, CD-R, CD-RW, MP3-CD, CD-DA |
| USB Media Playback | MP3, WMA, FLAC (max 48 kHz, 320 kbps) |
| Streaming | Bluetooth, DLNA, Spotify Connect, UNDOK app |
| Network Connectivity | Wi-Fi 2.4 GHz, Ethernet (RJ-45) |
| Remote Control | Infrared, included |
| Display | Colour LCD |
| Audio Inputs | 3.5 mm AUX, Optical IN, Audio IN (RCA) |
| Headphone Output | 3.5 mm jack |
| Power Consumption (Operation) | 45 W max |
| Power Supply | External adapter, 21V DC, 2.1A |
| Dimensions (W x H x D) | 430 x 128 x 280 mm |
| Weight | 4.7 kg |
| Multi-Room | Yes, via UNDOK app |
| Sleep Timer / Alarm | Dual alarms with snooze |
| Equalizer | 9 presets, custom bass/treble |
| Antennas | Telescopic FM/DAB, WLAN antenna (included) |
| Cleaning | Use dry cloth; disconnect power |
Frequently Asked Questions - SR-200 MKII Block
User questions about SR-200 MKII Block
0 question about this device. Answer the ones you know or ask your own.
Ask a new question about this device
Download the instructions for your Radio in PDF format for free! Find your manual SR-200 MKII - Block and take your electronic device back in hand. On this page are published all the documents necessary for the use of your device. SR-200 MKII by Block.
USER MANUAL SR-200 MKII Block
HIFI | STREAMING | AUDIO ○ ● ●
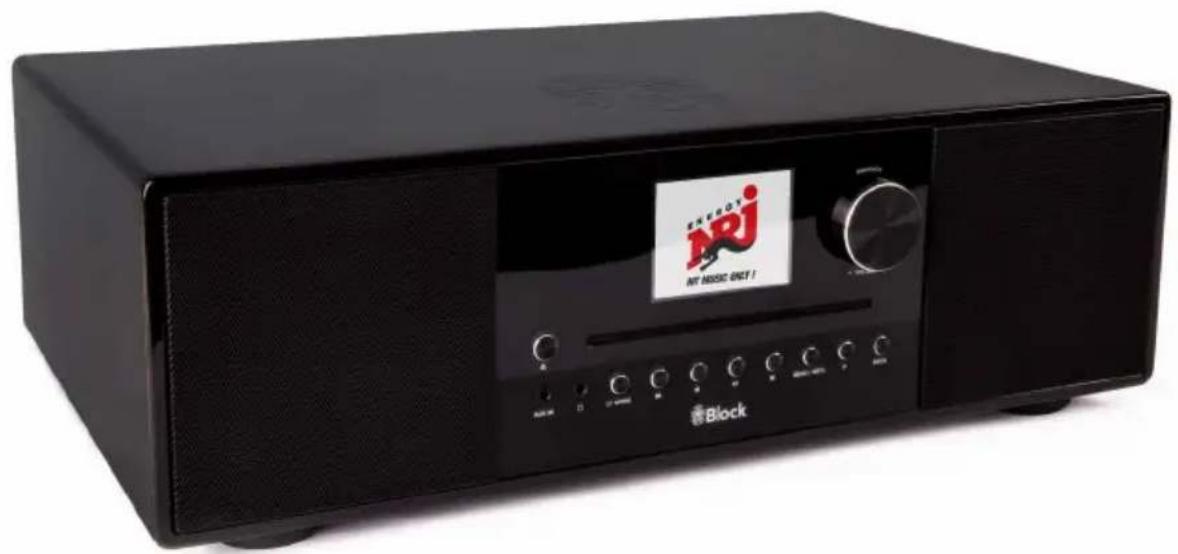
natural_image
Black electronic device with CD and audio interface, no visible text or symbols on bodySpotify Connect....23
Thank you for choosing topurchase this high quality device. This manual shall give you an overview of how to operate your device. You will receive safety information and you will be informed about how to clean your equipment best. The safety and operating information must be strictly followed in order to ensure the long-term and safe functioning of the product. Please, take some time to peruse the manual carefully. The operating instructions should be retained in a safe place for future reference, to be given with a resale. Due to software updates or technical developments with third manufactures (e.g. Apas), parts of this manual can be updated. Every now and then please visit our website www.audio-block.com to check whether there are up to date operating instructions for downloading.
For this purpose, compare the status on the cover page with the information on the Internet. If you have any further questions regarding your device, please contact an authorized specialist supplier or our service centre. In case of a defect resulting from improper operation, misuse or non-observance of the operating instructions, please be aware that the guarantee for this defect will be invalidated. Besides, no liability can be accepted for consequential damages. This product is EMC certified and meets all the directives and requirements of the European Union, CF and 30HS documentation are provided.
CONTENTS:

Safety instructions 34-37
Operating elements on the unit 58
Connections to the device 39
The remote control 40
Before operating 41
First operating and installation 42
Manual WLAN installation 43
Manual LAN installation (Ethernet) 43
Amplifiers and sound settings....44
The FM radio 25
The DAB + radio 46
The internet radio....47-48
The CD player....49
The media player (USB) 50
The media player (DINA) 51
Music streaming function 52
Music streaming services 53
How to Use Spotify® Connect .... 53
Remote control with the , UNDOK ^TM app....54
Connecting external devices via Bluetooth ^® 55
Externa connections: AUX IN, USB, headphones....56
System sellings 56-57
Additional comfort functions - Snobex and Alarms 58
Error messages and troubleshooting (General)....59
Error messages and troubleshooting (Network) 60
Care and transport....60
Technical data 51

Block
SAFETY INSTRUCTIONS
Caution to avoid the risk of electric shock, do not modify this device! The opening of the device as well as charges in the appliance may be carried out only by authorized personnel. Important security instructions:
▶ Before using the device for the first time, please read the operating instructions thoroughly.
▶ This device is to be used indoors only.
This device may be connected only to a socket intended for it.
▶ This device is not to be exposed to humidity.
▶ Make sure the appliance does not stand to close to other objects
▶ Make sure the appliance does not stand near a neat source.
▶ Make sure that the connection table is not damaged or is going to be damaged

mation on disposal of the old equipment:
Your product is made of high quality and recyclable materials. With this symbol, the product for this the FU Directive 2012/19/FU. Please do not dispose of your appliance in the domestic waste but in a suitable separate collection of materials. Electronic devices, accessories and packaging shall be handled to special places intended and marked by signs for its purpose. For more information, where you find these places, please contact your local garbage disposal service. Please, keep to this regulation in order to give a better environment to our children.

CAUTION
HIGH OF ELECTRIC BLOCK DO NOT OVER
The flash icon shall work the user of not isolated hazardous voltages in the device's housing. This voltage could be strong enough to injure people through an electrical shock. The excitation mark shall draw the attention of the user to the fact that the manual, delivered together with the device, contains important operating and maintenance instructions.
HANDLING BATTERIES
Batteries may contain flammable substances. Improper handling can cause batteries to leak, strongly heat, ignite, or even explore what, could damage your device and your health.
Follow these instructions:
▶ Keep children away from batteries.
▶ In case of batteries have been swallowed, report this to your doctor immediately.
▶ Never charge batteries (unless specifically stated).
▶ Never discharge batteries by high power output.
▶ Never short - circuit batteries.
▶ Never expose batteries to excessive heat, such as sunshine, fire or something similar.
Do not disassemble or deform batteries. Your hands or fingers could be injured or battery fluid could get into your eyes or on your skin. Should this happen, rinse the affected area with plenty of clear water and inform your doctor immediately.
▶ Avoid strong jolts and vibrations
▶ Never exchange the polarity. Make sure that the poles Plus (+) and minus (-) are correctly inserted, to prevent short circuits.
- If necessary, clear battery and device contacts before insertion. Do not mix new and old batteries or batteries of different types. This could cause malfunctions on your device. Besides, the weaker battery would discharge too strongly.
▶ Remove any discharged batteries immediately from the unit.
- Remove the batteries from your device if they haven't been used for an extended period of time.
- Replace at the same time all discharged batteries in a device with new batteries of the same type. If you want to store or to dispose the batteries, isolate their contacts with an adhesive tape.
DECLARATION OF CONFORMITY
CE
This device complies with the basic requirements and other relevant regulations of the Radis Equipment Directive (RED) 2014/53/EU, the ErP directive 2009/125 / EC and the RoHS directive 2011/65 / EU. To receive the complete EU declaration of conformity, send an email to the following email address: block@audioblock.com

Block
SAFETY INSTRUCTIONS
Do not let electrical appliances in children's hands! Never let children unattended to use electrical devices. Also keep the Packaging foils far away from children. There is a danger of shocking and suffocation.
SAFE POSITIONING
▶ Use the device exclusively in dry rooms.
If you bring the device from a cold into warm surroundings, it could be humid inside the equipment. In this case, wait about two to tree hours before running it.
▶ Place the device on a firm and horizontal plane surface.
▶ Place the device with at least 10 cm of distance to the wall.
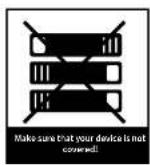
▶ Do no. cover existing ventilation openings.
- Avoid the proximity of heat sources, such as radiators, or devices with strong magnetic fields, such as outspeakers.
▶ Do not place open sources of fire, such as burning candles, on the device.
▶ Do no, place the device on sensitive surfaces.
SECURE CONNECTION
▶ Connect the device only to an easily accessible and suitable installed socket. With 230 V - 50 Hz.
The net plug must be of easy access so that the device can be easily and quickly disconnect from the power supply, in case of emergency.
▶ I locate the power can be so that nobody can trip over it or step on it.
▶ Do not use extension cables. Do not bend or squeeze the net cable.
▶ Always pull the mains cable from the socket.
SAFE USE
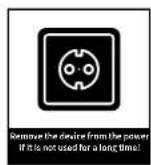
- Disconnect the power plug from the power socket and remove the serial cable from the device if you do not use the unit for a long time or when a thunderstorm is approaching.
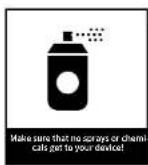
The not cable shall not be wrapped around the device during operation nor in touch to hot surfaces. Avoid humidity to enter the housing.
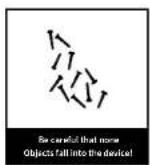
▶ Never touch the device, the net cable or the net plug with wet hands. There is a risk of electric shock. Should an item or liquid get into the housing, immediately disconnect the device from the power supply and have it checked. - Have your equipment inspected by qualified personnel before restarting it. Otherwise there is the anger of electric shock.
▶ Never use the device if it is damaged, or if there is any damage to the net cable or to the plugs. In case the appliance is damaged, immediately pull the plug from the socket.
▶ Never open the device. In case of fault, please contact our service centre or any other specialized shop.
▶ The remote control has an infrared diode Class I.
▶ Do not look at the IFD with optical devices.
Block
- CD* button: ejects the disc.
- Infrared sensor for remote control.
- CD tray. Inserting a CD it will start.
- Colour display.
- Multifunction knob: Turn the knob to the left/right to increase/decrease the volume. In the menu mode, the individual points are selected by turning and activated by pressing the multifunction rotary knob.
- 3.5 mm AUX IN input jack for externa, sources.
- 3.5 mm headphone connection jack.
- "Slanchy / Vode" buttons: a short pressure switches the display to overview mode. You can now select the music source using the multifunction knob or the arrow buttons on the remote control. Press and hold the button to enter the network Standby mode.
- "Pack" button on the radio mode, the unit automatically searches for the previous station by pressing the button. On CD and music player mode, the unit switches to the previous site.
- "Forward" button: on the radio mode, the unit automatically searches for the next station by pressing the button. On CD and music player mode, the unit switches to the next track.
- "Play/Pause": press the button to pause the music, press it again to continue to play.
- Stop button: the unit stops playing the music.
- "Menu / Info" button press once or several times to show additional information on the music source on the display; if there is any. Press and hold the button to show the menu.
- "FAV" button: short pressure to display the list of stored transmitters. Long pressure saves transmitter to selected memory locations.
- "Back" button: press this button to return to the previous menu item or to exit the menu.
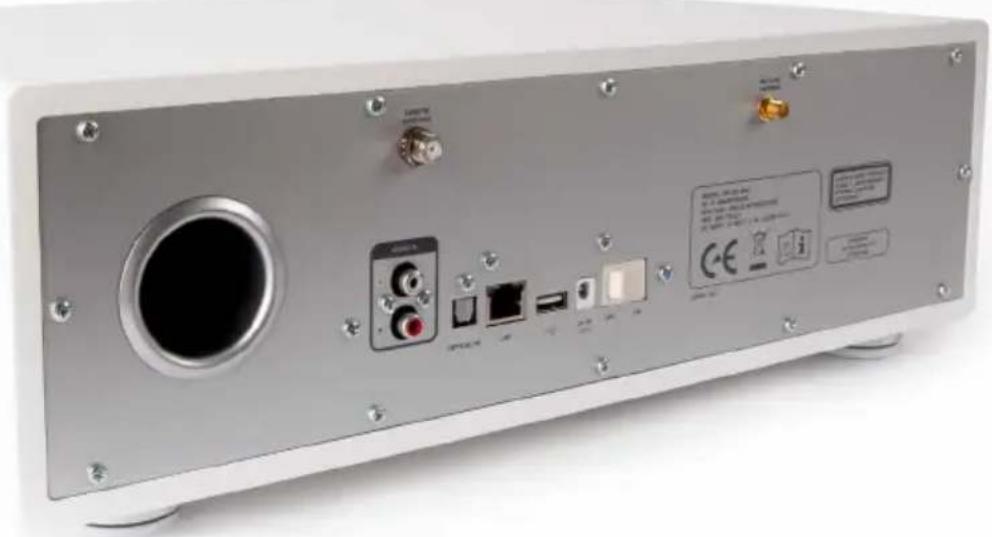
CONNECTIONS ON THE DEVICE
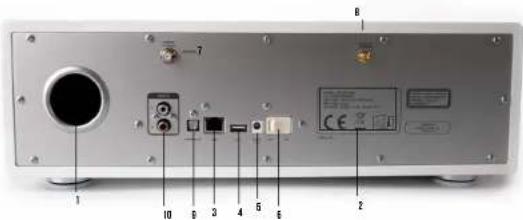
- Bass reflex cords for integrated speakers.
- Model designation, technical data, serial number, warnings and disposal instructions.
- LAN connector for RJ-45 connector (Ethernet).
- USB connection.
- Power supply for the supplied external power adapter. The power supply cable must not show any damage or defects, use only the supplied one.
- Power switch.
- FM and DAB + telescopic antenna (mountlec).
- WIAV antenna (mounted).
- Optical IN
- Audio n
Block
REMOTE CONTROL
-
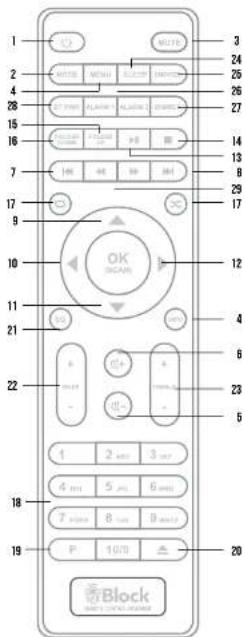
"Standby" button: switches the device to "Clock" mode, the display will show the time and the date. To save energy, switch off the device in the not counter.
-
"Mode" button: By pressing, the display switches to the overview mode. You can now use the multifunction knob or the arrow keys on the Remote control select the music source
-
"Musc" button switches the sound of
-
Taste, Menu/Info ^1 : One or more short presses will display additional information about the music source (if any) on the display. Long press calls up the menu of the device.
-
"Volume -" button: Increases the volume
-
"Volume -" button reduces the volume
-
"Back" button: on radio mode, the device searches the previous lower transmitter. On CD and media player mode, the unit jumps to the previous track.
-
"Forward" button on radio mode, the device searches the next higher transmitter. On CD and Media Player mode, the device jumps to the next track.
-
Arrow upwards: on FM mode to increase the frequency in 0.05 MHz. In menu to select the different points.
-
Arrow to the jell to reach the previous setting in the menu.
-
Arrow down in FM mode by the frequency in 0.05 MHz increments to reduce. To select the different points in the menu.
-
Arrow to the right to access selected functions in the menu.
-
"Play" button
-
Stop button.
-
"FOLDER UP" button: Only for CD operation on MP3 CDs with folder structure.
-
"FOLDER DOWN" button: Only for CD operation on MP3 CDs with folder structure.
Dr. Waste, NEPEAL/NRANDN! Press once to start the repeat function for the current title, press the repeat function twice whole media (for example, CC, USD, media server) a third press ends all topcat. Long press starts the playback of the entire medium in random Sequence, pressing again for a long time ends this function. Watch out for the displays at the bottom of the display.
-
Button, 1 10" or radio mode, recalls on the stored transmitters and on CD mode, it chooses the single pieces of the CD.
-
T,IP" button: recalls or saves pre-set transmitters in radio mode.
-
CD" button: ejects the CD.
-
"EQ": Select equalizer preset
-
"Pass": Adjust bass level as My FD setting.
-
"Treble": Adjust trouble level as My EQ setting
-
Sleep: Set sleep time
-
"Snoozc": Enable snoozc during alarm
-
Alarm*: Set Alarm
-
"Dimmer" Pass the display of brightness
-
"PT Fair": Hold down to turn Bluecoth discoverable
-
Taste "seek": Hold down to seek along the track
BEFORE OPERATING
Before you can use your Internet radio, the streaming functionality or the operation via smart phone app, you need:
- A fast internet connection.
- A router, preferably with WLAN (wireless access point).
- In case your router does not provide WLAN connection, you also could connect your equipment using Ethernet cable.
- Later, when setting up the device, you choose between wireless (WLAN) and cable connection.
- If your wireless network is protected with Wired Equivalent Privacy (WFP) or with Wi-Fi Protected Access (WPA), you will need a WFP or a WPA code, so that your Internet radio can be connected to the router.
- Before proceeding, make sure that your wireless network is turned on and has a broadband internet access.
- In case of problems while connecting your device to the router, please try to solve them using the manual instructions of the router.
SETTING UP THE DEVICE
- Connect the FM and DAB - telescopic antenna to the device. Then pull the telescopic aerial to full length, later, when setting up your channels, you can optimize the reception quality just changing the angle of inclination and the tilt angle of the aerials.
- If you want wirelessly to connect your SR-20C MKII to the internet via an existing wireless Network, please mount the included WLAN antenna
- If you want to connect your SR-200 MKII to the Internet via a Ethernet (wired), please connect your router to the Ethernet jack of the SR-200 MKII using a RJ-15 cable.
- Connect the connection cable of the enclosed power supply unit to the device and plug this into a power outlet.
Block
FIRST OPERATING AND INSTALLATION
After you have safely installed your device and have carried out all the wirings, you can now turn your SR-700 MKI on using the power switch on the back of the device. Please keep your password (WFP or WPA) and, if necessary, your network identifier (SSID) ready for a WI AN installation.
After turning on the SR 200 MKII, it starts up with the setup wizard. If it does not start automatically, please press for a longer time the "Menu" button on the remote control and select System Settings / Setup Wizard with the arrow keys on your remote control.
- Please confirm the question after starting the setup wizard with Yes, press the arrow buttons on the remote control until Yes lights up and confirm with the „Enter“ key.
- Choose your desired time format, either 12 n or 24 h display and confirm with the "Enter" key.
- In the next step, select Update from DAB (recommended), and confirm it. Your SR-200 MKI will automatically acquire its information about the time and date at every start.
- In the following query Connection received? You should confirm with Yes to avoid interception and streaming problems.
- When choosing WI AN Region, please select Most of Europe.
- Now it starts searching WLAN and shows you all the found WLAN networks (SSID) in your surroundings. Select your wireless network. If your WLAN does not appear, this could be due to the following reasons:
-WLAN antenna is not mounted.
- WI AN signal too weak at the installation location (if necessary, align the antennas or the router and the SR-200 MKII differently or use a WI AN repeater).
- To suppress WI AN SSID on the router, select to enter Manual configuration.
If instead of using WLAN you want to connect the SR-200 MKII to your router, select Cable.
- If your router supports WPS, select Enter, and then press the corresponding key on the router. Alternatively, you can also select Skip WPS and then enter your network password (WEP or WPA). In either case, both devices should be connected.
MANUAL INSTALLATION WLAN
Should any problem appear while setting up the wizard, or you want to make a manual setup, please proceed as follows:
- Press and hold the "Meru" button on the remote control. Use the arrow buttons on the remote to select System Settings / Internal Settings / Manual Settings / Wireless.
- In the next step, select DHCP active. This is the default setting for all common Internet routers and it takes a lengthy network configuration. * Confirm the setting.
- Now enter the name of your WLAN network (SSID), be sure to use correct spelling and case. Confirm with OK.
- Select the type of password protection (usually WFA2 and AFS). If there is any doubt, consult the manual of your router.
- Now enter the password of your WI AV network, be sure to use the correct spelling and case. Confirm with OK.
- Now the router and your SR-200-WKI should be connected and an Internet connection exists, the device will display "Connected".
MANUAL INSTALLATION CABLES (ETHERNET)
Should you want to connect the SR-200 MKII to the router using the Ethernet cable, instead of using the Wi AN connection, please proceed as follows:
- Connect a free LAN jack to your router and the LAN jack on the SR-200 MKII to an Ethernet cable (RJ-45).
- Press and hold the "Menu" button on the remote control. Use the arrow keys on the remote control to select System Settings / Internal Settings / Manual Settings / Cables.
- In the next step, select DHCP active. This is the default setting for all common Internet, routers and it takes a lengthy network configuration. * Confirm the setting.
- Now the router and your SR-200 MKI should be connected and an Internet connection exists, the device will display "Connected".
*Should you have extracted the LLC function on your routes, please select DHCP inactive. In this case, you must configure the retweck, you should be aware of the applicable rules and information. For experienced configuration, you may need the MAC address of your block device. These can be found under Main menu / System settings / Internet settings / Show settings / Mac address.

Block
AMPLIFIERS AND SOUND SETTINGS
The SR-200 MKII is equipped with a high-quality Class-D amplifier with a power of 2 x 20 watts at 6 Ohm (RMS). Use the following sellings to charge the sound:
VOLUME:
By pressing the „VOL“ and „VOL” buttons on the remote control or the multifunction knob on the device, you can change the volume of your system.
Please note that the SR-200 MKII can have different loudspeakers for different signal sources with the same volume setting. This is not a defect, but is caused by different input levels of the signal sources applied.
EQUALIZER:
Press and hold the "Menu" button on the remote control until the menu appears on the display. Select System Settings / Equalizer using the arrow buttons.
Now, by repeated pressure, you can choose under the following pre-sellings: Normal, Centric, Jazz, Rock, Sound rack, Classic, Pop, News, and My Equaliser (FQ).
Under My EQ setting, you can define bass and treble values. For this, use the "up arrow" button on the remote control to increase the value and the "down arrow" key to decrease the value. To exit the menu, press the "Left arrow" key.
Repeat this process for all values, and then press the "el Arrow" button again.
Now you are asked if you want to save the settings. Please confirm with Yes. Your settings are then available under the menu item My EQ.
THE FM RADIO
You can enjoy your FM radio with the supplied FM and DAB - reception combination, as well as with a house antenna or a cable connection (adapter is included). You can activate the FM radio with the remote control, pressing the "FM" button as well as pressing "Source" on the device.
FIRST SETUP:
▶ Press the key "Mode" on the remote control. The tuner will now search for the next available station
- If you want to save this station as favourite, press the „F” button on the remote control, use the arrow keys to select an available memory and keep pressing “Fule” until the announcement “saved” appears. Now you can access this station by pressing the receptive key on the remote control’s numeric keypad. You are also able to overwrite memory stations that have been stored at any time with new stations.
▶ Repeat steps 1-2 until you have stored all the desired stations or until the frequency is run through once. You can store up to 10 stations as favourites.
Please use the little yellow reception quality icon in the lower right corner of the display to align your antennas optimally.
DAILY OPERATION:
▶ Start the FM radio as described above.
▶ You can recall your stored transmitter at any time using the numeric keypad of your remote control.
The radio disposes of RDS, it becomes up-to-date information about the program, e.g., title, genre, etc. (depending on the transmitte). You can get more information by dressing the "info" but on your remote control once or several times.
By pressing the "left arrow" on the remote, you can access additional settings on the device: Scan settings: Only strong transmitters' - Yes / No
Audio settings: Mono Only* Yes / No (Select "YES" for strong-sounding stations).
With the keys „I onward“ and „Back“, you can switch the frequency band to the next higher or lower available station.
Block
THE DAB + RADIO
Press the "Mode" button on the remote control or on the device and select the DAB radio in the Menu using the arrow keys or the multifunction knob.
FIRST SETUP:
- An automatic search starts. After conclusion of the search all found stations would be shown as a list on the display.
- To select the desired station, use the arrow keys on the remote control and confirm with the "Enter" key. If you want to save this station as favourite, then press one of the keys on the numeric keypad until the message. Saved appears on the d'slay. During operation, you can now call up this station on the numeric keypad of the remote control. In this way, you can over store once occupied station memories with new stations at any time. Press the "left arrow" button on the remote control to return to the list.
- Repeat steps 1-2 until you have saved all desired stations. You can save up to 10 stations as favourites.
- Please use the small reception quality symbol in the lower right corner of the display to optimally align your antenna.
IN DAILY OPERATION:
- Start the DAB + radio as described above.
- The number pad of your remote control allows you to retrieve your stored stations at any time. The respective station memory location is shown at the bottom of the display. Briefly press the P' button on the remote control or on the unit to display a list of all stored stations.
- The DAB + Radio dispose of digital text functions which are shown on the display. By pressing the "Info" button on your remote control once or several times, you can, depending on the station, call up further information; with the "Enter" button you can switch the cover presentation to full screen.
- Press the "left arrow" key on the remote control to return to the station list.
- By pressing the "left arrow" key twice on the remote control, you can call us further setting on the device. The function DRC is in relevant in Germany, as the DAB + stations do not support this operation. The function "clean channels" doesn't remove receivable stations, e.g. after a processing.
- Use the "Forward" and "Backward" buttons on the remote control or the unit to switch to the next or previous station within the bouquet.
THE INTERNET RADIO
If you have your SR-200 MKII connected to the Internet as described, you shall receive Internet radio without any further settings.
Your Internet radio shall be automatically connected to one of the largest databases of Internet transmitters, with more than 25,000 broadcasters and podcasts worldwide. You can access the Internet radio pressing the key "IR" on the remote control or just by pressing repeatedly the "Source" button on the device.
IN DAILY OPERATION:
▶ Start the Internet radio using the key S^ on your remote control.
▶ Selecting transmitters:
By pressing the "Menu" button on the remote control and selecting "Last listened", the display will show you all the last stations you have listened to.
- You can save 10 presets. Using the Numberblock on the remote control. To save a station, press "P", select a number and press "Enter" to store.
If you press the "Menu" button on the remote control and select "Channel list / Local Germany", all German stations will be shown, either every available transmitter, only the most popular ones or sorted by genre.
- Pressing the "Menu" button on the remote control and selecting, "Channel list / station" all available stations worldwide will be shown, sorted by country, genre, popular stations or new stations. You also have the option to search for a transmitter by entering the name.
Just as described in FM or DAB + function, other than to "Favourites", you can also save stations to the remote control's number block.
The radio disposes of digital text functions; up-to-date information about the program, such as title, genre, etc., appears on the display. Pressing the "Info" button on your remote control once or several times will give you further information depending on the station.
Block
COMFORTABLE ADMINISTRATION OF YOUR INTERNET BROADCASTING STATIONS ON A COMPUTER:
- Press the "Model" button on the remote control or on the device and select the Internet radio in the Menu using the arrow keys or the multifunction knob.
- Press "Menu" on the remote control or the device and select Channel list / Help / Get access code. Then write down the displayed code.
- Log in at http://www.wifrad-o-frontier.com with your computer and create a profile. This service is free, the website is operated by the same company that manages the station database of your Internet radio. Then you can register your device there by entering the access code of your device.
- Select your desired stations and add them to your device. You can create folders for better sorting, e.g., "children", "news", "jazz" or "party" and place your stations in them. All assortments you carry out on this website are instantly transferred to your device and are available there under the item "Favourites".
- In case you cannot find a station in the database, you can add it yourself by visiting the station's website and copying or writing off the URL of the server. Then you can add this URL as your own channel or: the page http://www.wifradio-frontic.com and name it as you wish. You will then find this station on your device under „Menu / Channel List / My added stations”.
- Using this service, you can log in any Block device you want, which will then automatically have the same favourites.
THE CD PLAYER
The integrated CD player is equipped with a solid CD drive that plays the media „CD“, MF3-CD^c , CD-R^c , CD-RW^a and CD-DA^b . Only use the full size CD.
IN DAILY OPERATION:
- Press the "Mode" button on the remote control or on the device and select the CD player in the Menu, use the arrow keys or the multifunction keys to turn on the CD player. If there is already a CD in the drive, the 50-260 MKII will automatically start playing. If there is no CD in the drive, insert one into the CD slot. After reading, the CD II start is automatically. You can also start the CD player from other sources at any time by inserting a CD.
2. Playing a CD
- Press the "Play / Pause" button on the device or on your remote control to start playback.
- Pressing the "Play/Pause" button again pauses the playback.
- Pressing the "Stop" button on the device or your remote control stops playback.
3. Selecting titles:
Press the "Forward" or "Backward" button on the device or on your remote control repeatedly until you have reached your desired back. Playback will start automatically. Alternatively, you can enter track numbers directly from the numeric keypad on the remote control.
4. Forward or rewind within a track press the "Forward" or "Backwards" on your remote control to fast-forward or to rewind within one track.
5. Repeat: Press the "Repeat / Random" button on your remote control once to repeat a single track. Press the button a second time to repeat the entire CC and a third time to turn it off. The respective function is indicated with an icon at the bottom of the display.
6. Shuffle Play: Press and hold the „Repeat / Random" button on your remote control until the corresponding icon appears at the bottom of the display to start shuttle play. The contents of the CD will be played now in random order. To switch off the function, keep the button pressed until the symbol disappears again.
Block
You can connect a removable drive (such as a USB stick or USB hard disk) to the rear USB port on your SR-200 MKI. This storage medium must be FAT 32 formatted in order to be read by the SR-200 MKII. Depending on the manufacturer of the storage media, it may be limited in its size.
Attention! External hard drives require their own power supply
The SR-200 MKII recognizes MP3, WMA and FLAC files with a maximum sampling rate of 48 KHz at 15 bit (FLAC) and 320 kBI/s (MP3 and WMA).
IN DAILY OPERATION:
-
Press the "Mode" button on the remote control or on the device and select the Music Player in the Menu using the arrow keys or the multifunction knob. Select USB Play from the displayed menu to play music from your inserted storage media. The SR-200 MKII will show you the contents of the media on the display. Within the list you can navigate with the help of the arrow keys on your remote control and select the desired titles or folders with User ^® and play them.
-
The functions Play, Pause, Stop, Next track, Previous track, Fast Forward, Rewind, Repeat and Shuffle play are identical to those described on page 49 of the CD player.
-
You can create your own playlist by selecting a song on the USB media and then pressing the multifunction knob on the device or pressing the button "Enter" on the remote control. This adds the song to your playlist. You can delete this playlist, by pressing the "Menu / Info" button and selecting Music Player / Delete Playlist.
-
The USB function is capable of storing additional stored information about the titles, e.g. read out, MP3 taps. By pressing the "Menu/Info" button once or several times you can retrieve this information depending on the file.
A reproduction of cover art is not supported in the music player (USP).
THE MUSIC PLAYER (DLNA)
Your new SR-200 MKII is DI NA (Digital Living Network Alliance) certified. This means that you can access the appropriate music sources in your home network according to the DI NA standard.
- If you have connected your SR-200 MAIL to your router as described on page 41/42 and it disposes of a USB port, you can use its network attached storage (NAS) functionality.
- To do this, simply connect a standard USB hard drive your router and activate the NAS functionality in its configuration or connect a NAS drive to your network. Please refer to the router user manual if you have any problem or if you need any further information.
- On this hard drive or NAS drive, you can then upload your favourite pieces of music or folders. This is by far the cheapest way to install a uniform DLNA media server for all your devices in the household.
- Press the "Mode" button on the remote control or on the device and select the music player in the menu using the arrow buttons or the multifunction knob. From the menu that appears, choose Shared Media to see a list of all common media server suitable devices in your network. Select your installed media server and then select the item "Music".
- The contents of your hard drive will now be displayed pre-sorted according to various aspects, such as: "Artists", "Albums", "All Titles", "Genres" or "Folders". The quality of these sorting depends directly on the quality of the loaded data on the hard disk, if there are, for example, MP3 tags missing, the music pieces will be also not well sorted
- Within the respective lists, you can use the arrow keys on your remote control to navigate and also select and play the desired track or folder with "Enter".
• The music player (DINA) has the same control functions as the Music player (USB). - The music prayer (DLNA) interprets MP3, WMA and FLAC files with a maximum stream size of 1.5 Mbps.
- Many routers with NAS functionality can convert other file formats directly into a SR-200 MKI readable format as they stream. Please read the operating instruction of your router.
- A reproduction of cover art is not supported in the music player (D. NA).
Block
MUSIC STREAM
The "streaming" of music in the home area is the transfer of music data from an external device such as a computer, tablet PC or smartphone to a player such as your SR-200 MKII. The prerequisite is that these devices are in the same network (WLAN or LAN). Here we briefly introduce streaming solutions for the most popular devices:
APPLE ^® PC (MAC OS X ^® )
-
It is not possible to use the Airplay® feature of iTunes® with the SR-200 MKII.
-
Nevertheless, you can stream with the Apple Macintosh ^® :
Please install a streaming server as for example, download the free software "Servicio" (www.http://servio.org/download) and start it. Using the function "Media / US3 - Common Media" you will now find a Servito server, through which you can access all the music on your Apple Macintosh. If you have any problems or need further information, please read Servito Installation Guide.
WINDOWS® PC
-
Starting with version 12, a streaming function is integrated in Windows Media Player*.
-
Please activate it (see Windows Media Player® User Guide):
You can then access all the music in Windows Media Player Using the Media / USB Shared Media feature. If you have problems or need more information, please read the Windows Media Player User Guide:
STREAM FROM SMARTPHONE OR TABLET PC (ANDROID®)
- Please read the enclosed operating instructions for the UNDOA™ app to learn how to play the music from your android device on the 5R-70C MKII. Many current android units already have a function to play music on DLNA equipment. Your media usually needs to be shared on your android device as a media server. Please also read the operating instructions of your android device.
STREAM FROM IPOD ^® . IPHONE ^® OR IPAD ^® (IOS ^® )
- Please read the enclosed operating instructions for the UNDOK™ app to learn how to play the music from your iOS device on the SR-200 MKI. In order to enable the app, UNDOK™ to access the library of e.g., iTunes®, you must install an app and start it before, for example the free media: correct.
* Unfortunately Audioblock GmbH cannot guarantee the full functionality or accuracy of descriptions of third-party software, as these are subjects to constant further development or changes that can not be influenced by Audioblock GmbH.
STREAMING SERVICES
Currently there are a great variety of streaming services with a wide range of technologies on the market. If you want to use them on your SR-200 MKII, simply connect your SR-200 MKII to your phone, tablet or PC using Bluetooth. Select this as the output device.
HOW TO USE CONNECT (SPOTIFY)
You need Spotify Premium to use Connect. Details can be found on the enclosed "yer."
-
Connect your new device to the same Wi-Fi network that your phone, tablet or PC is connected to. (Further information can be found in the user manual).
-
Open the Spotify app on your phone, tablet or PC and play a song. If you are using the app on your phone, tap on the bottom left of the screen, click on the image to the song. Tablet and PC users continue with step 4.
-
Tap the Connect icon.
-
Select your device from the list. If it is not displayed, make sure that it is connected to the same Wi-Fi network as your phone, tables or PC is connected to.
Finished! Have fun listening to music.
SETTING UP AND OPERATING MULTI-ROOM SYSTEMS
To integrate your SR-200 MKII into a multi-room system, as for example, with the Smartbox SB-100 from Altidio-block, please read the enclosed instructions for the app "UNDOX™", which is mandatory for the configuration.
Block
REMOTE CONTROL OF THE DEVICE WITH THE APP „UNDOK™“
If you own an iPhone ^® , iPod ^® or iPad ^® , please go to the Apple App Store ^® and search for the word "undok". Import text: select iPhone apps ^® before!
If you have an android device (tablet or smartphone), visit Google Play Store ^® and look for the term „undok”. Then install the found free app on your mobile device.
Very important to operate your SR-200 MKII, the smartphone / tablet and the SR-200 MKII must be registered in the same wireless network and the SR-200 MKII must be turned on!
- Start the app, UNDOK™ now. The app is now looking for all DUNA-enabled devices in the WLAN.
- Please select your SR-200 MCI from the 'ourc devices.
- Your SR-20C MKII is now connected to the "UNDOK™" app and you can control the device at distance:
- "Source" function: select the desired one from the available signal sources.
- Browse" function depending on the selected signal source, the various options of the signal source can be selected here. For an overview of the functions, please refer to the respective chapters on the signal sources in this operating manual.
- Playing now ^a function: provides information and covers (if there is any available) to the currently playing song or radio station.
- Additional Settings* functions: this menu allows you to switch the device off and on, change the sound settings, quit the app and make further settings.
For further functions of the app, for example, configuration of multi-room systems, please read the enclosed "UNDOK™" manual.
Older versions of the app (DOK or BLOCK App), may ask for a FIN code for the connection. This is set from the factory "1234".
If you want to change it, press the Menu button or the remote control and select System settings / Internet settings / PIN for apps and enter here another PIN.
CONNECT EXTERNAL DEVICES VIA BLUETOOTH ^®
Your device is equipped with a modern Bluetooth® interface. These can be used to pair any Bluetooth® source with the SR-200 MKII. Possible signal sources are smartphones (iOS, Android, Windows Phone), tablet PCs (OS, Android, Windows 8) or music players (iPod, similar) with Bluetooth® function.
To activate the Bluetooth® function, press the „Mode" button on the remote control or on the device and select the Bluetooth® function in the source menu using the arrow keys or the multifunction knob.
If no Blue.coith devices have been paired or are in the proximity, the SR-100 switches automatically to the pairing mode, the small icon at the bottom of the screen will start to flash.
Now start the Bluetooth® function on your external device and search for devices in your environment. Select the SR-200 MKI from the devices found and confirm the subsequent request for pairing.
In case of problems or for further information on pairing, please refer to the operating instructions of the device you would like to pair with your SR-200 MKI. Then you can activate the music playback function of your external device and your SR-200 MKI will play the music. Please note that with the Integrated Bluetooth ^® function you can only connect signal sources.
The pairing of, for example, external loudspeakers to the SR-200 MKII via Bluetooth®'s not possible. For this purpose, use the multi-room function.
- Playback of audio files:
- Press the „Play / Pause“ button on the device or on your remote control to start playback.
- Pressing the „Play/Pause" button again pauses the playback.
2 Select titles:
Press the "Forward" or "Backward" button on the device or on your remote control repeatedly until you have reached your desired Lack. Playback will start automatically.
- To fast-forward or rewind within a track press the,Forward ^a or,Backwards ^b button on your remote control to fast-forward or rewind within one track.
The Bluetooth® feature does not support the Repeat or Shuffle functions.
As an alternative to the operating functions on the device or with the remote control, you can also control the music playback on your external Bluetooth® device.

Block
THE AUX CONNECTION
The AUX connector on the 50-200 MKII processes electrical high-level audio signals in analogous form. This connector is suitable for all external devices with analogue audio output. Please consult the operating instructions of the external device for connection. A suitable cinch cable is available in the accessories scores.
THE AUDIO IN CONNECTION
The Audio in connector on the SR-200 MKII processes electrical high-level audio signals in analogous form. This connector is suitable for all external devices with analogue audio output. Please consult the operating instructions of the external device for connection. A suitable cinch cable is available in the accessories stores.
THE USB PORT
For a more detailed description of the USB function, please refer to page 50.
THE HEADPHONE CONNECTION
To the headphone jack of the SR-200 MKII you can use a standard headphone with 3.5 mm Connect the jack plug. A 6.3 mm jack adapter for larger headphone plug is available in the accessories stores.
SYSTEM SETTINGS
Press the „Menu / info" button on your remote control or on the device and select the System Settings. In the following menu you can carry out the following settings:
EQUALIZER
In this menu you can change the sound settings of your SR-200 MKII.
INTERNET SETTINGS
In this menu, you can change the settings you have made for your Internet connection, for example, when you change your location. You can also restart the wizard or set up the connection completely manually. Refer to page 41-42 of this manual.
TIME SETTINGS
Here you can set the time and date manually, change display formats. Turn on Daylight Saving Time (summer/winter time) or disable automatic date and time retrieval from the Internet.
LANGUAGE
Here, you can select your preferred display language for the device.
DEFAULT SETTINGS
Selecting and confirming this item resets all settings to the factory settings.
Please use this function if you have problems receiving data from the Internet or the general operating software of the device. You should also perform this function if you want to resell the device. A restart after occurring the factory settings restarts the setup wizard.
SOFTWARE UPDATE
The SR-200 MKII regularly checks and informs you whether an update is available on the internet. You can set this function for manual update (not recommended), or to update the operating software.
SETUP WIZARD:
Selecting and confirming this item starts the setup wizard. All settings that you then make overwrite the old settings.
INFO
Selecting and confirming this item will show you technical information about the installed software version, the manufacturer ID of the device, and the name under which your device will be displayed on the network.
BACKLIGHT
Here you can separately adjust the brightness of the display curing operation and in network standby mode.
- Time until dimming: this value indicates the time after which the backlight of the display darkens after switching to network standby.
- Display brightness: this item controls the brightness of the display during operation.
- Dim brightness: if you have entered a time value under point 1, this point determines the brightness to which the display will be displayed after the selected time Network standby.
MULTI-ROOM
In this menu you can group the SR-200 M&I with multiple speakers in different rooms. We recommend using the free app UNOK ^™ for the configuration. Please also read the enclosed instructions for the app UNOK ^™ .

Block
ADDITIONAL COMFORT FEATURES
Press the "Menu / Info" button on your remote control or on the device and select the item Main menu. In the following menu you can also select. Snoove and Alarm in addition to the already known signal sources:
SNOOZE
Select Shoot on your remote control with the arrow keys and confirm with the "Enter" key. The message "Sleeping Off" appears. With the "Up arrow" and "Down arrow" buttons, you can now set the desired period of time after which the device will automatically switch to standby mode. Your setting will be taken over automatically after a short time. Exit this menu by pressing the "Menu / info" button again. At the bottom of the display an icon will indicate the selected time until switching to the network standby.
ALARM CLOCK
Select A arm Clock on your remote control with the arrow keys and confirm with the key
„Enter:“ The “Alarm clock” menu appears. Now you have the option to set two different alarm clocks. For example, select the first alarm clock, in the following menu, you can switch this alarm on and off, set the time, choose between daily, single days, weekends etc., set the signal source with which you are awakened and adjust the volume. Please do not forget to save this alarm by using, the last item in the menu!
Exit this menu by pressing the „Menu / Info* button again. The display will show at the bottom an icon for each programmed alarm clock and the alarm function is active.
If the alarm clock becomes active at the selected time, you have two options:
- Snove: press any button on the remote control or on the device except the „Standby” button. The unit will row display the time until the alarm is reactivated, with the „Up / down arrow” or „Vol +/-” buttons you can change this period.
- Turn off the alarm clock press the "Standby" button on the device or on the remote control to switch off the alarm clock. The alarm will become active again as soon as possible depending on the programming.
To turn off the alarm completely, follow the instructions above and set the alarm to Off.
ERROR MESSAGES AND TROUBLESHOOTING (GENERAL)
| Fehlerbeschreibung Mögliche Ursache und Behebung | |
| No power, though the device is turned on | The power cable is not connectedThe socket is defective.The fuse in the device is defective - must be repaired by a technicianThe power cord is defective - must be required by a technician |
| No sound - The device is not on | The volume is too lowThe loudspeaker cable is not connected correctlyNo input signalThe device has the wrong input |
| No sound on a channel. The audio input is connected incorrectlyThe selection of the input is wrongThe speaker cable is connected incorrectlyThe speakers are defective | |
| Loud hum. An audio cable is not connected properly or is defectiveThe turntable is not groundedYour device is too close to another device or the TV | |
| Work bass. The phase at the speaker is not connected correctly change it/ | |
| Distorted sound - Volume, bass or treble are set too highLoudspeakers could be defectiveI there is a jumper on the speaker cable (short circuit) | |
| The remote control does not work | Check if the batteries are correctly insertedAre the batteries empty? Plastic replace them with new onesPoint the remote control towards the receiver or the deviceRemove any objects between the remote control and the unitDetermine if the distance between the remote control and the device is more than 8 meters |
| Keys do not workDevice or remote control | I turn the unit off and then on again.Alternatively, disconnect the device from the power supply and then reconnect it,0 either at current inlet can affect the device) |
| Disturbance in the reception - The transmitter is not set correctlyThe antenna is not aligned correctlyStart a station search again | |
| Network connection's not possible | The network is currently unavailable. Try again laterThe router does not allow connection, since the device still hasn't received an address, start the setup wizardCheck the distance between the router and the deviceChange the selector encryption method on the routerDetermine if a firewall rejects the device |
Block
ERROR MESSAGES AND TROUBLESHOOTING (NETWORK)
| Meldung Ursache Behebung | ||
| No Connect | 1. Incorrect Password2. Correct password, no contact to the router | 1.Enter the correct password2.Disable Mac filter on the router |
| Forma.Error The No format is not recognized | Make sure the stream is exceeded in WMA,MFS,or.LAC at not more than 48K to.If not,please recode. | |
| Network Error | Incorrect Information is received from the network | The data from the server are not readable.Possibly reboot the SR 100 and router. |
| Network not available | Problems with the connection to the router Turn on or restart.the router | |
| Network timeout | No answer regardless of the network The solecd station can not be recorded atthe time,please charge the transmitter | |
| No UP-P found | No UP-P server was found | Make sure your media server is on the samenetwork as your SR 100 and it is turned on. |
| Not authorised Indcorrect password entry or not logged inon UP-P Server | Enter the correct password. | |
| Update failed Software Update failed Check your network settings or by it again later | ||

Only authorized qualified personnel may carry out repairs and interventions in the device.
CARE AND TRANSPORT
CARE AND CLEANING OF THE APPLIANCE
Before you clean it, disconnected it from the power supply. Use only clean and dry cloths to clear your appliance. If the appliance is very dirty, you can clean the unit with a damp cloth and milk cleaning fluid. Never use liquids such as gasoline, alcohol, petroleum or other solvents.
TRANSPORT THE UNIT
Please keep the packaging and the instructions for use so that you can pack the unit properly for transporting or shipping. The original packaging is designed so that you can satisfy transport or ship the device. Please keep this manual for future reference.
TECHNICAL DATA
| Amplitude: | Class D amplifier |
| Power (RMS @ 6 ohms): | 7 x 3,5 walls + 37 Wall Subwoofer |
| Analogic Inputs: | 3.5 mm AUX IN Storage 500 mV |
| Speaker: | Full Range 2 x 3 , Built in |
| Impedance: | 6 Ohm |
| Sound pressure: | 83 dB |
| Harmonic diu or lon: | < 0,3% @1 Wall |
| Signal to noise ratio: | > 60 dB |
| Frequency Response: | 40 -Hz -20 KHz @ -3 dB |
| Tone control: | Bass | Treble + 12 dB |
| Frequency range FM: | 87,5-108 MHz |
| Frequency range DAB: | 174,928 MHz - 239,200 MHz |
| Internet radio: | More than 25,000 Stations worldwide |
| Station memory: | 10 per VHF | DAB+ | Internet radio |
| File format: | AAC | AAC+ | MF3 | WAY | WMA | FLAC |
| Streamings: | Bluetooth | DNA UPnP with UNOOKTM App |
| Network: | LAN | Ethernet | WLAN 2,4 GHz | Bluetooth |
| CD Compatibility: | CD-R | CD-RW | MP3 | CD-DA |
| ISO9660, UDP V1.07, V1.5 (max. 2 multi-sessions) | |
| Power consumption , Off: | < 0,01 Watt |
| Power consumption , Network Standby: | 3 Well |
| Power consumption , Operation: | 45 Wall (max.) |
| Power Supply with Power Switch: | AC zu DC | 21 V | 2,1 A |
| W.H | D: | 430 x 128 x 280 mm |
| Weight: | 4,7 kg |
| Liquoront: | colour display, system remote control, |
natural_image
Back view of a silver electronic device with ports, buttons, and a circular vent (no visible text or symbols)Audioblock GmbH

- CONTENTS:
- Block
- SAFETY INSTRUCTIONS
- HANDLING BATTERIES
- DECLARATION OF CONFORMITY
- CE
- SAFE POSITIONING
- SECURE CONNECTION
- SAFE USE
- BEFORE OPERATING
- SETTING UP THE DEVICE
- FIRST OPERATING AND INSTALLATION
- MANUAL INSTALLATION WLAN
- MANUAL INSTALLATION CABLES (ETHERNET)
- AMPLIFIERS AND SOUND SETTINGS
- VOLUME:
- EQUALIZER:
- THE FM RADIO
- FIRST SETUP:
- DAILY OPERATION:
- THE DAB + RADIO
- IN DAILY OPERATION:
- THE INTERNET RADIO
- COMFORTABLE ADMINISTRATION OF YOUR INTERNET BROADCASTING STATIONS ON A COMPUTER:
- THE CD PLAYER
- Playing a CD
- Selecting titles:
- THE MUSIC PLAYER (DLNA)
- MUSIC STREAM
- APPLE ® PC (MAC OS X ® )
- WINDOWS® PC
- STREAM FROM SMARTPHONE OR TABLET PC (ANDROID®)
- STREAM FROM IPOD ® . IPHONE ® OR IPAD ® (IOS ® )
- STREAMING SERVICES
- HOW TO USE CONNECT (SPOTIFY)
- SETTING UP AND OPERATING MULTI-ROOM SYSTEMS
- REMOTE CONTROL OF THE DEVICE WITH THE APP „UNDOK™“
- CONNECT EXTERNAL DEVICES VIA BLUETOOTH ®
- THE AUX CONNECTION
- THE AUDIO IN CONNECTION
- THE USB PORT
- THE HEADPHONE CONNECTION
- SYSTEM SETTINGS
- EQUALIZER
- INTERNET SETTINGS
- TIME SETTINGS
- LANGUAGE
- DEFAULT SETTINGS
- SOFTWARE UPDATE
- SETUP WIZARD:
- INFO
- BACKLIGHT
- MULTI-ROOM
- ADDITIONAL COMFORT FEATURES
- SNOOZE
- ALARM CLOCK
- CARE AND TRANSPORT
- CARE AND CLEANING OF THE APPLIANCE
- TRANSPORT THE UNIT
- TECHNICAL DATA
Brand : Block
Model : SR-200 MKII
Category : Radio