USER MANUAL Mirage (2019) MITSUBISHI
Thank you for selecting a MIRAGE as your new vehicle.
This owner's manual will add to your understanding and full enjoyment of the many fine features of this vehicle.
It contains information prepared to acquire you with the proper way to operate and maintain your vehicle for the utmost in driving pleasure.
MITSUBISHI MOTORS Europe B.V. reserves the right to make changes in design and specifications and/or to make additions to or improvements in this product without obligation to install them on products previously manufactured.
It is an absolute requirement for the driver to strictly observe all laws and regulations concerning vehicles.
This owner's manual has been written in compliance with such laws and regulations, but some of the contents may become contradictory with later amendment of the laws and regulations.
Please leave this owner's manual in this vehicle at time of resale. The next owner will appreciate having access to the information contained in this owner's manual.
Repairs to your vehicle:
Vehicles in the warranty period:
All warranty repairs must be carried out by a MITSUBISHI MOTORS Authorized Service Point.
Vehicles outside the warranty period:
Where the vehicle is repaired is at the discretion of the owner.
Throughout this owner's manual the words WARNING and CAUTION appear. These serve as reminders to be especially careful. Failure to follow instructions could result in personal injury or damage to your vehicle.
WARNING
Indicates a strong possibility of severe personal injury or death if instructions are not followed.
CAUTION
Means hazards or unsafe practices that could cause minor personal injury or damage to your vehicle.
You will see another important symbol:
NOTE
Gives helpful information.
*: indicates optional equipment.
It may differ according to the sales classification; refer to the sales catalogue.
Abbreviations used in this owner's manual:
LHD: Left-Hand Drive
RHD: Right-Hand Drive
A/T: Automatic transmission
M/T: Manual Transmission
CVT: Continuously Variable Transmission
i San europea marvel
: See owner's manual

© 2018 Mitsubishi Motors Corporation
Information for station service
| Fuel | Fuel tank capacity 35 litres | Unloaded petrol octane number (EN220)95" ICON or higherRefer to the "General information" section for the fuel selection. |
| Recommended fuel |
| Engine oil Refer to the "Maintenance" section for the selection of engine oil.Tyre inflation pressure Refer to the "Maintenance" section for the tyre inflation pressure. |
OA0X19E2
BLO-18-000465
Table of contents
| Overview/Quick guide | 1 |
| General information | 2 |
| Locking and unlocking | 3 |
| Seat and seat belts | 4 |
| Instruments and controls | 5 |
| Starting and driving | 6 |
| For pleasant driving | 7 |
| For emergencies | 8 |
| Vehicle care | 9 |
| Maintenance | 10 |
| Specifications | 11 |
| Alphabetical index | 12 |
| Declaration of Conformity | 13 |
Instruments and controls
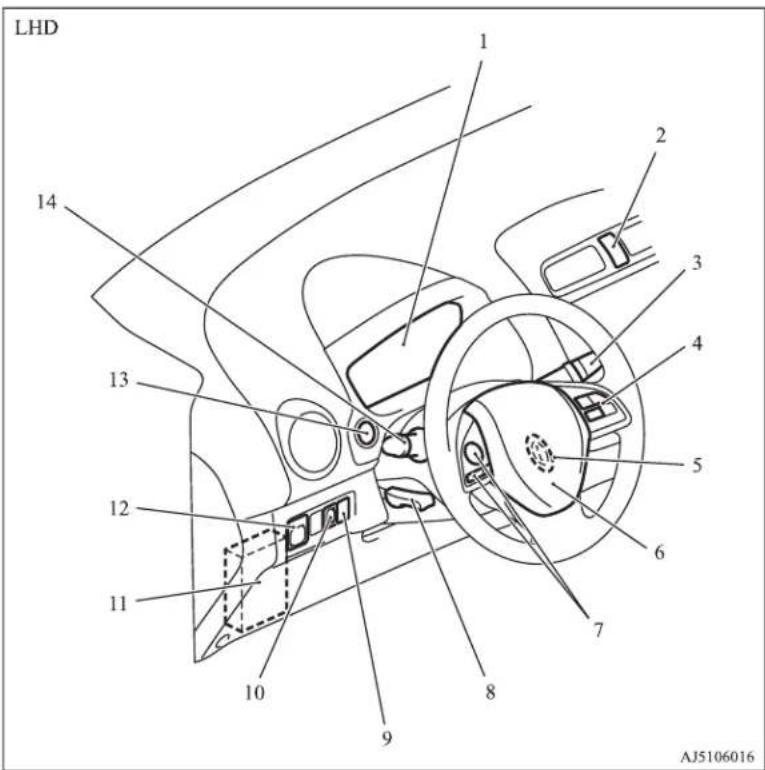
-
Instruments p. 5-02
-
Hazard warning flasher switch p. 5-19
-
Windscreen wiper and washer switch p. 5-21
Rear window wiper and washer switch p. 5-25
-
Cruise control switches* p. 6-39
-
Ignition switch* p. 6-10
-
Supplemental restraint system (SRS) -airbag (for driver) p. 4-17 Horn switch p. 5-26
-
Steering wheel remote control switches* p. 7-42, 7-48
-
Steering wheel height adjustment p. 6-06
-
Auto Stop & Go (AS&G) OFF switch* p. 6-24
-
Headlamp levelling switch p. 5-18
-
Fuses p. 10-15
-
Electric remote-controlled outside rear-view mirror switch p. 6-07
-
Engine switch* p. 6-11
-
Combination headlamps and dipper switch p. 5-15
Turn-signal lever p. 5-19
Front fog lamp switch* p. 5-20
Rear fog lamp switch p. 5-20
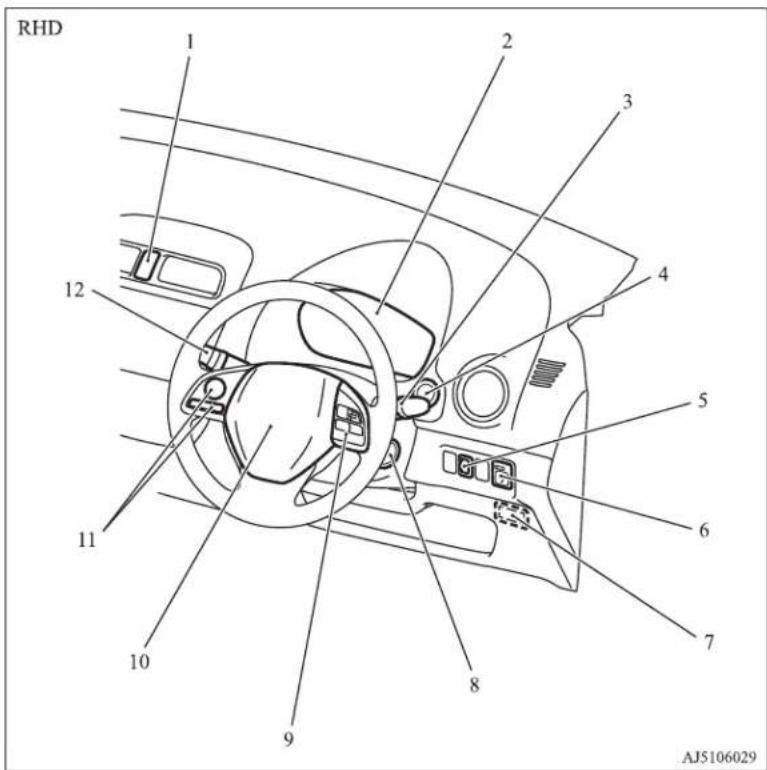
- Hazard warning flasher switch p. 5-19
- Instruments p. 5-02
- Windscreen wiper and washer switch p. 5-21
Rear window wiper and washer switch p. 5-25
- Engine switch* p. 6-11
- Headlamp levelling switch p. 5-18
- Electric remote-controlled outside rear-view mirror switch p. 6-07
- Key slot* p. 6-19
- Ignition switch* p. 6-10
- Cruise control switches* p. 6-39
- Supplemental restraint system (SRS) -airbag (for driver) p. 4-17
Horn switch p. 5-26
- Steering wheel remote control switches* p. 7-42, 7-48
- Combination headlamps and dipper switch p. 5-15
Turn-signal lever p. 5-19
Front fog lamp switch* p. 5-20
Rear fog lamp switch p. 5-20
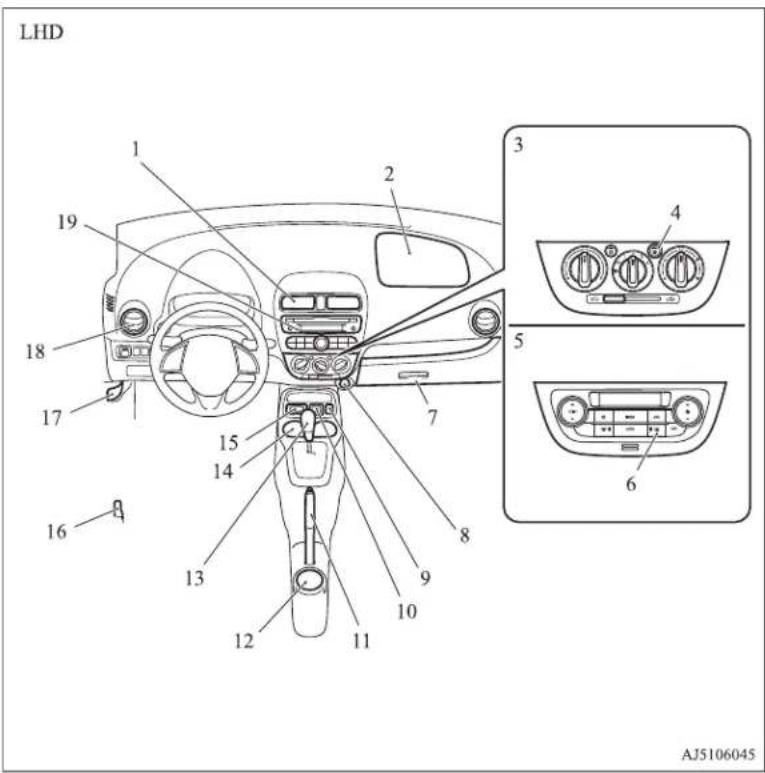
- Centre ventilators p. 7-02
- Supplemental restraint system (SRS)-airbag (for front passenger) p. 4-17
- Heater* p. 7-03
Manual air conditioning* p. 7-03
4. Rear window demister switch p. 5-26
5. Automatic air conditioning* p. 7-08
6. Rear window demister switch p. 5-26
7. Glove box p. 7-73
8. Accessory socket p. 7-71
9. USB input terminal* p. 7-67
10. Heated seat switches* p. 4-03
1. Parking brake lever p. 6-04
12. Cup holder (for the rear seat) p. 7-73
13. Gearshift lever* p. 6-25
Selector lever* p. 6-26
4. Cup holder (for the front seat) p. 7-73
5. Key slot* p. 6-19
6. Fuel tank filler door release lever p. 2-03
17. Bonnet release lever p. 10-03
18. Side ventilators p. 7-02
19. Audio* p. 7-15
Digital clock* p. 7-27
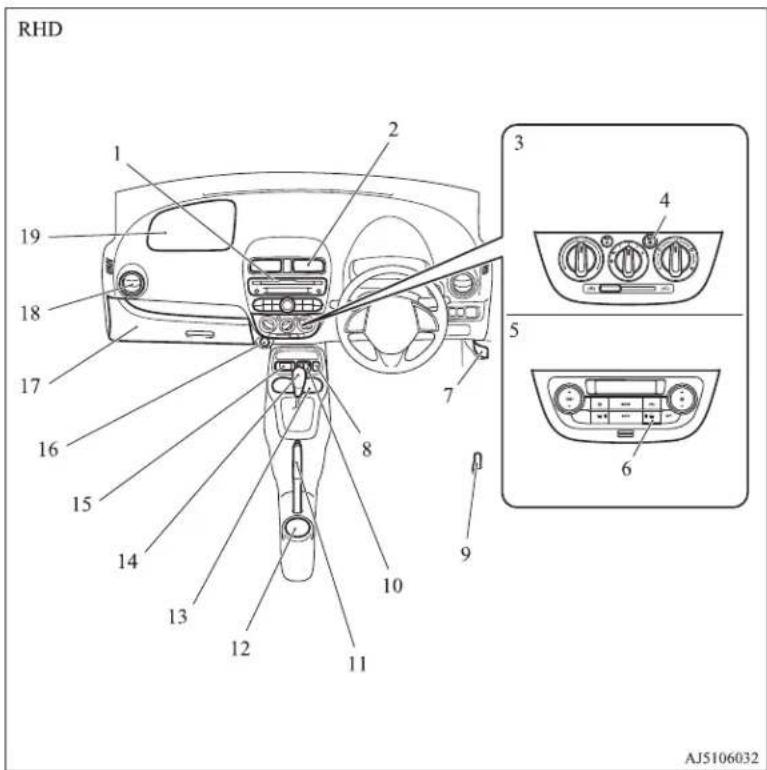
- Audio* p. 7-15
Digital clock* p. 7-27
- Centre ventilators p. 7-02
- Manual air conditioning* p. 7-03
- Rear window demister switch p. 5-26
- Automatic air conditioning* p. 7-08
- Rear window demister switch p. 5-26
- Bonnet release lever p. 10-03
- USB input terminal* p. 7-67
- Fuel tank filler door release lever p. 2-03
- Heated seat switches* p. 4-03
- Parking brake lever p. 6-04
- Cup holder (for the rear seat) p. 7-73
- Cup holder (for the front seat) p. 7-73
- Gearshift lever* p. 6-25
Selector lever* p. 6-26
- Auto Stop & Go (AS&G) OFF switch p. 6-24
- Accessory socket p. 7-71
- Glove box p. 7-73
- Side ventilators p. 7-02
- Supplemental restraint system (SRS)-airbag (for front passenger) p. 4-17
Interior
Interior
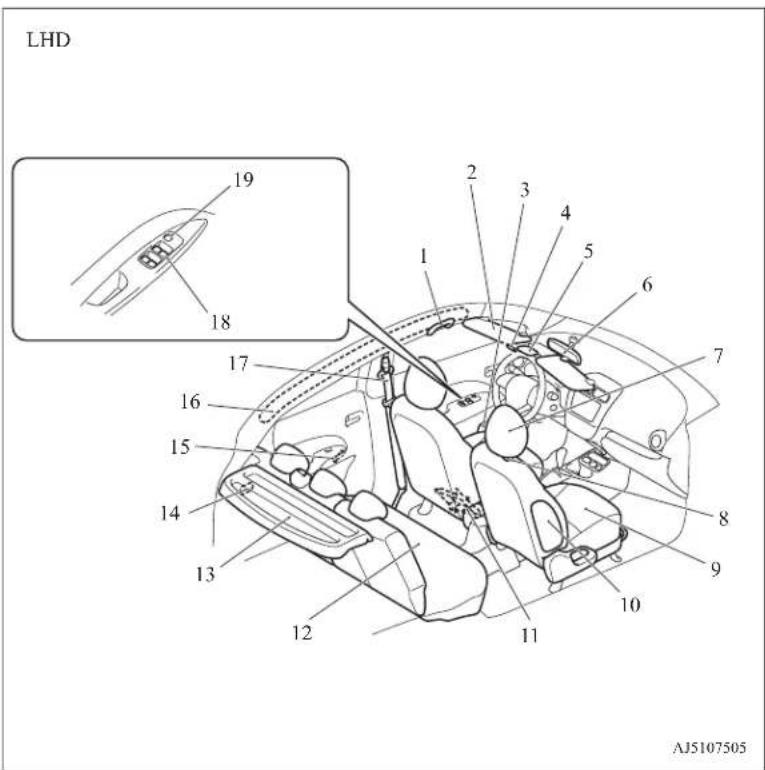
-
Assist grip p. 7-75
-
Sun visors p. 7-70
Vanity mirror* p. 7-70
Card holder* p. 7-70
-
Bottle holder p. 7-74
-
Microphone* p. 7-48
-
Room lamp p. 7-71, 10-22
-
Inside rear-view mirror p. 6-06
-
Convenient hook p. 7-75
-
Head restraints p. 4-04
-
Front seat p. 4-02
-
Supplemental restraint system (SRS) - side airbag (for front seat) p. 4-24
-
Jack* p. 8-06
-
Rear seat p. 4-03
-
Rear shelf panel* p. 7-74
-
Luggage room lamp* p. 7-72, 10-22
-
Manual window control* p. 3-19
-
Supplemental restraint system (SRS) - curtain airbag p. 4-24
-
Seat belts p. 4-05
Adjustable seat belt anchor* p. 4-07
-
Electric window control switch* p. 3-19
-
Electric window lock switch* p. 3-21
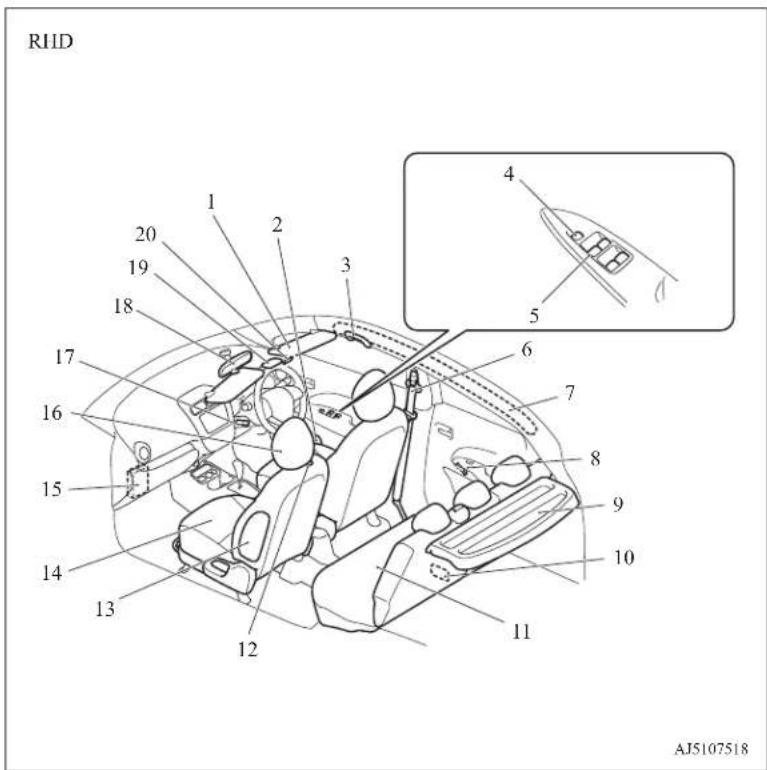
- Sun visors p. 7-70
Vanity mirror* p. 7-70
Card holder* p. 7-70
-
Bottle holder p. 7-74
-
Assist grip p. 7-75
-
Electric window lock switch* p. 3-21
-
Electric window control switch* p. 3-19
-
Seat belts p. 4-05
Adjustable seat belt anchor* p. 4-07
-
Supplemental restraint system (SRS) - curtain airbag p. 4-24
-
Manual window control* p. 3-19
-
Rear shelf panel* p. 7-74
-
Luggage room lamp* p. 7-72, 10-22
-
Rear seat p. 4-03
-
Convenient hook p. 7-75
-
Supplemental restraint system (SRS) - side airbag (for front seat)
p. 4-24
-
Front seat p. 4-02
-
Fuscs p. 10-15
-
Head restraints p. 4-04
-
Steering wheel height adjustment p. 6-06
-
Inside rear-view mirror p. 6-06
-
Room lamp p. 7-71, 10-22
-
Microphone* p. 7-48
Luggage area
1
Luggage area
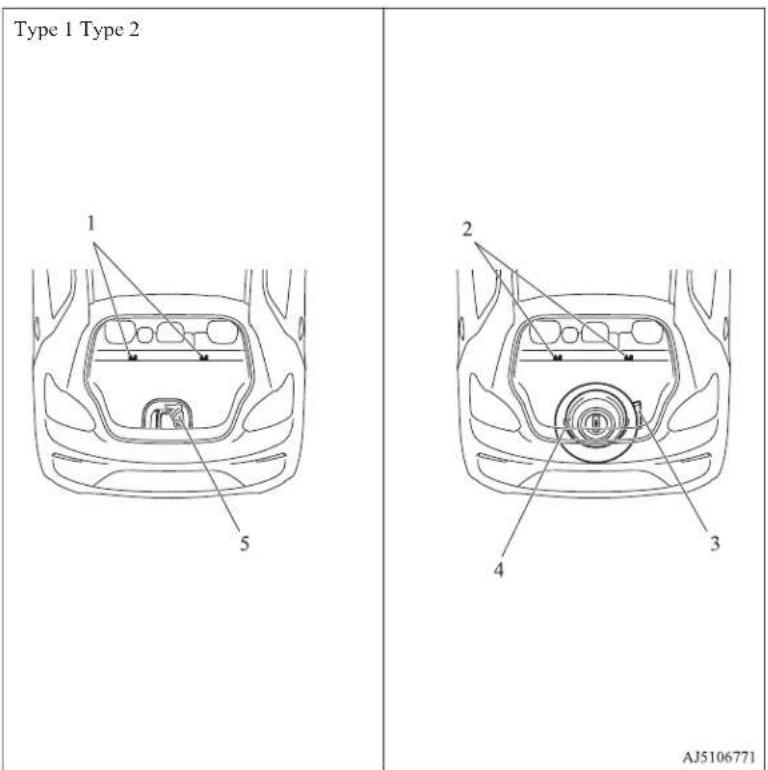
- Tether anchorages for child restraint system p. 4-15
- Tether anchorages for child restraint system p. 4-15
- Tools p. 8-06
- Spare wheel p. 8-13
- Tools p. 8-06
Tyre repair kit p. 8-06
Outside (Front)
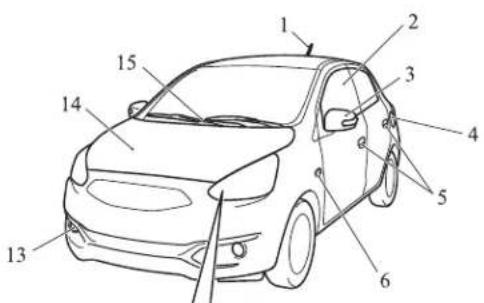
Halogen headlamps type Bi-xenon High Intensity Discharge (HID)
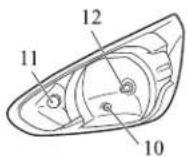
headlamps type
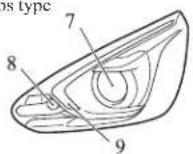
-
Antenna p. 7-46
-
Electric window control* p. 3-19
-
Outside rear-view mirror p. 6-07
Side turn-signal lamps* p. 5-19, 10-21
-
Fuel tank filler p. 2-03
-
Locking and unlocking the doors p. 3-15
Keyless entry system* p. 3-04
Keyless operation system* p. 3-07
-
Side turn-signal lamps* p. 5-19, 10-21
-
Headlamps p. 5-15, 10-21
-
Front turn-signal lamps p. 5-19, 10-21, 10-23
-
Position lamps p. 5-15, 10-21
-
Position lamps p. 5-15, 10-21, 10-23
-
Front turn-signal lamps p. 5-19, 10-21, 10-23
-
Headlamps p. 5-15, 10-21, 10-22
-
Front fog lamps* p. 5-20, 10-21, 10-24
Daytime running lamps p. 10-21, 10-24
- Engine compartment p. 10-02, 11-10
Bonnet p. 10-03
- Windscreen wiper and washer p. 5-21
AJ5105992
Outside (Rear)
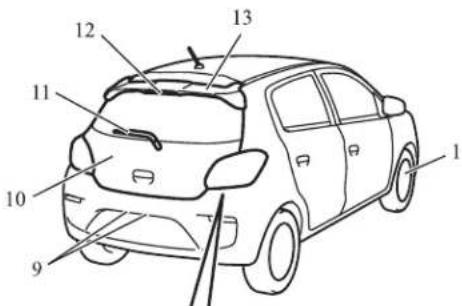
Bulb type stop and tail lamps LED type stop and tail lamps
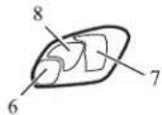
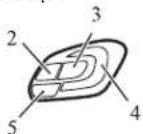
AJ5103943
- Tyre p. 10-09
Tyre inflation pressures p. 10-10
Tyre pressure monitoring system (TPMS)* p. 6-43
Wheel condition p. 10-10
Tyre rotation p. 10-11
Snow traction device (Tyre chains) p. 10-12
Size of tyres and wheels p. 11-08
-
Reversing lamps p. 10-21, 10-25
-
Rear turn-signal lamps p. 5-19, 10-21, 10-25
-
Stop and tail lamps p. 10-21, 10-25
-
Rear fog lamp (driver's side) p. 5-20, 10-21, 10-25
-
Reversing lamp (passenger's side) p. 10-21, 10-25
Rear fog lamp (driver's side) p. 5-20, 10-21, 10-25
-
Stop and tail lamps p. 10-21, 10-25
-
Rear turn-signal lamps p. 5-19, 10-21, 10-25
-
Licence plate lamps p. 10-21, 10-27
-
Tailgate p. 3-18
-
Rear window wiper and washer* p. 5-25
-
High-mounted stop lamp* p. 10-21, 10-26
-
Rear spoiler*
Quick guide
Locking and unlocking the doors and tailgate
Keyless entry system\*
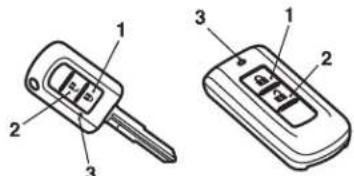
Press the remote control switch, and all the doors and the tailgate will be locked or unlocked as desired.
The remote control switch will operate within approximately 4 m from the vehicle.
Keyless entry key Keyless operation key
AJA113197
1- LOCK switch
2- UNLOCK switch
3- Indication lamp
Refer to "Keyless entry system*" on page 3-04.
Keyless operation system\*
When you are carrying the keyless operation key, if you press the driver's door lock/unlock switch (A), or the tailgate lock/unlock switch (B) within the operating range, all the doors and the tailgate are locked/unlocked.
The operating range is approximately 70 cm from the driver's door lock/unlock switch and the tailgate lock/unlock switch.
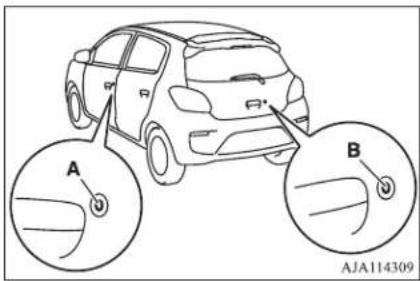
Refer to "Keyless operation system*" on page 3-07.
Around the driver's seat
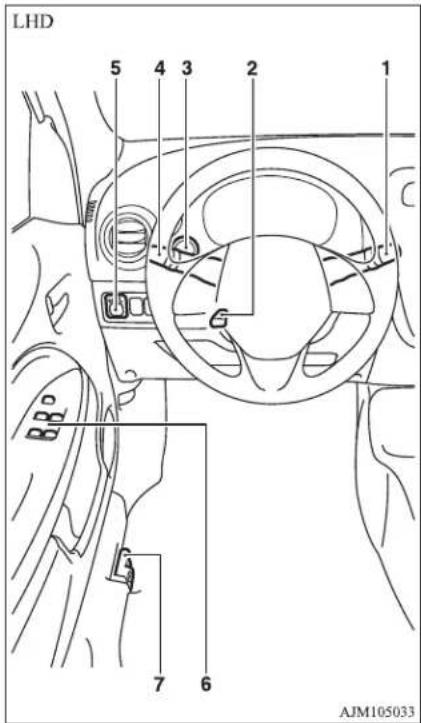
Quick guide
1
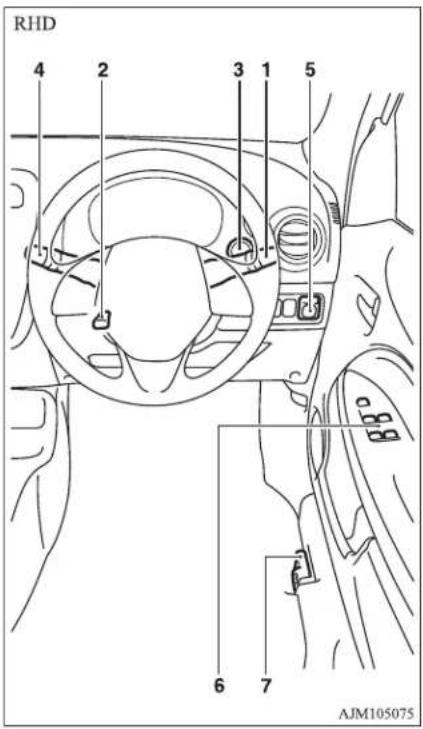
1-Wiper and washer switch
Except for vehicles equipped with rain sensor
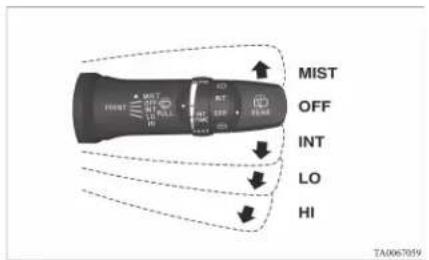
MIST- Misting function
The wipers will operate once.
OFF-Off
INT- Intermittent (Speed sensitive)
LO-Slow
HI-Fast
Vehicles with rain sensor
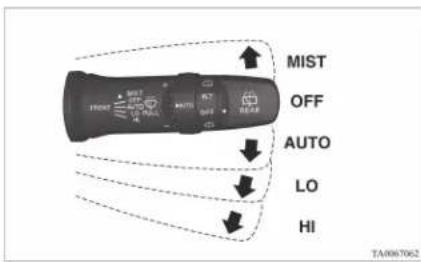
MIST- Misting function
The wipers will operate once.
OFF-Off
AUTO- Auto-wiper control
Rain sensor
The wipers will automatically operate depending on the degree of wetness on the windscreen.
LO-Slow
HI-Fast
The washer fluid will be sprayed onto the windscreen by pulling the lever towards you.
Refer to "Wiper and washer switch" on page 5-21.
2-Steering wheel height adjustment
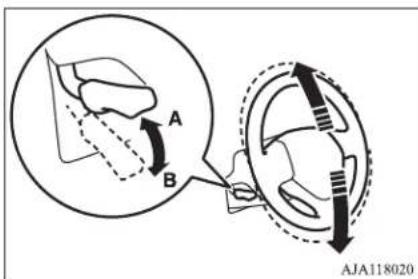
A-Locked
B- Release
- Release the lever while holding the steering wheel up.
- Adjust the steering wheel to the desired position.
- Securely lock the steering wheel by pulling the lever fully upward.
Refer to "Steering wheel height adjustment" on page 6-06.
3-Engine switch\*
If you are carrying the keyless operation key, you can start the engine. If you press the engine switch without depressing the brake pedal (CVT) or the clutch pedal (M/T), you can change the operation mode in the order of OFF, ACC, ON, OFF.
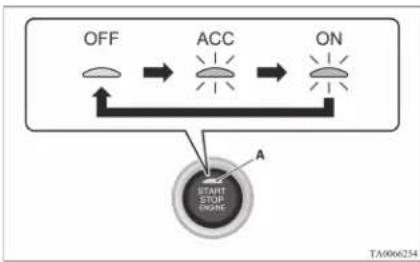
flowchart
graph TD
    A["OFF"] --> B["ACC"]
    B --> C["ON"]
    D["START STOP ENGINE"] --> E["A"]
    style D fill:#f9f,stroke:#333
    style E fill:#ccf,stroke:#333
OFF- The indication lamp (A) on the engine switch turns off.
ACC- The indication lamp on the engine switch illuminates orange.
ON- The indication lamp on the engine switch illuminates green.
Refer to "Engine switch" on page 6-11.
4-Combination headlamps
Type 1
Rotate the switch to turn on the lamps.
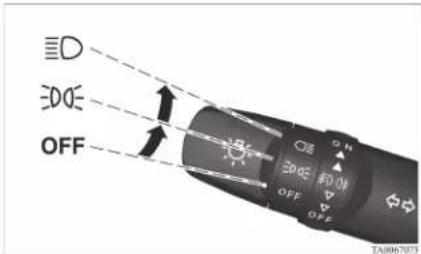
| OFF All lamps off |
| EDDS | Position, tail, licence plate and instrument panel lamps on. |
| ED | Headlamps and other lamps go on. |
Type 2
Rotate the switch to turn on the lamps.
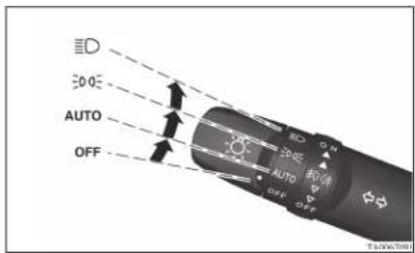
| OFF All lamps off |
| AUTO With the ignition switch or the operation mode is in ON, head-lamps, position, tail, licence plate, and instrument panel lamps turn on and off automatically in accordance with outside light level. All lamps turn off automatically when the ignition switch is turned to “OFF” position or the operation mode is put in OFF. |
| DOE | Position, tail, licence plate and instrument panel lamps on. |
| D | Headlamps and other lamps go on. |
Refer to "Combination headlamps and dipper switch" on page 5-15.
4-Turn-signal lever
The turn-signal lamps flash when the lever is operated
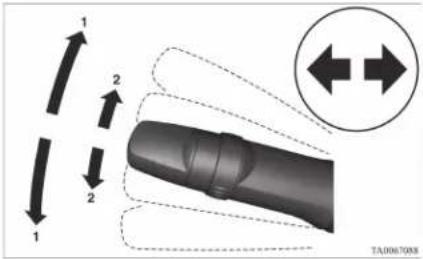
1- Turn-signals
2- Lane-change signals
Refer to "Turn-signal lever" on page 5-19.
5-Electric remote-controlled outside rear-view mirrors
To adjust the mirror position
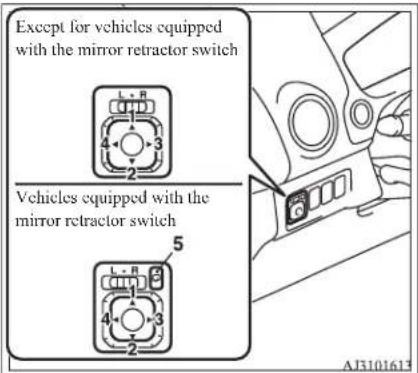
L- Left outside mirror adjustment
R- Right outside mirror adjustment
1- Up
2- Down
3- Right
4- Left
5- Mirror retractor switch
Refer to "To adjust the mirror position" on page 6-07.
6-Electric window control\*
Press the switch down for opening the window, and pull the switch for closing.
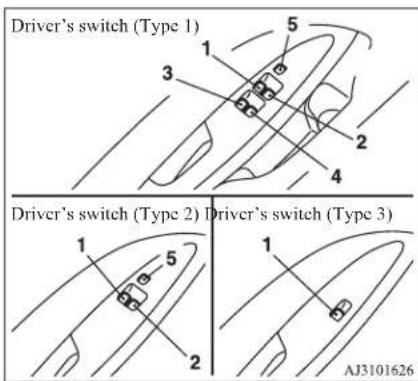
1- Driver's door window
2- Front passenger's door window
3- Rear left door window
4- Rear right door window
5- Lock switch
Lock switch (Type 1 and 2)
If you press the switch (5), the passenger's switches cannot be operated. To cancel, press it once again.
Refer to "Electric window control" on page 3-19.
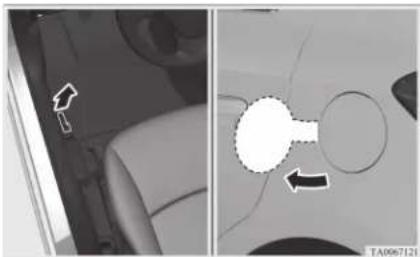
7-Fuel tank filler door release lever
Open the fuel tank filler door.
The fuel tank filler is located on the rear left side of your vehicle.
natural_image
Interior view of a car showing a vehicle's side profile and a cracked-out car interior (no text or symbols visible)
Refer to "Filling the fuel tank" on page 2-03.
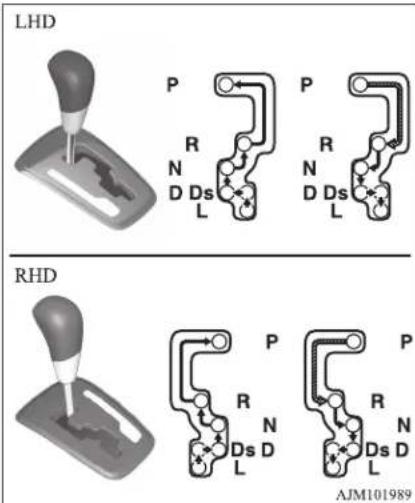
Automatic transmission IN-VECS-III CVT (Intelligent & Innovative Vehicle Electronic Control System III)\*
Selector lever operation
The CVT selects an optimum gear ratio automatically, depending on the speed of the vehicle and the position of the accelerator pedal.
chemical
Diagram comparing LHD and RHD motor control mechanisms with labeled components (P, R, N, D, S, L) and molecular structures
| While depressing the brake pedal, move the selector lever through the gate. |
| Move the selector lever through the gate. |
Selector lever positions
"P" PARK
This position locks the transmission to prevent the vehicle from moving. The engine can be started in this position.
Quick guide
1
"R" REVERSE
This position is to back up.
"N" NEUTRAL
At this position the transmission is disengaged.
“D” DRIVE
This position is used for most city and highway driving.
"Ds" (DOWNSHIFT & SPORTY DRIVING)
Use when engine braking is needed, or for high-power sport drive.
"L" LOW
This position is used only for low speeds when driving up very steep hills or driving downhill with engine braking.
Refer to "Automatic transmission IN-VECS-III CVT (Intelligent & Innovative Vehicle Electronic Control System III)" on page 6-26.
Instruments
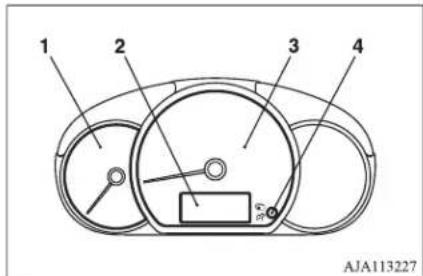
1- Tachometer
2- Multi-information display
3- Speedometer (km/h or mph + km/h)
4- Multi-information display switch
Refer to "Instruments" on page 5-02.
Always stop the vehicle in a safe place before operating.
The following information is included on the multi-information display: odometer, tripmeter, meter illumination control, service reminder, fuel remaining, driving range and average fuel consumption, etc.
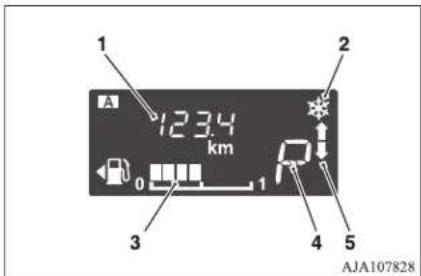
1- Information display
2- Frozen road warning
3- Fuel remaining display
4- Selector lever position display*
5- Gearshift indicator*
Refer to "Multi-information display" on page 5-02.
Indication and warning lamps
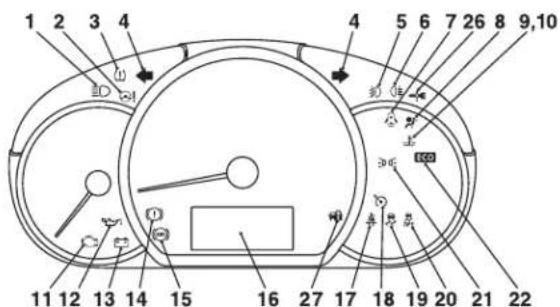
AJ1101909
1-High-beam indication lamp → p. 5-12
2- Electric power steering system (EPS) warning lamp → p. 6-37
3- Tyre pressure monitoring system warning lamp* → p. 6-43
4- Turn-signal indication lamps/Hazard warning indication lamps → p. 5-12
5- Front fog lamp indication lamp* → p. 5-12
6- Rear fog lamp indication lamp → p. 5-12
7- Door ajar warning lamp → p. 5-15
8- Supplement Restraint System (SRS)
warning lamp → p. 4-27
9- High coolant temperature warning lamp (red) → p. 5-15
10- Low coolant temperature indication lamp (green) → p. 5-12
11- Check engine warning lamp → p. 5-14
12- Oil pressure warning lamp → p. 5-14
13- Charge warning lamp → p. 5-14
14- Brake warning lamp → p. 5-13
15- Anti-lock brake system (ABS) warning lamp → p. 6-35
16- Multi-information display → p. 5-02
17- Seat belt warning lamp → p. 4-07
18- Cruise control indication lamp ^* → p. 4-07
OA0X19E2
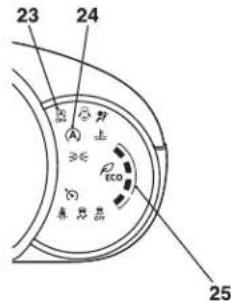
19- Active Stability Control (ASC) indication lamp → p. 6-38
20- Active Stability Control (ASC) OFF indication lamp → p. 6-38
21- Position lamp indication lamp* → p. 5-12
22- ECO indication lamp* → p. 5-12
23- Auto Stop & Go (AS&G) OFF indication lamp* → p. 6-24
24- Auto Stop & Go (AS&G) indication lamp* → p. 6-20
25- ECO drive assist* → p. 5-13
26- For details, refer to Warning activator
→ p. 3-12.
(if so equipped)
Overview/Quick guide
Quick guide
1
27- For details, refer to Warning activator
→ p. 3-12.
(if so equipped)
Fuel selection.... 2-02
Filling the fuel tank....2-03
Installation of accessories.... 2-04
Modification/alterations to the electrical or fuel systems.... 2-05
Genuine parts.... 2-05
Safety and disposal information for used engine oil....2-05
Disposal information for used batteries.... 2-06
Fuel selection
Fuel selection
Recommended fuel
Unleaded petrol octane number (EN228)
95 RON or higher

CAUTION
● The use of leaded fuel can result in serious damage to the engine and catalytic converter. Do not use leaded fuel.

NOTE
- Your vehicles have the knock control system so that you can use unleaded petrol 90 RON as an emergent measure in case unleaded petrol 95 RON or higher is not available on journey, etc.
In such a case, you don't need to adjust the engine specially. In case of using unleaded petrol 90 RON, the engine performance level is reduced.

NOTE
● Repeatedly driving short distances at low speeds can cause deposits to form in the fuel system and engine, resulting in poor starting and poor acceleration. If these problems occur, you are advised to add a detergent additive to the gasoline when you refuel the vehicle. The additive will remove the deposits, thereby returning the engine to a normal condition. Be sure to use a MITSUBISHI MOTORS GENUINE FUEL SYSTEM CLEANER. Using an unsuitable additive could make the engine malfunction. For details, please contact a MITSUBISHI MOTORS Authorized Service Point.
● Poor quality petrol can cause problems such as difficult starting, stalling, engine noise and hesitation. If you experience these problems, try another brand and/or grade of petrol.
If the check engine warning lamp flashes, have the system checked as soon as possible at a MITSUBISHI MOTORS Authorized Service Point.


E5: Petrol fuel containing up to 2.7% (m/m) oxygen or up to 5.0% (V/V) ethanol – Eg. EN 228 compliant unleaded petrol
E10: Petrol fuel containing up to 3.7 % (m/m) oxygen or up to 10.0 % (V/V) ethanol – Eg. EN 228 compliant unleaded petrol
The petrol engine are compatible with E5 type petrol (containing 5 % ethanol) and E10 type petrol (containing 10 % ethanol) conforming to European standards EN 228.

CAUTION
- Do not use more than 10% concentration of ethanol (grain alcohol) by volume.
Use of more than 10 % concentration may lead to damage to your vehicle fuel system, engine, engine sensors and exhaust system.
Filling the fuel tank

WARNING
- When handling fuel, comply with the safety regulations displayed by garages and filling stations.
● Gasoline is highly flammable and explosive. You could be burned or seriously injured when handling it. When refueling your vehicle, always turn the engine off and keep away from flames, sparks, and smoking materials. Always handle fuel in well-ventilated outdoor areas.
Before removing the fuel cap, be sure to get rid of your body's static electricity by touching a metal part of the car or the fuel pump. Any static electricity on your body could create a spark that ignites fuel vapour.
● Perform the whole refueling process (opening the fuel tank filler door, removing the fuel cap, etc.) by yourself. Do not let any other person come near the fuel tank filler. If you allowed a person to help you and that person was carrying static electricity, fuel vapour could be ignited.
- Do not move away from the fuel tank filler until refueling is finished. If you moved away and did something else (for example, sitting on a seat) partway through the refueling process, you could pick up a fresh charge of static electricity.
- If the tank cap must be replaced, use only a MITSUBISHI MOTORS genuine part.
Fuel tank capacity
35 litres
Refueling
- Before filling with fuel, stop the engine.
- The fuel tank filler is located on the rear left side of your vehicle.
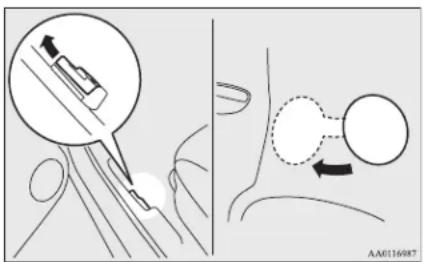
Open the fuel tank filler door by pulling the release lever located on the side of the driver's seat.
- Open the fuel tank filler tube by slowly turning the cap anticlockwise.
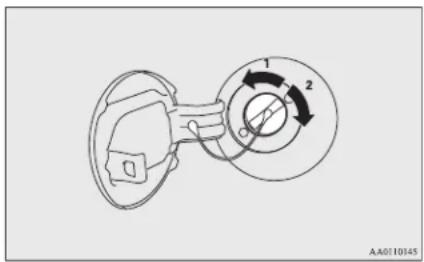
1 Remove
2 Close

CAUTION
- Since the fuel system may be under pressure, remove the fuel tank filler tube cap slowly. This relieves any pressure or vacuum that might have built up in the fuel tank. If you hear a hissing sound, wait until it stops before removing the cap. Otherwise, fuel may spray out, injuring you or others.
Installation of accessories
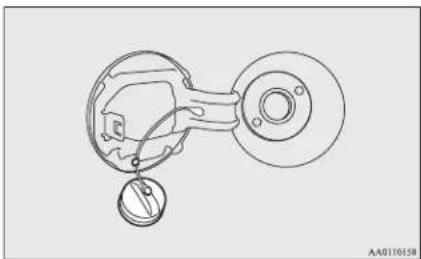
- While filling with fuel, hang the fuel cap cord on the hook located on the inside of the fuel tank filler door.
natural_image
Technical line drawing of a mechanical assembly with circular components and a central housing (no text or symbols)
- Insert the gun in the tank port as far as it goes.
CAUTION
- Do not tilt the gun.
- When the gun stops automatically, do not fill with fuel any more.
- To close, turn the fuel tank filler tube cap slowly clockwise until you hear clicking sounds, then gently push the fuel tank filler door closed.
Installation of accessories
We recommend you to consult a MITSUBISHI MOTORS Authorized Service Point.
CAUTION
- Your vehicle is equipped with a diagnosis connector for checking and servicing the electronic control system.
Do not connect a device other than a diagnosis tool for inspections and service to this connector. Otherwise, the battery could be discharged, the electronic devices of the vehicle could malfunction, or other unexpected problems could result.
In addition, malfunctions caused by connecting a device other than a diagnosis tool may not be covered under warranty.
- The installation of accessories, optional parts, etc., should only be carried out within the limits prescribed by law in your country, and in accordance with the guidelines and warnings contained within the documents accompanying this vehicle.
-
Installing electric components incorrectly could lead to a fire. Please refer to the Modification/alteration to the electrical or fuel systems section within this owner's manual.
-
When installing the radio, for the required information (frequency, transmission output, installing procedure), consult a MITSUBISHI MOTORS Authorized Service Point. If the frequency, transmission output and installing condition are not appropriate, it can adversely affect the electronic devices and could lead to unsafe vehicle operation.
- Using a cellular phone or radio set inside the vehicle without an external antenna may cause electrical system interference, which could lead to unsafe vehicle operation.
- Tyres and wheels which do not meet specifications must not be used.
Refer to the "Specifications" section for information regarding wheel and tyre sizes.
- When fitting accessories, ensure that maximum gross vehicle weight and maximum axle weight are not exceeded.
Important points!
Due to the large number of accessory and replacement parts of different manufactures available in the market, it is not possible, not only for MITSUBISHI MOTORS, but also for a MITSUBISHI MOTORS Authorized Service Point, to check whether the attachment or installation of such parts affects the overall safety of your vehicle.
Even when such parts are officially authorized, for example by a “general operators permit” (an appraisal for the part) or through the execution of the part in an officially approved manner of construction, or when a single operation permit following the attachment or installation of such parts, it cannot be deduced from that alone, that the driving safety of your vehicle has not been affected.
Consider also that there basically exists no liability on the part of the appraiser or the official. Maximum safety can only be ensured with parts recommended, sold and fitted or installed by a MITSUBISHI MOTORS authorized Service Point (MITSUBISHI MOTORS GENUINE replacement parts and MITSUBISHI MOTORS accessories). The same also pertains to modifications of MITSUBISHI vehicles with respect to the production specifications. For safety reasons, do not attempt any modifications other than those that follow the recommendations of a MITSUBISHI MOTORS authorized Service Point.
Modification/alterations to the electrical or fuel systems
MITSUBISHI MOTORS CORPORATION has always manufactured safe, high quality vehicles. In order to maintain this safety and quality, it is important that any accessory that is to be fitted, or any modifications carried out which involve the electrical or fuel systems, should be carried out in accordance with MITSUBISHI MOTORS guidelines.
CAUTION
- If the wires interfere with the vehicle body or improper installation methods are used (protective fuses not included, etc.), electronic devices may be adversely affected, resulting in a fire or other accident.
Genuine parts
MITSUBISHI MOTORS has gone to great lengths to bring you a superbly crafted automobile offering the highest quality and dependability.
Use MITSUBISHI MOTORS GENUINE Parts, designed and manufactured to maintain your MITSUBISHI MOTORS automobile at top performance. MITSUBISHI MOTORS GENUINE Parts are identified by this mark and are available at all MITSUBISHI MOTORS Authorized Service Points.
WARNING
● Prolonged and repeated contact may cause serious skin disorders, including dermatitis and cancer.
● Avoid contact with the skin as far as possible and wash thoroughly after any contact.
- Keep used engine oils out of reach of children.
Disposal information for used batteries
Protect the environment
2
It is illegal to pollute drains, water courses and soil. Use authorized waste collection facilities, including civic amenity sites and garages providing facilities for disposal of used oil and used oil filters. If in doubt, contact your local authority for advice on disposal.
Your vehicle contains batteries and/or accumulators.
Do not mix with general household waste.
For proper treatment, recovery and recycling of used batteries, please take them to applicable collection points, in accordance with your national legislation and the Directives 2006/66/EC.
By disposing of these batteries correctly, you will help to save valuable resources and prevent any potential negative effects on human health and the environment which could otherwise arise from inappropriate waste handling.
Locking and unlocking
Keys.... 3-02
Electronic immobilizer (Anti-theft starting system).... 3-03
Keyless entry system*....3-04
Keyless operation system* 3-07
Doors....3-15
Central door locks* 3-16
"Child-protection" rear doors....3-17
Tailgate....3-18
Manual window control* 3-19
Electric window control* 3-19
Keys
Keys
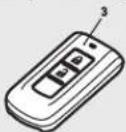
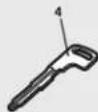
Key
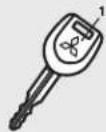
Keyless entry key
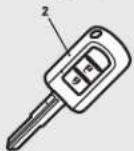
Keyless operation key
AJ3101134
1- Master key
2- Keyless entry key
3- Keyless operation key
4- Emergency key
WARNING
- When carrying a remote control key on flights, do not press any switches on the key while on the plane. If a switch is pressed on the plane, the key emits electromagnetic waves, which could adversely affect the plane's flight operation.
When carrying a remote control key in a bag, be careful that no switches on the key can be easily pressed by mistake.
NOTE
● The key (except for the emergency key) is a precision electronic device with a built-in signal transmitter. Please observe the following in order to prevent a malfunction.
- Do not leave in a place that is exposed to direct sunlight, for example on the dashboard.
- Do not disassemble or modify.
- Do not excessively bend the key or subject it to strong impacts.
- Do not expose to water.
- Keep away from magnetic key rings.
- Keep away from audio systems, personal computers, TVs, and other equipment that generates a magnetic field.
- Keep away from devices that emit strong electromagnetic waves, such as cellular phones, wireless devices and high frequency equipment (including medical devices).
- Do not clean with ultrasonic cleaners or similar equipment.
NOTE
- Do not leave the key where it may be exposed to high temperature or high humidity.
- The engine is designed so that it will not start if the ID code registered in the immobilizer computer and the key's ID code do not match. Refer to the "Electronic immobilizer" section for details and key usage.
Key number tag
The key number is stamped on the tag as indicated in the illustration.
Make a record of the key number and store the key and key number tag in separate places, so that you can order a key from your MITSUBISHI MOTORS Authorized Service Point in the event the original keys are lost. [Vehicles equipped with the master key]
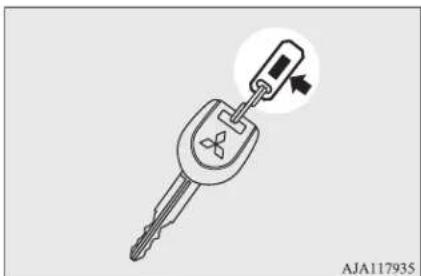
natural_image
Illustration of a key inserted into a plug with a magnified inset showing the tip (no text or symbols)
[ Vehicles equipped with the keyless entry key]
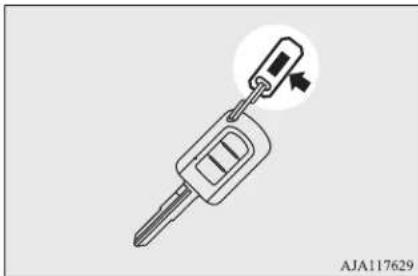
natural_image
Illustration of a key inserted into a car with a circular arrow indicating the insertion point (no text or symbols present)
[ Vehicles equipped with the keyless operation key]
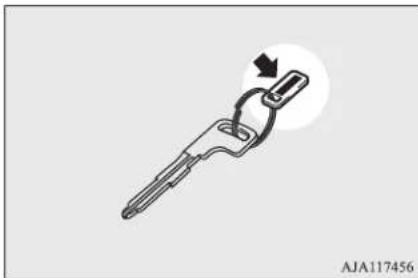
natural_image
Illustration of a mechanical tool with a circular arrow indicating motion (no text or symbols)
Electronic immobilizer (Anti-theft starting system)
The electronic immobilizer has been designed to significantly reduce the possibility of vehicle theft. The purpose of the system is to immobilize the vehicle if an invalid start is attempted. A valid start attempt can only be achieved by using a key “registered” to the immobilizer system.
CAUTION
- Don't make any alterations or additions to the immobilizer system; alterations or additions could cause failure of the immobilizer.
NOTE
● [Vehicles without keyless operation system] In the following cases, the vehicle may not be able to receive the registered ID code from the registered key and engine may not start:
NOTE
- When the key contacts a key ring or other metallic or magnetic object (Type A)
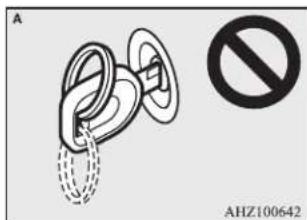
- When the key grip contacts metal of another key (Type B)
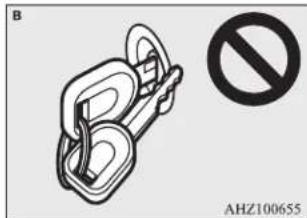
natural_image
Technical illustration of a chain clamp device with a no-smoking symbol (no text or labels on the diagram itself)
Keyless entry system*

NOTE
- When the key contacts or is close to other immobilizing keys (including keys of other vehicles) (Type C)
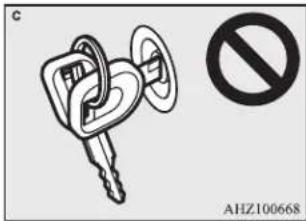
In cases like these, remove the object of additional key from the vehicle key. Then try again to start the engine. If the engine does not start, we recommend you to contact a MITSUBISHI MOTORS Authorized Service Point.
● [Vehicles with keyless operation system] If the engine does not start, we recommend you to contact a MITSUBISHI MOTORS Authorized Service Point.

NOTE
- If you lose one of the master keys, the keyless entry keys or the keyless operation keys, contact a MITSUBISHI MOTORS Authorized Service Point as soon as possible.
Refer to "Keys" on page 3-02.
To obtain a key, take your vehicle and all remaining keys to a MITSUBISHI MOTOR Authorized Service Point.
If you need an extra spare key, take your vehicle and all the keys to a MITSUBISHI MOTORS Authorized Service Point. All the keys have to be re-registered in the immobilizer computer unit.
For further information, please contact a MITSUBISHI MOTORS Authorized Service Point.
Keyless entry system\*
Press the remote control switch, and all doors and the tailgate will be locked or unlocked as desired.
Keyless entry key Keyless operation key
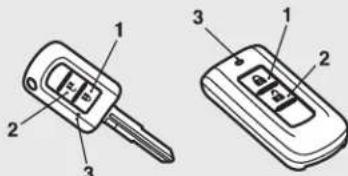
AHA106795
1- LOCK switch
2- UNLOCK switch
3- Indication lamp
To lock
Press the LOCK switch (1). All the doors and the tailgate will be locked. The turn-signal lamps will blink once. When they are locked with the room lamp switch in the middle (•) position, the room lamp also blink once.
To unlock
Press the UNLOCK switch (2). All the doors and the tailgate will be unlocked. If the room lamp switch is in the middle (•) position at this time, the room lamp will come on for approximately 15 seconds and the turn-signal lamps will blink twice.

NOTE
- For vehicles equipped with the mirror retractor switch, the outside rear-view mirrors automatically retract or extend when all the doors and the tailgate are locked or unlocked using the remote control switches of the keyless entry system. Refer to "Starting and driving: Outside rear-view mirrors" on page 6-07.
- If the UNLOCK switch (2) is pressed and no door or tailgate is opened within approximately 30 seconds, relocking will automatically occur.
- It is possible to modify functions as follows: For further information, please contact a MITSUBISHI MOTORS Authorized Service Point.
- The time from pressing the UNLOCK switch (2) to the moment of automatic locking can be changed.
- Activating the operation confirmation function (blinking of the turn-signal lamps) only during locking, or only during unlocking.

NOTE
- The confirmation function (this indicates locking or unlocking of the doors and tailgate with the blink of the turn-signal lamps) can be deactivated.
- The number of times the turn-signal lamps are flashed by the confirmation function can be changed.
● The keyless entry system does not operate in the following conditions:
- The key is left in the ignition switch. (except for vehicles with keyless operation system)
- The operation mode is not in OFF. (vehicles with keyless operation system)
• A door or the tailgate is open or ajar.
● The remote control switch will operate within approximately 4 m from the vehicle. However, the operating range of the remote control switch may change if the vehicle is located near a power station, or radio/TV broadcasting station.
- If either of the following problems occurs the battery may be exhausted.
- The remote control switch is operated at the correct distance from the vehicle, but the doors and tailgate are not locked/unlocked in response.

NOTE
- The indication lamp (3) is dim or does not come on.
For further information, please contact a MITSUBISHI MOTORS Authorized Service Point.
If you replace the battery yourself, refer to "Procedure for replacing the remote control switch battery" on page 3-05.
- If your remote control switch is lost or damaged, please contact a MITSUBISHI MOTORS Authorized Service Point for a replacement remote control switch.
- If you wish to add a remote control switch please contact a MITSUBISHI MOTORS Authorized Service Point.
The following numbers of the remote control switches are available.
• Keyless entry key: up to 4 keys.
• Keyless operation key: up to 4 keys.
Procedure for replacing the remote control switch battery
Before replacing the battery, remove static electricity from your body by touching a metal grounded object.
Keyless entry system*
WARNING
● Danger of explosion if battery is incorrectly replaced.
Replace only with the same battery or an equivalent type.
CAUTION
- When the remote control switch case is opened, be careful to keep water, dust, etc. out. Also, do not touch the internal components.
NOTE
- You may purchase a replacement battery at an electric appliance store.
- A MITSUBISHI MOTORS Authorized Service Point can replace the battery for you if you prefer.
Keyless entry key
- Remove the screw (A) from the remote control switch.
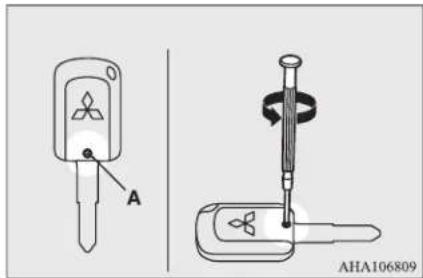
- With the MITSUBISHI mark facing you, insert the cloth covered tip of a straight blade (or minus) screwdriver into the notch in the remote control switch case and use it to open the case.
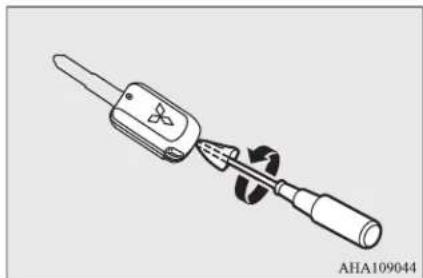
natural_image
Line drawing of a soldering iron with a screwdriver and handle (no text or symbols)
NOTE
- Be sure to perform the procedure with the MITSUBISHI mark facing you. If the MITSUBISHI mark is not facing you when you open the remote control switch case, the switches may come out.
- Remove the old battery.
- Install a new battery with the + side (B) down.
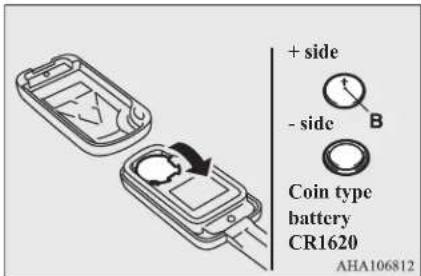
- Close the remote control transmitter firmly.
- Attach the screw (A) removed in step 1.
- Check the keyless entry system to see that it works.
Keyless operation key
- Remove the emergency key from the key.
Refer to "Emergency key" on page 3-11.
- With the MITSUBISHI mark facing you, insert the cloth-covered tip of a straight blade (or minus) screwdriver into the notch in the remote control switch case and use it to open the case.
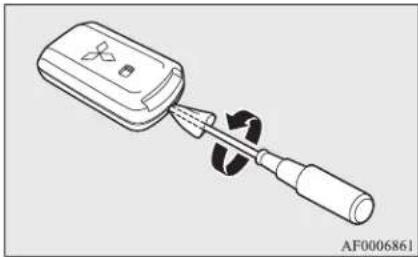
natural_image
Diagram of a handheld device with a screwdriver inserted, showing internal components (no text or symbols)

NOTE
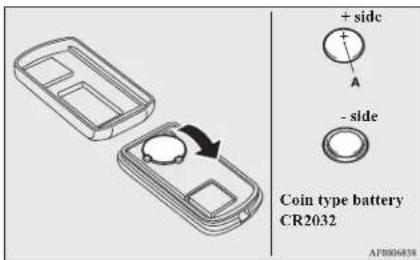
- Close the case firmly.
- Install the emergency key removed in step 1.
- Check the keyless operation function to see that it works.
Keyless operation system\*
The keyless operation system allows you to lock and unlock the doors and tailgate, start the engine and change the operation mode simply by carrying the keyless operation key with you.
The keyless operation key can also be used as the keyless entry system remote control switch.
Refer to "Starting and stopping the engine" on page 6-15.
Refer to "Keyless entry system" on page 3-04.
The driver should always carry the keyless operation key. This key is necessary for locking and unlocking the doors and tailgate, starting the engine and otherwise operating the vehicle, so before locking and leaving the vehicle, be sure to check that you have the keyless operation key.

WARNING
● People with implantable cardiac pacemakers or implantable cardiovascular-defibrillators should not go near the exterior transmitters (A) or the interior transmitters (B). The radio waves used by the key-less operation system could adversely affect implantable cardiac pacemakers or implantable cardiovascular-defibrillators.
Keyless operation system*
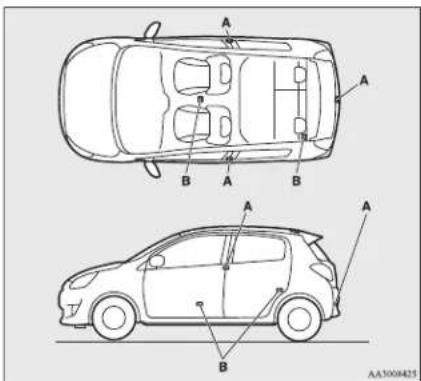
WARNING
- When using electro-medical devices other than implantable cardiac pacemakers or implantable cardiovascular-defibrillators, contact the electro-medical device manufacturer ahead of time to determine the affects of radio waves on the devices. Electro-medical device operations could be affected by radio waves.
You can limit the possible operations of the keyless operation system in the following ways. (The keyless operation system can be used as a keyless entry system.) Please consult a MITSUBISHI MOTORS Authorized Service Point for details.
● You can limit operation to locking and unlocking the doors and tailgate.
- You can limit operations to starting the engine.
● The keyless operation system can be disabled.
NOTE
● The keyless operation key uses an ultra-weak electromagnetic wave. In the following cases, the keyless operation system may not operate properly or may be unstable.
- When there is equipment nearby that emits strong radio waves, such as: a power station, a radio/TV broadcasting station or an airport.
- The keyless operation system is carried together with a communications device such as a cellular phone or radio set, o with an electronic device such as a personal computer.
- The keyless operation key is touching or covered by a metal object.
- A keyless entry system is being used nearby.
- When the keyless operation key battery is worn out.
- When the keyless operation key is placed in an area with strong radio waves or noise.
In such cases, use the emergency key.
Refer to "To lock/unlock without using the keyless operation function" on page 3-11.
NOTE
Because the keyless operation key receives signals in order to communicate with the transmitters in the vehicle, the battery continually wears down regardless of keyless operation key use. The battery life is 1 to 2 years, depending on usage conditions. When the battery wears out, have it replaced a MITSUBISHI MOTORS Authorized Service Point.
Refer to "Procedure for replacing the remote control switch battery" on page 3-05.
● Because the keyless operation key continually receives signals, strong radio wave reception could affect battery wear. Do not leave the key near a TV, personal computer, or other electronic device.
Operating range of the keyless operation system
If you are carrying the keyless operation key, enter the operating range of the keyless operation system, and press the driver's door lock/unlock switch, or the tailgate lock/unlock switch, the ID code for your key is verified.
You can only lock and unlock the doors and tailgate, start the engine and change the operation mode if the ID codes of your keyless operation key and the vehicle match.

NOTE
- If the keyless operation key battery is wearing out or there are strong electromagnetic waves or noise present, the operating range may become smaller and operation may become unstable.
Operating range for locking and unlocking the doors and tailgate
The operating range is approximately 70 cm from the driver's door lock/unlock switch and the tailgate lock/unlock switch.
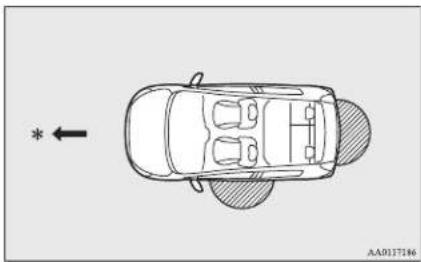
natural_image
Top-down line drawing of a car with a directional arrow and a vehicle silhouette (no text or symbols)
*: Forward direction

: Operating range

NOTE
- Locking and unlocking are only possible when the door or tailgate is operated while the keyless operation key is being detected.
● Operation may not be possible if you are too close to the front door, door window, or tailgate.
- Even if the keyless operation key is within 70 cm of the driver's door lock/unlock switch or the tailgate lock/unlock switch, the key is near to the ground or high up, the system may not operate.
- If the keyless operation key is within the operating range, even someone not carrying the key can lock and unlock the doors and tailgate by pressing the driver's door lock/unlock switch or the tailgate lock/unlock switch.
Operating range for starting the engine and changing the operation mode
The operating range is the interior of the vehicle.
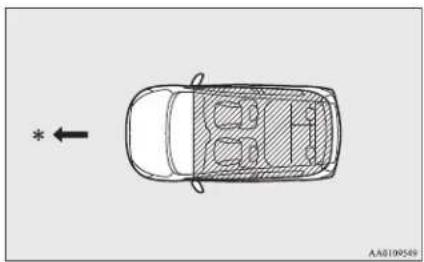
*: Forward direction

Operating range

NOTE
● Even if it is within the operating range, if the keyless operation key is in a small item holder such as the glove box, on top of the instrument panel, door pocket or in the luggage compartment, it may be impossible to start the engine and change the operation mode.
Keyless operation system*

NOTE
- If a keyless operation key is too close to the door or door window, it may be possible to start the engine or change the operation mode even when the key is outside the vehicle.
To operate using the keyless operation function
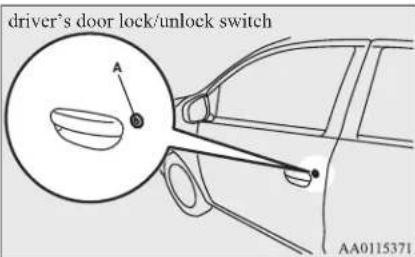
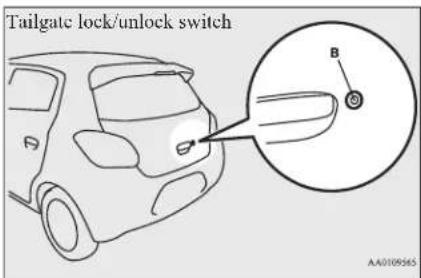
Locking the doors and tailgate
When you are carrying the keyless operation key, if you press the driver's door lock/unlock switch (A), or the tailgate lock/unlock switch (B) within the operating range, all the doors and the tailgate are locked.
The turn-signal lamps will blink.
Also refer to "Locking and unlocking: Doors, Central door locks, Tailgate" on pages 3-15, 3-16 and 3-18.
Unlocking the doors and tail-gate
When you are carrying the keyless operation key, if you press the driver's door lock/unlock switch (A), or the tailgate lock/unlock switch (B) within the operating range, all the doors and tailgate are unlocked.
If the room lamp switch is in the middle (•) position at this time, the room lamp will turn on for 15 seconds. The turn-signal lamps will blink twice.
If the driver's door lock/unlock switch or the tailgate lock/unlock switch is pressed and any of the doors or tailgate is not opened within approximately 30 seconds, relocking will automatically occur.
Refer to "Locking and unlocking: Doors, Central door locks, Tailgate" on pages 3-15, 3-16 and 3-18.

NOTE
● The keyless operation function does not operate under the following conditions:
- The keyless operation key is inside the vehicle.
• A door or the tailgate is open or ajar.
• The operation mode is not in OFF.
● The time between unlocking and automatic locking can be adjusted. Please consult a MITSUBISHI MOTORS Authorized Service Point.
Operation confirmation when locking and unlocking
Operation can be confirmed as shown below. However, the room lamp will illuminate only if the room lamp switch is in the middle (•) position.
When locking: The turn-signal lamps will blink once.
When unlocking: The room lamp illuminates for approximately 15 seconds, the turn-signal lamps blink twice.

NOTE
● Functions can be modified as stated below For further information, please contact a MITSUBISHI MOTORS Authorized Service Point.
- Activating the operation confirmation function (blinking of the turn-signal lamps) only during locking, or only during unlocking.
- Disabling the operation confirmation function (blinking of the turn-signal lamps).
- Changing the number of blinks for the operation confirmation function (blinking of the turn-signal lamps).
To lock/unlock without using the keyless operation function
Emergency key
The emergency key (A) can only be used to lock and unlock the front passenger's door. To use the emergency key, unlock the lock knob (B) and remove it from the keyless operation key (C).
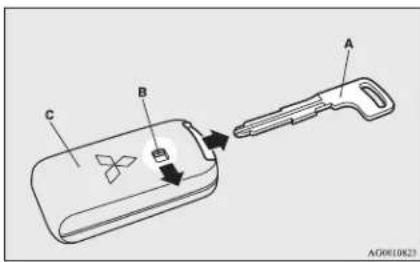
Locking and unlocking the front passenger's door
Turning the emergency key in the forward direction locks the door, and turning it in the rear direction unlocks the door. Also refer to "Locking and unlocking: Doors" on page 3-15.
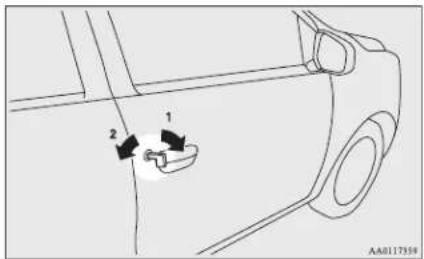
1- Lock
2- Unlock

NOTE
- Only use the emergency key for emergencies. If the keyless operation key battery wears out, replace it as quickly as possible so that you can use the keyless operation key.
● The emergency key is built in the keyless operation key.
● After using the emergency key, always return it into the original position.
Keyless operation system*
Warning activator
In order to prevent vehicle theft or the accidental operation of the keyless operation system, the lamp and buzzer are used to alert the driver.
| Lamp Buzzer Item Cause Note (Solution) | | | | |
| Blinks Outer buzzer sounds 4 times. Inner buzzer sounds. | Keyless operation key take-out monitoring system. | When the vehicle is parked with the operation mode in any mode other than OFF, if you close the door after opening any of the doors and taking the keyless operation key out of the vehicle. Outer buzzer sounds 4 times at this time. And when the vehicle starts, inner buzzer sounds once. | ● If you take the keyless operation key out of the vehicle through a window without opening a door, this system does not operate. ● It is possible to change the setting to make the system operate if you take the keyless operation key out from the vehicle through a window without opening a door. For further information, please contact a MITSUBISHI MOTORS Authorized Service Point. ● Even if you have the keyless operation key within the engine start operating range, if the key and vehicle ID codes cannot be matched, for example due to the ambient environment or electro-magnetic conditions, the warning may be activated. |
| Blinks Outer buzzer sounds approximately 3 seconds. | Key lock-in prevention system. | When the operation mode is in OFF, if you close all the doors and the tailgate with the keyless operation key left in the vehicle and you try to lock the doors and tailgate by pressing the driver's lock/unlock switch, or the tailgate lock/unlock switch. | Make sure you have the keyless operation key with you before locking the doors. Even if you leave the keyless operation key inside the vehicle, it is possible that the doors will lock depending on the surrounding environment and wireless signal conditions. |
Keyless operation system*
| Lamp Buzzer Item Cause Note (Solution) | | |
| Blinks Outer buzzer sounds approximately 3 seconds. | Door ajar prevention system. | When the operation mode is in OFF, if you try to lock the doors and tailgate by pressing the driver's door lock/unlock switch, or the tailgate lock/unlock switch with one of the doors or the tailgate not completely closed. | — | |
| Blinks No sounds Keyless operation system. | The battery in the keyless operation key has worn out. | Replace the battery as soon as possible at a MITSUBISHI MOTORS Authorized Service Point. If you replace the battery yourself, refer to “Procedure for replacing the remote control switch battery” on page 3-05. | | |
| A power supply is not switched over from OFF because the keyless operation key in the vehicle cannot be detected.When a warning is issued while being in the vehicle, it is because the battery of the keyless operation key has worn out or the state of the surrounding radio wave is bad. | Please confirm that the keyless operation key is in the vehicle.If the key is in the vehicle, insert the slot. Starting the engine and changing the operation mode should now be possible. | | |
| There is a fault in the keyless operation system. | If the warning lamp illuminates, please contact a MITSUBISHI MOTORS Authorized Service Point. | | |
Keyless operation system*
| Lamp Buzzer Item Cause Note (Solution) | | |
| Illuminates | Inner buzzer sounds (intermittent sounds). | | There is a fault in the electrical system. | |
| Inner buzzer sounds (continuous sounds). | Immediately stop the vehicle in a safe place an contact a MITSUBISHI MOTORS Authorized Service Point. |
| Blinks Outer | buzzer sounds approximately 3 seconds. Inner buzzer sounds approximately 1 minute. | Keyless operation key reminder. | When the operation mode is in OFF with the keyless operation key left in the key slot, if you try to open the driver's door. | Remove the keyless operation key from the key slot.Refer to “Starting and stopping the engine” on page 6-15. |
| Illuminates | Inner buzzer sounds. | Steering wheel lock. | There is a fault in the steering wheel lock system. | Refer to “Steering wheel lock” on page 6-13. |
| Blinks Outer | buzzer sounds approximately 3 seconds. | Operation mode OFF reminder system. | When the operation mode is in any mode other than OFF with all the doors and the tailgate are closed, if you try to lock by using the driver's door lock/unlock switch or the tailgate lock/unlock switch. | Refer to “Operation mode OFF reminder system” on page 6-13. |
Doors
| Lamp Buzzer Item Cause Note (Solution) | | | |
 | |
| Illuminates No | sounds Immobilizer system | There is a fault in the electronic immobilizer (Anti-theft starting system). | Put the operation mode in OFF and then start the engine again. If the warning is not cancelled, contact a MITSUBISHI MOTORS Authorized Service Point. | |
| Blinks Inner buzzer sounds. | Steering wheel lock | Steering wheel does not unlock. | Unlock the steering wheel lock following the procedure of reference page.Refer to “Steering wheel lock” on page 6-13. | |
| Illuminates No | sounds Steering wheel lock is abnor- | mal. | Refer to “Steering wheel lock” on page 6-13. | |
Doors

CAUTION
● Make sure the doors are closed: driving with doors not completely closed is dangerous.
● Never leave children in the vehicle unattended.
● Be careful not to lock the doors while the key is inside the vehicle.

NOTE
- To prevent the key from being locked inside the vehicle, neither the lock knob on the driver's door nor the key can be used to lock the driver's door when it is open.
To lock or unlock with the key
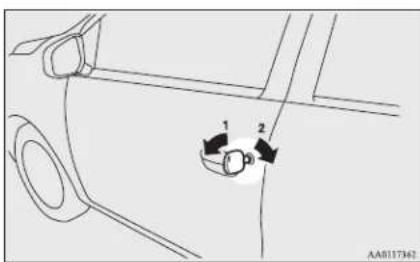
1- Lock
2- Unlock
To lock or unlock from inside the vehicle
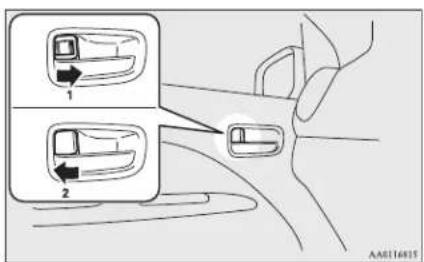
1- Lock
2- Unlock
Central door locks*

NOTE
- The driver's door can be opened without using the lock knob by pulling on the inside door handle.
To lock without using the key
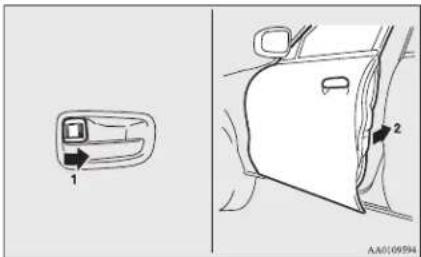
Set the inside lock knob (1) to the locked position, and close the door (2).

NOTE
- The driver's door cannot be locked using the inside lock knob while the driver's door is opened.
Ignition key reminder\*
Except for vehicles equipped with the keyless operation system
If the ignition switch is turned off and the driver's door is opened with the key in the ignition switch, the key reminder buzzer will sound intermittently to remind you to remove the key.
- Repeated continuous operation between lock and unlock could activate the central door locking systems built-in protection circuit and prevent the system from operating. If this occurs, wait approximately 1 minute before operating the central door lock system.
- To prevent the key from being locked inside the vehicle, neither the lock knob on the driver's door nor the key can be used to lock the driver's door when it is open.
All of the doors and the tailgate can be locked and unlocked as described hereafter.
Driver's door with key (except for vehicles with keyless operation system)
Using the key on the driver's door locks or unlocks.
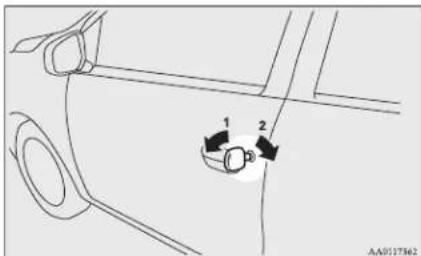
1-Lock
2- Unlock
Driver's door with inside lock knob
Using the door lock knob on the driver's door locks or unlocks all the doors and the tailgate.
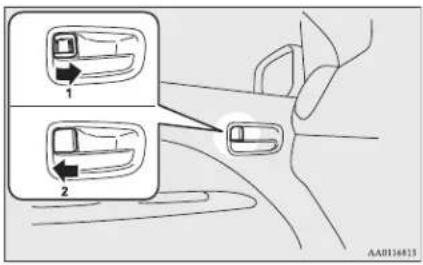
1-Lock
2- Unlock

NOTE
- Be careful not to lock the doors while the key is inside the vehicle when getting off the vehicle.
Using the selector lever position (CVT)
On vehicles with the keyless entry system or the keyless operation system, it is possible to unlock all of the doors and the tailgate using the selector lever by placing the selector lever in the "P" (PARK) position while the ignition switch or the operation mode is in the "ON" position.
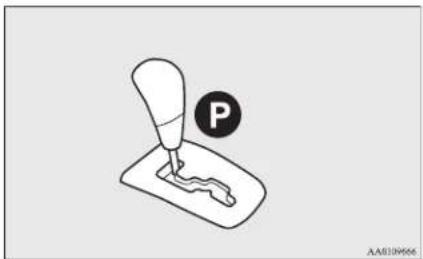

NOTE
- The vehicle is shipped from the factory with a setting established such that the doors and the tailgate are not unlocked when the selector lever is placed in the "P" (PARK) position with the ignition switch in the "ON" position. If you wish to change the setting so that the doors are unlocked, please contact a MITSUBISHI MOTORS Authorized Service Point.
"Child-protection" rear doors
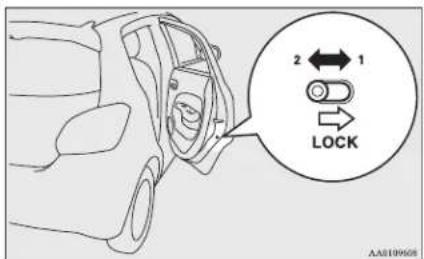
1-Lock
2- Unlock
Child protection helps prevent doors from being opened accidentally, especially when small children are in the rear seat.
A lever is provided on each rear door.
If the lever is set to the locked position, the rear door cannot be opened using the inside handle.
To open the rear door while the child protection is in use, pull the outside door handle.
If the lever is set to the "Unlock" position, the child protection mechanism does not function.
Tailgate

CAUTION
- When driving with a child in the rear seat, please use the child protection to prevent accidental door opening which may cause an accident.
Tailgate

WARNING
● The luggage compartment is not designed for people to ride in. Do not let people ride or children play there. This could result in a serious accident.
- It is dangerous to drive with the tailgate open, since carbon monoxide (CO) gas can enter the cabin.
You cannot see or smell CO. It can cause unconsciousness and even death. And also, if opening the tailgate while driving, luggage may fall from the tailgate. This could result in a serious accident.
- When opening and closing the tailgate, make sure of the surrounding safety and keep enough space from the back and upper of the vehicle and be careful not to hit your head or pinch your hands, neck, etc.
- When there is a build up of snow or ice, it should be removed before opening the tailgate. If you open the tailgate without removing it, there is a possibility that the tailgate may close suddenly due to the weight of that snow or ice.

WARNING
- When you open the tailgate make sure that the tailgate is opened fully and remains fully open. If you only open the tailgate halfway there is a risk that the tailgate may drop and slam shut. If you open the tailgate while your vehicle is parked on an incline it is more difficult to do so than on the flat and also it may drop and slam shut.

CAUTION
- Do not stand behind the exhaust pipe when loading and unloading luggage. Heat from the exhaust could lead to burns.
● To avoid damage to the tailgate, make sure that the area above and behind the tailgate is clear before opening it.

NOTE
- Locking/unlocking with the inside lock knob of the driver's door, the keyless entry system or the keyless operation function also locks/unlocks the tailgate.
To open
After unlocking the tailgate, pull the tailgate handle upward to open.
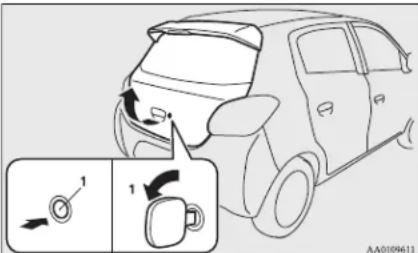
1- Unlock

CAUTION
● Make sure there is no one standing nearby when opening the tailgate.
To close
To close the tailgate, pull the tailgate grip (A) downward and release it before the tailgate is completely closed, then gently push shut the tailgate from the outside.
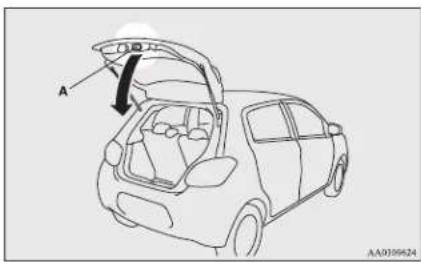

CAUTION
- When closing the tailgate, do not close it directly putting the hands on the tailgate grip. If hands or arms got caught, a serious injury could result.

NOTE
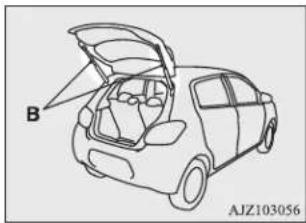
● Gas struts (B) are installed to support the tailgate. To prevent damage or faulty operation.

NOTE
natural_image
Line drawing of a car interior with open lid and labeled part B, no text or symbols present
To prevent damage or faulty operation,
- Do not hold the gas struts when closing the tailgate.
- Also, do not push or pull the gas struts.
- Do not attach any plastic material, tape, etc., to the gas struts.
- Do not tie string, etc., around the gas struts.
- Do not hang any object on the gas struts.
Manual window control\*
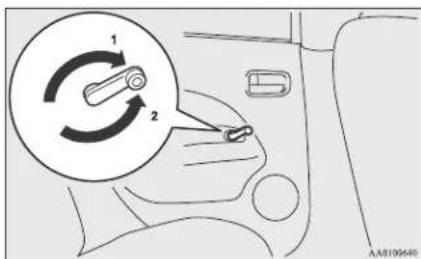
1- To open
2- To close
Electric window control\*
The electric windows can only be operated with the ignition switch or the operation mode in ON.
Electric window control*
Electric window control switch
Each door window opens or closes while the corresponding switch is operated.
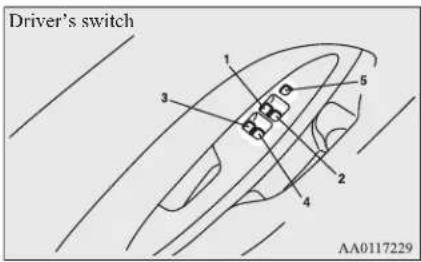
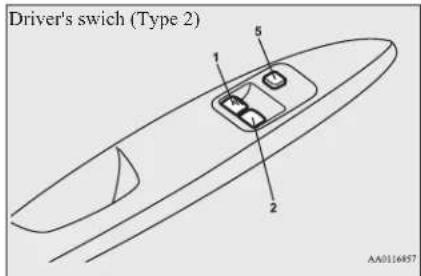
1- Driver's door window
2- Front passenger's door window
3- Rear left door window
4- Rear right door window
5- Lock switch
WARNING
● Before operating the electric window control, make sure that nothing can get trapped (head, hand, finger, etc.).
● Never leave the vehicle without removing the key.
● Never leave a child (or other person who might not be capable of safe operation of the electric window control) in the vehicle alone.
Driver's switches
Type 1
The driver's switches can be used to operate all door windows.
A window can be opened or closed by operating the corresponding switch.
Press the switch down to open the window, and pull up the switch to close it.
If the switch for the driver's window is fully pressed down/pulled up, the door window automatically opens/closes completely.
If you want to stop the window movement, operate the switch lightly in the reverse direction.
Type 2
The driver's switches can be used to operate front door windows. Press the switch down to open the window, and pull up the switch to close it.
If the switch for the driver's window is fully pressed down, the door window automatically opens completely.
If you want to stop the window movement, operate the switch lightly in the reverse direction.
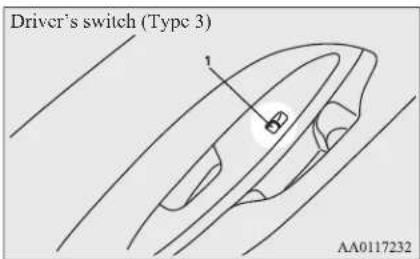
Type 3
Press the switch down for opening the window, and pull up the switch for closing it.
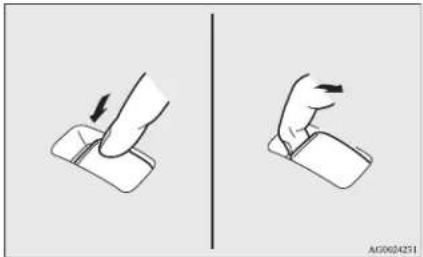
Passenger's switches\*
The passenger's switches can be used to operate the corresponding passenger's door windows.
Press the switch down for opening the win- To unlock, press it once again. dow, and pull up the switch for closing it.
natural_image
Two hand gestures in a contact position, one lifting the other with an arrow indicating motion (no text or symbols)

NOTE
● Repeated operation with the engine stopped will run down the battery. Operate the window switches only while the engine is running.
● The rear door windows only open halfway.
Lock switch (Type 1 and 2)
When this switch is operated, the passenger's switches cannot be used to open or close the door windows and the driver's switch cannot open or close any door windows other than the driver's door window.
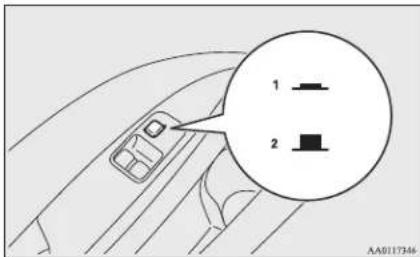
1-Lock
2- Unlock

WARNING
- A child may tamper with the switch at the risk of its hands or head being trapped in the window. When driving with a child in the vehicle, please press the window lock switch to disable the passenger's switches.
Timer function
The door windows can be opened or closed for 30 seconds after the engine is stopped. However, once the driver's door or the front passenger's door is opened, the windows cannot be operated.
Safety mechanism (driver's window of Type 1 only)
When the door window is automatically closed by pulling up the switch fully, if a hand or head is trapped in the closing window, it will lower automatically.
Nonetheless, make sure that nobody puts their head or hand out of the window when closing the driver's door window.
The lowered window will become operational after a few seconds.

WARNING
- If the battery terminals are disconnected or the fuse for electric window is replaced, the safety mechanism will be cancelled.
If a hand or head got trapped, a serious injury could result.

CAUTION
● The safety mechanism is cancelled just before the window is fully closed. This allows the window to close completely. Therefore be especially careful that no fingers are trapped in the window.
● The safety mechanism is deactivated while the switch is pulled up. Therefore be especially careful that fingers are not trapped in the door window opening.
Electric window control*

NOTE
- The safety mechanism can be activated if the driving conditions or other circumstances cause the driver's door window to be subjected to a physical shock similar to that caused by a trapped hand or head.
- If the safety mechanism is activated 5 or more times in a row, the safety mechanism will be cancelled and the door window will not close correctly.
In such a case, the following procedure should be implemented to rectify this situation. If the window is open, repeatedly raise the driver's door window switch until that window has been fully closed. Following this, release the switch, raise the switch once again and hold it in this condition for at least 1 second, then release it. You should now be able to operate in the normal fashion.
- If the battery terminals are disconnected of the fuse for electric window is replaced, the safety mechanism will be cancelled and the door window will not automatically open/close completely.
If the window is open, repeatedly raise the driver's door window switch until the window has been fully closed. Following this, release the switch, raise the switch once again and hold it in this condition for at least 1 second, then release it. You should now be able to operate the driver's door window in the normal fashion.
Seat and seat belts
Seat adjustment.... 4-02
Front seat....4-02
Rear seat....4-03
Head restraints....4-04
Seat belts....4-05
Pregnant women restraint....4-08
Seat belt pretensioner system and force limiter system.... 4-08
Child restraint....4-09
Seat belt inspection.... 4-17
Supplemental restraint system (SRS) - airbag.... 4-17
Seat adjustment
Seat adjustment
Adjust the driver's seat so that you are comfortable and that you can reach the pedals, steering wheel, switches etc. while retaining a clear field of vision.
WARNING
- Do not attempt to adjust the seat while driving. This can cause loss of vehicle control and result in an accident. After adjustments are made, ensure the seating is locked in position by attempting to move the seat forward and rearward without using the adjusting mechanism.
- Do not allow people or children to ride in any area of your vehicle that is not equipped with seats and seat belts, and make sure that everyone travelling in your vehicle is in a seat and wearing a seat belt, or in the case of a child is strapped in a child restraint.
● To minimize the risk of personal injury in the event of a collision or sudden braking, the seatbacks should always be in the almost upright position while the vehicle is in motion. The protection provided by the seat belts may be reduced significantly when the seatback is reclined. There is greater risk that the passenger will slide under the seat belt, resulting in serious injury, when the seatback is reclined.
WARNING
- Do not place objects under the seats. This could prevent the seat from locking securely, and it could lead to an accident. It may also cause damage to the seat or other parts.
CAUTION
● Make sure the seat is adjusted by an adult or with adult supervision for correct and safe operation.
- Do not place a cushion or the like between your back and the seatback while driving. The effectiveness of the head restraints will be reduced in the event of an accident.
- When sliding the seats, be careful not to catch your hand or foot.
Front seat
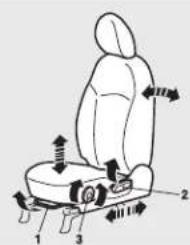
AAD16336
1- To adjust forward or backward
Lift the handle and adjust the seat to the desired position, and release the handle.
2- To recline the seatback
Pull the lever up and then lean backward to the desired position, and release the lever.
3- To adjust seat cushion height*
Turn the dial and adjust the seat cushion
height to the desired position.
CAUTION
● The reclining mechanism of the seatback is spring loaded, causing it to return to the vertical position when the lock lever is operated. When using the lever, sit close to the seatback or hold it with your hand to control its return motion.
Heated seats\*
The heated seats can be operated with the ignition switch or the operation mode in ON. Operate the switch as indicated by arrows. The indication lamp (A) will illuminate while the heater is on.
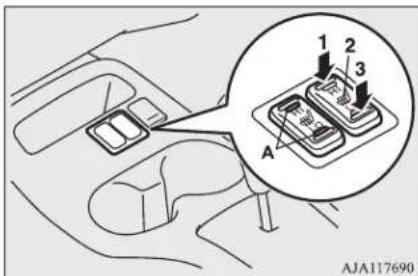
1 (HI) - Heater high (for quick heating).
2 (neutral - Heater off. position)
3 (LO) - Heater low (to keep the seat warm).
CAUTION
- Operate in the high position for quick heating. Once the seat is warm, set the heater to low to keep it warm. Slight variations in seat temperature may be felt while using the heated seats. This is caused by the operation of the heater's internal thermostat and does not indicate a malfunction.
- If the following types of persons use the heated seats, they might become too hot or receive minor burns (red skin, heat blisters, etc.):
• Children, elderly or ill people.
• People with sensitive skin.
• Excessively tired people.
• People under the influence of alcohol or sleep inducing medication (cold medicine, etc.).
- Do not place heavy objects on the seat or stick pins, needles, or other pointed objects into it.
- Do not use a blanket, cushion, or other material with high heat insulation properties on the seat while using the heater; this might cause the heater element to overheat
- Do not use benzine, kerosene, petrol, alcohol or other organic solvents when cleaning the seats. Doing so could damage not only the seat cover, but also the heater element.
- If water or any other liquid is spilled on the seat, allow it to dry thoroughly before attempting to use the heater.
● Turn the heater off immediately if it appears to be malfunctioning during use.
Rear seat
Folding the seatbacks forward
The passenger and luggage compartments can be joined by folding the rear seatback forward. This is useful for carrying long objects.
To fold
-
If your vehicle is equipped with head restraints, place each head restraint in its lowest position. (Refer to "Head restraints" on page 4-04.)
-
Pull the left or right release bands (A), and fold the rear seatbacks forward.
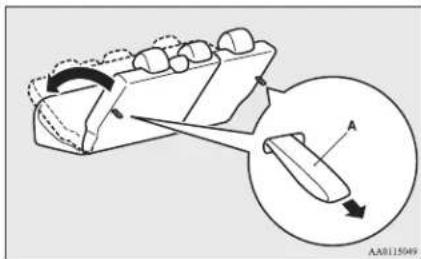
- Store the seat belt plate of the outboard seating position. (Refer to "Rear seat belt storage" on page 4-08.)
Head restraints
To return
- Confirm that the seat belt plate of the outboard seating position is stored.
- Raise the seatbacks until it locks securely into place.
Push lightly on the seatbacks to confirm that it has actually been secured.
Head restraints
WARNING
● Driving without the head restraints in place can cause you and your passengers serious injury or death in an accident. To reduce the risk of injury in an accident, always make sure the head restraints are installed and properly positioned when the seat is occupied.
● Never place a cushion or similar device on the seatback. This can adversely affect head restraint performance by increasing the distance between your head and the restraint.
- When a person sits in the rear seat, pull up the head restraint to a height at which it locks in position. Be sure to make this adjustment before starting to drive. Serious injuries could otherwise be suffered as the result of an impact.
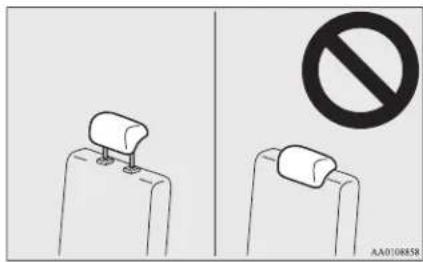
To adjust height
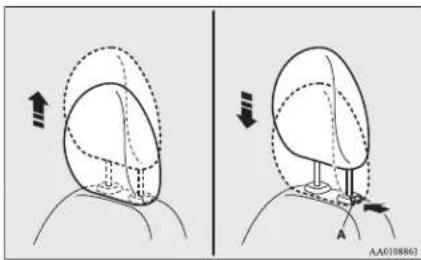
Adjust the head restraint height so that the centre of the restraint is as close as possible to ear level to reduce the chances of injury in the event of collision. Any person too tall for the restraint to reach their seated ear level, should adjust the restraint as high as possible.
To raise the head restraint, move it upward. To lower the restraint, move it downward while pushing the height adjusting knob (A) in the direction of the arrow. After adjustment, push the head restraint downward and make sure that it is locked.
natural_image
Two diagrams showing anatomical or structural changes with arrows indicating direction, no text or symbols present.
To remove
Lift the head restraint with the height adjusting knob (A) pushed in.
To install
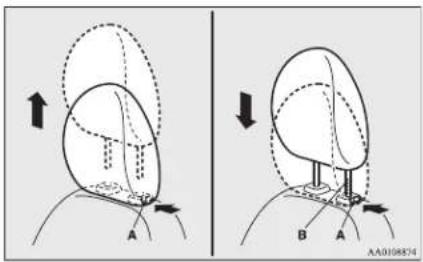
Confirm that the head restraint is facing the correct direction, and then insert it into the seatback while pressing the height adjusting knob (A) in the direction indicated by the arrow.
The head restraint stalk with the adjustment notches (B) must be installed in the hole with the adjusting knob (A).
CAUTION
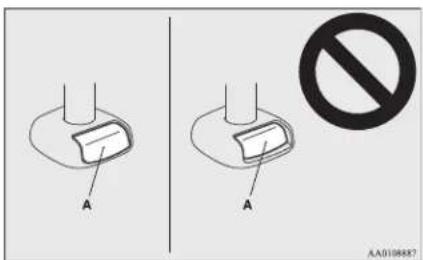
- Confirm that the height adjusting knob (A) is correctly adjusted as shown in the illustration, and also lift the head restraints to ensure that they do not come out of the seat-back.
CAUTION
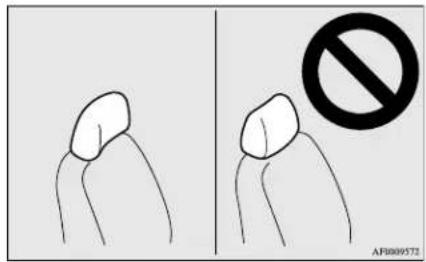
● The shape and size of the head restraint differs according to the seat. Always use the correct head restraint provided for the seat and do not install the head restraint in the wrong direction.
Seat belts
To protect you and your passengers in the event of an accident, it is most important that the seat belts are worn correctly while driving.
The front seat belt have a pretensioner system.
These belts are used the same way as a conventional seat belt.
Refer to "Seat belt pretensioner system and force limiter system" on page 4-08.
WARNING
- Seat belts should always be worn by every adult who drives or rides in this vehicle, and by all children who are tall enough to wear seat belts properly.
Other children should always use proper child restraint systems.
● Always place the shoulder belt over your shoulder and across your chest. Never put it behind you or under your arm.
● One seat belt should be used by only one person. Doing otherwise can be dangerous.
● The seat belt will provide its wearer with maximum protection if the recliner seatback is placed in fully upright position. When the seatback is reclined, there is greater risk that the passenger will slide under the belt, especially in a forward impact accident, and may be injured by the belt or by striking the instrument panel or seatbacks.
- Remove any twists when using the belt.
- No modifications or additions should be made by the user which will either prevent the seat belt adjusting devices from operating to remove slack, or prevent the seat belt assembly from being adjusted to remove slack.
● Never hold a child in your arms or on your lap when riding in this vehicle, even if you are wearing your seat belt. To do so risks severe or fatal injury to the child in a collision or sudden stop.
Seat belts
WARNING
● Always adjust the belt to a snug fit.
● Always wear the lap portion of the belt over your hips.
3-point type seat belt (with emergency locking mechanism)
This type of belt requires no length adjustment. Once worn, the belt adjusts itself to the movement of the wearer, but in the event of a sudden or strong shock, the belt automatically locks to hold the wearer's body.

NOTE
- You can check if the belt locks by pulling it forward quickly.
To fasten
- Pull the seat belt out slowly while holding the latch plate.

NOTE
- When the seat belts cannot be pulled out in a locked condition, pull the belts once forcefully and then return them. After that, pull the belts out slowly once again.
- Insert the latch plate into the buckle until a "click" is heard.
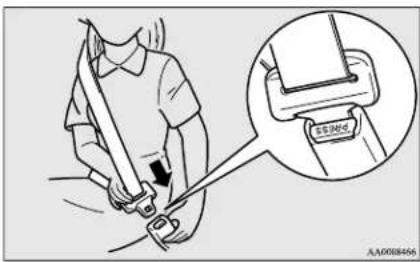
WARNING
● Never wear the lap portion of the belt across your abdomen. During accidents it can press sharply against the abdomen and increase the risk of injury.
● The seat belts must not be twisted when worn.
- Pull the belt slightly to adjust slackness as desired.
To unfasten
Hold the latch plate and push the button on the buckle.
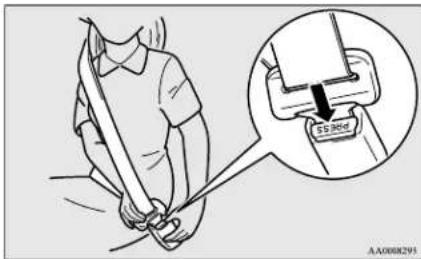

NOTE
● As the belt retracts automatically, keep holding the latch plate while retracting so that the belt stows slowly. Failure to do this could damage the vehicle.

NOTE
- If the seat belt (A) or ring (B) becomes dirty, the belt may not retract smoothly. If the seat belt and ring are dirty, clean them with a mild soap or detergent solution.
Type 1
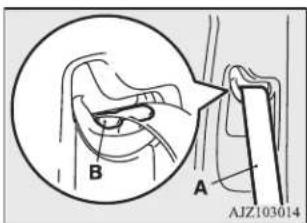
Type 2
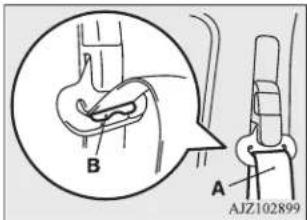
Seat belt reminder
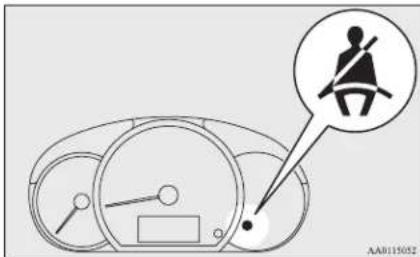
If the ignition switch is turned to the "ON" position or the operation mode is put in ON while a seat belt is not fastened, the warning lamp comes on and the tone sounds for about 6 seconds to remind the driver and the front passenger to fasten the seat belt.
If the vehicle is driven with the seat belt still unfastened, the warning lamp will blink and the tone will sound intermittently until the seat belt is fastened.

NOTE
- If the seat belt subsequently remains unfas tened, the warning lamp and the tone will issue further warnings each time the vehicle starts moving from a stop.

NOTE
● For the front passenger seat, the warning function works only while a person is sitting on the seat.
- When luggage is placed on the front passenger seat, a sensor in the seat cushion may depending on the weight and position of the luggage, cause the warning tone to sound and the warning lamp to come on.
Adjustable seat belt anchor (front seats)\*
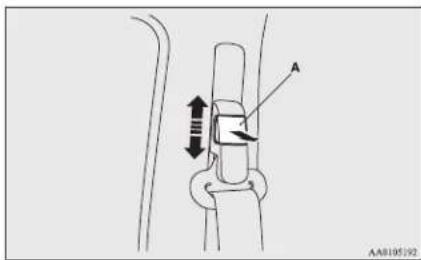
The seat belt anchor height can be adjusted. To move the anchor, pull the lock knob (A) and slide the anchor to the desired position. Release the lock knob to lock the anchor into position.
Pregnant women restraint
WARNING
- When adjusting the seat belt anchor, set it at a position that is sufficiently high so that the belt will make full contact with your shoulder but will not touch your neck.
Rear seat belt storage
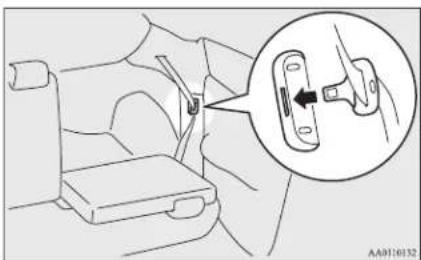
When folded the rear seatbacks forward, store the seat belts as shown in the illustration.
natural_image
Line drawing of a car seatbelt buckle assembly with an inset showing the bracket detail (no text or symbols)
Pregnant women restraint
WARNING
- Seat belts work for everyone, including pregnant women. Pregnant women should use the available seat belts. This will reduce the likelihood of injury to both the woman and the unborn child. The lap belt should be worn across the thighs and as snug against the hips as possible, but not across the waist. Consult your doctor if you have any additional questions or concerns.
Seat belt pretensioner system and force limiter system
The driver's seat and front passenger's seat each have a seat belt equipped with a pretensioner system and force limiter system.
Pretensioner system
When the ignition switch or the operation mode is under the following conditions, if there is a frontal impact severe enough to injure the and/or front passenger, the pretensioner system will retract their respective seat belts instantaneously, thus maximizing the seat belt's effectiveness.
[Except vehicles equipped with keyless operation system]
The ignition switch is in the "ON" or "START" position.
[ Vehicles equipped with keyless operation system]
The operation mode is in ON.
WARNING
● To obtain the best results from your pretensioner seat belt, make sure you have adjusted your seat correctly and wear your seat belt properly.
CAUTION
- Installation of audio equipment or repairs in the vicinity of the pretensioner seat belts or floor console must be performed in line with MITSUBISHI MOTORS guidelines. It is important to do so because the work could affect the pretensioner systems.
- If you need to scrap the vehicle, please consult a MITSUBISHI MOTORS Authorized Service Point. It is important to do so because unexpected activation of the pretensioner seat belts could cause injuries.
NOTE
● The pretensioner seat belts will be activated if the vehicle suffers a severe frontal impact, even if the seat belts are not worn.

NOTE
● The pretensioner seat belts are designed to work only once. After the pretensioner seat belts have been activated, we recommend you have them replaced by a MITSUBISHI MOTORS Authorized Service Point.
SRS warning lamp
This warning lamp is shared by the SRS airbags and the pretensioner seat belts.
Refer to "SRS warning lamp" on page 4-27.
Force limiter system
In the event of a collision, each force limiter system will effectively absorb the load applied to the seat belt to minimize the impact to the passenger.
Child restraint
When transporting children in your vehicle, some type of child restraint system should always be used according to the size of the child. This is required by law in most countries.
The regulations concerning driving with children in the front seat may differ from country to country. You are advised to comply with the relevant regulations.

WARNING
- When possible, put children in the rear seat. Accident statistics indicate that children of all sizes and ages are safer when properly restrained in the rear seat rather than in the front seat.
- Holding a child in your arms is no substitute for a restraint system. Failure to use a proper restraint system can result in severe or fatal injury to the child.
● Each child restraint device or fixing is to be used only by one child.
- When attaching a child restraint system to the rear seat, prevent the front seat-backs from touching the child restraint system.
Otherwise, the child could be seriously injured in the event of hard braking or a collision.
Caution for installing the child restraint on vehicles with front passenger's airbag
The label shown here is attached on vehicles with front passenger's airbag.
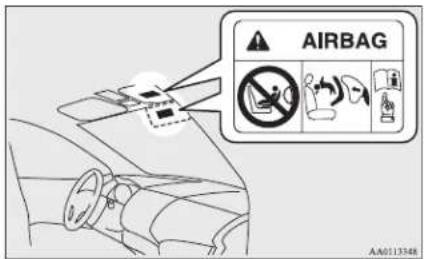

WARNING
● Extreme Hazard!
NEVER use a rearward facing child restraint on a seat protected by an ACTIVE AIRBAG in front of it, DEATH or SERIOUS INJURY to the CHILD can occur.
Child restraint
Use rearward facing child restraints in the rear seat or turn off the front passenger's airbag ON-OFF switch. (Refer to "To turn an airbag off" on page 4-20)
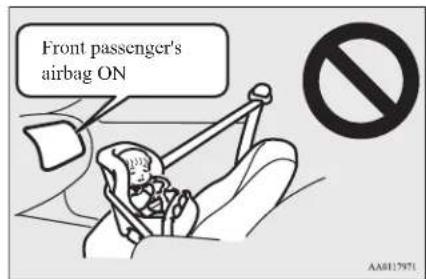
WARNING
- A REARWARD FACING CHILD RESTRAINT must NOT be used in the front passenger seat if the front passenger's airbag has not been deactivated. The force of an inflating airbag could kill or cause serious injuries to the child. A rearward facing child restraint should be used in the rear seat.
● A FORWARD FACING CHILD RE-STRAINT should be used in the rear seat whenever possible; if it must be used in the front passenger seat, turn off the front passenger's airbag ON-OFF switch. Failure to do so could kill or cause serious injuries to the child.
Infants and small children
When transporting infants and small children in your vehicle, follow the instruction given below.
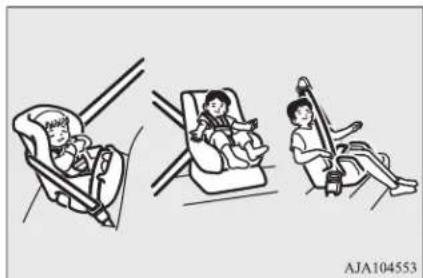
natural_image
Illustration of three children in car seat positions: seated, standing, and lying (no text or symbols)
Instruction:
● For small infants, an infant carrier should be used. For small children whose height when seated allows the shoulder belt to lie in contact with the face or the throat, a child seat should be used.
- The child restraint system should be appropriate for the child's weight and height and properly fit in the vehicle. For a higher degree of safety: THE CHILD RESTRAINT SYSTEM SHOULD BE INSTALLED IN THE REAR SEAT.
- Before purchasing a child restraint system, try installing it in the rear seat to make sure there is a good fit. Because of the location of the seat belt buckles and the shape of the seat cushion, it may be difficult to securely install some manufacturer's child restraint systems.
If the child restraint system can be pulled forward or to either side easily on the seat cushion after the seat belt has been tightened, choose another manufacturer's child restraint system.
WARNING
- When installing a child restraint system, refer to the instructions provided by the manufacturer of the restraint system. Failure to do so can result in severe or fatal injury to the child.
● After installation, push and pull the child restraint system back and forth, and side to side, to see that it is properly secured. If the child restraint system is not installed securely, it may cause injury to the child or other occupants in the case of accident or sudden stops.
- When the child restraint system is not in use, keep your child restraint system secured with the seat belt or remove it from the vehicle in order to prevent it from being thrown around inside the vehicle during an accident.

NOTE
Depending on the seating position in the vehicle and the child restraint system that you have, the child restraint can be attached using one of the following two ways:
- Using the lower anchorage in the rear seat ONLY if the child restraint has ISOFIX mountings (See page 4-15).
• Using the seat belt (See 4-16).
Older children
Children who have outgrown the child restraint system should be seated in the rear seat and wear combination lap shoulder belt.
The lap portion of the belt should be snug and positioned low on the abdomen so that it is below the top of the hip-bone. Otherwise, the belt could intrude into the child's abdomen during an accident and cause injury.
Child restraint
Suitability for various ISOFIX positions
| Mass group Size class Fixture | | Vehicle ISOFIX positions | Recommended Child Restraint Systems*1 | UN-R44 Approval No. | UN-R129 Approval No. |
| Rear (Left side/Right side) |
| Carrycot | F ISO/L1 X — — — | | | | | |
| G ISO/L2 X — — — | | | | | |
| 0 - Up to 10 kg E ISO/R1 IL — — — | | | | | |
| 0+ - Up to 13 kg | E ISO/R1 IL — — — | | | | | |
| D ISO/R2 IL, IL# BABY-SAFE i-SIZE: | MZ315055BABY-SAFE i-SIZE: FLEXBASE: MZ315056 | — E1-00008 |
| C ISO/R3 IL | | —— | | |
| 1 - 9 to 18 kg | D ISO/R2 IL — — — | | | | | |
| C ISO/R3 IL — — — | | | | | |
| B | ISO/F2 | IUF | — | — | — |
| B1 | ISO/F2X | IUF, IL# | DUO plus: MZ313045 | E1-04301133 | — |
| A ISO/F3 | IUF | —— — | | |
| II - 15 to 25 kg | | | X — — — | | | |
| III - 22 to 36 kg | | | X — — — | | | |
*1: MITSUBISHI MOTORS Europe B.V. reserves the right to changes without prior announcement. For detailed information, consult your MITSUBISHI MOTORS Authorized Service Point.

CAUTION
- When installing a child restraint system, remove the head restraint from the seat.
● "BABY-SAFE i-SIZE" and "BABY-SAFE i-SIZE FLEX BASE" are designed for children 40 to 83 cm in height.
Definition of characters to be inserted in the table above:
● IUF- Suitable for ISOFIX forward child restraint systems of universal category approved for use in the mass group.
- IL-Suitable for ISOFIX child restraint systems of semi-universal category approved for use in the mass group.
- IL#- Suitable for particular ISOFIX child restraint systems. See the above table of "Recommended Child Restraint Systems".
● X- ISOFIX position not suitable for ISOFIX child restraint systems in this mass group.
Suitability for various seating positions
| Mass group | Scating position | Recommended Child Restraint System*1 | UN-R44 Appro- val No. | UN-R129 Ap- proval No. |
| Front passenger Rear | |
| Activated air- bag | Deactivated Airbag*2 | Left side/ Right side | Centre |
| 0 - Up to 10 kg X U | U | X — — — | | | | | |
| 0+ - Up to 13 kg X | U, L# | U, L# X B | ABY-SAFE i- | | SIZE: MZ315055 | — | E1-000008 |
| I - 9 to 18 kg X U, | L# | U, L# X DUO | plus: | | MZ313045 | E1-04301133 | — |
*1: MITSUBISHI MOTORS Europe B.V. reserves the right to changes without any prior announcement.
For detailed information, consult your MITSUBISHI MOTORS Authorized Service Point.
*2: With front passenger's airbag deactivated by means of front passenger's airbag ON-OFF switch
*3: Do not remove the head restraint when installing a "universal" category booster cushion.
*4: When adjusting the head restraint height of the child restraint system, prevent the rear pillar from touching the head restraint.
Child restraint
| Mass group | Seating position | Recommended Child Restraint System*1 | UN-R44 Appro- val No. | UN-R129 Ap- proval No. |
| Front passenger Rear | |
| Activated air- bag | Deactivated Airbag*2 | Left side/ Right side | Centre |
| II - 15 to 25 kg X | | U^*3, L\# U | *3, L^\#*4 | X | KIDFIX XP: MZ315025 | E1-04301304 — | |
| III - 22 to 36 kg X | | U^*3, L\# U | *3, L^\#*4 | X |
*1: MITSUBISHI MOTORS Europe B.V. reserves the right to changes without any prior announcement.
For detailed information, consult your MITSUBISHI MOTORS Authorized Service Point.
*2: With front passenger's airbag deactivated by means of front passenger's airbag ON-OFF switch
^*3 : Do not remove the head restraint when installing a “universal” category booster cushion.
*4: When adjusting the head restraint height of the child restraint system, prevent the rear pillar from touching the head restraint.
CAUTION
- When installing a child restraint system, remove the head restraint from the seat.
However, do not remove the head restraint when installing a booster cushion (see 4-16).
- When installing a child restraint system on the front passenger seat, adjust the front seatback angle to 2 steps rearward from the first locking position.
● “BABY-SAFE i-SIZE” is designed for children 40 to 83 cm in height.
Definition of characters to be inserted in the table above:
- U- Suitable for “universal” category restraints approved for use in this mass group.
- L#- Suitable for particular child restraint systems. See the above table of “Recommended Child Restraint Systems”.
● X- Seat position not suitable for children in this mass group.
Installing a child restraint system to the lower anchorage (ISOFIX child restraint mountings) and tether anchorage
Lower anchorage location
Your vehicle's rear seat is fitted with lower anchorages for attaching a child restraint system with ISOFIX mountings.
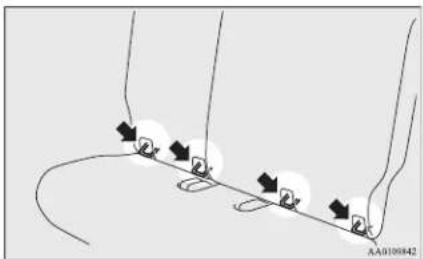
Tether anchorage locations
There are 2 attachment points located on the back of the rear seatbacks. These are for securing a child restraint system tether strap to each of the 2 rear seating positions in your vehicle.
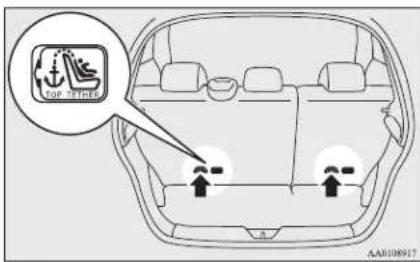
WARNING
● Child restraint anchorages are designed to withstand only those loads imposed by correctly fitted child restraints. Under no circumstances are they to be used for adult seat belts, harnesses, or for attaching other items or equipment to the vehicle.
Child restraint system with ISOFIX mountings
The child restraint system is designed only for seats that incorporate lower anchorages. Retain the child restraint system using the lower anchorages.
It is not necessary to retain the child restraint system using the vehicle's seat belts.
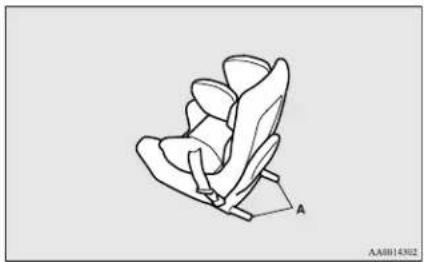
natural_image
Line drawing of a chair seat with labeled point A (no text or symbols on the diagram itself)
A- Child restraint system connectors
Installation:
- Remove any foreign material in or around the connectors and ensure the vehicle seat belt is in its normal storage position.
- Remove the head restraint from the location in which you wish to install a child restraint.
Refer to "Head restraints" on page 4-04.
Child restraint
- Open the gap a little between the seat cushion (A) and the seatback (B) with your hand to locate the lower anchorages (C).
- Push the child restraint system's connectors (D) into the lower anchorages (C) in accordance with the instructions provided by the child restraint system's manufacturer.
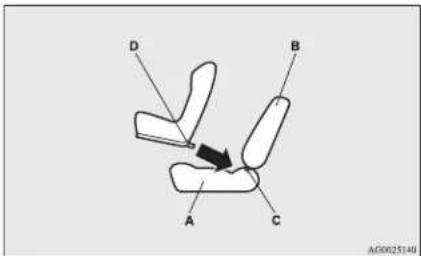
A- Vehicle seat cushion
B- Vehicle seatback
C- Lower anchorage
D- Connector
If your child restraint system requires the use of a tether strap, fasten the tether strap in accordance with step 5.
- Latch the top tether strap hook (E) of the child restraint system to the tether anchorage bracket (F) and tighten the top tether strap so it is securely fastened.
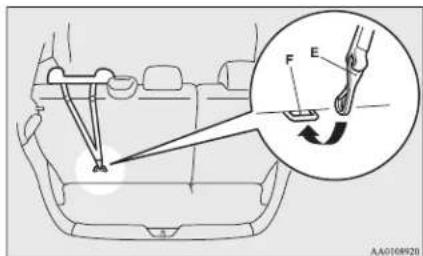
- Push and pull the child restraint system in all directions to be sure it is firmly secured.
Installing a child restraint system to a 3-point type seat belt (with emergency locking mechanism)
Installation:
- Put a child restraint system on the seat in which you wish to install it, and remove the head restraint from the seat. Refer to "Head restraints" on page 4-04.

CAUTION
- Do not remove the head restraint when installing a booster cushion.
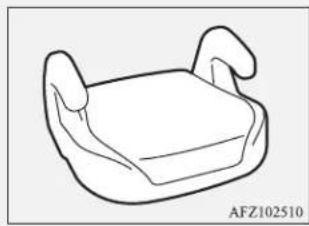
natural_image
Line drawing of a car seat with two side legs and a flat body (no text or symbols)
- When installing a child restraint system in the front passenger seat, adjust seat slide to its most rearward position.
- Route the belt through the child restraint according to the child restraint system manufacturer's instructions, then insert the latch plate into the buckle.
- Remove all slack of a lap belt by pulling the webbing through the belt's adjustment feature.
3-point type seat belt requires no length adjustment, remove all slack by using the locking clip.
- Before putting the child in the restraint, push and pull the restraint in all directions to be sure it is secure. Do this before each use.

WARNING
- For some types of child restraint, the locking clip (A) should be used to help avoid personal injury during a collision or sudden manoeuvre.
It must be fitted and used in accordance with the child restraint manufacturer's instructions.
The locking clip must be removed when the child restraint is removed.
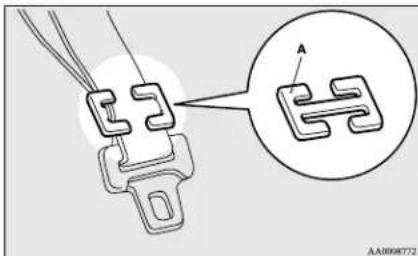
Seat belt inspection
Check the belts for cuts, worn or frayed webbing and for cracked or deformed metallic parts. Replace the belt assembly if it is defective.

WARNING
We recommend you to have all seat belt assemblies including retractors and attaching hardware inspected after any collision. We recommend that seat belt assemblies in use during a collision be replaced unless the collision was minor and the belts show no damage and continue to operate properly.
- Do not attempt to repair or replace any part of the seat belt assemblies; we recommend you to have this work done by a MITSUBISHI MOTORS Authorized Service Point. Incorrect repair or replacement could reduce the effectiveness of the belts and could result in serious injury in the event of a collision.
- Once the pretensioner has been activated, it cannot be re-used.
It must be replaced together with the retractor.

WARNING
- Do not insert any foreign objects (pieces of plastic, paper clips, buttons, etc.) in the buckle or retractor mechanism. In addition, do not modify, remove or install the seat belt. Otherwise, the seat belt may not be able to provide adequate protection in a collision or other situation.
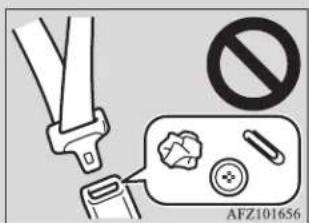
● A dirty belt should be cleaned with neutral detergent in warm water. After rinsing in water, let it dry in the shade. Do not attempt to bleach or re-dye the belts because this will affect their characteristics.
Supplemental restraint system (SRS) - airbag
The information written in this Supplemental Restraint System (SRS) section contains important points concerning the driver, front passenger, side and curtain airbags.
Supplemental restraint system (SRS) - airbag
The SRS driver's airbag and the SRS front passenger's airbag are designed to supplement the primary protection of the driver and front passenger side seat belt systems by providing those occupants with protection against head and chest injuries in certain moderate-to-severe frontal collisions.
The SRS side airbags are designed to supplement properly worn seat belts and provide the driver and front passenger with protection against chest injuries in certain moderate-to-severe side impact collisions.
The SRS curtain airbags are designed to supplement properly worn seat belts and provide the driver and passengers on the front seat and rear outboard seat with protection against head injuries in certain moderate-to-severe side impact collisions.
The SRS is NOT a substitute for the seat belts; for maximum protection in all types of crashes and accidents, seat belts should ALWAYS be worn by everyone who drives or rides in this vehicle.
How the Supplemental Re- straint System works
The SRS includes the following components:
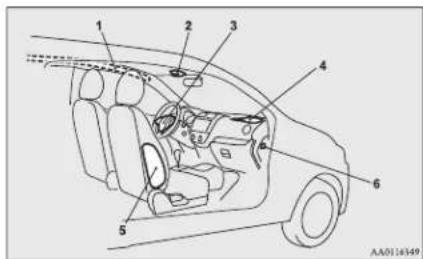
1- Curtain airbag modules
2- Front passenger's airbag OFF indication lamp
3- Airbag module (Driver)
4- Airbag module (Passenger)
5- Side airbag modules
6- Front passenger's airbag ON-OFF switch
Only when the ignition switch or the operation mode is under the following conditions, the airbags will operate.
[Except for vehicles equipped with keyless operation system]
The ignition switch is in the "ON" or "START" position.
[ Vehicles equipped with keyless operation system]
The operation mode is in ON.
The airbags deployment produces a sudden, loud noise, and releases some smoke and powder, but these conditions are not injurious, and do not indicate a fire in the vehicle.
People with respiratory problems may feel some temporary irritation from chemicals used to produce the deployment; open the windows after airbag deployment, if safe to do so.
The airbags deflate very rapidly after deployment, so there is little danger of obscured vision.

CAUTION
● Airbags inflate at an extremely rapid speed. In certain situations, contact with inflating airbags can result in abrasions, light cuts, bruises, and the like.

WARNING
● IT IS VERY IMPORTANT TO BE PROPERLY SEATED.
A driver or front passenger too close to the steering wheel or instrument panel during airbag deployment can be killed or seriously injured.
Airbags inflate very fast, and with great force.
If the driver and passengers are not properly seated and restrained, the airbags may not protect you properly, and could cause serious or fatal injuries when it inflates.
- Do not sit on the edge of the seat, or lean head or chest close to the steering wheel or instrument panel. Do not put feet or legs on or against the instrument panel.
- Place all infants and small children in the rear seat and properly restrained using an appropriate child restraint system.
The rear seat is the safest place for infants and children.
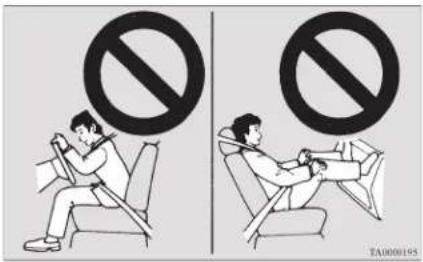

WARNING
- Infants and small children should never be unrestrained, stand up against the instrument panel or be held in your arms or on your lap. They could be seriously injured or killed in a collision, including when the airbag inflates. They should be properly seated in the rear seat in an appropriate child restraint system. See the "Child restraint" section of this owner's manual.
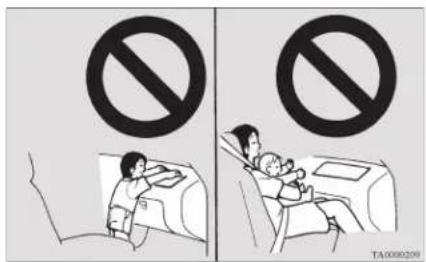

WARNING
● Older children should be seated in the rear seat, properly wearing the seat belt, with an appropriate booster seat if needed.
Caution for installing the child restraint on vehicles with front passenger's airbag
The label shown here is attached on vehicles with front passenger's airbag.
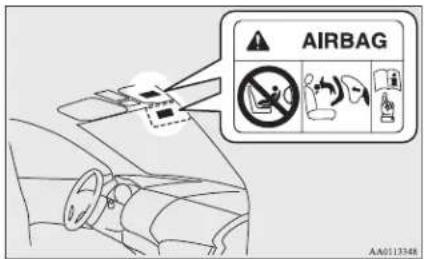

WARNING
● Extreme Hazard!
NEVER use a rearward facing child restraint on a seat protected by an ACTIVE AIRBAG in front of it, DEATH or SERIOUS INJURY to the CHILD can occur.
Supplemental restraint system (SRS) - airbag
Front passenger's airbag ON-OFF switch
The front passenger's airbag ON-OFF switch can be used to disable the front passenger's airbag. If you have a child restraint system that cannot be fitted to any seat other than the front passenger seat, be sure to turn OFF the front passenger's airbag ON-OFF switch before using it. (Refer to "To turn an airbag off" on page 4-20.)
Front passenger's airbag ON-OFF switch is located at shown in the illustration.
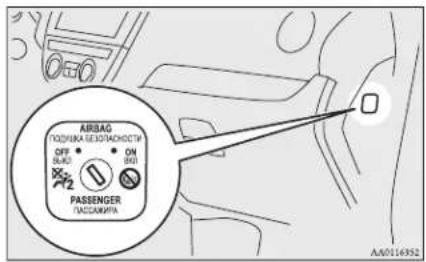
Front passenger's airbag OFF indication lamp
The front passenger's airbag OFF indication lamp is located at shown in the illustration.
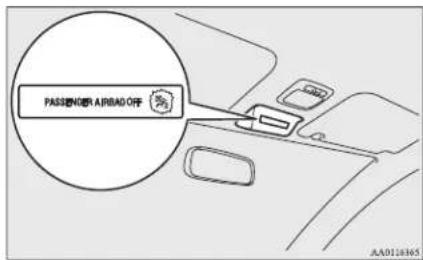
The indication lamp normally comes on when the ignition switch is turned to the "ON" position or the operation mode is put in ON, and goes off a few seconds later.
When the front passenger's airbag ON-OFF switch is turned OFF, the indication lamp will stay on to show that the front passenger's airbag is not operational.
When the front passenger's airbag ON-OFF switch is turned ON, the indication lamp goes off to show that the front passenger's airbag is operational.

WARNING
- Do not fit any accessory that makes the indication lamp impossible to see, and do not cover the indication lamp with a sticker. You would not be able to verify the status of the front passenger's airbag system.
To turn an airbag off

WARNING
● To reduce risk of serious or fatal injury:
- Always remove the key from the ignition switch before operating a front passenger's airbag ON-OFF switch. Failure to do so could adversely affect the airbag performance.
- Wait at least 60 seconds to operate the front passenger's airbag ON-OFF switch after turning the ignition switch to the "LOCK" position or putting the operation mode in OFF.
The SRS airbag system is designed to retain enough voltage to deploy the air-bag.
- Always remove the key from the front passenger's airbag ON-OFF switch after operating that switch. Failure to do so could lead to improper position of the front passenger's airbag ON-OFF switch.

WARNING
- Do not turn OFF the front passenger's airbag ON-OFF switch except when a child restraint system is fitted to the front passenger seat.
● To reduce risk of serious or fatal injury:
- If the indication lamp does not come on when the front passenger's airbag ON-OFF switch is turned OFF, do not fit a child restraint system to the front passenger seat. We recommend you to have the system inspected by a MITSUBISHI MOTORS Authorized Service Point.
- If the indication lamp remains on when the front passenger's airbag ON-OFF switch is turned ON, do not allow anyone to sit on the front passenger seat. We recommend you to have the system inspected by a MITSUBISHI MOTORS Authorized Service Point.
To turn an airbag off, follow these steps:
- Insert the key into the front passenger's airbag ON-OFF switch, and turn it to the "OFF" position.
-
Remove the key from the key opening of the front passenger's airbag ON-OFF switch.
-
Turn the ignition switch to the "ON" position or put the operation mode in ON. The front passenger's airbag OFF indication lamp will stay on.
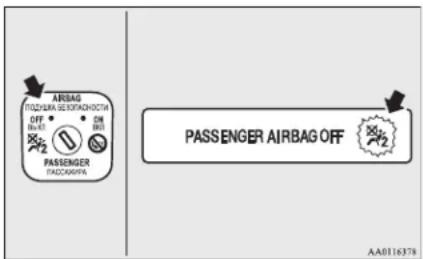
The front passenger's airbag is now deactivated and will not deploy until switched on again.
Driver's and passenger's front airbag system
The driver's airbag is located under the pad-ded cover in the middle of the steering wheel. The front passenger's airbag is contained in the instrument panel above the glove box.
The front passenger's airbag deploys at the same time as the driver's airbag, even if the passenger seat is not occupied.
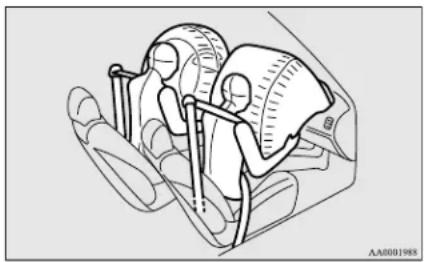
natural_image
Medical illustration showing a surgical procedure inside a vehicle (no text or labels)
Supplemental restraint system (SRS) - airbag
Deployment of front airbags
The front airbags ARE DE- SIGNED TO DEPLOY when...
The front airbags are designed to deploy when the vehicle suffers a moderate to severe frontal impact. A typical condition is shown in the illustration.
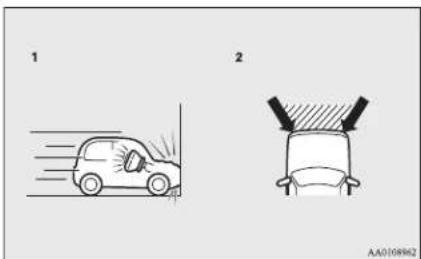
1- Head-on collision with a solid wall at a speed of approximately 25 km/h (16 mph) or higher
2- Moderate-to-severe frontal impact within the shaded area between the arrows
The front airbags will deploy if the severity of impact is above the designed threshold level, comparable to an approximately 25 km/h (16 mph) collision when impacting straight into a solid wall that does not move or deform. If the severity of the impact is below the above threshold level, the front airbags may not deploy. However, this threshold speed will be considerably higher if the vehicle strikes an object that absorbs the impact by either deforming or moving (for example, another stationary vehicle, pole or a guard rail).
Because frontal collisions can easily move you out of position, it is important to always properly wear your seat belts. Your seat belts will help keep you in a safe distance from the steering wheel and instrument panel during the initial stages of airbag deployment. The initial stage of airbag inflation is the most forceful, and can possibly cause serious or fatal injuries. Moreover, the seat belts in your vehicle are your primary means of protection in a collision. The SRS airbags are designed to provide additional protection. Therefore, for your safety and the safety of all occupants, be sure to always properly wear your seat belts.
The front airbags MAY NOT DEPLOY when...
With certain types of frontal collisions, the vehicle's body structure is designed to absorb the shock to help protect the occupants from harm. (The vehicle body's front area may deform significantly as it absorbs the impact.) Under such circumstances, the front airbags may not deploy irrespective of the deformation and damage to the vehicle body. Examples of some typical conditions are shown in the illustration.
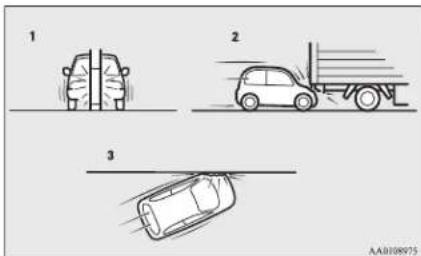
1- Collision with a utility pole, tree or other narrow objects
2- Vehicle slides under the rear body of a truck
3- Oblique frontal impacts
Because the front airbags do not protect the occupant in all types of frontal collisions, be sure to always properly wear your seat belts.
The front airbags ARE NOT DESIGNED TO DEPLOY when...
The front airbags are not designed to deploy in conditions where they cannot typically provide protection to the occupant. Such conditions are shown in the illustration.
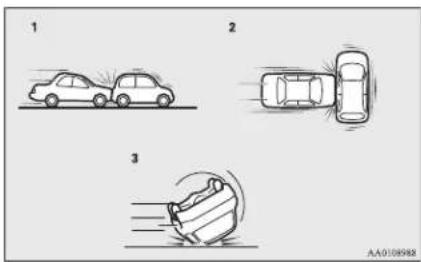
1- Rear end collisions
2- Side collisions
3- Vehicle rolls onto its side or roof
Because the front airbags do not protect the occupant in all types of collisions, be sure to always properly wear your seat belts.
The front airbags MAY DE- PLOY when...
The front airbags may deploy if the bottom of the vehicle suffers a moderate-to-severe impact (undercarriage damage).
Examples of some typical conditions are shown in the illustration.
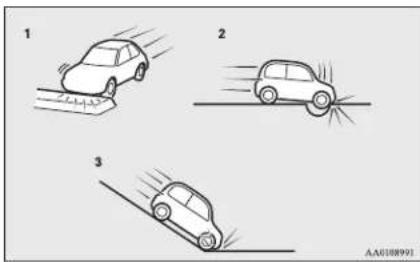
1- Collision with an elevated median/island or kerb
2- Vehicle travels over a deep hole/pothole
3- Vehicle drives down a steep slope and hits the ground
Because the front airbags may deploy in certain types of unexpected impacts as shown in the illustration that can easily move you out of position, it is important to always properly wear your seat belts. Your seat belts will help keep you in a safe distance from the steering wheel and instrument panel during the initial stages of airbag deployment. The initial stage of airbag inflation is the most forceful and can possibly cause serious or fatal injuries if you contact it at this stage.
WARNING
- Do not attach anything to the steering wheel's padded cover, such as trim material, badges, etc. It might strike and injure an occupant if the airbag inflates.
- Do not set anything on, or attach anything to, the instrument panel above the glove box. It might strike and injure an occupant if the airbag inflates.
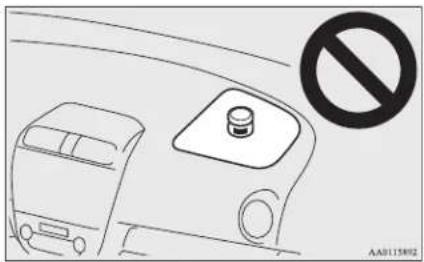
natural_image
Diagram of a car interior with a stopper and a no-smoking symbol (no text or labels)
WARNING
- Do not attach accessories to, or put them in front of, the windscreen. These objects could restrict the airbag inflation, or strike and injure an occupant if the airbags inflate.
- Do not put packages, pets or other objects between the airbags and the driver or front passenger. It could affect airbag performance, or could cause injury when the airbag inflates.
Supplemental restraint system (SRS) - airbag
WARNING
● Right after the airbag inflation, several airbag system components will be hot. Do not touch them; you could be burned.
● The airbag system is designed to work only once. Once the airbags have deployed, they will not work again. They must promptly be replaced, and we recommend you to have the entire airbag system inspected by a MITSUBISHI MOTORS Authorized Service Point.
Side airbag system
The side airbags (A) are contained in the driver and front passenger seatbacks.
The side airbag is designed to inflate only on the side of the vehicle that is impacted, even with no passenger in the front seat.
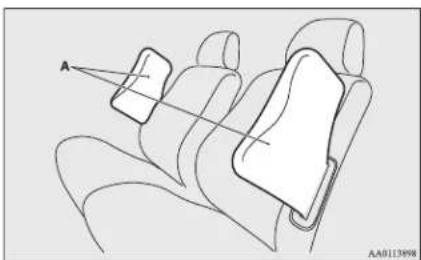
natural_image
Line drawing of a car seatbelt with labeled component A (no text or symbols beyond label)
The label shown here is attached to the seat-backs with a side airbag.
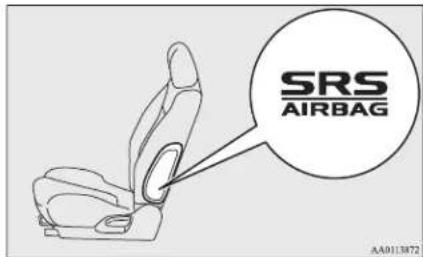
Curtain airbag system
The curtain airbags are contained in the front pillars and roof side rail. The curtain airbag is designed to inflate only on the side of the vehicle that is impacted, even with no passenger in the front seat or rear seat.
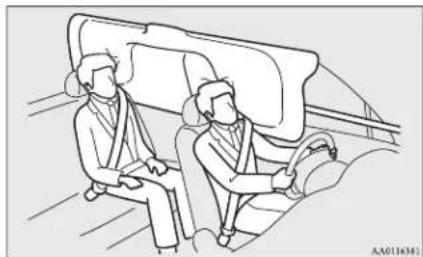
natural_image
Line drawing of two people seated in a car, one wearing a seatbelt and the other in a suit jacket (no text or symbols)
Deployment of side airbags and curtain airbags
The side airbags and curtain airbags ARE DESIGNED TO DEPLOY when...
The side airbags and curtain airbags are designed to deploy when the vehicle suffers a moderate-to-severe side impact to the middle of the passenger compartment.
The typical condition is shown in the illustration.
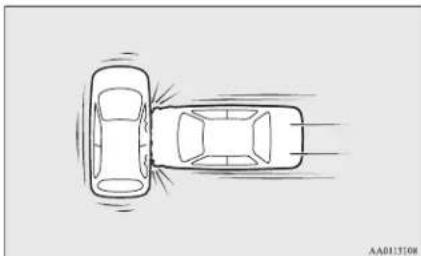
natural_image
Top-down line drawing of a car with motion lines indicating speed (no text or symbols)
The seat belts in your vehicle are your primary means of protection in a collision. The SRS side airbags and curtain airbags are designed to provide additional protection. Therefore, for your safety and the safety of all occupants, be sure to always properly wear your seat belts.
The side airbags and curtain airbags MAY NOT DEPLOY when...
With certain types of side collisions, the vehicle's body structure is designed to absorb the shock to help protect the occupants from harm. (The vehicle body's side area may deform significantly as it absorbs the impact.) Under such circumstances, the side airbags and curtain airbags may not deploy irrespective of the deformation and damage to the vehicle body. Examples of some typical conditions are shown in the illustration.
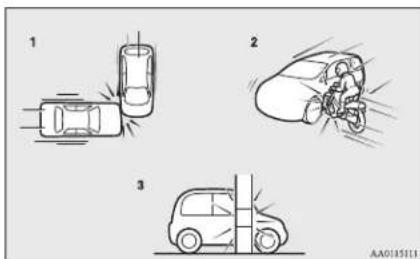
1- Side impacts in an area away from the passenger compartment
2- Motorcycle or other similar small vehicle collides with the side of vehicle
3- Collision with a utility pole, tree or other narrow object
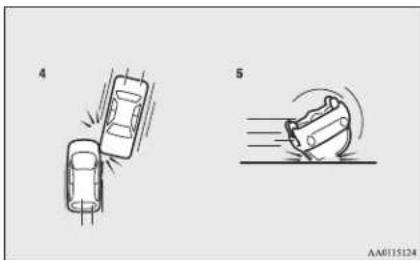
natural_image
Two cartoon car illustrations showing collision and collision motion (no text or symbols)
4- Oblique side impacts
5- Vehicle rolls onto its side or roof
Because the side airbags and curtain airbags do not protect the occupant in all types of side collisions, be sure to always properly wear your seat belts.
The side airbags and curtain airbags ARE NOT DESIGNED TO DEPLOY when...
The side airbags and curtain airbags are not designed to deploy in conditions where they cannot usually provide protection to the occupant. Typical conditions are shown in the illustration.
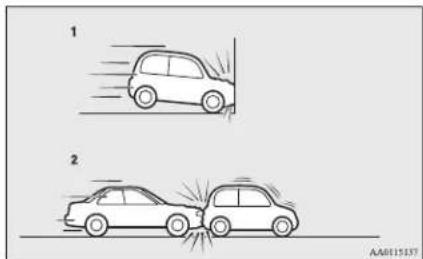
1- Head-on collisions
2- Rear end collisions
Because the side airbags and curtain airbags do not protect the occupant in all types of collisions, be sure to always properly wear your seat belts.
Supplemental restraint system (SRS) - airbag
WARNING
● The side airbags and curtain airbags are designed to supplement the driver and passenger seat belts in certain side impacts. Seat belts should always be worn properly, and the driver and passenger should sit well back and upright without leaning against the window or door.
● The side airbag and curtain airbag inflate with great force. The driver and passenger should not put their arms out of the window, and should not lean against the door, in order to reduce the risk of serious or possible fatal injury from the deploying side airbag and curtain airbag.
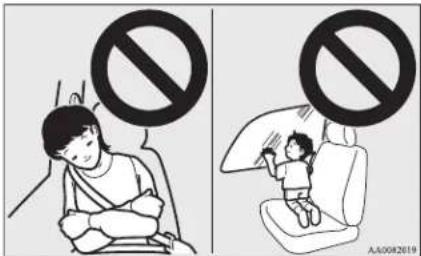
WARNING
- Do not allow any rear seat occupant to hold onto the seatback of either front seat, in order to reduce risk of injury from the deploying side airbags. Special care should be taken with children.
WARNING
- Do not place any objects near or in front of the seatback of either front seat. They could interfere with proper side airbag inflation, and also could cause injury if thrown free by side airbag deployment.
- Do not place stickers, labels or additional trim on the seatback of either front seat. They could interfere with proper side air-bag inflation.
- Do not install seat covers on seats with side airbags.
Do not re-cover seats that have side airbags. This could interfere with proper side airbag inflation.
- Do not attach a microphone (A) or any other device or object around the part where the curtain airbags activate such as on the windscreen, side door glass, front and rear pillars and roof side or assist grips. When the curtain airbags inflate, the microphone or other device or object will be hurled with great force or the curtain airbags may not activate correctly, resulting in death or serious injury.
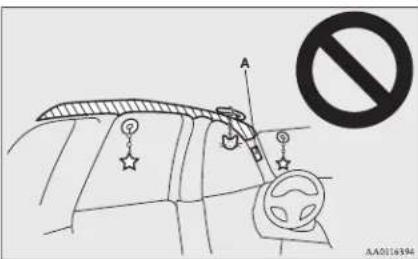
WARNING
● Never install a rearward facing child restraint in the front passenger seat. A forward facing child restraint should be used in the rear seat whenever possible. If a forward facing child restraint must be used in the front passenger seat, adjust the seat to the most rearward position, and ensure that the child stays in the child restraint and away from the door.
- Do not allow the child to lean against or close to the door even if the child is seated in a child restraint system.
The child's head should also not be leaned against or be close to the area where the side airbags and curtain airbags are located. It is dangerous if the side airbags and curtain airbags inflate.
Failure to follow all of these instructions could lead to serious or fatal injury to the child.

WARNING
- We recommend work around and on the side airbags and curtain airbags system to be done by a MITSUBISHI MOTORS Authorized Service Point.
SRS warning lamp
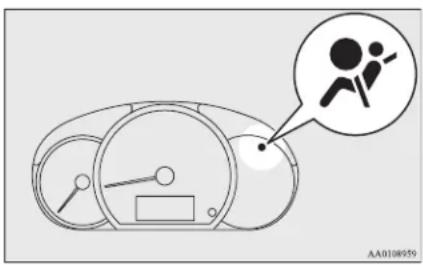
There is a Supplemental Restraint System (“SRS”) warning lamp on the instrument panel. The system checks itself every time the ignition switch is turned to the “ON” position or the operation mode is put in ON. The SRS warning lamp will come on for several seconds and then go out.
This is normal and means the system is working properly.
If there is a problem involving one or more of the SRS components, the warning lamp will come on and stay on.
The SRS warning lamp is shared by the SRS airbag and the seat belt pretensioner system.
WARNING
- If any of the following conditions occur, there may be a problem with the SRS airbags and/or seat belt pretensioners, and they may not function properly in a collision or may suddenly activate without a collision:
- Even when the ignition switch or the operation mode is in ON, the SRS warning lamp does not come on or it remains on.
- The SRS warning lamp comes on while driving.
The SRS airbags and seat belt pretensioners are designed to help reduce the risk of serious injury or death in certain collisions.
If either of the above conditions occurs, immediately have your vehicle checked by a MITSUBISHI MOTORS Authorized Service Point.
SRS servicing
WARNING
We recommend any maintenance performed on or near the components of the SRS to be performed by a MITSUBISHI MOTORS Authorized Service Point. Improper work on the SRS components or wiring could result in inadvertent deployment of the airbags, or could render the SRS inoperative; either situation could result in serious injury.
- Do not modify your steering wheel, seat belt retractor or any other SRS components. For example, replacement of the steering wheel, or modifications to the front bumper or body structure can adversely affect SRS performance and lead to possible injury.
- If your vehicle has sustained any damage, we recommend you to have the SRS inspected to ensure it is in proper working order.
- Do not modify your front seats, centre pillar and centre console.
It can adversely affect SRS performance and lead to possible injury.
- If you found any tear scratch, crack or damage to the portion where the airbag is stored, you should have the SRS inspected by a MITSUBISHI MOTORS Authorized Service Point.
Supplemental restraint system (SRS) - airbag

NOTE
- If your vehicle has to be scrapped, do this in line with local legislation and contact a MITSUBISHI MOTORS Authorized Service Point to safely dismantle the airbag system.
Instruments and controls
Instruments....5-02
Multi-information display....5-02
Indication and warning lamps.... 5-11
Indication lamps....5-12
Warning lamps.... 5-13
Combination headlamps and dipper switch.... 5-15
Headlamp levelling switch....5-18
Turn-signal lever.... 5-19
Hazard warning flasher switch....5-19
Fog lamp switch....5-20
Wiper and washer switch.... 5-21
Rear window demister switch.... 5-26
Horn switch....5-26
Instruments
Instruments
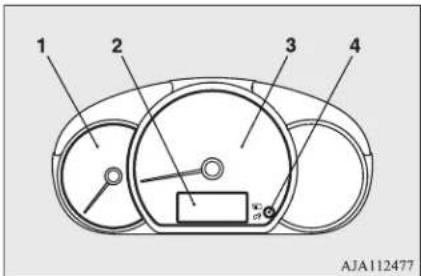
1- Tachometer
The tachometer indicates the engine speed (r/min). The tachometer helps you to obtain more economical driving and also warns you of excessive engine speeds (Red zone).
2- Multi-information display → p. 5-02
3- Speedometer (km/h or mph + km/h)
4- Multi-information display switch
CAUTION
- When driving, watch the tachometer to make sure that the engine speed indication does not rise into the red zone (excessive engine rpm).
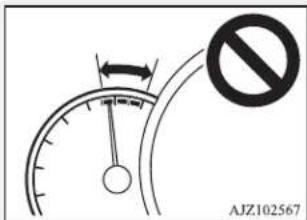
Always stop the vehicle in a safe place before operating.
The following information is included on the multi-information display: odometer, tripmeter, meter illumination control, service reminder, fuel remaining, driving range and average fuel consumption, etc.
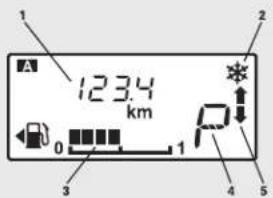
AJA106977
1- Information display → p. 5-03
2- Frozen road warning → p. 5-06
3- Fuel remaining display → p. 5-06
4- Selector lever position display* → p. 6-28
5- Gearshift indicator* → p. 6-25

NOTE
- When the ignition switch or the operation mode is OFF, the selector lever position display, gearshift indicator, fuel remaining display and frozen road warning are not displayed.
Each time you lightly press the multi-information display switch (A), the display switches in the following order.
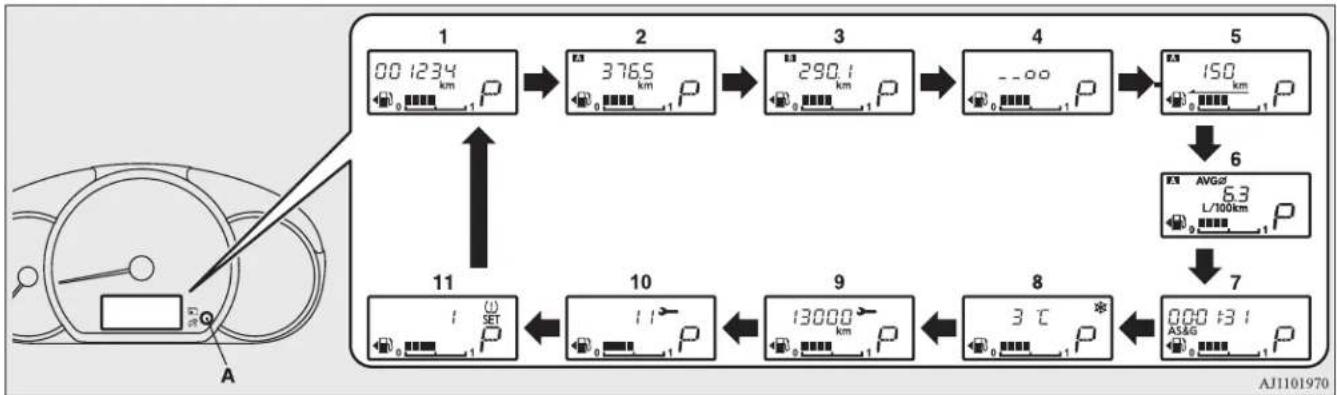
flowchart
graph TD
    A["1: 0.0 km/h"] --> B["2: 376.5 km/h"]
    B --> C["3: 290.1 km/h"]
    C --> D["4: -∞ P"]
    D --> E["5: 150 km/h"]
    E --> F["6: AVGd L/100km"]
    F --> G["7: 0.00-13.1 AS&G"]
    G --> H["8: 3°C"]
    H --> I["9: 13000 km/h"]
    I --> J["10: SET"]
    J --> K["11: 1.1 P"]
    K --> L["12: 1.1 P"]
    L --> M["13: 1.1 P"]
    M --> N["14: 1.1 P"]
    N --> O["AJ1101970"]
1- Odometer → p. 5-04
2- Tripmeter A p. 5-04
3- Tripmeter B p. 5-04
4- Meter illumination control → p. 5-04
5- Driving range display → p. 5-05
6- Average fuel consumption display
→ p. 5-05
7- Auto Stop & Go (AS&G) monitor* → p. 5-05
8- Outside temperature display → p. 5-05
9- Service reminder (distance) → p. 5-07
10- Service reminder (month) → p. 5-07
11- Tyre pressure monitoring system display* → p. 6-46, 6-47
Multi-information display

NOTE
- When the ignition switch or the operation mode is OFF, the driving range display, average fuel consumption display, outside temperature display and tyre pressure monitoring system display (if so equipped) are not displayed.
● While driving, the service reminder is not displayed even if you operate the multi-information display switch.
- When the position lamps are not illuminated, the illumination control meter is not displayed even if you operate the multi-information display switch.
Odometer
The odometer indicates the distance travelled.
Tripmeter
The tripmeter indicates the distance travelled between two points.
Example usage of tripmeter A and tripmeter B
It is possible to measure two currently travelled distances, from home using tripmeter And from a particular point on the way using tripmeter B
To reset the tripmeter
To return the display to 0, hold down the multi-information display switch for about 1 second or more. Only the currently displayed value will be reset.
Example
If tripmeter A is displayed, only tripmeter A will be reset.
5-04
Instruments and controls

NOTE
- When disconnecting the battery terminal, the memory of tripmeter aA are B cleared, and the display returns to "0".
Meter illumination control
Turn the position lamps on and press the multi-information display switch (2), there is a sound and the brightness changes.
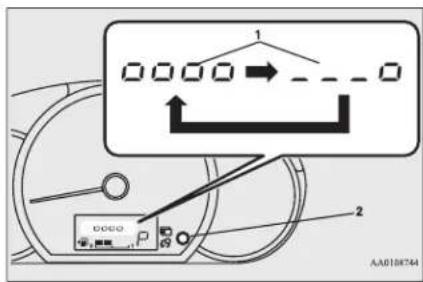
1- Brightness level
2- Multi-information display switch
OA0X19E2

NOTE
- When the position lamps are illuminated, you can adjust to 8 levels.
● Each time you reduce two brightness levels, the segment display of the brightness level decreases one by one.
● The brightness level of the instruments is stored when the ignition switch is turned to the "LOCK" position or the operation mode is put in OFF.
- If you press and hold the switch for longer than about 1 second, the brightness automatically scrolls through its different levels, and stops scrolling when you release the switch. Select your desired level of brightness.
● On vehicles equipped with automatic lamp control, the illumination control display is not displayed when it is bright outside and the ignition switch or the operation mode is ON.
Driving range display
This displays the approximate driving range (how many more kilometres or miles you can drive). When the driving range falls below approximately 50 km (30 miles), “---” is displayed.

NOTE
● The driving range is determined based on the fuel consumption data. This may vary depending on the driving conditions and habits. Treat the distance displayed as just a rough guideline.
- When you refuel, the driving range display is updated.
However, if you only add a small amount of fuel, the correct value will not be displayed. Fill with a full tank whenever possible.
- On rare occasions, the value displayed for the driving range may change if you are parked on an extremely steep incline. This is due to the movement of fuel in the tank and does not indicate a malfunction.
- The display setting can be changed to the preferred units (km or miles).
Refer to “Changing the function settings” on page 5-08.
Average fuel consumption display
This displays the average fuel consumption from the last reset to the present time.
The reset mode conditions for the average fuel consumption display can be switched between "Auto reset" and "Manual reset". For information on how to change the average fuel consumption display setting, refer to "Changing the function settings" on page 5-08.

NOTE
● The average fuel consumption display can be reset separately in both auto reset mode and manual reset mode.
- “---” is displayed when the average fuel consumption cannot be measured.
- The initial (default) setting is “Auto reset mode”.
● The average fuel consumption depends on the driving condition (road condition, driving behavior, etc.). The displayed fuel consumption may vary from the actual fuel consumption. Treat the fuel consumption displayed as just a rough guideline.
● The memory of the auto reset mode or manual reset mode for the average fuel consumption display is erased if the battery is disconnected.
- The display setting can be changed to the preferred units {km/L, L/100 km, mpg}. Refer to “Changing the function settings” on page 5-08.
Auto Stop & Go (AS&G) monitor\*
The accumulated time the engine has been stopped by Auto Stop & Go (AS&G) system is displayed.
Refer to "Auto Stop & Go (AS&G) system" on page 6-20.

NOTE
- When the ignition switch or the operation mode is ON again, the accumulated time will be reset.
Outside temperature display
This shows the temperature outside the vehicle.

NOTE
● The display setting can be changed to the preferred units (°C or °F).
Refer to “Changing the function settings” on page 5-08.
● Depending on factors such as the driving conditions, the displayed temperature may vary from the actual outside temperature.
Multi-information display
Frozen road warning
If the outside air temperature drops below approx. 3°C (37 °F), the alarm sounds and the outside air temperature warning symbol (A) flashes for about 10 seconds.
5
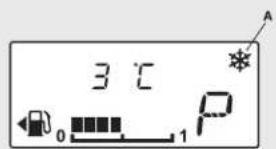
Fuel remaining display
The fuel remaining display indicates the fuel level in the fuel tank when the ignition switch or the operation mode is ON.
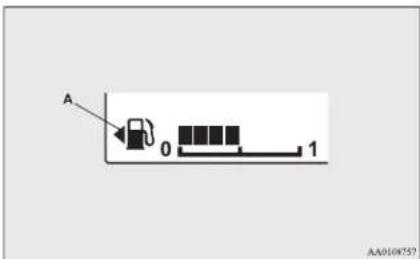

CAUTION
● There is a danger the road might be icy, even when this symbol is not flashing, so please take care when driving.
1-Full
0- Empty

NOTE
- It may take several seconds to stabilise the display after refilling the tank.
- If fuel is added with the ignition switch or the operation mode is ON, the fuel gauge may incorrectly indicate the fuel level.
● The fuel lid mark (A) indicates that the fuel tank filler door is located on the left side of the vehicle.
Fuel remaining warning display
If the remaining fuel level is approximately 6 litres or less (one segment displayed) when the ignition switch is turned to the "ON" position or the operation mode is changed to ON, the last segment of the fuel gauge flashes. If the remaining fuel level is reduced further, the last segment of the fuel gauge goes out, "☐" and the bar graph flash.
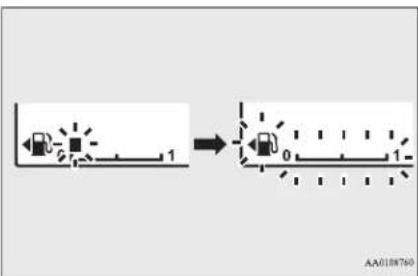

CAUTION
- Do not drive with an extremely low fuel level; running out of fuel could cause damage to the catalytic converter.

NOTE
- On inclines or curves, the display may be incorrect due to the movement of fuel in the tank.
Service reminder
Displays the approximate time until the next periodic inspection that MITSUBISHI MOTORS recommends. “---” is displayed when the inspection time has arrived.
The spanner mark indicates the periodic inspection.

NOTE
● Depending on the vehicle specifications, the displayed time until the next periodic inspection may differ from that recommended by MITSUBISHI MOTORS.
In addition, the display settings for the next periodic inspection time can be modified. To modify the display settings, have it adjusted at a MITSUBISHI MOTORS Authorized Service Point.
For more details, contact a MITSUBISHI MOTORS Authorized Service Point.
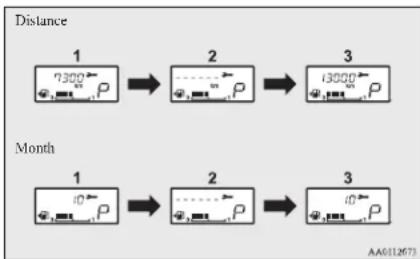
flowchart
graph LR
    A["1: 7300 P"] --> B["2: ... P"]
    B --> C["3: i3000 P"]
    D["1: i0 P"] --> E["2: ... P"]
    E --> F["3: i0 P"]
- Displays the time until the next periodic inspection.

NOTE
● The distance is shown in units of 100 km (100 miles). The time is shown in units of months.
- This informs you that a periodic inspection is due. Consult a MITSUBISHI MOTORS Authorized Service Point.
- After your vehicle is inspected at a MITSUBISHI MOTORS Authorized Service Point, it displays the time until the next periodic inspection.
To reset
The “---” display can be reset while the ignition switch or the operation mode is in OFF.
- When you lightly press the multi-information display switch a few times, the information display switches to the service reminder display.
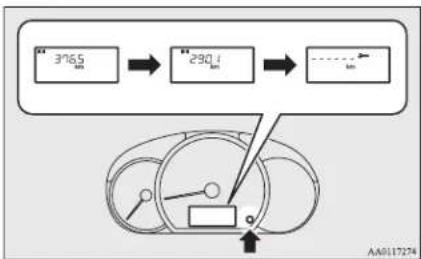
flowchart
graph TD
    A["3765 km"] --> B["290.1 km"]
    B --> C["-> meter"]
    style A fill:#f9f,stroke:#333
    style B fill:#f9f,stroke:#333
    style C fill:#ccf,stroke:#333
-
Press and hold the multi-information display switch for about 1 second or more to make the spanner mark start flashing. (If there is no operation for about 10 seconds with flashing, the display will revert to its original indication.)
-
Lightly press the multi-information display switch while the icon is flashing to change the display from “---” to “cLEAr”. After this, the time until the next periodic inspection will be displayed.
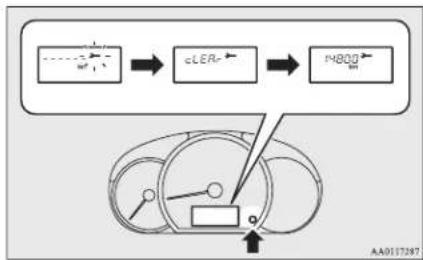
flowchart
graph TD
    A["Input Data"] --> B["CLEAR"]
    B --> C["M800"]
    C --> D["Control Panel"]
    D --> E["Output"]
CAUTION
● The customer is responsible for making sure that periodic inspection and maintenance are performed. Inspections and maintenance must be performed to prevent accidents and malfunctions.
NOTE
● “---”display cannot be reset when the ignition switch or the operation mode is in ON.
NOTE
- When “---” is displayed, after a certain distance and a certain period of time, the display is reset and the time until the next periodic inspection is displayed.
- If you accidentally reset the display, consult a MITSUBISHI MOTORS Authorized Service Point.
Changing the function settings
The average fuel consumption reset mode, fuel consumption unit and temperature unit setting can be modified as desired, when the ignition switch or the operation mode is ON.
CAUTION
● The driver should not operate the display while the vehicle is in motion.
- When operating the system, stop the vehicle in a safe area.
Changing the reset mode for average fuel consumption
The mode conditions for the average fuel consumption display can be switched between "Auto reset" and "Manual reset".
- When you lightly press the multi-information display switch a few times, the information display switches to the driving range display.
Refer to “Information display” on page 5-03.
- Each time you press the multi-information display switch for 1 second or more on driving range display, you can switch reset mode for average fuel consumption.
(A: Auto reset mode, B: Manual reset mode)
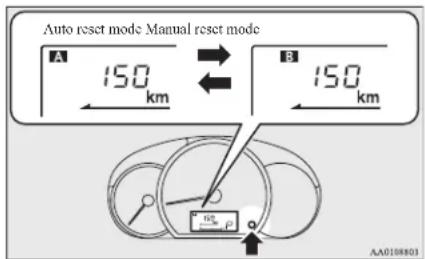
Manual reset mode
- When the average fuel consumption is being displayed, if you hold down the multi-information display switch, the average fuel consumption displayed at that time is reset.
- When the following operation is performed, the mode setting is automatically switched from manual to auto.
[Except for vehicles equipped with key-less operation system]
Turn the ignition switch from the "ACC" or "LOCK" position to the "ON" position.
[For vehicles equipped with keyless operation system]
Change the operation mode from ACC or OFF to ON.
Switching to auto occurs automatically. If switching to manual mode is done, however, the data from the last reset is displayed.
Auto reset mode
- When the average fuel consumption is being displayed, if you hold down the multi-information display switch, the average fuel consumption displayed at that time are reset.
- When the engine switch or the operation mode is in the following conditions, the average fuel consumption display is automatically reset.
[Except for vehicles equipped with key-less operation system]
The ignition switch is in the “ACC” or “LOCK” position for about 4 hours or longer.
[For vehicles equipped with keyless operation system]
The operation mode is in ACC or OFF for about 4 hours or longer.

NOTE
● The average fuel consumption display can be reset separately for the auto reset mode and for the manual reset mode.
● The memory of the auto reset mode or manual reset mode for the average fuel consumption display is erased if the battery is disconnected.
- The initial (default) setting is “Auto reset mode”.
Changing the fuel consumption display unit
The display unit for fuel consumption can be switched. The distance and amount units are also switched to match the selected fuel consumption unit.
- When you lightly press the multi-information display switch a few times, the information display switches to the average fuel consumption display.
Refer to "Information display" on page 5-03.
- Press and hold the multi-information display switch for about 5 seconds or more until buzzer sound is heard twice.
- Press and hold the multi-information display switch to switch in sequence from "km/L" → "L/100 km" → "mpg" → "km/L".
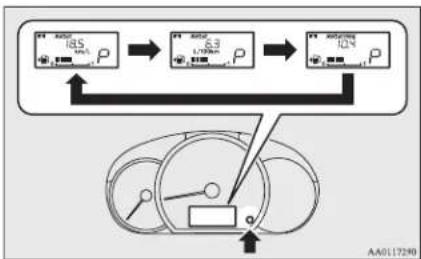
flowchart
graph TD
    A["AS"] --> B["S3"]
    B --> C["..."]
    C --> D["..."]
    D --> E["..."]
    E --> F["..."]
    F --> G["..."]
    G --> H["..."]
    H --> I["..."]
    I --> J["..."]
    J --> K["..."]
    K --> L["..."]
    L --> M["..."]
    M --> N["..."]
    N --> O["..."]
    O --> P["..."]
    P --> Q["..."]
    Q --> R["..."]
    R --> S["..."]
    S --> T["..."]
    T --> U["..."]
    U --> V["..."]
    V --> W["..."]
    W --> X["..."]
    X --> Y["..."]
    Y --> Z["..."]
    Z --> AA["..."]
    AA --> AB["..."]
    AB --> AC["..."]
    AC --> AD["..."]
    AD --> AE["..."]
    AE --> AF["..."]
    AF --> AG["..."]
    AG --> AH["..."]
    AH --> AI["..."]
    AI --> AJ["..."]
    AJ --> AK["..."]
    AK --> AL["..."]
    AL --> AM["..."]
    AM --> AN["..."]
    AN --> AO["..."]
    AO --> AP["..."]
    AP --> AQ["..."]
    AQ --> AR["..."]
    AR --> AS["..."]
    AS --> AT["..."]
    AT --> AU["..."]
    AU --> AV["..."]
    AV --> AW["..."]
    AW --> AX["..."]
    AX --> AY["..."]

NOTE
● The display units for the driving range, the average fuel consumption are switched, but the units for the indicating needle (speedometer), the odometer, the tripmeter and the service reminder will remain unchanged.

NOTE
● The memory of the unit setting is erased if the battery is disconnected, and it returns automatically to factory setting.
The distance units is also switched in the following combinations to match the selected fuel consumption unit.
| Fuel consumption Distance (driving range) |
| km/L km | |
| L/100 km km | |
| mpg mile(s) | |
Changing the temperature unit
The display unit for outside temperature can be switched.
- When you lightly press the multi-information display switch a few times, the information display switches to the outside temperature display.
Refer to "Information display" on page 5-03.
- Each time you press the multi-information display switch for about 5 seconds or more on outside temperature display, you can switch from °C to °F or from °F to °C unit of outside temperature display.

NOTE
- On vehicles with automatic air conditioning, the temperature value on the air conditioning panel is switched in conjunction with the outside temperature display unit of the multi-information display.
However, “C” or “F” are not shown on the temperature display of the air conditioner.
Indication and warning lamps
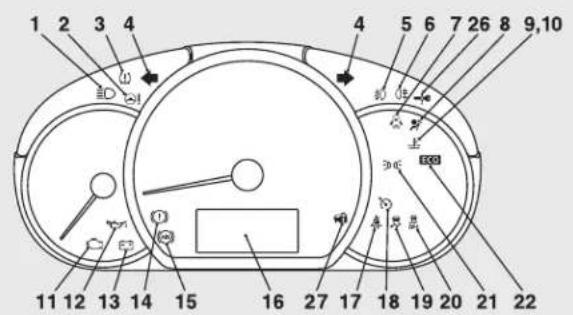
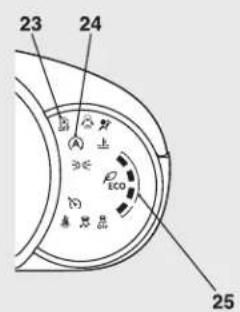
AJ1101882
1-High-beam indication lamp p. 5-12
2- Electric power steering system (EPS) warning lamp → p. 6-37
3- Tyre pressure monitoring system warning lamp* → p. 6-44
4- Turn-signal indication lamps/Hazard warning indication lamps → p. 5-12
5- Front fog lamp indication lamp* → p. 5-12
6- Rear fog lamp indication lamp
→ p. 5-12
7- Door ajar warning lamp → p. 5-15
8- Supplement Restraint System (SRS)
warning lamp → p. 4-27
9- High coolant temperature warning lamp (red) → p. 5-15
10- Low coolant temperature indication lamp (green) → p. 5-12
11- Check engine warning lamp → p. 5-14
12- Oil pressure warning lamp → p. 5-14
13- Charge warning lamp → p. 5-14
14- Brake warning lamp → p. 5-13
15- Anti-lock brake system (ABS) warning lamp → p. 6-35
16- Multi-information display → p. 5-02
17- Seat belt warning lamp → p. 4-07
18- Cruise control indication lamp ^* → p. 6-40
OA0X19E2
19- Active Stability Control (ASC) indication lamp → p. 6-38
20- Active Stability Control (ASC) OFF indication lamp → p. 6-38
21- Position lamp indication lamp ^* → p. 5-12
22- ECO indication lamp* → p. 5-12
23- Auto Stop & Go (AS&G) OFF indication lamp* → p. 6-24
24- Auto Stop & Go (AS&G) indication lamp* → p. 6-20
25- ECO drive assist* → p. 5-13
26- For details, refer to "Warning activator" on page 3-12.
(if so equipped)
Instruments and controls
27- For details, refer to "Warning activator" on page 3-12. (if so equipped)
Indication lamps
Turn-signal indication lamps/ Hazard warning indication lamps
These indication lamps blink in the following situations.
- When the turn-signal lever is moved to activate a turn-signal lamp. Refer to "Turn-signal lever" on page 5-19.
- When the hazard warning flasher switch is pressed to activate the hazard warning lamps.
Refer to "Hazard warning flasher switch" on page 5-19.
- When the hazard warning lamps automatically activate due to sudden braking while driving.
Refer to "Emergency stop signal system" on page 6-34.
High-beam indication lamp
This indication lamp illuminates when the high-beam is used.
Front fog lamp indication lamp\*
This indication lamp illuminates while the front fog lamps are on.
Rear fog lamp indication lamp
This indication lamp illuminates while the rear fog lamp is on.
Position lamp indication lamp\*

This indication lamp illuminates while the position lamps are on.
Low coolant temperature indication lamp
This indication lamp illuminates in green when the coolant temperature is low.
NOTE
- When the indication lamp goes out, this should be used as a rough indication of when the heating starts working.
ECO indication lamp\*

This indication lamp illuminates when fuel-efficient driving is achieved.
ECO drive assist\*
This function displays how fuel-efficiently you are driving under different driving conditions.
The ECO drive assist display will change as follows if you do fuel-efficient driving using the accelerator in a way well matched with the vehicle speed.
ECO drive level
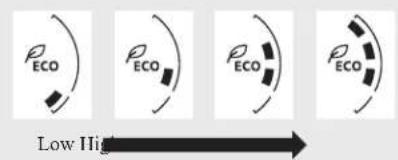
AJA113663

NOTE
- On vehicles with CVT, the ECO drive assist is displayed only when the vehicle is driving with the selector lever in the "D" (DRIVI) position.
Warning lamps
Brake warning lamp
This lamp illuminates when the ignition switch is turned to the "ON" position or the operation mode is put in ON, and goes off after a few seconds.
Always make sure that the lamp goes off before driving.
With the ignition switch or the operation mode in ON, the brake warning lamp illuminates under the following conditions:
- When the parking brake lever has been engaged.
- When the brake fluid level in the reservoir falls to a low level.
- When the brake force distribution function is not operating correctly.
With the ignition switch or the operation mode in ON, a buzzer sounds under the following condition:
● The vehicle speed exceeds 8 km/h (5 mph) with the parking brake applied.

CAUTION
- In the situations listed below, brake performance may be compromised or the vehicle may become unstable if brakes are applied

CAUTION
suddenly; consequently, avoid driving at high speeds or applying the brakes suddenly. Furthermore, the vehicle should be brought to a stop in a safe location and to have it checked.
- The brake warning lamp does not illuminate when the parking brake is applied or does not turn off when the parking brake is released.
- The ABS warning lamp and brake warning lamp illuminate at the same time. For details, refer to "ABS warning lamp" on page 6-35.
- The brake warning lamp remains illuminated during driving.
● The vehicle should be brought to a halt in the following manner when brake performance has deteriorated.
- Depress the brake pedal harder than usual. Even if the brake pedal moves down to the very end of its possible stroke, keep it pressed down hard.
- Should the brakes fail, use engine braking to reduce your speed and pull the parking brake lever.
Depress the brake pedal to operate the stop lamp to alert the vehicles behind you.
Warning lamps
Check engine warning lamp
This lamp is a part of an on-board diagnostic system which monitors the emissions, engine control system or CVT control system.
If a problem is detected in
one of these systems, this lamp illuminates or flashes.
Although your vehicle will usually be drivable and not need towing, we recommend you to have the system checked immediately.
This lamp will also illuminate when the ignition switch is turned "ON" or the operation mode is put in ON, and goes off after the engine has started. If it does not go off after the engine has started, we recommend you to have the vehicle checked.
CAUTION
● Prolonged driving with this lamp on may cause further damage to the emission control system. It could also affect fuel economy and drivability.
- If the lamp does not illuminate when the ignition switch is turned to the "ON" position or the operation mode is put in ON, we recommend you to have the system checked.
CAUTION
- If the lamp illuminates while the engine is running, avoid driving at high speeds and have the system inspected by a MITSUBISHI MOTORS Authorized Service Point immediately.
Accelerator pedal and brake pedal response may be negatively influenced under there conditions.
NOTE
- The engine electronic control module accommodating the onboard diagnostic system has various fault data (especially about the exhaust emission) stored.
This data will be erased if a battery cable is disconnected which will make a rapid diagnosis difficult. Do not disconnect a battery cable when the check engine warning lamp is ON.
Charge warning lamp
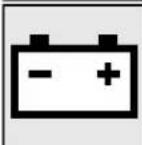
This lamp illuminates when the ignition switch is turned to the "ON" position or the operation mode is put in ON, and goes off after the engine has started.
CAUTION
- If it illuminates while the engine is running, there is a problem in the charging system. Immediately park your vehicle in a safe place and we recommend you to have it checked.
Oil pressure warning lamp
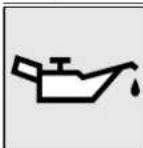
This lamp illuminates when the ignition switch is turned to the "ON" position or the operation mode is put in ON, and goes off after the engine has started. If it illuminates
while the engine is running, the oil pressure is too low.
Turn the engine off and have it inspected.
CAUTION
● This warning lamp does not indicate the amount of oil level in the engine. This must be determined by checking the oil level on the dipstick, while the engine is switched off.
- If this lamp illuminates when the engine oil level is not low, have it inspected.
- If you continue driving with low engine oil level or with this warning lamp illuminated, engine seizure may occur.
High coolant temperature warning lamp
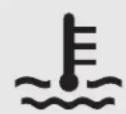
This lamp illuminates in red if the coolant temperature becomes excessively high.

CAUTION
- If the lamp illuminates during vehicle operation, it indicates that the engine is possibly overheating. Continued driving could make the engine fail. Immediately stop the vehicle in a safe place and take appropriate action. (Refer to “Engine overheating” on page 8-04.)

NOTE
● The high coolant temperature warning lamp may illuminate when the vehicle has been driven at high speeds or on hilly roads. This illuminating does not necessarily indicate a problem. It should stop if you keep the engine running for a while or continue driving the vehicle.
Door ajar warning lamp
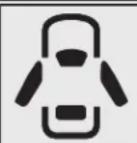
This lamp illuminates when a door or the tailgate is either open or not completely closed.
If the vehicle speed reaches approximately 8 km/h
(5 mph) with a door or the tailgate open or incompletely closed, a buzzer sounds 4 times as a warning.

CAUTION
● Before moving your vehicle, check that the warning lamp is OFF.
Combination headlamps and dipper switch
Headlamps

NOTE
● Vehicle with Bi-xenon High Intensity Discharge (HID) headlamps type, when entering a country in which vehicles are driven on the opposite side of the road to the country in which your vehicle is supplied, necessary measures have to be taken to avoid dazzling oncoming traffic. However, headlamps on this vehicle do not need any adjustment.

NOTE
- Do not leave the lamps on for a long time while the engine is stationary (not running). A run-down battery could result.
- When it rains, or when the vehicle has been washed, the inside of the lens sometimes becomes foggy, but this does not indicate a functional problem.
When the lamp is switched on, the heat will remove the fog. However, if water gathers inside the lamp, we recommend you to have it checked.
● The Bi-xenon High Intensity Discharge (HID) headlamps (if so equipped) exhibit the following characteristics.
- The light from the Bi-xenon HID head-lamps can gradually change to bluish while in use.
- Bulb life is shortened depending upon the frequency of use. If the bulb decreases in brightness, flashes or turns reddish, we recommend you to consult a MITSUBISIII MOTORS Authorized Service Point.
Combination headlamps and dipper switch
Type 1
Rotate the switch to turn on the lamps.
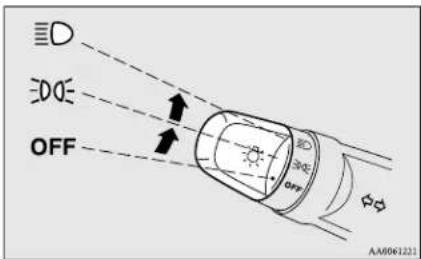
| OFF All lamps off |
| EDG | Position, tail, licence plate and instrument panel lamps on |
| ED | Headlamps and other lamps go on |
Type 2
Rotate the switch to turn on the lamps.
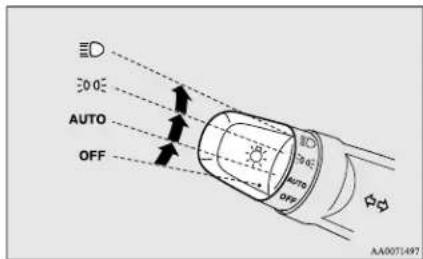
| OFF All lamps off |
| AUTO | With the ignition switch or the operation mode is in ON, head-lamps, position, tail, licence plate, and instrument panel lamps turn on and off automatically in accordance with outside light level. All lamps turn off automatically when the ignition switch is turned to “OFF” position or the operation mode is put in OFF. |
| EDGE | Position, tail, licence plate and instrument panel lamps on |
| ED | Headlamps and other lamps go on |

NOTE
● The sensitivity of the automatic on/off control can be adjusted. For further information, contact a MITSUBISHI MOTORS Authorized Service Point.
- When the headlamps are turned off by the automatic on/off control with the ignition switch in the "ON" position or the operation mode in ON, the front fog lamps (if so equipped) and rear fog lamps also go off. When the headlamps are subsequently turned back on by the automatic on/off control, the front fog lamps also come on but the rear fog lamp stays off. If you wish to turn the rear fog lamp back on, operate the switch again.
- Do not cover the sensor (A) for the automatic on/off control by affixing a sticker or label to the windscreen.
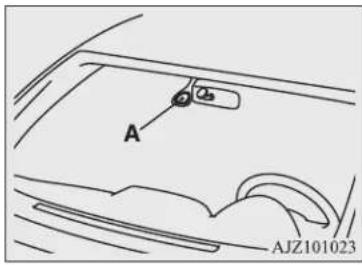

NOTE
- If the lamps do not turn on or off with the switch in the "AUTO" position, manually operate the switch and we recommend you to have your vehicle checked.
Lamps (headlamps, fog lamp, etc.) auto-cutout function
- If the following operation is performed while the lamp switch is in the “Position, the lamps will turn off automatically when the driver’s door is opened. [Except vehicles equipped with keyless operation system]
The ignition switch is turned to the “LOCK” or “ACC” position, or the key is removed from the ignition switch.
[For vehicles equipped with keyless operation system]
The operation mode is in OFF or ACC.
- If the following operation is performed while the lamp switch is in the “Position, the lamps will remain on for about 3 minutes while the driver’s door is shut and will then automatically turn off.
[Except vehicles equipped with keyless operation system]
The ignition switch is turned to the “LOCK” or “ACC” position, or the key is removed from the ignition switch.
[For vehicles equipped with keyless operation system]
The operation mode is in OFF or ACC.

NOTE
- The lamp auto-cutout will not function when the lamp switch is in the “position.
● The lamp auto-cutout function can also be disabled.
For further information, we recommend you to consult a MITSUBISHI MOTORS Authorized Service Point.
When you want to keep the lamps on:
- In the following cases, turn the lamp switch to the "OFF" position.
[Except vehicles equipped with keyless operation system]
The ignition switch is in the "LOCK" or "ACC" position.
[For vehicles equipped with keyless operation system]
The operation mode is in OFF or ACC.
- Turn on the lamps with the switch in the “”EDCE or “”ED position again, then the lamps will remain on.
Lamp monitor buzzer
If the following operation is performed, a buzzer will sound to remind the driver to turn off the lamps.
[Except for vehicles equipped with keyless operation system]
If the driver's door is opened when the key is in the "LOCK" or "ACC" position or removed from the ignition switch while the lamps are on.
[For vehicles equipped with keyless operation system]
If the driver's door is opened when the operation mode is in ACC or OFF while the lamps are on.
Headlamp levelling switch
In both cases, the buzzer will automatically stop if the auto-cutoff function is activated, the lamp switch is turned off, or the door is closed.
Daytime running lamps
The daytime running lamps comes on when the engine is running and the lamp switch is in the "OFF" or "AUTO" position and the tail lamps are off.
Dipper (High/Low beam change)
When the lamp switch is in the position, the beam changes from high to low (or low to high) each time the lever is pulled fully (1). While the high-beam is on, the high-beam indication lamp in the instrument cluster will also illuminate.
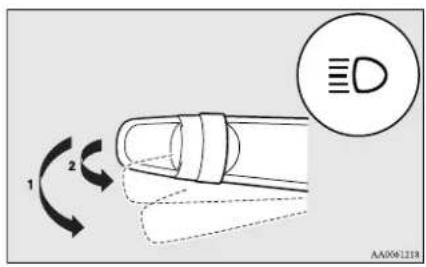
Headlamp flasher
The high-beams flash when the lever is pulled slightly (2), and will go off when it is released.
When the high-beam is on, the high-beam indication lamp in the instrument cluster will illuminate.

NOTE
● The high-beams can also flash when the lamp switch is OFF.
- If you turn the lamps off with the headlamps set to high-beam, the headlamps are automatically returned to their low-beam setting when the lamp switch is next turned to the '≡' position.
Headlamp levelling switch
The angle of the headlamp beam varies depending on the load carried by the vehicle. The headlamp levelling switch can be used to adjust the headlamp illumination distance (when the lower beam is illuminated) so that the headlamps' glare does not distract other drivers.
Set the switch according to the following table.
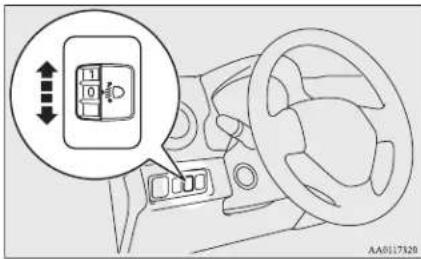

CAUTION
● Always perform adjustments before driving. Do not attempt to adjust while driving, as it could cause an accident.

NOTE
- When adjusting the beam position, first put the dial in the "0" position (the highest beam position).
| Vehicle condition Switch position |
| “0” |
 | “2” |
 | “3” |
 | “3” |
•: 1 person
: Full luggage loading
Switch position 0-
Driver only/Driver + 1 front passenger
Switch position 2-
5 passengers (including driver)
Switch position 3-
5 passengers (including driver) + Full luggage loading/Driver + Full luggage loading
Turn-signal lever
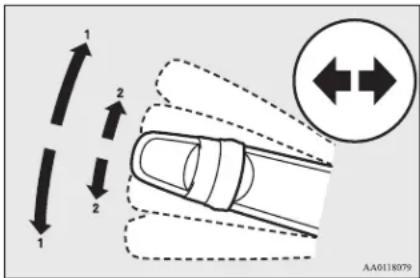
1- Turn-signals
When making a normal turn, use position (1). The lever will return automatically when cornering is completed.
2- Lane-change signals
When moving the lever to (2) slightly to change a lane, the turn-signal lamps and indication lamp in the instrument cluster will only flash while the lever is operated.
Also, when you move the lever to (2) slightly then release it, the turn-signal lamps and indication lamp in the instrument cluster will flash 3 times.

NOTE
For further information, we recommend you to consult a MITSUBISHI MOTORS Authorized Service Point.
Hazard warning flasher switch
Use the hazard warning flasher switch when the vehicle has to be parked on the road for any emergency.
The hazard warning flashers can always be operated, regardless of the ignition switch position or the operation mode.
Push the switch to turn on the hazard warning flashers, all turn-signal lamps flash continuously.
Fog lamp switch
To turn them off, push the switch again.
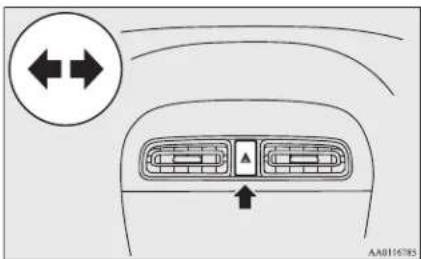

NOTE
- While the hazard warning lamps are blinking due to having manually pushed the switch the emergency stop signal system does not operate.
Refer to “Emergency stop signal system” on page 6-34.
Fog lamp switch
Front fog lamp switch\*
The front fog lamps can be operated while the headlamps or tail lamps are on. Turn the knob in the "ON" direction to turn on the front fog lamps. An indication lamp in the instrument cluster will also come on. Turn the knob in the "OFF" direction to turn off the front fog lamps. The knob will automatically return to its original position when you release it.
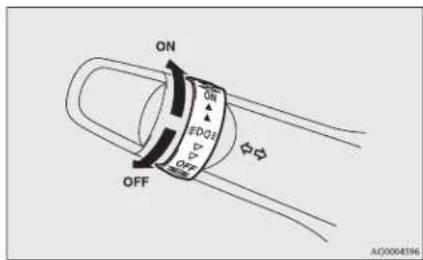

NOTE
- The front fog lamps are automatically turned off when the headlamps or tail lamps are turned off. To turn the front fog lamps on again, turn the knob in the "ON" direction after turning on the headlamps or tail lamps.

NOTE
- Do not use fog lamps except in conditions of fog, otherwise excessive lamp glare may temporarily blind oncoming vehicle drivers.
Rear fog lamp switch
The rear fog lamp can be operated when the headlamps or front fog lamps (if so equipped) turn on.
An indication lamp in the instrument cluster comes on when the rear fog lamp is turned on.
[Vehicle without front fog lamps]
Turn the knob once in the "ON" direction to turn on the rear fog lamp. To turn the rear fog lamp off, turn the knob once in the "OFF" direction. The knob will automatically return to its original position when you release it.
[Vehicle with front fog lamps]
Turn the knob once in the "ON" direction to turn on the front fog lamps. Turn the knob once more in the "ON" direction to turn on the rear fog lamp. To turn the rear fog lamp off, turn the knob once in the "OFF" direction. Turn the knob once more in the "OFF" direction to turn off the front fog lamps. The knob will automatically return to its original position when you release it.
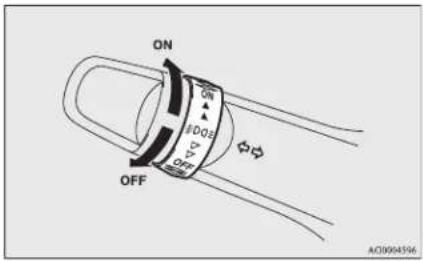

NOTE
● The rear fog lamp is automatically turned off when the headlamps or front fog lamps (if so equipped) are turned off.
● To turn the rear fog lamp on again, turn the knob once in the "ON" direction after turning on the headlamps. (Vehicle without front fog lamps)

NOTE
● To turn the rear fog lamp on again, turn the knob twice in the "ON" direction after turning on the headlamps. (Vehicle with front fog lamps)
Wiper and washer switch
The windscreen wipers, rear window wiper and washer can be operated with the ignition switch or the operation mode in ON or ACC. If the blades are frozen to the windscreen or rear window, do not operate the wipers until the ice has melted and the blades are freed, otherwise the wiper motor may be damaged.

CAUTION
- If the washer is used in cold weather, the washer fluid sprayed against the glass may freeze, which may hinder visibility. Warm the glass with the defroster or rear window demister before using the washer.
Windscreen wipers
Except for vehicles equipped with rain sensor
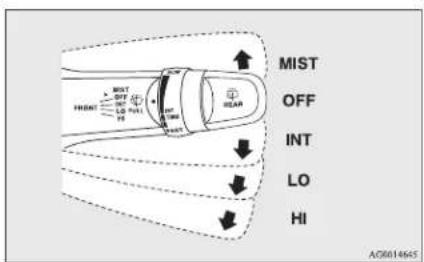
MIST- Misting function
The wipers will operate once.
OFF-Off
INT- Intermittent (Speed sensitive)
LO-Slow
HI-Fast
Wiper and washer switch
To adjust intermittent intervals
With the lever in the "INT" (speed-sensitive) position, the intermittent intervals can be adjusted by turning the knob (A).
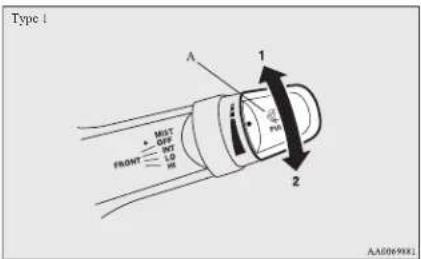
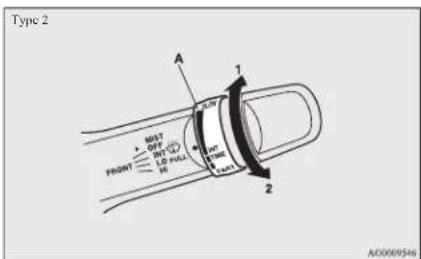
1 - Fast
2- Slow
NOTE
● The speed-sensitive-operation function of the windscreen wipers can be deactivated. For further information, we recommend you to consult a MITSUBISHI MOTORS Authorized Service Point.
Misting function
Move the lever in the direction of the arrow and release, to operate the wipers once.
Use this function when you are driving in mist or drizzle.
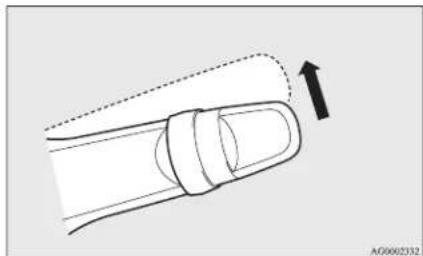
natural_image
Diagram of a finger with a curved arrow indicating upward motion (no text or symbols)
Vehicles with rain sensor
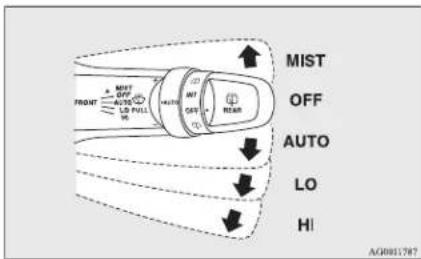
MIST- Misting function
The wipers will operate once.
OFF-Off
AUTO-Auto-wiper control
Rain sensor
The wipers will automatically operate depending on the degree of wetness on the windscreen.
LO-Slow
HI- Fast
Rain sensor
Can only be used when the ignition switch or the operation mode is in ON.
If the lever is put in the "AUTO" position, the rain sensor (A) will detect the extent of rain (or snow, other moisture, dust, etc.) and the wipers will operate automatically.
Keep the lever in the "OFF" position if the windscreen is dirty and the weather is dry. Wiper operation under these conditions can scratch the windscreen and damage the wipers.
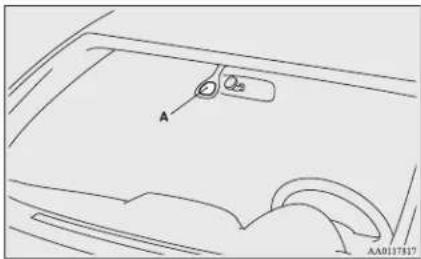
CAUTION
- With the ignition switch or the operation mode in ON and lever in the "AUTO" position, the wipers may automatically operate in the situations described below.
If your hands get trapped, you could suffer injuries or the wipers could malfunction. Be sure to turn the ignition switch to the "LOCK" position or put the operation mode in OFF, or move lever to the "OFF" position to deactivate the rain sensor.
- When cleaning the outside surface of the windscreen, if you touch on top of the rain sensor.
- When cleaning the outside surface of the windscreen, if you wipe with a cloth on top of the rain sensor.
CAUTION
- When using an automatic car wash.
- A physical shock is applied to the wind-screen.
• A physical shock is applied to the rain sensor.
NOTE
● To protect the rubber parts of the wipers, this operation of the wipers does not take place when the vehicle is stationary and the ambient temperature is about 0 °C or lower.
- Do not cover the sensor by affixing a sticker or label to the windscreen. Also, do not put any water-repellent coating on the windscreen. The rain sensor would not be able to detect the extent of rain, and the wipers might stop working normally.
- In the following cases, the rain sensor may be malfunctioning.
For further information, we recommend you to consult a MITSUBISHI MOTORS Authorized Service Point.
- When the wipers operate at a constant interval despite changes in the extent of rain.
- When the wipers do not operate even though it is raining.
NOTE
● The wipers may automatically operate when things such as insects or foreign objects are affixed to the windscreen on top of the rain sensor or when the windscreen is frozen. Objects affixed to the windscreen will stop the wipers when the wipers cannot remove them. To operate the wipers again, move the lever in the "LO" or "HI" position.
Also, the wipers may operate automatically due to strong direct sunlight or electromagnetic wave. To stop the wipers, place the lever in the "OFF" position.
- Contact a MITSUBISHI MOTORS Authorized Service Point when replacing the windscreen or reinforcing the glass around the sensor.
To adjust the sensitivity of the rain sensor
With the lever in the "AUTO" (rain sensor) position, it is possible to adjust the sensitivity of the rain sensor by turning the knob (B).
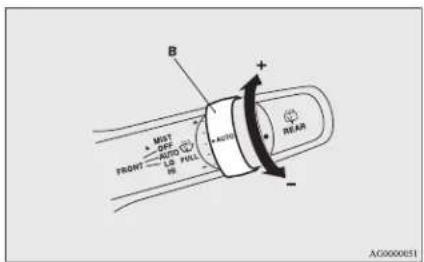
Wiper and washer switch
“+”- Higher sensitivity to rain
“-”- Lower sensitivity to rain

NOTE
- It is possible to activate the following functions.
• Automatic operation (rain droplet sensitive) can be changed to intermittent operation (vehicle-speed sensitive).
• Automatic operation (rain droplet sensitive) can be changed to intermittent operation (except vehicle-speed sensitive).
For further information, we recommend you to consult a MITSUBISHI MOTORS Authorized Service Point.
Misting function
Move the lever in the direction of the arrow and release, to operate the wipers once.
Use this function when you are driving in mist or drizzle.
The wipers will operate once if the lever is raised to the "MIST" position and released when the ignition switch or the operation mode is in the "ON" or "ACC" position. The wipers will continue to operate while the lever is held in the "MIST" position.
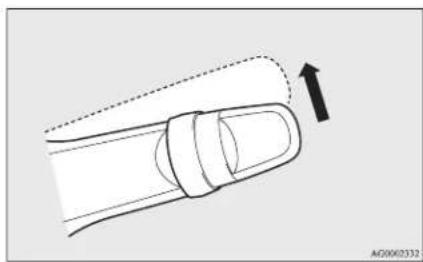
natural_image
Diagram of a finger with a curved arrow indicating direction (no text or symbols)
The wipers will operate once if the lever is moved to the "AUTO" position and the knob (C) is turned in the "+" direction when the ignition switch is in the "ON" position or the operation mode is in ON.
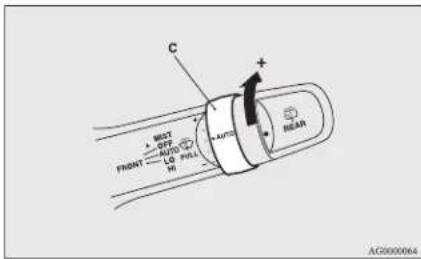
Windscreen washer
The washer fluid will be sprayed onto the windscreen by pulling the lever towards you. The wipers operate automatically several times while the washer fluid is being sprayed.
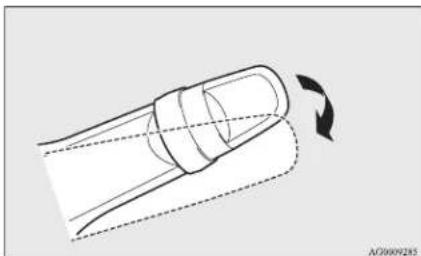
natural_image
Diagram of a mechanical component with a curved arrow indicating rotation (no text or symbols)

CAUTION
- If the washer is used in cold weather, the washer fluid sprayed against the glass may freeze resulting in poor visibility. Heat the glass with the defroster or demister before using the washer.
Rear window wiper and washer
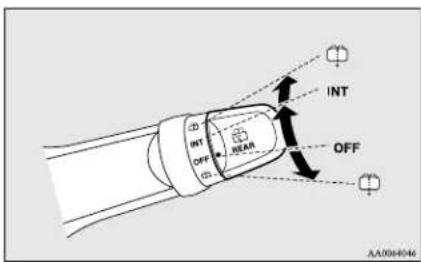
INT - The wiper operates continuously for several seconds then operates intermittently at intervals of about every 8 seconds
OFF - Off

- The washer fluid will be sprayed onto the rear window when the knob is turned fully in either direction.
The wipers operate automatically several times while the washer fluid is being sprayed.

NOTE
- On vehicles with CVT, to ensure a clear rearward view, the wiper perform several continuous operations when the revers gear is engaged and the switch is in the "INT" position.
Following this continuous operation, the wiper will automatically switch to intermittent operation.
- It is possible to modify functions as follows:
- Adjustment of the interval for intermittent operation.
- Changing intermittent wiper operation to continuous wiper operation.
For further information, we recommend you to consult a MITSUBISHI MOTORS Authorized Service Point.
Precautions to observe when using wipers and washers
- If the moving wipers become blocked partway through a sweep by ice or other deposits on the glass, the wipers may temporarily stop operating to prevent the motor from overheating. In this case, park the vehicle in a safe place, turn the ignition switch to the "LOCK" position or put the operation mode in OFF, and then remove the ice or other deposits. The wipers will start operating again after the wiper motor cools down, so check that the wipers operate before using them.
- Do not use the wipers when the glass is dry.
They may scratch the glass surface and the blades wear out prematurely.
● Before using the wipers in cold weather, check that the wiper blades are not frozen onto the glass. The motor may burn out if the wipers are used with the blades frozen onto the glass.
● Avoid using the washer continuously for more than 20 seconds. Do not operate the washer when the fluid reservoir is empty.
Otherwise, the motor may burn out.
Rear window demister switch
- Periodically check the level of washer fluid in the reservoir and refill if required.
During cold weather, add a recommended washer solution that will not freeze in the washer reservoir. Failure to do so could result in loss of washer function and frost damage to the system components.
Rear window demister switch
The rear window demister switch can be operated when the engine is running.
Push the switch to turn on the rear window demister. It will be turned off automatically in about 20 minutes. To turn off the demister within about 20 minutes, push the switch again.
The indication lamp (A) will illuminate while the demister is on.
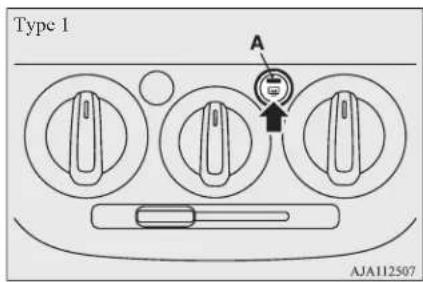
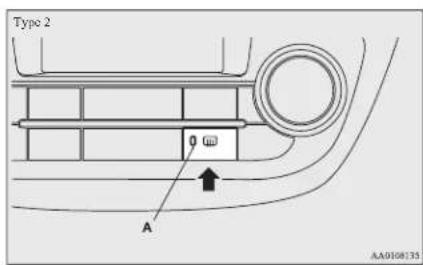
NOTE
- On vehicles equipped with heated mirrors, when the rear window demister switch is pressed, the outside rear-view mirrors are defogged or defrosted. Refer to "Heated mirror" on page 6-10.
NOTE
● The demister switch is not to melt snow but to clear mist. Remove snow before use of the demister switch.
● To avoid unnecessary discharge of the battery, do not use the rear window demister during starting of the engine or when the engine is not running. Turn the demister off immediately after the window is clear.
- When cleaning the inside of the rear window, use a soft cloth and wipe gently along the heater wires, being careful not to damage the wires.
- Do not allow objects to touch the inside of the rear window glass, damaged or broken wires may result.
Horn switch
Press the steering wheel on or around the "→" mark.
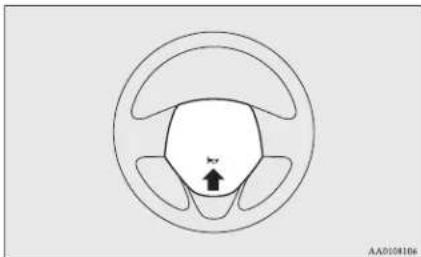
natural_image
Diagram of a vehicle steering wheel with an arrow indicating clockwise motion (no text or symbols)
Starting and driving
Economical driving....6-02
Driving, alcohol and drugs....6-02
Safe driving techniques....6-03
Running-in recommendations....6-03
Parking brake....6-04
Parking 6-05
Steering wheel height adjustment.... 6-06
Inside rear-view mirror.... 6-06
Outside rear-view mirrors.... 6-07
Ignition switch* 6-10
Engine switch* 6-11
Steering wheel lock....6-13
Starting and stopping the engine....6-15
Auto Stop & Go (AS&G) system* 6-20
Manual transmission* 6-25
Automatic transmission INVECS-III CVT (Intelligent & Innovative Vehicle Electronic Control System III)*......6-26
Braking....6-31
Hill start assist....6-32
Brake assist system.... 6-34
Emergency stop signal system.... 6-34
Anti-lock brake system (ABS)....6-35
Electric power steering system (EPS)....6-37
Active stability control (ASC).... 6-37
Cruise control*......6-39
Tyre pressure monitoring system (TPMS)* 6-43
Cargo loads....6-47
Trailer towing (1200 models)....6-48
Economical driving
Economical driving
For economical driving, there are some technical requirements that have to be met. The prerequisite for low fuel consumption is a properly adjusted engine. In order to achieve longer life of the vehicle and the most economical operation, we recommend you to have the vehicle checked at regular intervals in accordance with the service standards. Fuel economy and generation of exhaust gas and noise are highly influenced by personal driving habits as well as the particular operating conditions. The following points should be observed in order to minimize wear of brakes, tyres and engine as well as to reduce environmental pollution.
Accelerating and decelerating
Drive according to the traffic conditions and avoid sudden starts, sudden acceleration and sudden braking, as they will increase fuel consumption.
Shifting
Shift only at an appropriate speed and engine speed. Always use the highest shift position possible.
City traffic
Frequent starting and stopping increases the average fuel consumption. Use roads with smooth traffic flow whenever possible. When driving on congested roads, avoid use of a low shift position at high engine speeds.
Idling
The vehicle consumes fuel even during idling. Avoid extended idling whenever possible.
Speed
At higher vehicle speed, more fuel is consumed. Avoid driving at full speed. Even a slight release of the accelerator pedal will save a significant amount of fuel.
Tyre inflation pressure
Check the tyre inflation pressures at regular intervals. Low tyre inflation pressure increases road resistance and fuel consumption. In addition, low tyre pressures adversely affect tyre wear and driving stability.
Load
Do not drive with unnecessary articles in the luggage compartment. Especially during city driving where frequent starting and stopping is necessary, the increased weight of the vehicle will greatly affect fuel consumption. Also avoid driving with unnecessary luggage, etc., on the roof; the increased air resistance will increase fuel consumption.
Cold engine starting
Starting of a cold engine consumes more fuel.
Unnecessary fuel consumption is also caused by keeping a hot engine running. After the engine is started, commence driving as soon as possible.
Air conditioning
The use of the air conditioning will increase the fuel consumption.
Driving, alcohol and drugs
Driving after drinking alcohol is one of the most frequent causes of accidents.
Your driving ability can be seriously impaired even with blood alcohol levels far below the legal minimum. If you have been drinking, do not drive. Ride with a designated non-drinking driver, call a cab or a friend, or use public transportation. Drinking coffee or taking a cold shower will not make you sober.
Similarly, prescription and nonprescription drugs affect your alertness, perception and reaction time. Consult with your doctor or pharmacist before driving while under the influence of any of these medications.
WARNING
● NEVER DRINK AND DRIVE.
Your perceptions are less accurate, your reflexes are slower and your judgment is impaired.
Safe driving techniques
Driving safety and protection against injury cannot be fully ensured. However, we recommend that you pay extra attention to the following:
Seat belts
Before starting the vehicle, make sure that you and your passengers have fastened your seat belts.
Floor mats
WARNING
- Keep floor mats clear of the pedals by correctly laying floor mats that are suitable for the vehicle.
To prevent the floor mats from slipping out of position, securely retain them using the hook etc.
Note that laying a floor mat over a pedal or laying one floor mat on top of another can obstruct pedal operation and lead to a serious accident.
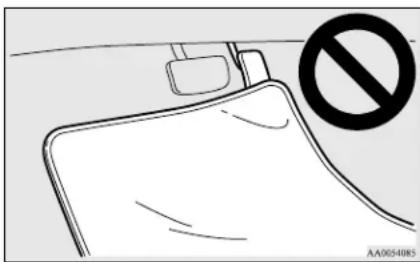
natural_image
Diagram of a vehicle door with a no-smoking symbol (no text or labels present)
Carrying children in the vehicle
● Never leave your vehicle unattended with the key and children inside the vehicle. Children may play with the driving controls and this could lead to an accident.
● Make sure that infants and small children are properly restrained in accordance with the laws and regulations, and for maximum protection in case of an accident.
● Prevent children from playing in the luggage compartment. It is quite dangerous to allow them to play there while the vehicle is moving.
Loading luggage
When loading luggage, be careful not to load above the height of seats. This is dangerous not only because rearward vision will be obstructed, but also the luggage may be projected into the passenger compartment under hard braking.
Running-in recommendations
During the running-in period for the first 1,000 km (620 miles), it is advisable to drive your new vehicle using the following precautions as a guideline to aid long life as well as future economy and performance.
- Do not race the engine at high speeds.
- Avoid rapid starting, accelerating, braking and prolonged high-speed running.
Parking brake
- Keep to the running-in speed limit shown below.
Please note that the legal speed limits displayed must be adhered to.
- Do not exceed loading limits.
● Refrain from towing a trailer.
Vehicles with M/T
| Shift point Speed limit |
| 1^st gear | 35 km/h (22 mph) |
| 2^nd gear | 65 km/h (40 mph) |
| 3^rd gear | 95 km/h (59 mph) |
| 4^th gear | 120 km/h (74 mph) |
| 5^th gear | 145 km/h (90 mph) |
Vehicles with CVT
| Shift point Speed limit |
| “D” (DRIVE) 100 | km/h (62 mph) |
Parking brake
To park the vehicle, first bring it to a complete stop, fully apply the parking brake sufficiently to hold the vehicle.
To apply
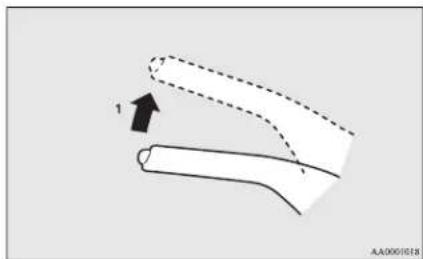
natural_image
Diagram of a curved pipe or duct with an arrow indicating direction, no text or symbols present
1- Firmly depress and hold the brake pedal, then pull the lever up without pushing the button at the end of hand grip.
CAUTION
- When you intend to apply the parking brake, firmly press the brake pedal to bring the vehicle to a complete stop before pulling the parking brake lever. Pulling the parking brake lever with the vehicle moving could make the rear wheels lock up, thereby making the vehicle unstable. It could also make the parking brake malfunction.
NOTE
- Apply sufficient force to the parking brake lever to hold the vehicle stationary after the foot brake is released.
NOTE
- If the parking brake does not hold the vehicle stationary after the foot brake is released, have your vehicle checked immediately.
To release
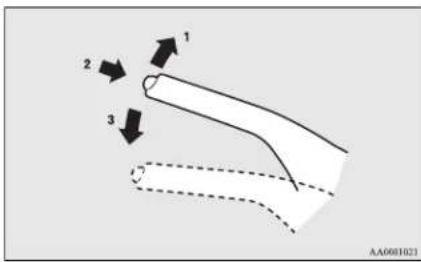
1- Firmly depress and hold the brake pedal, then pull the lever up slightly.
2- Push the button at the end of hand grip.
3- Lower the lever fully.

CAUTION
● Before driving, be sure that the parking brake is fully released and brake warning lamp is off.
If you drive without the parking brake fully released, the warning lamp will illuminate and a buzzer sounds when the vehicle speed exceeds 8 km/h (5 mph).
If a vehicle is driven without releasing the parking brake, the brake will be overheated, resulting in ineffective braking and possible brake failure.
- If the brake warning lamp does not extinguish when the parking brake is fully released, the brake system may be abnormal. Have your vehicle checked immediately. For details, refer to "Brake warning lamp" on page 5-13.
Parking
To park the vehicle, fully engage the parking brake, and then move the gearshift lever to 1 ^st or “R” (Reverse) position for vehicles with M/T, or set the selector lever to “P” (PARK) position for vehicles with CVT.
Parking on a hill
To prevent the vehicle from rolling, follow these procedures:
Parking on a downhill slope
Turn the front wheels towards the kerb and move the vehicle forward until the kerb side wheel gently touches the kerb.
Apply the parking brake and place the gear-shift lever into the "R" (Reverse) position (M/T) or the selector lever into the "P" (PARK) position (CVT).
If necessary, apply chocks to wheels.
Parking on an uphill slope
Turn the front wheels away from the kerb and move the vehicle back until the kerb side wheel gently touches the kerb.
Apply the parking brake and place the gear-shift lever into the I^1 position (M/T) or the selector lever into the “P” (PARK) position (CVT).
If necessary, apply chocks to wheels.

NOTE
- If your vehicle is equipped with CVT, be sure to apply the parking brake before moving the selector lever to the "P" (PARK) position. If you move the selector lever to the "P" (PARK) position before applying the parking brake, it may be difficult to disengage the selector lever from the "P" (PARK) position when next you drive the vehicle, requiring application of a strong force to the selector lever to move from the "P" (PARK) position.
Parking with the engine run- ning
Never leave the engine running while you take a short sleep/rest. Also, never leave the engine running in a closed or poorly ventilated place.

WARNING
● Leaving the engine running risks injury or death from accidentally moving the gearshift lever (M/T) or the selector lever (CVT) or the accumulation of toxic exhaust fumes on the passenger compartment.
Steering wheel height adjustment
Where you park
WARNING
- Do not park your vehicle in areas where combustible materials such as dry grass or leaves can come in contact with a hot exhaust, since a fire could occur.
Do not keep the steering wheel fully turned for a long time
More effort could be required to turn the steering wheel.
Refer to "Electric power steering system (EPS)" on page 6-37.
When leaving the vehicle
Always carry the key and lock all doors and the tailgate when leaving the vehicle unattended.
Always try to park your vehicle in a well lit area.
Steering wheel height adjustment
- Release the lever while holding the steering wheel up.
-
Adjust the steering wheel to the desired position.
-
Securely lock the steering wheel by pulling the lever fully upward.
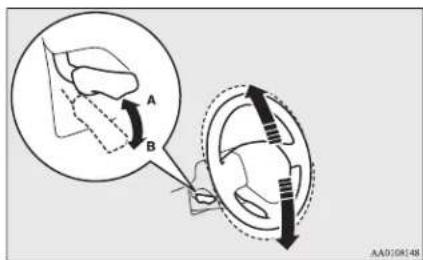
A-Locked B-Release
WARNING
● Do not attempt to adjust the steering wheel while you are driving the vehicle.
CAUTION
- When releasing the lever, hold the steering wheel by hand to prevent it falling to the lowest position.
Inside rear-view mirror
Adjust the rear-view mirror only after making any seat adjustments so you have a clear view to the rear of the vehicle.
WARNING
- Do not attempt to adjust the rear-view mirror while driving. This can be dangerous.
Always adjust the mirror before driving.
Adjust the rear-view mirror to maximize the view through the rear window.
To adjust the vertical mirror position
It is possible to move the mirror up and down to adjust its position.
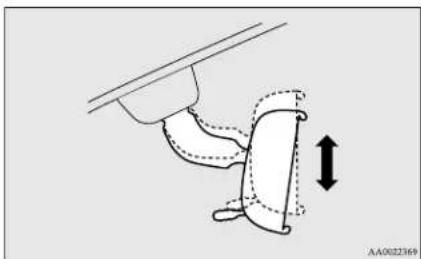
natural_image
Diagram of a hand holding a curved object with an arrow indicating vertical motion (no text or symbols)
To adjust the mirror position
It is possible to move the mirror up/down and left/right to adjust its position.
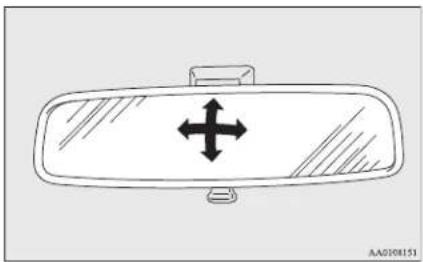
natural_image
Simple line drawing of a car rearview mirror with bidirectional arrow indicator (no text or symbols)
To reduce the glare
The lever (A) at the bottom of the mirror can be used to adjust the mirror to reduce the glare from the headlamps of vehicles behind you during night driving.
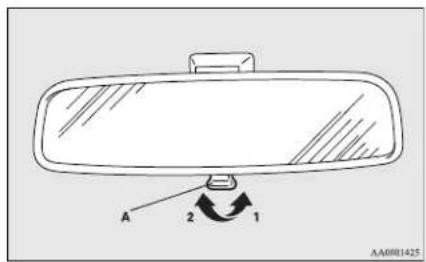
1- Normal
2- Anti-glare
Outside rear-view mirrors
WARNING
- Do not attempt to adjust the rear-view mirrors while driving. This can be dangerous.
Always adjust the mirrors before driving.
WARNING
- Your vehicle is equipped with convex type mirrors. Please take into consideration. Objects you see in the mirror will look smaller and farther away compared to a normal flat mirror.
Do not use this mirror to estimate distance of following vehicles when changing lanes.
To adjust the mirror position
The outside rear-view mirrors can be adjusted when the ignition switch or the operation mode is in ON or ACC.
Outside rear-view mirrors
- Place the lever (A) to the same side as the mirror whose adjustment is desired.
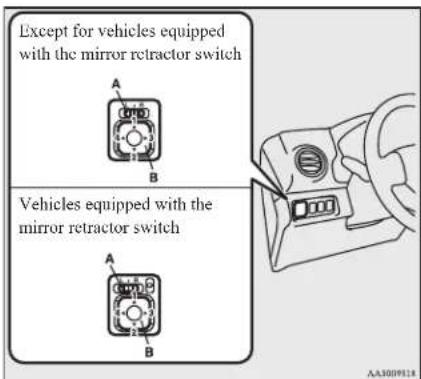
L- Left outside mirror adjustment
R- Right outside mirror adjustment
- Press the switch (B) to the left, right, up or down to adjust the mirror position.
1-Up
2-Down
3- Right
4- Left
- Return the lever (A) back to the middle position ( ).
Retracting and extending the outside mirrors
The outside mirror can be folded in towards the side window to prevent damage when parking in narrow areas.

CAUTION
- Do not drive the vehicle with the mirror folded in.
The lack of rearward visibility normally provided by the mirror could lead to an accident.
[Except for vehicles equipped with the mirror retractor switch]
Push the mirror towards the back of the vehicle with your hand to retract it in.
When extending the mirror, pull it out towards the front of the vehicle until it clicks to lock in place.
![MITSUBISHI Mirage (2019) - [Except for vehicles equipped with the mirror retractor switch] - 1](/content/2026/05/810599/images/1b74b39bc16fdb2a187e707da5a4e9b2d4b4519df6cc62c72cf7f9b2a980374f.jpg)
natural_image
Diagram of a 3D object with directional arrows indicating movement or force, no text or symbols present
[For vehicles equipped with the mirror retractor switch]
Retracting and extending the mirrors using the mirror retractor switch
With the ignition switch or the operation mode in ON or ACC, push the mirror retractor switch to retract the mirrors.
Push it again to extend the mirrors to their original positions.
After turning the ignition switch to the "LOCK" position or putting the operation mode in OFF, it is possible to retract and extend the mirrors using the mirror retractor switch for about 30 seconds.
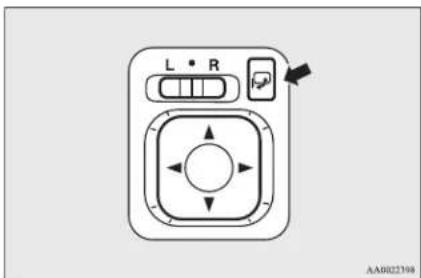

CAUTION
- It is possible to retract and extend the mirrors by hand. After retracting a mirror using the mirror retractor switch, however, you should extend it by using the switch again, not by hand. If you extended the mirror by hand after retracting it using the switch, it would not properly lock in position. As a result, it could move because of the wind or vibration while you are driving, taking away your rearward visibility.

NOTE
- Be careful not to get your hands trapped while a mirror is moving.
- If you move a mirror by hand or it moves after hitting a person or object, you may not be able to return it to its original position using the mirror retractor switch. If this happens push the mirror retractor switch to place the mirror in its retracted position and then push the switch again to return the mirror to its original position.
- When freezing has occurred and mirrors fail to operate as intended, please refrain from repeated pushing of the retractor switch as this action can result in burn-out of the mirror motor circuits.
Retracting and extending the mirrors without using the mirror retractor switch
[Except vehicles equipped with keyless operation system]
The mirrors automatically retract or extend when the doors are locked or unlocked using the remote control switches of the keyless entry system.
Refer to "Keyless entry system" on page 3-04.
[ Vehicles equipped with keyless operation system]
The mirrors automatically retract or extend when the doors are locked or unlocked using the remote control switches or the keyless operation function of the keyless operation system.
Refer to “Keyless entry system” on page 3-04.
Refer to “Keyless operation system: To operate using the keyless operation function” on page 3-10.

NOTE
● Functions can be modified as stated below. Please consult a MITSUBISHI MOTORS Authorized Service Point.

NOTE
- Automatically extend when the driver's door is closed, and then the following operation is performed.
[Except vehicles equipped with keyless operation system]
Turn the ignition switch to the "ON" of "ACC" position.
[ Vehicles equipped with keyless operation system]
Put the operation mode in ON or ACC.
- Automatically retract when the ignition switch is turned to the “LOCK” position or the operation mode is put in OFF, and the driver’s door is then opened.
• Automatically extend when the vehicle speed reaches 30 km/h (19 mph).
- Deactivate the automatic extension function.
- The outside rear-view mirrors can be retracted or extended by the following operations, even if changing to any of the above.
After pressing the “LOCK” switch on the key to lock the doors and tailgate, if the “LOCK” switch is pressed again twice in a row within about 30 seconds, the outside rear-view mirrors will retract.
After pressing the "UNLOCK" switch on the key to unlock the doors and tailgate, if the "UNLOCK" switch is pressed again twice in a row within about 30 seconds, the outside rear-view mirrors will extend again.
Ignition switch*
Heated mirror\*
To demist or defrost the outside rear-view mirrors, press the rear window demister switch.
The indication lamp (A) will illuminate while the demister is on.
The heater will be turned off automatically in about 20 minutes.
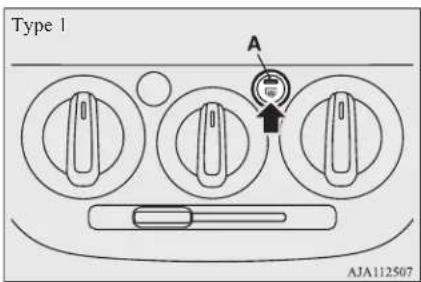
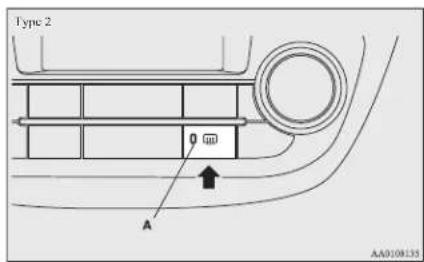
Starting and driving
Ignition switch\*
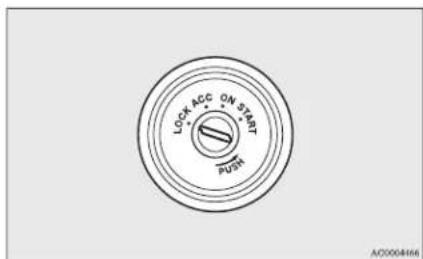
LOCK
The engine is stopped and the steering wheel locked. The key can only be inserted and removed in this position.
ACC
The engine is stopped, but the audio system and other electric devices can be operated.
ON
All the vehicle's electrical devices can be operated.
START
The starter motor operates. After the engine has started, release the key and it will automatically return to the "ON" position.
OA0X19E2

NOTE
- If your vehicle is equipped with an electronic immobilizer. To start the engine, the II code which the transponder inside the key sends must match the one registered in the immobilizer computer.
(Refer to "Electronic immobilizer (Anti-theft starting system)" on page 3-03.)
To remove the key
For vehicles equipped with a M/T, when removing the key, push the key in at the "ACC" position and keep it depressed until it is turned to the "LOCK" position and remove it.
For vehicles equipped with CVT when removing the key, first set the selector lever to the "P" (PARK) position, and push the key in at the "ACC" position and keep it depressed until it is turned to the "LOCK" position, and remove it.
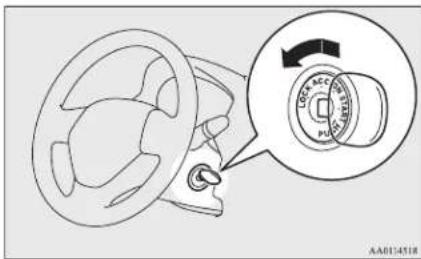

CAUTION
- Do not remove the ignition key from the ignition switch while driving. The steering wheel will be locked, causing loss of control.
- If the engine is stopped while driving, the brake servomechanism will cease to function and braking efficiency will deteriorate. Also, the power steering system will not function and it will require greater manual effort to operate the steering.
- Do not leave the key in the "ON" position for a long time when the engine is not running, doing so will cause the battery to be discharged.
- Do not turn the key to the "START" position when the engine is running, doing so could damage the starter motor.
Engine switch\*
In order to prevent theft, the engine will not start unless a preregistered keyless operation key is used. (Engine immobilizer function)
If you are carrying the keyless operation key, you can start the engine.
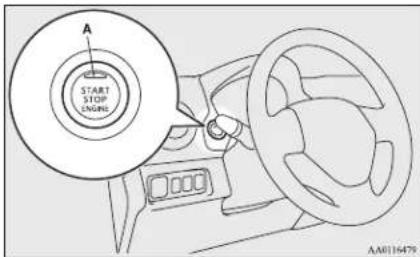

CAUTION
● The indication lamp (A) will flash orange when there is a problem or malfunction in the keyless operation system. Never drive if the indication lamp on the engine switch is flashing orange. Immediately contact a MITSUBISHI MOTORS Authorized Service Point.
- If the engine switch operation is not smooth and feels like it is sticking, do not operate the switch. Immediately contact a MITSUBISHI MOTORS Authorized Service Point.

NOTE
- When operating the engine switch, press the switch all the way in. If the switch is not fully pressed, the engine may not start or the operation mode may not change. If the engine switch is pressed correctly, there is no need to hold the engine switch down.
- When the battery in the keyless operation key has worn out, or when taking the keyless operation key out of the vehicle, a warning lamp will blink for 5 seconds.
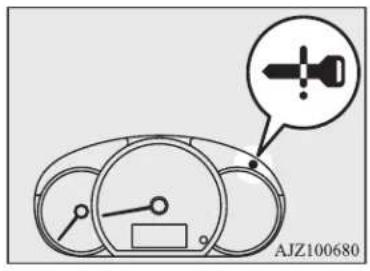
Operation mode of the engine switch and its function
OFF
The indication lamp on the engine switch turns off.
The operation mode cannot be put in OFF when the selector lever is in any position other than the "P" (PARK) position (CVT).
Engine switch*
ACC
Electrical devices such as the audio and accessory socket can be operated.
The indication lamp on the engine switch illuminates orange.
ON
All vehicle's electrical devices can be operated.
The indication lamp on the engine switch illuminates green. The indication lamp turns off when the engine is running.

NOTE
- Your vehicle is equipped with an electronic immobilizer.
To start the engine, the ID code transmitted by the transponder inside the key must match the code registered in the immobilizer computer. Refer to "Electronic immobilizer (Anti-theft starting system)" on page 3-03.
Changing the operation mode
If you press the engine switch without depressing the brake pedal (CVT) or the clutch pedal (M/T), you can change the operation mode in the order of OFF, ACC, ON, OFF.
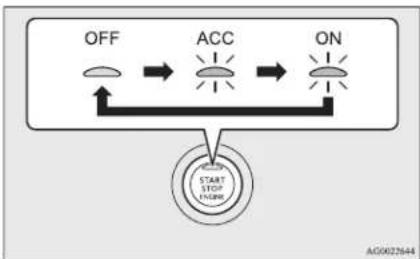
flowchart
graph TD
    A["OFF"] --> B["ACC"]
    B --> C["ON"]
    D["START STOP FRAME"] --> B

CAUTION
- When the engine is not running, put the operation mode in OFF. Leaving the operation mode in ON or ACC for a long time when the engine is not running may cause the battery to be discharged, making it impossible to start the engine, lock and unlock the steering wheel.

CAUTION
- When the battery is disconnected, the current operation mode is memorized. After reconnecting the battery, the memorized mode is selected automatically. Before disconnecting the battery for repair or replacement, make sure to put the operation mode in OFF. Be careful if you are not sure which operation mode the vehicle is in when the battery is run down.
- The operation mode cannot be changed from OFF to ACC or ON if the keyless operation key is not detected to be in the vehicle. Refer to "Keyless operation system: Operating range for starting the engine and changing the operation mode" on page 3-09.
- When there is the keyless operation key in the vehicle and the operation mode isn't change, the keyless operation key may have worn out.

NOTE
- If the operation mode cannot be changed to OFF, perform the following procedure.
1 Move the selector lever to the "P" . (PARK) position, and then change the operation mode to OFF. (For vehicles with CVT)

NOTE
2 One of the other causes could be low battery voltage. If this occurs, the keyless entry system, keyless operation function and steering lock will also not operate. Contact a MITSUBISHI MOTORS Authorized Service Point.
ACC power auto-cutout function
After about 30 minutes have elapsed with the operation mode in ACC, the function automatically cuts out the power for the audio system and other electric devices that can be operated with that position. (only when the driver's door has been closed and the selector lever is in the "P" (PARK) position)
When you open the driver's door or you operate the engine switch again, the power is supplied again.

NOTE
- When the ACC power supply automatically stops, the steering wheel cannot lock and you cannot lock and unlock the doors by the keyless entry key and keyless operation key.
- It is possible to modify functions as follows:
- The time until the power cuts out can be changed to approximately 60 minutes.

NOTE
- The ACC power auto-cutout function can be deactivated.
For details, we recommend you to consult a MITSUBISHI MOTORS Authorized Service Point.
Operation mode OFF reminder system
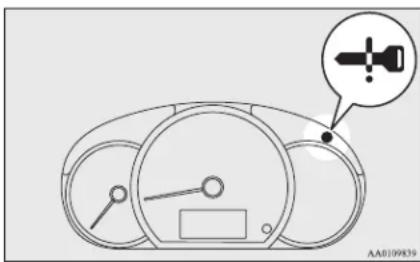
natural_image
Diagram of a car dashboard with steering wheel and indicator lights (no text or symbols)
When the operation mode is in any mode other than OFF, if you try to lock the doors and tailgate by pressing the driver's door lock/unlock switch, or the tailgate lock/unlock switch, a warning lamp will blink and the outer buzzer will sounds for approximately 3 seconds and you cannot lock the doors and tailgate.
Operation mode ON reminder system
If the driver's door is opened with the engine stopped and the operation mode in any mode other than OFF, the operation mode ON reminder inner buzzer sounds intermittently to remind you to put the operation mode in OFF.
Steering wheel lock
[Except vehicles equipped with keyless operation system]
To lock
Remove the key at the "LOCK" position. Turn the steering wheel until it is locked.
Steering wheel lock
To unlock
Turn the key to the "ACC" position while moving the steering wheel slightly right and left.
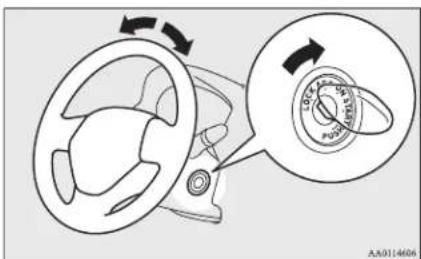
CAUTION
- Remove the key when leaving the vehicle. In some countries, it is prohibited to leave the key in the vehicle when parked.
[For vehicles equipped with keyless operation system]
To lock
After pressing the engine switch and putting the operation mode in OFF, when driver's door is opened, the steering wheel is locked.
NOTE
- When the following operation is performed with the operation mode in OFF and the selector lever is in the "P" (PARK) position (CVT), the steering wheel is locked.
- Open or close the driver's door.
- Close all the doors and the tailgate.
- Open one of the doors or the tailgate when all the doors and the tailgate are closed.
- Lock all the doors and the tailgate with the keyless entry system or the keyless operation system function.
- When the driver's door is opened while the steering wheel does not lock, a warning indicator will appear and the buzzer sounds to alert that the steering wheel is unlocked. Warning indicator
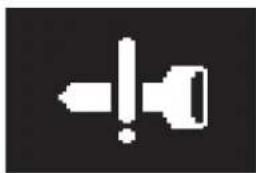
natural_image
Simple white icon of a pencil and megaphone on black background (no text or symbols)
To unlock
The following methods can be used to unlock the steering wheel.
● Put the operation mode in ACC.
- Start the engine.
CAUTION
- If the engine is stopped while driving, do not open a door or press the LOCK switch on the remote control switch until the vehicle stops in a safe place. This could cause the steering wheel to lock, making it impossible to operate the vehicle.
- Carry the key with you when leaving the vehicle.
If your vehicle needs to be towed, perform the following operation to unlock the steering wheel.
- On vehicles with M/T, put the operation mode in ACC or ON.
- On vehicles with CVT, put the operation mode in ON.
NOTE
- When the steering wheel does not unlock, the warning lamp will blink and the inner buzzer will sound. Press the engine switch again while moving the steering wheel slightly right and left.
- When the steering wheel lock is abnormal the warning lamp illuminates. Put the operation mode in OFF and then press the lock switch of the keyless operation key. And then press the engine switch, If the warning lamp illuminates again, contact a

NOTE
MITSUBISHI MOTORS Authorized Service Point.
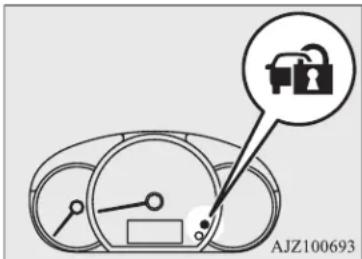
- If there is a fault in the steering wheel lock, the warning lamp illuminates and the inner buzzer sounds. Immediately stop the vehicle in a safe place and contact a MITSUBISHI MOTORS Authorized Service Point.
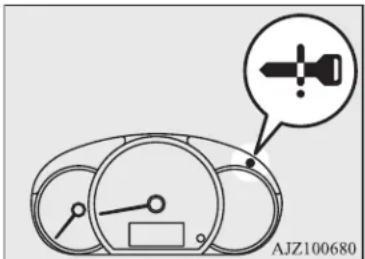
Starting and stopping the engine
Tips for starting
[Except vehicles equipped with keyless operation system]
Do not operate the starter motor continuously longer than 10 seconds; doing so could run down the battery. If the engine does not start, turn the ignition switch back to "LOCK", wait a few seconds, and then try again.
Trying repeatedly with the starter motor still turning will damage the starter mechanism.
![MITSUBISHI Mirage (2019) - [Except vehicles equipped with keyless operation system] - 1](/content/2026/05/810599/images/2ec8acb4ce8bb250455890791603ce08876ee8d2a3c2304de7fe79bf9d32f229.jpg)
WARNING
● Never run the engine in a closed or poorly ventilated area any longer than is needed to move your vehicle in or out of the area. Carbon monoxide gases are odourless and can be fatal.

CAUTION
● Never attempt to start the engine by pushing or pulling the vehicle.
- Do not run the engine at high revolutions or drive the vehicle at high speed until the engine has had a chance to warm up.

CAUTION
- Release the ignition key as soon as the engine starts to avoid damaging the starter motor.
[For vehicles equipped with keyless operation system]
● The operation mode can be in any mode to start the engine.
● The starter motor will be turning for up to approximately 15 seconds if the engine switch is released at once. Pressing the engine switch again while the starter motor is still turning will stop the starter motor. The starter motor will be turning for up to approximately 30 seconds while the engine switch is pressed.
If the engine does not start, wait for a while and then attempt to start the engine again. Trying repeatedly with the starter motor still turning will damage the starter mechanism.
![MITSUBISHI Mirage (2019) - [For vehicles equipped with keyless operation system] - 1](/content/2026/05/810599/images/88447dad817d53bd1aede3aa973bc7ec9aceb32836057a06ae061e43894d9ef0.jpg)
WARNING
● Never run the engine in a closed or poorly ventilated area any longer than is needed to move your vehicle in or out of the area. Carbon monoxide gases are odourless and can be fatal.
Starting and stopping the engine

CAUTION
● Never attempt to start the engine by pushing or pulling the vehicle.
- Do not run the engine at high revolutions or drive the vehicle at high speed until the engine has had a chance to warm up.
Starting the engine
[Except vehicles equipped with keyless operation system]
The starting procedure is as follows:
- Insert the ignition key and fasten the seat belt.
- Make sure the parking brake is applied.
- Depress and hold the brake pedal.
- Fully depress the clutch pedal (M/T).
![MITSUBISHI Mirage (2019) - [Except vehicles equipped with keyless operation system] - 1](/content/2026/05/810599/images/ccf9f2ec7ce605ec0cc17f8acfcc12b8e5a971f5b5e58d75c2ed3c815bd232e2.jpg)
NOTE
-
On vehicles equipped with M/T, the starte will not operate unless the clutch pedal is fully depressed (Clutch interlock).
-
On vehicles with M/T, place the gear-shift lever in the "N" (Neutral) position. On vehicles with CVT, make sure the selector lever is in the "P" (PARK) position.
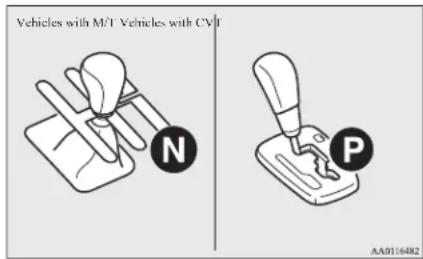
- After turning the ignition key to the "ON" position, make certain that all warning lamps are functioning properly before starting the engine.
- Turn the ignition key to the "START" position and release it when the engine starts.

NOTE
● Minor noises may be heard on engine start-up.
These will disappear as the engine warms up.
When it is difficult to start the engine
After several attempts, you may experience that the engine still does not start.
- Make sure that all electric devices, such as lamps, air conditioning blower and rear window demister, are turned off.
-
While depressing the brake pedal on vehicles equipped with CVT or the clutch pedal on the vehicles equipped with manual transmission, press the accelerator pedal halfway and hold it there, then crank the engine. Release the accelerator pedal, immediately after the engine starts.
-
If the engine still will not start, the engine could be flooded with too much petrol. While depressing the brake pedal on vehicles equipped with CVT or the clutch pedal on the vehicles equipped with manual transmission, push the accelerator pedal all the way down and hold it there, then crank the engine for 5 to 6 seconds. Return the ignition switch to the "LOCK" position and release the accelerator pedal. Wait a few seconds, and then crank the engine again for 5 to 6 seconds while depressing the brake pedal or the clutch pedal, but do not push the accelerator pedal. Release the ignition switch if the engine starts. If the engine fails to start, repeat these procedures. If the engine still will not start, we recommend you to have the vehicle checked.
Startability of CVT vehicle with ambient temperature of -20 °C or lower
When the ambient temperature is -20 ^ or lower, it may not be possible to start from a standstill even with the selector lever in the “D” (DRIVE) or “R” (REVERSE) position.
This phenomenon occurs because the transmission has not warmed up sufficiently; it does not indicate a problem. If this occurs, place the selector lever in the "P" (PARK) position and let the engine idle for at least 10 minutes.
The transmission will warm up, and you will be able to start normally.
Do not leave the vehicle during warm-up operation.
[For vehicles equipped with keyless operation system]
The starting procedure is as follows:
- Fasten the seat belt.
- Make sure the parking brake is applied.
- Press and hold the brake pedal down firmly with your right foot.
![MITSUBISHI Mirage (2019) - [For vehicles equipped with keyless operation system] - 1](/content/2026/05/810599/images/59086db6125324593b3c682021629868f144dc54783f5c6ff38d560a13b000f2.jpg)
NOTE
● After the engine has not started for a while, the brake pedal effort needed to start the engine may become greater.
If this occurs, depress the brake pedal more firmly than usual.
- Fully depress and hold the clutch pedal (M/T).

NOTE
-
On vehicles equipped with M/T, the starte will not operate unless the clutch pedal is fully depressed (Clutch interlock).
-
On vehicles with M/T, place the gear-shift lever in the "N" (Neutral) position. On vehicles with CVT, make sure the selector lever is in the "P" (PARK) position.
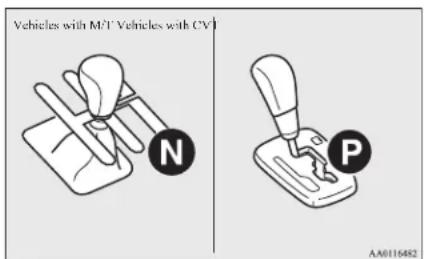
-
Press the engine switch.
-
Make sure that all warning lamps are functioning properly.

NOTE
● Minor noises may be heard on engine start-up. These will disappear as the engine warms up.
When it is difficult to start the engine
After several attempts, you may experience that the engine still does not start.
- Make sure that all electric devices, such as lamps, air conditioning blower and rear window demister, are turned off.
-
While depressing the brake pedal on vehicles equipped with CVT or the clutch pedal on the vehicles equipped with manual transmission, press the accelerator pedal halfway and hold it there, then crank the engine. Release the accelerator pedal, immediately after the engine starts.
-
If the engine still will not start, the engine could be flooded with too much petrol. While depressing the brake pedal on vehicles equipped with CVT or the clutch pedal on the vehicles equipped with manual transmission, push the accelerator pedal all the way down and hold it there, then press the engine switch to crank the engine. If the engine does not start after 5 to 6 seconds, push the engine switch to stop cranking the engine, and release the accelerator pedal. Put the operation mode in OFF. Wait a few seconds, and then press the engine switch to crank the engine again while depressing the brake pedal or the clutch pedal, but do not push the accelerator pedal. If the engine fails to start, repeat these procedures. If the engine still will not start, we recommend you to have the vehicle checked.
Startability of CVT vehicle with ambient temperature of -20 °C or lower
When the ambient temperature is -20 °C or lower, it may not be possible to start from a standstill even with the selector lever in the "D" (DRIVE) or "R" (REVERSE) position.
This phenomenon occurs because the transmission has not warmed up sufficiently; it does not indicate a problem. If this occurs, place the selector lever in the "P" (PARK) position and let the engine idle for at least 10 minutes.
The transmission will warm up, and you will be able to start normally.
Do not leave the vehicle during warm-up operation.
Stopping the engine
[Except for vehicles equipped with keyless operation system]
- Bring the vehicle to a complete stop.
- Firmly apply the parking brake while depressing the brake pedal.
- For vehicles equipped with M/T, turn the ignition switch to the "LOCK" position to stop the engine, and then move the gearshift lever to the 1^st (on a uphill) or "R" (Reverse) (on a downhill) position. For vehicles equipped with CVT, place the selector lever in the "P" (PARK) position, and stop the engine.
[For vehicles equipped with keyless operation system]
![MITSUBISHI Mirage (2019) - [Except for vehicles equipped with keyless operation system] - 1](/content/2026/05/810599/images/58206db94db1e5a7bd6396d142267938a4079be3fa05968cc4358019a45ced7a.jpg)
WARNING
- Do not operate the engine switch while driving except in an emergency. If the engine is stopped while driving, the brake servomechanism will cease to function and braking efficiency will deteriorate. Also, the power steering system will not function and it will require greater manual effort to operate the steering. This could result in a serious accident.

NOTE
- If you have to bring the engine to an emergency stop while driving, press and hold the engine switch for 3 seconds or more, or press it quickly 3 times or more. The engine will stop and the operation mode will go to ACC.
- Do not stop the engine with the selector lever in any position other than the "P" (PARK) position (CVT). If the engine is stopped with the selector lever in any position other than the "P" (Park) position, the operation mode will go to ACC rather than OFF.
Put the operation mode in OFF after placing the selector lever in the "P" (Park) position.

NOTE
- On vehicles with CVT, while the engine is stopped automatically by Auto Stop & Go (AS&G) system, if the selector lever is moved to "P" (Park) position quickly with the brake pedal firmly depressed, the engine does not restart automatically even if you release the brake pedal. If this occurs the indicator will blink to inform the driver.
If you want to put the operation mode in OFF, press the engine switch without depressing the brake pedal.
- Stop the vehicle.
- Fully engage the parking brake while depressing the brake pedal.
- On vehicles with M/T, press the engine switch to stop the engine, move the gear-shift lever to the 1^st (on a uphill) or “R” (Reverse) (on a downhill) position.
On vehicles with CVT, move the selector lever to the “P” (PARK) position, press the engine switch to stop the engine.
If the keyless operation key is not operating properly
Insert the keyless operation key into the key slot. Starting the engine and changing the operation mode should now be possible.
Remove the keyless operation key from the key slot after starting the engine or changing the operation mode.
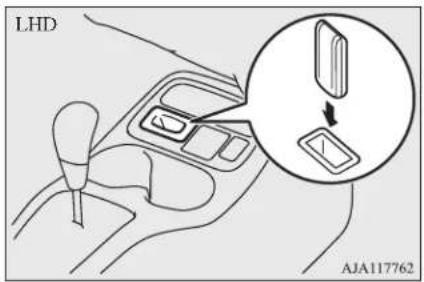
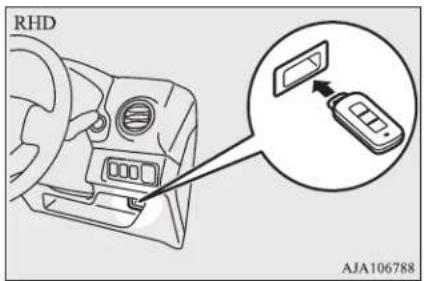

NOTE
- Do not insert into the key slot anything other than the keyless operation key. This could cause damage or a malfunction.
Auto Stop & Go (AS&G) system*

NOTE
- Remove the object or additional key from the keyless operation key before inserting the key into the key slot. The vehicle may not be able to receive the registered ID code from the registered key. Therefore, the engine may not start and the operation mode may not change.
● The keyless operation key is fixed in the key slot when inserted in the illustrated direction. Simply pull out the key to remove it from the key slot.
Keyless operation key reminder
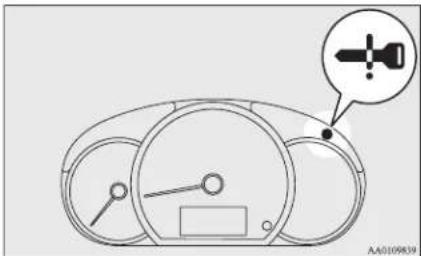
natural_image
Diagram of a car dashboard with steering wheel and indicator lights (no text or symbols)
If the operation mode is in OFF and the driver's door is opened with the keyless operation key in the key slot, the warning lamp will blink and the outer buzzer sounds for approximately 3 seconds and the inner buzzer sounds for approximately 1 minute to remind you to remove the key.
Auto Stop & Go (AS&G) system\*
The Auto Stop & Go (AS&G) system automatically stops and restarts the engine without operating the ignition switch or engine switch when the vehicle is stopped, such as at a traffic light or in a traffic jam, to reduce exhaust gases, increase fuel efficiency.

CAUTION
- If the vehicle will be stopped for a long time or if you will leave the vehicle unattended, stop the engine.

NOTE
● The accumulated time the engine has been stopped by Auto Stop & Go (AS&G) system is displayed in the multi information display. Refer to “Auto Stop & Go (AS&G) monitor” on page 5-05.

NOTE
- If the Auto Stop & Go (AS&G) system does not operate or it operates less frequently, the battery capacity may have decreased. Have your vehicle inspected by a MITSUBISHI MOTORS Authorized Service Point.
Automatically stopping the engine
The Auto Stop & Go (AS&G) system is automatically activated when the ignition switch is turned to the "ON" position or the operation mode is put in ON.
You can deactivate the system by pressing the "Auto Stop & Go (AS&G) OFF" switch.
Refer to "To deactivate" on page 6-24.
When the Auto Stop & Go (AS&G) system will operate, the Ⓧ indication lamp will turn on to inform the driver.
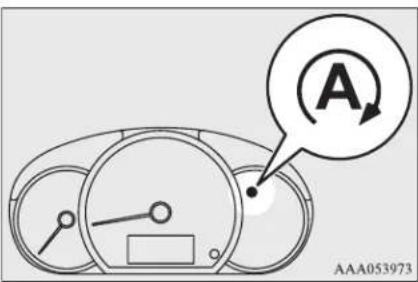
[For vehicles with M/T]
-
Stop the vehicle.
-
While depressing the brake pedal, fully depress the clutch pedal and place the gearshift lever in the "N" (Neutral) position.
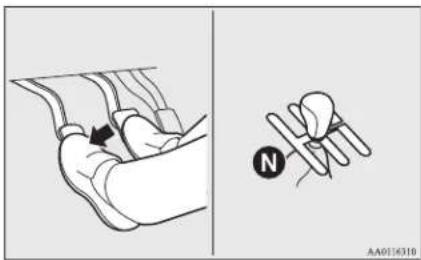
- Release the clutch pedal. The engine will stop automatically.
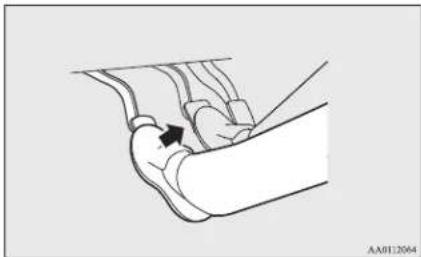
natural_image
Illustration of a hand holding a small object with a black arrow indicating rotation (no text or symbols)
-
Stop the vehicle.
-
Depressing the brake pedal. The engine will stop automatically.
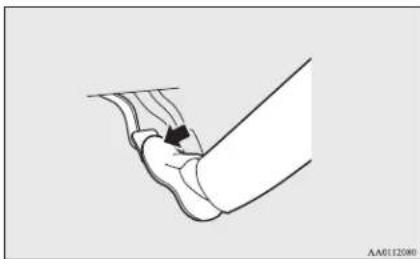
natural_image
Illustration of a foot and ankle joint with a black arrow indicating a specific point (no text or symbols present)

NOTE
- When the engine is automatically stopped, changes will occur in the driving operations. Pay close attention to the following.
- The brake booster becomes inoperative and the pedal effort will increase.
If the vehicle is moving, press down the brake pedal harder than usual.
- The electric power steering system (EPS) becomes inoperative and it will become harder to turn the steering wheel.

CAUTION
- When the engine is automatically stopped, do not attempt to exit the vehicle.
Because the engine restarts automatically when the driver's seat belt is unfastened or the driver's door is opened, an unexpected accident might occur when the vehicle starts moving.
- Observe the following precautions when the engine is stopped automatically. Otherwise, an unexpected accident might occur when the engine restarts automatically.
- Do not depress the accelerator pedal to race the engine while the vehicle is stopped (regardless of whether the engine is running or stopped).
- On vehicles with M/T, do not move the gearshift lever to a position other than the "N" (Neutral) position.
If the gearshift lever is moved to a position other than the "N" (Neutral) position, the Indication lamp blinks and the buzzer sounds.
If the gearshift lever is returned to the "N" (Neutral) position, the Indication lamp stops blinking and the buzzer stops sounding. The engine will not restart if the gearshift lever is in a position other than the "N" (Neutral) position.
[For vehicles with CVT]

NOTE
- In the following cases, the indication lamp will blink to inform the driver and the engine will not stop automatically:
- Driver's seat belt is not fastened.
- Driver's door is open.
- Bonnet is open.
- In the following cases, the Ⓐ indication lamp will turn off and the engine will not stop automatically even if the vehicle is stopped:
• After the engine starts, the vehicle speed has not exceeded approximately 5 km/h (3 mph).
• After the engine start, approximately 30 seconds or more have not elapsed.
• After the engine restarts automatically and the vehicle stops again within 10 seconds.
• Engine coolant temperature is low.
- Ambient temperature is low.
- When using the heater, vehicle interior temperature is not warm enough
- Air conditioning is operating and passenger compartment has not sufficiently cooled.
- When using the air conditioner at the demister position
- When the air conditioner is operated in the AUTO mode where the temperature control is set to max. hot or max. cool (for vehicles with automatic air conditioning).

NOTE
- Electric power consumption is high, such as when the rear window demister or other electrical components are operating of the blower speed is set to a high setting.
- Battery voltage or battery performance is low.
- Check engine warning lamp is illuminated or the indication lamp is blinking.
- The selector lever is in another position than in the "D" (Drive) position (CVT).
- ASC operation indicator and ASC OFF indicator is turned on (CVT)
• The ABS warning lamp is turned on.
- The selector lever position indicator is blinking (CVT).
- In the following cases, the engine will no stop automatically even if (A) the indication lamp is turned on:
- Push the accelerator pedal.
- Brake booster vacuum pressure is low.
- Operate the steering wheel.
- Brake pedal is not sufficiently depressed (CVT).
- Parking on steep hill (CVT).
• Parking brake operates (CVT).
- On vehicles with M/T, do not rest your foot on the clutch pedal while driving because this will cause detection of clutch pedal switch malfunction and blinking of the indication lamp, and Auto Stop & Go (AS&G) system will not operate.

NOTE
- If the Auto Stop & Go (AS&G) system operates while the air conditioner is operating, both the engine and the air conditioning compressor will stop. Therefore, only the blower will operate, the windows may start to fog up. If this occurs, press the demister switch to restart the engine.
Refer to "Demisting of the windscreen and door windows: For quick demisting" on pages 7-06, 7-13.
- If the windows become fogged up each time the engine is stopped, we recommend you to deactivate the Auto Stop & Go (AS&G) system by pressing the "Auto Stop & Go(AS&G) OFF" switch. Refer to "To deactivate" on page 6-24.
- If the air conditioner is operating, set the temperature control higher to lengthen the time that the engine is stopped automatically.
Automatically restarting the engine
On vehicles with M/T, depress the clutch pedal while the gearshift lever is in the "N" (Neutral) position. The indication lamp turns off and the engine restarts automatically.
On vehicles with CVT, Release the brake pedal. The Ⓐ indication lamp turns off and the engine restart automatically.

NOTE
- On vehicles with M/T, do not move the gear-shift lever to a position other than the “N” (Neutral) position or do not release the clutch pedal while the engine is restarting automatically. The starter motor will stop and the engine will not restart automatically.
- If the engine does not restart automatically or if the engine stalls, the charge warning lamp and check engine warning lamp will illuminate.
If this occurs,
[On vehicles with M/T]
The engine will not restart even if the clutch pedal is depressed again. While depressing the brake pedal, fully depress the clutch pedal and turn the ignition switch to the "START" position or press the engine switch to start the engine.
[On vehicles with CVT]
The engine will not restart even if the brake pedal is released again. Also, the indicator blinks, and the buzzer sounds.
While depressing the brake pedal, move the selector lever to the "P" (PARK) or "N" (NEUTRAL) position and turn the ignition switch to the "START" position or press the engine switch to start the engine. After the engine is started, the buzzer stops.
But the indicator keeps blinking until turning the ignition switch to the "LOCK" position or putting the operation mode in OFF.

NOTE
For details, refer to "Starting and stopping the engine" on page 6-15.
● The vehicles equipped with CVT have a function to prevent the unexpected start of the vehicle due to creeping, etc., by temporarily keeping the braking force applied when the engine restarts automatically.
This function is deactivated if the selector lever is set into "N" (NEUTRAL) position. While the function is activated, you might hear operation noise from under the vehicle or feel a shock from the brake pedal.
This indicates that the system is operating normally. It does not indicate a malfunction.

CAUTION
- In the following cases, the engine will restart automatically even if the engine was stopped by the Auto Stop & Go (AS&G) system. Pay attention, otherwise an unexpected accident might occur when the engine restarts.
- Vehicle speed is 3 km/h (2 mph) or higher when coasting down a slope.
- Brake booster vacuum pressure is low because the brake pedal is depressed repeatedly or depressed harder than usual.
• Engine coolant temperature is low.
- When the air conditioning is operated by pressing the air conditioning switch.
- When the preset temperature of the air conditioning is changed significantly.

CAUTION
- When the air conditioner is operated in AUTO mode where the temperature control is set to the max. hot or the max. cool. (for vehicles with automatic airconditioning)
- When the air conditioner is ON, the passenger compartment temperature rises and the air conditioning compressor operates to lower the temperature.
- When the air conditioner is changed to the demister position
- Electric power consumption is high, such as when the rear window demister or other electrical components are operating or the blower speed is set to a high setting.
- Push the accelerator pedal (CVT).
- Battery voltage or battery performance is low.
- Operate the steering wheel.
• After the engine stop, 3 minute elapse (CVT).
- Move the selector lever to the "R" (REVERSE) position (CVT).
- Move the selector lever from the “N” (NEUTRAL) to “D” (DRIVE) position (CVT).
- Driver's seat belt is unfastened.
- Driver's door is opened.

NOTE
- In the following cases, the engine will no restart automatically.
Auto Stop & Go (AS&G) system*

NOTE
- Bonnet is open.
- On vehicles with M/T, when the engine stopped automatically, the "Auto Stop & Go (AS&G) OFF" switch has to be pressed to deactivate the "Auto Stop & Go (AS&G) OFF" system.
- When the engine restarts automatically, the audio volume may temporarily be experienced. This does not indicate a malfunction.
● While the engine is stopped automatically, the air volume change of the air conditioner may temporarily be experienced. This does not indicate a malfunction.
- On vehicles with CVT, while the engine has stopped automatically, if the selector lever is moved to the "P" (PARK) position quickly with the brake pedal firmly depressed, the engine does not restart automatically even if you release the brake pedal. If this occurs the ④ indicator will blink to inform the driver.
If you want to restart the engine, depress the brake pedal again.
If you want to put the operation mode in OFF, press the engine switch without depressing the brake pedal. (Vehicles equipped with the keyless operation system)
To deactivate
The Auto Stop & Go (AS&G) system is automatically activated when the ignition switch is turned to the "ON" position or the operation mode put in ON. You can deactivate the system by pressing the "Auto Stop & Go (AS&G) OFF" switch.
When the Auto Stop & Go (AS&G) system is deactivated, the indicator will be turned on.
To reactivate the Auto Stop & Go (AS&G) system, press the "Auto Stop & Go (AS&G) OFF" switch; the indicator will turn off.
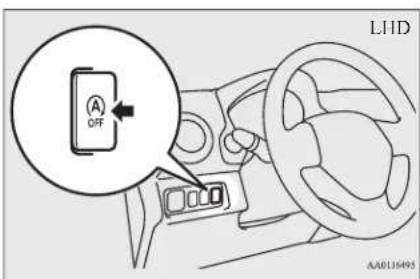
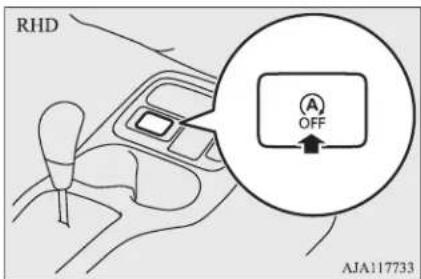
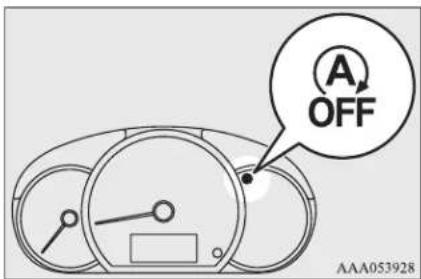

NOTE
● This indicator will also turn on for a few seconds when the ignition switch is turned to the "ON" position or when the operation mode is put in ON.
If the indication lamp blinks while driving
If the Indication lamp blinks, the Auto Stop & Go (AS&G) system is malfunctioning and will not operate.
We recommend you to consult a
MITSUBISHI MOTORS Authorized Service
Point.
Manual transmission\*
The shift pattern is shown on the gearshift lever knob. Press the clutch pedal all the way down while shifting gears. To start off, ensure to depress the clutch pedal all the way down and shift slowly into F or "R" (Reverse) position.
Then operate the gearshift lever slowly. Afterwards gradually release the clutch pedal while depressing the accelerator pedal.
CAUTION
- Do not put the gearshift lever into the reverse position while the vehicle is moving forward. Doing so could damage the transmission.
- Do not rest your foot on the clutch pedal while driving. Doing so could cause rapid wear to the clutch.
- Do not coast in the "N" (Neutral) position.
CAUTION
- Do not use the gearshift lever as a handrest, because this can result in premature wear of the transmission shift forks.
NOTE
● During cold weather, shifting may be difficult until the transmission lubricant has warmed up. This is normal and not harmful to the transmission.
- If it is hard to shift into 1^st , depress the clutch pedal again; the shift will then be easier to make.
- To shift into the "R" (Reverse) position from 5^th gear, move the gearshift lever to the "N" (Neutral) position, and then move it to the "R" (Reverse) position.
● To avoid grinding noises when shifting into the "R" (Reverse) position, wait approximately 3 seconds with depressing the clutch pedal after the vehicle is stopped.
Changing gears
Always take care to change the gear with the vehicle speed matched to the engine speed. Proper shifting will improve fuel economy and prolong engine life.
Avoid shifting down at high speed, as this may cause excessive engine speed and damage the engine.
NOTE
- The gearshift indicator shows recommended gearshift points for fuel-efficient driving. It shows a “↑ when an upshift is recommended, and it shows a “↓ when a downshift is recommended.
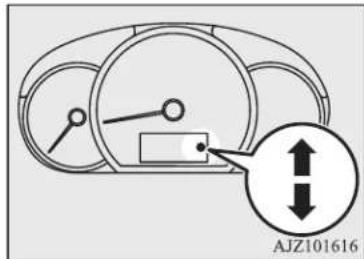
Possible driving speed
Avoid shifting down at high speed, as this may cause excessive engine speed and damage the engine.
| Shift point Speed limit |
| 1^st gear | 50 km/h (30 mph) |
| 2^nd gear | 95 km/h (59 mph) |
| 3^rd gear | 140 km/h (90 mph) |
| 4^th gear | 180 km/h (112 mph) |
Automatic transmission INVECS-III CVT (Intelligent & Innovative Vehicle Electronic Control System III)*
Use 5 ^th gear whenever vehicle speed allows, for maximum fuel economy.
Automatic transmission INVECS-III CVT (Intelligent & Innovative Vehicle Electronic Control System III)\*
The CVT will automatically and continuously change its gear ratio depending on road and driving conditions. This helps achieve smooth driving and excellent fuel efficiency.
Selector lever operation
The CVT selects an optimum gear ratio automatically, depending on the speed of the vehicle and the position of the accelerator pedal.
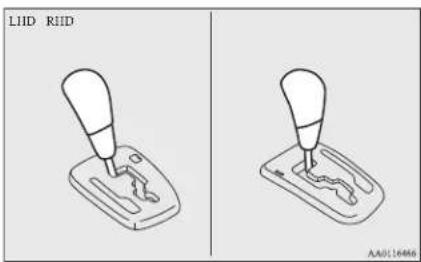
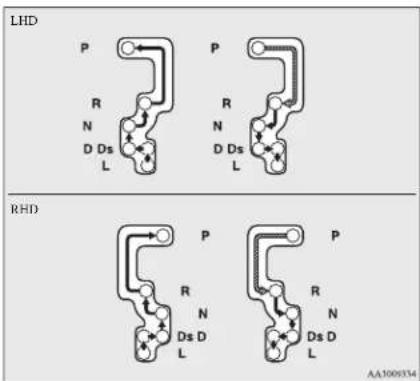
chemical
Molecular diagrams of LHD and RHD protein structures showing P, R, N, D, and L domains with labeled residues
| While depressing the brake pedal move the selector lever through the gate. |
| Move the selector lever through the gate. |
WARNING
● Always depress the brake pedal when shifting the selector lever into the other position from the "P" (PARK) or "N" (NEUTRAL) position.
Never put your foot on the accelerator pedal while shifting the selector lever from the "P" (PARK) or "N" (NEUTRAL) position.
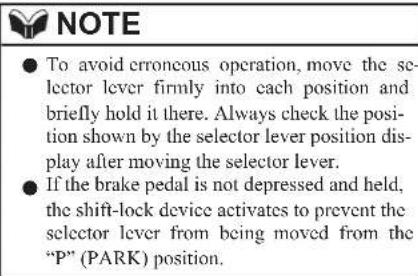
When the selector lever cannot be shifted from the "P" (PARK) position
When the selector lever cannot be shifted from the "P" (PARK) position to another position while the brake pedal is pressed and held down with the ignition switch or the operation mode in ON, the battery may be flat or the shift-lock mechanism may be malfunctioning.
Immediately have your vehicle checked by a MITSUBISHI MOTORS Authorized Service Point.
If you need to move the vehicle, shift the selector lever as follows.
For LHD vehicles
- Make sure the parking brake is applied.
-
Stop the engine if it is running.
-
Insert a straight blade (or minus) screw-driver with a cloth over its tip into notch (A) or the cover. Pry gently as shown to remove the cover.
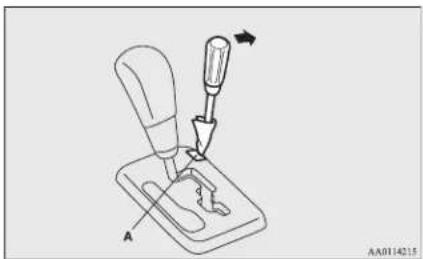
natural_image
Technical line drawing of a mechanical assembly with tool and base (no text or symbols)
-
Depress the brake pedal with the right foot.
-
Insert a straight blade (or minus) screwdriver in the shiftlock release hole (B). Shift the selector lever to the "N" (NEUTRAL) position while pressing the straight blade (or minus) screwdriver down.
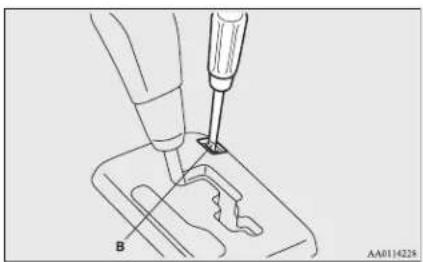
natural_image
Line drawing of a tool tiping a component labeled B, with no visible text or symbols
For RHD vehicles
- Make sure the parking brake is applied.
- Stop the engine if it is running.
-
Depress the brake pedal with the right foot.
-
Insert a straight blade (or minus) screwdriver in the shiftlock release hole (A). Shift the selector lever to the "N" (NEUTRAL) position while pressing the straight blade (or minus) screwdriver down.
natural_image
Line drawing of a mechanical lever mechanism with pivot point A (no text or symbols)
Automatic transmission INVECS-III CVT (Intelligent & Innovative Vehicle Electronic Control System III)*
Selector lever position display
When the ignition switch is turned to the "ON" position or the operation mode is put in ON, the position of the selector lever is indicated in the multi-information display.
natural_image
Diagram of a car dashboard with steering wheel and speedometer (no text or symbols)
Selector lever positions
"P" PARK
This position locks the transmission to prevent the vehicle from moving. The engine can be started in this position.
“R” REVERSE
This position is to back up.
CAUTION
● Never shift into the "P" (PARK) or "R" (REVERSE) position while the vehicle is in motion to avoid transmission damage.
“N” NEUTRAL
At this position the transmission is disengaged. It is the same as the neutral position on a manual transmission, and should only be used when the vehicle is stationary for an extended length of time during driving, such as in a traffic jam.
WARNING
- Never move the selector lever to the "N" (Neutral) position while driving. A serious accident could occur since you could accidentally move the lever into the "P" (Park) or "R" (Reverse) position or you will lose engine braking.
- On a gradient the engine should be started in the "P" (Park) position, not in the "N" (Neutral) position.
● To prevent rolling, always keep your foot on the brake pedal when the vehicle is in "N" (Neutral) position, or when shifting into or out of "N" (Neutral) position.
“D” DRIVE
This position is used for most city and highway driving. The transmission will automatically and continuously change its gear ratio depending on road and driving conditions.
CAUTION
● To prevent transmission damage, never shift into the "D" (Drive) position from the "R" (Reverse) position while the vehicle is in motion.
“Ds” (DOWNSHIFT & SPORTY DRIVING)
Use when engine braking is needed, or for high-power sport drive.
“L” LOW
This position is used only for low speeds when driving up very steep hills or driving downhill with engine braking.
When the selector lever is shifted to the "L" (LOW) position from other positions, the buzzer sounds two times.
If the vehicle speed is 7 km/h (4 mph) or more with "L" (LOW) position, the selector lever position "L" indicator blinks rapidly (once per second).

WARNING
● This position will generate maximum engine braking.
Be very careful not to shift into "L" (Low) suddenly.
Sudden engine braking may cause the tyres to skid.
Only use this position when driving at certain road conditions (described above) with low vehicle speed

CAUTION
- Immediately shift the selector lever to the "D" (DRIVE) position or "Ds" (DOWNSHIFT & SPORTY DRIVING) position, after using the "L" (LOW) position at certain road conditions.
- Never use the “L” (LOW) position with hight-speed driving.
When a malfunction occurs in the automatic transmission
When the selector lever position indicator blinks
When the selector lever position indicator blinks while you are driving, there could be a malfunction in the automatic transmission system or CVT fluid temperature becomes abnormally high.
To judge the CVT malfunction or the high oil temperature condition while using the "L" (LOW) position, it can be confirmed the blinking condition when the vehicle has stopped.

NOTE
- The “A” indicator on the selector lever position display will only blink if there is a problem with the CVT position switch.
It is not seen during normal driving.
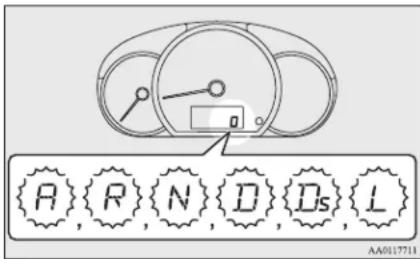
The “L” indicator will blink, if you are driving with “L” (LOW) position even without CVT malfunction or high CVT fluid temperature.
If the “L” indicator blinks during vehicle stopping, there is a CVT malfunction or a high CVT fluid temperature.
Automatic transmission INVECS-III CVT (Intelligent & Innovative Vehicle Electronic Control System III)*
CAUTION
- If a malfunction occurs in the CVT while driving, the indication lamp will blink.
In this case, immediately park your vehicle in a safe place and follow these procedures: [If the indication lamp blinks rapidly (once per second), the CVT fluid is overheating.] Park your vehicle in a safe place but do not turn off the engine. Move the selector lever to the "P" (Park) position and open the bonnet. Keep the engine idling.
After a while, move the selector lever into any position other than "P" (Park) position and confirm that the indication lamp stops blinking. It is safe to continue driving if the indication lamp no longer blinks.
If the indication lamp continues blinking, contact a MITSUBISHI MOTORS Authorized Service Point immediately.
[If the indication lamp blinks slowly (once per 2 seconds), the CVT safety device may be operating due to a malfunction.] Have the vehicle inspected by a MITSUBISHI MOTORS Authorized Service Point immediately.
- If the CVT does not change its gear ratio or the vehicle speed does not increase during driving with "L" (LOW) position, CVT safety device may be operating due to a malfunction in the CVT. If the "L" indicator blinks even after vehicle stopped, have the vehicle inspected by a MITSUBISHI MOTORS Authorized Service Point immediately.
Operation of the CVT
CAUTION
● Before selecting a position with the engine running and the vehicle stationary, fully depress the brake pedal to prevent the vehicle from creeping.
The vehicle will begin to move as soon as the CVT is engaged, especially when the engine speed is high, at fast idle or with the air conditioning (cooling or heating) operating, the brakes should only be released when you are ready to drive away.
● Depress the brake pedal with the right foot at all times.
Using the left foot could cause driver movement delay in case of an emergency.
- To prevent sudden acceleration, never race the engine when shifting from the "P" (PARK) or "N" (NEUTRAL) position.
- Operating the accelerator pedal while the other foot is resting on the brake pedal will affect braking efficiency and may cause premature wear of brake pads.
CAUTION
- Use the selector lever in the correct shift position in accordance with driving conditions. Never coast downhill backward with the selector lever in the "D" (DRIVE), "Ds" (DOWNSHIFT & SPORTY DRIVING), "L" (LOW) position or coast forward with the selector lever in the "R" (REVERSE) position.
The engine may stop and the unexpected increase in brake pedal effort and steering wheel effort could lead to an accident.
- Do not race the engine with brake pedal pressed when the vehicle is stationary. This can damage the CVT.
Also, when you depress the accelerator pedal while holding down the brake pedal with the selector lever in the "D" (DRIVE) position, the engine revolutions may not rise as high as when performing the same operation with the selector lever in the "N" (NEUTRAL) position.
Passing acceleration
To gain extra acceleration in “D” (DRIVE) position, push the accelerator to the floor. The CVT will automatically downshift.
Uphill/downhill driving
DRIVING UPHILL
The transmission prevents unnecessary upshifts even when the accelerator pedal is released and ensures smooth driving.
DRIVING DOWNHILL
According to the conditions, the transmission will automatically shift to a lower gear ratio to achieve stronger engine braking. This may help reduce your need to use the service brake.
Waiting
For short waiting periods, such as at traffic signals the vehicle can be left in selector lever position and held stationary with the service brake.
For longer waiting periods with the engine running, place the selector lever in the "N" (NEUTRAL) position and apply the parking brake, while holding the vehicle stationary with the service brake.

CAUTION
● Never hold the vehicle stationary while in CVT on a hill with the accelerator, always apply the parking brake and/or service brake.
Parking
To park the vehicle, first bring it to a complete stop, fully engage the parking brake, and then move the selector lever to the "P" (PARK) position.
If you are going to leave the vehicle unattended, always switch off the engine and carry the key.

NOTE
- On a slope, be sure to apply the parking brake before moving the selector lever to the "P" (PARK) position. If you move the selector lever to the "P" (PARK) position before applying the parking brake, it may be difficult to disengage the selector lever from the "P" (PARK) position when next you drive the vehicle, requiring application of a strong force to the selector lever to move from the "P" (PARK) position.
When the CVT makes no speed change
If the transmission does not change speeds while driving, or your vehicle does not pick up enough speed when starting on an uphill slope, it may be that there is something unusual happening in the transmission, causing a safety device to activate. We recommend you to have your vehicle checked immediately.
Braking
All the parts of the brake system are critical to safety. We recommend you to have the vehicle checked at regular intervals according to the service booklet.

CAUTION
- Avoid driving habits that cause heavy braking and never "ride" the brakes by resting your foot on the brake pedal while driving. It causes brake overheating and fade.
Brake system
The service brake is divided into two brake circuits. And your vehicle is equipped with power brakes. If one brake circuit fails, the other is available to stop the vehicle. If you should lose the power assist for some reason, the brakes will still work. In these situations, even if the brake pedal moves down to the very end of its possible stroke or resists being depressed, keep depressing the brake pedal down harder and further than usual; stop driving as soon as possible and have the brake system repaired.
Hill start assist
WARNING
- Do not turn off the engine while your vehicle is in motion. If you turn off the engine while driving, the power assistance for the braking system will stop working and your brakes will not work effectively.
- If the power assist is lost or if either brake hydraulic system stops working properly, have your vehicle checked immediately.
Warning lamp
The brake warning lamp illuminates to indicate a fault in the braking system. Refer to "Brake warning lamp" on page 5-13.
When brakes are wet
Check the brake system while driving at a low speed immediately after starting, especially when the brakes are wet, to confirm they work normally.
A film of water can be formed on the brake discs or brake drums and prevent normal braking after driving in heavy rain or through large puddles, or after the vehicle is washed. If this occurs, dry the brakes out by driving slowly while lightly depressing the brake pedal.
When driving downhill
It is important to take advantage of the engine braking by shifting to a lower shift position while driving on steep downhill roads in order to prevent the brakes from overheating.
WARNING
- Do not leave any objects near the brake pedal or let a floor mat slide under it; doing so could prevent the full pedal stroke that would be necessary in an emergency. Make sure that the pedal can be operated freely at all times. Make sure the floor mat is securely held in place.
Brake pads
● New brakes need to be broken-in by moderate use for the first 200 km (125 miles).
Avoid hard braking situations.
● The disc brakes are provided with a warning device which emits a shrieking metallic sound while braking if the brake pads have reached their wear limit.
If you hear this sound, have the brake pads replaced immediately.
WARNING
● Driving with worn brake pads will make it harder to stop, and can cause an accident.
Hill start assist
The hill start assist makes it easy to start off on a steep uphill slope by preventing the vehicle from moving backwards. It keeps the braking force for approximately 2 seconds when you move your foot from the brake pedal to the accelerator pedal.
CAUTION
- Do not overly rely on the hill start assist to prevent backwards movement of the vehicle. Under certain circumstances, even when hill start assist is activated, the vehicle may move backwards if the brake pedal is not sufficiently depressed, if the vehicle is heavily loaded, or if the road is very steep or slippery.
● The hill start assist is not designed to keep the vehicle stopped in place on uphill slopes for more than 2 seconds.
- When facing uphill, do not rely on using the hill start assist to maintain a stopped position as an alternative to depressing the brake pedal.
Doing so could result in an accident.

CAUTION
- Do not perform the following operation while the hill start assist is operating.
[Except vehicles equipped with keyless operation system]
Turn the ignition switch to the "LOCK" or "ACC" position.
[ Vehicles equipped with keyless operation system]
Put the operation mode in OFF or ACC.
The hill start assist could stop operating, which could result in an accident.
To operate
- Stop the vehicle completely using the brake pedal.
- On vehicles with M/T, place the gear-shift lever into the 1^st position.
On vehicles with CVT, place the selector lever into the "D" (DRIVE) position.

NOTE
-
When reversing on an uphill slope, place the gearshift lever or selector lever into the "R" position.
-
Release the brake pedal and the hill start assist will maintain the braking force applied while stopped for approximately 2 seconds.
-
Depress the accelerator pedal and the hill start assist will gradually decrease the braking force as the vehicle starts moving.

NOTE
● The hill start assist is activated when all of the following conditions are met.
- The engine is running.
(The hill start assist will not be activated while the engine is starting or immediately after the engine is started.)
- On vehicles wit M/T, the gearshift lever is in the following position.
[When starting an uphill slope forwards.] The gearshift lever is in any position other than "R" (Reverse).
(The hill start assist will operate, even if the gearshift lever is in the "N" (Neutral) position.)
[When starting an uphill slope backwards.]
The gearshift lever is in the "R" (Reverse) position.
(The hill start assist will not operate when the gearshift lever is in the "N" (Neutral) position.)
- On vehicles with CVT, the selector lever is in any position other than "P" (PARK) or "N" (NEUTRAL).
- The vehicle is completely stationary, with the brake pedal depressed.
• The parking brake is released.

NOTE
● The hill start assist will not operate if the accelerator pedal is depressed before the brake pedal is released.
● The hill start assist also operates when reversing on an uphill slope.
- When the hill start assist is activated, you may feel the operation sound or vibration from under the body.
This is a normal result of the hill start assist operation, and does not indicate a problem.
Warning indicator
If an abnormal condition occurs in the system, the indicator will turn on.

ASC indicator

CAUTION
- If the warning is turn on, the hill start assist will not operate. Start off carefully.
Brake assist system
CAUTION
● Park your vehicle in a safe place and stop the engine.
Restart the engine and check whether the warning indicator went out, in which case the hill start assist is again working normally.
If the warning remains displayed or reappears frequently, it is not necessary to stop the vehicle immediately, but the vehicle should be inspected by a MITSUBISHI MOTORS Authorized Service Point.
Brake assist system
The brake assist system is a device assisting drivers who cannot depress the brake pedal firmly when it is necessary to do so (such as in emergency stop situations) and provides greater braking force.
If the brake pedal is depressed suddenly, the brakes will be applied with more force than usual.
CAUTION
● The brake assist system is not a device designed to exercise braking force greater than its capacity. Make sure to always keep a sufficient distance between your vehicle and a vehicle in front of you without relying too much on the brake assist system.
NOTE
- Once the brake assist system is operational, it maintains great braking force even if the brake pedal is lightly released.
To stop its operation, completely remove your foot from the brake pedal.
- When the brake assist system is in use, you may feel as if the depressed brake pedal soft, the pedal moves in small motions in conjunction with the sound of the ABS operation, or the vehicle body and the steering wheel vibrate. This occurs when the brake assist system is operating normally and does not indicate faulty operation. Continue to firmly depress the brake pedal.
- When the anti-lock brake system warning lamp is illuminated, the brake assist system is not functioning.
Emergency stop signal system
This is a device that reduces the possibility of rear end collisions by the rapid and automatic blinking of the hazard warning lamps to alert vehicles approaching from behind during sudden braking. When the emergency stop signal system operates, the hazard warning indication lamp in the instrument cluster blinks rapidly at the same time.
CAUTION
- If the ABS warning or ASC warning is displayed, the emergency stop signal system may not operate.
Refer to “ABS warning lamp” on page 6-35.
Refer to “ASC warning indicator” on page 6-39.
NOTE
● [Activating condition for the emergency stop signal system]
It activates when all of the following conditions are met.
- The vehicle speed is approximately 55 km/h (34 mph) or higher.

NOTE
- The brake pedal has been depressed, and the system judges that it was sudden braking from the vehicle deceleration and the operating condition of the anti-lock brake system (ABS).
[Deactivating condition for the emergency stop signal system]
It deactivates when one of the following conditions is met.
• The brake pedal is released.
- The hazard warning flasher switch is pressed.
- The system judges that it was not sudden braking from the vehicle deceleration and the operating condition of the anti-lock brake system (ABS).
Anti-lock brake system (ABS)
The anti-lock brake system (ABS) helps prevent the wheels from locking during braking. This helps maintain vehicle drivability and steering wheel handling.
Driving hints
● Always keep a safe distance from the vehicle in front of you. Even if your vehicle is equipped with ABS, leave a greater braking distance when:
- Driving on gravel or snow-covered roads.
- Driving with snow traction device (tyre chains) installed.
- Driving on uneven road surfaces.
- Operation of ABS is not restricted to situations where brakes are applied suddenly. This system may also prevent the wheels from locking when you drive over manholes, steel roadwork plates, road markings, or any uneven road surface.
- When the ABS is activated, you may feel the brake pedal pulsation and the vibrations of the vehicle body and steering wheel. It may also feel as if the pedal resists being pressed.
In this situation, simply hold the brake pedal down firmly. Do not pump the brake, which will result in reduced braking performance.
- An operation noise is emitted from the engine compartment or you can feel a shock from the brake pedal when starting to drive immediately after starting the engine. These are normal sounds or operations that the ABS makes when performing a self-check. It does not indicate a malfunction.
● The ABS can be used after the vehicle has reached a speed over approximately 10 km/h (6 mph). It stops working when the vehicle slows below approximately 5 km/h (3 mph).

CAUTION
● The ABS cannot prevent accidents. It is your responsibility to take safety precautions and to drive carefully.
● To prevent failure of the ABS, be sure all 4 wheels and tyres are the same size and the same type.
- Do not install any aftermarket limited-slip differential (LSD) on your vehicle. The ABS may stop functioning properly.
ABS warning lamp
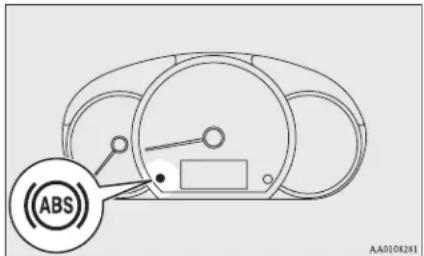
If there is a malfunction in the system, the ABS warning lamp will come on.
Anti-lock brake system (ABS)
Under normal conditions, the ABS warning lamp comes on when the ignition switch is turned to the "ON" position or the operation mode is put in ON and goes off a few seconds later.
CAUTION
- Any of the following indicates that the ABS is not functioning and only the standard brake system is working. (The standard brake system is functioning normally.) If this happens, we recommend you to have your vehicle inspected as soon as possible.
- When the ignition switch is turned to the "ON" position or the operation mode is put in ON, the warning lamp does not come on or it remains on and does not go off.
- The warning lamp comes on while driving.
However, if the warning lamp do not disappear, or if they come on again when the vehicle is driven, we recommend you to have the vehicle checked.
If the ABS warning lamp and brake warning lamp illuminate at the same time
The ABS and brake force distribution function may not work, so hard braking could make the vehicle unstable.
Avoid hard braking and high-speed driving. Stop the vehicle in a safe place and we recommend you to have it checked.
After driving on icy roads
After driving on snow or icy roads, remove any snow and ice which may have accumulated around the wheels. On vehicles that have an ABS, be careful not to damage the wheel speed sensors (A) or the cables located at each wheel.
If the warning lamp illuminates while driving
If only the ABS warning lamp illuminates
Avoid hard braking and high-speed driving. Stop the vehicle in a safe place.
Restart the engine and check to see whether the lamp goes out after a few minutes driving; if it then remains off during driving, there is no problem.
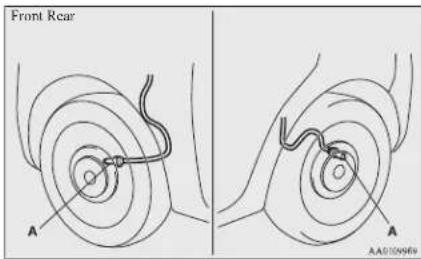
Electric power steering system (EPS)
The power steering system operates while the engine is running.
It helps reduce the effort needed to turn the steering wheel.
If the power assist is lost, you will notice it takes much more effort to steer.
If this happens, have the vehicle inspected by a MITSUBISHI MOTORS Authorized Service Point.

WARNING
- Do not stop the engine while the vehicle is moving. Stopping the engine would make the steering wheel extremely hard to turn, possibly resulting in an accident.

NOTE
● During repeated full-lock turning of the steering wheel (for example, while you are manocuvring the vehicle into a parking space), a protection function may be activated to prevent overheating of the power steering system. This function will make the steering wheel gradually harder to turn. In this event, limit your turning of the steering wheel for a while. When the system has cooled down, the steering action will return to normal.

NOTE
- If you turn the steering wheel while the vehicle is stationary with the headlamps on, the headlamps may become dim. This behaviour is not abnormal. The headlamps will return to their original brightness after a short while.
Electric power steering system warning lamp
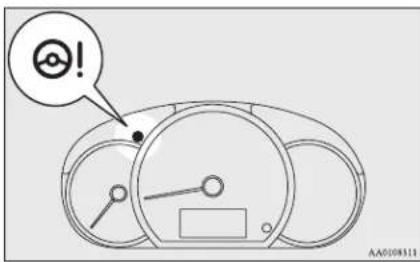
If there is a malfunction in the system, the warning lamp will come on.
Under normal conditions, the warning lamp comes on when the ignition switch is turned to the "ON" position or the operation mode is put in ON, and goes off after the engine has started.

CAUTION
- If the warning lamp comes on while the engine is running, have the vehicle inspected by a MITSUBISHI MOTORS Authorized Service Point as soon as possible.
It may become harder to turn the steering wheel.
Active stability control (ASC)
The Active Stability Control (ASC) takes overall control of the anti-lock brake system, traction control function and stability control function to help maintain the vehicle's control and traction. Please read this section in conjunction with the page on the anti-lock brake system, traction control function and stability control function.
Anti-lock brake system (ABS) → p. 6-35
Traction control function → p. 6-38
Stability control function → p. 6-38
Active stability control (ASC)
CAUTION
- Do not over-rely on the ASC. Even the ASC cannot prevent the natural laws of physics from acting on the vehicle.
This system, like any other system, has limits and cannot help you to maintain traction and control of the vehicle in all circumstances. Reckless driving may lead to accidents. It is the driver's responsibility to drive carefully. This means taking into account the traffic, road and environmental conditions.
- Be sure to use the same specified type and size of tyre on all 4 wheels. Otherwise, the ASC may not work properly.
- Do not install any aftermarket limited-slip differential (LSD) on your vehicle. The ASC may stop functioning properly.
NOTE
● An operation noise may be emitted from the engine compartment in the following situations. The sound is associated with checking the operations of the ASC. At this time, you may feel a shock from the brake pedal if you depress it. These do not indicate a malfunction.
- When the ignition switch is turned to the "ON" position or the operation mode is put in ON.
- When the vehicle is driven for a while after the engine is turned on.
NOTE
- When the ASC is activated, you may feel a vibration in the vehicle body or hear a whining sound from the engine compartment.
This indicates that the system is operating normally. It does not indicate a malfunction.
- When the anti-lock brake system warning lamp is illuminated, the ASC is not active.
Traction control function
On slippery surfaces, the traction control function prevents the drive wheels from excessive spinning, thus helping the vehicle to start moving from a stopped condition. It also provides sufficient driving force and steering performance as the vehicle turns while pressing the acceleration pedal.
CAUTION
- When driving a vehicle on a snowy or icy road, be sure to install snow tyres and drive the vehicle at moderate speeds.
Stability control function
The stability control function is designed to help the driver maintain control of the vehicle on slippery roads or during rapid steering manoeuvres. It works by controlling the engine output and brake on each wheel.
NOTE
● The stability control function operates at speeds of about 15 km/h (9 mph) or higher.
ASC operation indicator

ASC indicator
The indicator will blink when the ASC is operating.
CAUTION
- When Indicator blinks, ASC is operating, which means that the road is slippery or that your vehicle's wheels are beginning to slip. If this happens, drive slower with less accelerator input.
NOTE
● The Indicator may turn on when you start the engine. This means that the battery voltage momentarily dropped when the engine was started. It does not indicate a malfunction, provided that the display goes out immediately.
- When a compact spare tyre has been put on your vehicle, the gripping ability of the tyre will be lower, making it more likely that the indicator will blink.
ASC warning indicator
If an abnormal condition occurs in the system, the indicators will turn on.

ASC indicator

ASC OFF indicator
CAUTION
● The system may be malfunctioning.
Park your vehicle in a safe place and stop the engine.
Restart the engine and check whether the indicator go out. If they go out, there is no abnormal condition. If they do not go out or appears frequently, it is not necessary to stop the vehicle immediately, but we recommend you to have your vehicle inspected.
Towing
CAUTION
- When towing the vehicle with only the front wheels or only the rear wheels raised off the ground, do not place the ignition switch in the "ON" position or do not put the operation mode in ON. Placing the ignition switch in the "ON" position or putting the operation mode in ON could cause the ASC to operate, resulting in an accident.
Note that the correct towing method depends on the transmission type and the vehicle's drive configuration.
For details, refer to "Towing" on page 8-19.
Cruise control\*
Cruise control is an automatic speed control system that keeps a set speed. It can be activated at about 40 km/h (25 mph) or more.
CAUTION
- When you do not wish to drive at a set speed, turn off the cruise control for safety.
- Do not use cruise control when driving conditions will not allow you to stay at the same speed, such as in heavy traffic or on roads that are winding, icy, snow-covered, wet, slippery, on a steep downhill slope.
CAUTION
- On vehicles with M/T, do not move the gear-shift lever to the "N" (Neutral) position while driving at a set speed without depressing the clutch pedal. The engine will run too fast and might be damaged.
NOTE
● Cruise control may not be able to keep your speed on uphills or downhills.
- Your speed may decrease on a steep uphill. You may use the accelerator pedal if you want to stay at your set speed.
- Your speed may increase to more than the set speed on a steep downhill. You must use the brake to control your speed. As a result, the set speed driving is deactivated.
Cruise control switches
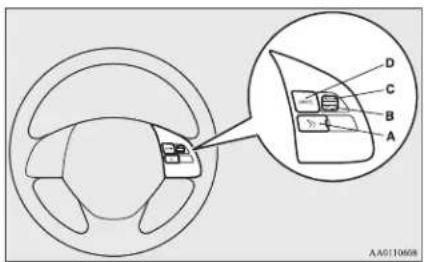
Cruise control\*
A- CRUISE CONTROL ON/OFF switch
Used to turn on and off the cruise control.
B- SET - switch
Used to reduce the set speed and to set the desired speed.
C-RES + switch
Used to increase the set speed and to return to the original set speed.
D-CANCEL switch
Used to deactivate the set speed driving.

NOTE
- When operating the cruise control switches, press the cruise control switches correctly. The set speed driving may be deactivated automatically if two or more switches of the cruise control are pressed at the same time.
To activate
- With the ignition switch in the "ON" position or the operation mode in ON, press the CRUISE CONTROL ON/OFF switch (A) to turn on the cruise control. The indication lamp in the meter cluster will come on.
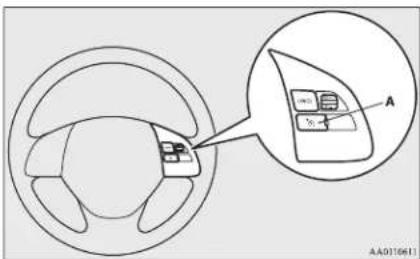
Indication lamp

- Accelerate or decelerate to your desired speed, then push down and release the SET - switch (B) when the indication lamp is illuminated. The vehicle will then maintain the desired speed.
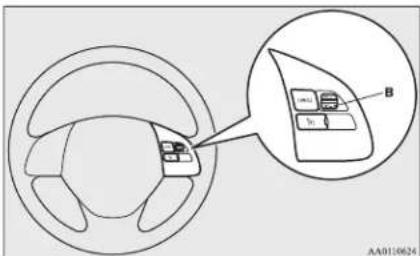

NOTE
- When you release the SET - switch (B), the vehicle speed will be set.
To increase the set speed
There are 2 ways to increase the set speed.
RES + switch
Push up and hold the RES + switch (C) while driving at the set speed, and your speed will then gradually increase.
When you reach your desired speed, release the switch. Your new cruising speed is now set.
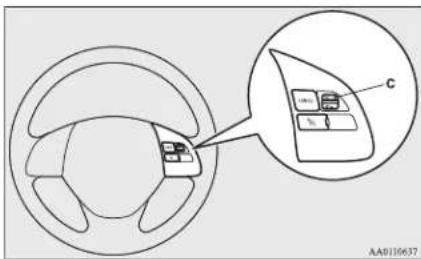
To increase your speed in small amounts, push up the RES + switch (C) for less than about 1 second and release it.
Each time you press the RES + switch (C), your vehicle will go about 1.6 km/h (1 mph) faster.
Accelerator pedal
While driving at the set speed, use the accelerator pedal to reach your desired speed and then push down the SET - switch (B) and release the switch momentarily to set a new desired cruising speed.
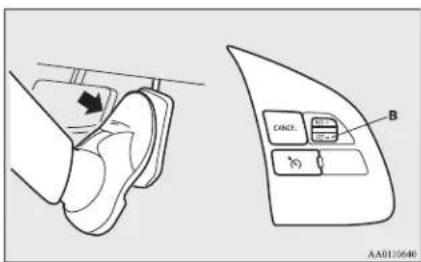
To decrease the set speed
There are 2 ways to decrease the set speed.
SET - switch
Push down and hold the SET - switch (B) while driving at the set speed, and your speed will slow down gradually.
When you reach your desired speed, release the switch. Your new cruising speed is now set.
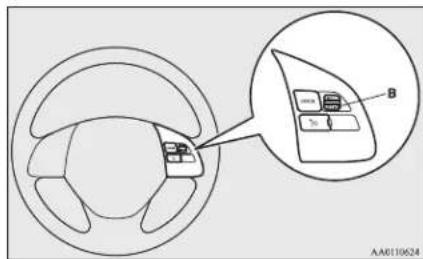
To slow down your speed in small amounts, push down the SET - switch (B) for less than about 1 second and release it. Each time you push down the SET - switch (B), your vehicle will slow down by about 1.6 km/h (1 mph).
Brake pedal
While driving at the set speed, use the brake pedal, which disengages the cruise control, then push down the SET - switch (B) and release the switch momentarily to set a new desired cruising speed.
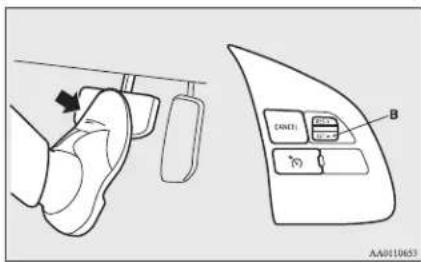
Cruise control*
To temporarily increase or decrease the speed
To temporarily increase the speed
Depress the accelerator pedal as you would normally. When you release the pedal, you will return to your set speed.
natural_image
Diagram of a hand holding a small object with an arrow indicating direction, no text or symbols present

NOTE
- In some driving conditions, the set speed driving may be deactivated. If this happens, refer to "To activate" on page 6-40 and repeat the speed setting procedure.
To temporarily decrease the speed
Depress the brake pedal to decrease the speed. To return to the previously set speed, push up the RES + switch (C).
Refer to "To resume the set speed" on page 6-43.
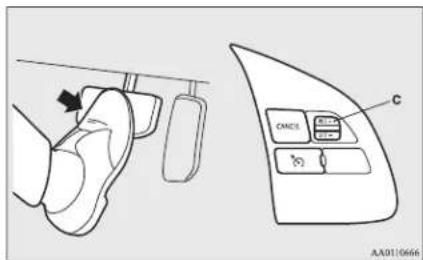
To deactivate
The set speed driving can be deactivated as follows:
- Press the CRUISE CONTROL ON/OFF switch (A) (Cruise control will be turned off.)
● Press the CANCEL switch (D).
● Depress the brake pedal.
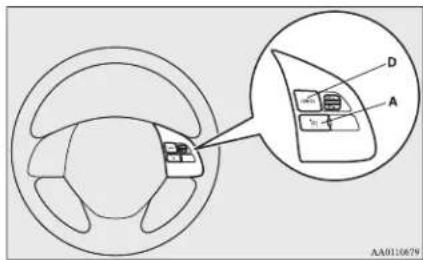
The set speed driving is deactivated automatically in any of the following ways.
- When you depress the clutch pedal (on vehicles with M/T).
- When your speed slows to about 15 km/h (9 mph) or more below the set speed because of a hill, etc.
- When your speed slows to about 40 km/h (25 mph) or less.
- When the Active Stability Control (ASC) starts operating.
Refer to "Active stability control (ASC)" on page 6-37.
WARNING
- On vehicles equipped with CVT, although the set speed driving will be deactivated when shifting to the "N" (NEUTRAL) position, never move the selector lever to the "N" (NEUTRAL) position while driving. You would have no engine braking and could cause a serious accident.
Also, the set speed driving may be deactivated as follows:
- When the engine speed rises and approaches the tachometer's red zone (the red-coloured part of the tachometer dial).

CAUTION
- When the set speed driving is deactivated automatically in any situation other than those listed above, there may be a system malfunction.
Press the CRUISE CONTROL ON/OFF switch to turn off the cruise control and have your vehicle inspected by a MITSUBISHI MOTORS Authorized Service Point.
To resume the set speed
If the set speed driving is deactivated by the condition described in "To deactivate" on page 6-42, you can resume the previously set speed by push up the RES + switch (C) while driving at a speed of about 40 km/h (25 mph) or higher.
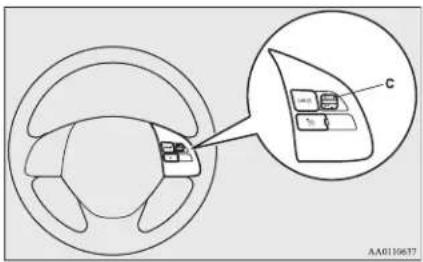
Under either of the following conditions, however, using the switch does not allow you to resume the previously set speed. In these situations, repeat the speed setting procedure:
● The CRUISE CONTROL ON/OFF switch is pressed.
● The ignition switch is turned OFF or the operation mode is put in OFF.
● Indication lamp goes off.
Tyre pressure monitoring system (TPMS)\*
The tyre pressure monitoring system (TPMS) uses tyre inflation pressure sensors (A) on the wheels to monitor the tyre inflation pressures. The system only indicates when a tyre is significantly under-inflated.
The base tyre pressure can be set at desired value by the driver with the reset function execution. (The low pressure warning threshold is set based on the reset.)
The tyre inflation pressure sensor IDs for two sets of tyres can be registered by a MITSUBISHI MOTORS Authorized Service Point, and the valid ID set can be switched by the multi-information display switch. (It's beneficial in case of seasonal tyre change between summer tyre and winter tyre.)
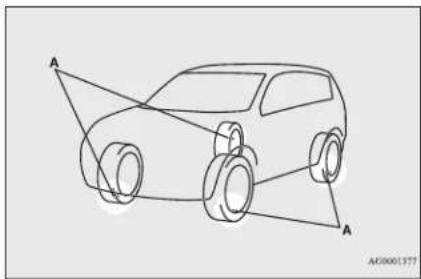
natural_image
Line drawing of a car with three wheels and connecting points labeled A, no text or symbols present

NOTE
● The tyre pressure monitoring system (TPMS) is not a substitute for regularly checking tyre inflation pressures.
Be sure to check the tyre inflation pressures as described in "Tyres" on page 10-09.
● The tyre inflation pressure sensor (A) is installed in the illustrated location.
Replace rubber air valve (D) with a new one when the tyre is replaced.
For details, please contact your
MITSUBISHI MOTORS Authorized Service Point.
Tyre pressure monitoring system (TPMS)*
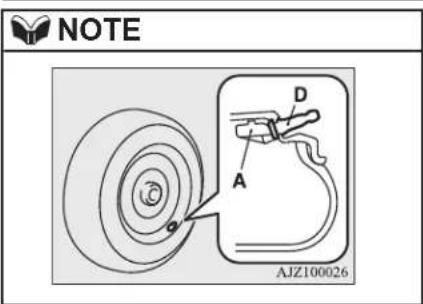
Tyre pressure monitoring sys-
tem warning lamp
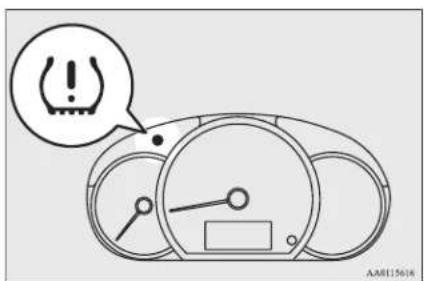
When the ignition switch is turned to the "ON" position or the operation mode is put in ON, the tyre pressure monitoring system warning lamp normally illuminates and goes off a few seconds later.
If one or more of the vehicle tyres are significantly under-inflated, the warning lamp will remain illuminated while the ignition switch or the operation mode is in ON.
Refer to "If the warning lamp illuminates while driving" on page 6-45 and take the necessary measures.
CAUTION
- If the warning lamp does not illuminate when the ignition switch is turned to the "ON" position or the operation mode is put in ON, it means that the tyre pressure monitoring system (TPMS) is not working properly. Have the system inspected at a MITSUBISIII MOTORS Authorized Service Point.
In such situations, a malfunctioning of the system may prevent the monitoring of the tyre pressure. Avoid sudden braking, sharp turning and high-speed driving.
CAUTION
- If a malfunction is detected in the tyre pressure monitoring system (TPMS), the warning lamp will blink for approximately 1 minute and then remain continuously illuminated.
The warning lamp will issue further warnings each time the engine is restarted as long as the malfunction exists.
Check to see whether the warning lamp goes off after few minutes driving.
If it then goes off during driving, there is no problem.
However, if the warning lamp does not go off, or if it blinks again when the engine is restarted, have the vehicle inspected by a MITSUBISIII MOTORS Authorized Service Point.
In such situations, a malfunctioning of the system may be preventing the monitoring of the tyre pressure. For safety reasons, when the warning lamp appears while driving, avoid sudden braking, sharp turning and high-speed driving.
Each tyre, including the spare, should be checked monthly when cold and inflated to the inflation pressure recommended by the vehicle manufacturer on the tyre inflation pressure label. (If your vehicle has tyres of a different size than the size indicated on the tyre inflation pressure label, you should determine the proper tyre inflation pressure for those tyres.)
As an added safety feature, your vehicle has been equipped with the tyre pressure monitoring system (TPMS) that illuminates a low tyre pressure telltale when one or more of your tyres is significantly under-inflated. Accordingly, when the low tyre pressure telltale illuminates, you should stop and check your tyres as soon as possible, and inflate them to the proper pressure. Driving on a significantly under-inflated tyre causes the tyre to overheat and can lead to tyre failure. Under-inflation also reduces fuel efficiency and tyre tread life, and may affect the vehicle's handling and stopping ability. Please note that the tyre pressure monitoring system (TPMS) is not a substitute for proper tyre maintenance, and it is the driver's responsibility to maintain correct tyre pressure, even if under-inflation has not reached the level to trigger illumination of the tyre pressure monitoring system (TPMS) low tyre pressure telltale. Your vehicle has also been equipped with a warning lamp to indicate when the system is not operating properly. The warning lamp is combined with the low tyre pressure telltale. When the system detects a malfunction, the telltale will flash for approximately one minute and then remain continuously illuminated. This sequence will continue upon subsequent vehicle start-ups as long as the malfunction exists.
When the warning lamp is illuminated, the system may not be able to detect or signal low tyre pressure as intended.
The tyre pressure monitoring system (TPMS) malfunctions may occur for a variety of reasons, including the installation of replacement or alternate tyres or wheels on the vehicle that prevent the tyre pressure monitoring system (TPMS) from functioning properly. Always check the tyre pressure monitoring system (TPMS) malfunction telltale after replacing one or more tyres or wheels on your vehicle to ensure that the replacement or alternate tyres and wheels allow the tyre pressure monitoring system (TPMS) to continue to function properly.
If the warning lamp illuminates while driving
- If the warning lamp illuminates, avoid hard braking, sharp steering manoeuvres and high speeds. You should stop and adjust the tyres to the proper inflation pressure as soon as possible. Refer to "Tyres" on page 10-09.

NOTE
- When inspecting or adjusting the tyre pressure, do not apply excessive force to the valve stem to avoid breakage.

NOTE
● After inspecting or adjusting the tyre pressure, always reinstall the valve cap on the valve stem.
Without the valve cap, dirt or moisture could get into the valve, resulting in damage to the tyre inflation pressure sensor.
- Do not use metal valve caps, which may cause a metal reaction, resulting in corrosion and damage of the tyre inflation pressure sensors.
- Once adjustments have been made, the warning lamp will go off after a few minutes of driving.
- If the warning lamp remains illuminated after you have been driving for about 10 minutes after you adjust the tyre inflation pressure, one or more of the tyres may have a puncture. Inspect the tyre and if it has a puncture, have it repaired by a MITSUBISHI MOTORS Authorized Service Point as soon as possible.

WARNING
- If the warning lamp illuminates while you are driving, avoid hard braking, sharp steering manoeuvres and high speeds. Driving with an under-inflated tyre adversely affects vehicle performance and can result in an accident.
Tyre pressure monitoring system (TPMS)*

CAUTION
● The warning lamp may not illuminate immediately in the event of a tyre blowout or rapid leak.

NOTE
● To avoid the risk of damage to the tyre inflation pressure sensors, have any punctured tyre repaired by a MITSUBISHI MOTORS Authorized Service Point. If the tyre repair is not done by a MITSUBISIII MOTORS Authorized Service Point, damage to the tyre inflation pressure sensor is not covered by your warranty.
- Do not use an aerosol puncture-repair spray on any tyre.
Such a spray could damage the tyre inflation pressure sensors.
Have any puncture repaired by a MITSUBISHI MOTORS Authorized Service Point.
- Using the tyre repair kit may damage the tyre inflation pressure sensor. The vehicle must promptly be inspected and repaired by a certified MITSUBISHI MOTORS Authorized Service Point after using the tyre repair kit.
The tyre pressure monitoring system (TPMS) may not work normally in the following circumstances:
● A wireless facility or device using the same frequency is near the vehicle.
● Snow or ice is stuck inside the fenders and/or on the wheels.
- The tyre inflation pressure sensor's battery is dead.
● Wheels other than MITSUBISHI MOTORS GENUINE wheels are being used.
● Wheels that are not fitted with tyre inflation pressure sensors are being used.
● Wheels whose ID codes are not memorized by the vehicle are used.
● A window tint that affects the radio wave signals is installed.

NOTE
- Tyre inflation pressures vary with the ambient temperature. If the vehicle is subjected to large variations in ambient temperature, the tyre inflation pressures may be underinflated (causing the warning lamp come on) when the ambient temperature is relatively low. If the warning lamp comes on, adjust the tyre inflation pressure.
Whenever the tyres and wheels are replaced with new ones
If new wheels with new tyre inflation pressure sensors are installed, their ID codes must be programmed into the tyre pressure monitoring system. Have tyre and wheel replacement performed by a MITSUBISHI MOTORS Authorized Service Point to avoid the risk of damaging the tyre inflation pressure sensors. If the wheel replacement is not done by a MITSUBISHI MOTORS Authorized Service Point, it is not covered by your warranty.

CAUTION
● The use of non-genuine wheels will prevent the proper fit of the tyre inflation pressure sensors, resulting air leakage or damage of the sensors.
Reset of low tyre pressure warning threshold
The threshold is set based on the tyre pressure which the reset function is executed by following procedure.
-
Transit the display by multi-information display switch until the tyre pressure monitoring system (TPMS) SET indicator is displayed.
-
Hold down the multi-information display switch for 3 seconds or more. (A beep is heard.)
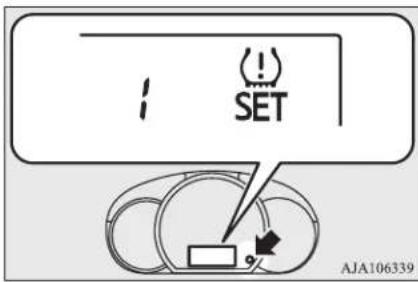
- The warning lamp start flashing slowly.
- Drive for a while. The reset is completed if the warning lamp goes out.

NOTE
● The reset function should be executed every time when the tyre pressure or tyre rotation is adjusted.
● The reset function should be executed when the tyre is cold. If it is executed when the tyre is warm (e.g. after driving), there may be a low tyre pressure warning earlier than usual.
Tyre ID set change
In case that 2 sets of tyre inflation pressure sensor ID are registered in the receiver, the valid tyre ID set can be changed by following procedure.
- Transit the display by multi-information display switch until the tyre pressure monitoring system (TPMS) SET indicator is displayed.
- Hold down the multi-information display switch for 10 seconds or more. (A beep is heard.)
(Although the reset execution starts at holding down the switch for 3 seconds, keep holding down the switch continuously.)
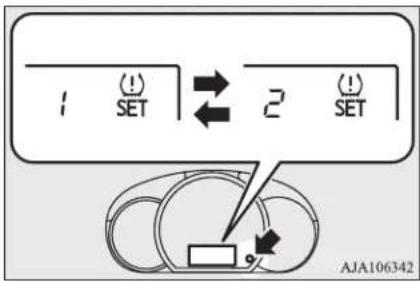
flowchart
graph TD
    A["1 SET"] --> B["2 SET"]
    B --> C["Terminal Block"]
    style A fill:#f9f,stroke:#333
    style B fill:#ccf,stroke:#333
    style C fill:#dfd,stroke:#333
- The valid tyre ID set is changed, and the number of the tyre pressure monitoring system (TPMS) SET indicator is changed.

NOTE
● Each time this procedure is done, the tyre ID set is changed. (1 - 2 - 1 - 2 ...)
● The tyre ID set is NOT changed, in case that only 1 set of ID is registered.
- When changing the tyre ID set, the reset function of low tyre pressure warning threshold is automatically started. (The warning lamp start flashing slowly.) If the tyre is warm at this time, the reset function should be executed again when the tyre is cold.
Cargo loads
Cargo load precautions

CAUTION
- Do not load cargo or luggage higher than the top of the seatback. Be sure that your cargo or luggage cannot move once your vehicle is moving.
Having the driver's vision blocked, and your cargo being thrown inside the cabin if you suddenly have to brake can cause a serious accident or injury.
- Load heavy cargo or luggage in the front of the vehicle. If the load in the back of the vehicle is too heavy, steering may become unstable.
Trailer towing (1200 models)
Loading a roof carrier

CAUTION
- Use a roof carrier that properly fits your vehicle.
Do not load luggage directly onto the roof. For installation, refer to the instruction manual accompanying the roof carrier.
- When attaching/removing the roof carrier and loading/removing luggage, do not apply excessive pressure on a single point.
Depending on how and where the force is applied, this may cause dents on the vehicle roof.
Roof carrier precaution

CAUTION
● Make sure that the weight of the luggage does not exceed the allowable roof load. If the allowable roof load is exceeded, this may cause damage to the vehicle.
The roof load is the total allowable load on the roof (the weight of the roof carrier plus the weight of luggage placed on the roof carrier).
For the specific value, refer to "Maximum roof load" on page 11-05.

CAUTION
- When luggage is loaded onto the vehicle, please make sure to drive slowly and avoid excessive manoeuvres such as sudden braking or quick turning.
In addition, place the luggage on the carrier so that its weight is distributed evenly with the heaviest items on the bottom. Do not load items that are wider than the roof carrier.
The additional weight on the roof could raise the vehicle's centre of gravity and affect vehicle handling characteristics.
As a result, driving errors or emergency manoeuvres could lead to a loss of control and result in an accident.
● Before driving and after travelling a short distance, always check the load to make sure it is securely fastened to the roof carrier. Check periodically during your travel that the load remains secure.

NOTE
● To prevent wind noise or reduction in fuel economy, remove the roof carrier when not in use.
● Before using an automatic car wash, remove the roof carrier.
- Be sure that adequate clearance is maintained for raising the tailgate when installing a roof carrier.
Trailer towing (1200 models)
In order to tow a trailer with your vehicle, when having a trailer towing device mounted that meets all relevant regulations in your area, consult a MITSUBISHI MOTORS Authorized Service Point.
The regulations concerning the towing of a trailer may differ from country to country. You are advised to obey the regulations in each area.

CAUTION
● Danger of Accident!
A towing bar should be fitted according to MITSUBISHI MOTORS guidelines.
Maximum towable weight with brake and maximum trailer-nose weight
Never exceed the maximum towable weight with brake and the maximum trailer-nose weight as listed in the specifications. (Refer to page 11-05.)
If you tow a trailer at an altitude of more than 1,000 m above sea-level, reduce your weight by 10 % of the gross combination weight for every increase of 1,000 m above sea-level, as the engine output is lowered owing to decrease in atmospheric pressure.
Towing bar mounting specifications
See the following table for fixing points (A) for the towing bar.
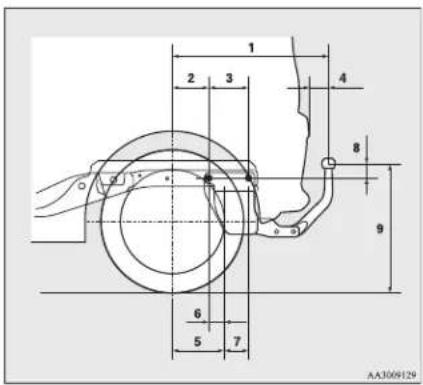
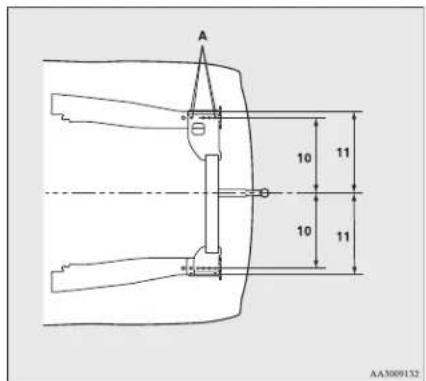
| 1 671.5 mm |
| 2 140.5 mm |
| 3 154.5 mm |
| 4 75 mm |
| 5 Left side: 183 mmRight side: 140 mm |
| 6 Left side: 42.5 mmRight side: 0.5 mm |
| 7 Left side: 112 mmRight side: 155 mm |
| 8 46.5 mm |
| 9 494.5 mm (14 inch tyre)497 mm (15 inch tyre)(at kerb weight condition) |
| 9 378 to 384 mm (at laden condition) |
| 10 467 mm |
| 11 505 mm |
Operating hints
● To prevent the clutch from slipping (Vehicle with a M/T only), do not rev the engine more than is required when starting off.
- Be sure that the driving speed does not exceed 100 km/h (62 mph) for trailer operation. It is also recommended that you obey the local regulations in case driving speed with a trailer is limited to less than 100 km/h (62 mph).
● To prevent shocks from the overrun brake, depress the brake pedal lightly at first and then more strongly.
● To make full use of engine braking, change to a lower shift point before descending a slope.
Trailer towing (1200 models)
Overheating
This will normally occur as a result of some mechanical failure. If your vehicle should overheat, stop and check for a loose or broken water pump/alternator drive belt, a blocked radiator air intake or a low coolant level. If these items are satisfactory the overheating could be caused by a number of mechanical causes that would have to be checked at a competent service centre.
CAUTION
- If the engine overheats, please refer to the "Engine overheating" section of "For emergencies" prior to taking any corrective action.
● On vehicles equipped with CVT, if the selector lever position indicator blinks, the temperature of the CVT fluid is high.
Read the reference page and take the required measures.
Refer to “When the selector lever position indicator blinks” on page 6-29.
For pleasant driving
Ventilators....7-02
Heater*/Manual air conditioning* 7-03
Automatic air conditioning ^* 7-08
Important operation tips for the air conditioning.... 7-14
Air purifier ^* 7-15
LW/MW/FM electronic tuning radio with CD player*....7-15
To play tracks from USB device*....7-32
To play tracks from a Bluetooth® device (vehicles with
Bluetooth ^(1) 2.0 interface)....7-40
Steering wheel audio remote control switches*....7-42
Error codes.... 7-43
Handling of compact discs....7-44
Antenna....7-46
Link System ^* 7-46
Bluetooth ^® 2.0 interface ^* 7-46
USB input terminal* 7-67
Sun visors....7-70
Accessory socket....7-71
Interior lamps.... 7-71
Storage spaces....7-72
Cup holder....7-73
Bottle holder....7-74
Rear shelf panel* 7-74
Convenient hook....7-75
Assist grip....7-75
Ventilators
Ventilators
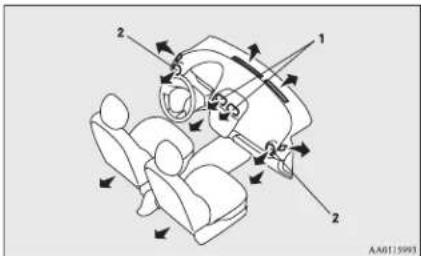
1- Centre ventilators
2- Side ventilators

NOTE
- Do not place beverages on top of the instrument panel. If they splash into the air conditioning ventilators, they could damage the system.
Air flow and direction adjustments
Centre ventilators
Move the knobs (A) to make adjustments.
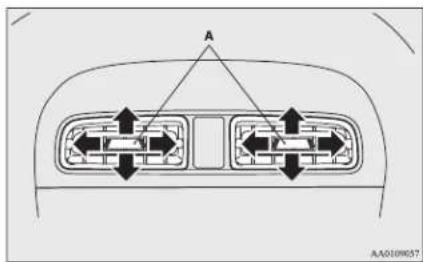
Side ventilators
When the dimple (A) is pressed, the ventilators open.
To close the ventilators, press the dimple on the opposite side. Change the direction of the air flow by turning the ventilator itself.
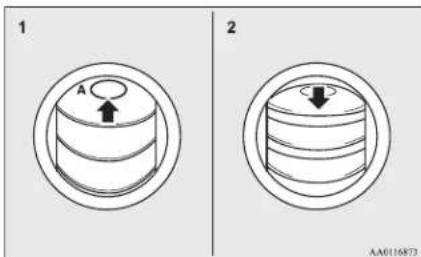
1- Open
2- Close

NOTE
● On vehicles with air conditioning, the cool air from the ventilators may appear as a mist.
This is due to moist air being suddenly cooled by the air conditioning. This will clear after a few moments.
Mode selection
To change the position and amount of air flowing from the ventilators, turn the mode selection dial.
On vehicles with the automatic air conditioning, press the MODE switch or demister switch. (Refer to "MODE switch" on page 7-12, "Demister switch" on page 7-13.)
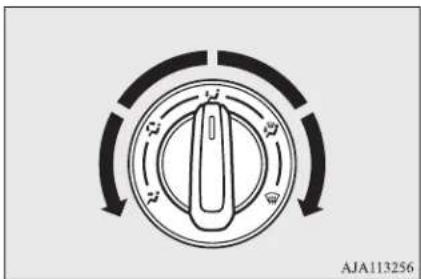
natural_image
Circular diagram showing a rotary knob with directional arrows, no text or symbols present
Face position
Air flows only to the upper part of the passenger compartment.
Air flows to the upper part of the passenger compartment, and flows to the leg area.
Air flows mainly to the leg area.
Air flows to the leg area, the windscreen and the door windows.
W Demister position
Air flows mainly to the windscreen and the door windows.
CAUTION
- On vehicles with the heater or the manual air conditioning, when using the mode selection dial between the 🔊 and “” positions, prevent fogging by moving the air selection lever to select outside air. (Refer to “Air selection lever” on page 7-04.)
NOTE
- For vehicles with the Auto Stop & Go (AS&G) system, the windows may start to fog up while the Auto Stop & Go (AS&G) system is operating.
If this occurs, press the demister switch to remove fog from the windows.
- With the mode selection dial between the “” and “” positions, the air flows mainly to the upper part of the passenger compartment. With the mode selection dial between the “” and “” positions, the air flows mainly to the leg area.
- With the mode selection dial in the “” position, a small amount of air flows to the windscreen and the door windows.
NOTE
- With the mode selection dial between the “” and “” positions, the air flows mainly to the leg area. With the mode selection dial between the “” and “” positions, the air flows mainly to the windscreen and door windows.
Heater\*/Manual air conditioning\*
The air conditioning can only be used while the engine is running.
CAUTION
● The engine speed may increase when the air conditioning is operating.
With an increased engine speed, a CVT vehicle will creep to a greater degree than with a lower engine speed. Fully depress the brake pedal to prevent the vehicle from creeping.
Heater*/Manual air conditioning*
Control panel
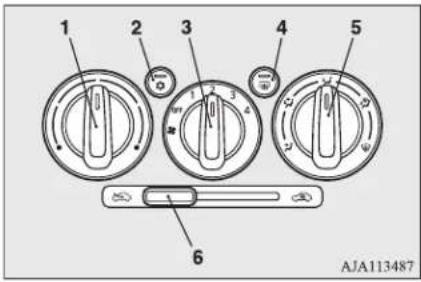
1- Temperature control lever
2- Air conditioning switch*
3- Blower speed selection dial
4- Rear window demister switch → p. 5-26
5- Mode selection dial
6- Air selection lever
Blower speed selection dial
Select the blower speed by turning the blower speed selection dial clockwise or anticlockwise.
The blower speed will gradually increase as the dial is turned to the right.
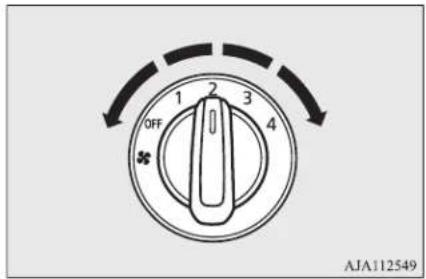
Temperature control dial
The temperature control dial is used to select the desired air temperature.
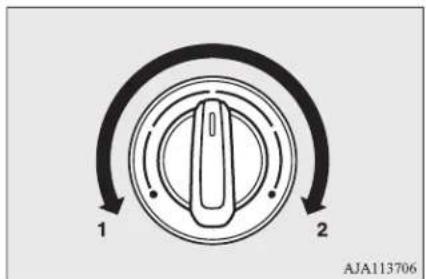
1- Cooler
2- Warmer

NOTE
● While the engine coolant temperature is low, the temperature of the air from the heater will be cool/cold until the engine warms up, even if you have selected warm air with the dial.
Air selection lever
To change the air selection, use the air selection lever.
● “Outside air
Outside air is introduced into the passenger compartment.
● “” Recirculated air
Air is recirculated inside the passenger compartment.
LIHD
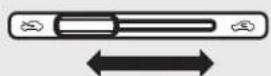
RHD
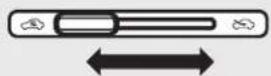
AJA114295

CAUTION
● Use of the recirculation position for extended time may cause the windows to fog up.

NOTE
- Normally, use the outside position to keep the windscreen and side windows clear and quickly remove fog or frost from the windscreen.
If high cooling performance is desired, or if the outside air is dusty or otherwise contaminated use the recirculation position. Switch to the outside position periodically to increase ventilation so that the windows do not become fogged up.
Air conditioning switch\*
Push the switch to turn the air conditioning on, indication lamp (A) will come on.
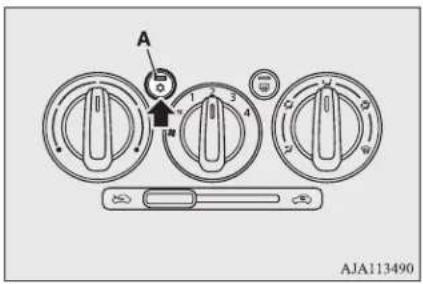
Push the switch again to switch it off.
Operating the air conditioning system
Select dials and lever as shown in the illustration according to your purpose.
Heating
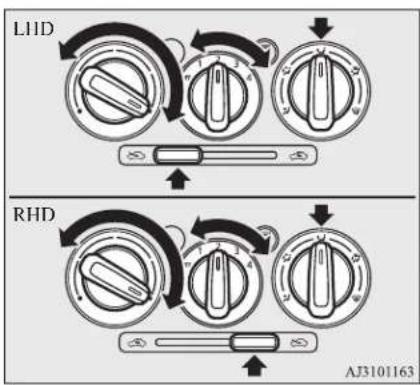
flowchart
graph TD
    A["L1HD"] --> B["Directional Arrow"]
    B --> C["RHD"]
    C --> D["Directional Arrow"]
    D --> E["Directional Arrow"]
    E --> F["Directional Arrow"]
    F --> G["Directional Arrow"]
    G --> H["Directional Arrow"]
    H --> I["Directional Arrow"]

NOTE
- For maximum heat, set the blower speed to the 3^rd position.
Cooling (manual air condition-ing)
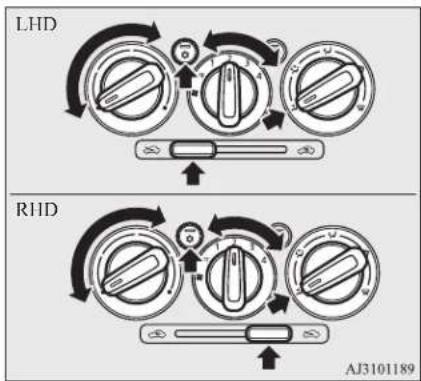

CAUTION
- If the outside air is dusty or otherwise contaminated, or if you want a high cooling performance, set the air selection lever to the recirculation position and the temperature control dial all the way to the left.
Switch to the outside position periodically to increase ventilation so that the windows do not become fogged up.
Heater*/Manual air conditioning*
Combination of unheated air and heated air
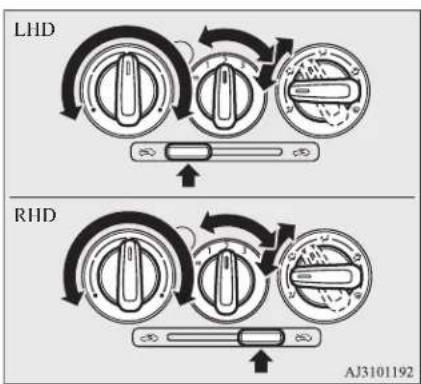
Demisting of the windscreen and door windows

CAUTION
● For safety, make sure you have a clear view through all the windows.
For ordinary demisting
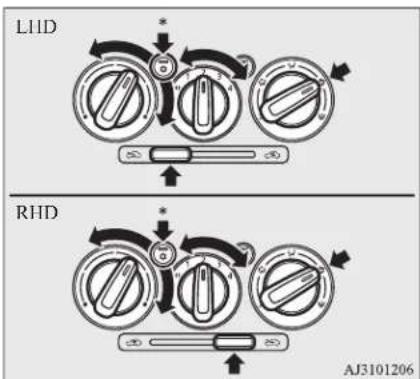
*: Optional equipment
For quick demisting
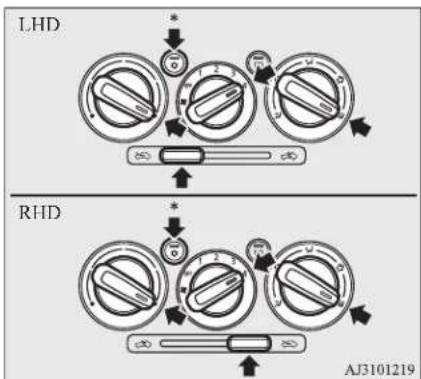
*: Optional equipment

NOTE
● To demist effectively, direct the air flow from the side ventilators towards the door windows.
- Do not set the temperature control dial to the max. cool position. Cool air will blow against the window glasses and prevent de-misting.
Heater*/Manual air conditioning*
Introduction of outside air
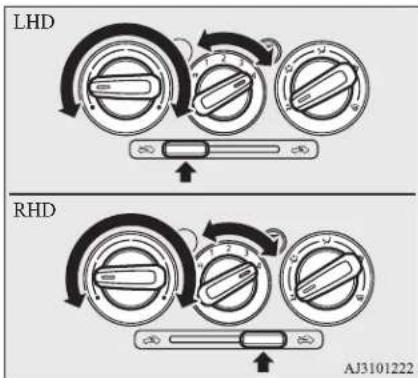
Automatic air conditioning*
Automatic air conditioning\*
The air conditioning can only be used while the engine is running.

CAUTION
● The engine speed may increase when the air conditioning is operating.
With an increased engine speed, a CVT vehicle will creep to a greater degree than with a lower engine speed. Fully depress the brake pedal to prevent the vehicle from creeping.
Control panel
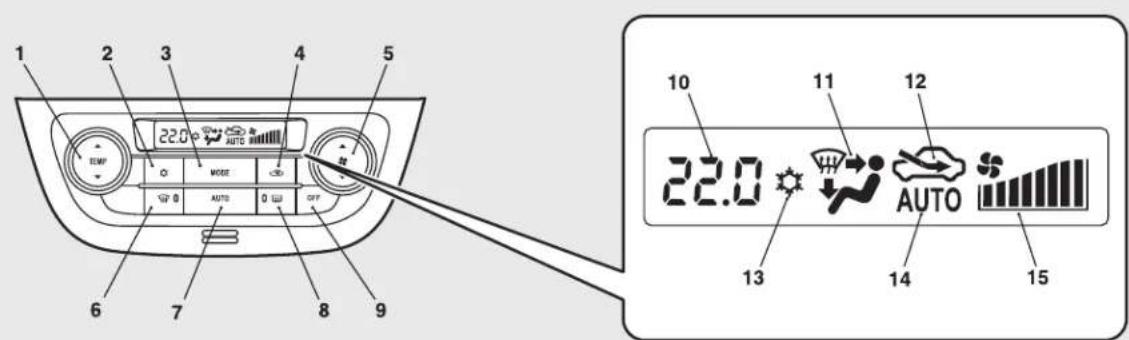
AA1009154
1- Temperature control switch
2- Air conditioning switch
3- MODE switch
4- Air selection switch
5- Blower speed selection switch
6- Demister switch
7- AUTO switch
8- Rear window demister switch → p. 5-26
9-OFF switch
10- Temperature display → p. 7-10
11- Mode selection display
12- Air selection indicator
13- Air conditioning indicator
14- AUTO indicator
15- Blower speed display

NOTE
- There is an interior air temperature sensor (A) in the illustrated position.
Never place anything on top of the sensor, since doing so will prevent it from functioning properly.
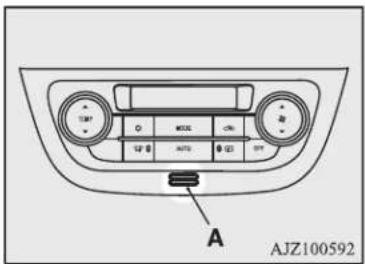
● A sound will be made every time you push all the switches.
Blower speed selection switch
Press of the blower speed selection switch to increase the blower speed. Press of the blower speed selection switch to decrease the blower speed.
Automatic air conditioning*
The selected blower speed (A) will be shown in the display.
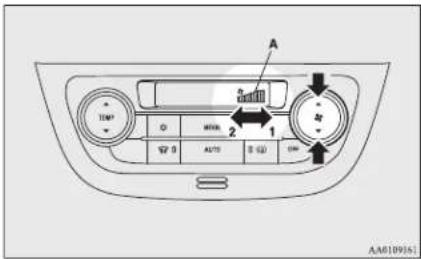
1- Increase
2- Decrease
Temperature control switch
Press or of the temperature control switch to the desired temperature.
The selected temperature (A) will be shown in the display.
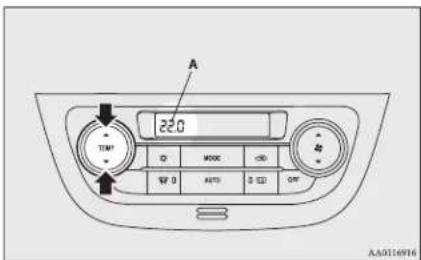

NOTE
● The temperature value of air conditioning is switched in conjunction with outside temperature display unit of the multi information display.
Refer to "Changing the temperature unit" on page 5-10.
● While the engine coolant temperature is low, the temperature of the air from the heater will be cool/cold until the engine warms up, even if you have selected warm air with the switch.
To prevent the windscreen and windows from fogging up, the ventilator mode will be changed to "and the blower speed will be reduced.
- When the temperature is set to the highest or the lowest, the air selection and the air conditioning will be automatically changed as follows.
- Quick Heating (When the temperature is set to the highest setting)
Outside air will be introduced and the air conditioning will stop.
- Quick Cooling (When the temperature is set to the lowest setting)
Inside air will be recirculated and the air conditioning will operate.
The settings described above are the factory settings.
The air selection and air conditioning switches can be customized (function setting changed), and the automatic switching of outside air and the air conditioner according to operating conditions can be changed as desired.
For further information, we recommend you to consult a MITSUBISHI MOTORS Authorized Service Point.
Refer to "Customizing the air conditioning switch" on page 7-12.
Refer to "Customizing the air selection" on page 7-10.
Air selection switch
To change the air selection, simply press the air selection switch.
The selected position (A) will be shown in the display.
● Outside air: “∞” indicator is ON Outside air is introduced into the passenger compartment.
● Recirculated air: “☐” indicator is ON
Air is recirculated inside the passenger compartment.
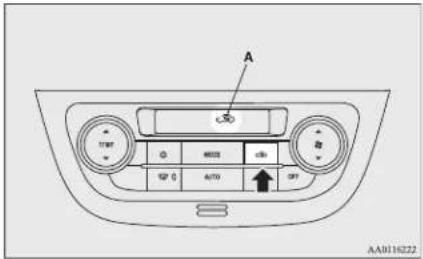

CAUTION
● Use of the recirculation position for extended time may cause the windows to fog up.

NOTE
● Normally, use the outside position to keep the windscreen and side windows clear and quickly remove fog or frost from the windscreen.
If high cooling performance is desired, or if the outside air is dusty or otherwise contaminated use the recirculation position.
Switch to the outside position periodically to increase ventilation so that the windows do not become fogged up.

NOTE
- If you press the AUTO switch to select automatic control after manually switching between outside air and recirculated air, the air selection will also be automatically controlled.
Customizing the air selection
Functions can be changed as desired, as stated below.
● Enable automatic air control
When the AUTO switch pressed, the air selection switch is also controlled automatically.
● Disable automatic air control
Even when the AUTO switch is pressed, the air selection switch is not controlled automatically.
- Setting change method
Hold down the air selection switch for about 10 seconds or more.
- When the setting is changed from enable to disable 3 sounds are emitted and the “💡” indicator flashes 3 times.
- When the setting is changed from disable to enable 2 sounds are emitted and the “ 🔒” indicator flashes 3 times.

NOTE
● The factory setting is “Enable automatic air control.”
- When the demister switch is pressed, in order to prevent misting of the windows the ventilator automatically switches to outside air even if "Disable automatic air control" is set.
AUTO switch
When the AUTO switch is pressed, the mode selection, blower speed adjustment, recirculated/outside air selection, temperature adjustment, and air conditioner ON/OFF status are all controlled automatically.
The "AUTO" indicator (A) will be shown in the display.
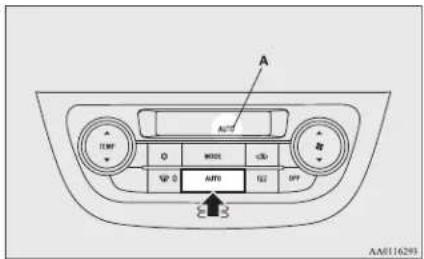
Automatic air conditioning*
Air conditioning switch
Push the switch to turn the air conditioning on, the ⚙ indicator (A) will be shown in the display.
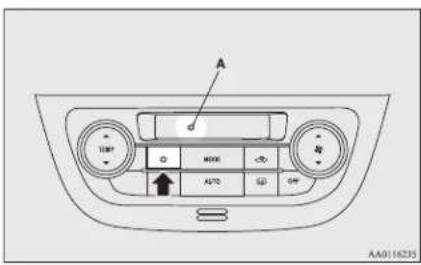
Push the switch again to switch it off.
Customizing the air conditioning switch
Functions can be changed as desired, as stated below.
● Enable automatic air conditioning control:
When the AUTO switch is pressed, or the temperature control switch is set to the minimum temperature, the air conditioning switch is controlled automatically.
● Disable automatic air conditioning control:
The air conditioning switch is not controlled automatically as long as the air conditioning switch is not operated.
- Setting change method
Hold down the air conditioning switch for about 10 seconds or more.
- When the setting is changed from enable to disable 3 sounds are emitted and the “☐” indicator flashes 3 times.
- When the setting is changed from disable to enable 2 sounds are emitted and the “ indicator flashes 3 times.

NOTE
● The factory setting is "Enable automatic air conditioning control".
- When the demister switch is pressed, in order to prevent misting of the windows the air conditioning operates automatically even if "Disable automatic air conditioning control" is set.
OFF switch
Push the OFF switch to turn off the air conditioning system.
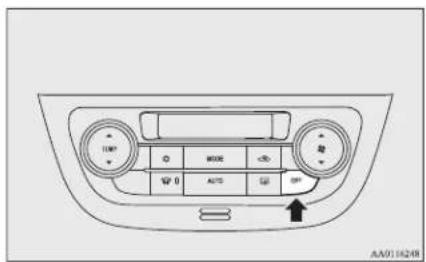
OA0X19E2
MODE switch
Each time the MODE switch is pressed, the mode changes to the next one in the following sequence: “✗” → “✗” → “✗” → “✗” → “✗”. The selected mode (A) is shown in the display. (Refer to “Mode selection” on page 7-02.)
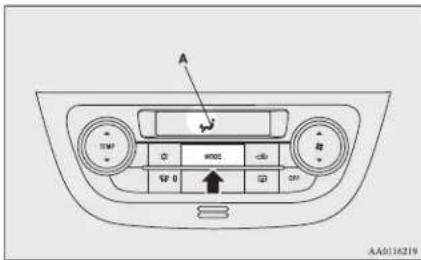
For pleasant driving
Demister switch
When this switch is pressed, the mode changes to the “” mode. The indication lamp (A) will come on. The selected mode (B) is shown in the display. (Refer to “Mode selection” on page 7-02.)
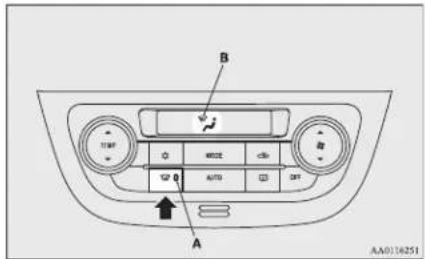

NOTE
- When the demister switch is pressed, the air conditioning system automatically operates and outside air (as opposed to recirculated air) is selected.
(Refer to "Demisting of the windscreen and door windows" on page 7-13.)
Operating the system in automatic mode
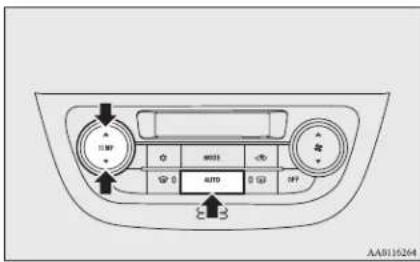
In normal conditions, use the system in the AUTO mode and follow these procedures:
- Push the AUTO switch.
- Set the temperature control switch to the desired temperature.
The mode selection, blower speed adjustment, recirculated/outside air selection, temperature adjustment, and air conditioner ON/OFF status are all controlled automatically

NOTE
- If the blower speed selection switch, air conditioning switch, Mode switch, or air selection switch is operated while the system is operating in the AUTO mode, the activated function overrides the corresponding function of automatic control. All other functions remain under automatic control.
Operating the system in manual mode
Blower speed and ventilator mode may be controlled manually by setting the blower speed selection switch and the MODE switch to the desired positions.
To return to automatic operation, press the AUTO switch.
Demisting of the windscreen and door windows

CAUTION
● For safety, make sure you have a clear view through all the windows.
Important operation tips for the air conditioning
For ordinary demisting
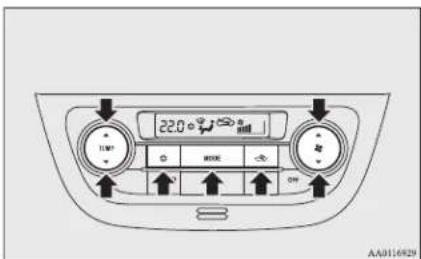
- Set the air selection switch to the outside position.
- Set the MODE switch to the “ ^3 ” position.
- Select your desired blower speed by pressing the blower speed selection switch.
- Select your desired temperature by pressing the temperature control switch.
- Push the air conditioning switch.
For quick demisting
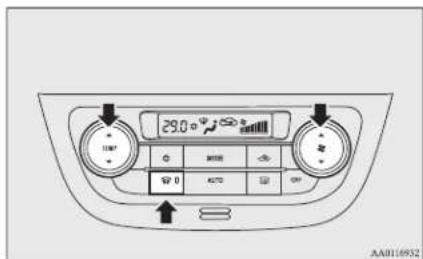
- Push the demister switch to change to the "position."
- Set the blower to the maximum speed.
- Set the temperature to the highest position.
NOTE
● To demist effectively, direct the air flow from the side ventilators towards the door windows.
- Do not set the temperature to the max. cool position. Cool air will blow against the window glasses and prevent demisting.
Important operation tips for the air conditioning
- Park the vehicle in the shade.
Parking in the hot sun will make the vehicle inside extremely hot, and it will require more time to cool the interior.
If it is necessary to park in the sun, open the windows for the first few minutes of air conditioning operation to expel the hot air.
- Close the windows when the air conditioning is in use. The entry of outside air through open windows will reduce the cooling efficiency.
● Too much cooling is not good for the health. The inside air temperature should only be 5 to 6 °C below the outside air temperature.
- When operating the system, make sure the air intake, which is located in front of the windscreen, is free of obstructions such as leaves and snow. Leaves collected in the air-intake plenum may reduce air flow and plug the plenum water drains.
Air conditioning system refrigerant and lubricant recommendations
If the air conditioning seems less effective than usual, the cause might be a refrigerant leak. We recommend you to have the system inspected.
The air conditioning system in your vehicle must be charged with the refrigerant HFO-1234yf and the lubricant VC 200YF.
Use of any other refrigerant or lubricant will cause severe damage which will result in the need to replace your vehicle's entire air conditioning system. The release of refrigerant into the atmosphere should be prevented.
We recommend you to recover and recycle the refrigerant for reuse.
During a long period of disuse
The air conditioning should be operated for at least five minutes each week, even in cold weather. This is to prevent the compressor from seizing and to maintain the air conditioning in the best operating condition.
Air purifier\*
An air filter has been incorporated into this air conditioning so that dirt and dust are cleaned from the air.
Replace the air filter periodically as its ability to clean the air will be reduced as it collects pollen and dirt. For the maintenance interval, refer to the "SERVICE BOOKLET".

NOTE
Operation in certain conditions such as driving on a dusty road and frequent use of the air conditioning can lead to reduction of service life of the filter. When you feel that the air flow is lower than normal or when the windscreen or windows start to fog up easily, replace the air filter.
We recommend you to have it checked.
LW/MW/FM electronic tuning radio with CD player\*
The audio system can only be used when the ignition switch or the operation mode is in ON or ACC.

NOTE
- To listen to the audio system while the engine is not running, turn the ignition switch to the "ACC" position or put the operation mode in ACC.
For vehicles equipped with the keyless operation system, if the operation mode is left in ACC, the accessory power will automatically turn off after a certain period of time and you will no longer be able to use the audio system. The accessory power comes on again if the engine switch is operated with it in the "ACC" position.
Refer to "ACC power auto-cutout function" on page 6-13.
- If a cellular phone is used inside the vehicle, it may create noise from the audio equipment. This does not mean that anything is wrong with your audio equipment. In such a case, use the cellular phone at a place as far away as possible from the audio equipment.
- If foreign objects or water get into the audio equipment, or if smoke or a strange odour comes from it, immediately turn off the audio system. We recommend you to have it checked. Never try to repair it by yourself. Avoid continuous usage without inspection by a qualified person.
LW/MW/FM electronic tuning radio with CD player*
Volume and tone control panel
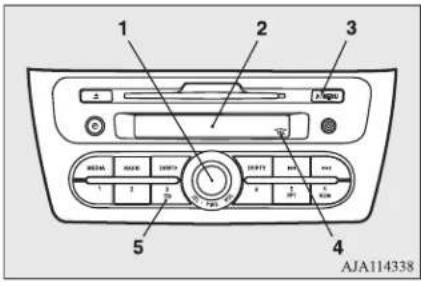
1- PWR (On-Off)/VOL (Volume control)/SEL (Select) switch
2- Display
3-/MENU (Mode change) button
4- SEL (Select) indicator
5- → (Return) button
To adjust the volume
VOL (Volume control)
Turn the VOL switch clockwise to increase the volume; anticlockwise to decrease the volume.
To adjust the tone
- Press the /MENU button to select
BASS → TREBLE → FADER → BAL-
ANCE → Sound control mode off.
7-16
For pleasant driving
- Turn the SEL switch either clockwise or anticlockwise to change the tone/balance setting.
The status will be displayed in the display.
BASS (Bass tone control)
To select the desired bass level.
TREBLE (Treble tone control)
To select the desired treble level.
FADER (Front/Rear balance control)
To balance the volume from the F (front) and the R (rear) speakers.
BALANCE (Left/Right balance control)
To balance the volume from the L (left) and the R (right) speakers.

NOTE
- When turning the SEL switch is enabled, the SEL indicator will appear on the display.
- When set to "0", it will beep.
- When the following operation is performed, this mode will be cancelled.
- The button is pressed.
• Another mode is selected.

NOTE
- No operation is performed for more than 10 seconds.
- In a two-speakers vehicle, keep the FADER setting in the middle position. Since no rear speakers are connected, adjusting the FADER setting towards the R (rear) side will result in a loss of sound output.
Radio control panel and display
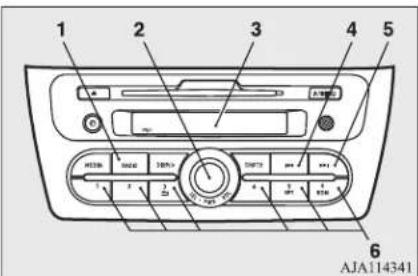
1- RADIO (FM/MW/LW selection) button
2- PWR (On-Off) switch
3- Display
4-1◀◀ (Down-seek) button
5-▶▶ (Up-seek) button
6- Memory select buttons
To listen to the radio
- Press the PWR switch or the RADIO button to turn ON the radio.
Press and hold the PWR switch for 2 seconds or longer to turn OFF the radio.
- Press the RADIO button to select the desired band.
- Press the ◀◀ button or ▶button or memory select buttons to tune into a radio broadcasting station.
To tune the radio
Manual tuning
The frequency changes every time the button or the button is pressed. Press the button to select the desired radio broadcasting station.
Automatic tuning
After keeping the button or the button depressed until it beeps, release the button, and the selected station reception will start.
To enter frequencies into the memory
Manual setting
You can assign to the memory select buttons a maximum of 18 stations in the FM band (6 FM1, 6 FM2 and 6 FM3 stations) and 6 stations each in the MW and LW band. (Stations already assigned to the memory select buttons are replaced by any newly assigned stations.)
Follow the steps described below.
- Press the ◀◀ button or the ▶button to tune to the frequency you wish to keep in the memory.
- Press one of the memory select buttons until it beeps.
The sound will be momentarily interrupted while the frequency is being entered into the memory. The number of the button matching the entry in the memory as well as the frequency is displayed.
- The preset memory setting is retrieved by pressing the button and then releasing it within 1 second.
Automatic setting
With the method, all manually set stations in the band currently selected for reception are replaced with stations in the same band that are automatically selected in order of signal strength. The radio automatically selects 6 stations in the FM band (FM3 station only) and 6 stations each in the MW and LW band.
Follow the steps described below.
- With the radio mode selected, hold down the RADIO button for 2 seconds or longer. The 6 stations with the best signal strength will automatically be assigned to the memory select buttons, with the lowest-frequency station being assigned to the lowest-number button.
- When you subsequently press a memory select button to select a channel number, the radio will begin receiving the station assigned to that number.

NOTE
- If you press the RADIO button for 2 seconds or longer while tuning in the FM1 or FM2 band, the radio will automatically switch to the FM3 band, where the automatic seeking/storing will be activated.
LW/MW/FM electronic tuning radio with CD player*
Radio data system (RDS)
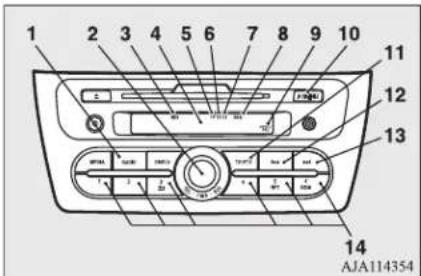
1- RADIO (FM/MW/LW selection) button
2- PWR (On-Off)/SEL (Select) switch
3- RDS (Radio data system) indicator
4- Display
5- TP (Traffic program identification) indicator
6- PTY (Program type) indicator
7- CT (Clock time) indicator
8- REG (Regional program) indicator
9- SEL (Select) indicator
10- ▶ /MENU button
11- TP (Traffic program)/PTY (Program type) button
12-1◀◀ (Down-seck) button
13- (Lip-seek) button
14- Memory select buttons
NOTE
- When turning the SEL switch is enabled, the SEL indicator will appear on the display.
RDS uses PI (program identification) signal and AF (alternative frequency) list transmitted in addition to the normal FM broadcasting programs, and picks up the FM stations that are transmitting the same program from the AF list and automatically tunes to the station with the strongest signal intensity.
Therefore, you can continue listening to one program in, for example, a long distance driving without retuning to the other station transmitting the same program when you are leaving the service area of the currently receiving station.
The RDS radio also features the limited reception of the program types, the break-in reception of the traffic announcement to the EON (enhanced other network) and emergency broadcast, and the limited/unlimited reception of the regional programs.
AF (Alternative Frequencies) function
The AF function finds a station broadcasting the same program and selects the station with the strongest signal of AF lists.
The AF function is turned on at all times unless you manually switch it off.
The AF function can be turned ON and OFF. Refer to "Function setup mode" on page 7-21.
CT (Clock Time) function
The clock can be set automatically by using the signal from the local RDS stations. Refer to "To adjust the clock" on page 7-27.
REG function limits to receive the stations broadcasting regional programs.
Regional programming and regional networks are organized differently depending on the country or area (they may be changed according to the hour, state, or broadcast area), so if you don't want to receive the regional programs automatically, you can set up REG ON not to receive regional programs.
The REG function can be turned ON and OFF.
Refer to "Function setup mode" on page 7-21.
PI (Program Identification) search function
When travelling long distance and the recalled preset station is weak, the radio searches another frequency broadcasting the same programming with the same PI code in AF list.
If there are no frequencies broadcasting the same programming, the radio searches a frequency broadcasting the regional programming. The radio succeeds in searching the regional programming, then the display shows the REG indicator.
If the radio does not succeed in searching the regional programming, the radio returns to the recalled preset station.
The PI function can be turned ON and OFF. Refer to "Function setup mode" on page 7-21.

NOTE
● While searching, the audio system is muted. The display shows "PI-SEARCH".
PTY (Program type)
RDS broadcasts are classified according to program type (PTY) as follows. Use the SEL switch to select your desired PTY.
-
NEWS
-
AFFAIRS (Current affairs)
-
INFO (Information)
-
SPORT
-
EDUCATE (Education)
-
DRAMA
-
CULTURE
-
SCIENCE
-
VARIED
-
POP M (Pop music)
-
ROCK M (Rock music)
-
EASY M (Easy music)
-
LIGHT M (Light classics)
-
CLASSICS
-
OTHER M (Other music)
-
WEATHER (Weather information)
-
FINANCE
-
CHILDREN
-
SOCIAL
-
RELIGION
-
PHONE IN
-
TRAVEL
-
LEISURE
-
JAZZ
-
COUNTRY
-
NATION M (National music)
-
OLDIES
-
FOLK M (Folk music)
-
DOCUMENT
To search for a broadcast of desired program type:
-
Press the PTY button.
-
Turn the SEL switch or press a memory select button to select your desired PTY.
-
Two seconds after a desired PTY has been selected, the radio will begin to search for a broadcast of your selected PTY. During search, the selected PTY on the display blinks.
-
When the radio picks up a station with your desired PTY, the display will show the name of the station.

NOTE
- If the I button or the button is pressed, the radio will try to find another broadcast of the same program type as currently selected.
- If no station is found with your desired PTY, the display will show “EMPTY” for about 5 seconds and the radio will return to the previous station.
How to enter PTYs in the memory
As many as 6 PTYs can be entered in the memory.
Follow the steps described below.
-
Turn the SEL switch to tune the PTY to be entered in the memory.
-
Press one of the memory select buttons for 2 seconds or longer. The sound will be momentarily interrupted while the PTY is being entered into the memory. The number of the button corresponding to the entry into the memory and the PTY are displayed.
-
The preset memory setting is retrieved by pressing the button and then releasing it within about 2 seconds.
LW/MW/FM electronic tuning radio with CD player*
To change the language of PTY display
You can select your favourite language among ENGLISH (English), FRANCAIS (French), DEUTSCH (German), SVENSK (Swedish), ESPANOL (Spanish) and ITALIANO (Italian).
For details, refer to "Function setup mode" on page 7-21.
The radio will automatically tune in to traffic information broadcasts while receiving FM broadcasts or playing compact discs.
To select this function, follow the instructions below.
- Press the TP button. The display will show "TP".
If the RDS data can be read, the display will show "RDS". If not, the display will show "NO RDS" for about 5 seconds.
-
If the radio detects traffic information on either the station currently selected or another station, the display will show "TRAF INF" for 5 seconds followed by a 2-second indication of the frequency. Then, it will show the name of the station broadcasting the traffic information to which you will listen. The volume level is set separately for listening to normal audio programs and for listening to traffic information. The volume level will therefore change automatically to that set when traffic information was last received. When the traffic information broadcast is over, the radio will return to the previously received program and to the corresponding volume level.
-
Press the TP button to return to the previous condition.

NOTE
● While "TP" is illuminated, the radio stops only at TP stations, even if the button or the button is pressed.
The traffic information program standby function is turned on (with the TP indicator shown on the display) and after about 45 seconds since the RDS indicator turns off due to weak signal or the tuning station is changed over from a TP station to a station which does not broadcast traffic information, the sound will beep 5 times and seeks out a TP station in all frequencies automatically.
The TP search function can be turned ON and OFF.
Refer to "Function setup mode" on page 7-21.
Emergency broadcasts
If an emergency broadcast is caught while receiving a FM broadcast or playing back a compact disc with the ignition switch or the operation mode is in ON or ACC, the display will show "ALARM" and the emergency broadcast will interrupt the current program. The volume level is set separately for listening to normal audio programs and for listening to emergency broadcasts. The volume level will therefore change automatically to that set when an emergency broadcast or traffic information broadcast was last received. When the emergency broadcast is over, the radio will return to the previously received program and to the corresponding volume level.
Function setup mode
It is possible to change the following functions:
● AF
- REG*
- TP-S
- PI-S*
● Language of PTY display
-
Press the ▶/MENU button for 2 seconds or longer to select the function setup mode.
-
Turn the SEL switch or press the ▶ / MENU button several times to select "RDS SET" and then press the SEL switch.
- Turn the SEL switch to select the mode you wish to change. The order is: AF → REG* → TP-S → PI-S* → Language of PTY (language of PTY display) → Return.
Then, press the SEL switch.
- Turn the SEL switch to select the desired setting and then press the SEL switch. The setting will be shown on the display.
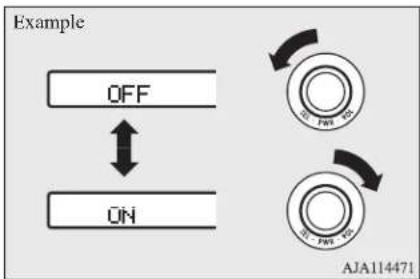
flowchart
graph TD
    A["OFF"] <--> B["ON"]
    C["AJA114471"] --> D["Switch 1"]
    C --> E["Switch 2"]
NOTE
- When the following operation is performed, this mode will be cancelled.
- The /MENU button is pressed for 2 seconds or longer.
- The button is pressed.
NOTE
- No operation is not performed for more than 10 seconds.
- The EXIT "MENU" is selected.
Listen to DAB (Digital Audio Broadcast)\*
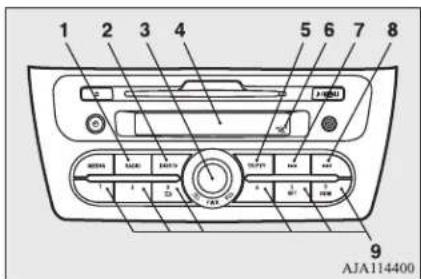
- RADIO button
- DISP/> (Display/Title scroll) button
- PWR (On-Off)/SEL (Select) switch
- Display
- TP/PTY button
- SEL (Select) indicator
- ◀ button
- ▶ button
- Memory select buttons
LW/MW/FM electronic tuning radio with CD player*

NOTE
- When turning the SEL switch is enabled, the SEL indicator will appear on the display.
To listen to DAB
- Press the PWR switch or the RADIO button to turn ON the radio.
Press and hold the PWR switch for 2 seconds or longer to turn OFF the radio.
- Press the RADIO button to select the desired band.
Switch between DAB1, DAB2, and DAB3 bands.
The selected band is indicated on the display.
This switches in the order FM1, FM2, FM3, DAB1, DAB2, DAB3, MW, and LW.
To select a Service
Press the key or the key to select the service.
▶▶1 : Automatically receives higher lead services within ensembles that can be received.
▶◀◀ (hold down) : Automatically receives lower lead services within ensembles that can be received.
▶▶1 : Switches to higher services.
: Switches to lower services.
Going to the first service or last service within the ensemble switches to the next ensemble.
To enter service into the memory
You can assign to the memory select buttons a maximum of 18 service (6 services each in the DAB1, DAB2 and DAB3).
- Press the button or button to tune to the service you wish to keep in the memory.
- Press one of the memory select buttons until it beeps.
The sound will be momentarily interrupted while the service is being entered into the memory. The number of the button matching the entry in the memory as well as the service is displayed.
- The preset memory setting is retrieved by pressing the button and then releasing it within 1 second.

NOTE
- If a memory select button that already has a service registered is selected, then this is overwritten with the new preset.
To switch the display
The display changes as follows every time the DISP/> button is pressed: service name → ensemble name → preset channel.

NOTE
- The display can show up to 11 characters. If a service name or ensemble name has more than 11 characters, press the DISP/> button to view the next 11 characters. When there is no title information to be displayed, then nothing is displayed.
To search for a Service
Search for ensembles and services that can be received.
- Press the SEL switch.
- Turn the SEL switch to select the ensemble.
- Press the SEL switch. The service name within the selected ensemble is displayed.
- Turn the SEL switch to select the service.
- Press the SEL switch. Receive the selected service.

NOTE
- If the text information for the service name cannot be obtained, then nothing is displayed.
- If there is no operation for 10 seconds, then service search mode will be cancelled.
To search PTY (Program type)
Select PTY (program content), and automatically scan for services.
- Press the PTY/SCAN key.
This switches to the PTY selection mode.
- Turn the SEL switch to select PTY
- Press the ▶ button or button.
This starts PTY search.
▶▶1 key : Switches to higher services.
key : Switches to lower services.

NOTE
- When selecting PTY, press any of the memory select buttons to switch to the PTY registered as a preset.
- When selecting PTY, select the PTY to register, and hold down any of the memory select button to register the PTY as a preset.
● While in PTY select status, if there is no operation for 2 seconds, then an upwards search within the selected PTY will start.
To change DAB setting
It is possible to change the following settings items:
LINK (DAB-DAB link function)
If low reception sensitivity, switch to another service.
This function can be turned ON and OFF.
BAND (DAB band)
The DAB band can be selected among BAND III, L-BAND and BOTH.
| Settings value Setting content |
| BAND III Set used broadcast band to 174 to 239 MHz. |
| L-BAND | Set used broadcast band to 1452 to 1490 MHz. |
| BOTII | Set used broadcast band to BAND III and L-BAND. |
- Press the ▶/MENU button for 2 seconds or longer to select the function setup mode.
-
Turn the SEL switch or press the ♪ / MENU button several times to select "DAB SET" and then press the SEL switch.
-
Turn the SEL switch to select the settings items you wish to change. The order is: LINK → BAND → Return.
Then, press the SEL switch.
- Turn the SEL switch to select the desired setting and then press the SEL switch. The setting will be shown on the display.
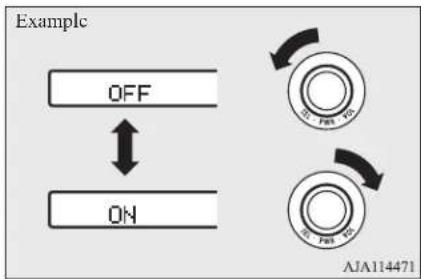
flowchart
graph TD
    A["OFF"] --> B["ON"]
    B --> C["Switch 10"]
    B --> D["Switch 20"]

NOTE
- When the following operation is performed, this mode will be cancelled.
- The /MENU button is pressed for 2 seconds or longer.
- The ➕ button is pressed.
- No operation is performed for more than 10 seconds.
- The EXIT "MENU" is selected.
LW/MW/FM electronic tuning radio with CD player*
CD control panel and display
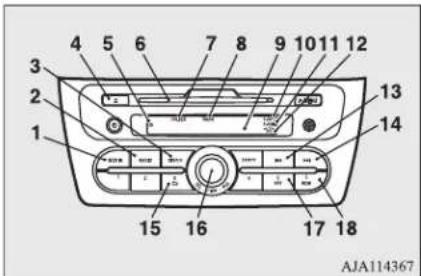
1-MEDIA button
2-RADIO button
3- DISP/> (Display/Title scroll) button
4- CD eject button
5- CD indicator
6- Disc-loading slot
7- FOLDER (Folder number) indicator
8- TRACK (Track number) indicator
9- Display
10-RPT (Repeat)/F-RPT (Folder repeat mode) indicator
11-RDM (Random mode)/F-RDM (Folder random mode) indicator
12- SEL (Select) indicator
13-1◀◀ (Fast-reverse/Track down) button
14- (Fast-forward/Track up) button
15- (return) button
16- PWR (On-Off)/SEL (Select) switch
17- RPT (Repeat) button
7-24
For pleasant driving
18- RDM (Random) button
To listen to a CD
To set a disc
- Insert disc with label facing up.
When a disc is inserted, the CD indicator will come on and the CD player will begin playing even if the radio is being used. The CD player will also start play-back when the MEDIA button is pressed with a disc in the player or with a disc set in the Disc-loading slot, even if the radio is being used.
- To stop the CD, turn off the power by pressing the PWR switch for 2 seconds or longer, or change over to the radio mode by pressing the RADIO button, or eject the disc by pressing the eject button.

NOTE
- For information on adjusting the volume and tone, refer to "To adjust the volume" on page 7-16 and "To adjust the tone" on page 7-16.
● An 8 cm compact disc cannot be played on this CD player.
- For information concerning the handling of compact discs, refer to "Handling of compact discs" on page 7-44.
To eject a disc
When the CD eject button is pressed, the disc automatically stops and is ejected.

NOTE
- If you do not remove the disc before 15 seconds have elapsed, the CD player will automatically reload the disc and stop.
To listen to a music CD
Press the MEDIA button if a disc is already in the CD player. The CD player will enter CD mode and start playback. The track number and the playing time will appear on the display. The tracks in the disc will be played continuously.
To listen to an MP3 CD
This CD player allows you to play MP3 (MPEG Audio Layer-3) files recorded on CD-ROMs, CD-Rs (recordable CDs), and CD-RWs (rewritable CDs) in ISO9660 Level 1/Level 2, Joliet, and Romeo formats. Each disc can hold up to 255 files in up to 100 folders, up to a maximum of 16 levels. The ID3 tag information can be displayed during MP3 playback. For information concerning ID3 tags, refer to "CD text and MP3 title display" on page 7-26.
-
Insert a disc containing MP3 files into the slot.
-
Press the MEDIA button if a disc is already in the CD player.
The display shows "READING", then playback will begin.

NOTE
- While listening to a disc on which CD-DA (CD-Digital Audio) and MP3 files have both been recorded, you can switch between reading the CD-DA, reading the MP3 files, and the external audio input mode by pressing the MEDIA button for 2 seconds or longer (until you hear a beep).
For information on the external audio input, refer to “To use the external audio input function” on page 7-31.
- With a disc that contains both CD-DA and MP3 files, the CD-DA files are automatically played first.
- The playback sound quality differs depending on the encoder software and the bit rate. For more information, refer to the owner's manual for the encoder software.
● Depending on the layout of the files and folders on the disc, it may take some time until playback starts.
● MP3 conversion software and writing software are not supplied with this unit.
- You may encounter trouble in playing an MP3 or displaying the information of MP3 files recorded with certain writing software or CD recorders (CD-R/RW drivers).
- If you write many folders or files other than MP3 files, it may take some time before playback starts.

NOTE
● This unit does not record MP3 files.
- For information on CD-Rs/RWs, refer to "Notes on CD-Rs/RWs" on page 7-45.

CAUTION
- Attempting to play a file not in the MP3 format which has a “.mp3” file name may produce noise from the speakers and speaker damage, and can significantly damage your hearing.
Folder selection order/MP3 file playback order (Example)
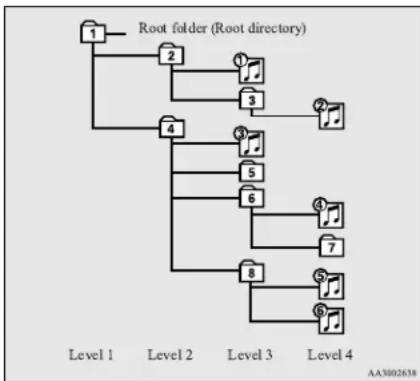
flowchart
graph TD
    A["Root folder (Root directory)"] --> B["1"]
    A --> C["2"]
    A --> D["3"]
    A --> E["4"]
    A --> F["5"]
    A --> G["6"]
    A --> H["7"]
    A --> I["8"]
    A --> J["9"]
    B --> K["Level 1"]
    C --> L["Level 2"]
    D --> M["Level 3"]
    E --> N["Level 4"]
    F --> O["Level 5"]
    G --> P["Level 6"]
    H --> Q["Level 7"]
    I --> R["Level 8"]
    J --> S["Level 9"]
Folder selection
In the order
File selection
In the order


To fast-forward/reverse the disc
Fast-forward
The disc is fast-forwarded while the button is held down. Playback will begin once the button is released.
Fast-reverse
The disc is fast-reversed while the button is held down. Playback will begin once the button is released.
To select a desired track
Track up
The disc will skip as many songs as the number of times the button ▶ is pressed.
The display window will display the track number of the track selected.
Track down
The disc will skip as many songs as the number of times the button is pressed.
The display window will display the track number of the track selected.
LW/MW/FM electronic tuning radio with CD player*
To find a file (MP3 CDs only)
Operate the SEL switch to select desired file. When this mode is activated by pressing the SEL switch, the SEL indicator will be appear on the display.
Press the SEL : To start this mode or to se-switch select the folder or file.
Turn the SEL: To show the folder or file switch

NOTE
- To cancel the selection, press the button to return to the previous step.
- If no operation is performed for 10 seconds or more or other button is operated after the SEL switch has been turned, searching of the desired file is cancelled.
- If no operation is performed for 5 seconds or more after the file is displayed, playback starts.
- When the SEL indicator is not shown on the display and the SEL switch is operated, the volume adjustment is effective.
To repeat tracks
To repeat a track
Press the RPT button to repeat the same track.
If the RPT button is pressed, the RPT indicator will come on.
7-26
For pleasant driving
To exit this mode, press the button again.
To repeat songs in the same folder (MP3 CDs only)
While a song is playing, press the RPT button for 2 seconds or longer (until you hear a beep). The F-RPT indicator will come on and the dise will repeat all the songs in the folder that contains the song currently playing. To exit this mode, press the button again.

NOTE
- With a disc that contains both CD-DA and MP3 files, the repeat mode causes only files of the same format (CD-DA only or MP3 files only) to be repeated.
To change track playback order
Random playback for a disc (music CDs only)
If the RDM button is pressed, the RDM indicator will come on and the tracks that are played will be selected at random.
To exit this mode, press the button again.
Random playback for a folder (MP3 CDs only)
If the RDM button is pressed, the F-RDM indicator will come on and the tracks that are played will be selected at random from the folder that is currently selected.
To exit this mode, press the button again.
Random playback for all folders on a disc (MP3 CDs only)
Press the RDM button for 2 seconds or longer (until you hear a beep). The RDM indicator will come on and the tracks that are played will be selected at random from all folders on the disc currently selected.
To exit this mode, press the button again.

NOTE
- With a disc that contains both CD-DA and MP3 files, the random mode causes only files of the same format (CD-DA only or MP3 files only) to be played in a random sequence.
CD text and MP3 title display
This CD player can display CD text and MP3 titles including ID3 tag information.
CD text
The CD player can display disc and track titles for discs with converted disc and track title information. Press the DISP/> button repeatedly to make selections in the following sequence: disc name → track name → normal display mode.

NOTE
● The display can show up to 11 characters. If a disc name or track name has more than 11 characters, press the DISP/> button for 2 seconds or longer to view the next 11 characters.
- When there is no title information to be displayed, the display shows "NO TITLE".
● Characters that the CD player cannot display are shown as “•”.
The CD player can display folder and file titles for discs with converted folder and file information. Press the DISP/> button repeatedly to make selections in the following sequence: folder name → file name → album TAG → track TAG → artist TAG → normal display mode.

NOTE
- When there is no title information to be displayed, the display shows "NO TITLE".
- The display can show up to 11 characters. If a folder name, track name, or item of ID tag information has more than 11 characters, press the DISP/> button for 2 seconds or longer to view the next 11 characters.
- Characters that the CD player cannot display are shown as “•”.
To display the clock
Press the ⏻ button to switch the clock mode. To exit the clock mode, press the ⏻ button.
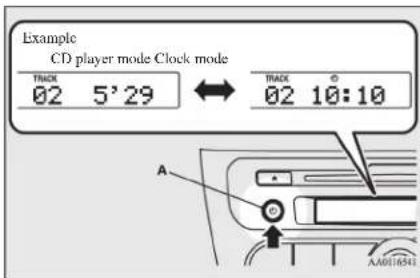
A- (Clock) button

NOTE
● While the clock mode is selected, the display will switch to the applicable operation display whenever the CD player, external audio input mode or radio, etc. is operated. Then, if no entries are made for 7 seconds, the display will automatically return to the clock mode.
To adjust the clock
Automatic mode and manual mode are available for digital clock adjustment.
Select the automatic mode or the manual mode by performing the following operations:
- Press the PWR switch to turn ON the audio system.
- Enter the function setup mode by pressing the ⏻ button for 2 seconds or longer.
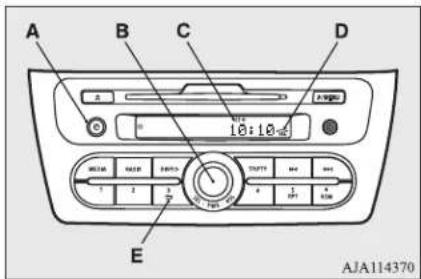
A-④Clock) button
LW/MW/FM electronic tuning radio with CD player*
B-PWR (On-Off)/SEL (Select) switch
C- CT (Clock Time) indicator
D- SEL (Select) indicator
E- (Return) button
- Select the desired setting for each mode to be turned ON and OFF as shown below.
The setting will be shown on the display.
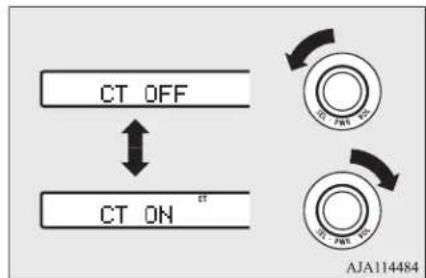
flowchart
graph TD
    A["CT OFF"] <--> B["CT ON"]
    B --> C["Directional Roll 1"]
    B --> D["Directional Roll 2"]
    C --> E["Return Arrow"]
    D --> F["Return Arrow"]
CT ON- Automatic mode
CT OFF- Manual mode

NOTE
● After selecting a mode, you can leave the function setup mode by taking either of the following steps:
- Press the Ⓗ button for at least 2 seconds.
- Press the ➤ button.

NOTE
• Make no entry for 7 seconds.
Automatic mode
The automatic adjustment mode can set the local time automatically by using the signal from local RDS stations. In this mode, CT indicator is shown in the display. Refer to "Radio data system (RDS)" on page 7-18.
Manual mode
The manual mode is also available in case the automatic mode shows the incorrect time when the adjacent local RDS stations are located in a different time zone. Refer to "Radio data system (RDS)" on page 7-18.
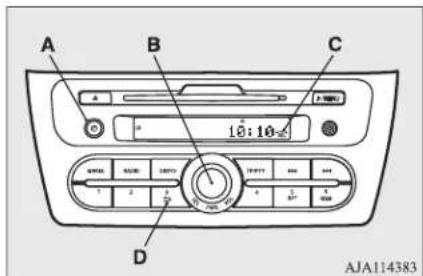
A- (Clock) button
B- SEL (Select) switch
C- SEL (Select) indicator
D- (return) button
- Press and hold the Ⓑutton for two seconds or longer.
- Turn the SEL switch to select the "CT OFF", then press the ⏻ button.
- Turn the SEL switch to select the time notation: 12-hour or 24-hour.
- When the time notation is selected, press the Ⓞ button to flash the "hours" digit.
Turn the SEL switch to adjust the "hours" digit.
- When the "hours" digit is adjusted, press the ⏻ button to flash the "minutes" digit.
Turn the SEL switch to adjust the "minutes" digit.
- When the time is set, press the ⏻ button to stop the clock display from flashing.

NOTE
- When using the manual mode to adjust the clock, set the "CT" function to "OFF". If the "CT" function is set to "ON", the time will automatically be corrected using the signals from the local RDS stations even if it was set manually.
-
When the following operation is performed, this mode will be cancelled.
-
The Ⓑ button is pressed until you hear a beep.
- The button is pressed.

NOTE
• Another mode is selected.
- Reset the time after the battery terminals are disconnected and reconnected.
- Seconds do not appear in the clock display, but after adjusting the "minutes" setting, the clock begins to operate from 0 seconds.
To confirm the version number of the Gracenote DB (vehicles with a Bluetooth® 2.0 interface)
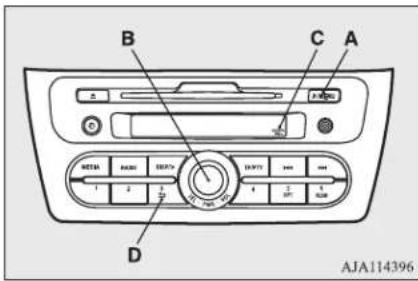
A-/MENU button
B- SEL (Select) switch
C- SEL (Select) indicator
D- → (Return) button
-
Press and hold the /MENU button for 2 seconds or longer.
-
Turn the SEL switch or press the ♪ / MENU button several times to select "Gracnote DB" and then press the SEL switch.
- Turn the SEL switch to select "DB Version" and then press the SEL switch. The Gracenote DB version is displayed.

NOTE
- When turning the SEL switch is enabled, the SEL indicator will appear on the display.
- When the following operation is performed, this mode will be cancelled.
- The button is pressed.
- No operation is performed for more than 10 seconds.
• The EXIT "MENU" is selected.
To change the language (vehicles with Bluetooth® 2.0 interface)
It is possible to set the language used for voice control.
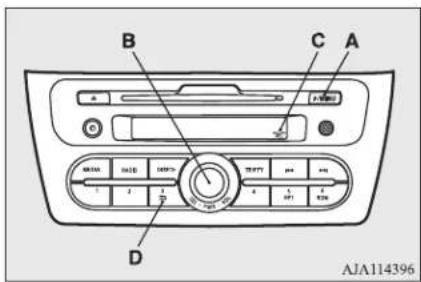
A-/MENU button
B- SEL (Select) switch
C- SEL (Select) indicator
D- → (Return) button
- Press and hold the ▶ /MENU button for 2 seconds or longer.
- Turn the SEL switch or press the ▶/MENU button several times to select "PHONE SET" and then press the SEL switch.
- Turn the SEL switch to select "LANGUAGE" and then press the SEL switch.
LW/MW/FM electronic tuning radio with CD player*
- Turn the SEL switch to select "LangChg YES" and then press the SEL switch.
- Turn the SEL switch to select language and then press the SEL switch.
- Turn the SEL switch to select "LangSet YES" and then press the SEL switch.

NOTE
- When turning the SEL switch is enabled, the SEL indicator will appear on the display.
- When the following operation is performed, this mode will be cancelled.
- The button is pressed.
- No operation is performed for more than 10 seconds.
• The EXIT "MENU" is selected.
To change the position of the speaker of the output sound (vehicles with Bluetooth® 2.0 interface)
It is possible to change the position of the speaker of the output sound during cellular phone voice cut-in.
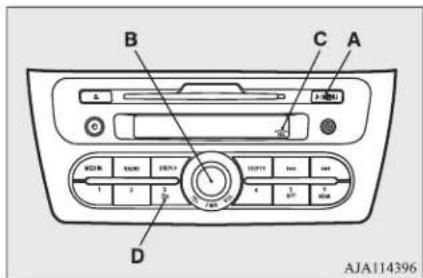
- Turn the SEL switch to select “← PHONE IN →” and then press the SEL switch.
- Turn the SEL switch to select "IN-L" (output sound from the left side speaker) or "IN-R" (output sound from the right side speaker) and then press the SEL switch.

NOTE
- When turning the SEL switch is enabled, the SEL indicator will appear on the display.
- When the following operation is performed, this mode will be cancelled.
• The button is pressed.
• No operation is performed for more than 10 seconds.
• The EXIT "MENU" is selected.
A-/MENU button
B- SEL (Select) switch
C- SEL (Select) indicator
D- (return) button
- Press and hold the /MENU button for 2 seconds or longer.
- Turn the SEL switch or press the ▶ / MENU button several times to select "PHONE SET" and then press the SEL switch.
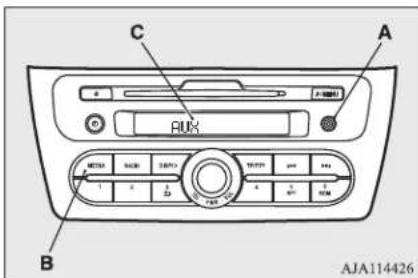
A- Auxiliary Audio connector (mini-jack)
B-MEDIA button
C- Display
You can listen to commercially available audio equipment, such as a portable audio system, from your vehicle's speakers, by connecting the audio equipment to the auxiliary audio connector.

NOTE
● Use a stereo mini-jack connector to connect the audio equipment to the auxiliary audio connector.
- Connect the headphone port of the portable audio system to the auxiliary audio connector using a commercially available connection cord.
- Press the MEDIA button several times to switch to the AUX mode. The display will show "AUX" and then the external audio input mode will be activated.
- To deactivate the external audio input mode, press the MEDIA button to switch to another mode.

CAUTION
- Do not operate the connected audio equipment while driving.
This could distract you and an accident might occur.

NOTE
- The connected audio equipment cannot be operated with the vehicle's audio system.
● Depending on the connected audio equipment, it may produce noise from the speakers.

NOTE
- Use the connected audio equipment's own power source, such as its battery.
Noise may be produced from the speakers if the connected audio equipment is used while charging it using the accessory socket of the vehicle.
- Do not activate the external audio input mode when no audio equipment is connected.
Otherwise, noise may be produced from the speakers.
- Connect audio equipment when the external audio input mode is deactivated or lower the vehicle's speaker volume before connecting it.
Noise may be produced from the speakers if audio equipment is connected after the external audio input mode is activated.
- Compared to the CD player mode and radio mode, the vehicle's speaker volume will be lower in the external audio input mode. Therefore, be careful when switching from the external audio input mode to the CD player mode or radio mode since the speaker volume will be higher.
- Do not use excessive force on the connection cord. Otherwise, the cord and connectors may be damaged.
- If the connection cord alone is left connected to the auxiliary audio connector, noise may be produced from the speakers.
To play tracks from USB device*

NOTE
- For information on how to connect and operate the commercially available audio equipment, refer to the owner's manual for the commercially available audio equipment.

NOTE
● A file protected by copyright may not be able to playback.
- It is recommended to adjust the equalizer of the connected device to 0 db or neutral.
To play tracks from USB device\*
If your vehicle is equipped with the USB input terminal, you can connect your iPod or USB memory device to the USB input terminal and play music files stored in the iPod or USB memory device.
See the following section for the types of connectable devices and supported files.
Refer to "Types of connectable devices and supported file specifications" on page 7-68.
See the following sections for the connecting methods, "How to connect an iPod" on page 7-68 and "How to connect a USB memory device" on page 7-68.
If your vehicle is equipped with a Bluetooth ^® 2.0 interface, you can play music files in your iPod or USB memory device via voice operation.
Refer to "To play iPod tracks via voice operation" on page 7-34 and "To play USB memory device tracks via voice operation" on page 7-39.
iPod control panel and display
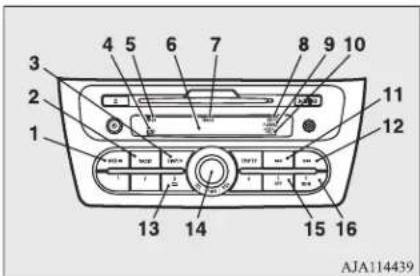
1-MEDIA button
2-RADIO button
3- DISP/> (Display/Title scroll) button
4- (USB device active) indicator
5- iPod indicator
6- Display
7- TRACK (Track number) indicator
8- RPT (Repeat mode) indicator
9-RDM (Random mode)/F-RDM (Folder random mode) indicator
10- SEL (Select) indicator
11-◀◀ (Fast-reverse/Track down) button
12-▶(Fast-forward/Track up) button
13- (return) button
14- PWR (On-Off)/SEL (Select) switch
15- RPT (Repeat) button
16- RDM (Random) button
To play from an iPod
- Press the PWR button to turn on the audio system. The system turns on in the last mode used.
- Connect your iPod to the USB input terminal.
Refer to "How to connect an iPod" on page 7-68.
- Press the MEDIA button several times to switch to the iPod mode. The input mode changes as follows every time the MEDIA button is pressed: CD mode → iPod mode → Bluetooth ^ mode* → AUX mode → CD mode.
The iPod indicator is illuminated and then the iPod mode will be activated.
- Once the device is selected, playback starts and ⚪ indicator appears on the display.

NOTE
● Depending on the condition of your iPod, it may take a longer time before the playback starts.
- To stop the playback, press the RADIO button or MEDIA button to switch to a different mode.

NOTE
- Buttons on the iPod are disabled while the iPod is connected to the audio system.
● To adjust the volume and tone, refer to "To adjust the volume" on page 7-16 and "To adjust the tone" on page 7-16.
To fast-forward/reverse the track
To fast-forward/reverse the current track, press the button or button.
Fast-forward
To fast-forward the current track, press the ▶▶1 button. While the button is kept pressed, the track will be fast-forwarded.
Fast-reverse
To fast-reverse the current track, press the button. While the button is kept pressed, the track will be fast-reversed.
To select a desired track
Track up
Press the ▶button repeatedly until the desired track number appears on the display.
Track down
Press the ◄ button repeatedly until the desired track number appears on the display.

NOTE
- Pressing the button once during the song will cause the audio system to restart play-back from the beginning of the song.
You can select desired tracks from the "Playlists", "Artists", "Albums", "Songs" or "Genre" (vehicles with Bluetooth® 2.0 interface) menus on your iPod.
Operate the SEL switch to select desired tracks.
The selected menu or category or track appears on the display.
When this mode is activated by pressing the SEL switch, the SEL indicator will be displayed in the display.
Press the SEL :To start this mode or to se-
switch select the menu or category or
track.
Turn the SEL :To show the menu or cate-
switch gory or track.

NOTE
- To cancel the selection, press the ➕ button to return to the previous step.
- If no operation is performed for 10 seconds or more or other button is operated after the SEL switch has been pressed, searching of the desired tracks is cancelled.
- If no operation is performed for 5 seconds or more after the track is displayed, playback starts.
- When the SEL indicator does not appear on the display and the SEL switch is operated, the volume will be adjusted.
To play the same track repeatedly
Press the RPT button during playback to show "RPT" in the display.
To exit this mode, press the button again.
To play tracks in random order
Press the RDM button to show "RDM" in the display.
The iPod randomly selects tracks from the current category and plays the selected tracks.
To exit this mode, press the button again.
To play tracks in each album in random order
Press and hold the RDM button until you hear a beep to show "F-RDM" in the display.
To play tracks from USB device*
The iPod randomly selects tracks in the album from the current category and play the selected tracks.
To exit this mode, press the button again.
To switch the display
You can display the track titles, artist names, genre and album titles recorded in the iPod. The display changes as follows every time the DISP/> button is pressed during playback: Album title → Track name → Artist name → Genre (vehicles with Bluetooth® 2.0 interface) → Normal display.

NOTE
- Up to 11 characters are shown in the display at once. If the title is cut off in the middle press the DISP/> button. The next characters are displayed every time this button is pressed for 2 seconds or longer.
- If no title is stored, "NO TITLE" is shown in the display.
- Characters that cannot be displayed are substituted by “•”.
To play iPod tracks via voice operation (vehicles with Bluetooth® 2.0 interface)
Desired tracks can be selected and played from your iPod by "Artist", "Album", "Playlist" and "Genre" using voice commands.
For information concerning the voice recognition function or speaker registration function, refer to "Bluetooth® 2.0 interface" on page 7-46.
The following explains how to prepare for voice operation and play the tracks.
Preparation for voice operation
To use the voice operation, press the SPEECH button (A) first.
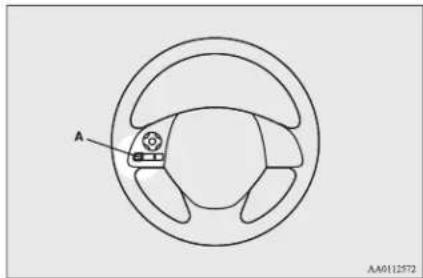
To search by artist name
- Say "Play" on the main menu.

NOTE
- The Bluetooth® 2.0 interface starts recognizing the connected device.
If the connected device cannot be recognized or a connection error occurs, the Bluetooth® 2.0 interface starts an appropriate voice guide. Follow the voice guide.
- After the voice guide says "Would you like to play by Artist, Album, Playlist or Genre?," say "Artist".

NOTE
- If you say "Artist ," you can skip step 3.
- After the voice guide says "What Artist would you like to play?," say the artist name.
- If there is only one match, the system proceeds to step 6.
- If there are two or more matches, the voice guide will say "More than one match was found, would you like to play ?" If you say "Yes," the system proceeds to step 6.
If you say "No," the next matching artist is uttered by the system.

NOTE
- If you say “No” to three or all artist names uttered by the system, the voice guide will say “Artist not found, please try again” and the system returns to step 2.
-
Search time is dependant on the number of songs on your connected device. Devices containing a large number of songs may take longer to return search results.
-
After the voice guide says "Playing ," the system creates a playlist index for the artist.

NOTE
- If the confirmation function is active, the voice guide confirms if the artist name is correct. If the artist name is correct, say "Yes". If not, say "No". After the voice guide says "Artist not found, please try again," the system returns to step 2.
- The system exits the voice recognition mode and starts playback.
To search by album title
- Say "Play" on the main menu.

NOTE
- The Bluetooth® 2.0 interface starts recognizing the connected device.
If the connected device cannot be recognized or a connection error occurs, the Bluetooth® 2.0 interface starts an appropriate voice guide. Follow the voice guide.
- After the voice guide says "Would you like to play by Artist, Album, Playlist or Genre?," say "Album".

NOTE
- If you say “Album
,” you can skip step 3.</p>
<ol>
<li>After the voice guide says "What Album would you like to play?" say the album title. </li>
<li>If there is only one match, the system proceeds to step 6. </li>
<li>If there are two or more matches, the voice guide will say "More than one match was found, would you like to play <album title>? If you say "Yes," the system proceeds to step 6.</li>
</ol>
<p>If you say "No," the next matching album is uttered by the system.</p>
<p><img alt="" src="images/5e479d942af595ff66bb6f16a120dd53dae4afbf45e128c8f15838d66bd60997.jpg" /></p>
<h1 id="note-219">NOTE</h1>
<ul>
<li>If you say "No" to three or all album titles uttered by the system, the voice guide will say "Album not found, please try again" and the system returns to step 2. </li>
<li>After the voice guide says "Playing <album title>," the system creates a playlist index for the album title.</li>
</ul>
<p><img alt="" src="images/e58d8076f089821936ec5eb707c2567a0d06e5cc7c8b50a74d0701d1ee9aef0f.jpg" /></p>
<h1 id="note-220">NOTE</h1>
<ul>
<li>If the confirmation function is active, the voice guide confirms if the album title is correct. If the album title is correct, say "Yes". If not, say "No". After the voice guide says "Album not found, please try again," the system returns to step 2. </li>
<li>The system exits the voice recognition mode and starts playback.</li>
</ul>
<h1 id="to-search-by-playlist">To search by playlist</h1>
<ol>
<li>Say "Play" on the main menu.</li>
</ol>
<p><img alt="" src="images/f1b56fe3b0619b040f10f71e277ce7765e09059f66b083a6cd7936b6f26493dd.jpg" /></p>
<h1 id="note-221">NOTE</h1>
<p>- The Bluetooth ^® 2.0 interface starts recognizing the connected device.
If the connected device cannot be recognized or a connection error occurs, the Bluetooth ^® 2.0 interface starts an appropriate voice guide. Follow the voice guide.</p>
<p>To play tracks from USB device*</p>
<ol>
<li>
<p>After the voice guide says "Would you like to play by Artist, Album, Playlist or Genre?," say "Playlist".</p>
</li>
<li>
<p>After the voice guide says "Playing <playlist>," the system creates an index for the playlist.</p>
</li>
</ol>
<p><img alt="" src="images/1b48ee79d608cdafabc1edfe5ca5e8ef6166294075ef4ba6acbb0015c68cd358.jpg" /></p>
<h1 id="note-222">NOTE</h1>
<p>- If you say “Playlist <playlist>,” you can skip step 3.
If the device has no playlist, the voice guide will say “There are no playlists stored on device” and the system returns to step 2.</p>
<ol>
<li>After the voice guide says "What Playlist would you like to play?," say the playlist name.</li>
<li>If there is only one match, the system proceeds to step 6.</li>
<li>If there are two or more matches, the voice guide will say "More than one match was found, would you like to play <playlist>? If you say "Yes," the system proceeds to step 6.
If you say "No," the next matching playlist name is uttered by the system.</li>
</ol>
<p><img alt="" src="images/3490e861983b87b028fd6e7e4814e3b5a73986e760d4b7360a6a6f5fada7fc17.jpg" /></p>
<h1 id="note-223">NOTE</h1>
<p>- If you say “No” to three or all playlist names uttered by the system, the voice guide will say “Playlist not found, please try again” and the system returns to step 2.</p>
<p><img alt="" src="images/209affdc379011923855f82e55b2c6d080e2ce7e3c05f54f10a97228e01860d0.jpg" /></p>
<h1 id="note-224">NOTE</h1>
<p>- If the confirmation function is active, the voice guide confirms if the playlist name is correct. If the playlist name is correct, say "Yes". If not, say "No". After the voice guide says "Playlist not found, please try again," the system returns to step 2. Refer to "Confirmation function setting" on page 7-50.</p>
<ol>
<li>The system exits the voice recognition mode and starts playback.</li>
</ol>
<h1 id="to-search-by-genre">To search by genre</h1>
<ol>
<li>Say "Play" on the main menu.</li>
</ol>
<p><img alt="" src="images/f76b173d6575d6dd249376af7c31322a0c700449d892f283b04ef402d68f1d28.jpg" /></p>
<h1 id="note-225">NOTE</h1>
<p>- The Bluetooth ^® 2.0 interface starts recognizing the connected device.
If the connected device cannot be recognized or a connection error occurs, the Bluetooth ^® 2.0 interface starts an appropriate voice guide. Follow the voice guide.</p>
<ol>
<li>After the voice guide says "Would you like to play by Artist, Album, Playlist or Genre?," say "Genre".</li>
</ol>
<p><img alt="" src="images/62d37e2d2df6352fb069c1e373e526411beda13775b706c58a78d8a5729a54b8.jpg" /></p>
<h1 id="note-226">NOTE</h1>
<p>- If you say “Genre <type>,” you can skip step 3.</p>
<ol>
<li>After the voice guide says "What Genre would you like to play?," say the music type.</li>
<li>If there is only one match, the system proceeds to step 6.</li>
<li>If there are two or more matches, the voice guide will say "More than one match was found, would you like to play <genre>?" If you say "Yes," the system proceeds to step 6.
If you say "No," the next matching genre is uttered by the system.</li>
</ol>
<p><img alt="" src="images/01a17ba9d4abed357ec947723162d11968c6f2f0ba6a00013e52b8ebabd40790.jpg" /></p>
<h1 id="note-227">NOTE</h1>
<p>- If you say “No” to three or all genres uttered by the system, the voice guide will say “Genre not found, please try again” and the system returns to step 2.</p>
<ol>
<li>After the voice guide says “Playing <genre>,” the system creates an index for the genre.</li>
</ol>
<p><img alt="" src="images/6e82fcb66791a9f8ae82d2705de9ce96eaa8cccf88bad7fcf7c60780f0a1e5ab.jpg" /></p>
<h1 id="note-228">NOTE</h1>
<p>- If the confirmation function is active, the voice guide confirms if the genre is correct. If the genre is correct, say "Yes". If not, say "No". After the voice guide says "Genre not found, please try again," the system returns to step 2. Refer to "Confirmation function setting" on page 7-50.</p>
<ol>
<li>The system exits the voice recognition mode and starts playback.</li>
</ol>
<p>USB control panel and display <br />
<img alt="" src="images/3596e45721818426ca7868b94e345b90058d953d18bad2012fe9ab6e398d59e3.jpg" /></p>
<details>
<summary>text_image</summary>
1
2
3
4 5 6 7 8 9 10
11
12
13 14 15 16
AJA114442
</details>
<p>1- MEDIA button <br />
2-RADIO button <br />
3- DISP/> (Display/Title scroll) button <br />
4- (USB device active) indicator <br />
5-USB indicator <br />
6- Display <br />
7- TRACK (Track number) indicator</p>
<p>8-RPT (Repeat mode)/F-RPT (Folder repeat mode) indicator <br />
9-RDM (Random mode)/F-RDM (Folder random mode) indicator <br />
10- SEL (Select) indicator <br />
II-1◀ (Fast-reverse/Track down) button <br />
12-▶(Fast-forward/Track up) button <br />
13- (Return) button <br />
14- PWR (On-Off)/SEL (Select) switch <br />
15- RPT (Repeat) button <br />
16- RDM (Random) button</p>
<h1 id="to-play-from-a-usb-memory-device">To play from a USB memory device</h1>
<ol>
<li>Press the PWR button to turn on the audio system. The system turns on in the last mode used. </li>
<li>Connect your USB memory device to the USB input terminal.
Refer to "How to connect a USB memory device" on page 7-68. </li>
<li>Press the MEDIA button several times to switch to the USB mode. The input mode changes as follows every time the CD button is pressed: MEDIA mode → USB mode → Bluetooth ^ mode* → AUX mode → CD mode.
The USB indicator is illuminated and then the USB mode will be activated. </li>
<li>Once the device is selected, playback starts and ✉ indicator appears on the display.</li>
</ol>
<p><img alt="" src="images/88fdd233e88da1304b3ec76ecd1a28e11579b1d8c0d67b22efd818094725f2ff.jpg" /></p>
<h1 id="note-229">NOTE</h1>
<p>● Depending on the condition of your USB device, it may take a longer time before the playback starts.</p>
<ol>
<li>To stop the playback, press the RADIO button or MEDIA button to switch to a different mode.</li>
</ol>
<p><img alt="" src="images/fb9c50f6141d386bc589dde783b5f3126fe4986b3912d9fe787a8fbfc6cd63fb.jpg" /></p>
<h1 id="note-230">NOTE</h1>
<p>● To adjust the volume and tone, refer to "To adjust the volume" on page 7-16 and "To adjust the tone" on page 7-16.</p>
<h1 id="supported-compressed-music-files">Supported compressed music files</h1>
<p>This audio can play MP3, WMA and AAC files recorded in a USB memory device. This audio supports up to 65,535 files in 700 folders on 8 levels.</p>
<p>To play tracks from USB device*</p>
<p>Folder selection order/file playback order (example)</p>
<p>The folder and file hierarchy in the USB memory device is shown below.</p>
<p><img alt="" src="images/8536bbc8fead08951e97b6aefba616873e6e6956a7576992a4cd705cf2a4f3e3.jpg" /></p>
<details>
<summary>flowchart</summary>
<pre><code class="language-mermaid">graph TD
A["Root folder (Root directory)"] --> B["1"]
A --> C["2"]
A --> D["3"]
A --> E["4"]
A --> F["5"]
A --> G["6"]
B --> H["Leaf Node 1"]
C --> I["Leaf Node 2"]
D --> J["Leaf Node 3"]
E --> K["Leaf Node 4"]
F --> L["Leaf Node 5"]
G --> M["Leaf Node 6"]
style A fill:#f9f,stroke:#333
style B fill:#ccf,stroke:#333
style C fill:#cfc,stroke:#333
style D fill:#fcc,stroke:#333
style E fill:#cff,stroke:#333
style F fill:#ffc,stroke:#333
style G fill:#cfc,stroke:#333
style H fill:#fff,stroke:#333
style I fill:#fff,stroke:#333
style J fill:#fff,stroke:#333
style K fill:#fff,stroke:#333
style L fill:#fff,stroke:#333
style M fill:#fff,stroke:#333
</code></pre>
</details>
<p>Folder selection</p>
<p>In the order</p>
<p>File selection</p>
<p>In the order</p>
<p><img alt="" src="images/bfedf27b43e643323c1d79a70ac78310e3efca320878925f99a382b3a9b34932.jpg" /></p>
<p><img alt="" src="images/8f3836f6a1393d40180cb65ffd21c540a94ff74e68068f636488c788819eab0b.jpg" /></p>
<p><img alt="" src="images/30d541ded9ea3b58da16ffb1ed772634b15f4bed3b37f55c2a2bfb76f7ea711a.jpg" /></p>
<h1 id="note-231">NOTE</h1>
<p>- If a file protected by copyrights is played, the file will be skipped.</p>
<h1 id="to-fast-forwardreverse-the-track-2">To fast-forward/reverse the track</h1>
<p>To fast-forward/reverse the current track, press the ▶button or button.</p>
<h1 id="fast-forward-3">Fast-forward</h1>
<p>To fast-forward the current track, press the ▶▶ button. While the button is kept pressed, the track will be fast-forwarded.</p>
<h1 id="fast-reverse-3">Fast-reverse</h1>
<p>To fast-reverse the current track, press the ◀◀ button. While the button is kept pressed, the track will be fast-reversed.</p>
<h1 id="to-select-a-file">To select a file</h1>
<h1 id="track-up-3">Track up</h1>
<p>Press the ▶button repeatedly until the desired file number appears on the display.</p>
<h1 id="track-down-3">Track down</h1>
<p>Press the button repeatedly until the desired file number appears on the display.</p>
<p><img alt="" src="images/fe8f202d1eed1b598ba52b10570822837f4ecffc5f62baef8a2710f5ca28f9b6.jpg" /></p>
<h1 id="note-232">NOTE</h1>
<p>- Pressing the button once during the song will cause the audio system to restart play back from the beginning of the file.</p>
<h1 id="to-find-a-file">To find a file</h1>
<p>Operate the SEL switch to select desired file. When this mode is activated by pressing the SEL switch, the SEL indicator will be appear on the display.</p>
<p>Press the SEL : To start this mode or to select the folder or file.</p>
<p>Turn the SEL : To show the folder or file.
switch</p>
<p><img alt="" src="images/7e426205a466cad25f89394a14df25ecdfc93c8435399460720f82b2e5ed7fcc.jpg" /></p>
<h1 id="note-233">NOTE</h1>
<ul>
<li>To cancel the selection, press the ➕ button to return to the previous step. </li>
<li>If no operation is performed for 10 seconds or more or other button is operated after the SEL switch has been turned, searching of the desired file is cancelled. </li>
<li>If no operation is performed for 5 seconds or more after the file is displayed, playback starts. </li>
<li>When the SEL indicator does not appear on the display and the SEL switch is operated, the volume will be adjusted.</li>
</ul>
<h1 id="to-play-the-same-file-repeatedly">To play the same file repeatedly</h1>
<p>Press the RPT button to show "RPT" in the display. To cancel this mode, press the button again.</p>
<h1 id="to-play-the-files-in-the-same-folder-repeatedly">To play the files in the same folder repeatedly</h1>
<p>Press and hold the RPT button until you hear a beep to show "F-RPT" in the display.</p>
<p>All tracks in the current folder are played repeatedly.</p>
<p>To exit this mode, press the button again.</p>
<h1 id="to-play-a-folder-in-random-or-der">To play a folder in random or- der</h1>
<p>Press the RDM button to show "F-RDM" in the display.</p>
<p>The audio randomly selects tracks from the current folder and plays the selected tracks.</p>
<p>To exit this mode, press the button again.</p>
<h1 id="to-play-all-folders-in-random-order">To play all folders in random order</h1>
<p>Press and hold the RDM button until you hear a beep to show "RDM" in the display. The audio randomly selects tracks from all folders and plays the selected tracks.</p>
<p>To exit this mode, press the button again.</p>
<h1 id="to-switch-the-display-3">To switch the display</h1>
<p>You can displays titles with tag information.</p>
<h1 id="folder-title">Folder title</h1>
<p>The display changes as follows every time the DISP/> button is pressed during playback: Folder name → File name → Normal display.</p>
<h1 id="tag-information">Tag information</h1>
<ol>
<li>
<p>Press and hold the DISP/> button until you hear a beep.</p>
</li>
<li>
<p>The display changes as follows every time the DISP/> button is pressed briefly: Album TAG → Track TAG → Artist TAG → Genre TAG (vehicles with Bluetooth® 2.0 interface) → Normal display.</p>
</li>
</ol>
<p><img alt="" src="images/b3d7322ea45ba8b4cd9abbb20bffc2fcfaf200e15673bf136369b63135b2e2ae.jpg" /></p>
<h1 id="note-234">NOTE</h1>
<p>- Press and hold the DISP/> button again until you hear a beep, and the tag information display returns to the folder title display.</p>
<p>- Up to 11 characters are shown in the display at once. If the title is cut off in the middle, press the DISP/> button. The next characters are displayed every time this button is pressed for 2 seconds or longer.</p>
<p>- If no title is stored, "NO TITLE" is shown in the display.</p>
<p>- Characters that cannot be displayed are substituted by “•”.</p>
<h1 id="to-play-usb-memory-device-tracks-via-voice-operation-vehicles-with-bluetooth-20-interface">To play USB memory device tracks via voice operation (vehicles with Bluetooth® 2.0 interface)</h1>
<p>Desired tracks can be selected and played from your USB memory device by "Artist", "Album", "Playlist" and "Genre" using voice commands.</p>
<p>For information concerning the voice recognition function or speaker registration function, refer to "Bluetooth® 2.0 interface*" on page 7-46.</p>
<p>The playback sequence of tracks is the same as when an iPod is connected. Refer to the "To play iPod tracks via voice operation" on page 7-34.</p>
<p>To play tracks from a Bluetooth® device (vehicles with Bluetooth® 2.0 interface)</p>
<h1 id="preparation-for-voice-operation-2">Preparation for voice operation</h1>
<p>To use the voice operation, press the SPEECH button (A) first.</p>
<p><img alt="" src="images/1f5c27613755b486533c542cc70cfd0123916c20684ca9e08f54f4ba96432111.jpg" /></p>
<details>
<summary>text_image</summary>
A
AA0112572
</details>
<h1 id="to-play-tracks-from-a-bluetooth-device-vehicles-with-bluetooth-20-interface">To play tracks from a Bluetooth ^® device (vehicles with Bluetooth ^® 2.0 interface)</h1>
<p>You can wirelessly connect a digital audio player or cellular phone supporting Bluetooth® to listen to the tracks on the connected device.</p>
<p>Refer to "Bluetooth® 2.0 interface" on page 7-46 for the connecting method, etc.</p>
<p>The following explains the basic playback method.</p>
<p>7-40</p>
<p>For pleasant driving</p>
<p><img alt="" src="images/7ea1104059785d0d2c0669d2dfaedb984d29fc1d3863b31d8e36c1be586783c6.jpg" /></p>
<h1 id="note-235">NOTE</h1>
<ul>
<li>The connected Bluetooth® device may not operate correctly or its function may be limited. <br />
● A file protected by copyright may not be able to playback. <br />
● It is recommended to adjust the equalizer of the connected device to 0 db or neutral. </li>
<li>The voice operation is not available to access music files on the connected Bluetooth® device.</li>
</ul>
<h1 id="bluetooth-device-control-panel-and-display">Bluetooth ^® device control panel and display</h1>
<p><img alt="" src="images/1bd9327ad73e19c830ee75d41380e3dbe3680f549a1336435cb28cdaa3ad25d5.jpg" /></p>
<details>
<summary>text_image</summary>
1
2
3
4
5
6
7
8
9
10
11
12
AJA114455
</details>
<p>1-MEDIA button <br />
2-PWR (On-Off) switch <br />
3- BT (Bluetooth®) indicator <br />
4- TRACK (Track number) indicator <br />
5- Display</p>
<p>OA0X19E2</p>
<p>6-1(Fast-reverse/Track down) button <br />
7- (Fast-forward/Track up) button <br />
8- DISP/> (Display/Title display) button <br />
9- Play/Pause button <br />
10- Stop button <br />
11- RPT (Repeat) button <br />
12-RDM (Random) button</p>
<h1 id="to-listen-to-tracks-from-a-device-connected-via-bluetooth">To listen to tracks from a device connected via Bluetooth®</h1>
<ol>
<li>Press the PWR button to turn on the audio system. The system turns on in the last mode used. </li>
<li>Press the MEDIA button several times to switch to the BT-A (Bluetooth) mode. The input mode changes as follows every time the MEDIA button is pressed: CD mode → iPod mode → Bluetooth mode* → AUX mode → CD mode. The BT indicator are illuminated and then the BT-A mode will be activated. </li>
<li>Connect your Bluetooth® device.
Refer to “Connecting the Bluetooth® 2.0 interface and Bluetooth® device” on page 7-52. </li>
<li>Playback starts automatically.</li>
</ol>
<p><img alt="" src="images/add901f3b5b226beba498098696df1d2fe0cd614fb45cc331fa45005689f107e.jpg" /></p>
<h1 id="note-236">NOTE</h1>
<p>● Depending on the connected device, the playback may not start automatically.
In this case, operate the connected device to start the playback.</p>
<h1 id="to-stop-the-playback-if-supported-by-the-device">To stop the playback (if supported by the device)</h1>
<p>To stop the playback, press the Stop button. To restart the playback, press the Play/Pause button.</p>
<h1 id="to-pause-the-playback-if-supported-by-the-device">To pause the playback (if supported by the device)</h1>
<p>To pause the playback, press and hold the Play/Pause button until you hear a beep.
To restart the playback, press the Play/Pause button.</p>
<h1 id="to-fast-forwardreverse-the-track-if-supported-by-the-device">To fast-forward/reverse the track (if supported by the device)</h1>
<p>To fast-forward/reverse the current track, press the ▶button or button.</p>
<h1 id="fast-forward-4">Fast-forward</h1>
<p>To fast-forward the current track, press the ▶▶ button. While the button is kept pressed, the track will be fast-forwarded.</p>
<h1 id="fast-reverse-4">Fast-reverse</h1>
<p>To fast-reverse the current track, press the ◀◀ button. While the button is kept pressed, the track will be fast-reversed.</p>
<h1 id="to-select-a-track-if-supported-by-the-device">To select a track (if supported by the device)</h1>
<h1 id="track-up-4">Track up</h1>
<p>Press the ▶button repeatedly until the desired file number appears on the display.</p>
<h1 id="track-down-4">Track down</h1>
<p>Press the ◄ button repeatedly until the desired file number appears on the display.</p>
<p><img alt="" src="images/f104884abbc34ada49b65b0c236ff16c88763fcd5460c3861945b475fdbc16db.jpg" /></p>
<h1 id="note-237">NOTE</h1>
<p>- Pressing the button once during the song will cause the audio system to restart playback from the beginning of the file.</p>
<h1 id="to-play-the-same-track-repeatedly-if-supported-by-the-device">To play the same track repeatedly (if supported by the device)</h1>
<p>Press the RPT button several times to switch to "RPT" in the display.</p>
<p>The mode changes as follows every time the RPT button is pressed:</p>
<p>No display (no repeat) → RPT (repeat same track) → F-RPT (repeat all tracks) → No display</p>
<p>To exit this mode, press the button again.</p>
<h1 id="to-play-the-same-track-or-all-tracks-repeatedly-if-supported-by-the-device">To play the same track or all tracks repeatedly (if supported by the device)</h1>
<p>Press the RPT button several times to switch to show "F-RPT" in the display.</p>
<p>The mode changes as follows every time the RPT button is pressed:</p>
<p>No display (no repeat) → RPT (repeat same track) → F-RPT (repeat all tracks) → No display</p>
<p>All tracks in the Bluetooth ^ device are played repeatedly.</p>
<p>To exit this mode, press the button again.</p>
<h1 id="to-play-tracks-in-random-order-if-supported-by-the-device">To play tracks in random order (if supported by the device)</h1>
<p>Press the RDM button to show "RDM" in the display.</p>
<p>The system randomly selects and plays tracks from all tracks in the Bluetooth ^® device.</p>
<p>To exit this mode, press the button again.</p>
<h1 id="to-switch-the-display-if-supported-by-the-device">To switch the display (if supported by the device)</h1>
<p>The system can display tag information.</p>
<ol>
<li>
<p>Press the DISP/> button.</p>
</li>
<li>
<p>The display changes as follows every time the DISP/> button is pressed:</p>
</li>
</ol>
<p>Album title → Title name → Artist
name → Genre → Normal display</p>
<p>For pleasant driving</p>
<p>Steering wheel audio remote control switches*</p>
<p><img alt="" src="images/7ed2ce2458a5c147d3dd6b725585d9425fb0cf8feaadee60248414bcb1de7f31.jpg" /></p>
<h1 id="note-238">NOTE</h1>
<ul>
<li>Up to 11 characters are shown in the display at once. If the title is cut off in the middle press the DISP/> button. The next characters are displayed every time this button is pressed for 2 seconds or longer. </li>
<li>If no title is stored, “NO TITLE” is shown in the display. </li>
<li>Characters that cannot be displayed are substituted by “•”.</li>
</ul>
<h1 id="steering-wheel-audio-remote-control-switches">Steering wheel audio remote control switches\*</h1>
<p>The remote control switches are located on the left side of the steering wheel.</p>
<p>These switches can be used when the ignition switch or the operation mode is in ON or ACC.</p>
<p><img alt="" src="images/3db3e8170a1f9676bfb8ad40c57a63f2fefb7b4b56a5d5e99998079db804d36a.jpg" /></p>
<details>
<summary>text_image</summary>
1
2
2
3
AF0016154
</details>
<p>1-button, button <br />
Adjust audio functions and the mobile phone function volume. <br />
2- button, button <br />
Select CD and other audio source tracks and radio stations. <br />
Hold down to skip up and down through tracks. <br />
3- MODE button <br />
Hold down to turn the audio function ON/OFF. Additionally, each time this is pressed, this switches the audio source. The order of switching is as shown below.</p>
<p>FM1, 2, 3 → DAB1, 2, 3 ^ → MW → LW
→ CD or MP3 → iPod ^<em>2 or USB device → Bluetooth Audio ^</em>3 → AUX → FM1, 2, 3</p>
<p>*1: Vehicles with a DAB tuner. <br />
*2: An iPod cable (available separately) is required. <br />
*3: Requires a separately-purchased Bluetooth-capable audio device (vehicles with a Bluetooth® 2.0 interface).</p>
<h1 id="error-codes">Error codes</h1>
<p>If an error code appears in the display, take action in accordance with the table below.</p>
<p>Audio system </p>
<table><tr><td>Error display Item Repair</td><td></td><td></td></tr><tr><td colspan="2">CHECK DISC Disc is not loaded correctly, or condensation on disc.</td><td>Insert disc with label facing up.Remove moisture from disc.</td></tr><tr><td>DISC ERROR</td><td>Disc is dirty, scratched, or deformed; or excessive vehicle vibration.</td><td>Clean or replace disc. Retry when vibrations stop.</td></tr><tr><td>INTERNAL E Loading</td><td>or eject error. Pick-up is out of position.</td><td>Eject disc and reload. If disc will not eject, have the equipment inspected.</td></tr><tr><td colspan="3">HEAT ERROR Internal protection against high temperatures. Allow radio to cool by waiting about 30 minutes.</td></tr><tr><td colspan="2">ERROR DC Foreign material is inside the radio or amplifier.</td><td>Bring your vehicle to a MITSUBISHI MOTORS Authorized Service Point.</td></tr></table>
<p>iPod*</p>
<table><tr><td>Error display Item</td><td>Repair</td><td></td></tr><tr><td colspan="2">NO SONG There are no playable music files. Record music files in the iPod.</td><td></td></tr><tr><td colspan="3">VER ERROR The iPod or its software cannot be recognized. Connect a supported iPod.</td></tr></table>
<p>USB memory device*</p>
<table><tr><td>Error display</td><td>Item</td><td>Repair</td></tr><tr><td>FILE ERROR</td><td>The file cannot be played.</td><td>The file is protected by copyrights, etc. An error is displayed for several seconds, and then the next playable file is played automatically.</td></tr></table>
<p>Handling of compact discs </p>
<table><tr><td>Error display Item Repair</td><td></td><td></td></tr><tr><td>UNSUPPORTED (first) → DEVICE (after)</td><td colspan="2">The USB memory device cannot be recognized. Remove the USB memory device.</td></tr><tr><td>UNSUPPORTED (first) → FORMAT (after)</td><td>The USB memory device format cannot be recognized.</td><td>Remove the USB memory device.</td></tr><tr><td>USB BUS PWR</td><td>An overcurrent or other power-supply error has occurred.</td><td>Remove the USB memory device.Have the vehicle inspected at a MITSUBISHI MOTORS Authorized Service Point.</td></tr><tr><td>LSI ERROR Internal device errors</td><td></td><td>Have the vehicle inspected at a MITSUBISHI MOTORS Authorized Service Point.</td></tr></table>
<h1 id="handling-of-compact-discs">Handling of compact discs</h1>
<p>- Use only the type of compact discs that have the mark shown in the illustration below. (Playback of CD-R or CD-RW discs may cause problems.)</p>
<p><img alt="" src="images/fc9821cb8dfb2742b52ab8e83e12155d1c8cd56830e70edbd5c151abeff123ad.jpg" /></p>
<details>
<summary>text_image</summary>
COMPACT
disc
DIGITAL AUDIO
</details>
<p>● The use of special shaped, damaged compact discs (like cracked discs) or low-quality compact discs (like warped discs or burrs on the discs) such as those shown will damage the CD player.</p>
<p><img alt="" src="images/a68c6a57e64bf5e194fa3f6aa7d4fbda7a7defeb52fc9f1e028b3b1852a48d7f.jpg" /></p>
<details>
<summary>text_image</summary>
Safety warning diagram with heart-shaped and hexagonal shapes, no text labels, and directional arrows indicating safety or compliance actions.
</details>
<p>- In the following circumstances, moisture can form on discs and inside the audio system, preventing normal operation.</p>
<ul>
<li>When there is high humidity (for example, when it is raining). </li>
<li>When the temperature suddenly rises, such as right after the heater is turned on in cold weather.</li>
</ul>
<p>In this case, wait until the moisture has had time to dry out.</p>
<ul>
<li>When the CD player is subjected to violent vibrations, such as during off-road driving, the tracking may not work. </li>
<li>
<p>When storing compact discs, always store them in their separate cases. Never place compact discs in direct sunlight, or in any place where the temperature or humidity is high. <br />
● Never touch the flat surface of the disc without a label. This will damage the disc surface and could affect the sound quality. When handling a compact disc, always hold it by the outer edge and the centre hole. <br />
● To clean a disc, use a soft, clean, dry cloth. Wipe directly from the centre hole towards the outer edge. Do not wipe in a circle. Never use any chemicals such as benzine, paint thinner, a disc spray cleaner, or an anti-static agent on the disc.</p>
</li>
<li>
<p>Do not use a ball point pen, felt pen, pencil, etc. to write on the label surface of the disc. </p>
</li>
<li>Do not put additional labels or stickers on compact discs. Also, do not use any compact disc on which a label or sticker has started to peel off or any compact disc that has stickiness or other contamination left by a peeled-off label or sticker. If you use such a compact disc, the CD player may stop working properly and you may not be able to eject the compact disc.</li>
</ul>
<h1 id="notes-on-cd-rsrws">Notes on CD-Rs/RWs</h1>
<ul>
<li>You may have trouble playing back some CD-R/RW discs recorded on CD recorders (CD-R/RW drives), either due to their recording characteristics or dirt, fingerprints, scratches, etc. on the disc surface. </li>
<li>CD-R/RW discs are less resistant to high temperatures and high humidity than ordinary music CDs and can therefore be damaged and rendered unplayable if left inside your vehicle for a long time. <br />
● Depending on the combination of the writing software, the CD recorder (CD-R/RW drive), and the disc used to create a CD-R/RW, the disc might not play successfully.</li>
</ul>
<p>● This player cannot play the CD-R/RW discs if the session is not closed. <br />
● This player cannot play CD-R/RW discs which contain other than CD-DA or MP3 data (Video CD, etc.). <br />
- Be sure to observe the handling instructions for the CD-R/RW disc.</p>
<h1 id="warning-67">WARNING</h1>
<p>- Operating the CD player in a manner other than specifically instructed herein may result in hazardous radiation exposure. Do not remove the cover and attempt to repair the CD player by yourself. There are no user serviceable parts inside. If the CD player is not working correctly, it is recommended that you have it inspected.</p>
<p>Antenna</p>
<h1 id="antenna">Antenna</h1>
<h1 id="to-remove-2">To remove</h1>
<p>Turn the pole (A) anticlockwise.</p>
<p><img alt="" src="images/d3455a8065850547a84fc1de4eb988a18130552ee478342fb290aca30b7c008f.jpg" /></p>
<details>
<summary>text_image</summary>
Type 1 Type 2
A
B
A
B
AJA114325
</details>
<h1 id="to-install-2">To install</h1>
<p>Screw the pole (A) clockwise into the base (B) until it is securely retained.</p>
<p><img alt="" src="images/3ef9512bfcb3705beddbc39ef7cfebb25fa603862bd1d8072e07aafd77817bb9.jpg" /></p>
<h1 id="note-239">NOTE</h1>
<p>● Be sure to remove the roof antenna in the following cases:</p>
<p>- When using an automatic car wash.</p>
<p>- When placing a car cover over the vehicle.</p>
<p>- When driving into a structure that has a low ceiling.</p>
<h1 id="link-system">Link System\*</h1>
<p>The Link System takes overall control of the devices connected via the USB input terminal or the Bluetooth® 2.0 interface allowing the connected devices to be operated by using the switches in the vehicle or voice commands. See the following section for details on how to operate.</p>
<p>Refer to "Bluetooth® 2.0 interface" on page 7-46.</p>
<p>Refer to "USB input terminal" on page 7-67.</p>
<p>Refer to "To play tracks from USB device" on page 7-32.</p>
<p>Refer to "To play iPod tracks via voice operation" on page 7-34.</p>
<p>Refer to "To play tracks from a Bluetooth device" on page 7-40.</p>
<p>Bluetooth ^® is a registered trademark of BLUETOOTH SIG, INC.</p>
<h1 id="link-system-end-user-licence-agreement">Link System End User Licence Agreement</h1>
<p>You have acquired a device that includes software licensed by MITSUBISHI MOTORS CORPORATION from Visteon corporation and their subsequent 3 ^rd party suppliers. For a complete list of these 3 ^rd party products and their end user licence agreements, please go to the following website. http://www.jciblueconnect.com/faq/fulldisclosure.pdf</p>
<h1 id="bluetooth-20-interface">Bluetooth® 2.0 interface\*</h1>
<p>The Bluetooth® 2.0 interface allows for making/receiving hands-free calls in the vehicle using a Bluetooth® compatible cellular phone based on the wireless communication technology commonly known as Bluetooth®. It also allows the user to play music, saved in a Bluetooth® music player, from the vehicle's speakers.</p>
<p>The system is equipped with a voice recognition function, which allows you to make hands-free calls by simple switch operations and voice command operations using a defined voice tree.</p>
<p>The Bluetooth ^® 2.0 interface can be used when the ignition switch or the operation mode is in ON or ACC.</p>
<p>Before you can use the Bluetooth ^® 2.0 interface, you must pair the Bluetooth ^® device and Bluetooth ^® 2.0 interface. Refer to “Connecting the Bluetooth ^® 2.0 interface and Bluetooth ^® device” on page 7-52.</p>
<p>Bluetooth ^® is a registered trademark of BLUETOOTH SIG, INC.</p>
<p><img alt="" src="images/d64d084e7a2f999908ea76a562155462e3210dba1e97e63cea1ff7eae94f4717.jpg" /></p>
<h1 id="warning-68">WARNING</h1>
<ul>
<li>Although the Bluetooth® 2.0 interface allows you to make hands-free calls, if you choose to use the cellular phone while driving, you must not allow yourself to be distracted from the safe operation of your vehicle. Anything, including cellular phone usage, that distracts you from the safe operation of your vehicle increases your risk of an accident. <br />
● Refer to and comply with all state and local laws in your area regarding cellular phone usage while driving.</li>
</ul>
<p><img alt="" src="images/175a38a8e110e58f62bf7ab188c7172fe5fd5777b00825429ab45b95d5cb41cb.jpg" /></p>
<h1 id="note-240">NOTE</h1>
<ul>
<li>For vehicles equipped with the keyless operation system, if the operation mode is left in ACC, the accessory power will automatically turn off after a certain period of time and you will no longer be able to use the Blu tooth® 2.0 interface. The accessory power comes on again if the engine switch is operated.
Refer to “ACC power auto-cutout function” on page 6-13. </li>
<li>The Bluetooth ^ 2.0 interface cannot be used if the Bluetooth ^ device has a flat battery or the device power is turned off. <br />
● Hands-free calls will not be possible if your phone does not have service available. </li>
<li>If you place the Bluetooth ^ device in the luggage compartment, you may not be able to use the Bluetooth ^ 2.0 interface. </li>
<li>Some Bluetooth ^ devices are not compatible with the Bluetooth ^ 2.0 interface. </li>
<li>You can confirm the Link System software version by pressing the HANG-UP button 3 times (press and hold 2 times and then press briefly) within 10 seconds. </li>
<li>You can find more details about the Bluetooth® 2.0 interface (hands-free/Link system) via the MITSUBISHI MOTORS web site. <br />
Please read and agree to the “Warning about Links to the Web Sites of Other Companies”, connecting to an external link. http://www.mitsubishi-motors.com/en/products/index.html</li>
</ul>
<p><img alt="" src="images/4630bac2f08e60003ef3c44d4b5749f80616e898e87310b641aa425b8200a4d5.jpg" /></p>
<h1 id="note-241">NOTE</h1>
<p>● Software updates by cellular phone/digital audio device manufacturers may change/alter device connectivity.</p>
<p>Steering control switch and microphone → p. 7-48</p>
<p>Voice recognition function → p. 7-49</p>
<p>Useful voice commands → p. 7-49</p>
<p>Speaker enrollment function → p. 7-51</p>
<p>Connecting the Bluetooth® 2.0 interface and Bluetooth® device → p. 7-52</p>
<p>Operating a music player connected via Bluetooth® → p. 7-58</p>
<p>How to make or receive hands-free calls p. 7-58</p>
<p>Phone book function p. 7-60</p>
<p>Bluetooth ^® 2.0 interface*</p>
<h1 id="steering-control-switch-and-microphone">Steering control switch and microphone</h1>
<p><img alt="" src="images/434279a369568d43032b19a946791b8fd22eeabbb4de8e56d5a2bea40015bb80.jpg" /></p>
<details>
<summary>text_image</summary>
1
2
3
4
5
6
AA1008991
</details>
<p>1- Volume up button <br />
2- Volume down button <br />
3- SPEECH button <br />
4- PICK-UP button <br />
5- HANG-UP button <br />
6- Microphone</p>
<h1 id="volume-up-button">Volume up button</h1>
<p>Press this button to increase the volume.</p>
<h1 id="volume-down-button">Volume down button</h1>
<p>Press this button to decrease the volume.</p>
<h1 id="speech-button">SPEECH button</h1>
<ul>
<li>Press this button to change to voice recognition mode.
While the system is in voice recognition mode, "Listening" will appear on the audio display. </li>
<li>If you press the button briefly while in voice recognition mode, it will interrupt prompting and allow voice command input.
Pressing the button longer will deactivate the voice recognition mode. </li>
<li>Pressing this button briefly during a call will enable voice recognition and allow voice command input.</li>
</ul>
<h1 id="pick-up-button">PICK-UP button</h1>
<p>● Press this button when an incoming call is received to answer the telephone. <br />
- When another call is received during a call, press this button to put the first caller on hold and talk to the new caller.</p>
<p>- In such circumstances, you can press the button briefly to switch between callers. You will switch to the first caller and the other caller will be put on hold.</p>
<p>- To establish a three-way call in such situations, press the SPEECH button to enter voice recognition mode and then say "Join calls".</p>
<h1 id="hang-up-button">HANG-UP button</h1>
<p>● Press this button when an incoming call is received to refuse the call. <br />
- Press this button during a call to end the current call.
When another call is on hold, you will switch to that call. <br />
- If this button is pressed in the voice recognition mode, the voice recognition mode will be deactivated.</p>
<p><img alt="" src="images/3e8028e86b461d2e3ff5c92d3c759819b3bdea2f5f42a2646feee6063c2cd6ab.jpg" /></p>
<h1 id="note-242">NOTE</h1>
<ul>
<li>When you press the SPEECH button to enter voice recognition mode with a cellular phone paired to the system, current information on the cellular phone, such as "remaining battery life," "signal strength" or "roaming," will be displayed on the audio display.*
*: Some cellular phones will not send this information to the Bluetooth ^® 2.0 interface. </li>
<li>Call waiting and three-way calls can be used by the Bluetooth ^® 2.0 interface, only if it is possible to use those services with your cellular phone.</li>
</ul>
<h1 id="microphone">Microphone</h1>
<p>Your voice will be recognized by a microphone in the overhead console, allowing you to make hands-free calls with voice commands.</p>
<p><img alt="" src="images/382a1315558e1fbf13658796c4252c1a8560bd33291bb7261f2c452131cb9178.jpg" /></p>
<h1 id="note-243">NOTE</h1>
<p>- If a cellular phone is brought close to the microphone, it may create noise in the voice on the phone. In such a case, take the cellular phone at a place as far as possible from the microphone.</p>
<h1 id="voice-recognition-function">Voice recognition function</h1>
<p>The Bluetooth ^® 2.0 interface is equipped with a voice recognition function.
Simply say voice commands and you can perform various operations and make or receive hands-free calls.</p>
<p>With the Bluetooth ^® 2.0 interface, voice recognition is possible for English, French, Spanish, Italian, German, Dutch, Portuguese and Russian. The factory setting is “English” or “Russian.”</p>
<p><img alt="" src="images/f0fa99b586a6463877cf2d981745ec8c4cc51e2cc985ac95db0fd1db5822abbf.jpg" /></p>
<h1 id="note-244">NOTE</h1>
<ul>
<li>If the voice command that you say differs from the predefined command or cannot be recognised due to ambient noise or some other reason, the Bluetooth ^® 2.0 interface will ask you for the voice command again up to 3 times. </li>
<li>For best performance and further reduction of ambient noise, close the vehicle windows, lower the blower speed and refrain from conversation with your passengers while engaging the voice recognition function.</li>
</ul>
<p><img alt="" src="images/5cd14ed066a3fe06b5202aa1dd89d3ac54d78f2178dfecb1117155c67c72f446.jpg" /></p>
<h1 id="note-245">NOTE</h1>
<p>● Some voice commands have alternative commands. <br />
● Depending on the selected language, some functions may not be available. <br />
● Language can be changed by using the audio control panel besides the following procedure. <br />
For details, refer to “To change the language (vehicles with Bluetooth ^® 2.0 interface)” on page 7-29.</p>
<h1 id="selecting-the-language">Selecting the Language</h1>
<ol>
<li>Press the SPEECH button. </li>
<li>Say "Setup." </li>
<li>Say "Language." </li>
<li>The voice guide will say “Select a language: English, French, Spanish, Italian, German, Dutch, Portuguese or Russian” Say the desired language. (Example: Say “English.”) </li>
<li>The voice guide will say “English (French, Spanish, Italian, German, Dutch, Portuguese or Russian) selected. Is this correct?” Say “Yes.” <br />
If you say "No," the system will return to Step 4.</li>
</ol>
<p><img alt="" src="images/9f196ceb92c788f8eaf9dcf74d54c715661ad0af1b22c008405d80803fe7887f.jpg" /></p>
<h1 id="note-246">NOTE</h1>
<p>● The voice guide will repeat the same message twice. The first message is in the current language, and the second message is in the selected language. <br />
- If many entries are registered in the vehicle phone book, changing the language will take longer. <br />
- Changing the language deletes the mobile phone book imported to the Bluetooth 2.0 interface. If you wish to use it, you will have to import it again.</p>
<ol>
<li>When the voice guide says “English (French, Spanish, Italian, German, Dutch, Portuguese or Russian) selected,” the language change process will be completed and the system will return to the main menu.</li>
</ol>
<h1 id="useful-voice-commands">Useful voice commands</h1>
<h1 id="help-function">Help function</h1>
<p>The Bluetooth ^® 2.0 interface is equipped with a help function.</p>
<p>If you say "Help" when the system is waiting for a voice command input, the system will tell you a list of the commands that can be used under the circumstances.</p>
<h1 id="cancelling">Cancelling</h1>
<p>There are two cancel functions.</p>
<p>If you are at the main menu, say "Cancel" to exit from the Bluetooth® 2.0 interface.
If you are anywhere else within the system, say "Cancel" to return to the main menu.</p>
<p><img alt="" src="images/f20e028226c3a2fae13ca6197041c824169e4e507ebee758121e9db3902c5e7d.jpg" /></p>
<h1 id="note-247">NOTE</h1>
<p>- You can return to the previous menu by saying "Go Back." (if so equipped)</p>
<h1 id="confirmation-function-setting">Confirmation function setting</h1>
<p>The Bluetooth ^® 2.0 interface is equipped with a confirmation function.
With the confirmation function activated, you are given more opportunities than normal to confirm a command when making various settings to the Bluetooth ^® 2.0 interface. This allows you to decrease the possibility that a setting is accidentally changed.
The confirmation function can be turned on or off by following the steps below.</p>
<ol>
<li>Press the SPEECH button. </li>
<li>Say "Setup". </li>
<li>Say "Confirmation prompts". </li>
<li>
<p>The voice guide will say "Confirmation prompts are <on/off>. Would you like to turn confirmation prompts <off/on>". Answer "Yes" to change the setting or answer "No" to keep the current setting.</p>
</li>
<li>
<p>The voice guide will say "Confirmation prompts are <off/on>" and then the system will return to the main menu.</p>
</li>
</ol>
<h1 id="security-function">Security function</h1>
<p>It is possible to use a password as a security function by setting a password of your choice for the Bluetooth® 2.0 interface.
When the security function is turned on, it is necessary to make a voice input of a 4-digit password in order to use all functions of the Bluetooth® 2.0 interface, except for reception.</p>
<h1 id="setting-the-password">Setting the password</h1>
<p>Use the following procedure to turn on the security function by setting a password.</p>
<p>I. Press the SPEECH button. <br />
2. Say "Setup." <br />
3. Say "Password." <br />
4. The voice guide will say "Password is disabled. Would you like to enable it?" Answer "Yes." <br />
Answer "No" to cancel the setting of the password and return to the main menu. <br />
5. The voice guide will say "Please say a 4-digit password. Remember this password. It will be required to use this system". <br />
Say a 4-digit number which you want to set as a password.</p>
<ol>
<li>For confirmation purposes, the voice guide will say "Password <4-digit password>. Is this correct?" Answer "Yes." Answer "No" to return to the password input in Step 5. </li>
<li>When the registration of the password is completed, the voice guide will say "Password is enabled" and the system will return to the main menu.</li>
</ol>
<p><img alt="" src="images/5478a9414fce0a86e4d8cf10b758e7d7fe158e7a6b14ce56badac64bcb32bddc.jpg" /></p>
<h1 id="note-248">NOTE</h1>
<p>● Password will be required to access the system after the next ignition cycle. <br />
- It is required for a little time after engine stop that the entered password is actually recorded in the system.</p>
<p>If the ignition switch or the operation mode is made to ACC or ON or the engine is started immediately after engine stop, there is a case when the entered password is not recorded in the system. At this time, please try to enter the password again.</p>
<h1 id="entering-the-password">Entering the password</h1>
<p>If a password has been set and the security function is enabled, the voice guide will say "Hands-free system is locked. State the password to continue" when the SPEECH button is pressed to enter voice recognition mode. Say the 4-digit password number to enter the password.</p>
<p>If the entered password is wrong, the voice guide will say "<4-digit password>, Incorrect password. Please try again". Enter the correct password.</p>
<p><img alt="" src="images/9cc3cd6bc1f601597c0e3e4cf868277035f1ab7b9a1821d7f8d1a7756b233aa9.jpg" /></p>
<h1 id="note-249">NOTE</h1>
<ul>
<li>You can re-enter the password as many times as you want. </li>
<li>If you have forgotten your password, say "Cancel" to quit the voice input mode and then check with a MITSUBISHI MOTORS Authorized Service Point.</li>
</ul>
<h1 id="disabling-the-password">Disabling the password</h1>
<p>Use the following procedure to turn off the security function by disabling the password.</p>
<p><img alt="" src="images/1f5ed1f6f1eb63b917ac0782697a2f3cf761d91c0fc48a9932aa6ec083776afb.jpg" /></p>
<h1 id="note-250">NOTE</h1>
<p>● System must be unlocked to disable the password.</p>
<ol>
<li>Press the SPEECH button. </li>
<li>Say "Setup." </li>
<li>Say "Password." </li>
<li>
<p>The voice guide will say "Password is enabled. Would you like to disable it?" Answer "Yes." <br />
Answer "No" to cancel the disabling of the password and return to the main menu.</p>
</li>
<li>
<p>When the disabling of the password is completed, the voice guide will say "Password is disabled" and the system will return to the main menu.</p>
</li>
</ol>
<h1 id="speaker-enrollment-function">Speaker enrollment function</h1>
<p>The Bluetooth ^® 2.0 interface can use the speaker enrollment function to create a voice model for one person per language.</p>
<p>This makes it easier for the Bluetooth® 2.0 interface to recognise voice commands said by you.</p>
<p>You can turn a voice model registered with the speaker enrollment function on and off whenever you want.</p>
<h1 id="speaker-enrollment">Speaker enrollment</h1>
<p>It takes about 2 to 3 minutes to complete the speaker enrollment process.</p>
<p>To ensure the best results, run through the process while in the driver's seat, in an environment that is as quiet as possible (when there is no rain or strong winds and the vehicle windows are closed). Please turn off your phone while in speaker enrollment to prevent interruption of the process.</p>
<p>Use the following procedure for speaker enrollment.</p>
<ol>
<li>Stop your vehicle in a safe area, put the gearshift lever (M/T) in the "N" (Neutral) position, or the selector lever (CVT)</li>
</ol>
<p>in the "P" (PARK) position, and pull the parking brake lever.</p>
<p><img alt="" src="images/9ffecec4241fed220cfab19ea38ef0ae84c2227abd5dfb1c7e572fa8d29586b5.jpg" /></p>
<h1 id="note-251">NOTE</h1>
<p>● Speaker enrollment is not possible unless the vehicle is parked. Make sure you park the vehicle in a safe area before attempting speaker enrollment.</p>
<ol>
<li>
<p>Press the SPEECH button.</p>
</li>
<li>
<p>Say "Voice training".</p>
</li>
<li>
<p>The voice guide will say "This operation must be performed in a quiet environment while the vehicle is stopped. See the owner's manual for the list of required training phrases. Press and release the SPEECH button when you are ready to begin. Press the HANG-UP button to cancel at any time". Press the SPEECH button to start the speaker enrollment process.</p>
</li>
</ol>
<p><img alt="" src="images/7a7be4d66ed2cb0f4602fb94c7266d5b95a992b5e800309a2c71e23db7c16459.jpg" /></p>
<h1 id="note-252">NOTE</h1>
<ul>
<li>If you do not start the speaker enrollment process within 3 minutes of pressing the SPEECH button, the speaker enrollment function will time out. <br />
The voice guide will say "Speaker enrollment has timed out." The system will then beep and the voice recognition mode will be deactivated.</li>
</ul>
<h1 id="bluetooth-20-interface-2">Bluetooth® 2.0 interface\*</h1>
<ol>
<li>The voice guide will prompt for phrase 1. Repeat the corresponding phrase listed in table "Enrollment commands" on page 7-67.</li>
</ol>
<p>The system will register your voice and then move on to the registration of the next command. Continue the process until all phrases have been registered.</p>
<p><img alt="" src="images/3a98bdf1869d5b5ab3d15cec5a53e830d7f6771e2d8b5958b92b3afca84f13ed.jpg" /></p>
<h1 id="note-253">NOTE</h1>
<p>● To repeat the most recent voice training command, press and release the SPEECH button. <br />
- If you press the HANG-UP button anytime during the process, the system will beep and stop the speaker enrollment process.</p>
<ol>
<li>When all enrollment commands have been read out, the voice guide will say "Speaker enrollment is complete." The system will then end the speaker enrollment process and return to the main menu.</li>
</ol>
<p><img alt="" src="images/b865a70fecfcc0cc8218d98533e2b235d73fb0f623222cff73e5ec7ae9ab5c96.jpg" /></p>
<h1 id="note-254">NOTE</h1>
<p>● Completing the speaker enrollment process will turn on the voice model automatically. <br />
● The commands "Help" and "Cancel" will not work in this mode.</p>
<h1 id="enabling-and-disabling-the-voice-model-and-retraining">Enabling and disabling the voice model and retraining</h1>
<p>You can turn a voice model registered with the speaker enrollment function on and off whenever you want.</p>
<p>You can also retrain the system.</p>
<p>Use the following procedure to perform these actions.</p>
<ol>
<li>Press the SPEECH button. </li>
<li>Say "Voice training". </li>
<li>If you have completed a speaker enrollment process once already, the voice guide will say either "Enrollment is enabled. Would you like to disable or retrain?" or "Enrollment is disabled. Would you like to enable or retrain?" </li>
<li>When enrollment is "enabled", the voice model is on; when enrollment is "disabled", the voice model is off. Say the command that fits your needs.</li>
</ol>
<p>Say "Retrain" to start the speaker enrollment process and recreate a new voice model. (Refer to "Speaker enrollment" on page 7-51.)</p>
<h1 id="connecting-the-bluetooth-20-interface-and-bluetooth-device">Connecting the Bluetooth ^® 2.0 interface and Bluetooth ^® device</h1>
<p>Before you can make or receive hands-free calls or play music using the Bluetooth ^® 2.0 interface function, you must pair the Bluetooth ^® device and Bluetooth ^® 2.0 interface.</p>
<p><img alt="" src="images/5bb60d6842b6c69b142a14636a14f802dbee72644ec45b0d3ff1902d9ce0a5ae.jpg" /></p>
<h1 id="note-255">NOTE</h1>
<p>- Pairing is required only when the device is used for the first time. Once the device has been paired with the Bluetooth ^ 2.0 interface, all you need is to bring the device into the vehicle next time and the device will connect to the Bluetooth ^ 2.0 interface automatically (if supported by the device). The device must have Bluetooth ^ turned ON to connect.</p>
<p>Up to 7 Bluetooth ^® devices can be paired with the Bluetooth ^® 2.0 interface.</p>
<p>If multiple paired Bluetooth ^® devices are available in the vehicle, the cellular phone or music player most recently connected is automatically connected to the Bluetooth ^® 2.0 interface.</p>
<p>You can also change a Bluetooth device to be connected.</p>
<h1 id="to-pair">To pair</h1>
<p>To pair a Bluetooth ^® device with the Bluetooth ^® 2.0 interface, use either one of the following 2 methods (Type 1 or Type 2).</p>
<h1 id="pairing-procedure-type-1">Pairing procedure - Type 1\*</h1>
<ol>
<li>Stop your vehicle in a safe area, put the gearshift lever (M/T) in the "N" (Neutral) position, or the selector lever (CVT) in the "P" (PARK) position, and pull the parking brake lever.</li>
</ol>
<p><img alt="" src="images/7dd8175e52a857a8c74e51caa55835615b618bc7fa034ca8178a25176c20e6e6.jpg" /></p>
<h1 id="note-256">NOTE</h1>
<p>- You cannot pair any Bluetooth ^ device with the Bluetooth ^ 2.0 interface unless the vehicle is parked. Before pairing a Bluetooth ^ device with the Bluetooth ^ 2.0 interface, confirm that the vehicle is parked in a safe location.</p>
<ol>
<li>Press the SPEECH button. </li>
<li>Say "Setup". </li>
<li>Say "Pairing options." </li>
<li>The voice guide will say "Select one of the following: pair, edit, delete, or list." Say "Pair."</li>
</ol>
<p><img alt="" src="images/2a755d03ec8a452c8a5b4068fc749d0d76c9b3bf94159d7adda38df956b1a8a5.jpg" /></p>
<h1 id="note-257">NOTE</h1>
<p>- If 7 devices have already been paired, the voice guide will say "Maximum devices paired" and then the system will end the pairing process. To register a new device, delete one device and then repeat the pairing process.</p>
<p>(Refer to "Selecting a device: Deleting a device" on page 7-55.)</p>
<ol>
<li>The voice guide will say "Please say a 4-digit pairing code." Say a 4-digit number.</li>
</ol>
<p>When the confirmation function is on, the system will confirm whether the number said is acceptable. Answer "Yes."</p>
<p>Answer "No" to return to pairing code selection.</p>
<p><img alt="" src="images/adfe936160e66ae5fb56c4a4859b5ac1e34e2483199ec67c23455f9bc9b77691.jpg" /></p>
<h1 id="note-258">NOTE</h1>
<p>- Some Bluetooth ^ devices require a specific pairing code. Please refer to the device manual for pairing code requirements.</p>
<p><img alt="" src="images/3437ac99aa80294a6fd912fe7301c7762d829223b3691f18445b05d740fe47c5.jpg" /></p>
<h1 id="note-259">NOTE</h1>
<p>- The pairing code entered here is only used for the Bluetooth® connection certification. It is any 4-digit number the user would like to select.</p>
<p>Remember the pairing code as it needs to be keyed into the Bluetooth ^® device later in the pairing process.</p>
<p>Depending on the connection settings of the Bluetooth ^® device, this code may have to be entered each time you connect the Bluetooth ^® device to the Bluetooth ^® 2.0 interface. For the default connection settings, refer to the instructions for the device.</p>
<ol>
<li>The voice guide will say "Start pairing procedure on the device. See the device manual for instructions." Enter in the Bluetooth® device the 4-digit number you have registered in Step 6.</li>
</ol>
<p><img alt="" src="images/5401f44dd98ab10deef32687dbd621b116a0af6f6f378016282253387614a886.jpg" /></p>
<h1 id="note-260">NOTE</h1>
<ul>
<li>According to the corresponding device to Bluetooth ^ , it might take a few minutes to pair the Bluetooth ^ device with the Bluetooth ^ 2.0 interface. </li>
<li>If the Bluetooth ^® 2.0 interface cannot recognize the Bluetooth ^® device, the voice guide will say "Pairing has timed out" and the pairing process will be cancelled.
Confirm that the device you are pairing supports Bluetooth ^® , and try pairing it again.</li>
</ul>
<p>Bluetooth ^® 2.0 interface*</p>
<p><img alt="" src="images/944658875e297a6bf186278397d26b51c85d610cff9e3fa1e1fdc2386468fa43.jpg" /></p>
<h1 id="note-261">NOTE</h1>
<p>- If you enter the wrong number, the voice guide will say "Pairing failed" and the pairing process will be cancelled. Confirm the number is right, and try pairing it again.</p>
<ol>
<li>The voice guide will say "Please say the name of the device after the beep." You can assign a desired name for the Bluetooth® device and register it as a device tag. Say the name you want to register after the beep.</li>
</ol>
<p><img alt="" src="images/a0cb54096779f795d9b43109200f9d7a495f64b5a9138ef158f10bec05c87e37.jpg" /></p>
<h1 id="note-262">NOTE</h1>
<p>- When the confirmation function is on, after repeating the device tag you have said, the voice guide will ask "Is this correct?" Answer "Yes." To change the device tag, answer "No" and then say the device tag again.</p>
<ol>
<li>The voice guide will say "Pairing complete," and the pairing process will end.</li>
</ol>
<h1 id="pairing-procedure-type-2">Pairing procedure - Type 2\*</h1>
<ol>
<li>Stop your vehicle in a safe area, put the gearshift lever (M/T) in the "N" (Neutral) position, or the selector lever (CVT) in the "P" (PARK) position, and pull the parking brake lever.</li>
</ol>
<p><img alt="" src="images/1fe8f04a43a1e0531e820fd06f3b8a96d625a2de7509bb28ed2e228c97167ed0.jpg" /></p>
<h1 id="note-263">NOTE</h1>
<p>- You cannot pair any Bluetooth ^ device with the Bluetooth ^ 2.0 interface unless the vehicle is parked. Before pairing a Bluetooth ^ device with the Bluetooth ^ 2.0 interface, confirm that the vehicle is parked in a safe location.</p>
<ol>
<li>
<p>Press the SPEECH button.</p>
</li>
<li>
<p>Say "Pair Device."</p>
</li>
</ol>
<p><img alt="" src="images/cd97e703355f13dc13cba6c1b1002f8cac40873b1816939190095e80f182f7d2.jpg" /></p>
<h1 id="note-264">NOTE</h1>
<p>- The following procedure (to) can also be used instead of saying "Pair Device." Replace this step 3 with the following procedure if you prefer.
① Say "Setup."
② Say "Pairing Options."
③ The voice guide will say "Select one of the following: pair, edit, delete, list or set code."
Say "Pair."</p>
<p>- If 7 devices have already been paired, the voice guide will say "Maximum devices paired" and then the system will end the pairing process. To register a new device, delete one device and then repeat the pairing process.
(Refer to "Selecting a device: Deleting a device" on page 7-55.)</p>
<ol>
<li>The voice guide will say "Start pairing procedure on the device. See the device</li>
</ol>
<p>manual for instructions." and then will say "The pairing code is <pairing code>."</p>
<p><img alt="" src="images/bb55390c4f9ea89292fd662886c4606c418956a95314b99abcf1dc683548125e.jpg" /></p>
<h1 id="note-265">NOTE</h1>
<p>- Some Bluetooth® devices require a specific pairing code. Please refer to the device manual for pairing code requirements and read the next section "If your device requires a specific pairing code" on page 7-52 to set the pairing code.
- The pairing code entered here is only used for the Bluetooth® connection certification. Depending on the connection settings of the Bluetooth® device, this code may have to be entered each time you connect the Bluetooth® device to the Bluetooth® 2.0 interface. For the default connection settings, refer to the instructions for the device.</p>
<ol>
<li>Enter in the Bluetooth ^® device the 4-digit number that has been read out in Step 4.</li>
</ol>
<p><img alt="" src="images/57d272ac280cdd02f81915b6660b70cb1b09ae0f117251780b71b5acc697776c.jpg" /></p>
<h1 id="note-266">NOTE</h1>
<p>- According to the corresponding device to Bluetooth ^ , it might take a few minutes to pair the Bluetooth ^ device with the Bluetooth ^ 2.0 interface.</p>
<p><img alt="" src="images/3f876f32e2007f55da737eb83c0fbb65478510b6664bf24c98fa4eed3793a53b.jpg" /></p>
<h1 id="note-267">NOTE</h1>
<ul>
<li>If the Bluetooth ^® 2.0 interface cannot recognize the Bluetooth ^® device, the voice guide will say “Pairing has timed out” and the pairing process will be cancelled.
Confirm that the device you are pairing supports Bluetooth ^® , and try pairing it again. </li>
<li>
<p>If you enter the wrong number, the voice guide will say "Pairing failed" and the pairing process will be cancelled.
Confirm the number is right, and try pairing it again.
If your device requires a specific pairing code, you need to set the pairing code. Refer to the device manual for pairing code requirements and read the next section "If your device requires a specific pairing code" on page 7-52.</p>
</li>
<li>
<p>The voice guide will say "Please say the name of the device after the beep." You can assign a desired name for the Bluetooth® device and register it as a device tag. Say the name you want to register after the beep.</p>
</li>
</ul>
<p><img alt="" src="images/e734bed250dc56d0def21964ca673a995a096c96512fc98ed9580fc21b2604e2.jpg" /></p>
<h1 id="note-268">NOTE</h1>
<p>- When the confirmation function is on, after repeating the device tag you have said, the voice guide will ask "Is this correct?" Answer "Yes." To change the device tag, answer "No" and then say the device tag again.</p>
<ol>
<li>The voice guide will say "Pairing Complete. Would you like to import the contacts from your mobile device now?" Answer "Yes," and the voice guide will say "Please wait while the contacts are imported. This may take several minutes." Answer "No" to end the pairing process.</li>
</ol>
<h1 id="if-your-device-requires-a-specific-pairing-code">If your device requires a specific pairing code</h1>
<p>If your device requires a specific pairing code, you need to set the pairing code. Follow the procedures below.</p>
<ol>
<li>Press the SPEECH button. </li>
<li>Say "Setup." </li>
<li>Say "Pairing Options." </li>
<li>Say "Set Code." </li>
<li>The voice guide will say "Do you want the pairing code to be random or fixed?" Say "Fixed." </li>
<li>The voice guide will say "Please say a 4-digit pairing code." Say a 4-digit number. </li>
<li>The voice guide will say "Pairing code set to <pairing code>."</li>
</ol>
<p>When the confirmation function is on, the system will confirm whether the number said is acceptable. Answer "Yes."</p>
<p>Answer "No" to return to Step 6.</p>
<ol>
<li>The voice guide will say "Do you want to pair a device now?" Answer "Yes," the system will proceed to Step 3 in the pairing process. Refer to the "Pairing procedure- Type 2".</li>
</ol>
<h1 id="selecting-a-device">Selecting a device</h1>
<p>If multiple paired Bluetooth ^® devices are available in the vehicle, the cellular phone or music player most recently connected is automatically connected to the Bluetooth ^® 2.0 interface.</p>
<p>You can connect to the other paired cellular phone or music player by following setting change procedures.</p>
<h1 id="to-select-a-cellular-phone">To select a cellular phone</h1>
<p>I. Press the SPEECH button. <br />
2. Say "Setup". <br />
3. Say "Select phone." <br />
4. After the voice guide says "Please say," the numbers of the cellular phones and device tags of corresponding cellular phones will be read out in order, starting with the cellular phone that has been most recently connected.
Say the number of the cellular phone that you want to connect to.</p>
<p>When the confirmation function is on, the system will ask you again whether the phone that you want to connect to is</p>
<h1 id="bluetooth-20-interface-3">Bluetooth® 2.0 interface\*</h1>
<p>correct. Answer "Yes" to continue and connect to the cellular phone.
Answer "No," and the voice guide will say "Please say." Say the number of the phone that you want to connect to.</p>
<p><img alt="" src="images/15d55d0ae9c13a4f4b0002d122f9337bf907909ecf925e667af465ff50dee559.jpg" /></p>
<h1 id="note-269">NOTE</h1>
<p>- You can connect to a phone at any time by pressing the SPEECH button and saying the number, even before all of the paired numbers and device tags of corresponding cellular phones are read out by the system.</p>
<ol>
<li>The selected phone will be connected to the Bluetooth® 2.0 interface. The voice guide will say "<device tag> selected" and then the system will return to the main menu.</li>
</ol>
<h1 id="to-select-a-music-player">To select a music player</h1>
<ol>
<li>Press the SPEECH button. </li>
<li>Say "Setup". </li>
<li>Say "Select music player." </li>
<li>After the voice guide says "Please say," the numbers of the music players and device tags of corresponding music players will be read out in order, starting with the music player that has been most recently connected. <br />
Say the number of the music player that you want to connect to.</li>
</ol>
<p>When the confirmation function is on, the system will ask you again whether the music player that you want to connect to is correct. Answer "Yes" to continue and connect to the music player. Answer "No," and the voice guide will say "Please say." Say the number of the music player that you want to connect to.</p>
<p><img alt="" src="images/31524941faf8d4917724e4c01ce63a5d5c149fb158b6f4913755573f9f08dd8b.jpg" /></p>
<h1 id="note-270">NOTE</h1>
<p>- You can connect to a music player at any time by pressing the SPEECH button and saying the number, even before all of the paired numbers and device tags of corresponding music players are read out by the system.</p>
<ol>
<li>The selected music player will be connected to the Bluetooth® 2.0 interface. The voice guide will say “<device tag> selected” and then the system will return to the main menu.</li>
</ol>
<h1 id="deleting-a-device">Deleting a device</h1>
<p>Use the following procedure to delete a paired Bluetooth ^® device from the Bluetooth ^® 2.0 interface.</p>
<p>I. Press the SPEECH button. <br />
2. Say "Setup". <br />
3. Say "Pairing options."</p>
<ol>
<li>The voice guide will say "Select one of the following: pair, edit, delete, or list." Say "Delete." </li>
<li>After the voice guide says "Please say," the numbers of the devices and device tags of corresponding devices will be read out in order, starting with the device that has been most recently connected. After it completes reading all pairs, the voice guide will say "or all." <br />
Say the number of the device that you want to delete from the system. If you want to delete all paired phones from the system, say "All." </li>
<li>For confirmation purposes, the voice guide will say "Deleting <device tag> <number>. Is this correct?" or "Deleting all devices. Is this correct?"
Answer "Yes" to delete the phone(s).
Answer "No" to return to Step 4. </li>
<li>The voice guide will say "Deleted," and then the system will end the device deletion process.</li>
</ol>
<p><img alt="" src="images/8a818b512d72a590fd426e9d2fc4521f060cf9617ddd0a3431b0de0b6243b213.jpg" /></p>
<h1 id="note-271">NOTE</h1>
<p>- If the device deletion process fails for some reason, the voice guide will say "Delete failed" and then the system will cancel deleting the device.</p>
<h1 id="to-check-a-paired-bluetooth-device">To check a paired Bluetooth ^® device</h1>
<p>You can check a paired Bluetooth ^® device by following the steps below.</p>
<ol>
<li>Press the SPEECH button. </li>
<li>Say "Setup". </li>
<li>Say "Pairing options." </li>
<li>The voice guide will say "Select one of the following: pair, edit, delete, or list." Say "List." </li>
<li>The voice guide will read out device tags of corresponding devices in order, starting with the Bluetooth device that has been most recently connected. </li>
<li>After the device tags of all paired Bluetooth ^® devices have been read, the system will say “End of list, would you like to start from the beginning?”</li>
</ol>
<p>To hear the list again from the beginning, answer "Yes."</p>
<p>When you are done, answer "No" to return to the main menu.</p>
<p><img alt="" src="images/0ba657de3aeb414f3558f66de3fd76fd608f08a6245871adcb0d239ac809fdd4.jpg" /></p>
<h1 id="note-272">NOTE</h1>
<ul>
<li>If you press and release the SPEECH button and say “Continue” or “Previous” while the list is being read, the system will advance or rewind the list. <br />
Say “Continue” to proceed to the device with the next highest number or “Previous” to return to the phone with the previous number. </li>
<li>You can change the device tag by pressing and releasing the SPEECH button and then saying "Edit" while the list is being read. </li>
<li>You can change the phone to be connected by pressing and releasing the SPEECH button and then saying "Select phone" while the list is being read. </li>
<li>You can change the music player to be connected by pressing and releasing the SPEECH button and then saying "Select music player" while the list is being read.</li>
</ul>
<h1 id="changing-a-device-tag">Changing a device tag</h1>
<p>You can change the device tag of a paired cellular phone or music player.</p>
<p>Follow the steps below to change a device tag.</p>
<ol>
<li>Press the SPEECH button. </li>
<li>Say "Setup". </li>
<li>Say "Pairing options." </li>
<li>The voice guide will say "Select one of the following: pair, edit, delete, or list." Say "Edit." </li>
<li>The voice guide will say "Please say," and read out the numbers of the Blue-</li>
</ol>
<p>OA0X19E2</p>
<p>tooth ^® devices and device tags of corresponding devices in order, starting with the Bluetooth ^® that has been most recently connected.</p>
<p>After all paired device tags have been read, the voice guide will say “Which device, please?” Say the number of the device tag you want to change.</p>
<p><img alt="" src="images/e3718d1713a2aa223ba42b5e7595c241360ea6ca7ae49596fb10bf8884ffb723.jpg" /></p>
<h1 id="note-273">NOTE</h1>
<p>- You can press and release the SPEECH button while the list is being read, and immediately say the number of the device tag you want to change.</p>
<ol>
<li>The voice guide will say "New name, please." Say the name you want to register as a new device tag.</li>
</ol>
<p>When the confirmation function is on, the voice guide will say "<New device tag>. Is this correct?" Answer "Yes."</p>
<p>Answer "No," to say the new device tag you want to register again.</p>
<ol>
<li>The device tag is changed.</li>
</ol>
<p>When the change is complete, the voice guide will say “New name saved” and then the system will return to the main menu.</p>
<p>For pleasant driving</p>
<p>Bluetooth ^® 2.0 interface*</p>
<h1 id="operating-a-music-player-connected-via-bluetooth">Operating a music player connected via Bluetooth®</h1>
<p>For the operation of a music player connected via Bluetooth ^® , refer to “To play tracks from a Bluetooth ^® device” on page 7-40.</p>
<h1 id="how-to-make-or-receive-hands-free-calls">How to make or receive hands-free calls</h1>
<p>You can make or receive hands-free calls using a Bluetooth® compatible cellular phone connected to the Bluetooth® 2.0 interface. You can also use the phone books in the Bluetooth® 2.0 interface to make calls without dialling telephone numbers.
"To make a call" on page 7-58
"SEND function" on page 7-59
"Receiving calls" on page 7-60
"MUTE function" on page 7-60
"Switching between hands-free mode and private mode" on page 7-60</p>
<p><img alt="" src="images/1466d5f1f9a41ab60aceee6f4ca8d0a96ef26729da43f5d64085203c868d9f25.jpg" /></p>
<h1 id="note-274">NOTE</h1>
<p>● The hands-free calls might not be operated correctly when it makes calling or receiving by operating the cellular phone directly.</p>
<h1 id="to-make-a-call">To make a call</h1>
<p>You can make a call in the following 3 ways using the Bluetooth® 2.0 interface:</p>
<p>Making a call by saying a telephone number, making a call using the Bluetooth ^® 2.0 interface's phone book, and making a call by redialing.</p>
<h1 id="making-a-call-by-using-the-telephone-number">Making a call by using the telephone number</h1>
<p>You can make a call by saying the telephone number.</p>
<ol>
<li>Press the SPEECH button. </li>
<li>Say "Dial." </li>
<li>After the voice guide says "Number please," say the telephone number. </li>
<li>The voice guide will say "Dialing <number recognised>." <br />
The Bluetooth ^® 2.0 interface will then make the call. <br />
When the confirmation function is on, the system will confirm again the telephone number. To continue with that number, answer "Yes." <br />
To change the telephone number, answer "No." The system will say "Number please" then say the telephone number again.</li>
</ol>
<p><img alt="" src="images/109ac6ba3b5d6f1765c84ddccdddcf1a8828984f6e5e2c74f452e7581a18cd66.jpg" /></p>
<h1 id="note-275">NOTE</h1>
<ul>
<li>In the case of English, the system will recognise both “zero” and “oh” (Letter “o”) for the number “0.” </li>
<li>The Bluetooth ^® 2.0 interface supports numbers (0 to 9) and characters (+, # and*).</li>
</ul>
<p><img alt="" src="images/000b9a27def2d0f3896cd530ef1c98cb12e739b0eeb3a151e14773b952ad382f.jpg" /></p>
<h1 id="note-276">NOTE</h1>
<p>● The maximum supported telephone number length is as follows: <br />
• International telephone number: + and telephone numbers (to 18 digits). <br />
- Except for international telephone number: telephone numbers (to 19 digits).</p>
<h1 id="making-a-call-using-a-phone-book">Making a call using a phone book</h1>
<p>You can make calls using the vehicle phone book or mobile phone book of the Bluetooth® 2.0 interface.</p>
<p>For details on the phone books, refer to "Phone book function" on page 7-60.</p>
<ol>
<li>Press the SPEECH button. </li>
<li>Say "Call."</li>
</ol>
<p><img alt="" src="images/9965445855ad13da71bdbde1a7fa0f314fa9c45f894a12b6fa001a16a0684e35.jpg" /></p>
<h1 id="note-277">NOTE</h1>
<ul>
<li>
<p>If you say "Call" when the vehicle phone book and the mobile phone book are empty, the voice guide will say "The vehicle phone book is empty. Would you like to add a new entry now?" <br />
Answer "Yes," and the voice guide will say "Entering the phone book - new entry menu." You can now create data in the vehicle phone book. <br />
Answer "No," to return to the main menu.</p>
</li>
<li>
<p>After the voice guide says "Name please," say the name you want to call, from those registered in the phone book.</p>
</li>
<li>
<p>If there is only one match, the system proceeds to Step 5.</p>
</li>
</ul>
<p>If there are two or more matches, the voice guide will say “More than one match was found, would you like to call <returned name>.” If that person is the one you want to call, answer “Yes.” Answer “No,” and the name of the next matching person will be uttered by the voice guide.</p>
<p><img alt="" src="images/88291e9578c5282d323da21bbc6abee7a7ffba81eed78cc2fbd0e3139bd180be.jpg" /></p>
<h1 id="note-278">NOTE</h1>
<p>- If you say “No” to all names read by the system, the voice guide will say “Name not found, returning to main menu” and the system will return to the main menu.</p>
<ol>
<li>If only 1 telephone number is registered under the name you just said, the voice guide proceed to Step 6.</li>
</ol>
<p>If two or more telephone numbers are registered that match the name you just said, the voice guide will say “Would you like to call <name> at [home], [work], [mobile], or [other]?” Select the location to call.</p>
<p><img alt="" src="images/deddcf5788770bb8d3593b51e0ef30dffeb76fc8f239b83594b7d0059b2c67c8.jpg" /></p>
<h1 id="note-279">NOTE</h1>
<p>- If the name you selected has matching data in the vehicle phone book but no telephone number is registered under the selected location, the voice guide will say “{home/work/mobile/other} not found for <name>. Would you like to add location or try again?”</p>
<p>Say "Try again," and the system will return to Step 3.</p>
<p>Say "Add location" and you can register an additional telephone number under the selected location.</p>
<p>- If the name you selected has matching data in the mobile phone book but no telephone number is registered under the selected location, the voice guide will say “{home/work/mobile/other} not found for <name>. Would you like to try again?”</p>
<p>Answer "Yes," and the system will return to Step 3.</p>
<p>Answer "No," and the call will be cancelled. Start over again from Step 1.</p>
<ol>
<li>The voice guide will say "Calling <name> <location>" and then the system will dial the telephone number.</li>
</ol>
<p><img alt="" src="images/d1b9dcdcf085981a4479dd758109f0b79a1c856c495cb52b0f719e95ef25a299.jpg" /></p>
<h1 id="note-280">NOTE</h1>
<p>- When the confirmation function is on, the system will ask if the name and location of the receiver are correct. If the name is correct, answer "Yes."</p>
<p>If you want to change the name or location to call, answer "No." The system will return to Step 3.</p>
<h1 id="redialing">Redialing</h1>
<p>You can redial the last number called, based on the history of dialed calls in the paired cellular phone.</p>
<p>Use the following procedure to redial.</p>
<ol>
<li>
<p>Press the SPEECH button.</p>
</li>
<li>
<p>Say "Redial."</p>
</li>
</ol>
<h1 id="send-function">SEND function</h1>
<p>During a call, press the SPEECH button to enter voice recognition mode, then say "<numbers> SEND" to generate DTMF tones.</p>
<p>For example, if during a call you need to simulate the press of a phone button as a response to an automated system, press the SPEECH button and speak “1 2 3 4 pound SEND” and the 1234# will be sent on your cellular phone.</p>
<h1 id="receiving-calls">Receiving calls</h1>
<p>If an incoming phone call is received while the ignition switch or the operation mode is in ON or ACC, the audio system will be automatically turned on and switched to the incoming call, even when the audio system was originally off.</p>
<p>The voice guide announcement for the incoming call will be output from the right side speaker. You can change the setting so that the voice guide announcement will be output from the left side speaker. For details, refer to "To change the position of the speaker of the output sound" on page 7-30.</p>
<p>If the CD player or radio was playing when the incoming call was received, the audio system will mute the sound from the CD player or radio and output only the incoming call.</p>
<p>To receive the call, press the PICK-UP button on the steering wheel control switch.</p>
<p>When the call is over, the audio system will return to its previous state.</p>
<h1 id="mute-function">MUTE function</h1>
<p>At any time during a call, you can mute the vehicle microphone.</p>
<p>Pressing the SPEECH button and then saying "Mute" during a call will turn ON the MUTE function and mute the microphone.</p>
<p>Saying “Mute off” in the same way will turn off the MUTE function and cancel the mute on the microphone.</p>
<p>7-60</p>
<p>For pleasant driving</p>
<h1 id="switching-between-hands-free-mode-and-private-mode">Switching between hands-free mode and private mode</h1>
<p>The Bluetooth® 2.0 interface can switch between hands-free mode (hands-free calls) and private mode (calls using cellular phone). If you press the SPEECH button and say "Transfer call" during a hands-free call, you can stop the hands-free mode and talk in private mode.</p>
<p>To return to Hands-free mode, press the SPEECH button again and say "Transfer call".</p>
<h1 id="phone-book-function">Phone book function</h1>
<p>The Bluetooth ^® 2.0 interface has 2 types of unique phone books that are different from the phone book stored in the cellular phone. They are the vehicle phone book and the mobile phone book.</p>
<p>These phone books are used to register telephone numbers and to make calls to desired numbers via the voice recognition function.</p>
<p><img alt="" src="images/b423fdb22a58457b679da3baf7f79cd2462157549a2e2431d26b4b8362ef2a0c.jpg" /></p>
<h1 id="note-281">NOTE</h1>
<p>- Disconnecting the battery cable will not delete information registered in the phone book.</p>
<h1 id="vehicle-phone-book">Vehicle phone book</h1>
<p>This phone book is used when making calls with the voice recognition function.</p>
<p>OA0X19E2</p>
<p>Up to 32 names can be registered in the vehicle phone book per language.</p>
<p>Also, each entry has 4 locations associated with: home, work, mobile and other. You can register one telephone number for each location.</p>
<p>You can register a desired name as a name for any phone book entry registered in the vehicle phone book.</p>
<p>Names and telephone numbers can be changed later on.</p>
<p>The vehicle phone book can be used with all paired cellular phones.</p>
<h1 id="to-register-a-telephone-number-in-the-vehicle-phone-book">To register a telephone number in the vehicle phone book</h1>
<p>You can register a telephone number in the vehicle phone book in the following 2 ways: Reading out a telephone number, and selecting and transferring 1 phone book entry from the phone book of the cellular phone.</p>
<h1 id="to-register-by-reading-out-a-telephone-number">To register by reading out a telephone number</h1>
<ol>
<li>Press the SPEECH button. </li>
<li>Say "Phone book." </li>
<li>
<p>The voice guide will say “Select one of the following: new entry, edit number, edit name, list names, delete, erase all, or import contact.” Say “New entry.”</p>
</li>
<li>
<p>The voice guide will say "Name please." Say your preferred name to register it.</p>
</li>
</ol>
<p><img alt="" src="images/4e7e1c5af7c071935f8a13eb29071286d953a828adfdb4adc1729298e49a3b84.jpg" /></p>
<h1 id="note-282">NOTE</h1>
<ul>
<li>
<p>If the maximum number of entries are already registered, the voice guide will say "The phone book is full. Would you like to delete a name?" Say "Yes" if you want to delete a registered name.
Say "No," to return to the main menu.</p>
</li>
<li>
<p>When the name has been registered, the voice guide will say "home, work, mobile, or other?" Say the location for which you want to register a telephone number.</p>
</li>
</ul>
<p><img alt="" src="images/9a18c2949668f8091fc3f9bf9cf92a354f31115b6f8879ddecc0ab1bd9f89cb7.jpg" /></p>
<h1 id="note-283">NOTE</h1>
<ul>
<li>
<p>When the confirmation function is on, the voice guide will say “<Location>. Is this correct?” Answer “Yes.” <br />
If a telephone number has been registered for the selected location, the voice guide will say "The current number is <telephone number>, number please." <br />
If you do not want to change the telephone number, say "cancel" or the original number to keep it registered.</p>
</li>
<li>
<p>The voice guide will say "Number please." Say the telephone number to register it.</p>
</li>
</ul>
<p><img alt="" src="images/d5f91462e681c80c59ea8a1cccb8c15b27c913cea2a2641008db3ea2614ed544.jpg" /></p>
<h1 id="note-284">NOTE</h1>
<ul>
<li>
<p>In the case of English, the system will recognise both “zero” and “oh” (Letter “o”) for the number “0.”</p>
</li>
<li>
<p>The voice guide will repeat the telephone number you have just read, and then register the number.</p>
</li>
</ul>
<p>When the telephone number has been registered, the voice guide will say "Number saved. Would you like to add another number for this entry?" To add another telephone number for a new location for the current entry, answer "Yes." The system will return to location selection in Step 5.</p>
<p>Answer "No" to end the registration process and return to the main menu.</p>
<p><img alt="" src="images/61db1e411e6b28d6e9ccc0f1d28bdeda17bcf6ed75f608a8184c2ef3433f3846.jpg" /></p>
<h1 id="note-285">NOTE</h1>
<ul>
<li>When the confirmation function is on, after repeating the telephone number you have read, the voice guide will ask "Is this correct?" Answer "Yes." <br />
Answer “No” to return to telephone number registration in step 6.</li>
</ul>
<p>To select and transfer one phone book entry from the phone book of the cellular phone</p>
<p>You can select 1 phone book entry from the phone book of the cellular phone and register it in the vehicle phone book.</p>
<p><img alt="" src="images/9249033d925bceb4c21bcb313fcfd394cbe6ee5749d51958024d483fde9ee143.jpg" /></p>
<h1 id="note-286">NOTE</h1>
<p>● Transfer is not permitted unless the vehicle is parked. Before transferring, make sure that the vehicle is parked in a safe location. <br />
- All or part of data may not be transferred even when the cellular phone supports Bluetooth ^ , depending on the compatibility of the device. <br />
● The maximum supported telephone number length is 19 digits. Any telephone number of 20 digits or more will be truncated to the first 19 digits. <br />
- If telephone numbers contain characters other than 0 to 9, *, # or +, these characters are deleted before the transfer. <br />
- For the connection settings on the cellular phone side, refer to the instructions for the cellular phone.</p>
<ol>
<li>
<p>Press the SPEECH button.</p>
</li>
<li>
<p>Say "Phone book."</p>
</li>
<li>
<p>The voice guide will say “Select one of the following: new entry, edit number, edit name, list names, delete, erase all, or import contact.” Say “Import contact.”</p>
</li>
</ol>
<h1 id="bluetooth-20-interface-4">Bluetooth ^® 2.0 interface\*</h1>
<ol>
<li>The voice guide will say "Would you like to import a single entry or all contacts?" Say "Single entry."</li>
</ol>
<p>The Bluetooth ^® 2.0 interface will become ready to receive transferred phone book data.</p>
<p><img alt="" src="images/a18c6f2573ef242796b7a69af2cf94535150277cd8dbd74e006ff6c76fdbb953.jpg" /></p>
<h1 id="note-287">NOTE</h1>
<p>- If the maximum number of entries are already registered, the voice guide will say "The phone book is full. Would you like to delete a name?" Say "Yes" if you want to delete a registered name.</p>
<p>Say "No," to return to the main menu.</p>
<ol>
<li>After the voice guide says “Ready to receive a contact from the phone. Only a home, a work, and a mobile number can be imported,” the Bluetooth® 2.0 interface will receive the phone book data from the Bluetooth® compatible cellular phone. </li>
<li>Operate the Bluetooth® compatible cellular phone to set it up so that the phone book entry you want to register in the vehicle phone book can be transferred to the Bluetooth® 2.0 interface.</li>
</ol>
<p><img alt="" src="images/81e118f29f9a061da0a5bd9beed0baff13d1ce71fa70abcca7e1d08a68a4d85c.jpg" /></p>
<h1 id="note-288">NOTE</h1>
<ul>
<li>If the Bluetooth® 2.0 interface cannot recognise the Bluetooth® compatible cellular phone or the connection takes too much time, the voice guide will say “Import contact has timed out” and then the system will cancel the registration. In such case, start over again from Step 1. </li>
<li>
<p>Pressing the IIANG-UP button or pressing and holding the SPEECH button will cancel the registration.</p>
</li>
<li>
<p>When the reception is complete, the voice guide will say "<Number of telephone numbers that had been registered in the import source> numbers have been imported. What name would you like to use for these numbers?" Say the name you want to register for this phone book entry.</p>
</li>
</ul>
<p><img alt="" src="images/0c485d1a9925a1a4d8cf57cfe23b61d843e1e29dd8a79f0ab66b0e9571e18d79.jpg" /></p>
<h1 id="note-289">NOTE</h1>
<p>- If the entered name is already used for other phone book entry or similar to a name used for other phone book entry, that name cannot be registered.</p>
<ol>
<li>The voice guide will say "Adding <name>." <br />
When the confirmation function is on, the system will ask if the name is correct. Answer "Yes." <br />
Answer "No," and the voice guide will say "Name please." Register a different name. </li>
<li>The voice guide will say "Numbers saved." </li>
<li>The voice guide will say "Would you like to import another contact?" <br />
Answer "Yes" if you want to continue with the registration. You can continue to register a new phone book entry from Step 5. <br />
Answer "No," to return to the main menu.</li>
</ol>
<h1 id="to-change-the-content-registered-in-the-vehicle-phone-book">To change the content registered in the vehicle phone book</h1>
<p>You can change or delete a name or telephone number registered in the vehicle phone book.</p>
<p>You can also listen to the list of names registered in the vehicle phone book.</p>
<p><img alt="" src="images/d579e2fd54b8b7f21c3120bc428b9880974c0cb1e331725dd26f2f3c750e9760.jpg" /></p>
<h1 id="note-290">NOTE</h1>
<p>● The system must have at least one entry.</p>
<h1 id="editing-a-telephone-number">Editing a telephone number</h1>
<ol>
<li>Press the SPEECH button. </li>
<li>Say "Phone book." </li>
<li>The voice guide will say "Select one of the following: new entry, edit number, edit name, list names, delete, erase all, or import contact." Say "Edit number." </li>
<li>The voice guide will say "Please say the name of the entry you would like to edit, or say list names." Say the name of the phone book entry you want to edit.</li>
</ol>
<p><img alt="" src="images/af624e23e361eababa42a6a8aa78999a0338f0f656067140b026d5268bbbeb69.jpg" /></p>
<h1 id="note-291">NOTE</h1>
<p>- Say “List names,” and the names registered in the phone book will be read out in order. Refer to “Vehicle phone book: Listening to the list of registered names” on page 7-60.</p>
<ol>
<li>The voice guide will say "Home, work, mobile or other?" Select and say the location where the telephone number you want to change or add is registered. When the confirmation function is on, the system will check the target name and location again. Answer "Yes" if you want to continue with the editing. Answer "No," the system will return to Step 3. </li>
<li>The voice guide will say "Number please." Say the telephone number you want to register.</li>
</ol>
<p><img alt="" src="images/9c6725ae6996d0160351b4ff86e58d228823dd23e96ea06b7f5705eb7acc7a94.jpg" /></p>
<h1 id="note-292">NOTE</h1>
<ul>
<li>If the telephone number is already registered in the selected location, the voice guide will say "The current number is <current number>. New number, please." Say a new telephone number to change the current number. </li>
<li>The voice guide will repeat the telephone number.</li>
</ul>
<p>When the confirmation function is on, the system will ask if the number is correct. Answer "Yes."</p>
<p>Answer "No" to return to Step 3.</p>
<ol>
<li>Once the telephone number is registered, the voice guide will say "Number saved" and then the system will return to the main menu.</li>
</ol>
<p><img alt="" src="images/c2e15dd4dc668a0e913a0e7faabc87a8886299e553434e48345248ace7bca2b8.jpg" /></p>
<h1 id="note-293">NOTE</h1>
<p>- If the location where a telephone number was already registered has been overwritten with a new number, the voice guide will say "Number changed" and then the system will return to the main menu.</p>
<h1 id="editing-a-name">Editing a name</h1>
<ol>
<li>Press the SPEECH button. </li>
<li>Say "Phone book." </li>
<li>
<p>The voice guide will say "Select one of the following: new entry, edit number, edit name, list names, delete, erase all, or import contact." Say "Edit name."</p>
</li>
<li>
<p>The voice guide will say "Please say the name of the entry you would like to edit, or say list names." Say the name you want to edit.</p>
</li>
</ol>
<p><img alt="" src="images/fdc2410e659ecfa1d46781ecff7907e69fb2bc77ad079a7db2a9e123052cae6c.jpg" /></p>
<h1 id="note-294">NOTE</h1>
<ul>
<li>Say "List names," and the names registered in the phone book will be read out in order. Refer to "Vehicle phone book: Listening to the list of registered names" on page 7-60. </li>
<li>The voice guide will say "Changing <name>."</li>
</ul>
<p>When the confirmation function is on, the system will ask if the name is correct. Answer "Yes" if you want to continue with the editing based on this information.</p>
<p>Answer "No" to return to Step 4.</p>
<ol>
<li>The voice guide will say "Name please." Say the new name you want to register. </li>
<li>The registered name will be changed.
When the change is complete, the system will return to the main menu.</li>
</ol>
<h1 id="listening-to-the-list-of-registered-names">Listening to the list of registered names</h1>
<ol>
<li>Press the SPEECH button. </li>
<li>Say "Phone book."</li>
</ol>
<h1 id="bluetooth-20-interface-5">Bluetooth ^® 2.0 interface\*</h1>
<ol>
<li>The voice guide will say "Select one of the following: new entry, edit number, edit name, list names, delete, erase all, or import contact." Say "List names." </li>
<li>Bluetooth ^® 2.0 interface will read out the entries in the phone book in order. </li>
<li>When the voice guide is done reading the list, it will say "End of list, would you like to start from the beginning?" When you want to check the list again from the beginning, answer "Yes." <br />
When you are done, answer "No" to return to the previous or main menu.</li>
</ol>
<p><img alt="" src="images/cae6e361c401943c1e959dfc6907a35c89fdfeb4f6a0571812754548762b1cae.jpg" /></p>
<h1 id="note-295">NOTE</h1>
<ul>
<li>You can call, edit or delete a name that is being read out. <br />
Press the SPEECH button and say "Call" to call the name, "Edit name" to edit it, or "Delete" to delete it. <br />
The system will beep and then execute your command. </li>
<li>If you press the SPEECTI button and say "Continue" or "Previous" while the list is being read, the system will advance or rewind the list. Say "Continue" to proceed to the next entry or "Previous" to return to the previous entry.</li>
</ul>
<h1 id="deleting-a-telephone-number">Deleting a telephone number</h1>
<ol>
<li>
<p>Press the SPEECH button.</p>
</li>
<li>
<p>Say "Phone book."</p>
</li>
<li>
<p>Press the SPEECH button.</p>
</li>
<li>
<p>Say "Phone book."</p>
</li>
<li>
<p>The voice guide will say "Select one of the following: new entry, edit number, edit name, list names, delete, erase all, or import contact." Say "Delete." </p>
</li>
<li>The voice guide will say "Please say the name of the entry you would like to delete, or say list names." Say the name of the phone book entry in which the telephone number you want to delete is registered.</li>
</ol>
<p><img alt="" src="images/0b6540f1705f0318b1f703cdb37dfb71cb1aa4c251d281223db2fb9773a3d5d9.jpg" /></p>
<h1 id="note-296">NOTE</h1>
<p>- Say “List names,” and the names registered in the phone book will be read out in order. Refer to “Vehicle phone book: Listening to the list of registered names” on page 7-60.</p>
<ol>
<li>If only one telephone number is registered in the selected phone book entry, the voice guide will say "Deleting <name> <location>."
If multiple telephone numbers are registered in the selected phone book entry, the voice guide will say "Would you like to delete [home], [work], [mobile], [other], or all?"
Select the location to delete, and the voice guide will say "Deleting <name> <location>."</li>
</ol>
<p>- Say “List names,” and the names registered in the phone book will be read out in order. Refer to “Vehicle phone book: Listening to the list of registered names” on page 7-60.
5. If only one telephone number is registered in the selected phone book entry, the voice guide will say “Deleting <name> <location>.”
If multiple telephone numbers are registered in the selected phone book entry, the voice guide will say “Would you like to delete [home], [work], [mobile], [other], or all?” Select the location to delete, and the voice guide will say “Deleting <name> <location>.”</p>
<p><img alt="" src="images/ef6273231e7ace181352ac56a140114c387dff38924bd2c2b4d8bb4f8f06bec3.jpg" /></p>
<h1 id="note-297">NOTE</h1>
<p>- To delete the telephone numbers from all locations, say "All."</p>
<ol>
<li>The system will ask if you really want to delete the selected telephone number(s) to go ahead with the deletion, answer "Yes." <br />
Answer “No,” the system will cancel deleting the telephone number(s) and then return to Step 4. </li>
<li>When the telephone number deletion is complete, the voice guide will say "<name> <location> deleted" and then the system will return to the main menu. If all locations are deleted, the system will say "<name> and all locations deleted" and the name will be removed from the phone book. If numbers still remain under the entry, the name will retain the other associated numbers.</li>
</ol>
<h1 id="erasing-the-phone-book">Erasing the phone book</h1>
<p>You can delete all registered information from the vehicle phone book.</p>
<ol>
<li>
<p>Press the SPEECH button.</p>
</li>
<li>
<p>Say "Phone book."</p>
</li>
<li>
<p>The voice guide will say "Select one of the following: new entry, edit number, edit name, list names, delete, erase all, or import contact." Say "Erase all."</p>
</li>
<li>
<p>Press the SPEECH button.</p>
</li>
<li>Say “Phone book.”</li>
<li>
<p>The voice guide will say “Select one of the following: new entry, edit number, edit name, list names, delete, erase all, or import contact.” Say “Erase all.”</p>
</li>
<li>
<p>For confirmation purposes, the voice guide will ask "Are you sure you want to erase everything from your hands-free system phone book?" Answer "Yes." Answer "No" to cancel the deletion of all registered information in the phone book and return to the main menu. </p>
</li>
<li>The voice guide will say "You are about to delete everything from your hands-free system phone book. Do you want to continue?" Answer "Yes" to continue. Answer "No" to cancel the deletion of all registered information in the phone book and return to the main menu. </li>
<li>The voice guide will say "Please wait, erasing the handsfree system phone book" and then the system will delete all data in the phone book. <br />
When the deletion is complete, the voice guide will say “Hands-free system phone book erased” and then the system will return to the main menu.</li>
</ol>
<h1 id="mobile-phone-book">Mobile phone book</h1>
<p>All entries in the phone book stored in the cellular phone can be transferred in a batch and registered in the mobile phone book.</p>
<p>Up to 7 mobile phone books, each containing up to 1,000 names, can be registered.</p>
<p>The Bluetooth ^® 2.0 interface automatically converts from text to voice the names registered in the transferred phone book entries, and creates names.</p>
<p><img alt="" src="images/f839b538f9ef20b1ec2c2ae450e962bd798ced9d878b056c8326da8ef9d36b10.jpg" /></p>
<h1 id="note-298">NOTE</h1>
<p>● Only the mobile phone book transferred from the connected cellular phone can be used with that cellular phone. <br />
- You cannot change the names and telephone numbers in the phone book entries registered in the mobile phone book. You cannot select and delete specific phone book entries, either. To change or delete any of the above, change the applicable information in the source phone book of the cellular phone and then transfer the phone book again.</p>
<h1 id="to-import-a-devices-phone-book">To import a devices phone book</h1>
<p>Follow the steps below to transfer to the mobile phone book the phone book stored in the cellular phone.</p>
<p><img alt="" src="images/3a478ebfad4967f48741a09f125fc6ad2c6f8768ab795fd110b588326182aa8e.jpg" /></p>
<h1 id="note-299">NOTE</h1>
<p>● Transfer should be completed while the vehicle is parked. Before transferring, make sure that the vehicle is parked in a safe location. <br />
● The already stored phone book in the mobile phone book is overwritten by the stored phone book in the cellular phone.</p>
<p><img alt="" src="images/a70f795e71490302f1d08031d2de9737a02b46b6f56993b890f738d0e692908a.jpg" /></p>
<h1 id="note-300">NOTE</h1>
<ul>
<li>All or part of data may not be transferred even when the cellular phone supports Bluetooth ^ , depending on the compatibility of the device. </li>
<li>Only a home, a work, and a mobile number can be imported. <br />
● The maximum supported telephone number length is 19 digits. Any telephone number of 20 digits or more will be truncated to the first 19 digits. </li>
<li>If telephone numbers contain characters other than 0 to 9, *, # or +, these characters are deleted before the transfer. </li>
<li>
<p>For the connection settings on the cellular phone side, refer to the instructions for the cellular phone.</p>
</li>
<li>
<p>Press the SPEECH button. </p>
</li>
<li>Say "Phone book." </li>
<li>The voice guide will say "Select one of the following: new entry, edit number, edit name, list names, delete, erase all, or import contact." Say "Import contact." </li>
<li>The voice guide will say “Would you like to import a single entry or all contacts?” Say “All contacts.” </li>
<li>The voice guide will say “Importing the contact list from the mobile phone book. This may take several minutes to complete. Would you like to continue?” Answer “Yes,” transferring to the mobile phone book the phone book stored in the cellular phone will start.</li>
</ul>
<p>For pleasant driving</p>
<p>Answer "No," to return to the main menu.</p>
<p><img alt="" src="images/866f27b495cd6f40d352231adeb370ee2de4a6dc9a1d3de5aa96d751f555a62a.jpg" /></p>
<h1 id="note-301">NOTE</h1>
<p>● The transfer may take some time to complete depending on the number of contacts. <br />
- If the Bluetooth ^® 2.0 interface could not be connected to the Bluetooth ^® compatible cellular phone, the voice guide will say “Unable to transfer contact list from phone” and then the system will return to the main menu. <br />
- If you press the HANG-UP button or press and hold the SPEECH button during the data transfer, the transfer will be cancelled and the system will return to the main menu. <br />
- If an error occurs during the data transfer, all transfer will be cancelled and the voice guide will say "Unable to complete the phone book import" and then the system will return to the main menu. <br />
- If there are no contacts in the phone book, the voice guide will say “There are no contacts on the connected phone.”</p>
<ol>
<li>When the transfer is complete, the voice guide will say "Import complete" and then the system will return to the main menu.</li>
</ol>
<p>Enrollment commands </p>
<table><tr><td>Phrase</td><td>English</td><td>French</td><td>Spanish</td><td>Italian</td><td>German</td><td>Dutch</td><td>Portuguese</td><td>Russian</td></tr><tr><td>1</td><td>0123456789</td><td>0123456789</td><td>0123456789</td><td>0123456789</td><td>0123456789</td><td>0123456789</td><td>0123456789</td><td>0123456789</td></tr><tr><td>2</td><td>888 555 1212</td><td>888 555 1212</td><td>888 555 1212</td><td>888 555 1212</td><td>888 555 1212</td><td>888 555 1212</td><td>888 555 1212</td><td>888 555 1212</td></tr><tr><td>3</td><td>Call</td><td>Appeler</td><td>Llamar</td><td>Chiama</td><td>Anrufen</td><td>Bellen</td><td>Ligar</td><td>Вызов</td></tr><tr><td>4</td><td>Dial</td><td>Composer</td><td>Marcar</td><td>Componi</td><td>Wählen</td><td>Nummer keuze</td><td>Marcar</td><td>Набор</td></tr><tr><td>5</td><td>Setup</td><td>Configurer</td><td>Configuración</td><td>Configura</td><td>Einrichtung</td><td>Setup</td><td>Configurar</td><td>Настройка</td></tr><tr><td>6</td><td>Cancel</td><td>Annuler</td><td>Cancelar</td><td>Annulla</td><td>Abbrechen</td><td>Annuleren</td><td>Cancelar</td><td>Отмена</td></tr><tr><td>7</td><td>Continue</td><td>Continuer</td><td>Continuar</td><td>Continua</td><td>Weiter</td><td>Doorgaan</td><td>Continuar</td><td>Продолжить</td></tr><tr><td>8</td><td>Help</td><td>Aide</td><td>Ayuda</td><td>Aiuto</td><td>Hilfe</td><td>Help</td><td>Ajuda</td><td>Справка</td></tr></table>
<h1 id="usb-input-terminal">USB input terminal\*</h1>
<p>You can connect your USB memory device or iPod* to play music files stored in the USB memory device or iPod.</p>
<p>This section explains how to connect and remove a USB memory device or iPod.</p>
<p>See the following section for details on how to play music files.</p>
<p>Refer to "To play tracks from USB device*" on page 7-32.</p>
<p>Refer to "To play iPod tracks via voice operation" on page 7-34.</p>
<p>*: "iPod" is a registered trademark of Apple Inc. in the United States and other countries.</p>
<h1 id="warning-69">WARNING</h1>
<p>- Do not connect/disconnect the USB memory device or iPod while driving.
This can be dangerous.
Be sure to connect/disconnect before driving.</p>
<p>USB input terminal*</p>
<h1 id="how-to-connect-a-usb-memory-device">How to connect a USB memory device</h1>
<h1 id="to-connect">To connect</h1>
<ol>
<li>Connect a commercially available USB connector cable (A) to the USB memory device (B).</li>
</ol>
<p><img alt="" src="images/ee3bd1b61c8282d99be029c6ed6a256c34c465eace9b7798c663ad509d6b00ac.jpg" /></p>
<details>
<summary>text_image</summary>
A
A
B
AJA110082
</details>
<ol>
<li>Open the cover (C) and connect the opposite end of the USB connector cable.</li>
</ol>
<p><img alt="" src="images/11526912de327f07570aee5303e42394b8e0ac61986573b0a4b93cf34827392a.jpg" /></p>
<details>
<summary>text_image</summary>
C
AJA117658
</details>
<h1 id="note-302">NOTE</h1>
<p>- Do not connect the USB memory device of the USB input terminal directly.
The USB memory device may be damaged.</p>
<ol>
<li>To disconnect the USB connector cable, perform the installation steps in reverse.</li>
</ol>
<h1 id="how-to-connect-an-ipod">How to connect an iPod</h1>
<h1 id="to-connect-2">To connect</h1>
<ol>
<li>Connect the connector cable to the iPod.</li>
</ol>
<h1 id="note-303">NOTE</h1>
<p>● Use a genuine connector cable from Apple Inc.</p>
<ol>
<li>Open the cover (A) and connect the opposite end of the connector cable.</li>
</ol>
<p><img alt="" src="images/20b38b5bce87d56a48b2243d60643c47b91750f3bcf79f800f041e4f457a5149.jpg" /></p>
<details>
<summary>text_image</summary>
A
AJA117661
</details>
<ol>
<li>To disconnect the connector cable, perform the installation steps in reverse.</li>
</ol>
<h1 id="types-of-connectable-devices-and-supported-file-specifications">Types of connectable devices and supported file specifications</h1>
<h1 id="device-types">Device types</h1>
<p>Devices of the following types can be connected.</p>
<p>USB input terminal* </p>
<table><tr><td colspan="2">Model name Condition</td><td></td></tr><tr><td colspan="2">USB memory device</td><td>Storage capacity of 256 Mbytes or more (File System is FAT16/32)</td></tr><tr><td>iPod*</td><td>fifth generation</td><td>F/W Vcr.1.3 or later</td></tr><tr><td rowspan="3">iPod classic*</td><td>80GB/180GB</td><td>F/W Ver.1.1.2 or later</td></tr><tr><td>120GB F/W</td><td>Ver.2.0.1 or later</td></tr><tr><td>160GB (late 2009)</td><td>F/W Ver.2.0.4 or later</td></tr><tr><td rowspan="5">iPod nano*</td><td>first generation</td><td>F/W Ver.1.3.1 or later</td></tr><tr><td>second generation</td><td>F/W Vcr.1.1.3 or later</td></tr><tr><td>third generation</td><td>F/W Ver.1.1.3 or later</td></tr><tr><td>fourth generation</td><td>F/W Vcr.1.0.4 or later</td></tr><tr><td>fifth generation</td><td>F/W Ver.1.0.2 or later</td></tr></table>
<p>*: “iPod,” “iPod classic,” “iPod nano,” “iPod touch” and “iPhone” are registered trademarks of Apple Inc. in the United States and other countries.</p>
<table><tr><td colspan="2">Model name Condition</td><td></td></tr><tr><td></td><td>sixth generation</td><td>F/W Ver.1.0 or later</td></tr><tr><td rowspan="4">iPod touch*</td><td>first generation</td><td>F/W Ver.3.1.3 or later</td></tr><tr><td>second generation</td><td>F/W Ver.4.2.1 or later</td></tr><tr><td>third generation</td><td>F/W Ver.4.3.1 or later</td></tr><tr><td>fourth generation</td><td>F/W Ver.4.3.1 or later</td></tr><tr><td rowspan="5">iPhone*</td><td>iPhone F/W V</td><td>er.3.1.3 or later</td></tr><tr><td>iPhone 3G</td><td>F/W Ver.4.2.1 or later</td></tr><tr><td>iPhone 3GS</td><td>F/W Ver.4.3.1 or later</td></tr><tr><td>iPhone 4</td><td>F/W Ver.4.3.1 or later</td></tr><tr><td>iPhone 4S</td><td>F/W Ver.5.0.1 or later</td></tr></table>
<p>*: “iPod,” “iPod classic,” “iPod nano,” “iPod touch” and “iPhone” are registered trademarks of Apple Inc. in the United States and other countries.</p>
<table><tr><td>Model name Condition</td><td></td></tr><tr><td>Models other than USB memory devices and iPods</td><td>Digital audio player supporting mass storage class</td></tr></table>
<p>*: "iPod," "iPod classic," "iPod nano," "iPod touch" and "iPhone" are registered trademarks of Apple Inc. in the United States and other countries.</p>
<p>On vehicles equipped with the Bluetooth® 2.0 interface, for connectable device types for “iPod*,” “iPod classic*,” “iPod nano*,” “iPod touch*” and “iPhone*,” access the MITSUBISHI MOTORS website.</p>
<p>Please read and agree to the “Warning about Links to the Web Sites of Other Companies”. The websites mentioned above may connect you to websites other than the MITSUBISHI MOTORS websites.
http://www.mitsubishi-motors.com/en/products/index.html</p>
<p><img alt="" src="images/a86adab267d5bb3d5c67bd977f21599dc79f3768e4b90a47b320a42e7342a2c3.jpg" /></p>
<h1 id="note-304">NOTE</h1>
<p>● Depending on the type of the USB memory device or other device connected, the connected device may not function properly or the available functions may be limited. <br />
- It is recommended to use an iPod with firmware updated to the latest version.</p>
<h1 id="sun-visors">Sun visors</h1>
<p><img alt="" src="images/1f7994cdb82f755a371b8b0e2fb608e791269e429fef5c954e567e4fd463e2ce.jpg" /></p>
<h1 id="note-305">NOTE</h1>
<ul>
<li>You can charge your iPod by connecting it to the USB input terminal when the ignition switch or the operation mode is in ON or ACC. </li>
<li>Do not keep your USB memory device or iPod in your vehicle. </li>
<li>It is recommended that you back up files in case of data damage. </li>
<li>Do not connect to the USB input terminal any device (hard disk, card reader, memory reader, etc.) other than the connectable devices specified in the previous section. The device and/or data may be damaged. If any of these devices was connected by mistake, remove it after turning the ignition switch to the "LOCK" position or putting the operation mode in OFF.</li>
</ul>
<h1 id="file-specifications">File specifications</h1>
<p>You can play music files of the following specifications that are saved in a USB memory device or other device supporting mass storage class. When you connect your iPod, playable file specifications depend on the connected iPod.</p>
<table><tr><td>Item Condition</td><td></td></tr><tr><td colspan="2">File format MP3, WMA, AAC</td></tr><tr><td>Maximum number of levels (including the root)</td><td>Level 8</td></tr></table>
<table><tr><td>Item Condition</td><td></td></tr><tr><td>Number of folders 700</td><td></td></tr><tr><td>Number of files 65,535</td><td></td></tr></table>
<h1 id="sun-visors-2">Sun visors</h1>
<p><img alt="" src="images/590682ed9d6da91332cd63e4671d5bb7590c71476f4d409f0282c0086dac3fe6.jpg" /></p>
<details>
<summary>text_image</summary>
Technical diagram showing a mechanical or architectural component with labeled parts and directional arrows, likely from an engineering or CAD context.
</details>
<p>1- To eliminate front glare <br />
2- To eliminate side glare</p>
<h1 id="vanity-mirror">Vanity mirror\*</h1>
<p>A vanity mirror is fitted to the back of the sun visor.</p>
<p><img alt="" src="images/b3941dd1a8d1b247b733df59f7313925f447451c16443dabf1afe64612270806.jpg" /></p>
<details>
<summary>natural_image</summary>
Simple line drawing of a car interior with a handle and arrow indicating direction (no text or symbols)
</details>
<h1 id="card-holder">Card holder\*</h1>
<p>Cards can be slipped into the holder (A) on the back of the sun visor.</p>
<p><img alt="" src="images/75ffc2c055e15e5c0929e1d19bbd90b4bd7f443d449d8f8c1b6ddbdd6fb658a0.jpg" /></p>
<details>
<summary>text_image</summary>
A
AC00006312
</details>
<h1 id="accessory-socket">Accessory socket</h1>
<p>The accessory socket can be used while the ignition switch or the operation mode is in ON or ACC.</p>
<p>To use a plug-in type accessory, open the cap, and insert the plug in the accessory socket.</p>
<p><img alt="" src="images/422848cc8c18b81695c88ca927a492eafb4e341b08bd11c86fda27a56bada6cf.jpg" /></p>
<details>
<summary>text_image</summary>
AJA113373
</details>
<h1 id="caution-109">CAUTION</h1>
<ul>
<li>Be sure to use a "plug-in" type accessory operating at 12 V and at 120 W or less. <br />
● Long use of the electric appliance without running the engine may run down the battery. </li>
<li>When the accessory socket is not in use, be sure to close the cap, because the socket might become clogged by foreign material and be short-circuited.</li>
</ul>
<h1 id="interior-lamps">Interior lamps</h1>
<p><img alt="" src="images/d33d0e093a4b01a8680ed011e11dffba1d8c2dcf65351d78896d1447846121ae.jpg" /></p>
<details>
<summary>text_image</summary>
Technical diagram of a car interior with numbered components and a license plate text at the bottom right.
</details>
<p>1- Luggage room lamp* <br />
2- Room lamp</p>
<p><img alt="" src="images/6647b62ef24ba6d36efe3e7d0cf4ca31e18846fa6944dad611c3fce0fc871d4a.jpg" /></p>
<h1 id="note-306">NOTE</h1>
<ul>
<li>If you leave the lamp on without running the engine, you will run down the battery. Before you leave the vehicle, make sure that the lamp is off.</li>
</ul>
<h1 id="room-lamp">Room lamp</h1>
<p><img alt="" src="images/5f0a9b90ee2967f1dedb6de603e44bd69ac42dda19b79a821705a74989de8e8a.jpg" /></p>
<details>
<summary>text_image</summary>
1 2 3
AA0108656
</details>
<p>1-()</p>
<p>The lamp illuminates regardless of whether a door or the tailgate is open or closed.
2- (•)</p>
<h1 id="delayed-off-function">Delayed off function</h1>
<p>[ Vehicles without central door locks system] The lamp illuminates when a door or the tailgate is opened. It goes off about 7 seconds after all doors and the tailgate are closed. However, the lamp goes off immediately when the ignition switch is turned to the "ON" position with all doors and the tailgate closed. [ Vehicles with central door locks system] The lamp illuminates when a door or the tailgate is opened. It goes off about 15 seconds after the door or tailgate is closed.</p>
<h1 id="storage-spaces">Storage spaces</h1>
<p>However, the lamp goes off immediately with all doors and the tailgate closed in the following cases:</p>
<ul>
<li>When the ignition switch is turned to the "ON" position or the operation mode is put in ON. </li>
<li>When the central door lock function is used to lock the vehicle. </li>
<li>When the keyless entry key or the keyless operation key is used to lock the vehicle. </li>
<li>If the vehicle is equipped with the keyless operation system, when the keyless operation function is used to lock the vehicle.</li>
</ul>
<h1 id="auto-cut-out-function">Auto cut-out function</h1>
<p>If the lamp is left switched on with the ignition switch is in the "LOCK" or "ACC" position or the operation mode is in OFF or ACC, and a door or the tailgate is opened, it goes off automatically after approximately 30 minutes.</p>
<p>The lamp will illuminate again after it automatically goes off in the following cases:</p>
<ul>
<li>When the ignition switch is turned to the "ON" position or the operation mode is put in ON. </li>
<li>When the keyless entry system or the keyless operation system is operated. </li>
<li>When all doors and the tailgate are closed.</li>
</ul>
<p><img alt="" src="images/a8e55b0f1196b9cb428eb8aadb3eebf06af58eecc548e3c19191bcdc2d39acab.jpg" /></p>
<h1 id="note-307">NOTE</h1>
<ul>
<li>When the key was used to start the engine, if the key is removed while the doors and tailgate are closed, the lamp is illuminated and after a few seconds it goes off. </li>
<li>When the keyless operation function was used to start the engine, if the operation mode is put in OFF while the doors and tailgate are closed, the lamp illuminates and after about 15 seconds it goes off. (if so equipped) <br />
● The time until the lamp goes off (delayed off) can be adjusted. For details, please consult a MITSUBISHI MOTORS Authorized Service Point. </li>
<li>The auto cut-out function cannot be operated when the room lamp switch is in the “” position. <br />
Also, this function can be deactivated. For details, please consult a MITSUBISHI MOTORS Authorized Service Point</li>
</ul>
<h1 id="3-①">3- (①)</h1>
<p>The lamp goes off regardless of whether a door or the tailgate is open or closed.</p>
<h1 id="luggage-room-lamp">Luggage room lamp\*</h1>
<p><img alt="" src="images/3cf732628d1b9e2e464ca2a7bb390b8f697ea3f04d4df6b75198ead201a8fcfb.jpg" /></p>
<details>
<summary>natural_image</summary>
Top-down line drawing of a car interior showing the dashboard and seat area (no text or symbols)
</details>
<p>The lamp illuminates when the tailgate is opened, and goes out when the tailgate is closed.</p>
<h1 id="storage-spaces-2">Storage spaces</h1>
<p><img alt="" src="images/21ae0de5dc1205edbaf7a826f5d3a53347c3e325b5c456efb4201703deb1ba0c.jpg" /></p>
<h1 id="caution-110">CAUTION</h1>
<p>● Never leave lighters, cans of carbonated drink, and spectacles in the cabin when parking the vehicle in hot sunshine. The cabin will become extremely hot, so lighters and other flammable items may catch fire and unopened drink cans may rupture. Also, spectacles with plastic lenses or materials could deform or crack. <br />
- Keep the lids of storage spaces closed while driving the vehicle. A lid or the contents of a storage space could otherwise cause injuries.</p>
<h1 id="glove-box">Glove box</h1>
<p>To open, pull the lever (A).</p>
<p><img alt="" src="images/569bd887d0f865149aaaa674596741f04b3c11b44fac5f09f3a457725536d3ce.jpg" /></p>
<details>
<summary>text_image</summary>
A
AA0115717
</details>
<h1 id="luggage-floor-box">Luggage floor box\*</h1>
<p>The box (A) for storing articles is located inside the luggage compartment.
To use the box, raise the luggage floor board (B).</p>
<p><img alt="" src="images/856dd76d14807ecbec4153fedf34068ce983ed2b5ccf9627a52d675c8aef05b2.jpg" /></p>
<details>
<summary>text_image</summary>
A
B
AJA112738
</details>
<h1 id="cup-holder">Cup holder</h1>
<h1 id="warning-70">WARNING</h1>
<p>- Do not spray water or spill beverages inside the vehicle. If the switches, wires or electrical components become wet, they could malfunction or cause a vehicle fire. If you accidentally spill a beverage, wipe up as much liquid as possible and immediately consult a MITSUBISHI MOTORS Authorized Service Point.</p>
<h1 id="caution-111">CAUTION</h1>
<p>- Do not drink beverages while driving. This is distracting and could cause an accident.</p>
<h1 id="note-308">NOTE</h1>
<p>- Plastic bottles may sometimes not fit securely depending on the shape of the bottle. Plastic bottles could fall if driving is done while a plastic bottle is not securely placed, so check that plastic bottles are placed securely or use the bottle holder.</p>
<h1 id="for-the-front-seat">For the front seat</h1>
<p>The cup holder is located in front of the floor console.</p>
<p><img alt="" src="images/998ff51263dceb26347705a199e768c6185ab6b4010ebf8b087e2555797d8b2f.jpg" /></p>
<details>
<summary>natural_image</summary>
Line drawing of a car gear shift lever with no text or symbols
</details>
<h1 id="for-the-rear-seat">For the rear seat</h1>
<p>The cup holder is located behind the parking brake lever.</p>
<p><img alt="" src="images/e5ad2ee855065e58c9bf22b4298a30c8b51fe53db69264bce0b22c0c4c937c28.jpg" /></p>
<details>
<summary>natural_image</summary>
Line drawing of a car interior showing steering wheel and dashboard (no text or symbols)
</details>
<p>Bottle holder</p>
<h1 id="bottle-holder">Bottle holder</h1>
<h1 id="warning-71">WARNING</h1>
<p>- Do not spray water or spill beverages inside the vehicle. If the switches, wires or electrical components become wet, they could malfunction or cause a vehicle fire. If you accidentally spill a beverage, wipe up as much liquid as possible and immediately consult a MITSUBISHI MOTORS Authorized Service Point.</p>
<h1 id="caution-112">CAUTION</h1>
<p>- Do not drink beverages while driving. This is distracting and could cause an accident.
- Drinks could be spilled by the vibration and jolts while driving. If the spilt drink is very hot, you could be burnt.</p>
<p>There are bottle holders located on the front doors.</p>
<p><img alt="" src="images/3ca7941eb09715ff75d0ff9fdb51fe9e7298b52a31d00edd3f337f9214ffbaab.jpg" /></p>
<details>
<summary>text_image</summary>
No
Stopper
AA0108698
</details>
<p>For pleasant driving</p>
<h1 id="note-309">NOTE</h1>
<ul>
<li>Do not store cup or drink can in the bottle holder. <br />
● Tightly close the cap on drink bottles before storing them. <br />
● Some bottles may be too big or the wrong shape to fit in the holder.</li>
</ul>
<h1 id="rear-shelf-panel">Rear shelf panel\*</h1>
<h1 id="caution-113">CAUTION</h1>
<p>- Do not place luggage or other items on the rear shelf panel. Any items on the rear shelf panel would obstruct your rearward view, and they could fly forward and cause injuries or other mishap in the event of hard braking.</p>
<h1 id="to-install-3">To install</h1>
<ol>
<li>Insert the concave portion (A) on the underside of the rear shelf panel into the inside protruding portion (B) of the rear pillar.</li>
</ol>
<p><img alt="" src="images/1032ad2d4148528cd0eaf75d915cd21a2bfd7b84a0585a3c0a0742ad004e9a65.jpg" /></p>
<details>
<summary>text_image</summary>
A
B
AA0108762
</details>
<h1 id="caution-114">CAUTION</h1>
<p>● Lightly push the rear shelf panel to make sure that the concave portion (A) is set firmly in the protruding portion (B) of the tailgate. If the rear shelf panel is not securely locked in place, it could unhook while driving and cause injuries.</p>
<ol>
<li>Hang the strap (C) of the rear shelf panel on the hook (D).</li>
</ol>
<p><img alt="" src="images/6cbff03a4f20de822508949055c041a896342cf47bd95222ea50647912cb34cf.jpg" /></p>
<details>
<summary>text_image</summary>
Diagram showing a car interior with labeled parts C, D, and an inset of a cable or cable bundle, likely illustrating a mechanical or electrical component.
</details>
<h1 id="to-remove-3">To remove</h1>
<p>Follow this procedure in reverse to remove.</p>
<h1 id="convenient-hook">Convenient hook</h1>
<p>Light items of luggage can be hung from the hook.</p>
<p><img alt="" src="images/3b6fe5205436aa3790cbc842ae772ff0ebcbadea3c2ebb259ff3cccf64d6f620.jpg" /></p>
<details>
<summary>natural_image</summary>
Illustration of a hand holding a small object with a magnified inset showing a droplet or droplet (no text or symbols)
</details>
<p><img alt="" src="images/626d1b7a72988fe78dffd8eeed0e61810c136c467e21c5c0ff5d4a098c81a4c4.jpg" /></p>
<h1 id="note-310">NOTE</h1>
<p>- Do not hang heavy luggage (more than about 4 kg) on the hook.
Doing so could cause damage to the hook.</p>
<h1 id="assist-grip">Assist grip</h1>
<p>The grip is to support the body by hand while seated in the vehicle.</p>
<p><img alt="" src="images/cc180d82f26aa371c45389ce097723ab2050a5f166b749a8c7aaeb03de730372.jpg" /></p>
<details>
<summary>natural_image</summary>
Diagram of a car seatbelt buckle being inserted into the seat (no text or symbols)
</details>
<p><img alt="" src="images/3b5ea8684ed5f3b28adfec89369502f8c4f298a85261cf2c8b481582e5a0a3b1.jpg" /></p>
<h1 id="caution-115">CAUTION</h1>
<p>- Do not use the assist grip when getting into or out of the vehicle. The assist grip could detach causing you to fall.</p>
<h1 id="for-emergencies">For emergencies</h1>
<p>If the vehicle breaks down....8-02</p>
<p>If the operation mode cannot be changed to OFF (vehicles equipped with the keyless operation system).... 8-02</p>
<p>Emergency starting....8-02</p>
<p>Engine overheating....8-04</p>
<p>Tool and jack....8-05</p>
<p>Tyre repair kit* 8-06</p>
<p>How to change a tyre (Vehicles equipped with spare tyre)....8-13</p>
<p>Towing....8-19</p>
<p>Operation under adverse driving conditions.... 8-23</p>
<p>If the vehicle breaks down</p>
<h1 id="if-the-vehicle-breaks-down">If the vehicle breaks down</h1>
<p>If the vehicle breaks down on the road, move it to the shoulder and use the hazard warning flashers and/or the warning triangle etc. Refer to “Hazard warning flasher switch” on page 5-19.</p>
<h1 id="if-the-engine-stopsfails">If the engine stops/fails</h1>
<p>Vehicle operation and control are affected if the engine stops. Before moving the vehicle to a safe area, be aware of the following:</p>
<p>● The brake booster becomes inoperative and the pedal effort will increase. Press down the brake pedal harder than usual. <br />
● Since the power steering system is no longer operative, the steering wheel feels heavy when turning it.</p>
<h1 id="if-the-operation-mode-cannot-be-changed-to-off-vehicles-equipped-with-the-keyless-operation-system">If the operation mode cannot be changed to OFF (vehicles equipped with the keyless operation system)</h1>
<p>If the operation mode cannot be changed to OFF, perform the following procedure.</p>
<ol>
<li>
<p>Move the selector lever to the "P" (PARK) position, and then change the operation mode to OFF. (For vehicles with CVT)</p>
</li>
<li>
<p>One of the other causes could be low battery voltage. If this occurs, the keyless entry system, keyless operation function and steering lock will also not operate.</p>
</li>
</ol>
<p>Contact a MITSUBISHI MOTORS Authorized Service Point.</p>
<h1 id="emergency-starting">Emergency starting</h1>
<p>If the engine cannot be started because the battery is weak or dead, the battery from another vehicle can be used with jumper cables to start the engine.</p>
<h1 id="warning-72">WARNING</h1>
<p>● To start the engine using jumper cables connected to another vehicle, perform the correct procedures according to the instruction below. Incorrect procedures could result in a fire or explosion or damage to the vehicles. <br />
- Keep sparks, cigarettes and flames away from the battery because the battery may produce an explosion.</p>
<h1 id="caution-116">CAUTION</h1>
<ul>
<li>Do not attempt to start the engine by pulling or pushing the vehicle.
It could damage your vehicle.</li>
</ul>
<h1 id="caution-117">CAUTION</h1>
<ul>
<li>Check the other vehicle. It must have a 12-volt battery. <br />
If the other system isn't 12-volt, shorting can damage both vehicles. <br />
● Use the proper cables suitable for the battery size to prevent overheating of the cables. </li>
<li>Check the jumper cables for damage and corrosion before use. <br />
● Always wear protective eye goggles when working near the battery. </li>
<li>
<p>Keep the battery out of the reach of children.</p>
</li>
<li>
<p>Get the vehicles close enough so the jumper cables can reach, but be sure the vehicles aren't touching each other. </p>
</li>
<li>Turn off all lamps, heater and other electrical loads. </li>
<li>Set the parking brake firmly on each vehicle. Put an A/T or CVT in "P" (PARK) or a M/T in "N" (Neutral). Stop the engine.</li>
</ul>
<h1 id="warning-73">WARNING</h1>
<p>● Turn off the ignition on both vehicles beforehand. Make sure that the cables or your clothes cannot be caught by the fan or drive belt. Personal injury could result.</p>
<ol>
<li>Make sure battery electrolyte is at the proper level.
Refer to "Battery" on page 10-08.</li>
</ol>
<p><img alt="" src="images/dc2ed7ff8f243ce2553c753ab592d671c5cedcbd872fb8697ec5f28284ffc1ba.jpg" /></p>
<h1 id="warning-74">WARNING</h1>
<ul>
<li>
<p>If electrolyte fluid is not visible, or appears to be frozen, Do Not Attempt Jump Starting! <br />
A battery might rupture or explode if the temperature is below the freezing point or if it is not filled to the proper level. <br />
● Electrolyte is corrosive diluted sulphuric acid. <br />
If electrolyte (battery acid) comes into contact with your hands, eyes, clothes and the painted surface of your vehicle, it should be thoroughly flushed with water. If electrolyte gets in your eyes, flush them with water immediately and thoroughly, and get prompt medical attention.</p>
</li>
<li>
<p>Connect one end of one jumper cable ① to the positive (+) terminal of the discharged battery (A), and the other end ② to the positive (+) terminal of the booster battery (B).</p>
</li>
</ul>
<p>Connect one end of the other jumper cable ③ to the negative (-) terminal of the booster battery, and the other end ④ to the designated ground location of the ve-</p>
<p>hicle with the discharged battery at the point farthest from the battery.</p>
<p><img alt="" src="images/809bd9327d8c311f2b7cccf41a1ee5d4cae345b47416c3c9db1bced24ec1e9c2.jpg" /></p>
<details>
<summary>text_image</summary>
Diagram showing car battery charging setup with labeled components and wiring, including a magnified inset view of the battery's electrical connection.
</details>
<p><img alt="" src="images/4e00a816053035255fd8e06177f02e9663656582501e2533b6b2ec93ecc41da3.jpg" /></p>
<h1 id="warning-75">WARNING</h1>
<p>● Make sure that the connection is made to the appointed position (shown in the illustration). If the connection is made directly to the negative side of the battery, the inflammable gasses generated from the battery might catch fire and explode. <br />
- When connecting the jumper cable, do not connect the positive (+) cable to the negative (-) terminal. <br />
Otherwise sparks might cause explosion of the battery.</p>
<p><img alt="" src="images/86836d0645803312d2b150c5abd983e0ff920403acc83d957d2fe8171e17311c.jpg" /></p>
<h1 id="caution-118">CAUTION</h1>
<p>● Take care not to get the jumper cable caught in the cooling fan or other rotating part in the engine compartment.</p>
<ol>
<li>Start the engine in the vehicle which has the booster battery, let the engine idle a few minutes, then start the engine in the vehicle with the discharged battery.</li>
</ol>
<p><img alt="" src="images/4d4883a890d039aba8d96de7220627b71e457eb74cc7a9f57231c9ffe31128f2.jpg" /></p>
<h1 id="caution-119">CAUTION</h1>
<p>- Keep the engine of the vehicle giving assistance running.</p>
<p><img alt="" src="images/ffa949d6c96ce907e729a41e8de7867d86fabe5f9e3e00e5e0f35c27e2a3ead5.jpg" /></p>
<h1 id="note-311">NOTE</h1>
<ul>
<li>
<p>For vehicles equipped with the Auto Stop & Go (AS&G) system, press the "Auto Stop & Go (AS&G) OFF" switch to deactivate the Auto Stop & Go (AS&G) system and prevent the engine from automatically stopping before the battery is sufficiently charged. Refer to "To deactivate" on page 6-24.</p>
</li>
<li>
<p>After the engine is started, disconnect the cables in the reverse order and keep the engine running for several minutes.</p>
</li>
</ul>
<p><img alt="" src="images/af42c012d2182730023c016576b515f25bdd79664109c9cdc6194565e32047de.jpg" /></p>
<h1 id="note-312">NOTE</h1>
<p>- If the vehicle is put in motion without fully charging the battery, it might cause the loss of smooth engine operation and the anti-lock brake warning lamp to illuminate.
Refer to “Anti-lock brake system (ABS)” on page 6-35.</p>
<p>Engine overheating</p>
<h1 id="engine-overheating">Engine overheating</h1>
<p>If the high coolant temperature warning lamp illuminates during the engine is running, the engine may be overheating.</p>
<p>If this occurs, take the following corrective measures:</p>
<ol>
<li>Stop the vehicle in a safe place. </li>
<li>Check whether steam is coming from the engine compartment.</li>
</ol>
<p>[If steam does not come from the engine compartment]</p>
<p>With the engine still running, raise the bonnet to ventilate the engine compartment.</p>
<p><img alt="" src="images/e2462e73dd3f63ddd25502ae4b7993f1c6886f916e8488fd526722207c52d1cf.jpg" /></p>
<h1 id="note-313">NOTE</h1>
<p>- For vehicles equipped with the Auto Stop & Go (AS&G) system, press the "Auto Stop & Go (AS&G) OFF" switch to deactivate the Auto Stop & Go (AS&G) system before stopping the vehicle.
Refer to "To deactivate" on page 6-24.</p>
<p>[If steam is coming from the engine compartment]</p>
<p>Stop the engine, and when the steam stops, raise the bonnet to ventilate the engine compartment. Restart the engine.</p>
<h1 id="warning-76">WARNING</h1>
<ul>
<li>Do not open the bonnet while steam is coming from the engine compartment. It could cause steam or hot water to spurt out, causing burns. Hot water could spurt out even when there is no steam coming out, and some parts will be very hot. Be very careful when opening the bonnet. <br />
● Be careful of hot steam, which could be blowing off the reserve tank cap. </li>
<li>Do not attempt to remove the radiator cap while the engine is hot.</li>
</ul>
<p><img alt="" src="images/40ab7c3b4620dc6aaee393b0b51c2fafa6f01b28abcdace4b7cace688307cde5.jpg" /></p>
<details>
<summary>text_image</summary>
AJM101628
</details>
<ol>
<li>Confirm that the cooling fan (A) is turning.</li>
</ol>
<p>[If the cooling fan is turning]</p>
<p>After the high coolant temperature warning lamp has gone off, stop the engine.</p>
<p>[If the cooling fan is not turning]</p>
<p>Stop the engine immediately and contact a MITSUBISHI MOTORS Authorized Service Point for assistance.</p>
<p><img alt="" src="images/9ed038ede4e36e5a50003e7ea7f350887c1f02ffe12214c3e377cc38e62dcdca.jpg" /></p>
<details>
<summary>text_image</summary>
A
*
AJA106368
</details>
<p>*: Front of the vehicle</p>
<h1 id="warning-77">WARNING</h1>
<p>● Be careful not to get your hands or clothes caught in the cooling fan.</p>
<ol>
<li>Check the coolant level in the reserve tank (B).</li>
</ol>
<p>Add coolant to the radiator and/or reserve tank if necessary. (Refer to the "Maintenance" section.)</p>
<p><img alt="" src="images/650dbce1f38ecb18e4f8a0c9e9beaaaa897577047e0482dd6b3532b0d81763ae.jpg" /></p>
<details>
<summary>text_image</summary>
C
B Full
Low
AA0106412
</details>
<p><img alt="" src="images/0eabb9657c215f25d80490403066d5fb7ed0b98973bb1a9bb8692b51f09e0ad8.jpg" /></p>
<h1 id="warning-78">WARNING</h1>
<p>● Make sure that the engine has cooled down before removing the radiator cap (C), because hot steam or boiling water otherwise will gush from the filler port and may scald you.</p>
<p><img alt="" src="images/8a2ef0e6cd1f4c87e7620d555c50575cf868f495ee82c6d65f2199e5bb808614.jpg" /></p>
<h1 id="caution-120">CAUTION</h1>
<p>- Do not add coolant while the engine is hot. Suddenly adding cold coolant could damage the engine. Wait for the engine to cool down, then add coolant a little at a time.</p>
<ol>
<li>Examine the radiator hoses for coolant leakage and the drive belt for looseness or damage.</li>
</ol>
<p>If there is anything wrong with the cooling system or drive belt, we recommend you to have it checked and repaired.</p>
<h1 id="tool-and-jack">Tool and jack</h1>
<h1 id="storage">Storage</h1>
<p>The tools are stored beneath the luggage floor board of the luggage compartment.</p>
<p>The jack (if so equipped) is stored under the front left side seat. The storage location of the tools and jack should be remembered in case of an emergency.</p>
<p><img alt="" src="images/e4e37f895c23702cbc9e4d07aeb7f2c25581a79d585e7e586ce046cdc498a2cc.jpg" /></p>
<details>
<summary>text_image</summary>
Type 1
1
Type 2
1
2
AA3009389
</details>
<p>1-Tools <br />
2-Jack*</p>
<p>Tyre repair kit*</p>
<h1 id="tools">Tools</h1>
<p><img alt="" src="images/f2663c00d0ba644e4b19420ae32c56b831d766be0bcbb6334d329fc291272e9d.jpg" /></p>
<details>
<summary>text_image</summary>
1
2
3
4
A00065144
</details>
<p>1- Tool case* <br />
2- Wheel nut wrench <br />
3- Jack bar <br />
4- Towing hook</p>
<h1 id="jack">Jack\*</h1>
<p>The jack is used only for the purpose of changing a tyre when a tyre is punctured.</p>
<p><img alt="" src="images/f6308a12317491272926f6d13e4d54c125b065219598dedb2a92c76aabb9e7f9.jpg" /></p>
<h1 id="note-314">NOTE</h1>
<p>● The jack is maintenance-free. <br />
● The jack is in conformity with EC law as approximated by the Machinery Directive 2006/42/EC. <br />
- The EC declaration of conformity is attached to the section “Declaration of Conformity” in the end of this owner’s manual.</p>
<p><img alt="" src="images/bd8fb15245190ad88386bf2bc248bced25b7a422b2a6b17cbd7959ce32855776.jpg" /></p>
<h1 id="note-315">NOTE</h1>
<p>- The business name, full address of the manufacturer and of his authorised representative and the designation of the jack are described in the EC declaration of conformity.</p>
<h1 id="removing-and-storing-the-jack">Removing and storing the jack</h1>
<p>Before removing or storing the jack, move the front left side seat fully forward to access the jack from the rear seat area. (Refer to "Front seat" on page 4-02.)</p>
<p><img alt="" src="images/e7d14741f3c48ea9204bac42c19e676d2323418193a1d65310209d9d9b8cd765.jpg" /></p>
<h1 id="caution-121">CAUTION</h1>
<p>● Never access, remove or store the jack from the front of the seat. Doing so could damage electrical wires under the seat.</p>
<h1 id="to-remove-4">To remove</h1>
<p>Turn the shaft end of the jack in the direction (1) until the jack fully retracts and remove the jack from the holder (A).</p>
<h1 id="to-store">To store</h1>
<p>Put the jack in the holder (A) and turn the shaft end of the jack in the direction (2) by hand until the jack is firmly secured.</p>
<p><img alt="" src="images/2c744e2a73ca3c924d0d64d365650e0042faadfb7a6bd450b224178cca4fe46e.jpg" /></p>
<details>
<summary>text_image</summary>
Diagram illustrating car seatbelting technique with labeled parts and a magnified view of the seatbelt mechanism.
</details>
<p><img alt="" src="images/bc970c3e39ffb5d490f610be3ebcbb259080233c5ecbc98d3986bcdf8893a272.jpg" /></p>
<h1 id="warning-79">WARNING</h1>
<p>● After storing the jack in place, make sure the jack is securely fixed in the holder. If the jack is not fixed securely, it may move and hit an occupant in an accident resulting in serious injury or death.</p>
<h1 id="tyre-repair-kit">Tyre repair kit\*</h1>
<p>This kit enables emergency repair of a small puncture in the tread area of a tyre that has run over a nail, screw, or similar object.</p>
<h1 id="storage-2">Storage</h1>
<p>The tyre repair kit is stored beneath the luggage floor board of the luggage compartment. The storage location of the tyre repair kit should be remembered in case of an emergency.</p>
<p><img alt="" src="images/99c4eb678ee6edb540976ecbb1d6d369a55f285b4f8b803eb8c28ed6e334a699.jpg" /></p>
<details>
<summary>text_image</summary>
1
2
Type 1
3
4
5
6
7
8
Type 2
3
4
6
7
8
AJE101420
</details>
<p>1- Tyre repair set <br />
2- Tyre compressor</p>
<p>3- Tyre sealant bottle <br />
4-Filler hose <br />
5- Extension hose*</p>
<p>(This hose is used for removal of sealant. It is not used in emergency puncture repair.)</p>
<p>6- Valve insert (spare) <br />
7- Valve remover <br />
8- Speed restriction sticker</p>
<h1 id="how-to-use-the-tyre-repair-kit">How to use the tyre repair kit</h1>
<h1 id="warning-80">WARNING</h1>
<p>● Using the tyre repair kit may damage the wheel and/or the tyre inflation pressure sensor for the tyre. <br />
The vehicle must promptly be inspected and repaired by a certified MITSUBISHI MOTORS Authorized Service Point after using the tyre repair kit.</p>
<h1 id="caution-122">CAUTION</h1>
<p>● The tyre sealant can cause health damage if swallowed. If you accidentally swallow it, drink as much water as possible and immediately consult a doctor. <br />
- If the tyre sealant gets in your eyes or on your skin, rinse with lots of water. If you still sense an abnormality, consult a doctor. <br />
- Consult a doctor immediately if any allergic reactions occur.</p>
<h1 id="caution-123">CAUTION</h1>
<ul>
<li>Do not allow children to touch the tyre sealant. <br />
● Do not breathe in the vapours of tyre sealant. <br />
● Be sure to use a MITSUBISHI MOTORS GENUINE tyre sealant.</li>
</ul>
<h1 id="note-316">NOTE</h1>
<p>- The tyre sealant cannot be used in any of the situations listed below. If any of these situations occurs, please contact a MITSUBISHI MOTORS Authorized Service Point or another specialist.
- The tyre sealant's expiry date has passed. (The expiry date is shown on the bottle label.)</p>
<p><img alt="" src="images/288f6572438269de64edd089c3f2a0d7c282648101aa799119645cd3bcf87764.jpg" /></p>
<details>
<summary>natural_image</summary>
Simple line drawing of a bottle with an arrow pointing to it, no text or symbols present.
</details>
<p>• More than one tyre is punctured. <br />
- The puncture hole has a length or width of 4 mm or more.</p>
<p>Tyre repair kit*</p>
<p><img alt="" src="images/befb3d482af38b20135b80eb9d881d2743af98224eecf357a760fe4462e5fa03.jpg" /></p>
<h1 id="note-317">NOTE</h1>
<p>- The tyre is punctured in the side wall (A), not in the tread (B).</p>
<p><img alt="" src="images/e973f5f947d23946a7ee3cd28cd4fad5b51b3ccafe2a1136c5e496fed2b3a970.jpg" /></p>
<details>
<summary>text_image</summary>
A
A
B
AJZ101599
</details>
<p>- The vehicle has been driven with the tyre almost completely flat.
- The tyre has completely slipped over the wheel rim and has come off the wheel.
- The wheel is damaged.</p>
<ul>
<li>Use the tyre sealant only at ambient temperatures of -30^ to +60^ . <br />
● Effect an emergency repair without pulling out the object (nail, screw, etc.) that is stuck in the tyre. </li>
<li>Do not use the tyre sealant if the tyre has been damaged by being driven when insufficiently inflated (e.g. bumps, cuts, cracks etc. on the tyre). <br />
● Wipe tyre sealant off the paintwork immediately with a damp cloth. </li>
<li>Immediately wash clothes contaminated with tyre sealant.</li>
</ul>
<p><img alt="" src="images/cbf2d1e16afa532e29ed9dc672bc59f521ed0c088bc1a6040644e21d16d30d7d.jpg" /></p>
<h1 id="note-318">NOTE</h1>
<p>- Check the tyre sealant's expiry date regularly, and be sure to purchase a new one from a MITSUBISHI MOTORS Authorized Service Point before the expiry date.</p>
<p>Before repairing a tyre, first stop your vehicle in a safe, flat location.</p>
<ol>
<li>Park the vehicle on level and stable ground. </li>
<li>Set the parking brake firmly. </li>
<li>On vehicles with M/T, stop the engine and move the gearshift lever to the "R" (Reverse) position.</li>
</ol>
<p>On vehicles with CVT, move the selector lever to the "P" (PARK) position and stop the engine.</p>
<ol>
<li>Turn on the hazard warning flashers and set up a warning triangle, flashing signal lamp, etc., at an adequate distance from the vehicle, and have all your passengers leave the vehicle. </li>
<li>
<p>Take out the tyre repair kit.</p>
</li>
<li>
<p>Take the valve cap (C) off the tyre valve (D), then press the valve remover (E) onto the valve as illustrated. Allow all of the air in the tyre to escape.</p>
</li>
</ol>
<p><img alt="" src="images/ff9308e1f14517529d4754c009e9aedc815f697cc6224bb791560b96b2388098.jpg" /></p>
<details>
<summary>text_image</summary>
C
D
E
AJA106919
</details>
<ol>
<li>Remove the valve insert (F) by turning it anticlockwise using the valve remover (E). Put the removed valve insert in a clean place so it does not get dirty.</li>
</ol>
<p><img alt="" src="images/97fd6fbb4483c4b97df81286dce35e551f2af82f106bb2452ce213b849266842.jpg" /></p>
<details>
<summary>text_image</summary>
F
E
AJA106922
</details>
<p><img alt="" src="images/d4950d28e7662ae259630090f34519a191ac890d103e961b0705c90aead7e061.jpg" /></p>
<h1 id="caution-124">CAUTION</h1>
<p>- If there is any air left in the tyre when you remove the valve insert, the valve insert may fly out and injure you. Make sure the tyre contains no air before removing the valve insert.</p>
<ol>
<li>Shake the tyre sealant bottle well.</li>
</ol>
<p><img alt="" src="images/1c0b87ffc0de1e9ded3cb2bc7b4de82abd99397923e9733780251a650da1712f.jpg" /></p>
<details>
<summary>natural_image</summary>
Line drawing of a hand holding a bottle with an arrow indicating upward motion (no text or symbols)
</details>
<p><img alt="" src="images/5ad8e13b359f378ec0ae9c70a67c2d5821443bc30a5a65794dd4ebc355cfd8c9.jpg" /></p>
<h1 id="note-319">NOTE</h1>
<p>- In cold conditions (when the ambient temperature is 0 °C or lower), thickening of the tyre sealant can make the tyre sealant hard to squeeze out of the bottle. Warm the bottle inside the vehicle.</p>
<ol>
<li>Take the cap (G) off the tyre sealant bottle (II). Do not remove the seal (I). Screw the filler hose (J) onto the bottle (H). As you screw the filler hose onto</li>
</ol>
<p>the bottle, the seal will break, allowing the sealant to be used.</p>
<p><img alt="" src="images/391c1e35b36bf50a9e7c649bbf98c2e58e4519eb3e51e6159c92777dac38b35d.jpg" /></p>
<details>
<summary>text_image</summary>
J
I
H
G
AFA109282
</details>
<p><img alt="" src="images/54ecdeda4a6ca36a29fb7efeca32491ff960c0fdb757926921e2a5d15afd90c3.jpg" /></p>
<h1 id="caution-125">CAUTION</h1>
<p>- If you shake the bottle after screwing on the hose, sealant may spray out of the hose.</p>
<ol>
<li>Remove the plug (K) from the free end of the hose (J). (Type 1 only)</li>
</ol>
<p>Press the hose onto the valve (D).</p>
<p><img alt="" src="images/82287b6d33c54f7d93205598ba88724bc36814efac96ec7899ae8c5da7f277be.jpg" /></p>
<details>
<summary>text_image</summary>
D
K
J
AJA106951
</details>
<ol>
<li>Holding the sealant bottle upside-down, squeeze it again and again to inject all of the sealant into the tyre.</li>
</ol>
<p><img alt="" src="images/74691eeb99966e4dc3ef794ac9f30e5241a42ea9661716d40c27ceb6a7b64ae7.jpg" /></p>
<details>
<summary>natural_image</summary>
Technical line drawing of a mechanical component with concentric rings and a handle (no text or symbols)
</details>
<h1 id="tyre-repair-kit-2">Tyre repair kit\*</h1>
<p><img alt="" src="images/f2008bef4c1165af714887cb4b7872fd0d10d83d20f3d4b9d242b80f5daf24a4.jpg" /></p>
<h1 id="note-320">NOTE</h1>
<p>- When injecting the sealant, position the valve away from the bottom, i.e., away from the point where the tyre touches the ground. If the valve is near the point where the tyre touches the ground, the sealant may not go into the tyre easily.</p>
<ol>
<li>After injecting the sealant, pull the hose off the valve, remove any residual sealant from the valve, rim and/or tyre.
Fit the valve insert (F) into the valve (D), and screw the valve insert securely into place using the valve remover (E).</li>
</ol>
<p><img alt="" src="images/f17790941e308168a0516e6e5e34fdf9a94a21ab2759f28616b3ed3ee90be14c.jpg" /></p>
<details>
<summary>text_image</summary>
D
F
E
AJA106935
</details>
<p><img alt="" src="images/9bbd188e7673d07b8d7acb3370367e418f1363f87aeb5301c9d6f2eee637d8c0.jpg" /></p>
<h1 id="note-321">NOTE</h1>
<p>- When removing and screwing in the valve insert using the valve remover, turn the valve remover by hand. Using a tool to turn the valve remover could damage it.</p>
<ol>
<li>Insert the plug (K) or the valve remover (E) in the tip of the filler hose to prevent the sealant from leaking from the empty sealant bottle.</li>
</ol>
<p><img alt="" src="images/7dc57ade7de1e2f5d38a11078559aed8806c2b71355ac2d89bb6651164b45940.jpg" /></p>
<details>
<summary>text_image</summary>
K
E
AJA106948
</details>
<ol>
<li>Pull out the compressor hose (L) from the side of the tyre compressor, and then securely attach the hose to the tyre valve (D).</li>
</ol>
<p><img alt="" src="images/1bf48ad9a312cf8b157e667eb6382812c9dffcdb015aa3f1d0571dc5c259eb04.jpg" /></p>
<details>
<summary>text_image</summary>
D
L
AJA106964
</details>
<ol>
<li>Place the compressor (M) with its air pressure gauge (N) on top.
Pull out the compressor's power cord (O), insert the plug on the cord into the accessory socket (P), and then turn the ignition switch to the "ACC" position or put the operation mode in ACC. (Refer to "Accessory socket" on page 7-71.)
Turn ON the compressor switch (Q) and inflate the tyre to the specified pressure. (Refer to "Tyre inflation pressures" on page 10-10.)</li>
</ol>
<p><img alt="" src="images/77470bd6e3192e95aaa38af3b1d00577f99cb41cacf7f50851d66309c897aa45.jpg" /></p>
<details>
<summary>text_image</summary>
P
O
N
M
Q
AJ3100573
</details>
<p><img alt="" src="images/077220556757acdf4a448e707a470f9f30172e9918033257e3e8d4e2ed0d5677.jpg" /></p>
<h1 id="caution-126">CAUTION</h1>
<p>● The supplied compressor is designed only for inflation of your vehicle tyres.</p>
<p><img alt="" src="images/6fc0e0f7f68ecf0800e8f478eb825dce0dc9cb6351cdacee4540ad53cc3b4270.jpg" /></p>
<h1 id="caution-127">CAUTION</h1>
<ul>
<li>The compressor is designed to run on a vehicle's 12 V power supply. Do not connect it to any other power source. <br />
● The compressor is not waterproof. If you use it in rain, make sure water does not get on it. <br />
● Any sand or dust sucked into the compressor could make the compressor break down. Do not place the compressor directly on any sandy or dusty surface when using it. </li>
<li>
<p>Do not disassemble or modify the compressor. Also, do not subject the air pressure gauge to shock. It could malfunction.</p>
</li>
<li>
<p>Check and adjust the tyre pressure with reference to the air pressure gauge on the compressor. If you overinflate the tyre, release air by loosening the hose's end fitting.
If there is a gap between the tyre and wheel because the tyre has moved inward from the wheel rim, press the periphery of the tyre towards the wheel to close the gap before running the compressor. (With no gaps, the tyre pressure will rise.)</p>
</li>
</ul>
<p><img alt="" src="images/b7baff21906934825c5f06b983fdb3e4eb78f3995f1671c3df0c6a57ff017dcf.jpg" /></p>
<h1 id="caution-128">CAUTION</h1>
<p>- Be careful not to get your fingers trapped between the tyre and wheel as the tyre inflates.</p>
<p><img alt="" src="images/65b7503138abec7d4e1744442aa45bf42ffb9379acfd40c42419e758e102dddf.jpg" /></p>
<h1 id="caution-129">CAUTION</h1>
<p>● The surface of the compressor will get hot while the compressor is running. Do not keep the compressor running continuously for more than 10 minutes. After using the compressor, wait for the compressor to cool before using it again. <br />
- If the compressor becomes sluggish or hot while operating, it is overheating. Immediately place the switch in the OFF position and let the compressor cool down for at least 30 minutes.</p>
<p><img alt="" src="images/288bdb61ff4e1b0ca06a48942609ab8bfc5bb51f7100c128b0c044ea65682018.jpg" /></p>
<h1 id="note-322">NOTE</h1>
<ul>
<li>
<p>If the tyre pressure does not rise to the specified level within 10 minutes, the tyre may be so severely damaged that the tyre sealant cannot be used to effect an emergency repair. Please contact a MITSUBISHI MOTORS Authorized Service Point or another specialist in this event.</p>
</li>
<li>
<p>Turn OFF the compressor switch, then pull the power cord plug out of the socket.</p>
</li>
</ul>
<p><img alt="" src="images/42c4cd6d534cea39cca93d3e99656b369d41c4c0b54ec4018eb0f9bd91bcba16.jpg" /></p>
<h1 id="note-323">NOTE</h1>
<p>- Simply putting sealant and air into the tyre using the tyre repair kit does not seal the puncture hole. Air will leak through the puncture hole until the emergency repair procedure is completed (through step 20 or step 21 of these instructions).</p>
<ol>
<li>Affix the speed restriction sticker (R) to the three-diamond mark on the steering wheel.</li>
</ol>
<p><img alt="" src="images/1d9aba5d91ce07b2cd020e54d2e75c53ef59912911f81289902aa2b9c3c864fb.jpg" /></p>
<details>
<summary>text_image</summary>
R
AJA117427
</details>
<p><img alt="" src="images/16719cebc7e1c4107fc85de5b40f33166e37de528bbfcf368459b6c6d98c31b1.jpg" /></p>
<h1 id="caution-130">CAUTION</h1>
<p>- Do not affix the sticker anywhere except the specified position on the pad of the steering wheel. Affixing the sticker in an incorrect position could prevent the SRS airbag from working normally.</p>
<ol>
<li>When you have inflated the tyre to the specified pressure, stow the compressor,</li>
</ol>
<p>For emergencies</p>
<p>8-11</p>
<h1 id="tyre-repair-kit-3">Tyre repair kit\*</h1>
<p>bottle, and other items in the vehicle and promptly start driving the vehicle so that the tyre sealant can spread evenly in the tyre. Drive with great care. Do not exceed a speed of 80 km/h (50 mph). Observe local speed limits.</p>
<h1 id="caution-131">CAUTION</h1>
<p>- If you sense any abnormality while driving, stop the vehicle and contact a MITSUBISHI MOTORS Authorized Service Point or another specialist. Otherwise the tyre pressure may drop before the emergency repair procedure is completed, rendering the vehicle unsafe.</p>
<h1 id="note-324">NOTE</h1>
<p>● Driving faster than 80 km/h (50 mph) can make the vehicle vibrate.</p>
<ol>
<li>After driving for 10 minutes or 5 km, check the tyre pressure using the air pressure gauge on the compressor. If the tyre pressure has apparently not dropped, the emergency repair procedure is complete. Continue the process from step 22.
If the tyre pressure is not sufficient, inflate the tyre to the specified pressure again and drive the vehicle carefully without exceeding a speed of 80 km/h (50 mph).</li>
</ol>
<p>8-12</p>
<p>For emergencies</p>
<h1 id="caution-132">CAUTION</h1>
<p>- If the tyre pressure is lower than the minimum permitted pressure (1.3 bar {130 kPa}), the tyre cannot successfully be repaired with the tyre sealant. Do not drive the vehicle any further. Contact a MITSUBISHI MOTORS Authorized Service Point or another specialist.</p>
<ol>
<li>After driving for 10 minutes or 5 km, check the tyre pressure using the air pressure gauge on the compressor. If the tyre pressure has apparently not dropped, the emergency repair procedure is complete. You must still not exceed a speed of 80 km/h (50 mph). Observe local speed limits.</li>
</ol>
<h1 id="note-325">NOTE</h1>
<p>- If the tyre pressure has dropped below the specified level when you check it at the end of the repair procedure, do not drive the vehicle any further. Contact a MITSUBISHI MOTORS Authorized Service Point or another specialist.</p>
<h1 id="note-326">NOTE</h1>
<p>- In cold conditions (when the ambient temperature is 0 °C or lower), the time and driving distance necessary until completion of the repair can be longer than in warmer conditions, meaning that the tyre pressure can drop below the specified level even when you have inflated the tyre a second time and subsequently driven the vehicle. If this happens, inflate the tyre to the specified pressure once more, drive for about 10 minutes or 5 km, then check the tyre pressure again. If the tyre pressure has again dropped below the specified level, stop driving the vehicle and contact a MITSUBISHI MOTORS Authorized Service Point or another specialist.</p>
<ol>
<li>Immediately drive with great care to a MITSUBISHI MOTORS Authorized Service Point and have tyre repair/replacement performed.</li>
</ol>
<h1 id="caution-133">CAUTION</h1>
<p>- Be sure to check the tyre pressure for confirmation that the emergency repair procedure is complete.</p>
<p><img alt="" src="images/c3d332b18413c1088a163ce24a9568e1e56841f03dda300328ae759b4ec55754.jpg" /></p>
<h1 id="note-327">NOTE</h1>
<ul>
<li>Please give the empty sealant bottle to your MITSUBISHI MOTORS Authorized Service Point when you purchase new sealant or dispose of the sealant bottle according to national regulations for the disposal of chemical waste. </li>
<li>A tyre in which puncture sealant has been used should ideally be replaced with a new one. If you wish to have such a tyre properly repaired for reuse, please contact a MITSUBISHI MOTORS Authorized Service Point or another specialist. Note that a proper repair is impossible following an emergency repair if the puncture hole cannot be located. </li>
<li>The manufacturer is unable to guarantee that all tyre punctures can be repaired with the tyre repair kit, in particular cuts or perforations with a diameter of more than 4 mm or away from the tyre's tread. The manufacturer is not liable for damage sustained through improper use of the tyre repair kit. <br />
● The manufacturer is not liable for damage sustained through re-use of any tyre in which tyre sealant has been used.</li>
</ul>
<h1 id="how-to-change-a-tyre-vehicles-equipped-with-spare-tyre">How to change a tyre (Vehicles equipped with spare tyre)</h1>
<p>Before changing a tyre, first stop your vehicle in a safe, flat location.</p>
<ol>
<li>Park the vehicle on level and stable ground, free of loose pebbles, etc. </li>
<li>Set the parking brake firmly. </li>
<li>On vehicles with M/T, stop the engine and move the gearshift lever to the "R" (Reverse) position. <br />
On vehicles with CVT, move the selector lever to the "P" (PARK) position and stop the engine. </li>
<li>Turn on the hazard warning flashers and set up a warning triangle, flashing signal lamp, etc., at an adequate distance from the vehicle, and have all your passengers leave the vehicle. </li>
<li>To prevent the vehicle from rolling when jacking up the vehicle, place chocks or blocks (A) at the tyre that is diagonally opposite from the tyre (B) you are changing.</li>
</ol>
<p><img alt="" src="images/e1094e6b261ac52c57369aa57077c5b05295703eb1e93bf50f8cc66600ec3f7e.jpg" /></p>
<details>
<summary>natural_image</summary>
Line drawing of a car with labeled components A and B, showing a suspension or repair mechanism (no text or symbols beyond labels)
</details>
<p><img alt="" src="images/df87e4be3cc011bea51025229606d567a982fd335662b36eca3b30912c70dea3.jpg" /></p>
<h1 id="warning-81">WARNING</h1>
<p>- Be sure to apply chocks or blocks to the correct tyre when jacking up the vehicle. If the vehicle moves while jacked up, the jack could slip out of position, leading to an accident.</p>
<p><img alt="" src="images/35383b97f3e9ae519af9c8a6558fc1f4be8748bc92c3a6b015034e621991557b.jpg" /></p>
<h1 id="note-328">NOTE</h1>
<p>● The chocks shown in the illustration do not come with your vehicle. It is recommended that you keep some in the vehicle for use if needed. <br />
- If chocks are not available, use stones or any other objects that are large enough to hold the wheel in position.</p>
<ol>
<li>Get the jack bar and wheel nut wrench ready. Refer to "Tool and jack" on page 8-05.</li>
</ol>
<h1 id="spare-wheel-information">Spare wheel information</h1>
<p>The spare wheel is stored beneath the luggage floor board of the luggage compartment. Check the air pressure of the spare tyre frequently and make sure it is ready for emergency use at any time.</p>
<p>Maintaining the spare wheel at the highest specified air pressure will ensure that it can always be used under any conditions (city/high-speed driving, varying load weight, etc.).</p>
<p>How to change a tyre (Vehicles equipped with spare tyre)</p>
<h1 id="caution-134">CAUTION</h1>
<p>- The pressure should be periodically checked and maintained at the specified pressure while the tyre is stowed.
Driving with an insufficient tyre pressure can lead to an accident. If you have no choice but to drive with an insufficient tyre pressure, keep your speed down and inflate the tyre to the correct pressure as soon as possible. (Refer to "Tyre inflation pressures" on page 10-10.)</p>
<h1 id="compact-spare-wheel">Compact spare wheel</h1>
<p>The compact spare wheel is designed to save space in the luggage compartment and its lighter weight makes it easier to use if a flat tyre occurs.</p>
<h1 id="caution-135">CAUTION</h1>
<p>● The compact spare wheel is for temporary use only and should be removed as soon as the original wheel can be repaired or replaced. <br />
● The vehicle must not be driven at speeds in excess of 80 km/h (50 mph) while using the compact spare wheel. <br />
● The compact spare tyre is not as good as a standard tyre in controllability and stability. When the compact spare tyre is used, avoid quick starts, sudden braking and sharp steering.</p>
<h1 id="caution-136">CAUTION</h1>
<p>● The compact spare wheel is specifically designed for your vehicle and it should not be used on any other vehicle. <br />
- Do not use snow traction device (tyre chains) with your compact spare wheel. Because of the smaller tyre size, a snow traction device (tyre chains) will not fit properly. This could cause damage to the wheel and result in loss of the chain.
If a front tyre becomes flat when using snow traction device (tyre chains), first replace a rear wheel with the compact spare wheel and then use the removed rear wheel to replace the flat front wheel so that you can continue to use the snow traction device (tyre chains).</p>
<p><img alt="" src="images/9a43eefdc8feabcc630adf24792b52bc94218899f5d30cad729911b72f0d1784.jpg" /></p>
<details>
<summary>natural_image</summary>
Simple line drawing of a car with wheels and motion arrows indicating vehicle movement (no text or symbols)
</details>
<h1 id="caution-137">CAUTION</h1>
<ul>
<li>Upon installation of the compact spare wheel, the ground clearance is reduced as the tyre is smaller in diameter than the standard tyre. When passing over the projections on the road, take care not to damage the vehicle's undercarriage. </li>
<li>Do not install more than one compact spare wheel at the same time.</li>
</ul>
<h1 id="to-remove-the-spare-tyre">To remove the spare tyre</h1>
<ol>
<li>Lift up the luggage floor board. </li>
<li>To remove the spare tyre, remove the installation clamp (A) by turning it anticlockwise.</li>
</ol>
<p><img alt="" src="images/af0481819799194c56883295578933c38f257b11cec747d2bfabf7f85696057f.jpg" /></p>
<details>
<summary>natural_image</summary>
Diagram of a car interior showing steering wheel and dashboard (no text or symbols)
</details>
<h1 id="note-329">NOTE</h1>
<p>● Put the spare wheel under the vehicle body near the jack. This makes it safer if the jack slips out of position.</p>
<p><img alt="" src="images/c7d5ad5edf2042cd22a55639024a0166f954c0f289c813c47979a7015e1e8b7f.jpg" /></p>
<details>
<summary>natural_image</summary>
Diagram of a mechanical device with two wheels and a connecting rod (no text or symbols)
</details>
<h1 id="to-change-a-tyre">To change a tyre</h1>
<ol>
<li>On vehicles with wheel covers, first remove the covers (refer to "Wheel covers" on page 8-18). Then loosen the wheel nuts a quarter turn with the wheel nut wrench. Do not remove the wheel nuts yet.</li>
</ol>
<p><img alt="" src="images/2120f3b4b5ed93a0e514fa5d9e13493de8472db913a0e368a16acba41d759f90.jpg" /></p>
<details>
<summary>text_image</summary>
Diagram illustrating a mechanical or electrical component with numbered parts and an arrow indicating rotation or movement.
</details>
<ol>
<li>Place the jack under one of the jacking points (A) shown in the illustration. Use</li>
</ol>
<p>the jacking point closest to the tyre you wish to change.</p>
<p><img alt="" src="images/e9d8391e327edfd3467c1e759e041ef5cf3b0972024788994e5cb18f582ae4d2.jpg" /></p>
<details>
<summary>text_image</summary>
A
O
AA0106470
</details>
<h1 id="warning-82">WARNING</h1>
<ul>
<li>Set the jack only at the positions shown here. If the jack is set at a wrong position, it could dent your vehicle or the jack might fall over and cause personal injury. </li>
<li>Do not use the jack on a tilted or soft surface. <br />
Otherwise, the jack might slip and cause personal injury. Always use the jack on a flat, hard surface. Before setting the jack, make sure there are no sand or pebbles under the jack base.</li>
</ul>
<h1 id="note-330">NOTE</h1>
<p>- If you raise the vehicle with a garage jack refer to "If your vehicle is raised with a garage jack" on page 10-03.</p>
<ol>
<li>Rotate the jack by hand until the flange portion (B) fits in the groove (C) at the top of the jack.</li>
</ol>
<p><img alt="" src="images/0d267e477cafcb6733f37b78f7a3c19b1db21bde9467f2b481a0e4d2c5c03ec6.jpg" /></p>
<details>
<summary>text_image</summary>
B
C
AA0108483
</details>
<ol>
<li>Insert the bar (D) into the wheel nut wrench (E). Then put the end of the bar into the shaft's jack end, as shown in the illustration.</li>
</ol>
<p>Slowly rotate the wheel nut wrench until the tyre is raised slightly off the ground surface.</p>
<p><img alt="" src="images/4002a8dac9680855ba57c2cb3f6f790bfc531a076ae8fe93e9e9cb7b556a56b9.jpg" /></p>
<details>
<summary>text_image</summary>
E
D
AA108496
</details>
<p>How to change a tyre (Vehicles equipped with spare tyre)</p>
<h1 id="warning-83">WARNING</h1>
<ul>
<li>Stop jacking up the vehicle as soon as the tyre is raised off the ground. It is dangerous to raise the vehicle any higher. </li>
<li>Do not get under your vehicle while using the jack. </li>
<li>Do not bump the raised vehicle or leave it sitting on the jack for a long time. Both are very dangerous. </li>
<li>Do not use a jack except the one that came with your vehicle. <br />
● The jack should not be used for any purpose other than to change a tyre. <br />
● No one should be in your vehicle when using the jack. </li>
<li>Do not start or run the engine while your vehicle is on the jack. </li>
<li>
<p>Do not turn the raised wheel. The tyres still on the ground could turn and make your vehicle fall off the jack.</p>
</li>
<li>
<p>Remove the wheel nuts with the wheel nut wrench, then take the wheel off.</p>
</li>
</ul>
<h1 id="caution-138">CAUTION</h1>
<p>● Handle the wheel carefully when changing the tyre, to avoid scratching the wheel surface. <br />
6. Clean out any mud, etc. on the hub surface (F), hub bolts (G) or in the installation holes (H) in the wheel, and then mount the spare tyre.</p>
<p><img alt="" src="images/fde780d990745e25dd8366145a137a70b1fed87375d384bbfef52f9f3117fa83.jpg" /></p>
<details>
<summary>text_image</summary>
F
G
H
AA0108500
</details>
<h1 id="warning-84">WARNING</h1>
<p>- Mount the spare wheel with the valve stem (I) facing outboard. If you cannot see the valve stem (I), you have installed the wheel backwards.
Operating the vehicle with the spare wheel installed backwards can cause vehicle damage and result in an accident.</p>
<p><img alt="" src="images/064c4708ceafe155a0ed1ad12bfa5f9a8cc108ae7f66f993225fe6e6f91ea9a7.jpg" /></p>
<details>
<summary>natural_image</summary>
Technical line drawing of a car tire assembly with hands adjusting the wheel (no text or symbols)
</details>
<ol>
<li>Temporarily tighten the wheel nuts by hand until the tapered parts of the wheel</li>
</ol>
<p>nuts make light contact with the seats of the wheel holes and the wheel is not loose.</p>
<p><img alt="" src="images/cede52d224ab771d2a1b7b03d759673665f6dadb3bb7eb03f63021997dc1bdf7.jpg" /></p>
<details>
<summary>text_image</summary>
Steel wheel
Aluminium wheel
AJA118189
</details>
<h1 id="caution-139">CAUTION</h1>
<p>● Never apply oil to either the wheel bolts or the nuts, or they will tighten too much.</p>
<ol>
<li>Lower the vehicle slowly by rotating the wheel nut wrench anticlockwise until the tyre touches the ground.</li>
</ol>
<p><img alt="" src="images/64609a4d1dcab2dec86b63eea7e7dadb33ea9433a9cdb79ec44a49ea19ff3b2c.jpg" /></p>
<details>
<summary>natural_image</summary>
Illustration of a hand using a tool to adjust a car tire (no text or symbols present)
</details>
<ol>
<li>Tighten the nuts in the order shown in the illustration until each nut has been tightened to the torque listed here.</li>
</ol>
<p>Tightening torque 88 to 108 Nm</p>
<p><img alt="" src="images/2203e4593c28d1e6dfd0dce4db6121b37ca245f8d6fc066122f5b3ceaf1a68e6.jpg" /></p>
<details>
<summary>text_image</summary>
①
④ ③
②
7
7
5
AA0108542
</details>
<h1 id="caution-140">CAUTION</h1>
<p>● Never use your foot or a pipe extension for extra force in the wheel nut wrench. If you do so, you will tighten the nut too much.</p>
<ol>
<li>
<p>Lower the jack all the way and remove it.</p>
</li>
<li>
<p>Check your tyre inflation pressure at the next gasstation. The correct pressures are shown on the door label. See the illustration.</p>
</li>
</ol>
<p><img alt="" src="images/b78f84478bc46d9f6bba62c24a280a9b257a558becca521feb7af6e65ccc4904.jpg" /></p>
<details>
<summary>natural_image</summary>
Medical illustration showing a surgical procedure with an arrow pointing to a specific anatomical structure (no text or labels present)
</details>
<ol>
<li>After filling your tyres to the correct pressure, reset the tyre pressure monitoring system (TPMS).</li>
</ol>
<p>Refer to "Tyre pressure monitoring system (TPMS): Reset of low tyre pressure warning threshold" on page 6-46.</p>
<h1 id="caution-141">CAUTION</h1>
<p>● After changing the tyre and driving the vehicle about 1,000 km (620 miles), retighten the wheel nuts to make sure that they have not come loose.</p>
<p>- If the steering wheel vibrates when driving after changing the tyre, we recommend you to have the tyres checked for balance.</p>
<p>- Do not mix one type of tyre with another or use a different size from the one listed. This would cause early wear and poor handling.</p>
<h1 id="to-store-the-flat-tyre-or-spare-wheel">To store the flat tyre or spare wheel</h1>
<ol>
<li>To store the flat tyre or spare wheel, fit the installation clamp (A) by turning it clockwise.</li>
</ol>
<p><img alt="" src="images/8e76cca9e841bf4fbdae5a67c9ee1c133c0132b6c653e15639ae2b2fc4fcca3f.jpg" /></p>
<details>
<summary>natural_image</summary>
Diagram of a car interior showing a person inside the dashboard with concentric rings and directional arrows (no text or symbols)
</details>
<p>How to change a tyre (Vehicles equipped with spare tyre)</p>
<p><img alt="" src="images/25a619fbe150251183a416f88554dece999193d127f7de50606f0852eb2c2250.jpg" /></p>
<h1 id="note-331">NOTE</h1>
<p>● The flat tyre (normal wheel) cannot be stored beneath the luggage floor board. Store the flat tyre in the luggage compartment.</p>
<ol>
<li>Have the damaged tyre repaired at a MITSUBISHI MOTORS Authorized Service Point as soon as possible.</li>
</ol>
<h1 id="to-store-the-tools-and-jack">To store the tools and jack</h1>
<p>Reverse the removing procedure when storing the jack, bar and wheel nut wrench. Refer to "Tool and jack" on page 8-05.</p>
<h1 id="wheel-covers">Wheel covers\*</h1>
<h1 id="to-remove-5">To remove</h1>
<ol>
<li>Wrap the tip of the jack bar with a cloth, insert it into the notch provided in the wheel cover, and use it to lever up the cover a little.</li>
</ol>
<p><img alt="" src="images/0c1abb2574ea24bab5178ce195b41b7ad61ac9c1dbfc7869cb89f7836e2a15be.jpg" /></p>
<details>
<summary>text_image</summary>
Technical diagram showing a mechanical component with an inset close-up view highlighting a detail of a bent pipe or sleeve.
</details>
<p>8-18</p>
<p>For emergencies</p>
<ol>
<li>With the cover raised a little, pry it off completely using the jack bar. Insert the jack bar under the cover, and move it around the circumference, prying the cover away from the wheel little by little as you move the bar around.</li>
</ol>
<p><img alt="" src="images/23fcd95b16659ed10e37ba08d0a927fd30f69adeac3f4aaaf6f9a794de142ae8.jpg" /></p>
<h1 id="caution-142">CAUTION</h1>
<p>● If you try to use your hands, they may get hurt by the edge of the wheel cover.</p>
<p><img alt="" src="images/eec5c6de37e3c3839918a4f933037e919a5e1ace0becf74073e6e4b7b6060456.jpg" /></p>
<h1 id="note-332">NOTE</h1>
<p>● The wheel cover is made of plastic; take care when prying it off.</p>
<h1 id="to-install-4">To install</h1>
<ol>
<li>Make sure the tabs (A) of the back of the wheel cover are not broken and correctly fitted on the rings (B). If in doubt, do not install the wheel cover and consult your MITSUBISHI MOTORS Authorized Service Point.</li>
</ol>
<p><img alt="" src="images/c220bdb8b24bed9bb325d333ec5fde21529bae774df31da67d5d376b582d9652.jpg" /></p>
<details>
<summary>natural_image</summary>
Technical diagram of a mechanical component with cross-sectional view (A-A), no visible text or symbols
</details>
<ol>
<li>Align the air valve (C) of the tyre with the notch (D) in the wheel cover.</li>
</ol>
<p><img alt="" src="images/61abbbee3c9cb57da494a2652880348040a2492a3249c931219bfa69e3849a33.jpg" /></p>
<details>
<summary>text_image</summary>
E
C
D
AJA112943
</details>
<p><img alt="" src="images/5725f910996c28628717c58285f6eb3ddad39b45393e94b46ff5c3ed4e34b42f.jpg" /></p>
<h1 id="note-333">NOTE</h1>
<p>● Full wheel covers have a symbol mark (E) provided on the reverse side to show the air valve location.</p>
<p>Before installing the wheel cover to the wheel, make sure that the opening with the symbol mark is correctly aligned with the air valve.</p>
<ol>
<li>Push the bottom part (F) of the wheel cover into the wheel. </li>
<li>
<p>Gently push both sides (G) of the wheel cover and hold them in place with both knees.</p>
</li>
<li>
<p>Gently tap around the circumference of the wheel cover at the top (H), then push the wheel cover into place.</p>
</li>
</ol>
<p><img alt="" src="images/fe81368be1873e12f5bc3b7631aea44ffe17134aa7de1ee9354abb2b1837c345.jpg" /></p>
<details>
<summary>text_image</summary>
H
G
F
AG000855
</details>
<h1 id="towing-2">Towing</h1>
<h1 id="if-your-vehicle-needs-to-be-tow-ed">If your vehicle needs to be tow-ed</h1>
<p>If towing is necessary, we recommend you to have it done by your MITSUBISHI MOTORS Authorized Service Point or a commercial tow truck service.</p>
<p>In the following cases, transport the vehicle using a tow truck.</p>
<p>● The engine runs but the vehicle does not move or abnormal noise is produced. <br />
- Inspection of the vehicle's underside reveals that oil or some other fluid is leaking.</p>
<p>If a wheel gets stuck in a ditch, do not try to tow the vehicle. Please contact your MITSUBISHI MOTORS Authorized Service Point or a commercial tow truck service for assistance.</p>
<p>Only when you cannot receive a towing service from a MITSUBISHI MOTORS Authorized Service Point or commercial tow truck service, tow your vehicle carefully in accordance with the instructions given in "Emergency towing" in this part.</p>
<h1 id="towing-3">Towing</h1>
<p>The regulations concerning towing may differ from country to country. It is recommended that you obey the regulations of the area where you are driving your vehicle.</p>
<p><img alt="" src="images/9a53b98ec5f57bbe91c39ed2b2730cf40eedc0d6ab3f6431af3b804935a01d26.jpg" /></p>
<details>
<summary>text_image</summary>
A
B Do not use CVT vehicles with this style.
C
D
E
AA2002133
</details>
<h1 id="towing-the-vehicle-by-a-tow-truck">Towing the vehicle by a tow truck</h1>
<h1 id="caution-143">CAUTION</h1>
<p>● This vehicle must not be towed by a tow truck using sling lift type equipment (Type A) as illustrated. Using a sling lift will damage the bumper and front end. <br />
- Do not tow CVT vehicles with the driving wheels on the ground (Type B) as illustrated. If the vehicle is towed like this, the automatic transmission (CVT) fluid may not reach all parts of the transmission, thus damaging it.
If you tow CVT vehicles, use Type C, D or E equipment.</p>
<p>- If the transmission is malfunctioning or damaged, transport the vehicle with the driving wheels on a carriage (Type C, D or E) as illustrated.</p>
<h1 id="caution-144">CAUTION</h1>
<ul>
<li>If the vehicle is towed with the ignition switch in the "ON" position or the operation mode in ON and only the front wheels or only the rear wheels raised off the ground (Type B or C), the Active Stability Control (ASC) may operate, resulting in an accident. <br />
When towing the vehicle with the rear wheels raised, turn the ignition switch to the "ACC" position or put the operation mode in ACC. When towing the vehicle with the front wheels raised, keep the ignition switch or the operation mode as follows. <br />
[Except vehicles equipped with keyless operation system] <br />
The ignition switch is in the "LOCK" or "ACC" position. <br />
[ Vehicles equipped with keyless operation system] <br />
The operation mode is in OFF or ACC.</li>
</ul>
<h1 id="towing-with-rear-wheels-off-the-ground-type-b-manual-transmission-vehicles-only">Towing with rear wheels off the ground (Type B - manual transmission vehicles only)</h1>
<p>Place the gearshift lever in the "Neutral" position.</p>
<p>Turn the ignition switch to the "ACC" position or put the operation mode in ACC and secure the steering wheel in a straight-ahead position with a rope or tie-down strap. Never place the ignition switch in the "LOCK" position or put the operation mode in OFF when towing.</p>
<h1 id="towing-with-front-wheels-raised-off-the-ground-type-c">Towing with front wheels raised off the ground (Type C)</h1>
<p>Release the parking brake.</p>
<p>Place the gearshift lever in the "Neutral" position (M/T) or the selector lever in the "N" (NEUTRAL) position (CVT).</p>
<h1 id="emergency-towing">Emergency towing</h1>
<p>If towing service is not available in an emergency, your vehicle may be temporarily towed by a rope secured to the towing hook.</p>
<p>In case of your vehicle is to be towed by another vehicle, pay careful attention to the following points.</p>
<h1 id="if-your-vehicle-is-to-be-towed-forward-by-another-vehicle">If your vehicle is to be towed forward by another vehicle</h1>
<ol>
<li>Take out the towing hook, wheel nut wrench and jack bar.</li>
</ol>
<p>(Refer to "Tools and jack" on page 8-05.)</p>
<ol>
<li>Cover the tip of the jack bar with a cloth, then use it to remove the cover (A) that is located on the front bumper.</li>
</ol>
<p><img alt="" src="images/e5272b0d6b955f42d3e5e1629ec2173d84b9bd64c763c508281609ca42ca8cad.jpg" /></p>
<details>
<summary>text_image</summary>
A
M
AJA112956
</details>
<ol>
<li>Use the wheel nut wrench (B) to securely mount the towing hook (C).</li>
</ol>
<p><img alt="" src="images/e9c0e10ec08c133a23739afe86d21cef3d2c80b64994ae4ca8ccdc95a5169cba.jpg" /></p>
<details>
<summary>text_image</summary>
B
C
AJA112969
</details>
<ol>
<li>Secure the tow rope to the front towing hook.</li>
</ol>
<p><img alt="" src="images/2de916e93548ad11d293cc80505d6376082c751d31eadf9286300170ed96715b.jpg" /></p>
<h1 id="caution-145">CAUTION</h1>
<p>- Do not tow the vehicle with the rope at an excessive diagonal angle.</p>
<p><img alt="" src="images/46c01333121098009c98e3095d5d5c3fc87da9de210da058ab00c81f25c0a33f.jpg" /></p>
<h1 id="note-334">NOTE</h1>
<p>● To avoid deforming or otherwise damaging the vehicle body when hooking the rope on-to the towing hook, observe the following instructions:</p>
<ul>
<li>Mount the towing hook securely. </li>
<li>Do not attach the rope to any part of the vehicle other than the towing hook. </li>
<li>
<p>Ensure that the tow rope is taut when the towing vehicle moves away.</p>
</li>
<li>
<p>Keep the engine running.</p>
</li>
</ul>
<p>If the engine is not running, perform the following operation to unlock the steering wheel.</p>
<p>[Except vehicles equipped with keyless operation system]</p>
<p>On vehicles with M/T, turn the ignition key to the "ACC" or "ON" position.</p>
<p>On vehicles with CVT, turn the ignition key to the "ON" position.</p>
<p>[For vehicles with the keyless operation system]</p>
<p>On vehicles with M/T, put the operation mode in ACC or ON.</p>
<p>On vehicles with CVT, put the operation mode in ON.</p>
<h1 id="towing-4">Towing</h1>
<p><img alt="" src="images/f9c7d1b2373bc2a3061615d2653076df2a5c4e0e97995880e35fcfecce63b198.jpg" /></p>
<h1 id="note-335">NOTE</h1>
<p>- For vehicles equipped with the Auto Stop & Go (AS&G) system, press the “Auto Stop & Go (AS&G) OFF” switch to deactivate the Auto Stop & Go (AS&G) system before stopping the vehicle.
Refer to “To deactivate” on page 6-24.</p>
<p><img alt="" src="images/9137ac56269dd8a5fca0c5ab4b5eb08b804b21c4ea88284634b46f04cc47ff41.jpg" /></p>
<h1 id="warning-85">WARNING</h1>
<p>- When the engine is not running, the brake booster and power steering system do not operate. This means higher brake depression force and higher steering effort are required. Therefore, vehicle operation is more difficult than usual.</p>
<p><img alt="" src="images/e7e1585645eae2f79bf52965569d8800b8758299b1233f721bfb915dd54b77e3.jpg" /></p>
<h1 id="caution-146">CAUTION</h1>
<p>- Do not leave the key in the “LOCK” position or the operation mode in OFF. The steering wheel will lock, causing loss of control.</p>
<ol>
<li>Place the gearshift lever in the "Neutral" position (M/T) or the selector lever in the "N" (NEUTRAL) position (CVT). </li>
<li>Turn on the hazard warning lamps if required by law. (Follow the local driving laws and regulations.) </li>
<li>During towing make sure that close contact is maintained between the drivers of</li>
</ol>
<p>both vehicles, and that the vehicles travel at low speed.</p>
<p><img alt="" src="images/f4f7c9af61b346da417cf0eb60c8f0dc8b60ed6d416cdd7e553c3c234ed4f7b9.jpg" /></p>
<h1 id="warning-86">WARNING</h1>
<p>● Avoid sudden braking, sudden acceleration and sharp turning; such operation could cause damage to the towing hooks or the tow rope. <br />
People in the vicinity could be injured as a result. <br />
- When towing or being towed down a long slope, the brakes may overheat reducing the effectiveness. In this situation, have your vehicle transported by a tow truck.</p>
<p><img alt="" src="images/d994db38ee2b8f0e3fdab75b9c5abb0b66014f769ab9c6076eb32c84214b8746.jpg" /></p>
<h1 id="caution-147">CAUTION</h1>
<p>● The person in the vehicle being towed must pay attention to the brake lamps of the towing vehicle and make sure the rope never becomes slack. <br />
- When the vehicle with CVT is to be towed by another vehicle with all wheels on the ground, make sure that the towing speed and distance given below are never exceeded, causing damage to the transmission.</p>
<p>Towing speed: 40 km/h (25 mph)
Towing distance: 40 km (25 miles)</p>
<p>For the towing speed and the towing distance, follow the local driving laws and regulations.</p>
<ol>
<li>When finished towing, remove the towing hook, and stow it in the specified location.
Refer to "Tools and jack" on page 8-05. When installing the cover, align the hook with the cut out area on the vehicle, and firmly insert.</li>
</ol>
<h1 id="if-your-vehicle-is-to-be-towed-rearward-by-another-vehicle">If your vehicle is to be towed rearward by another vehicle</h1>
<p>If your vehicle is stuck in sand, mad, snow, etc., use the rear towing hook (A) as shown in the illustration.</p>
<p>Secure the tow rope to the rear towing hook.</p>
<p><img alt="" src="images/095a87cac07b73bdcd297bca1413bad8a3dbb7192c0fab561db71cd3555f2034.jpg" /></p>
<details>
<summary>natural_image</summary>
Diagram of a car interior showing hand positioning and movement, no text or symbols present
</details>
<p><img alt="" src="images/9b897523413d61cee851d3da520f215612f93a6e1d004f485a03a4fad9057fbb.jpg" /></p>
<h1 id="warning-87">WARNING</h1>
<p>- When towing your vehicle out of a stuck position, be sure that the area around the vehicle is clear of people and physical objects.</p>
<p><img alt="" src="images/559a686c84a864e6d7e402f01bb6bd80e850a0aef2a829d2c92642fae64f5373.jpg" /></p>
<h1 id="note-336">NOTE</h1>
<p>● Using nay part other than the designated towing hooks (A) could result in damage to the vehicle body.</p>
<h1 id="towing-another-vehicle">Towing another vehicle</h1>
<p>Your vehicle cannot be used to tow another vehicle.</p>
<h1 id="operation-under-adverse-driving-conditions">Operation under adverse driving conditions</h1>
<h1 id="on-a-flooded-road">On a flooded road</h1>
<p>- Avoid flooded roads. Water could enter the brake discs, resulting in temporarily ineffective brakes. In such cases, lightly depress the brake pedal to see if the brakes operate properly. If they do not, lightly depress the pedal several times while driving in order to dry the brake pads.</p>
<p>- When driving in rain or on a road with many puddles a layer of water may form between the tyres and the road surface. This reduces a tyre's frictional resistance on the road, resulting in loss of steering stability and braking capability.</p>
<p>To cope with this, observe the following items:</p>
<p>(a) Drive your vehicle at slow speed. <br />
(b) Do not drive on worn tyres. <br />
(c) Always maintain the specified tyre inflation pressures.</p>
<h1 id="on-a-snow-covered-or-frozen-road">On a snow-covered or frozen road</h1>
<ul>
<li>When driving on a snow-covered or frozen road, it is recommended that you use snow tyres or snow traction device (tyre chains). <br />
Refer to the “Snow tyres” and “Snow traction device (tyre chains)” sections. </li>
<li>Avoid high-speed operation, sudden acceleration, abrupt brake application and sharp cornering.</li>
</ul>
<p>- Depressing the brake pedal during travel on snowy or icy roads may cause tyre slippage and skidding. When traction between the tyres and the road is reduced the wheels may skid and the vehicle cannot readily be brought to a stop by conventional braking techniques. Braking will differ, depending upon whether you have anti-lock brake system (ABS). As your vehicle is equipped with ABS, brake by pressing the brake pedal hard, and keeping it pressed.</p>
<p>- Allow extra distance between your vehicle and the vehicle in front of you, and avoid sudden braking.</p>
<p>● Accumulation of ice on the braking system can cause the wheels to lock. Pull away from a standstill slowly after confirming safety around the vehicle.</p>
<p><img alt="" src="images/23f65cb9752a1dfd5b30f33e5420c55c6f96fb368d9d4ddd5b9336a29bf37fd1.jpg" /></p>
<h1 id="caution-148">CAUTION</h1>
<p>- Do not press the accelerator pedal rapidly. If the wheels break free of the ice, the vehicle could suddenly start moving and possibly cause an accident.</p>
<h1 id="on-a-bumpy-or-rutted-road">On a bumpy or rutted road</h1>
<p>- Drive as slow as possible when driving on bumpy or rutted roads.</p>
<h1 id="caution-149">CAUTION</h1>
<p>● The impact on tyres and/or wheels when driving on a bumpy or rutted road can damage the tyre and/or wheel. <br />
- The vehicle's body, bumper, muffler and other parts may be damaged if the vehicle is: <br />
- driven over a step (for example, at the entrance or exit of a parking lot); <br />
- parked too closely against a kerb or parking block, or by the side of a road with kerbstones; <br />
- driven on a steep slope.</p>
<h1 id="vehicle-care">Vehicle care</h1>
<p>Vehicle care precautions....9-02</p>
<p>Cleaning the interior of your vehicle.... 9-02</p>
<p>Cleaning the exterior of your vehicle....9-03</p>
<h1 id="vehicle-care-precautions">Vehicle care precautions</h1>
<p>In order to maintain the value of your vehicle, it is necessary to perform regular maintenance using the proper procedures. Always maintain your vehicle in compliance with environmental pollution control regulations. Carefully select the materials used for washing, etc., to be sure that they do not contain corrosives. If in doubt, we recommend you to consult a specialist for selection of these materials.</p>
<h1 id="caution-150">CAUTION</h1>
<p>● Cleaning products can be dangerous. Always follow the instructions of the cleaning product supplier.</p>
<p>● To avoid damage, never use the following to clean your vehicle:</p>
<ul>
<li>Petrol </li>
<li>Paint Thinner </li>
<li>Benzine </li>
<li>Kerosene </li>
<li>Turpentine </li>
<li>Naphtha </li>
<li>Lacquer Thinner <br />
• Carbon Tetrachloride </li>
<li>Nail Polish Remover </li>
<li>Acetone</li>
</ul>
<h1 id="cleaning-the-interior-of-your-vehicle">Cleaning the interior of your vehicle</h1>
<p>After cleaning the interior of your vehicle with water, cleaner or similar, wipe and dry in a shady, well-ventilated area.</p>
<h1 id="note-337">NOTE</h1>
<p>- To clean the inside of the tailgate window, always use a soft cloth and wipe the window glass along the demister heater element so as not to cause damage.</p>
<h1 id="caution-151">CAUTION</h1>
<p>- Do not use organic substances (solvents, benzine, kerosene, alcohol, petrol, etc.) or alkaline or acidic solutions.
These chemicals can cause discolouring, staining or cracking of the surface.
If you use cleaners or polishing agents, make sure their ingredients do not include the substances mentioned above.</p>
<h1 id="plastic-vinyl-leather-fabric-and-flocked-parts">Plastic, vinyl leather, fabric and flocked parts</h1>
<ol>
<li>Lightly wipe these off with a soft cloth soaked in a mild soap and water solution. </li>
<li>Dip cloth in fresh water and wring out well. Using this cloth, wipe off the detergent thoroughly.</li>
</ol>
<h1 id="note-338">NOTE</h1>
<p>- Do not use cleaners, conditioners, and protectants containing silicons or wax.</p>
<p>Such products can cause discolouring and, when applied to the instrument panels or other parts, may cause reflections on the windscreen and obscure vision.</p>
<p>Also, if such products get on the switches of the electrical accessories, it may lead to failure of these accessories.</p>
<p>● The surface of gloss center panel may be scratched if it is rubbed hard by a brush, synthetic fiber or hard cloth. <br />
- Do not use synthetic fiber or dry cloth. They can cause discolouring or damage the surface. <br />
- Do not place a deodorizer on the instrument panel or near lamps and instruments. The ingredients for deodorizer can cause discolouring or cracking.</p>
<h1 id="upholstery">Upholstery</h1>
<ol>
<li>To maintain the value of your new vehicle, handle the upholstery carefully and keep the interior clean.</li>
</ol>
<p>Use a vacuum cleaner and brush to clean the seats. If stained, vinyl and synthetic leather should be cleaned with an appropriate cleaner, Cloth fabrics can be cleaned with either upholstery cleaner or a mild soap and water solution.</p>
<ol>
<li>Clean the carpeting with a vacuum cleaner and remove any stains with carpet cleaner. Oil and grease can be removed by lightly dabbing with a clean colourfast cloth and stain remover.</li>
</ol>
<h1 id="genuine-leather">Genuine leather\*</h1>
<ol>
<li>To clean, lightly wipe the leather with a soft cloth soaked in a mild soap and water solution. </li>
<li>Dip cloth in fresh water and wring it out well. Using this cloth, wipe off the detergent thoroughly. </li>
<li>Apply leather protecting agent to the genuine leather surface.</li>
</ol>
<p><img alt="" src="images/0f52fd401e8c7b9a25d7324d07f5ba9d81db5b298d54607d93c91a58b11ba038.jpg" /></p>
<h1 id="note-339">NOTE</h1>
<ul>
<li>If genuine leather is wet with water or is washed in water, wipe off water as quickly as possible with a dry, soft cloth. If left damp, mildew may grow. </li>
<li>Organic solvents such as benzine, kerosene, alcohol and petrol, acid or alkaline solvents may discolour the genuine leather surface. Be sure to use neutral detergents. </li>
<li>Remove dirty patches or oil substances quickly as they can stain genuine leather. <br />
● The genuine leather surface may harden and shrink if it is exposed to direct sun for long hours. When your vehicle is parked, place it in the shade as much as possible.</li>
</ul>
<h1 id="cleaning-the-exterior-of-your-vehicle">Cleaning the exterior of your vehicle</h1>
<p>If the following is left on your vehicle, it may cause corrosion, discolouration and stains, wash the vehicle as soon as possible.</p>
<p>● Seawater, road deicing products. <br />
- Soot and dust, iron powder from factories, chemical substance (acids, alkalis, coal-tar, etc.). <br />
- Droppings from birds, carcasses of insects, tree sap, etc.</p>
<h1 id="washing">Washing</h1>
<p>Chemicals contained in the dirt and dust picked up from the road surface can damage the paint coat and body of your vehicle if left in prolonged contact.</p>
<p>Frequent washing and waxing is the best way to protect your vehicle from this damage. This will also be effective in protecting it from environmental elements such as rain, snow, salt air, etc.</p>
<p>Do not wash the vehicle in direct sunlight. Park the vehicle in the shade and spray it with water to remove dust. Next, using an ample amount of clean water and a car washing brush or sponge, wash the vehicle from top to bottom.</p>
<p>Use a mild car washing soap if necessary. Rinse thoroughly and wipe dry with a soft cloth. After washing the vehicle, carefully clean the joints and flanges of the doors, bonnet, etc., where dirt is likely to remain.</p>
<p><img alt="" src="images/8b19c5d717ed312afd6c8ac0e206c07cfc8ca73fe1e10e8cd90987f00bc984a8.jpg" /></p>
<h1 id="caution-152">CAUTION</h1>
<ul>
<li>When washing the under side of your vehicle or wheel, be careful not to injure your hands. </li>
<li>If your vehicle has rain sensor wipers, place the wiper switch lever in the "OFF" position to deactivate the rain sensor before washing the vehicle. Otherwise, the wipers will operate in the presence of water spray on the windscreen and may get damaged as a result. </li>
<li>Refrain from excessively using a car wash as its brushes may scratch the paint surface, causing it to lose its gloss.
Scratches will be especially visible on darker coloured vehicles. <br />
● Never spray or splash water on the electrical components in the engine compartment, as this may adversely affect engine starting. Exercise caution also when washing the underbody; be careful not to spray water into the engine compartment. <br />
● Some types of hot water washing equipment apply high pressure and heat to the vehicle. They may cause heat distortion and damage to the vehicle resin parts and may result in flooding of the vehicle interior. Therefore;</li>
</ul>
<h1 id="caution-153">CAUTION</h1>
<ul>
<li>Maintain a distance of approx. 70 cm or more between the vehicle body and the washing nozzle. </li>
<li>When washing around the door glass, hold the nozzle at a distance of more than 70 cm and at right angles to the glass surface.</li>
</ul>
<p>● After washing the vehicle, drive the vehicle slowly while lightly depressing the brake pedal several times in order to dry out the brakes.</p>
<p>Leaving the brakes wet could result in reduced braking performance. Also, there is a possibility that they could freeze up or become inoperative due to rust, rendering the vehicle unable to move.</p>
<p>- When using an automatic car wash, pay attention to the following items, referring to the operation manual or consulting a car wash operator. If the following procedure is not followed, it could result in damage to your vehicle.</p>
<p>• The outside mirrors are retracted. <br />
• The antenna is removed. <br />
• The wiper arm assembly is taped. <br />
- If your vehicle is equipped with a rear spoiler, consult a car wash operator before using the car wash. <br />
- If your vehicle has rain sensor wipers, place the wiper switch lever in the "OFF" position to deactivate the rain sensor.</p>
<h1 id="during-cold-weather">During cold weather</h1>
<p>Salt and other chemicals spread on the roads in some areas in winter can have a harmful effect on the vehicle body. You should therefore wash the vehicle as often as possible in accordance with our care-instructions. It is recommended to have a preservative applied and the underfloor protection checked before and after the cold weather season.</p>
<p>After washing your vehicle, wipe off all waterdrops from the rubber parts around the doors to prevent the doors from freezing.</p>
<h1 id="note-340">NOTE</h1>
<p>● To prevent freezing of the weatherstripping on the doors, bonnet, etc., they should be treated with silicone spray.</p>
<h1 id="waxing">Waxing</h1>
<p>Waxing the vehicle will help prevent the adherence of dust and road chemicals to the paintwork. Apply a wax solution after washing the vehicle, or at least once every three months to assist displacing of water.</p>
<p>Do not wax your vehicle in direct sunlight. You should wax after the surfaces have cooled.</p>
<p>For information on how to use wax refer to the instruction manual of the wax.</p>
<h1 id="caution-154">CAUTION</h1>
<p>● Waxes containing high abrasive compounds should not be used.</p>
<h1 id="polishing">Polishing</h1>
<p>The vehicle should only be polished if the paintwork has become stained or lost its lustre. Matt-finish parts and plastic bumpers must not be polished, polishing these parts will stain them or damage their finish.</p>
<h1 id="cleaning-plastic-parts">Cleaning plastic parts</h1>
<p>Use a sponge or chamois leather.
If a car wax adheres on a grey or black rough surface of the bumper, moulding or lamps, the surface becomes white. In such a case, wipe it off using lukewarm water and soft cloth or chamois leather.</p>
<h1 id="caution-155">CAUTION</h1>
<p>- Do not use a scrubbing brush or other hard tools as they may damage the plastic part surface.</p>
<p><img alt="" src="images/ceb722f90fffc7f39f317cf6b91be6ebf9fa4759ce47c97e22f0f5bd3834c33e.jpg" /></p>
<h1 id="caution-156">CAUTION</h1>
<p>- Do not bring the plastic parts into contact with petrol, light oil, brake fluids, engine oils, greases, paint thinners, and sulphuric acid (battery electrolyte) which may crack, stain or discolour the plastic parts.
If they touch the plastic parts wipe them off with soft cloth, chamois or the like and an aqueous solution of neutral detergent then immediately rinse the affected parts with water.</p>
<h1 id="chrome-parts">Chrome parts</h1>
<p>In order to prevent spots and corrosion of chrome parts, wash with water, dry thoroughly, and apply a special protective coating. This should be done more frequently in winter.</p>
<h1 id="aluminium-wheels">Aluminium wheels\*</h1>
<ol>
<li>Remove dirt using a sponge while sprinkling water on the wheels. </li>
<li>Use neutral detergent on any dirt that cannot be removed easily with water. Rinse off the neutral detergent after washing the wheels. </li>
<li>Dry the wheels thoroughly using a chamois leather or a soft cloth.</li>
</ol>
<p><img alt="" src="images/a0c9247dbd4a453e3d280ff62d4aa94913a6365362696f7a4b2973a7ae80c1b1.jpg" /></p>
<h1 id="caution-157">CAUTION</h1>
<ul>
<li>Do not use a brush or other hard implement on the wheels.
Doing so could scratch the wheels. </li>
<li>Do not use any cleaner that contains an abrasive substance or is acidic or alkaline. Doing so could cause the coating on the wheels to peel or become discoloured or stained. </li>
<li>Do not directly apply hot water using a steam cleaner or by any other means. </li>
<li>Contact with seawater and road deicer can cause corrosion. Rinse off such substances as soon as possible.</li>
</ul>
<h1 id="window-glass">Window glass</h1>
<p>The window glass can normally be cleaned using only a sponge and water.</p>
<p>Glass cleaner can be used to remove oil, grease, dead insects, etc. After washing the glass, wipe dry with a clean, dry, soft cloth. Never use the same cloth to wipe the window glass as would be used to wipe the paintwork; wax from the painted surfaces could adhere to the glass and reduce its transparency and visibility.</p>
<p><img alt="" src="images/f222a585bf47a8465ddbe3aa0c9e0a6c4ce5e55c6ad65df486f55f5dbfef96cb.jpg" /></p>
<h1 id="note-341">NOTE</h1>
<p>● To clean the inside of the tailgate window always use a soft cloth and wipe the window glass along the demister heater element so as not to cause damage.</p>
<h1 id="wiper-blades">Wiper blades</h1>
<p>Use a soft cloth and glass cleaner to remove grease, dead insects, etc., from the wiper blades. Replace the wiper blades when they no longer wipe properly. (Refer to page 10-13.)</p>
<h1 id="engine-compartment">Engine compartment</h1>
<p>Clean the engine compartment at the beginning and end of winter. Pay particular attention to flanges, crevices and peripheral parts where dust containing road chemicals and other corrosive materials might collect.</p>
<p>If salt and other chemicals are used on the roads in your area, clean the engine compartment at least every 3 months.</p>
<p>Never spray or splash water on the electrical components in the engine compartment, as this may cause damage.</p>
<p>Do not bring the nearby parts, the plastic parts and so on into contact with sulphuric acid (battery electrolyte) which may crack, stain or discolour them.</p>
<p>If they are in contact, wipe off with soft cloth, chamois or the like and an aqueous solution of neutral detergent then immediately rinse the affected parts with plenty of water.</p>
<h1 id="maintenance">Maintenance</h1>
<p>Service precautions.... 10-02</p>
<p>Catalytic converter.... 10-03</p>
<p>Bonnet....10-03</p>
<p>Engine oil....10-04</p>
<p>Engine coolant....10-05</p>
<p>Washer fluid.... 10-07</p>
<p>Brake fluid....10-07</p>
<p>Battery....10-08</p>
<p>Tyres....10-09</p>
<p>Wiper blade rubber replacement.... 10-13</p>
<p>General maintenance....10-15</p>
<p>Fusible links.... 10-15</p>
<p>Fuses....10-15</p>
<p>Replacement of lamp bulbs....10-19</p>
<p>Masking the headlamps....10-27</p>
<h1 id="service-precautions">Service precautions</h1>
<p>Adequate care of your vehicle at regular intervals serves to preserve the value and appearance as long as possible.</p>
<p>Maintenance items as described in this owner's manual can be performed by the owner. We recommend you to have the periodic inspection and maintenance performed by a MITSUBISHI MOTORS Authorized Service Point or another specialist.</p>
<p>In the event a malfunction or a problem is discovered, we recommend you to have it checked and repaired. This section contains information on inspection maintenance procedures that you can do yourself. Follow the instructions and cautions for each of the various procedures.</p>
<p><img alt="" src="images/529404aa4b28b5f2bffbefc6d170557566038857473c3548c1401c00d3016223.jpg" /></p>
<details>
<summary>text_image</summary>
A
B
AJA106384
</details>
<p>A- Cooling fan <br />
B- Caution label</p>
<p>10-02</p>
<p>Maintenance</p>
<p>*: Front of the vehicle</p>
<h1 id="warning-88">WARNING</h1>
<ul>
<li>When checking or servicing the inside of the engine compartment, make sure the engine is switched off and has had a chance to cool down. </li>
<li>If it is necessary to do work in the engine compartment with the engine running, be especially careful that your clothing, hair, etc., does not become caught by the cooling fans, drive belts, or other moving parts. <br />
● After performing the maintenance, make sure that no tools or cloths are left behind in the engine compartment. If they are left behind, a fire or damage to the vehicle may occur. </li>
<li>The cooling fan can turn on automatically even if the engine is not running. Turn the ignition switch to the "LOCK" position or put the operation mode in OFF to be safe while you work in the engine compartment. </li>
<li>Do not smoke, cause sparks or allow open flames around fuel or battery. The fumes are flammable. <br />
● Be extremely cautious when working around the battery. It contains poisonous and corrosive sulphuric acid. </li>
<li>Do not get under your vehicle with just the body jack supporting it. Always use automotive jack stands.</li>
</ul>
<h1 id="warning-89">WARNING</h1>
<p>- Improper handling of components and materials used in the vehicle can endanger your personal safety. We recommend you to consult a specialist for necessary information.</p>
<p>Check items of engine compartment are located as shown in the figure below.</p>
<p><img alt="" src="images/d5ea10914809210dfd6c363946e94fe466da178527b0ca45664e3e16caa21659.jpg" /></p>
<details>
<summary>text_image</summary>
Technical diagram of a mechanical component with numbered parts for identification
</details>
<p>AA0114909</p>
<ol>
<li>Brake fluid reservoir (RHD) </li>
<li>Engine oil level dipstick </li>
<li>Battery </li>
<li>Brake fluid reservoir (LHD) </li>
<li>Washer fluid reservoir </li>
<li>Engine oil cap </li>
<li>Engine coolant reservoir</li>
</ol>
<h1 id="if-your-vehicle-is-raised-with-a-garage-jack">If your vehicle is raised with a garage jack</h1>
<p>Only use the appointed position as shown in the illustration.</p>
<p><img alt="" src="images/54b4acac5c70db5a5ffd951f370199fee0a59ec8183fb5df04a002494cf4fd68.jpg" /></p>
<details>
<summary>text_image</summary>
Never use the rear suspensions as a jacking point.
AJ3101046
</details>
<p>*: Front of the vehicle</p>
<p><img alt="" src="images/14a927672432f75d13d2d1ac04c7e6c1d385b89b285e1da0bc9a7cfc547d80ff.jpg" /></p>
<h1 id="warning-90">WARNING</h1>
<p>- Set the jack only at the positions shown here. If the jack is set at a wrong position, it could damage your vehicle or the jack might fall over and cause personal injury.</p>
<h1 id="warning-91">WARNING</h1>
<p>- Do not use the jack on a tilted or soft surface.
Otherwise, the jack might slip and cause personal injury. Always use the jack on a flat, hard surface. Before setting the jack, make sure there are no sand or pebbles under the jack base.</p>
<h1 id="catalytic-converter">Catalytic converter</h1>
<p>The exhaust gas scavenging devices used with the catalytic converter are extremely efficient for the reduction of noxious gases. The catalytic converter is installed in the exhaust system.</p>
<p>It is important to keep the engine properly tuned to ensure proper catalyst operation and prevent possible catalyst damage.</p>
<h1 id="warning-92">WARNING</h1>
<p>- As with any vehicle, do not park or operate this vehicle in areas where combustible materials such as dry grass or leaves can come in contact with a hot exhaust since a fire could occur.
- Paint should not be applied to the catalytic converter.</p>
<h1 id="note-342">NOTE</h1>
<p>- Use fuel of the type recommended in "Fuel selection" on page 2-02.</p>
<h1 id="bonnet">Bonnet</h1>
<h1 id="to-open-2">To open</h1>
<ol>
<li>Pull the release lever towards you to unlock the bonnet.</li>
</ol>
<p><img alt="" src="images/a7d322936971464ba407ccbe28350cc1bd8564baa63c4ee1925de32eef9d3436.jpg" /></p>
<details>
<summary>natural_image</summary>
Diagram of a medical or anatomical structure with a highlighted region and arrow, no visible text or symbols
</details>
<ol>
<li>Raise the bonnet while pressing the safety lock.</li>
</ol>
<p>Engine oil <br />
<img alt="" src="images/a0d35d10be6ff5d2edab037550bb6ff007f46bc163b293c39a15c52d3268792a.jpg" /></p>
<details>
<summary>natural_image</summary>
Illustration of a car with a close-up inset showing the seatbelt mechanism (no text or symbols)
</details>
<p><img alt="" src="images/dd9bbf0ad188cead5f1d4d14f9c845d670cfc97287dfeb10da9f64643c8e87cd.jpg" /></p>
<h1 id="note-343">NOTE</h1>
<p>- Only open the bonnet when the wipers are in the original position. Failure to do so may cause damage to the bonnet, wiper arms or windscreen.</p>
<ol>
<li>Support the bonnet by inserting the support bar in its slot.</li>
</ol>
<p><img alt="" src="images/41cf63cc437e620c7f28a1a1e89b38bd6c2f6163001d2d37810f556457708220.jpg" /></p>
<details>
<summary>text_image</summary>
Diagram showing car steering wheel and gear shift mechanism with magnified detail view
</details>
<p><img alt="" src="images/fce521141834d34f402bb80fdd005cf1f5215884786200a86a65745dc1bdddb7.jpg" /></p>
<h1 id="caution-158">CAUTION</h1>
<p>● Note that the support bar may disengage the bonnet if the open bonnet is lifted by a strong wind. <br />
● After inserting the support bar into the slot, make sure the bar supports the bonnet securely from falling down on to your head or body.</p>
<h1 id="to-close-2">To close</h1>
<ol>
<li>Unlatch the support bar and clip it in its holder. </li>
<li>Slowly lower the bonnet to a position approximately 20 cm above the closed position, then let it drop. </li>
<li>Make sure the bonnet is securely locked by softly lifting the centre of the bonnet.</li>
</ol>
<p><img alt="" src="images/bde50bd37535ca2e7c408eb73e501bbc60f83405fc861a4167709efdf48219ea.jpg" /></p>
<details>
<summary>natural_image</summary>
Technical diagram showing a mechanical assembly with a magnified inset of a component detail (no text or symbols)
</details>
<p><img alt="" src="images/c273792d938f4fc4b690ef05b55a95f5d787bd7eadd183cecf292c2d8d4a5d93.jpg" /></p>
<h1 id="caution-159">CAUTION</h1>
<ul>
<li>Be careful that hands or fingers are not trapped when closing the bonnet. <br />
● Before driving, make sure that the bonnet is securely locked. An incompletely locked bonnet can suddenly open while driving. This can be extremely dangerous.</li>
</ul>
<p><img alt="" src="images/490109de0432ac81ae94d918aa5326c21746a6a408ca30e7c1e107b9bcf842cd.jpg" /></p>
<h1 id="note-344">NOTE</h1>
<ul>
<li>If this does not close the bonnet, release from a slightly higher position. </li>
<li>Do not press down the bonnet hard with hand as it may damage the bonnet.</li>
</ul>
<h1 id="engine-oil">Engine oil</h1>
<p>To check and refill engine oil <br />
<img alt="" src="images/84af247e9d23c305fb3af48418b4321a08ece31a54260383d74f523fd4fbabcc.jpg" /></p>
<details>
<summary>text_image</summary>
MAX. MIN
AA097747
</details>
<p>The engine oil used has a significant effect on the engine's performance, service life and startability. Be sure to use oil of the recommended quality and appropriate viscosity. All engines consume a certain amount of oil during normal operation. Therefore, it is important to check the oil level at regular intervals or before starting a long trip.</p>
<ol>
<li>Park the vehicle on a horizontal surface. </li>
<li>Switch off the engine. </li>
<li>Wait a few minutes. </li>
<li>Remove the dipstick and wipe it with a clean cloth. </li>
<li>Reinsert the dipstick as far as it goes. </li>
<li>Remove the dipstick and read the oil level, which should always be within the range indicated. </li>
<li>If the oil level is below the specified limit, remove the cap located on the cylinder head cover and add enough oil to raise the level to within the specified range. Do not overfill to avoid engine damage. Be sure to use the specified engine oil and do not mix various types of oil. </li>
<li>After adding oil, close the cap securely. </li>
<li>Confirm the oil level by repeating step 4 to 6.</li>
</ol>
<p><img alt="" src="images/b50278c3ab4ce4178f491ec114ac1202ccc760fc1d3c73cd52a9750c46b7d93b.jpg" /></p>
<h1 id="note-345">NOTE</h1>
<p>● The engine oil will deteriorate rapidly if the vehicle is subjected to severe conditions, requiring earlier oil replacement. <br />
Please refer to the maintenance schedule. <br />
● For handling of used engine oils, refer to page 2-05.</p>
<h1 id="selection-of-engine-oil">Selection of engine oil</h1>
<p><img alt="" src="images/8d9720a9d44fb914b3cf4d98b7d00d7266e679e79e4ddb83480ef0dc5e4c8bd0.jpg" /></p>
<details>
<summary>text_image</summary>
-40 -30 -20 -10 0 10 20 30 40 50 °C
SAE 20W-40,20W-50
SAE 15W-40,15W-50
SAE 10W-30,10W-40,10W-50
SAE 0W-20, 0W-30, 5W-20, 5W-30, 5W-40
AJA118437
</details>
<ul>
<li>Select engine oil of the proper SAE viscosity number according to the atmospheric temperature. </li>
<li>Use engine oil conforming to the following classification: </li>
<li>API classification: "For service SM" or higher <br />
• ILSAC certificated oil </li>
<li>ACEA classification:
"For service A1/B1, A3/B3, A3/B4 or A5/B5"</li>
</ul>
<p><img alt="" src="images/bb7f43bedb5fab6118d51a8e93568d84f6bab7cfa902cd4b49a99d77f62346b8.jpg" /></p>
<h1 id="note-346">NOTE</h1>
<p>- Use of additives is not recommended since they may reduce the effectiveness of additives already included in the engine oil. It may result in failure of the mechanical assembly.</p>
<h1 id="engine-coolant">Engine coolant</h1>
<h1 id="to-check-the-coolant-level">To check the coolant level</h1>
<p>A translucent coolant reservoir (A) is located in the engine compartment.</p>
<h1 id="engine-coolant-2">Engine coolant</h1>
<p>The coolant level in this tank should be kept between the "L" (LOW) and "F" (FULL) marks when measured while the engine is cold.</p>
<p><img alt="" src="images/15430c2dff37d0b6328a613da0e58aa6497ade80d5c0236b4f0b17ad9614ec5d.jpg" /></p>
<details>
<summary>text_image</summary>
FULL
LOW
AJM101820
</details>
<h1 id="to-add-coolant">To add coolant</h1>
<p>The cooling system is a closed system and normally the loss of coolant should be very slight. A noticeable drop in the coolant level could indicate leakage. If this occurs, we recommend you to have the system checked as soon as possible.</p>
<p>If the level should drop below the "L" (LOW) level on the reservoir, open the lid and add coolant.</p>
<p>Also, if the reservoir is completely empty, remove the radiator cap (B) and add coolant until the level reaches the filler neck.</p>
<h1 id="warning-93">WARNING</h1>
<p>- Do not open the radiator cap while the engine is hot. The coolant system is under pressure and any hot coolant escaping could cause severe burns.</p>
<h1 id="anti-freeze">Anti-freeze</h1>
<p>The engine coolant contains an ethylene glycol anti-corrosion agent. Some parts of the engine are cast aluminium alloy, and periodic changing of the engine coolant is necessary to prevent corrosion of these parts.</p>
<p>Use "MITSUBISHI MOTORS GENUINE SUPER LONG LIFE COOLANT PREMIUM" or equivalent*.</p>
<p>*: similar high quality ethylene glycol based non-silicate, non-amine, non-nitrate and non-borate coolant with long life hybrid organic acid technology</p>
<p>MITSUBISHI MOTORS GENUINE Coolant has excellent protection against corrosion and rust formation of all metals including aluminium and can avoid blockages in the radiator, heater, cylinder head, engine block, etc.</p>
<p>Because of the necessity of this anti-corrosion agent, the coolant must not be replaced with plain water even in summer. The required concentration of anti-freeze differs depending on the expected ambient temperature.</p>
<p>Above -35 °C: 50 % concentration of anti-freeze</p>
<p>Below -35 °C: 60 % concentration of anti-freeze</p>
<h1 id="caution-160">CAUTION</h1>
<ul>
<li>Do not use alcohol or methanol anti-freeze or any engine coolants mixed with alcohol or methanol anti-freeze. The use of an improper anti-freeze can cause corrosion of the aluminium components. </li>
<li>Do not use water to adjust the concentration of coolant. <br />
● Concentrations exceeding 60 % will result in a reduction of both the anti-freeze and cooling performance thus adversely affecting the engine. <br />
● Do not top up with water only.</li>
</ul>
<h1 id="during-cold-weather-2">During cold weather</h1>
<p>The concentration should be checked before the start of cold weather and anti-freeze added to the system if necessary to prevent damage to engine and radiator due to freezing.</p>
<h1 id="washer-fluid">Washer fluid</h1>
<p>Open the washer fluid reservoir cap and check the level of washer fluid.</p>
<p>If the level is low, replenish the container with washer fluid.</p>
<p>Full level is approximately 5 cm below from the upper surface of the reservoir.</p>
<p><img alt="" src="images/7d7a06b50361b3cf52dec032efdeb976985e945e3338c1af07d7c97358f9ad08.jpg" /></p>
<details>
<summary>text_image</summary>
Upper surface
Full
AJA104944
</details>
<p><img alt="" src="images/2385a98608c474c84143418d8a85d001cbb18fa20184ca38ca6a50057ae004c6.jpg" /></p>
<h1 id="note-347">NOTE</h1>
<p>● The washer fluid container serves the wind-screen and rear window (if so equipped).</p>
<h1 id="during-cold-weather-3">During cold weather</h1>
<p>To ensure proper operation of the washers at low temperatures, use a fluid containing an anti-freezing agent.</p>
<h1 id="brake-fluid">Brake fluid</h1>
<h1 id="to-check-the-fluid-level">To check the fluid level</h1>
<p>The fluid level must be between the "MAX" and "MIN" marks on the reservoir.</p>
<p><img alt="" src="images/78fe3867b18ca505e8f93280cd6582fcb007fcdebe00079e740296578053cdf5.jpg" /></p>
<details>
<summary>text_image</summary>
LHD
AA0114912
</details>
<p><img alt="" src="images/118b4429358baea48405928d331ffeb1d61d0eb5afd9c738fea39d6d5a348231.jpg" /></p>
<details>
<summary>text_image</summary>
RHD
AA010776
</details>
<p>The fluid level is monitored by a float. When the fluid level falls below the "MIN" mark, the brake fluid warning lamp lights up.</p>
<p>The fluid level falls slightly with wear of the brake pads, but this does not indicate any abnormality.</p>
<p>If the fluid level falls markedly in a short length of time, it indicates leaks from the brake system.</p>
<p>If this occurs, we recommend you to have the vehicle checked.</p>
<h1 id="fluid-type">Fluid type</h1>
<p>Use brake fluid conforming to DOT3 or DOT4 from a sealed container. The brake fluid is hygroscopic. Too much moisture in the brake fluid will adversely affect the brake system, reducing the performance.</p>
<p><img alt="" src="images/adf19153c872d33c0c9f73810d0190ccd2e43158cf457ba3eaa3bc86938d6ec5.jpg" /></p>
<h1 id="warning-94">WARNING</h1>
<p>● Take care in handling brake fluid as it is harmful to the eyes, may irritate your skin and will damage painted surfaces. Wipe up spills immediately. If brake fluid gets on your hands or in your eyes, flush immediately with clean water. Follow up with a doctor as necessary.</p>
<h1 id="battery">Battery</h1>
<h1 id="caution-161">CAUTION</h1>
<ul>
<li>Use only the specified brake fluid. Do not mix or add different brands of brake fluid to prevent chemical reactions. Do not let any petroleum-based fluid touch, mix with, or get into the brake fluid. This will damage the seals. </li>
<li>Keep the reservoir tank cap closed to prevent the brake fluid from deteriorating except maintenance. <br />
● Clean the filler cap before removing and close the cap securely after maintenance.</li>
</ul>
<h1 id="battery-2">Battery</h1>
<p>The condition of the battery is very important for quick starting of the engine and proper functioning of the vehicle's electrical system. Regular inspection and care are especially important in cold weather.</p>
<h1 id="checking-battery-electrolyte-level">Checking battery electrolyte level</h1>
<p><img alt="" src="images/651486ea9a01fa2b1dc0a71375522b57f2ca109b3913b66049a42ec5e2e4ff34.jpg" /></p>
<details>
<summary>natural_image</summary>
Diagram of a car battery with visible circuit connections and fluid flow arrows (no text or labels)
</details>
<p>The electrolyte level must be between the specified limit on the outside of the battery. Replenish with distilled water as necessary. The inside of the battery is divided into several compartments; remove the cap from each compartment and fill to the upper mark. Do not top up beyond the upper mark because spillage during driving could cause damage. Check the electrolyte level at least once every 4 weeks, depending on the operating conditions.
If the battery is not used, it will discharge by itself with time. Check it once every 4 weeks and charge with low current as necessary.</p>
<h1 id="during-cold-weather-4">During cold weather</h1>
<p>The capacity of the battery is reduced at low temperatures. This is an inevitable result of its chemical and physical properties.</p>
<p>This is why a very cold battery, particularly one that is not fully charged, will only deliver a fraction of the starter current which is normally available.</p>
<p>We recommended you to have the battery checked before the start of cold weather and, if necessary, have it charged or replaced.</p>
<p>This does not only ensure reliable starting, but a battery which is kept fully charged also has a longer life.</p>
<h1 id="disconnection-and-connection">Disconnection and connection</h1>
<p>To disconnect the battery cable, stop the engine, first disconnect the negative (-) terminal and then the positive (+) terminal. When connecting the battery, first connect the positive (+) terminal and then the negative (-) terminal.</p>
<h1 id="note-348">NOTE</h1>
<p>- Open the terminal cover (A) before disconnecting or connecting the positive (+) terminal of the battery.</p>
<p><img alt="" src="images/9eed85c1d88ed9c6065b4a167dba5f59d3ec2132145f89d2ab8aa2e120257cf7.jpg" /></p>
<h1 id="note-349">NOTE</h1>
<p>- Loosen the nut (B), and then disconnect the battery cable from the positive (+) terminal.</p>
<p><img alt="" src="images/e60e41b93fae9c9ee88b2ee15f3c223e3758c1dc34642bb3fe7670e5817b1b0d.jpg" /></p>
<details>
<summary>text_image</summary>
A
B
AJZ102668
</details>
<p><img alt="" src="images/52ef7744f18b3ef3391660c584722136750042b5674993ad7b852d1dc5b4dfbf.jpg" /></p>
<h1 id="warning-95">WARNING</h1>
<ul>
<li>Keep sparks, cigarettes, and flames away from the battery because the battery could explode. <br />
● The battery electrolyte is extremely caustic. Do not allow it to come in contact with your eyes, skin, clothing, or the painted surfaces of the vehicle. <br />
Spilt electrolyte should be flushed immediately with ample amounts of water. Irritation to eyes or skin from contact with electrolyte requires immediate medical attention.</li>
</ul>
<p><img alt="" src="images/ccb15b3d561e5d498f2075a4f56fd49014ece241489bb8c77aec57ed6191bc1e.jpg" /></p>
<h1 id="warning-96">WARNING</h1>
<p>● Ventilate when charging or using the battery in an enclosed space.</p>
<p><img alt="" src="images/bd10dbf3f1771b17cfad9e4ad9c7594bb2243a0046e3b8a28f469ba1fa0906a4.jpg" /></p>
<h1 id="caution-162">CAUTION</h1>
<ul>
<li>Keep it out of reach of children. </li>
<li>Never disconnect the battery when the ignition switch is in the "ON" position. Doing so could damage electric components. <br />
● Never short-circuit the battery. This could cause it to overheat and be damaged. </li>
<li>If the battery is to be quick-charged, first disconnect the battery cables. </li>
<li>In order to prevent a short circuit, be sure to disconnect the negative (-) terminal first. <br />
● Always wear protective eye goggles when working near the battery. </li>
<li>Do not bring the nearby parts, the plastic parts and so on into contact with sulphuric acid (battery electrolyte) which may crack, stain or discolour them.
If they are in contact, wipe off with soft cloth, chamois or the like and an aqueous solution of neutral detergent then immediately rinse the affected parts with plenty of water.</li>
</ul>
<p><img alt="" src="images/e2af8faf4d46d4505db4f44378291b774bc52d23ec97f2a31212a742b4b8cfac.jpg" /></p>
<h1 id="note-350">NOTE</h1>
<p>- Keep the terminals clean. After the battery is connected, apply terminal protection grease. To clean the terminals, use lukewarm water.</p>
<p><img alt="" src="images/32a455eb80e69e8b32b53b16ed7a1f59f4d04ca5812a47d24d3375e634e485bf.jpg" /></p>
<h1 id="note-351">NOTE</h1>
<ul>
<li>Check to see if the battery is securely installed and cannot be moved during travel. Also check each terminal for tightness. </li>
<li>When the vehicle is to be left unused for a long period of time, remove the battery and store it in a place where the battery fluid will not freeze. The battery should be stored only in a fully charged condition.</li>
</ul>
<h1 id="tyres">Tyres</h1>
<p><img alt="" src="images/864af05e0882407e19580f1d192b74a935e65371fec4e000c3e60b82a430ea5f.jpg" /></p>
<h1 id="warning-97">WARNING</h1>
<p>● Driving with tyres that are worn, damaged or improperly inflated can lead to a loss of control or blow out of the tyres which can result in a collision with serious or fatal injury.</p>
<p>Tyres</p>
<p>Tyre inflation pressures </p>
<table><tr><td>Item Tyre size Front Rear</td><td></td><td></td><td></td></tr><tr><td rowspan="2">Normal tyre</td><td colspan="3">165/65R14 79S 2.7 bar (39 psi) [270 kPa]</td></tr><tr><td colspan="3">175/55R15 77V 2.2 bar (32 psi) [220 kPa],2.4 bar (35 psi) [240 kPa]*</td></tr><tr><td>Compact spare tyre T115/70D14 88M</td><td>4.2 bar (60 psi) [420 kPa]</td><td colspan="2"></td></tr></table>
<p>*: Above 160 km/h (99 mph)</p>
<p>Check the tyre inflation pressure of all the tyres while they are cold: if insufficient or excessive, adjust to the specified value. After the tyre inflation pressure has been adjusted, check the tyres for damage and air leaks. Be sure to put caps on the valves.</p>
<p>Wheel condition <br />
<img alt="" src="images/4debbf2e21c9d0e8b6a97948b55464dbc0066f01aae30fd659278004dfdd1fe8.jpg" /></p>
<details>
<summary>text_image</summary>
Diagram illustrating a mechanical or structural assembly with labeled components and directional arrows, including a magnified inset showing internal structure.
</details>
<p>1- Location of the tread wear indicator</p>
<p>2- Tread wear indicator</p>
<p>Check the tyres for cuts, cracks and other damage. Replace the tyres if there are deep cuts or cracks. Also check each tyre for pieces of metal or pebbles.</p>
<p>The use of worn tyres can be very dangerous because of the greater chance of skidding or hydroplaning. The tread depth of the tyres must exceed 1.6 mm in order for the tyres to meet the minimum requirement for use.</p>
<p>Tread wear indicators will appear on the surface of the tyre as the tyre wears, thereby indicating that the tyre no longer meets the minimum requirement for use. When these wear indicators appear, the tyres must be replaced with new ones.</p>
<h1 id="replacing-tyres-and-wheels">Replacing tyres and wheels</h1>
<h1 id="caution-163">CAUTION</h1>
<p>● Avoid using different size tyres from the one listed and the combined use of different types of tyres, as this can affect driving safety. <br />
Refer to "Tyres and wheels" on page 11-08. <br />
● Even if a wheel has the same rim size and offset as the specified type of wheel, its shape may prevent it from being fitted correctly. We recommend you to consult a specialist before using wheels that you have.</p>
<p>10-10</p>
<p>Maintenance</p>
<p>OA0X19E2</p>
<p>Tyres</p>
<p><img alt="" src="images/e10d5b84ab1851b1f5c5804b203ce2cea231b03d856661a55607babe6706b789.jpg" /></p>
<h1 id="caution-164">CAUTION</h1>
<p>- If your vehicle is equipped with a tyre pressure monitoring system, only MITSUBISHI MOTORS GENUINE wheels should be used.
Use of another type of wheel risks air leaks and sensor damage, as it will not be possible to install the tyre pressure sensor properly. Refer to "Tyre pressure monitoring system (TPMS)" on page 6-43.</p>
<h1 id="tyre-rotation">Tyre rotation</h1>
<p>Tyre wear varies with vehicle conditions, road surface conditions and individual driver's driving habits. To equalize the wear and help extend tyre life, it is recommended to rotate the tyres immediately after discovery of abnormal wear, or whenever the wear difference between the front and rear tyres is recognizable.</p>
<p>When rotating tyres, check for uneven wear and damage. Abnormal wear is usually caused by incorrect tyre pressure, improper wheel alignment, out of balance wheel, or severe braking. We recommend you to have it checked to determine the cause of irregular tread wear.</p>
<p><img alt="" src="images/98e1b9a707fc92315486b2fa52db80d9996c3ad472c7202e3656884087331a4a.jpg" /></p>
<details>
<summary>flowchart</summary>
<pre><code class="language-mermaid">graph TD
A["Front"] --> B["Left Arrows"]
B --> C["Right Arrows"]
C --> D["Left Arrows"]
D --> E["Right Arrows"]
E --> F["Left Arrows"]
F --> G["Right Arrows"]
G --> H["Left Arrows"]
H --> I["Right Arrows"]
I --> J["Left Arrows"]
J --> K["Right Arrows"]
K --> L["Left Arrows"]
L --> M["Right Arrows"]
M --> N["Left Arrows"]
N --> O["Right Arrows"]
O --> P["Left Arrows"]
P --> Q["Right Arrows"]
Q --> R["Left Arrows"]
R --> S["Right Arrows"]
S --> T["Left Arrows"]
T --> U["Right Arrows"]
U --> V["Left Arrows"]
V --> W["Right Arrows"]
W --> X["Left Arrows"]
X --> Y["Right Arrows"]
Y --> Z["Left Arrows"]
Z --> AA["Right Arrows"]
</code></pre>
</details>
<p><img alt="" src="images/54cd719f3a7a51c7caaac264e87e48ee1b8ad98293fbf95957ab274e08afb908.jpg" /></p>
<h1 id="caution-165">CAUTION</h1>
<p>● A compact spare tyre can be fitted temporarily in place of a tyre that has been removed during the tyre rotation. However, it must not be included in the regular tyre rotation sequence.</p>
<p><img alt="" src="images/0be8da18b1cc1510fee6760084f17e1f8f256ee3d1d06368a585b98ed3f799f4.jpg" /></p>
<h1 id="caution-166">CAUTION</h1>
<p>- If the tyres have arrows (A) indicating the correct direction of rotation, swap the front and rear wheels on the left hand side of the vehicle and the front and rear wheels on the right hand side of the vehicle separately. Keep each tyre on its original side of the vehicle. When fitting the tyres, make sure the arrows point in the direction in which the wheels will turn when the vehicle moves forward. Any tyre whose arrow points in the wrong direction will not perform to its full potential.</p>
<p><img alt="" src="images/bd70d4a9656d9a472c7dc5376143407f78c2880326160e583075500b2e563efe.jpg" /></p>
<details>
<summary>text_image</summary>
Front
A
A
A
A
AA0002552
</details>
<p><img alt="" src="images/710ee16092f2a8f6e285755629b2918c0c66b18671c5f3344bcaf500208a40b9.jpg" /></p>
<h1 id="caution-167">CAUTION</h1>
<p>● Avoid the combined use of different types of tyres. Using different types of tyres can affect vehicle performance and safety.</p>
<p>Tyres</p>
<h1 id="snow-tyres">Snow tyres</h1>
<p>The use of snow tyres is recommended for driving on snow and ice. To preserve driving stability, mount snow tyres of the same size and tread pattern on all 4 wheels.</p>
<p>A snow tyre that is worn down more than 50 % is no longer appropriate to use.</p>
<p>Snow tyres which do not meet specifications must not be used.</p>
<h1 id="caution-168">CAUTION</h1>
<ul>
<li>Observe permissible maximum speed for your snow tyres and the legal speed limit. </li>
<li>If your vehicle is equipped with a tyre pressure monitoring system, only MITSUBISHI MOTORS GENUINE wheels should be used.</li>
</ul>
<p>Use of another type of wheel risks air leaks and sensor damage, as it will not be possible to install the tyre pressure sensor properly. Refer to “Tyre pressure monitoring system (TPMS)” on page 6-43.</p>
<p><img alt="" src="images/8c0c86cdeda60e5d7d7d45fddd89b463db013293d79cc2d9756074ff0672dedc.jpg" /></p>
<h1 id="note-352">NOTE</h1>
<p>● The laws and regulations concerning snow tyres (driving speed, required use, type, etc.) vary. Find out and follow the laws and regulations in the area you intend to drive.</p>
<h1 id="snow-traction-device-tyre-chains">Snow traction device (tyre chains)</h1>
<p>If snow traction device (tyre chains) have to be used, ensure that they are fitted only on the drive wheels (front) in accordance with the manufacturer's instructions.</p>
<p>Use only snow traction device (tyre chains) which are designed for use with the tyres mounted on the vehicle: use of the incorrect size or type of snow traction device (tyre chains) could result in damage to the vehicle body.</p>
<p>Contact a MITSUBISHI MOTORS Authorized Service Point before putting on a snow traction device (tyre chains). The max. snow traction device (tyre chains) height is as follows.</p>
<table><tr><td>Tyre size</td><td>Wheel size Max.</td><td>snow traction device (tyre chains) height [mm]</td></tr><tr><td>165/65R1479S</td><td>14 x 4 1/2 J</td><td rowspan="2">9 mm</td></tr><tr><td>175/55R1577V</td><td>15 x 5 J</td></tr></table>
<p>When driving with a snow traction device (tyre chains) on the tyres, do not drive faster than 50 km/h (30 mph). When you reach roads that are not covered in snow, immediately remove the snow traction device (tyre chains).</p>
<h1 id="caution-169">CAUTION</h1>
<ul>
<li>Choose a clear straight stretch of road where you can pull off and still be seen while you are fitting the snow traction device (tyre chains). </li>
<li>Do not fit snow traction device (tyre chains) before you need them. This will wear out your snow traction device (tyre chains) and the road surface. <br />
● After driving around 100-300 meters, stop and retighten the snow traction device (tyre chains). </li>
<li>Drive carefully and do not exceed 50 km/h (30 mph). Remember that preventing accidents is not the purpose of snow traction device (tyre chains). </li>
<li>When snow traction device (tyre chains) are installed, take care that they do not damage the disc wheel or body. </li>
<li>Do not install a snow traction device (tyre chains) on an emergency wheel which is compact in size. If one of the front wheels has punctured, replace it with one of the rear wheels and install the compact spare wheel in that place before fitting a snow traction device (tyre chains).</li>
</ul>
<p><img alt="" src="images/83a0d628ff8f4fd6d20091e9f48d63c118c16c63b9bc191fb2688e1c1f0eff19.jpg" /></p>
<h1 id="caution-170">CAUTION</h1>
<ul>
<li>An aluminium wheel can be damaged by a snow traction device (tyre chains) while driving. When fitting a snow traction device (tyre chains) on an aluminium wheel, take care that any part of the snow traction device (tyre chains) and fitting cannot be brought into contact with the wheel. </li>
<li>Remove the wheel covers before installing a snow traction device (tyre chains), otherwise they may be damaged by the snow traction device (tyre chains). (See page 8-18.) </li>
<li>When installing or removing a snow traction device (tyre chains), take care that hands and other parts of your body are not injured by the sharp edges of the vehicle body.</li>
</ul>
<p><img alt="" src="images/187a6d4f757f352ae3d2796f3d03f2e1549a4eb513c51792344f040edb5bd417.jpg" /></p>
<h1 id="note-353">NOTE</h1>
<p>● The laws and regulations concerning the use of snow traction device (tyre chains) vary. Always follow local laws and regulations. In most countries, it is prohibited by the law to use a snow traction device (tyre chains) on roads without snow.</p>
<h1 id="wiper-blade-rubber-replacement">Wiper blade rubber replacement</h1>
<h1 id="windscreen-wiper-blades-drivers-side">Windscreen wiper blades (Driver's side)</h1>
<ol>
<li>Lift the wiper arm off the windscreen. </li>
<li>Pull the wiper blade until its stopper (A) disengages from the hook (B). Then, pull the wiper blade further to remove it.</li>
</ol>
<p><img alt="" src="images/9a69c2399caf2856b98f0c3d41bcb4a22fc20c3a904d62bb3060083dae348eac.jpg" /></p>
<details>
<summary>text_image</summary>
A
B
C
AA0005713
</details>
<p><img alt="" src="images/33ce34f638b076254bd3c901bc8ad45bddff6a060411c4ea6c40910362290f8d.jpg" /></p>
<h1 id="note-354">NOTE</h1>
<ul>
<li>Do not allow the wiper arm to fall onto the windscreen; it could damage the glass.</li>
</ul>
<p>Refer to the illustration to ensure that the retainers are correctly aligned as you attach them.</p>
<p><img alt="" src="images/58bf8e0d780f30f8ecdefb3eda6fcd2dce071db7dba307078f000870806bdd39.jpg" /></p>
<details>
<summary>natural_image</summary>
Technical line drawing of a mechanical component with labeled point C (no text or symbols beyond label)
</details>
<ol>
<li>Insert the wiper blade into the arm, starting with the opposite end of the blade from the stopper. Make sure the hook (B) is fitted correctly in the grooves in the blade.</li>
</ol>
<p><img alt="" src="images/700b34bd8f9deb27d1c6f009f1b64f85b1ef10fe4eb5665e0c8d5a38c0b3eba7.jpg" /></p>
<h1 id="note-355">NOTE</h1>
<p>- If retainers are not supplied with the new wiper blade, use the retainers from the old blade.</p>
<ol>
<li>Attach the retainers (C) to a new wiper blade.</li>
</ol>
<h1 id="wiper-blade-rubber-replacement-2">Wiper blade rubber replacement</h1>
<ol>
<li>Push the wiper blade until the hook (B) engages securely with the stopper (A).</li>
</ol>
<p><img alt="" src="images/ae48deb667e443aede2624e872e0ef4a3bb6bdf1582270e9227069957167bb8c.jpg" /></p>
<details>
<summary>text_image</summary>
A
B
AA0007296
</details>
<h1 id="windscreen-wiper-blades-passengers-siderear-window-wiper-blades">Windscreen wiper blades (Passenger's side)/Rear window wiper blades</h1>
<ol>
<li>Lift the wiper arm off the window glass. </li>
<li>Pull the wiper blade downward to disengage it from the stopper (A) at the end of the wiper arm. Pull the wiper blade further to remove it. </li>
<li>Slide a new wiper blade through the hook (B) on the wiper arm.</li>
</ol>
<p><img alt="" src="images/ac44f4d2e806d5282a17af9485fb350bb6f126c640026d7f5304ba9a67556a5d.jpg" /></p>
<details>
<summary>natural_image</summary>
Technical line drawing of a mechanical component with labeled parts A and B, showing a downward force arrow (no text or symbols beyond labels)
</details>
<p><img alt="" src="images/5fed6de3c14b1985661864142caa4defa1148a9b0f5af470de5b9676b4f9e2ef.jpg" /></p>
<h1 id="note-356">NOTE</h1>
<p>- Do not allow the wiper arm to fall onto the window glass; it could damage the glass.</p>
<ol>
<li>Firmly insert the retainer (C) into the groove (D) in the wiper blade.</li>
</ol>
<p>Refer to the illustration to ensure that the retainers are correctly aligned as you insert them into the groove.</p>
<p><img alt="" src="images/363c17f09ebcd38da4dcc633d31695ec98e5e736c949178bec5224364ebef591.jpg" /></p>
<details>
<summary>natural_image</summary>
Technical diagram showing three curved mechanical components with labeled parts C and D, no readable text or symbols present.
</details>
<p><img alt="" src="images/755dd61c5af74030df8f188c7a96a01e6eebe0d95711f75bef4cf531341d6bd7.jpg" /></p>
<h1 id="note-357">NOTE</h1>
<p>- If a retainer is not supplied with the new wiper blade, use the retainer from the old blade.</p>
<h1 id="general-maintenance">General maintenance</h1>
<h1 id="fuel-engine-coolant-oil-and-ex-haust-gas-leakage">Fuel, engine coolant, oil and ex- haust gas leakage</h1>
<p>Look under the body of your vehicle to check for fuel, engine coolant, oil and exhaust gas leaks.</p>
<p><img alt="" src="images/8c1b9fd4c022771287cc2b3933eee06672dce116cd8990eb97c1a8352cd2e608.jpg" /></p>
<h1 id="warning-98">WARNING</h1>
<p>- If you see a suspicious fuel leak or if you smell fuel, do not operate the vehicle; call your MITSUBISHI MOTORS Authorized Service Point for assistance.</p>
<h1 id="exterior-and-interior-lamp-operation">Exterior and interior lamp operation</h1>
<p>Operate the combination lamp switch to check that all lamps are functioning properly. If the lamps do not illuminate, the probable cause is a blown fuse or defective lamp bulb. Check the fuses first. If there is no blown fuses, check the lamp bulbs.
For information regarding the inspection and replacement of the fuses and the lamp bulbs, refer to “Fuses” on page 10-15 and “Replacement of lamp bulbs” on page 10-19. If the fuses and bulbs are all OK, we recommend you to have your vehicle checked and repaired.</p>
<h1 id="meter-gauge-and-indicatorwarning-lamps-operation">Meter, gauge and indicator/warning lamps operation</h1>
<p>Run the engine to check the operation of all meters, gauges, and indicator/warning lamps. If there is anything wrong, we recommend you to have your vehicle inspected.</p>
<h1 id="hinges-and-latches-lubrication">Hinges and latches lubrication</h1>
<p>Check all latches and hinges, and, if necessary, have them lubricated.</p>
<h1 id="fusible-links">Fusible links</h1>
<p>The fusible links will melt to prevent a fire if a large current attempts to flow through certain electrical systems.</p>
<p>In case of a melted fusible link, we recommend you to have your vehicle inspected. For the fusible links, please refer to "Engine compartment fuse location table" on page 10-17.</p>
<p><img alt="" src="images/a43e66ab2579756d761f0d886132cc276b17ef02d5db6077f31ecaed16a48371.jpg" /></p>
<h1 id="warning-99">WARNING</h1>
<p>● Fusible links must not be replaced by any other device. Failing to fit the correct fusible link may result in fire in the vehicle, property destruction and serious or fatal injuries at any time.</p>
<h1 id="fuses">Fuses</h1>
<h1 id="fuse-block-location">Fuse block location</h1>
<p>To prevent damage to the electrical system due to short-circuiting or overloading, each individual circuit is provided with a fuse. There are fuse blocks in the passenger compartment and in the engine compartment.</p>
<h1 id="passenger-compartment-lhd-vehicles">Passenger compartment (LHD vehicles)</h1>
<p>The fuse blocks in the passenger compartment are located behind the fuse lid in front of the driver's seat at the position shown in the illustration. Pull the fuse lid to remove it.</p>
<p><img alt="" src="images/6a454bd026e029fea65c4f1ce75368b934890c8055419f1711324e450edfb50e.jpg" /></p>
<details>
<summary>natural_image</summary>
Line drawing of a car interior showing dashboard, steering wheel, and control panel (no text or symbols)
</details>
<p>Fuses</p>
<h1 id="passenger-compartment-rhd-vehicles">Passenger compartment (RHD vehicles)</h1>
<p>The fuse boxes in the passenger compartment are located behind the glove box at the position shown in the illustration.</p>
<p><img alt="" src="images/1396a86890de0314e8fad6ad42f65a378f3607ba0362d160052afd16502afd6a.jpg" /></p>
<details>
<summary>natural_image</summary>
Line drawing of a car interior showing a vehicle rear panel with a connector block (no text or symbols)
</details>
<ol>
<li>Open the glove box. </li>
<li>While pressing the side of the glove box, unhook the left and right hooks (A) and lower the glove box.</li>
</ol>
<p><img alt="" src="images/ba100f951f72e67be0dc9c01940413676589cd785f6a0cd1590d192361a85644.jpg" /></p>
<details>
<summary>text_image</summary>
A
A
AA0107819
</details>
<p>10-16</p>
<p>Maintenance</p>
<ol>
<li>Remove the glove box fastener (B), and then remove the glove box.</li>
</ol>
<p><img alt="" src="images/199be2bbb65e02bab7f0595206e08ac817fe5083ae2c1d675a16fd82ce867f11.jpg" /></p>
<details>
<summary>natural_image</summary>
Technical line drawing of a mechanical component with labeled part B (no text or symbols beyond label)
</details>
<h1 id="engine-compartment-2">Engine compartment</h1>
<p>In the engine compartment, the fuse block is located as shown in the illustration. While pressing the tab (A), pull up the cover (B).</p>
<p><img alt="" src="images/ccf508a842dc23b7e13ec0cb9305230fc6eb26804a811c0e073141bdce662c4a.jpg" /></p>
<details>
<summary>text_image</summary>
A
B
AA0107855
</details>
<p>OA0X19E2</p>
<h1 id="fuse-load-capacity">Fuse load capacity</h1>
<p>The fuse capacity and the names of electrical systems protected by the fuses are indicated on the inside of the fuse lid (LHD vehicles), the back of the glove box (RHD vehicles) and inside of the fuse block cover (inside of the engine compartment).</p>
<p><img alt="" src="images/8aab6b1a3562f0c9a0939c8da93528d6a64d73c1bb23b853e19b9802fa33ebbd.jpg" /></p>
<h1 id="note-358">NOTE</h1>
<p>- Spare fuses are provided in the fuse block of the engine compartment. Always use a fuse of the same capacity for replacement.</p>
<h1 id="passenger-compartment-fuse-location-table">Passenger compartment fuse location table</h1>
<p><img alt="" src="images/64f144f94628f8e697e16d5fbfadd0683d4df955be83ae4f84bd30143ede898b.jpg" /></p>
<details>
<summary>text_image</summary>
22
23
4 5 6 7 8 9
10 11 12 13 14 15
16 17 18 19 20 21
24
25
26
AA0103837
</details>
<table><tr><td>No.</td><td>Symbol</td><td>Electrical system</td><td>Capacity</td></tr><tr><td colspan="3">1 Tail lam# (left) 7.5 A</td><td></td></tr><tr><td>2 Cigarette</td><td>(VCTA)lighter 15 A</td><td></td><td></td></tr><tr><td>3 Ignition</td><td>(BRTS)oil</td><td>10 A</td><td></td></tr><tr><td>4 Starter</td><td>(YVCT)motor</td><td>7.5 A</td><td></td></tr><tr><td>5 —</td><td>(WCKB)</td><td></td><td></td></tr><tr><td>6 —</td><td>(TYW)</td><td></td><td></td></tr><tr><td>7 Tail la</td><td>(WCKB)(right) 7.5 A</td><td></td><td></td></tr><tr><td>8</td><td>(OTHH)LTJ.B(73X5)</td><td>Outside rear-view mirrors</td><td>7.5 A</td></tr><tr><td>9</td><td>(BW46)CATH</td><td>Engine control unit</td><td>7.5 A</td></tr><tr><td>10 Conta</td><td>(BD20)unit</td><td>7.5 A</td><td></td></tr><tr><td>11 Rear</td><td>(48CC)lamp 10 A</td><td></td><td></td></tr><tr><td>12</td><td>(VE64)[G483]</td><td>Central door lock</td><td>15 A</td></tr><tr><td>13</td><td>(72A5)</td><td>Room lamp</td><td>15 A</td></tr><tr><td>14</td><td>(BVCS)[37H8]</td><td>Rear window wiper</td><td>15 A</td></tr><tr><td>15</td><td>(A40T)</td><td>Gauge</td><td>7.5 A</td></tr><tr><td>16</td><td>(TYTS)</td><td>Relay</td><td>7.5 A</td></tr><tr><td>17</td><td>(TWDR)</td><td>Heated seat</td><td>20 A</td></tr></table>
<table><tr><td>No.</td><td>Symbol</td><td>Electrical system</td><td>Capacity</td></tr><tr><td>18</td><td>OPTION</td><td>Option</td><td>10 A</td></tr><tr><td>19</td><td></td><td>Heated door mirror</td><td>7.5 A</td></tr><tr><td>20</td><td></td><td>Windscreen wiper</td><td>20 A</td></tr><tr><td>21</td><td></td><td>Reversing lamps</td><td>7.5 A</td></tr><tr><td>22</td><td></td><td>Demister</td><td>30 A</td></tr><tr><td>23</td><td></td><td>Heater</td><td>30 A</td></tr><tr><td>24</td><td></td><td></td><td></td></tr><tr><td>25</td><td></td><td>Radio</td><td>10 A</td></tr><tr><td>26</td><td></td><td>Electronic controlled unit</td><td>15 A</td></tr></table>
<p>Engine compartment fuse location table <br />
<img alt="" src="images/19587b57f174056408f37bcaa7ea162a2ad810806eab6c13cd922f0026fba530.jpg" /></p>
<details>
<summary>text_image</summary>
#1
#2
#1
#2
SF1
SF2
SF3
SF4
SF5
SF6
SF7
SF8
SF9
SF10
SF11
SF12
SF13
SF14
SF15
SF16
SF17
SF18
SF19
SF20
SF21
SF22
SF23
SF24
SF25
SF26
SF27
SF28
SF29
SF30
SF31
SF32
SF33
SF34
SF35
SF36
SF37
SF38
SF39
SF40
SF41
SF42
SF43
SF44
SF45
SF46
SF47
SF48
SF49
SF50
SF51
SF52
SF53
SF54
SF55
SF56
SF57
SF58
SF59
SF60
SF61
SF62
SF63
SF64
SF65
SF66
SF67
SF68
SF69
SF70
SF71
SF72
SF73
SF74
SF75
SF76
SF77
SF78
SF79
SF80
</details>
<table><tr><td>No.</td><td>Symbol</td><td>Electrical system</td><td>Capacity</td></tr><tr><td>SBF1</td><td></td><td>Radiator fan motor</td><td>40 A^* </td></tr><tr><td>SBF2</td><td></td><td>Anti-lock brake system</td><td>30 A^* </td></tr><tr><td>SBF3</td><td></td><td>Ignition switch</td><td>40 A^* </td></tr></table>
<p>*: Fusible link</p>
<p>Fuses </p>
<table><tr><td>No.</td><td>Symbol</td><td colspan="2">Electrical system</td><td>Capacity</td></tr><tr><td>SBF4</td><td></td><td colspan="2">Electric window control</td><td>40A*</td></tr><tr><td>BF1</td><td>DC/DC</td><td colspan="2">(P/T) 30 A</td><td></td></tr><tr><td>BF2</td><td>DC/DC</td><td colspan="2">(AUDIO) 30 A</td><td></td></tr><tr><td rowspan="2">F1</td><td rowspan="2"></td><td rowspan="2">Headlamp low beam(left)</td><td>Halogen</td><td>10 A</td></tr><tr><td>Discharge</td><td>20 A</td></tr><tr><td rowspan="2">F2</td><td rowspan="2"></td><td rowspan="2">Headlamp low beam(right)</td><td>Halogen</td><td>10 A</td></tr><tr><td>Discharge</td><td>20 A</td></tr><tr><td>F3</td><td></td><td colspan="2">Headlamp high-beam(1cft)</td><td>10 A</td></tr><tr><td>F4</td><td></td><td colspan="2">Headlamp high-beam(right)</td><td>10 A</td></tr><tr><td>F5</td><td>Hom-10</td><td colspan="2">A</td><td></td></tr><tr><td>F6</td><td colspan="3">Frostog lamps 15 A</td><td></td></tr><tr><td>F7</td><td></td><td colspan="2">Daytime runninglamps</td><td>10 A</td></tr><tr><td>F8</td><td></td><td colspan="2"></td><td></td></tr><tr><td>F9</td><td></td><td colspan="2"></td><td></td></tr></table>
<p>*: Fusible link</p>
<table><tr><td>No.</td><td>Symbol</td><td>Electrical system</td><td>Capacity</td></tr><tr><td>F10</td><td>Battery</td><td>current sensor 7.5 A</td><td></td></tr><tr><td>F11</td><td>———</td><td></td><td></td></tr><tr><td>F12</td><td>STOP</td><td>Stop lamps (Brake lamps)</td><td>15 A</td></tr><tr><td>F13</td><td>Ignition</td><td>coil 7.5 A</td><td></td></tr><tr><td>F14</td><td>Engine</td><td>control 7.5 A</td><td></td></tr><tr><td>F15</td><td></td><td>Alternator</td><td>7.5 A</td></tr><tr><td>F16</td><td></td><td>Hazard warning flasher</td><td>10 A</td></tr><tr><td>F17</td><td>A/T</td><td>Automatic transmission</td><td>15 A</td></tr><tr><td>F18</td><td></td><td>Air conditioning</td><td>10 A</td></tr><tr><td>F19</td><td></td><td>ETV</td><td>15 A</td></tr><tr><td>F20</td><td></td><td>Starter</td><td>7.5 A</td></tr><tr><td>F21</td><td>CVA/Toil</td><td>/pump 15 A</td><td></td></tr><tr><td>F22</td><td></td><td>Fuel pump</td><td>15 A</td></tr><tr><td>F23</td><td></td><td>Enginc</td><td>20 A</td></tr><tr><td>F24</td><td>A/T</td><td>Automatic transmission</td><td>7.5 A</td></tr></table>
<p>*: Fusible link</p>
<table><tr><td>No.</td><td>Symbol</td><td>Electrical system</td><td>Capacity</td></tr><tr><td>#1</td><td>—</td><td>Spare fuse</td><td>20 A</td></tr><tr><td>#2</td><td>—</td><td>Spare fuse</td><td>30 A</td></tr></table>
<p>*: Fusible link <br />
● Some fuses may not be installed on your vehicle, depending on the vehicle model or specifications. <br />
● The table above shows the main equipment corresponding to each fuse.</p>
<p>The fuse block does not contain spare 7.5 A, 10 A or 15 A fuses. If one of these fuses burns out, substitute with the following fuse.</p>
<h1 id="75-a-outside-rear-view-mirrors">7.5 A: Outside rear-view mirrors</h1>
<h1 id="10-a-option">10 A: Option</h1>
<h1 id="15-a-cigarette-lighter">15 A: Cigarette lighter</h1>
<p>When using a substitute fuse, replace with a fuse of the correct capacity as soon as possible.</p>
<p>Identification of fuse </p>
<table><tr><td>Capacity</td><td>Colour</td></tr><tr><td>7.5 A</td><td>Brown</td></tr><tr><td>10 A</td><td>Red</td></tr><tr><td>15 A</td><td>Blue</td></tr><tr><td>20 A</td><td>Yellow</td></tr><tr><td colspan="2">Capacity Colour</td></tr><tr><td>30 A</td><td>Green (fuse type) / Pink (fusible link type)</td></tr><tr><td colspan="2">40 A Green (fusible link type)</td></tr></table>
<h1 id="fuse-replacement">Fuse replacement</h1>
<ol>
<li>Before replacing a fuse, always turn off the electrical circuit concerned and place the ignition switch in the "LOCK" position or put the operation mode in OFF. </li>
<li>Remove the fuse puller (A) from the inside of the fuse box in the engine compartment.</li>
</ol>
<p><img alt="" src="images/5b05dde52ccc359be31150b74725cfad70967492d6e0abd4201c18f2dc80af93.jpg" /></p>
<details>
<summary>natural_image</summary>
Line drawing of a vehicle battery pack with labeled components (no text or symbols beyond label)
</details>
<ol>
<li>Referring to the fuse load capacity table, check the fuse pertaining to the problem.</li>
</ol>
<p><img alt="" src="images/315143ff84d9a92ea377855eea0c7b158c55f91eabc11ff4998430e8cbe60bfa.jpg" /></p>
<details>
<summary>natural_image</summary>
Technical line drawing of two mechanical components labeled A and B, showing internal structure without any text or symbols.
</details>
<p>B-Fuse is OK</p>
<p>C- Blown fuse</p>
<p><img alt="" src="images/95434796d22ddb966085bf13ff70e4b086959bc8d730e9adb6816cf9e271cbc7.jpg" /></p>
<h1 id="note-359">NOTE</h1>
<p>- If any system does not function but the fuse corresponding to that system is normal, there may be a fault in the system elsewhere. We recommend you to have your vehicle checked.</p>
<ol>
<li>Insert a new fuse of the same capacity by using the fuse puller into the same place at the fuse block.</li>
</ol>
<p><img alt="" src="images/c5354b32847a449ad5d7b9120143c9a200ada92832535f54a44d59d57aaafbbd.jpg" /></p>
<details>
<summary>natural_image</summary>
Line drawing of two hands holding a small object, no text or symbols present
</details>
<p><img alt="" src="images/05979449b4db0bd688e54b66294a28d01ded14734c6a344f5b3d4b6b3a853a1f.jpg" /></p>
<h1 id="caution-171">CAUTION</h1>
<ul>
<li>If the newly inserted fuse blows again after a short time, we recommend you to have the electrical system checked to find the cause and rectify it. <br />
● Never use a fuse with a capacity larger than that specified or any substitute, such as wire, foil, etc.; doing so will cause the circuit wiring to heat up and could cause a fire.</li>
</ul>
<h1 id="replacement-of-lamp-bulbs">Replacement of lamp bulbs</h1>
<p>Before replacing a bulb, ensure the lamp is off. Do not touch the glass part of the new bulb with your bare fingers; the skin oil left on the glass will evaporate when the bulb gets hot and the vapour will condense on the reflector and dim the surface.</p>
<h1 id="replacement-of-lamp-bulbs-2">Replacement of lamp bulbs</h1>
<h1 id="caution-172">CAUTION</h1>
<p>● Bulbs are extremely hot immediately after being turned off.</p>
<p>When replacing a bulb, wait for it to cool sufficiently before touching it. You could otherwise be burnt.</p>
<p>● Handle halogen lamp bulbs with care. The gas inside halogen lamp bulbs is highly pressurized, so dropping, knocking, or scratching a halogen lamp bulb can cause it to shatter.</p>
<p>● Never hold the halogen lamp bulb with a bare hand, dirty glove, etc. The oil from your hand could cause the bulb to break the next time the headlamps are operated.</p>
<p>If the glass surface is dirty, it must be cleaned with alcohol, paint thinner, etc., and refit it after drying it thoroughly.</p>
<p><img alt="" src="images/827dfd15d58ded07dd2a9555f53e6819690fffc2166b357e56e34305bfaaeeba.jpg" /></p>
<details>
<summary>text_image</summary>
TA0001520
</details>
<h1 id="caution-173">CAUTION</h1>
<p>- Do not install commercially available LED-type bulbs.
Commercially available LED-type bulbs could adversely affect the operation of the vehicle, such as by preventing the lamps and other vehicle equipment from operating properly.</p>
<h1 id="note-360">NOTE</h1>
<p>- If you are unsure of how to carry out the work as required, we recommend you to consult a specialist.</p>
<p>● Be careful not to scratch the vehicle body when removing a lamp or lens.</p>
<p>- When it rains or when the vehicle has been washed, the inside of the lens sometimes becomes foggy. This is the same phenomenon as when window glass mists up on a humid day, and does not indicate a functional problem. When the lamp is switched on, the heat will remove the fog. However, if water gathers inside the lamp, we recommend you to have the lamp checked.</p>
<h1 id="bulb-location-and-capacity">Bulb location and capacity</h1>
<h1 id="caution-174">CAUTION</h1>
<p>- When replacing a bulb, be sure to use a new bulb of the same type, wattage and colour. If you install a different bulb, the bulb could malfunction or fail to come on and could lead to a vehicle fire.</p>
<h1 id="outside">Outside</h1>
<p><img alt="" src="images/da1e9691b6e4089f96eae6f0922d69c1d49fc88bf8b82f27b010c3f3e8cc526c.jpg" /></p>
<details>
<summary>text_image</summary>
Front
4
5
6
Type A
1
2
3
Type B
1
2
3
AJE101084
</details>
<p>Type A: Halogen headlamps type</p>
<p>Type B: Bi-xenon High Intensity Discharge (HID) headlamps type</p>
<p>1- Front turn-signal lamps: 21 W (PY21W)</p>
<p>2- Headlamps: <br />
Type A: 60/55 W (H4)
Type B: 25 W (D5S) <br />
3- Position lamps: <br />
Type A: 5 W (W5W)
Type B: - <br />
4- Type 1 <br />
Daytime running lamps: 13 W (P13W) <br />
Type 2 <br />
Front fog lamps: 35 W (H8) <br />
Daytime running lamps: 13 W (P13W) <br />
5- Side turn-signal lamps (on fender)*: 5 W <br />
6- Side turn-signal lamps (on outside rear-view mirror)* <br />
Codes in parentheses indicate bulb types.</p>
<h1 id="warning-100">WARNING</h1>
<p>- Bi-xenon HID headlamps operate at high voltage. If you try to service any of the system components, you could be seriously injured or killed.
Contact a MITSUBISHI MOTORS Authorized Service Point whenever it is necessary to repair the Bi-xenon HID headlamp or to replace the bulb.</p>
<p><img alt="" src="images/6aca8a2774c7b4f1610df9a84d2c77ec1f57da9b9076f39ae7294aebb19b1202.jpg" /></p>
<h1 id="note-361">NOTE</h1>
<p>- It is not possible to repair or replace only the bulb for the side turn-signal lamp (on fender).
For repair and replacement, contact a MITSUBISHI MOTORS Authorized Service Point.</p>
<p>- The following lamps use an LED instead of the bulb.
If you need to repair or replace these lamps, contact a MITSUBISHI MOTORS Authorized Service Point.
- Position lamps (Type B)
- Side turn-signal lamps (on outside rear-view mirror)</p>
<h1 id="replacement-of-lamp-bulbs-3">Replacement of lamp bulbs</h1>
<p><img alt="" src="images/e34bf0963844d6a0055472be010f5e027234a8d992b6aed3ab83de9d070f80df.jpg" /></p>
<details>
<summary>text_image</summary>
Rear
1
2
Type A
3,4 5 6
Type B
3 4 5 6
AJE101172
</details>
<p>Type A: Bulb type stop and tail lamps</p>
<p>Type B: LED type stop and tail lamps</p>
<p>1- High-mounted stop lamp (bulb type)*:
5 W (W5W)</p>
<p>2- Licence plate lamps: 5 W (W5W)</p>
<p>3- Reversing lamps (passenger's side): Type A (passenger's side): 21 W (P21W)</p>
<p>Type B: 16 W (W16W)</p>
<p>4- Rear fog lamp (driver's side): 21 W (P21W)</p>
<p>5- Rear turn-signal lamps: 21 W (P21W)
Type A: 21 W (P21W)
Type B: 21 W (PY21W)</p>
<p>6- Stop and tail lamps:
Type A: 21/5 W (P21/5W)
Type B: -</p>
<p>Codes in parentheses indicate bulb types.</p>
<p><img alt="" src="images/80364c84f2b37f5a8212951fa8438006afaca18509f4cec9ebb9dcd415ff5771.jpg" /></p>
<h1 id="note-362">NOTE</h1>
<p>- The following lamps use an LED instead of the bulb.
If you need to repair or replace these lamps, contact a MITSUBISHI MOTORS Authorized Service Point.
- High-mounted stop lamp (on rear spoiler)
- Stop and tail lamps (Type B)</p>
<h1 id="inside">Inside</h1>
<p><img alt="" src="images/f2407c1358595956bc8bfb9358f24a963d5b031b3511a831ec4af417d44a79d8.jpg" /></p>
<details>
<summary>text_image</summary>
1
2
AA0116437
</details>
<p>1- Luggage room lamp*: 5 W
2- Room lamp: 8 W</p>
<h1 id="headlamps-halogen-head-lamps-type">Headlamps (Halogen head-lamps type)</h1>
<ol>
<li>Pull out the connector (A), and then remove the scaling cover (B).</li>
</ol>
<p><img alt="" src="images/0a8497975f7c25ec8d3ff279e1ca0b8cd5327ba907a12ef3c89226e67982f81e.jpg" /></p>
<details>
<summary>text_image</summary>
A
B
A
AA0107893
</details>
<p>*: Front of the vehicle</p>
<ol>
<li>Unhook the spring (C), which secures the bulb, and then remove the bulb (D).</li>
</ol>
<p><img alt="" src="images/6470658c81ed7585ed323a2dc573e12dd5887824274791fc99bf3541e4251c51.jpg" /></p>
<details>
<summary>text_image</summary>
AA0187907
</details>
<ol>
<li>To install the bulb, perform the removal steps in reverse.</li>
</ol>
<h1 id="position-lamps-halogen-head-lamps-type">Position lamps (Halogen head-lamps type)</h1>
<ol>
<li>Turn the socket (A) anticlockwise to remove it.</li>
</ol>
<p><img alt="" src="images/a70283d3dc02b8314d01440331dd7c9bec269dfa804b1415462859e111905959.jpg" /></p>
<details>
<summary>text_image</summary>
Technical diagram showing a mechanical assembly with labeled components and directional arrows indicating motion or force.
</details>
<p>*: Front of the vehicle</p>
<ol>
<li>Pull the bulb out of the socket.</li>
</ol>
<p><img alt="" src="images/aec5c744b2dfc21aa3e13fd1d6ded370c05eff41d2f1f7f43e6df5826024a639.jpg" /></p>
<details>
<summary>natural_image</summary>
Simple line drawing of a connector with a curved cable and arrow indicating direction (no text or symbols)
</details>
<ol>
<li>To install the bulb, perform the removal steps in reverse.</li>
</ol>
<h1 id="front-turn-signal-lamps">Front turn-signal lamps</h1>
<ol>
<li>Turn the socket (A) anticlockwise to remove it.</li>
</ol>
<p><img alt="" src="images/6a6264526a8e96b13ab39ee2e0f30ee2bbb5a5273a7332de27d5da63d62465c3.jpg" /></p>
<details>
<summary>text_image</summary>
Typc A
A
</details>
<p><img alt="" src="images/37b930054ea431a02c4dfa1316d38c3e23e3fbd0e5e4be14bd2bf0f246546e38.jpg" /></p>
<details>
<summary>text_image</summary>
Type B
A
AJ4100626
</details>
<p>*: Front of the vehicle</p>
<h1 id="replacement-of-lamp-bulbs-4">Replacement of lamp bulbs</h1>
<ol>
<li>Remove the bulb from the socket by turning it anticlockwise while pressing in.</li>
</ol>
<p><img alt="" src="images/e91d1df835b783f199cb9b96472ba7623976d7c96cf8b7ff04d68ab3878ee93c.jpg" /></p>
<details>
<summary>natural_image</summary>
Diagram of a light bulb connected to a cable with an arrow indicating direction (no text or symbols)
</details>
<ol>
<li>To install the bulb, perform the removal steps in reverse.</li>
</ol>
<h1 id="daytime-running-lamps-front-fog-lamps">Daytime running lamps / Front fog lamps\*</h1>
<ol>
<li>
<p>To create enough work space, turn the steering wheel all the way in the direction opposite to the side you wish to replace.</p>
</li>
<li>
<p>Remove the clips/bolts (A) to turn up the cover (B).</p>
</li>
</ol>
<p><img alt="" src="images/d2dfea6cb153a60e3c774f26b92db64f49c24bf3adc70a3b640fe4d7c55cdf7b.jpg" /></p>
<details>
<summary>text_image</summary>
B
A
A01142K
</details>
<ol>
<li>While pressing the tab (C or D), pull out the connector.</li>
</ol>
<p><img alt="" src="images/3c13265265ccb9c7c04b956d0b5772c49e4ee847cd0d26ceba28245d171a1620.jpg" /></p>
<details>
<summary>text_image</summary>
Type 1
C
Type 2
r
D
C
AA3009161
</details>
<p>C-Daytime running lamp</p>
<p>D- Front fog lamp</p>
<ol>
<li>Turn the bulb anticlockwise to remove it.</li>
</ol>
<p><img alt="" src="images/b723abd20f78812ae2b7c107a889860c7e2903d0fe59e4b1e544a2a7b069e1de.jpg" /></p>
<details>
<summary>text_image</summary>
Type 1
Type 2
AA3089321
</details>
<ol>
<li>To install the bulb, perform the removal steps in reverse.</li>
</ol>
<p><img alt="" src="images/29976df9531c8a590cd43f9704264d65d2989beaf9c79d74ca70c81a50de23a6.jpg" /></p>
<h1 id="note-363">NOTE</h1>
<p>- When refitting each of the clips, first insert part (E) of the clip into the hole and then press part (F) into it.</p>
<p><img alt="" src="images/2681a22781be4eb28d47b5f2013caf3f4f95fba9bd295eb833cf12ff8e383ed8.jpg" /></p>
<details>
<summary>text_image</summary>
E
F
AJZ101603
</details>
<h1 id="rear-combination-lamps">Rear combination lamps</h1>
<ol>
<li>Open the tailgate
(Refer to "Tailgate" on page 3-18.) </li>
<li>Remove the screws (A) that hold the lamp unit.</li>
</ol>
<p><img alt="" src="images/ee2a625c6d2d3bc9d630fb99186197ad6a78056657595bc1da01c75b035d3dcc.jpg" /></p>
<details>
<summary>text_image</summary>
A
AA0107981
</details>
<ol>
<li>Move the lamp unit towards the rear of the vehicle to unfix the notch (B) and pin (C).</li>
</ol>
<p><img alt="" src="images/de6d9a7b7eb819e725ed9dc59529f77448c70b38a80c8d2e431bc8dffe31315c.jpg" /></p>
<details>
<summary>text_image</summary>
B
C
AA8107994
</details>
<ol>
<li>Turn the socket anticlockwise to remove it.</li>
</ol>
<p>Bulb type stop and tail lamps <br />
<img alt="" src="images/33fb35168cc4cc666fd7a40119ebd9ff9e918d681b38d4b62b76b11b08ada26b.jpg" /></p>
<details>
<summary>text_image</summary>
AAB198005
</details>
<p>D- Reversing lamp (passenger's side)/
Rear fog lamp (driver's side)</p>
<p>E- Rear turn-signal lamp <br />
F- Stop and tail lamp</p>
<p>LED type stop and tail lamps <br />
<img alt="" src="images/796d1a75d2a30ed16ef09a01a8d258dc037c671806d7a1e3c0cfdf334dbf3b56.jpg" /></p>
<details>
<summary>text_image</summary>
D E F G
AJA114279
</details>
<p>D- Reversing lamp <br />
E- Rear fog lamp (driver's side) <br />
F- Rear turn-signal lamp <br />
G- Stop and tail lamp - Do not touch the socket. Lamp replacement is carried out by a MITSUBISHI MOTORS Authorized Service Point.</p>
<p><img alt="" src="images/3c7d189ab4281c9b7d8d23ff2f5578f26145950595d11edc752687eb679b3374.jpg" /></p>
<h1 id="note-364">NOTE</h1>
<p>- On a vehicle with LED type stop and tail lamps, the stop and tail lamps use a LED instead of the bulb.
If you need to repair or replace these lamps, contact a MITSUBISHI MOTORS Authorized Service Point.</p>
<h1 id="replacement-of-lamp-bulbs-5">Replacement of lamp bulbs</h1>
<ol>
<li>Remove the bulb from the socket as follows.</li>
</ol>
<p>● Type 1: Reversing lamp on the LED type stop and tail lamp.
Pull the bulb out.</p>
<p>● Type 2: Other lamps
Turn the bulb anticlockwise while pressing in.</p>
<p><img alt="" src="images/ce86c034fe66cfefbf51c3cc26f7e94121ec5c8056ca961006765ff2a6e7a917.jpg" /></p>
<details>
<summary>text_image</summary>
Type 1 Typc 2
AJA112695
</details>
<ol>
<li>To install the bulb, perform the removal steps in reverse.</li>
</ol>
<p><img alt="" src="images/c1ed641bd67c4584b9fae3daef844a5be7afddf18dc8dbcbbf328c8c040f45bc.jpg" /></p>
<p><img alt="" src="images/1811c8c7452ff796835d4f4868df7e30c4834f588bef0798c6823ca80b07c421.jpg" /></p>
<details>
<summary>text_image</summary>
NOTE
J
H
I
K
AJZ102671
</details>
<h1 id="high-mounted-stop-lamp-bulb-type">High-mounted stop lamp (bulb type)\*</h1>
<ol>
<li>Open the tailgate.
(Refer to "Tailgate" on page 3-18)</li>
<li>Insert a straight blade (or minus) screw-driver with a cloth over its tip at the edge of the cover and pry gently to remove the cover (A).</li>
</ol>
<p><img alt="" src="images/d2f82651ca48a3a8b6f8915c5236069552e0291f17371f3aa3745474fb0dc5af.jpg" /></p>
<details>
<summary>text_image</summary>
A
AJA117469
</details>
<ol>
<li>Push the 4 hooks (B) and remove the lamp unit. (Close the tailgate to cause the lamp unit to come out.)</li>
</ol>
<p><img alt="" src="images/0aa30ea15b5d490d25db05053cb4b1839606e979090b94f748a400126b26156c.jpg" /></p>
<details>
<summary>text_image</summary>
B
AA0108034
</details>
<ol>
<li>Gently close the tailgate, remove the lamp unit, and turn the socket anticlockwise to remove it.</li>
</ol>
<p><img alt="" src="images/7a0671fd23c4df809a34e3e7c1e69fcf2f83b3e23e67aca0676a248822f1a3ea.jpg" /></p>
<details>
<summary>natural_image</summary>
Line drawing of a vehicle interior with four wheels and a handle (no text or symbols)
</details>
<ol>
<li>Pull the bulb out of the socket.</li>
</ol>
<p><img alt="" src="images/4b205a618790d512ce58c033c76fc20179723147170d72602696f103cf69ea9c.jpg" /></p>
<details>
<summary>natural_image</summary>
Mechanical component diagram showing a cylindrical shaft with an arrow indicating direction (no text or symbols)
</details>
<ol>
<li>To install the bulb, perform the removal steps in reverse.</li>
</ol>
<h1 id="licence-plate-lamps">Licence plate lamps</h1>
<ol>
<li>Push the lamp unit (A) towards the left side of the vehicle to remove it.</li>
</ol>
<p><img alt="" src="images/a18183f0e790a1f31b7943c7196365a495478479c7501d6e62fde052d0550783.jpg" /></p>
<details>
<summary>text_image</summary>
A
AJA112709
</details>
<ol>
<li>Turn the socket (B) anticlockwise to remove it, and then pull the bulb out from the socket.</li>
</ol>
<p><img alt="" src="images/b97a468ba6d77d07e5524bea51113a2203ed9fe05406b74a42244cb86f39305a.jpg" /></p>
<details>
<summary>text_image</summary>
B
AJA112712
</details>
<ol>
<li>To install the bulb, perform the removal steps in reverse.</li>
</ol>
<p><img alt="" src="images/96f2d46772ae140fce31863777156985d540099e021e1516335baae7a8594cf4.jpg" /></p>
<h1 id="note-365">NOTE</h1>
<p>- When installing the lamp unit, first insert the tab (C) into the hole on the body, and then push on the lamp unit to fit it into place.</p>
<p><img alt="" src="images/5995d295ee4328432c03af4d1c9dd98a116ec2587f7fb20d16f3a07ac71c1209.jpg" /></p>
<details>
<summary>natural_image</summary>
Mechanical assembly diagram showing a clamping device with labeled component C (no text or symbols beyond label)
</details>
<h1 id="masking-the-headlamps">Masking the headlamps</h1>
<p>When entering a country in which vehicles are driven on the opposite side of the road to the country in which your vehicles is supplied, necessary measures have to be taken to avoid dazzling oncoming traffic.</p>
<h1 id="bi-xenon-high-intensity-discharge-hid-headlamps-type">Bi-xenon High Intensity Discharge (HID) headlamps type</h1>
<p>Do not need any adjustment.</p>
<h1 id="halogen-headlamps-type">Halogen headlamps type</h1>
<p>Mask the headlamps according to the next procedure.</p>
<ol>
<li>Turn the headlamp off and wait until the headlamps got cold.</li>
</ol>
<h1 id="masking-the-headlamps-2">Masking the headlamps</h1>
<ol>
<li>According to the illustrations, prepare the sticker (A) to stick the headlamp surface of right and left.</li>
</ol>
<p><img alt="" src="images/511880f4e0944fd24b6c4052ae05646d568ffc594ff0c345f921fe1de07dc221.jpg" /></p>
<h1 id="note-366">NOTE</h1>
<ul>
<li>Use a sticker with a light blocking effect enough.
Using of a sticker without a light blocking effect will not acquire a blocking effect. </li>
<li>Seeing from the headlamp front, position (C) of the sticker and the central mark (B) of the headlamp and stick a sticker along the vertical dotted line.</li>
</ul>
<p><img alt="" src="images/d0f9c4c8920a77be4ca59f4b47d1c73189dabbdd7ad4371b0e396d4831b522a9.jpg" /></p>
<h1 id="note-367">NOTE</h1>
<p>- Align the vertical dotted line with the line of the reflector in the headlamp.</p>
<p><img alt="" src="images/cab1e97d619dc742ef5d6271c1cd5e5f2a03d1b73ef115191173e06a8ae10247.jpg" /></p>
<details>
<summary>text_image</summary>
LHD
Left Icns
B
C
116mm
37mm
A
116mm
8.5mm
</details>
<p>Right lens</p>
<p><img alt="" src="images/691fc75203af42916b1f77ca5553a03e3a13faafe1af877bea8be56114c2ada8.jpg" /></p>
<details>
<summary>text_image</summary>
B
C
98mm 6.5mm
37mm
98mm
A
</details>
<p><img alt="" src="images/887d1805fca6b6ce2ad7aa1dcd8f15d1b297c7cb7a8c5f9faa93573801045d5a.jpg" /></p>
<details>
<summary>text_image</summary>
RHD
Left lens
6.5mm
98mm
C
37mm
98mm
A
</details>
<p>Right lens</p>
<p><img alt="" src="images/4c64803f459b3b08ed17a328d400a59956ad9a51a788a505e416471ec7b3f3c1.jpg" /></p>
<details>
<summary>text_image</summary>
B
116mm
C
37mm
116mm
A
8.5mm
</details>
<h1 id="specifications">Specifications</h1>
<p>Vehicle labeling....11-02</p>
<p>Vehicle dimensions....11-04</p>
<p>Vehicle performance....11-05</p>
<p>Vehicle weight....11-05</p>
<p>Engine specifications.... 11-06</p>
<p>Electrical system.... 11-07</p>
<p>Tyres and wheels.... 11-08</p>
<p>Clutch pedal.... 11-08</p>
<p>CO2 Mass Emissions.... 11-09</p>
<p>Capacity....11-10</p>
<p>Vehicle labeling</p>
<h1 id="vehicle-labeling">Vehicle labeling</h1>
<h1 id="vehicle-identification-number">Vehicle identification number</h1>
<p>The vehicle identification number is stamped on the bulkhead as shown in the illustration.</p>
<p><img alt="" src="images/6ec055a8204ff188bcd24e2675b98fff1bdbe1464541d885f2ffd763d45661c4.jpg" /></p>
<details>
<summary>natural_image</summary>
Technical line drawing of a car engine compartment with no visible text or symbols
</details>
<h1 id="vehicle-information-code-plate">Vehicle information code plate</h1>
<p>The vehicle information code plate is located as shown in the illustration.</p>
<p><img alt="" src="images/10b53e8439e37359e51ac8b01002a4e4563e409dd0c5d5e7c1a31fbe6c12b1e5.jpg" /></p>
<details>
<summary>natural_image</summary>
Line drawing of a car with an open hood and arrow indicating direction (no text or symbols)
</details>
<p>The plate shows model code, engine model, transmission model and body colour code, etc.</p>
<p>Please use this number when ordering replacement parts.</p>
<p><img alt="" src="images/a17ad1e53d1987dd36149e8b3e29f7bbc321ff43496b2b1bc46d622743034d8d.jpg" /></p>
<details>
<summary>text_image</summary>
MITSUBISHI MOTORS
(THAILAND) CO.,LTD.
MODEL:
ENGINE
TRANS
AXLE
COLOR, TRIM
OPT
2 3 4 5 6 7
AA0117333
</details>
<p>1- Model code <br />
2- Engine model code <br />
3- Transmission model code <br />
4- Final gear ratio <br />
5- Body colour code <br />
6- Interior code <br />
7- Option code</p>
<h1 id="vehicle-identification-number-plate-rhd-vehicles-only">Vehicle identification number plate (RHD vehicles only)</h1>
<p>The vehicle identification number is stamped on the plate riveted to the left front corner of the vehicle body. It is visible from outside of the vehicle through the windscreen.</p>
<p><img alt="" src="images/896e110eb8178772edef863eb25c4a82f21558d4777d4c1d0020a8190fc2fac3.jpg" /></p>
<details>
<summary>natural_image</summary>
Line drawing of a car's front and side view showing the window and side door (no text or symbols)
</details>
<h1 id="engine-modelnumber">Engine model/number</h1>
<p>The engine model and number are stamped on the engine cylinder block as shown in the illustration.</p>
<p><img alt="" src="images/be8ed80d355e2662debf80f4b78c3985fd6a1d602a9d5b795df4054aa80fdce1.jpg" /></p>
<details>
<summary>natural_image</summary>
Technical line drawing of a mechanical component with no visible text or symbols
</details>
<p>*: Front of the vehicle</p>
<p>Vehicle dimensions</p>
<p>Vehicle dimensions <br />
<img alt="" src="images/2d8328edff752f8e5f7f2f75d3dc306f02c6da3d95ab99bf98cb2741fca594b4.jpg" /></p>
<details>
<summary>natural_image</summary>
Front view line drawing of a car with dimension labels (1 and 2) for height and width (no text or symbols beyond labels)
</details>
<p><img alt="" src="images/d5195717953c62e5cd91fceaac1292bc1ac49ee2bc1188de8fde929d1136a43c.jpg" /></p>
<details>
<summary>text_image</summary>
3
4
5
6
7
8
</details>
<p><img alt="" src="images/36f645acc29253f60f44f7ad9d3cd58f353e4630b7a4984d5e1157be04d4fd59.jpg" /></p>
<details>
<summary>natural_image</summary>
Front view line drawing of a car with height dimension labeled as 9 (no text or symbols beyond the dimension)
</details>
<p>AJ1101781</p>
<table><tr><td>1 Front track 1,430 mm</td><td></td></tr><tr><td>2 Overall width 1,665 mm</td><td></td></tr><tr><td>3 Front overhang 745 mm</td><td></td></tr><tr><td>4 Wheel base 2,450 mm</td><td></td></tr><tr><td>5 Rear overhang 600 mm</td><td></td></tr><tr><td>6 Overall length 3,795 mm</td><td></td></tr><tr><td>7 Ground clearance (unladen) 150 mm</td><td></td></tr><tr><td>8 Overall height (unladen) 1,505 mm</td><td></td></tr><tr><td>9 Rear track 1,415 mm</td><td></td></tr></table>
<p>Vehicle performance</p>
<p>Minimum turning radius </p>
<table><tr><td>Body 4.9 m</td><td></td></tr><tr><td>Wheel 4.6 m</td><td></td></tr></table>
<p>Vehicle performance </p>
<table><tr><td rowspan="3">Maximum speed</td><td colspan="2">1000 models 172 km/h</td><td></td></tr><tr><td rowspan="2">1200 models</td><td>M/T 180 km/h</td><td></td></tr><tr><td>CVT 173 km/h</td><td></td></tr></table>
<p>Vehicle weight</p>
<p>1000 models </p>
<table><tr><td colspan="2">Item M/T CVT</td><td></td><td></td></tr><tr><td rowspan="2">Kerb weight</td><td>Without optional parts</td><td>865 kg, 870 kg*1</td><td>905 kg</td></tr><tr><td>With full optional parts 886 kg 919 kg</td><td>kg</td><td></td></tr><tr><td colspan="2">Maximum gross vehicle weight 1,290 kg 1,330 kg</td><td></td><td></td></tr><tr><td rowspan="2">Maximum axle weight</td><td>Front 730 kg</td><td colspan="2"></td></tr><tr><td>Rear 670 kg</td><td colspan="2"></td></tr><tr><td colspan="2">Maximum roof load 50 kg</td><td colspan="2"></td></tr><tr><td colspan="2">Seating capacity</td><td colspan="2">5 persons</td></tr></table>
<p>*1: Vehicles equipped with Auto Stop & Go (AS&G) system</p>
<p>Engine specifications </p>
<table><tr><td colspan="4">1200 models</td></tr><tr><td colspan="2">Item M/T CVT</td><td></td><td></td></tr><tr><td rowspan="2">Kerb weight</td><td>Without optional parts</td><td>865 kg, 870 kg^*1 </td><td>895 kg, 905 kg^*1 </td></tr><tr><td>With full optional parts</td><td>984 kg, 901 kg^*1 </td><td>922 kg, 930 kg^*1 </td></tr><tr><td colspan="2">Maximum gross vehicle weight</td><td>1,340 kg, 1,370 kg^*2 </td><td>1,370 kg, 1,400 kg^*2 </td></tr><tr><td rowspan="2">Maximum axle weight</td><td>Front 730 kg</td><td colspan="2"></td></tr><tr><td>Rear</td><td colspan="2">670 kg, 700 kg^*2 </td></tr><tr><td rowspan="2">Maximum towable weight</td><td>With brake 200 kg</td><td colspan="2"></td></tr><tr><td>Without brake 100 kg</td><td colspan="2"></td></tr><tr><td colspan="2">Maximum trailer-nose weight 25 kg</td><td colspan="2"></td></tr><tr><td colspan="2">Maximum roof load 50 kg</td><td colspan="2"></td></tr><tr><td colspan="2">Seating capacity 5 persons</td><td colspan="2"></td></tr></table>
<p>^1 : Vehicles equipped with Auto Stop & Go (AS&G) system <br />
^2 : In case of trailer towing</p>
<p><img alt="" src="images/6383a5008110ca9245fbf6071031b78264951203e13c9acf6f08c5d37957655a.jpg" /></p>
<h1 id="note-368">NOTE</h1>
<p>- Trailer specifications indicate the manufacturer's recommendation.</p>
<p>Engine specifications </p>
<table><tr><td>Item 1000 models 1200 models</td><td></td><td></td></tr><tr><td>Engine model 3A90 3A92</td><td></td><td></td></tr></table>
<p>11-06</p>
<p>Specifications</p>
<p>OA0X19E2</p>
<p>Electrical system </p>
<table><tr><td>Item 1000 models 1200 models</td><td></td><td></td></tr><tr><td>No. of cylinders 3 in line 3 in lineTotal displacement 999 cc 1,193 ccBore 75.0 mm 75.0 mmStroke 75.4 mm 90.0 mmCamshaft Double overhead Double overheadMixture preparation Electronic injection Electronic injection</td><td></td><td></td></tr><tr><td>Maximum output (EEC net) 52 kW/6,000 r/min 59 kW/6,000 r/min</td><td></td><td></td></tr><tr><td>Maximum torque (EEC net) 88 Nm/5,000 r/min 106 Nm/4,000 r/min</td><td></td><td></td></tr></table>
<p>Electrical system </p>
<table><tr><td colspan="2">Voltage</td><td>12 V</td></tr><tr><td rowspan="2">Battery</td><td>Type (JIS)</td><td>80D23L, Q-85*</td></tr><tr><td>Capacity (5HR)</td><td>59 Ah, 55 Ah*</td></tr><tr><td colspan="2">Alternator capacity</td><td>95 A</td></tr><tr><td>Spark plug type</td><td>NGK</td><td>DILFR6L11</td></tr></table>
<p>*: Vehicles equipped with Auto Stop & Go (AS&G) system</p>
<p>Tyres and wheels</p>
<p><img alt="" src="images/ea003d68de791594dba1817e54a5e90a6313818ef2c95ca17066314218c38e3e.jpg" /></p>
<h1 id="note-369">NOTE</h1>
<p>- Vehicles equipped with the Auto Stop & Go (AS&G) system have a dedicated AS&G battery type. The use of a different battery could cause the battery to run down quickly or the AS&G system not to operate normally. Please contact a MITSUBISHI MOTORS Authorized Service Point when replacing the battery.</p>
<p>Tyres and wheels </p>
<table><tr><td colspan="2">Item 1000 models 1200 models</td><td></td><td colspan="2"></td></tr><tr><td colspan="2">Tyre 165/65R14 79S 165/65R14 79S 175/55R15 77V</td><td></td><td></td><td></td></tr><tr><td rowspan="2">Wheel</td><td colspan="2">Size 14x4 1/2J 14x4 1/2J 15x5 J</td><td></td><td></td></tr><tr><td>Offset (Inset) 46 mm</td><td colspan="3"></td></tr></table>
<p><img alt="" src="images/eec701ea98647d75aa5f45960578bb0fe9bdd9ee1fb4a01749156759f4be2c9c.jpg" /></p>
<h1 id="note-370">NOTE</h1>
<p>- Contact your MITSUBISHI MOTORS Authorized Service Point for details on the combination used on your vehicle.</p>
<p>Clutch pedal </p>
<table><tr><td>Free play 11 to 16 mm</td><td></td></tr></table>
<p><img alt="" src="images/e47b0010a5446635f47e6c24846d2a90359de9807a57c91650a179c16c1bca9f.jpg" /></p>
<h1 id="note-371">NOTE</h1>
<p>● Have the clutch pedal adjusted at a MITSUBISIII MOTORS Authorized Service Point.</p>
<p>CO2 Mass Emissions </p>
<table><tr><td rowspan="3" colspan="3">Item</td><td colspan="2">Combined</td></tr><tr><td colspan="2"> CO^2 (g/km)</td></tr><tr><td>NEDC*1</td><td>WLTC*2</td></tr><tr><td rowspan="2">1000 models</td><td colspan="2">M/T</td><td>104, 103*3</td><td>116, 117*3</td></tr><tr><td colspan="2">CVT</td><td>109*3</td><td>126*3</td></tr><tr><td rowspan="4">1200 models</td><td rowspan="2">M/T</td><td>Vehicle with 14 inch tyres</td><td>109, 107*3</td><td>119, 115*3</td></tr><tr><td>Vehicle with 15 inch tyres</td><td>113, 111*3</td><td>125, 123*3</td></tr><tr><td rowspan="2">CVT</td><td>Vehicle with 14 inch tyres</td><td>116, 114*3</td><td>124, 125*3</td></tr><tr><td>Vehicle with 15 inch tyres</td><td>117, 114*3</td><td>132, 133*3</td></tr></table>
<p>*1: New European Driving Cycle</p>
<p>*2: Worldwide harmonized Light vehicles Test Cycle</p>
<p>^*3 : Vehicles equipped with Auto Stop & Go (AS&G) system</p>
<h1 id="note-372">NOTE</h1>
<p>● The results given do not express or imply any guarantee of the CO_2 mass emissions of the particular vehicle.</p>
<p>The vehicle itself has not been tested and there are inevitably differences between individual vehicles of the same model. In addition, this vehicle may incorporate particular modifications. Furthermore, the driver's style and road and traffic conditions, as well as the extent to which the vehicle has been driven and the standard of maintenance, will all affect its CO_2 mass emissions.</p>
<p>Capacity</p>
<h1 id="capacity">Capacity</h1>
<p><img alt="" src="images/59e44c8b216752f89e4e642e11a8ad3858b33e95348ab4402c19f36e6a5a3616.jpg" /><br />
AA1008968</p>
<table><tr><td colspan="3">No.ItemQuantityLubricants</td><td></td><td></td></tr><tr><td colspan="4">1 Brake fluid As required Brake fluid DOT3 or DOT4</td><td></td></tr><tr><td rowspan="2">2 Engine coolant</td><td>M/T</td><td colspan="2"> 4.0 litres^*1 </td><td rowspan="2">MITSUBISHI MOTORS GENUINE SUPER LONG LIFE COOLANT PREMIUM or equivalent ^*2 </td></tr><tr><td>CVT</td><td colspan="2"> 4.6 litres^*1 </td></tr><tr><td colspan="3">3 Washer fluid 2.5 litres —</td><td></td><td></td></tr><tr><td rowspan="2">4 Engine oil</td><td colspan="3">Oil pan 2.8 litres</td><td rowspan="2">Refer to page 10-04.</td></tr><tr><td colspan="3">Oil filter 0.2 litre</td></tr></table>
<p>*1: Includes 0.5 litre in the reservoir <br />
^*2 : Similar high quality ethylene glycol based non-silicate, non-amine, non-nitrate and non-borate coolant with long life hybrid organic acid technology</p>
<p>11-10</p>
<p>Specifications</p>
<p>OA0X19E2</p>
<p>Capacity </p>
<table><tr><td>No.ItemQuantityLubricants</td><td></td><td></td></tr><tr><td>5 CVT fluid 7.0 litres MITSUBISHI MOTORS GENUINE CVTF-J4</td><td></td><td></td></tr></table>
<p>*1: Includes 0.5 litre in the reservoir <br />
^*2 : Similar high quality ethylene glycol based non-silicate, non-amine, non-nitrate and non-borate coolant with long life hybrid organic acid technology</p>
<h1 id="caution-175">CAUTION</h1>
<p>- For the CVT fluid, use only the MITSUBISHI MOTORS GENUINE CVTF. Use of a different fluid could damage the CVT.</p>
<table><tr><td colspan="2">No.ItemQuantityLubricants</td><td></td><td></td></tr><tr><td>6 M</td><td colspan="3">Manual transmission oil 1.6 litres MITSUBISHI MOTORS GENUINE NEW MULTI GEAROIL ECO API GL-4, SAE 75W-80</td></tr><tr><td>7</td><td>Refrigerant (air conditioning*3)</td><td colspan="2">250-290 g HFO-1234yf</td></tr></table>
<p>^*3 : Optional equipment</p>
<h1 id="a">A</h1>
<p>Accessory (Installation)....2-04</p>
<p>Accessory socket....7-71</p>
<p>Active stability control (ASC)....6-37</p>
<p>Air conditioning</p>
<p>Automatic air conditioning....7-08</p>
<p>Heater....7-03</p>
<p>Important operation tips for the air</p>
<p>conditioning....7-14</p>
<p>Manual air conditioning....7-03</p>
<p>Air purifier....7-15</p>
<p>Airbag....4-17</p>
<p>Caution for installing the child re-</p>
<p>straint on vehicles with a front</p>
<p>passenger airbag.... 4-09,4-19</p>
<p>Front passenger's airbag OFF indi-</p>
<p>cation lamp.... 4-20</p>
<p>Front passenger's airbag ON-OFF switch.... 4-20</p>
<p>Antenna....7-46</p>
<p>Anti-lock brake system (ABS)....6-35</p>
<p>Warning lamp....6-35</p>
<p>Assist grip....7-75</p>
<p>Audio</p>
<p>Error codes....7-43</p>
<p>Handling of compact discs....7-44</p>
<p>LW/MW/FM electronic tuning ra-</p>
<p>dio with CD player.... 7-15</p>
<p>Auto Stop & Go (AS&G) system....6-20</p>
<p>Automatic transmission</p>
<p>Fluid....11-10</p>
<p>Selector lever operation.... 1-15,6-26</p>
<p>Selector lever positions....6-28</p>
<h1 id="b">B</h1>
<p>Battery....10-08</p>
<p>Charge warning lamp....5-14</p>
<p>Discharged battery (Emergency starting).....8-02</p>
<p>Disposal information for used batteries..... 2-06</p>
<p>Specification....11-07</p>
<p>Bluetooth® 2.0 interface....7-46</p>
<p>Bonnet....10-03</p>
<p>Bottle holder....7-74</p>
<p>Brake</p>
<p>Anti-lock brake....6-35</p>
<p>Brake assist system.... 6-34</p>
<p>Braking....6-31</p>
<p>Fluid....10-07,11-10</p>
<p>Parking brake.... 6-04</p>
<p>Warning lamp....5-13</p>
<p>Bulb capacity....10-20</p>
<h1 id="c">C</h1>
<p>Capacities....11-10</p>
<p>Card holder....7-70</p>
<p>Cargo loads....6-47</p>
<p>Catalytic converter.... 10-03</p>
<p>Central door locks.... 3-16</p>
<p>Charge warning lamp.... 5-14</p>
<p>Check engine warning lamp....5-14</p>
<p>Child restraint....4-09</p>
<p>Caution for installing the child re-</p>
<p>straint on vehicles with a front</p>
<p>passenger airbag.... 4-09,4-19</p>
<p>Child-protection rear doors.... 3-17</p>
<p>Cleaning</p>
<p>Exterior of your vehicle.... 9-03</p>
<p>Interior of your vehicle.... 9-02</p>
<p>CO2 Mass Emissions....11-09</p>
<p>Combination headlamps and dipper switch..... 5-15</p>
<p>Compact spare wheel....8-14</p>
<p>Convenient hook....7-75</p>
<p>Coolant....10-05,11-10</p>
<p>Cruise control....6-39</p>
<p>Cup holder....7-73</p>
<h1 id="d">D</h1>
<p>Daytime running lamps</p>
<p>Bulb capacity.... 10-21</p>
<p>Replacement....10-24</p>
<p>Demister (rear window)....5-26</p>
<p>Dimensions....11-04</p>
<p>Dipper (High/Low beam change)....5-18</p>
<p>Door ajar warning lamp....5-15</p>
<p>Doors</p>
<p>Central door locks.... 3-16</p>
<p>Child-protection.... 3-17</p>
<p>Lock and unlock....3-15</p>
<p>Driving, alcohol and drugs.... 6-02</p>
<h1 id="e">E</h1>
<p>Economical driving....6-02</p>
<p>Electric power steering system (EPS)....6-37</p>
<p>Electric window control.... 3-19</p>
<p>Electrical system....11-07</p>
<p>Electronic immobilizer (Anti-theft</p>
<p>starting system).... 3-03</p>
<h1 id="alphabetical-index">Alphabetical index</h1>
<p>Emergency starting....8-02</p>
<p>Emergency stop signal system.... 6-34</p>
<p>Engine</p>
<p>Coolant....10-05,11-10</p>
<p>High coolant temperature warning lamp.....5-15</p>
<p>Number....11-03</p>
<p>Oil....10-04</p>
<p>Oil and oil filter....11-10</p>
<p>Overheating....8-04</p>
<p>Safety and disposal information for</p>
<p>used engine oil.... 2-05</p>
<p>Specifications.... 11-06</p>
<p>Switch....6-11</p>
<p>Error codes.... 7-43</p>
<p>Exterior and interior lamp operation.... 10-15</p>
<h1 id="f">F</h1>
<p>Fluid</p>
<p>Automatic transmission fluid.... 11-10</p>
<p>Brake fluid.... 10-07,11-10</p>
<p>Capacities and lubricants....11-10</p>
<p>Engine coolant.... 10-05</p>
<p>Washer fluid.... 10-07,11-10</p>
<p>Front fog lamps</p>
<p>Bulb capacity.... 10-21</p>
<p>Replacement....10-24</p>
<p>Switch.... 5-20</p>
<p>Front passenger's airbag ON-OFF switch.....4-20</p>
<p>Front seat.... 4-02</p>
<p>Front turn-signal lamps</p>
<p>Bulb capacity.... 10-21</p>
<p>Replacement....10-23</p>
<p>Frozen road warning....5-06</p>
<p>Fuel</p>
<p>Filling the fuel tank....2-03</p>
<p>Fuel remaining display....5-06</p>
<p>Fuel remaining warning display....5-06</p>
<p>Fuel selection.... 2-02</p>
<p>Modification/alterations to the</p>
<p>electrical systems....2-05</p>
<p>Tank capacity.... 2-03</p>
<p>Fuses....10-15</p>
<p>Fusible links.... 10-15</p>
<h1 id="g">G</h1>
<p>General maintenance.... 10-15</p>
<p>General vehicle data.... 11-04</p>
<p>Genuine parts....2-05</p>
<p>Glove box....7-73</p>
<h1 id="h">H</h1>
<p>Hazard warning flasher switch....5-19</p>
<p>Hazard warning indication lamps....5-12</p>
<p>Head restraints....4-04</p>
<p>Headlamps</p>
<p>Bulb capacity.... 10-21</p>
<p>Headlamp flasher.... 5-18</p>
<p>Headlamp levelling switch....5-18</p>
<p>Replacement....10-22</p>
<p>Switch....5-15</p>
<p>Heated mirror.... 6-10</p>
<p>Heated seats....4-03</p>
<p>Heater....7-03</p>
<p>High coolant temperature warning lamp....5-15</p>
<p>High-mounted stop lamp</p>
<p>Bulb capacity.... 10-21</p>
<p>Replacement....10-26</p>
<p>Hill start assist.... 6-32</p>
<p>Hinges and latches lubrication.... 10-15</p>
<p>Hook</p>
<p>Convenient hook....7-75</p>
<p>Horn switch.... 5-26</p>
<h1 id="i">I</h1>
<p>If the vehicle breaks down.... 8-02</p>
<p>Ignition switch....6-10</p>
<p>Indication and warning lamps.... 1-17,5-11</p>
<p>Indication lamps.... 5-12</p>
<p>Inside rear-view mirror....6-06</p>
<p>Instruments.... 5-02</p>
<p>Interior lamps....7-71</p>
<h1 id="j">J</h1>
<p>Jack....8-06</p>
<p>Garage jack up position.... 10-03</p>
<p>Storage....8-05</p>
<p>Jump starting (Emergency starting)...... 8-02</p>
<h1 id="k">K</h1>
<p>Keyless entry system....3-04</p>
<p>Keyless operation system.... 3-07</p>
<p>Keys....3-02</p>
<h1 id="l">L</h1>
<p>Labeling....11-02</p>
<p>Lamp monitor buzzer.... 5-17</p>
<p>Leakage (Fuel, engine coolant, oil and exhaust gas)....10-15</p>
<h1 id="12-2-alphabetical-index">12-2 Alphabetical index</h1>
<h1 id="alphabetical-index-2">Alphabetical index</h1>
<p>Licence plate lamps</p>
<p>Bulb capacity.... 10-21</p>
<p>Replacement....10-27</p>
<p>Link System....7-46</p>
<p>Locking and unlocking the doors and tailgate...1-11</p>
<p>Lubricants....11-10</p>
<p>Luggage room lamp.... 7-72</p>
<p>Bulb capacity.... 10-22</p>
<p>LW/MW/FM electronic tuning radio with CD player....7-15</p>
<h1 id="m">M</h1>
<p>Manual air conditioning.... 7-03</p>
<p>Manual transmission.... 6-25</p>
<p>Manual window control.... 3-19</p>
<p>Masking the headlamps....10-27</p>
<p>Meter illumination control.... 5-04</p>
<p>Mirror</p>
<p>Inside rear-view mirror.... 6-06</p>
<p>Outside rear-view mirrors.... 6-07</p>
<p>Modification/alterations to the electrical systems.... 2-05</p>
<p>Multi-information display.... 5-02</p>
<h1 id="0">0</h1>
<p>Oil pressure warning lamp.... 5-14</p>
<p>Oil</p>
<p>Engine oil.... 10-04</p>
<p>Operation under adverse driving conditions..... 8-23</p>
<p>Outside rear-view mirrors.... 6-07</p>
<p>Overheating....8-04</p>
<h1 id="p">P</h1>
<p>Parking....6-05</p>
<p>Parking brake.... 6-04</p>
<p>Position lamps</p>
<p>Bulb capacity.... 10-21</p>
<p>Replacement....10-23</p>
<p>Precautions to observe when using</p>
<p>wipers and washers.... 5-25</p>
<p>Pregnant women restraint....4-08</p>
<p>Puncture (Tyre changing).... 8-13</p>
<p>Tyre repair kit....8-06</p>
<h1 id="r">R</h1>
<p>Radio</p>
<p>LW/MW/FM electronic tuning radio with CD player.... 7-15</p>
<p>Rear fog lamp</p>
<p>Bulb capacity.... 10-21</p>
<p>Replacement....10-25</p>
<p>Switch.... 5-20</p>
<p>Rear seat.... 4-03</p>
<p>Rear shelf panel....7-74</p>
<p>Rear turn-signal lamps</p>
<p>Bulb capacity.... 10-21</p>
<p>Replacement.... 10-23,10-25</p>
<p>Rear window demister switch.... 5-26</p>
<p>Rear-view mirror</p>
<p>Inside....6-06</p>
<p>Outside 6-07</p>
<p>Replacement of lamp bulbs.... 10-19</p>
<p>Reversing lamps</p>
<p>Bulb capacity.... 10-21</p>
<p>OA0X19E2</p>
<p>Replacement....10-25</p>
<p>Roof carrier precaution....6-47</p>
<p>Room lamp....7-71</p>
<p>Bulb capacity.... 10-22</p>
<p>Running-in recommendations.... 6-03</p>
<h1 id="s">S</h1>
<p>Safe driving techniques.... 6-03</p>
<p>Safety and disposal information for used engine oil.... 2-05</p>
<p>Seat belt 4-05</p>
<p>Adjustable seat belt anchor.... 4-07</p>
<p>Child restraint....4-09</p>
<p>Force limiter....4-09</p>
<p>Inspection....4-17</p>
<p>Pregnant women restraint.... 4-08</p>
<p>Seat belt reminder.... 4-07</p>
<p>Seat</p>
<p>Adjustment....4-02</p>
<p>Front seat....4-02</p>
<p>Head restraints.... 4-04</p>
<p>Heated seats.... 4-03</p>
<p>Rear seat....4-03</p>
<p>Service precaution.... 10-02</p>
<p>Side turn-signal lamps</p>
<p>Bulb capacity.... 10-21</p>
<p>Snow traction device (Tyre chains)....10-12</p>
<p>Snow tyres.... 10-12</p>
<p>Spare wheel....8-13</p>
<p>Spark plug....11-07</p>
<p>Specifications.... 11-02</p>
<p>Steering</p>
<p>Steering wheel height adjustment.... 6-06</p>
<p>Steering wheel lock....6-13</p>
<p>Alphabetical index</p>
<p>12-3</p>
<h1 id="alphabetical-index-3">Alphabetical index</h1>
<p>Stop and tail lamps.... 10-22</p>
<p>Bulb capacity.... 10-21</p>
<p>Replacement....10-25</p>
<p>Storage spaces.... 7-72</p>
<p>Sun visors.... 7-70</p>
<p>Supplemental restraint system....4-17</p>
<p>Caution for installing the child restraint on vehicles with a front</p>
<p>passenger airbag.... 4-09,4-19</p>
<p>How the Supplemental Restraint</p>
<p>System works....4-18</p>
<p>Servicing.... 4-27</p>
<p>Warning lamp....4-27</p>
<h1 id="t">T</h1>
<p>Tailgate.... 3-18</p>
<p>Tank capacity....2-03</p>
<p>Tools....8-06</p>
<p>Storage 8-05</p>
<p>Towing....8-19</p>
<p>Trailer towing.... 6-48</p>
<p>Transmission</p>
<p>Automatic transmission.... 1-15,6-26</p>
<p>Fluid.... 11-10</p>
<p>Manual transmission.... 6-25</p>
<p>Turn-signal indication lamps....5-12</p>
<p>Turn-signal lever.... 5-19</p>
<p>Tyre repair kit.... 8-06</p>
<p>Tyres....10-09</p>
<p>How to change a tyre.... 8-13</p>
<p>Inflation pressures....10-10</p>
<p>Rotation.... 10-11</p>
<p>Size (tyre and wheel)....11-08</p>
<p>Snow traction device (Tyre chains)....10-12</p>
<p>Snow tyres....10-12</p>
<p>Spare wheel information.... 8-13</p>
<p>Tyre repair kit....8-06</p>
<p>Tyre rotation.... 10-11</p>
<p>Wheel condition.... 10-10</p>
<h1 id="u">U</h1>
<p>USB input terminal....7-67</p>
<h1 id="v">V</h1>
<p>Vanity mirror.... 7-70</p>
<p>Vehicle care precautions....9-02</p>
<p>Vehicle dimensions....11-04</p>
<p>Vehicle identification number.... 11-02</p>
<p>Vehicle information code plate....11-02</p>
<p>Vehicle labeling.... 11-02</p>
<p>Vehicle performance....11-05</p>
<p>Vehicle weight.... 11-05</p>
<p>Ventilators....7-02</p>
<h1 id="w">W</h1>
<p>Washer</p>
<p>Fluid.... 10-07,11-10</p>
<p>Switch.... 5-21,5-25</p>
<p>Washing....9-03</p>
<p>Waxing....9-04</p>
<p>Weight....11-05</p>
<p>Wheel</p>
<p>Condition....10-10</p>
<p>Covers....8-18</p>
<p>Specification....11-08</p>
<p>Wiper</p>
<h1 id="12-4-alphabetical-index">12-4 Alphabetical index</h1>
<p>OA0X19E2</p>
<p>Rear window.... 5-25</p>
<p>Windscreen....5-21</p>
<p>Wiper blades....10-13</p>
<h1 id="a-generic-information">A) Generic information:</h1>
<h1 id="manufacturer-postal-address">Manufacturer Postal Address</h1>
<p>OMRON Automotive Electronics Co. Ltd.</p>
<p>6368 Nenjozaka, Okusa, Komaki, Aichi 485-0802 JAPAN</p>
<p>B) Language Text: </p>
<table><tr><td colspan="2">01_RED_BG_Bulgarian</td></tr><tr><td>ОПРОСТЕНА ЕСДЕКЛАРАЦИЯ ЗАСЪОТВЕТСТВИЕ</td><td>С настоящия документ OMRON Automotive Electronics Co. Ltd., декларира, чеУ166E, G8C-930M, G8C-931M, G8C-932M, G8C-937M, G8C-938M, GHR-M004,GGM-M006 съответстват с Директива 2014/53/EC. За подробности посететеспедния адрес: http://www.mitsubishi-motors.com/en/red-doc/</td></tr><tr><td></td><td>Честотни ленти, на които работи радиооборудването:J166E, GHR-M004 : 433.92MHzG8C-930M, G8C-932M, G8C-937M, GGM-M006 : 125kHz</td></tr><tr><td></td><td>Максималната радиочестотна енергия, предавана по честотната лента(честотните ленти) на която/които работи радиооборудването:J166E, GHR-M004 : 11μWG8C-930M, G8C-932M, G8C-937M : 81dBμV/m [@3m]GGM-M006 : 68dBμV/m [@10m]</td></tr><tr><td></td><td>ВНИМАНИЕРиск от експлозия, ако батерията е сменена с неправилния вид.Изхвърлете използваните батерии спорединструкциите.</td></tr><tr><td colspan="2">02_RED_ES_Spanish</td></tr><tr><td>DECLARACIÓNUE DECONFORMIDADSIMPLIFICADA</td><td>Por la presente, OMRON Automotive Electronics Co. Ltd., declara que J166E,G8C-930M, G8C-931M, G8C-932M, G8C-937M, G8C-938M, GHR-M004,GGM-M006 cumple con la Directiva 2014/53/UE. Para más información, acceda a lasiguiente URL: http://www.mitsubishi-motors.com/en/red-doc/</td></tr><tr><td></td><td>Banda(s) de frecuencia en que opera el equipo radioeléctrico:J166E, GHR-M004 : 433.92MHzG8C-930M, G8C-932M, G8C-937M, GGM-M006 : 125kHz</td></tr><tr><td></td><td>Máxima potencia radioeléctrica transmitida en la(s) banda(s) de frecuencia en lasque opera el equipo radioeléctrico:J166E, GHR-M004 : 11μWG8C-930M, G8C-932M, G8C-937M : 81dBμV/m [@3m]</td></tr></table>
<table><tr><td></td><td>GGM-M006 : 68dBμV/m [@10m]</td></tr><tr><td></td><td>ADVERTENCIAExiste riesgo de explosión si sustituyela batería por un modelo inadecuado.Deshágase de las baterías usadas siguiendo las instrucciones.</td></tr><tr><td colspan="2">03_RED_CS_Czech</td></tr><tr><td>ZJEDNODUŠENÉEU PROHLÁŠENÍO SHODĚ</td><td>Společnost OMRON Automotive Electronics Co. Ltd. tímto prohlašuje, že J166E,G8C-930M, G8C-931M, G8C-932M, G8C-937M, G8C-938M, GHR-M004,GGM-M006 dodržuje Nařízení 2014/53/EU. Podrobné informace naleznete na následující URL: http://www.mitsubishi-motors.com/en/red-doc/</td></tr><tr><td></td><td>Frekvenční pásmo (pásma), ve kterých rádiové zařízení funguje:J166E, GHR-M004 : 433.92MHzG8C-930M, G8C-932M, G8C-937M, GGM-M006 : 125kHz</td></tr><tr><td></td><td>Maximální radiofrekvenční energie, přenášené v rámci frekvenčních pásem, ve kterých rádiové zařízení funguje:J166E, GHR-M004 : 11μWG8C-930M, G8C-932M, G8C-937M : 81dBμV/m [@3m]GGM-M006 : 68dBμV/m [@10m]</td></tr><tr><td></td><td>UPOZORNĚNÍNebezpečí výbuchu, pokud je baterie nahrazena nesprávným typem.Použité baterie zlikvidujte v souladu s pokyny.</td></tr><tr><td colspan="2">04_RED_DA_Danish</td></tr><tr><td>FORENKLETEU-OVERENSSTEMMEL SESERKLÆRING</td><td>OMRON Automotive Electronics Co. Ltd. erklærer herved, at J166E, G8C-930M,G8C-931M, G8C-932M, G8C-937M, G8C-938M, GHR-M004, GGM-M006 er i overensstemmelse med Direktiv 2014/53/EU. For detaljer, bedes du adgang til følgende webadresse: http://www.mitsubishi-motors.com/en/red-doc/</td></tr><tr><td></td><td>Frekvensbåndet (er), hvor radiostyret driver:J166E, GHR-M004 : 433.92MHzG8C-930M, G8C-932M, G8C-937M, GGM-M006 : 125kHz</td></tr><tr><td></td><td>Maksimal radiofrekvence effekt transmitteret i frekvensbåndet (er), hvor radiostyret driver:J166E, GHR-M004 : 11μWG8C-930M, G8C-932M, G8C-937M : 81dBμV/m [@3m]GGM-M006 : 68dBμV/m [@10m]</td></tr><tr><td></td><td>FORSIGTIGHEDRisiko for eksplosion hvis batteriet udskiftes med et af forkert type.Bortskaf brugte batterier i henhold til instruktionerne.</td></tr><tr><td colspan="2">05_RED_DE_German</td></tr><tr><td>VEREINFACHTEEU-KONFORMITÄTSERKLÄRUNG</td><td>Hiermit erklärt OMRON Automotive Electronics Co. Ltd., dass J166E, G8C-930M,G8C-931M, G8C-932M, G8C-937M, G8C-938M, GHR-M004, GGM-M006 inÜbereinstimmung mit der Richtlinie 2014/53/EU steht. Für Einzelheiten greifen Sie auf folgende URL zu: http://www.mitsubishi-motors.com/en/red-doc/</td></tr><tr><td></td><td>Frequenzband/Frequenzbänder, in dem das Funkgerät betrieben wird:J166E, GHR-M004 : 433.92MHzG8C-930M, G8C-932M, G8C-937M, GGM-M006 : 125kHz</td></tr><tr><td></td><td>Maximal übertragene Hochfrequenzleistung im Frequenzband/Frequenzbänder, in dem das Funkgerät betrieben wird:J166E, GHR-M004 : 11μWG8C-930M, G8C-932M, G8C-937M : 81dBμV/m [@3m]GGM-M006 : 68dBμV/m [@10m]</td></tr><tr><td></td><td>VORSICHTExplosionsgetahr, wenn die Batterie durch einen falschen Typ ersetzt wird.Entsorgen Sie die gebrauchten Batterien gemäß den Anweisungen.</td></tr><tr><td colspan="2">06_RED_ET_Estonian</td></tr><tr><td>LIHTSUSTATUDELIVASTAVUSDEKLARATSIOON</td><td>Käesolevaga teatab OMRON Automotive Electronics Co. Ltd., et J166E, G8C-930M,G8C-931M, G8C-932M, G8C-937M, G8C-938M, GHR-M004, GGM-M006 onkooskõlas Direktiiviga 2014/53/EL. Üksikasjade nägemiseks külastagevõrguaadressi: http://www.mitsubishi-motors.com/en/red-doc/</td></tr><tr><td></td><td>Sagedusala(d), milles raadioseade töötab:J166E, GHR-M004 : 433.92MHzG8C-930M, G8C-932M, G8C-937M, GGM-M006 : 125kHz</td></tr><tr><td></td><td>Maksimaalne saatevõimsus/võimsustihedus sagedusala(de)s, milles raadioseadetöötab:J166E, GHR-M004 : 11μWG8C-930M, G8C-932M, G8C-937M : 81dBμV/m [@3m]GGM-M006 : 68dBμV/m [@10m]</td></tr><tr><td></td><td>HOIATUSPlahvatuseoht, kui patarei asendatakse valet tüüpi patareiga.Kõrvaldage kasutatud patareid vastavalt juhendile.</td></tr><tr><td colspan="2">07_RED_EL_Greek</td></tr><tr><td>ΑΠΛΟΥΣΤΕΥΜΕΝΗ ΔΗΛΩΣΗΣΥΜΜΟΡΦΩΣΗΣ</td><td>Με το παρόν, η OMRON Automotive Electronics Co. Ltd., δηλώνει ότι τα J166E,G8C-930M, G8C-931M, G8C-932M, G8C-937M, G8C-938M, GHR-M004,GGM-M006 συμμορφώνονται με την Οδηγία 2014/53/EE. Για λεπτομέρειες,</td></tr><tr><td>EE</td><td>επισκεφτείτε την εξής ιστοσελίδα: http://www.mitsubishi-motors.com/en/red-doc/</td></tr><tr><td></td><td>Ζώνες συχνοτήτων στις οποίες λειτουργεί ο ραδιοεξοπλισμός:J166E, GHR-M004 : 433.92MHzG8C-930M, G8C-932M, G8C-937M, GGM-M006 : 125kHz</td></tr><tr><td></td><td>Μέγιστη εκτεμπόμενη ισχύς ραδιοσυχνοτήτων στις ζώνες συχνοτήτων στις οποίες λειτουργεί ο ραδιοεξοπλισμόςJ166E, GHR-M004 : 11μWG8C-930M, G8C-932M, G8C-937M : 81dBμV/m [@3m]GGM-M006 : 68dBμV/m [@10m]</td></tr><tr><td></td><td>ΠΡΟΣΟΧΗΚίνδυνος έκρηδης σε περίπτωση αντικατάστασης της μπαταρίας με άλλη εσφαλμένου τύπου.Απορρίψτε τις άδειες μπαταρίες σύμφωνα με τις οδηγίες</td></tr><tr><td colspan="2">08_RED_EN_English</td></tr><tr><td>SIMPLIFIED EU DECLARATION OF CONFORMITY</td><td>Hereby, OMRON Automotive Electronics Co. Ltd., declares that J166E, G8C-930M, G8C-931M, G8C-932M, G8C-937M, G8C-938M, GHR-M004, GGM-M006 are in compliance with Directive 2014/53/EU. For details, please access the following URL:http://www.mitsubishi-motors.com/en/red-doc/</td></tr><tr><td></td><td>Frequency band(s) in which the radio equipment operates:J166E, GHR-M004 : 433.92MHzG8C-930M, G8C-932M, G8C-937M, GGM-M006 : 125kHz</td></tr><tr><td></td><td>Maximum radio-frequency power transmitted in the frequency band(s) in which the radio equipment operates:J166E, GHR-M004 : 11μWG8C-930M, G8C-932M, G8C-937M : 81dBμV/m [@3m]GGM-M006 : 68dBμV/m [@10m]</td></tr><tr><td></td><td>CAUTIONRisk of explosion if battery is replaced by an incorrect type.Dispose of used batteries according to the instructions.</td></tr><tr><td colspan="2">09_RED_FR_French</td></tr><tr><td>DECLARATION UE DE CONFORMITE SIMPLIFIEE</td><td>Par le présent document OMRON Automotive Electronics Co. Ltd., déclare que J166E, G8C-930M, G8C-931M, G8C-932M, G8C-937M, G8C-938M, GHR-M004, GGM-M006 sont conformes à la Directive 2014/53/UE. Pour plus d'informations visitez la page suivante: http://www.mitsubishi-motors.com/en/red-doc/</td></tr><tr><td></td><td>Bandes de fréquence dans lesquelles fonctionne l'appareil à radiofréquence:J166E, GHR-M004 : 433.92MHz</td></tr><tr><td></td><td>G8C-930M, G8C-932M, G8C-937M, GGM-M006 : 125kHz</td></tr><tr><td></td><td>Puissance radiofréquence maximale transmise dans la (les) bande(s) de fréquencedans laquelle/lesquelles l'appareil à radiofréquence fonctionne:J166E, GHR-M004 : 11μWG8C-930M, G8C-932M, G8C-937M : 81dBμV/m [@3m]GGM-M006 : 68dBμV/m [@10m]</td></tr><tr><td></td><td>ATTENTIONRisque d'explosion si la pile est remplacée par un type incorrect de pile.Jetez les piles usagées conformément aux instructions.</td></tr><tr><td colspan="2">10_RED_IS_Icelandic</td></tr><tr><td>EINFÖLDUDESB-SAMRÆMISYFIRLÝSING</td><td>Hér, OMRON Automotive Electronics Co. Ltd., segir að J166E, G8C-930M,G8C-931M, G8C-932M, G8C-937M, G8C-938M, GHR-M004, GGM-M006 peir eru ísamræmi við Úrskurði 2014/53/ESB. Fyrir frekari upplýsingar, vinsamlegast aðgangað eftirfarandi URL: http://www.mitsubishi-motors.com/en/red-doc/</td></tr><tr><td></td><td>Tíðnisviði (s) sem práðlausan búnað undirrita burt:J166E, GHR-M004 : 433.92MHzG8C-930M, G8C-932M, G8C-937M, GGM-M006 : 125kHz</td></tr><tr><td></td><td>Mámarks útvarp-tíðni máttur miðlað á tíðnisviðinu (s) sem práðlausan búnaðundirrita burt:J166E, GHR-M004 : 11μWG8C-930M, G8C-932M, G8C-937M : 81dBμV/m [@3m]GGM-M006 : 68dBμV/m [@10m]</td></tr><tr><td></td><td>VARÚĐbað er hætta á sprengingu ef rafhlåðan er skipt með rangri tegund.Notuðu rafhlöður eru fargað samkvæmt leiðbeiningum.</td></tr><tr><td colspan="2">11_RED_HR_Croatian</td></tr><tr><td>POJEDNOSTAVLJENA EU IZJAVA OSUKLADNOSTI</td><td>Ovim putem tvrtka OMRON Automotive Electronics Co. Ltd. objavljuje da je J166E,G8C-930M, G8C-931M, G8C-932M, G8C-937M, G8C-938M, GHR-M004,GGM-M006 sukladna s Direktivom 2014/53/EU. Za pojedinosti posjetite sljedečiURL: http://www.mitsubishi-motors.com/en/red-doc/</td></tr><tr><td></td><td>Frekvencijski pojas (pojasevi) u kojima radi radio oprema:J166E, GHR-M004 : 433.92MHzG8C-930M, G8C-932M, G8C-937M, GGM-M006 : 125kHz</td></tr><tr><td></td><td>Maksimalna snaga radio frekvencije prenesena u frekvendijske pojaseve u kojimaradi radio oprema:J166E, GHR-M004 : 11μWG8C-930M, G8C-932M, G8C-937M : 81dBμV/m [@3m]GGM-M006 : 68dBμV/m [@10m]</td></tr><tr><td></td><td>OPREZOpasnost od eksplozije baterije ako se zamijeni s neodgovarajućim tipom.Odbacite baterije u skladu s uputama.</td></tr><tr><td colspan="2">12_RED_IT_Italian</td></tr><tr><td>DICHIARAZIONEDI CONFORMITÀUESEMLIFICATA</td><td>Con la presente, OMRON Automotive Electronics Co. Ltd., dichiara che J166E,G8C-930M, G8C-931M, G8C-932M, G8C-937M, G8C-938M, GHR-M004,GGM-M006 sono conformi alla Direttiva 2014/53/UE. Per ulteriori dettagli, accedere al seguente URL: http://www.mitsubishi-motors.com/en/red-doc/</td></tr><tr><td></td><td>Banda/e di frequenza su cui operano le apparecchiature radio:J166E, GHR-M004 : 433.92MHzG8C-930M, G8C-932M, G8C-937M, GGM-M006 : 125kHz</td></tr><tr><td></td><td>Massima alimentazione a radiofrequenza trasmessa sulla/e banda/e di frequenza su cui operano le apparecchiature radio:J166E, GHR-M004 : 11μWG8C-930M, G8C-932M, G8C-937M : 81dBμV/m [@3m]GGM-M006 : 68dBμV/m [@10m]</td></tr><tr><td></td><td>ATTENZIONEL'utilizzo di una batteria di diverso tipo può provocare esplosioni.Smaltire le batterie usate in conformità con le istruzioni.</td></tr><tr><td colspan="2">13_RED_LV_Latvian</td></tr><tr><td>VIENKÄRŠOTAES ATBIL STĪBASDEKLARĀCIJA</td><td>Ar šo uznēmums OMRON Automotive Electronics Co. Ltd. apstiprina, ka J166E,G8C-930M, G8C-931M, G8C-932M, G8C-937M, G8C-938M, GHR-M004,GGM-M006 atbilst Direktīvas 2014/53/ES prasībām. Detalizētu informāciju, lūdzu, skatiet šajā vietrādī URL: http://www.mitsubishi-mctors.com/en/red-doc/</td></tr><tr><td></td><td>Frekvences josla(-s), kurās darbojas radio aprīkojums:J166E, GHR-M004 : 433.92MHzG8C-930M, G8C-932M, G8C-937M, GGM-M006 : 125kHz</td></tr><tr><td></td><td>Radio aprīkojuma darbības frekvenčujoslā(-s) raidītā maksimālā radiofrekvences jauda:J166E, GHR-M004 : 11μWG8C-930M, G8C-932M, G8C-937M : 81dBμV/m [@3m]GGM-M006 : 68dBμV/m [@10m]</td></tr><tr><td></td><td>BRĪDINĀJUMSJa akumulators tiek aizvietots ar nepareiza veida akumulatoru, pastāvssprādzienbīstamības risks. Izlietotos akumulatorus utilizējiet atbilstoši instrukcijām.</td></tr><tr><td colspan="2">14_RED_LT_Lithuanian</td></tr><tr><td>SUPAPRASTINTA ES ATITIKTIES DEKLARACIJA</td><td>Šiuo dokumentu OMRON Automotive Electronics Co. Ltd. pareiškia, kad J166E, G8C-930M, G8C-931M, G8C-932M, G8C-937M, G8C-938M, GHR-M004, GGM-M006 atitinka Direktyvą 2014/53/ES. Norėdami išsamesnės informacijos, apsilankykite šiuo URL adresu: http://www.mitsubishi-motors.com/en/red-doc/</td></tr><tr><td></td><td>Dažnio juosta (-os), kurioje veikia radijo jranga: J166E, GHR-M004 : 433.92MHz G8C-930M, G8C-932M, G8C-937M, GGM-M006 : 125kHz</td></tr><tr><td></td><td>Didžiausia radijo dažnio galia, perduodama dažnio juosta (-os), kurioje veikia radijo jranga: J166E, GHR-M004 : 11μW G8C-930M, G8C-932M, G8C-937M : 81dBμV/m [@3m] GGM-M006 : 68dBμV/m [@10m]</td></tr><tr><td></td><td>|SPĖJIMAS Pakeitus bateriją netinkamo tipo baterija, kyla sprogimo pavojus. Panaudotas baterijas šalinkite pagal instrukcijas.</td></tr><tr><td colspan="2">15_RED_HU_Hungarian</td></tr><tr><td>EGYSZERŪSĪTET T EU-MEGFELELŌS ĐGI NYILATKOZAT</td><td>Alulírott, OMRON Automotive Electronics Co. Ltd., kijelenti, hogy J166E, G8C-930M, G8C-931M, G8C-932M, G8C-937M, G8C-938M, GHR-M004, GGM-M006 megfelel a 2014/53/EU Irányelvnek. A részletekért nyissa meg a következő URL hivatkozást: http://www.mitsubishi-motors.com/en/red-doc/</td></tr><tr><td></td><td>A rádióberendezés mūkōdéséhez szūkséges frekvendasáv(ok): J166E, GHR-M004 : 433.92MHz G8C-930M, G8C-932M, G8C-937M, GGM-M006 : 125kHz</td></tr><tr><td></td><td>A rádióberendezés mūkōdéséhez szūkséges frekvendasáv(ok) maximális rádiófrekvencías teljesítménye: J166E, GHR-M004 : 11μW G8C-930M, G8C-932M, G8C-937M : 81dBμV/m [@3m] GGM-M006 : 68dBμV/m [@10m]</td></tr><tr><td></td><td>VIGYĀZAT A nem megfelelō típusú csereelem robbásveszélyt okozhat. Az utasítások betartásával ártalmatlanítsa a használt elemeket.</td></tr><tr><td colspan="2">16_RED_MT_Maltese</td></tr><tr><td>DIKJARAZZJONISSIMPLIFIKATATA' KONFORMITÀTAL-UE</td><td>OMRON Automotive Electronics Co. Ltd., tiddikjara li J166E, G8C-930M,G8C-931M, G8C-932M, G8C-937M, G8C-938M, GHR-M004, GGM-M006 huma"konformità mad-Direttiva 2014/53/UE. Għal dettalji, jekk jogħgbok acessa I-URL ligejja: http://www.mitsubishi-motors.com/en/red-doc/</td></tr><tr><td></td><td>Medda(meded) ta' frekwenza li fiha jopera t-tagħmir tar-radju:J166E, GHR-M004 : 433.92MHzG8C-930M, G8C-932M, G8C-937M, GGM-M006 : 125kHz</td></tr><tr><td></td><td>Qawwa massima tal-medda ta' frekwenza tar-radju trażmessa fil-medda(meded)tal-frekwenza li fiha jopera t-tagħmir tar-radju:J166E, GHR-M004 : 11μWG8C-930M, G8C-932M, G8C-937M : 81dBμV/m [@3m]GGM-M006 : 68dBμV/m [@10m]</td></tr><tr><td></td><td>ATTENZJONIHemm ir-riskju ta' splużjoni jekk il-batterija tkun sostitwita bit-tip żbaljat.Armi l-batteriji użati skont l-istruzzjonijiet.</td></tr><tr><td colspan="2">17_RED_NL_Dutch</td></tr><tr><td>VEREENVOUDIGDEEU-CONFORMITEITSVERKLARING</td><td>Hiermee verklaart OMRON Automotive Electronics Co. Ltd., dat J166E, G8C-930M,G8C-931M, G8C-932M, G8C-937M, G8C-938M, GHR-M004, GGM-M006 inovereenstemming zijn met Richtlijn 2014/53/EU. Klik voor meer informatie op deonderstaande link: http://www.mitsubishi-motors.com/en/red-doc/</td></tr><tr><td></td><td>Frequentieband(en) waarop de radioapparatuur werkt:J166E, GHR-M004 : 433.92MHzG8C-930M, G8C-932M, G8C-937M, GGM-M006 : 125kHz</td></tr><tr><td></td><td>Maximum radiofrequentie-vermogen doorgegeven in de frequentieband(en) waaropde radioapparatuur werkt:J166E, GHR-M004 : 11μWG8C-930M, G8C-932M, G8C-937M : 81dBμV/m [@3m]GGM-M006 : 68dBμV/m [@10m]</td></tr><tr><td></td><td>LET OPRisico op explosie als batterij door een onjuist type wordt vervangen.Gooi gebruikte batterijen volgens de instructie weg.</td></tr><tr><td colspan="2">18_RED_PL_Polish</td></tr><tr><td>UPROSZCZONADEKLARACJAZGODNOŚCI UE</td><td>OMRON Automotive Electronics Co. Ltd. niniejszym oświadcza, że produktyJ166E, G8C-930M, G8C-931M, G8C-932M, G8C-937M, G8C-938M, GHR-M004,GGM-M006 spełniają wymogi Dyrektywy 2014/53/UE. Szczegóowe informacje sądostępne pod następującym adresem URL: http://www.mitsubishi-motors.com/en/red-doc/</td></tr><tr><td></td><td>Pasmo(-a) częstotliwości obsługiwane przez sprzęt radiowy: J166E, GHR-M004 : 433.92MHz G8C-930M, G8C-932M, G8C-937M, GGM-M006 : 125kHz</td></tr><tr><td></td><td>Maksymalna przesyłana moc o częstotliwości radiowej w paśmie (pasmach) częstotliwości obsługiwanych przez sprzęt radiowy: J166E, GHR-M004 : 11μW G8C-930M, G8C-932M, G8C-937M : 81dBμV/m [@3m] GGM-M006 : 68dBμV/m [@10m]</td></tr><tr><td></td><td>UWAGA Ryzyko wybuchu w przypadku wymiary baterii na nieprawidłowy rodzaj. Zużyte baterie należy zutylizować zgodnie z instrukcjami.</td></tr><tr><td colspan="2">19_RED_PT_Portuguese</td></tr><tr><td>DECLARAÇÃO UE DE CONFORMIDADE SIMPLIFICADA</td><td>Por isto, OMRON Automotive Electronics Co. Ltd., dedara que J166E, G8C-930M, G8C-931M, G8C-932M, G8C-937M, G8C-938M, GHR-M004, GGM-M006 estão em conformidade com a Directiva 2014/53/UE. Para mais detalhes, favor aceder acessar ao seguinte URL: http://www.mitsubishi-motors.com/en/red-doc/</td></tr><tr><td></td><td>Banda (s) de frequência em que o equipamento de rádio opera: J166E, GHR-M004 : 433.92MHz G8C-930M, G8C-932M, G8C-937M, GGM-M006 : 125kHz</td></tr><tr><td></td><td>Potência máxima de radiofrequência transmitida na (s) faixa (s) de frequência em que o equipamento de rádio opera: J166E, GHR-M004 : 11μW G8C-930M, G8C-932M, G8C-937M : 81dBμV/m [@3m] GGM-M006 : 68dBμV/m [@10m]</td></tr><tr><td></td><td>CUIDADO Risco de explosão se a bateria for substituída por um tipo incorreto. Descarte as baterias usadas de acordo com as instruções.</td></tr><tr><td colspan="2">20_RED_RO_Romanian</td></tr><tr><td>DECLARAȚIA UE DE CONFORMITATE SIMPLIFICATĂ</td><td>Prin prezenta, OMRON Automotive Electronics Co. Ltd., declară că J166E, G8C-930M, G8C-931M, G8C-932M, G8C-937M, G8C-938M, GHR-M004, GGM-M006 sunt în conformitate cu Directiva 2014/53/UE. Pentru detalii, accesati următorul URL: http://www.mitsubishi-motors.com/en/red-doc/</td></tr><tr><td></td><td>Bandă/benzi de frecventa în care funcționează echipamentul radio: J166E, GHR-M004 : 433.92MHzG8C-930M, G8C-932M, G8C-937M, GGM-M006 : 125kHz</td></tr><tr><td></td><td>Puterea maximă a frecventei radio transmisă în banda/benzile de frecvență în care funcționează echipamentul radio:J166E, GHR-M004 : 11μWG8C-930M, G8C-932M, G8C-937M : 81dBμV/m [@3m]GGM-M006 : 68dBμV/m [@10m]</td></tr><tr><td></td><td>ATENȚIERisc de explozie dacă bateria este înlocuită cu un tip incorect.Eliminați bateriile uzate conform instrucțiunilor.</td></tr><tr><td colspan="2">21_RED_SK_Slovak</td></tr><tr><td>ZJEDNODUŠENĚ EÚ VYHLÁSENIE O ZHODE</td><td>Spoločnosť OMRON Automotive Electronics Co. Ltd. týmto vyhlasuje, že J166E, G8C-930M, G8C-931M, G8C-932M, G8C-937M, G8C-938M, GHR-M004, GGM-M006 dodržiava Smernicu 2014/53/EU. Podrobné informácie nájdete na nasledujúcej URL: http://www.mitsubishi-motors.ccm/en/red-doc/</td></tr><tr><td></td><td>Frekvenčné pásma, v ktorých toto rádiové zariadenie funguje:J166E, GHR-M004 : 433.92MHzG8C-930M, G8C-932M, G8C-937M, GGM-M006 : 125kHz</td></tr><tr><td></td><td>Maximálna ráciofrekvenčná energia prenăšaná v týchto rádiových pásmach:J166E, GHR-M004 : 11μWG8C-930M, G8C-932M, G8C-937M : 81dBμV/m [@3m]GGM-M006 : 68dBμV/m [@10m]</td></tr><tr><td></td><td>UPOZORNENIENebezpečenstvo výbuchu, ak je batéria nahradená nesprávnym typom.Použité batérie zlikvidujte v súlade s pokynmi.</td></tr><tr><td colspan="2">22_RED_SL_Slovenian</td></tr><tr><td>POENOSTAVLJEN A IZJAVA EU O SKLADNOSTI</td><td>S tem podjetje OMRON Automotive Electronics Co. Ltd., izjavlja, da so J166E, G8C-930M, G8C-931M, G8C-932M, G8C-937M, G8C-938M, GHR-M004, GGM-M006 v skladu z Direktivo 2014/53/EU. Za podrobnosti odprite naslednji URL: http://www.mitsubishi-motors.com/en/red-doc/</td></tr><tr><td></td><td>Frekvenčni pas(ovi) v katerih deluje radijska oprema:J166E, GHR-M004 : 433.92MHzG8C-930M, G8C-932M, G8C-937M, GGM-M006 : 125kHz</td></tr><tr><td></td><td>Največja radio-frekvenčna moč oddajana v frekvenčnem(ih) pasu(ovih), v katerem radijska oprema deluje:J166E, GHR-M004 : 11μWG8C-930M, G8C-932M, G8C-937M : 81dBμV/m [@3m]GGM-M006 : 68dBμV/m [@10m]</td></tr><tr><td></td><td>POZORTveganje eksplozije v primeru, da baterijo zamenjale z napačnim tipom. Izpraznjene baterije zavrzite v skladu z navodili.</td></tr><tr><td colspan="2">23_RED_FI_Finnish</td></tr><tr><td>YKSINKERTAISTETTUEU-VAATIMUSTENMUKAISUUSVAKUUTUS</td><td>OMRON Automotive Electronics Co. Ltd., ilmoittaa täten, että J166E, G8C-930M, G8C-931M, G8C-932M, G8C-937M, G8C-938M, GHR-M004, GGM-M006 noudattaa Direktiivin 2014/53/EU vaatimuksia. Saadaksesi lisätietoja, käytä seuraavaa URL-osoitetta: http://www.mitsubishi-motors.com/en/red-doc/</td></tr><tr><td></td><td>Taajuusalue(et), joilla radiolaite toimii:J166E, GHR-M004 : 433.92MHzG8C-930M, G8C-932M, G8C-937M, GGM-M006 : 125kHz</td></tr><tr><td></td><td>Suurin radiotaajuudella lähetettävä teho taajuusalueella/-alueilla, joilla radiolaite toimi:J166E, GHR-M004 : 11μWG8C-930M, G8C-932M, G8C-937M : 81dBμV/m [@3m]GGM-M006 : 68dBμV/m [@10m]</td></tr><tr><td></td><td>HUOMIORäjähdysvaara, jos paristo valhdetaan väärään tyyppiin.Noudata ohjeila käytettyjen paristojen hävittämisessä.</td></tr><tr><td colspan="2">24_RED_SV_Swedish</td></tr><tr><td>FÖRENKLADEU-FÖRSÄKRANOMÖVERENSSTÄMMELSE</td><td>OMRON Automotive Electronics Co. Ltd. förklarar jag härmed att J166E, G8C-930M, G8C-931M, G8C-932M, G8C-937M, G8C-938M, GHR-M004, GGM-M006 är i enlighet med Direktiv 2014/53/EU. För detaljer vänligen använd följande webbläsare: http://www.mitsubishi-motors.com/en/red-doc/</td></tr><tr><td></td><td>Frekvensband (er) i hvilken radio utrustning en arbetar:J166E, GHR-M004 : 433.92MHzG8C-930M, G8C-932M, G8C-937M, GGM-M006 : 125kHz</td></tr><tr><td></td><td>Maximala radiofrekvens makt överförs i frekvens mottagningsläger som driver radioutrustning:J166E, GHR-M004 : 11μWG8C-930M, G8C-932M, G8C-937M : 81dBμV/m [@3m]GGM-M006 : 68dBμV/m [@10m]</td></tr><tr><td></td><td>FÖRSIKTIGHET</td></tr><tr><td></td><td>Risk för explosion om batteriet ersätts av fel batterityp.Kassera använda batterier enligt instruktionema.</td></tr><tr><td colspan="2">25_RED_NO_Norwegian</td></tr><tr><td>FORENKLET EU KONFORMITETSE RKLÆRING</td><td>Herved OMRON Automotive Electronics Co. Ltd., erklærer at J166E, G8C-930M, G8C-931M, G8C-932M, G8C-937M, G8C-938M, GHR-M004, GGM-M006 samsvar mcd Resolusjon 2014/53/EU. For ytterligcrc informasjon, vcnningst sjckk følgondc URL: http://www.mitsubishi-motors.com/en/red-doc/</td></tr><tr><td></td><td>Frekvens bänd (s) der radioutstyret fungerer:J166E, GHR-M004 : 433.92MHzG8C-930M, G8C-932M, G8C-937M, GGM-M006 : 125kHz</td></tr><tr><td></td><td>Maksimal radiofrekvensen strøm ble sendt i frekvensbänd(s) som radioutstyret fungerer:J166E, GHR-M004 : 11μWG8C-930M, G8C-932M, G8C-937M : 81dBμV/m [@3m]GGM-M006 : 68dBμV/m [@10m]</td></tr><tr><td></td><td>FORSIKTIGDet er fare for eksplosjon hvis batteriet er erstattet med feil type.I henhold til instruksjonene, er batteriene fjemet.</td></tr><tr><td colspan="2">26_RED_TR_Turkish</td></tr><tr><td>AB UYGUNLUK BASITLEŞTIRILMI Ş BEYAN</td><td>OMRON Automotive Electronics Co. Ltd., şirketi J166E, G8C-930M, G8C-931M, G8C-932M, G8C-937M, G8C-938M, GHR-M004, GGM-M006 ürünlerinin2014/53/EU Direktifi ile uyumlu olduğunu beyan eder. Ayrıntılar için lütfen aşağıdakiURL'ye erişin: http://www.mitsubishi-motors.com/en/red-doc/</td></tr><tr><td></td><td>Radyo ekipmanının çalıştığı frekans bantları:J166E, GHR-M004 : 433.92MHzG8C-930M, G8C-932M, G8C-937M, GGM-M006 : 125kHz</td></tr><tr><td></td><td>Radyo ekipmanının çalıştığı frekans bantlarında iletilen maksimum radyofrekans gücü:J166E, GHR-M004 : 11μWG8C-930M, G8C-932M, G8C-937M : 81dBμV/m [@3m]GGM-M006 : 68dBμV/m [@10m]</td></tr><tr><td></td><td>DİKKATPil, yanlış tip pille değiştirilirse, patlama riski vardır.Kullanılmış pilleri talimatlara göre imha edin.</td></tr><tr><td colspan="2">27_RED_MK_Macedonian</td></tr><tr><td>ПОЕДНОСТАВЕН</td><td>Со оттука, OMRON Automotive Electronics Co. Ltd. изjavува дека J166E,</td></tr><tr><td>А ДЕКЛАРАЦИЈАЗА СОГЛАСНОСТНА ЕУ</td><td>G8C-930M, G8C-931M, G8C-932M, G8C-937M, G8C-938M, GHR-M004,GGM-M006 е во согласност со Директивата 2014/53/ EU. За подеталниинформации, отворете ја следнава УРЛ:http://www.mitsubishi-motors.com/en/red-doc/</td></tr><tr><td></td><td>Радио опремата работи на следниот радиофреквенциоки спектар:J166E, GHR-M004 : 433.92MHzG8C-930M, G8C-932M, G8C-937M, GGM-M006 : 125kHz</td></tr><tr><td></td><td>Радио опремата функционира на следната максимальна моїност на радиофреквенции емитувана во радиофреквенцискют спектар:J166E, GHR-M004 : 11μWG8C-930M, G8C-932M, G8C-937M : 81dBμV/m [@3m]GGM-M006 : 68dBμV/m [@10m]</td></tr><tr><td></td><td>ВНИМАНИЕОпасност од експлозија ако батеријата се замени со неправилен тип.Фрлете пи употребените батерии во согласност со упатствата.</td></tr><tr><td colspan="2">28_RED_SQ_Albanian</td></tr><tr><td>DEKLARATĚTHJESHTUAR SĚKONFORMITETITTĚ BE-SĚ</td><td>Kětu, OMRON Automotive Electronics Co. Ltd., dedaron se J166E, G8C-930M,G8C-931M, G8C-932M, G8C-937M, G8C-938M, GHR-M004, GGM-M006 janě něpěrputhje me Direktivěn 2014/53/EU. Pěr hollěsi, ju lutem hapni URL-ně eměposhtme: http://www.mitsubishi-motors.com/en/red-doc/</td></tr><tr><td></td><td>Banda(t) e frekuencěs me tě cilat punojně pajisjet radio:J166E, GHR-M004 : 433.92MHzG8C-930M, G8C-932M, G8C-937M, GGM-M006 : 125kHz</td></tr><tr><td></td><td>Fuqia maksimale radio-frekuencě e transmetuar ně banděn(at) e frekuencave rě těcilěn punojně pajisjet radio:J166E, GHR-M004 : 11μWG8C-930M, G8C-932M, G8C-937M : 81dBμV/m [@3m]GGM-M006 : 68dBμV/m [@10m]</td></tr><tr><td></td><td>KUJDESRrezik shpěrthimi ně qoftě se bateria èshtě zěvencësuar nga njě lloj i gabuar.Shkatěrro bateritě e pěrdorura sipas udhězimeve.</td></tr><tr><td colspan="2">29_RED_XX_Montenegrin</td></tr><tr><td>POJEDNOSTAVLJENA EU IZJAVA OUSAGLAŠENOSTI</td><td>Ovim putem OMRON Automotive Electronics Co. Ltd., izjavljuje da su J166E,G8C-930M, G8C-931M, G8C-932M, G8C-937M, G8C-938M, GHR-M004,GGM-M006 u skladu sa Odredbom 2014/53/EU. Za više detalja, pristupite sjedećojURL adrcsi: http://www.mitsubishi-motors.com/crv/red-doc/</td></tr></table>
<table><tr><td></td><td>Frekventni opseg u kojem funkdoniše radio oprema:J166E, GHR-M004 : 433.92MHzG8C-930M, G8C-932M, G8C-937M, GGM-M006 : 125kHz</td><td></td></tr><tr><td></td><td>Maksimalna prenesena snaga radio frekvencije u frekventnom opsegu u kojemfunkcioniše radio oprema :J166E, GHR-M004 : 11μWG8C-930M, G8C-932M, G8C-937M : 81dBμV/m [@3m]GGM-M006 : 68dBμV/m [@10m]</td><td></td></tr><tr><td></td><td>OPREZPostoji rizik od eksplozije ako se baterija zamijeni pogrešnom vrstom.Odložite iskorišćene baterije u skladu sa uputstvima.</td><td></td></tr><tr><td colspan="2">30_RED_KA_Georgian</td><td></td></tr><tr><td>EU </td><td colspan="2"> OMRON Automotive Electronics Co. Ltd. , , 166E, G8C-930M, G8C-931M, G8C-932M, G8C-937M, G8C-938M, GHR-M004,GGM-M006 ŝn̂ou 2014/53/EU . ) </td></tr><tr><td colspan="2"> EU G8C-930M, G8C-931M, G8C-932M, G8C-937M, G8C-938M, GHR-M004, GGM-M006 ŝn̂ou 2014/53/EU q̂n̂ou\( g8C-930M, G8C-931M, G8C-932M, G8C-937M, G8C-938M, GHR-M004, GGM-M006 ŝn̂ou 2014/53/EU q̂n̂ou\( g8C-930M, G8C-921M, G8C-932M, G8C-937M, G8C-938M, GHR-M004, GGM-M006 ŝn̂ou 2014/53/EU q̂n̂ou\( g8C-930M, G8C-921M, G8C-932M, G9C-937M, G8C-938M, GHR-M004, GGM-M006 ŝn̂ou 2014/53/EU q̂n̂ou\( g8C-930M, G8C-921M, G8C-932M, G8C-937M, G8C-937M, G8C-938M, GHR-M004, GGM-M006 ŝn̂ou 2014/53/EU q̂n̂ou\( g8C-930M, G8C-921M, G8C-932M, G8C-937M, G8c-937M, G8C-938M, GHR-M004, GGM-M006 ŝn̂ou 2014/53/EU q̂n̂ou\( g8C-930M, G8C-921M, G8C-932M, G8C-937M, G8C-937B, G8C-938M, G8C-938M, G8C-938M, G8C-938M, G8C-938M, G8C-938M, G8C-938M, G8C-938M, G8C-938M, G8C-938M, G8C-938M, G8C-938M, </td><td></td></tr><tr><td colspan="2"> H_166E H_86C-930M, G8C-932M, G8C-937M, GGM-M006 ŝn̂ou 2014/53/EU q̂n̂ou\( g8C-930M, G8C-921M, G8C-932M, G8C-937M, G8C-938M, GHR-M004, GGM-M006 ŝn̂out 2014/53/EU q̂n̂ou\( g8C-930M, G8C-921M, G8C-932M, G8C-937M, G8C-937M, G8C-938M, G8C-938M, G8C-938M, G8C-938M, G8C-938M, G8C-938M, G8C-938M, G8C-938M, G8C-938M, G8C-938M, G8C-938 M, G8C-938M, G8C-938M, G8C-938M, G8C-938M, G8C-938M, G8C-938M, G8C-938M, G8C-938M, G8C-938M, G8C-938M, G8C-938M ,G8C-938M, G8C-938M, G8C-938M, G8C-938M, G8C-938M, G8C-938M, G8C-938M, G8C-938M, G8C-938M, G8C-938M, G8C-938M, G 8C-938M, G8C-938M, G8C-938M, G8C-938M, G8C-938M, G8C-938M, G8C-938M, G8C-938M, G8C-938M, G8C-938M, G8C-938M, G6C-938M, G8C-938M, G8C-938M, G8C-938M, G8C-938M, G8C-938M, G8C-938M, G8C-938M, G8C-938M, G8C-938M, G8C-938M, G8c-938M, G8c-938M, G8c-938M, G8c-938M, G8c-938M, G8c-938M, G8c-938M, G8c-938M, G8c-938M, G8c-938M, G8c-938M, G8c -938M, G8c-938M, G8c-938M, G8c-938M, G8c-938M, G8c-938M, G8c-938M, G8c-938M, G8c-938M, G8c-938M, G8c-938M, G8c- 938M, G8c-938M, G8c-938M, G8c-938M, G8c-938M, G8c-938M, G8c-938M, G8c-938M, G8c-938M, G8c-938M, G8c-938M, G8c-198M, G8c-938M, G8c-938M, G8c-938M, G8c-938M, G8c-938M, G8c-938M, G8c-938M, G8c-938M, G8c-938M, G8c-938M, G8c-936M, G8c-938M, G8c-938M, G8c-938M, G8c-938M, G8c-938M, G8c-938M, G8c-938M, G8c-938M, G8c-938M, G8c-938M, G8c-938N, G8c-938M, G8c-938M, G8c-938M, G8c-938M, G8c-938M, G8c-938M, G8c-938M, G8c-938M, G8c-938M, G8c-938M, G8c-938M ,G8c-938M, G8c-938M, G8c-938M, G8c-938M, G8c-938M, G8c-938M, G8c-938M, G8c-938M, G8c-938M, G8c-938M, G8c-938M, G 8c-938M, G8c-938M, G8c-938M, G8c-938M, G8c-938M, G8c-938M, G8c-938M, G8c-938M, G8c-938M, G8c-938M, G8c-938M, G4c-938M, G4c-938M, G4c-938M, G4c-938M, G4c-938M, G4c-938M, G4c-938M, G4c-938M, G4c-938M, G4c-938M, G4c-938M, G4 c-938M, G4c-938M, G4c-938M, G4c-938M, G4c-938M, G4c-938M, G4c-938M, G4c-938M, G4c-938M, G4c-938M, G4c-938M, G4c -938M, G4c-938M, G4c-938M, G4c-938M, G4c-938M, G4c-938M, G4c-938M, G4c-938M, G4c-938M, G4c-938M, G4c-938M, G4c- 938M, G4c-938M, G4c-938M, G4c-938M, G4c-938M, G4c-938M, G4c-938M, G4c-938M, G4c-938M, G4c-938M, G4c-938M, G4c-198M, G4c-938M, G4c-938M, G4c-938M, G4c-938M, G4c-938M, G4c-938M, G4c-938M, G4c-938M, G4c-938M, G4c-938M, G4c-936M, G4c-938M, G4c-938M, G4c-938M, G4c-938M, G4c-938M, G4c-938M, G4c-938M, G4c-938M, G4c-938M, G4c-938M, G4c-938K, G4c-938M, G4c-938M, G4c-938M, G4c-938M, G4c-938M, G4c-938M, G4c-938M, G4c-938M, G4c-938M, G4c-938M, G4c-938M ,G4c-938M ,G4c-938M ,G4c-938M ,G4c-938M ,G4c-938M ,G4c-938M ,G4c-938M ,G4c-938M ,G4c-938M ,G4c-938M ,G4c-938M ,G7c-938M ,G7c-938M ,G7c-938M ,G7c-938M ,G7c-938M ,G7c-938M ,G7c-938M ,G7c-938M ,G7c-938M ,G7c-938M ,G7c-938M ,G7 c-938M ,G7 c-938M ,G7 c-938M ,G7 c-938M ,G7 c-938M ,G7 c-938M ,G7 c-938M ,G7 c-938M ,G7 c-938M ,G7 c-938M ,G7 c-938M ,G7 c -938M ,G7 c -938M ,G7 c -938M ,G7 c -938M ,G7 c -938M ,G7 c -938M ,G7 c -938M ,G7 c -938M ,G7 c -938M ,G7 c -938M ,G7 c -938M ,G7 c - 938M ,G7 c -938M ,G7 c -938M ,G7 c -938M ,G7 c -938M ,G7 c -938M ,G7 c -938M ,G7 c -938M ,G7 c -938M ,G7 c -938M ,G7 c -938M ,G7 c -198M ,G7 c -938M ,G7 c -938M ,G7 c -938M ,G7 c -938M ,G7 c -938M ,G7 c -938M ,G7 c -938M ,G7 c -938M ,G7 c -938M ,G7 c -938M ,G7 c -936M ,G7 c -938M ,G7 c -938M ,G7 c -938M ,G7 c -938M ,G7 c -938M ,G7 c -938M ,G7 c -938M ,G7 c -938M ,G7 c -938M ,G7 c -938M ,G7 c -938W ,G7 c -938M ,G7 c -938M ,G7 c -938M ,G7 c -938M ,G7 c -938M ,G7 c -938M ,G7 c -938M ,G7 c -938M ,G7 c -938M ,G7 c -938M ,G7 c -938M, G7 c -938M ,G7 c -938M ,G7 c -938M ,G7 c -938M ,G7 c -938M ,G7 c -938M ,G7 c -938M ,G7 c -938M ,G7 c -938M ,G7 c -938M ,G7 c -938M ,G4c -938M ,G4c -938M ,G4c -938M ,G4c -938M ,G4c -938M ,G4c -938M ,G4c -938M ,G4c -938M ,G4c -938M ,G4c -938M ,G4c -938M ,G4c- 938M ,G4c- 938M ,G4c- 938M ,G4c- 938M ,G4c- 938M ,G4c- 938M ,G4c- 938M ,G4c- 938M ,G4c- 938M ,G4c- 938M ,G4c-198M ,G4c- 938M ,G4c- 938M ,G4c- 938M ,G4c- 938M ,G4c- 938M ,G4c- 938M ,G4c- 938M ,G4c- 938M ,G4c- 938M ,G4c- 9% </td><td></td></tr></table>
<p>A) Generic information: <br />
Manufacture Postal Address
VISTEON CORPORATION <br />
One Village Center Drive, Van Buren Township, Michigan USA <br />
B) Language Text: </p>
<table><tr><td colspan="2">01_RED_BG_Bulgarian</td></tr><tr><td>ОПРОСТЕНА ЕСДЕКЛАРАЦИЯЗАСЪОТВЕТСТВИЕ</td><td>С настоящото VISTEON CORPORATION декларира, че този тип радиосъоръжение MDGMY10 е в съответствие с Директива 2014/53/EC.Цялостният текст на ЕС декларацията за съответствие може да се намери на следния интернет адрес:http://www.mitsubishi-motors.co.jp/en/red-doc/</td></tr><tr><td></td><td>радиочестотната лента или ленти, в която или които работи радиосъоръжението:2.402-2.480 GHz</td></tr><tr><td></td><td>максималната радиочестотна мощност, изпъчвана в радиочестотната лентаили ленти, в която или които работи радиосъоръжението.:4 dbm</td></tr><tr><td colspan="2">02_RED_ES_Spanish</td></tr><tr><td>DECLARACIÓNUE DECONFORMIDADSIMPLIFICADA</td><td>Por la presente, VISTEON CORPORATION declara que el tipo de equipo radioeléctrico MDGMY10 es conforme con la Directiva 2014/53/UE. El texto completo de la declaración UE de conformidad está disponible en la direcciónInternet siguiente:http://www.mitsubishi-motors.co.jp/en/red-doc/</td></tr><tr><td></td><td>Banda o bandas de frecuencia en las que opera el equipo radioeléctrico:2.402-2.480 GHz</td></tr><tr><td></td><td>Potencia máxima de radiofrecuencia transmitida en la banda o bandas defrecuencia en las que opera el equipo radioeléctrico:</td></tr></table>
<table><tr><td></td><td>4 dbm</td></tr><tr><td colspan="2">03_RED_CS_Czech</td></tr><tr><td>ZJEDNODUŠENÉEU PROHLÁŠENÍO SHODĚ</td><td>Tímto VISTEON CORPORATION prohlašuje, že typ rádiového zařízení MDGMY10 je v souladu se směrnici 2014/53/EU. Úplné znění EU prohlášení o shodě je k dispozici na této internetové adrese: http://www.mitsubishi-motors.co.jp/en/red-doc/</td></tr><tr><td></td><td>Kmitočtové pásmo (kmitočtová pásma), v němž (v nichž) rádiové zařízení pracuje: 2.402-2.480 GHz</td></tr><tr><td></td><td>Maximální radiofrekvenční výkon vysílaný v kmitočtověm pásmu (v kmitočtových pásmech), v němž (v nichž) je rádiové zařízení provozováno: 4 dbm</td></tr><tr><td colspan="2">04_RED_DA_Danish</td></tr><tr><td>FORENKLET EUOVERENSSTEMMELSESERKLÆRING</td><td>Hermed erklærer VISTEON CORPORATION, at radioudstyrstypenMDGMY10 er i overensstemmelse med direktiv 2014/53/EU. EUoverensstemmelseserklæringens fulde tekst kan findes på følgende internetadresse:http://www.mitsubishi-motors.co.jp/en/red-doc/</td></tr><tr><td></td><td>Frekvensbând, som radioudstyret fungerer på: 2.402-2.480 GHz</td></tr><tr><td></td><td>Maksimal radiofrekverseffekt, der udsendes i de frekvensbând, som radioudstyret fungerer på: 4 dbm</td></tr><tr><td colspan="2">05_RED_DE_German</td></tr><tr><td>VEREINFACHTEEUKONFORMITÄTSERKLÄRUNG</td><td>Hiermit erklärt VISTEON CORPORATION, dass der Funkanlagentyp MDGMY10 der Richtlinie 2014/53/EU entspricht. Der vollständige Text der EU-Konformitätserklärung ist unter der folgenden Internetadresse verfügbar:http://www.mitsubishi-motors.co.jp/en/red-doc/</td></tr><tr><td></td><td>Das Frequenzband oder die Frequenzbänder, in dem bzw.</td></tr><tr><td></td><td>denen dieFunkanlage betrieben wird:2.402-2.480 GHz</td></tr><tr><td></td><td>Die in dem Frequenzband oder den Frequenzbändern, in cembzw. denendie Funkanlage betrieben wird, abgestrahlte maximaleSendeleistung:4 dbm</td></tr><tr><td colspan="2">06_RED_ET_Estonian</td></tr><tr><td>LIHTSUSTATUD ELIVASTAVUSDEKLARATSIDON</td><td>Käesolevaga deklareerib VISTEON CORPORATION, et käesolev raadioseadme tüüp MDGMY10 vastab direktiivi 2014/53/EL nõuetele. ELi vastavusdeklaratsiooni täielik tekst on kättesaadavjärgmisel internetiaadressil:http://www.mitsubishi-motors.co.jp/en/red-doc/</td></tr><tr><td></td><td>Sagedusriba(d), nillel raadioseade töötab:2.402-2.480 GHz</td></tr><tr><td></td><td>Raadioseadme töösagedus(t)el edastatav maksimaalne saatevõimsus:4 dbm</td></tr><tr><td colspan="2">07_RED_EL_Greek</td></tr><tr><td>ΑΠΛΟΥΣΤΕΥΜΕΝΗΔΗΛΩΣΗΣΥΜΜΟΡΦΩΣΗΣ ΕΕ</td><td>Με την παρούσα σ/η VISTEON CORPORATION,δηλώνει ότι ο ραδιοεξοπλισμός MDGMY10 πληροί την οδηγία 2014/53/EE. Tοπλήρες κείμενο της δήλωσης συμμόρφωσης ΕΕ διατίθεται στην ακόλουθηιστοσελίδα στο διαδίκτυο:http://www.mitsubishi-motors.co.jp/en/red-doc/</td></tr><tr><td></td><td>Οι ζώνες συχνοτήτων στις οποίες λειτουργεί οραδιοεξοπλισμός:2.402-2.480 GHz</td></tr><tr><td></td><td>η μέγιστη ραδιοηλεκτρική ισχύς στις ζώνες συχνοτήτων στις οποίες λειτουργεί οραδιοεξοπλισμός:4 dbm</td></tr><tr><td colspan="2">08_RED_EN_English</td></tr><tr><td>SIMPLIFIED EU DECLARATION OF CONFORMITY</td><td>Hereby, VISTEON CORPORATION declares that the radio equipment type MDGMY10 is in compliance with Directive 2014/53/EU. The full text of the EU declaration of conformity is available at the following internet address: http://www.mitsubishi-motors.co.jp/en/red-doc/</td></tr><tr><td></td><td>Frequency band(s) in which the radio equipment operates: 2.402-2.480 GHz</td></tr><tr><td></td><td>Maximum radio-frequency power transmitted in the frequency band(s) in which the radio equipment operates: 4 dbm</td></tr><tr><td colspan="2">09_RED_FR_French</td></tr><tr><td>DECLARATION UE DE CONFORMITE SIMPLIFIEE</td><td>Le soussigné, VISTEON CORPORATION, dédare que l'équipement radioélectrique du type MDGMY10 est conforme à la directive 2014/53/UE. Le texte complet de la déclaration UE de conformité est disponible à l'adresse internet suivante: http://www.mitsubishi-motors.co.jp/en/red-doc/</td></tr><tr><td></td><td>Bandes de fréquences utilisées par l'équipement radioélectrique: 2.402-2.480 GHz</td></tr><tr><td></td><td>Puissance de radiofréquence maximale transmise sur les bandes de fréquences utilisées par l'équipement radioélectrique: 4 dbm</td></tr><tr><td colspan="2">10_RED_GA_empty_no_text</td></tr><tr><td></td><td></td></tr><tr><td></td><td></td></tr><tr><td></td><td></td></tr><tr><td colspan="2">11_RED_HR_Croatian</td></tr><tr><td>POJEDNOSTAVLJENA EU IZJAVA O SUKLADNOSTI</td><td>VISTEON CORPORATION ovime izjavljuje da je radijska oprema tipa MDGMY10 u skladu s Direktivom 2014/53/EU. Cjeloviti tekst EU izjave</td></tr><tr><td></td><td>o sukladnosti dostupan je na sljedećoj internetskoj adresi::http://www.mitsubishi-motors.co.jp/en/red-doc/</td></tr><tr><td></td><td>Frekvencijski pojas (frekvencijski pojasi) u kojem (kojima)radijska oprema radi:2.402-2.480 GHz</td></tr><tr><td></td><td>Najveća radiofrekvencijska snaga koja se prenosi ufrekvendijskom pojasu(frekvencijskim pojasima) u kojem (kojima) radijska opremaradi:4 dbm</td></tr><tr><td colspan="2">12_RED_IT_Italian</td></tr><tr><td>DICHIARAZIONE DI CONFORMITÀ UESEMLIFICATA</td><td>Il fabbricante, VISTEON CORPORATION, dichiara che il tipo di apparecchiatura radio MDGMY10 è conforme alla direttiva 2014/53/UE. Il testo completo della dichiarazione di conformità UE è disponibile al seguenteindirizzo Internet:http://www.mitsubishi-motors.co.jp/en/red-doc/</td></tr><tr><td></td><td>Bande di frequenza di funzionamento dell'apparecchiaturaradio:2.402-2.480 GHz</td></tr><tr><td></td><td>Massima potenza a radiofrequenza trasmessa nelle bande difrequenza in cuiopera l'apparecchiatura radio:4 dbm</td></tr><tr><td colspan="2">13_RED_LV_Latvian</td></tr><tr><td>VIENKÄRŠOTA ESATBILSTĪBASDEKLARĀCIJA</td><td>Ar šo VISTEON CORPORATION deklarē, ka radioiekārtamDGMY10 atbilst Direktīvai 2014/53/ES. Pilins ES atbilstībasdeklarācijas teksts irpieejams šādā interneta vietnē:http://www.mitsubishi-motors.co.jp/en/red-doc/</td></tr><tr><td></td><td>Frekvenču joslu(-as), kurā(-ās) radioiekārtas darbojas:2.402-2.480 GHz</td></tr><tr><td></td><td>Frekvenču joslā(-ās), kurā(-ās) darbojas radioiekārtas,maksimālo pārraidītāsignāla jaudu.:</td></tr><tr><td></td><td>4 dbm</td></tr><tr><td colspan="2">14_RED_LT_Lithuanian</td></tr><tr><td>SUPAPRASTINTA ESATTITKIESDEKLARACIJA</td><td>Aš, VISTEON CORPORATION, patvirtinu, kad radijo jrenginiųtipas MDGMY10 atitinka Direktyvą 2014/53/ES. Visas ESatitikties deklaracijos tekstasprieinamas šiuo interneto adresu:http://www.mitsubishi-motors.co.jp/en/red-doc/</td></tr><tr><td></td><td>Dažnių juosta (-os), kurioje (-iose) veikia radijo jrenginiai:2.402-2.480 GHz</td></tr><tr><td></td><td>Didžiausia radijo dažnių galia, perduodama toje (tose) dažniųjuostoje (-ose), kurioje(-iose) veikia radijo jrenginiai:4 dbm</td></tr><tr><td colspan="2">15_RED_HU_Hungarian</td></tr><tr><td>EGYSZERŪ SĪTETT EUMEGFELELŌ SĒGINYILATKOZAT</td><td>VISTEON CORPORATION igazolja, hogy a MDGMY10 típusúrádióberendezés megfelel a 2014/53/EU irányelvnek. AzEU-megfelelōség nyilatkozatteljes szövege elérhető a következő internetes címen::http://www.mitsubishi-motors.co.jp/en/red-doc/</td></tr><tr><td></td><td>Az(ok) a frekvenciasáv(ok), amely(ek)en a rádióberendezésmūködik:2.402-2.480 GHz</td></tr><tr><td></td><td>Az abban a frekvenciasávban vagy azokban afrekvendasávokban továbbítottmaximális jelerösség, amely(ek)ben a rádióberendezészüzemel:4 dbm</td></tr><tr><td colspan="2">16_RED_MT_Maltese</td></tr><tr><td>DIKJARAZZJONISSIMPLIFIKATA TA'KONFORMITÀ TAL-UE</td><td>B'dan, VISTEON CORPORATION, niddikjara li dan it-tipta' taghmir tar-radju MDGMY10 huwa konformi mad-Direttiva2014/53/UE. It-testkollu tad-dikjarazzjoni ta' konformità tal-UE huwa disponibblif'dan l-indirizz tal-Internet li ğej:http://www.mitsubishi-motors.co.jp/en/red-doc/</td></tr><tr><td></td><td>II-medda/meded tal-frekwenza li jaħdem fihom it-tagħmir</td></tr><tr><td></td><td>tar-radju:2.402-2.480 GHz</td></tr><tr><td></td><td>II-potenza massima tal-frekwenza tar-radju trażmessafil-medda/meded talfrekwerzali jaħdem fihom it-lagħmir tar- radju:4 dbm</td></tr><tr><td colspan="2">17_RED_NL_Dutch</td></tr><tr><td>VEREENVOUDIGDEEUCONFORMITEITSVERKLARING</td><td>Hierbij verklaar ik, VISTEON CORPORATION, dathet type radioapparatuur MDGMY10 conform is met Richtlijn 2014/53/EU. Devolledige tekst van de EU-conformiteitsverklaring kan worcen geraadpleegd op het volgende internetadres:http://www.mitsubishi-motors.co.jp/en/red-doc/</td></tr><tr><td></td><td>Frequentieband(en) waarin de radioapparatuur functioneert:2.402-2.480 GHz</td></tr><tr><td></td><td>Maximaal radiofrequent vermogen uitgezonden in defrequentieband(en)waarin de radioapparatuur functioneert:4 dbm</td></tr><tr><td colspan="2">18_RED_PL_Polish</td></tr><tr><td>UPROSZCZONADEKLARACJAZGODNOŚCI UE</td><td>VISTEON CORPORATION niniejszym oświadcza, że typurządzenia radiowego MDGMY10 jest zgodny z dyrektywą 2014/53/UE. Pełny tekstdeklaracji zgodności UE jest dostępny pod następującymadresem internetowym:http://www.mitsubishi-motors.co.jp/en/red-doc/</td></tr><tr><td></td><td>Zakresu(-ów) częstotliwości, w którym (których) pracujeurządzenie radiowe:2.402-2.480 GHz</td></tr><tr><td></td><td>Maksymalnej mocy częstotliwości radiowej emitowanej wzakresie(-ach) częstotliwości,w którym (których) pracuje urządzenie radiowe:4 dbm</td></tr><tr><td colspan="2">19_RED_PT_Portuguese</td></tr><tr><td>DECLARAÇÃO UE DECONFORMIDADE</td><td>O(a) abaixo assinado(a) VISTEON CORPORATIONdeclara que o presente tipo de equipamento de rádio</td></tr><tr><td>SIMPLIFICADA</td><td>MDGMY10 está emconformidade com a Diretiva 2014/53/UE. O texto integral da declaração deconformidade está disponível no seguinte endereço de Internet:http://www.mitsubishi-motors.co.jp/en/red-doc/</td></tr><tr><td></td><td>A(s) banda(s) de frequências em que o equipamento de rádio funciona:2.402-2.480 GHz</td></tr><tr><td></td><td>A potência máxima de radiofrequências transmitida na(s)banda(s) defrequências em que o equipamento de rádio funciona:4 dbm</td></tr><tr><td colspan="2">20_RED_RO_Romanian</td></tr><tr><td>DECLARATIA UE DECONFORMITATESIMPLIFICATÃ</td><td>Prin prezenta, VISTEON CORPORATION dedicarã câtipul de echipamente radio MDGMY10 este în conformitate cu Directiva2014/53/UE. Textul integral al declarației UE de conformitate este disponibil laurmâtoarea adresă internet:http://www.mitsubishi-motors.co.jp/en/red-doc/</td></tr><tr><td></td><td>Banda (benzile) de frecvente în care funcționeazăechipamentul radio:2.402-2.480 GHz</td></tr><tr><td></td><td>Puterea maximă de radiofrecvență transmisă în banda (benzile)de frecvente încare funcționeazăechipamentul radio:4 dbm</td></tr><tr><td colspan="2">21_RED_SK_Slovak</td></tr><tr><td>ZJEDNODUŠENÉ EÜVYHLÂSENIE O ZHODE</td><td>VISTEON CORPORATION týmto vyhlasuje, že rádiovézariadenie typu MDGMY10 je v súlade so smernicou2014/53/EÜ. Úplnê EÜvyhlásenie o zhode je k dispozícii na tejto internetovej adrese:http://www.mitsubishi-motors.co.jp/en/red-doc/</td></tr><tr><td></td><td>Frekvenčné pásmo resp. pásma, v ktorých rádiové zariadenie pracuje:2.402-2.480 GHz</td></tr><tr><td></td><td>Maximálny vysokofrekvenčný výkon prenášaný vo frekvenčnom pásme, resp.pásmach, v ktorých rádiové zariadenie pracuje:4 dbm</td></tr><tr><td colspan="2">22_RED_SL_Slovenian</td></tr><tr><td>POENOSTAVLJENAIZJAVA EU OSKLADNOSTI</td><td>VISTEON CORPORATION potrjuje, da je tip radijske opreme MDGMY10 skladen z Direktivo 2014/53/EU. Celotno besedilo izjave EU o skladnosti je na voljo na naslednjem spletnem naslovu:http://www.mitsubishi-motors.co.jp/en/red-doc/</td></tr><tr><td></td><td>Frekvenčni pas ali pasovi, na katerih deluje radijska oprema:2.402-2.480 GHz</td></tr><tr><td></td><td>Največja energijla za radijsko frekvenco, preneseno po frekvenčnem pasu ali pasovih, na katerih radijska oprema deluje:4 dbm</td></tr><tr><td colspan="2">23_RED_FI_Finnish</td></tr><tr><td>YKSINKERTAISTETTUEUVAATIMUSTENMUKAISUUSVAKUUTUS</td><td>VISTEON CORPORATION vakuuttaa, että radiolaitetyppi MDGMY10 on direktiivin 2014/53/EU mukainen. EUvaatimustenmukaisuusvakuutuksentäysimittainen teksti on saatavillaseuraavassa internetosoitteessa:http://www.mitsubishi-motors.co.jp/en/red-doc/</td></tr><tr><td></td><td>Radiotaajuudet, joilla radiolaite toimii:2.402-2.480 GHz</td></tr><tr><td></td><td>Suurin mahdollinen lähetysteho radiotaajuuksilla, joillaradiolaitetoimii:4 dbm</td></tr><tr><td colspan="2">24_RED_SV_Swedish</td></tr><tr><td>FÖRENKLAD EUFÖRSÄKRANOMÖVERENSSTÄMMELSE</td><td>Härmed försäkrar VISTEON CORPORATION att dennatyp av radioutrustning MDGMY10 överensstämmer med direktiv 2014/53/EU. Den fullständiga texten till EU-försäkran om överensstämmelse finns på följandewcbbadress:</td></tr></table>
<table><tr><td></td><td>http://www.mitsubishi-motors.co.jp/en/red-doc/</td></tr><tr><td></td><td>Det eller de frekvensband där radioutrustningen arbetar:2.402-2.480 GHz</td></tr><tr><td></td><td>Den maximala radiofrekvenseffekt som överförsinom det eller de frekvensbanddär radioutrustningen arbetar:4 dbm</td></tr></table>
<table><tr><td colspan="2">01-RED-BC-Bulgaran</td></tr><tr><td colspan="2">onростheaEC(Alexiarylation3A cob提前CTINE)</td></tr><tr><td colspan="2">02-RED-ES-Spanish</td></tr><tr><td>DECILARCIONUE DECONFORMINIDADSIMPUFLCADA</td><td>Por la presente, Continental Automotive GmbH decara gue etl tipo de equipo radioteletico S180052094/TIS-03 es conforme con la Direcerva 2014/53/UE. El texto completo de la deciaracion UE de conformedad esta disponibile en la direccion Internet siguiente: http://www.mitsubishi-motors.com/en/red-doc/</td></tr><tr><td>paktoceportobjekneto:43.92MHZ</td><td>Mackinamhata paktocectroha moultocnt, nambuwana s paktocectrohata nephta inni nephni. B kɔrto inni kɔmto pagoni paktoccobpobjekneto: -17 dbm</td></tr><tr><td>paktocectrohata nephta inni nephni. B kɔrto inni kɔmto pagoni paktoccobpobjekneto:43.92MHZ</td><td>paktocectrohata nephta inni nephni. B kɔrto inni kɔmto pagoni paktoccobpobjekneto: -17 dbm</td></tr><tr><td colspan="2">03-RED-CS.Czech</td></tr></table>
<h1 id="b-language-text">B) Language Text:</h1>
<p>Seimensstasse12-D-93055 Regensburg Germany</p>
<p>Continental Automotive GmbH</p>
<p>Manfucaurer Postal Address</p>
<p>A) Generic information:</p>
<table><tr><td>2JEONODUŞENE EU PROHŁASENI O SHODE</td><td></td></tr><tr><td colspan="2">04. RED. DA. DAJIJSH</td></tr><tr><td colspan="2">FORENKLET ECUVERENSSSTEMM ELSEERKULERI NG</td></tr><tr><td colspan="2">Hermed erkaderer Continental Automotive GmbH, at radiodystypen S180052094/ITS-03 er i overnssstemise med direkty 2014/53/EU. Eluovernssstemiseserklaanjgers túde tekst kan findes på tagende interestadresse: http://www.milstubish-motors.com/en/red-doc/</td></tr><tr><td colspan="2">Ferekversbande, som radiodystyret Tungerer på: 43.92MHZ</td></tr><tr><td colspan="2">Masimiani radiofrekvenčni yukon vysliany v kmtotočem pasmu (v kmtotočych pasmedni), v nemez (v nichz) je radiove zazieni provozovanco:-17 dBM</td></tr><tr><td colspan="2">Maximiani radiofrekvenčni yukon vysliany v kmtotočem pasmu (v kmtotočych pasmedni), v nemez (v nichz) je radiove zazieni provozovanco:-17 dBM</td></tr><tr><td colspan="2">Kmtotočove pasmo (kmtotova pasma), v nemez (v nichz) radiove zazieni pracuje: 43.92MHZ</td></tr><tr><td colspan="2">http://www.milstubish-motors.com/en/red-doc/</td></tr><tr><td colspan="2">Dle in dem Freuernzband oder den Freuernzandem, in dem bzw. Denen die Funkanlage betieben wird, abggestariffe maximale Sendelisstung:-17 dBM</td></tr><tr><td colspan="2">Die in dem Freuernzband oder den Freuernzandem, in dem bzw. Denen die Funkanlage betieben wird, abggestariffe maximale Sendelisstung:-17 dBM</td></tr><tr><td colspan="2">43.92MHZ</td></tr><tr><td colspan="2">Das Freuernzband oder die Freuernzander, in dem bzw. denen die Funkanlage betieben wird: 433.92MHZ</td></tr><tr><td colspan="2">Hermet erkart Continental Automotive GmbH, dass der Funkanlage typ S180052094/ITS-03 der Richlinne 2014/53/EU enspricht. Der vollständige Text der EU-Kontomaltserklaring ist unter der Tojogenden Internetadresse Vertrigbar: http://www.milstubish-motors.com/en/red-doc/</td></tr><tr><td colspan="2">43.92MHZ</td></tr><tr><td colspan="2">05. RED. DE. GERMAN</td></tr><tr><td colspan="2">VEREINEACHTE EUKONFORMITATISERKLARUWE</td></tr><tr><td colspan="2">06. RED. ET. Estonian</td></tr><tr><td colspan="2">UHITSUSTATUD EU</td></tr><tr><td colspan="2">07. RED. EL. Creek</td></tr><tr><td colspan="2">ANIOVATEMENIAHADZHSYMORFOOZHE EE</td></tr><tr><td colspan="2">ANIOVATEMENIAHADZHSYMORFOOZHE EE</td></tr><tr><td colspan="2">08. RED. EN. English</td></tr><tr><td colspan="2">SIMPUFED EUCEDLARATION OFCONFORMTY</td></tr><tr><td colspan="2">99. RED. FR. French</td></tr><tr><td colspan="2">DECARATION UE</td></tr><tr><td colspan="2">Le sousigne, Continental Automotive GmbH, dedicate que</td></tr><tr><td colspan="2">Kesolevaga dekareerd Continental Automotive GmbH, etkaeslow raaloseade troup S180052094/TIS-03 vasaddatekirdiw 2014/53/EL noulete. ELJ vastavusdekaratistodniitalelek tekst on katesaday jargmisel internetlaadressil;http://www.mitsubishi-motors.com/en/red-doc/</td></tr><tr><td colspan="2">Sageduribaa(d), milli radiosade totalab:433.92MHz</td></tr><tr><td colspan="2">Radiolesadme tosgeduus(t)el edastatal maksimainesatevdimus:s:-17 dBM</td></tr><tr><td colspan="2">Radiolesadme tosgeduus(t)el edastatal maksimainestatevimus:s:-17 dBM</td></tr><tr><td colspan="2">Me trey maipouca ofi Coninental Automotive GmbH, analyzeith o radiocetoinaligos S180052094/TIS-03 tanpori tvv obvivae2014/53/EE. To trihpez kejlevo tns bhlakwrsQUIlgepawmsEE diartietri otly akcdoaun iotocealda oto diadikkuo;http://www.mitsubishi-motors.com/en/red-doc/</td></tr><tr><td colspan="2">Oi gluves oXyovitihayotiis otloleg aeroupyei opadiocetoinaligos:433.92MHz</td></tr><tr><td colspan="2">n izvioti padionlakarpiki loxugs otis gluves oXyovitihayotiisotloleg aeroupyei o radiocetoinaligos:-17 dBM</td></tr><tr><td colspan="2">Heroby, Continental Automotive GmbH declares that radioequipment type S180052094/TIS-03 is in compliance withDirective 2014/53/EU. The full text of the EU declaration ofconformity is avaliade at the following internet address:http://www.mitsubishi-motors.com/en/red-doc/</td></tr><tr><td colspan="2">Frequency band(s) in which the radio equipment operates:-17 dBM</td></tr><tr><td colspan="2">Maximum radio-frequency power transmitted in the frequencyband(s) in which the radio equipment operates:433.92MHz</td></tr><tr><td colspan="2">99. RED. FR. French</td></tr><tr><td>SIMPULSE</td><td>Requirement radiolactique du type S180052094/TIS-03 est conforme a la directive 2014/53/UE le texte complete la decarlation UE de conforme est disponibile a radresse internet suivante: http://www.mitsubishi-motors.com/en/red-doc/</td></tr><tr><td>CONFORMTE</td><td></td></tr><tr><td>CONFORMTA UE</td><td>II tabbranche. Continued Automotive GmbH, dichara che il tipo di apparecchialura radio S180052094/TIS-03 e controme alla direttiva 2014/53/UE. Il testo completo della dicharazione di conformità UE e disponibile al segunte indirizzo Internet: http://www.mitsubishi-motors.com/en/red-doc/</td></tr><tr><td>DICHLARAZIONE DI</td><td></td></tr><tr><td>SEMPUFICATA</td><td></td></tr><tr><td colspan="2">12-RED-IT-Litalian</td></tr></table>
<table><tr><td></td><td>radio:433.92MHz</td></tr><tr><td></td><td>Massima potenza a radiofrequenza trasmessa nelle bande di frequenza in cui opera l'apparecchiatura radio:10mW</td></tr><tr><td colspan="2">13_RED_LV_Latvian</td></tr><tr><td>VIENKÄRŠOTA ESATBILSTĪBASDEKLARĀCIJA</td><td>Ar šo Continental Automotive GmbH deklarē, ka radioiekārta S180052094/TIS-03 atbilst Direktīvai 2014/53/ES.Pilns ES atbilstības deklarācijas teksts ir pieejams šādā interneta vietnē:http://www.mitsubishi-motors.com/en/red-doc/</td></tr><tr><td></td><td>Frekvenču joslu(-as), kurā(-ās) radioiekārtas darbojas:433.92MHz</td></tr><tr><td></td><td>Frekvenču joslā(-ās), kurā(-ās) darbojas radioiekārtas,maksimālo pārraidītā signāla jaudu:-17 dBm</td></tr><tr><td colspan="2">14_RED_LT_Lithanian</td></tr><tr><td>SUPAPRASTINTA ESATTITKTIESDEKLARACIJA</td><td>Aš, Continental Automotive GmbH, patvirtinu, kad radijo įrenginių tipas S180052094/TIS-03 atitinka Direktyvą 2014/53/ES. Visas ES atitikties deklaracijos tekstas prieinamas šiuo interneto adresu:http://www.mitsubishi-motors.com/en/red-doc/</td></tr><tr><td></td><td>Dažnių juosta (-os), kurioje (-iose) veikia radijo įrenginiai:433.92MHz</td></tr><tr><td></td><td>Didžiausia radijo dažnių galia, perduodama toje (tose) dažnių juostoje (-ose), kurioje (-iose) veikia radijo įrenginiai:-17 dBm</td></tr><tr><td colspan="2">15_RED_HU_Hungarian</td></tr><tr><td>EGYSZERŪSĪTETT EUMEGFELELŌSĒGINYILATKOZAT</td><td>Continental Automotive GmbH igazolja, hogy a S180052094/TIS-03 típusū rádióberendezés megfelel a 2014/53/EU irányelvnek. Az EU-megfelelōsėgi nyilatkozat teljes szōvege elérhetō a kōvetkezō internetes címen::http://www.mitsubishi-motors.com/en/red-doc/</td></tr><tr><td></td><td>Az(ok) a frekvenciasáv(ok), amely(ek)en a rádióberendezés mūkōdik:433.92MHz</td></tr></table>
<table><tr><td colspan="2">16. RED. MT. Maltese</td></tr><tr><td colspan="2">Diklarazzioni SIMPUfikAtA TA. KONFORMAtA TAL-UE</td></tr><tr><td colspan="2">Diklarazzioni SIMPUfikAtA TA. KONFORMAtA TAL-UE</td></tr><tr><td colspan="2">17. RED. NL. Dutch</td></tr><tr><td colspan="2">VEREENVOLICDE EUCONFORMETSVERKLARING</td></tr><tr><td colspan="2">18. RED. PL. Polish</td></tr><tr><td colspan="2">UPROSCZONA DEKLABACJAA ZGODNOSCI UE</td></tr><tr><td colspan="2">19. RED.PT.Portuguese</td></tr><tr><td colspan="2">DECILARAJOUDECONFORMIDADESIMPUIFICADA</td></tr><tr><td colspan="2">0(s) banda(s) de frequenças em que o equipamento de radiofunciona:43.92MHZ</td></tr><tr><td colspan="2">A potenca maximae radiorequencias transmitida na(s)banda(s) de frequenças em que o equipamento de radiofunciona:-17 dBM</td></tr><tr><td colspan="2">DECILARAUAUDECONFORMTATESIMPUIFICATA</td></tr><tr><td colspan="2">Pin prezenia, Continental Automotive GmbH deciara ca Itpulde echipamente radio S180052094/TIS-03 este in conolmiatecu Direcivira 2014/53/UE. Textul integral al declaratie UE deconformitate este disponibili la umilioarea adresa internet:http://www.mitsubishi-motors.com/en/red-doc/</td></tr><tr><td colspan="2">Banda (benzile) de frequenie in care funciionezaaechipamentul radio:433.92MHZ</td></tr><tr><td colspan="2">Pulerea maxima de radiorevenia transmisla in banda (benzile)de fecuene in care funciionezaa echipamentul radio:-17 dBM</td></tr><tr><td colspan="2">21. RED.SK.Slovak</td></tr><tr><td colspan="2">ZJEODODUSENE EUVYLASENE O ZHOOE</td></tr><tr><td colspan="2">Continental Automotive GmbH Itymo vynlasiye, ze radiovezraidee Itpy S180052094/TIS-03je y sulade so seminccou</td></tr><tr><td colspan="2">22. RED. SL.-Slovenian</td></tr><tr><td colspan="2">POENOSTAVLENAIZAVA EU OSKLABONOTT</td></tr><tr><td colspan="2">23. RED. FI.Finish</td></tr><tr><td colspan="2">YKISNKERASTETUEVATAIMUSTENMUKASIUSAKUTUS</td></tr><tr><td colspan="2">43.92MHZ</td></tr><tr><td>Frekvenchi pas all pasov, na katerin deluje radijška operma:-17 dBM</td><td></td></tr><tr><td>Naivejfa energija za radijsko freveenco, prenesno portrekvenchem pasu all pasov, na katerih radijška opermadeluje:</td><td></td></tr><tr><td>Continental Automotive GmbH vakuttta, elta radiolateyyppiidrolaite tomlt:-17 dBM</td><td></td></tr><tr><td>Suluri mandolinen lantysteho radiotajukusilla, jolla radiolate tomlt:-17 dBM</td><td></td></tr><tr><td>Harmed forsarker Continental Automotive GmbH at denna typav radiourutting S180052094/TIS-03 overressjämmer meddierady 2014/53/EU. Den Rullisandinga texen till E.U-torsarkan</td><td></td></tr><tr><td colspan="2">OVERENSSTAMMELESE</td></tr><tr><td colspan="2">24. RED. SV.-Swedish</td></tr><tr><td colspan="2">FORENKLAĐ EUFORSAKRAONOM</td></tr></table>
<table><tr><td colspan="2">25. RED-NO-Norwegian</td></tr><tr><td colspan="2">FORENKLET EU-ERKLÆRING</td></tr><tr><td colspan="2">26. RED-1S-Icelandic</td></tr><tr><td colspan="2">Einfanda ESB LEVIFISFIRLYSTING</td></tr><tr><td colspan="2">Her med lystir Continental Automotive GmbH yfr Pvt ay S180052094/TIS-C3 er i sanmarni vio qunnikotur og aortar krotur, sem gerðar eru i tiskupn 2014/53/E.C.The fultur texi at ESB-samraemisyfiryšing er i bodi a effirtalandi vettfang: http://www.mitsubish Motors.com/en/ed-doc/</td></tr><tr><td colspan="2">Maksimal radiotrekavent energi som overtores i de tekevensbänd i hvilke det radiolustyr operer. -17 dBM</td></tr><tr><td colspan="2">Frékversbänd der radiolustyr operer 43.92MHZ</td></tr><tr><td colspan="2">Continental Automotive GmbH erklærer herved at uštýret S180052094/TIS-C3 er i sansvar med de grunnlegende kray og øvrige relevanite kray i direktiv 2014/53/E.U.Den fulstenidge teksten i EU-deklarasjon finnes på telgende internetaldresse: http://www.mitsubish Motors.com/en/ed-doc/</td></tr><tr><td colspan="2">Den maximala radiotrekvenseffekt som overtors inom del eller de tekevensbänd dar radiolustrušingen arbeter: -17 dBM</td></tr><tr><td colspan="2">Det eller de tekeversbänd dar radiolutrustungen arbeter: 433.92MHZ</td></tr><tr><td colspan="2">om overensstämmeise finns på tollande webdadress: http://www.mitsubish Motors.com/en/ed-doc/</td></tr></table>
<h1 id="manufacturer-postal-address-2">Manufacturer Postal Address</h1>
<p>MITSUBISHI ELECTRIC CORPORATION</p>
<p>2-3-33, MIWA, SANDA-CITY, HYOGO, 669-1513, JAPAN</p>
<p>A) Generic information:</p>
<p>B) Language Text: </p>
<table><tr><td>Cesk [Czech]</td><td>Tímto [Mitsubishi Electric Corporation], prohlašuje, že [DY-1/CQ-0ME] jsou v souladu se směrnici 2014/53/EU. Podrobnosti naleznete na následující internetevé adrese: http://www.mitsubishi-metors.com/en/red-doc/</td></tr><tr><td>Dansk [Danish]</td><td>Hermed, [Mitsubishi Electric Corporation], erklærer, at [DY-1/CQ-0ME] er i overensstemmelse med direktiv 2014/53/EU. For yderligere information gå ind på folgende webadresse: http://www.mitsubishi-metors.com/en/red-doc/</td></tr><tr><td>Deutsch [German]</td><td>Hiermit erklärt [Mitsubishi Electric Corporation], dass [DY-1/CQ-0ME] in Übereinstimmung mit der Richtlinie 2014/53/EU stehen. Weitere Informationen erhalten Sie über folgende URL: http://www.mitsubishi-metors.com/en/red-doc/</td></tr><tr><td>Eesti [Estonian]</td><td>Käesolevaga [Mitsubishi Electric Corporation], teatab, et [DY-1/CQ-0ME] on kooskõlas direktiivi 2014/53/EL. Ukskasjalikuma teabe saamiseks tutvuda järgmste URL: http://www.mitsubishi-metors.com/en/red-doc/</td></tr><tr><td>English [English]</td><td>Hereby, [Mitsubishi Electric Corporation], declares that [DY-1/CQ-0ME] are in compliance with Directive 2014/53/EU. For details, please access the following URL: http://www.mitsubishi-metors.com/en/red-doc/</td></tr><tr><td>Español [Spanish]</td><td>Por este medio, [Mitsubishi Electric Corporation], declara que [DY-1/CQ-0ME] están en conformidad con la Directiva 2014/53/UE. Para obtener más detalles, acceda a la siguiente URL: http://www.mitsubishi-metors.com/en/red-doc/</td></tr><tr><td>Ελληνικά [Greek]</td><td>Διο του παρόντος, [Mitsubishi Electric Corporation], δηλώνει όπ [DY-1/CQ-0ME] ελναι σε συμμόρφωση με την οδηγία 2014/53/EE. Για λεπτομέρεις, επιοκερείτε την παρακάτια διεύθυνοη URL: http://www.mitsubishi-metors.com/en/red-doc/</td></tr><tr><td>Français [French]</td><td>Par la présente, [Mitsubishi Electric Corporation], déclare que [DY-1/CQ-0ME] sont conformes à la directive 2014/53/UE. Pour plus de détails, veuillez accéder à l'URL suivante: http://www.mitsubishi-metors.com/en/red-doc/</td></tr><tr><td>Italiano [Italian]</td><td>Con la presente, [Mitsubishi Electric Corporation], dichiara che [DY-1/CQ-0ME] sono in conformità con la direttiva 2014/53/UE. Per ulteriori informazioni, si prega di consultare il seguente URL: http://www.mitsubishi-metors.com/en/red-doc/</td></tr><tr><td>Latviski [Latvian]</td><td>Ar So, [Mitsubishi Electric Corporation], paziņo, ka [DY-1/CQ-0ME] ir saskaņa ar Direktīvu 2014/53/ES. Lai iegūtu plašaku informāciju, lōdzu, apmeklējiet šādu URL: http://www.mitsubishi-metors.com/en/red-doc/</td></tr><tr><td>Lietuviu [Lithuanian]</td><td>Šiuo [Mitsubishi Electric Corporation], pareškiu, kad [DY-1/CQ-0ME] rra laikomasi Direktyvos 2014/53/ES. Del išsamesnes informacijos, prašome prisijungtiprie šių URL: http://www.mitsubishi-metors.com/en/red-doc/</td></tr><tr><td>Nederlands [Dutch]</td><td>Hierbij [Mitsubishi Electric Corporation], verklaart dat [DY-1/CQ-0ME] zijn in overeenstemming met Richtlijn 2014/53/EU. Voor meer informatie, neem dan de volgende URL: http://www.mitsubishi-metors.com/en/red-doc/</td></tr><tr><td>Malti [Maltese]</td><td>Hawnhekk, [Mitsubishi Electric Corporation], jirdrikjara li [DY-1/CQ-0NF] huma konformi mad-Direttiva 2014/53/IUF. Ghad-rlettalji, jekk jogħghok access għali-URI li gej: http://www.mitsubishi-motors.com/en/red-doc/</td></tr><tr><td>Magyar [Hungarian]</td><td>Ezáltal [Mitsubishi Electric Corporation], kijelenti, hogy [DY-1/CQ-0ME] irányelvnek megfelelő 2014/53/EU. A részleteket lásd az alábbi URL: http://www.mitsubishi-motors.com/en/red-doc/</td></tr><tr><td>Polski [Polish]</td><td>Niniejszym [Mitsubishi Electric Corporation], deklaruje, ze [DY-1/CQ-0ME] są zgodne z dyrektywą 2014/53/UE. Szczegółowe informacje można znaleźć pod następującym adresem URL: http://www.mitsubishi-motors.com/en/red-doc/</td></tr><tr><td>Português [Portuguese]</td><td>Por este meio, a [Mitsubishi Electric Corporation], declara que [DY-1/CQ-0ME] estão em conformidade com a Directiva 2014/53/UE. Para obter detalhes, acesse o seguinte URL: http://www.mitsubishi-motors.com/en/red-doc/</td></tr><tr><td>Slovenski [Slovenian]</td><td>S tem, [Mitsubishi Electric Corporation], izjavlja, da so [DY-1/CQ-0ME] v skladu z Direktivo 2014/53/EU. Za več informacij, prosimo, pojdite na naslednji naslov: http://www.mitsubishi-motors.com/en/red-doc/</td></tr><tr><td>Slovenské [Slovak]</td><td>Týmto [Mitsubishi Electric Corporation], vyhlasuje, že [DY-1/CQ-0ME] sú v súlade so smernicou 2014/53/EÚ. Pocrobnosti nájdete na nasledujúcej internetovej adrese: http://www.mitsubishi-motors.com/en/red-doc/</td></tr><tr><td>Suomi [Finnish]</td><td>Tåten [Mitsubishi Electric Corporation], ilmoittaa, että [DY-1/CQ-0ME] noudattavat direktivin 2014/53/EU. Lisätietoja, seuraavassa URL-osoitteessa: http://www.mitsubishi-motors.com/en/red-doc/</td></tr><tr><td>Svenska [Swedish]</td><td>Härmed [Mitsubishi Electric Corporation], förklarar att [DY-1/CQ-0ME] överensstämmer med direktiv 2014/53/EÚ. För mer information, gå in på foljande webbadress: http://www.mitsubishi-motors.com/en/red-doc/</td></tr><tr><td>Íslenska [Icelandic]</td><td>Hér, [Mitsubishi Electric Corporation], segir að [DY-1/CQ-0ME] eru í samræmi við tilskipun 2014/53/ESB. Fyrir upplýsingar, vinsamlegast aðgang eftirfarandi vefslóð: http://www.mitsubishi-motors.com/en/red-doc/</td></tr><tr><td>Norsk [Norwegian]</td><td>Herved [Mitsubishi Electric Corporation], erklærer at [DY-1/CQ-0ME] ar i samsvar med direktiv 2014/53/EÚ. For flere detaljer, vennligst falgende URL: http://www.mitsubishi-motors.com/en/red-doc/</td></tr><tr><td>Türk [Turkish]</td><td>Burada, [Mitsubishi Electric Corporation], [DY-1/CQ-0ME] 'in 2014/53/AB sayli Direktife uygun olduğunu beyan eder. Aynntilar için lütfen aşağıdaki URL'ye erişin: http://www.mitsubishi-motors.com/en/red-doc/</td></tr><tr><td>Româna [Romania]</td><td>Prin prezenta, [Mitsubishi Electric Corporation], declară că [DY-1/CQ-0ME] sunt conforme cu Directiva 2014/53/UE. Pentru mai multe detalii, vã rugăm să accesa ti urmáltoarea adresă URL: http://www.mitsubishi-motors.com/en/red-doc/</td></tr><tr><td>Български [Bulgarian]</td><td>С настоящото [Mitsubishi Electric Corporation], декларира, че [DY-1/CQ-0ME] са в съответствие с Директива 2014/53/EC. За повече информация, моля, посетете следния URL адрес: http://www.mitsubishi-motors.com/en/red-doc/</td></tr><tr><td>Hrvatski [Croatian]</td><td>Ovime [Mitsubishi Electric Corporation], izjavljuje da je [DY-1/CQ-0ME] su u skladu s Direktivom 2014/53/EÚ. Za detalje, molimo pogledajte sljedeći URL: http://www.mitsubishi-motors.com/en/red-doc/</td></tr><tr><td>Македонски [Macedonian]</td><td>Co ora, [Mitsubishi Electric Corporation], изjavува дека [DY-1/CQ-0ME] се во согласност со Директивата 2014/53/EÚ. За повече детали, посетете ja следната веб-адреса: http://www.mitsubishi-motors.com/en/red-doc/</td></tr><tr><td>Shgiptar [Albanian]</td><td>Me anė të kisaj, [Mitsubishi Electric Corporation], deklaron se [DY-1/CQ-0ME] jane ne përputhje me Direktiven 2014/53/BE. Pér detaje, vizitoni URL e měposhtme: http://www.mitsubishi-motors.com/en/red-doc/</td></tr><tr><td>Úрногорски / Crnogorski [Montenegrin]</td><td>Ovim putem, [Mitsubishi Electric Corporation], izjavljuje da je [DY-1/CQ-0ME] su u skladu sa Direktivi 2014/53/EÚ. Za detalje, molimo vas da pristupite sljedeći URL: http://www.mitsubishi-motors.com/en/red-doc/</td></tr><tr><td>žeborgren [Georgian]</td><td>žbānəviš, [Mitsubishi Electric Corporation], žbā, izbuggiš, řněl [DY-1/CQ-0ME] āgludubobinšašio gvnęgjūnga 2014/53/EÚ. āgludubobinšašio gvnęgjūnga, gyobergan, obocneko ābjeggo URL: http://www.mitsubishi-motors.com/en/red-doc/</td></tr></table>
<table><tr><td>COUNTRY</td><td>IMPORTER NAME</td><td>REGISTERED TRADE NAME OR REGISTERED TRADE MARK</td><td>POSTAL ADDRESS</td></tr><tr><td>ALBANIA</td><td>MMAI</td><td>M.M. Automobili Italia SpA</td><td>Via Giovanni da Udine 45, 20156 Milano, Italy</td></tr><tr><td>AUSTRIA</td><td>DENZEL Autoimport GmbH</td><td>DENZEL Autoimport GmbH</td><td>A-1230 Wien, Richard Strauss-Straße 14</td></tr><tr><td>BELGIUM</td><td>Beherman</td><td>Beherman Motors NV/SA</td><td>Industrieweg 3, Bornem Belgium</td></tr><tr><td>BULGARIA</td><td>Balkan Star Motors EOOD</td><td>Balkan Star Motors EOOD</td><td>Bulgaria, 1510 Sofia, Rezbarska str. 5</td></tr><tr><td>CROATIA</td><td>LMG Autokuća d.o.o.</td><td>LMG Autokuća d.o.o.</td><td>Velikogorička 18a,10419 Staro Číče, CROATIA</td></tr><tr><td>CYPRUS</td><td>FAIRWAYS</td><td>Fairways Ltd</td><td>100 Arch. Makarios Avenue, P.O. BOX S1023,3021 Limmasol, Cyprus</td></tr><tr><td>CZECH</td><td>M Motors CZ s.r.o.</td><td>M Motors CZ s.r.o.</td><td>Na Chodovci 2457/1, Praha 4 Sporilov, ZIP 141 00, Czech Rep.</td></tr><tr><td>DENMARK</td><td>MMDk</td><td>MMC Danmark A/S</td><td>Hovedvejen 3 2600 Glostrup, Denmark</td></tr><tr><td>ESTONIA</td><td>AS SILBERAUTO</td><td>Silberaurto</td><td>Järvevana tee 11, Tallinn 11314, Estonia</td></tr><tr><td>FINLAND</td><td>Delta Motor</td><td>Delta Motor Group Oy</td><td>Valsalantie 6, 02130 Espoo, Finland</td></tr><tr><td>FRANCE</td><td>MMAF</td><td>M Motors Automobiles France SAS</td><td>1, avenue du Fief PA les Béthunes 95310 Saint Ouen L'Aumône FRANCE</td></tr><tr><td>GERMANY</td><td>MMD Automobile GmbH</td><td>MMD Automobile GmbH</td><td>Stahlstr. 42-44, 65428 Rüsselsheim Deutschland</td></tr><tr><td>GREECE</td><td>Saracakis Brothers</td><td>SARACAKIS BROTHERS S.A.</td><td>71, Athinon Ave., GR-101 73 Athens, Greece</td></tr><tr><td>HUNGARY</td><td>MM INPORT KFT</td><td>MM Import kft</td><td>Mogyorodi ut24-40, H-1149 Budapest,Hungary</td></tr><tr><td>ICELAND</td><td>HEKLA</td><td>Hekla Hf.</td><td>Laugavegur 172-174, P.O.Box 5310, 125 Reykjavik, Iceland</td></tr><tr><td>IRELAND</td><td>MMC Commercials</td><td>MMC Commercials Unlimited</td><td>John F. Kennedy Drive, Naas Road, Dublin 12, Ireland</td></tr><tr><td>ITALY</td><td>MMAI</td><td>M.M. Automobili Italia SpA</td><td>Via Giovanni da Udine 45, 20156 Milano, Italy</td></tr><tr><td>LATVIA</td><td>MML Imports SIA</td><td>MML Imports SIA</td><td>ir 32 Lielirbes Street, Riga, LV1046, Latvia.</td></tr><tr><td>LITHUANIA</td><td>JSC Autovytaras</td><td>JSC Autovytaras, company code:126413861</td><td>P. Žadeikos str. 1B, Vilnius LT-06319, Lithuania</td></tr><tr><td>LUXEMBOURG</td><td>Beherman</td><td>Beherman Motors NV/SA</td><td>Industrieweg 3, Bornem Belgium</td></tr><tr><td>MALTA</td><td>INDUSTRIAL Motors Ltd</td><td>Industrial Motors Limited</td><td>Mizzi House, National Road,Biata I-Bajda HMR 9010,Malta</td></tr><tr><td>MOLDOVA</td><td>Auto Space S.R.L.</td><td>AUTO SPACE</td><td>str. Bucuriei 18a, Chisinau, Republica Moldova, MD-2064</td></tr><tr><td>NETHERLANDS</td><td>MMSN</td><td>Mitsubishi Motor Sales Nederland B.V.</td><td>Postbus 9090 1180 MB Amstelveen Bovenkerkerweg 6-8, 1185 XE Amstelveen, The Netherlands</td></tr><tr><td>NORWAY</td><td>MMCN</td><td>MMC Norge AS</td><td>Ostre Aker vei 62, 0581 Oslo P.O. Box 6843 Rodelokka, 0504 Oslo, Norway</td></tr><tr><td>POLAND</td><td>MMCP</td><td>MMC Car Poland Sp.z o.o.</td><td>ul.,17 Stycznia 45A,02-146,Warsaw,Poland</td></tr><tr><td>PORTUGAL</td><td>MBP Automoves Portugal,S.A.</td><td>MBP Automoveis Portugal,S.A.</td><td>Rua Dr. José Espírito Santo, 38, 1950-097 LISBOA, Portugal</td></tr><tr><td>ROMANIA</td><td>M CAR TRADING</td><td>M CAR TRADING</td><td>2nd,Expozitiei Blv,district 1,012103 BUCHAREST,BULGARIA</td></tr><tr><td>SLOVAKIA</td><td>M Motors SK s.r.o.</td><td>M Motors SK s.r.o.</td><td>Panonska cesta 33, Bratislava, Slovakia, ZIP 851 04</td></tr><tr><td>SLOVENIA</td><td>AC-Mobil d.o.o.</td><td>AC-Mobil, d.o.o. Ljubljana</td><td>Baragova 9, 1113 Ljubljana</td></tr><tr><td>SPAIN</td><td>B&M Automóviles España, S.A.</td><td>B&M Automóviles España, S.A.</td><td>calle Alcalá, 65, 28014 Madrid, Spain</td></tr><tr><td>SWEDEN</td><td>MMCS</td><td>MMC Bilar Sverige AB</td><td>Bergkallavagen 32, SE-192 07 Sollentuna, Sweden</td></tr><tr><td>SWITZERLAND</td><td>MM Automobile Schweiz AG</td><td>MM Automobile Schweiz AG</td><td>Lischmatt 17, 4624 Harkingen, Switzerland</td></tr><tr><td>U.K.</td><td>CCC</td><td>The Colt Car Company Limited</td><td>Watermoor, Cirencester Gloucestershire GL7 1LF, The United Kingdom</td></tr><tr><td>GEORGIA</td><td>Caucasus Motors Ltd.</td><td>Caucasus Motors Ltd.</td><td>12th km David Agmashenebeli Alley Digomi, 0131 Tbilisi, Georgia</td></tr><tr><td>TAHITI</td><td>SOPADEP S.A.</td><td>SOPADEP S.A.</td><td>Route de ceinture de Tpaerui, BP 1617, 98713 Papote, Tahli French Polynesia</td></tr></table>
<h1 id="manufacturers-declaration">MANUFACTURERS DECLARATION</h1>
<h1 id="of-conformity">OF CONFORMITY</h1>
<p><img alt="" src="images/5beb53f433ec434b632033973e50a2cfa8c32372c622a98a219151ae898547da.jpg" /></p>
<p>For</p>
<p><img alt="" src="images/27563d1535c6d16ee38bc9a542c2b7b76262756e4eea796762cc889940178cd2.jpg" /></p>
<h1 id="pantagraph-car-jack">Pantagraph Car Jack</h1>
<h1 id="models-pjm700-pjm800-pjm1000-pjm1200">Models PJM700, PJM800, PJM1000 & PJM1200</h1>
<p>Technical File compiled and held in the EU, on behalf of the manufacturer by</p>
<p>TRac Global Ltd</p>
<p>100 Frobisher Business Park,</p>
<p>Kyoto 612-830</p>
<p>Japan</p>
<h1 id="manufactured-by">Manufactured by</h1>
<p>Taihei Industrial Co., Ltd.
No.49-1, Kagekatsu-Cho,</p>
<p>Fushimi-Ku,</p>
<p>Kyoto 612-8307</p>
<p>Japan</p>
<h1 id="standards-used-as-guidance">Standards used as guidance</h1>
<p>Machinery Directive</p>
<p>Annex I of 2006/42/EC with reference to : EN 1494:2000/A1:2008</p>
<h1 id="means-of-conformity">Means of Conformity</h1>
<p>The Product is in conformity with EC law as approximated by the Machinery Directive 2006/42/EC, As detailed in Technical Documentation File No 2136 Revision 2, March 2012</p>
<h1 id="mr-masato-nasu">Mr. Masato Nasu</h1>
<p>President</p>
<p>Taihei Industrial Co., Ltd.</p>
<p>Signature of Responsible Person:</p>
<p><img alt="" src="images/6fc34997ee408da71bc8b7d314145888998ed6825ee825c33c51783c599e90b4.jpg" /></p>
<p>Mr Neil Roche
EMC Product Manager
TRaC Global Ltd.</p>
<p>the Technical File:</p>
<p><img alt="" src="images/17382b30e1e711e1ef83276a3d6b067b28fa569272c9f5de6edb884b3d442799.jpg" /></p>
<h1 id="date">Date:</h1>
<p>Date:</p>
<p>MACHINE SERIAL No.</p>
<p>Certificate No. 17-0074-1 DofC Issue 3</p>
<table><tr><td>Deutsch (German)</td><td>Français (French)</td><td>Italiano (Italian)</td></tr><tr><td>KONFORMITÄTSERKLÄRUNG DES HERSTELLERSFürPantagraph Wagenheber, Modelle PJM700, PJM800, PJM1000 & PJM1200</td><td>DECLARATION DE CONFORMITE DU FABRICANTPourPantagraph Car Jack, modèles PJM700, PJM800, PJM1000 & PJM1200</td><td>DICHIARAZIONE DI CONFORMITÀ DEL PRODUTTOREPerCric a pantografo, modelli PJM700, PJM800, PJM1000 & PJM1200</td></tr><tr><td>Hergestellt vonTaihei Industrial Co., Ltd.No.49-1, Kagekatsu-cho, Fushimi-ku, Kyoto 612-8307 Japan</td><td>Fabriqué parTaihei Industrial Co., Ltd.No.49-1, Kagekatsu-cho, Fushimi-ku, Kyoto 612-8307 Japon</td><td>Prodotto daTaihei Industrial Co., Ltd.No.49-1, Kagekatsu-cho, Fushimi-ku, Kyoto 612-8307 Giappone</td></tr><tr><td>Technische Dokumentation zusammengestellt und bereitgehalten in der EU, im Namen des Herstellers durch TRaC Global Ltd100 Frobisher Business Park, Leigh Sinton Road, Malvern, Worcestershire, WR14 1BX Vereinigtes Königreich</td><td>Fichier technique compilé et maintenu dans l'UE, au nom du fabricant enTRaC Global Ltd100 Frobisher Business Park, Leigh Sinton Road, Malvern, Worcestershire, WR14 1BX Royaume-Uni</td><td>File tecnico compilato e detenuto nell'UE per conto del produttore daTRaC Global Ltd100 Frobisher Business Park, Leigh Sinton Road, Malvern, Worcestershire, WR14 1BX Regno Unito</td></tr><tr><td>Als Leitlinie der Maschinenrichtlinie verwendete NormenAnhang I der 2006/42/EG mit Bezug auf:EN 1494:2000/A1:2008</td><td>Normes utilisées pour le guide de l'appareilAnnexe I de 2006/42/EC en se reportant à la section :EN 1494:2000/A1:2008</td><td>Standard utilizzati come guida della direttiva macchineAppendice I di 2006/42/CE con riferimento a:EN 1494:2000/A1:2008</td></tr><tr><td>KonformitätDas Produkt steht in Übereinstimmung mit den der Maschinenrichtlinie 2006/42/EG angeglichenen EG-Gesetzen,</td><td>Moyens de conformitéLe produit est en conformité avec la loi CE comme approximativement par la directive sur la machinerie 2006/42/CE,</td><td>Certificato di conformitàIl prodotto è conforme alle leggi della CE poiché rispetta la direttiva macchine 2006/42/CE,</td></tr><tr><td>Entsprechend der Technischen Dokumentation Akte Nr. 2136 2.Revision, März 2012</td><td>Comme décrit dans le fichier de la documentation techniquen°2136 révision 2, mars 2012</td><td>Come dettagliato nel file della documentazione tecnica N. 2136, revisione 2 marzo 2012</td></tr><tr><td>Unterschrift der verantwortlichen Person:Herr Masato NasuPräsidentTaihei Industrial Co., Ltd.</td><td>Signature de la personne responsable :M. Masato NasuPrésidentTaihei Industrial Co., Ltd.</td><td>Firma del responsabile:Masato NasuPresidenteTaihei Industrial Co., Ltd.</td></tr><tr><td>Unterschrift der Person, die die technische Dokumentation in der EU bereithält:Herr Neil RocheEMV-ProduktmanagerTRaC Global Ltd.</td><td>Signature de la personne dans l'UE gardant le fichier technique :M. Neil RocheChef de produit EMCTRaC Global Ltd.</td><td>Firma della persona che detiene il file tecnico nell'UE:Neil RocheEMC Product ManagerTRaC Global Ltd.</td></tr><tr><td>MASCHINENSERIENNR.Datum:13. März 2012Zertifikatsnr.17-0074-1 DofC 3. Ausgabe</td><td>N° DE SERIE DE LA MACHINEDate :13 mars 2012N° de certificat17-0074-1 DofC Edition 3</td><td>N. SERIALE DELLA MACCHINAData:13 marzo 2012Certificato N.17-0074-1 DofC Issue 3</td></tr><tr><td>Nederland (Dutch)</td><td>Dansk (Danish)</td><td>Ελληνικά (Greek)</td></tr><tr><td>FABRIKANTENVERKLARING VAN CONFORMITEITVoorPantagraph Autokrik, Modellen PJM700, PJM800, PJM1000 & PJM1200Geproduceerd doorTaihei Industrial Co., Ltd.No.49-1, Kagekatsu-cho, Fushimi-ku, Kyoto 612-8307 JapanTechnisch Dossier samengesteld en gehouden in de EU,namens de fabrikant doorTRaC Global Ltd100 Frobisher Business Park, Leigh Sinton Road, Malvern,Worcestershire, WR14 1BX United KingdomNormen als leidraad Machinerichtlijn</td><td rowspan="2">PRODUCENTENS OVERENSSTEMMELSESERKLÆRINGforPantografisk donkraft i modellerne PJM700, PJM800, PJM1000 & PJM1200Fremstillet afTaihei Industrial Co., Ltd.No.49-1, Kagekatsu-cho, Fushimi-ku, Kyoto 612-8307 JapanTeknisk fil kompileret og holdt inden for EU på vegne af producentenTRaC Global Ltd100 Frobisher Business Park, Leigh Sinton Road, Malvern,Worcestershire, WR14 1BX EnglandStandarder anvendt som vejledende maskindirektivBilag I i 2006/42/EU med reference til:EN 1494:2000/A1:2008Overensstemmelseserklæringens betydningerProduktet er i overensstemmelse med EU-lovgivningen defineret af Maskindirektivet 2006/42/EF,Som beskrevet i fil med teknisk dokumentation nr. 2136Revidering 2, marts 2012Signatur for ansvarlig:Hr. Masato NasuPresidentTaihei Industrial Co., Ltd.</td><td rowspan="2">ΔΗΛΩΣΗ ΣΥΜΜΟΡΦΩΣΗΣ ΤΩΝ ΚΑΤΑΣΚΕΥΑΣΤΩΝΓιαΓρύλος Αυτοκινήτου Pantagraph, Μοντέλα PJM700, PJM800,PJM1000 και PJM1200Κατασκευάστηκε από τηνTaihei Industrial Co., Ltd.No.49-1, Kagekatsu-cho, Fushimi-ku, Kyoto 612-8307 ΙαπωνίαΤεχνικό Αρχείο συντασσόμενο και διατηρούμενο στην ΕΕ, εξ ονόματος του κατασκευαστή από τηνTRaC Global Ltd100 Frobisher Business Park, Leigh Sinton Road, Malvern,Worcestershire, WR14 1BX Ηνωμένο ΒασίλειοΠρότυπα που χρησιμοποιούνται ως κατευθυντήρια Οδηγία περί ΜηχανημάτωνΠαράρτημα Ι της 2006/42/ΕΚ με αναφορά στην:EN 1494:2000/A1:2008Μέσα ΣυμμόρφωσηςΤο Προϊόν είναι σύμφωνο με την κοινοτική νομοθεσία, όπως προσεγγγίζεται από την Οδηγία για τα Μηχανήματα 2006/42/ΕΚ, Οπως αναφέρεται λεπτομερώς στην Τεχνική Τεκμηρίωση με Αρ. Αρχείου 2136 Ανοθεώρηση 2, Μαρτίου2012Υπογραφή του Υπεύθυνου Ατόμου:κ. Masato NasuΠρόεδροςTaihei Industrial Co., Ltd.Υπογραφή του ατόμου στην ΕΕ που διατηρεί το Τεχνικό Αρχείο:κ. Neil RocheΔιευθυντής Προϊόντων Ηλεκτρομαγνητικής Συμβατότητας TRaC Global Ltd.ΣΕΙΡΙΑΚΟΣ ΑΡ. ΣΥΣΚΕΥΗΣΗμερομηνία:13 Μαρτίου 2012Αρ. Πιστοποιητικού17-0074-1 DofC Eκδοση 3</td></tr><tr><td>Bijlage I van 2006/42/EG met betrekking tot:EN 1494:2000 / A1: 2008Middel van conformiteitHet product is in overeenstemming met het EG-recht zoals benaderd door de Machinerichtlijn 2006/42/EG,Zoals beschreven in Technische Documentatie Dossier nr. 2136Revisie 2, maart 2012Handtekening van de bevoegde persoon:De heer Masato NasuPresidentTaihei Industrial Co., Ltd.Handtekening van de persoon in de EU die het Technisch Dossier:De heer Neil RocheEMC Product ManagerTRaC Global Ltd.MACHINE SerienummerDatum:13 maart 2012Certificaat nr.17-0074-1 DofC Uitgave 3</td></tr><tr><td>Español (Spanish)</td><td>Português (Portuguese)</td><td>Svenska (Swedish)</td></tr><tr><td>DECLARACIÓN DE CONFORMIDAD DEL FABRICANTEParaGato pantógrafo para coche, modelos PJM700, PJM800,PJM1000 & PJM1200Fabricado porTaihei Industrial Co., Ltd.Núm. 49-1, Kagekatsu-cho, Fushimi-ku, Kioto 612-8307 JapónArchivo técnico compilado y mantenido en la UE, en nombre del fabricante porTRaC Global Ltd100 Frobisher Business Park, Leigh Sinton Road, Malvern,Worcestershire, WR14 1BX Reino UnidoEstándares usados como guía Directiva sobre maquinariaAnexo I de 2006/42/CE con referencia a:EN 1494:2000/A1:2008Medidas de conformidadEl producto se encuentra en conformidad con la ley de la CE según se aproxima por la Directiva de máquinas 2006/42/CE,Como se detalla en el Archivo de documentación técnica Núm.2136 Revisión 2, marzo de 2012Firma de la persona responsable:Sr. Masato NasuPresidenteTaihei Industrial Co., Ltd.Firma de la persona en la UE que sostiene el Archivo técnico:Sr. Neil RocheGestor de producto EMCTRaC Global Ltd.NÚM. DE SERIE DE LA MÁQUINAFecha:13 de marzo de 2012Núm. de certificado17-0074-1 DofC Edición 3</td><td>DECLARAÇÃO DE CONFORMIDADE DOS FABRICANTES ParaMacaco para Carro Pantagraph, Modelos PJM700, PJM800,PJM1000 e PJM1200Fabricado porTaihei Industrial Co., Ltd.N.o 49-1, Kagekatsu-cho, Fushimi-ku, Quioto 612-8307 JapãoFicha Técnica compilada e mantida na UE, em nome do fabricante porTRaC Global Ltd100 Frobisher Business Park, Leigh Sinton Road, Malvern,Worcestershire, WR14 1BX Reino UnidoNormas usadas como orientação da Diretiva de MaquinariaAnexo I da 2006/42/EC com referência a:EN 1494:2000/A1:2008Meios de ConformidadeO Produto está em conformidade com a lei CE como aproximado através da Diretiva Relativa a Máquinas 2006/42/CE,Como detalhado na Ficha de Documentação Técnica N.o 2136 Revisão 2, de Março de 2012Assinatura da Pessoa Responsável:Sr. Masato NasuPresidenteTaihei Industrial Co., Ltd.Assinatura da pessoa que detêm a Ficha Técnica na UE:Sr. Neil RocheGestor de Produto EMCTRaC Global Ltd.N.o DE SÉRIE DA MÁQUINAData:13 de Março de 2012Certificado N.o17-0074-1 DofC Edição 3</td><td>TILLVERKARENS FÓRSÄKRAN OM ÖVERENSSTÄMMELSEFörPantagraph domkraft för bil, modellerna PJM700, PJM800,PJM1000 & PJM1200Tillverkad avTaihei Industrial Co., Ltd.No.49-1, Kagekatsu-cho, Fushimi-ku, Kyoto 612-8307 JapanTeknisk fil sammanställd och förvarad i EU, à tillverkarens vägnar genomTRaC Global Ltd100 Frobisher Business Park, Leigh Sinton Road, Malvern,Worcestershire, WR14 1BX StorbritannienStandarder som används som vägledning för maskindirektivetBilaga I i 2006/42/EG med avseende på:EN 1494:2000/A1:2008ÖverensstämmelseProdukten överensstämmer med EG-lagstiftningen som approximeras av Maskindirektivet 2006/42/EG,I enlighet med Teknisk dokumentationsfil nr. 2136 revision 2,mars 2012Signatur av ansvarig person:Mr. Masato NasuOrdförandeTaihei Industrial Co., Ltd.Signatur av den person i EU som förvarar den tekniska filen:Mr Neil RocheEMC ProduktchefTRaC Global Ltd.MAXINENS SERIENUMMERDatum:13 mars 2012Certifikat nr.17-0074-1 DofC Utgåva 3</td></tr><tr><td>Suomi/Suomen kieli (Finnish)</td><td>Čeština (Czech)</td><td>Magyar (Hungarian)</td></tr><tr><td>VALMISTAJAN VAATIMUSTENMUKAISUUSVAKUUTUSMalleillePantagraph-autonosturi, mallit PJM700, PJM800, PJM1000 & PJM1200ValmistajaTaihei Industrial Co., Ltd.No.49-1, Kagekatsu-cho, Fushimi-ku, Kyoto 612-8307 JapanTeknisen asiakirjan on laatinut ja sită säilyttää EU:ssa valmistajan puolestaTRaC Global Ltd100 Frobisher Business Park, Leigh Sinton Road, Malvern, Worcestershire, WR14 1BX United KingdomOhjeena käytetyt standardit Konedirektiivi2006/42/EY:n liite I viitaten standardiin:EN 1494:2000/A1:2008Vaatimustenmukaisuuden sisältöTuote on EY:n lain mukainen konedirektiivin 2006/42/EYMukaisesti,Kuten on selitetty teknisessä asiakirjassa nro 2136 versio 2, maaliskuuta 2012Vastuuhenkilön allekirjoitus:Mr. Masato NasuPuheenjohtajaTaihei Industrial Co., Ltd.Teknisestä asiakirjasta EU:ssa vastaavan henkilön asiakirjoitus:Mr Neil RocheEMC-tuotepäällikköTRaC Global Ltd.KONEEN SARJANROPälvämäärä:13. maaliskuuta 2012Sertifikaatin nro17-0074-1 DofC-numero 3</td><td>PROHLÁŠENÍ VÝROBCE O SHODĚProAutomobilový plošinový zvedák, modely PJM700, PJM800, PJM1000 & PJM1200Vyrobeno společnostíTaihei Industrial Co., Ltd.Č. 49-1, Kagekatsu-cho, Fushimi-ku, Kyoto 612-8307 JaponskoTechnický soubor sestaven a uložen v EU, jménem výrobce vTRaC Global Ltd100 Frobisher Business Park, Leigh Sinton Road, Malvern, Worcestershire, WR14 1BX Velká BritánieDoporučené normy k použití Směrnice o strojních zařízeních Dodatek I k 2006/42/EC s odkazem na:EN 1494:2000/A1:2008Prostředky pro shoduVýrobek vyhovuje předpisům ES vyjádřeným ve směrnici o strojních zařízeních 2006/42/ES,Jak je podrobné uvedeno ve Složce technické dokumentace č. 2136 revize 2, března 2012Podpis odpovědné osoby:p. Masato NasuPředsedaTaihei Industrial Co., Ltd.Podpis osoby v EU uchovávajici Technickou složku:p. Neil RocheEMC Výrobní manažerTRaC Global Ltd.SÉRIOVÉ Č. STROJEDatum:13. března 2012Certifikát č.17-0074-1 DofC vydání 3</td><td>GYÁRTÓI MEGFELELŐSÉGI NYILATKOZATAPantagraph Autóemelő PJM700, PJM800, PJM1000 & PJM1200 modelljeihezGyártóTaihei Industrial Co., Ltd.No.49-1, Kagekatsu-cho, Fushimi-ku, Kyoto 612-8307 JapanAz EU-ban összeállított és megtartott Műszaki Akta, a gyártó részérőlTRaC Global Ltd100 Frobisher Business Park, Leigh Sinton Road, Malvern, Worcestershire, WR14 1BX United KingdomAz irányadó Gépészeti irányelvként használt szabványok A 2006/42/EC I. melléklete, az EN 1494:2000/A1:2008-ra hivatkozvaA megfelelőség eszközeiA Termék megfelel az EK törvényeinek, a Gépi berendezésekre vonatkozó 2006/42/EK irányelvek alapján,A 2136. számú Műszaki Dokumentációs Akta 2., 2012. március javított kiadásában részletezettek szerintFelelős személy aláírása:Mr. Masato NasuElnökTaihei Industrial Co., Ltd.A Műszaki Aktát az EU-ban betartó személy aláírása:Mr Neil RocheEMC TermékmenedzserTRaC Global Ltd.GĚP SOROZATSZÁMADátum:2012. március 13.Tanúsítvány sz.17-0074-1 DofC 3. kiadás</td></tr><tr><td>Polski (Polish)</td><td>Slovenský (Slovak)</td><td>Eesti (Estonian)</td></tr><tr><td>DEKLARACJA ZGODNOŚCI PRODUCENTADotyczącaPantografowy podnośnik samochodowy, modele PJM700,PJM800, PJM1000 i PJM1200Wyprodukowane przezTaihei Industrial Co., Ltd.No.49-1, Kagekatsu-cho, Fushimi-ku, Kioto 612-8307 JaponiaDokumentacja techniczna sporządzona i przechowywana w UEw imieniu producenta przezTRaC Global Ltd100 Frobisher Business Park, Leigh Sinton Road, Malvern,Worcestershire, WR14 1BX Wielka BrytaniaNormy stosowane zgodnie z zaleceniami dyrektywy maszynowejZałącznik I dyrektywy 2006/42/WE w odniesieniu do:EN 1494:2000/A1:2008Zgodność z przepisamiProdukt spełnia wymogi prawa WE zgodnie z DyrektywąMaszynową 2006/42/WE;Zgodnie ze}szczegołowym opisem w dokumentacji technicznejnr 2136 rewizja 2, marca 2012 r.Podpis osoby odpowiedzialnej:Pan Masato NasuPrezesTaihei Industrial Co., Ltd.Podpis osoby w UE pozostającej w posiadaniu dokumentacjitechnicznej:Pan Neil RocheMenedżer Produktów EMCTRaC Global Ltd.Nr SERYJNY MASZYNYData:13 marca 2012 r.Nr certyfikatu17-0074-1 DofC wyd. 3</td><td>VYHLÁSENIE VÝROBCU O ZHODEpreAutomobilovy płošinovy zdvihák, modely PJM700, PJM800,PJM1000 a PJM1200VýrobcaTaihei Industrial Co., Ltd.No.49-1, Kagekatsu-cho, Fushimi-ku, Kyoto 612-8307 JaponskoTechnický súbor zostavený a uložený v EÚ v zastúpení výrobcuTRaC Global Ltd100 Frobisher Business Park, Leigh Sinton Road, Malvern,Worcestershire, WR14 1BX Veľká BritániaNormy použité podľa smerníc o strojových zariadeniachPriloha I 2006/42/ES s odkazom na:EN 1494:2000/A1:2008Prostriedky pre zhoduTento výrobok je v súlade so zákonmi EÚ podľa smernice ostrojových zariadeniach 2006/42/ES,Ako je uvedené v technickej dokumentácii č. 2136 revízia č. 2,marec 2012Podpis zodpovednej osoby:Mr. Masato NasuRiaditeľTaihei Industrial Co., Ltd.Podpis osoby v EÚ držiacej technickú dokumentáciu:Mr Neil RocheProduktový manažér EMCTRaC Global Ltd.VÝROBNÉ ČÍSLO ZARIADENIADátum:13. marec 2012Certifikát č.17-0074-1 Vyhl. o zhode 3.vydanie</td><td>TOOTJATE VASTAVUSDEKLARATSIOONtoodeteleAutotungraud Pantagraph, mudelid PJM700, PJM800, PJM1000ja PJM1200TootjaTaihei Industrial Co., Ltd.No.49-1, Kagekatsu-cho, Fushimi-ku, Kyoto 612-8307 Japan(Jaapan)Tehnilise toimiku koostaja ja selle hoidja tootja nimel ElisTRaC Global Ltd100 Frobisher Business Park, Leigh Sinton Road, Malvern,Worcestershire, WR14 1BX United Kingdom (Ühendkuningriik)Suunistena kasutatud standardid Masinate direktiv2006/42/EC lisa I viitematerjaliga standardistEN 1494:2000/A1:2008VastavusnormatiividAntud toode on vastavuses EÚ seadustega, mis on úhtlustatudmasinate direktiiviga 2006/42/EÚ,Vastavalt’üksikasjalisele kirjeldusele tehnilise dokumentatsioonitoimikus nr 2136, redaktsioon 2, märts 2012Vastutava isiku allkiri:Mr. Masato NasuPresidentTaihei Industrial Co., Ltd.Tehnilise dokumentatsiooni hoidja allkiri ELis:Mr Neil RocheEMC tootejuhtTRaC Global Ltd.MASINA SEERIANUMBERKuupäev:13. märts 2012Sertifikaat nr17-0074-1 DofC, väljaanne 3</td></tr><tr><td>Lietuvių kalba (Lithuanian)</td><td>Latviešu valoda (Latvian)</td><td>Slovenščina (Slovenian)</td></tr><tr><td>GAMINTOJO ATITIKTIES DEKLARACIJASkirta šiems modeliamsŽirklinis automobilinis domkratas, modeliai PJM700, PJM800,PJM1000 ir PJM1200</td><td>RAŽOTĀJA ATBILSTĪBAS DEKLARĀCIJAlzstrādājumsPantogrāfa tipa automobija domkrats, modelji PJM700, PJM800,PJM1000 un PJM1200</td><td>IZJAVA PROIZVAJALCEV O SKLADNOSTIZaDvigalka Pantagraph, Modeli PJM700, PJM800, PJM1000 & PJM1200</td></tr><tr><td rowspan="2">PagamintaTaihei Industrial Co., Ltd.No.49-1, Kagekatsu-cho, Fushimi-ku, Kiotas 612-8307 JaponijaTechninė była sudaryta ir laikoma ES, gamintojo vardu</td><td>RažotājsTaihei Industrial Co., Ltd.No.49-1, Kagekatsu-cho, Fushimi-ku, Kyoto 612-8307 Japan</td><td>ProizvajaTaihei Industrial Co., Ltd.No.49-1, Kagekatsu-cho, Fushimi-ku, Kjoto 612-8307, Japonska</td></tr><tr><td>Tehniskais fails ir kompilēts un to uzglabā ES ražotāja vārdā</td><td>Tehnično dokumentacijo se, v imenu proizvajalca, za EU zbira in hrani na</td></tr><tr><td>TRaC Global Ltd100 Frobisher Business Park, Leigh Sinton Road, Malvern,Worcestershire, WR14 1BX Jungtinė Karalystė</td><td>TRaC Global Ltd100 Frobisher Business Park, Leigh Sinton Road, Malvern,Worcestershire, WR14 1BX United Kingdom</td><td>TRaC Global Ltd100 Frobisher Business Park, Leigh Sinton Road, Malvern,Worcestershire, WR14 1BX Združeno kraljestvo</td></tr><tr><td>Naudojami Mašinų direktyvoje nurodyti standartaiDirektyvos 2006/42/EB I priedas su nuoroda įEN 1494:2000/A1:2008</td><td>Standarti, kas izmantoti kā Mehānismu direktīvas vadīlīnijas direktīvas 2006/42/EK Pielikums I ar atsauci uzEN 1494:2000/A1:2008</td><td>Standardi se uporabljajo kot vodilo Direktive o strojihAneks I k 2006/42/ES s sklicem na:EN 1494:2000/A1:2008</td></tr><tr><td>Atlīkties apibūdinimasŠis gaminys atitinka EB įstatymus, apibrēztus Mašinųdirektyvoje 2006/42/EB,Kaip nurodyta Techninės dokumentacijos byloje Nr. 2136,2-iojoje pataisoje, 2012 m. kovo mén.</td><td>Atbilstības nodrošināšanas līdzekļiIzstrādājums atbiist EK likumiem, kas tuvināti ar Mašīnudirektīvu 2006/42/EK,Kā detalizēti norādīts Tehniskās dokumentācijas failā Nr. 2136,2. pārstrādātais izdevums, 2012. g. Marts</td><td>SkladnostProizvod je v skladu z zakonodajo ES, kot navaja Direktiva o strojih 2006/42/ES,Kot je podrobno opisano v Tehnični dokumentaciji številkadokumenta 2136 revizija 2, marec 2012</td></tr><tr><td>Atsakingo asmens parašas:P. Masato NasuPrezidentasTaihei Industrial Co., Ltd.</td><td>Atbildīgās personas paraksts:Masato Nasu k-gsPrezidentsTaihei Industrial Co., Ltd.</td><td>Podpis odgovorne osebe:G. Masato NasuPredsednikTaihei Industrial Co., Ltd.</td></tr><tr><td>Asmens, kuriam ES priklauso Techninė dokumentacija, parašas:P. Neil RocheEMC gamybos vadovasTRaC Global Ltd.</td><td>Personas, kas glabā tehnisko failu ES, paraksts:Neil Roche k-gsEMC produktu menedžerisTRaC Global Ltd.</td><td>Podpis osebe v EU, ki hrani tehnično dokumentacijo:G. Neil RocheEMC Produktni vodjaTRaC Global Ltd.</td></tr><tr><td>MAŠINOS SERIJOS Nr.Data:2012 m. kovo 13 d.Sertifikato Nr.17-0074-1 DofC, 3-iasis leidimas</td><td>MEHĀNISMA SĒRIJAS Nr.Datums:2012. gada 13. MartsSertifikāta Nr.17-0074-1 DofC, 3. izdevums</td><td>SERIJSKA ŠT. STROJADatum:13. marec 2012Št. certifikata17-0074-1 DofC Izdaja 3</td></tr><tr><td>Български (Bulgarian)</td><td>Român (Romanian)</td><td>Hrvatski (Croatian)</td></tr><tr><td>ДЕКЛАРАЦИЯ ЗА СЪОТВЕТСТВИЕ НА ПРОИЗВОДИТЕЛЯЗаАвто крик тип пантограф, модели PJM700, PJM800, PJM1000и PJM1200Произведено отTaihei Industrial Co., Ltd.No.49-1, Kagekatsu-cho, Fushimi-ku, Kyoto 612-8307 JapanТехническото досие е изготвено и се съхранява в ЕС отимето на производителя отTRaC Global Ltd100 Frobisher Business Park, Leigh Sinton Road, Malvern,Worcestershire, WR14 1BX United KingdomСтандартите, използвани като ръководство за директива за машинитеПриложение I от 2006/42/EC с позоваване на:EN 1494:2000/A1:2008Съответствие с изискваниятаПродуктът отговаря на законодателството на ЕО, съгласно Директива за машините 2006/42/EC,Както е описано подробно в Папка с техническа документация No. 2136 редакция 2, март 2012Подпис на отговорното лице:Г-н Масато НасуПрезидентTaihei Industrial Co., Ltd.Подпис на лицето в ЕС, притежаващо техническото досие:Г-н Нийл РошПродуктов мениджър за EMCTRaC Global Ltd.CЕРИЕН No. НА МАШИНАТАДата:13 март 2012г.Сертификат No.17-0074-1 DofC издание 3</td><td>DECLARAȚIA DE CONFORMITATE A PRODUCĂTORULUI PentruCric pantograf pentru automobile, modelele PJM700, PJM800, PJM1000 & PJM1200Produs deTaihei Industrial Co., Ltd.No.49-1, Kagekatsu-cho, Fushimi-ku, Kyoto 612-8307 JaponiaDosarul tehnic elaborat și păstrat în UE în numele producătorului de cătreTRaC Global Ltd100 Frobisher Business Park, Leigh Sinton Road, Malvern, Worcestershire, WR14 1BX Regatul UnitStandarde utilizate ca linii directoare în Directiva privind echipamentele tehniceAnexa I la Directiva 2006/42/CE cu trimitere la:EN 1494:2000/A1:2008Mijloace de asigurare a conformitățiiProdusul respectă legislația CE, astfel cum este aproximată de Directiva Mașini 2006/42/CEși cum este detaliată în Dosarul de documentație tehnică nr. 2136, revizia 2, martie 2012Semnătura persoanei responsabile:DI. Masato NasuPreședinteTaihei Industrial Co., Ltd.Semnătura persoanei din UE care păstrează Dosarul tehnic: DI. Neil RocheManager Produs EMCTRaC Global Ltd.NR. DE SERIE ECHIPAMENTData:13 martie 2012Certificat nr.17-0074-1 DofC Editița 3</td><td>PROIZVODAČEVA IZJAVA O SUKLADNOSTIZaPantagrafska auto dizalica, Modeli PJM700, PJM800, PJM1000 & PJM1200ProizvodiTaihei Industrial Co., Ltd.No.49-1, Kagekatsu-cho, Fushimi-ku, Kyoto 612-8307 JapanTehnički dokument sastavljen i držan u EU, u ime proizvođačaTRaC Global Ltd100 Frobisher Business Park, Leigh Sinton Road, Malvern, Worcestershire, WR14 1BX Ujedinjeno KraljevstvoStandardi korišteni kao smjernice Direktive o strojevimaDodatak I iz 2006/42/EC s povezivanjem s:EN 1494:2000/A1:2008Značenje sukladnostiProizvod je sukladan sa zakonima EK po Direktivi o strojevima 2006/42/EC,Kao što je navedeno u Tehničkoj dokumentaciji dokument broj 2136 revizija 2, ožujka 2012.Potpis ovlaštene osobe:G. Masato NasuPredsjednikTaihei Industrial Co., Ltd.Potpis osobe iz EU koja posjeduje Tehnički dokument:G. Neil RocheEMC Menadžer proizvodaTRaC Global Ltd.SERIJSKI BROJ UREĐAJADatum:13. ožujka 2012.Certifikat br.17-0074-1 DofC Broj 3</td></tr><tr><td>Norsk (Norwegian)</td><td>Türk (Turkish)</td><td>İslenska (Icelandic)</td></tr><tr><td>PRODUSENTENS ERKLÆRING OM OVERENSSTEMMELSE ForPantagraph biljekk, modellene PJM700, PJM800, PJM1000 og PJM1200</td><td>AŞAĞIDAKİ ÜRÜNLER İÇİNİMALATÇI UYGUNLUK BEYANI</td><td>YFIRLYSING FRAMLEIDANDA UM SAMRÆMIFyrirBıla-Skæra Tjakkur, Gerðir PJM700, PJM800, PJM1000 & PJM1200</td></tr><tr><td>Produsert avTaihei Industrial Co., LtdNr. 49-1, Kagekatsu-cho, Fushimi-ku, Kyoto 612-8307 Japan</td><td>Pantograf Araba Krikosu, Model PJM700, PJM800, PJM1000 ve PJM1200Üretici :Taihei Industrial Co., LtdNo.49-1, Kagekatsu-cho, Fushimi-ku, Kyoto 612-8307 Japonya</td><td>Framleitt afTaihei Industrial Co., LtdNr.49-1, Kagekatsu-cho, Fushimi-ku, Kyótó 612-8307 Japan</td></tr><tr><td>Teknisk fil er satt sammen og lagret i EU, på vegne av produsenten avTRaC Global Ltd100 Frobisher Business Park, Leigh Sinton Road, Malvern, Worcestershire, WR14 1BX, Storbritannia</td><td>İmalatçı adına Teknik Dosyayı derleyen ve AB'de muhafaza eden kuruluşTRaC Global Ltd100 Frobisher Business Park, Leigh Sinton Road, Malvern, Worcestershire, WR14 1BX Birleşik Krallık</td><td>Tækniskjal tekið saman og notað i ESB, fyrir hönd framleiðandaTRaC Global Ltd100 Frobisher Business Park, Leigh Sinton Road, Malvern, Worcestershire, WR14 1BX, Bretland</td></tr><tr><td>Veiledende standarder, brukt av maskindirektivetTillegg 1 for 2006/42/EU med henvisning til:EN 1494:2000/A1:2008</td><td>Yol Gösterici Makine Yönetmeliği olarak kullanılan standartlar EN 1494:2000/A1:2008 no.lu standarda atifta bulunan2006/42/EC no.lu Ek I</td><td>Staðlar notaðir sem leiðsögn Tilskipun VélbúnaðarViðauki i frá 2006/42/EC með tilvisun til:EN 1494:2000/A1:2008</td></tr><tr><td>Betydningen av overensstemmelseApparatet er i overensstemmelse med EU-lovverket, slik det er tilnæmet i maskindirektiv 2006/42/EU,Som beskrevet i teknisk dokumentasjonsfil nr. 2136, revisjon 2, fra mars 2012</td><td>Uyumluluk AracıÜrün, 2006/42/EC no lu Makine Yönetmeliği tarafından öngörüldüğü şekilde Avrupa Topluluğu yasalarıyla uyumludur, 2136 No.lu 2. Revizyon, 2012 Mart tarihlı Teknik Dokümantasyon Dosyasında detaylandırıldığı şekilde</td><td>Uppfylling skilyrðaVaran uppfyllir lög ESB eins og mælt er fyrir i tilskipun 2006/42/EC um vélarbúnað,Sem tekið er fram i tækniskjali nr. 2136 2. Endurskoðun, mars 2012</td></tr><tr><td>Signatur fra ansvarlig person:Hr. Masato NasuDirektørTaihei Industrial Co., Ltd.</td><td>Sorumlu Kişinin İmzası:Sayın Masato NasuBaşkanTaihei Industrial Co., Ltd.</td><td>Undirskrift ábyrgðarmanns:Hr. Masato NasuForstjöriTaihei Industrial Co., Ltd.</td></tr><tr><td>Signatur til person i EU som oppbevarer teknisk fil:Hr. Neil RocheEMC produktsjefTRaC Global Ltd.</td><td>Teknik Dosyayı AB'de muhafaza eden kişinin imzası:Sayın Neil RocheEMC Ürün MüdürüTRaC Global Ltd.</td><td>Undirskrift einstaklings i ESB sem heldur um tækniskjalið:Hr. Neil RocheEMC FramleiðslustjöriTRaC Global Ltd.</td></tr><tr><td>MASKINENS SERIENR.Dato:13. mars 2012Sertifikat nr.17-0074-1 DofC utgave 3</td><td>MAKİNE SERİ No.Tarih:13 Mart 2012Sertifika No.17-0074-1 no.lu Uyum Beyanı Yayın 3</td><td>RADNÚMER TÆKISDagsetning:13. mars 2012Número vottorðs17-0074-1 DofC útgáfa 3</td></tr></table>
<p>"בְרָה אַעֹרִי אַעֹרִי אַעֹרִי אַעֹרִי אַעֹרִי אַעֹרִי אַעֹרִי אַעֹרִי אַעֹרִי אַעֹרִי אַעֹרִם</p>
<p>. וְרָה אַלְבָרִי לְאָה בְּרָה אַלְבָרִי לְאָה בְּרָה אַלְבָרִי לְאָה בְּרָה אַלְבָרִי לְאָה בְּרָה אַלְבּרִי לְאָה בְּרָה אַלְבּרִי לְאָה בְּרָה אַלְבּרִי לְאָה בְּרָה אַלְבּרִי לְאָה ב-</p>
<p>.שְׁרָה אַלְבָרִי לֶתֹאָה בְּרָה אַלְבָרִי, וְרֵלְה אַלְבָרִי לֶתֹאָה בְּרָה אַלְבָרִי "הַלְבָרִי" כְׁרָה</p>
<p>.תְרָה בַעִי לְרָה בַעִי לְרָה בַעִי לְרָה "בְרָה" וּוֹ</p>
<p>. וְאָה אַרְעֹת הַלְהִי לֶלְרִי, בְּוֹרִי לֶלְרִי, בְּוֹרִי לֶלְרִי, בְּוֹרִי לֶלְרִי, בְּוֹרִי לֶלְרִי, בְּוֹרִי לֶל:</p>
<p>51-52240 79</p>
<p>אַלְרָה אַתִי לֹשׁוּעָה בְּרָה אַתִי לֹשׁוּעָה</p>
<p>תא וְרָה בְּרַעֹן</p>


