
10034193 - Cooker Klarstein - Free user manual and instructions
Find the device manual for free 10034193 Klarstein in PDF.


| Product Type | Ceramic Glass Hob |
| Brand | Klarstein |
| Model | 10034193 (Delicatessa 3) |
| Power Supply | 220-240 V ~ 50/60 Hz |
| Number of Cooking Zones | 3 |
| Total Power | 5800 W |
| Top Cooking Zone Power | 1500 W |
| Bottom Cooking Zone Power | 2000 W |
| Right Cooking Zone Power | 2300 W |
| Control Type | Touch (sensitive keys) |
| Display | LED |
| Functions | Timer, Stop & Go, Child Lock, Automatic Shut-off, Residual Heat Indicator, Overboil Protection |
| Safety | Child lock, automatic shut-off, overboil protection, emergency stop (On/Off button) |
| Cooking Surface | Ceramic glass |
| Cleaning | Special ceramic glass cleaner, scraper blade |
| Installation | Built-in, cut-out in worktop |
| Utensil Compatibility | All types of pots suitable for ceramic glass |
| Certifications | CE (2014/30/EU, 2014/35/EU, 2011/65/EU, 2009/125/EC) |
Frequently Asked Questions - 10034193 Klarstein
User questions about 10034193 Klarstein
0 question about this device. Answer the ones you know or ask your own.
Ask a new question about this device
Download the instructions for your Cooker in PDF format for free! Find your manual 10034193 - Klarstein and take your electronic device back in hand. On this page are published all the documents necessary for the use of your device. 10034193 by Klarstein.
USER MANUAL 10034193 Klarstein
Built-In Electric Hob
Encimera incorporada
Plaques de cuisson encastrables
| Maße (mm) L | W H D | A B X | |||||
| 10030683 | 288 52 | 0 52 48 | 265+0-5 | 495+0-5 | min. 50 | ||
| 10034193 | 590 52 | 0 56 52 | 555+0-5 | 495+0-5 | min. 50 | ||
| 10034194 |
| A (mm) B (mm) C (mm) D E | |||
| 760 min. 50 min. 20 Lufteinlass Luftauslass 5 mm |
natural_image
Two technical diagrams showing a rectangular panel with mounting holes and a magnified inset of a mechanical component (no text or symbols)natural_image
Diagram of a layered structure with arrows indicating force or movement (no text or symbols)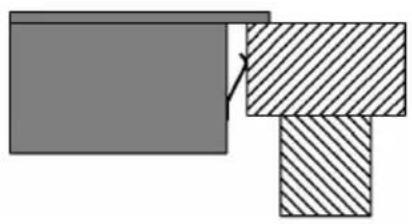
natural_image
Pure geometric diagram showing two stacked rectangles with diagonal hatching, no text or symbols presentnatural_image
Simple line drawing of a cooking pot with a U-shaped magnet (no text or symbols)natural_image
Symbol of a trash bin crossed with a diagonal line, no text or labels presentCongratulations on purchasing this equipment. Please read this manual carefully and take care of the following hints to avoid damages. Any failure caused by ignoring the items and cautions mentioned in the instruction manual is not covered by our warranty and any liability.
CONTENT
Technical Data 31
Declaration of Conformity 31
Safety Instructions 32
Installation 33
Device Overview and Control Panel 36
Getting Started 39
Operation 41
Other Functions 43
Using the Timer 47
Safety Functions 50
Cooking Guidelines 51
Heat Settings 52
Cleaning and Care 53
Troubleshooting 55
Hints on Disposal 57
TECHNICAL DATA
| Item VariCook Domino Delicatessa 3 Delicatessa 3 Flex | |
| Item number 10030683 10034193 10034194 | |
| Power supply 220-240 V ~ 50/60 Hz | |
DECLARATION OF CONFORMITY

Producer:
Chal-Tec GmbH, Wallstraße 16, 10179 Berlin, Germany.
This product is conform to the following European
Directives:
2014/30/EU (EMC)
2014/35/EU (LVD)
2011/65/EU (RoHS)
2009/125/EC (ErP)
SAFETY INSTRUCTIONS
- The installation and connection of the new appliance must only be carried out by qualified personal.
- Repairs to the appliance are only to be carried out by approved service persons. Repairs carried out by inexperienced persons may cause injury or serious malfunctioning. If your appliance needs repairing, please contact costumer service.
- If your appliance malfunctions or fractures: switch off all cooking zones, and contact costumer service. If the surface is cracked, switch off the appliance to avoid the possibility of electric shock. Do not re-use your hob until the glass surface has been changed. If the supply cord is damaged, it must be replaced by its service agent or similarly qualified persons in order to avoid a hazard.
- This device may be only used by children 8 years old or older and persons with limited physical, sensory and mental capabilities and / or lack of experience and knowledge, provided that they have been instructed in use of the device by a supervisor responsible for them and understand the associated risks. Ensure that children do not play with the device.
- Accessible parts may become hot during use. Young children should be kept away.
- The cooking zones will become hot when you cook. Therefore, always keep small children away from the appliance.
- Although cooktop is equipped with a control lock, surfaces may still be hot.
Safety during Use
• This appliance may only be used for normal cooking and frying in the kitchen.
- Do not use the hob to heat the room.
• Take care when plugging in electric appliances near the hob. Connection leads must not come into contact with the hot surface.
• Overheated fats and oils catch fire quickly. You should supervise cooking when preparing foods in fat or oil.
- Switch off the cooking zones after use.
• Always keep the control panels clean and dry.
- Never place combustible items on the hob. You must not keep any combustible items aerosol cans in a drawer located under the hob.
Safety when Cleaning
• Always switch off the appliance before cleaning.
- For safety reasons do not clean the appliance with a steam jet or high pressure cleaner.
- Clean the hob in accordance with the maintenance and cleaning instructions in this manual.
- Do not use harsh abrasive cleaners or sharp metal scrapers to clean the oven door glass since they can scratch the surface, which may result in shattering of the glass.
How to avoid damage to the appliance
- Do not use the cooking area as a worktop or storage space.
- Please be careful the edges when moving pots and pans around.
- Do not have the cooking zones on with empty pans, or with no pots or pans on them.
- Ceramic glass is very tough, and impervious to sharp temperature changes, but is not unbreakable. It can be damaged if particularly hard or sharp objects fall on to it.
- Be very cautious if using pots made of cast iron, or other pots with rough edges or burrs. Moving these can cause scratches on glass.
- If sugar or a mixture containing sugar falls onto a hot cooking zone and melts, remove immediately, while still hot. If left to cool down, it may damage the surface when removed.
- Keep objects or materials liable to melt away from the ceramic glass surface, for example, plastic utensils, aluminum foil, or cooking wraps. If any other materials or foodstuffs have melted on the ceramic glass surface, these should also be cleaned away immediately.
INSTALLATION
Cut out the work surface according to the sizes shown in the table and the drawing. For the purpose of installation and use, a minimum of 50 mm space shall be preserved around the hole. Be sure the thickness of the work surface is at least 30 mm. Please select heat-resistant work surface material to avoid larger deformation caused by the heat radiation from the hotplate.
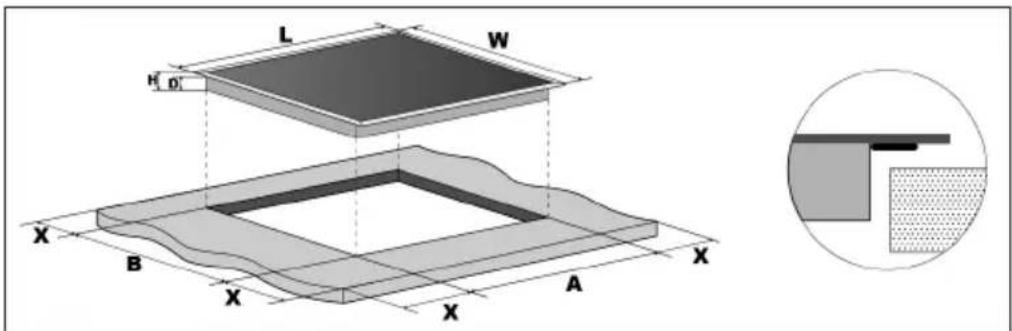
| Dimensions (mm) L | W H D A B X | |||||
| 10030683 | 288 520 52 48 | 265+0-5 | 495+0-5 | min.50 | ||
| 10034193 | 590 520 56 52 | 555+0-5 | 495+0-5 | min.50 | ||
| 10034194 |
Under any circumstances, make sure the ceramic cooker hob is well ventilated and the air inlet and outlet are not blocked. Ensure the ceramic cooker hob is in good work state. As shown below.
Note: The safety distance between the hob and the cupboard above the hob should be at least 760 mm.
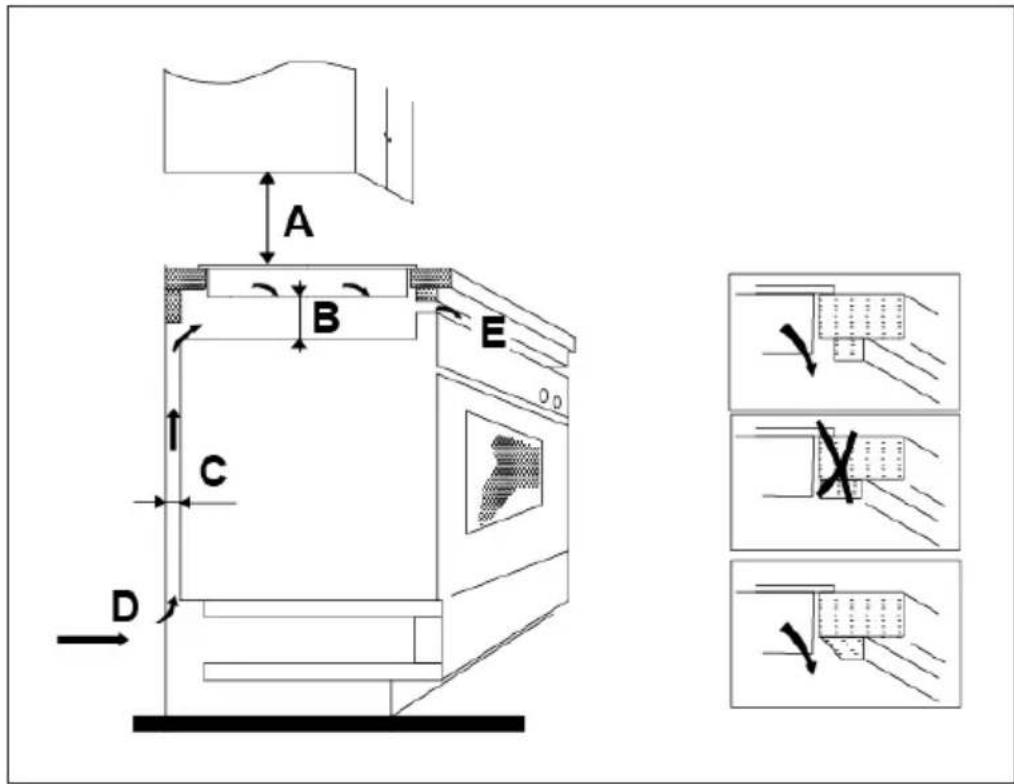
| A (mm) B (mm) C (mm) D E | |||
| 760 min. 50 min. 20 Air intake Air exit 5 mm |
Before locating the fixing brackets
The unit should be placed on a stable, smooth surface (use the packaging). Do not apply force onto the controls protruding from the hob.
Easy Fit kits
There is one easy fit kits package for each hob, include fixing clips and screws (for ceramic hob total 2 clips and 2 screws, for induction hob total 4 clips and 4 screws). Find the easy fit kit package first.
Fix clips to hob:
Insert the fixing clips into fixing holes reserved on 2 sides of housing, fix clip to housing with screw, then insert hob into cabinet/work surface.

natural_image
Two technical diagrams showing a rectangular plate with internal features and a magnified inset of a mechanical component (no text or symbols)Fix hob to cabinet:
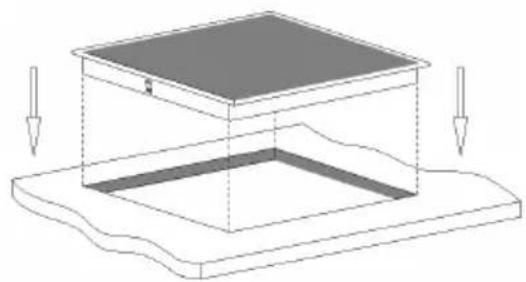
Insert the hob into the cabinet/work surface as shown below, the mounted clips on the sides can secure your hob sturdily.
natural_image
Diagram of a 3D mechanical assembly with a square base and internal cavity, showing downward force arrows (no text or symbols)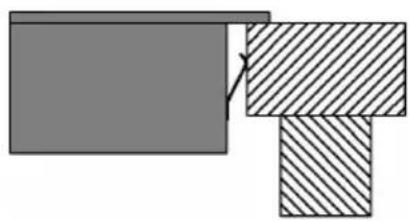
natural_image
Pure geometric diagram showing two stacked rectangles with diagonal hatching, no text or symbols presentNotes on installation
- The electric hob shall not be mounted above cooling equipment, dishwashers and rotary dryers.
- The electric hob shall be installed such that better heat radiation can be ensured to enhance its reliability. Therefore, keep to the specified distances and dimensions.
- The wall and induced heating zone near and above the work surface shall withstand heat.
• To avoid any damage, the sandwich layer and adhesive must be heat resistant.
Notes on electrical connection
- The power supply should be connected in compliance with the relevant standard, or a single-pole circuit breaker. The appliance has a large power rating and must be connected to electricity by a qualified electrician. Do not perform the installation yourself.
- If the appliance is being connected directly to the mains supply, an omnipolar circuit breaker must be installed with a minimum gap of 3 mm between the contacts.
- The installer must ensure that the correct electrical connection has been made and that it complies with safety regulations.
• The power cord must not be bent or compressed.
- The power cord must be checked regularly and only replaced by qualified technician. If the power cord or plug is damaged, it must be replaced by the manufacturer, an authorized service center, or a similarly qualified person.
DEVICE OVERVIEW AND CONTROL PANEL
Hob VariCook Domino (10030683)
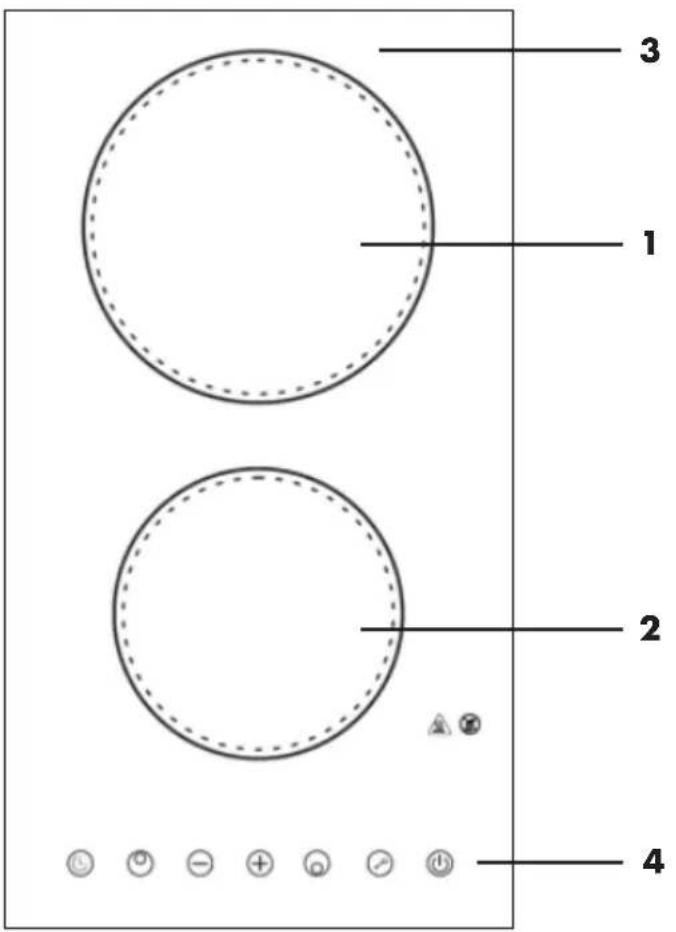
1 Upper Cooking Zone 1800 W
2 Lower Cooking Zone 1200 W
3 Glass Plate
4 Control Panel
Control Panel (10030683)
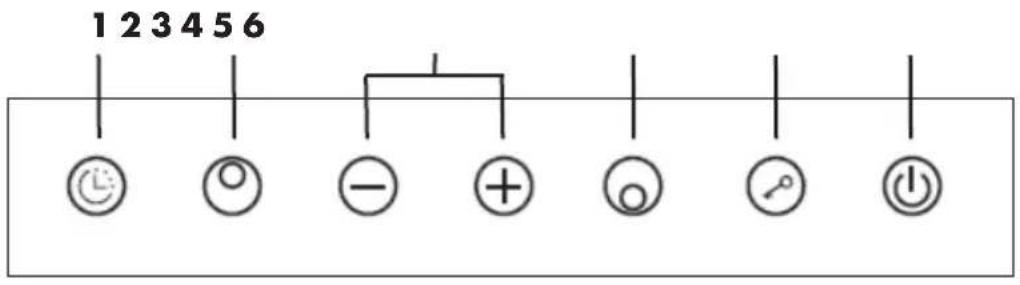
1 Timer 4 Lower Cooking Zone
2 Upper Cooking Zone 5 Child Lock
3 Heating Level/Timer (-) and (+) 6 ON/OFF
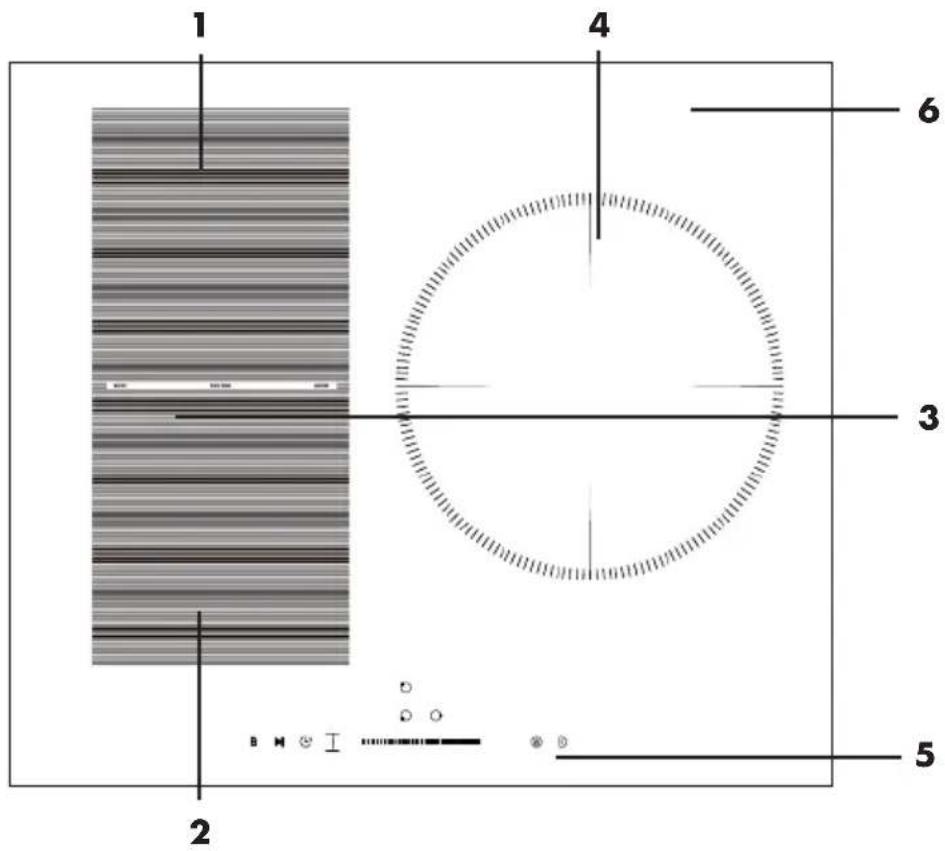
Hob Delicatessa 3 (10034193)
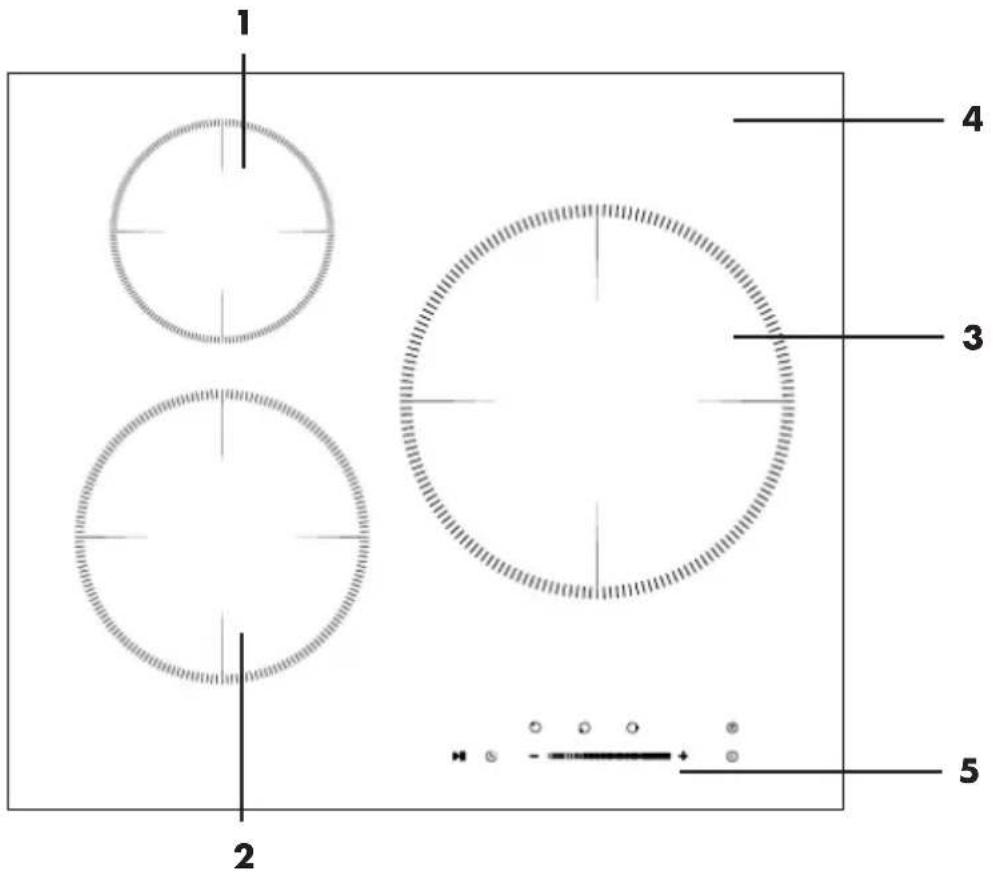
1 Upper Cooking Zone 1500 W 4 Glass Plate
2 Lower Cooking Zone 2000 W 5 Control Panel
3 Right Cooking Zone 2300 W
Control Panel (10034193)
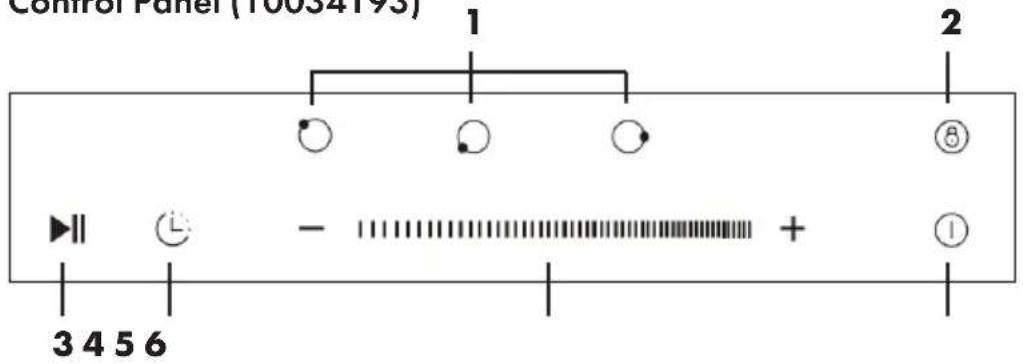
1 Cooking Zone Selection 4 Timer
2 Child Lock 5 Heating Level/Timer (-) and (+)
3 Stop & Go Function 6 ON/OFF
Hob Delicatessa 3 Flex (10034194)
1 Upper Cooking Zone 1500 W (Boost 2000 W) 5 Control Panel
2 Lower Cooking Zone 2000 W (Boost 2600 W) 6 Glas Plate
3 Left flexible Cooking Zone 3000 W (Boost 3600 W)
4 Right Cooking Zone 2300 W (Boost 3000 W)
Control Panel (10034194)
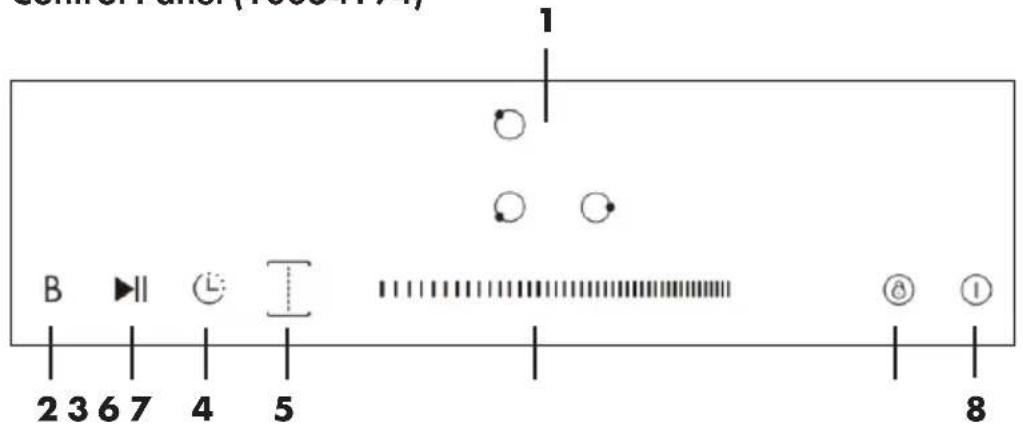
1 Cooking Zone Selection 5 Left flexible Cooking Zone
2 Boost Function 6 Heating Level/Timer (-) and (+)
3 Stop & Go Function 7 Child Lock
4 Timer 8 ON/OFF
Note: The details of your hob may differ slightly from the product pictures shown here. These are only for reference.
GETTING STARTED
Note: Remove any protective film that may still be on your new electric hob.
Using the Touch Controls
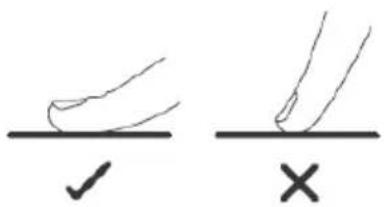
- The controls respond to touch, so you don't need to apply any pressure.
• Use the ball of your finger, not its tip (see figure).
• You will hear a beep each time a touch is registered. - Make sure the controls are always clean, dry, and that there is no object (e.g. an utensil or a cloth) covering them. Even a thin film of water may make the controls difficult to operate.
Choosing the right Cookware
- Only use cookware with a base suitable for induction cooking. Look for the induction symbol on the packaging or on the bottom of the pan.
- You can check whether your cookware is suitable by carrying out a magnet test. Move a magnet towards the base of the pan. If it is attracted, the pan is suitable for induction hob.
• If you do not have a magnet:
- Put some water in the pan you want to check.
- If the indicator does not flash in the display and water is heating, the pan is suitable.
- Cookware made from the following materials is not suitable for an induction hob: pure stainless steel, aluminium or copper without a magnetic base, glass, wood, porcelain, ceramic, and earthenware.
- Induction hob are made from smooth, ceramic glass, the heat comes from a magnetic induction coil which heats the cookware but not the cooking surface. The heat from the cookware is transferred to the food.
- It's important that you use only metal pans specifically designed and/or approved for use on induction hobs. Never allow melamine or plastic containers to come in contact with the heat zones.
- A pan which diameter less than 140 mm may not be detected by the induction hob.
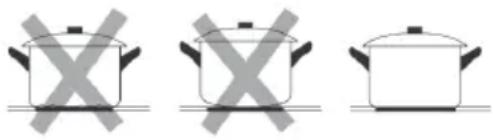 | Do not use cookware with jagged edges or a curved base. |
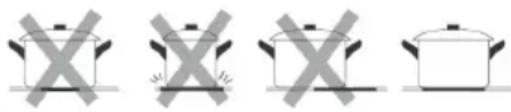 | Make sure that the base of your pan is smooth, sits flat against the glass, and is the same size as the cooking zone. If you use smaller pot efficiency could be less than expected. Always centre your pan on the cooking zone. |
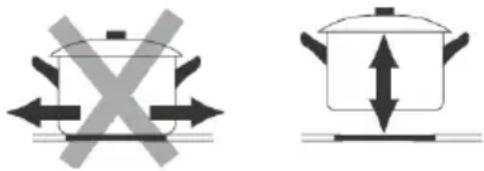 | Always lift pans off the hob. Do not slide, or they may scratch the glass. |
Note: You can use any kind of pot or pan for ceramic hob.
Suggested Pan dimensions for induction hob
The cooking zones are, up to a limit, automatically adapted to the diameter of the pan. However, the bottom of this pan is suggested to have a minimum of diameter according to the corresponding cooking zone. To obtain the best efficiency of your hob, please place the pan in the centre of the cooking zone.
Suggested size of cookware (bottom diameter)
| Cooking zone | Minimum diameter bottom Max | imum diameter bottom |
| 160 mm 140 | mm 160 mm | |
| 180 mm 140 | mm 180 mm | |
| 210 mm 160 | mm 210 mm | |
| 280 mm 230 | mm 280 mm | |
| Flexible zone 2 | 200 mm 400 x 200 mm |
OPERATION
To start cooking
| 1 | After the hob has been connected to electricity and power on. Touch and hold the ON/OFF button for about 3 seconds till you hear a “beep” to turn the hob on. Now the hob enters into standby mode, all heat setting indicators and timer setting indicators show “-”. |  |
| 2 | Place a suitable pan on the cooking zone you wish to use. Make sure the bottom of the pan and the surface of the cooking zone are clean and dry. | 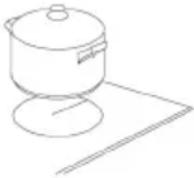 |
| 3 | Touch the heating zone button to select the cooking zone you want to use. The heat setting indicator of the selected zone will flash. | 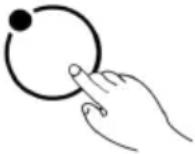 |
| 4 | Set the heating level as follows:Model with Touch control (figure right):Set heat setting by touching the "+" or "-" button. If you touch and hold either of the two buttons, the value will adjust down or up rapidly, from 0 to 9 in circle.Models with Slider Touch control (figure below):Adjust heat setting by sliding the slider control. | 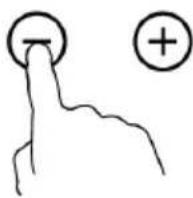 |
 | ||
Notes on Use
• After you connected the appliance to electricity, when power on, the buzzer sounds briefly. All displays light up for 1 second and then go out again.
- When the hob is in standby mode, if there is no practice within 1 minute, the electric hob will auto turn off, with buzzer beeps once.
Note: To turn on the hob, touch the ON/OFF button and hold on for about 3 seconds. To turn it off, you just need to touch the ON/OFF button briefly.
- The power level can be adjusted from 0 to 9, default setting is level 5.
- The heat setting indicator of the selected zone is flashing when adjusting. After adjusting, the number is flashing for 5 seconds then stops flashing, the setting is now confirmed.
To turn off hob
| 1 | Touch the corresponding cooking zone button on the control panel and use either the "+" or "-" button or the touch slider, depending on the model, to set the heat level to 0. The cooking zone is now switched off and the display shows "-" in this case. | 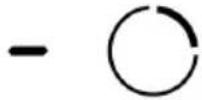 |
| 2 | You can also turn the whole hob off by touching the ON/OFF button. |  |
Note: The cooling fan of induction hob will remain on for about 1 minute after the hob is turned off.
Note: If there is power cut off during cooking, all setting will be cancelled.
OTHER FUNCTIONS
Extended cooking zones (ceramic hobs)
Some of ceramic hob models might have one or several extended cooking zones (Oval/Dual/Triple zone), these extended zones can provide larger cooking area and additional heat to fit for different size of cooking pan.
To use the extended zone when the hob is working, proceed as follows:
| 1 | Select and activate the cooking zone which you would like to use extended zones, for those cooking zone with this feature. Touch the heating zone selection button to select and activate it for adjustment. |  |
| 2 | The central zone will be switched on, when first adjust of heat level for extended cooking zone. | |
| 3 | When the heating zone is selected and activated (power level indicator is flashing), touch extended zone button Ⓞ to activate the extended heating element to get a large heating area. |  |
Notes on using the extended cooking zones
- By continuous touching the control button, the extended zones operate in the following order:
• Oval zone: Central - Oval - Central - Oval - Central zone
- Dual zone: Central - Dual - Central - Dual - Central zone
- Triple zone: Central - Dual - Triple - Central - Dual - Triple - Central zone
- When the Oval zone or the Dual zone is active, the corresponding LED indicator will show heat setting and “” alternately. When the Triple zone is active, the corresponding LED indicator will show heat setting and “” alternately.
Using Booster Function (induction hobs)
Some of induction hob models might have one or several cooking zones which has Booster function. You can use the "Booster" function to boost power of relevant cooking zone for a maximum power rating for 5 minutes. This function could reduce the cooking time, which convenience for cooking when in hurry!
To use booster function when hob is working, follows below:
| 1 | Activate the cooking zone for which you want to use booster function. Touch the heating zone selection button to select the cooking zone for which you want to use boost function. |  |
| 2 | Touch the Booster function button, the heating zone indicator will show "b" and flash for 5 seconds, then will stop flashing and Booster function is activated. |  |
Notes on using the booster function
-
If the booster function is used for a cooking zone and in addition a second cooking zone, vertically above or below, is working with a higher power setting than level 2, then the power setting of this second cooking zone is automatically reduced to level 2.
-
After the booster function is completed, the cooking zone returns to the original setting.
Cancel the Booster function
| 1 | To deactivate the booster function for a cooking zone, touch the corresponding cooking zone button on the control panel. |  |
| 2 | Then touch the Booster function button to cancel the Booster function. The power of the corresponding cooking zone is then reset to the initial setting. |  |
| 3 | You can also cancel the booster function by setting the heating level for the corresponding cooking zone to 0 using the touch slider. |
Flexible Cooking Areas (Induction Hobs)
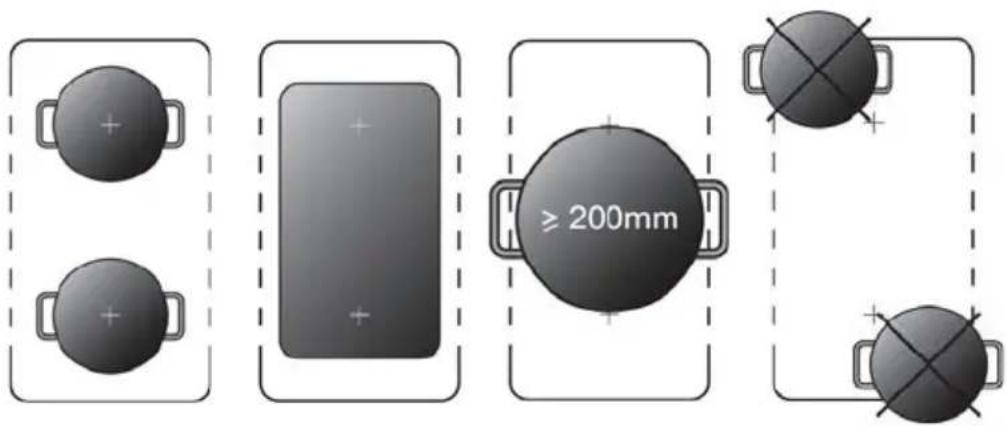
Some of the models might have one or several flexible cooking areas. These flexible cooking areas can each be used as a single zone or as two independent zones, accordingly to the cooking needs anytime.
Flexible areas are each made of two independent inductors that can be controlled separately. When working as a single zone, a cookware is moved from one zone to the other one within the flexible area keeping the same power level of the zone where the cookware originally was placed, and the part that is not covered by cookware is automatically switched off.
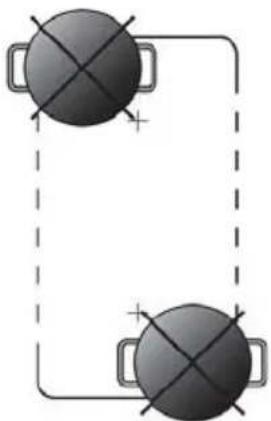
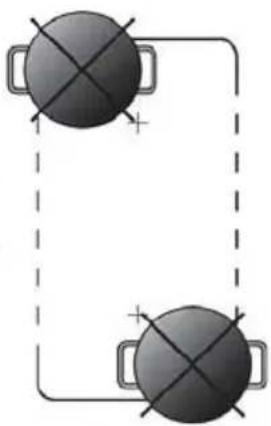
Note: Make sure to place the cookware centered on the single cooking zone. In case of big pot, oval, rectangular and elon-gated pans make sure to place the pans centered on the cooking zone covering both cross.
Activate the flexible induction area:
To activate a flexible area as a single big zone, first touch either of the two cooking zone selection buttons of this flexible area, then press the flexible area button. When the flexible area works, the indicator above corresponding flexible area button will light up, the power level indicator will flash, and you can adjust power level of the flexible area by slide the slidern.
Deactivate the flexible induction area:
To deactivate the flexible area during operation, press either of the two cooking zone selection buttons of this flexible area, when power level indicator is flashing, touch the flexible button again. The indicator will turn off after the flexible area is deactivated.
Child Lock Safety Control
You can lock the controls to prevent unintended use (for example children accidentally turning the cooking zones on) by activated child lock function.
Note: When the controls are locked, except the ON/OFF button and the child lock button, all other touch control buttons are disabled.
To lock the controls:
Touch the child lock button once. The timer indicator will show "Lo", and the child lock function is activated.
To unlock the controls:
- Make sure the hob is turned on.
- Touch and hold the child lock button for 3 seconds, the buzzer beeps once and "Lo" disappears in timer indicator, the child lock is deactivated.
- You can now start using your hob.
Note: Under child lock function, if turn the hob off without inactive the child lock function. When turn on the hob later, the child lock function will still valid
Note: You can always turn the hob off with the ON/OFF control in an emergency, but you shall unlock the hob first in the next operation
Stop & Go function
- If you need to leave the hob quickly, you can use the Stop & Go function to switch off all zones. When you return, just press the Stop & Go button ▶ and cooking will continue with the same settings as before the interruption.
Note: If the Stop & Go function is activated, all buttons except the ON/OFF button and the Stop & Go button are deactivated.
Activate Stop & Go function:
To active Stop & Go function, you can touch the Stop & Go function button ▶ once. Then all program settings will be hold on and hob will stop heating, all heat setting indicators show "P".
Deactivate Stop & Go function:
To cancel the Stop & Go function after you return, touch the Stop & Go button 📋 again. All program settings will return to the state they had before the interruption. The Stop & Go indicator "P" disappears from all displays.
Note: The hob will auto turn off, if Stop & Go function lasts longer than 10 minutes.
USING THE TIMER
When the hob is turned on, you can use the timer in two different ways:
• 1. As Minute minder: In this case, the timer will not turn any cooking zone off when the set time is up.
• 2. As Timer: You can set it to turn either or more than one cooking zones off.
- You can set the minute minder/timer for up to 99 minutes.
Timer - Overview
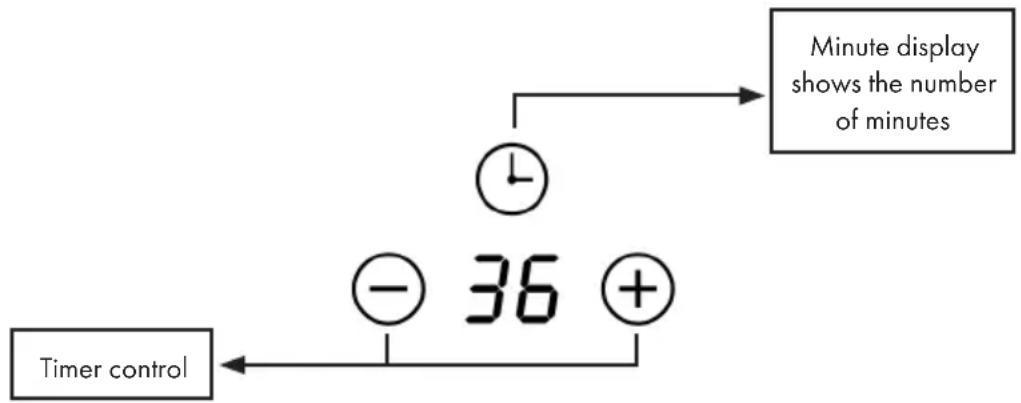
flowchart
graph TD
    A["Clock"] --> B["Time"]
    B --> C["Timer control"]
    D["+"] --> E["- 36"]
    F["+"] --> G["Time"]
    H["Minute display shows the number of minutes"] --> I["Time"]
1. Using the Timer without selecting a Cooking Zone (Minute Minder)
Make sure the hob is turned on. You can use the minute minder if you haven't selected any cooking zone.
| 1 | Touch the timer button ⏻, the number in the timer indicator is flashing. | 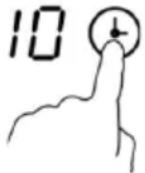 |
| 2 | Set the timer (as minute minder) as follows:Model with touch control (figure right):Use the "+" and "-" buttons to set the timer. Touch and hold either button to increase or decrease the value more quickly.Note:When the timer indicator is flashing, touch the timer button again to quickly confirm the timer setting. | 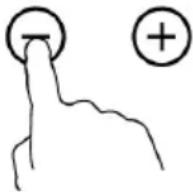 |
| 2 | Model with touch slider (figure below):In the timer indicator, the digits of the two-digit minute display can be set individually. First set the units of the minutes by sliding the slider. Touch the timer button 📁 again. The tens digit is displayed and blinks in the timer indicator. Now set the tens digit of the minutes by sliding the slider.Note: By continuous touching the timer button, the minutes can be set with the slider in the following order: "Single Digit - Ten Digit - Confirm Setting - Single Digit - ...". | |
 | ||
| 3 | When the minute minder is set, it will begin to count down immediately, the display will show the remaining time | 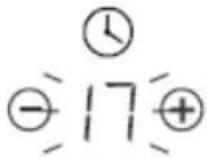 |
| 4 | Buzzer will beep for 30 seconds and timer indicator shows “- - “when the setting time is finished. Any efficient touching of control buttons during it, would end up the buzzer beeps. | 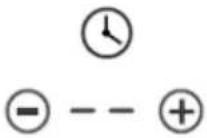 |
2. Setting the timer to turn cooking zone off
| 1 | Touch the corresponding cooking zone button on the control panel for which you want to set a timer. | 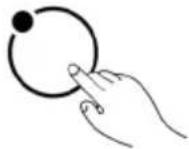 |
| 2 | Touch the timer button ⏻, the number in the timer indicator is flashing. | 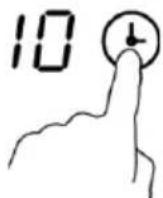 |
| 3 | Adjust the timer setting as follows:Model with touch control (figure right):Use the "+" and "-" buttons to set the timer. Touch and hold either button to increase or decrease the value more quickly.Note:When the timer indicator is flashing, touch the timer button again to quickly confirm the timer setting. | 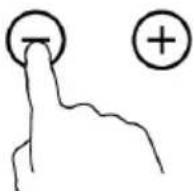 |
| Model with touch slider (figure below):In the timer indicator, the digits of the two-digit minute display can be set individually. First set the units of the minutes by sliding the slider. Touch the timer button 📁 again. The tens digit is displayed and blinks in the timer indicator. Now set the tens digit of the minutes by sliding the slider.Note:By continuous touching the timer button, the minutes can be set with the slider in the following order: "Single Digit - Ten Digit - Confirm Setting - Single Digit - ...". | ||
| - 1111111111111111111111111111111111111111111111111111111111111111111111111111111111111111111111111111 | ||
| 4 | When the timer is set, it will begin to count down immediately, the display will show the remaining timeNote:The red dot next to power level indicator will illuminate for those zones be set with timer. You can check timer setting of different cooking zone which set with timer, by touching the corresponding cooking zone button.Note:If more than one heating zone has timer setting, the timer indicator will show the lowest time. The red dot next to power level indicator will flash. | 6.○3.○ |
| 5 | When cooking timer expires, the corresponding cooking zone will be switch off automatically. | |
Notes on Using the Timer
• The default setting of minute reminder and timer is 30 minutes.
• After adjusting, the setting in timer indicator will flash for 5 seconds and then stop flashing, then the setting will be confirmed.
- The minute reminder and timer can be used at the same time. The timer indicator shows the lowest time setting. If the lowest setting is minute minder, the red dot next to the timer indicator will flash. If the lowest setting is timer setting, the red dot of corresponding cooking zone power level indicator will flash.
- When the timer display shows the time of the timer with cooking zone selection, you can display the time of the minute minder by touching the timer button ⏱
SAFETY FUNCTIONS
Automatic Detection of Pan and Small Articles (Induction Hobs)
For an induction hob, if the indicator flashes alternately with heat setting; this may mean:
• You have not placed a pan on the correct cooking zone.
• The pan you are using is not suitable for induction cooking.
- The pan is too small or not properly centered on the cooking zone.
Notes on automatic pan detection:
- No heating takes place unless there is a suitable pan on the cooking zone.
- No heating takes place unless there is a suitable pan on the cooking zone.
- When an unsuitable size or non-magnetic pan (e.g. aluminum), or some other small item (e.g. knife, fork, key) has been left on the hob, the corresponding cooking zone will automatically turn off in 1 minute.
Residual Heat Warning
- This function is mainly used to warn of hot surfaces: When the hob has been operating for some time, there will be some residual heat. The letter "H" appears in power setting indicator to warn you to keep away from it.
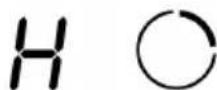
- The function can also be used as an energy saving function: If you want to heat further pans, use the hotplate that is still hot.
Auto Shutdown
Another safety feature of the hob is auto shutdown. This occurs whenever you forget to switch off a cooking zone. The default shutdown times as below table:
| Power level 1 2 3 4 5 6 7 8 9 | ||||||||
| Default working time (hour) 8 8 8 4 4 4 2 2 2 |
Over-heat Protection
A temperature sensor equipped can monitor the temperature inside the hob. When an excessive temperature is monitored, the hob will auto stop operation.
Over-flow Protection
For your safety, the programmer will auto shut off the power if liquid is boiling over or a wet cloth lies on the touch control panel. All control buttons became invalid except the ON/OFF button and the child lock button, unless you wipe the touch control area dry.
COOKING GUIDELINES

CAUTION
Risk of fi re! Be careful when frying, as oil and fat heat up quickly, especially when using the booster function. At extremely high temperatures, oils and fats may spontaneously ignite.
- Once the food is boiling, reduce the temperature.
• Using a lid will reduce cooking times and save energy by retaining the heat - Minimize the amount of liquid or fat to reduce cooking times.
- Start cooking on a high setting and reduce the setting when the food has heated through.
Simmering, cooking rice
- Simmering occurs below boiling point, at around 85 °C, when bubbles are just rising occasionally to the surface of the cooking liquid. It is the key to delicious soups and tender stews because fl avors develop without overcooking the food. You should also cook egg-based and fl our thickened sauces below boiling point.
- Some tasks, including cooking rice by the absorption method, may require a setting higher than the lowest setting to ensure the food is cooked properly in the time recommended.
Searing steak
- Stand the meat at room temperature for about 20 minutes before cooking.
• Heat up a heavy-based frying pan. - Brush both sides of the steak with oil. Drizzle a small amount of oil into the hot pan and then lower the meat onto the hot pan.
- Turn the steak only once during cooking. The exact cooking time will depend on the thickness of the steak and how cooked you want it. Times may vary from about 2-8 minutes per side. Press the steak to gauge how cooked it is – the firmer it feels the more ‘well done’ it will be.
- Leave the steak to rest on a warm plate for a few minutes to allow it to relax and become tender before serving.
For stir-frying
- Choose a ceramic compatible flat-based wok or a large frying pan.
- Have all the ingredients and equipment ready. Stir-frying should be quick. If cooking large quantities, cook the food in several smaller batches.
- Preheat the pan briefly and add two tablespoons of oil.
- Preheat the pan briefly and add two tablespoons of oil.
- Stir-fry the vegetables. When they are hot but still crisp, turn the cooking zone to a lower setting, return the meat to the pan and add your sauce.
- Stir the ingredients gently to make sure they are heated through.
- Serve immediately.
HEAT SETTINGS
Note: The settings below are guidelines only. The exact setting will depend on factors including your cookware and the amount you are cooking. Experiment with the hob to find the settings that best suit you.
| Power level Suitability | |
| 1-2 | Delicate warming for small amounts of foodMelting chocolate, butter, and foods that burn quicklyGentle simmeringSlow warming |
| 3-4 | ReheatingRapid simmeringCooking rice |
| 5-6 • Pancakes | |
| 7-8 | SautéingCooking pasta |
| 9 | Stir-fryingSearingBringing soup to the boilBoiling water |
CLEANING AND CARE
CAUTION
Risk of electric shock and injury! Before any maintenance or cleaning work is carried out, disconnect the appliance from electricity supply and ensure the appliances is completely cool.
Cleaning the Hob Surface
- Clean spillages from the hob surface as soon as possible after use. Clean spillages from the hob surface as soon as possible after each use with a soft cloth or kitchen paper. Always ensure the surface is cool enough before cleaning. If soiling has dried up, you may want to use a specialist vitro-ceramic glass cleaner, which is available in most supermarkets.
- Do not clean the appliance with a high-pressure cleaner.
- Do not use other abrasive cleaners and/or wire wool ect., as it may scratch the ceramic glass surface of your hob.
Cleaning tips
| What? How? Important! | ||
| Everyday soiling is on the glass (fi ngerprints, marks, stains left by food or non-sugary spillovers on the glass). | 1. Switch off the power supply.2. Apply a vitro-ceramic glass cleaner while the glass is still warm (but not hot!)3. Rinse and wipe dry with a clean cloth or paper towel.4. Switch on the power supply to the hob. | When turn off the power supply of hob, there will be no ‘hot surface’ indication but the cooking zone may still be hot! Take extreme care!Heavy-duty scourers, some nylon scourers and harsh/abrasive cleaning agents may scratch the glass. Always read the label to check if your cleaner or scourer is suitable.Never leave cleaning residue on the hob glass surface: the glass may become stained |
| Boil over, melts, and hot sugary spills are on the glass. | Remove these immediately with a fish slice, palette knife or razor blade scraper suitable for ceramic glass of hob, but beware of hot cooking zone surfaces:1. Switch off the power supply.2. Hold the blade or utensil at a 30° angle and scrape the soiling or spill to a cool area of the hob.3. Clean the soiling or spill up with a dish cloth or paper towel.4. Follow steps 2 to 4 for “Everyday soiling on glass” above. | Remove stains left by melts and sugary food or spillovers as soon as possible. If left to cool on the glass, they may be difficult to remove or even permanently damage the glass surface.Attention: Risk of injury due to cuts !When the safety cover is retracted, the blade in a scraper is razor-sharp. Use with extreme care and always store safely and out of reach of children. |
| Spillovers on the touch controls. | Switch off the power supply.Soak up the spill.Wipe the touch control area with a clean damp sponge or cloth.Wipe the area completely dry with a paper towel.Switch on the power supply to the hob. | The hob may beep and turn itself off, and the touch controls may not function while there is liquid on them. Make sure you wipe the touch control area dry before turning the hob back on. |
TROUBLESHOOTING
| Problem Possible | Cause Possible Solution | |
| The hob is not working. | There is no power to the appliance. | There may be a power failure. If not, make sure the hob is plugged in and turned on. Check whether a fuse is turned on or broken. If the problem persists, contact a qualified technician. |
| The timer has elapsed. The set co | coking time has been reached and the appliance has switched off automatically. | |
| There is overflowing liquid on the control panel. The automatic overflow protection ensures that the hob switches off. | Clean the control panel (see section “Cleaning and care”). | |
| The function buttons do not react or are very difficult to operate. | The buttons are locked because the child lock is activated. “Lo” appears in the timer display. | Deactivate the child lock (see “Deactivate the child lock” in the “Other Functions” section). |
| A thin film of water or a wet cloth is on the control panel and the automatic overflow protection has been activated. | Check if the buttons are dry and wipe them dry if necessary. | |
| You are using the fingertips instead of the ball of your finger. | Use the ball of your finger. | |
| After cooking there is “H” shown on display. | The automatic safety function residual heat warning has been activated. | That is normal. The hob is equipped with safety functions to warn against residual heat. It remains on until the surface is cool enough to touch. |
| After switching off, the fan of the induction hob remains working for a while. | The induction hob is completely cooled down by the continued operation of the fan. | That is normal. The “run-on” of the fan is not a fault, but the necessary cooling function of the hob. |
| Some pans make crackling or clicking noises. | These noises are caused by the induction coils during cooking. Due to their construction, such noises can also occur with certain cooking utensils, as the bases are often made of different materials which expand differently when heated. | This is not an error, such noises are normal. |
| The glass is being scratched. | Rough-edged cookware, unsuitable, abrasive scourer or cleaning products are used. | Use cookware with flat and smooth bases. See „Choosing the right cookware“ in section „Getting Started“. |
Failure Inspection for induction hob
- If an abnormality comes up, the induction hob will enter the protective state automatically and display corresponding protective codes, which are listed in the following table.
| Problem Possible | causes Possible Solution | |
| E1/E2 | Abnormal supply voltage Check | that the power supply is intact, that the hob is properly connected to the power supply, and that it is turned on. |
| E3 | High temperature of the pan sensor | Check that there is no liquid in the pot or pan on the hob. Fill with liquid and then restart the hob. |
| E5 | High temperature of the IGBT temperature sensor | Please restart the induction hob after cooling down. |
Note: For all other error codes not listed in the table, turn off the hob and contact customer service.
HINTS ON DISPOSAL
natural_image
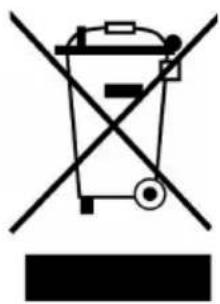
Symbol of a trash bin crossed with a diagonal line, no text or numbers presentAccording to the European waste regulation 2012/19/EU this symbol on the product or on its packaging indicates that this product may not be treated as household waste. Instead it should be taken to the appropriate collection point for the recycling of electrical and electronic equipment. By ensuring this product is disposed of correctly, you will help prevent potential negative consequences for the environment and human health, which could otherwise be caused by inappropriate waste handling of this product. For more detailed information about recycling of this product, please contact your local council or your household waste disposal service.
Chère cliente, cher client,
DÉCLARATION DE CONFORMITÉ

Fabricant :
Chal-Tec GmbH, Wallstraße 16, 10179 Berlin, Allemagne.
| Dimensions(mm) | L W | H D A B X | |||||
| 10030683 | 288 52 | 0 52 48 | 265+0-5 | 495+0-5 | min. 50 | ||
| 10034193 | 590 52 | 0 56 52 | 555+0-5 | 495+0-5 | min. 50 | ||
| 10034194 |
| A (mm) B (mm) C (mm) D E | |||
| 760 min. 50 min. 20 Entrée | d'air Sortie d'air | 5 mm |
natural_image
Two technical diagrams showing a rectangular panel with internal components and a magnified inset of a mechanical component (no text or symbols)natural_image
Isometric diagram of a rectangular container with a top platform and two downward arrows indicating force or movement (no text or symbols)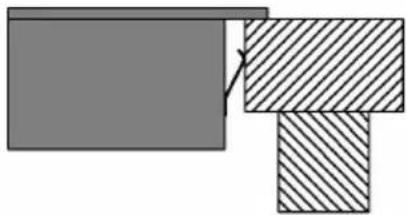
natural_image
Pure geometric diagram showing two overlapping rectangles with diagonal hatching, no text or symbols presentnatural_image
Two identical gray circular objects with plus signs placed side by side within a dashed border (no text or symbols)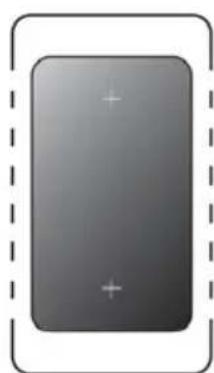
natural_image
Gray rectangular button with plus and minus signs, enclosed by a dashed border (no text or symbols)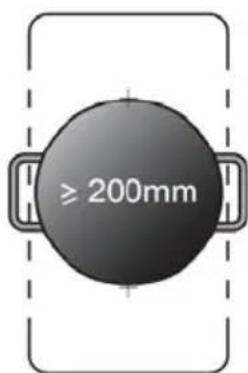
natural_image
Two identical dark circular objects with cross marks connected by a dashed line, no text or symbols present.Protection anti surchauffe
natural_image
Symbol of a trash bin crossed with a diagonal line, no text or numbers present| Dimensiones (mm) | L W | H D A B X | |||||
| 10030683 | 288 52 | 0 52 48 | 265 +0-5 | 495 +0-5 | min. 50 | ||
| 10034193 | 590 52 | 0 56 52 | 555 +0-5 | 495 +0-5 | min. 50 | ||
| 10034194 |
| A (mm) B (mm) C (mm) D E | |||
| 760 min. 50 min. 20 Entrée | d'air Sortie d'air | 5 mm |
natural_image
Two technical diagrams showing a rectangular plate with internal features and a magnified inset of a mechanical component (no text or symbols)natural_image
Diagram of a 3D mechanical assembly with a square base and two downward arrows indicating force or movement (no text or symbols)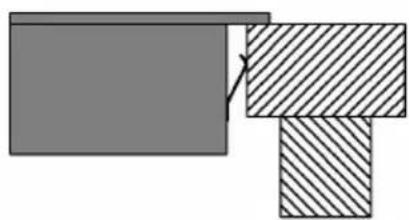
natural_image
Pure geometric diagram showing two stacked rectangles with diagonal hatching, no text or symbols presentnatural_image
Two identical gray circular objects with plus signs placed vertically, enclosed in a dashed border (no text or symbols)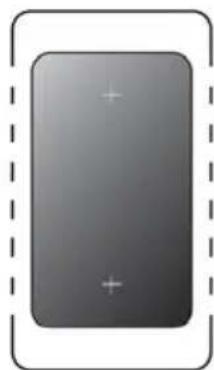
natural_image
Gray rectangular object with plus and minus symbols, enclosed by a dashed border (no text or labels)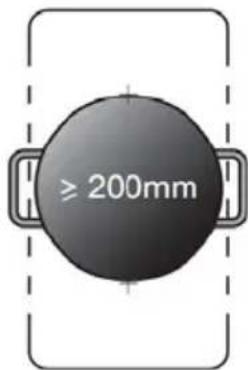
natural_image
Two black circular objects with cross marks connected by a dashed line, no text or symbols present.natural_image
Symbol of a trash bin crossed with a diagonal line, no text or numbers present| Dimensioni(mm) | L W | H D A B X | |||||
| 10030683 | 288 52 | 0 52 48 | 265+0-5 | 495+0-5 | min. 50 | ||
| 10034193 | 590 52 | 0 56 52 | 555+0-5 | 495+0-5 | min. 50 | ||
| 10034194 |
| A (mm) B (mm) C (mm) D E | |||
| 760 min. 50 min. 20 Ingresso aria Uscita aria 5 mm |
natural_image
Technical line drawings of a rectangular structure with internal components and an inset showing a magnified view of a mechanical component (no text or symbols)natural_image
Diagram of a 3D mechanical assembly with a square plate and base platform, showing force arrows (no text or symbols)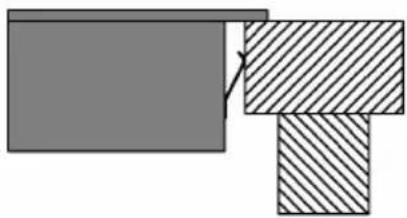
natural_image
Pure geometric diagram showing two stacked rectangles with diagonal hatching, no text or symbols presentLe stoviglie adatte
natural_image
Symbol of a trash bin crossed out by a diagonal line, with no text or labels present.- CONTENT
- TECHNICAL DATA
- DECLARATION OF CONFORMITY
- SAFETY INSTRUCTIONS
- Safety during Use
- Safety when Cleaning
- How to avoid damage to the appliance
- INSTALLATION
- Before locating the fixing brackets
- Easy Fit kits
- Fix clips to hob:
- Fix hob to cabinet:
- Notes on installation
- Notes on electrical connection
- DEVICE OVERVIEW AND CONTROL PANEL
- GETTING STARTED
- Using the Touch Controls
- Choosing the right Cookware
- Suggested Pan dimensions for induction hob
- OPERATION
- Notes on Use
- OTHER FUNCTIONS
- Extended cooking zones (ceramic hobs)
- Notes on using the extended cooking zones
- Using Booster Function (induction hobs)
- Notes on using the booster function
- Cancel the Booster function
- Flexible Cooking Areas (Induction Hobs)
- Child Lock Safety Control
- Stop & Go function
- USING THE TIMER
- Using the Timer without selecting a Cooking Zone (Minute Minder)
- Setting the timer to turn cooking zone off
- Notes on Using the Timer
- SAFETY FUNCTIONS
- Automatic Detection of Pan and Small Articles (Induction Hobs)
- Notes on automatic pan detection:
- Residual Heat Warning
- Auto Shutdown
- Over-heat Protection
- Over-flow Protection
- COOKING GUIDELINES
- CAUTION
- Simmering, cooking rice
- Searing steak
- For stir-frying
- HEAT SETTINGS
- CLEANING AND CARE
- Cleaning the Hob Surface
- Cleaning tips
- TROUBLESHOOTING
- Failure Inspection for induction hob
- HINTS ON DISPOSAL
- DÉCLARATION DE CONFORMITÉ
- Protection anti surchauffe
- Le stoviglie adatte
Brand : Klarstein
Model : 10034193
Category : Cooker