
HVSD9800B - Range hood HOOVER - Free user manual and instructions
Find the device manual for free HVSD9800B HOOVER in PDF.


| Product type | Decorative extractor hood |
| Brand | Hoover |
| Model | HVSD9800B |
| Width | 90 cm |
| Depth | 50 cm |
| Height | 60-110 cm (adjustable) |
| Net weight | 14 kg |
| Power supply | 220-240 V ~ 50 Hz |
| Motor power | 220 W |
| Speed levels | 3 speeds + intensive |
| Max airflow | 650 m³/h |
| Max noise level | 68 dB(A) |
| Lighting type | Integrated LED |
| Lighting power | 2 x 3 W |
| Control type | Electronic touch |
| Grease filter material | Washable aluminium |
| Charcoal filter included | Yes (recyclable) |
| Exhaust mode | External exhaust or recirculation |
| Air outlet diameter | 150 mm |
| Special functions | Timer, automatic shut-off, filter saturation indicator |
| Maintenance and cleaning | Grease filters: wash every 2 months in dishwasher; charcoal filter: replace every 6-12 months |
| Safety | Automatic safety shut-off, motor thermal protection |
| Spare parts and repairability | Filters, LED bulbs, motor and electronic board available as spare parts |
Frequently Asked Questions - HVSD9800B HOOVER
User questions about HVSD9800B HOOVER
0 question about this device. Answer the ones you know or ask your own.
Ask a new question about this device
Download the instructions for your Range hood in PDF format for free! Find your manual HVSD9800B - HOOVER and take your electronic device back in hand. On this page are published all the documents necessary for the use of your device. HVSD9800B by HOOVER.
USER MANUAL HVSD9800B HOOVER
INSTALLATION AND USER'S MANUAL
CONTENT
INTRODUCTION....2
SAFETY PRECAUTION....2
WALL MOUNTING INSTALLATION....3-6
PREPARE FOR INSTALLATION....3
INSTALLATION (VENT OUTSIDE)......4-5
INSTALLATION (VENT INSIDE)......6
OPERATION....7
MAINTENANCE....8
TROUBLESHOOTING....9
ENVIRONMENTAL PROTECTION....10
INTRODUCTION
Thank you for choosing this cooker hood.
This instruction manual is designed to provide you with all required instructions related to the installation, use and maintenance of the appliance.
In order to operate the unit correctly and safety, please read this instruction manual carefully before installation and usage.
The cooker hood use high quality materials, and is made with a streamlined design. Equipped with large power electric motor and centrifugal fan, it also provides strong suction power, low noise operation, non-stick grease filter and easy assembly installation.

By placing the “marking on this product, we declare, on our own responsibility, compliance to all of European safety, health and environmental requirements stated in the legislation for this product.
SAFETY PRECAUTION
□ Never let the children operate the machine.
☐ The cooker hood is for home use only, not suitable for barbecue, roast shop and other commercial purpose.
☐ The cooker hood and its filter should be clean regularly in order to keep in good working condition.
☐ Clean the cooker hood according to the instruction manual and keep the unit from danger of burning.
☐ Forbid the direct baking from the gas cooker.
☐ Please keep the kitchen room a good convection.
Before connecting this appliance check that the power supply cord is not damaged. A damage supply cord must be replaced by qualified service personnel only.
☐ There shall be adequate ventilation of the room when the range hood is used at the same time as appliances burning gas or other fuels;
The air must not be discharged into a flue that is used for exhausting fumes from appliances burning gas or other fuels;
☐ Regulations concerning the discharge of air have to be fulfilled.
☐ This appliance is not intended for use by persons(including children) with reduced physical, sensory or mental capabilities, or lack of experience and knowledge, unless they have been given supervision or instruction concerning use of the appliance by a person slide for their safety.
☐ Children should be supervised to ensure that they do not play with the appliance.
☐ Do not flambé under the range hood.
☐ The range hood is not intended to be installed over a hob having more than four hob elements
Electrical Shock Hazard
☐ Only plug this unit into a properly earthed outlet. If in doubt seek advice from a suitably qualified engineer.
☐ Failure to follow these instructions can result in death, fire, or electrical shock.
WALL MOUNTING INSTALLATION
1. Prepare for installation:
a. If you have an outlet to the outside, your cooker hood can be connected as below picture by means of an extraction duct (enamel, aluminum, flexible pipe or inflammable material with an interior diameter of 150mm)

natural_image
Diagram of airflow around a mechanical component with directional arrows indicating movement (no text or symbols)b. Before installation, turn the unit off and unplug it from the outlet.

natural_image
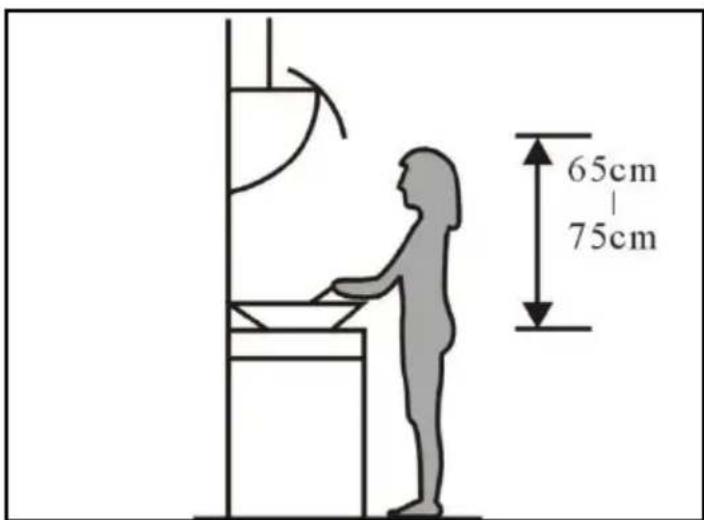
Hand inserting a plug into an electrical outlet (no text or symbols visible)c. The cooker hood should be placed at a distance of 65\~75cm above the cooking plane for best effect.
2. Installation (Vent outside):
Attention! Observe the warning in the instruction sheet concerning the operation of the appliance when air is discharged from the room.
When the range hood and appliance supplied with energy other than electricity are simultaneously in operation, the negative pressure in the room must be not exceed 4 Pa ( 4 × 10^-5 Bar)
- Drill 3 x 8mm holes to accommodate the bracket. Screw and tighten the bracket onto the wall with the screws & screw plugs provided.

- For inclined panel Model, need to drill 4 x 8mm extra holes & fixing screws & screw plugs before installation.

natural_image
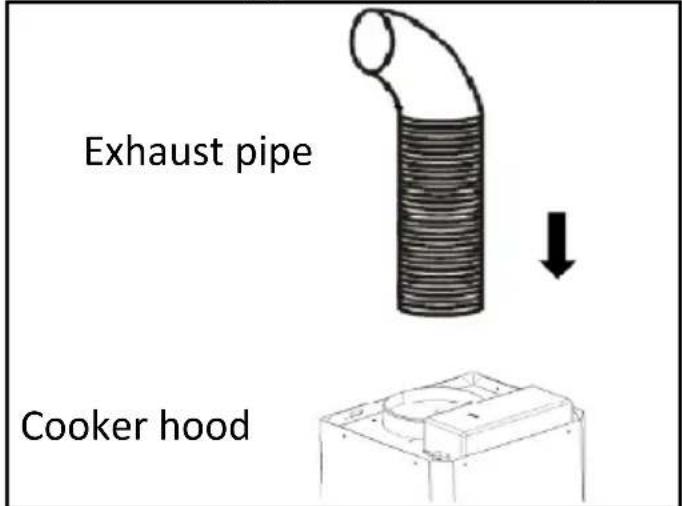
Technical line drawing of a mechanical component with no visible text or symbols● Fix the one-way-valve to the air outlet of the cooker hood. Then, attached the exhaust pipe onto the one-way-valve as shown below.
● Chimney installation.
◆ Sliding the chimney to adjust the chimney height. When the height you required is reached, then hang the fixing hole to the fixing screws as showed in below pictures.

◆ Drill 2×8mm holes to accommodate the plate II. Screw and tighten the plate II onto the wall with 2 screws provided. Assembly the chimney onto the unit and fix it with 2 screws.

Installation (Vent inside)
If you do not have an outlet to the outside, exhaust pipe is not required and the installation is similar to the one show in section "Installation (Vent outside)".

natural_image
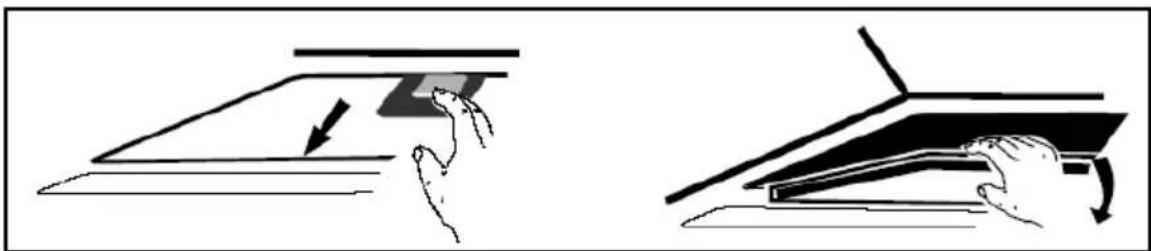
Simple line drawing of a mechanical component with directional arrows indicating motion (no text or symbols)Activated carbon filter can be used to trap odors. In order to install the activated carbon filter, the grease filter should be detached first. Press the lock and pull it downward.
natural_image
Illustration showing two hand gestures interacting with a flat surface, one pointing downward and the other holding a slide (no text or symbols)Plug the activated carbon filter into the unit and turn it in clockwise direction. Repeat the same on the other side.

natural_image
Technical line drawing of a mechanical fan or motor with a close button and rotation arrow (no text or symbols on the diagram itself)NOTE:
○ Make sure the filter is securely locked. Otherwise, it would loosen and cause dangerous.
- When activated carbon filter attached, the suction power will be lower.
Touch control

Fan Speed

Light

Timer
LED display

Infrared Receiver

Cleaning

OFF

FAN SPEED Key
Button for changing the speed of motor following cycle 'Low-Middle-High-Off'.

LIGHT Button
For lighting ON & OFF.

Timer Button
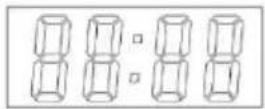
- Setting the time of the day
When hood in standby mode (motor not working), press the timer button to enter the time setting.
Press the 'Fan speed' key to set the hour of the day and press the 'Light' key to set the minute.
- Setting the Timer
When the hood is in operation mode, press the timer button to set the countdown.
Press the timer button one timer then the countdown will increase one minute. The max countdown is 60 minutes.

Infrared Receiver
Infrared receiver for the remote control
For better using the remote control, pls. see below effective control areas.
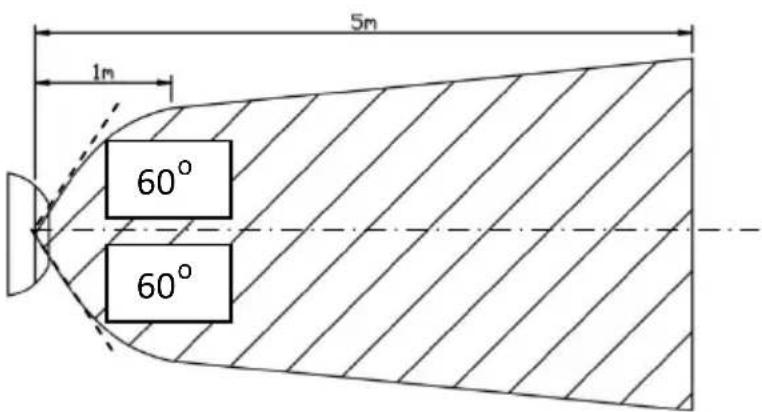

Cleaning Mode
Press the button for 3 seconds to active the cleaning mode, glass panel will open but motor doesn't work.

Off Button
Keep pressing this button for 3 seconds to switch off the cooker hood. Glass panel will close.
MAINTENANCE
Before cleaning switch the unit off and pull out the plug.
I. Regular Cleaning
Use a soft cloth moistened with hand-warm mildly soapy water or household cleaning detergent. Never use metal pads, chemical, abrasive material or stiff brush to clean the unit.
II. Monthly Cleaning for Grease Filter
ESSENTIAL: Clean the filter every month can prevent any risk of fire.
The filter collects grease, smoke and dust..... so the filter is directly affecting the efficiency of the cooker hood. If not cleaned, the grease residue (potential flammable) will saturate on the filter. Clean it with household cleaning detergent.
III. Annual Cleaning for Activated Carbon Filter
Apply SOLELY to unit that installed as a recirculation unit (not vented to the outside). This filter traps odours and must be replaced at least once a year depending on how frequent the cooker hood used.
IV. Bulb Replacement
- Switch the unit off and unplug the appliance.
- Remove the lamp cover by unscrewing the 2 screws.
- Unscrew the incandescent bulb
- Replace with the same type and rated lamp
● LED lamp (max,1.5W).
Replace bulb
Remove the screws on the glass, and remove it. Find the bulb that needs to be replaced, you will find it located inside the base of the hood.

natural_image
Pure diagram of a mechanical or electrical component with downward arrows indicating force or direction (no text or symbols)TROUBLESHOOTING
| Fault | Cause | Solution |
| Light on, but fan does not work | The fan blade is jammed. | Switch off the unit and repair by qualified service personnel only. |
| The motor is damaged. | ||
| Both light and fan do not work | light bulb burn. | Replace the bulb with correct rating. |
| Power cord looses. Plug into the power supply again. | ||
| Serious Vibration of the unit | The fan blade is damaged. | Switch off the unit and repair by qualified service personnel only. |
| The fan motor is not fixed tightly. | Switch off the unit and repair by qualified service personnel only. | |
| The unit is not hung properly on the bracket. | Take down the unit and check whether the bracket is in proper location. | |
| Suction performance not good | Too long distance between the unit and the cooking plane | Readjust the distance to 65-75cm |
ENVIRONMENTAL PROTECTION
Waste electrical products should not be disposed of with household waste. Please recycle where facilities exist. Check with your Local Authority or retailer for recycling advice.
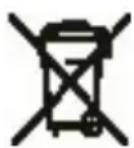
This appliance is marked according to the European directive 2012/19/EU on Waste Electrical and Electronic Equipment (WEEE).
By ensuring this product is disposed of correctly, you will help prevent potential negative consequences for the environment and human health, which could otherwise be caused by inappropriate waste handling of this product.
The symbol on the product indicates that this product may not be treated as household waste. Instead it shall be handed over to the applicable collection point for the recycling of electrical and electronic equipment
Disposal must be carried out in accordance with local environmental regulations for waste disposal.
For more detailed information about treatment, recovery and recycling of this product, please contact your local city office, your household waste disposal service or the shop where you purchased the product.
natural_image
Diagram of airflow around a mechanical component with directional arrows indicating movement (no text or symbols)natural_image
Technical line drawing of a mechanical component with no visible text or symbolsnatural_image
Diagram of a pipe with a curved duct and a downward arrow indicating flow or direction (no text or symbols)Hotte

natural_image
Technical line drawing of a mechanical housing or enclosure with no visible text or symbols6.
Installation (En recyclage)
Installation (En recyclage)
natural_image
Simple line drawing of a mechanical component with directional arrows indicating motion (no text or symbols)natural_image
Illustration of a hand holding a rectangular object with an arrow pointing downward (no text or symbols)
natural_image
Simple line drawing of a hand pressing down on a laptop keyboard (no text or symbols)natural_image
Technical line drawing of a mechanical component with no visible text or symbolsEnclenché
natural_image
Pure mechanical diagram showing two downward arrows pointing to a horizontal beam with a central component (no text or symbols)
- CONTENT
- INTRODUCTION
- Thank you for choosing this cooker hood.
- SAFETY PRECAUTION
- Electrical Shock Hazard
- WALL MOUNTING INSTALLATION
- Prepare for installation:
- Installation (Vent outside):
- Installation (Vent inside)
- NOTE:
- Touch control
- FAN SPEED Key
- Timer Button
- Infrared Receiver
- Cleaning Mode
- Off Button
- MAINTENANCE
- Regular Cleaning
- Monthly Cleaning for Grease Filter
- Annual Cleaning for Activated Carbon Filter
- Bulb Replacement
- ENVIRONMENTAL PROTECTION
- Installation (En recyclage)
Brand : HOOVER
Model : HVSD9800B
Category : Range hood