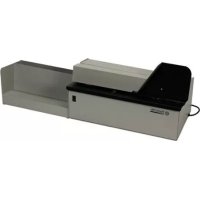
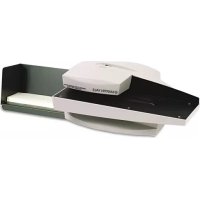
AutoFolder 1501X - Plieuse automatique MartinYale - Free user manual and instructions
Find the device manual for free AutoFolder 1501X MartinYale in PDF.


User questions about AutoFolder 1501X MartinYale
0 question about this device. Answer the ones you know or ask your own.
Ask a new question about this device
Download the instructions for your Plieuse automatique in PDF format for free! Find your manual AutoFolder 1501X - MartinYale and take your electronic device back in hand. On this page are published all the documents necessary for the use of your device. AutoFolder 1501X by MartinYale.
USER MANUAL AutoFolder 1501X MartinYale
natural_image
Abstract gear-shaped logo with a stylized 'M' inside, no text or symbols present.MARTIN YALE
Industries
Model 1501
AutoFolder Instructions
Specifications
Functional
Paper Weight....16# to 28# Bond Stock (60g-105g)
Form Width....3 ^1/2 " min. to 8 ^3/4 " max.
Form Length....5" min. to 14" max.
Feed Table Capacity....167 sheets of 20# (1/2" stack)
Speed....7500 sheets per hour (8 ½" X 11")
Fold Styles......Letter, Half/Single, Double Parallel, Z, and Brochure
Duty Cycle....20,000 sheets per month
Stapled Documents....Three 24 # sheets max, hand fed
Physical
Dimensions....15 ½"W X 24"L X 11 ½"H
Machine Weight....31 lbs.
Shipping Weight....36 lbs.
Electrical
Power....115 V.A.C., 1.3 Amp, Thermal Overload Protected
Introduction
Thank you for selecting the Martin Yale Model 1501 Autofolder. We recommend that you familiarize yourself with the 1501 Autofolder by carefully reading these instructions. Thorough understanding of the information contained within this instruction manual will help to eliminate most operator-associated errors and ensure years of trouble-free performance.
WARNING! Never connect power to the machine until you are ready to set up and operate the folder. During set up, operation, and maintenance keep hands, hair, loose clothing, and jewelry away from all moving parts. Serious bodily injury could result. Service, or disassembly of folder should only be attempted with the power disconnected and locked out.
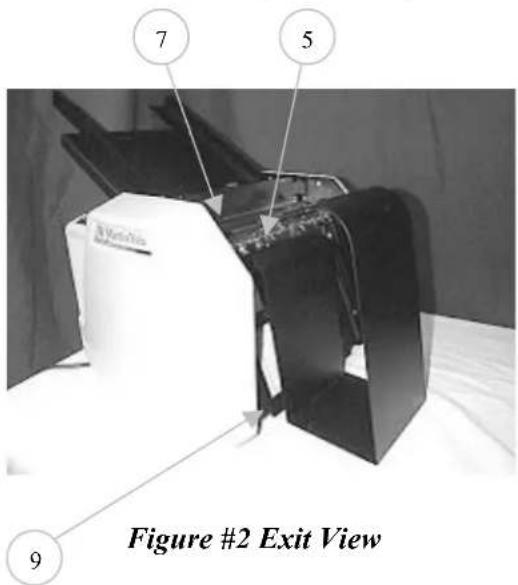
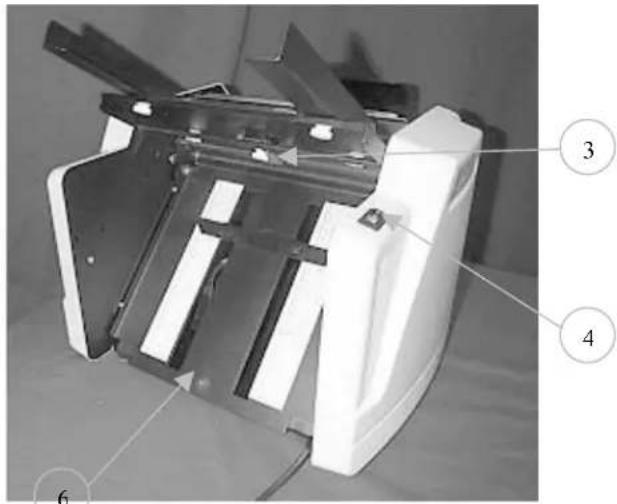
1.0 Parts
- Feed Table (W-O001669)
- First Exit Tray (W-O001611)
- Red Retarder (WRA003116)
- ON/OFF/MOMENTARY Switch (M-S033064)
- Antistatic Tinsel (W-A001684)
- First Fold Table (W-A001602)
- Upper Paper Guide (W-A001678)
- Second Exit Tray (W-O001668)
- Second Fold Table (W-A001604)
text_image
7 5 9 Figure #2 Exit View2.0 Installation
text_image
Labeled diagram of a device showing internal components and parts numbered 3, 4, and 6.Figure #1 Entry View
text_image
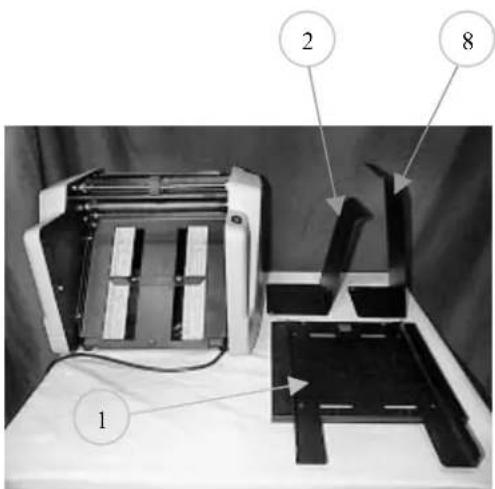
1 2 8Figure #3 Folder Unpacked
2.1 Unpacking
Carefully unpack the 1501 letter folder and accessories. Place the 1501 on a flat, level surface where it will be used. It is necessary to have a clear area behind the folder to place the exit trays. Place all of the packing material back in the shipping box and store the box for any future shipment of the 1501. Inspect the 1501 and all accessories for shipping damage. If any damage is found, contact the carrier immediately. Note: Never handle the feed table by the paper guides.
2.2 Feed table assembly
The feed table can be installed in the 1501 by following three simple steps.
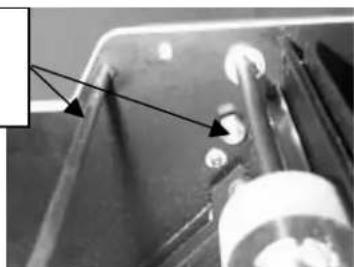
First-Locate the Feed Table support pins and support bar (see figure #4).
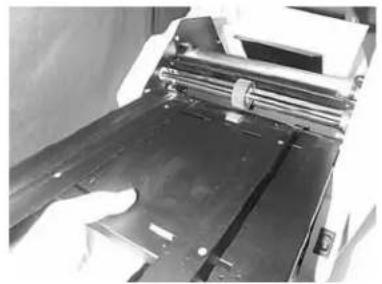
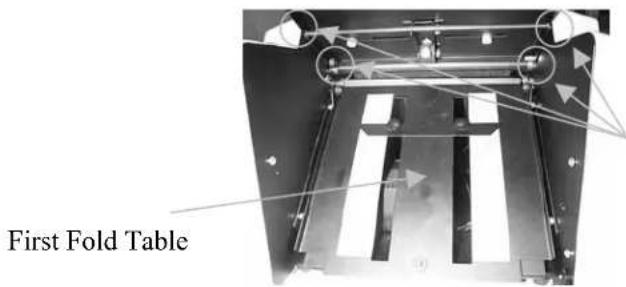
Second-Place front edge of feed table between side frames at the top of the machine (see figure #5). Push feed table into folder so that the cutout areas on the bottom of the feed table fit onto the feed table support
Feed table support pin and support bar; feed table mounts on these
natural_image
Close-up of a mechanical component with arrows pointing to features (no visible text or symbols)Figure #4
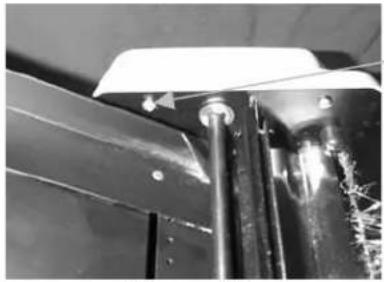
pins. Table should be mounted so that it clears the silver Philips head screws on the side frames (see figure #6). Lower the back of the feed table onto the support bar. Note: Installing the feed table requires the red retarder press against the black feed wheel. This is normal and will not damage the unit. Do not attempt to adjust red retarder to assist feed table installation.
Third-Verify feed table is seated properly onto support pins and support rod (see figure #7).
natural_image
Close-up of a mechanical component with layered metal parts and mounting brackets (no visible text or symbols)Figure #5 Starting feed table into folder
natural_image
Close-up of a metallic mechanical component with visible pipes and bolts (no text or symbols)Figure #6 Close-up of feed table
Note that feed table slides in below Philips head screw
text_image
First Fold TableFigure #7 View from under feed
Feed table installed on support pins and rod
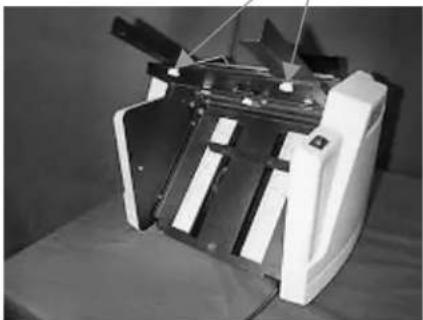
Paper Guide Thumbscrews
natural_image
Exterior view of a white industrial machine or device with metal brackets and mounting feet (no visible text or symbols)Figure #8
2.3 Paper Guides
Note: The folder is preset and tested for a standard 8½” X 11” letter fold.
text_image
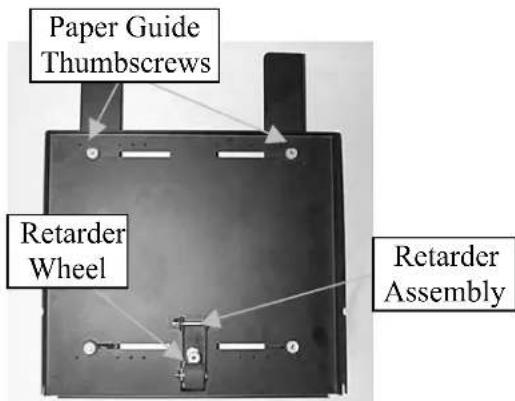
Paper Guide Thumbscrews Retarder Wheel 6 Retarder AssemblyFigure #9 Bottom of Feed Table
To adjust the paper guides, loosen the
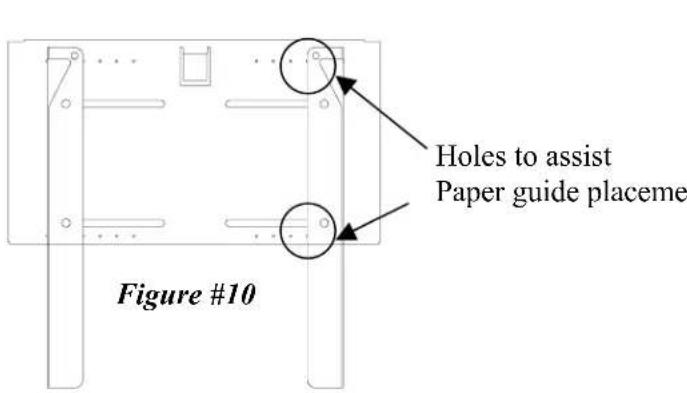
four thumbscrews (see figures #8 and #9) under the feed table and slide them outward. Center a single sheet of paper under the feed wheel. Slide the paper guides in so they are 1mm away from the sides of the paper, and tighten the thumbscrews into place. The paper should be between the guides with a small amount of clearance to feed freely. If necessary, adjust the angle of the paper guides slightly for straight feeding. Small locating holes are in the feed table to assist in paper guide placement (see figures #10 and #11). For example, an 8½" wide sheet of paper results in the outermost holes intersecting with the edges of the paper guides. NOTE: Align locating holes on the outside edges of the paper guides. For odd widths of paper, these holes can be used as an aid in keeping the paper guides square with the folder.
text_image
Holes to assist Paper guide placeme Figure #10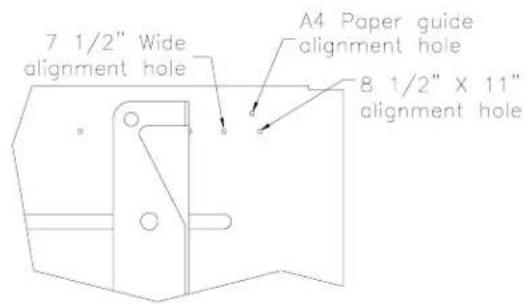
text_image
7 1/2" Wide alignment hole A4 Paper guide alignment hole 8 1/2" X 11" alignment holeFigure #11
Note: The folder is preset and tested for a standard 8½ X 11 letter fold.
Before attempting to use this unit, one must understand the different types of folds (see figure #12 for examples of several common folds and their corresponding icons). A half fold requires that only the first fold table be set and used. All other folds require that both fold tables be set up and used.

text_image
Letter Z Half Brochure Double ParallelFigure #12
2.4.1 Double Fold operation
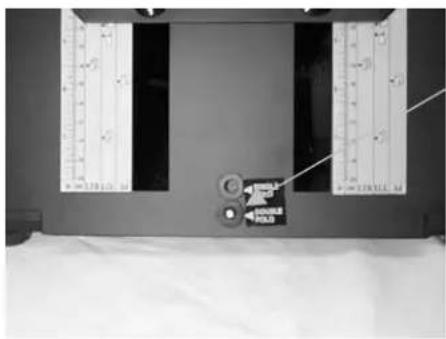
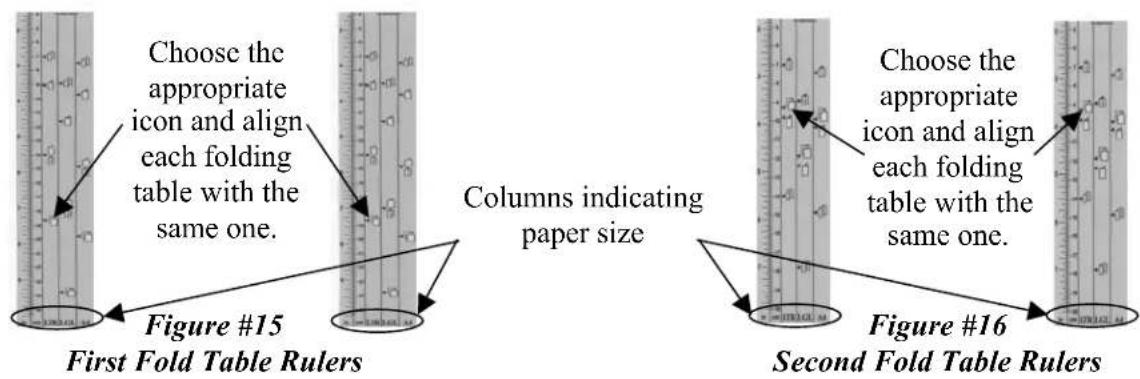
All folding operations apart from the half fold require two folds be placed in the stock. This is the case in the typical letter fold or typical Z-fold. The second fold table must be put into double fold position (see figure #13). If necessary, the second fold table may be moved by pulling out on the bottom edge and lowering or raising so that the double fold grommet is aligned with the mounting post (see figure #14). Fold table may then be pushed onto its mounting post. The paper stops on both fold tables must now be adjusted for the appropriate fold. Match icon color on both sets of labels to choose one of three common paper sizes (see figures #15 and #16). NOTE: LTR=8 ½ X 11" (Yellow), LGL=8 ½ X 14" (Pink), A4=European (Blue). Loosen the paper stop adjusting knobs and slide the paper stop to the desired set of icons, aligning the top edge of the paper stop with the arrows next to the desired icons. NOTE: The user may find it easier to move the paper stops with the fold tables removed from the 1501.
text_image
Technical diagram showing measurement setup with ruler and labeled components, including a control knob and directional arrowsPost in double Fold hole
Figure #13
Fold table in double fold
natural_image
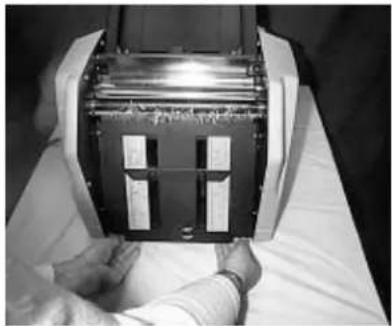
Person handling a device with visible slots and components (no text or symbols)Figure #14 Removing Fold Table
Fold Tables can be removed by pulling the bottom of the table off its mounting stud, and then gently pulling its upper slots from the folder. Installation is the reversal of the above.
text_image
Choose the appropriate icon and align each folding table with the same one. Columns indicating paper size Figure #15 First Fold Table Rulers Choose the appropriate icon and align each folding table with the same one. Figure #16 Second Fold Table Rulers2.4.2 Half Fold Operation
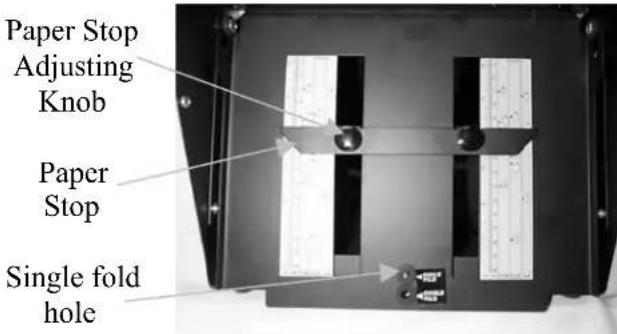
Half Fold Operation requires only one fold table be used (the first fold table in the 1501). First, the second fold table must be put into the single fold position (see figure #17). Do this by pulling out on the bottom edge of the fold table and lowering it so that the “single fold” hole is aligned with the mounting post. Fold table may then be pushed onto its mounting post. Once the second fold table is in the “single fold” position, this fold table is disabled and moving its paper stop will have no effect. The first fold table paper stop must now be adjusted for the half fold (see section 2.5 and figure #15 for paper stop placement). Note: Use only the second exit tray as shown
in figure #19.
2.4.3 Custom Folds
To make custom folds, simply use the rulers to gauge the fold length measured from the paper stop edge to the fold. If the fold is longer on one side than the other, adjust the paper stop with a slight tilt to compensate.
text_image
Paper Stop Adjusting Knob Paper Stop Single fold holeFigure #17 Second fold table in single fold position
2.5 Exit tray set-up
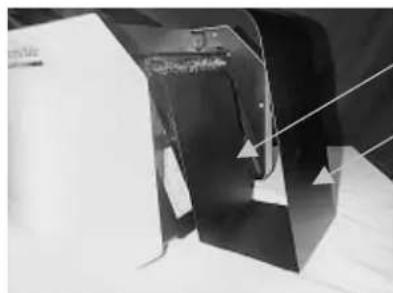
Place the first exit tray behind the folder with the long end up and the short lip pointed toward the folder (see figure #18).
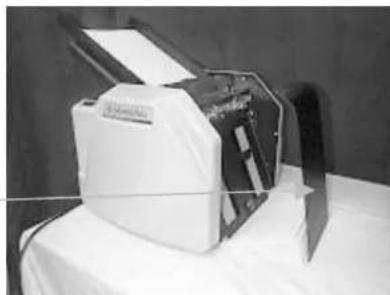
The first exit tray should be centered and touching the folder. Place the second exit tray directly behind and on top of the first. The distance between the exit trays will vary with different types of folds. This distance can be adjusted until the desired paper stack is obtained. Note: Use only the second exit tray when making half folds with the 1501 (see figure #19).
natural_image
Abstract geometric sculpture with layered black forms and white background (no text or symbols)Figure #18
First exit tray
Second exit tray, base goes on top of first exit tray
1501 set up for half folds, only second exit tray is used
natural_image
Exterior view of a white electronic device with a black cover and paper clip, placed on a white surface against a dark background (no visible text or symbols)Figure #19
3.0 Operation
3.1 Automatic Feed Operation
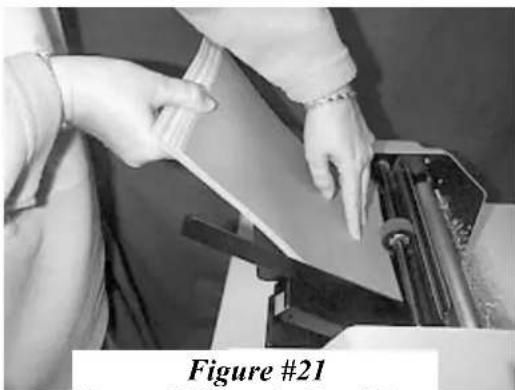
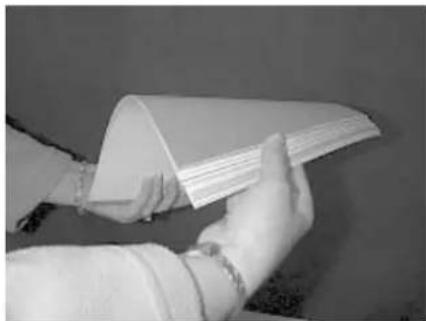
Make sure machine is powered Off. Set up the folder as described in section 2 of these instructions. Fan the stack of paper (see figure #20). Place the fanned paper onto the feed table (see figure #21) with the top sheet positioned where the feed roller and retarder meet. Note: Top paper of stack goes into rollers first. Place only a few sheets on the folder and turn it on continuous run as denoted by 'I' on the OFF/ON switch. Inspect the folded sheets for accuracy and stacking. Make any necessary corrections as described in sections 2.3 and 2.4. Run only a few sheets at a time until all necessary adjustments have been made. A full stack of paper may now be placed on the folder and run. For proper feeding, the stack must be squared in between the paper guides, and the paper should be fanned so that the top sheet is closest to the black feed wheel. Each sheet underneath is staggered backwards. Note: When squaring the paper guides do not allow guides to pinch stock.
natural_image
Person handling a large sheet of paper on a machine, labeled 'Figure #21' (no other text or symbols visible)Fanned Paper in Feed Tray
natural_image
Close-up of hands holding a white sheet of paper or paper on a wall (no visible text or symbols)Figure #20
Person fanning paper to stagger stack
3.2 Multiple Page Set Operation
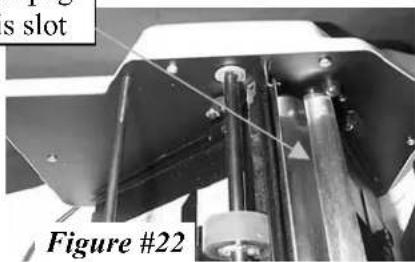
Your unit is capable of folding up to three pieces of 105gsm bond stock at a time. This requires that the sets be fed one at a time through the top of the bonnet assembly. Set up the folder as described in Section 2.1, 2.3, and 2.5 of these instructions. Drop the paper in the slot located in the Upper Guide Assembly. Hold the paper so that it rests squarely on the rollers located underneath (See figure #22). Initiate folding by depressing the ‘(I)’ portion of ON/OFF/MOMENTARY switch and hold down until the folding cycle is complete. The user may find that removing the feed table during long runs of multiple page set operation helps prevent unnecessary feed tire wear. Note: Do not attempt to fold paper through the Upper Guide Assembly with the machine already running, or poor folds will result. To obtain straight folds, the front edge of the paper must be in the nip (pinch point) of the fold rollers before the machine starts running.
Insert multiple page sets into this slot
natural_image
Close-up of a mechanical assembly with visible components and no readable text or symbols4.0 Maintenance
4.1 Folding Rollers
During normal operation, the fold rollers will become coated with ink, toner, paper dust, and other contaminants. Contaminated fold rollers can cause a variety of folding problems including poor feeding and wrinkled paper. Periodic cleaning of the fold rollers will be necessary to maintain peak folding performance (approximately every 5,000-10,000 sheets). Use the following steps to clean folding rollers:
• Make sure that the power to the machine has been disconnected.
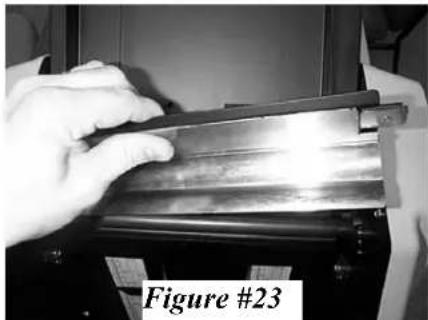
- Remove the Upper Guide Assembly by pushing it sideways into
the right side frame until the left end is clear of the machine, and then lift the left end straight up and out (See figure #23). Liberally spray Martin Yale Rubber Roller Cleaner and Rejuvenator onto a clean, dry cloth. A mild soap solution on a damp cloth may also be used.
natural_image
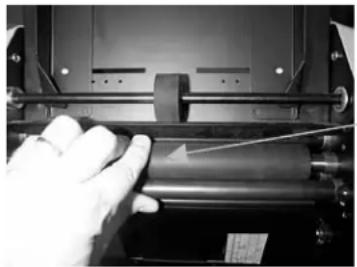
Close-up of a hand holding a metallic object, labeled 'Figure #23' (no other text or symbols visible)- Wipe down the exposed rollers until contaminates no longer appear on the cloth. Rotate the rollers by hand and continue cleaning until all the roller surfaces are clean (See figure #24 for manual spinning of rollers).
- If the surface of the rollers becomes glazed or shiny, it may be necessary to return them to a dull luster
by using a lightly abrasive scouring pad such as 3M Scotchbrite®. Do not use metal scouring pads such as steel wool, as damage to the rollers or bushings may result.
- Re-install the Upper Guide Assembly in the reverse order as described in the first step.
4.2 Clearing Paper Jams
Use the following steps to clear a paper jam:
- Remove top guide assembly (see figure #23).
- Manually rotate rollers “turning” the jam out if possible (see figure #24).
- In the case of a severe jam, it may be necessary to remove each folding table by disengaging it off of its mounting pin and pulling it out of folder (see figure #14).
4.3 Feed Wheel
As with the fold rollers, contamination of the feed wheel may cause problems. When feeding becomes inconsistent, clean with Martin Yale Rubber Roller Cleaner and Rejuvenator and a soft cloth as described above.
4.4 Bushings
If the machine becomes sluggish, clean the fold rollers as outlined in 4.1 above and remove any contaminants from the ends of the shafts and bushings. Lubricate all bushings and shafts with one drop of common household machine oil (i.e. sewing machine oil) on the shaft where it enters the bushing (2 per shaft). CAUTION: Do not allow oil to come in contact with the folding rollers. If oil is spilled on the folding rollers, remove immediately with Martin Yale Rubber Roller Cleaner and Rejuvenator.
natural_image
Close-up of a gloved hand holding a rolled document or scroll, with no visible text or symbols.Figure #24
Manually rotate rollers by spinning the center rubber roller, and one of the rollers next to it together.
5.0 Troubleshooting
5.1 Machine will not run
5.1.1 Circuit Breaker has tripped
If the machine has jammed while folding, turn it off for about 10 minutes to allow thermal breaker to cool and reset. WARNING! Motor will start automatically once it cools. Always turn machine off to allow cooling so as to avoid automatic starts.
5.1.2 Dead receptacle
Try Folder in known good receptacle.
5.1.3 Electrical Malfunction
Have AutoFolder serviced by a qualified technician. Call Martin Yale customer service at (260)-563-0641 if further assistance is needed.
5.2 Paper will not feed
5.2.1 Paper guides are too tight
Adjust the paper guides so that a sheet slides freely between them. Review section 2.3.
5.2.2 Paper stack is not properly fanned
Review section 3.1 along with figure #20 and figure#21.
5.2.3 Feed roller is contaminated
Clean the feed roller as outlined in section 4.3 of this manual.
5.2.4 Static electricity buildup
Fan or jog the paper to loosen the stack. Martin Yale Static Eliminator Spray may be used—liberally spray over paper edges, feed tables, fold tables, and receiving tray.
5.2.5 Retarder roller has developed a flat wear area
Remove the feed table and lay upside down to gain access to the retarder bracket. Loosen nut on retarding locking screw and turn retarder to expose a new surface. Note: Always turn retarder
in the direction of the paper travel. Re-tighten the nut to lock the retarder in this position.
Note: The retarder roller should always be locked in a stationary position.
5.2.6 Paper has a curl in it
Paper will sometimes develop a curl that makes automatic feeding difficult. This is especially common in paper just printed from a laser jet printer. Stacking it and placing a large heavy object such as a large book on it for a couple hours can straighten paper. Another option is to place the paper on the 1501 feed table with the curl down.
5.2.7 Retarder pressure needs adjustment
Retarder pressure is pre-set at the factory and should require no further adjustment throughout the life of the folder. However, if feeding problems continue after following the above steps, the retarder pressure can be adjusted by turning the retarder pressure knob clockwise to increase pressure or counterclockwise to decrease pressure. The normal tendency is to place too much pressure on the retarder resulting in feed wheel damage. Call Martin Yale customer service at (260)-563-0641 if further assistance is needed.
5.3 Crooked Folds
5.3.1 Excessive paper guide side play
Readjust the paper guides to eliminate excessive side play between guides and paper edges, per section 2.3 of these instructions.
5.3.2 Paper guides not aligned properly
Align paper guides per section 2.3 of these instructions. Be sure paper stack is square and centered in the feed tray.
5.3.3 Paper stops not aligned properly
Align paper stops per section 2.4 of this manual. To rule out crooked feeding, test with single sheet of paper in single sheet operation, bypassing the feed tray completely.
5.4 Ink smudges on paper
5.4.1 Ink not dry
Allow additional ink drying time before folding. Some inks do not dry, they only set (dry to the touch). Because of the physical nature of friction feeding, you may notice a mark on the leading edge of the paper.
5.4.2 Excessive toner on photocopied stock
Check copy machine
5.5 Wrinkled paper
5.5.1 Feed table paper guides misaligned
Align the paper guides perpendicular to the folding rollers until the paper feeds straight into the folder. Review section 2.3.
5.5.2 Feed table paper guides too tight
Set guides so that sheets slide freely down between the guides without excessive side play. Review section 2.3.
5.5.3 Dirty Rollers
Dirty rollers are often the cause of wrinkled paper. Clean rollers as described in section 4.1.

MARTIN YALE
Industries
251 Wedcor Avenue
Wabash, Indiana 46992
Phone: (260) 563-0641 Fax (260) 563-4575
Email: info@martinyale.com Website: www.martinyale.com
MADE IN U.S.A.