SC0198 - Keyboard Raspberry Pi - Free user manual and instructions
Find the device manual for free SC0198 Raspberry Pi in PDF.


User questions about SC0198 Raspberry Pi
0 question about this device. Answer the ones you know or ask your own.
Ask a new question about this device
Download the instructions for your Keyboard in PDF format for free! Find your manual SC0198 - Raspberry Pi and take your electronic device back in hand. On this page are published all the documents necessary for the use of your device. SC0198 by Raspberry Pi.
USER MANUAL SC0198 Raspberry Pi
Raspberry Pi keyboard and hub Raspberry Pi mouse
Getting started
natural_image
Line drawing of a computer keyboard and mouse on a solid pink background (no text or symbols)Getting started with the official Raspberry Pi keyboard and hub
Our official keyboard includes three host USB ports for connecting external devices, such as USB mice, USB drives, and other USB-controlled devices.
The product's micro USB port is for connection to the Raspberry Pi. Via the USB hub built into the keyboard, the Raspberry Pi controls, and provides power to, the three USB Type A ports.

text_image
3× USB Type A host ports micro USB port to connect to Raspberry PiKeyboard features:
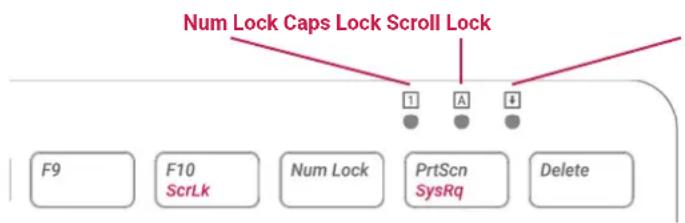
The Raspberry Pi keyboard has three lock keys: Num Lock, Scroll Lock, and Caps Lock. There are three LEDs in the top right-hand corner that indicate which locks are enabled.
Num Lock – Allows use of the red number keys on the letter keys, effectively creating a numeric keypad. This mode is enabled and disabled by pressing the Num Lock key.
Caps Lock – Allows typing capital letters; press the Shift key to type lower-case letters in this mode. This mode is enabled and disabled by pressing the Caps Lock key.
Scroll Lock (ScrLk) – Allows use of the cursor keys for browsing web pages and spreadsheets without the mouse. This mode is enabled and disabled by pressing the ScrLk key while holding the Fn key.
flowchart
graph TD
    A["Num Lock Caps Lock Scroll Lock"] --> B["1"]
    A --> C["A"]
    A --> D["B"]
    B --> E["F9"]
    C --> F["F10 ScrLk"]
    C --> G["Num Lock"]
    C --> H["PrtScn SysRq"]
    C --> I["Delete"]
Getting started with the official Raspberry Pi mouse
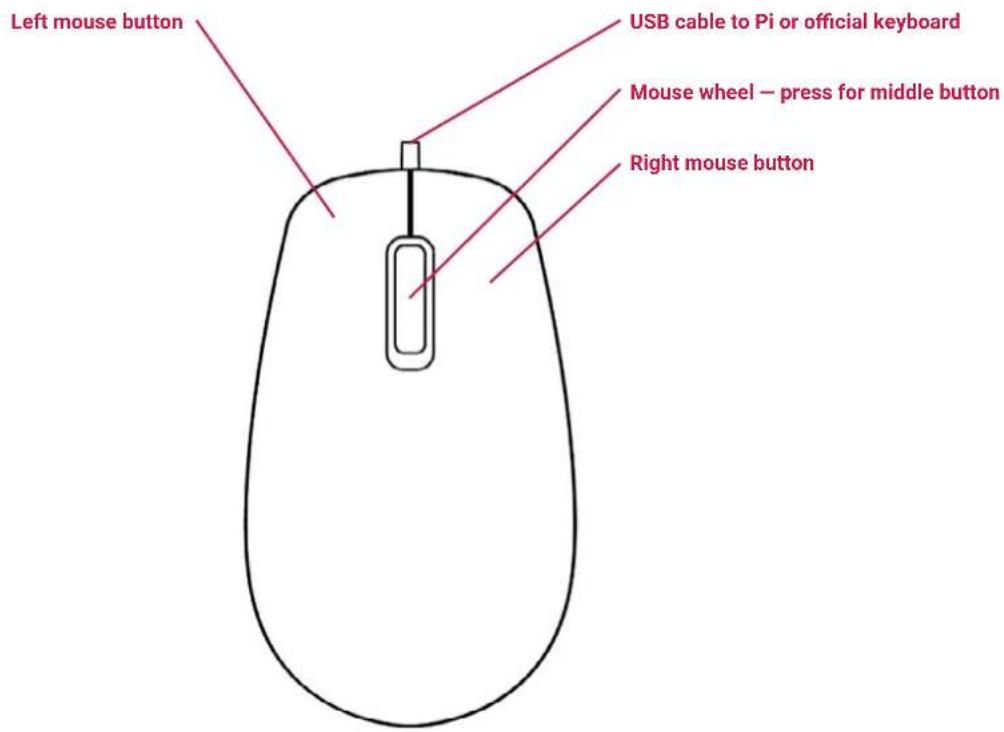
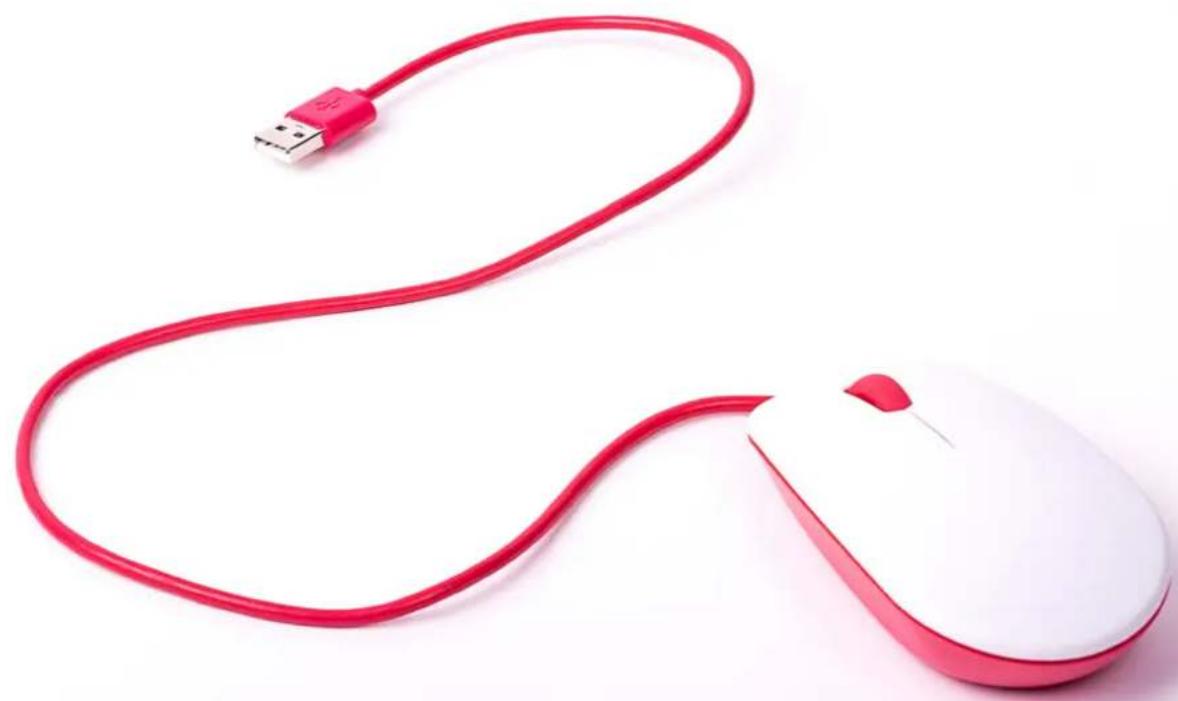
Our official mouse has three buttons, which activate high-quality micro-switches. The wheel is for quick scrolling when browsing documents and web pages.
Always place the mouse on a flat, stable surface while using it. The mouse optically detects movement on the surface on which it is placed. On featureless surfaces, e.g. PVC or acrylic table tops, the mouse cannot detect movement. When you are working on such a surface, place the mouse on a mouse mat.
text_image
Left mouse button USB cable to Pi or official keyboard Mouse wheel – press for middle button Right mouse buttonConnection diagram
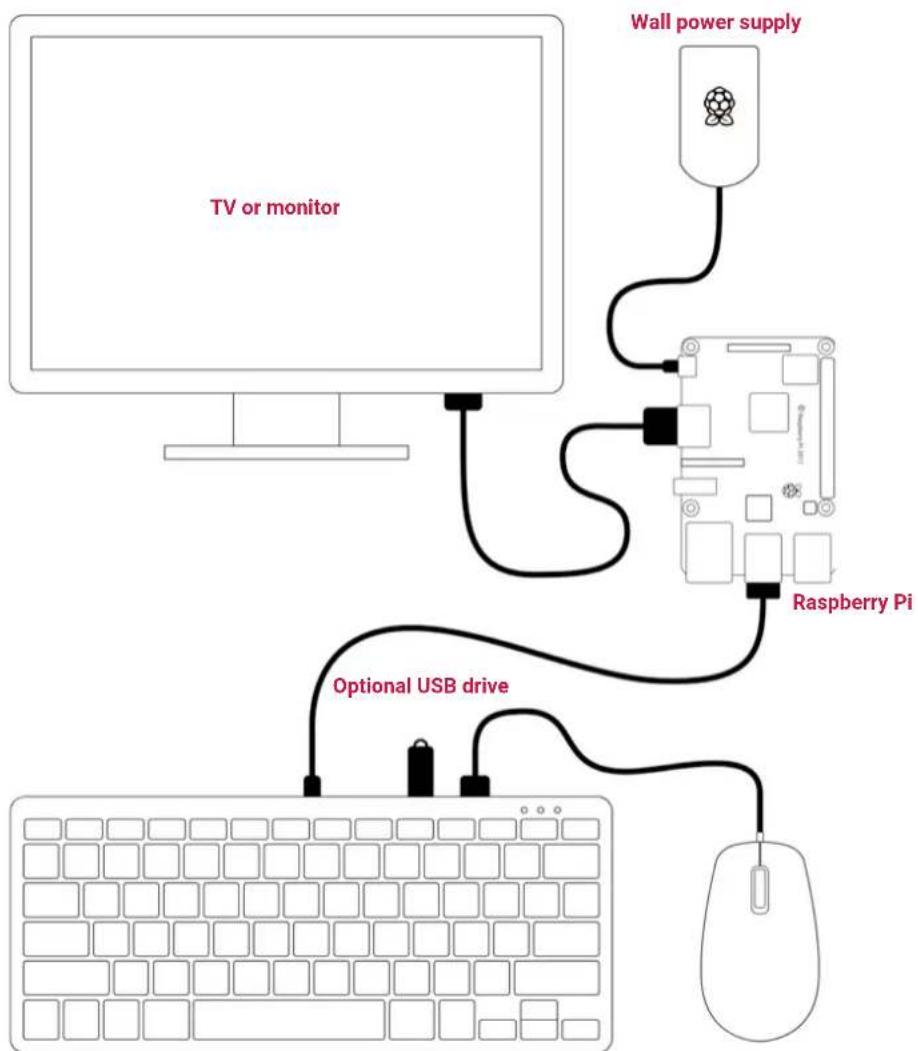
This is the configuration we recommend for using your Raspberry Pi, official keyboard and hub, and official mouse together. The hub on the keyboard ensures easy access to USB drives, and the mouse's cable is tidy, while being long enough to allow you to use the mouse left- or right-handed.
Note: It is important that the power supply is connected to the Raspberry Pi and the keyboard is connected to the Raspberry Pi. If the power supply were connected to the keyboard, with the Raspberry Pi powered via the keyboard, then the keyboard would not operate correctly.
flowchart
graph TD
    A["TV or monitor"] --> B["Raspberry Pi"]
    B --> C["Wall power supply"]
    C --> D["Optional USB drive"]
    D --> E["Computer"]
natural_image
Red computer mouse with white base and USB cable, no text or symbols visible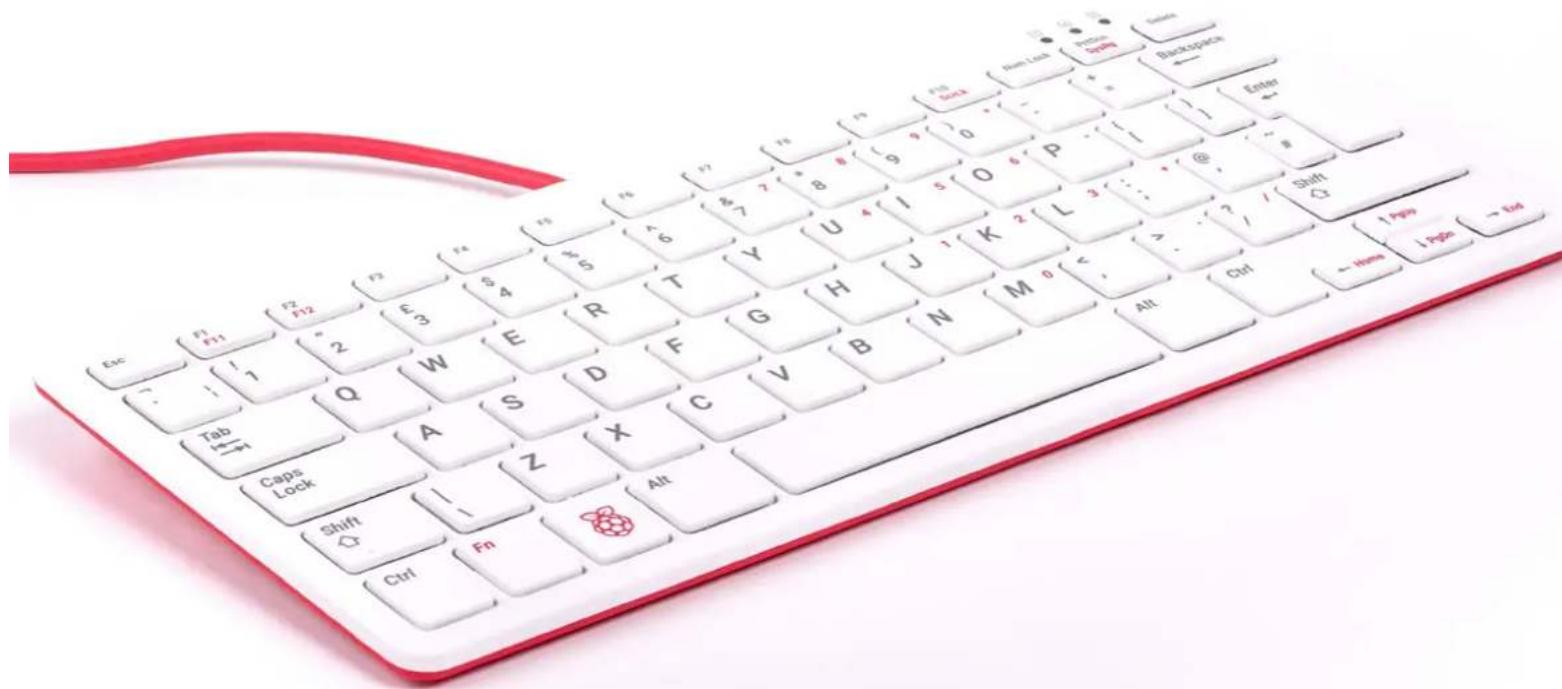
text_image
Esc F1 F11 F2 F12 F3 E 3 Q W E R T Y U 4 I S O 6 P J K 2 L 3 :\ @\ Shift C1 Tab ←→ Caps Lock A S D F G H J K 2 L 3 : / / / - Ctrl 1 Page 1 Page → EndSafety info
WARNINGS
• These products should only be connected to a Raspberry Pi computer or another compatible device.
- While in use, these products should be placed on a stable, flat, non-conductive surface, and they should not be contacted by conductive items.
- All peripherals used with these products should comply with relevant standards for the country of use and should be marked accordingly to ensure that safety and performance requirements are met.
- The cables and connectors of all peripherals used with these products must have adequate insulation so that relevant safety requirements are met.
SAFETY INSTRUCTIONS
To avoid malfunction or damage to these products, please observe the following instructions:
- Do not expose to water or moisture, and do not place on a conductive surface while in operation.
- Do not expose to heat from any source; these products are designed for reliable operation at normal ambient temperatures.
• Take care while handling to avoid mechanical or electrical damage. - Do not stare directly at the LED in the base of the mouse.