007341 - Compressor Meec Tools - Free user manual and instructions
Find the device manual for free 007341 Meec Tools in PDF.


| Product Type | Air Compressor |
| Brand | Meec Tools |
| Model | 007341 |
| Rated Voltage | 230 V ~ 50 Hz |
| Output Power | 2200 W |
| Compressor Speed | 2850 rpm |
| Maximum Working Pressure | 10 Bar (145 psi) |
| Air Volume (Free Air Delivery) | 392 L/min |
| Tank Capacity | 50 L |
| Oil Type | Compressor oil (sold separately) |
| Oil Capacity | 0.35 L |
| Weight | 40.5 kg |
| Sound Pressure Level (LpA) | 81.9 dB(A), K=3 dB |
| Sound Power Level (Measured) | 96 dB(A), K=3 dB |
| Sound Power Level (Guaranteed) | 97 dB(A), K=3 dB |
| Features | Handle, wheels, pressure regulator, dual pressure gauges, safety valve, air filter, oil sight glass, water drain valve, overheating protection, two quick-couplers |
| Safety Features | Automatic shut-off on overload/overheat, safety valve, thermal protection |
| Maintenance | Check oil level before use; change oil every 200 hours or 3 months; clean air filter every 3 months; drain condensation after use |
| Included Accessories | Wheels, air filters (unmounted) |
| Recommended Ambient Temperature | +5°C to +40°C |
| Certifications | CE marked, compliant with Machinery Directive 2006/42/EC, EMC Directive 2014/30/EU, RoHS |
Frequently Asked Questions - 007341 Meec Tools
User questions about 007341 Meec Tools
0 question about this device. Answer the ones you know or ask your own.
Ask a new question about this device
Download the instructions for your Compressor in PDF format for free! Find your manual 007341 - Meec Tools and take your electronic device back in hand. On this page are published all the documents necessary for the use of your device. 007341 by Meec Tools.
USER MANUAL 007341 Meec Tools
007341
natural_image
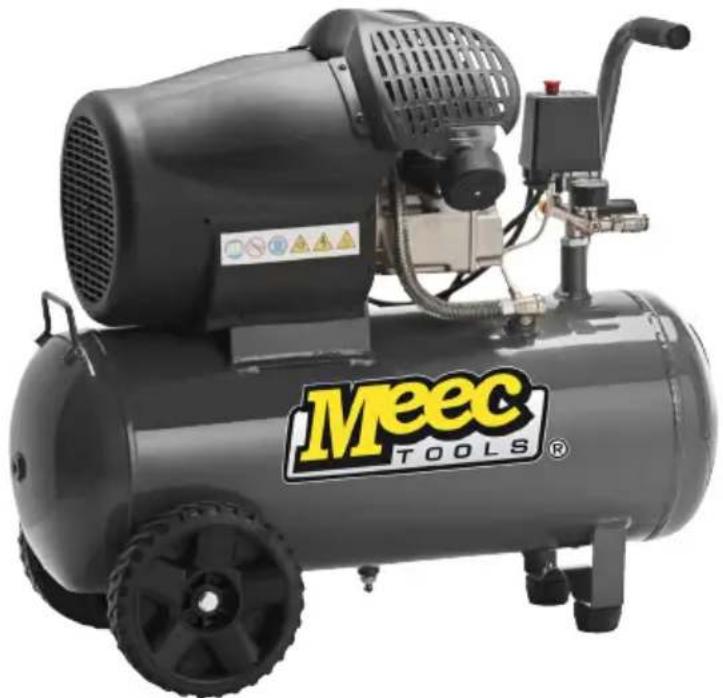
Exterior view of a Meec TOOLS air compressor with visible branding and warning symbols (no text-heavy elements)
SE KOMPRESSOR
Operating instructions (Translation of the original instructions) Important! Read the user instructions carefully before use. Save them for future reference.
Värna om miljön!
Care for the environment!
Must not be discarded with household waste! This product contains electrical or electronic components that should be recycled. Leave the product for recycling at the designated station e.g. the local authority's recycling station.
Jula reserves the right to make changes. In the event of problems, please contact our service department.
www.jula.com
Tillverkare/ Produsent/ Producenci/ Manufacturer
Jula AB, Box 363, 532 24 SKARA
Distributör/ Distributør/ Dystrybutor/ Distributor
Jula Poland Sp. z o.o., ul.
EU DECLARATION OF CONFORMITY
EU FÖRSÄKRAN OM ÖVERENSSTÄMMELSE
EU SAMSVARSERKLÆRING
DEKLARACJA ZGODNOŚCI UE

Jula AB, Box 363, SE-532 24 SKARA, SWEDEN
This declaration of conformity is issued under the sole responsibility of the manufacturer
Machinery Directive 2006/42/EC
EN 1012-1:2010, EN 60204-1:2006+A1
Electromagnetic Compatibility Directive 2014/30/EU
EN 55014-1:2017, EN 55014-2:2015
EN 61000-3-2:2014, EN 61000-3-3:2013
Outdoor Noise Directive 2000/14/EC, amended by 2005/88/EC
RoHS Directive 2011/65/EU
EN 50581:2012
| Measured sound power level on an equipment representative for this type: Uppnätt ljudeffektiniva pa en utrustning som är representativ för denna typ: Målt lydeffektiniva for utstyr som er representativ for vedkommende type: zmierzony poziom mocy akustycznej urządzenia reprezentatywnego dla danego typu: | Guaranteed sound power level: Garanterad ljudeffektiniva: Garantert lydeffektiniva: Gwarantowana moc akustyczna: | Conformity assessment procedure according to 2000/14/EC: Förfarande för bedömning av överensstämmelse enligt 2000/14/EC: Framgangsmáter for samsvarsvurdering iht. 2000/14/EC: Procedura oceny zgodności na podstawie dyrektywy 2000/14/WE: |
| 96 dB(A) 97 dB(A) | Annex VI / Bilaga VI Vedlegg VI / Załącznik VI |
Where applicable, name and address of the notified body involved:
Dar tillampbart, namn och adress hos involverat kontrollorgan: Når det kreves, navn og adresse til det aktuelle meldte organet:
Unit 2 Easter Court, Europa Boulevard, Warrington, Cheshire WA5 7ZB
NB1067
This product was CE marked in year -18
Name and address of the person authorised
to compile the technical file:
natural_image
Close-up of a mechanical device with pressure gauges and wiring, no visible text or symbols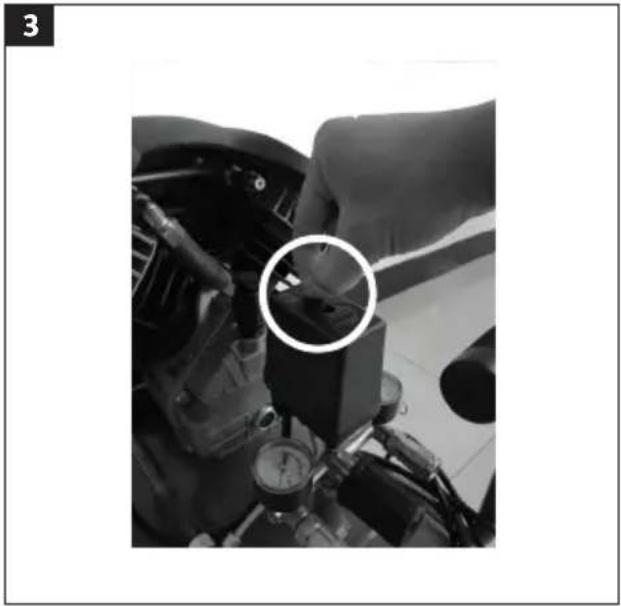
natural_image
Close-up of a car interior showing dashboard and steering wheel (no visible text or symbols)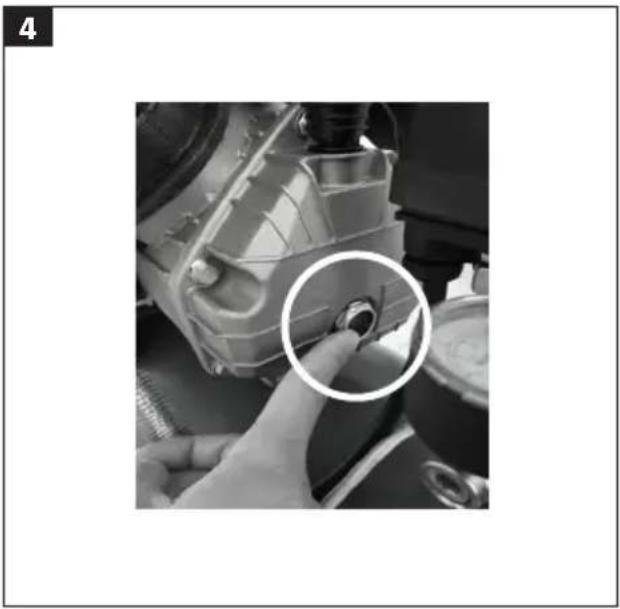
natural_image
Close-up of a mechanical component with a hand adjusting parts, highlighting a circular detail (no text or symbols visible)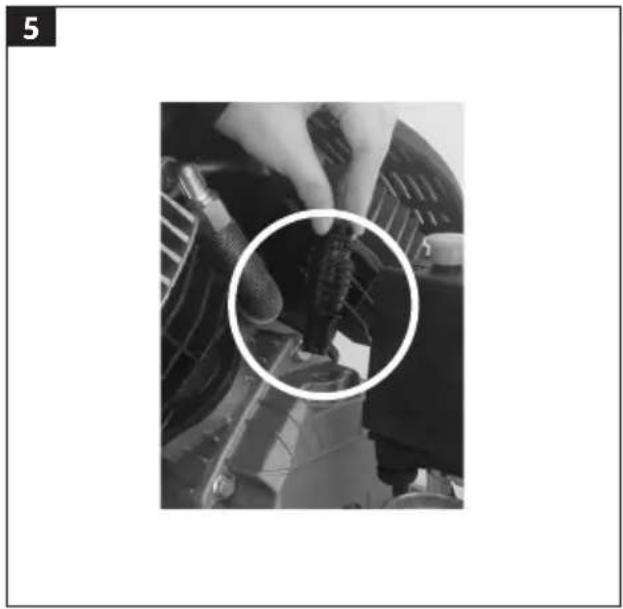
natural_image
Close-up of a hand adjusting a mechanical component with a white circle highlighting the part (no text or symbols visible)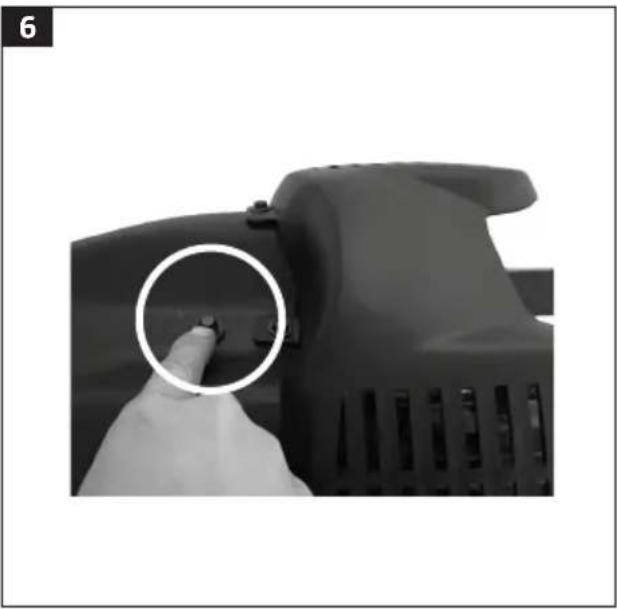
natural_image
Close-up of a mechanical device with a hand pointing to a button, circled in white (no text or symbols visible)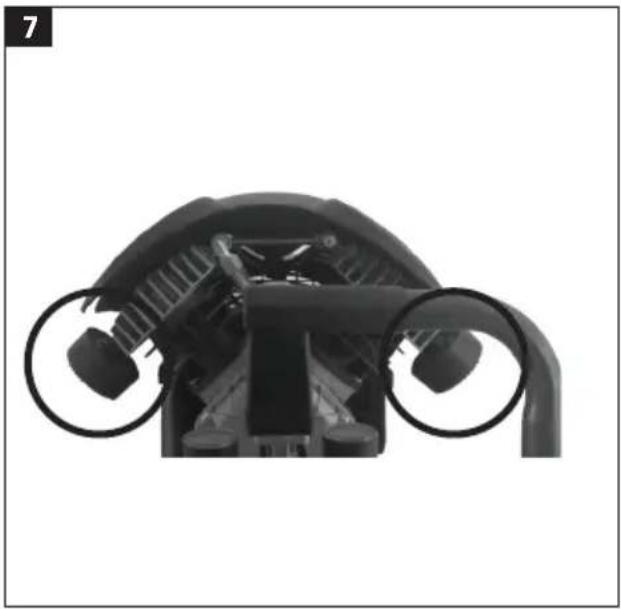
natural_image
Close-up of a black plastic object with circular cutouts and internal structure (no visible text or symbols)SÄKERHETSANVISNINGAR
INNSTILLING AV ARBEIDSTRYKK
Read the operating instructions. Most accidents associated with a compressor are a result of failure to follow the safety regulations. Accidents can be avoided by recognising potential risk situations and carefully following the safety instructions. Only use the compressor in accordance with the recommendations of the manufacturer.
- Keep the work area tidy. Untidy work areas increase the risk of accidents and injuries.
- Take into account any surrounding factors that might affect the work. Do not expose the compressor to rain. Do not use the compressor in wet or damp places. Make sure the work area is well lit. Do not use the compressor near flammable liquids or gases.
- Protect against the risk of electric shock. Do not touch earthed or grounded surfaces such as pipes, radiators, cookers and refrigerators.
- Keep children away from the compressor! Do not allow other people to touch the compressor or the cable. Keep others away from your workplace.
- Store in a safe place. When the compressor is not in use, store it in a dry, enclosed space and out of the reach of children.
- Do not overload the compressor. It works better and safer when used within the specified capacity range.
- Wear proper work clothes. Do not wear loose-fitting clothing or jewellery. They can get caught in moving parts. Wear rubber gloves and non-slip shoes when working outdoors. Wear a hair net if you have long hair.
- Wear safety glasses. Use a breathing mask when working in dusty environments.
- Use the power cord only for its intended purpose. Do not pull the power cord to pull the compressor and never use it to
remove the plug from the mains socket. Keep the power cord away from heat, oil and sharp edges.
- Always stand firmly. Avoid awkward postures. Always maintain a firm footing and good balance.
- Look after the compressor. Keep the compressor clean to ensure safe and correct operation. Follow the maintenance instructions. Check the plug and power cord regularly. Have them replaced by an authorised electrician, if necessary. Check extension cords regularly and replace if damaged.
- Pull out the mains plug. When the machine is not in use and before carrying out any maintenance work.
- Do not leave any tool keys in place. Remove spanners, keys and other tools from the machine before starting it.
- Avoid accidental starting. Make sure the circuit-breaker is turned off when the mains supply is connected.
- Extension cords outdoors. When working outdoors, only use extension cords designed and approved for outdoor use and which have an equivalent designation.
- Always pay attention to what you are doing. Pay attention to your work. Do not use the compressor when you are distracted.
-
Check your compressor for damage. Before further use, carefully check that the safety equipment or slightly damaged parts are operating properly and as intended. Make sure that moving parts function correctly, do not jam and are not damaged. All parts must be correctly fitted and all conditions for the compressor must be met. Damaged safety equipment and parts must be repaired or replaced professionally at a service centre unless otherwise stated in the Operating Instructions. Damaged circuit-breakers must be replaced by a service centre. Do not use the tool if it cannot be switched on and off using the power switch.
-
Keep the power cord away from heat, oil, sharp edges and moving parts. Avoid bending, clenching, dragging or driving over the power cord. Route the power cord so that there is no risk of tripping over it. Do not pull the power cord to pull out the plug.
- Always check before use that the power point, cord and plug are undamaged and do not show signs of fatigue.
- Check the power cord and plug for damage at regular intervals. Do not use the product if the power cord or plug are damaged. A damaged power cord or plug must be replaced by an authorised service centre or other qualified personnel to ensure safe use.
NOTE:
For your own safety, only use accessories and optional equipment specified in the Operating Instructions or that have been recommended or specified by the dealer. The use of tools or accessories other than those recommended in these Operating Instructions or in the catalogue can result in personal injury.
- Repair work must be carried out by an electrician. Otherwise accidents can occur.
- Connect the vacuum cleaner device. If there is a connection unit for the vacuum cleaner device
- make sure it is connected and used.
- Noise. The noise level at the workplace may exceed 85 dB(A). In this case, the user must wear ear protection.
Installation instructions
- Check the compressor for transport damage. Immediately report any damage to the dealer.
-
Check the oil level in the compressor pump before starting.
-
Stand the compressor close to the user.
- Avoid long air lines and long supply lines (extensions).
- Make sure the intake air is dry and free from dust.
- Do not position the compressor in a damp or wet area.
- The compressor may only be used in suitable areas (adequate ventilation, ambient temperature +5°C/+40°C). The area must be free of dust, acids, steam, or explosive or flammable gases.
- The compressor is suitable for use in dry areas.
- Do NOT use the compressor in areas where water jets are used.
Safety instructions for work with compressed air and paint spraying
- The compressor and lines reach high temperatures while operational. Contact results in burns.
- Gases or vapours drawn in by the compressor must be kept free from contamination that can result in fire or explosions in the compressor.
- Hold the coupling part firmly with your hand when you loosen the hose coupling to prevent injury due to the hose flying backwards.
- Wear safety glasses when working with the blow gun. Foreign objects and parts that are blown away can easily cause personal injuries. Do not direct air at others with the blow gun and do not blow clothes to clean them while wearing them.
Follow the safety instructions when spray painting!
- Do not work with paint or solvent with a flash-point lower than 55^ C.
- Do not heat paint and solvent.
- If working with hazardous liquids, a filtering device (face mask) must be used. Also follow safety precaution information provided by the manufacturer of such substances.
- Smoking is prohibited while spray painting and in the work area. Even paint fumes are inflammable.
- Fireplaces, open flames or equipment causing sparks must not be used at the workplace.
- The work area must be larger than 30 m ^3 and there must be sufficient ventilation when spraying and drying. Do not spray into the wind. Follow the directions from the local police for spraying flammable or hazardous spray materials.
- Food and drink may not be stored or consumed in the workplace.
- Observe the information and labels for hazardous substances on the work material packaging. Take appropriate precautions, especially with regard to clothing and face masks.
- Do not work with substances such as white spirit, butyl alcohol and methylene chloride together with the PVC pressure hose (shorter lifespan).
Use of pressure vessels in conformance with the pressure vessel safety act
-
Anyone using a pressure tank must keep it in perfect working order, use and monitor it properly, perform the necessary maintenance and repairs without delay and take precautions that circumstances dictate.
-
The supervisory authorities can occasionally arrange the necessary supervisory measures.
- A pressure tank may not be used if it has deficiencies that may pose a risk to users or third parties.
- Regularly check the pressure tank for damage, e.g. rust. Contact the customer support centre if damage is found.
OTHER RISKS
The machine is designed in accordance with the latest technology and generally accepted technical safety regulations. Nevertheless other risks can occur.
- Noise can be a health hazard. Wear ear protection when working in noisy environments.
- Danger of electric shock from incorrectly connected electrical connections.
- Other risks can occur even if precautions are taken.
- Other risks can be minimised by following the safety instructions and the operating instructions in their entirety.
It is not possible to exclude all other risks even if the unit is used as intended. The following risks can occur as a result of the design of this unit:
- Damage to lungs if a breathing mask is not used.
- Hearing impairment if suitable ear protection is not used.
- Eye damage if safety glasses (or guard) is not used.
WARNING!
The air supply to the compressor must be disconnected if an air hose breaks or is damaged. A broken air hose is extremely dangerous and can rotate at great speed,
causing injury to persons nearby and blowing foreign objects into the air.
Do not attempt to catch the hose, evacuate all onlookers from the risk area, turn off the air supply, switch off the compressor with the ON/OFF switch and then remove the hose from the compressor.
Symbols
 | Read the instructions. |
 | Approved in accordance with the relevant EU directives. |
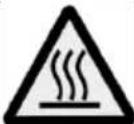 | Risk of burns. |
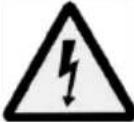 | Warning – live parts. |
 | Risk of automatic start. |
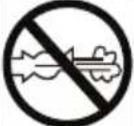 | Do not open the tap until the air hose is connected. |
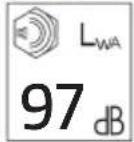 | Sound power level. |
 | Wear safety glasses. |
 | Wear ear protection. |
| Wear a dust mask. | |
| Recycle as electrical waste. |
TECHNICAL DATA
| Rated voltage 230 V | ~50 Hz |
| Output | 2200 W |
| Compressor speed 2850 rpm | |
| Maximum working pressure 10 Bar | |
| Stated air volume 392 l/min | |
| Compressor tank 50 l | |
| Oil* Compressor oil (0,35 l) | |
| Weight 40.5 kg | |
| Sound pressure level, LpA 81.9 dB(A), K=3 dB | |
| Sound power level**, L_W A 96 dB(A), K=3 dB | |
| Sound power level***, L_W A 97 dB(A), K=3 dB | |
* Sold separately in Julas department store. ** Measured, *** Guaranteed
Always wear ear protection.
The declared values for vibration and noise, which have been measured by a standardised test method, can be used to compare different tools with each other and for a preliminary assessment of exposure. The measurement values have been determined in accordance with EN 1012-1:2010.
WARNING!
The actual vibration and noise level when using tools may differ from the specified maximum value, depending on how the tool is used and the material. It is therefore
necessary to determine which safety precautions are required to protect the user, based on an estimate of exposure in actual operating conditions (taking into account all stages of the work cycle, e.g. the time when the tool is switched off and when it is idling, in addition to the start-up time).
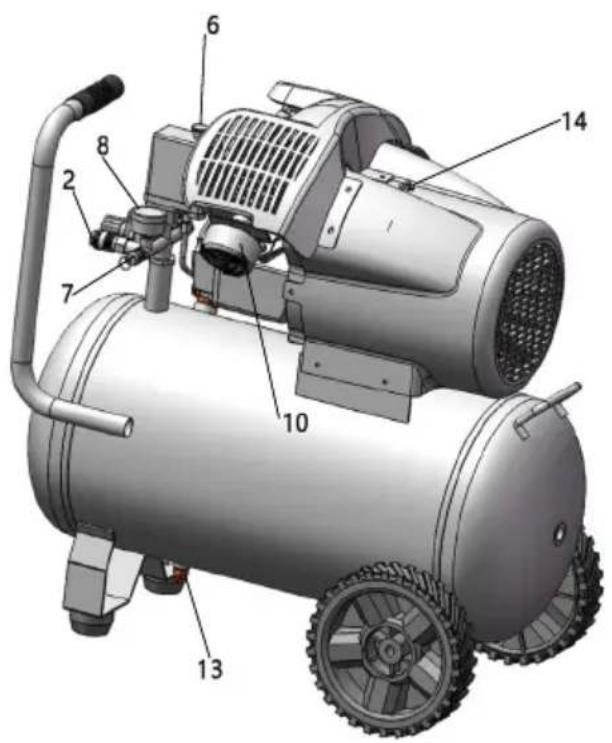
DESCRIPTION
- Handle
- Connection for air hose
- Wheel
- Airtank
- Pressureregulator
- Powerswitch
- Safetyvalve
- Pressure gauge, tank pressure
- Pressure gauge, output pressure
- Airfilter
- Oil filler cap
- Levelindicator
- Water drain valve
- Overheatingprotection
FIG. 1
ASSEMBLY
Unpack the product and check that all the parts are included and are not damaged. Fit the supplied wheels. Remove the plastic covers by the pumps and fit the air filters.
WARNING!
Keep the packaging materials out of the reach of children – risk of suffocation.
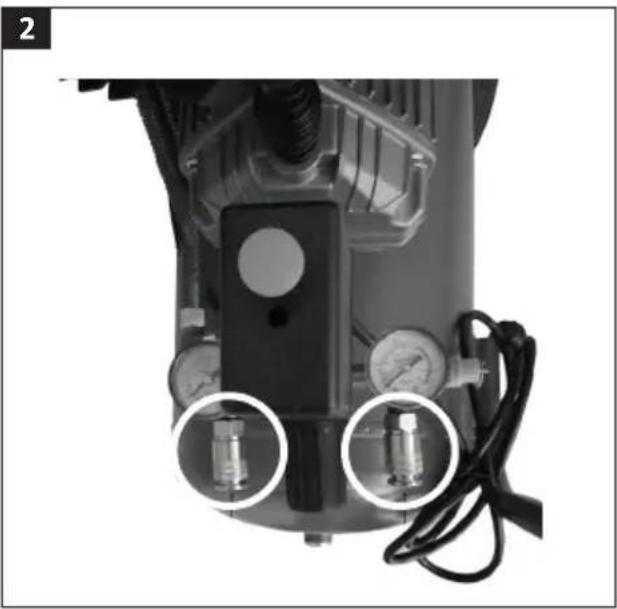
AIR HOSE
FIG. 2
NOTE:
Switch off the compressor and pull out the plug before connecting or disconnecting the air hose.
Connection
The compressor has two quick-couplings to connect an air hoses.
- Press in the coupling part of the air hose in the quick-coupling.
- Check that the air hose is properly connected.
Disconnection
- Press in the coupling part of the air hose further into the quick-coupling.
- Move back the sleeve on the quick-coupling.
- Pull out the coupling part of the air hose from the quick-coupling.
- Release the sleeve.
SETTING THE WORKING PRESSURE
The set working pressure is shown on the pressure gauge. Never exceed the maximum permitted working pressure for the connected equipment.
- Turn the adjuster knob to the right to increase the pressure.
- Turn the adjuster knob to the left to decrease the pressure.
USE
-
Check that the air tank is relieved of pressure and that any accumulated liquid has been drained out.
-
Check the oil level (12).
- Check that the safety valve is working properly.
- Check that the air hose is properly connected.
- Start the compressor and build up the pressure in the air tank.
- The motor switches off automatically when the set pressure is reached, and starts again when the pressure in the air tank gets to low.
- Switch off the product after use. Relieve the pressure in the tank and drain out any accumulated liquid.
STARTING/STOPPING
Start the compressor by pulling out the power switch. Switch off the compressor by pressing in the power switch.
FIG. 3
MAINTENANCE
CLEANING
Clean the outside of the compressor with a damp cloth.
GENERAL CHECKS
Check the compressor for leakage and/or damage at regular intervals.
PRESSURE RELIEF AND DRAINING OF LIQUID
Relieve the pressure in the air tank and drain any liquid that has accumulated in the tank after use.
-
Turn up the product to access the drain plug underneath.
-
Carefully loosen the plug.
- Turn back the product so that any liquid runs out. Shake the tank so that all the liquid runs out.
- Firmly tighten the screw.
- Make sure to always drain any liquid that has accumulated in the tank. Do not fully tighten the drain plug if the ambient temperature is lower than 0^ .
CHECKING THE OIL LEVEL
Check the oil level before use. The oil level should be up to the red marking on the sight glass.
FIG. 4
Top up with oil if the level is too low
FIG. 5
CHANGING THE OIL
The oil should be changed after 50 working hours and then every 200 working hours, or at 3 month intervals.
- Place a suitable container under the drain plug.
- Remove the oil filler cap.
- Remove the screw from the sight glass.
- Tilt the product back a little and allow the oil to run out.
- Replace the screw and firmly tighten.
- Fill with compressor oil of the standard type to the marking in the sight glass.
- Replace the plug.
OVERHEATING PROTECTION
The product switches off automatically if it overheats or is overloaded. If this happens, allow the product to cool for a few minutes. Start the product again by pressing the power
EN
switch.
FIG. 6
CHECKING AND CLEANING THE AIR FILTER
Check the air filter every 3 months.
FIG. 7
- Allow the product to cool.
- Remove the filter cover.
- Clean the filter with dry air. Replace the filter if necessary.
- Replace the filter cover.
TROUBLESHOOTING
See next page.
TROUBLESHOOTING
| Symptom Action | |
| The motor will not start. | Check that the power switch is in the ON position.Check that the mains voltage corresponds to the rated voltage on the type plate.Check that the mains fuses have not tripped.Check where appropriate that the extension cord has a cross-sectional area to match the power supply to the product.Check that the ambient temperature is not too low. |
| The compressor does not produce compressed air. | Check that the pressure regulator is set correctly. |
| Pressure is too high. | Check that the hose is connected to the right valve.Adjust the pressure. |
- SE KOMPRESSOR
- EU DECLARATION OF CONFORMITY
- EU FÖRSÄKRAN OM ÖVERENSSTÄMMELSE
- EU SAMSVARSERKLÆRING
- DEKLARACJA ZGODNOŚCI UE
- This product was CE marked in year -18
- SÄKERHETSANVISNINGAR
- INNSTILLING AV ARBEIDSTRYKK
- NOTE:
- Installation instructions
- Safety instructions for work with compressed air and paint spraying
- Follow the safety instructions when spray painting!
- Use of pressure vessels in conformance with the pressure vessel safety act
- OTHER RISKS
- WARNING!
- Always wear ear protection.
- DESCRIPTION
- ASSEMBLY
- AIR HOSE
- Connection
- Disconnection
- SETTING THE WORKING PRESSURE
- USE
- STARTING/STOPPING
- MAINTENANCE
- CLEANING
- GENERAL CHECKS
- PRESSURE RELIEF AND DRAINING OF LIQUID
- CHECKING THE OIL LEVEL
- CHANGING THE OIL
- OVERHEATING PROTECTION
- EN
- CHECKING AND CLEANING THE AIR FILTER
- 7
- TROUBLESHOOTING
Brand : Meec Tools
Model : 007341
Category : Compressor