
ELIP-2036BF - Security Camera Monacor - Free user manual and instructions
Find the device manual for free ELIP-2036BF Monacor in PDF.


User questions about ELIP-2036BF Monacor
0 question about this device. Answer the ones you know or ask your own.
Ask a new question about this device
Download the instructions for your Security Camera in PDF format for free! Find your manual ELIP-2036BF - Monacor and take your electronic device back in hand. On this page are published all the documents necessary for the use of your device. ELIP-2036BF by Monacor.
USER MANUAL ELIP-2036BF Monacor
text_image
Diagram showing various security camera modules with labeled components, including a surveillance camera and multiple camera modules.V 4.0
Note:
This manual may contain some incorrect places, even though it was published with our carefully proofreading.
The news updates will be added to the next release without notice. Your valuable advice is really appreciated.
1
Connecting the camera to system
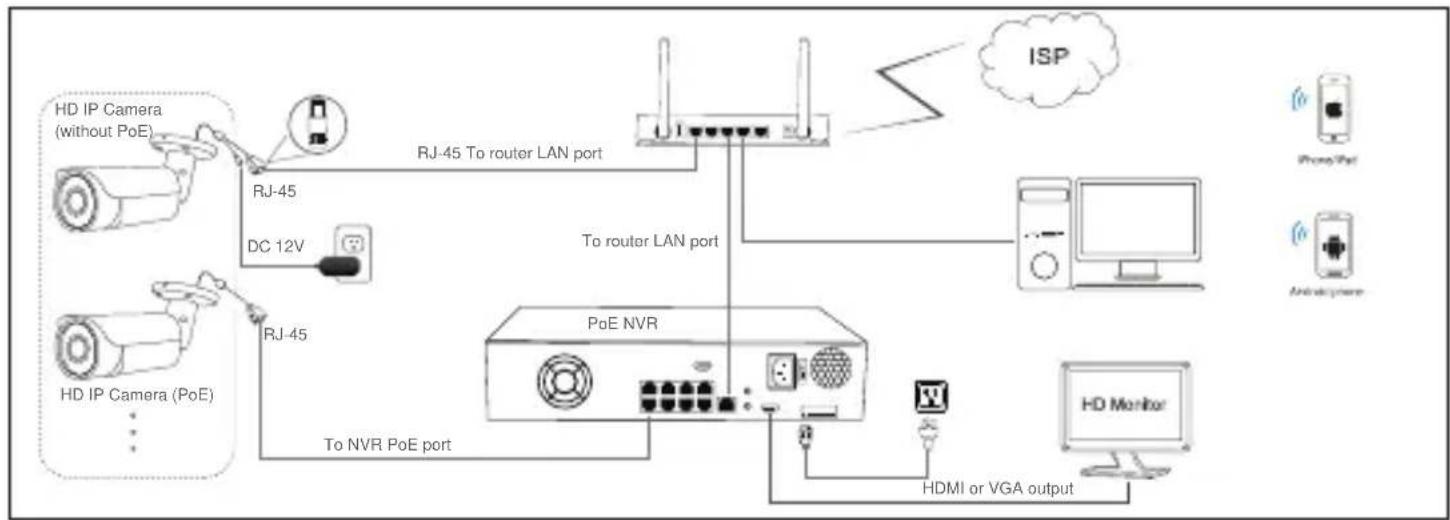
flowchart
graph TD
    A["HD IP Camera (without PoE)"] -->|RJ-45| B["RJ-45 To router LAN port"]
    C["HD IP Camera (PoE)"] -->|RJ-45| D["To router LAN port"]
    B --> E["ISP"]
    D --> E
    E --> F["Computer"]
    G["PoE NVR"] --> H["To NVR PoE port"]
    I["HD Monitor"] --> J["HDMI or VGA output"]
    K["RFID"] --> L["RFID Port"]
    M["RFID"] --> N["RFID Port"]
    O["RFID"] --> P["RFID Port"]
Figure 1: Working With POE Switch
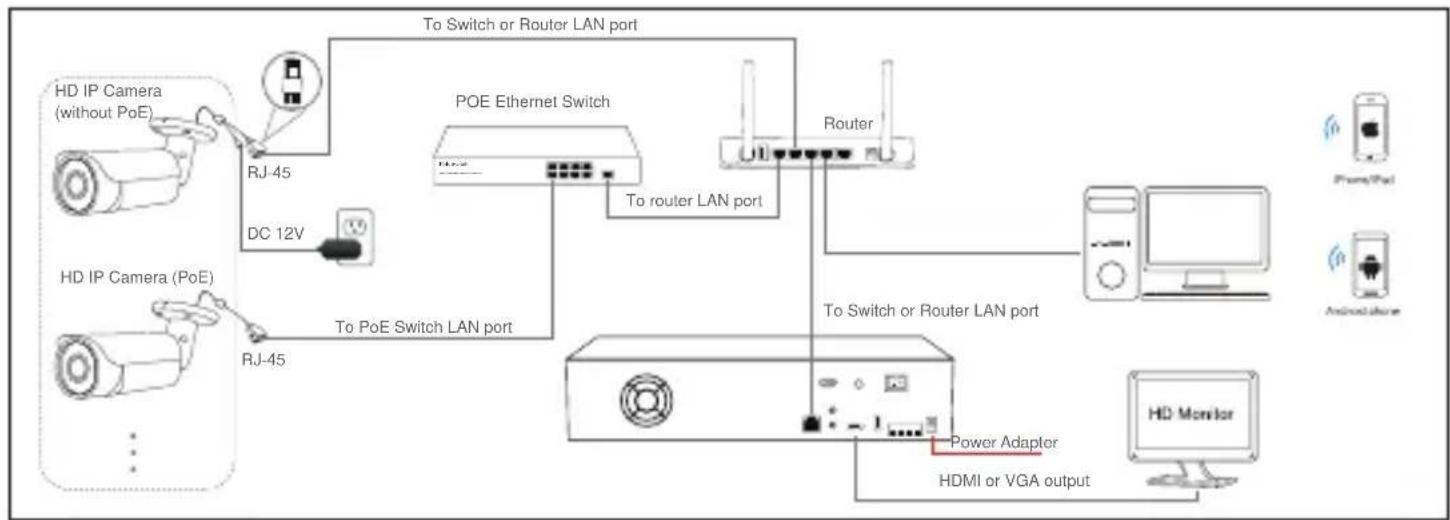
flowchart
graph TD
    A["HD IP Camera (without PoE)"] -->|RJ-45| B["TO Switch or Router LAN port"]
    C["HD IP Camera (PoE)"] -->|RJ-45| D["TO PoE Switch LAN port"]
    B --> E["POE Ethernet Switch"]
    D --> E
    E --> F["Router"]
    F --> G["To switch or Router LAN port"]
    G --> H["Power Adaptor"]
    G --> I["HDMI or VGA output"]
    H --> J["HD Monitor"]
    I --> J
    K["PCIe/PCI"] --> L["Computer"]
    M["Android Phone"] --> N["Smartphone"]
Figure 2: Working With POE NVR
Note:
- The camera should be connected to an OPTIONAL 12 volt power supply if you do not use PoE (Power over Ethernet).
- A Windows computer is more convenient to setup and troubleshooting.
Modifying the camera's IP address
Default: IP address: 192.168.0.123, Username: admin, Password: 123456
( We strongly recommend modifying the default password for your security).
Each IP camera has the same default IP address after leaving the factory. In order to guarantee network connectivity and access the live video, it is essential to change the camera's IP address to unique via computer before using. To quickly configure the IP camera, download the device search tool from the Internet: www.monacor.com -> Support -> Downloads.
Before modifying the IP address you'd better confirm the IP network planning and avoid IP address conflict.
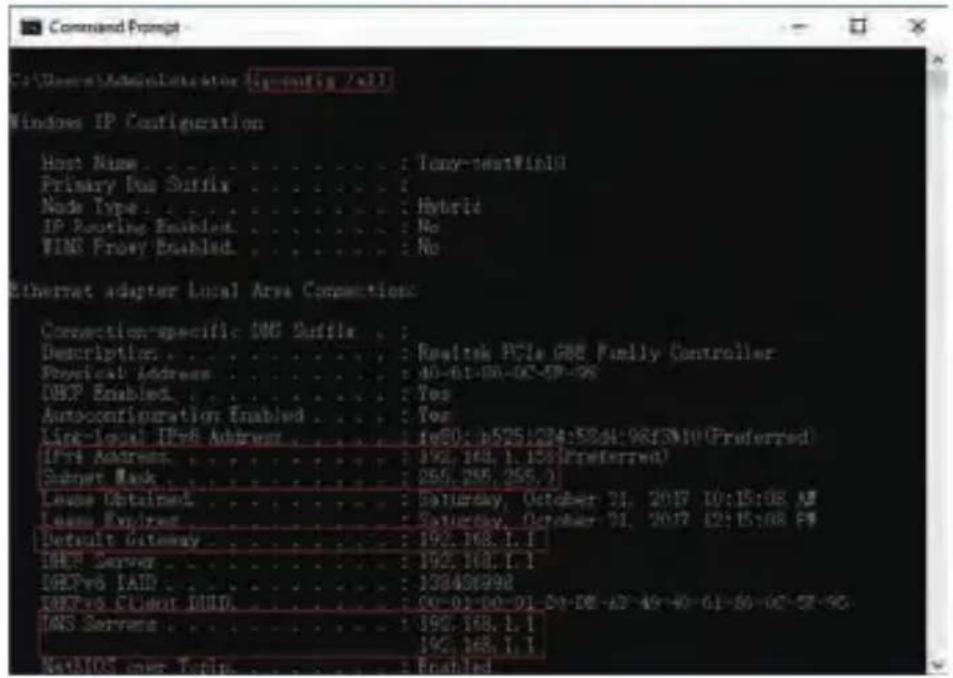
Steps on Local Area Windows 10 PC : Search Windows -> cmd -> ipconfig /all
text_image
Command Prompt C:\Users\Administrator\ip-config /all Windows IP Configuration Host Name : Tony-textWin10 Primary Bus Suffix : Node Type : Hybrid IP Routing Enabled : No WIN3 Proxy Enabled : No Ethernet adapter Local Area Connections Connection-specific DNS Suffix : Description : Realtek PCIe GNE Family Controller Physical Address : 40-61-88-02-59-96 DSCP Enabled : Yes Autoconfiguration Enabled : Yes Link-local IPv6 Address : f@0: b575/224:53:04:98:3M10 (Preferred) IPv6 Address : 192.168.1.153 (Preferred) Submit Mask : 269.269.269.1 Lease Obtained : Saturday, October 31, 2017 10:15:08 AM Lease Expires : Saturday, October 31, 2017 12:15:08 PM Default Gateway : 192.168.1.1 DSCP Server : 192.168.1.1 DSCPv6 IAID : 138488998 DSCPv6 Client IUDL : 00-01-00-01-01-08-A3-49-40-61-80-02-27-95 DNS Servers : 192.168.1.1 NetMOS non-Tocin : EnabledNow you can get all the local network information.
IPv4 Address: 192.168.1.?
Subnet Mask: 255.255.255.0
Default gateway: 192.168.1.1
DNS Servers: 192.168.1.1
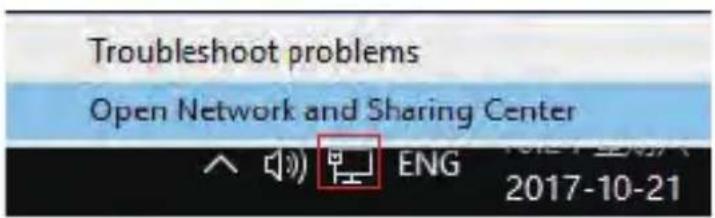
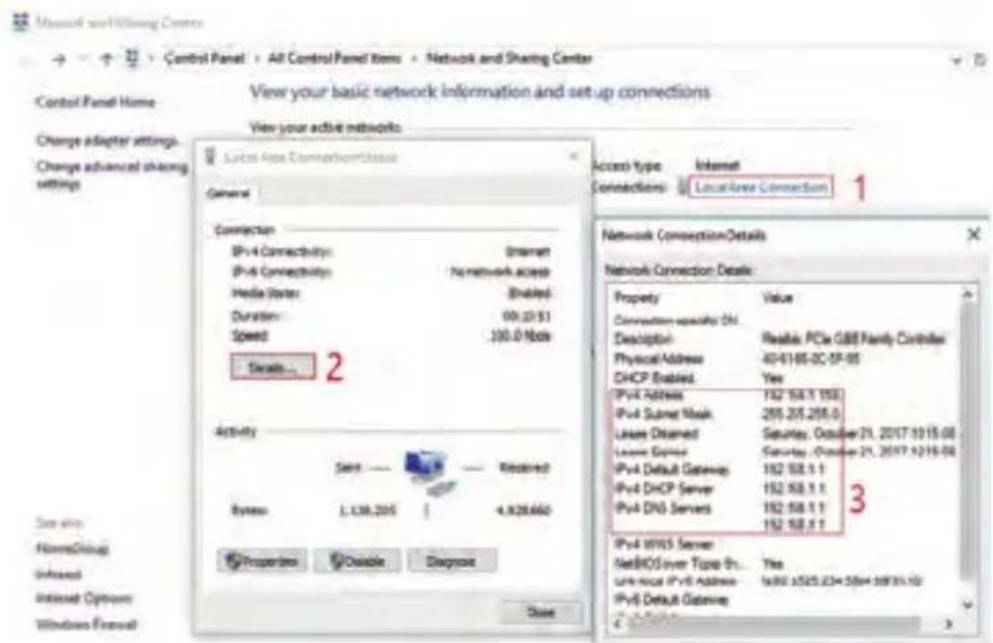
Note : You can also find out the LAN configuration via Windows GUI
text_image
Troubleshoot problems Open Network and Sharing Center ENG 2017-10-21Right-click on the Network icon and select open Network and Sharing Center.
text_image
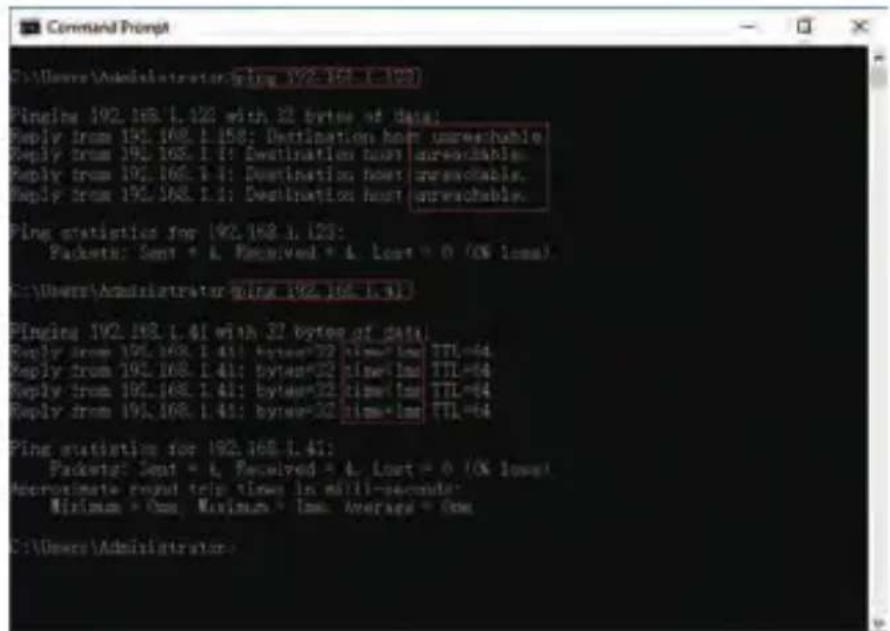
Microsoft Control Panel All Control Panel Items Network and Sharing Center View your basic network information and set up connections View your active networks Local Area Connection Details General Connection IPv4 Connectivity: Internet IPv4 Connectivity: No network access Media Worker: Enabled Duration: 00:23:51 Speed: 100.0 Nio Details... Activity Send —— Received System: J.138.205 | 4.928.660 Properties Visible Diagnose Close Access type Internet Connections Local Area Connection Network Connection Details Property Value Connection specific ID... Description: Realtek PCIe GBB Random Controller Physical Address: 40-61-65-02-57-95 DHCP Enabled: Yes IPv4 Address 152 58.1.1 152 IPv4 Subnet Mask: 255 205.205.0 Lease Desired: Saturday, October 21, 2017 10 15:00 Lease Expires: Saturday, October 21, 2017 12/15:00 IPv4 Default Gateway: 152 58.1.1 IPv4 DHCP Server: 152 58.1.1 IPv4 DNS Servers: 152 58.1.1 IPv4 WNTS Server: 152 58.1.1 NetBIOS over Tone Sh... Yes Unknown IPv4 Address: 1680 1525.234 58H-58H35.10 IPv4 Default Gateway: 3If the camera is installed to work with the local switch or router directly, the camera IP range should be 192.168.1.x (x=2-254). To void IP conflict, you should test and select an unoccupied IP like this:
Command Prompt ping test
text_image
Command Prompt C:\Users\Administrator\ping 192.168.1.103 Pingling 192.168.1.123 with 32 bytes of data; Reply from 192.168.1.158: Destination host unreachable. Reply from 192.168.1.1: Destination host unreachable. Reply from 192.168.1.1: Destination host unreachable. Reply from 192.168.1.1: Destination host unreachable. Ping statistics for 192.168.1.123: Packets: Sent * L Received * L Lost * O (X less) C:\Users\Administrator\ping 192.168.1.31 Pingling 192.168.1.41 with 37 bytes of data, Reply from 192.168.1.41: bytes*32 time=lm TTL=64 Reply from 192.168.1.41: bytes*32 time=lm TTL=64 Reply from 192.168.1.41: bytes*32 time=lm TTL=64 Reply from 192.168.1.41: bytes*32 time=lm TTL=64 Ping statistics for 192.168.1.41: Packets: Sent = L Received = L Lost = 0 (X less) Approximate round trip times in milli-seconds: Minimum > One, Maximum > Low, Average > One C:\Users\Administrator:Only when reply unreachable that means the IP address is no conflict and available, otherwise when you see time reply do not use this IP address.
There are three methods to modify the camera IP configuration, Search tool, UC Client software and Internet Explorer.
Using Device Search Tool
text_image
AI DEVICE TOOLS FOR SEARCHING/CONFIGURING/UPGRADING 3.1.9_201610528 ALL RetCard ALL RetCards Search Search Indie Full sensor matching stress QF Address Mode TS Bar TP ID Version order Stroke Missing 1 192.194 1.40 MS-CPGB-RC200 0600000004817FF 30 06-00-01 40 13 TDCI173487 ICDXLC_MZ_33R_1_VZ_3_1 Build 2016-02-07 12:10:22 Qware action 1 Seq1 Res 192.194 1.200 Game Walk 30 06-00-01 40 16 ZEC3488FAA ICDXLC_MZ_33R_1_VZ_3_1 Build 2016-02-08 12 Logio storebox 1 Bag42 192.194 1.203 Remote Config(short) 30 06-00-01 52.4P ICDXLC_MZ_33R_1_VZ_3_1 Build 2016-02-08 Logio storebox 1 Bag43 192.194 1.230 Remote Config(short) 30 02-00-04 57.4S 3617764729 ICDXLC_MZ_33R_1_VZ_3_1 Build 2016-02-08 ICDXLC_MZ_33R_1_VZ_3_1 Build 2016-02-08 12:10:18 Qware action 1 Bag44 192.194 1.225 Remote Config(short) 30 09-00-00 60.2B 37339566C3 ICDXLC_MZ_33R_1_VZ_3_1 Build 2016-02-08 ICDXLC_MZ_33R_1_VZ_3_1 Build 2016-02-08 12:10:58 Qware action 1 Bag45 192.194 1.218 Remote Config(short) 30 08-00-00 60.1B 3718384829 ICDXLC_MZ_33R_1_VZ_3_1 Build 2016-02-08 ICDXLC_MZ_33R_1_VZ_3_1 Build 2016-02-08 12:15:48 Qware action 1 Bag46 192.194 1.517 Stop playing Open trap directory Model IP address Allow available IP addresses Restore default settings Snap picture Open trap directory Balance reset IP Reset Settings Reset setting maintenance Reset Set Platform Balance ordered config Reset order time Reset set title Balance set password Reset set language Reset section detection Start-testing CDS Balance set wide Manual set size Reset map packet Copy-X ED output Directory upgrade File upgrade Upload credit QR code for Danale APP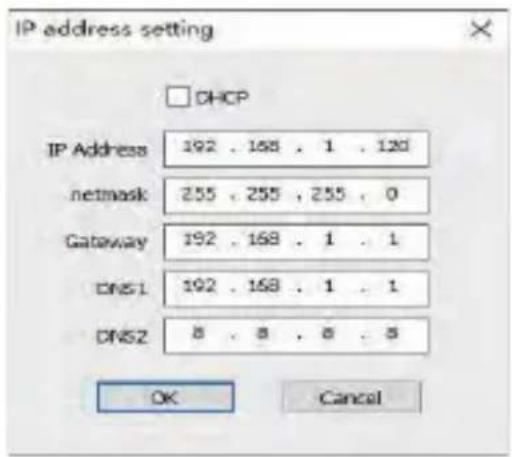
text_image
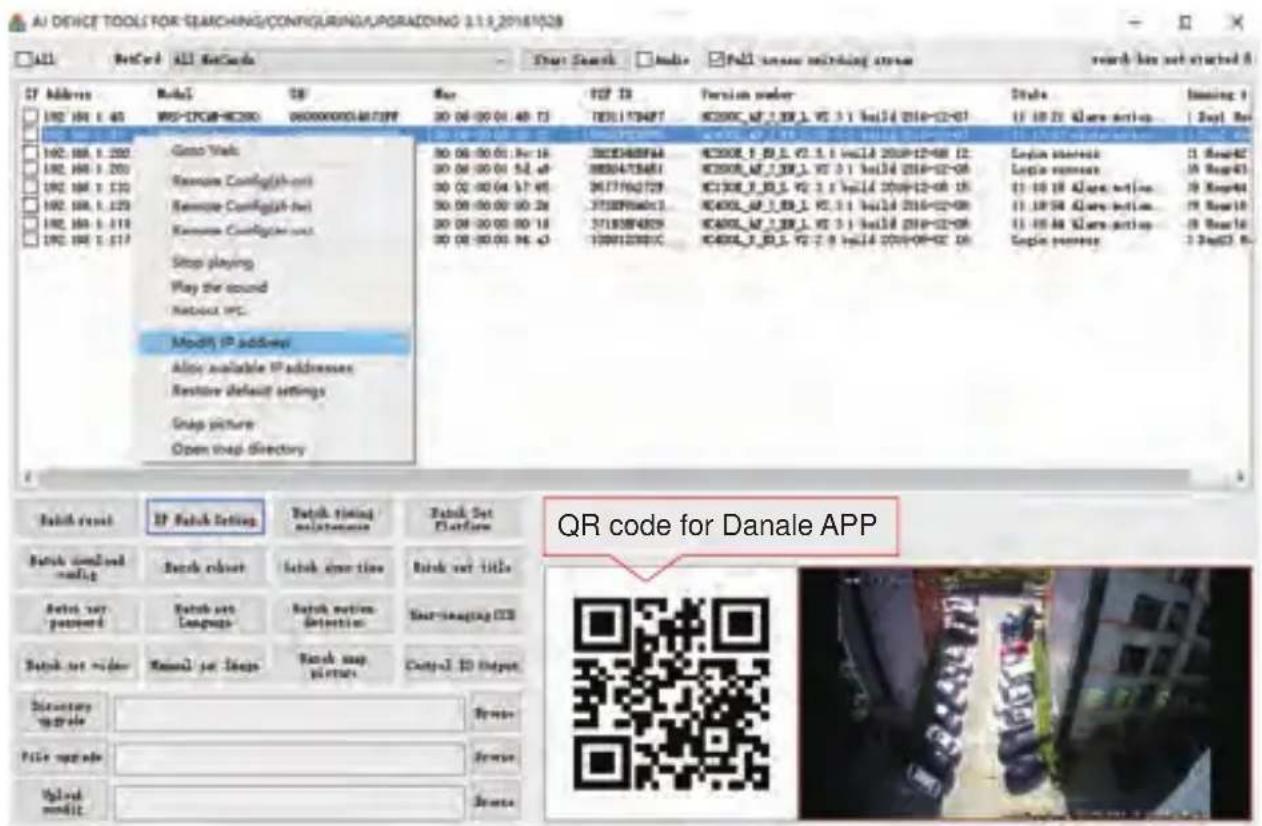
IP address setting □ DHCP IP Address 192 . 168 . 1 . 120 netmask 255 . 255 . 255 . 0 Gateway 192 . 168 . 1 . 1 DNS1 192 . 168 . 1 . 1 DNS2 8 . 8 . 8 . 8 OK Cancela. Click Start Search and all your cameras in the LAN will be listed. Modify IP address to suit the LAN's IP scheme. There are two modifying methods available: 1) Right click on the desired camera and choose "Modify IP address". 2) Click the ALL check-box then click "IP Batch Setting".
b. You can also enable the camera DHCP function if there is a DHCP server available in the LAN.
Most router has DHCP server built-in. (IP address in DHCP setting may change after device restart. We do not recommend leaving the IP camera on DHCP).
Tips:
Reset Password -> Restore default settings;
Video full-screen -> double-click video;
Firmware upgrade -> Select the check-box, click Browse then click File Upgrade.
(Default user name: admin, Password: 123456)
text_image
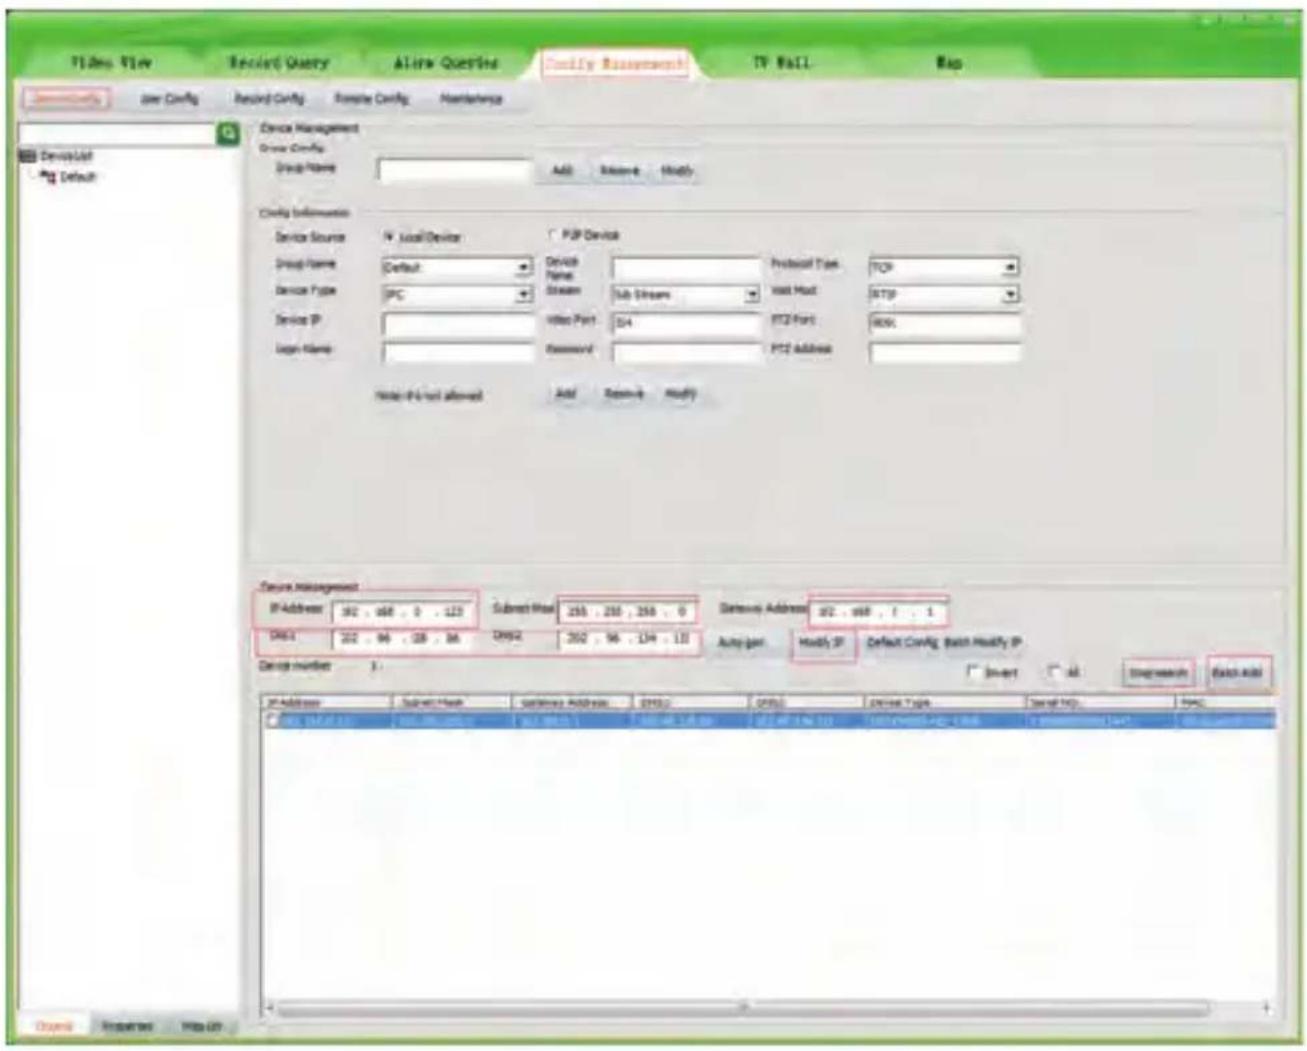
Video View Record Query Allow Questions Modify Settings TV Wall Map Service Config Record Config Remote Config Maintenance Device List Default Device Management Group Config: Group Name: Add Remove Modify Config Information Service Source: IV Local Device POP Device Group Name: Default: Device Type: IPC Stream Sub Streams Protocol Type: Vcc Host: TCP Service IP: Vcc Port: S4 PT2 Port: R056 Login Name: Password: PT2 Address: Note: P1 not allowed Add Remove Modify Service Management IP Address: 302 . 968 . 0 . 123 Subnet Mask: 250 . 250 . 250 . 0 DMS1: 202 . 96 . 288 . 86 DMS2: 202 . 96 . 134 . 133 Derau Address: 372 . 968 . 1 . 1 Auto-port: Modify IP Default Config Batch Modify IP Device Number: Smart All Upgrade Batch Add IP Address: Submit Search Sendaway Address: DMS1: DMS2: DMS3: DMS4: DMS5: DMS6: DMS7: DMS8: DMS9: DMS10: DMS11: DMS12: DMS13: DMS14: DMS15: DMS16: DMS17: DMS18: DMS19: DMS20: DMS21: DMS22: DMS23: DMS24: DMS25: DMS26: DMS27: DMS28: DMS29: DMS30: DMS31: DMS32: DMS33: DMS34: DMS35: DMS36: DMS37: DMS38: DMS39: DMS40: DMS41: DMS42: DMS43: DMS44: DMS45: DMS46: DMS47: DMS48: DMS49: DMS50: DMS51: DMS52: DMS53: DMS54: DMS55: DMS56: DMS57: DMS58: DMS59: DMS60: DMS61: DMS62: DMS63: DMS64: DMS65: DMS66: DMS67: DMS68: DMS69: DMS70: DMS71: DMS72: DMS73: DMS74: DMS75: DMS76: DMS77: DMS78: DMS79: DMS80:-
Go to the Devices Config and click Start search, all the camera in the LAN will be listed. Highlighting one of the camera will populate the filed above. Change the parameter listed in the field and click on "Modify IP" to modify the camera's IP address. Please modify the default IP address to match your LAN's IP scheme. Note: Be careful when setting up IP addresses to not have duplicated IP as other devices in LAN.
-
After changing all the IP cameras' IP address, you can search again and add them all to the UC client. Once the cameras are added, go to the tab Video View and drag the camera into the split windows to start previewing the cameras.
4
Working with Internet Explorer
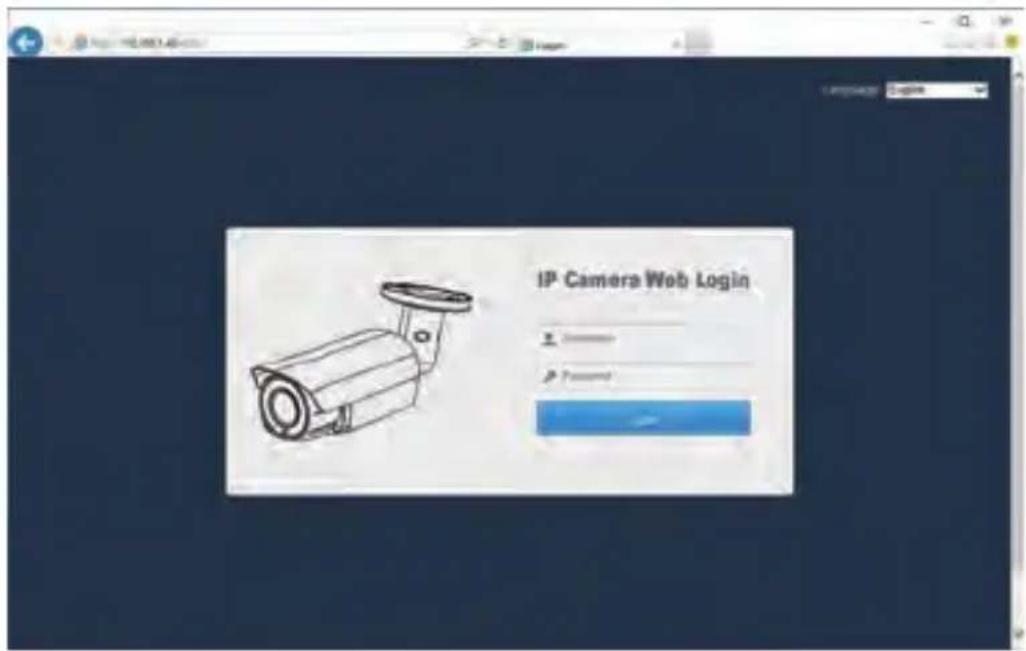
To access the camera's web interface, type in the IP camera's IP address in Internet Explorer's URL bar to gain access to the login page. Please modify IP address to the same subnet if login page can not load.
(Default user name: admin, Password: 123456); only IE is supported.
text_image
IP Camera Web Login PasswordFrom the login page, select your familiar language, then log in with the username and password.
text_image
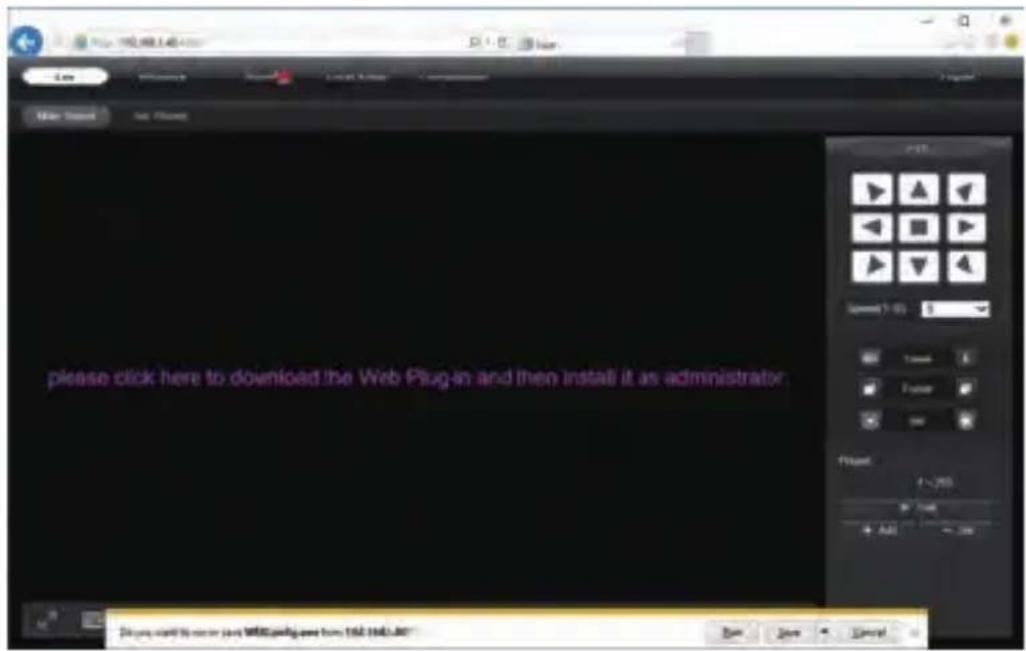
please click here to download the Web Plug-in and then install it as administrator.Working with Internet Explorer
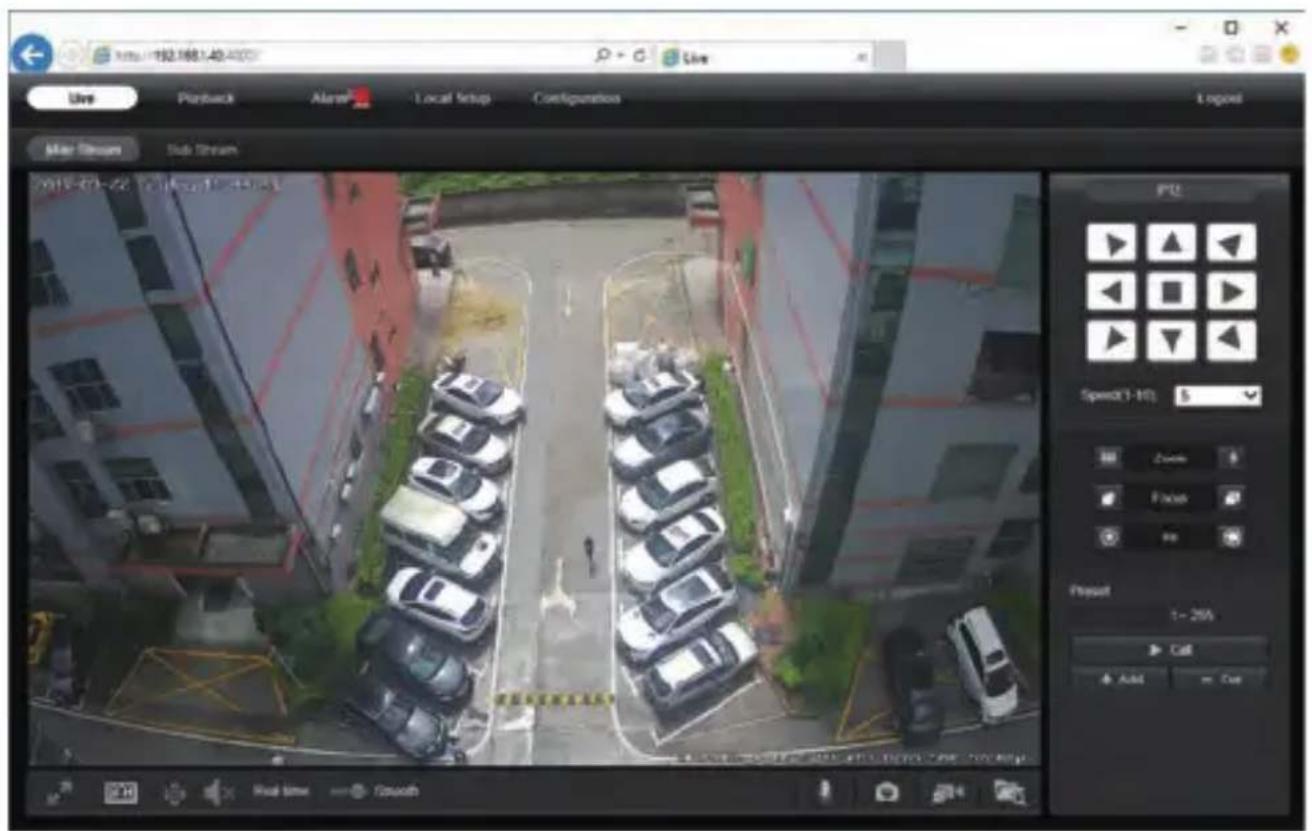
Install Web Plug-in when red line characters prompted. You may have to download WEBConfig.exe and run it as administrator. After installation, restart or refresh your web browser and access the IP again. The live video will start automatically after login successfully.
text_image
Live Portback Alert Local Setup Configurations Last Post After Stream Sub Stream 2015-03-22 16:48:10:44:43 Speed(1-10): 5 Zoom Face Reset 1-20% Call Add CutNote: Only the Motorized Auto Focus cameras can Zoom In and Zoom Out. Keeping pressing on live video and dragging for Digital Zoom.
If there is a delay in video response when accessing remotely, please switch to Sub Stream instead. To learn the function of each button, just put the mouse on, it will show screen tips.
5
General Configurations
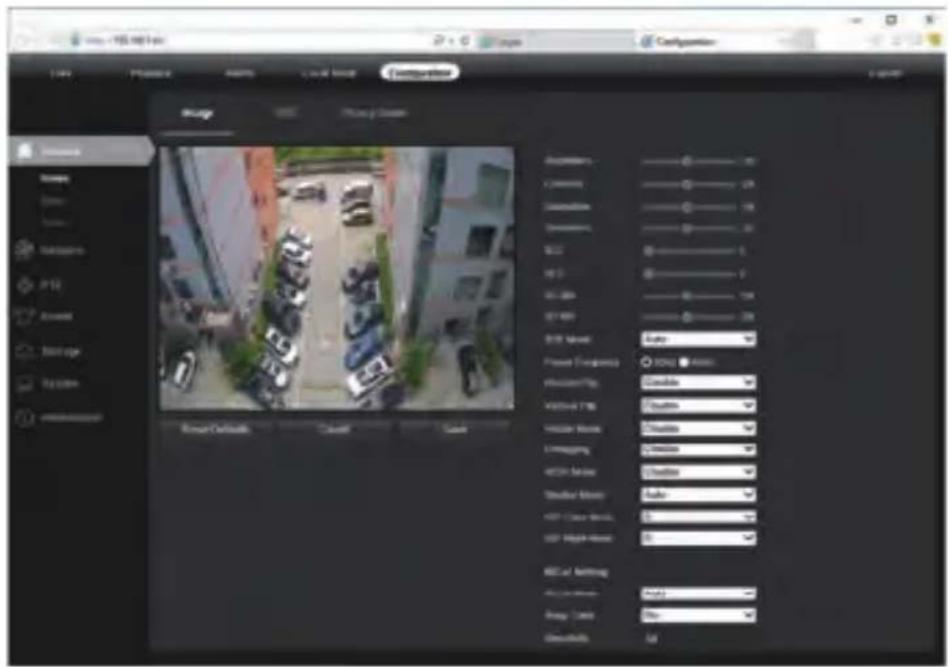
1) Power System frequency configuration (50Hz/60Hz)
Configuration > Camera > Image > Power Frequency
To avoid the video flicker, the camera should be set to right working frequency to suit the country electric system. The countries that use 60Hz have USA, Canada, Japan, Korea, Taiwan, Brazil, Philippines, Mexico. Other countries apply 50Hz.
text_image
Image Photo Player Parameters Combiners Combiners SCL M1 M2 M3 M4 M5 M6 M7 M8 M9 M10 M11 M12 M13 M14 M15 M16 M17 M18 M19 M20 M21 M22 M23 M24 M25 M26 M27 M28 M29 M30 M31 M32 M33 M34 M35 M36 M37 M38 M39 M40 M41 M42 M43 M44 M45 M46 M47 M48 M49 M50 M51 M52 M53 M54 M55 M56 M57 M58 M59 M60 M61 M62 M63 M64 M65 M66 M67 M68 M69 M70 M71 M72 M73 M74 M75 M76 M77 M78 M79 M80 M81 M82 M83 M84 M85 M86 M87 M88 M89 M90 M91 M92 M93 M94 M95 M96 M97 M98 M99 Nursing Details... Cancel... Cancel... Power Transparency: Allowance: EnablePlay: EnablePlay: Enable Mode: Enable Mode: Aligning: Enable Mode: Auto: Enable Mode: Auto: Auto: None: Auto: None: Auto: None: Auto: None: Auto: None: Auto: None: Auto: None: Auto: None: Auto: None: Auto: None: Auto: None: Auto: None: Auto: None: Auto: None: Auto: None: Auto: None: Auto: None: Auto: None: Auto: None: Auto: None: Auto: None: Auto: None: Auto: None: Auto: None: Auto: None: Auto: 100% Auto: 100% Auto: 100% Auto: 100% Auto: 100% Auto: 100% Auto: 100% Auto: 100% Auto: 100% Auto: 100% Auto: 100% Auto: 100% Auto: 100% Auto: 100% Auto: 100% Auto : 100% Auto : 100% Auto : 100% Auto : 100% Auto : 100% Auto : 100% Auto : 100% Auto : 100% Auto : 100% Auto : 100% Auto : 100% Auto : 100% Auto : 100% Auto : 100% Auto : 5%2) To modify the camera Title name and Time & Date
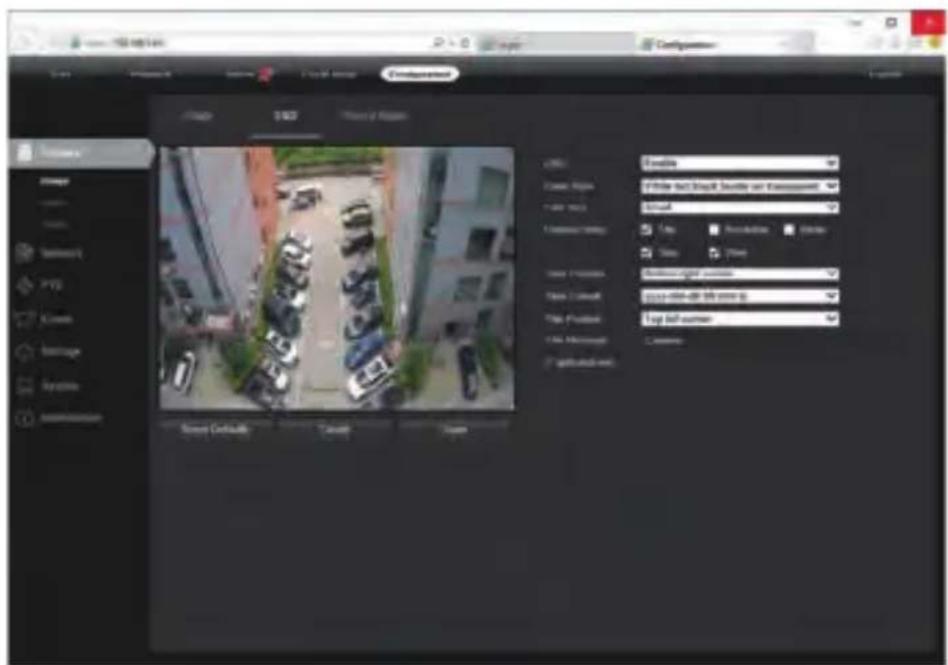
Configuration > Camera > Image > OSD > Title Message
text_image
Control panel SAMS Status of Region File Edit File Name: 100000000000000000000000000000000000000000000000000000000000000000000000000000000000000000000 File Edit File Name: 100000000000000000 File Status: 1 File Properties: 1 File Location: 1 File Provider: 1 File Timestamp: 1 Security Details: 1 Cancel Cancel Preview Preview not clear. Security is known as Event Map Production Order Time Time Endzone number source 232-248-256-267-278-289-299-319-339-359-379-399-419-439-459-479-499-519-539-559-579-599-619-639-659-679-699-719-739-759-779-799-819-839-859-879-899-919-939-959-979-999-11/1/12/12/12/12/12/12/12/12/12/12/12/12/12/12/12/12/12/12/12/12/12/12/12/12/12/12/12/12/12/12/12/12/12/12/ Copyright Copyright name: 1 Copyright status: 1 Copyright location: 1 Copyright type: 1 Copyright time: 1 Copyright size: 1 Copyright resolution: 1 Copyright speed: 1 Copyright speed: 1 Copyright speed: 1 Copyright speed: 1 Copyright speed: 1 Copyright speed: 1 Copyright speed: 1 Copyright speed: 1 Copyright speed: 1 Copyright speed: 1 Copyright speed: 1 Copyright speed: 1 Copyright speed: 1 Copyright speed: 1 Copyright speed: 1 Copyright speed: 1 Copyright speed: 1
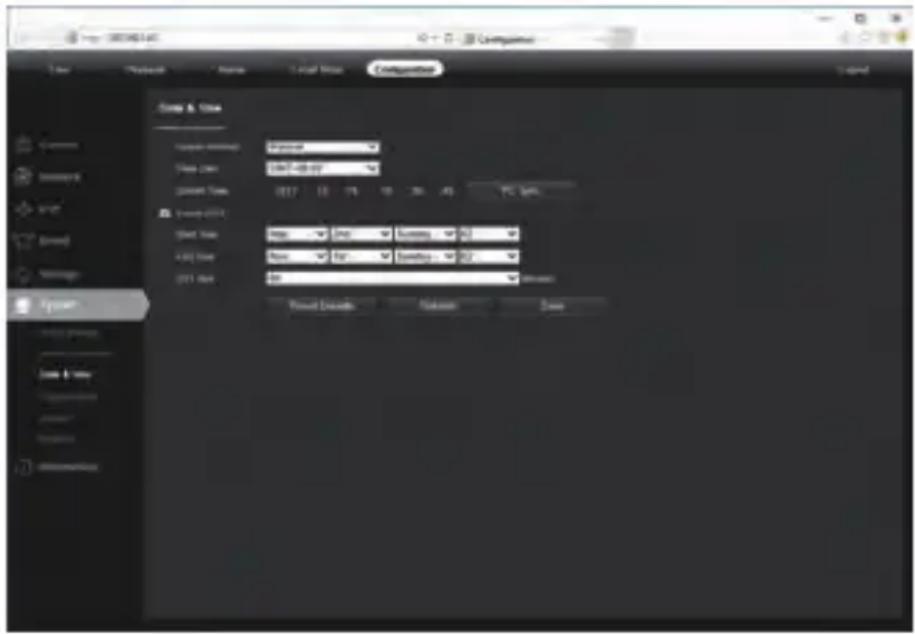
Configuration > System > Time setup
There are two time update modes available, Manual and NTP.
text_image
Size & Size Current Time Size: 100% Current Time: 207.12.15 Current Time: 207.12.15 Current Time: 207.12.15 Current Time: 207.12.15 Current Time: 207.12.15 Current Time: 207.12.15 Current Time: 207.12.15 Current Time: 207.12.15 Current Tires: Current Tires: Current Tires: Current Tires: Current Tires: Current Tires: Current Tires: Current Tires: Current Tires: Current Tires: Current Tires: Current Tires: Current Tires: Current Tires: Current Tires: Current Tires: Current Tires: Current Tires: Current Tires: Current Tires: Current Tires: Current Tires: Current Tires: Current Tires: Current Tires: Current Tires:a. Select your Time Zone, and click PC Sync. Set up your DST (Daylight Savings Time) if needed, click Save. (Time and date will be set 2000-01-01 if the camera is reset.)
b. If the camera is connected to the Internet, you can set up a NTP server for the camera to sync the time and date automatically.
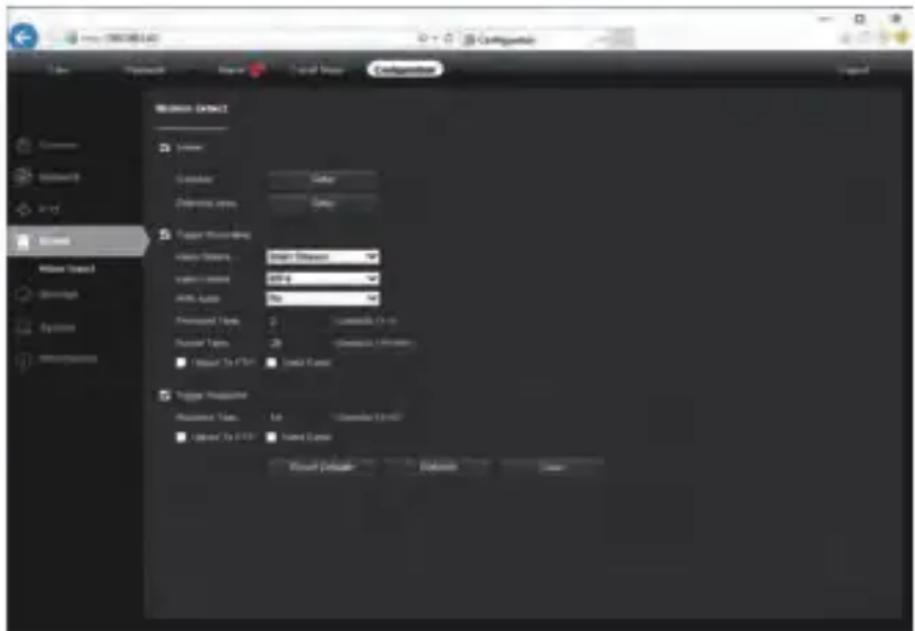
3) To enable Motion Detection Alarm
Configuration > Event > Video Detection
text_image
Background Address Lower Delete Delete area Trigger Mapping View Options: View Area: 100% View Active: 0% Pressure Tools: 2 Number Tires: 25 Trigger To FTR: Trigger Inspector Trigger Type: 1x Trigger To FTR: Trigger Address: Delete Load5
General Configurations
When Motion is detected, there is a small alarm light pup up beside the Alarm menu. You can also setup an email address or FTP storage server to receive the motion snapshot. (Trigger recording will work only if memory card or NFS NAS connected.)
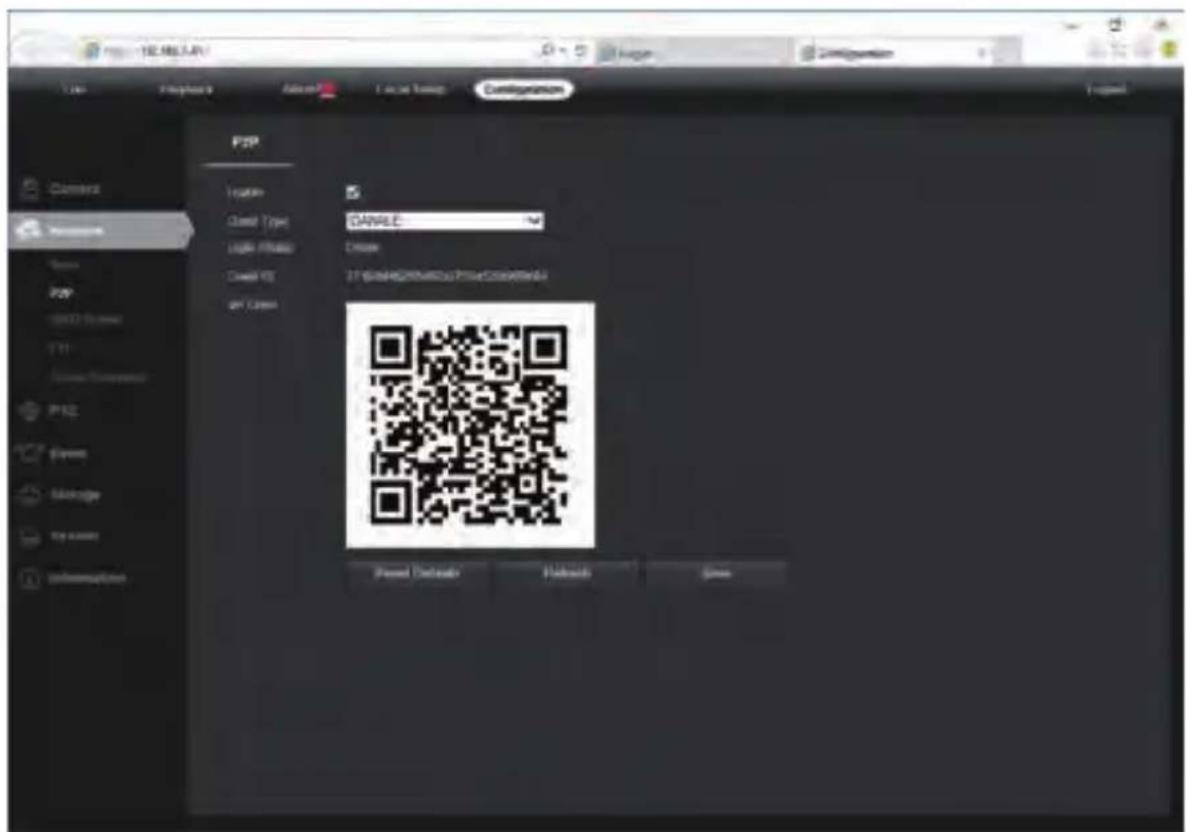
4) To find the device Cloud ID and QR code for p2p remote access
Configuration > Network > P2P
text_image
GANALE Drawn ST-GANALE-010000000000000000000000000000000000000000000000000000000000000000000000000000000000000000000000000000Using the P2P ID and QR code, you can access the camera remotely anywhere via smart phone with Internet access. Please register an account via mobile phone after installing the Danale APP from APP Store or Google Play Market, then log in and add your camera to start previewing.
Or you can go to the website http://www.danale.com/ to register if you need PC remote access. You can download APP from the website to find out more.
Tips: if the Login Status shows Offline, please check your network connection and IP camera TCP/IP Network configurations. Please make sure to use a valid DNS server IP in the TCP/IP Network setting.
6
Working with mobile device
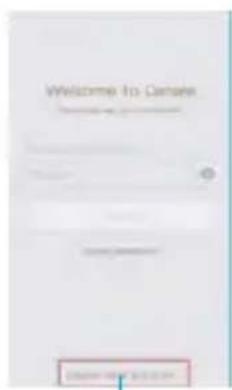
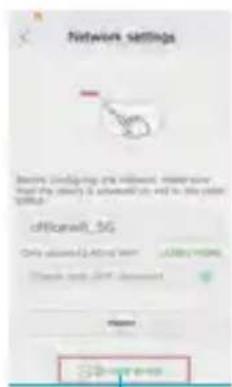
Visit the Apple App Store or the Google Play Store to download the Danale app for iOS or Android devices. (For transferring the file manually to your smart device, please refer to your smart device's manual). After installation, tap the icon to launch the Danale app. For first time use, please create a new account by following the steps below:
text_image
Welcome to Canse1

text_image
Create Account Part of the Board of Directors of 20172
text_image
Account verification #ir#p#t## ## #y#d ###### ###③
text_image
Danale Welcome to Danale Now we don't want to add your new items. Add Options4
text_image
Network settings Beets configuring the network, mean value for the security & advanced users and to this power onset. officeral_5G Only allowed: 12.0% or 100% Check with: OFF download Name: Onset user5
text_image
Search QR Code PRESERVING UNIVERSITY6
text_image
Screenshot of a presentation slide with a pie chart and multiple photo thumbnails, likely from an educational or media presentation.7
text_image
cast 04/17 02:16 10:27:09-
For new users, please tap CREATE NEW ACCOUNT to register an account.
-
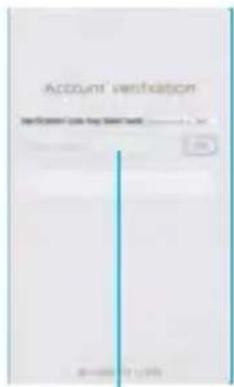
Type in your mobile phone number or email address, then tap NEXT.
-
Check your SMS or Email for the verification code, then tap NEXT.
-
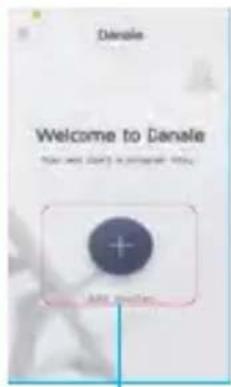
Tap + to Add devices
-
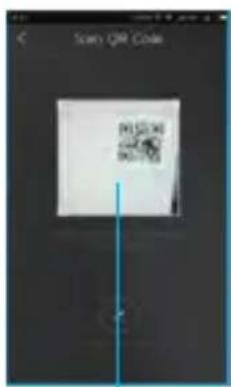
Tap QR Code to add to get into the scan camera QR code page, or click NEXT to discover the connected local LAN IP camera.
-
Put the IP camera QR code in the app effective scan area, and then give a nickname for the recognized camera.
-
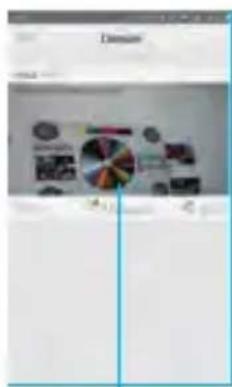
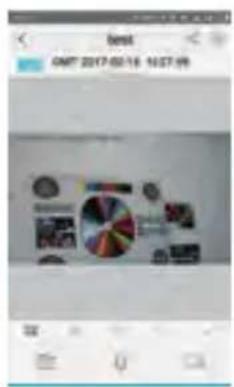
Tap the camera list to start live video.
Tips: a. Tap ≡ to check your account profile and configure settings.
b. To share your camera with your friends or another user, click “◀” icon and type in or scan his/her Danale account.
Note: If you cannot connect the camera, please check your Internet connection and verify the IP address, gateway, and DNS setting in the camera. The Cloud login status should be online, which means the camera has registered to the cloud server. You may also want to connect your phone to WiFi for better performance.
The app is offered free of charge by a third party; it is not covered by the warranty of MONACOR International. Charges may apply for some of the Cloud services available as options in the app! If problems occur, please contact the provider of the app.
7
Working with NVR
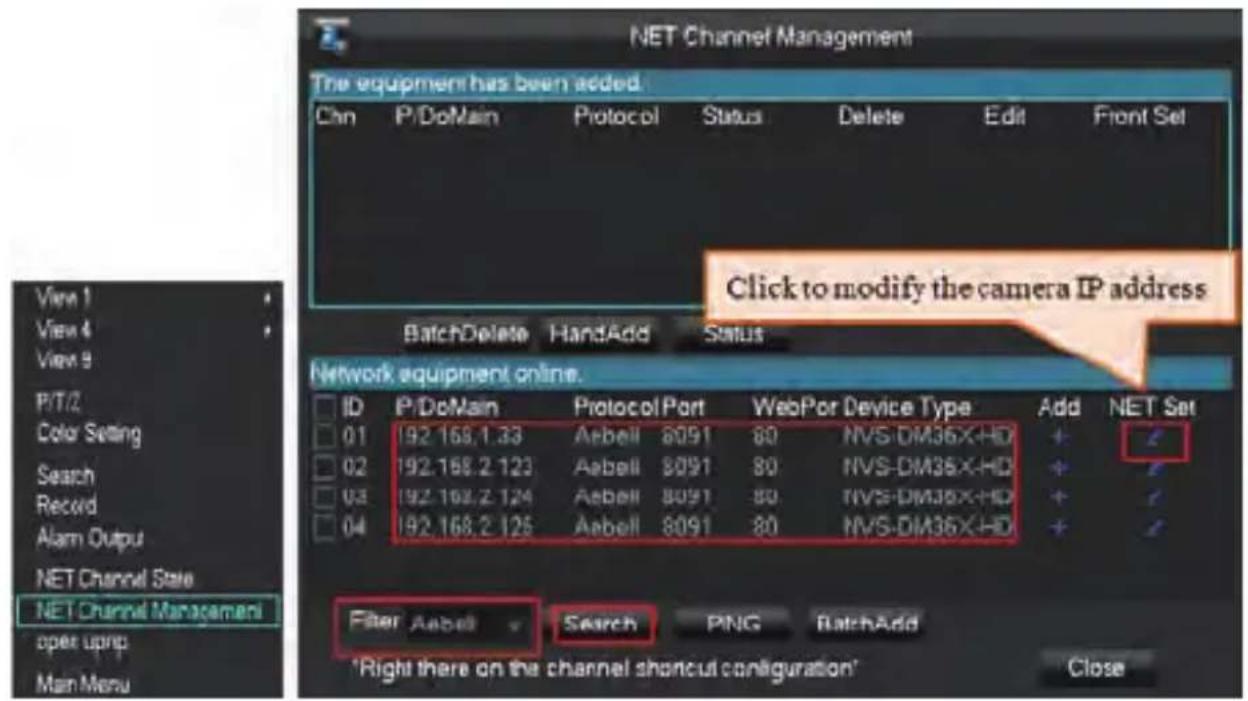
The IP camera supports standard ONVIF protocol and it can be added to third-party video recorder. Some of the models support both H.264 and H.265 encode mode. The H.265 encode cameras can compress the video data to a very low bit rates which allows more video data storage than normal H.264 camera. Only configure the camera to H.265 mode when your NVR supports H.265 mode
Before pairing cameras to the NVR, make sure the NVR and cameras have valid and matching IP scheme.
text_image
NET Channel Management The equipment has been added. Chn P/DoMain Protocol Status Delete Edit Front Set Click to modify the camera IP address BatchDelete HandAdd Status Network equipment online. ID P/DoMain Protocol Port WebPor Device Type Add NET Set 01 92.168.1.33 Aebell 8091 80 NVS-DM36X-HD + 02 92.168.2.123 Aebell 8091 80 NVS-DM36X-HD + 03 92.168.2.124 Aebell 8091 80 NVS-DM36X-HD + 04 92.168.2.125 Aebell 8091 80 NVS-DM36X-HD + Filter Aebell Search PNG BatchAdd 'Right there on the channel shoutcui configuration' Close View 1 View 4 View 9 P/T/Z Color Setting Search Record Alarm Output NET Channel State NET Channel Managemani open upnp Man MenuNote: Some of the PoE NVR supports Plug & play, which allows you to get video without manually search and add. if Plug & play feature is not available or not compatible, please follow the NVR manual steps and select ONVIF protocol as the paring protocol. (camera default password: 123456)
If the POE NVR can not discover the connected camera or can not display the camera video, please check it's internal POE interface IP configuration and make sure all connected cameras and NVR POE interface are in the same subnet schema. For more help please contact the both NVR and IP camera suppliers for technical assistance.
8
Frequently Asked Questions
- Why can't I open the default IP address 192.168.0.123 via web browser?
Check your computer's IP address before accessing the camera. If the IP address does not match the 192.168.0.x scheme, please download the device search tool from the Internet (www.monacor.com -> Support -> Downloads) to modify the camera's IP address. Make sure the IP address of the camera matches the LAN IP scheme. For example, if the LAN is 192.168.1.xxx, then set the IP camera to 192.168.1.123 and so on. Only IE windows computer is supported by the camera.
- How to reset the password?
The default Username: admin, Password: 123456. If you lost the password or would to reset the camera's setting, please install the search tool to search the camera IP and click Reset factory button.
- How to upgrade the IP camera?
1) Ask the supplier for the suitable firmware
2) you can use the web browser, search tool, or PC client to upgrade the camera.
3) go to the Configuration > System > update, click browse and select the firmware, then click Upgrade button and wait for the operation to complete.
- How to fetch the RTSP video stream and http snapshot?
1) Main Stream: rtsp://IP:554/h264?username=admin&password=123456
2) Sub Stream: rtsp://IP:554/h264cif?username=admin&password=123456
3) Low resolution snapshot: http://IP/cgi-bin/snapshot.cgi?stream=1
4) HD snapshot : http://IP/cgi-bin/snapshot.cgi?stream=0
- Why does the NVR not show image after adding your IP camera?
1) Make sure you selected the right protocol and enter the correct username and password when adding the cameras,
2) Make sure the NVR and IP camera are the same IP scheme.(eg. NVR:192.168.1.x, and IP camera:192.168.1.y),
3) try changing the camera encode mode to H.264 if the NVR can't support H.265.
(Configuration -> Camera -> Video > Encode mode: H.264)
- How to make the NVR record in motion detection mode?
1) Enable the IP camera motion detection function via web browser or Search configure tool,
2) activate the record mode for motion detection in the schedule of the recorder,
3) check the NVR screen MD icon and try playback. Please refer to your NVR manual for NVR motion record option.
- Where can I control the motorized auto focus lens zoom?
1) Using the camera's web interface;
2) Control by PC client software UC;
3) Roll the mouse wheel at the search tool preview window;
4) Find the PTZ menu in your NVR to control lens zoom.