RM/195 - Toaster Ramtons - Free user manual and instructions
Find the device manual for free RM/195 Ramtons in PDF.


User questions about RM/195 Ramtons
0 question about this device. Answer the ones you know or ask your own.
Ask a new question about this device
Download the instructions for your Toaster in PDF format for free! Find your manual RM/195 - Ramtons and take your electronic device back in hand. On this page are published all the documents necessary for the use of your device. RM/195 by Ramtons.
USER MANUAL RM/195 Ramtons
Ramtons Ideas for easy living
TOASTER
IINSTRUCTION MANUAL
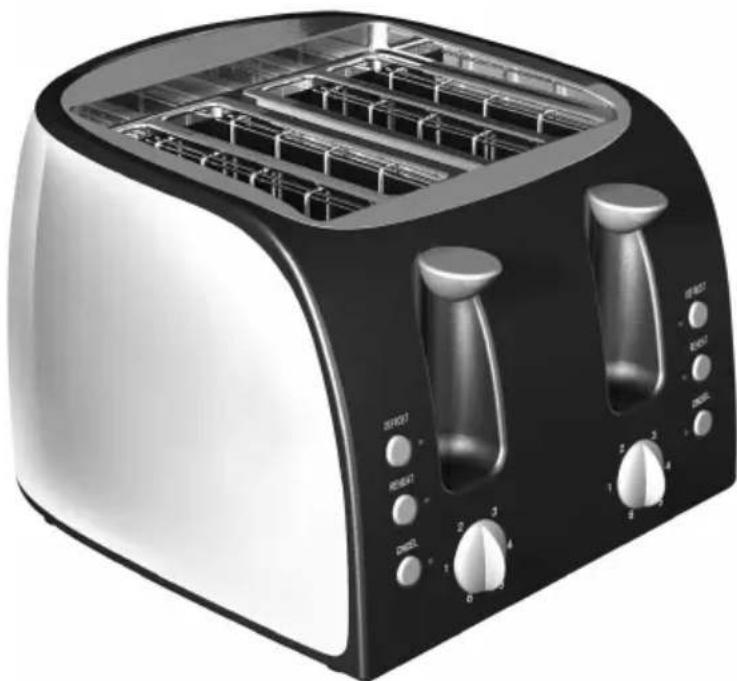
natural_image
Exterior view of a modern black-and-white photo of a 3rd-to-5 grater with side grates and control knobs (no text or symbols visible)RM/195
Read this booklet thoroughly before using and save it for future referen
IMPORTANT SAFEGUARD
When using electrical appliance. Basic safety precautions should always be followed including the following:
- Read all instruction.
- Make sure that your outlet voltage corresponds to voltage stated on the rating label of the toaster.
- Do not touch hot surface. Use handles or knobs
- To protect against electrical shock, do not immers cord, plug, or any part of the toaster in water or liquid.
- Close supervision is necessary when it is used by near children.
- Unplug unit from outlet when not in use and be cleaning.
- Do not operate any appliance with a damaged plug, or in abnormal state. If its main cord is da it must be replaced by the manufacturer, the near service agent or a qualified person.
- Do not let the cord hang over edge of table or or touch hot surface.
- Do not place on or near a hot gas or electric or in a heated oven.
- Do not use the appliance for other than its inter use.
- Oversize food, metal foil packages or utensils must not be inserted in the toaster as they may cause
or electric shock.
-
Bread may burn, therefore toasters must not be used near or below curtains and other combustible materials, they must be watched.
-
The use of accessory attachments not recommended by the appliance manufacturer may cause injuries.
-
Don't attempt to dislodge food when toaster is in operation.
-
Be sure to take the bread out carefully after toa so as to avoid injuries.
-
Don't use the appliance outdoors.
-
Save these instructions.
Household use only
Product introduction
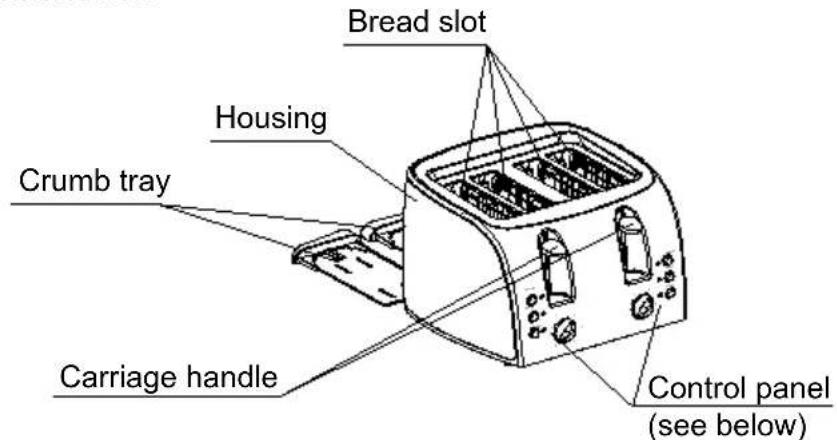
text_image
Bread slot Housing Crumb tray Carriage handle Control panel (see below)Control panel:
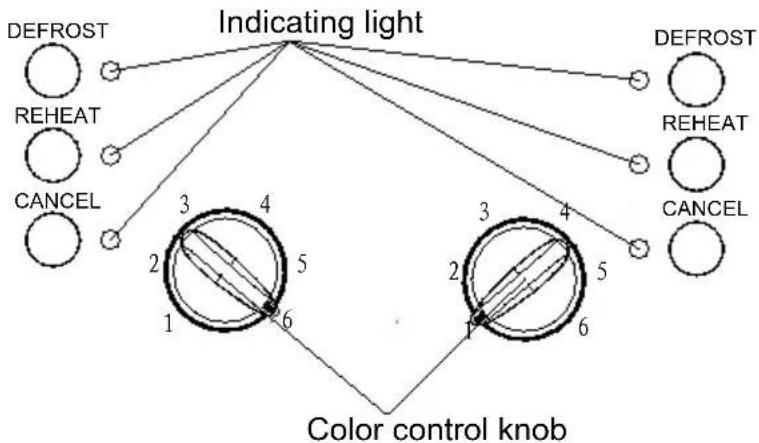
flowchart
graph TD
    A["Defrost"] --> B["Indicating light"]
    C["REHEAT"] --> B
    D["CANCEL"] --> B
    B --> E["Color control knob"]
    E --> F["1"]
    E --> G["2"]
    E --> H["3"]
    E --> I["4"]
    E --> J["5"]
    E --> K["6"]
    E --> L["1"]
    E --> M["2"]
    E --> N["3"]
    E --> O["4"]
    E --> P["5"]
    E --> Q["6"]
    E --> R["DEFROST"]
For the first use
As there is manufacturing residue or oil remained in the toaster or heat element, it usually will emit the odor for the first use. It is normal and will not occur after several times use, for the first use it is suggested to operate according to the below steps, except without bread. Then let the toaster cool down and begin toasting the first slice.
Operation:
- Put bread slice into the bread slot, it can be inserted four slices at most every time.
Note: 1. Make sure the crumb tray is completely positioned in place before using. - Plug the power cord into the outlet. The appliance can be treated as a combination of two units. The operation of each unit is completely same but independent to each other. The two units can be operated together as well. You may choose any combination you like.
- Set color control knob to your desired color. There is 6-position level, the lowest is set white and the highest is dark. The "3" position of control knob can toast the bread to golden color.
Note: 1. Toasting color for one slice is darker than that for double the same level.
-
If toasted continuously, toasting color for the latter bread is dark than that for the anterior bread at the same level.
-
Press carriage handle down vertically until it is positioned in place, the lamp beside "Cancel" will be illuminated, and toast will begin at once.
Note: 1. Toasting process can be terminated at any time by pressing "Cancel" button.
-
Only the power supply is switching on, the carriage handle ca rest on the bottom of slot.
-
During the toasted process, you may observe the toasting color, if it satisfying, you press the "Cancel" button to cancel the operation at an time.
-
Once the bread has been toasted to the preset color, the carriage has will automatically spring up.
-
If you want to reheat the cold toasted bread, press the “Reheat” butt and the lamp beside it will be illuminated. In this mode toasting time fixed, so long as time is running over, the carriage handle will autom spring up and end up the reheating process.
-
If the bread has been taken out from refrigerator, set color control kn your desired color, press carriage handle down vertically until it is positioned in place, press "Defrost" button and the lamp beside it will illuminated, in this mode it will be toasted to your desired color.
Caution:
-
If toaster starts to smoke, Press "Cancel" to stop toasting immediately.
-
Remove all protective wrapping prior to placing in toaster.
-
Avoid toasting the food with extremely runny ingredients such as butter
-
Never attempt to remove bread jammed in the slots without unplugging toaster from the electrical outlet first, Be sure not to damage the inte mechanism or heating elements when removing bread.
-
The bread slot is only applicable for toasting regular bread slice, Like irregular bread or round bread, you can not toast it in the Bread slo
Cleaning and maintenance:
-
Disconnect from AC outlet before cleaning.
-
Wipe the outside with soft dry cloth after toaster cools down, never use metal polish.
-
Pull out crumb tray on bottom of toaster and empty it. If toaster is frequently, accumulated bread crumbs should remove at least once a week. Make sure the crumb tray is completely closed before using the toaster again.
-
When not use or storage, the power cord may be wound under the of toaster.