
10031343 - Humidifier Klarstein - Free user manual and instructions
Find the device manual for free 10031343 Klarstein in PDF.


| Product Type | Dehumidifier |
| Brand | Klarstein |
| Model | 10031343 |
| Control Panel | Electronic with LED indicators |
| Fan Speeds | 2 (Low and High) |
| Humidity Setting | Adjustable (default 60% RH) |
| Humidity Display | Yes, room humidity level |
| Timer Function | Programmable on/off (1-24 hours) |
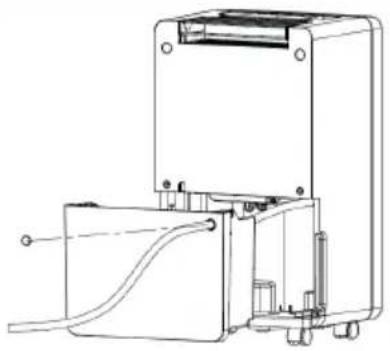
| Continuous Drainage | Yes (via pipe with 10 mm inner diameter) |
| Water Tank | Removable with float sensor, auto shut-off when full |
| Air Filter | Washable (vacuum or warm water) |
| Ionizer Function | Optional (if model includes) |
| Louver Settings | Adjustable (swing function) |
| Casters | Yes (wheels) |
| Operating Temperature Range | 5°C to 35°C |
| Auto Defrost | Yes |
| Storage | Empty tank, fold cord, clean filter, store in cool dry place |
| Cleaning Instructions | Wipe body with damp cloth, clean filter regularly |
| Safety | Do not operate in closed area, unplug before cleaning, do not submerge |
| Disposal | Compliant with WEEE directive 2012/19/EU |
Frequently Asked Questions - 10031343 Klarstein
User questions about 10031343 Klarstein
0 question about this device. Answer the ones you know or ask your own.
Ask a new question about this device
Download the instructions for your Humidifier in PDF format for free! Find your manual 10031343 - Klarstein and take your electronic device back in hand. On this page are published all the documents necessary for the use of your device. 10031343 by Klarstein.
USER MANUAL 10031343 Klarstein
natural_image
Row of white kitchen and appliance icons including blender, kettle, refrigerator, air conditioner, fan, TV, and microwave (no text or symbols)natural_image
Technical line drawing of a portable electronic device with attached wiring and control panel (no text or symbols)natural_image
Symbol of a trash bin crossed out by a diagonal line, with no text or labels present.Congratulations on purchasing this equipment. Please read this manual carefully and take care of the following hints to avoid damages. Any failure caused by ignoring the mentioned items and cautions mentioned in the instruction manual are not covered by our warranty and any liability.
Contents
Technical Data 2
Safety Instructions 2
Components 3
Operation 4
Installation / Cleaning / Storage 6
Troubleshooting 8
Hints on Disposal 8
Declaration of Conformity 8
Technical Data
Please refer to the rating label on the item.
Safety Instructions
- Unplug the power supply cord before cleaning or storage.
- DO not submerge the unit in water, or place the unit close to water.
- Do not put the unit close to heat-generating devices or near flammable and dangerous materials.
- Never put your fingers or objects into the intake or discharge ducts.
- Do not sit or stand on the unit.
- Discard water that has collected in the tank as required
- Do not operate the dehumidifier in a closed area such as inside a closet, as it may cause a fire
• Install drain piping at a downhill grade to make sure that condensed water can be drained continuously. - If the power supply cord is damaged it must be replaced by the manufacture or a qualified service agent.
Components
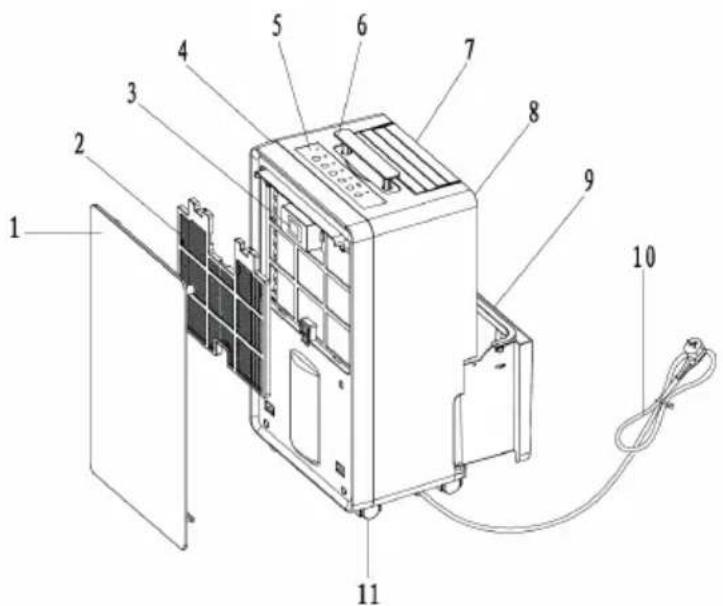
1 Front panel·
2 Air filter
3 Adjustable humidity setting and timer indication
4 Front
5 Control panel
6 Handle
7 Air outlet
8 Rear
9 Water tank
10 Supply cord
11 Wheels
The indicator features 3 functions:
A) When the unit is plugged in, it will indicate the room humidity level.
B) When you set the humidity, it will indicate the humidity that you have selected
C) When you program the time for the unit to turn on and off, it will show the hours.
D) When the environment humidity is lower than 35%, it will show "LO"
E) When the environment humidity is higher than 95%, it will show "HI"
User Panel
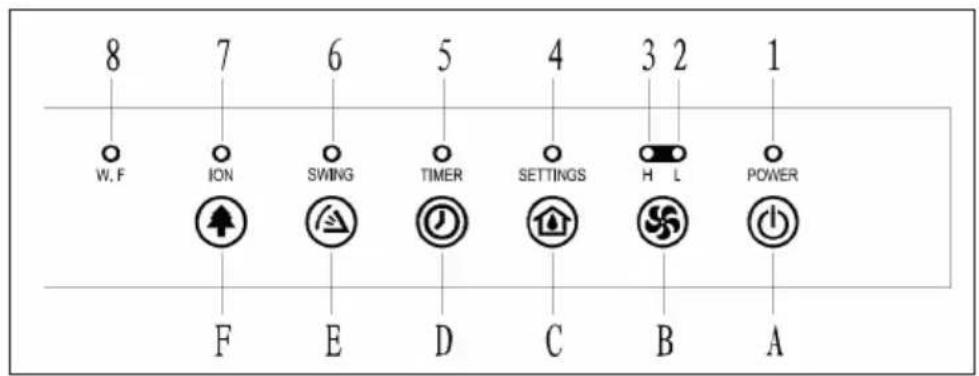
1 POWER-LED - Power Led
2 LF-LED - Low-fan Led
3 HF-LED - High-fan Led
4 SET-LED - Set-Led
5 TIM-LED - Time-Led
6 SW-LED - Swing-Led
7 ION-LED - Ion-Led (Optional)
8 W.F-LED - Water full-Led
A Power Push Button
B Fan Speed Push Button
C Adjustable Humidity Push Button
D Timer Push Button
E Louver settings Button
F ION Button (Optional)
Operation
User Panel
| 1 | The Power indication light will turn on in green when the unit is plugged in, regardless of whether the unit is operating or not. | |
| 2 | Press the button once to start operation, the default humidity level is 60%. Press it again to stop operation. | |
| 3 | Press button as follows: Press to set the desired fan speed. It can be adjusted between high speed and low speed. | |
| 4 | Press to set the desired humidity level in the room. When the relative humidity in the room is lower than the selected humidity, the operation of the unit will stop automatically. | |
| 5 | Press the button to program the time when the unit turns on and turns off. If you want to cancel the timer programming, press the button to adjust the time at 00, and press the button ,it will be circulate from 00-01-02......23-24. It is the programmed time to switch the machine. The programmed time will be cancelled when to switch compressor manually each time. The programmed time remains unchanged if the machine stops to wok due to water full or during defrosting | |
| 6 | Press to set the louver settings the indication light. | |
| 7 | When press button·the lon function will be open and the indication light. (Optional) |
Draining the collected water
When the drainage tank is full, the tank full indicator light will turn on, the operation will stop automatically and the buzzer will beep 15 times to alert the user, that the water need to be emptied from the drainage tank.
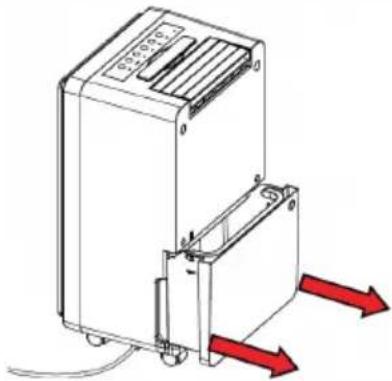 | Lightly press on the sides of the tank with both hands and pull the tank out gently. | |
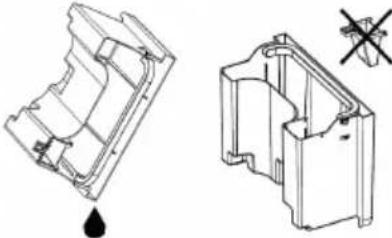 | Discard the collected water.NOTE: 1. Do not remove the float from the water tank. The water full sensor will no longer be able to detect the water level correctly without the float and water may leak from the water tank. If the drainage tank is dirty, wash it with cold or lukewarm water. Do not use detergent, scouring pads, chemically treated dust cloths, gasoline, benzene, thinner, or other solvents, as these can scratch and damage the tank and cause water leakage | |
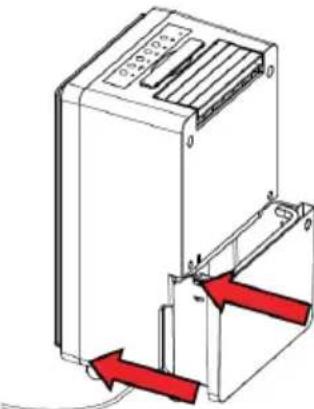 | When replacing the drainage tank, press the tank firmly into place with both hands. If the tank is not positioned properly, the “TANK FULL” sensor will be activated, and the dehumidifier will not operate. | |
Continuous Water Drainage
natural_image
Technical line drawing of a mechanical device with no visible text or symbolsThe unit features a continuous drainage port. Using a plastic pipe (with an inner diameter of 10mm). The water in the drainage tank can be continuously drained out from the continuous port on the unit.
Installation/ Cleaning / Storage
To clean the body
Wipe it with a soft damp cloth.
To Clean the Air Filter
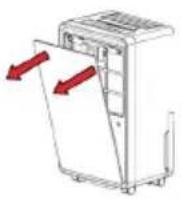 | 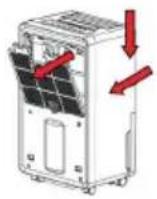 | Remove the front panel firstly and remove the air filter. |
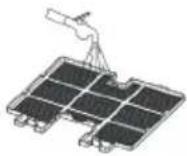 | 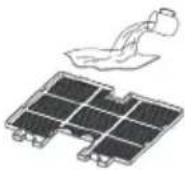 | Run a vacuum cleaner lightly over the surface of the air filter to remove dirt. If the air filter is exceptionally dirty, wash it with warm water and a mild cleanser and dry thoroughly. |
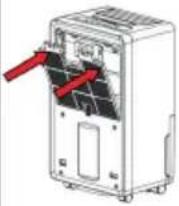 | 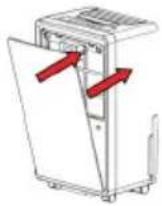 | Insert the filter into the unit in smoothly, and insert the front panel into right place. |
Storing the Dehumidifier
natural_image
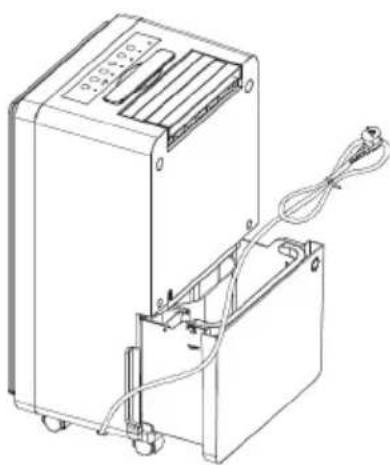
Technical line drawing of a device with attached wiring and ports (no text or symbols)When the unit is not being used for a long period of time and you want to store it note the following steps:
- Empty any water left in the drainage tank.
- Fold up the power supply cord and put it in the water tank.
- Clean the air filter
- Discard in a cool and dry place.
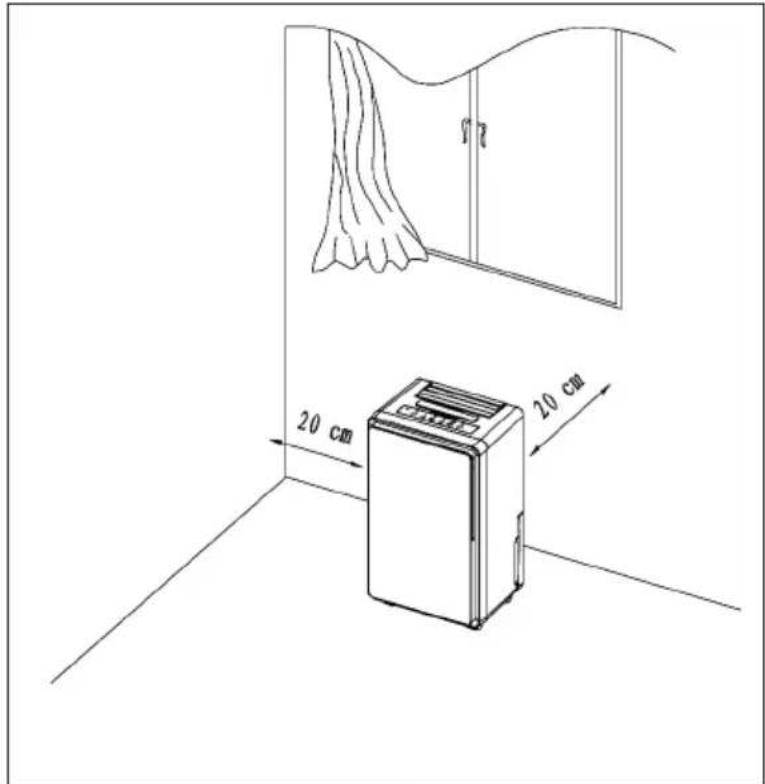
Installation
Maintain the minimum clearance around the dehumidifier when the unit is operating as shown in the drawing.
Troubleshooting
| Problem Possible Cause Solution | ||
| The unit doesn't operate Has the power cord been disconnected? | Plug the power cord into the outlet. | |
| Is the tank full indication lamp blinking? (The tank is full or in a wrong position.) | ||
| Is the temperature of the room above 35· or below 5·? | ||
| The dehumidifying function doesn't work | Is the air filter clogged? Clean the air filter as instructed under Cleaning the dehumidifier". | |
| Is the intake duct or discharge duct obstructed? | Remove the obstruction from the discharge duct or intake duct. | |
| No air is discharged Is the air filter clogged? Clean the air filter as instructed under "Cleaning the dehumidifier". | ||
| Operation is noisy Is the unit tilted or unsteady? Move the unit to a stable, sturdy location. | ||
Hints on Disposal
natural_image
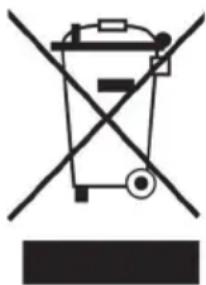
Symbol of a trash bin crossed with a diagonal line, no text or numbers presentAccording to the European waste regulation 2012/19/EU this symbol on the product or on its packaging indicates that this product may not be treated as household waste. Instead it should be taken to the appropriate collection point for the recycling of electrical and electronic equipment. By ensuring this product is disposed of correctly, you will help prevent potential negative consequences for the environment and human health, which could otherwise be caused by inappropriate waste handling of this product. For more detailed information about recycling of this product, please contact your local council or your household waste disposal service.
Declaration of Conformity
Producer: Chal-Tec GmbH, Wallstraße 16, 10179 Berlin, Germany.

This product is conform to the following European Directives:
2014/30/EU (EMC)
2014/35/EU (LVD)
2011/65/EU (RoHS)
206/2012/EU (ErP)
Estimado cliente,
- Contents
- Technical Data
- Safety Instructions
- Components
- The indicator features 3 functions:
- User Panel
- Operation
- Draining the collected water
- Continuous Water Drainage
- Installation/ Cleaning / Storage
- Storing the Dehumidifier
- Installation
- Troubleshooting
- Hints on Disposal
- Declaration of Conformity
- Estimado cliente,
Brand : Klarstein
Model : 10031343
Category : Humidifier